Creative Squad

Creative Squad: My Kindred Spirit – Robin Seiz

Hello from my Creative Squad! Today we have a post from Robin Seiz who is sharing a project that will have you thinking about Spring! She is using my Small Circle Jumble, Floral Tile Small, Fan-fare, and Mini Motifs rubber stamps and our theme: My Kindred Spirit – Animals are often symbols of qualities that we humans identify with, so let’s take some inspiration from them this month. Do you have an animal whose characteristics you identify with? Maybe it changes depending on your mood or what life throws. Who is your Kindred Spirit in the animal kingdom today?

Hello friends,

This month’s themed project, Kindred Spirits, was lots of fun for me to do. Although I live in the Northeast, I’m a warm weather person (Go figure!) Gardening is my outdoor passion. I have a big vegetable garden and a property with lots of native plants. Butterflies are a critical part of the ecosystem. I love watching them fly from one plant to another doing what they were meant to do – move pollen  from one plant to another. While they love nectar they drink from puddles to supply the minerals they need. I, like butterflies, am attracted to bright colors. We are both nearsighted but they can see ultraviolet colors invisible to the human eye. I absolutely love the Monarchs, who live a few weeks longer than most butterflies. Their colors are so beautiful and they blend into their surroundings to avoid predators. All and all, they are a beauty to appreciate and a true helper in the garden. 

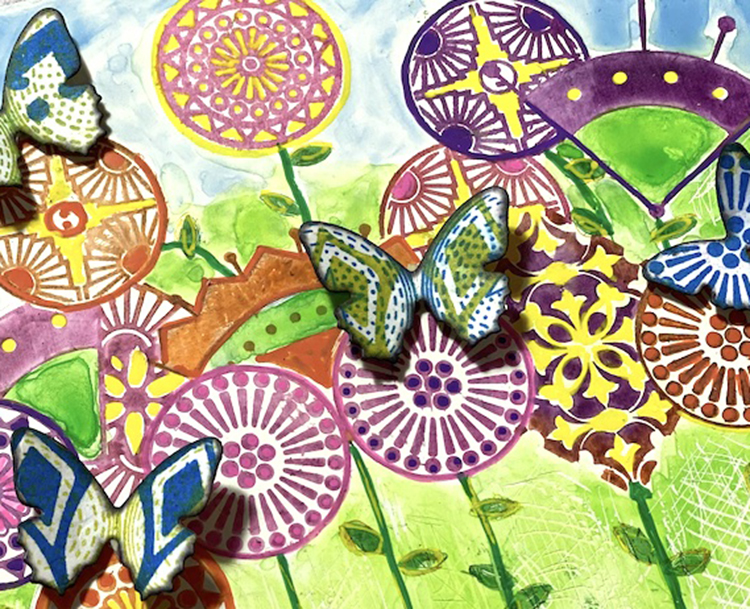
We are using Nathalie’s rubber stamps this month and when I thought of the butterfly and the garden, the Small Floral Tile set, the Mini Motifs set, and the Small Circle Jumble Set all immediately came to mind as they remind me of flower heads. The Fan Fare Cube has the perfect designs for both the butterfly wings and the leaves of the flowers. This months project has more whimsy than I usually create, but it was fun to push myself out of my normal comfort zone. 

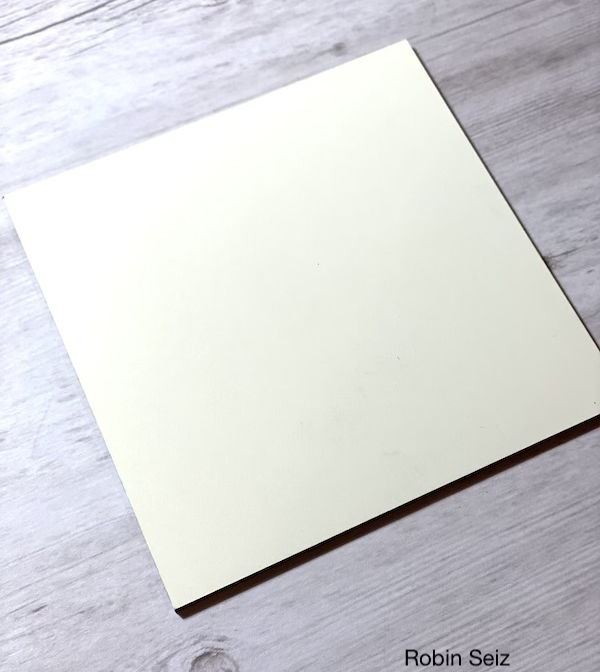
I started the project with a 5” x 5” piece of Clayboard as the substrate. I was reminded during Creative Jump Start that Clay Board can provide some dimension and texture.
Since there is quite a bit of masking required for this project. I planned out the placement of the flowers on a piece of paper, marking which ones would be stamped in the front, which were 2nd, and so on. This helped so much when I was ready to actually do the stamping. 
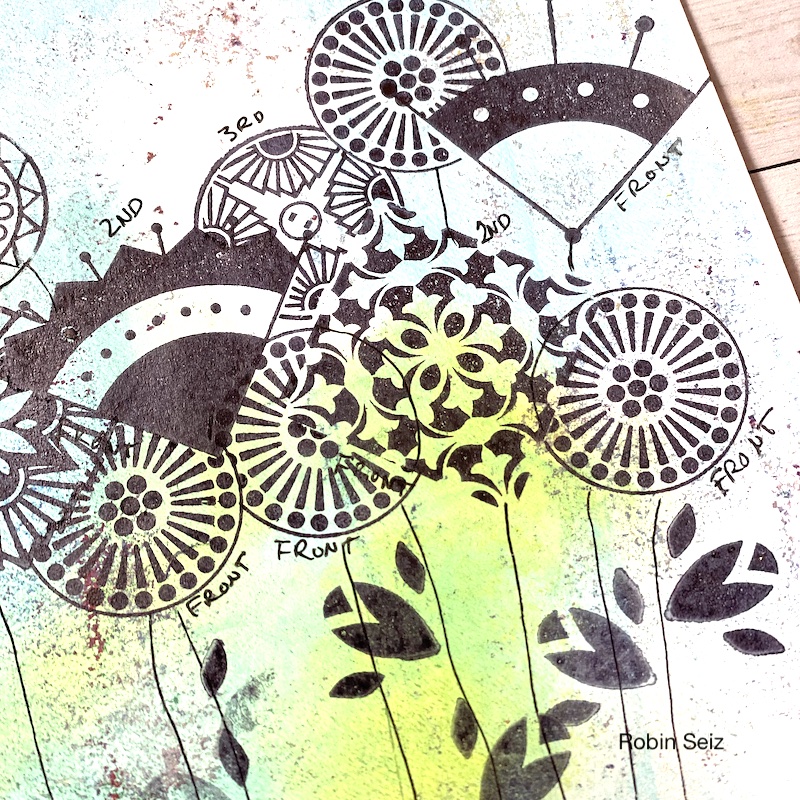
I stamped several of each “flower” and cut them out as masks and then I began stamping on the Clay Board with Versa Fine Clair Ink. The most important thing about masking is that all stamps that are in the foreground go on first and then you work your way back into the background with masks in the foreground so the 2nd row of stamps look like they are “behind” the other stamps. 
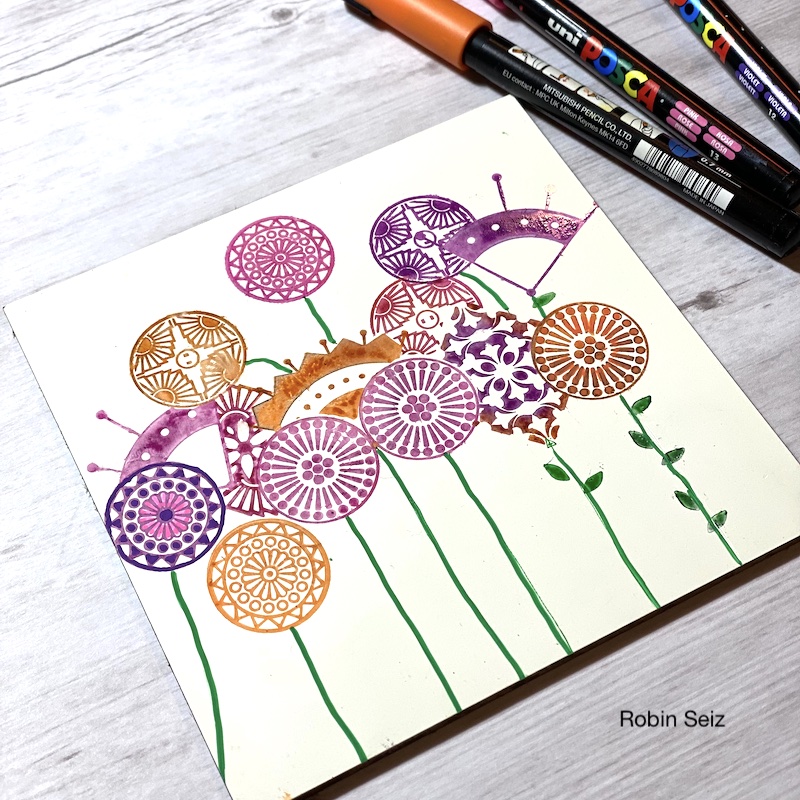
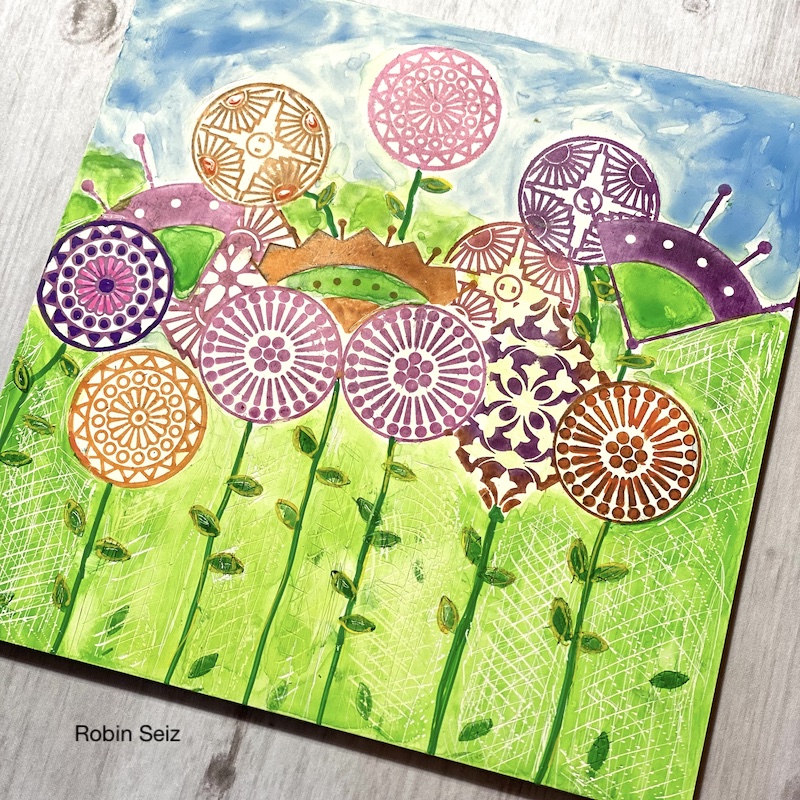
Once all the “flower heads” were stamped I began to embellish them with Posca pens to bring out the colors and make them pop. I drew stems with Posca pens, and used one of the “leaves” in the Fan Fare Cube to place “leaves” on the stem. I quickly  realized that once I painted the background with watercolors, the stems and leaves would disappear. (oops) The wonderful thing about clay board is that the smooth surface is very forgiving. I took a baby wipe and erased all the stems so I could lay down the background of green grass and blue sky using Qor Watercolor paints.
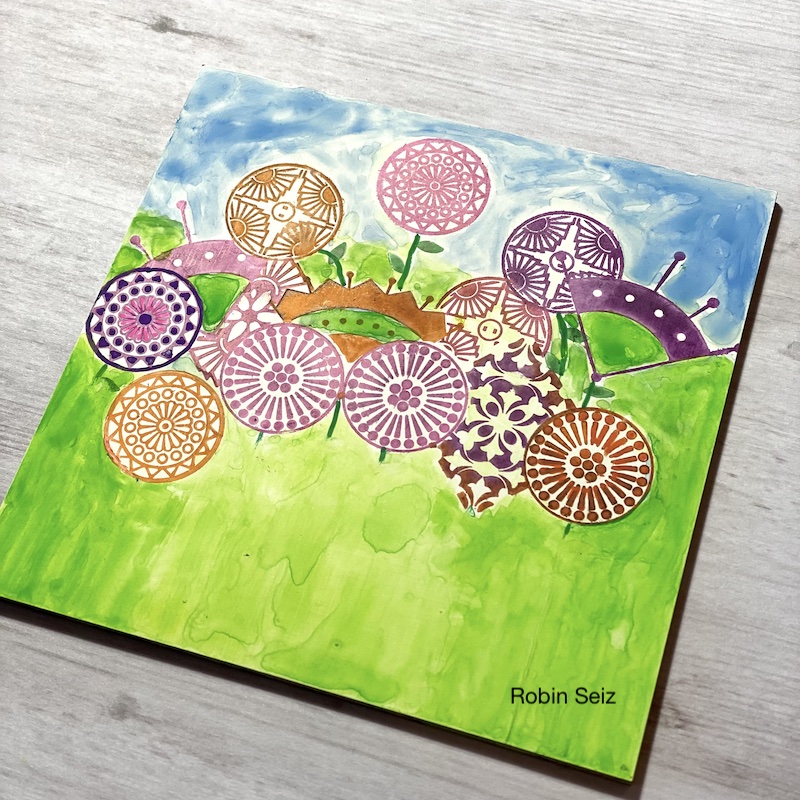
Once the background was completed, I drew in the stems again and then scratched around the stems with my utility knife. This gave the green background a texture and added quite a bit to a dimension to the piece. 
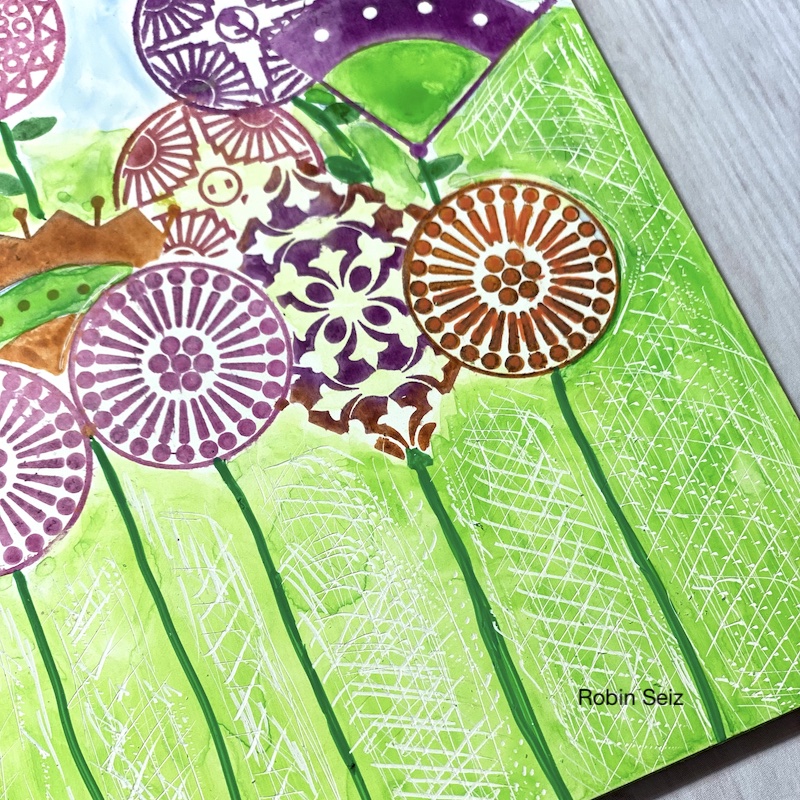
To finish off the flowers, I stamped one leaf, over and over, onto the stem from the Fan Fare Cube. In order to get ink on just one portion of the stamp, I covered the rest of the stamp with a stickie note (but you could use any paper) I continued to embellish with the posca pens. 
Finally, I took my butterfly die cuts and stamped them with a stamp from the Fan Fare Cube and the Circle Drive Positive Small from the Small Circle Jumble Set; both perfect for the wings. I attached my butterflies to the flowers with two sided adhesive dimensional tape which completed the whole scene. 
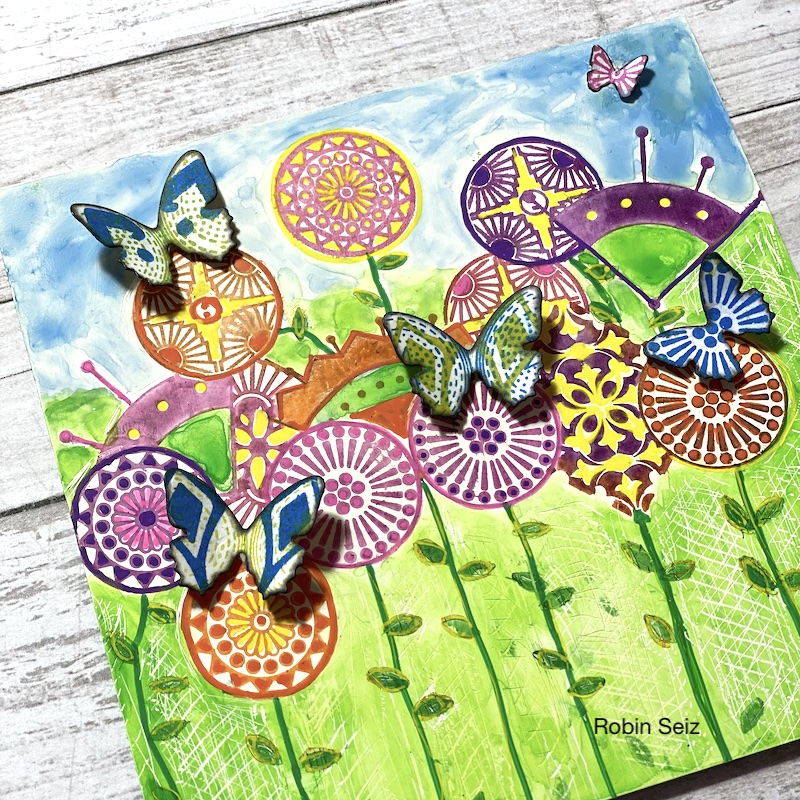
This project makes me smile because it reminds me that spring is right around the corner and I’ll be planting seeds and watching those butterflies before long! 

One of the greatest lessons for me in doing this project was how important it is to stay open to seeing the stamps in new ways. A circle, square or even a triangle can easily become a flower! 

I hope you chose the animal (or insect :o) ) that resonates with you and try something new. Please tag me with what you create.


Thank you Robin – your technique for organizing your layers is a great idea. And we love your beautiful stamped blooms and butterflies!

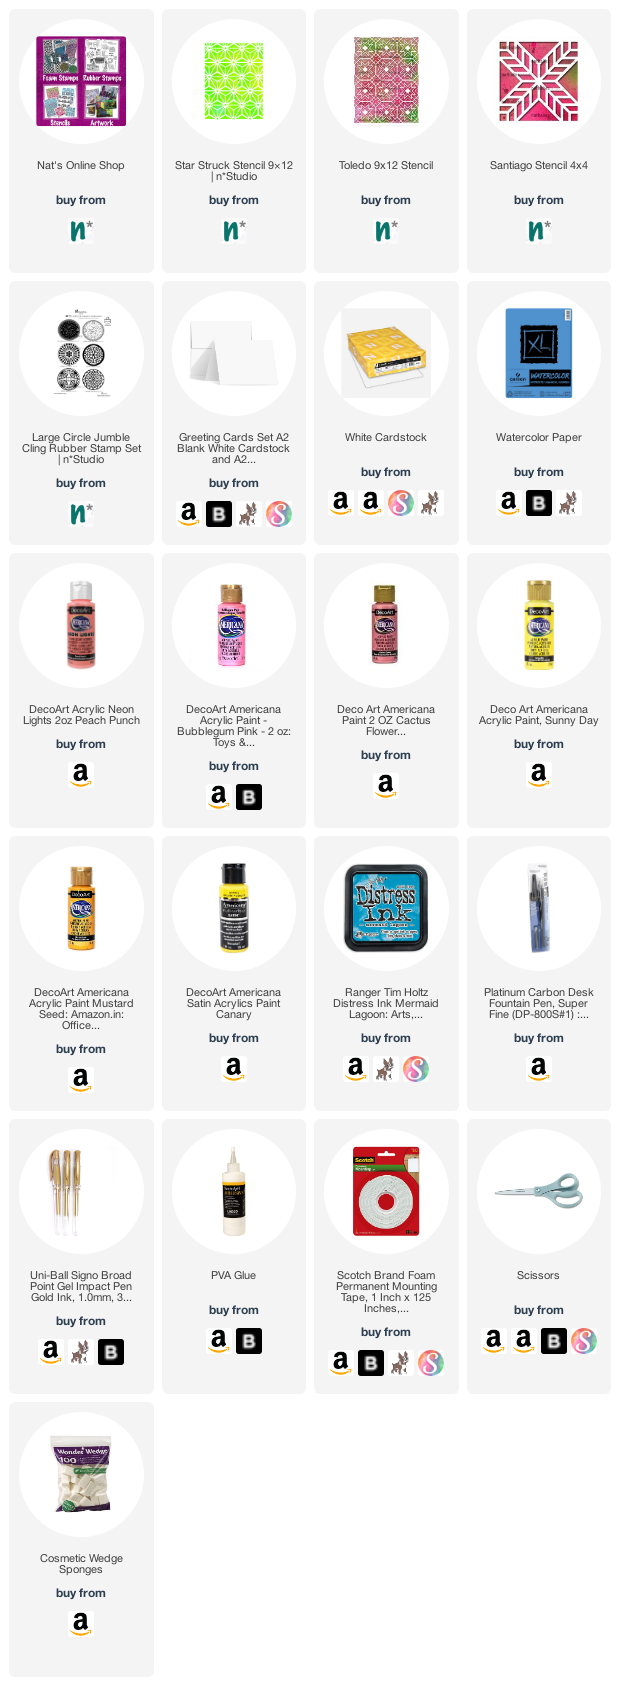
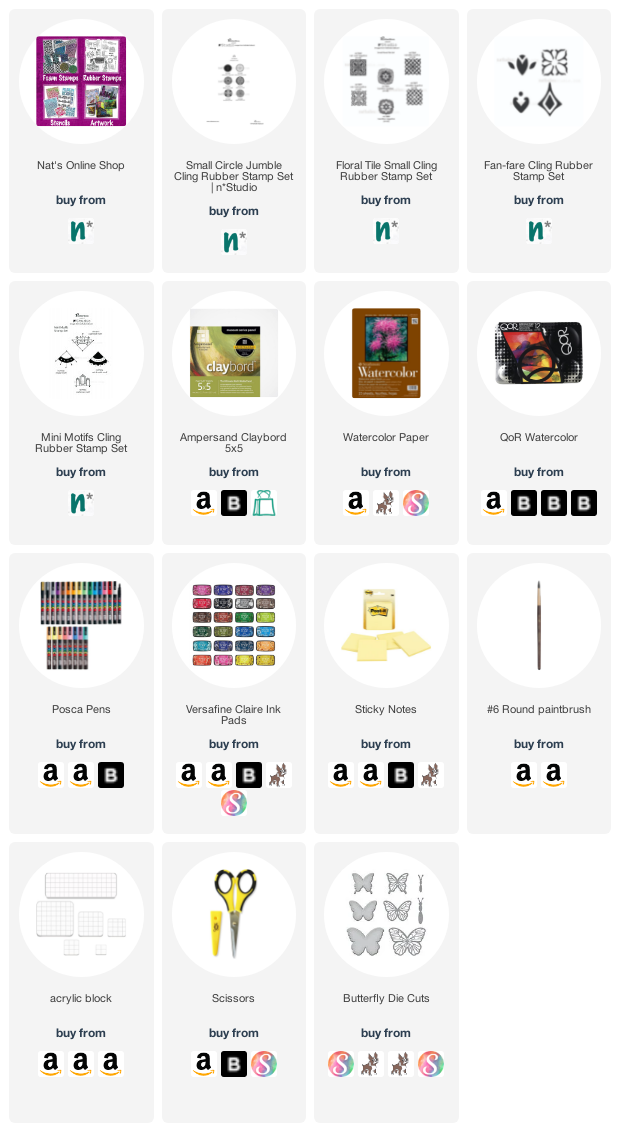
Give it a try: you can find all my Rubber Stamps in my Online Shop and here are some of the supplies Robin used:
Looking for more projects? Follow the Creative Squad on Instagram here.

Leave a comment

Creative Squad: Celebrate the Season – Robin Seiz

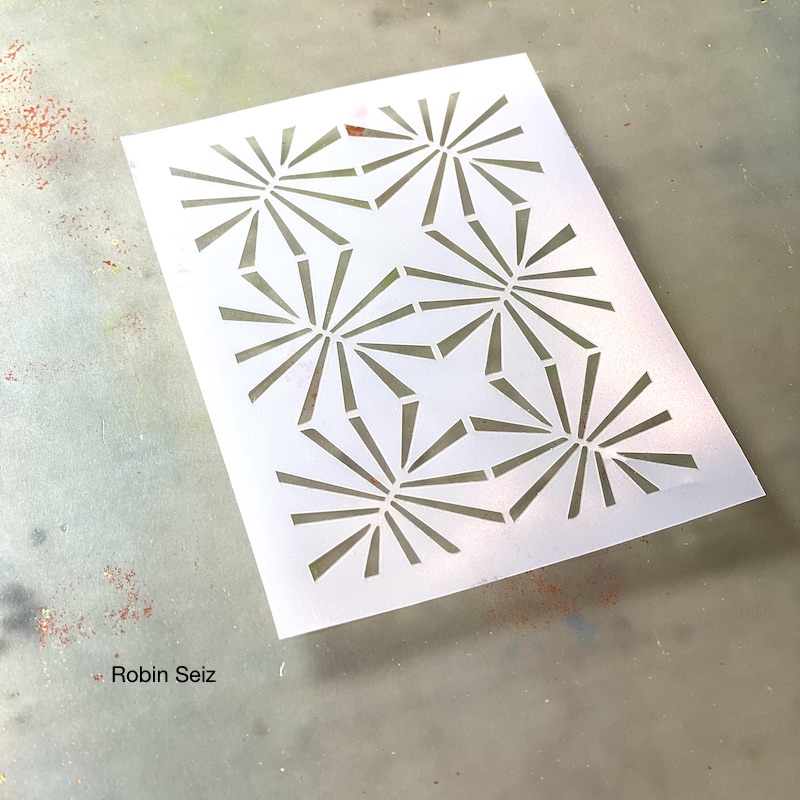
Happy Holidays from my Creative Squad! Today we have a festive post from Robin Seiz who is sharing a mixed media piece using my Hydrant foam stamp, Small Circle Jumble rubber stamps, and my new ATC Mixup stencil. Our theme is Celebrate the Season – Many cultures celebrate in December so let’s do some celebrating ourselves with our favorite art supplies and the holidays that make this season so festive.


Hello friends, This month we are celebrating the season! I love bling; my friends know this and always expect me to show up with just a little “extra something”. As I thought about this project, I knew it had to have some sparkle for the holidays.  

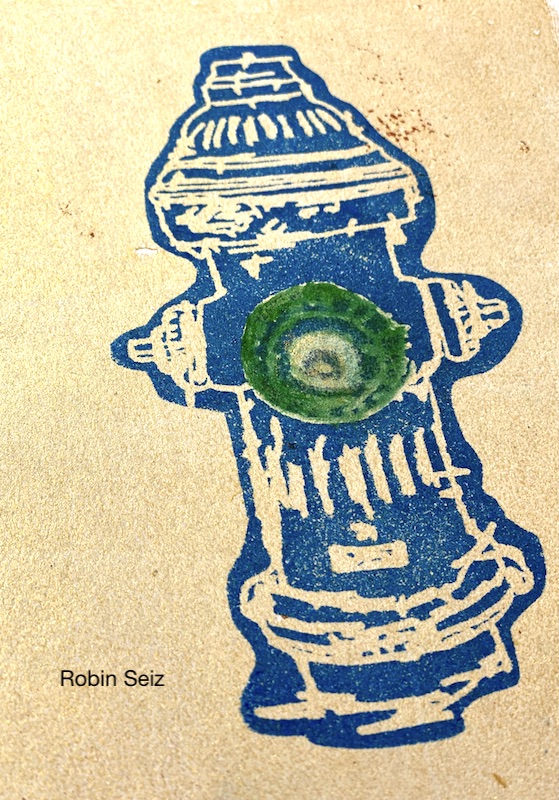
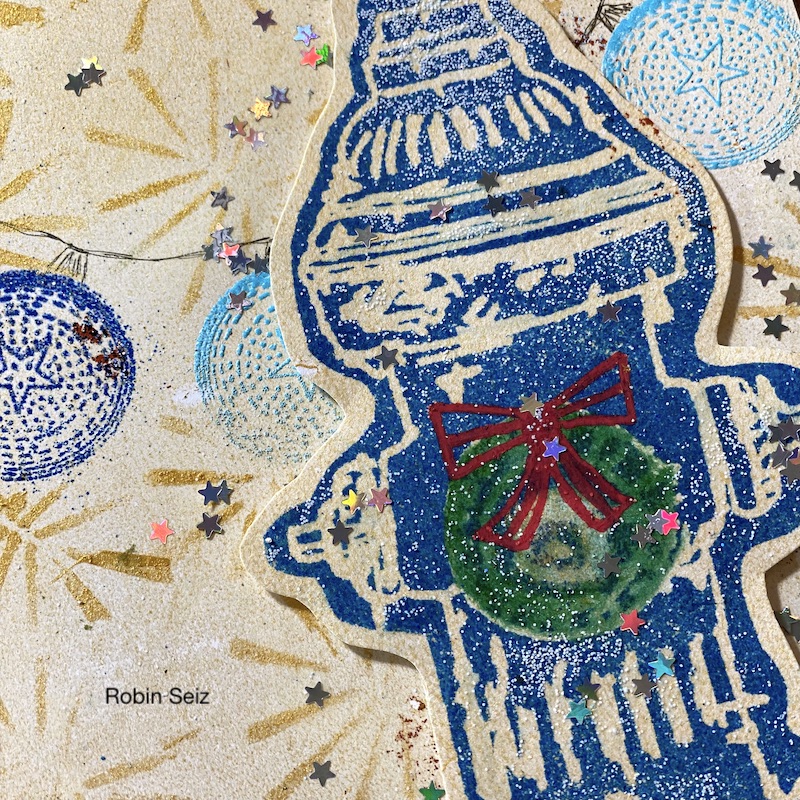
We were encouraged to use some foam stamps from Nat’s last release; I hadn’t used the Hydrant that much. It’s such a fun foam stamp! When I stamped it, the front looked like a wreath to me… so that’s where I started. 

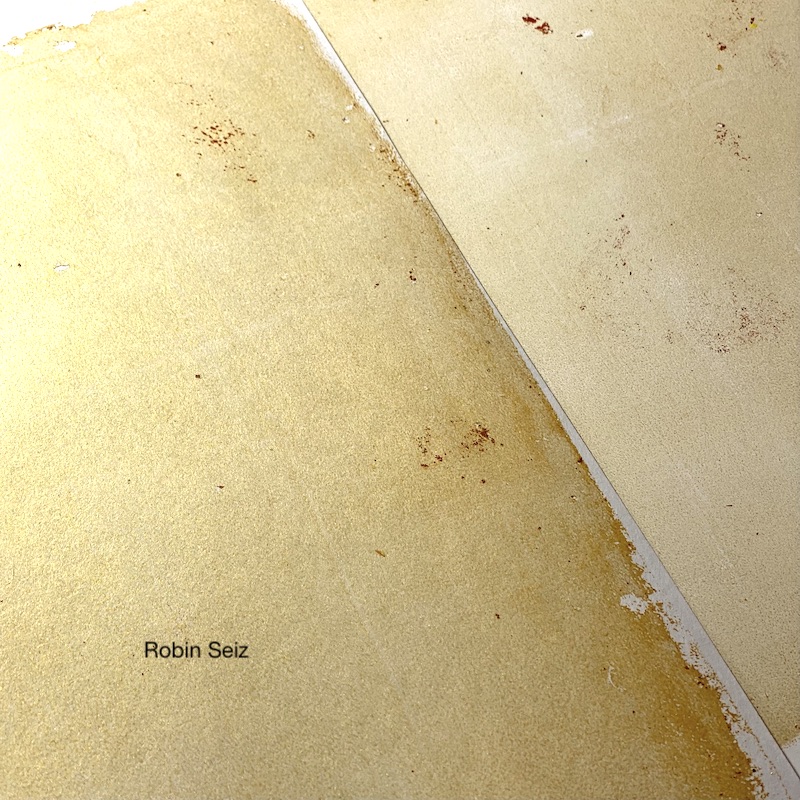
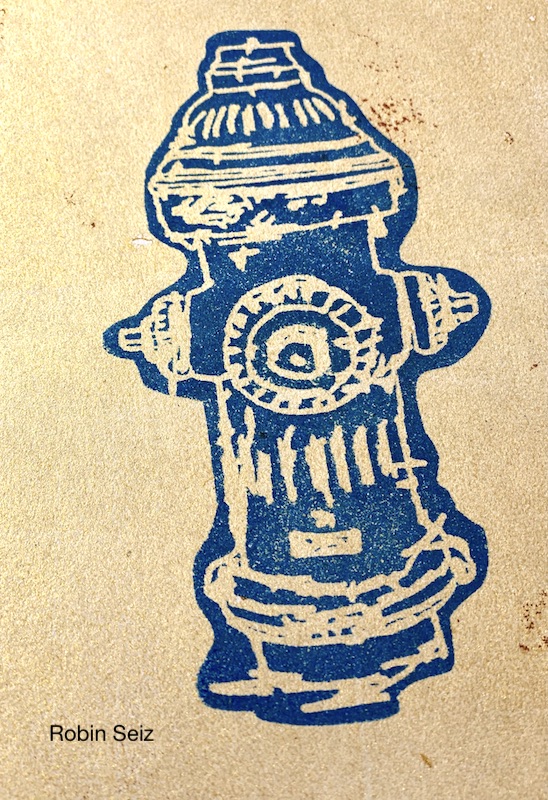
The first thing I did was use my Gelli plate to pull two gold papers, one darker than the other. (You’ll see there are red marks on the gold paper; that’s from a previous project and I don’t mind those little bits and pieces. If you are more of a perfectionist; I suggest cleaning your plate before you start, but I rarely do.) The lighter piece would be the background paper for my piece, the darker piece would be the background for the fire hydrant stamp. I wanted the gold to show through the stamp and I knew I would be fussy cutting the hydrant. That’s the wonderful thing about foam stamps, they often have the lines you can see through and play with the color in the background. I used Versa Fine Clair Paradise to stamp the hydrant.

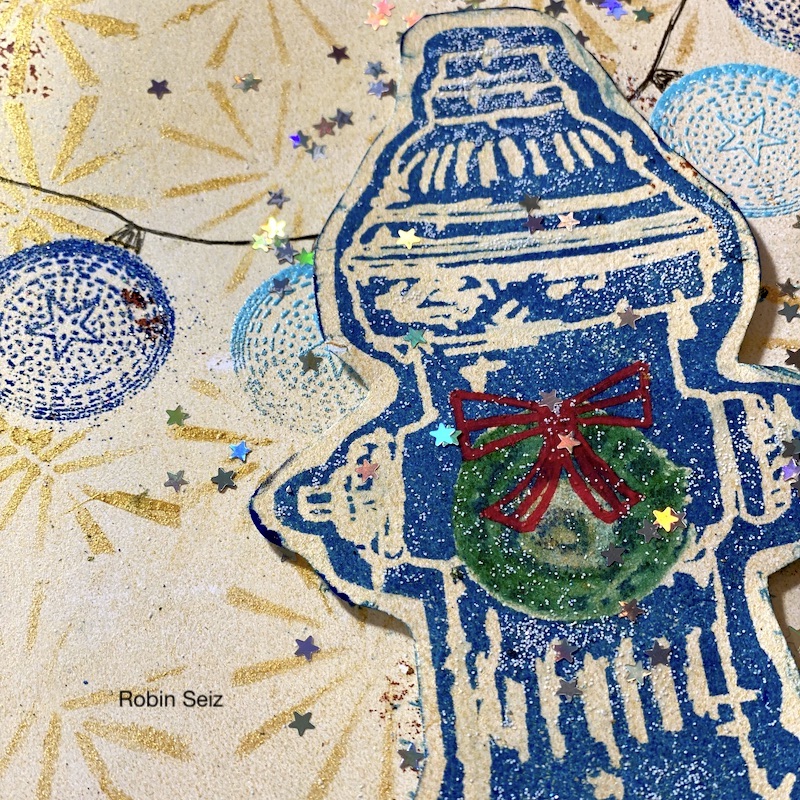
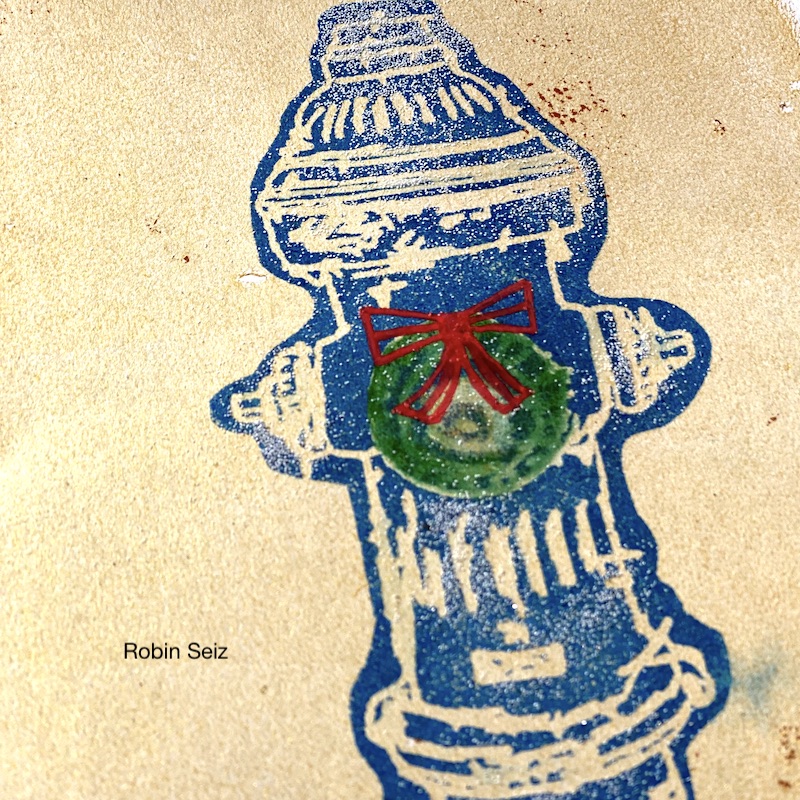
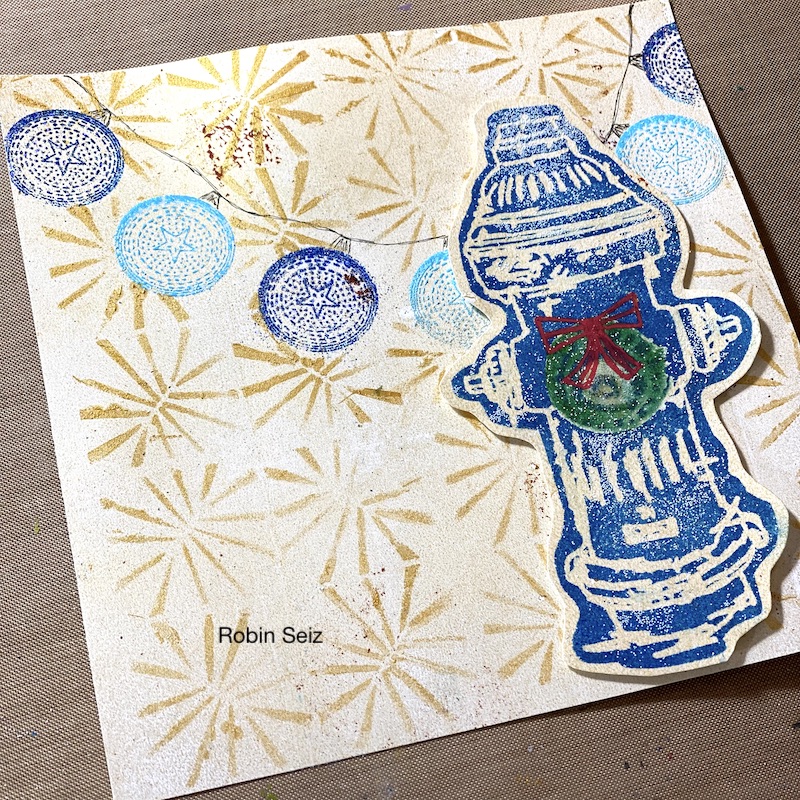
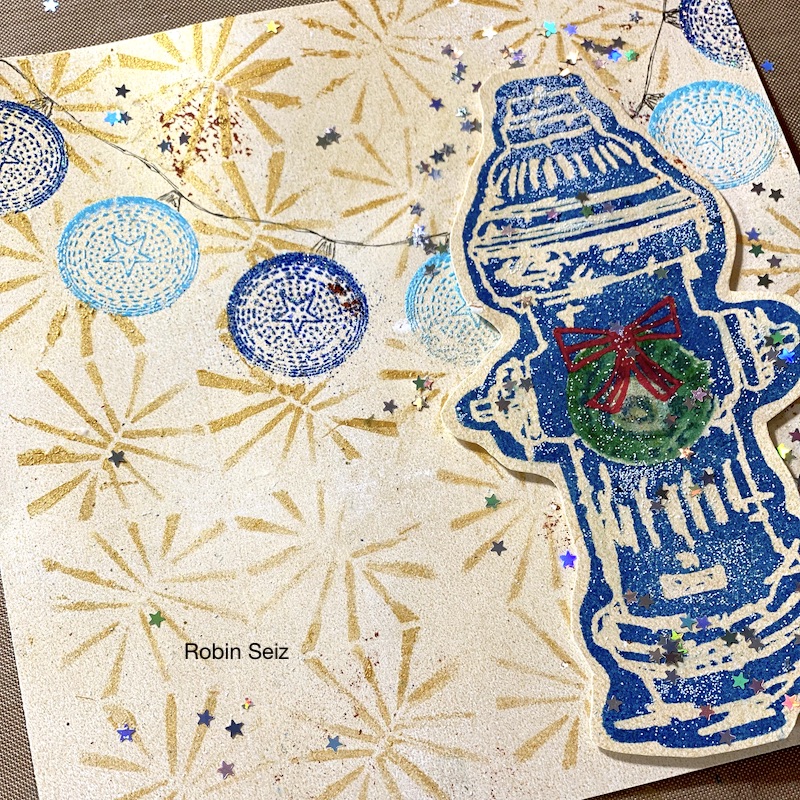
Next, I took a very small flat tipped brush and dipped it on the Versa Fine Clair Green Oasis and painted the “wreath” on the front of the fire hydrant. Once it was dry (and that’s a super important step) I drew a ribbon with a red Posca paint pen. If you are like me and really don’t have drawing skills, then I would suggest a few simple books to help you out. They come in super handy. I will list them in the supplies. Once the wreath was finished I wanted it to have the look of fresh fallen snow. I don’t often use glitter because it’s so bad for the environment, but sometimes, I just have to break it out! If you look closely at picture 4, you will see the “snow” both on the wreath and the hydrant. It’s subtle, but it does show up.

I moved to the lighter gold background paper for the next steps. 

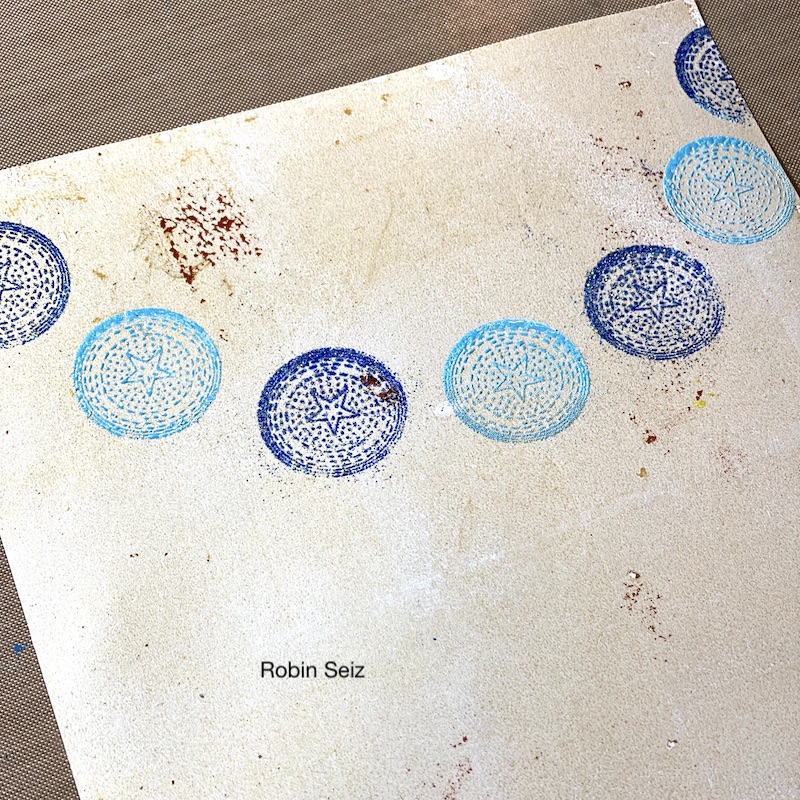
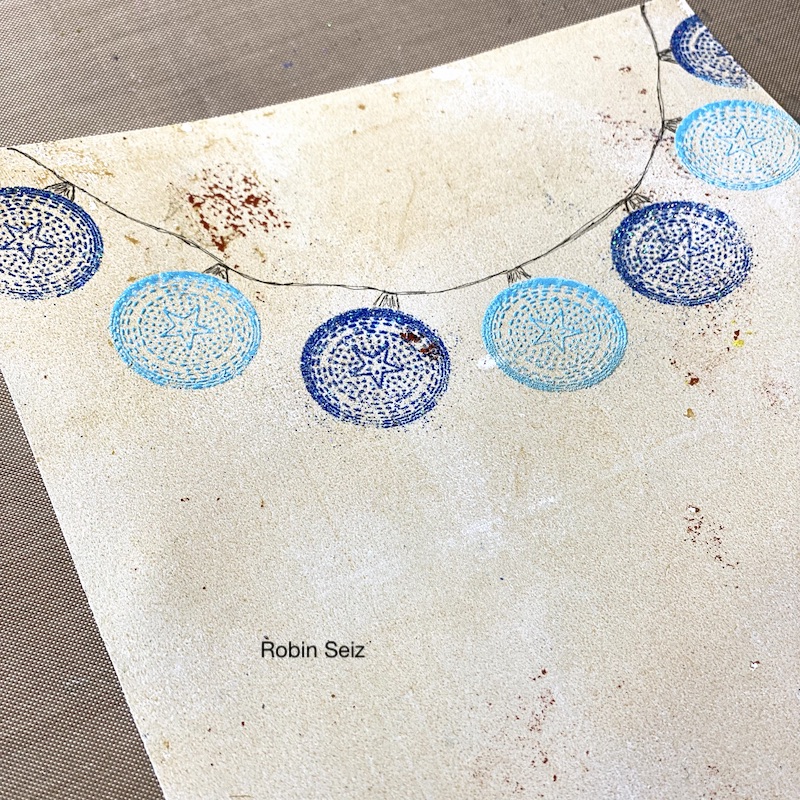
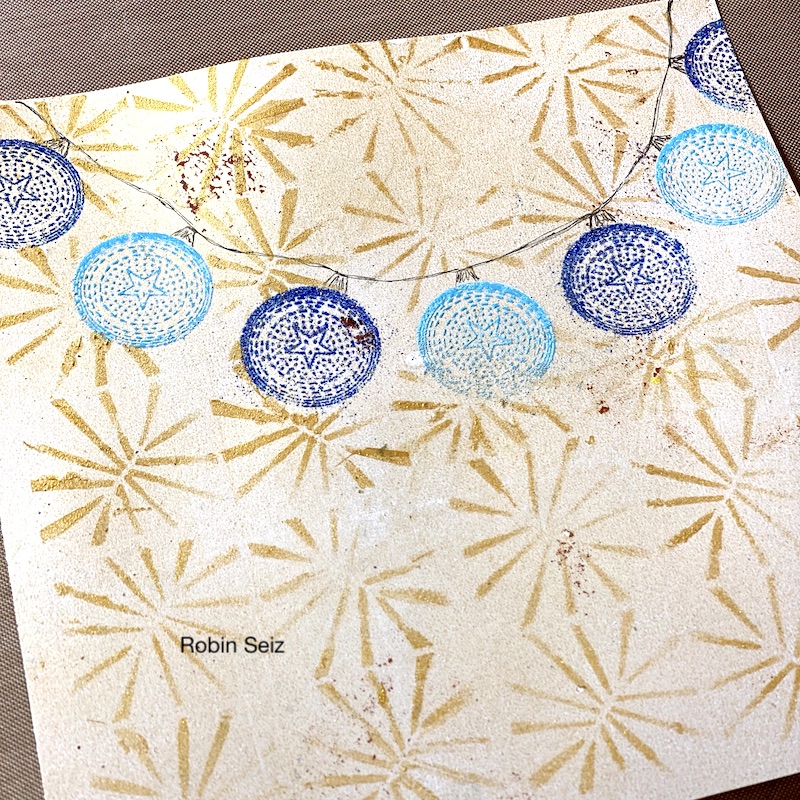
I recently ordered Nathalie’s Small Circle Jumble Set and hadn’t yet used them. They were the perfect stamp for the hanging lights. I rarely use embossing powders, but I did so in this project. Embossing always feels like a “little something special” and gives a piece a lovely dimension. I then drew in some string for the lights with a micron pen; I did later go back over it with a little heavier line. 

Next, I fussy cut the hydrant and auditioned where it would be placed on the paper. It’s quite bold, so I needed something to counter balance it compositionally. Nathalie recently gifted her Creative Squad the new ATC Mixup stencil sheet and it has a wonderful star pattern on it. I thought this would be the perfect background to balance the hydrant. I used the stencil with gold acrylic paint. I worked more boldly in the upper left corner to balance the hydrant. 

When I was finished with the background, I attached the hydrant with dimension tape. I think it adds so much to a piece when there is  dimension. I still felt like the piece needed a little more of “something” (some bling) I added glitter stars and the piece was finished. As I looked at it more, I thought that perhaps I should outline the hydrant in the Versa Fine Blue. This never works well for me, I seem to get it all over everything. If that works for you, it definitely adds even more dimension. I have included both pictures, ( 10 and 11) with and without. You see which you prefer. 

This piece could be a card (it’s 6×6) or a add-on for your journal. It could even be framed and brought out during the holidays, which is what I might do.

I wish you all a wonderful holiday. I hope it’s filled with joy, love and perhaps even some creative time! See you in the New Year! Peace, Robin


Thank you Robin for such a lively composition – feels perfect for celebrating the holidays!

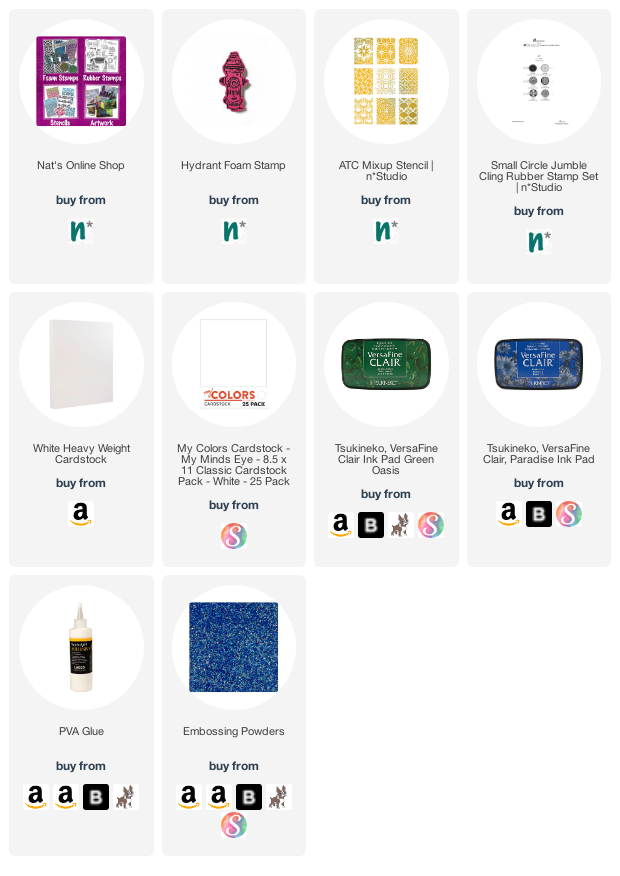
Give it a try: you can find all my Foam Stamps, Rubber Stamps and Stencils in my Online Shop and here are some of the supplies Robin used:

Looking for more inspiration from the Creative Squad? Follow them on Instagram here.
Leave a comment

Pattern Monday 22 – Ledger Video

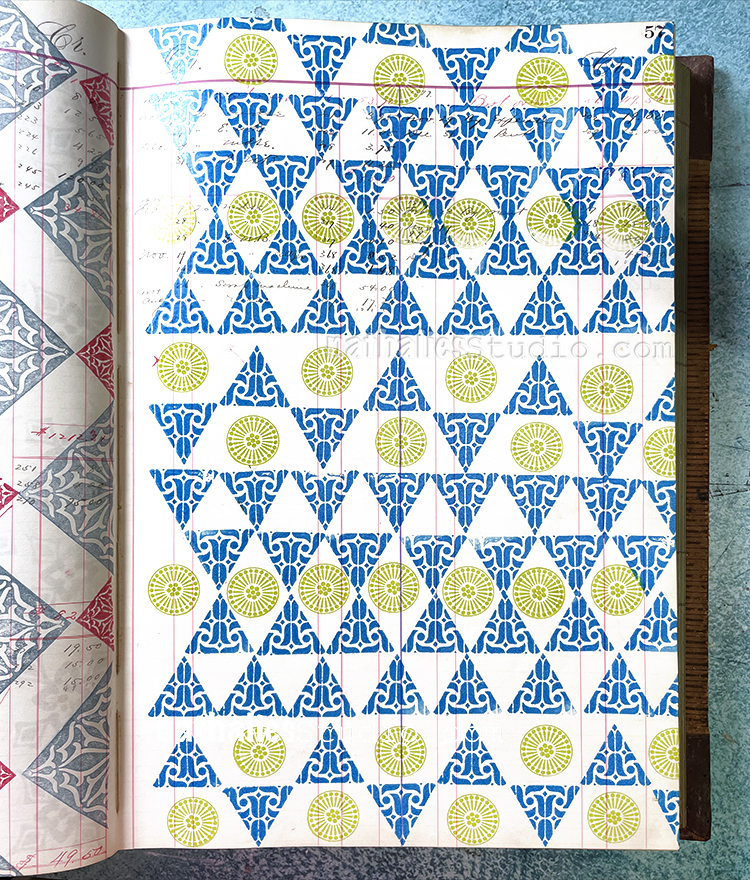
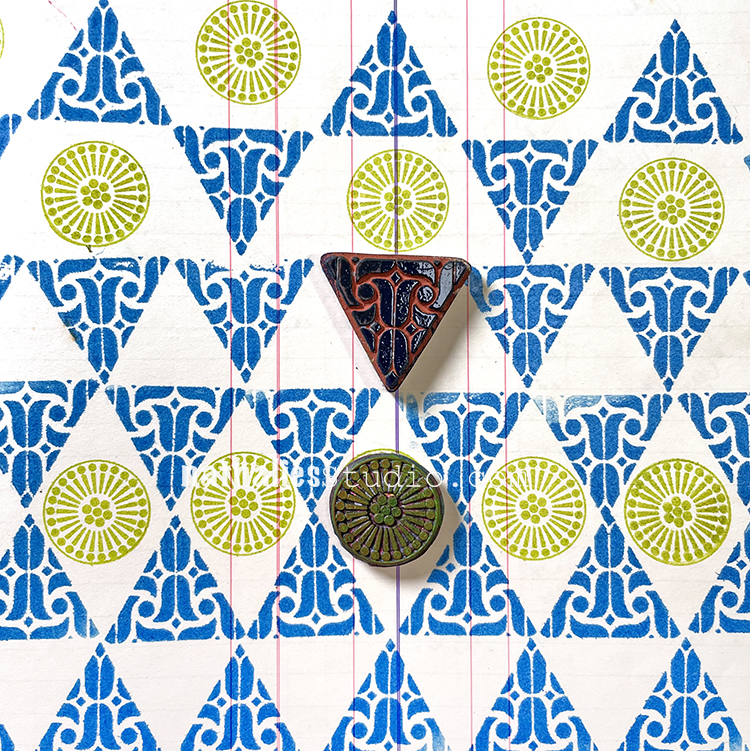
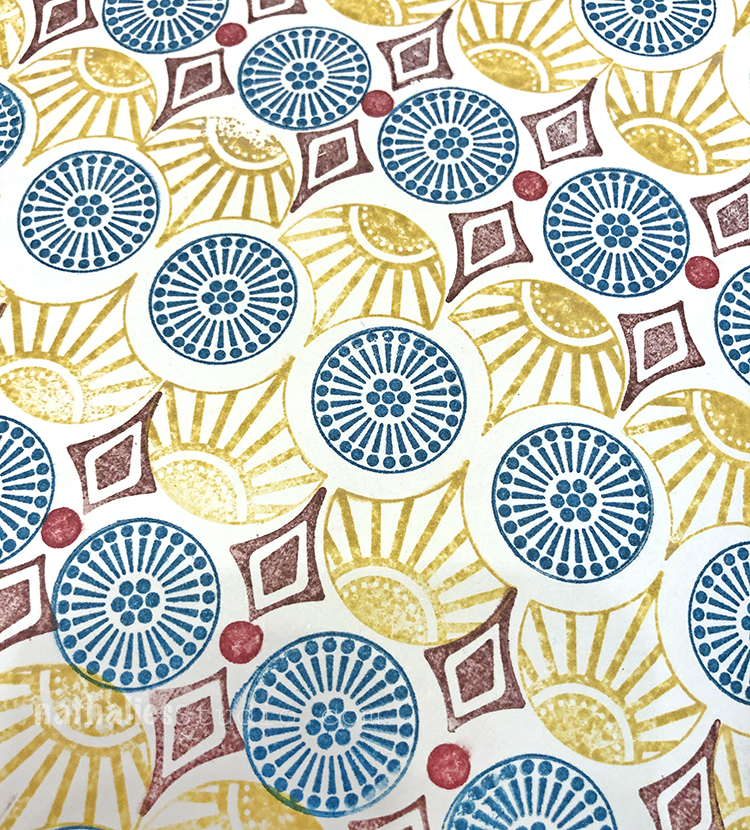
Pattern Monday time and today I’m working in my big vintage ledger and playing with just two little stamps and changing up the orientation and frequency of stamping to create a pattern that has a surprising amount of complexity. So, just one stamp from my Small Circle Jumble set and one from my Triangle Love set is being used here and I definitely wish with this one that my big vintage ledger was even BIGGER so that I could do more of the pattern for you. You will just have to use your imaginations :)

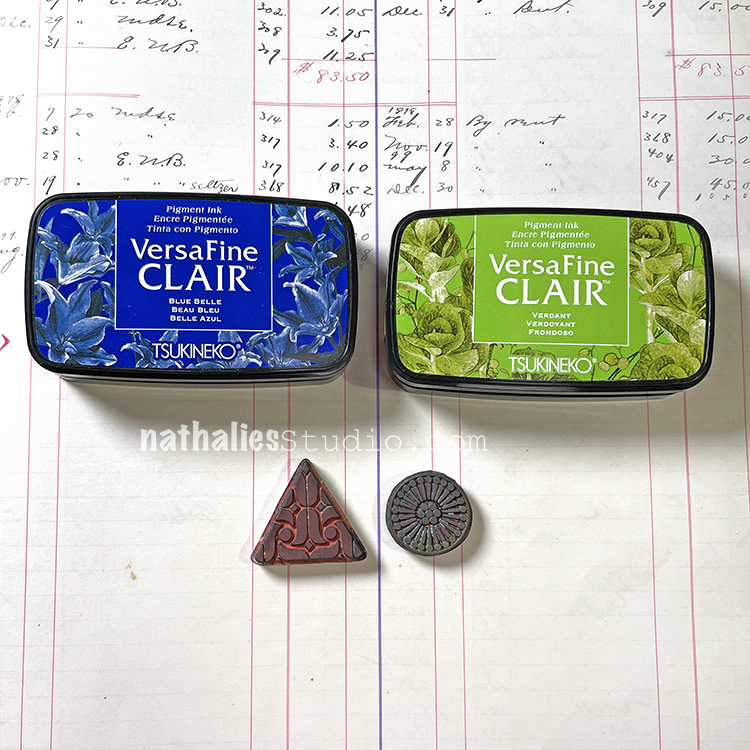
Here is another look at the finished pattern and the stamps I used:

Your turn to give it a try! Here are the supplies:

Leave a comment

Little but Fierce – Art Journal

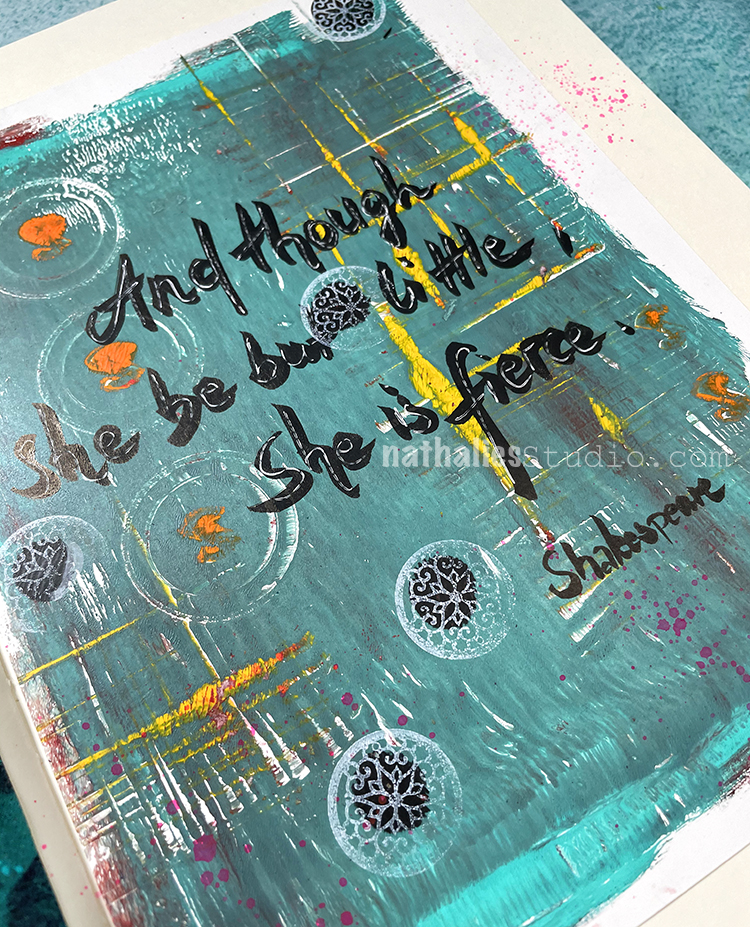
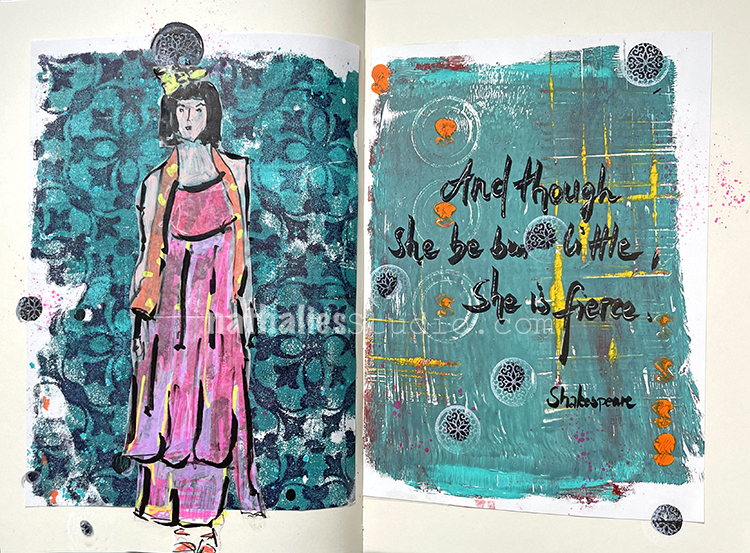
“And though she be but little, she is fierce.” – Shakespeare

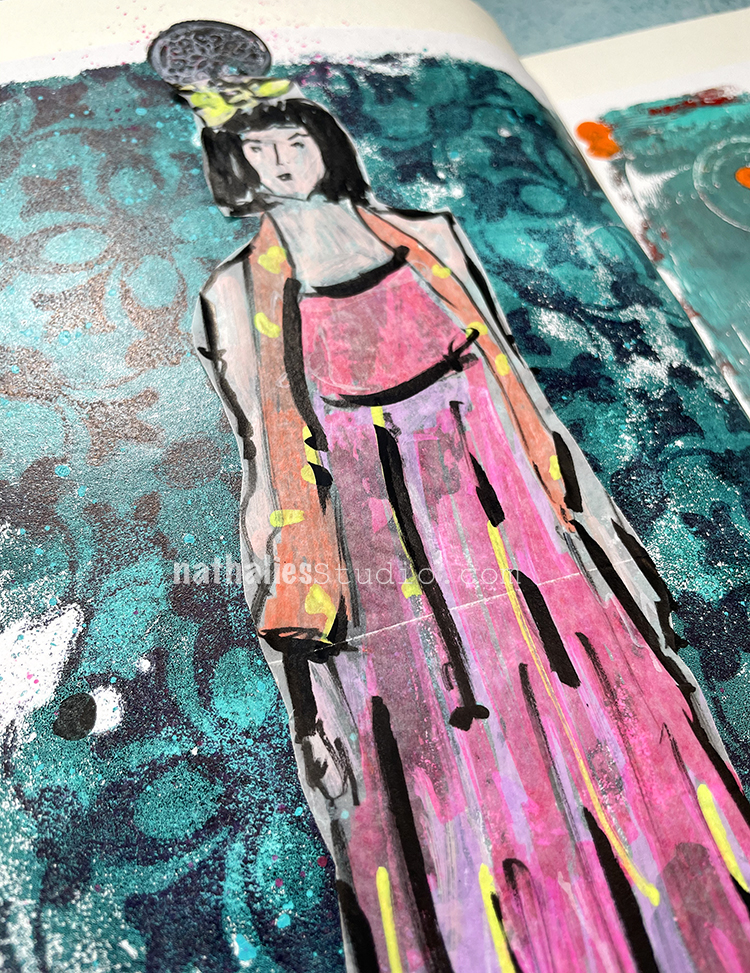
I used two gel prints that I pasted into the art journal for this spread – done years apart but I felt they would work together because of the similarities of color. On this side I used my Versailles stencil for the print, then layered my figure with markers on deli paper over top. 

I added some of the colors to the other side to tie it together as well and I picked up the circles and used them all over too – I stamped the circles with white Moonlight ink pad and my Circle Jumble stamps.

Here are some of the supplies I used:

Leave a comment

Creative Squad: Light & Shadow – Maura Hibbitts

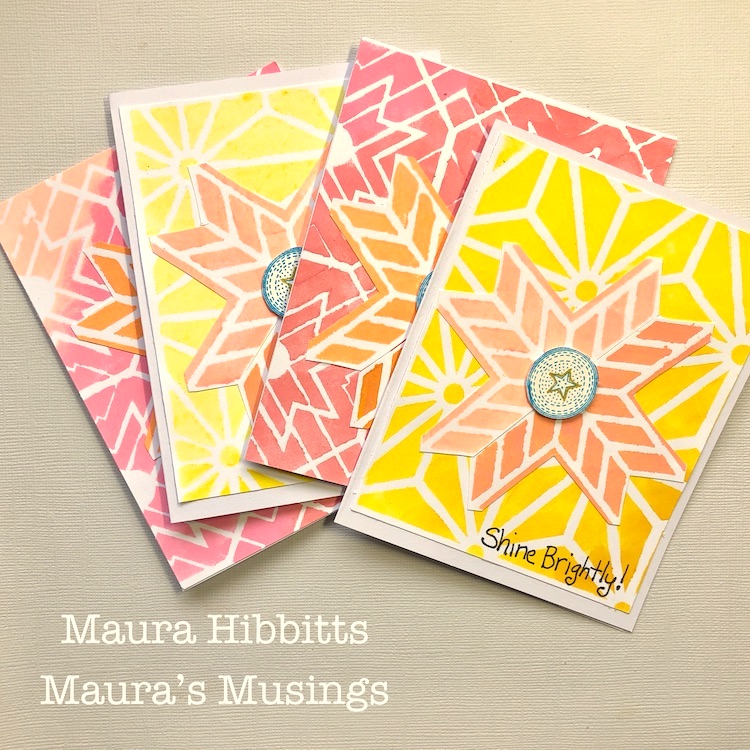
Hello from my Creative Squad! Today we are kicking off a new monthly theme with Maura Hibbitts. She is bringing us some lovely holiday cards in some perhaps untraditional colors, shaking things up to finish up 2020 with my Star Struck, Toledo, and Santiago 4×4 stencils, my Small Circle Jumble rubber stamps, and our theme: Light & Shadow – In art and maybe also in life, the balance between light and shadow is an important consideration. Play with this equilibrium in your art and show us how the two sides work together.


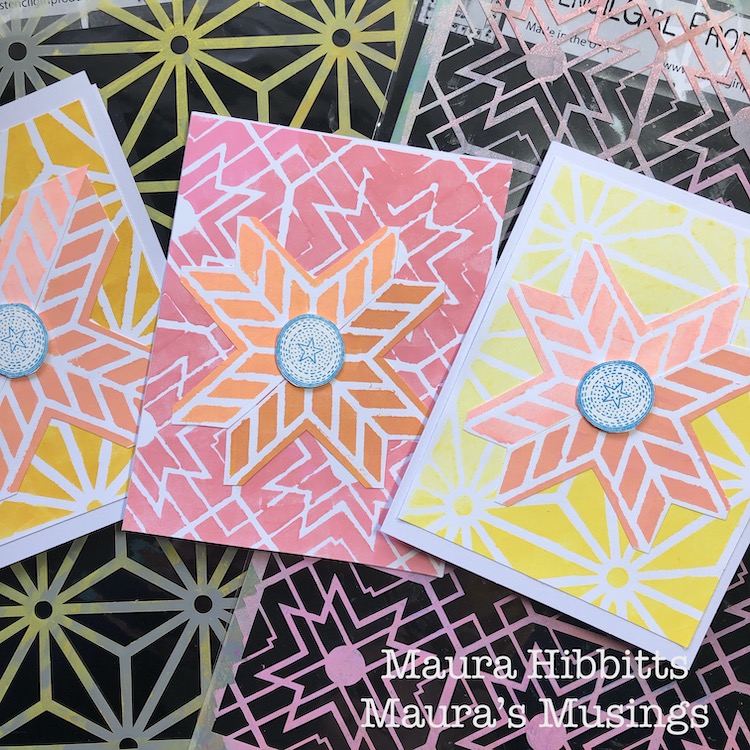
Light and Shadow, dark and light…as the days get shorter and the shadows longer I’m feeling the need for more light in my life. I watch the strip of sunlight on my deck railing in the morning outside of my work window (It was all lit in the summer), and then the shadows as they expand across the yard during the day. Each day will get shorter until the Winter Solstice on December 21. This year, more than ever, I am looking forward to our shift again to more daylight. These thoughts also prompted me to challenge myself to work with bright colors that I would not normally choose – yellow and pink. So, I’ve ended up making eight holiday cards in very non-traditional colors, check it out.

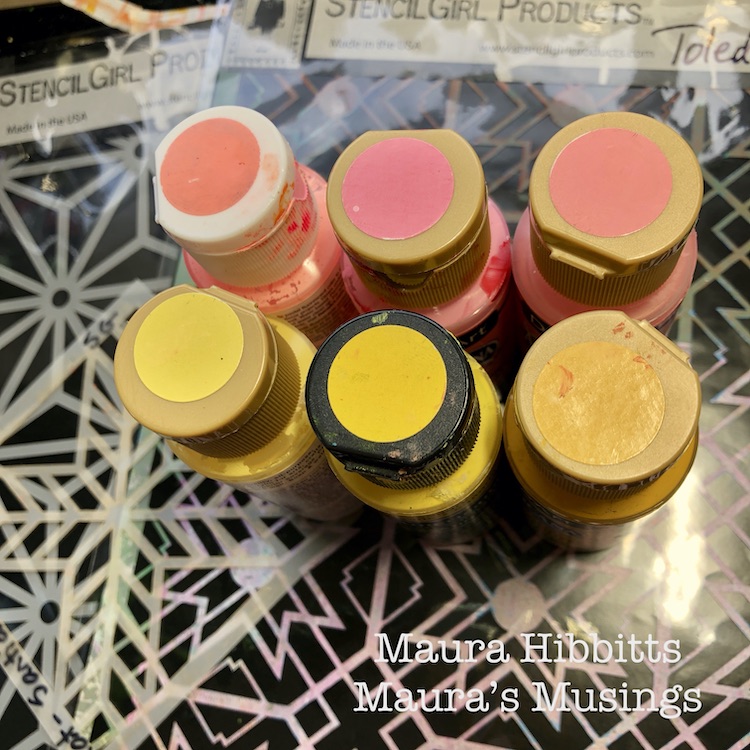
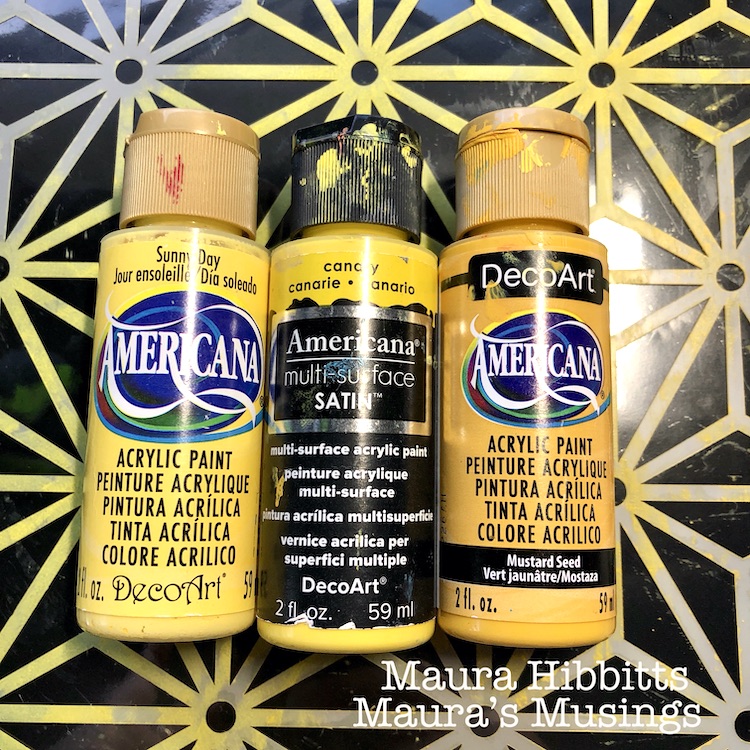
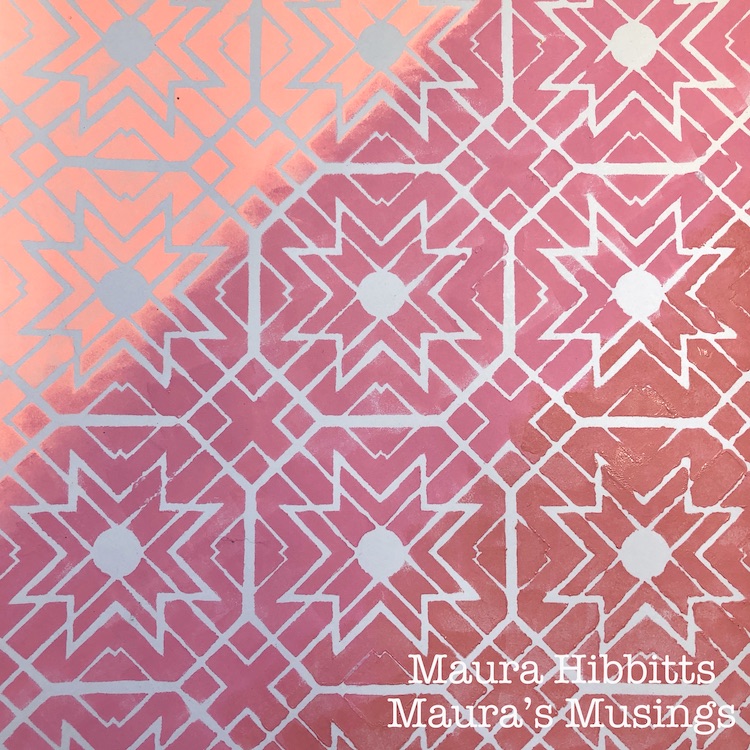
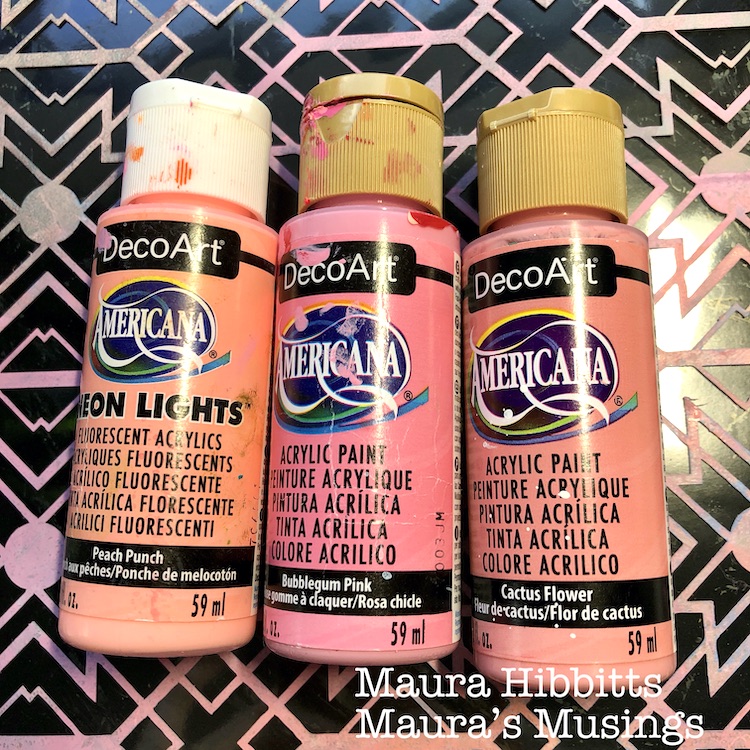
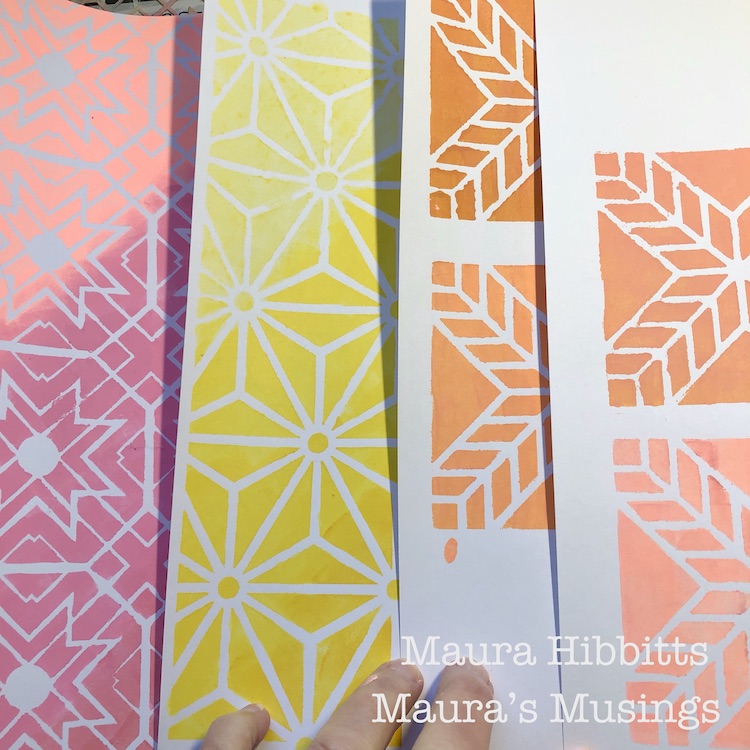
I started by going through my stash and pulling out paints in varying shades of pink and yellow, so I would have a blend from dark to light.

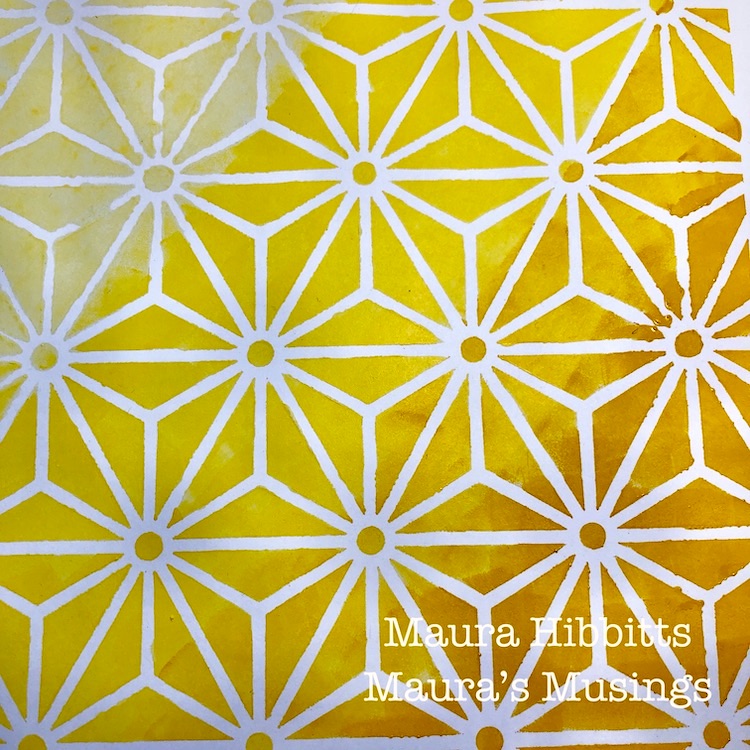
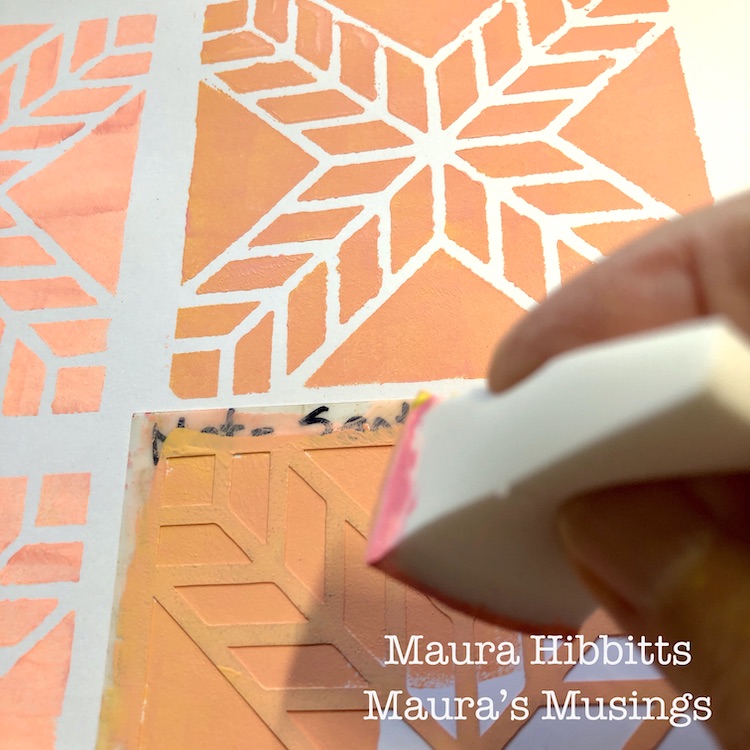
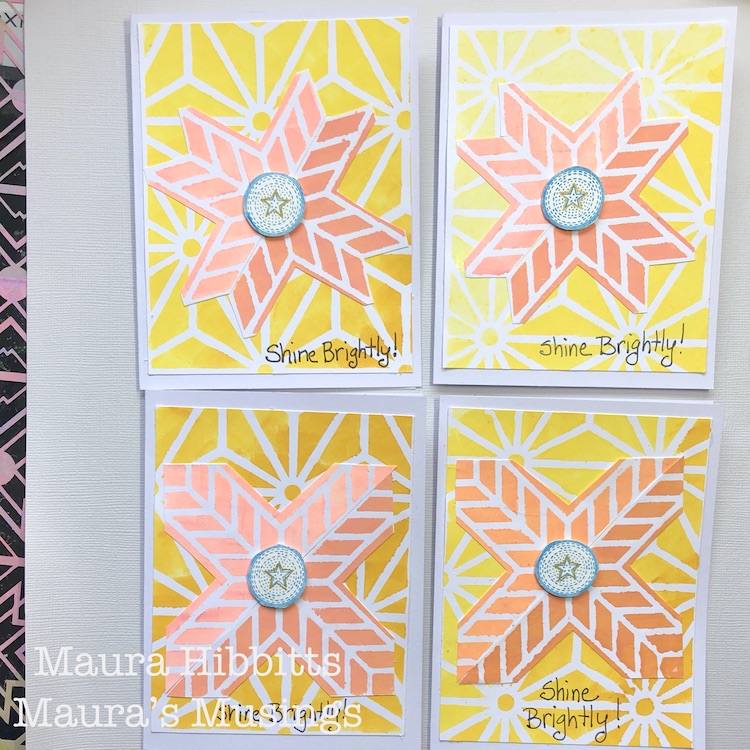
Nat’s Star Struck stencil seemed to call for the yellows, so I dabbed the colors in with a cosmetic sponge onto white cardstock, starting with the lightest in the top left, and working my way to the darkest in the lower right. Light and shadow, along with a bit of ombre.
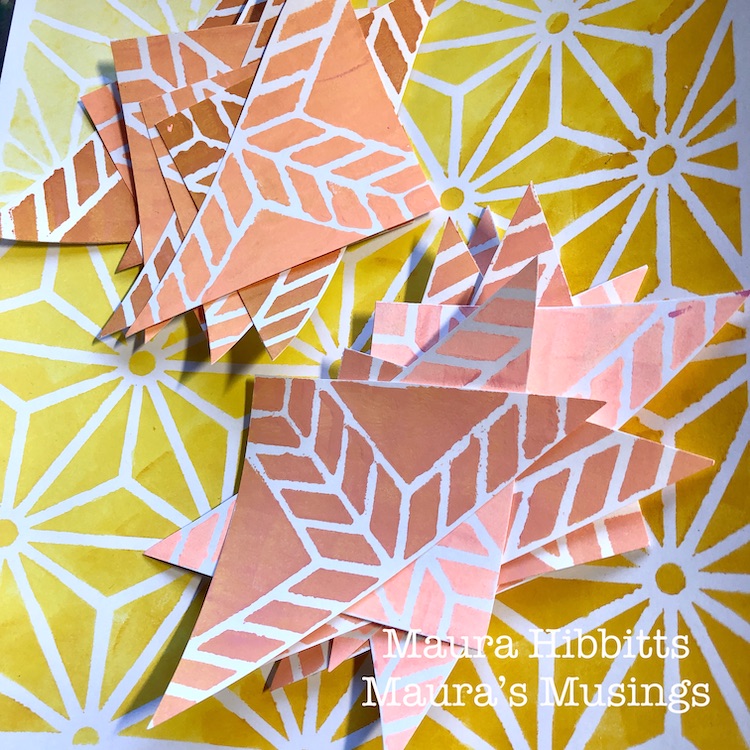
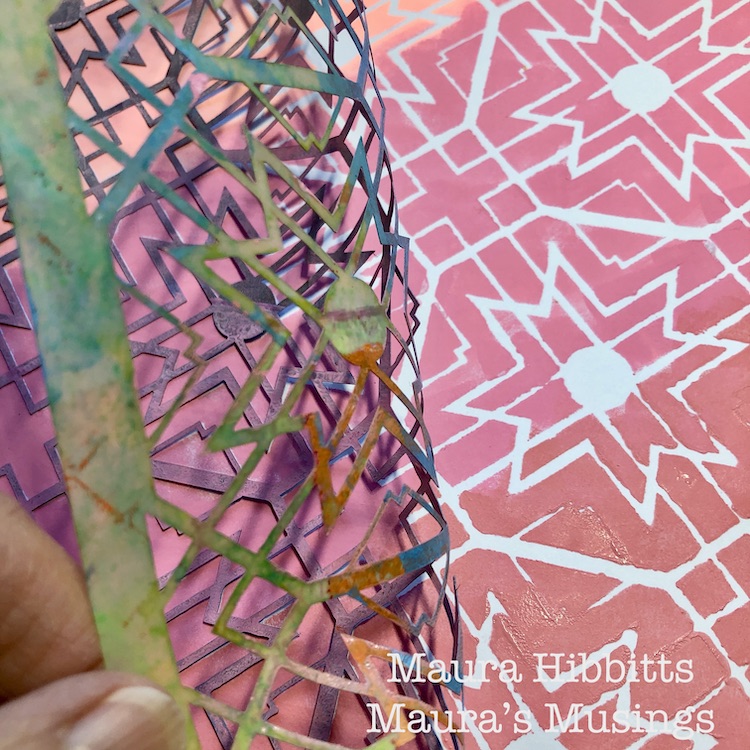
Next up are the pinks. where I repeated the previous step, only this time I used Nat’s Toledo stencil.

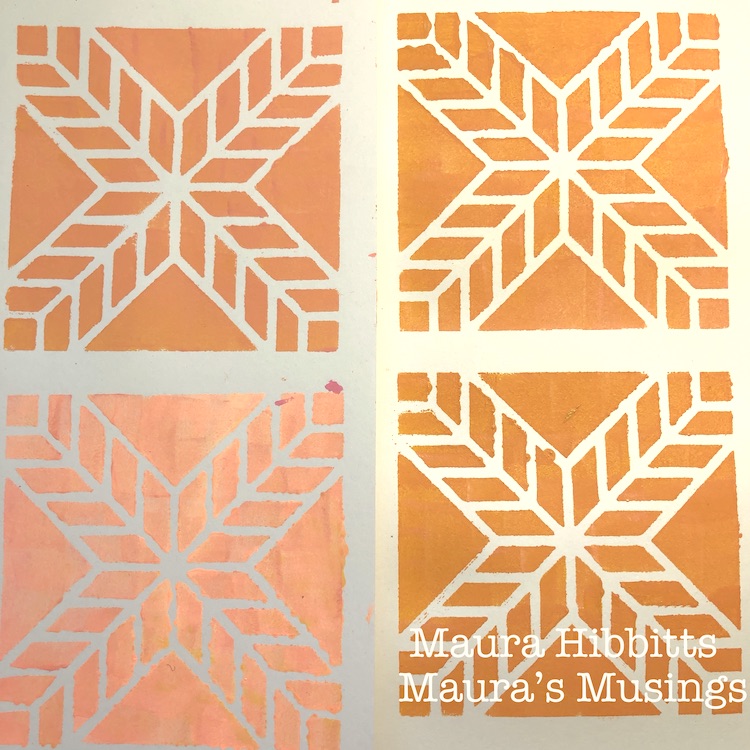
I decided I wanted to create a focal point, so I mixed varying shades of peach and orange, by blending the yellows and pinks, and used Nat’s Santiago 4×4 stencil. My goal was to have a mix of light and dark (shadow) shades.

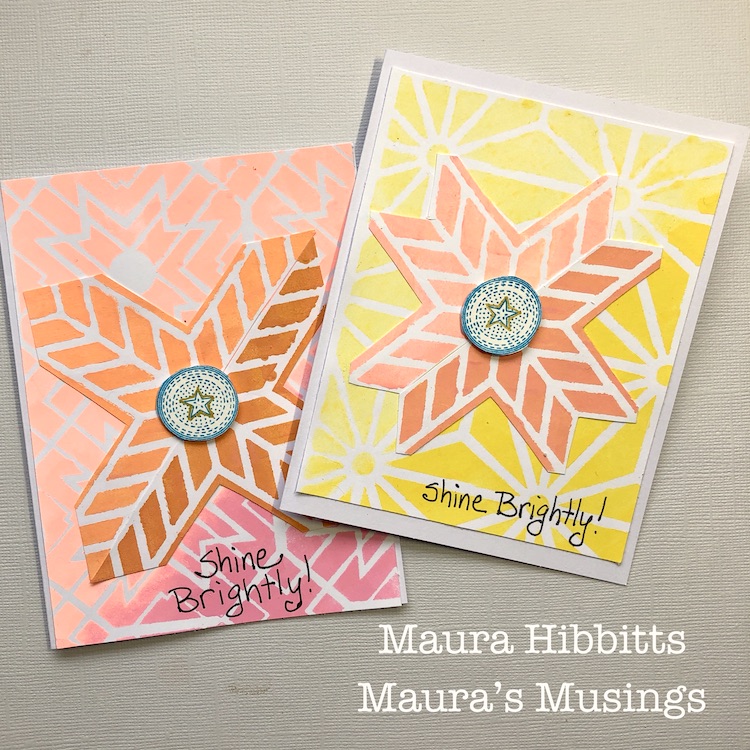
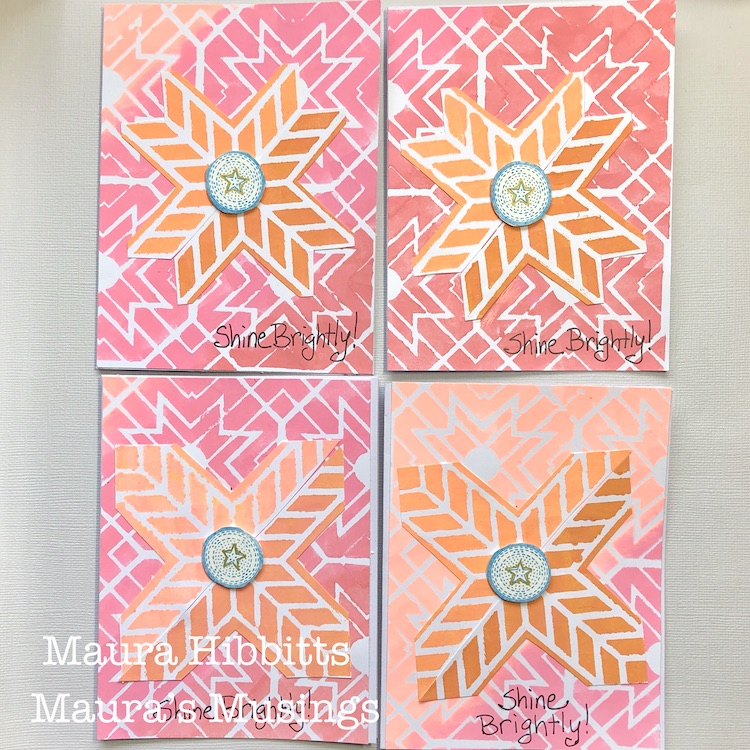
Now that everything is painted and stenciled, it’s time to start building the cards. I cut the large sheets of stenciled yellows and pinks into fourths to use as the card background. Next, I cut out the Santiago mini squares, and cut them diagonally in half. I laid the two parts together, decided I wanted more of the background to show, so cut out parts of the smaller stenciled papers.  I glued the papers onto the cards using a PVA glue.
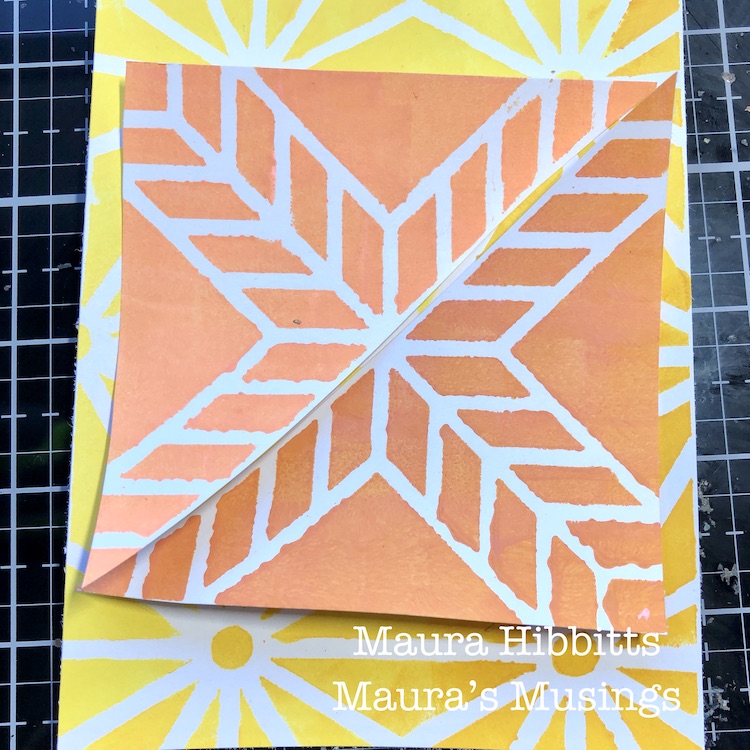
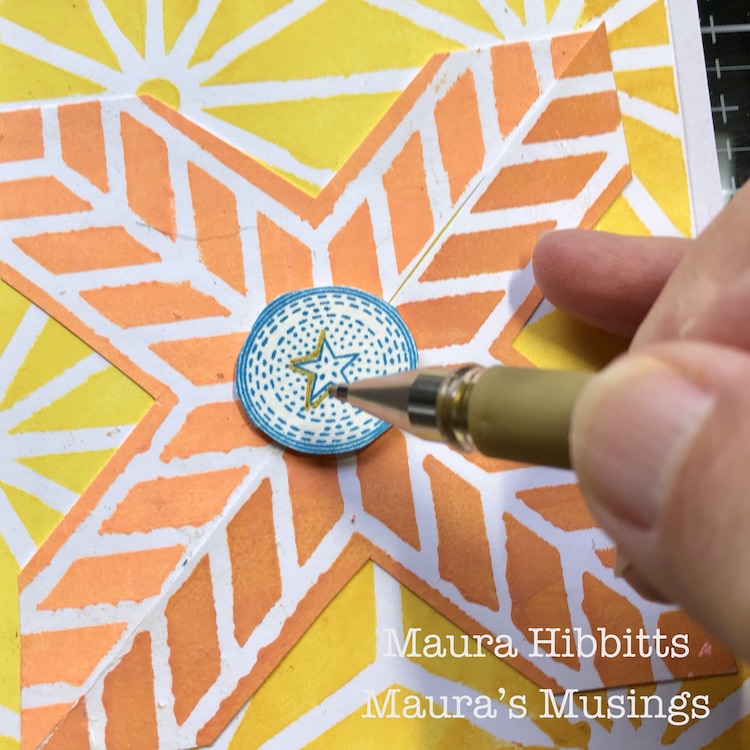
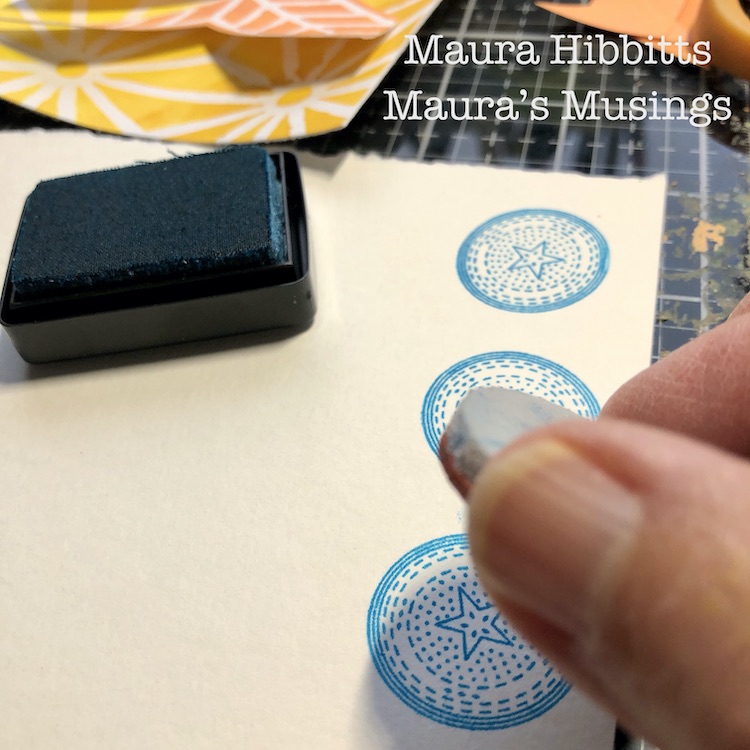
I felt that I needed one more pop of color, so I stamped Nat’s Circle Drive Positive small stamp onto watercolor paper with blue ink. I cut these out and popped them up on the center.
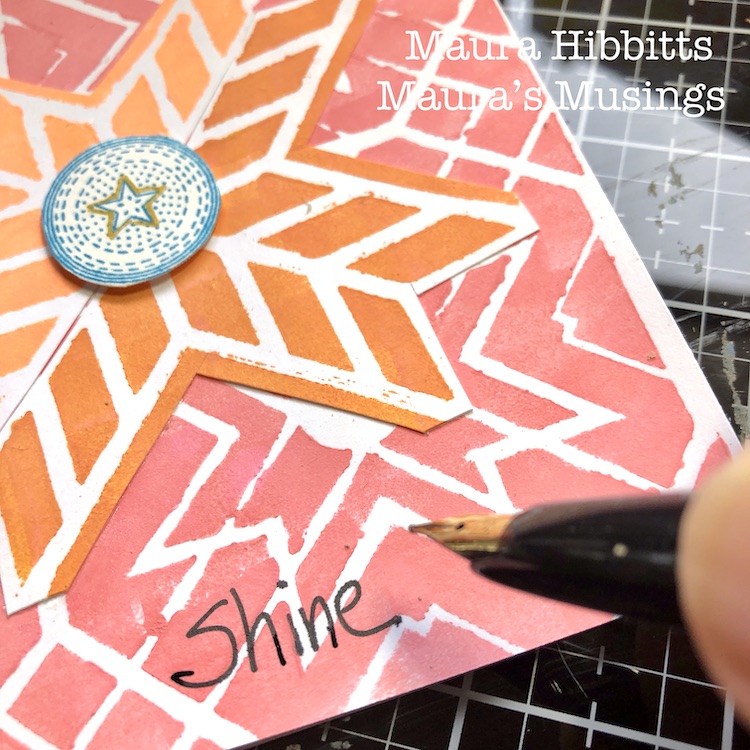
Now for the final touches – a bit of sparkle with a gold pen, where I outlined the star shape, and hand lettered words “Shine Brightly!” I love to use a Platinum Carbon ink pen over dry paint, but any permanent black pen will work.

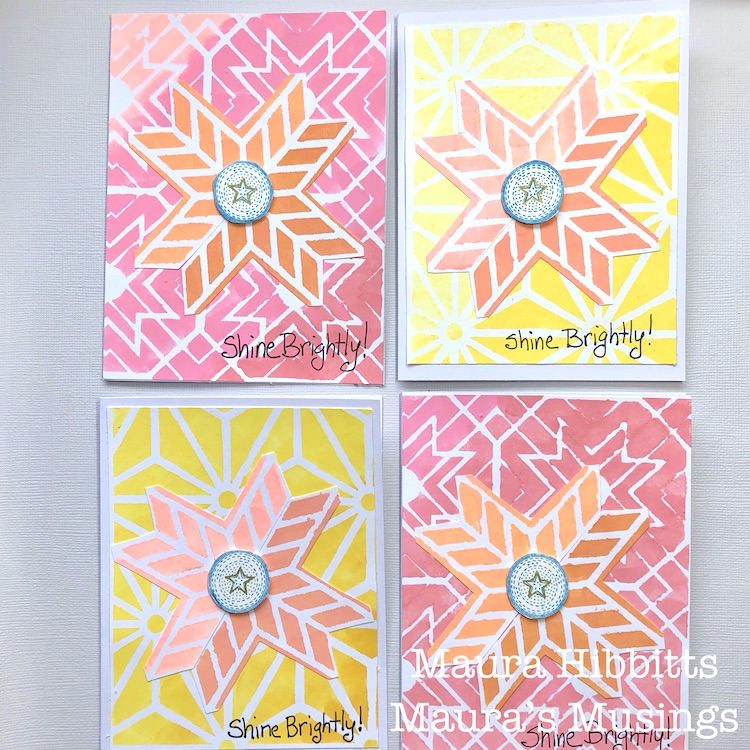
I aimed to use the colors to give a feel of light and shadow, so I worked both the background and focal piece from lightest on the top left, to darkest on the bottom right. What do you think, did it work?

And there you have it, a set of eight cards in a bright array of yellows and pinks. These might be very non-traditional Christmas cards, or maybe Solstice cards. Another thought is to save them, and randomly send them out in the dark days of winter to bring a ray of light to someone. I hope this inspires you to observe the light and shadow in your life and let it guide your creative endeavors. Wishing you health, joy, and light this holiday season! – Maura


Thank you Maura! We love how your colors make these patterns pop. And nontraditional holiday colors seem perfect for this crazy year :)

Give it a try: you can find all my Rubber Stamps and Stencils in my Online Shop and here are some of the other supplies Maura used:

Don’t forget to check out Nat’s Creative Squad on Instagram too: Each week we post projects, ideas, and inspiration for mixed media art.

Leave a comment

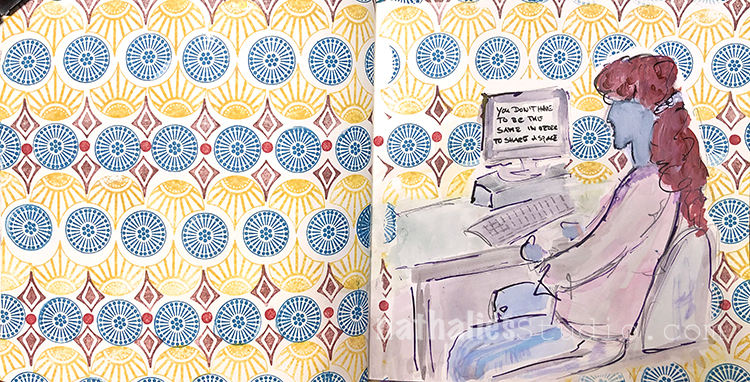
Sharing Space – Art Journal

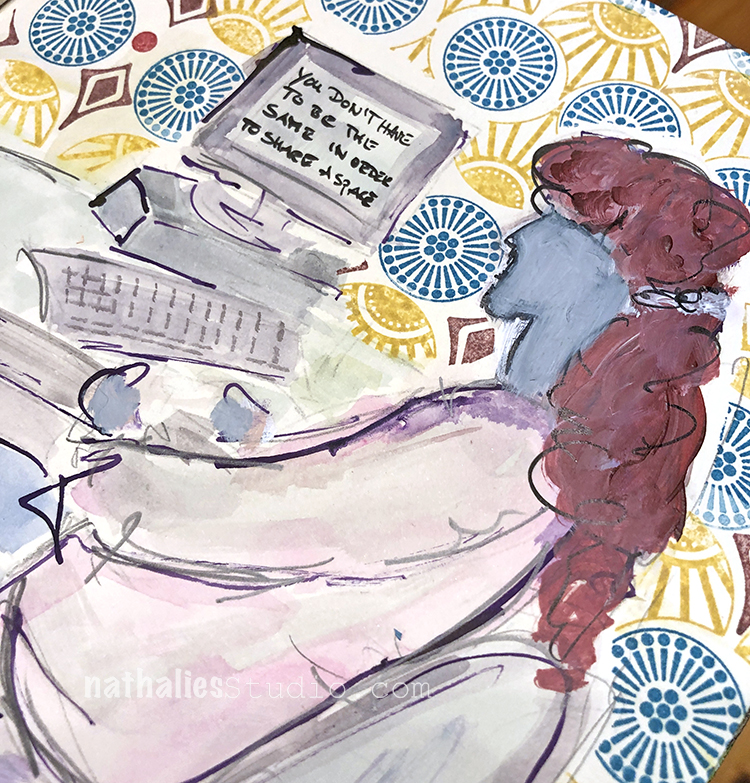
“You don’t have to be the same to share a space.”

I stamped out a background pattern with my Fantastic Small, Small Circle Jumble, and Fanfare stamps. I used a pencil eraser for some dots in between.

I sketched the figure right on the page with ink and pencil and then filled in with gouache and watercolor.

Here are some of the supplies I used:

Leave a comment

Deck of Cards Challenge – Prompts 8 & 9

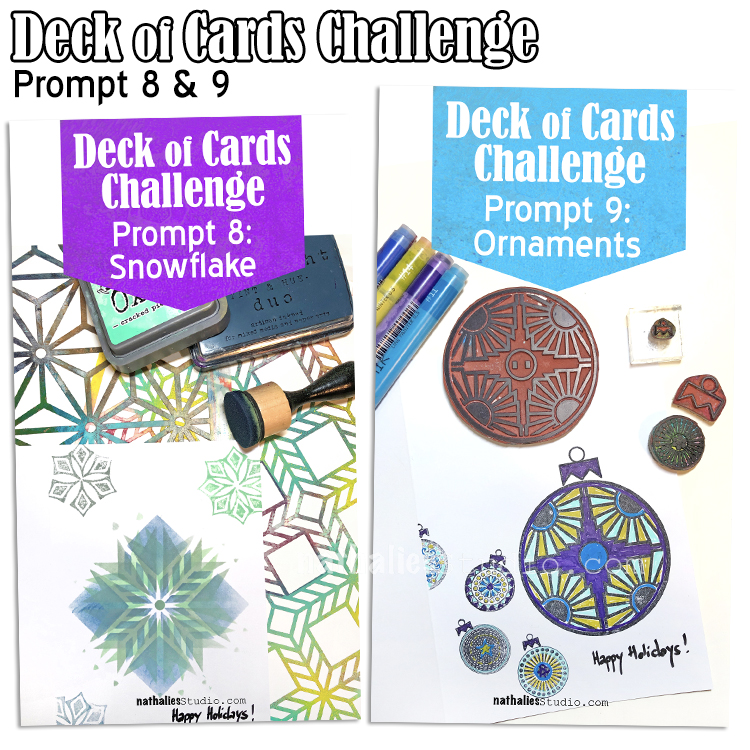
Today I am recapping Day 8 and 9 of my Deck of Cards Challenge that is running this month on Instagram. This week we are making holiday cards with a focus on shapes.

Here is a recap of days 8 and 9:

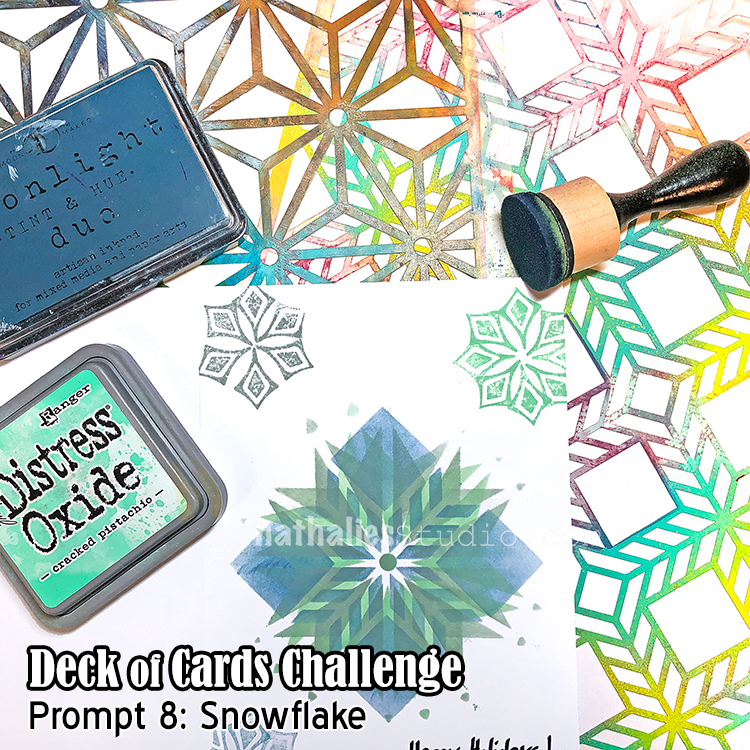
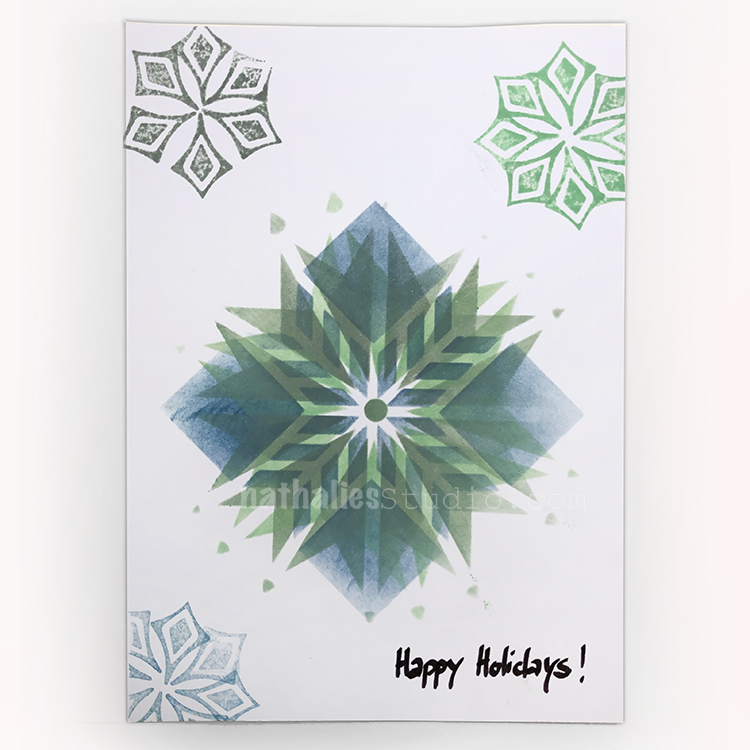
Day 08 – Snowflake

For week 2 of the challenge we are making holiday cards so I thought I’d start off with a classic winter motif – the snowflake.

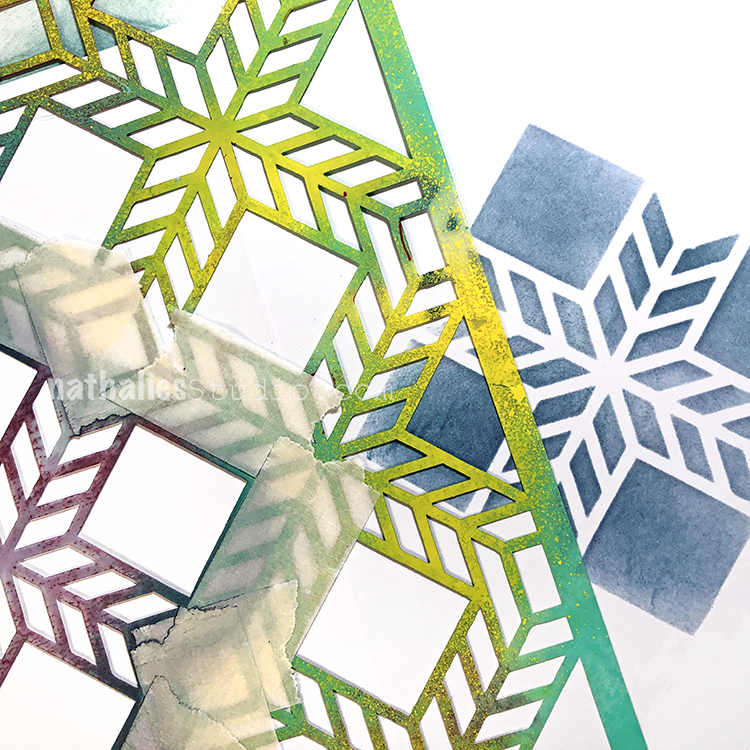
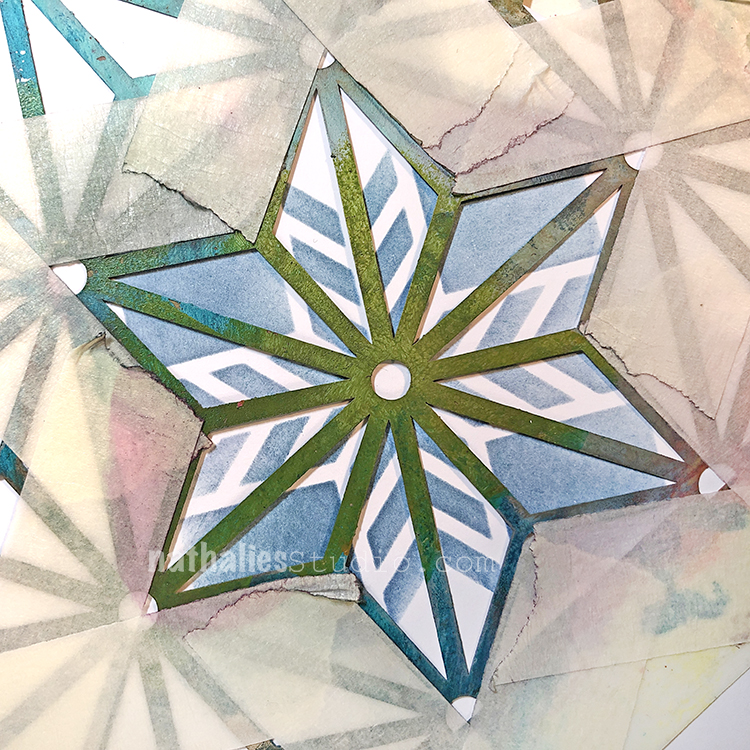
Using an ink blending tool and masking off a shape in my Santiago stencil… 

and then Star Struck stencil, I layered up a very nice snowflake. Because no two snowflakes are the same, I added a few more with my Fanfare stamps. This is one snow storm that will brighten anyone’s day :)

Day 09 – Ornaments

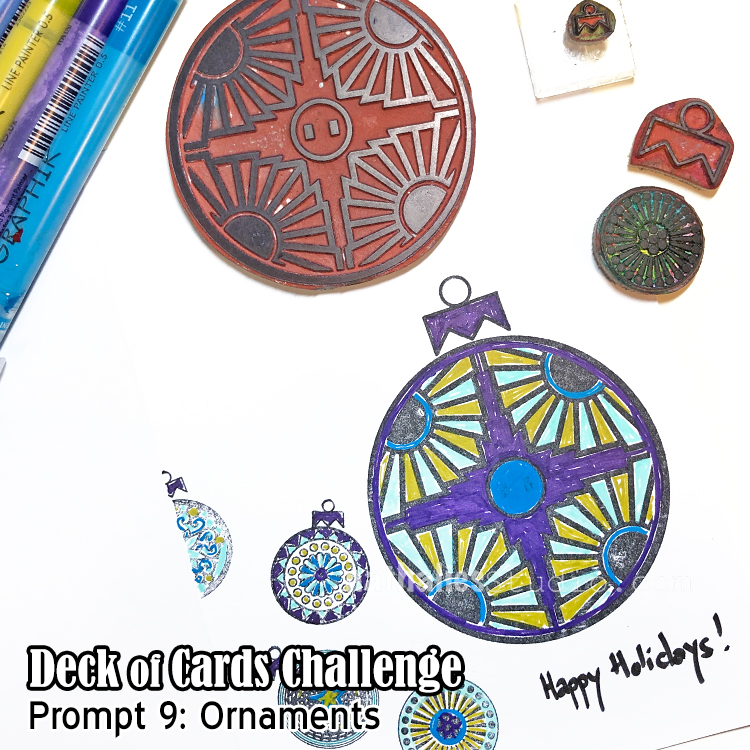
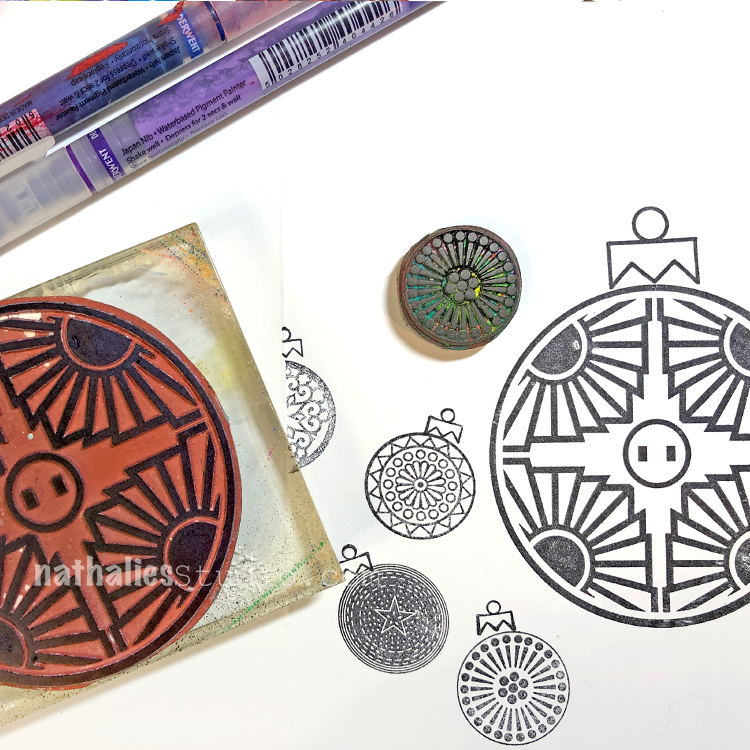
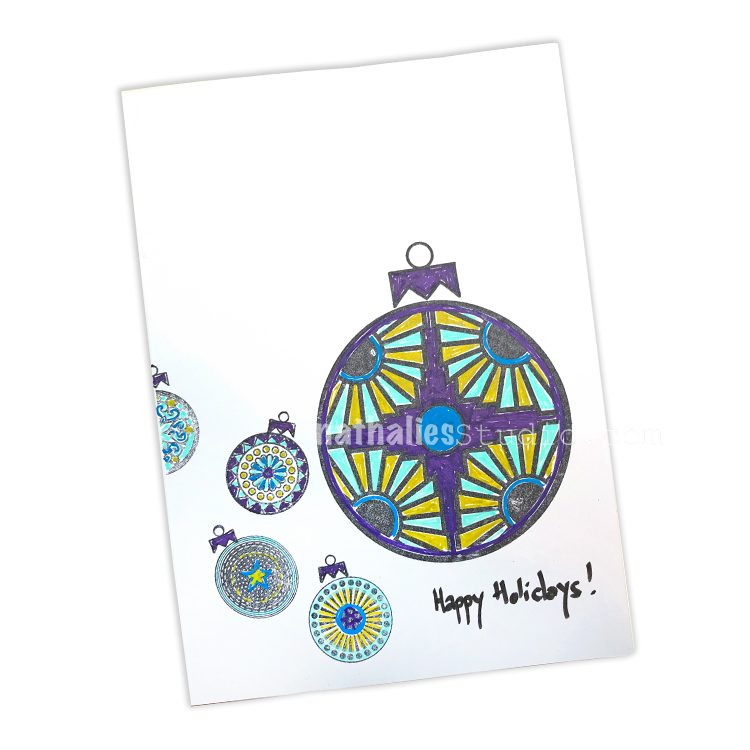
Today we are making a holiday card with Ornaments on it.

My Small and Large Circle Jumble stamp sets actually include an ornament topper stamp in them – so it couldn’t be easier. You could fill these in with lots of different colors – I’ve chosen to use Graphik Line Painter markers in some merry and bright colors.

Keep following us and I hope you share what you are working on using #docchallenge

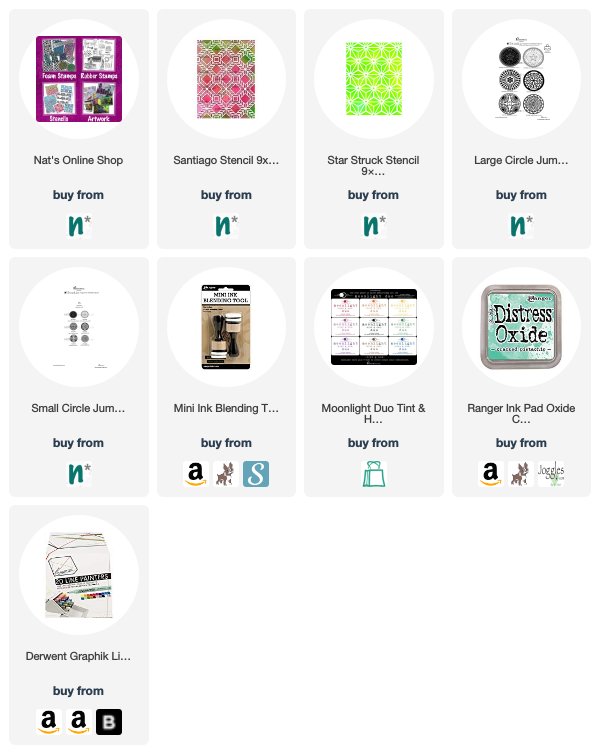
Here are some of the supplies that I used in these prompts:

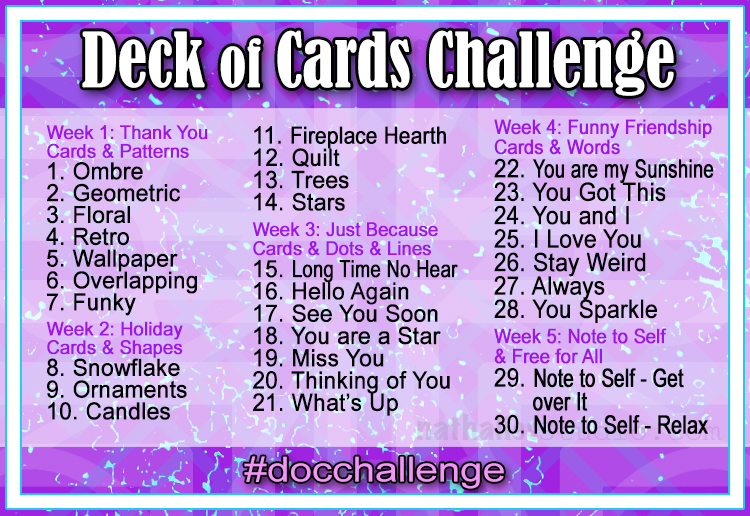
Here is the prompt list so you can play along too! Follow the daily prompts on Instagram and tag your creations with #docchallenge

Leave a comment

Doin’ My Thing -Jennifer Gallagher


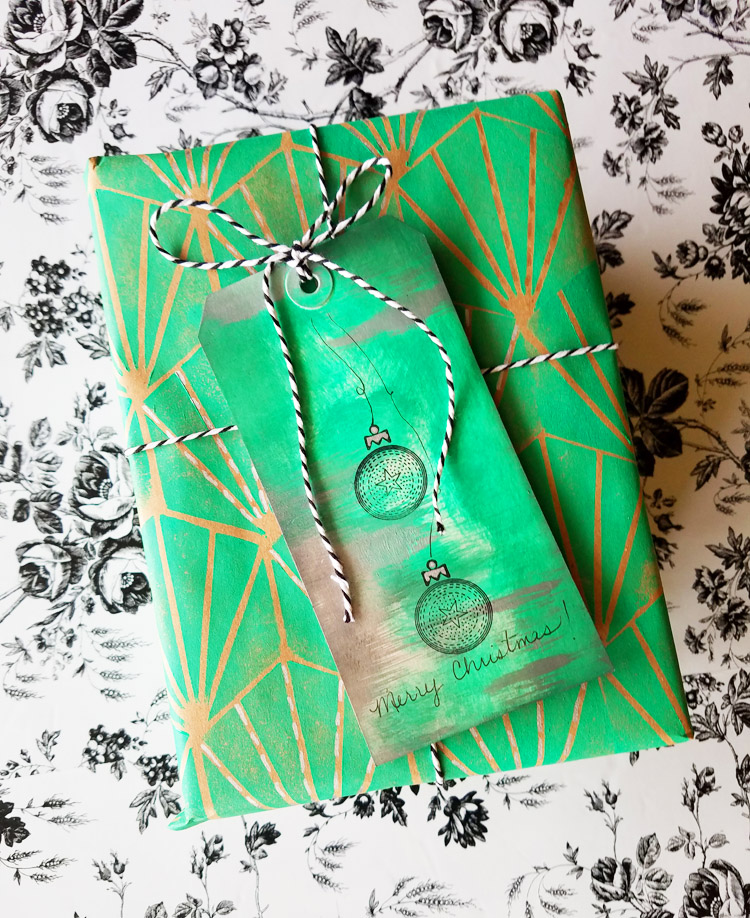
Hello from my Creative Squad! Today we have a post from Jennifer Gallagher to inspire you this holiday season with some creative gift wrapping ideas. Jennifer is using my Mini Clam Hex foam stamp and my Small Circle Jumble stamp set, along with this month’s theme: Doin’ My Thing – We all have a unique artistic style and way of working with supplies. This is the time to rock it! Be yourself. Do your thing.


This month we are doin’ our thing over on the n*Studio blog. So, what is my thing? That is hard to nail down because I love so many products and techniques. Then I realized that using my supplies to create useful items that others will enjoy is definitely ‘my thing’.

Often when we think of seasonal gift wrapping our minds go straight to decorated trees and snowmen. But who says that you can’t create beautiful, nontraditional holiday wrapping using some of your favorite n*Studio art supplies? Let’s break out our artfoamies and stamps and create some one of a kind paper!

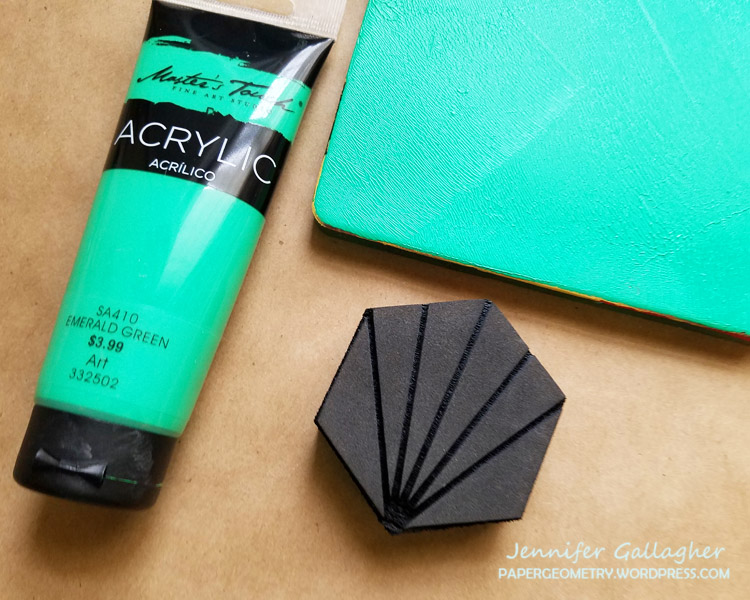
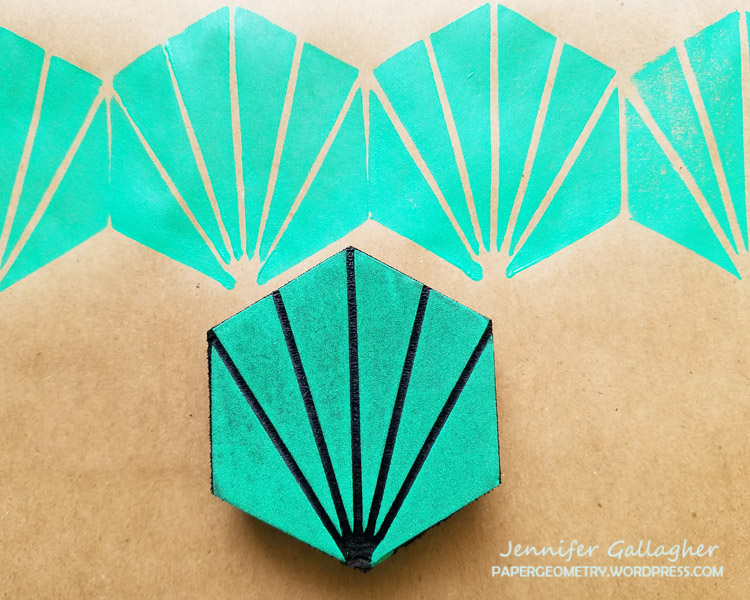
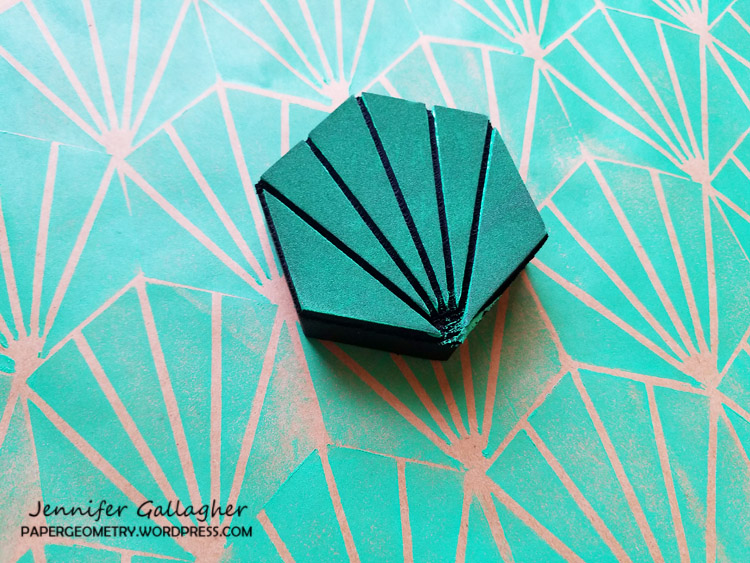
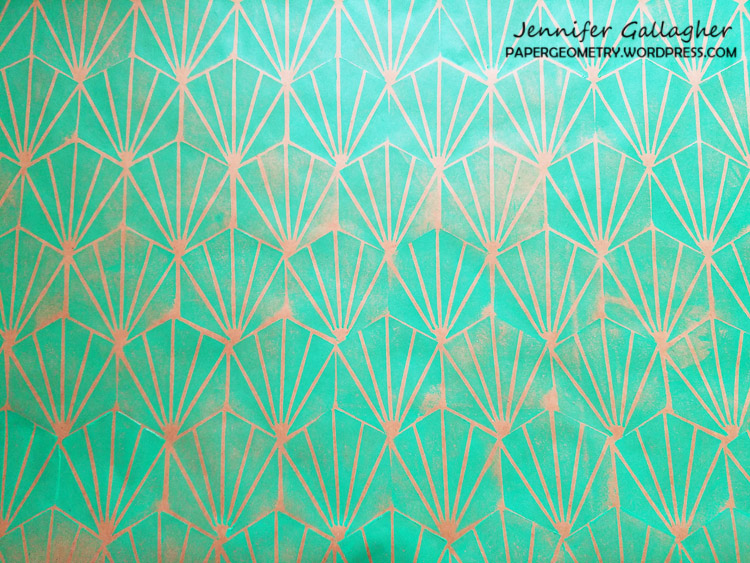
Start with an inexpensive roll of kraft paper. I found mine at a local dollar store. Lay the paper down on a flat surface and tape down the corners and edges with painters tape. This will help keep the paper from rolling up as you work. Brayer out some paint onto your gel plate and press your artfoamie into the paint. I am using Nat’s mini clam hex foam stamp. Now firmly press the stamp onto your kraft paper.

Repeat this process creating whatever design you wish.

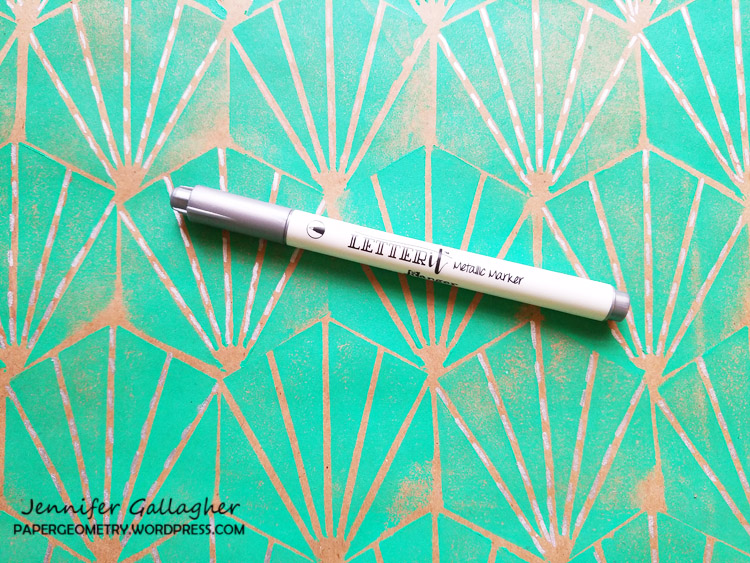
Add some pizzazz and additional interest with metallic markers. I have added dashed lines with my silver Letter It Metallic Marker by Ranger.

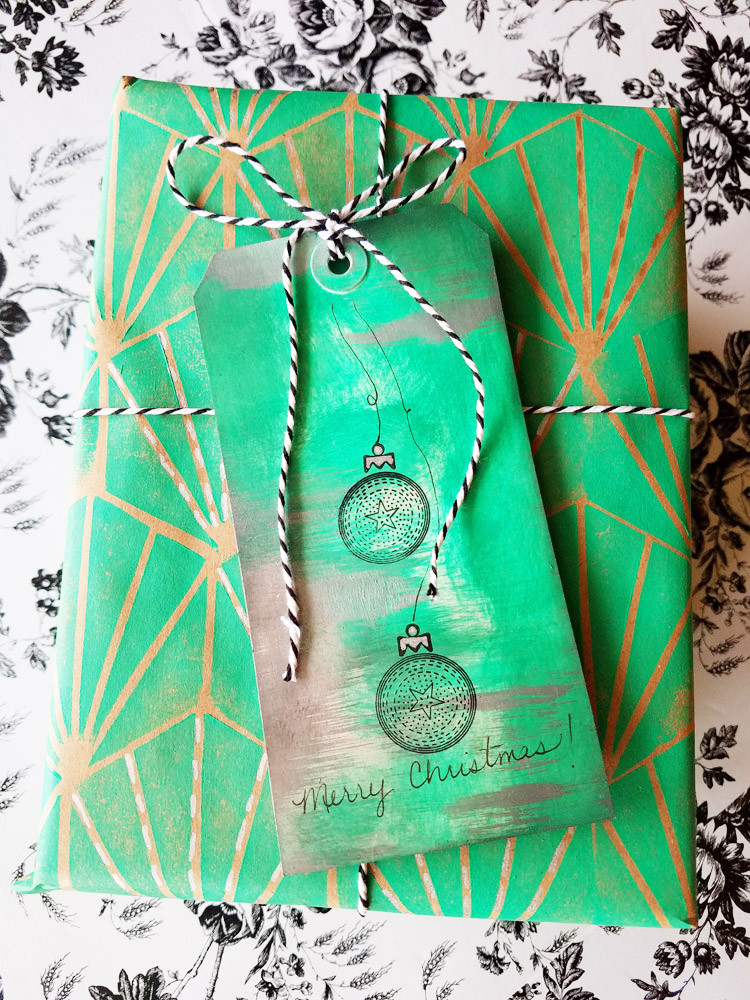
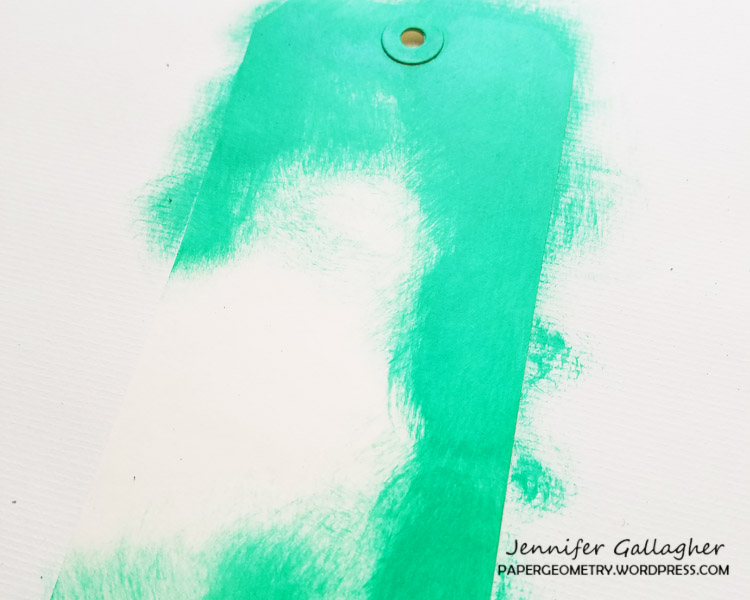
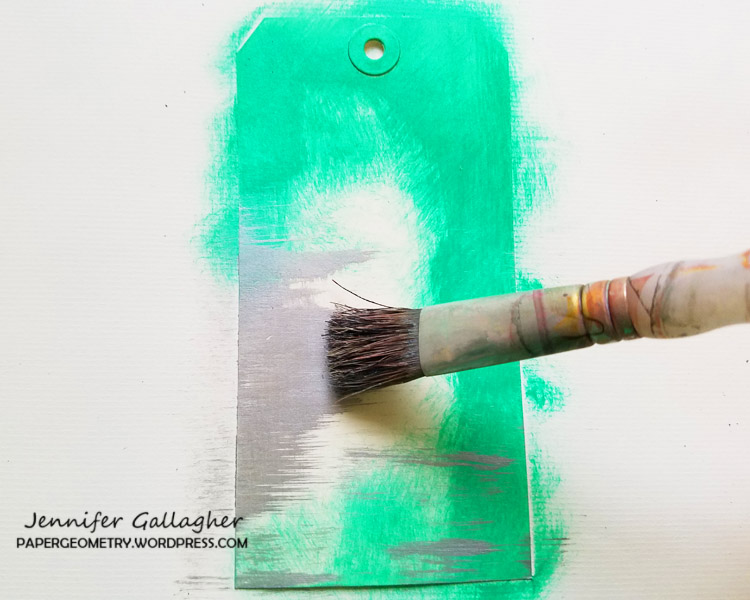
What would a beautifully wrapped package be without a gift tag? Start with a #8 mixed media tag. Apply the same emerald green paint onto the tag in a haphazard fashion using a mini blending tool.

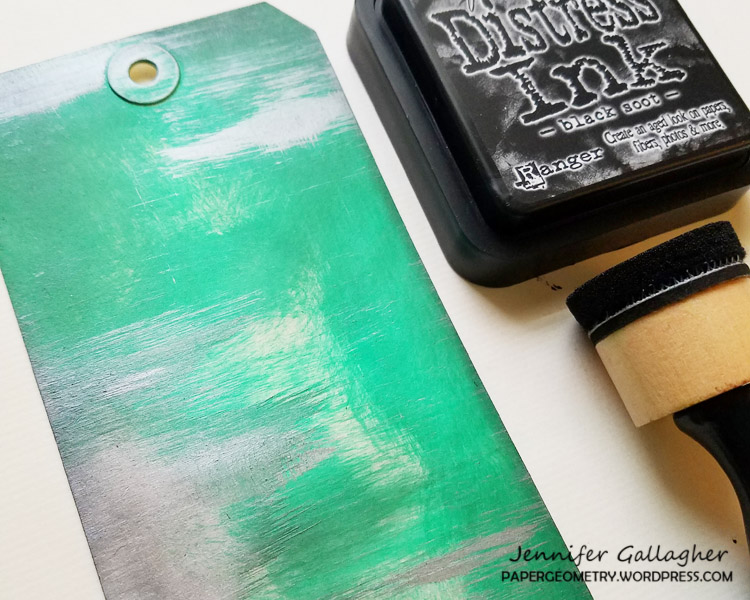
Thinly apply platinum modeling paste with a dry coarse bristled brush in some areas of your tag. You can continue to layer the green acrylic and platinum modeling paste until you achieve an affect you like.

Add black soot distress ink around the edges and throughout the tag to add additional interest.

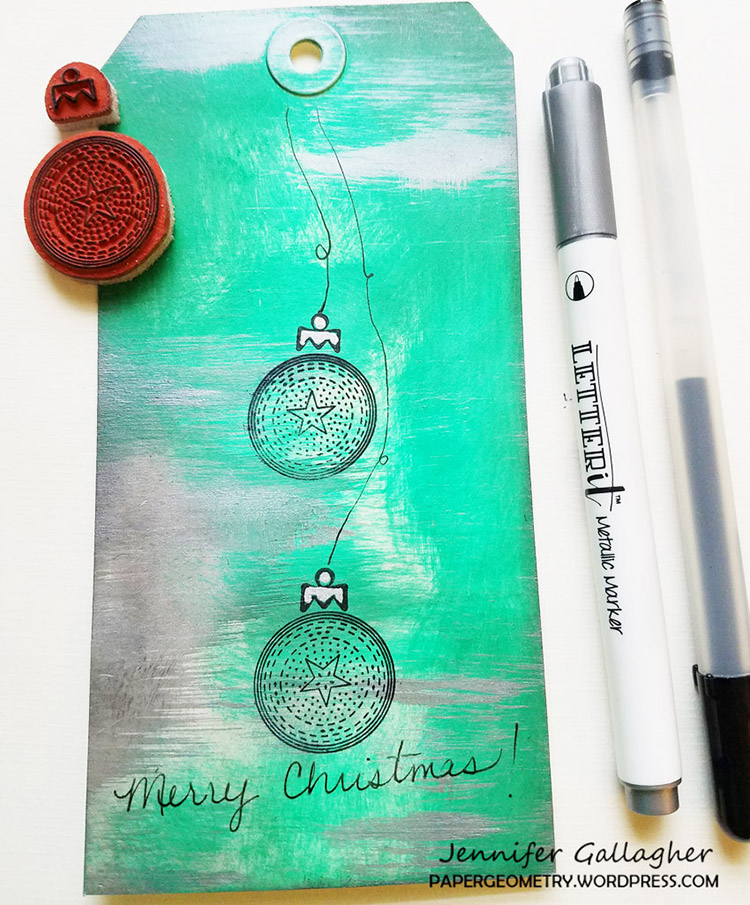
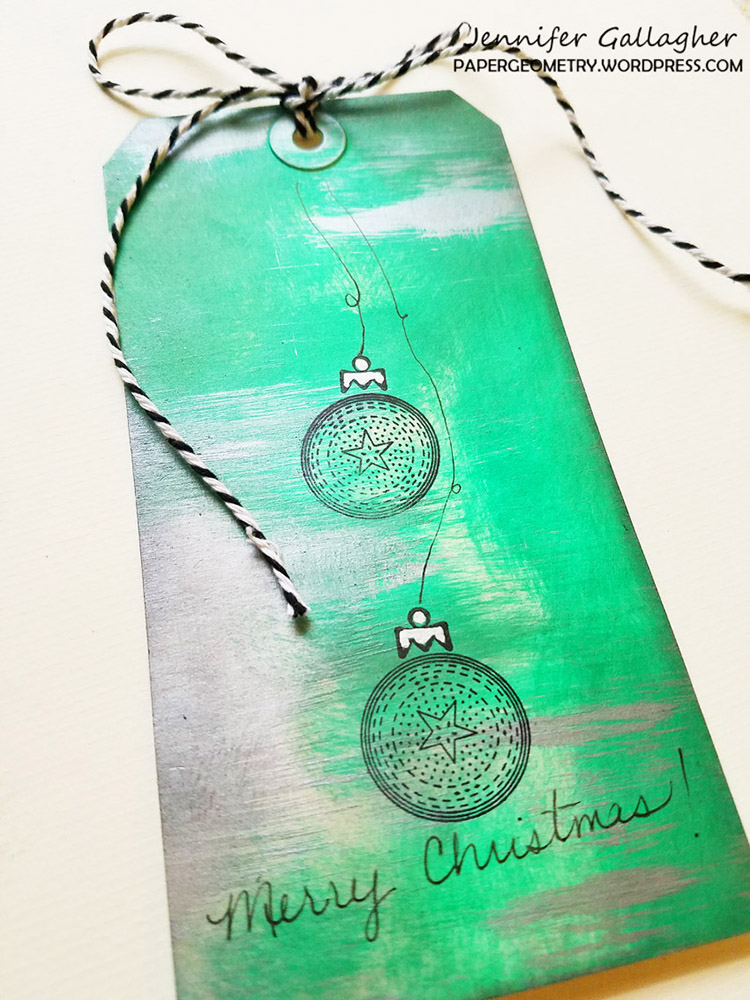
Next, stamp a few of the negative circle drive small stamps from the Small Circle Jumble Stamp Set – don’t forget to add the ornament topper. Draw a few strings from the ornaments and add a little silver highlights.

Thanks for joining us. We would love to see what unique and creative gift wrapping you can come up with using your favorite n*Studio products. And be sure to stop by each Tuesday to see what the Creative Squad is up to.


Thank you Jennifer! We can’t wait to try some papers of our own this year. You can find all of my foam stamps and rubber stamps in my online store and here are some of the other supplies that Jennifer used:


Feel inspired? Working on something yourself that you’d like to share?  I love to see how you interpret our monthly themes. Email me how you used my stencils and stamps with the theme and email me an image – I would love to share your projects in my next  “n*Spiration From Around the Globe“.

Leave a comment

Doin’ My Thing – Tania Ahmed


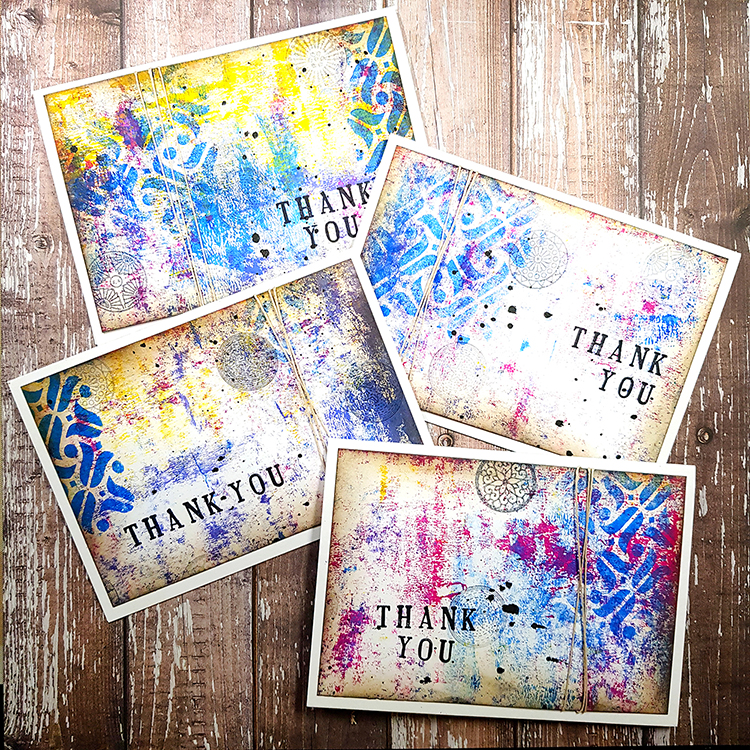
Happy Tuesday from the Creative Squad! Today we have a post from the lovely Tania Ahmed, sharing with us a set of cards using rubber stamps from my Small Circle Jumble set and my Mini Amsterdam foam stamp from the Mini Tile Set. Tania was inspired by this month’s theme: Doin’ My Thing – We all have a unique artistic style and way of working with supplies. This is the time to rock it! Be yourself. Do your thing.


Our challenge this month was to use Nat’s Small Circle Jumble Stamps plus one of the foam stamps from the Mini Tile Set. I love using different kinds of patterns and seeing how I can make the two work together. I needed some thank you cards, so I thought this was the perfect opportunity to create a master board. A master board is basically a sheet of paper or cardstock that you create a background on with stamping, paint and mediums applied to it, which can be cut into smaller pieces to use as collage material or even cards. Also we were asked to really show off our styles so this project has all things that I love: bright colours, stamping, making cards, splatters and using brayers to create a super easy and quick background!

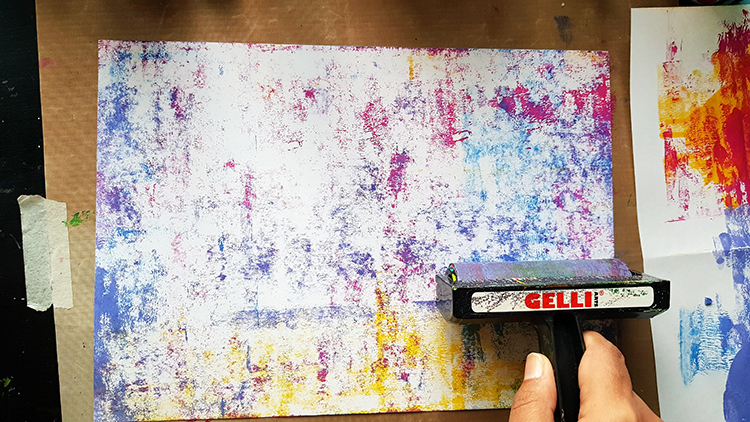
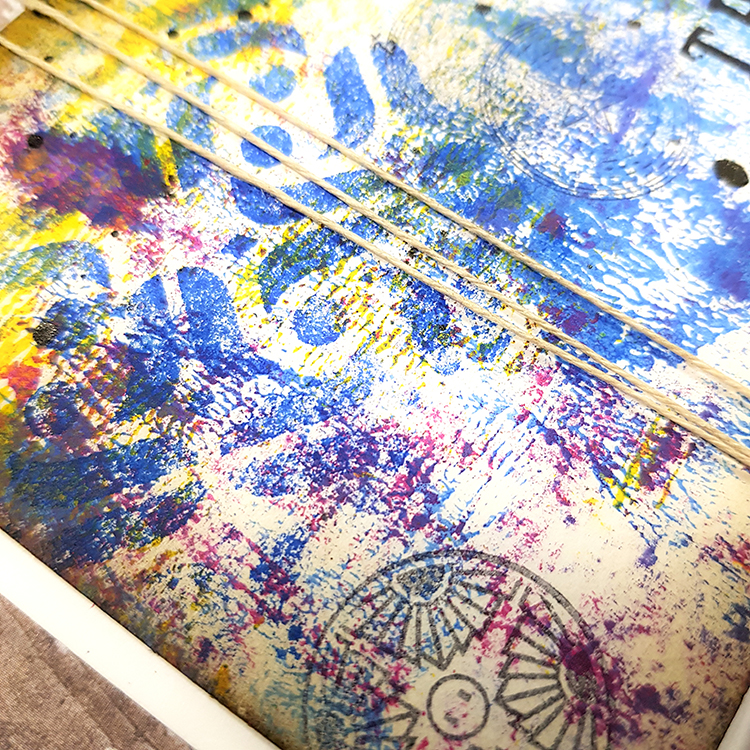
Lightly apply paint to cardstock with brayer. Less paint gives better effects!

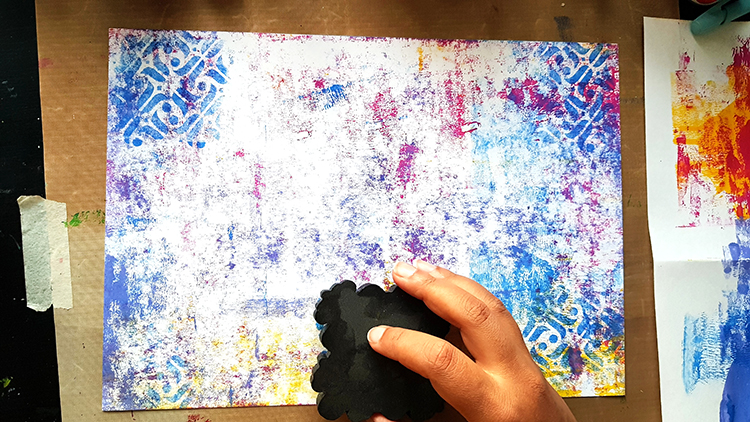
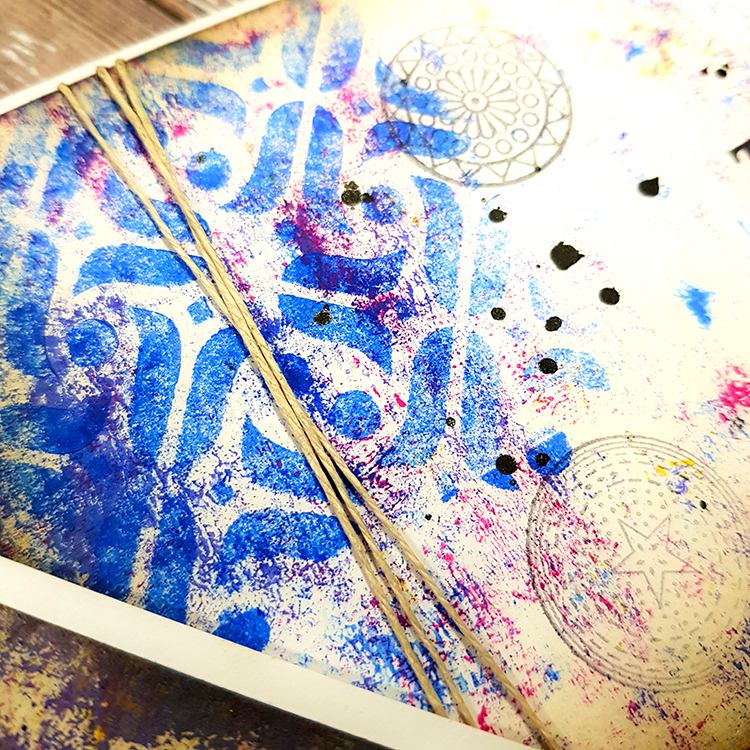
Stamp lightly with the Mini Amsterdam ArtFoamie. Double stamp to create ghostly impressions.

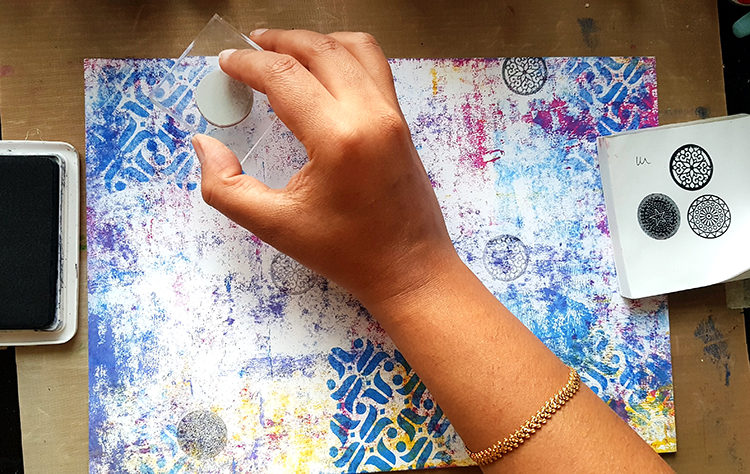
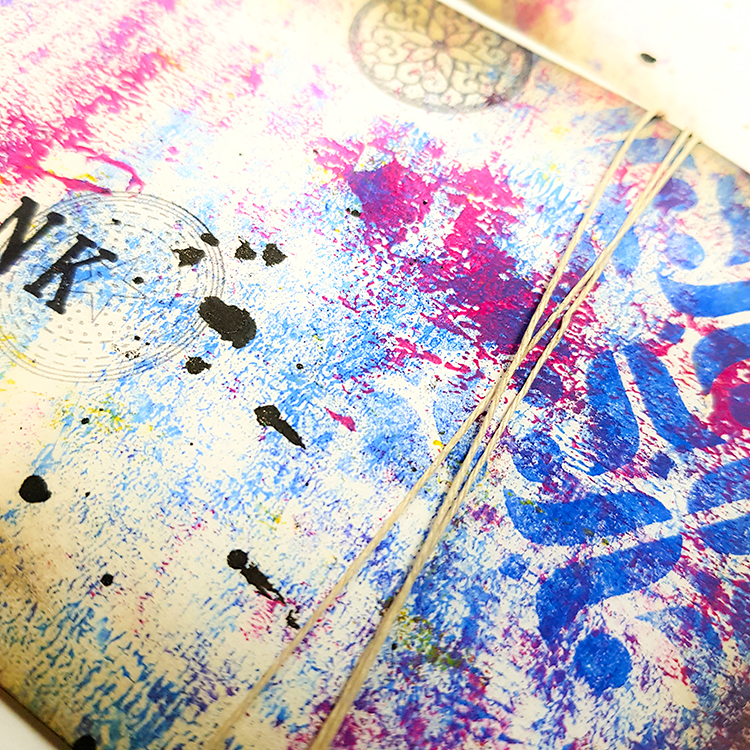
Ink the Small Circle Jumble Stamps with Jet Black Archival Ink and stamp off on a scrap piece of paper and then stamp on your masterboard cardstock paper a few times to get light stamped images.

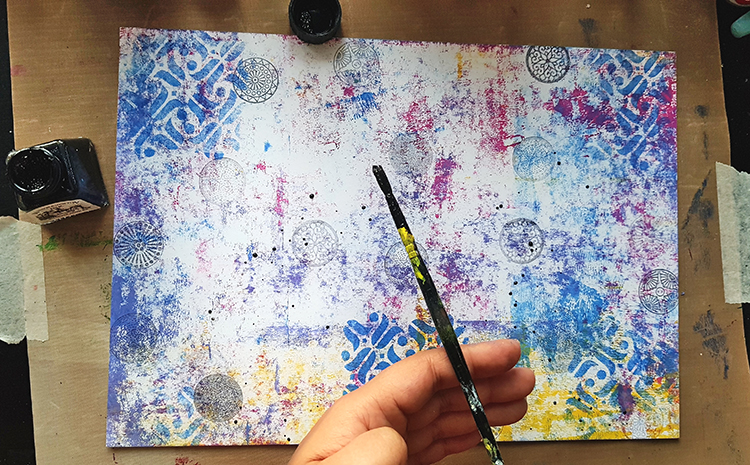
Add splatters with black ink.

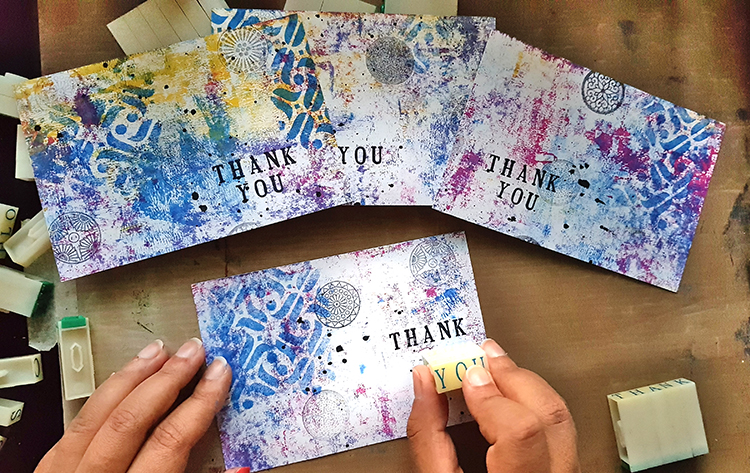
Cut the masterboard cardstock into four 3.75 x 5.5 panels. Add sentiment with alphabet stamps.

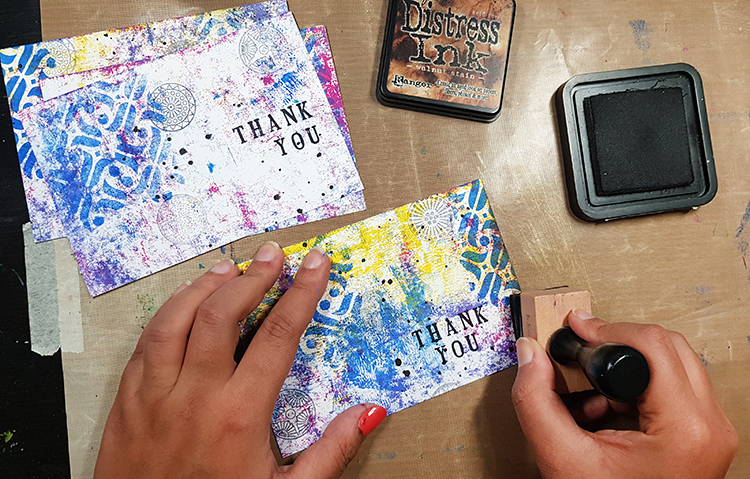
Add Distress Ink around edges. Add twine and adhere to white card base.


Thank you Tania – I love all those yummy layers! Want to try Tania’s card method? You can find all my Rubber Stamps and Foam Stamps in my Online Shop. Here are some of the other supplies that Tania used:


Feel inspired? Working on something yourself that you’d like to share?  I love to see how you interpret our monthly themes. Email me how you used my stencils and stamps with the theme and email me an image – I would love to share your projects in my next  “n*Spiration From Around the Globe“.

Leave a comment