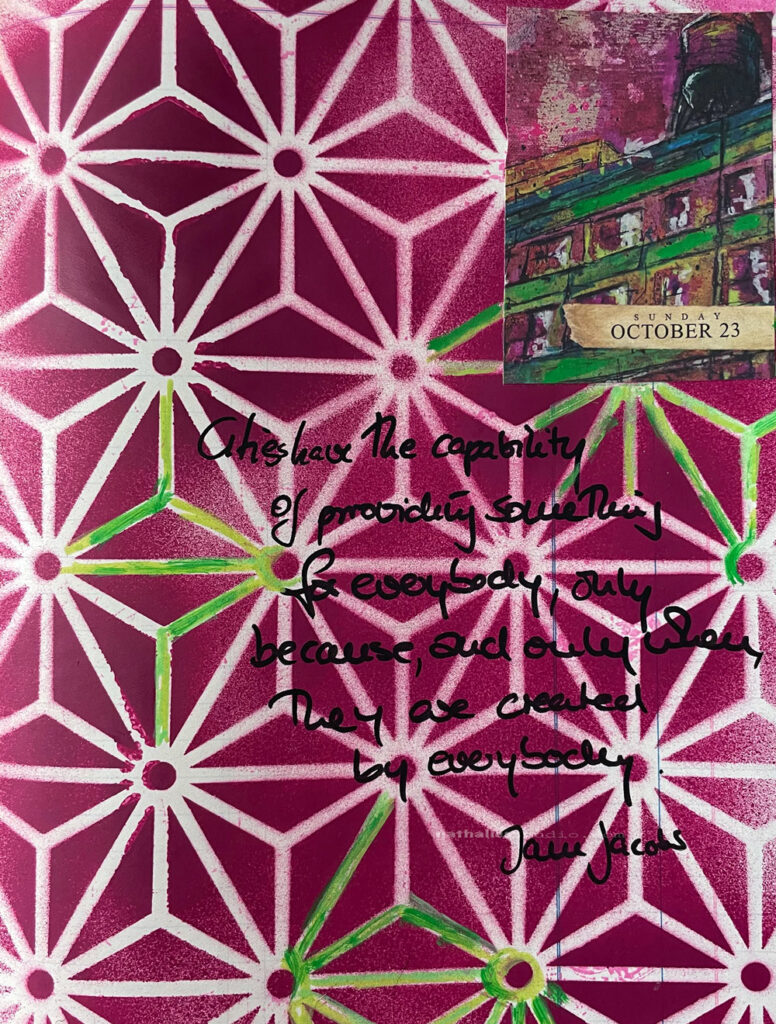
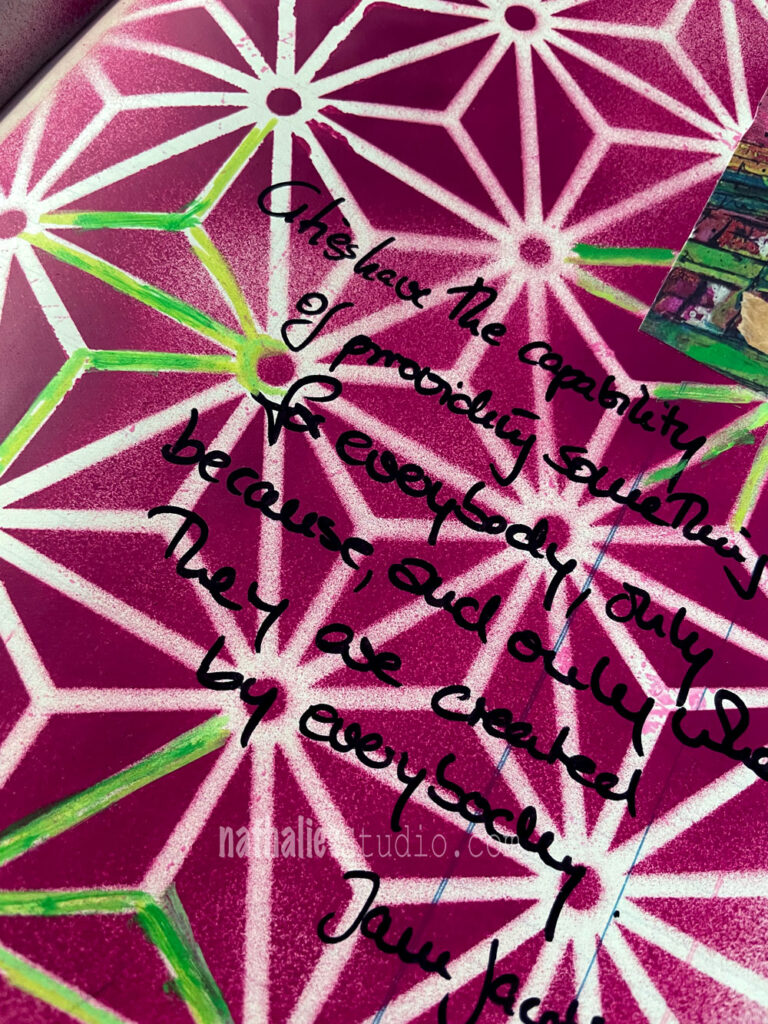
“Cities have the capability of providing something for everybody, only because and only when they are created by everybody” Jane Jacobs
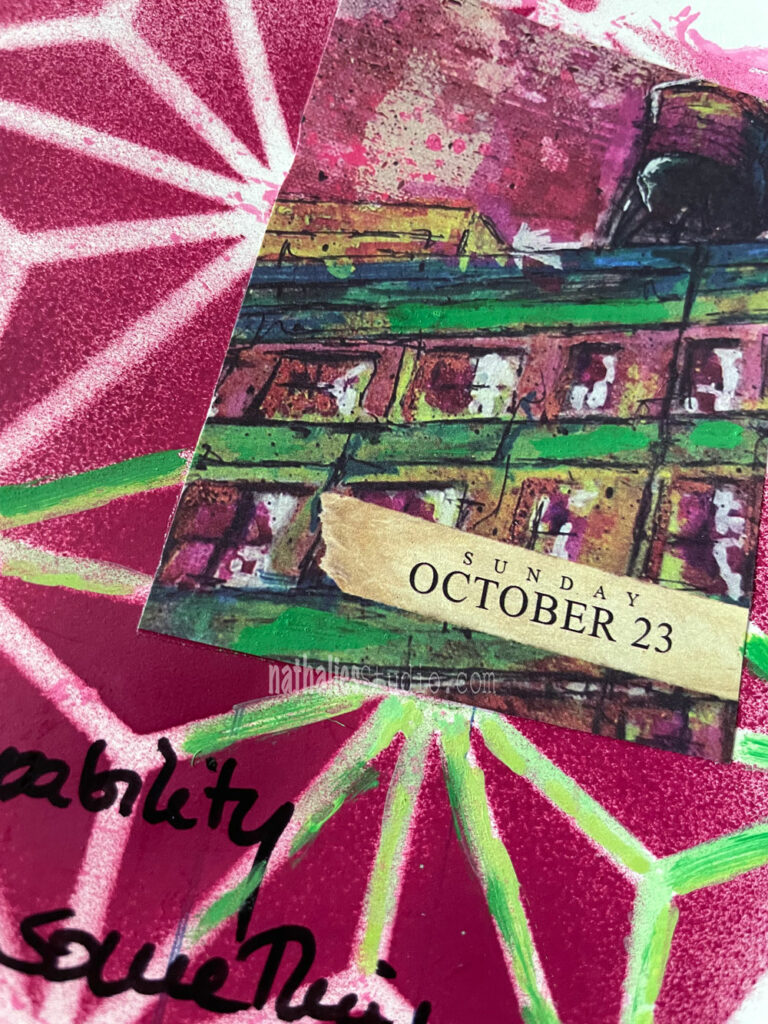
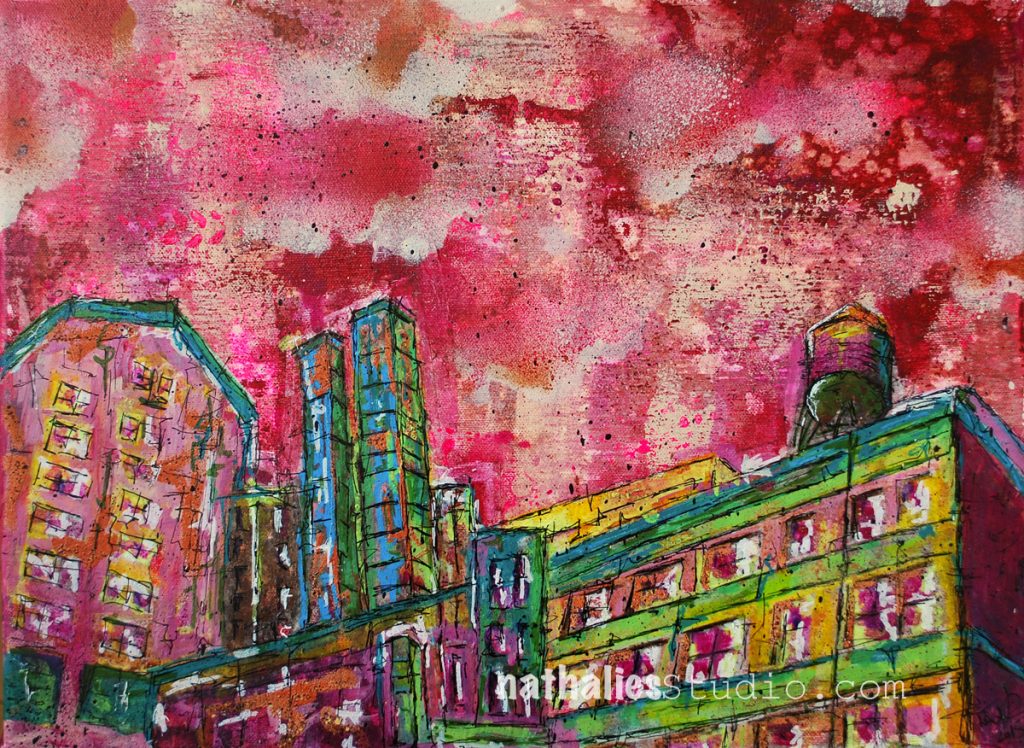
The page is based on this original artwork “Highline”
Nat

“Cities have the capability of providing something for everybody, only because and only when they are created by everybody” Jane Jacobs
The page is based on this original artwork “Highline”

“We are living in modern times and yet we are dominated by medieval minds.”
Isn’t this the truth.
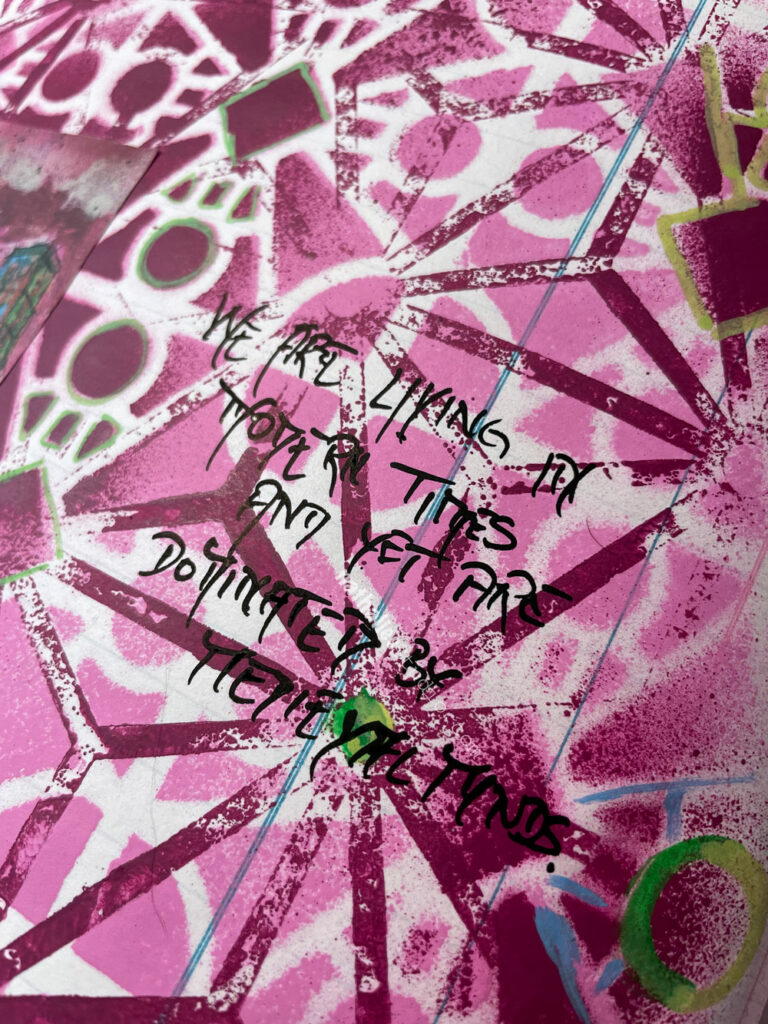
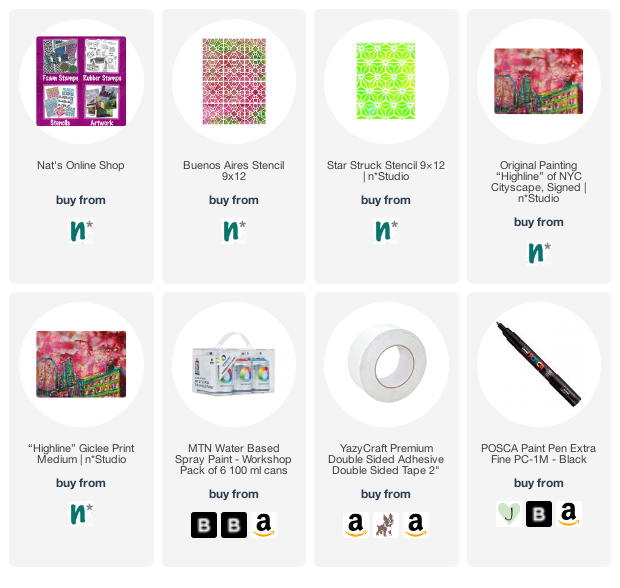
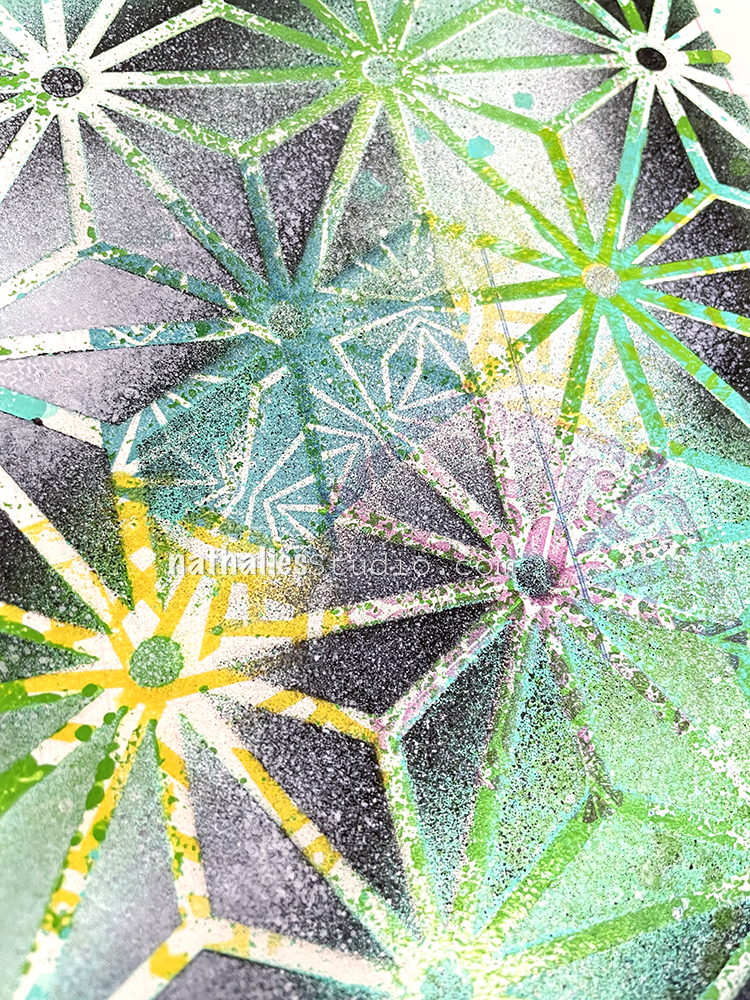
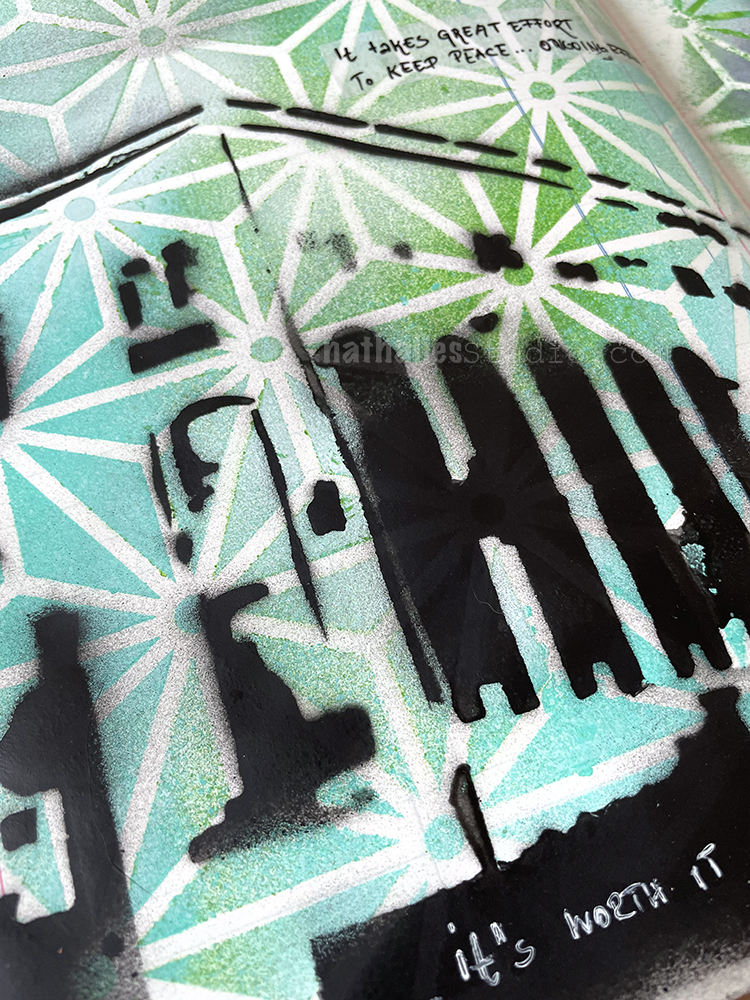
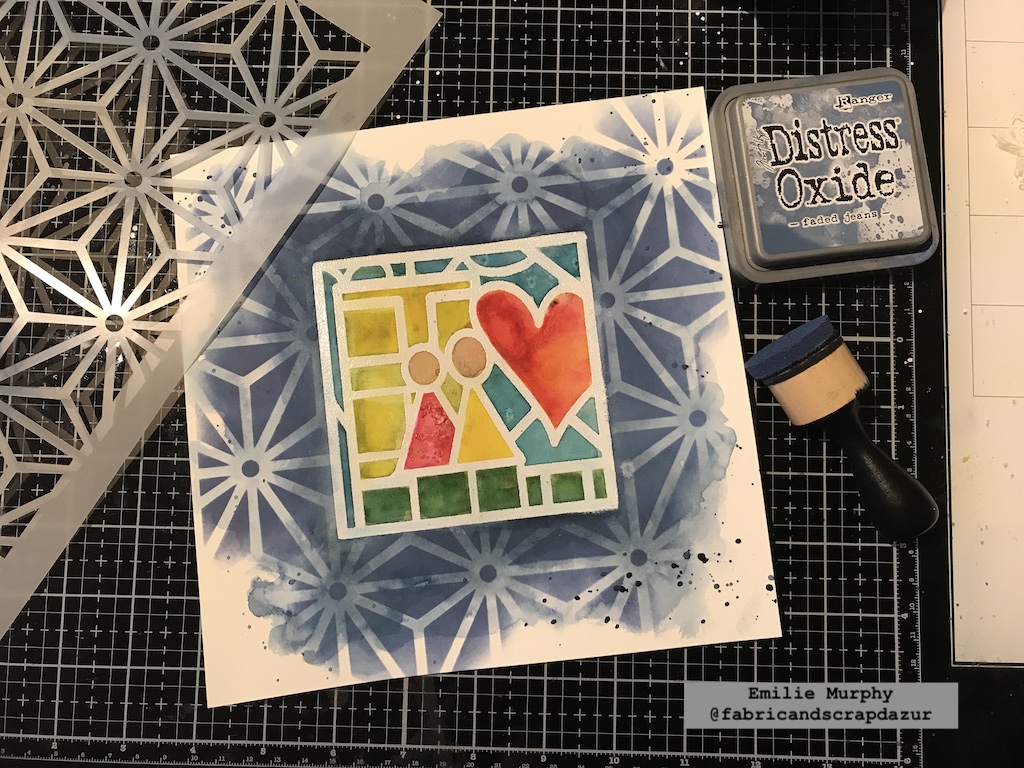
For this background I played with my Buenos Aires Stencil and Star Struck Stencil using Acrylic Spraypaint. I outlined some of the areas with acrylic marker to add some colors that were used in the painting in the collage calendar page.
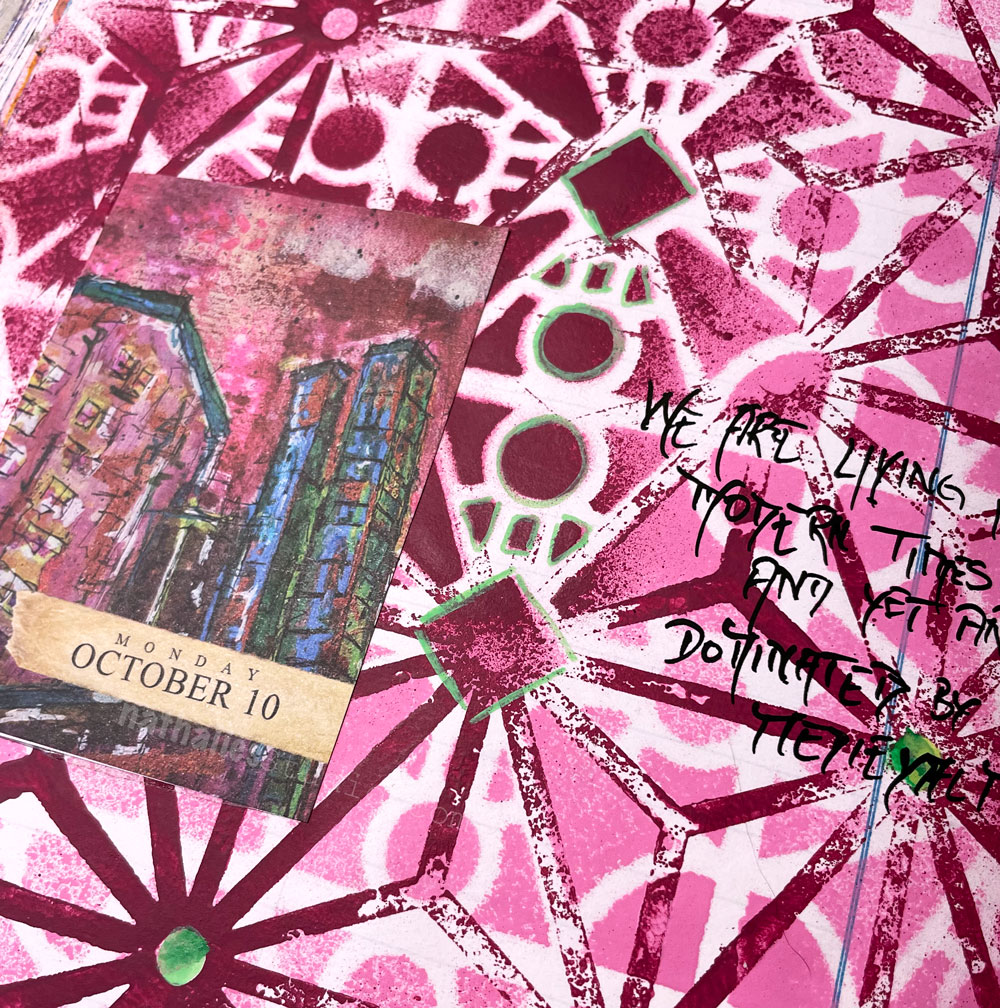
I remember when I created the original painting that the colors were unusual to use for me and yet I still love the painting- which is for sale here: Highline Original Painting also available as prints.
Hello from my Creative Squad. Today we have a post from Robin Seiz who is sharing her beautiful and final project with us today! We have been so lucky to have Robin with us on the Squad and have always appreciated her thoughtful takes on our themes and also her skill at combining colors and elements within her compositions. She will be missed and we wish her all the best as she continues on her art journey!
Today she shares a repurposed bag project with us, using my Star Struck, Central Ave, Grove Street, and Park Blvd stencils and our theme: Favorite Art – My Way – Look at a favorite work of art and create something inspired by it, drawing from the colors, shapes, subject matter, feeling etc. that strikes you most when you look at it.
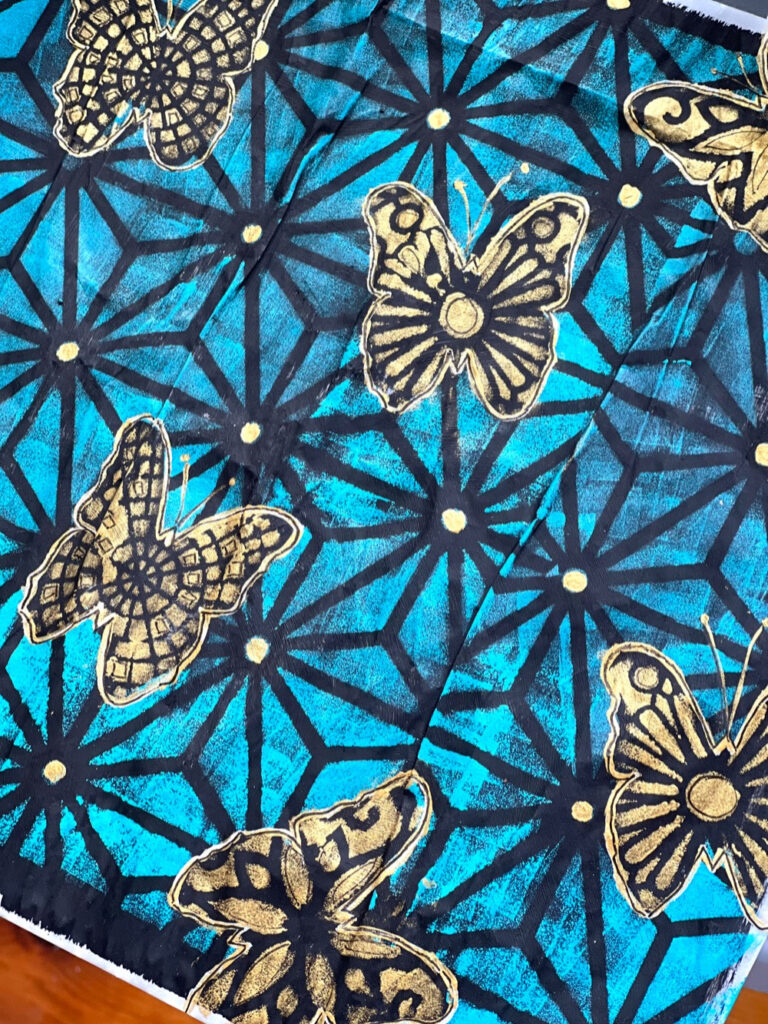
Hello friends. This month’s theme is Favorite Art – My Way. My partner gave me a painting on canvas for an engagement present. It’s a realistic painting of glass jars in the most beautiful shades of blue. By far, it’s my most favorite piece of art in our home. This painting was what I thought about when I started this project. While I didn’t use shades of blue, I did start with teal as the basis for my project this month.
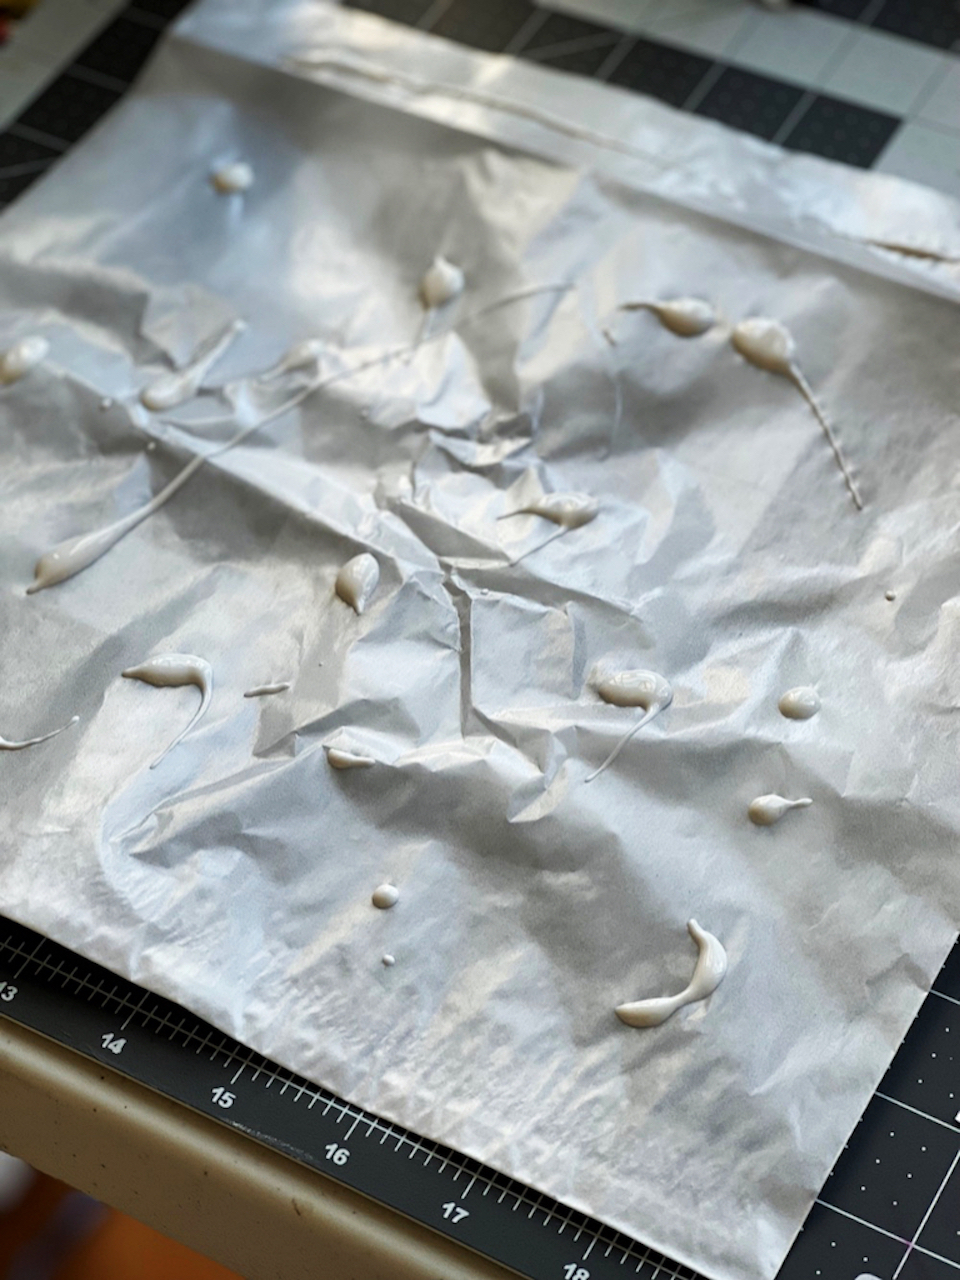
My studio is being renovated, as is much of our home. I have a tiny little space right now to create with most of my supplies packed up in boxes in the basement, so using recycled materials seems to make sense right now. I recently got a shipment of art supplies in glassine bags and decided to use one of those bags for my substrate. This finished bag will make a terrific hostess gift bag.
Since the glassine bags are quite shiny and smooth, I started by adding a layer of white gesso to give it some tooth. Once the gesso was on, I realized the teal paint would look better on a black background; so I put down a layer of black gesso. (One of the things I love about mixed media is more layers often make the piece more interesting).

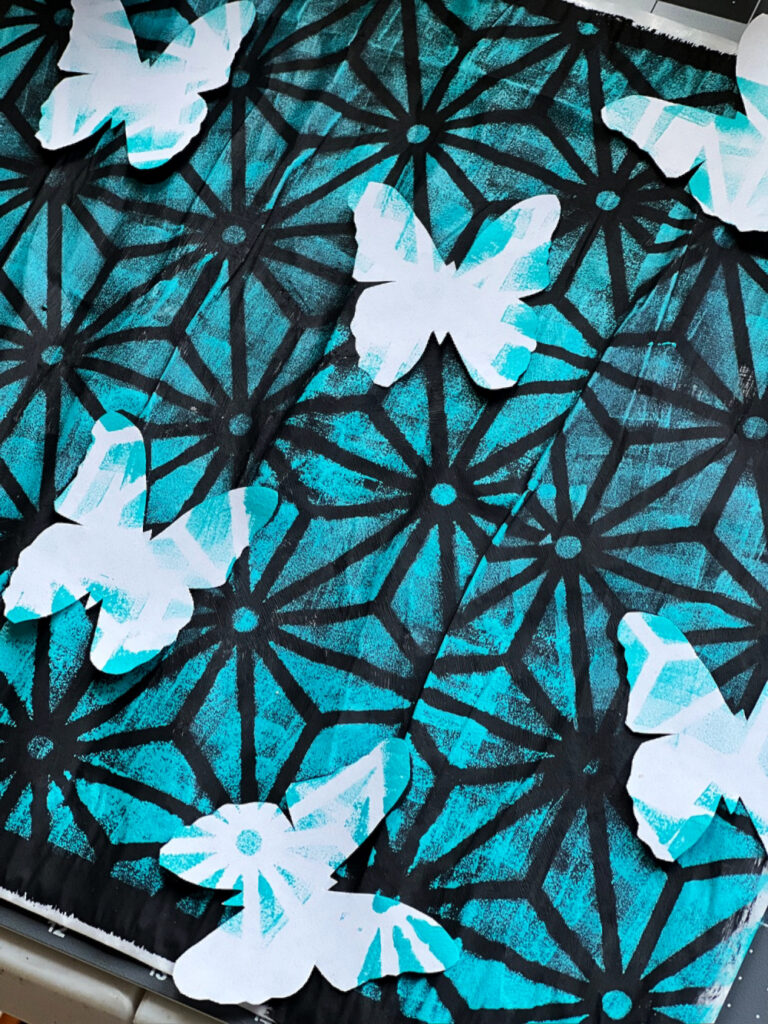
Next I drew a butterfly on a post-it note and cut it out. Once I was satisfied with it, I cut out 8 more butterflies. I placed these down on the black glassine to act as masks before I put down Nathalie’s Star Struck stencil. I used Golden Teal paint with a sponge and “pounced” the paint through the stencil. I removed the stencil and the masks which left black butterflies on the page. I thought I wanted to make the butterflies stand out, so I used a white Posca Pen to outline each butterfly.
I wanted some “Bling” on the page. With a small paint brush, I applied gold gesso to the dots in the Star Struck stencil. See the lower left bottom corner to see how I filled in the gold dots.
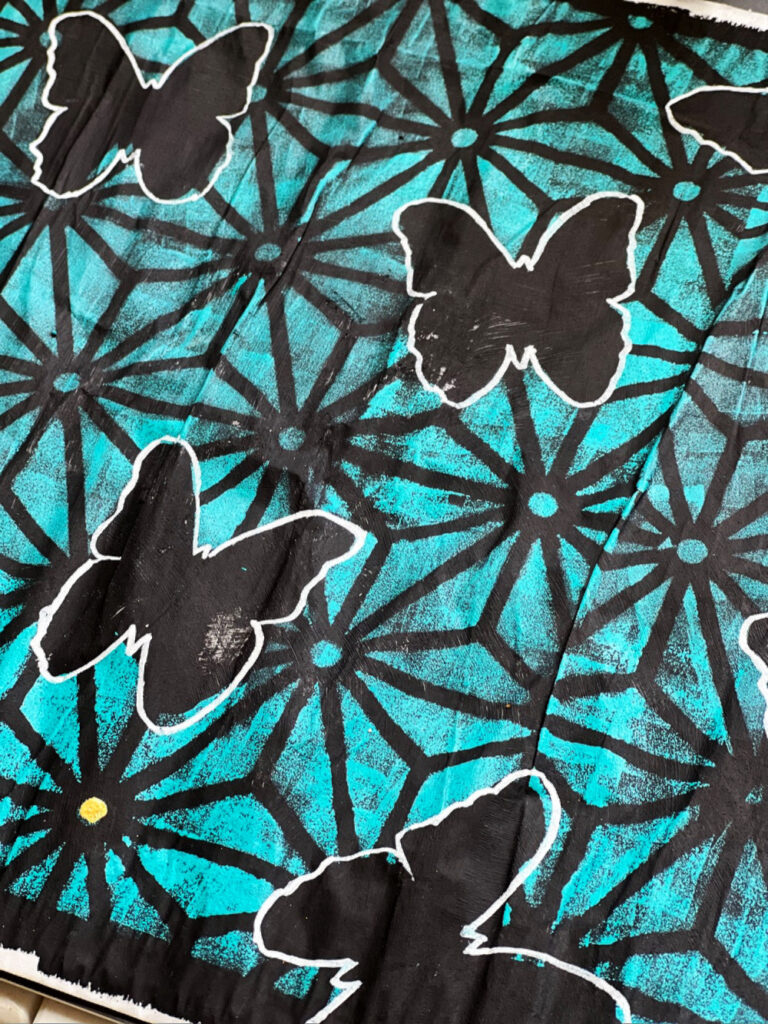
Next I used Natalie’s Grove Street stencil, Central Ave Stencil, and Park Blvd stencil and a makeup sponge to lay down a design on each butterfly.
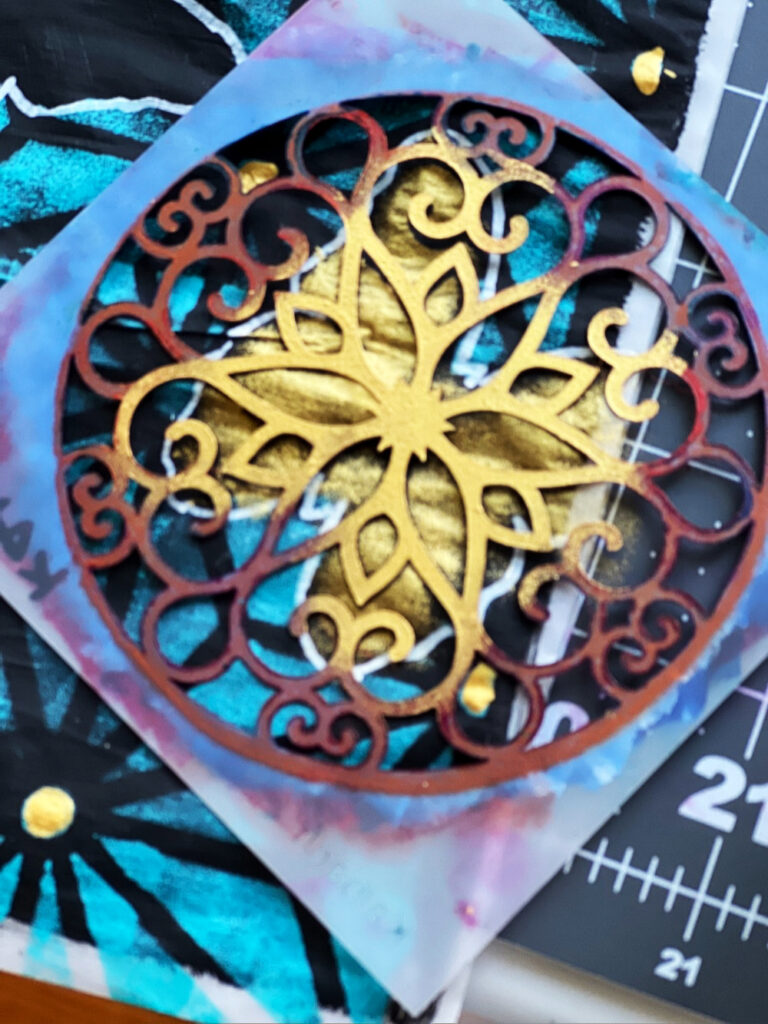
After the designs were on each butterfly, I realized I didn’t like the white outline, so I covered it up with gold paint and then applied a black micron #8 to outline the gold providing more depth to the butterflies.
Thank you Robin for this fun project idea that could be used to repurpose lots of different types of bags! Also thank you for participating in the Creative Squad for the past 2 years – it has been a pleasure working with you!
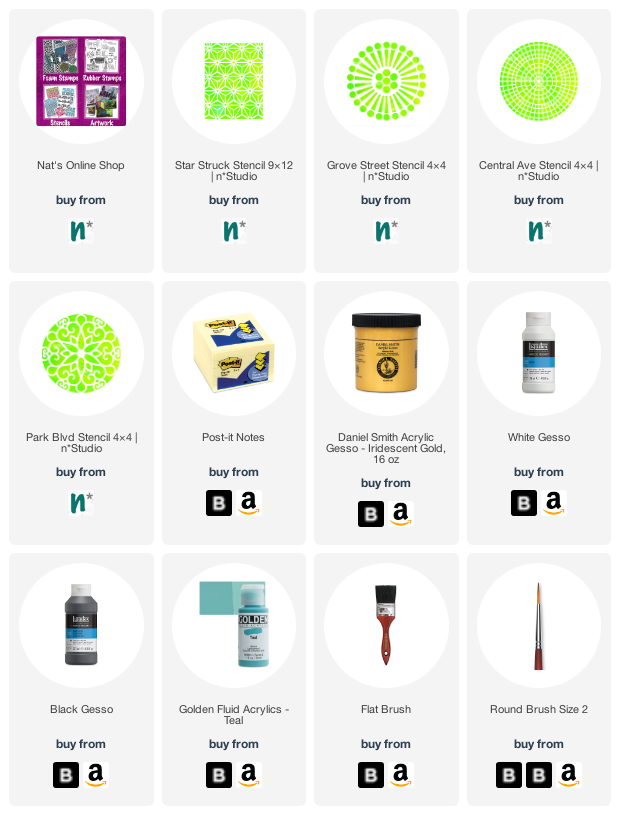
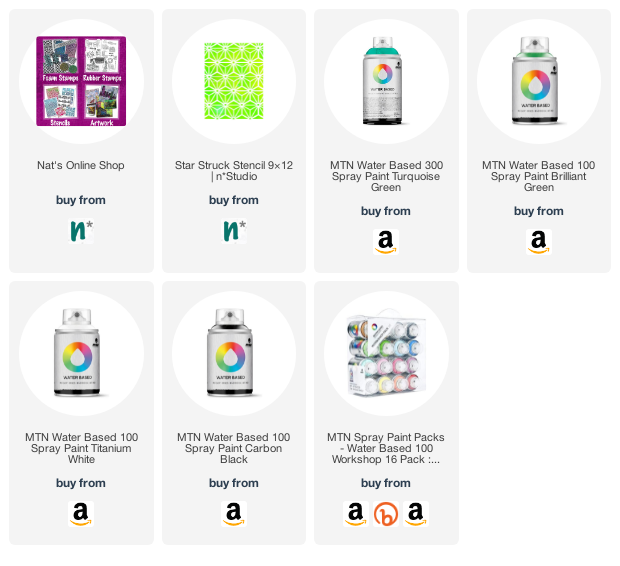
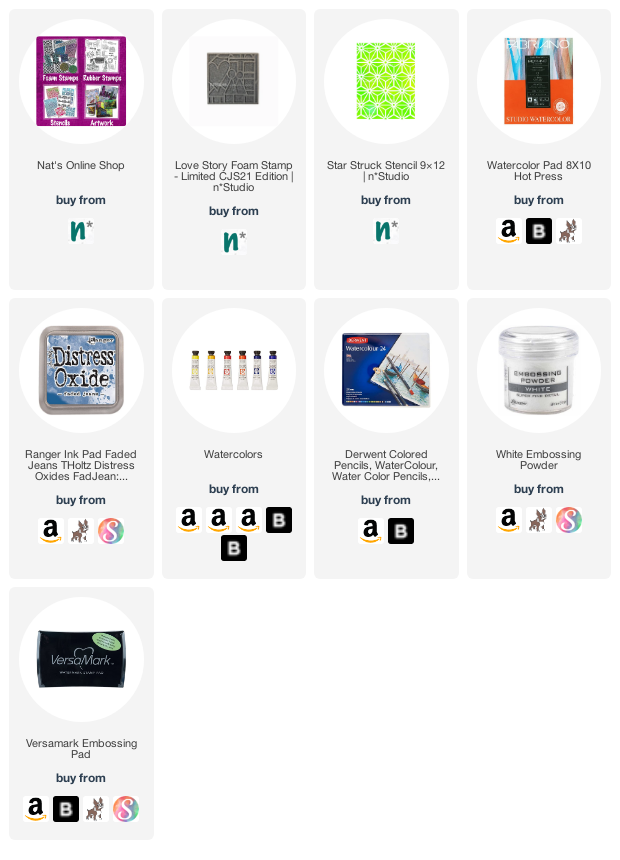
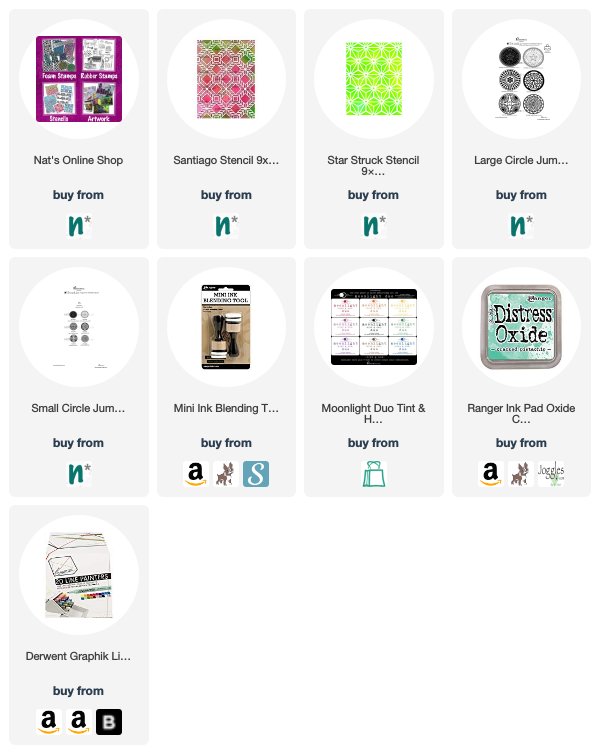
Give it a try: you can find all my Stencils in my Online Shop and in addition to her upcycled glassine bag, here are some of the supplies Robin used:
Looking for more projects? Follow the Creative Squad on Instagram here.
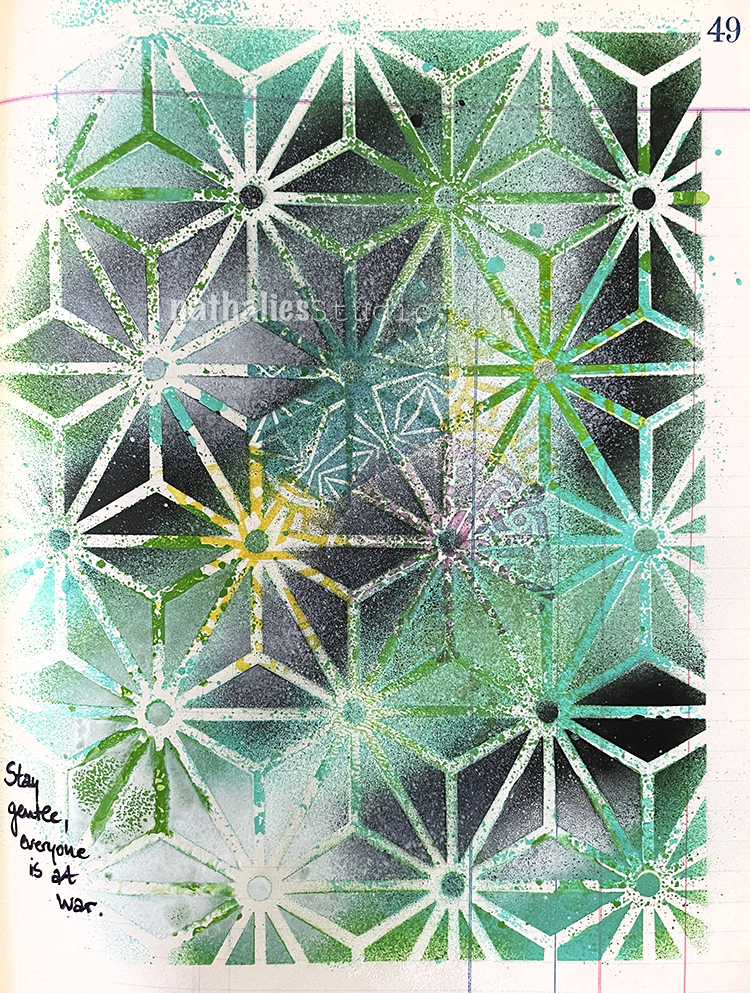
For this spread I used the Star Struck stencil that was still wet from applying spray paint over it for the It’s Worth It art journal page. I flipped it over and pressed it onto the next page in the ledger, which created an uneven reverse print, mostly visible with the green structure of the stencil on the top right. I love getting inspired by something I was working on earlier and not just starting on a blank canvas, so to speak.
My first idea was to stamp into the Star Struck areas with my Triangle Love stamps and some Versafine – which worked out nicely but it was a bit off. So I layered the Star Struck stencil back on top, basically covering up what I had printed before and used the same colors yet again but tried to spare most of the area that was stamped.
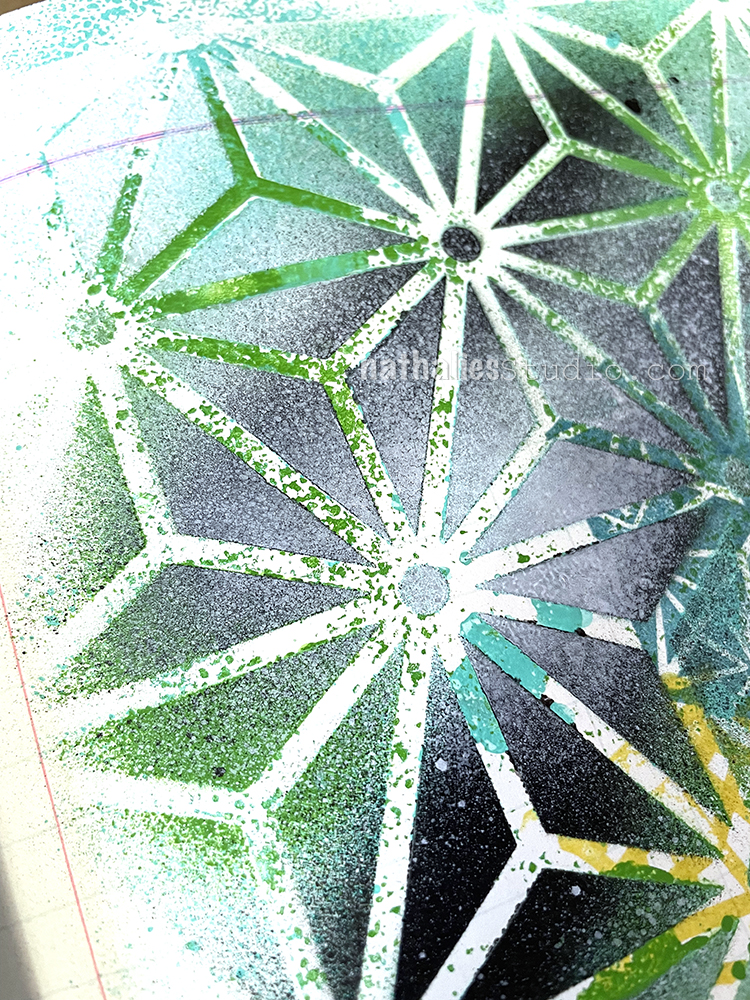
I love the effect and I definitely want to play more with the flip flop stencil technique :) There is also a slight dimension to the built up spray paints which is hard to see in the photos, but I love it and I think I want to explore this a bit more on some of my bigger paintings as well as for the backgrounds.
Here are some of the supplies I used:

I love the look of spray paint with my Star Struck stencil, especially when it’s applied with different spray paint colors. Here I used a teal and a green as well as some white on it. I then layered an old hand cut stencil on top and sprayed with black spray paint.
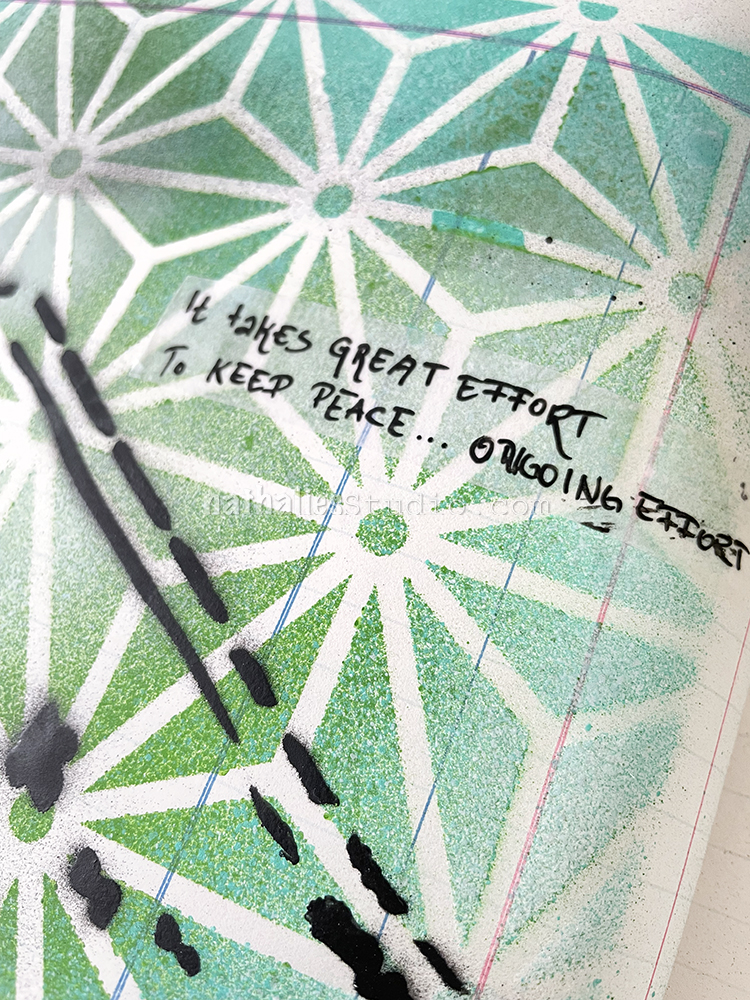
I was listening to a podcast about the war in Ukraine and the reporter was saying that it takes great effort to keep peace in the world, ongoing effort. It just struck me in that moment and so I wanted to keep this in my journal, being that the journal is often a reflection of thoughts, emotions, things I hear, read or what is happening …
Here are some of the supplies I used:
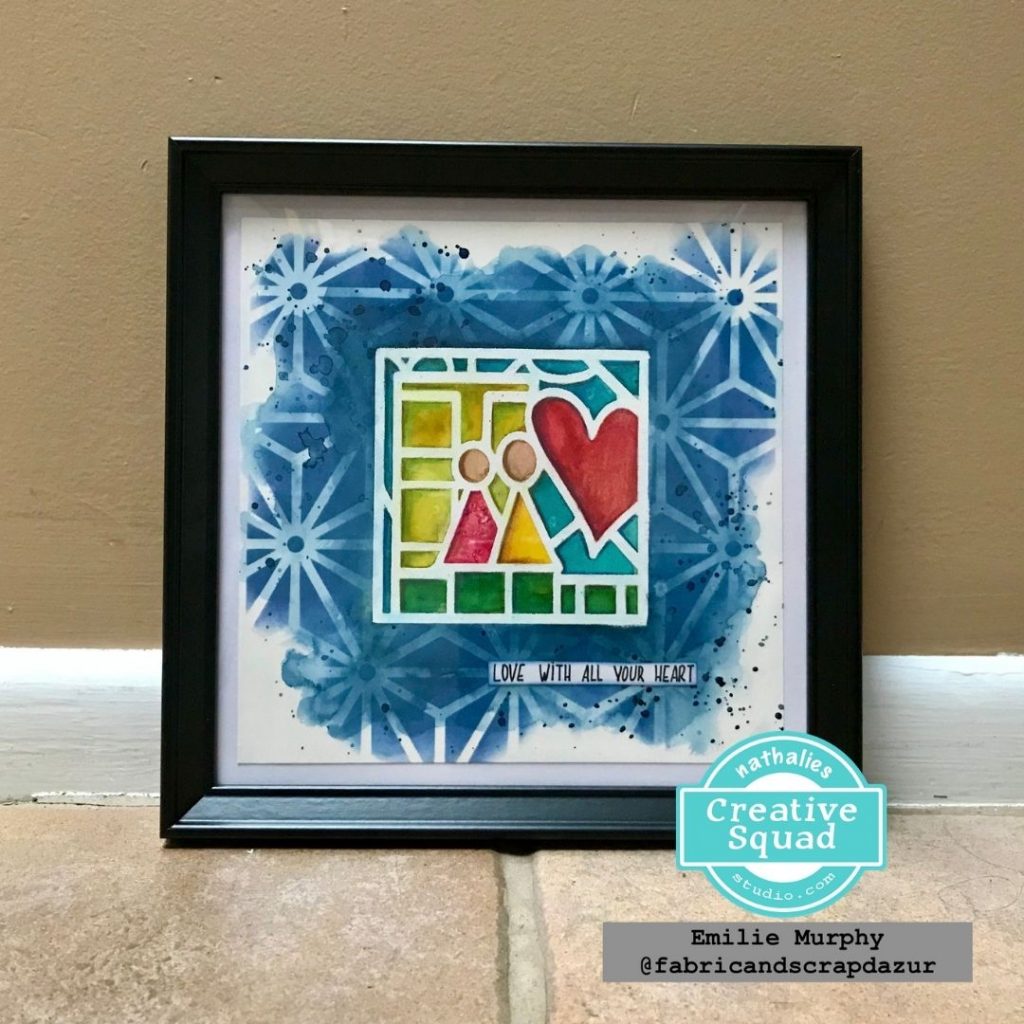
Hello from my Creative Squad! We have a fantastic mixed media painting from Emilie Murphy who is using my CJS21 limited edition foam stamp Love Story, my Star Struck stencil, and our theme: Storyteller – This month we’re playing along with Creative JumpStart 2021 and the theme Storyteller. We’re using our artwork, our color and material choices, and our personal style to tell a Love Story.
“Love with all your heart”
Hi there! And Happy New Year everyone!
Let’s start the year off by playing along with Creative JumpStart 2021 using the limited edition “Love Story” foam stamp. I decided to paint a simple illustration with watercolors. So let’s jump!
I worked on an 8×8 piece of Hot Press watercolor paper, because I wanted to have a smooth surface but it will also work great on cold press watercolor paper as well.
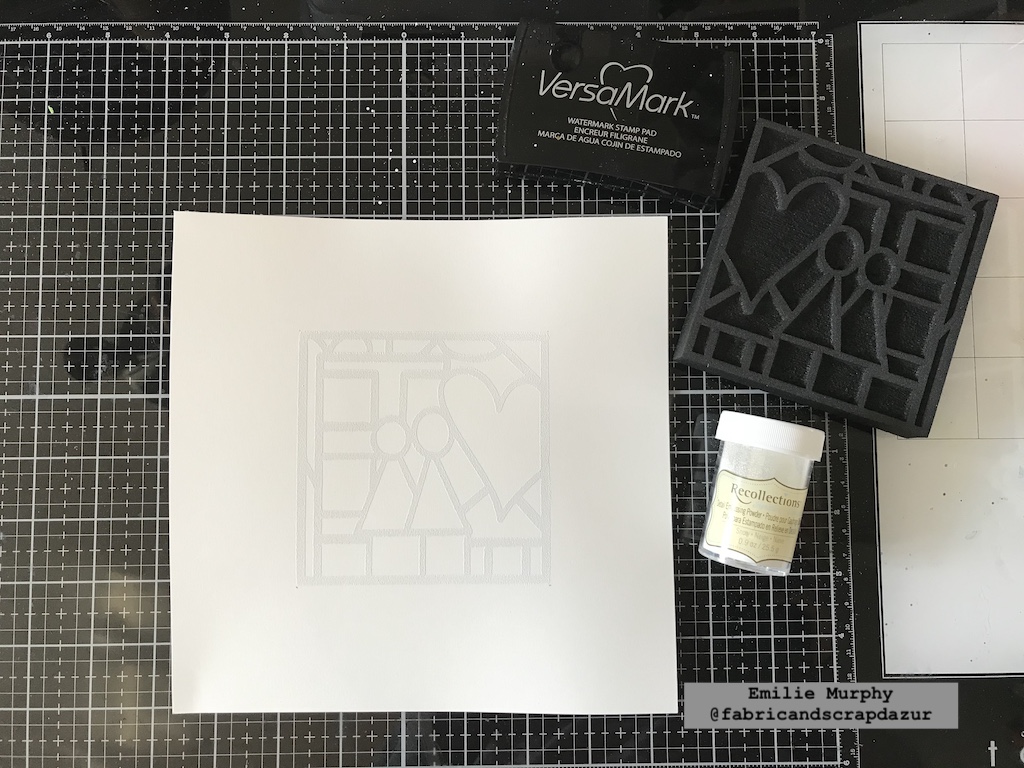
The first thing I did was to apply VersaMark ink on my Love Story foam stamp to emboss it with white embossing powder. That’s a great technique of “resist” when using watercolors.
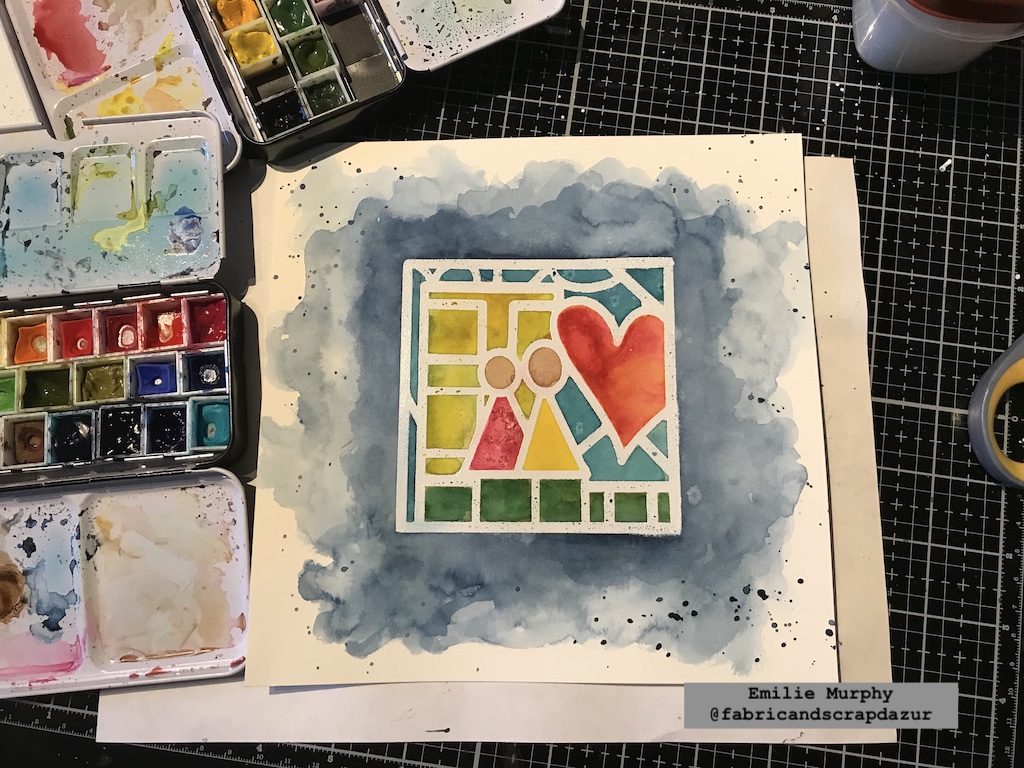
Next, I painted the interior of the stamp with bright watercolors. Don’t hesitate to apply enough watercolor pigment because the watercolors get lighter when it dries. I sprinkled some salt on the pink triangle shape to add some texture. I did the same thing on the heart but it didn’t show up when it dried. Probably because my surface was too wet and/or I didn’t put enough salt on it. Just so you know.
Salt is a nice way to add texture, which adds a little bit of interest when using with watercolors.
I let dry, then, I applied some indigo watercolor to the exterior. I left some white space on purpose and added more watercolor pigment along the exterior edges of the stamp.
What I recommend is to work in layers. First, apply a layer of watercolor, let it dry slightly, then add some more and so on.
To add some interest to the background, I laid down the “Star Struck” stencil and applied some “Faded Jeans” Oxide ink with a foam applicator, only over the layer of watercolor. I slightly went over the top right corner and bottom just to give an irregular look while still leaving white space.
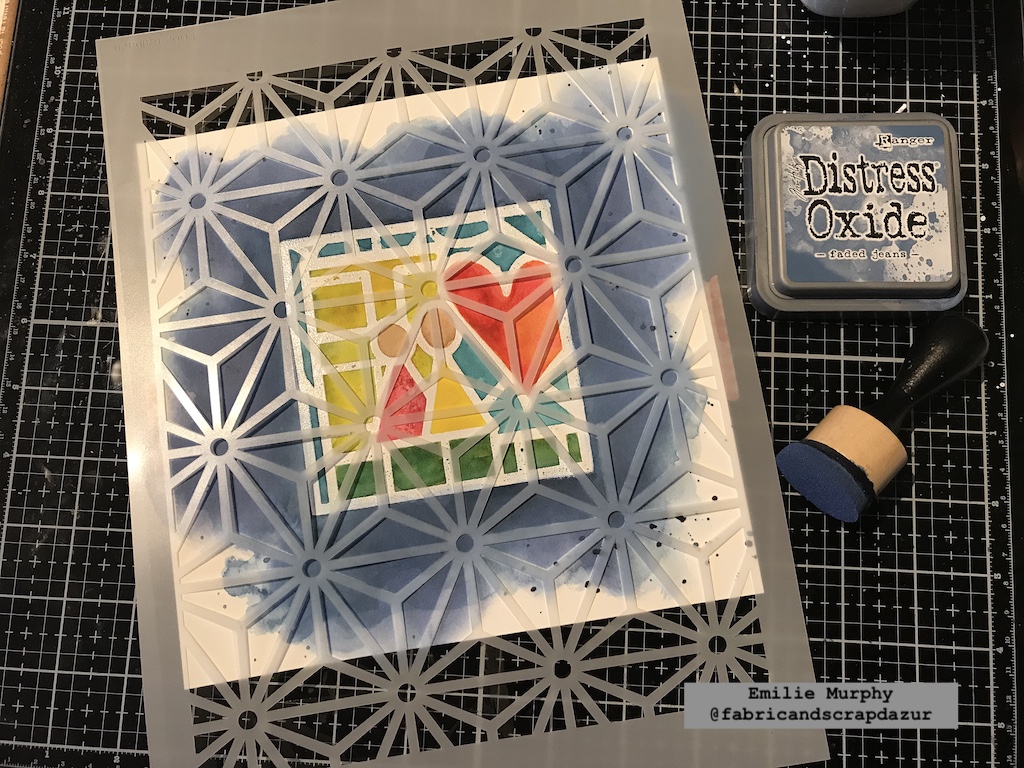
I really love the result. The distress or oxide inks work beautifully with watercolors.
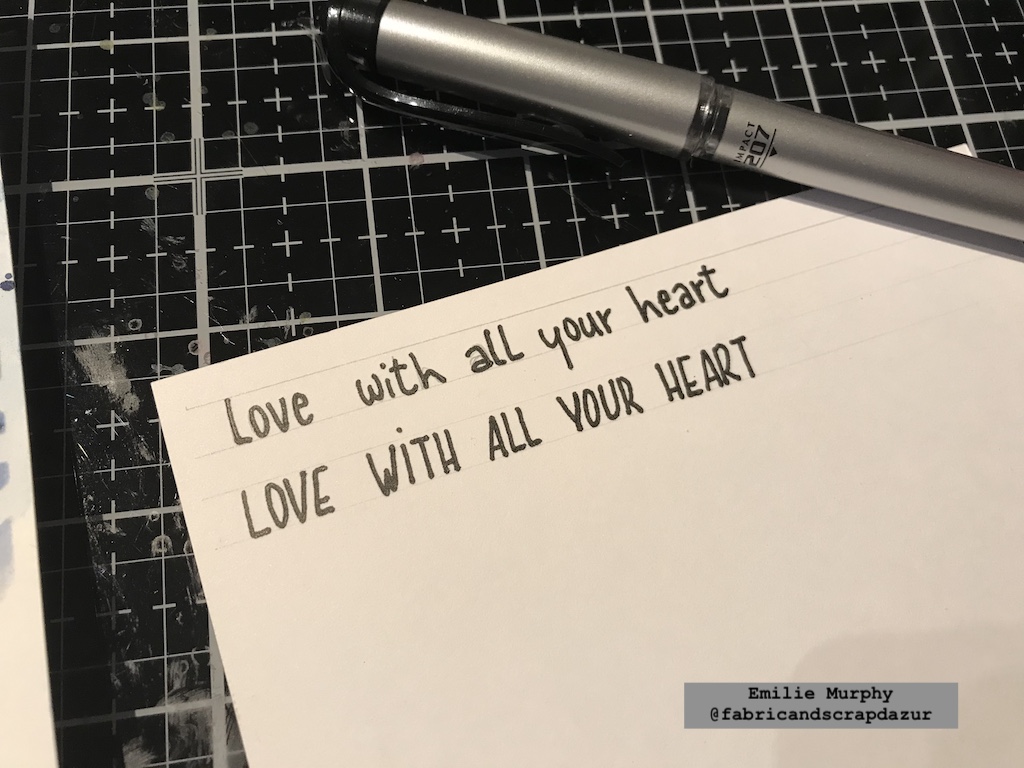
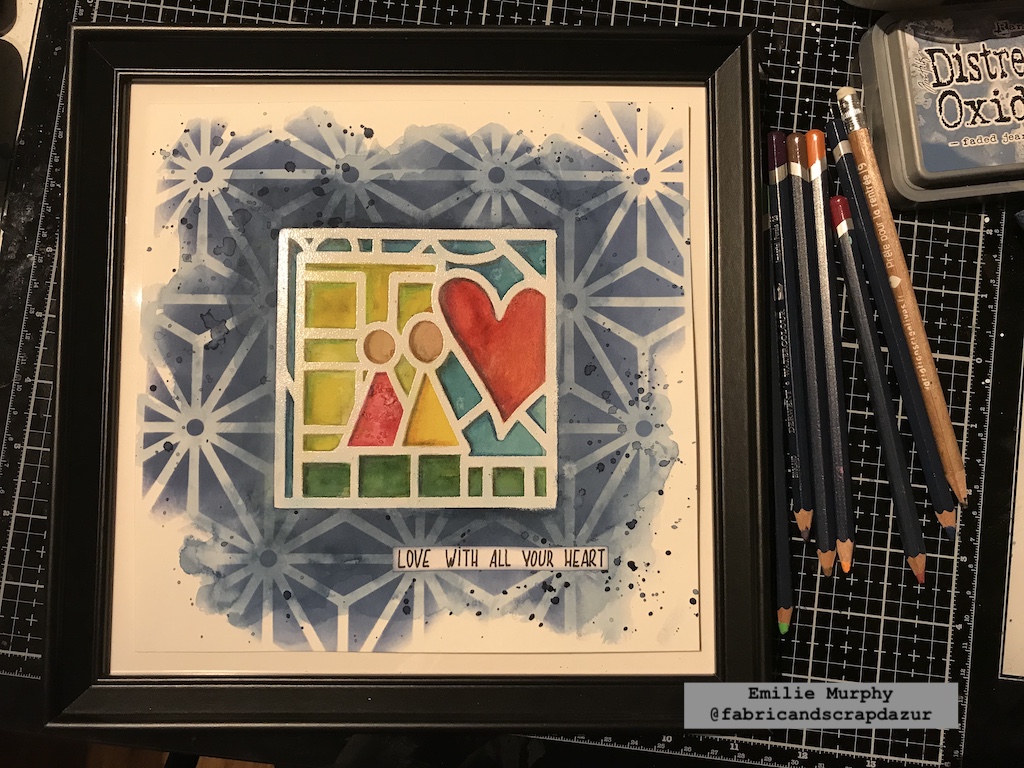
At that point, my painting needed a title. I simply wrote down by hand the sentiment on a piece of white cardstock. I chose the uppercase style by preference.
I slightly inked the edges of my sentiment with some oxide ink. Before gluing it down, I applied some splatters with indigo watercolor hiding my stamp image.
Finally I used some watercolor pencils to add some depth to the image and get a dimensional effect. I first applied a similar color inside each shape to get more depth. Then, I used a brown color to enhance the left and top edges of each shape to get the dimensional effect.
And voila!

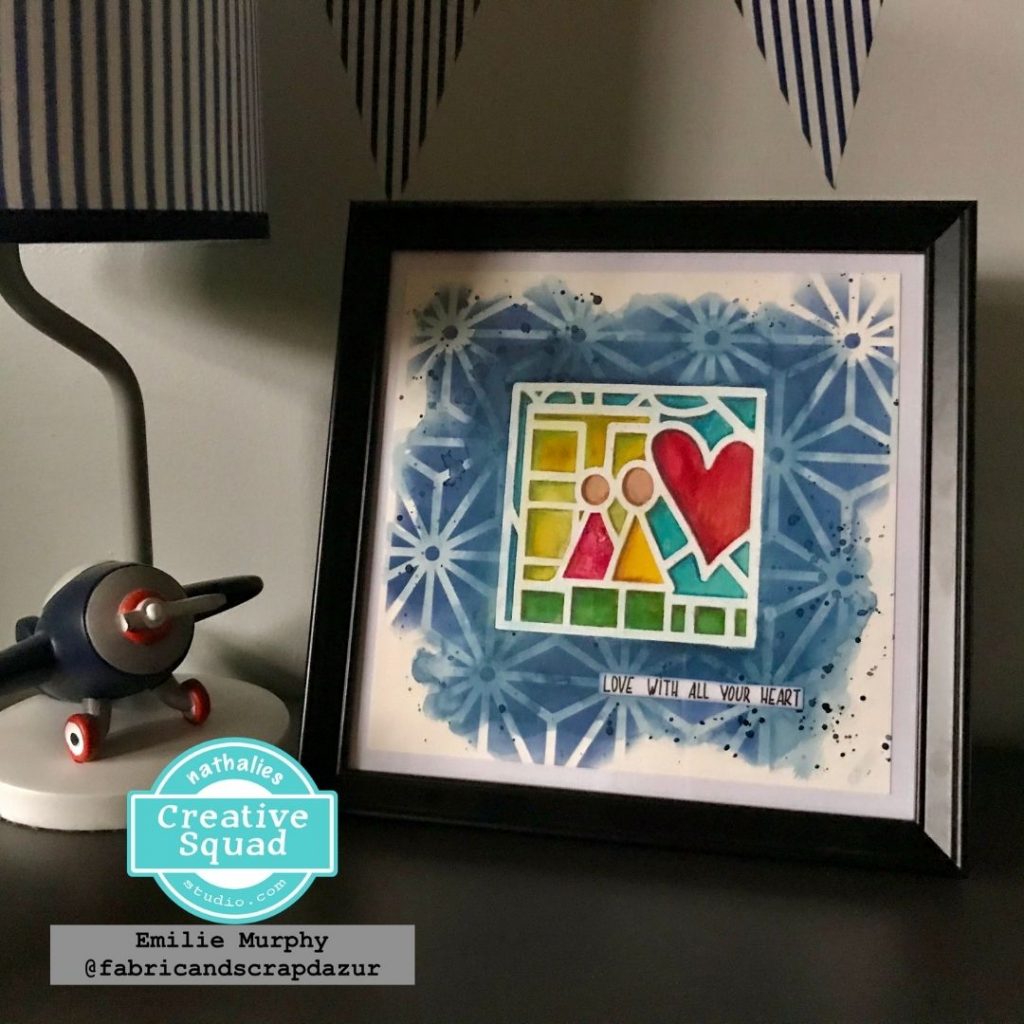
I decided to frame this painting and put it in my son’s bedroom. This painting can make a great gift for someone you love.
It would make a nice greeting card or art journal page as well or whatever you’d like to try and make.
Hope it gets you inspired. What about starting the year of 2021 with some fun and creativity!
Have a good rest of the week and see you next month!
Thank you Emilie – absolutely love this piece and that it now has a place in your son’s room – lovely!
Give it a try: you can find all my Foam Stamps and Stencils in my Online Shop and here are some of the supplies Emilie used:
Don’t forget to check out Nat’s Creative Squad on Instagram too: Each week we post projects, ideas, and inspiration for mixed media art.
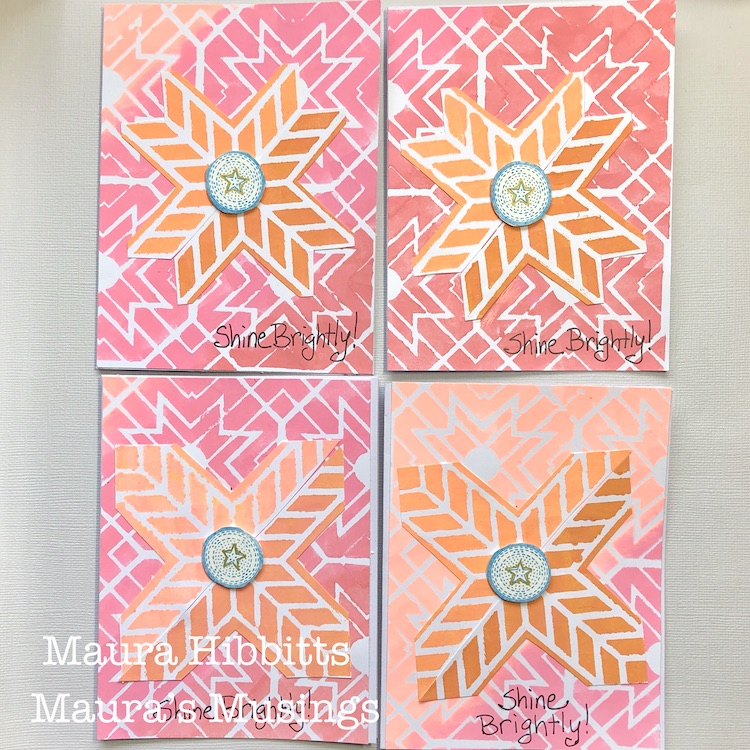
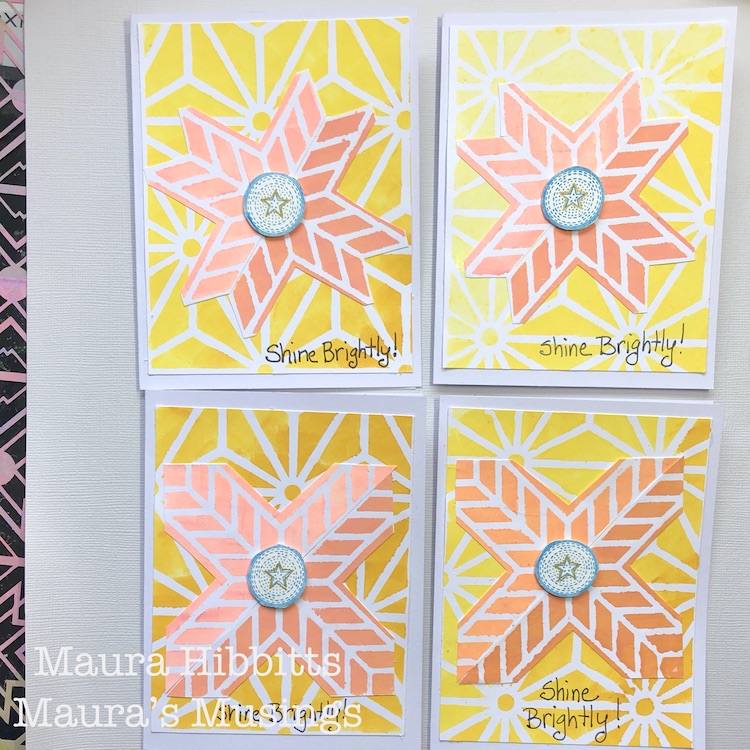
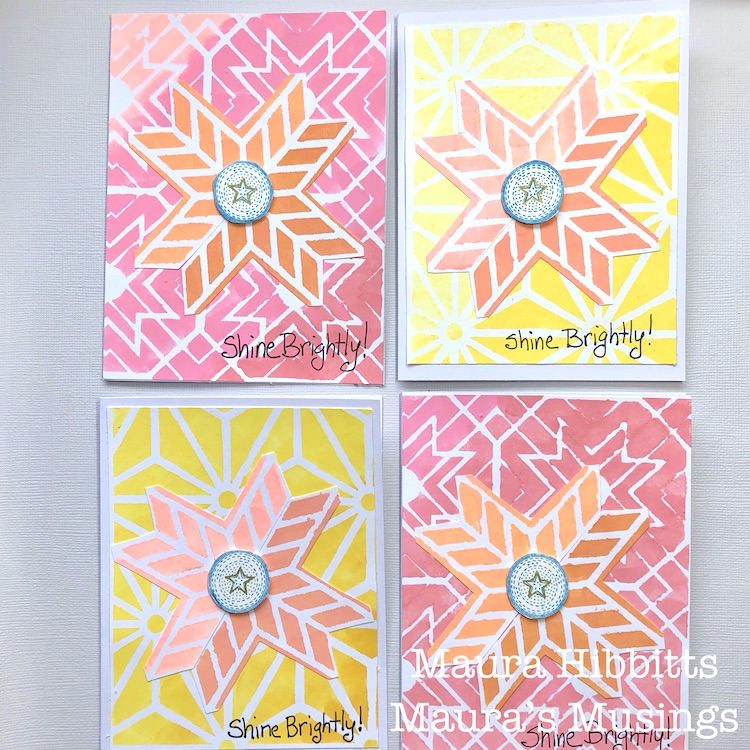
Hello from my Creative Squad! Today we are kicking off a new monthly theme with Maura Hibbitts. She is bringing us some lovely holiday cards in some perhaps untraditional colors, shaking things up to finish up 2020 with my Star Struck, Toledo, and Santiago 4×4 stencils, my Small Circle Jumble rubber stamps, and our theme: Light & Shadow – In art and maybe also in life, the balance between light and shadow is an important consideration. Play with this equilibrium in your art and show us how the two sides work together.

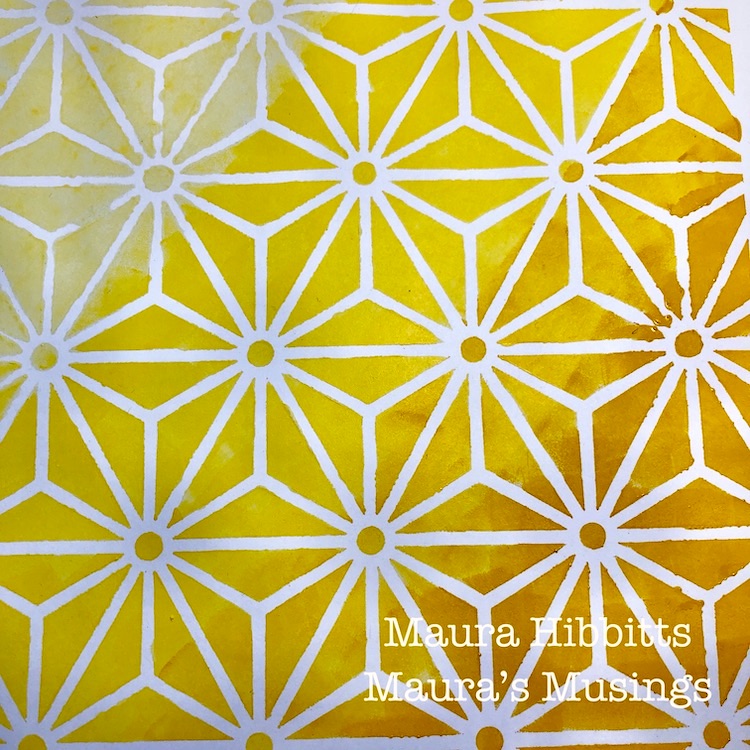
Light and Shadow, dark and light…as the days get shorter and the shadows longer I’m feeling the need for more light in my life. I watch the strip of sunlight on my deck railing in the morning outside of my work window (It was all lit in the summer), and then the shadows as they expand across the yard during the day. Each day will get shorter until the Winter Solstice on December 21. This year, more than ever, I am looking forward to our shift again to more daylight. These thoughts also prompted me to challenge myself to work with bright colors that I would not normally choose – yellow and pink. So, I’ve ended up making eight holiday cards in very non-traditional colors, check it out.
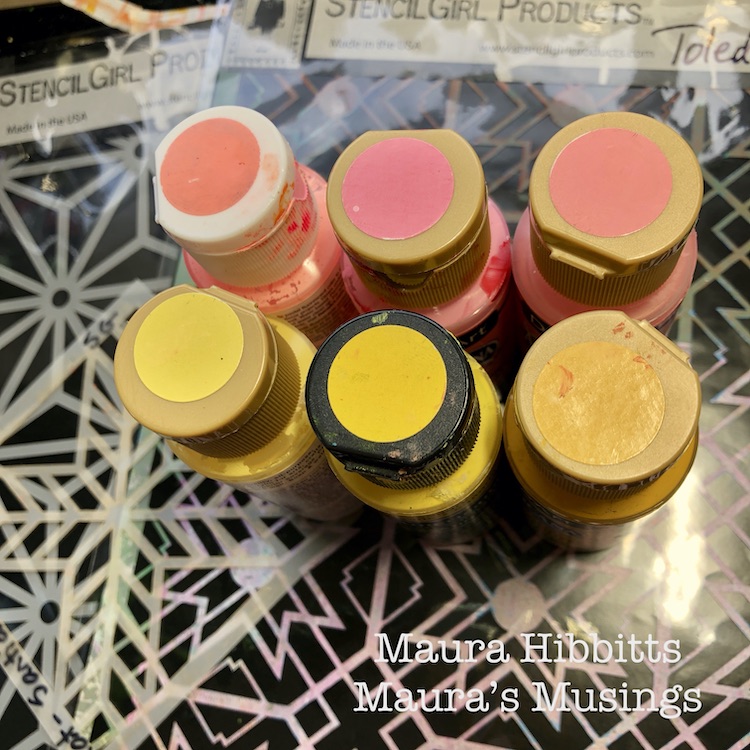
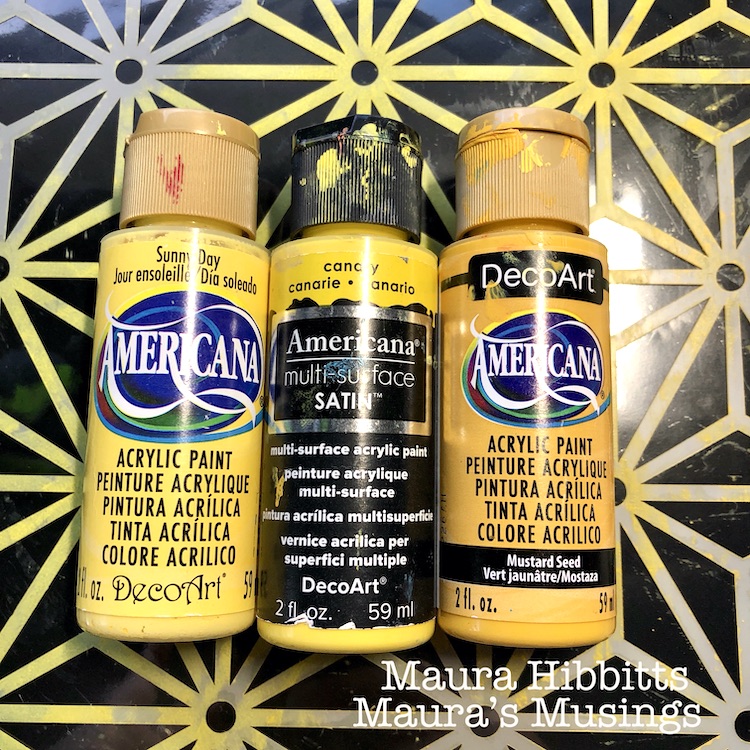
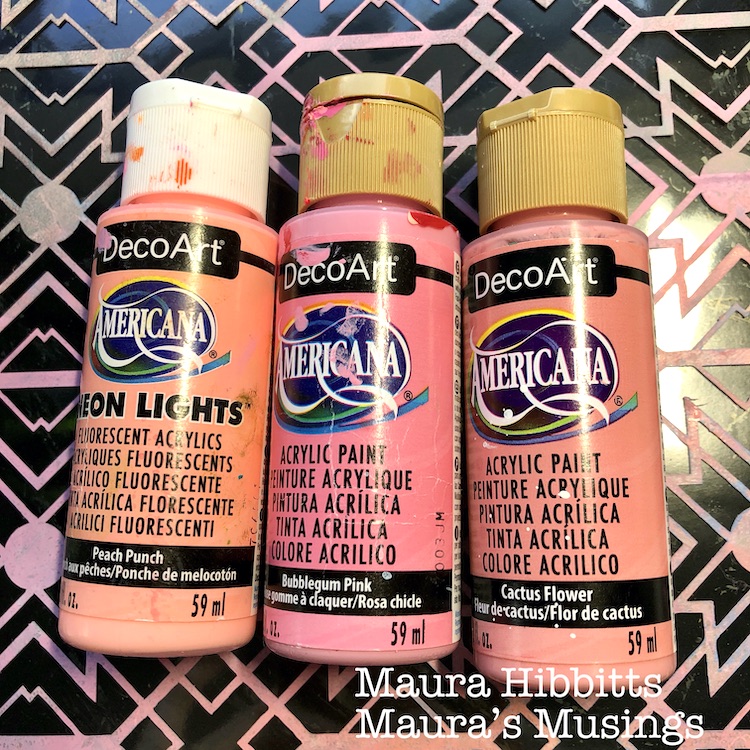
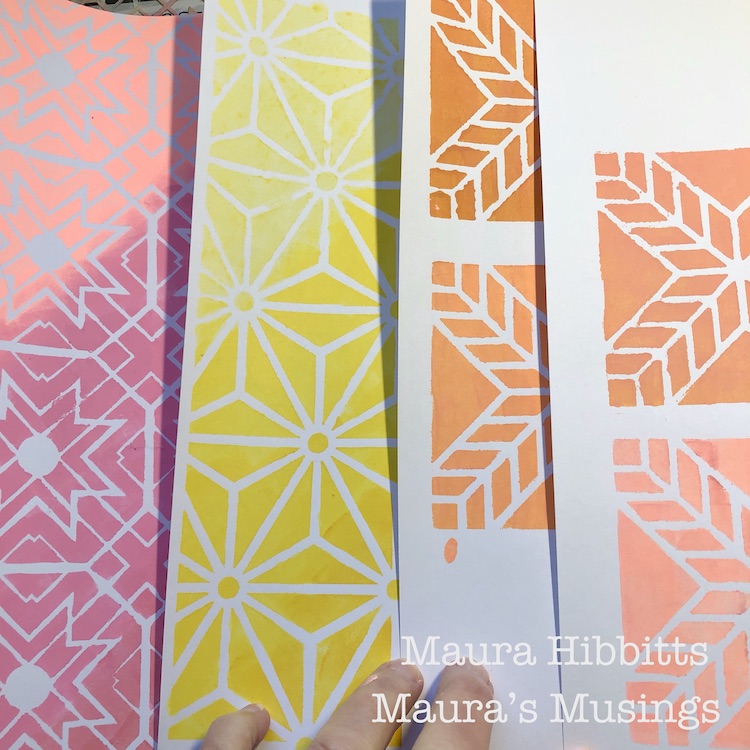
I started by going through my stash and pulling out paints in varying shades of pink and yellow, so I would have a blend from dark to light.
Nat’s Star Struck stencil seemed to call for the yellows, so I dabbed the colors in with a cosmetic sponge onto white cardstock, starting with the lightest in the top left, and working my way to the darkest in the lower right. Light and shadow, along with a bit of ombre.
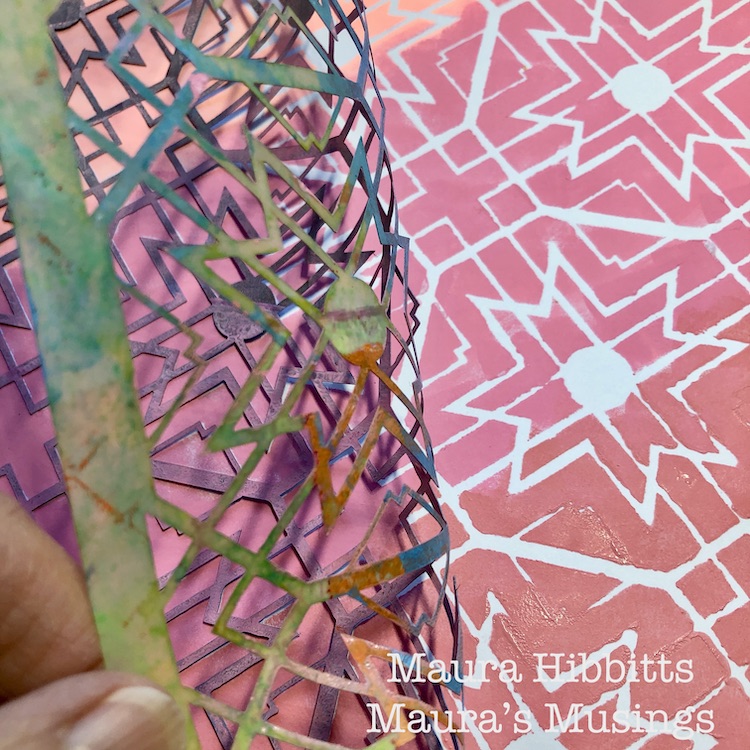
Next up are the pinks. where I repeated the previous step, only this time I used Nat’s Toledo stencil.

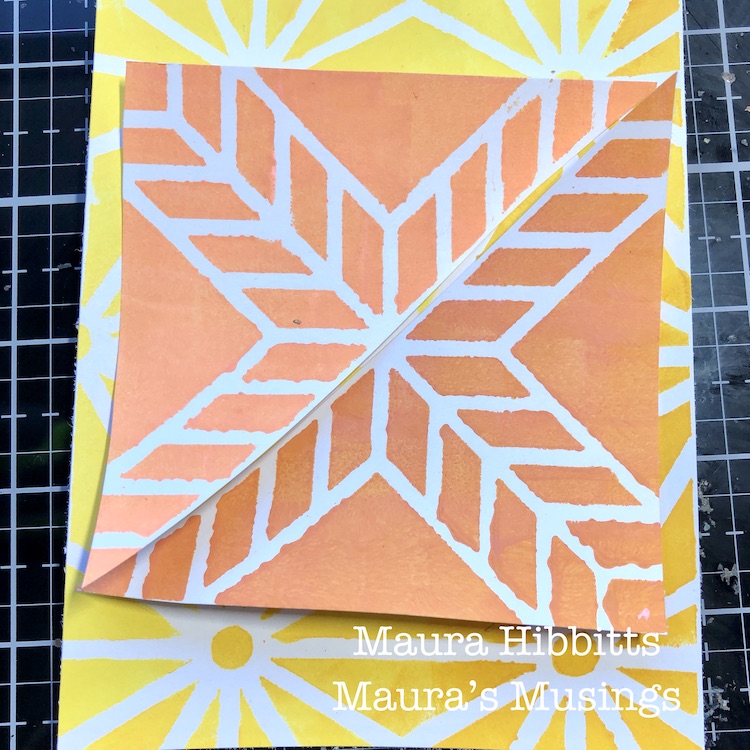
I decided I wanted to create a focal point, so I mixed varying shades of peach and orange, by blending the yellows and pinks, and used Nat’s Santiago 4×4 stencil. My goal was to have a mix of light and dark (shadow) shades.
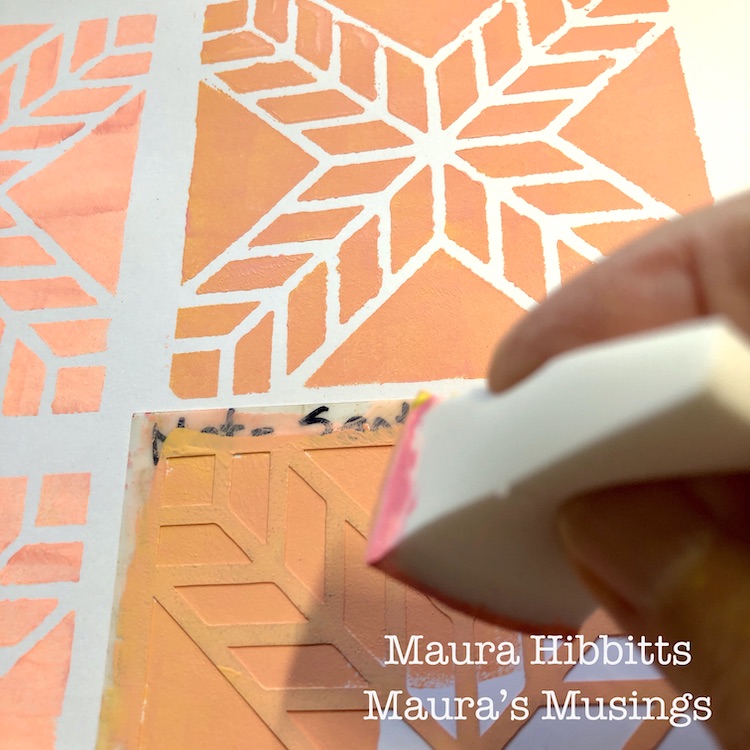
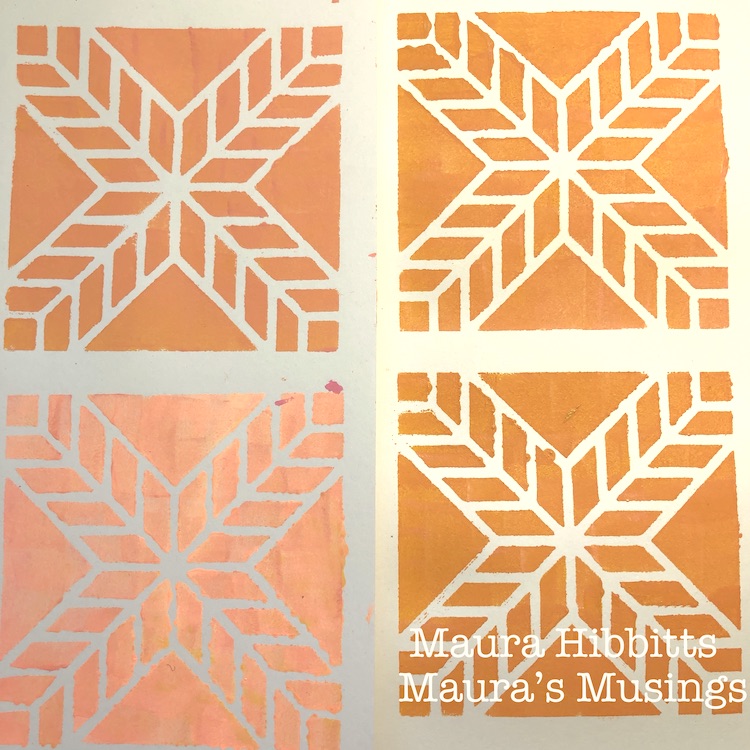
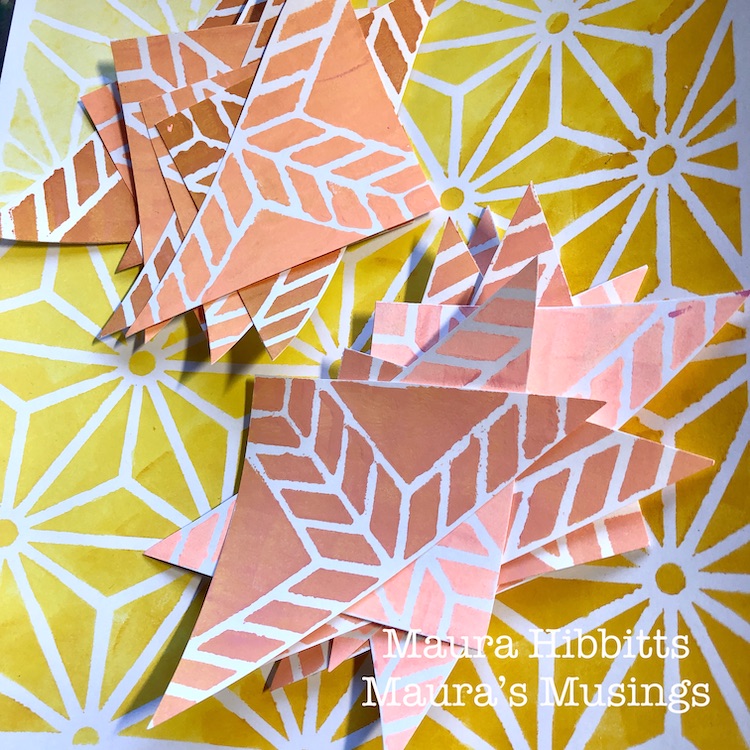
Now that everything is painted and stenciled, it’s time to start building the cards. I cut the large sheets of stenciled yellows and pinks into fourths to use as the card background. Next, I cut out the Santiago mini squares, and cut them diagonally in half. I laid the two parts together, decided I wanted more of the background to show, so cut out parts of the smaller stenciled papers. I glued the papers onto the cards using a PVA glue.
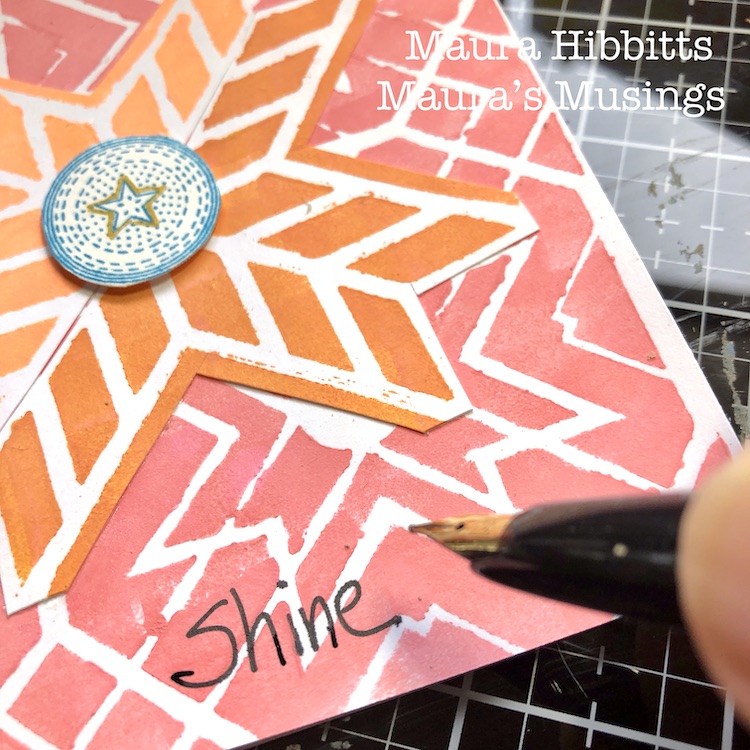
I felt that I needed one more pop of color, so I stamped Nat’s Circle Drive Positive small stamp onto watercolor paper with blue ink. I cut these out and popped them up on the center.

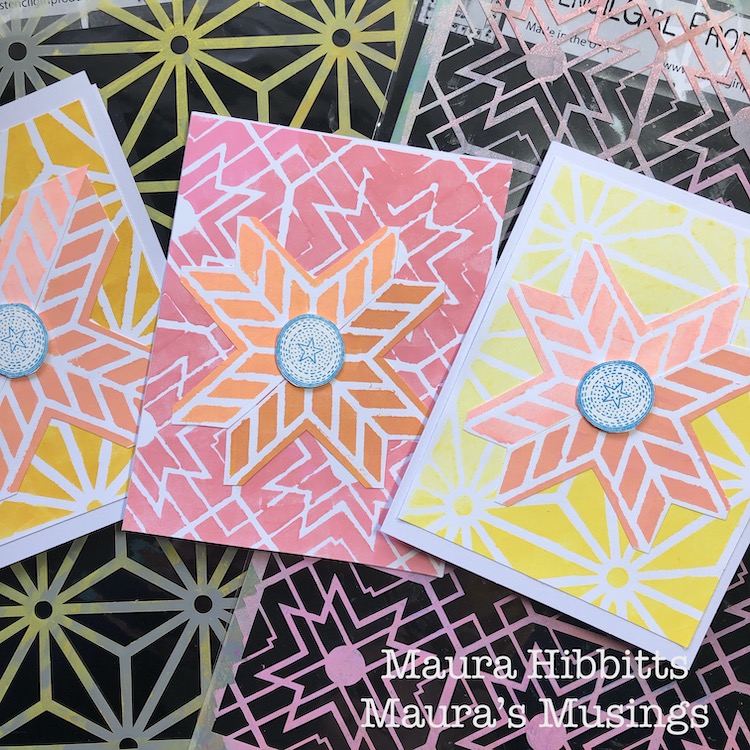
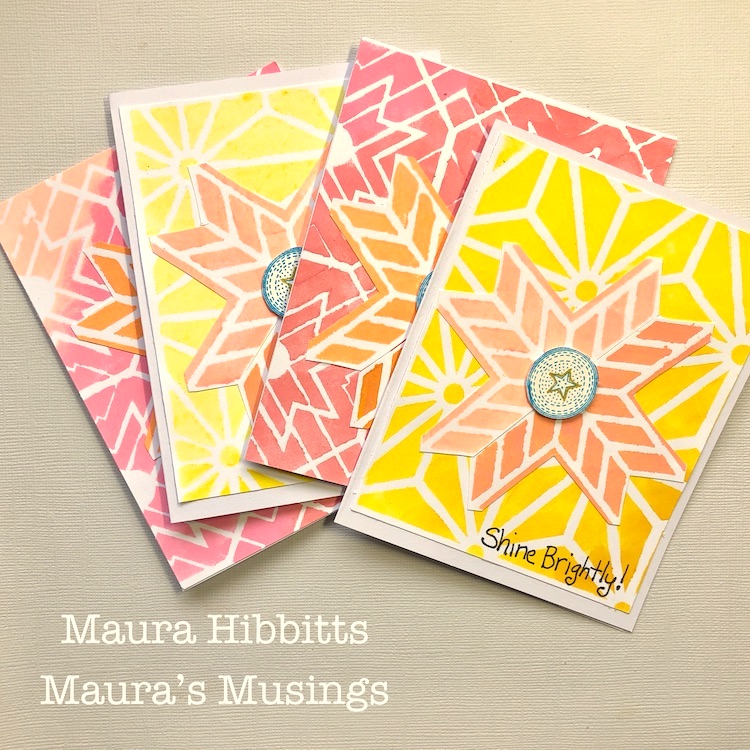
Now for the final touches – a bit of sparkle with a gold pen, where I outlined the star shape, and hand lettered words “Shine Brightly!” I love to use a Platinum Carbon ink pen over dry paint, but any permanent black pen will work.

I aimed to use the colors to give a feel of light and shadow, so I worked both the background and focal piece from lightest on the top left, to darkest on the bottom right. What do you think, did it work?
And there you have it, a set of eight cards in a bright array of yellows and pinks. These might be very non-traditional Christmas cards, or maybe Solstice cards. Another thought is to save them, and randomly send them out in the dark days of winter to bring a ray of light to someone. I hope this inspires you to observe the light and shadow in your life and let it guide your creative endeavors. Wishing you health, joy, and light this holiday season! – Maura
Thank you Maura! We love how your colors make these patterns pop. And nontraditional holiday colors seem perfect for this crazy year :)
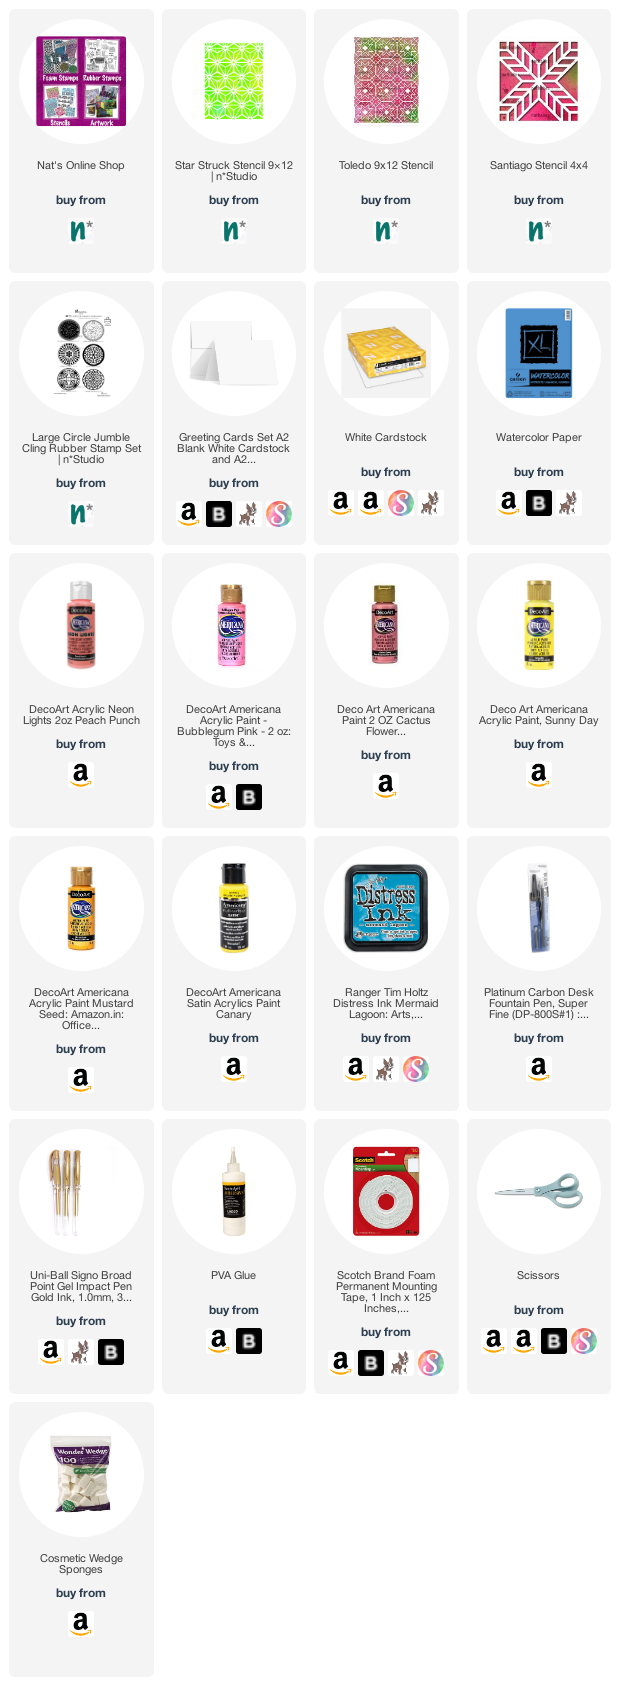
Give it a try: you can find all my Rubber Stamps and Stencils in my Online Shop and here are some of the other supplies Maura used:
Don’t forget to check out Nat’s Creative Squad on Instagram too: Each week we post projects, ideas, and inspiration for mixed media art.
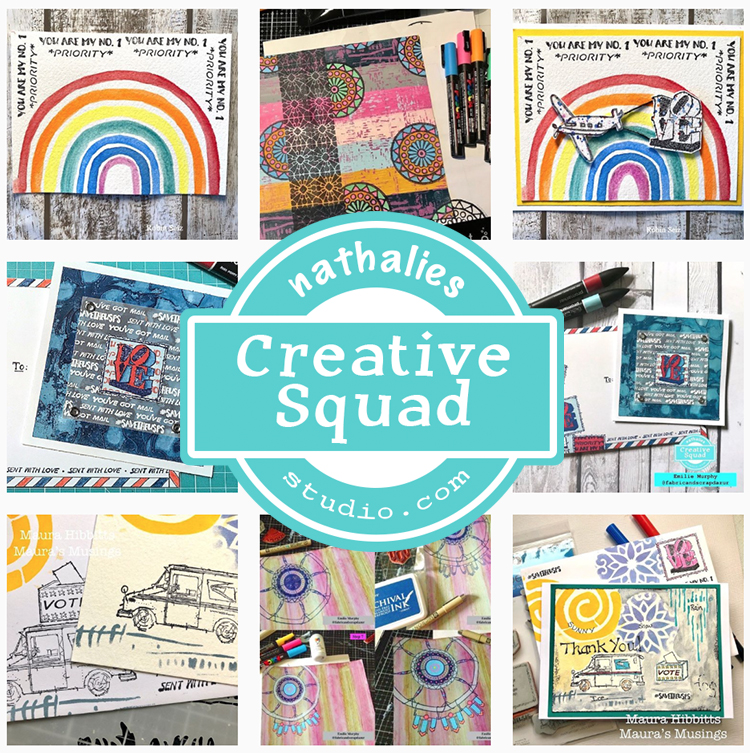

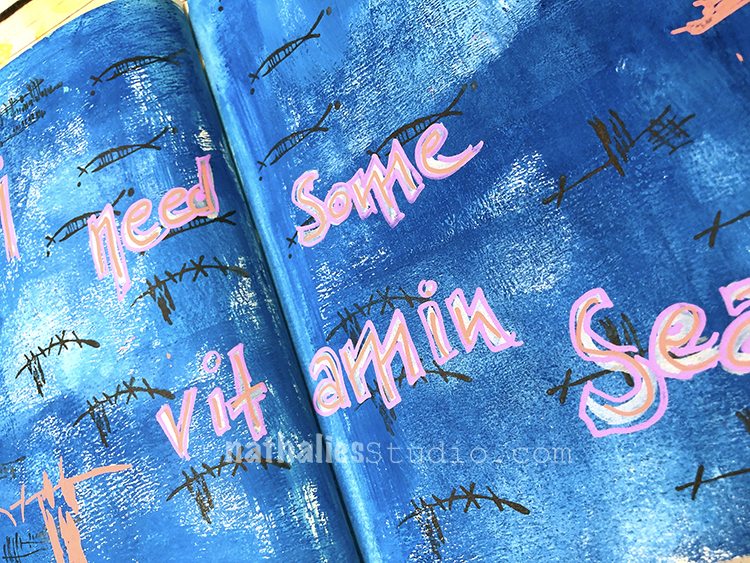
I need some vitamin Sea! How about you? I was inspired by our Creative Squad theme this month – Under the Sea. Are you longing for the ocean too?

I used acrylic paints for my background and posca markers with my Kyoto and Star Struck stencils. I also threw in my Wabi Sabi rubber stamps with archival ink so a little play with changing up scale with the same design elements.
I tried out a new set of Posca markers and really like the colors and pastel shades of them. You can find those in the links below.
Here are some of the supplies I used:
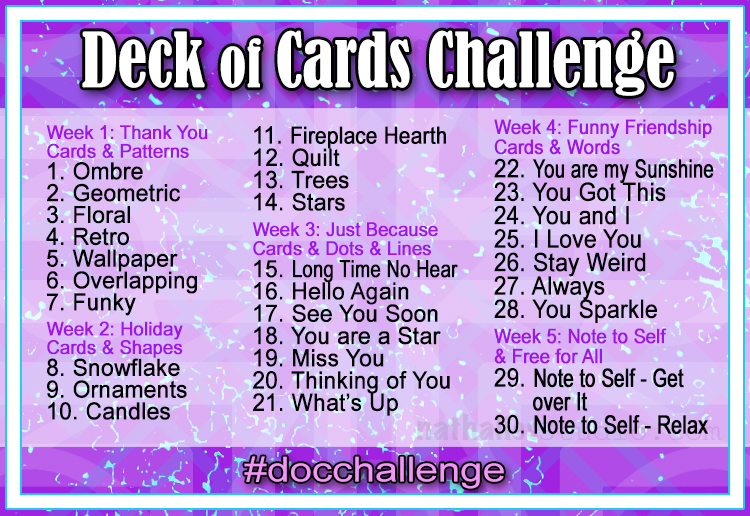
Today I am recapping Day 8 and 9 of my Deck of Cards Challenge that is running this month on Instagram. This week we are making holiday cards with a focus on shapes.
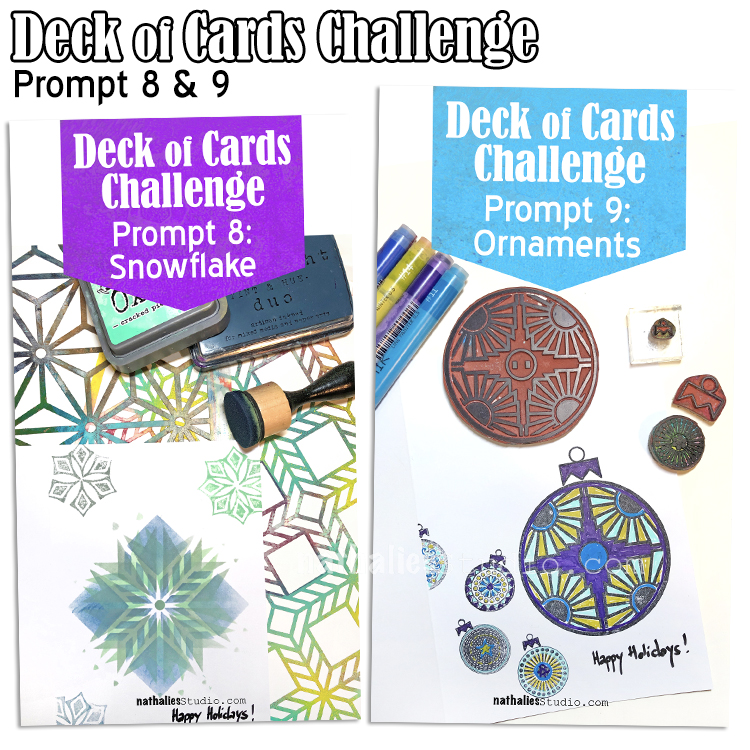
Here is a recap of days 8 and 9:
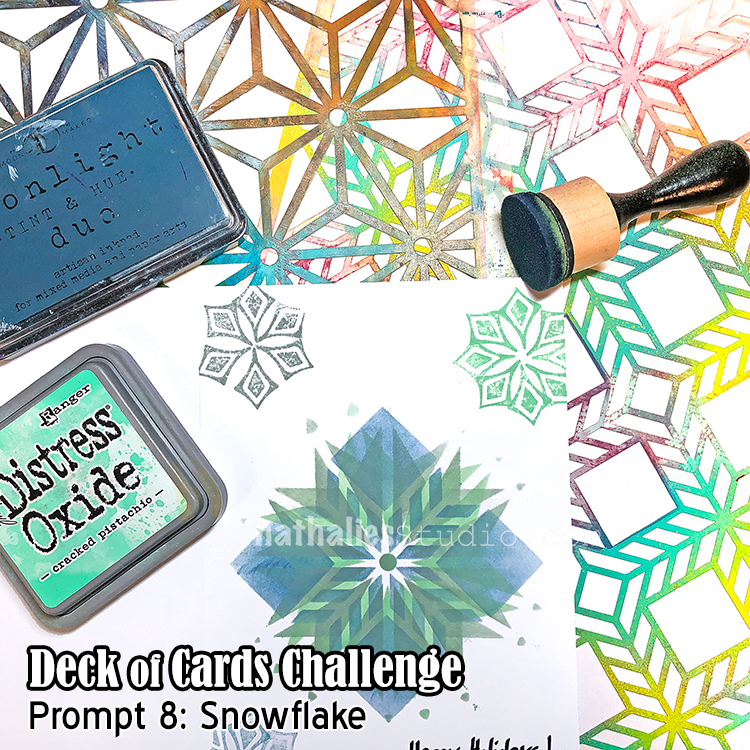
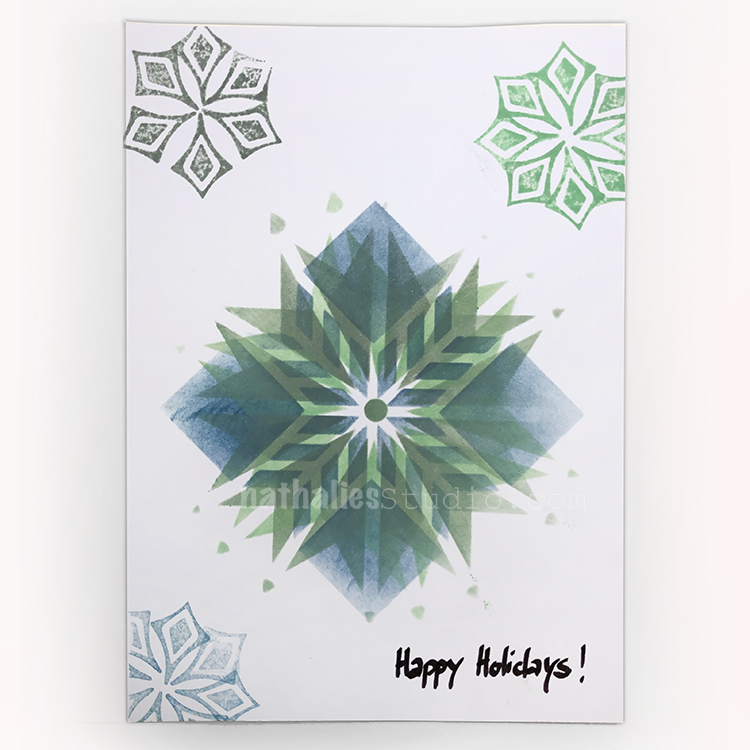
Day 08 – Snowflake
For week 2 of the challenge we are making holiday cards so I thought I’d start off with a classic winter motif – the snowflake.

Using an ink blending tool and masking off a shape in my Santiago stencil…

and then Star Struck stencil, I layered up a very nice snowflake. Because no two snowflakes are the same, I added a few more with my Fanfare stamps. This is one snow storm that will brighten anyone’s day :)
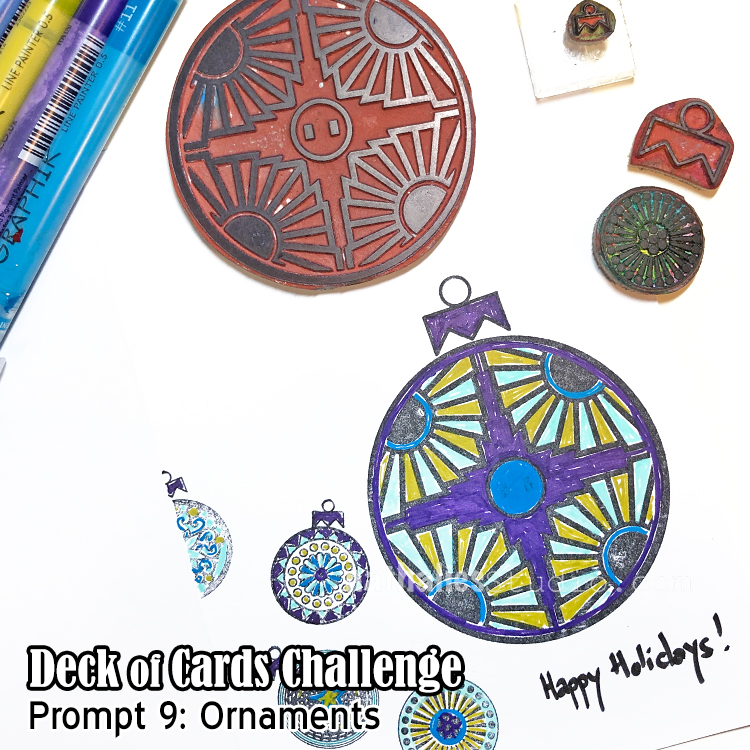
Day 09 – Ornaments
Today we are making a holiday card with Ornaments on it.
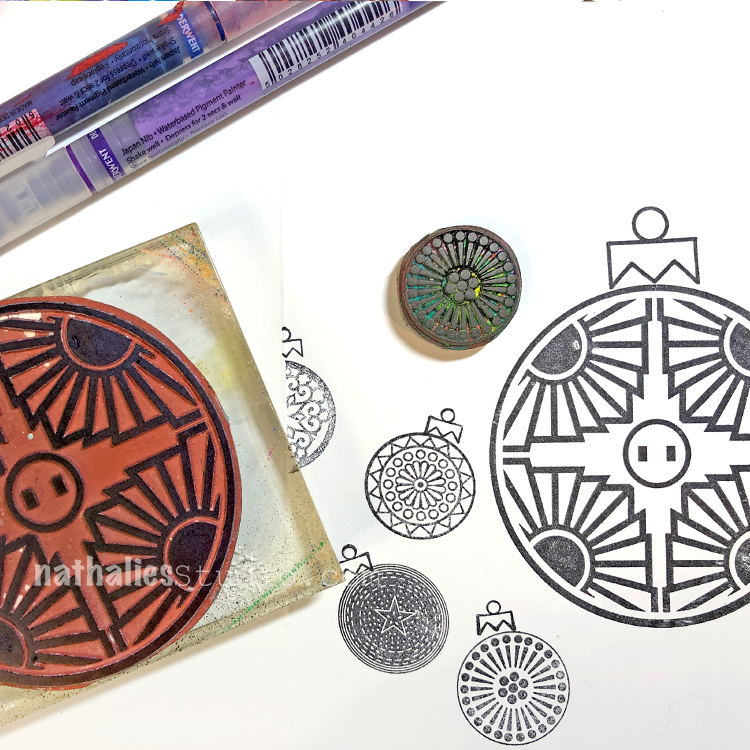
My Small and Large Circle Jumble stamp sets actually include an ornament topper stamp in them – so it couldn’t be easier. You could fill these in with lots of different colors – I’ve chosen to use Graphik Line Painter markers in some merry and bright colors.

Keep following us and I hope you share what you are working on using #docchallenge
Here are some of the supplies that I used in these prompts:
Here is the prompt list so you can play along too! Follow the daily prompts on Instagram and tag your creations with #docchallenge
Emilie. As always, your piece is beautiful! I love the colors and how you used the stencil in the background. It’s so fun that it’s framed and in your sons room!!!
Reply