Altered Art

Lovely Margot Minialbum or…New Prima Collection Rondelle

Can you make it through another CHA project? LOL- I have been quite busy before CHA ;) Here is another Prima Project using the new collection Rondelle.

I have to say this is not only my favorite line that Prima released this summer….

it is also my favorite project using some wonderful old photos I found of my beloved aunt

I used an old grammar book

and this is probably turning into an upcoming class

The embellishments are so cute

and I am in love with those clothespins

and the stamps

and the flowers are some of my faves too

and oh – did I mention I love those photos? They are so fun! Here my aunt with her friend Marga at the beach early 30s.

Prima Products used:

  • Rondelle Collection Polonaise #844660
  • Rondelle Collection Pavanne #844622
  • Rondelle Collection Etude #844639
  • Rondelle Collection Quadrille #844653
  • Rondelle Collection Gavotte #844608
  • Rondelle Collection Cabriole #844615
  • Rondelle Collection Alphabet Stickers #559144
  • Rondelle Collection Cardstock Stickers #559007
  • Rondelle Collection Cling Mounted Stamps #559359
  • Rondelle Collection Tiles & Trinkets #559632
  • Rondelle Collection Metal Trinkets #559700
  • Rondelle Collection Wood Clips #558865
  • Rondelle Collection Flowers #562427
  • Say It in Crystals #560508

Other supplies:

old Book

Tonic Studios Punches

I’m sure you can tell I loved working on this book. My auntie has been through a very very tough time the last couple weeks and this has been a good project for me …kind of therapeutic. I love her !

Have an amazing day

Huge hugs

Nat

Comments (23)

  • Sue

    |

    I found an old English grammar book that was my mother’s in school and it has some of her doodles in it and I think I will do this with it. I was trying to think what I could do with the book and still have a bit of “her” inside. I have some older pictures of her and some family pics that I can add. Thanks very much for sharing this wonderful project Natalie.

    Reply

  • Kerstin

    |

    Mannmann, ich bin ja gerade nich so bastelmäßig unterwegs, aber jetzt hätte ich Dich gern auf ‘ne Runde hier um mich, damit Du mir die Falterei näher bringst und noch einiges mehr. Totales Schmuckstück geworden!

    Reply

  • Yvonne

    |

    Das sieht so wunderschön aus!
    LG Yvonne

    Reply

  • Marsha.

    |

    Love! Great photos, love the grammar book and this would make an awesome class!

    Reply

  • Julie Bonomo

    |

    Love it, love it, love it! My thoughts are with you and your beloved aunt….wishing her a speedy recovery. Thank you for the inspiration.

    Reply

  • Andrene

    |

    Awesome job Nat!! I love old books and have a couple waiting to be altered! Hope to see an online class on altered books. Your pictures are priceless especially the beach photo. I have pictures of my mom in the 1940’s style bathing suits – what a hoot!! Thanks for sharing!!

    Reply

  • Liz Thayne

    |

    This is stunning- a wonderful tribute to your aunt. Hope she gets better soon.

    Reply

  • Carrie

    |

    This book is gorgeous! I love the ways some of the pages are folded. And the vintage look of a lot of the embellishments is really cool. Is that diamond border on the cover from a stamp?

    Reply

    • nathalie-kalbach

      |

      Hi Carrie, thank you so much. Yes that diamond border is a Prima Stamp- I love it . It is one of their new rubber cling stamps from the Rondelle Collection. wishing you an amazing day :) nat

      Reply

  • Riikka

    |

    This is just unbelievable gorgeous! <3

    Reply

  • Cuchy

    |

    This album is stunning. From the way you folded the pages to all the bits and pieces you put on there and all those old pics. This is a beautiful treasure.
    Hope your auntie is better now. Be strong. Loves, Cuchy

    Reply

  • Barb Starace

    |

    Love the way you folded all the pages and of course all the yummy Prima products. Hope Auntie is doing better this week and then you will be better. Great project!

    Reply

  • selena

    |

    bravo pour ce bel album, moi aussi j’aime beaucoup le livre comme support.

    Reply

  • Kelly Belton

    |

    OOOH – Nat I love this book. Bring this class with you when you come back to Toronto please!

    Reply

  • Cat

    |

    I love this Nat!

    Reply

  • tina phillips

    |

    Oh my goodness….this is absolutely stunning!!!

    Reply

  • Lisa Flaherty

    |

    Absolutely stunning, Nat! Your details and fun folds are so cool, and the vintage book with those vintage photos are perfection! I’m sorry Auntie has been through a hard week, and I know a hard week for her means a hard week for you. What a wonderful way to find a bit of escape while maintaining a strong connection. Hugs to you both!

    Reply

  • Dottie

    |

    Altered books are my favorite projects and I love this one!!! The folds and tags are great. This collection works wonderfully with the old book pages.

    Reply

  • Madeline Rains

    |

    This is so moving! I feel like I know your aunt seeing it. I am inspired to make a book about my late mother now with an old book that she would have loved and b&w photos. Thank you.

    Reply

  • Anski

    |

    Breathtakingly beautiful! I love the mood, the colours and the details!

    Reply

  • Sue Clarke

    |

    I do believe that this is my favorite project ever using Prima products.
    I hope that Auntie Margo will be feeling chipper again soon.

    Reply

  • mjmarmo

    |

    What a gorgeous project!

    Reply

  • Milagros

    |

    I love it, its a beautiful idea for altered book .
    hugs

    Reply

Leave a comment

9 Facts About Me…or New Prima Donna Downey Album

I had fun creating this Donna Downey Album for CHA this summer.

I was in the mood for summer colors and I loved the shape of this coffee cup album

Love the little see through :) and the cute felt flower

I worked a lot of acrylic paint and also string gel medium to play around

Loved working with Donna’s new Stencils in 12×12 and 6×6

used some super heavy acrylic paint here

For the fun Canvas Resist I used Dylusions Ink Sprays

With the Canvas Sticker Letters everything just worked together great

loved playing with the acrylic paint- can you tell? ;)

Prima Products used:

  • Mixed Media Album #922085
  • Poppies & Peonies Flower #922283
  • Donna Downey Stencil 12×12 #922191
  • Donna Downey Stencil 12×12 #922177
  • Donna Downey Stencil 6×6 #922146
  • Resist Canvas Banner and Ticket #560997
  • Alphabet Craftsman #559113
  • Alphabet Rosarian #559151

Other Supplies:

  • Liquitex Acrylic Paints
  • Liquitex String Gel
  • Ranger’s Dylusions Ink Sprays


and the 10th bonus fact? this little album makes me happy :)

what about a fun fact about you?

Have a wonderful day

Nat

Comments (8)

  • Yvonne

    |

    Die Farben machen so richtig fröhlich! Das Album sieht cool aus!
    LG Yvonne

    Reply

  • Miae

    |

    You make me want to create!!

    Reply

  • Sue Clarke

    |

    These colors are so different for you and yet you managed to ROCK them like all your work Nat! I would be able to make one of these albums and focus on my Starbucks soy chai no water no foam chai. That is a fun fact about me…I have one drink and I stick to it. My hubby hates to be with me when I order it since he says I sound like such a snob. The folks at Starbucks just laugh and have gotten to know me. I even manage to have birthday treats saved for me when workers bring them in for each other.

    Reply

  • Vicki Chrisman

    |

    Awesome Awesome album Nat!

    Reply

  • Cuchy

    |

    Love those vibrant colours and all the media you used on this. messy, messy, yummy, yummy :)

    Reply

  • misty

    |

    This is awesome! I love it!

    Reply

  • Maggie M

    |

    Hi Nat! Hey, what is string gel medium? I’ve never heard of it before? Cute canvas album!

    Reply

Leave a comment

zip zip Treasure Tin or New Prima Collection Zephyr

Giggled the whole time while I was creating this treasure tin using the new Prima Marketing Collection Zephyr for CHA last month. Something about creating this Sardine Tin was just funny :)

Playing with acrylic paints and the yummie new products.

Prima Products:

  • Zephyr Collection Tabarette #844431
  • Zephyr Collection Tempore #844456
  • Zephyr Collection Tempore #844509
  • Zephyr Collection Zephyr #844493
  • Zephyr Collection Wood Tickets/Clocks #559243
  • Zephyr Collection Crystal Stickers #560294
  • Say It In Crystals #560379
  • Shabby Chic Resin Treasures La Coeur #891442
  • Junkyard Findings Type Zippers #891558
  • Ribbon #529444

Other Products:

  • Tin
  • Feathers
  • Acrylic Paints
  • Liquitex Pouring Medium
  • Liquitex Gel Medium
  • Scrapbook Adhesives by 3L Crafty Power Tape

Wishing you a wonderful and sunny day

Huge hugs

Nat


Comments (6)

  • Sue Clarke

    |

    What a cool tin. This would be so fun to see hanging up in a small area of your wall. It is something that would catch people’s eye.

    Reply

  • Conny

    |

    Man ist das genial! Die rinnende Farbe -super idee sieht klasse aus!!!

    Reply

  • Lisa Flaherty

    |

    Funny, but SO COOL! All the little bits of bling juxtaposed with the cool drippy paint–love it!

    Reply

  • Cuchy

    |

    ohhhhhhh poor sardines. Where did they end? :)
    Love how colourful it turned out and I agree with Kim, awesome paint drips

    Reply

  • Kim S

    |

    Oh wowzers, this is stunning! I love the how the paint drips, so fun!

    Reply

Leave a comment

n*Lab Tales – Today featuring Letraset Promarkers with Letrajet Airbrush System

I had to postpone my play date in the n*lab several times- but finally I stuck to my plan and tried the so far untried Letrajet Airbrush System.

Another tool I have not yet used and had in my tool box for a long time. As I do not really work with markers, though I love my Promarkers, I found the idea totally thrilling to use the markers in an airbrushing way.

Attaching the whole thing to the bottle and the marker weren’t as hard as I had imagined- LOL -but I won’t lie- this whole pressure bottle thing is a bit intimidating to me. I think that is also the reason why this whole thing was living a sad dark life in my tool box.

After some just stupid writing and playing I grabbed a Hambly Transparency and started spraying on top to see how I liked it. I realized that I liked the colors on the sheet- but for stenciling that I would have to be a little bit more careful, since the airbrushed marker was so fine that it would easily go underneath the stencil. I also realized that the air container would need a rest pretty quick and as otherwise it would only start spitting out paints. I told you I have never airbrushed before- so every pro will now probably just shake the head …well- have fun and keep on shaking like a headbanger…LOL- you gotta start somewhere Dude ;)

So I finally decided to change the blue iPad cover…although as some of you  know it is the end of the Bee Gees in my handbag – I still use the cover at home. It is practical though it looks dirty pretty quick …I cleaned it up just for you and this photo- hahahaha

I started spraying different colors using some of the awesome Ranger Dylusions Stencils – and I loved how the Promarkers were wonderfully covering up the underlying surface.

Again I wasn’t paying attention enough to hold down with skewers or brush handles the stencils- I don’t know why- I do this always when I work with aerosol spray paints – but I guess my brain wasn’t commuting with my hands in the right way that day ;) So I just used another stencil on top ;)

So my favorite features of the Letrajet System were:

  • I love that I can use my Letraset Promarkers also as sprays – more possibilities!
  • vibrant colors
  • the colors cover the surface in a great way
  • awesome possibilities to use them on transparencies
  • awesome possibilities to work very fine and detailed

I like it a lot- but I know I won’t use it very often – although all those awesome features are true. The reason why? I do love to use many different colors and I am just a terribly impatient person when I am in my creating zone- I wanna grab the paint media and just go. The fiddling to get the markers exchanged in the system with my little sausage fingers was making me a bit grumpy. The other thing that plays a role with my impatience is that the air container needs a pause very quick…so you can only work for a certain time on the project and then need to pause. BUT – I know exactly I will go through this for certain projects whenever I want beautiful vibrant colors and there is a slick surface involved ;)

I wonder what I should put down next in my calendar to try for my n*Lab day ….oh I have something…LOL…I just checked my shelf and found another paint media that was looking a bit dusty and sad.

Have a gorgeous day

Nat

Comments (6)

  • mjmarmo

    |

    So cool!

    Reply

  • Cat

    |

    This is quite possibly the coolest new product I have seen for quite some time…wonder if you can use it with the other alcohol markers…probably not. But I do,love your new iPad cover.

    Reply

  • Martha Richardson

    |

    uhmmmm…I think I need to get a new iPad cover because you have inspired me ;)

    Reply

  • Milagros

    |

    Me encanta la idea de poder alterar superficies plásticas, queda fantástico. Es como hacer graffitti, pero yo también soy muy impaciente.

    Reply

  • Cuchy

    |

    Love the idea of altering the ipad cover and how yours turned out. mmmmm hubby… you better hide your ipad :)

    Reply

  • jerseytjej

    |

    I love all of the colors and had you not pointed out the splotches, I would not have seen them. It feels like graffiti!

    Reply

Leave a comment

Maya Road Guest Designer – Road Trip Minialbum

Last but not least I show you the little minialbum I created for my guest design spot at Maya Road.

The photos were all taken at our recent road trip in Januar in California- I loved working on this project, as it brought back so many fun memories!

This Mini album uses a mix of the  Maya Road Canvas Flag Banner and the Maya Road Chipboard Flag Banner Album as its base.

A variety of Maya Mist adorn the pages of this mini album.

A great feature of the Maya Road Canvas albums is that the canvas doesn’t bleed.

You can spray lots of mist on one side and the other side will remain blank until you are ready to alter it.

Using a stencil and Maya Mists I created both negative and positive images on my pages.

I love the way the chipboard takes the Maya Mist

I used a black marker to trace the stencil by Crafter’s Workshop an give it  more definition. Fun

What was the last Mini Album about you created?

hugs

Nat

Comments (5)

  • Gunvor

    |

    Lovely and colourful!

    Reply

  • Riikka

    |

    Great colours! The last mini I’ve finished was the one I made for ColorConspira, I think. It was the best one I’ve created so far.

    Reply

  • Lisa Flaherty

    |

    I’d never made a mini album before last month! They just didn’t appeal to me. But, I was assigned to do one as a new member of the design team at my local scrapbook store. While I turned it into a COLOSSAL project (with the supplies I was given, I decided to chronicle the 22 years with my husband!), I am thrilled with the results, and I am a mini album fan! I love what you’ve done with the Maya Road goodies-those mists are so vibrant! So cool that you tinted your photos to coordinate with each page. Luscious!

    Reply

  • Sue Clarke

    |

    Fun colors as always Ms. Nat and my last mini-album was about my puppy Jessie (now just over one year old).

    Reply

  • mjmarmo

    |

    So colorful! I am almost finished with an album of all my kid’s graduation photos from Kindergarten on up. It is not as colorful as this though!

    Reply

Leave a comment

Maya Road Guest Designer- Canvas- Tutorial

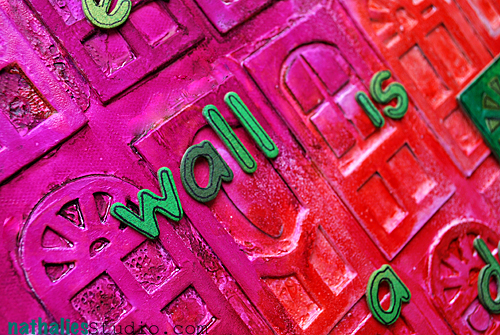
For my guest designer spot with Maya Road this month I created this 12 x 12 canvas using lots of Chipboard DoorwaysMaya Mists, and Gesso.

I created a video sharing how I made this canvas:

[youtube=https://www.youtube.com/watch?v=rH5MHQMMgmY&feature=youtu.be]

So love those colors :)

And I totally love those doors…yum yum!

Hope you enjoyed the tutorial :)


hugs

Nat

P.S.: psst

Comments (12)

  • Deleted User

    |

    I like this piece for the foyer!…like a welcome to my visitors, says a lot! tfs Nat.

    Reply

  • Marjie Kemper

    |

    This is fabulous, Nat! Love how you used the neg spaces on the green door and all the yummy texture you built up with the CB and gesso.

    Reply

  • Rose Curtis

    |

    love what you created with the doors!

    Reply

  • Liz Thayne

    |

    Love your use of colour and texture on this canvas. Thanks for sharing.

    Reply

  • Bev W.

    |

    Yes!!! So liking the colors and those doors are a must have and on my wish list! Congrats Anne:) Thanks for the vid Nat!
    ♥Bev

    Reply

  • Conny

    |

    Die Farben sind einfach der Wahnsinn und ich liebe ja die Embellish von Maya Road – absolut Genial!!!!!

    LG Conny

    Reply

  • Sue Clarke

    |

    Yes, you are the texture lady! I enjoyed this video while eating my breakfast. And you can use reds and oranges as well as blues and greens. The quote has me thinking
    this morning. As always, thanks for sharing your crafty knowledge Nat.

    Reply

  • Dottie

    |

    Love, love the door canvas!!!

    Reply

  • Erika N

    |

    Very clever page. I love your idea and the this page.

    Reply

  • Birgit Kunte

    |

    Einfach der Oberknaller, die Türen, super gefällt mir total gut, liebe Grüße Birgit

    Reply

  • enscrappersbekendelser

    |

    Oh, wow it’s SO über cool. Thanks for the inspiration :)

    Reply

Leave a comment

Maya Road Guest Designer Art Bag

So stoked that I was asked to be a guest designer for Maya Road.

I had heaps of fun creating this art bag using the Maya Road Alterable Canvas Messenger Bag .

I added a page from the  Maya Road Canvas Flag Banner to create the pocket.  I used lots of Maya Road Mists to get the bold colorful front of the tote.

The Deborah Chipboard was my stencil for the word “Art bag.”

Love the colors and I love that the Maya Mists can be heat set – so they are awesome to use on  fabric!

I will show more of my projects for Maya Road in the next days :)

hugs

Nat

P.S.:

Comments (4)

  • Kathy Gledsdale

    |

    Really fun, love it!

    Reply

  • Sue Clarke

    |

    Super crafty and something that Julie might have made (in terms of using fabric):-)

    Reply

  • Lisa Flaherty

    |

    Super! And a great tip about heat-setting the mists so they can be used on fabric! I had no idea! Now the wheels are turning!

    Reply

Leave a comment

Second Floor Challenge #5: Found Object

Are you ready to take the second floor this time? If you have no clue what I am talking about- read all about it here :) The Second Floor Challenge

So today is our 5th Second Floor Challenge: Found Object

Click here to see what Julie did

Whatever that means to you or however it inspires you.  The prompt is simply meant to get you started.  The level of challenge you aim for is entirely internal and up to you.

Found Objects….Love them. What does this mean in the Art World?

Let me just quote Wikipedia: “A found object, in an artistic sense, indicates the use of an object which has not been designed for an artistic purpose, but which exists for another purpose already. Found objects may exist either as utilitarian, manufactured items, or things which occur in nature. In both cases the objects are discovered by the artist or musician to be capable of being employed in an artistic way, and are designated as “found” to distinguish them from purposely created items used in the art forms.”

But an found object could also just be something that you found!

My problem with found objects is, that I want to incorporate them in my work- but then I can’t get over me to use them. Because most of those objects are one of a kind findings at a flea market, a junk yard or something I have this “perfect moment” feeling. This leads to piles of stuff of objects that are desperately whispering “take me, take me!” yet….I am just ignoring it ;)
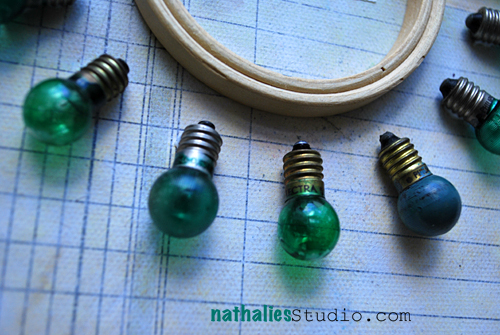
So the first floor was ….picking up stuff that I had in my pile of “found objects” to use. I didn’t make a huge effort – I simply picked the first three items I found on the pile.

Lightbulbs – mini lightbulbs, which i had found last in Australia at a junk yard, a little cross stitching hoop – I have no clue where this came from , and a vintage yarn spool which I found at a flea market in the States and says Kismet on the spool ends- FATE :)

I transfered some beautiful Prima Ledger Paper to a canvas fabric and then added the found objects on top of it, pit a frame on top and and knew I would love to give this my friend Katja who is a costume director and made me my favorite clothings in my wardrobe :) (If you are ever in Hamburg for longer and are looking for awesome tailored clothes – let me know !)

But what I didn’t know for two days before I glued it down, was…what else and which paint media I should add. It was taunting me. Every time I passed  the project walking by…I thought…”I like it- but mmmmhh what am I going to add to it?”. I took everything apart, arranged everything differently and yet…in the end I would end up with exactly the same design as before. And walk out of the studio, sighing again…

And then…I slapped my hand against my forehead hard today…still have some fingermarks…”Mc Fly…you like it as it is, so just glue all down and leave it” . It is OK to not use paint media (pssstttt….I used gel medium but don’t tell anyone ;) )

What I learned from this challenge:

  1. It is ok to use stuff from the pile of found objects…it is not even noticeable that something is missing.
  2. The frame hiding underneath a stretched canvas is a beautiful thing.
  3. It doesn’t kill me to not use paint on a project.
  4. Less is sometimes more
  5. Projects like this are extremely hard to photograph– it looks so much better in real life …sigh
  6. I am cheating and even lie in my blog post since I actually not used the first 3 things I found in the pile…my hand magically wandered over the Dresden dolls…because seriously they need to be on a really really cool project, I haven’t even dreamed of yet ;)

If you’d like to leave a link showing off what you did in response to this challenge, here’s the linky list:

add your own creations inspired by our 2nd Floor Challenge: Found Object

have a wonderful day

hugs

Nat

Comments (12)

  • marjiekemper

    |

    That’s so flipping cool… love how your mind works to come up with the bulbs around the sewing gizmo (forget the name of that thing but I had one as a little girl when my grandmother taught me how to cross-stitch).

    Reply

  • Melisa

    |

    Wonderful collage! So smart of you to realize it didn’t need anything else. I just found this challenge. I wonder if I have time to make something? I pick up lots of found objects to use in my art but have trouble using anything I feel is special or I can’t get more of. I just tend to hoard.

    Reply

  • Catherine

    |

    love love love — the green lightbulbs are awesome! I have a LOT of found objects I can’t bear to use hoping I can find a few minutes to do something for this with them ;-)

    Reply

  • misty

    |

    You are so funny! I thought that I was the only one who can not tell a lie and admit to it after saying it! This is awesome…not your normal style but still totally awesome!

    Reply

  • Lisa Flaherty

    |

    Great piece, and great lessons. I can understand how it took great restraint to make it to the 2nd floor with this piece, instead of skipping merrily down your painty, first floor hallway! :) Love how you applied that cool spool and the thread especially!

    Reply

  • Cindy Kotora

    |

    Very interesting piece! So different from your usual style. How did you transfer the Prima paper? TFS

    Reply

  • Sue Clarke

    |

    I have this wonderful collection of special items that I may use some day.
    I also have that attitude that it must be super special (as if I won’t find more “special” items in the future). Like what you did and how you used the light bulbs.

    Reply

  • jane w.

    |

    awesome- those tiny bulbs are so cool!

    Reply

  • linda

    |

    What a fabulous found object piece of art! Love everything you post, but especially when you give the thought processes behind what you’ve created; would love to see more about your thoughts behind mixed media pieces your create. I’ve learned so much from your blog. Thank you for your generous spirit!

    Reply

  • Jean Marmo

    |

    I love the list of things you learned! I could take a lesson from yoU!

    Reply

    • Martha Richardson

      |

      Oh man…a week off the internet and look what I missed…lots of catching up to do but I’m up for it ;) Love this challenge!

      Reply

Leave a comment

Spinning, Pouring, Stringing or…How to turn an LP into a Birthday Card

Lot’s of birthdays of dear friends are coming up the next couple weeks finally to celebrate the big 40 was my friend M.

Well – while playing and showing possibilities with some paint media for some Bonus Techniques for Lesson 7 of the Über*Media Acrylic Paint Online Workshop I created this LP Birthday Card for him

This photo is cracking me up at the party – funky M. on the left and funny crazy S. on the right- LOL ;) BTW- that was not the reaction to the birthday card – snigger ;) I think I said something stupid…LOL

It was a fun party…just a bit too cold outside …but we are true Hamburgers…if it says it’s May on the calendar it is time for BBQ outside, no matter how the weather turns out and even if it is a chilling 8 C (46 Fahrenheit) ;)

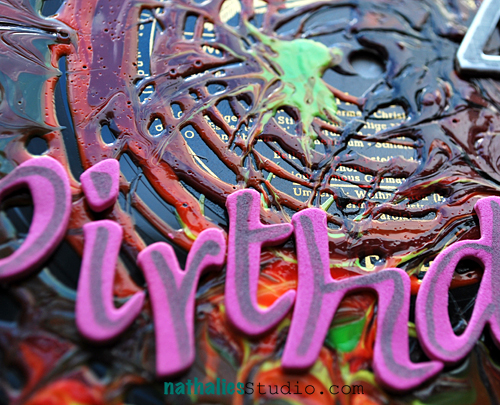
Here are some details of the LP

It was fun working with Liquitex Acrylic Paints, Inks, String Gel and Pouring Medium – and there are so many fun things you can create with it.

What was the most “unusual” material you ever created a birthday card with?

Have a gorgeous day

hugs

Nat


Comments (6)

  • Sue Clarke

    |

    Rock’in b-day card for sure Nat. I used b-day candles on a card once. Not unusual per say but I usually put them on the cake (not the card).

    Reply

  • Bev W.

    |

    This is totally cool! Looks like a lot of fun! I think you have me beat as far as the most unusual..lol! Love it Nat:)

    Reply

  • Riikka

    |

    Great card – love the texture of it!

    Reply

  • Marja Seidemo

    |

    well, it wasn´t really a birthday card, more a Hello-card to a friend but years ago i filled a vintage glove with plaster and before it had set i put a letter in a roll with a satin ribbon around it, in the glove/hand. It was sooo heavy and very expensive to ship..It was worth it though, he got very happy:-) I think he kept it for all these years..

    Reply

    • nathalie-kalbach

      |

      How cool Marja! I am sure that was REALLY heavy- lol- but the idea is so cool – think about putting it on a canvas!

      Reply

Leave a comment