Creative Squad

True Blue – Josefine Fouarge


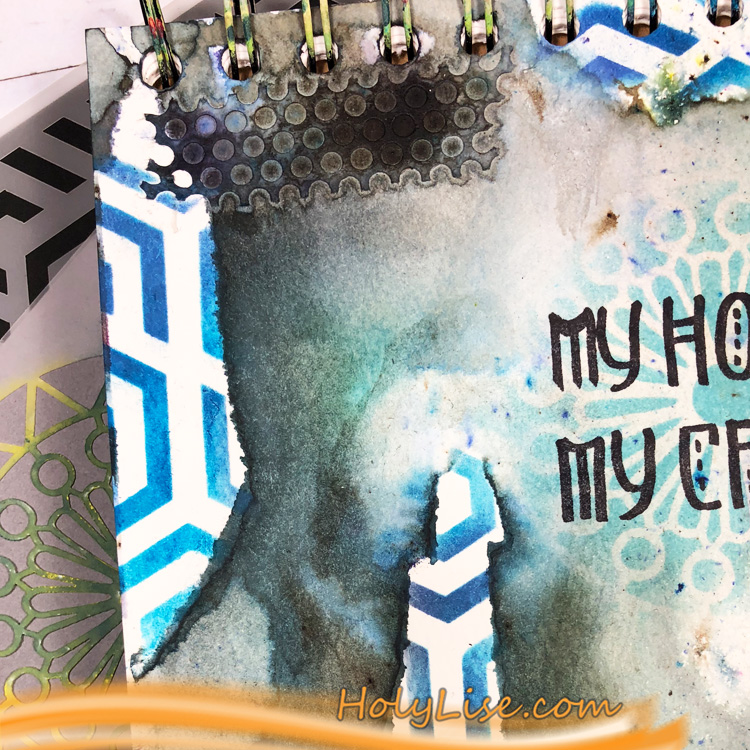
Hello my friends! Today is Tuesday so that means one of my Creative Squad posts! Here we have Josefine Fouarge sharing with us an art journal page that is a wonderful combination of colors and stamped and stenciled elements. Josefine uses my new Flower Maze and Valley Road stencils, and my Brownstone and My Home is My Castle stamps in this lovely composition. This month’s theme is: True Blue – Blue is the color of honesty and serenity. It’s calming and has even been shown to promote healing. It reminds us of the water and the sky. Let’s slow things down this month and bask in the tranquility of the color blue.


I could use some calmness this month. Life is catching up and finding those quiet moments is becoming a challenge. So, I’m looking forward to those healing effects from using the color blue (it’s probably more the process of creating itself that will do that for me ;) ).

I started by adding different pieces of tape to my journal page to create some texture for the background. I was hoping for more blue from the watercolor powders, but it turned out that there were a lot of green and purple pigments in there as well.
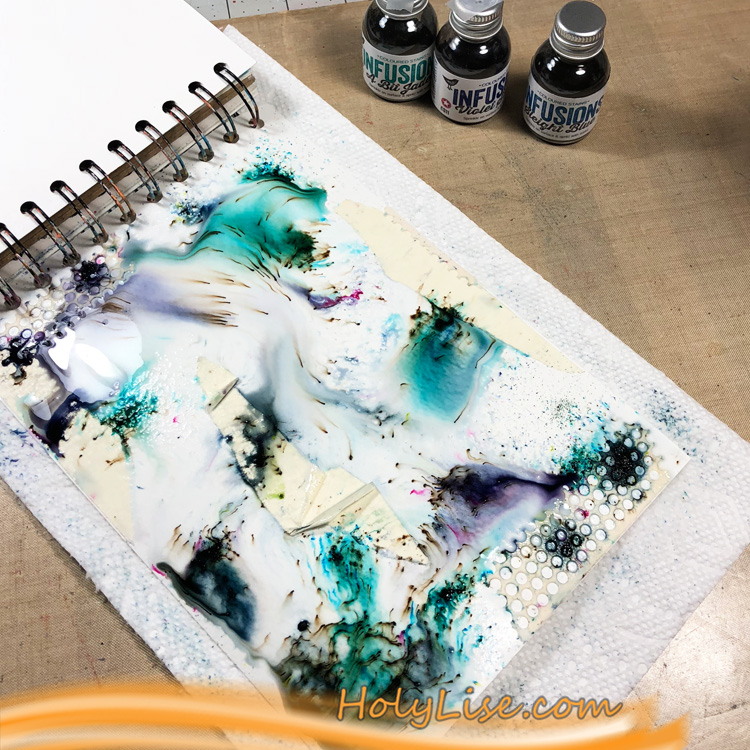
But that just made it more interesting, so I added powders and water in different layers, till I had the look that I liked. What I didn’t like was the tape that I used for the background, so I removed those, at least the majority of it.
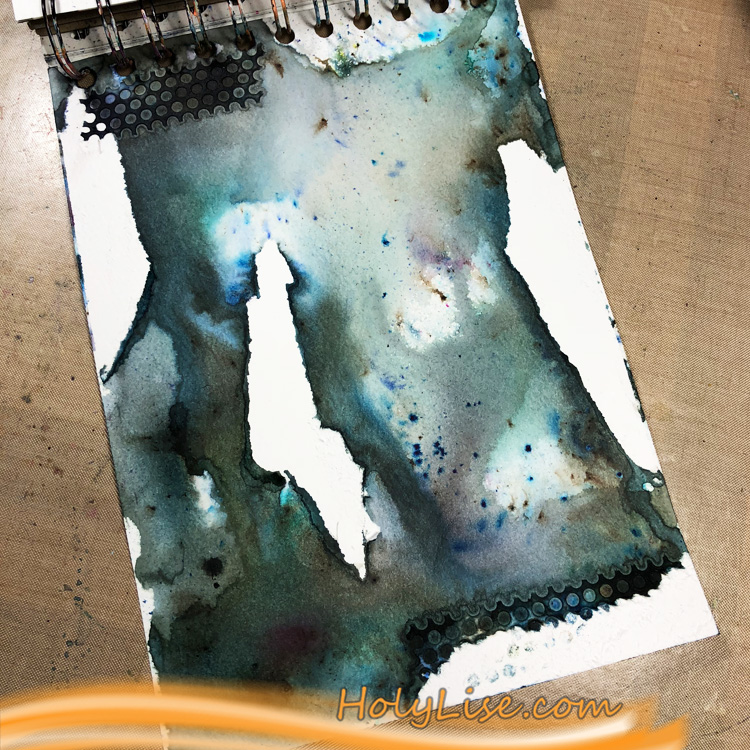
To decorate those now white areas, I grabbed the new Flower Maze stencil and blended a mix of Mermaid Lagoon Distress Ink and Blueprint Sketch Distress Oxide through them.
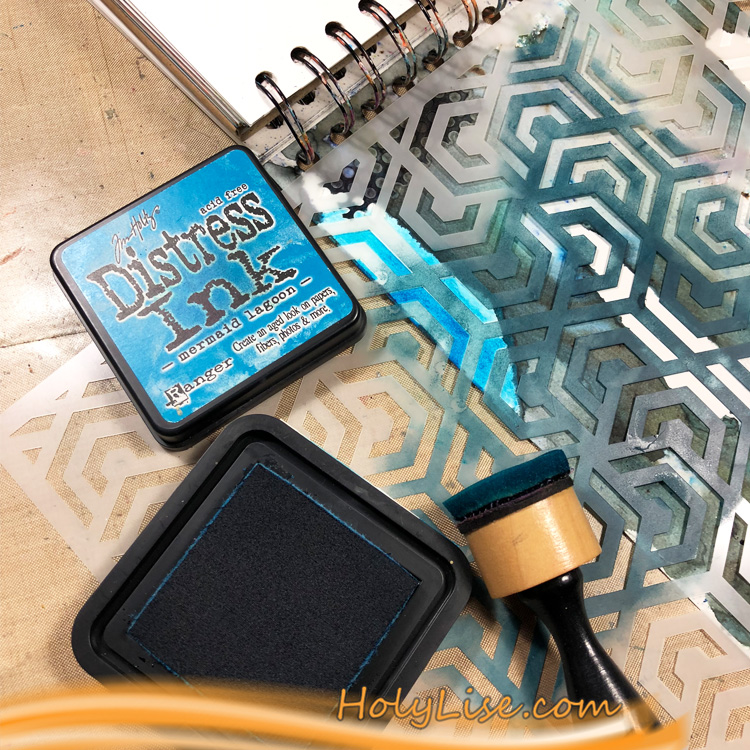
I made sure to blend the ink only in those white areas.
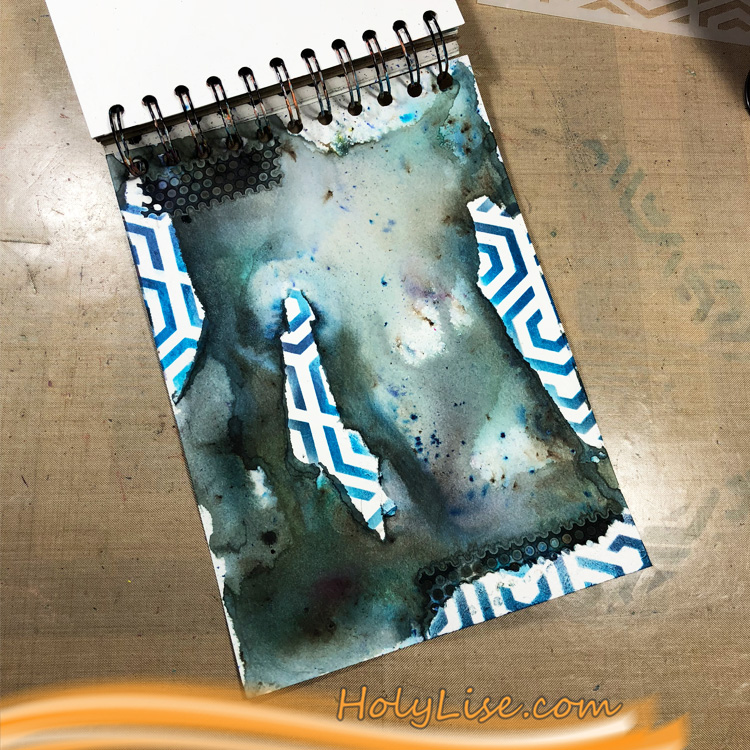
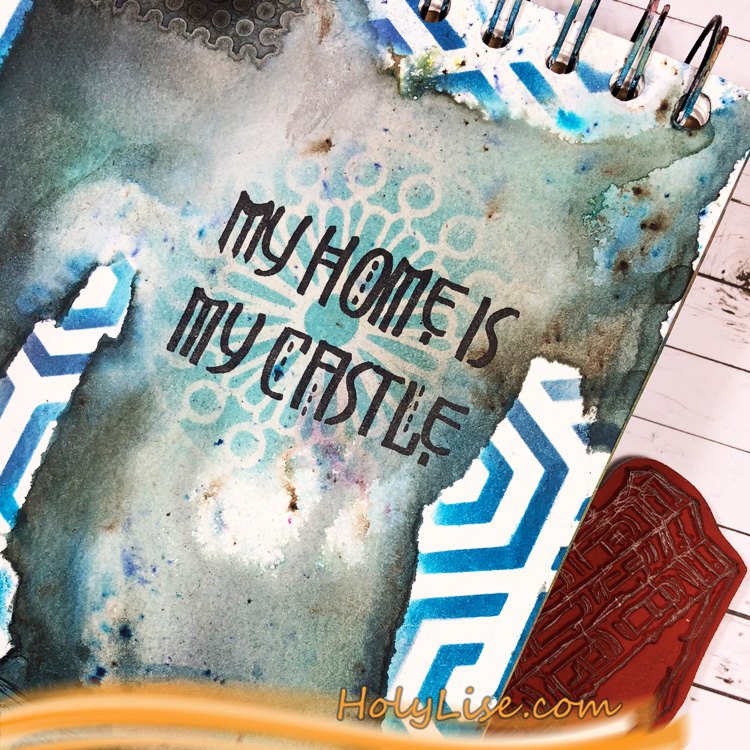
I already knew that I wanted to add the sentiment “My Home is my Castle” and I wanted it to pop a little against the background. A lighter blue blended through the Valley Road stencil helped me with that.
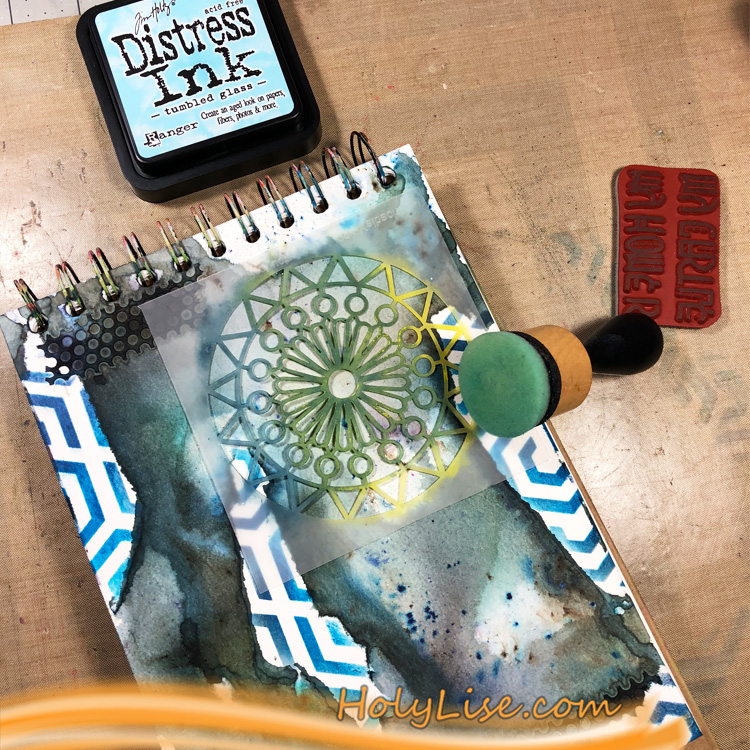
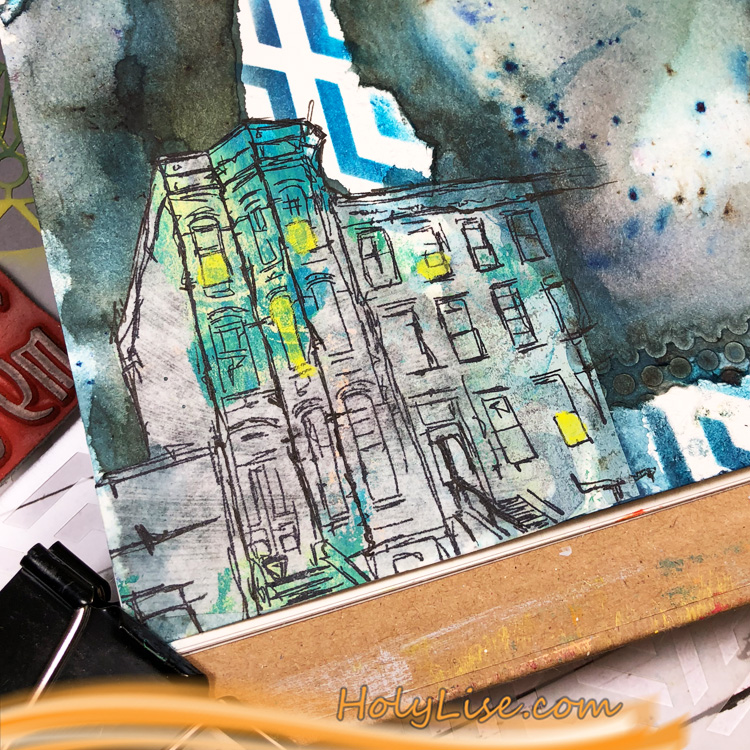
My home really is my castle and the place where I regenerate and calm down. In order to see the Brownstone stamp house in the background, I decided to stamp it onto a piece of tissue paper that had some clean up spots from a different project on it. Thankfully, they are mainly blue.
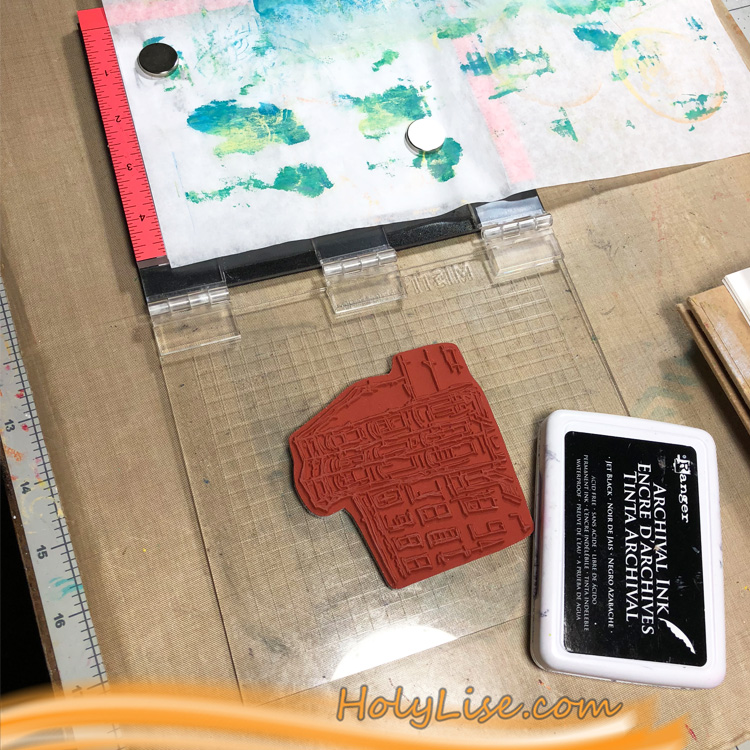
Just a few finishing touches everywhere and I was done with my grungy, blue art journal page.
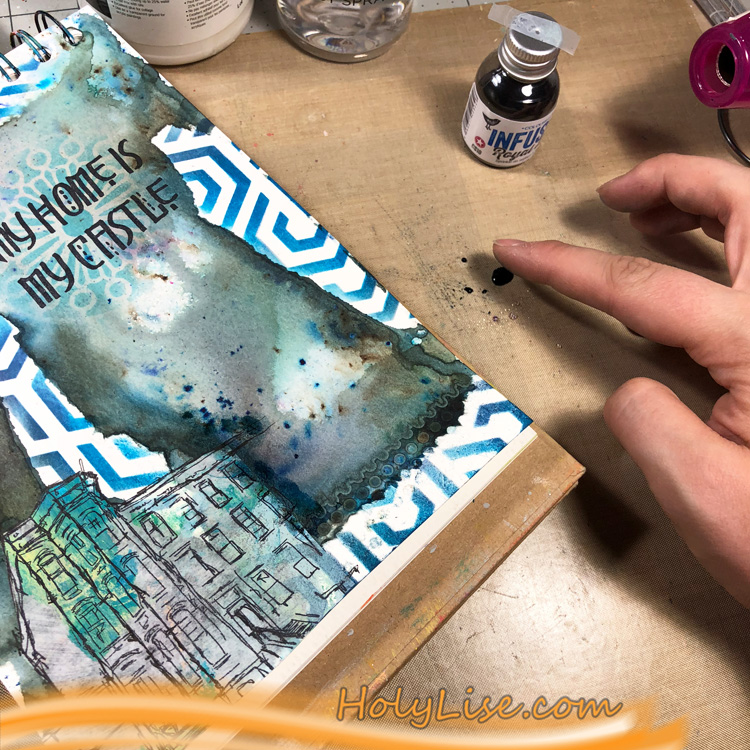
I really like the look of the Flower Maze stencil in the white areas.
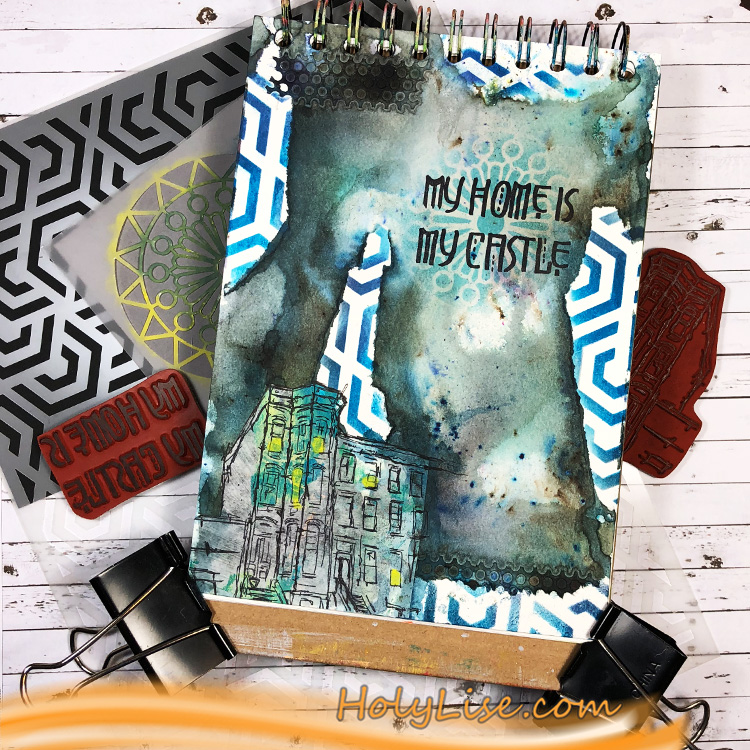
Here is the close up of the Brownstone. A few of the neighbors were home.
Thanks for stopping by and don’t forget to come back every Tuesday for more inspiration from the Creative Squad.


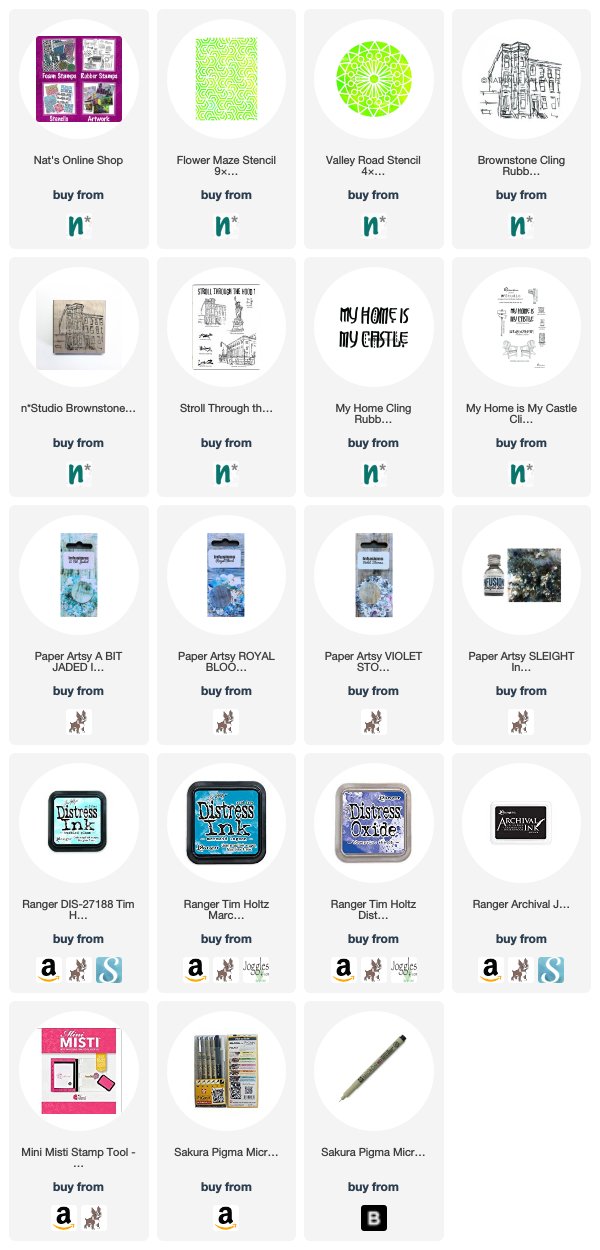
Thank you Josefine – I also love how that Flower Maze stencil pops! You can find all my stencils and stamps in my Online Shop. Here are some of the other supplies that Josefine used:


Feel inspired? Working on something yourself that you’d like to share?  I love to see how you interpret our monthly themes. Email me how you used my stencils and stamps with the theme and email me an image – I would love to share your projects in my next  “n*Spiration From Around the Globe“.

Leave a comment

True Blue – Tania Ahmed


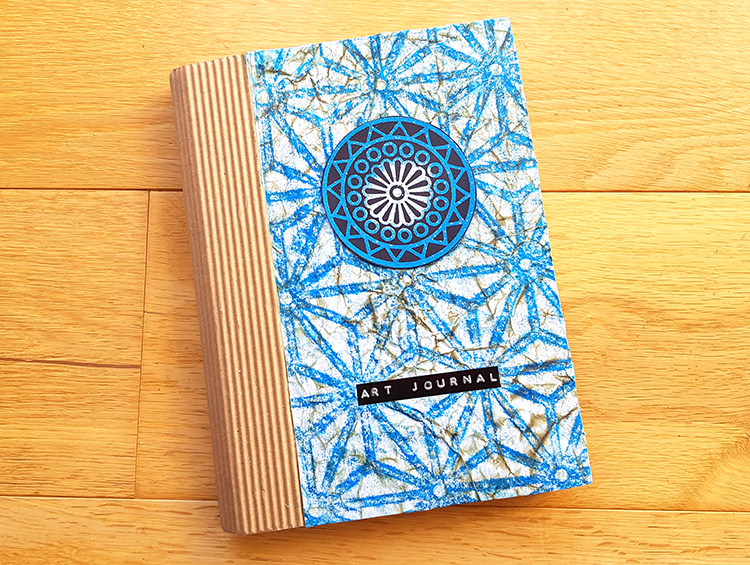
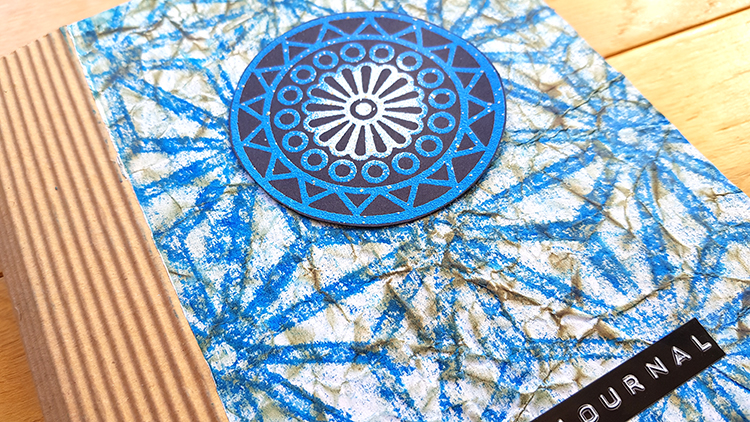
Happy Tuesday from my Creative Squad! Today we have a post from Tania Ahmed, sharing with us an awesome way to use my Star Struck stencil and Large Circle Jumble rubber stamps to decorate the cover of an art journal. Check out the video below to see Tania’s technique. This month’s theme is: True Blue – Blue is the color of honesty and serenity. It’s calming and has even been shown to promote healing. It reminds us of the water and the sky. Let’s slow things down this month and bask in the tranquility of the color blue.


Our theme this month was True Blue, and for us to use any of Nat’s new Stencil Girl designs which I had been looking forward to having a play with as soon as I saw the designs! Blue also happens to be one of my favourite colours and I use almost any excuse I can get to use it in my projects! :)

I had an art journal that I made last year in a workshop that I attended with Nat and her friend Birgit Koopsen which I still use to test new techniques. I still hadn’t made a cover for it, so I decided that it was about time that I decorated it.

I made a video showing how I decorated my art journal cover:

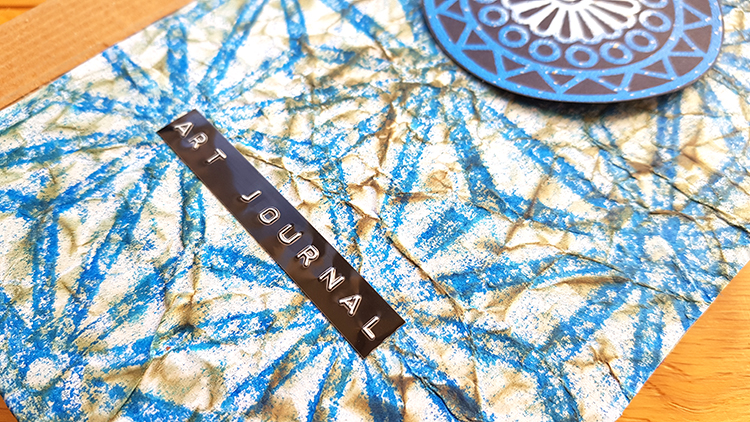
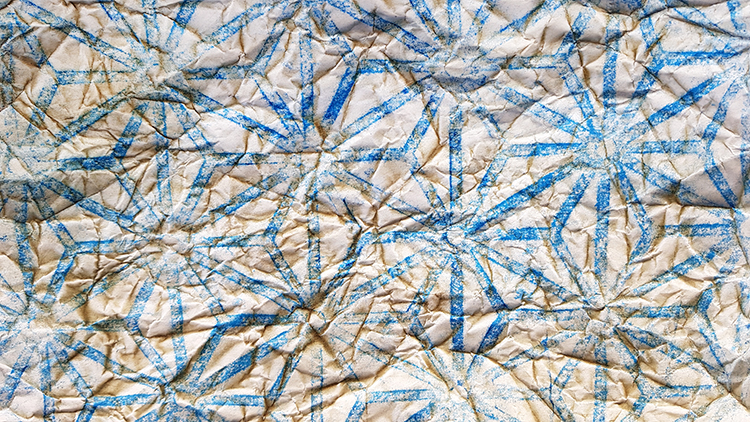
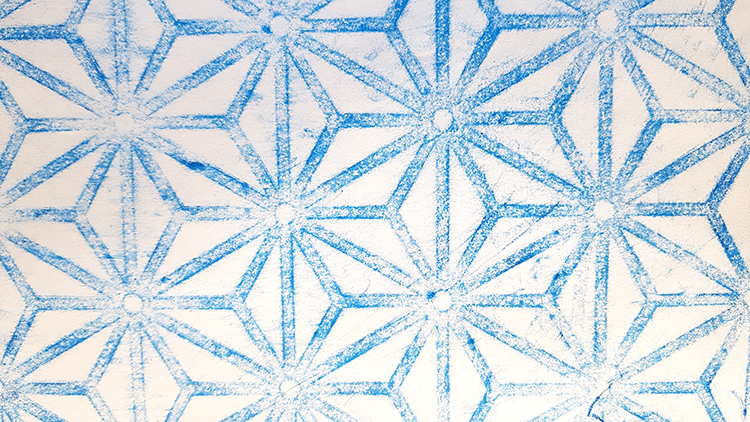
When I saw the Star Struck Stencil, I was immediately reminded of Japanese fabric and I knew that I wanted to create a print which looked like vintage cloth. I had an image of furoshiki wrapping (Japanese art of wrapping gifts and parcels with fabric) in mind and I set out to see how I could create a project as an homage to the technique.

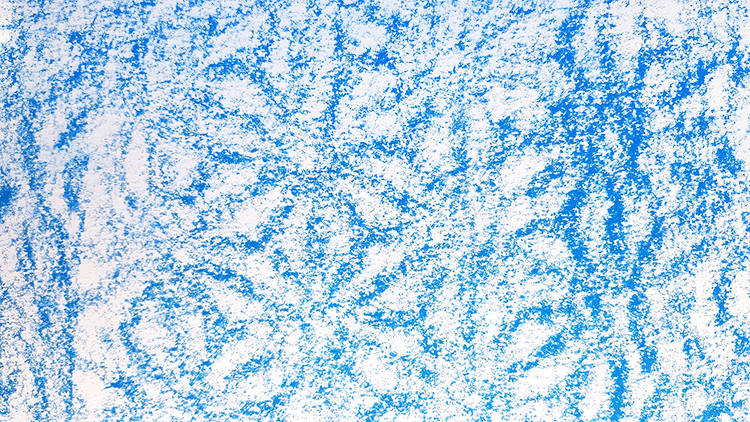
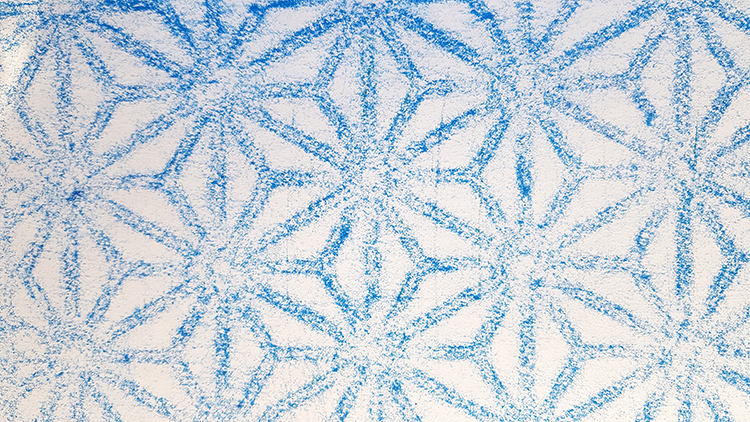
I started by taping down a sheet of printer paper to the stencil and created a rubbing of the stencil using Faber Castell Gelatos. You can create rubbings using pencils, pastels, crayons, anything that you have in your stash! Experiment with different pressures and papers to see what effects you can get. I tried the technique on printer paper, cartridge paper and thick cardstock. The thinner the paper, the better impression you will get!

Printer paper

Cartridge paper

Heavy cardstock

Thank you so much for watching and reading and have a great day!


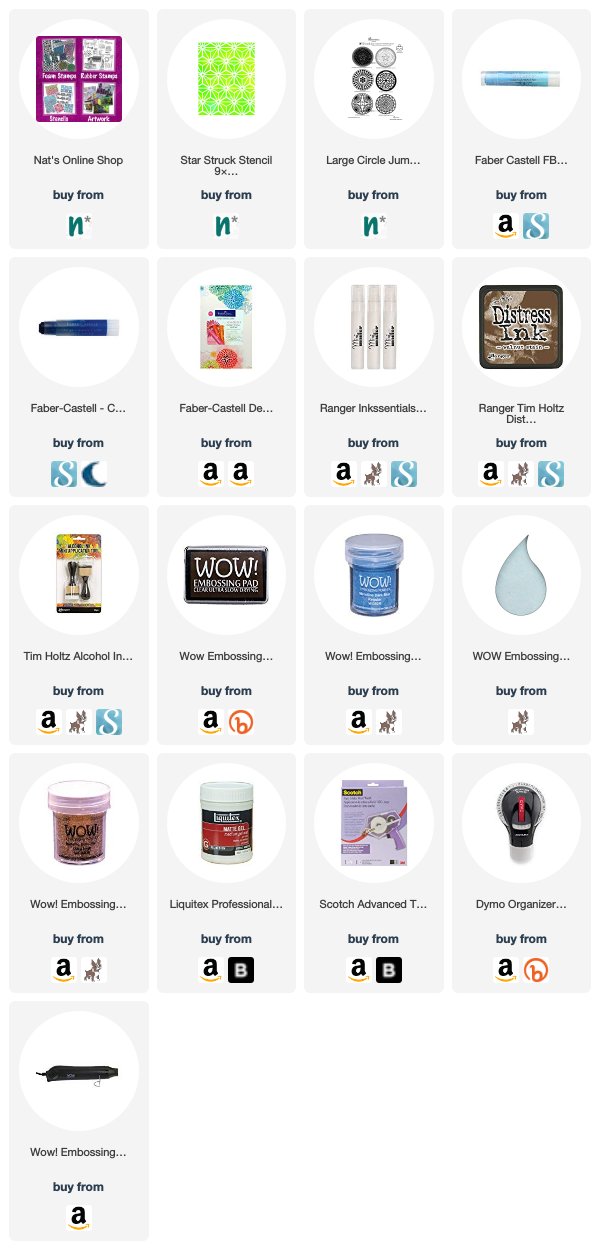
Thank you Tania! I loved watching how the stencil rubbing transformed – it really does remind me of the textiles I saw in Japan. You can find my Star Struck stencil and Valley Road stamp in my Online Shop. Here are some of the other products that Tania used:


Feel inspired? Working on something yourself that you’d like to share?  I love to see how you interpret our monthly themes. Email me how you used my stencils and stamps with the theme and email me an image – I would love to share your projects in my next  “n*Spiration From Around the Globe“.

SaveSave

Leave a comment

Never Stop Dreaming – Maura Hibbitts


Welcome to a post from Maura Hibbitts from my Creative Squad! Today Maura is sharing with us an art journal spread that reminds us of all the strong momen who have come before us! Maura is using my Mesa Verde and Downtown stencils and my Actually I Can stamp set. This month’s theme is: Never Stop Dreaming – This month we’re sending a message of confidence and empowerment to all those in the world (near and far and maybe even you!) who have been told “You can’t”, “That’s not possible”, or “Not you”. Actually we can and we will! And we’ll never stop dreaming either :)


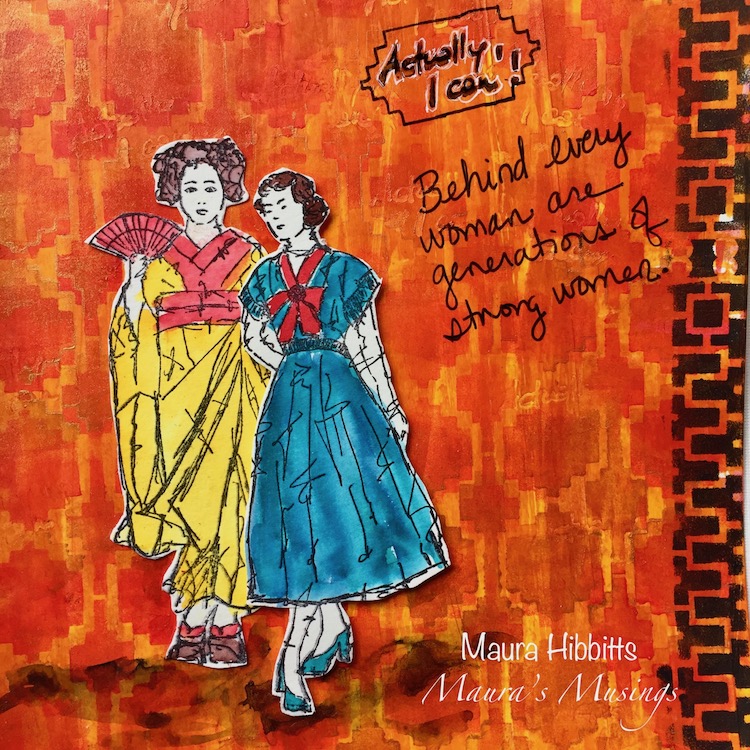
When I looked at this month’s theme, I began to think about all the dreams we women have in our lives…family, friends, career, health, financial, pets…so many things touch our lives. I know my mother encouraged me to become the person I am today, and I am thinking her mother did the same for her. It could be our relatives cheering us on, or friends, but just think of the many generations of women behind each of us who have believed in the next generation.

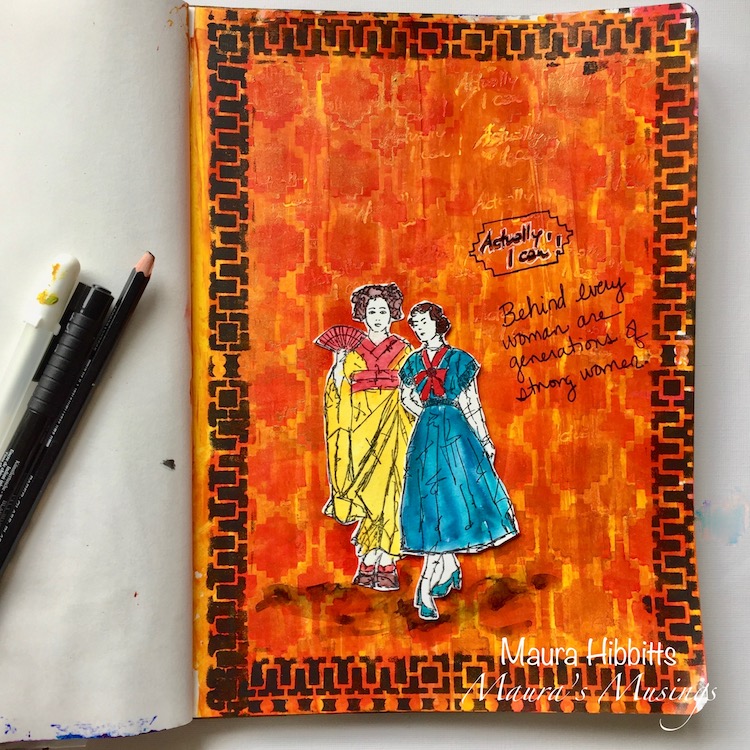
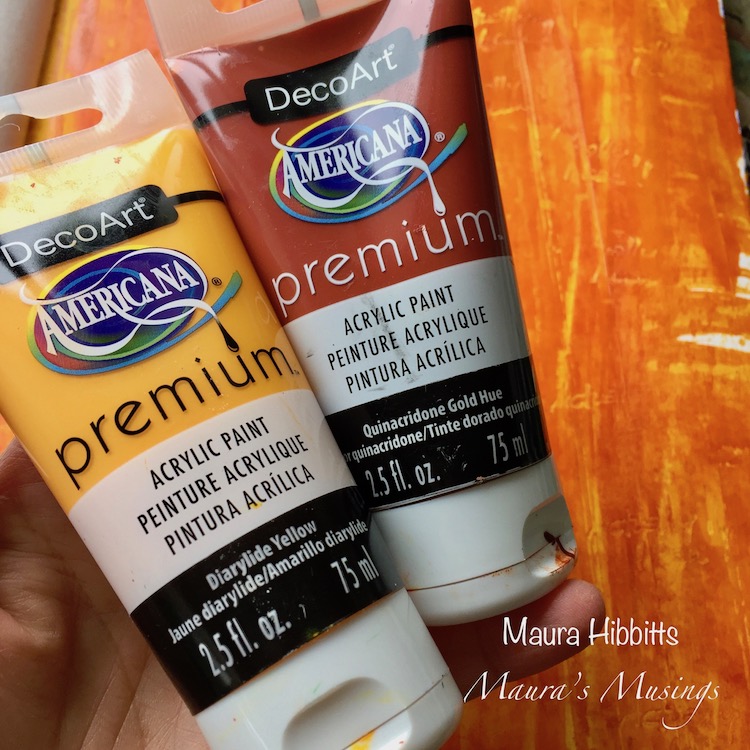
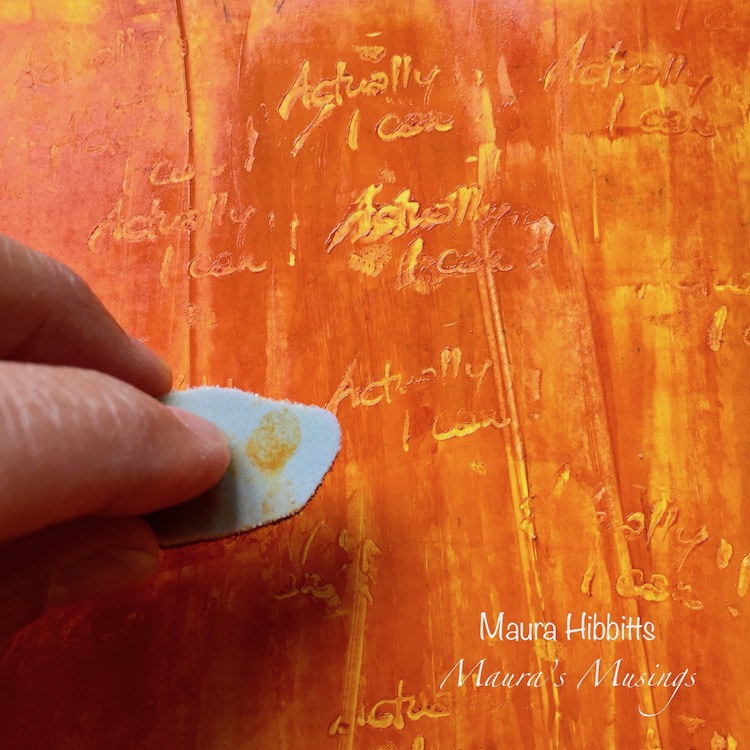
I headed to my art journal, and scraped a layer of Diarylide Yellow and Quinacridone Gold down my page with a key card. Before the paint dried, I stamped in Nat’s “Actually I can” rubber stamp a number of times.

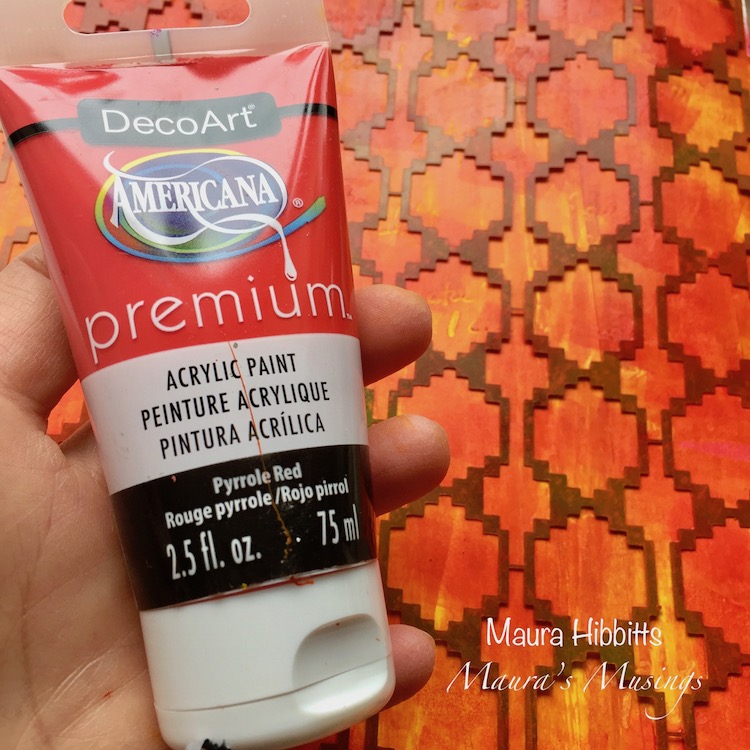
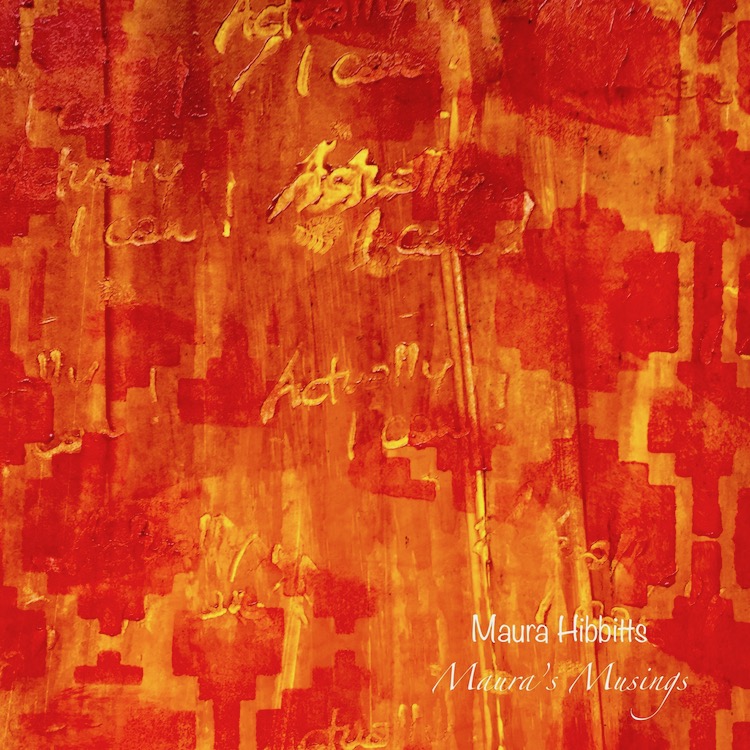
I added my next layer using the Mesa Verde stencil and some Pyrrole Red, using a light touch.I worked in a random fashion and left some areas open.

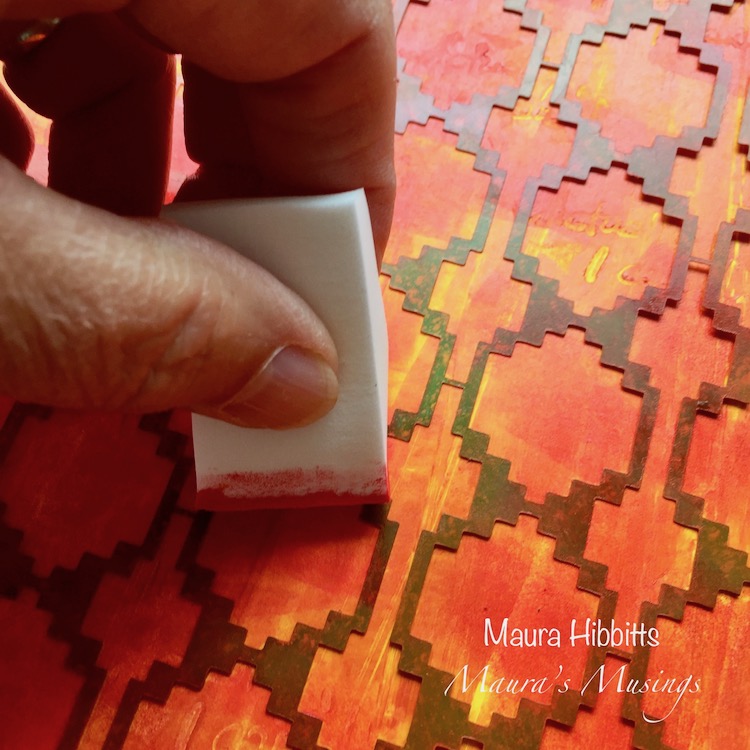
Then, I shifted the stencil down slightly and sponged in a layer of gold. Now I have a shadow effect.

Time to add a border to my page with Nathalie’s new Downtown stencil. As you can see, I just used part of it to make my border with black.

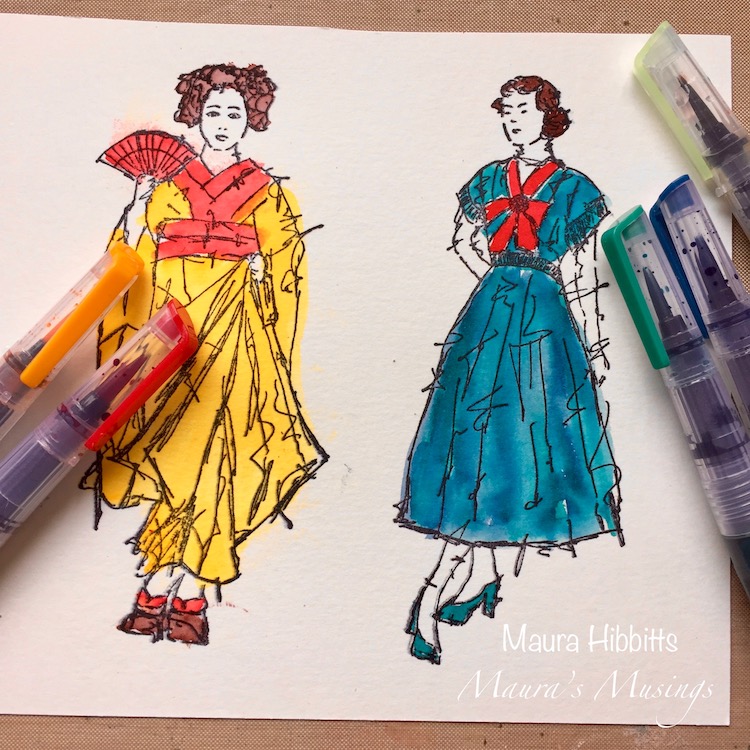
Now comes the fun part – stamping and coloring these two lovely ladies, Maiko and Millie. I wanted to tie in some of the same colors in both of their outfits to help link them together.

Time to put it all together! I put Maiko, in traditional dress behind Millie, to represent the previous generations of women. I stamped “Actually, I can” with black ink, and outlined it a bit with a white pen, and added my own thoughts. I also used the Mesa Verde stencil with the black pen to create the word box, by outlining one side, and moving it to “stretch” it. Finally, a shadow under the ladies to create a bit of depth with a graphite pencil and water brush.

Think of the many generations behind each one us, and Never Stop Dreaming!


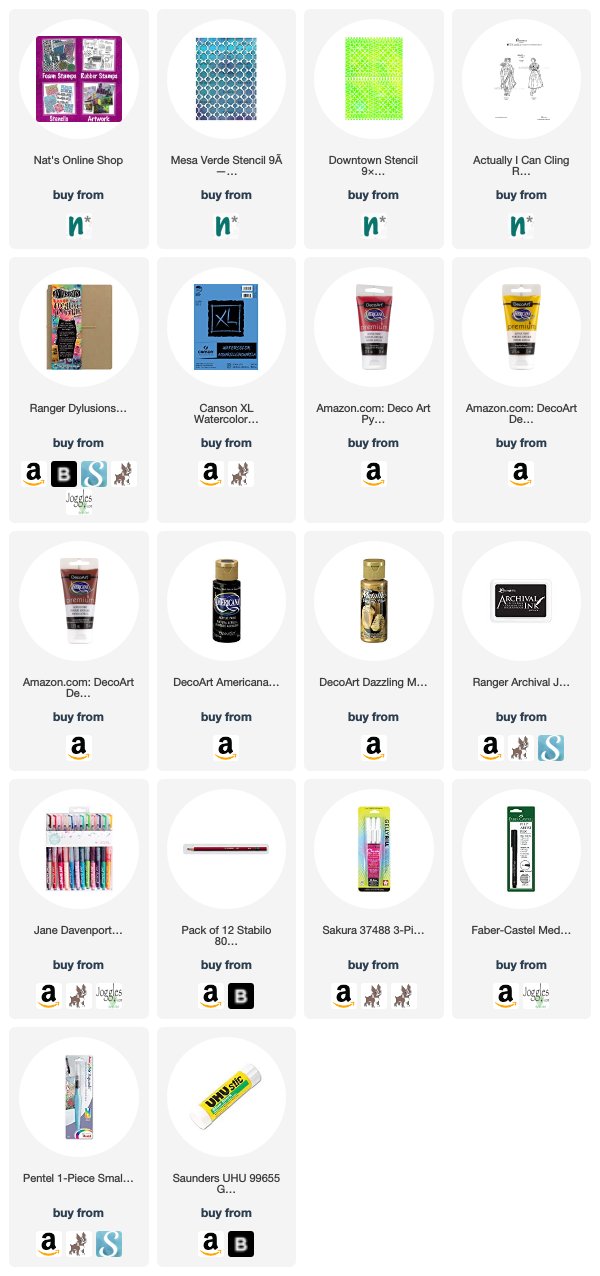
Thank you Maura for such a thoughtful project! You can find my stencils and my stamps in my online shop. Here are some of the other supplies that Maura used:


Feel inspired? Working on something yourself that you’d like to share?  I love to see how you interpret our monthly themes. Email me how you used my stencils and stamps with the theme and email me an image – I would love to share your projects in my next  “n*Spiration From Around the Globe“.
Leave a comment

Never Stop Dreaming – Jennifer Gallagher


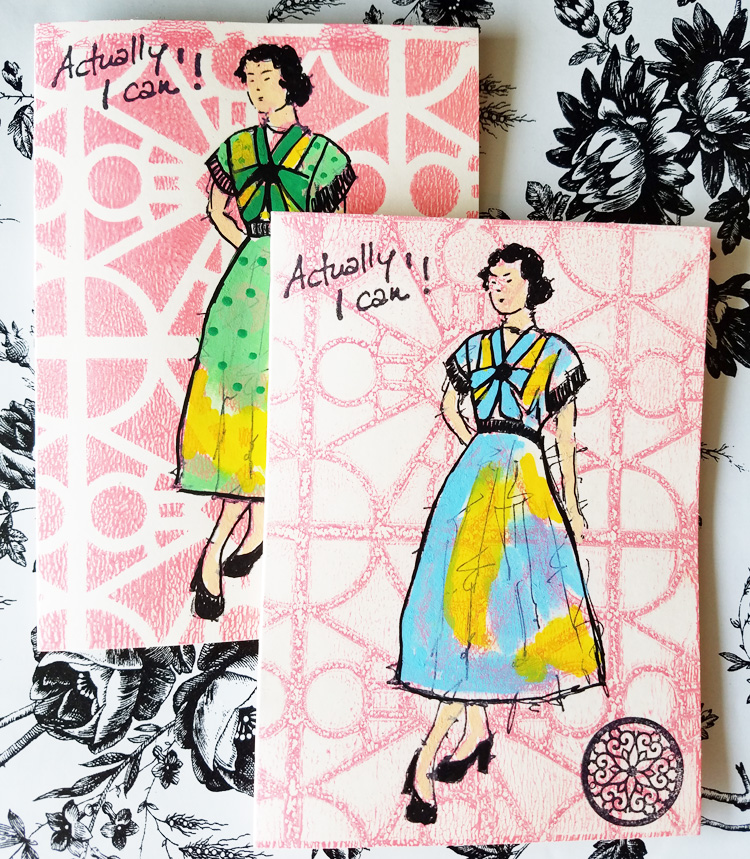
Today we have a post from Jennifer Gallagher from my Creative Squad. She is sharing some really nifty paper doll inspired cards that use my new Millie and Actually I Can stamps. This month’s theme is:  Never Stop Dreaming – This month we’re sending a message of confidence and empowerment to all those in the world (near and far and maybe even you!) who have been told “You can’t”, “That’s not possible”, or “Not you”. Actually we can and we will! And we’ll never stop dreaming either :)


This month we are creating with positive affirmations and the idea of female empowerment in mind. While pondering a fun way to use Nat’s new Actually, I Can stamp set, I was reminded of all of the fun I had as a child playing with paper dolls. I would spend hours as a child daydreaming of parties with ladies wearing fancy clothes and shoes while changing the outfits on my paper ladies. This stamp set takes me right back to those days. I was inspired to create an encouragement card that plays on the idea of a paper doll.

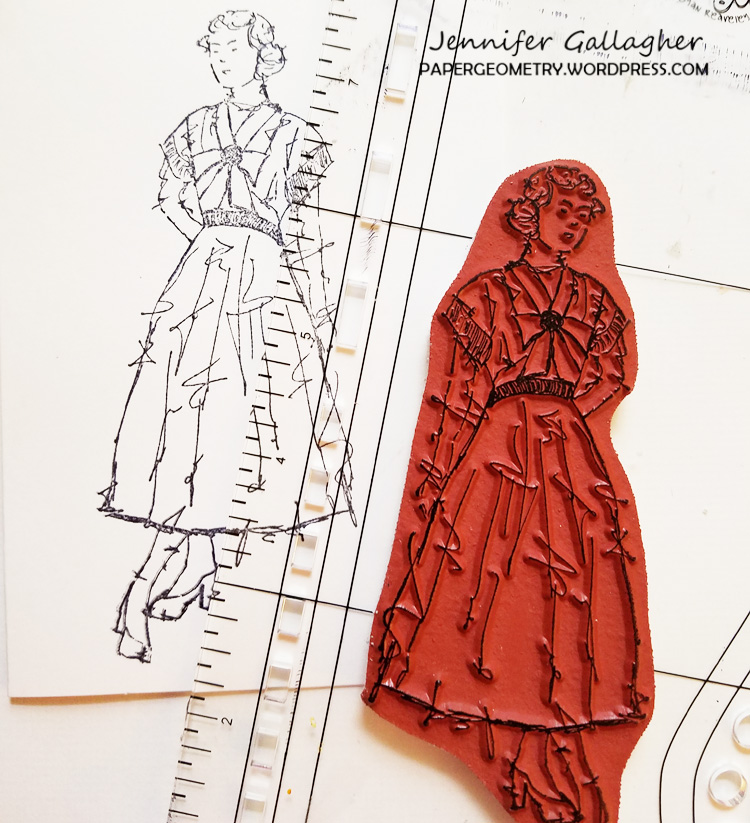
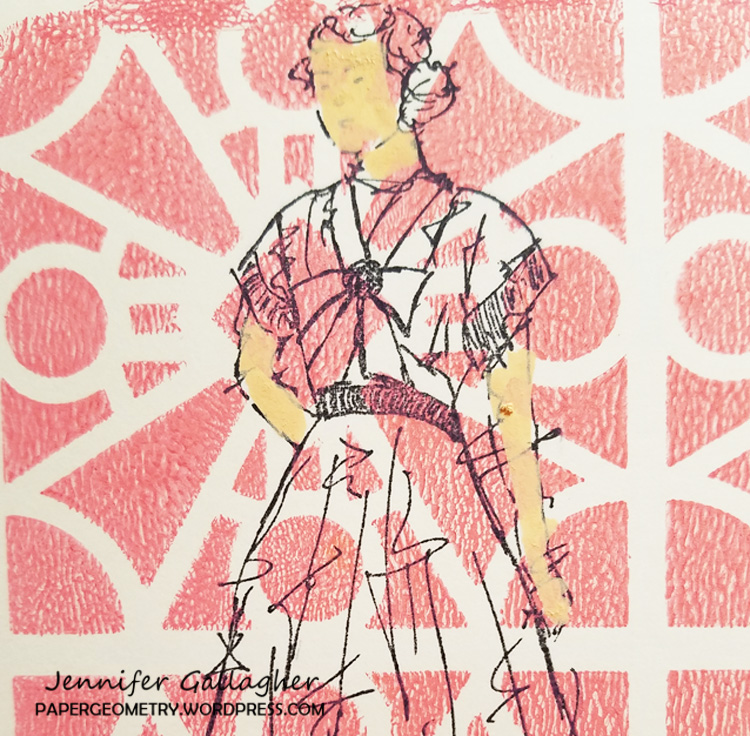
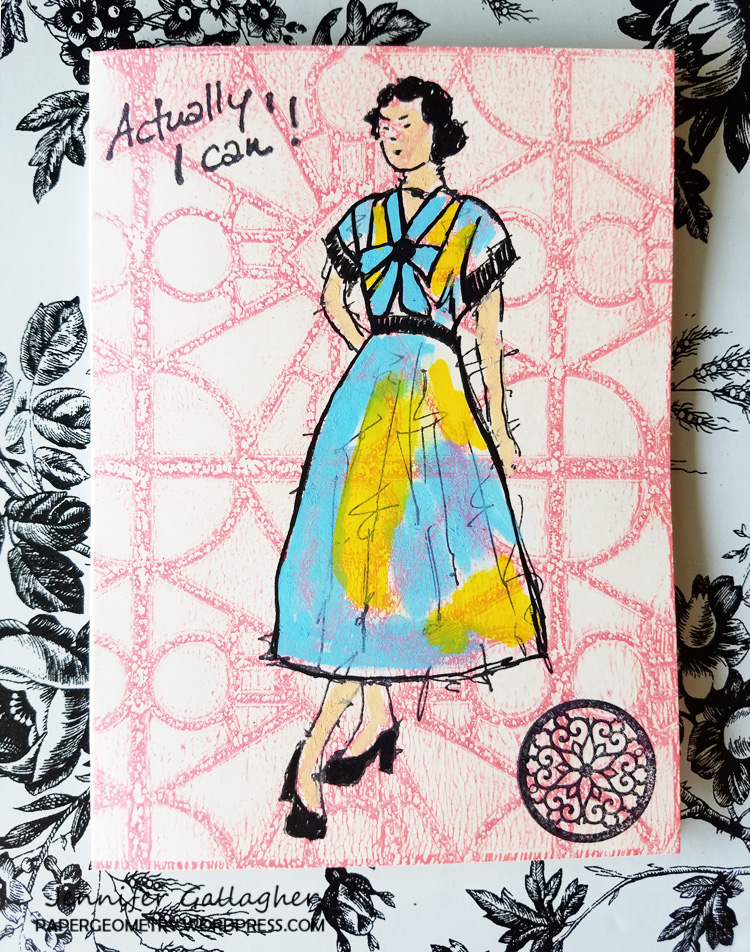
I began by stamping the Millie stamp in the center of a 4 x 5.5 inch ivory card base with black archival ink.

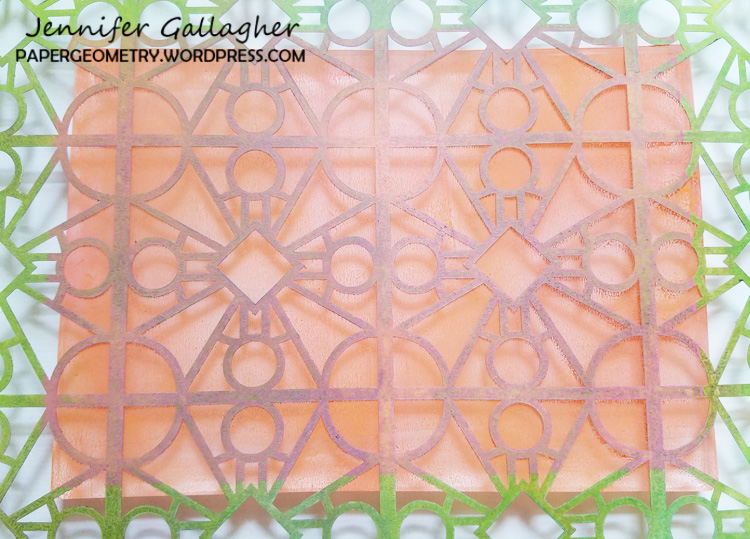
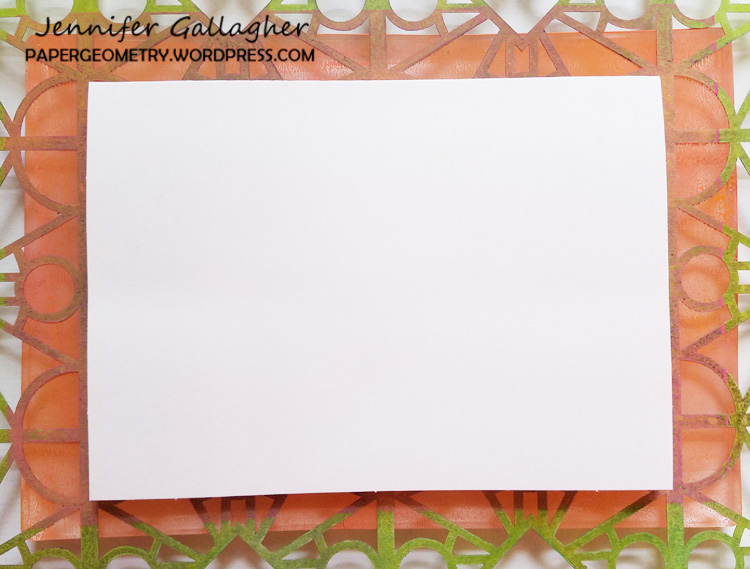
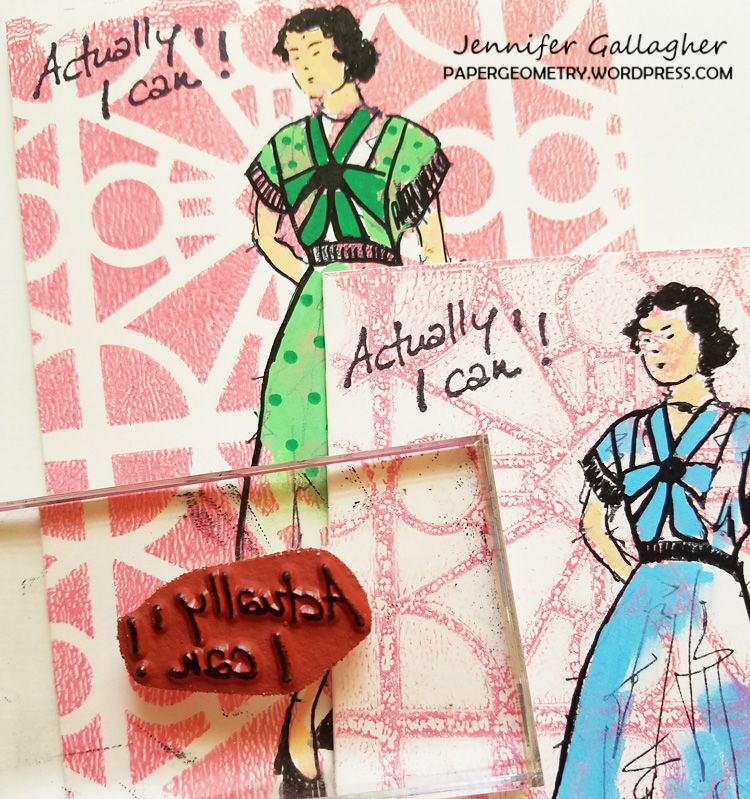
Next, I brayered out a mixture of Dina Wakley Media Acrylic paint in cheddar and magenta onto my 5×7 gel plate. After placing Nat’s Buenos Aires stencil down onto the paint, I pressed my stamped card face on top of the stencil and pressed evenly across the surface.

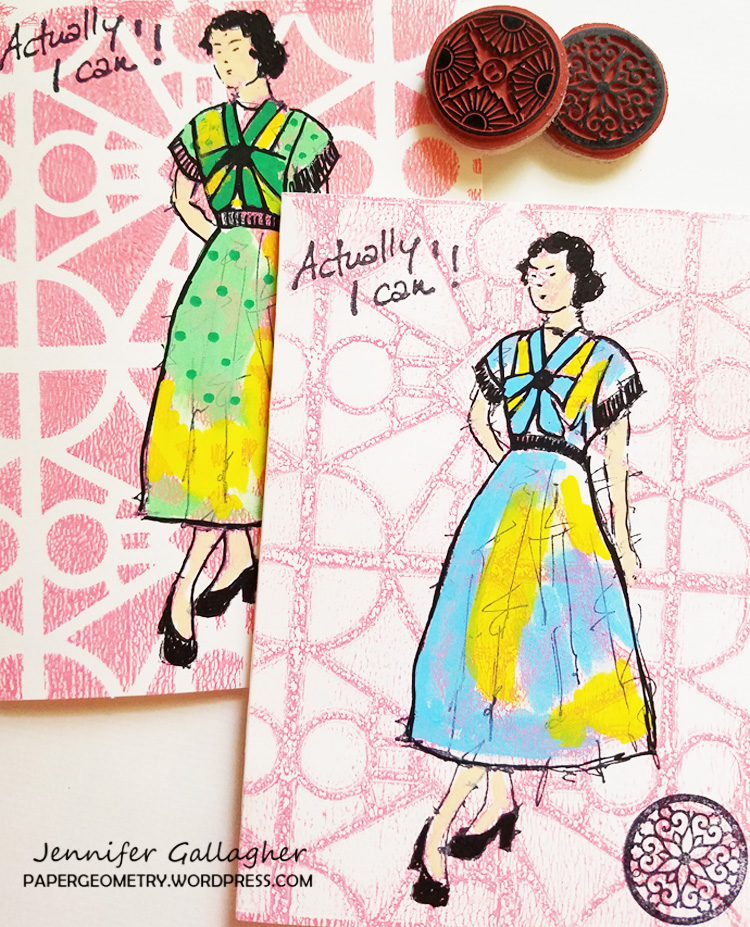
I pulled up the stencil to find what is referred to as the “ghost print”. I laid a second card base down to pull that leftover paint off the plate.

Once the gelli print is dry, I colored in the image starting with the skin using a Posca Pen in light orange. Her hair, dress, and shoes were also colored in with various posca pen colors. You can really have a lot of fun with this step adding stripes, polka dots, etc. I finished off the front with the “Actually, I can” stamp in the upper left hand corner and a stamp from Nat’s Small Circle Jumble stamp set in the lower right corner.

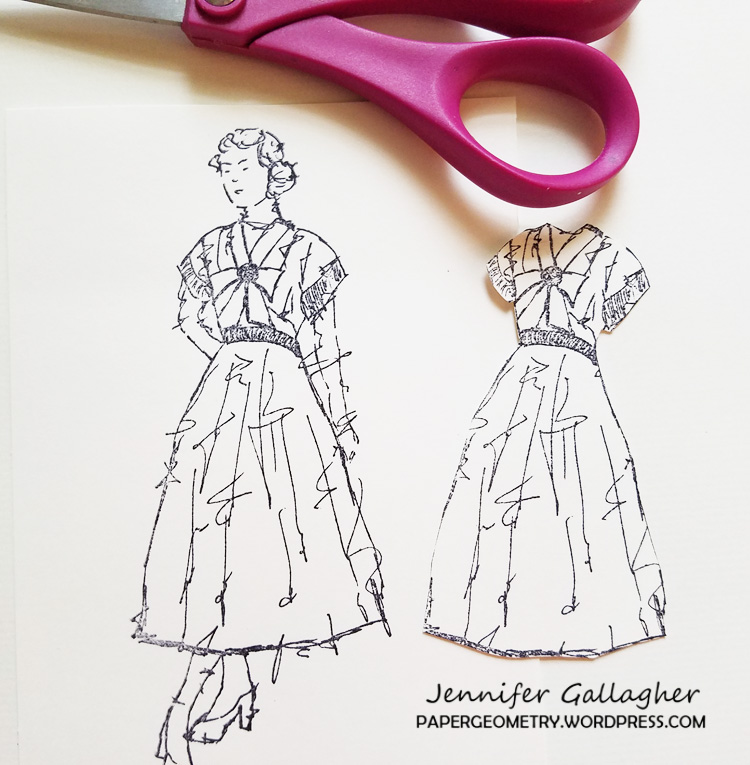
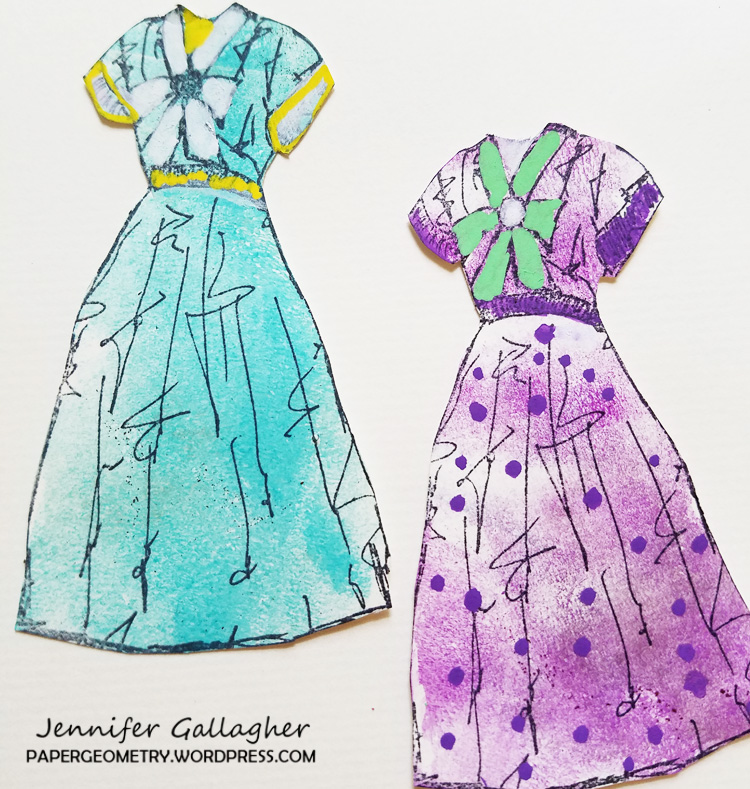
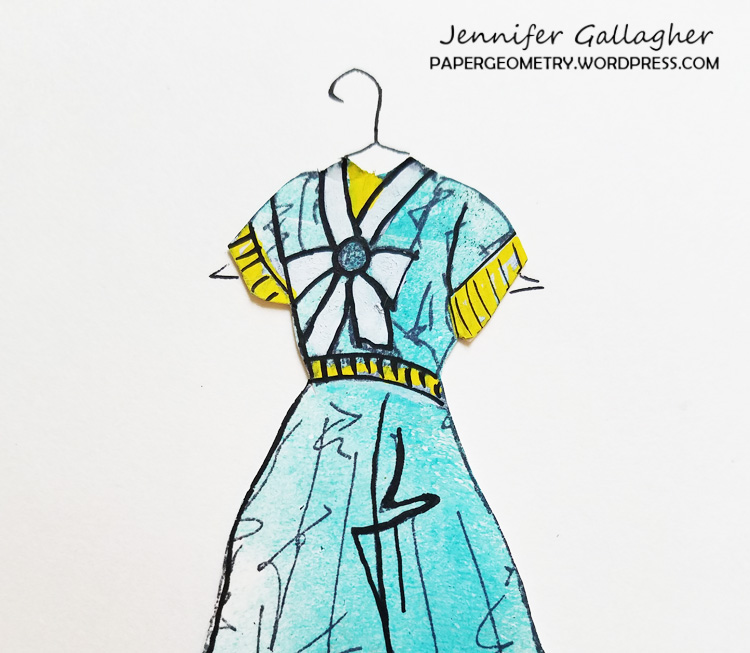
I took a few extra card bases and cut them in half. Then I stamped the Millie image on the front of each one. Next, I fussy cut around the edges of her dress and colored them in with my Posca paint pens to create a few changes of clothes for Millie. Once dry, I placed scor-tape on the back of the dresses and added them to the insides of my two cards.

I took a Sakura Gelli Roll pen in black and drew a clothes hanger for Millie’s dress. Later, when I send it I will write in an inspirational quote for the recipient beside of her new fancy party dress.

I hope you have enjoyed my paper doll inspired cards. Be sure to check back each Tuesday to see more from Nat’s Creative Squad.


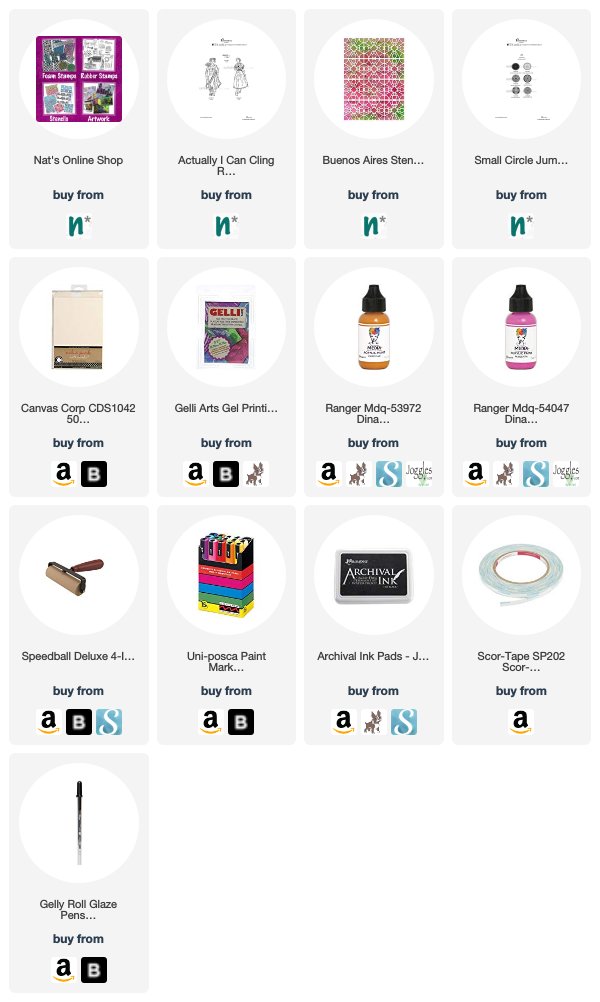
Thank you Jennifer! These are so fun and I know who ever receives them will love playing with Millie’s wardrobe :) You can find my new Millie and Actually I Can stamps, along with all my products, in my online shop. Jennifer also used some of the following supplies:


Feel inspired? Working on something yourself that you’d like to share?  I love to see how you interpret our monthly themes. Email me how you used my stencils and stamps with the theme and email me an image – I would love to share your projects in my next  “n*Spiration From Around the Globe“.
Leave a comment

Never Stop Dreaming – Josefine Fouarge


Today we have a post from my Creative Squad. Squad member Josefine Fouarge is sharing with us a fun art journal page that really shows off my new Millie rubber stamp, and my Hamburg and Lily Wallpaper stencils. Josefine was inspired by this month’s theme: Never Stop Dreaming – This month we’re sending a message of confidence and empowerment to all those in the world (near and far and maybe even you!) who have been told “You can’t”, “That’s not possible”, or “Not you”. Actually we can and we will! And we’ll never stop dreaming either :)


For me, creating is all about expressing myself and experiencing with new mediums, styles, etc. I love to sit down and come up with several ideas of how to use a specific stamp or stencil – sometimes I see a finished project, sometimes I just see the beginning – and then just start creating.

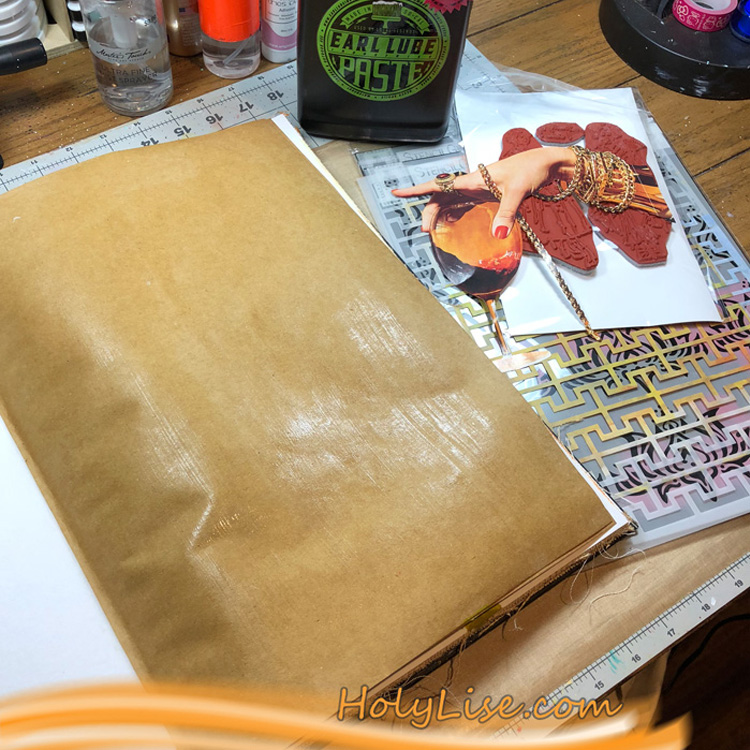
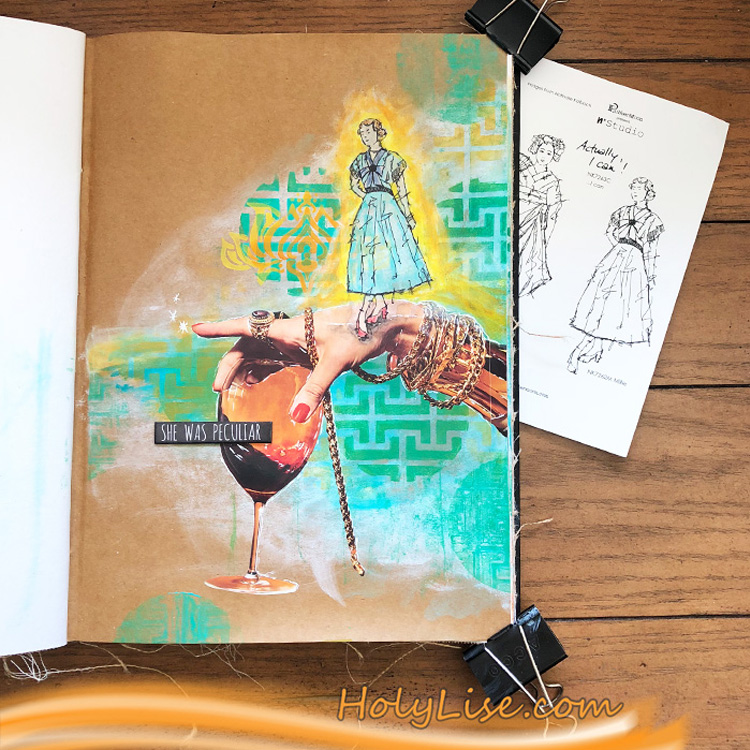
For this page, I decided to use Nathalie’s Hamburg and Lily Wallpaper stencil as well as the new Actually, I Can stamp set. I knew that my image would end up being rather long, so I grabbed my large Dina Wakley journal and primed one of the craft card stock pages.

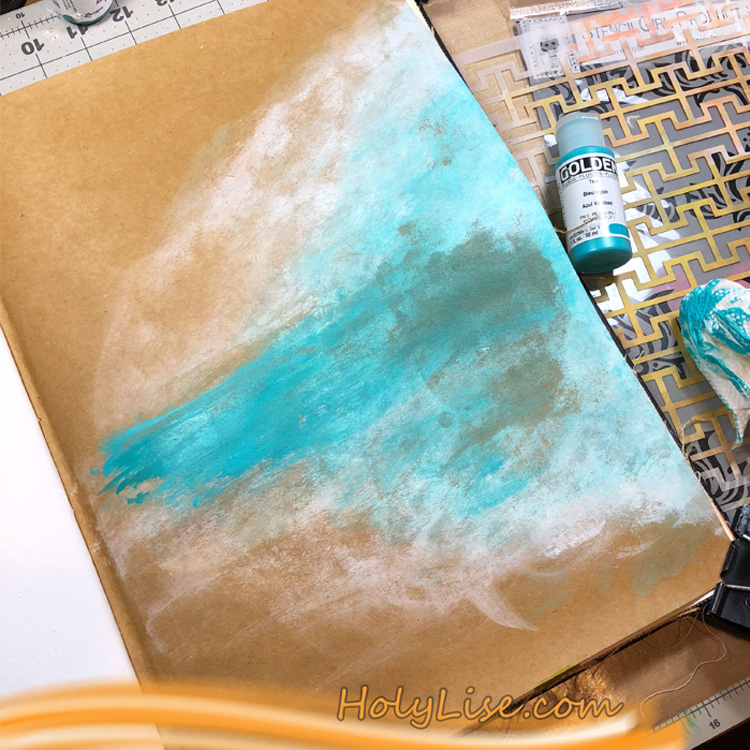
I didn’t want to cover the entire page in paint, so I applied a very thin layer of white gesso to create a fog like coverage. This allowed the blue tones that I added on top to shine nicely.

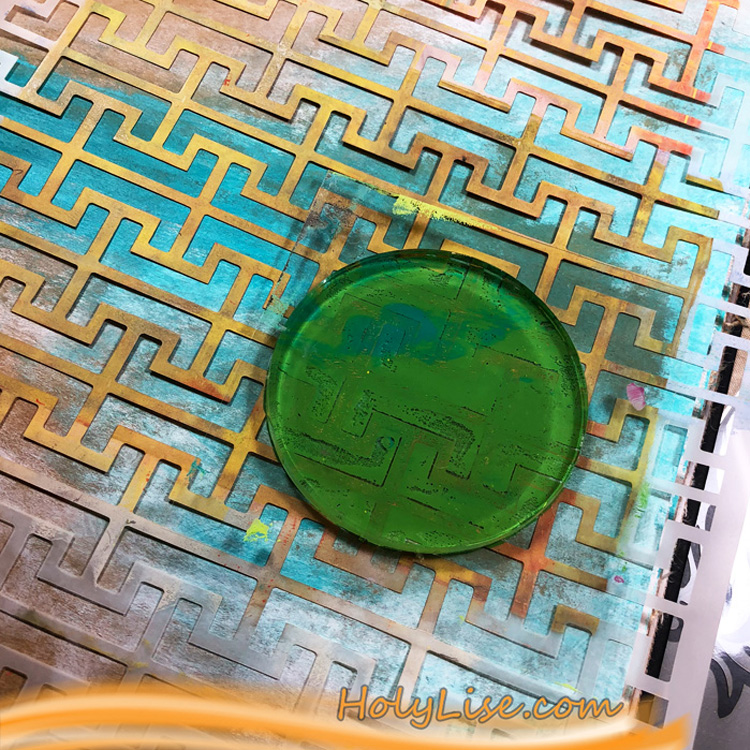
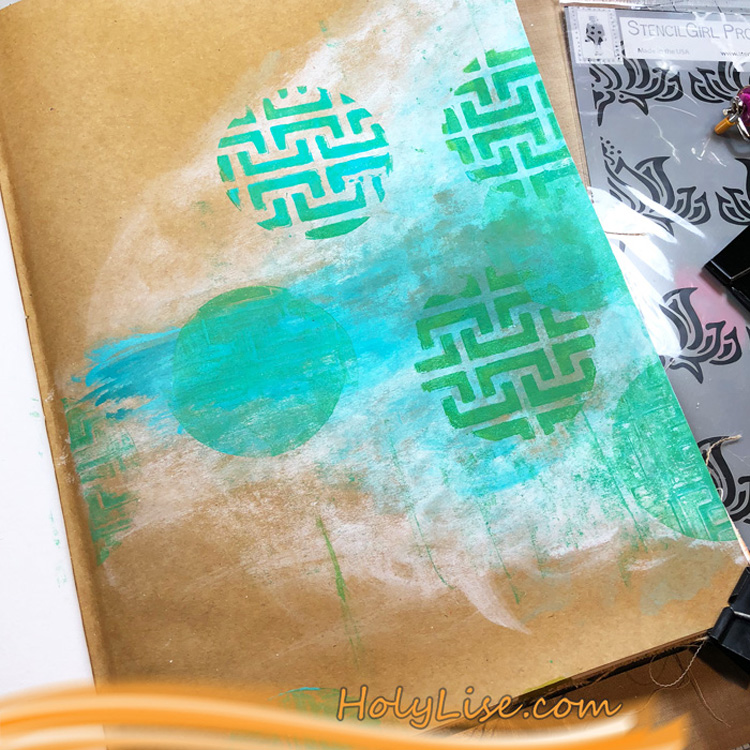
To keep the page light, I added a few accents. I made these by mono printing different green and blue shades through the Hamburg stencil using a round Gel Press.

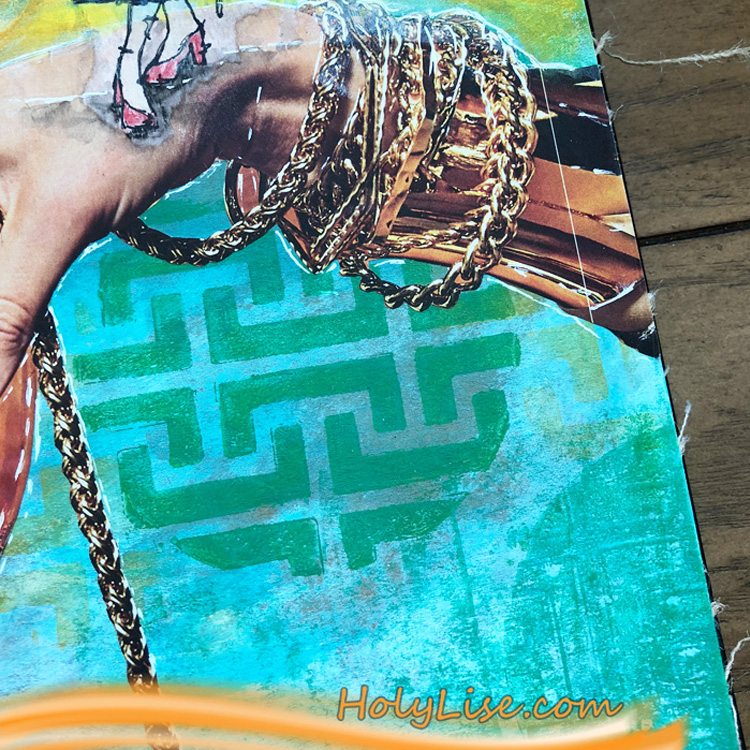
To clean up my Gel Press, I applied the leftover paint to the page, creating round shapes with the impressions from the stencil in them. To add a little more interest to the circles, I stenciled one lily from the Lily Wallpaper stencil into one of the circles.

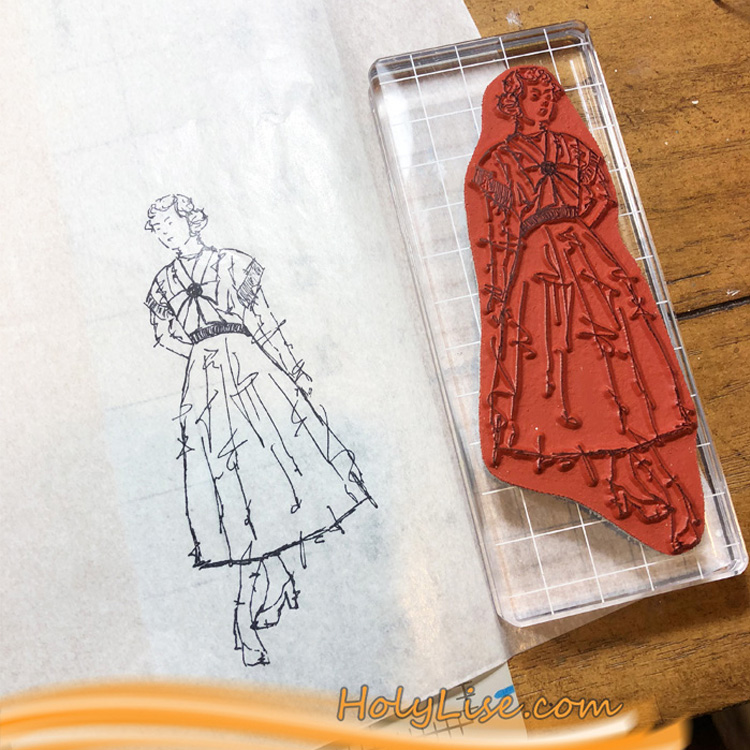
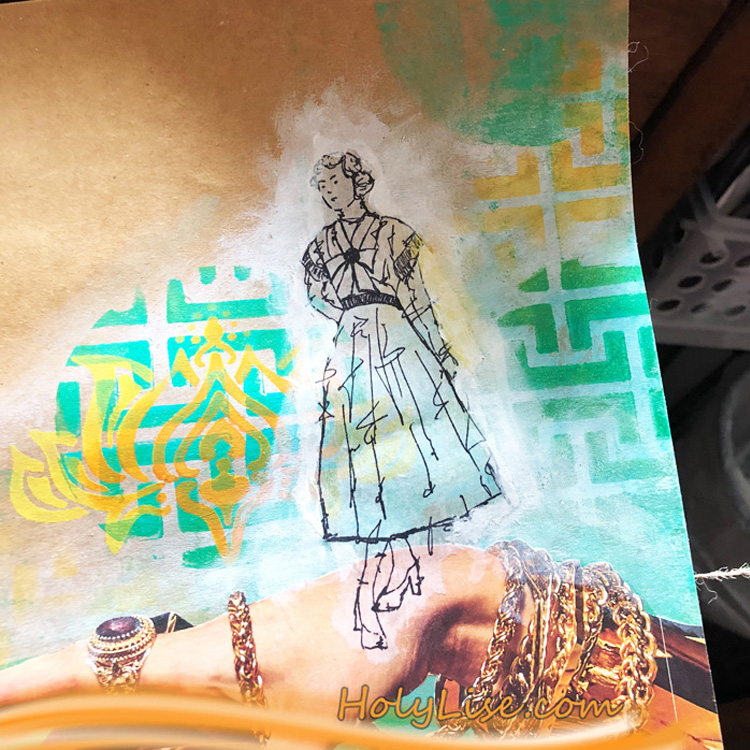
I stamped one of the girls from the “Actually, I Can” stamps onto a piece of collage paper. This allowed me to adhere a crisp image of her to the page.

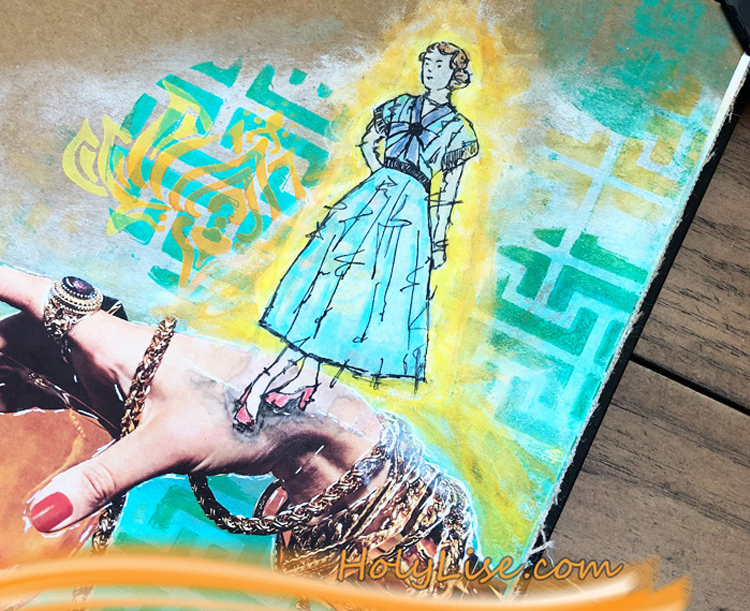
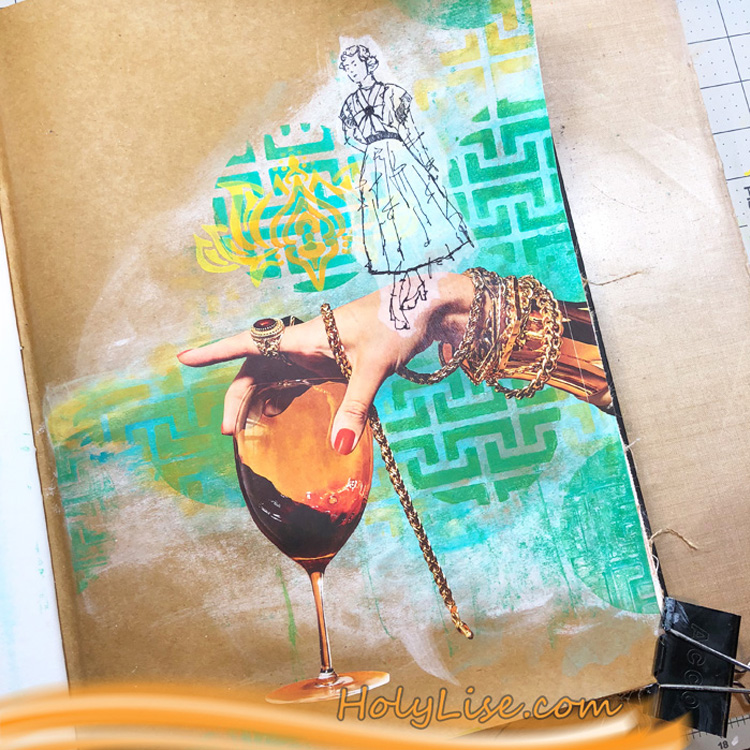
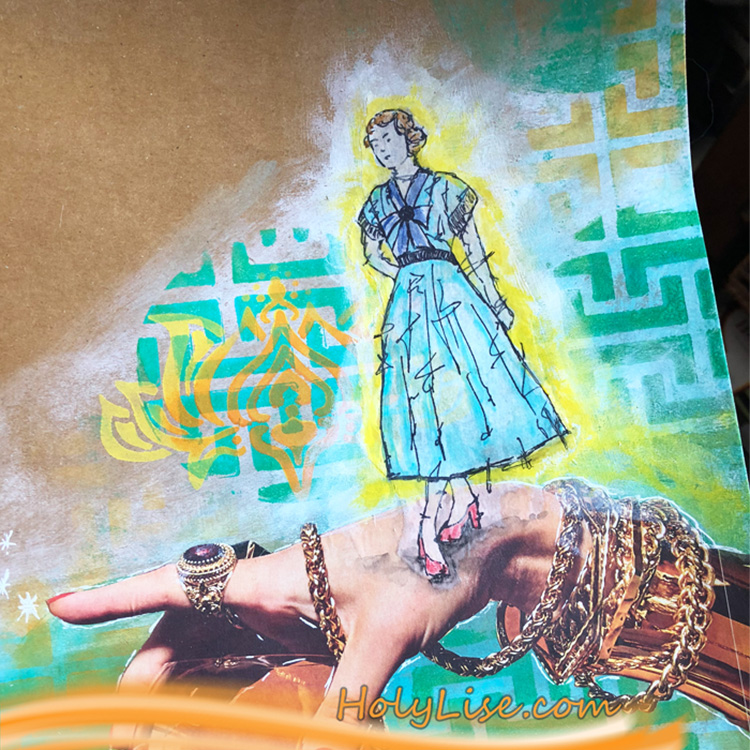
First, I adhered the hand with gel medium, then the girl. I overlapped them a little, so it looks like she’s standing on the hand.

Unfortunately, the collage paper didn’t merge with the background entirely, so I “fixed” it by applying a thin layer of gesso all around her.

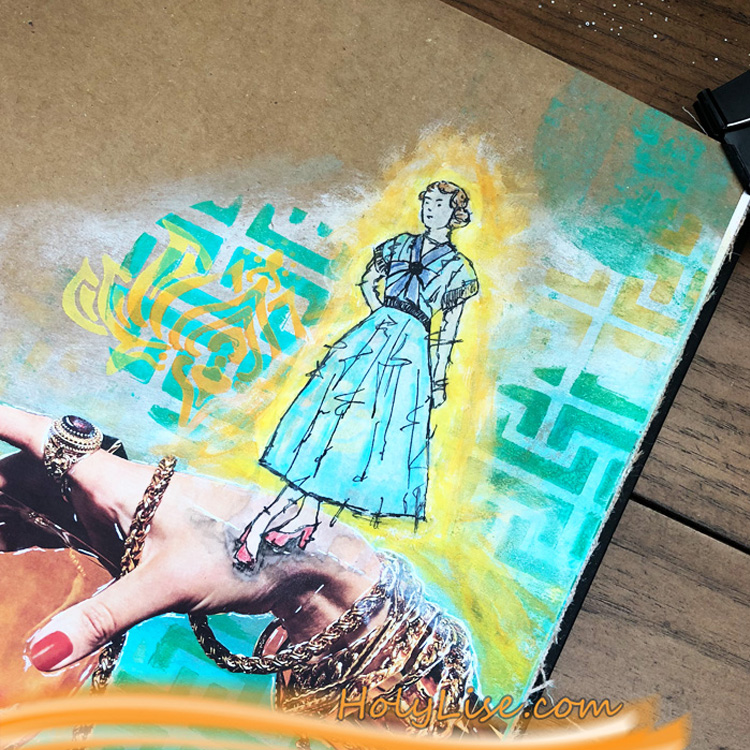
This felt like an aura to me, so I decided to embrace that fact. I applied layers of yellow and orange all around her till it looked like she’s on fire. I also lightly colored her using Liquitex paint markers.

Now, she really felt magical to me. As a final touch, I added a few outlines around the hand and some finishing touches around her. She definitely can, no matter what anyone says :)

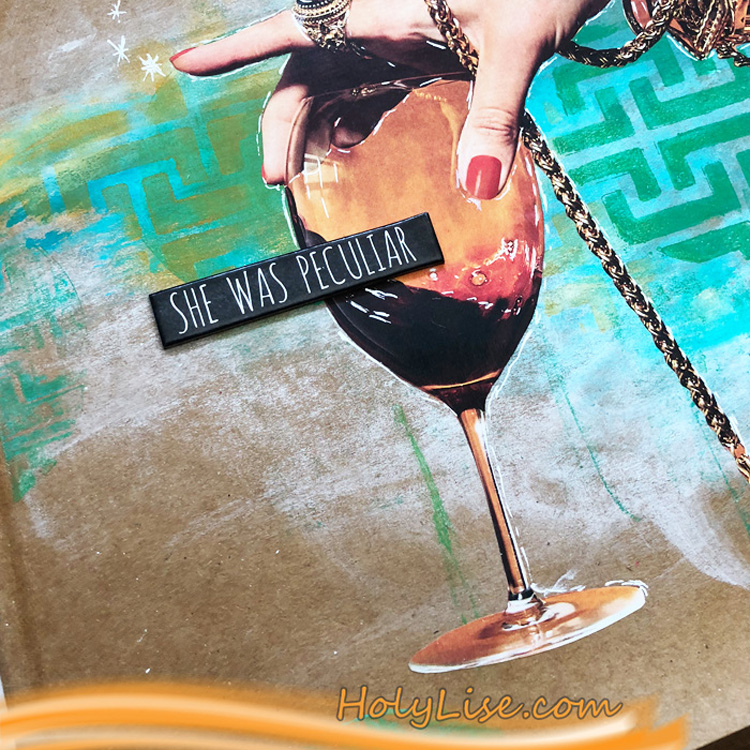
Everything came alive and played so well with each other – the elegant hand, the girl on fire – so it just needed a little sentiment, which btw, I interpret as something very positive.

It’s exciting to see all these layers melt into each other and shine through.

I hope you enjoyed my magical page with the girl that could and feel encouraged to let your dreaming girl out.

Thanks for stopping by and don’t forget to come back every Tuesday for more inspiration from the Creative Squad.


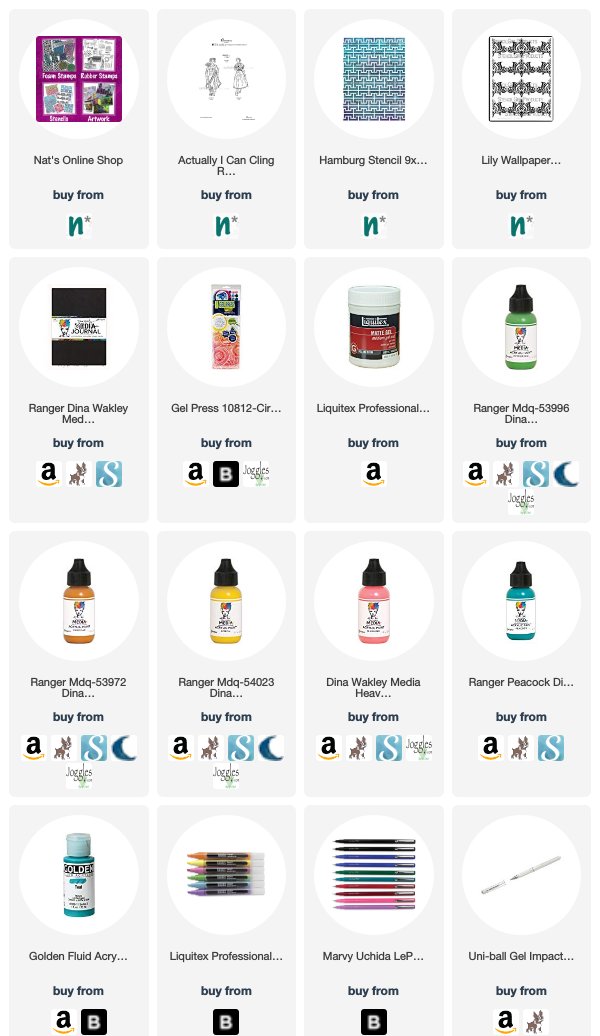
Thanks Josefine! Love how you layered the Hamburg and Lily Wallpaper stencils together! You can find my new Millie rubber stamp here in my online shop as well as all of my stencil designs. Here are some of the other products that Josefine used in her post:


Feel inspired? Working on something yourself that you’d like to share?  I love to see how you interpret our monthly themes. Email me how you used my stencils and stamps with the theme and email me an image – I would love to share your projects in my next  “n*Spiration From Around the Globe“.
Comments (1)

  • Sue Clarke

    |

    I love how this came out Josefine! I also like mixing magazine elements with other images/stamps…very fun page.

    Reply

Leave a comment

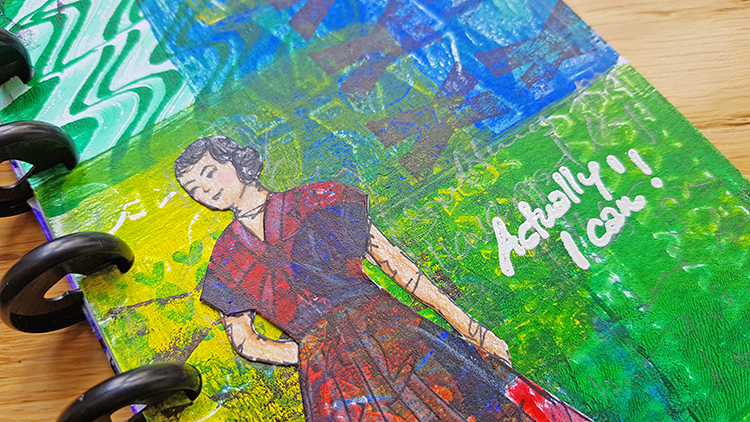
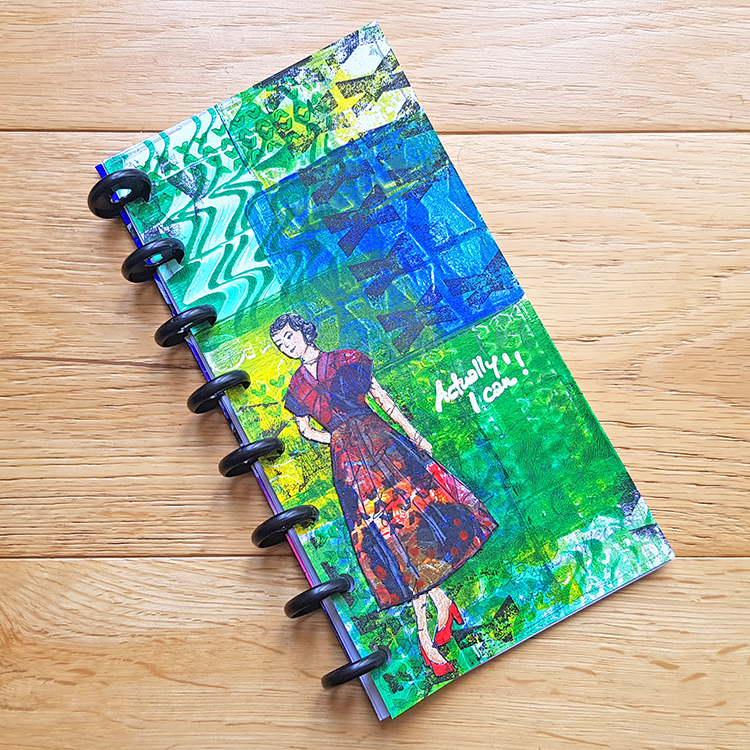
Never Stop Dreaming – Tania Ahmed


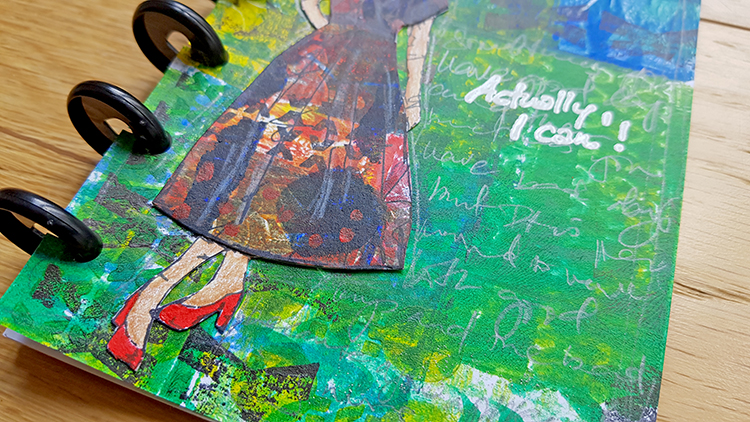
Welcome to a post from my Creative Squad! Today we have a gorgeously layered art journal page from Tania Ahmed – showing off some of my rubber stamps including my new Actually I Can set and an oldie but a goodie – my Marks set. Tania was inspired by the new theme for this month: Never Stop Dreaming – This month we’re sending a message of confidence and empowerment to all those in the world (near and far and maybe even you!) who have been told “You can’t”, “That’s not possible”, or “Not you”. Actually we can and we will! And we’ll never stop dreaming either :)


It can be incredibly hard in today’s world with all its demands and expectations to make time to do what is right for ourselves and this is something that I personally struggle with. The theme this month for the Creative Squad was “Never Stop Dreaming” and to me this, coupled with working hard to achieve those dreams, has proved a powerful motivator for change.

I’ve had many conversations with people in my life and artists about what stops them from going for their dreams … there is fear of failure, disappointing others and the expectation that one must live a “conventional” life. I have lately discovered that the biggest motivator for me to go out and work hard to achieve my dreams is the consequences of not doing it! Life is too short for regrets, so I have learnt to do more of what makes me happy, look after myself and occasionally agree to do things that scare me or put me out of my comfort zone, haha!

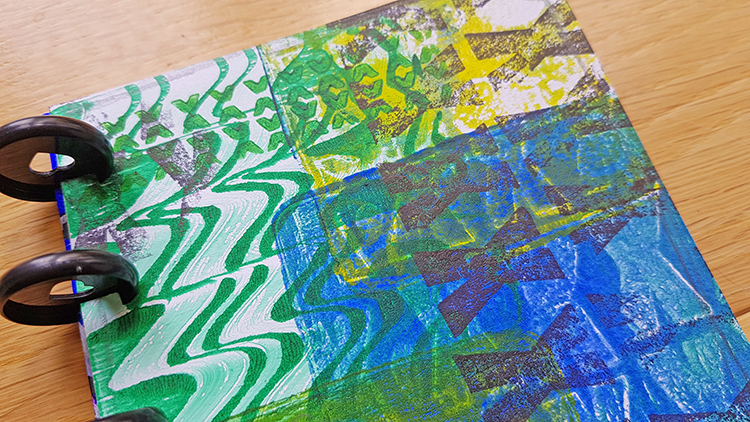
I made an art journal page for my disc bound journal to celebrate and remind myself that yes, I can do anything I can dream of as long as I work hard for it and keep learning from the inevitable failures that come my way.

I hope you enjoy the video that I made using Nat’s stamps (I must confess I am in love with the Millie and Maiko stamps!) Please do let me know if you have any questions about the page that I made and I apologize for the strobing effect in my video which was caused by the craft mat. You might see me using Millie and Maiko in future projects as well :)

Thanks for popping by, and have a great day!


Thank you Tania for sharing with us – it’s always fun to see the process of a page coming together and to know the important ideas behind it :) To get your hands on my Millie stamp, just visit my online store. Here are some of the other supplies that Tania used today:


Feel inspired? Working on something yourself that you’d like to share?  I love to see how you interpret our monthly themes. Email me how you used my stencils and stamps with the theme and email me an image – I would love to share your projects in my next  “n*Spiration From Around the Globe“.
Leave a comment

Raiders of the Lost Stash – Maura Hibbitts


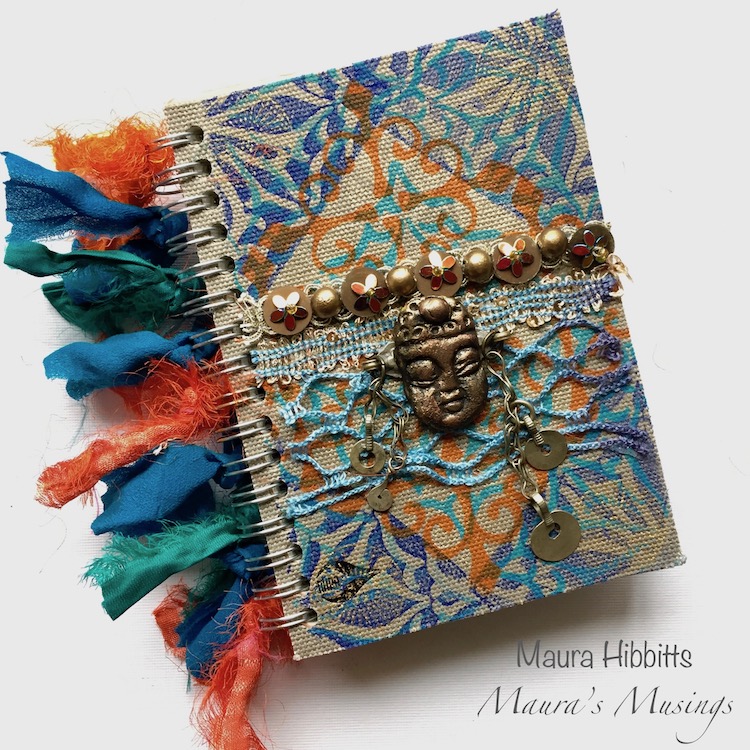
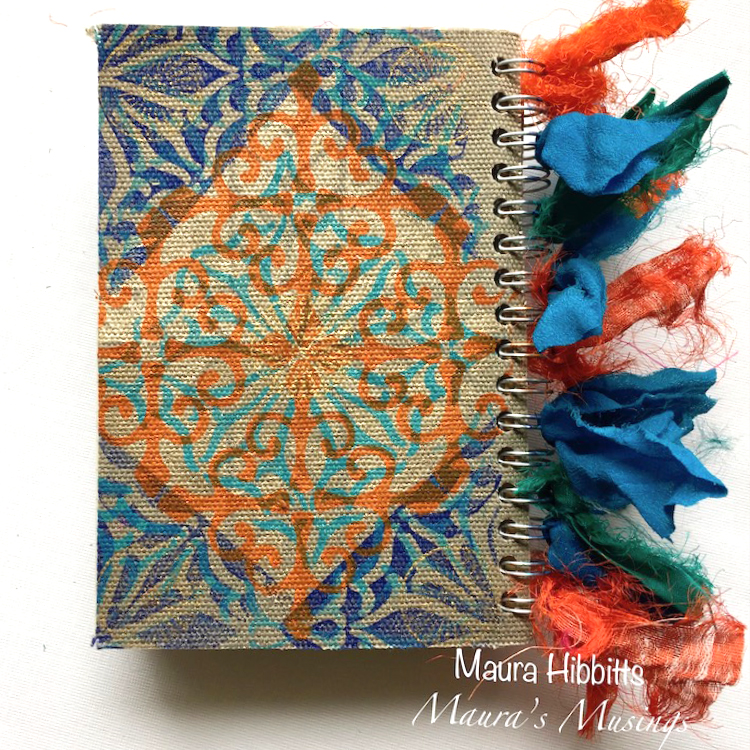
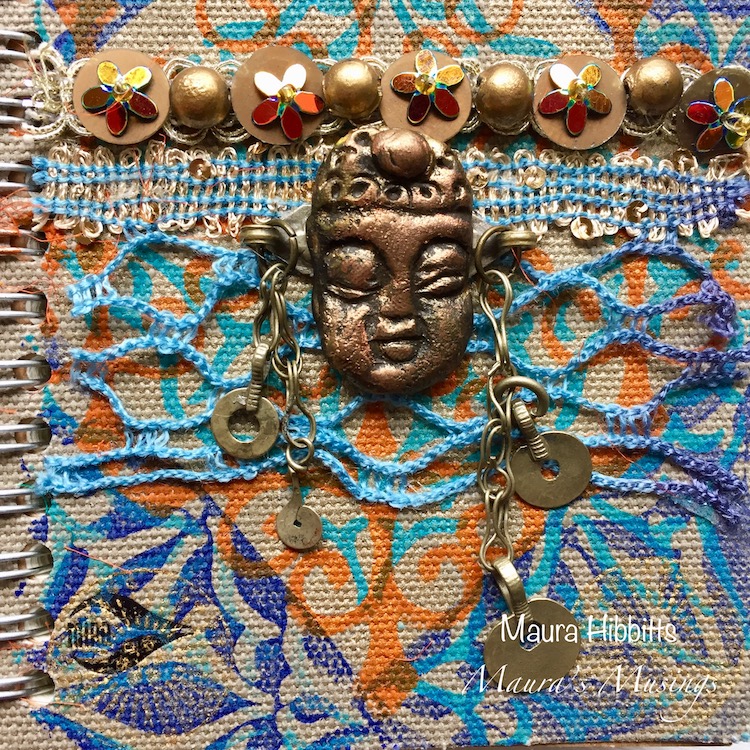
Hello from the Creative Squad! Today we have a post from Maura Hibbitts who is sharing a beautiful little notebook that she has personalized using a collection of supplies from her stash, as well as my Van Vorst foam stamp, Antique Tile foam stamp, Santiago stencil, and Small Circle Jumble rubber stamps. This month’s theme is: Raiders of the Lost Stash – It’s time to raid your stash of art making stuff. Pick a few things you’ve tucked away for later and use them NOW. Maybe you have some leftover scraps or deli papers that you couldn’t bear to part with. Maybe you’ve squirreled away a new product that you’ve been meaning to try. The time is now! Raid your stash and try it :)


I’m feeling a bit like Indiana Jones this month with our theme! First, I raided my stash to find something to work on – I was looking for a notebook I could alter, and found a small canvas covered one I use for notes on projects.  Then, because I was channeling Indiana Jones, I wanted to find something exotic to use, and came up with some great trims from India, Turkmen jewelry pieces and an head that reminds me of a deity.

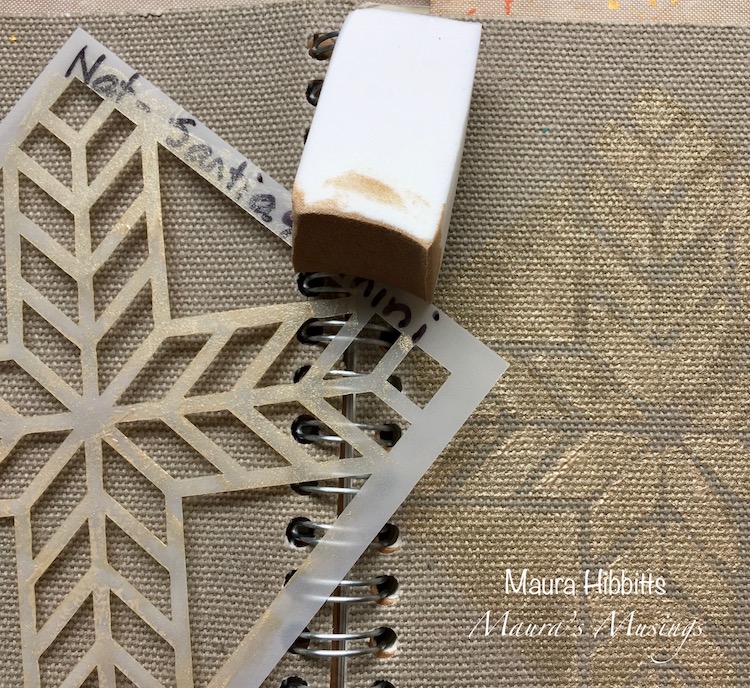
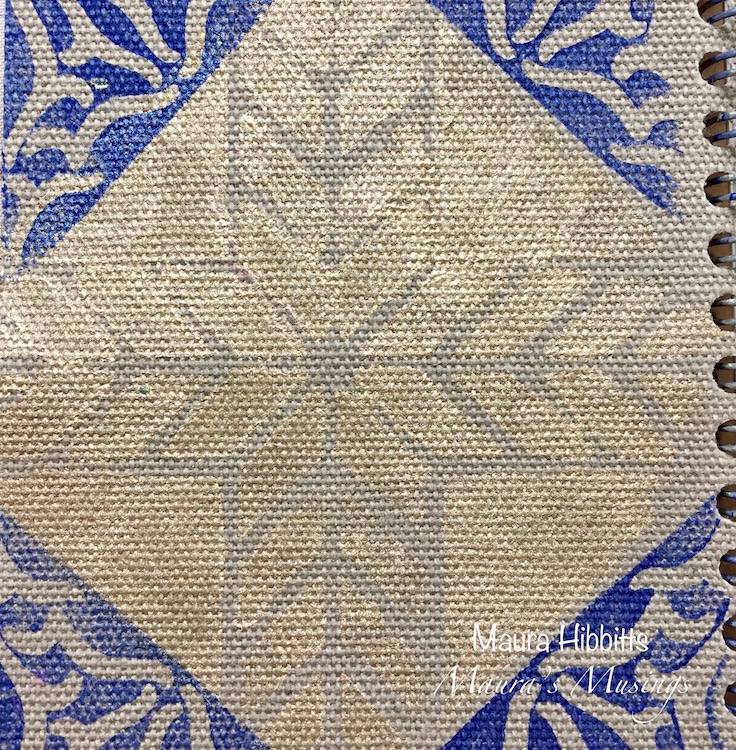
I started by stenciling both covers with the mini Santiago stencil, using Pale Gold paint and a cosmetic sponge for a very subtle layer.

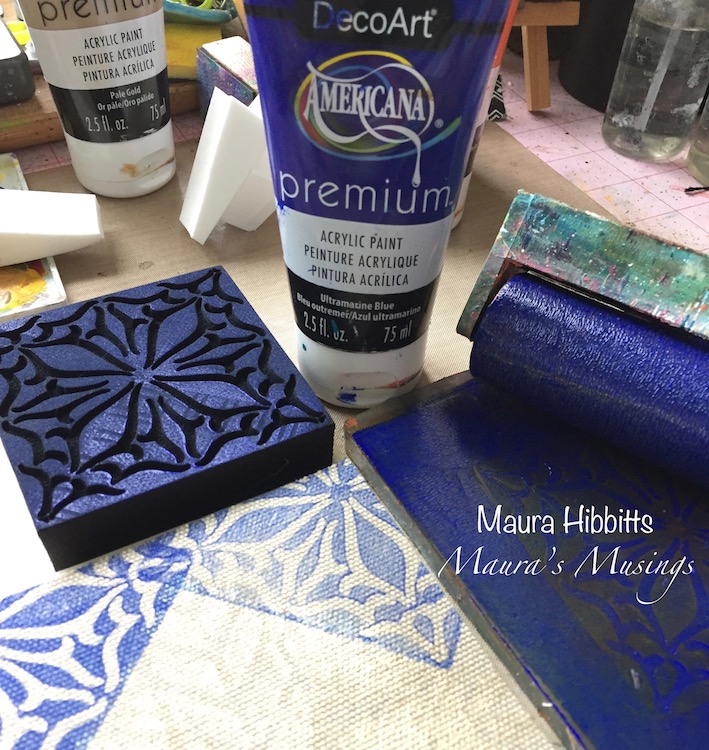
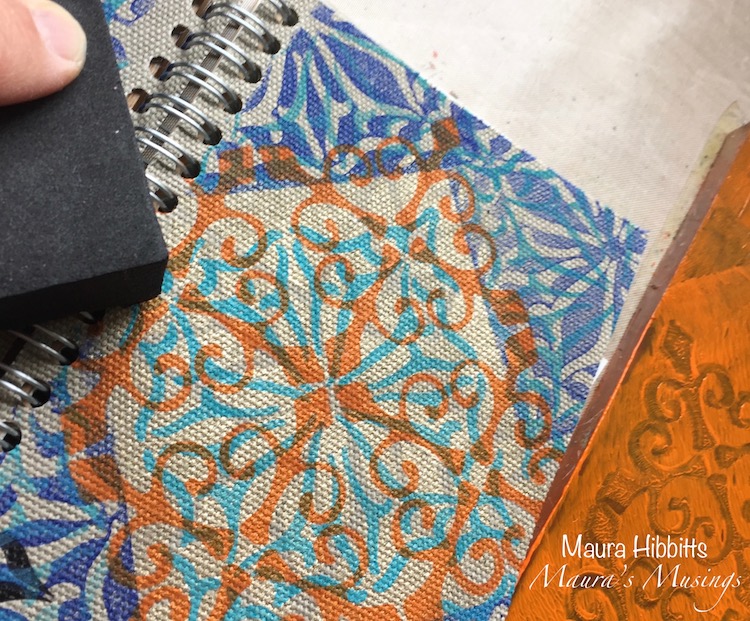
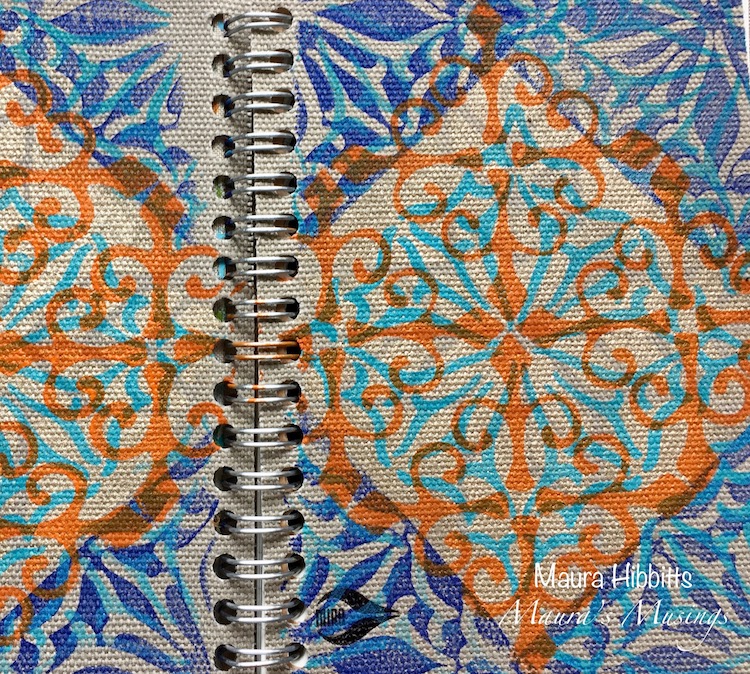
Next I added Ultramarine Blue to the gel plate and rolled it out with a brayer, so I could stamp on it to pick up the paint. I angled the Van Vorst Negative around all corners of the notebook.

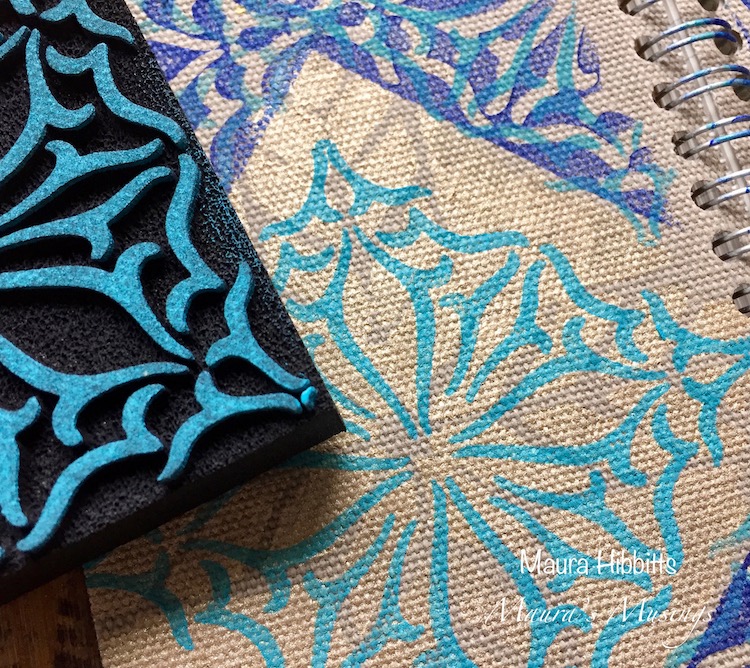
I attempted to line up the positive Van Vorst Art Foamie with a corner section, and was totally off kilter, so decided to go with imperfection. I also stamped this image in the center of each cover over the gold, using the Cobalt Teal Hue.

Time for a contrasting color, so once again, I rolled out the paint on the gel plate with a brayer (this is a great way to “ink” up the art foamie stamps) and stamped the orange into the center using the Antique Tile pattern.

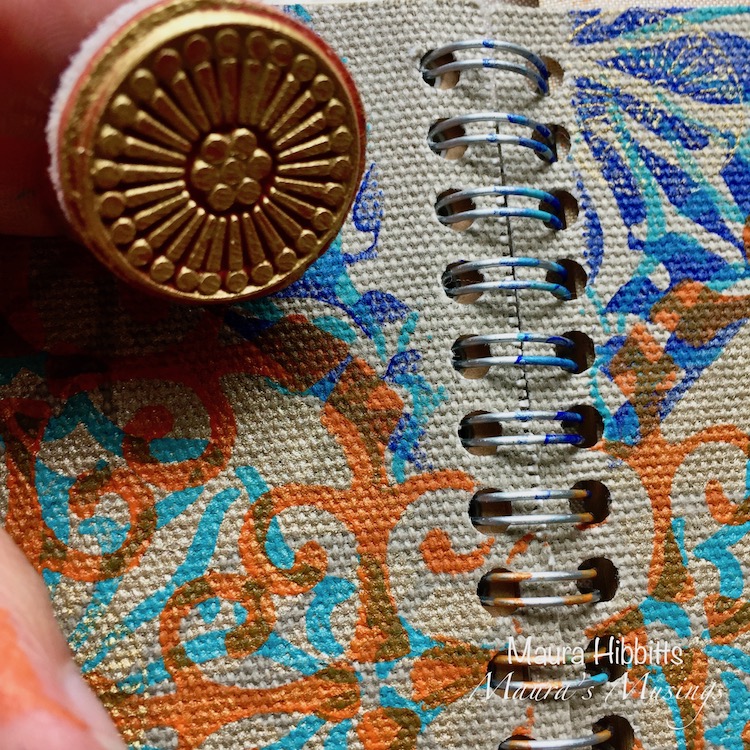
Now that I feel like I am on a global journey with my notebook it’s time to add in some more gold. I have found that gold adds a hint of the mysterious and exotic, so I stamped more onto the canvas using the Grove Street Small Circle stamp.

I tied bits of sari ribbon onto the notebook spiral.

Now that my background is done, it’s time to add the cover embellishments. I glued down the fabric trims, added the dangly bits to the metal piece, and glued that in place with the head. It’s almost like having a small shrine on my notebook.

Since I use this notebook for jotting down ideas, perhaps my little shrine will act like my muse and keep sending me creative vibes. It will certainly be colorful and fun to pull out and use!


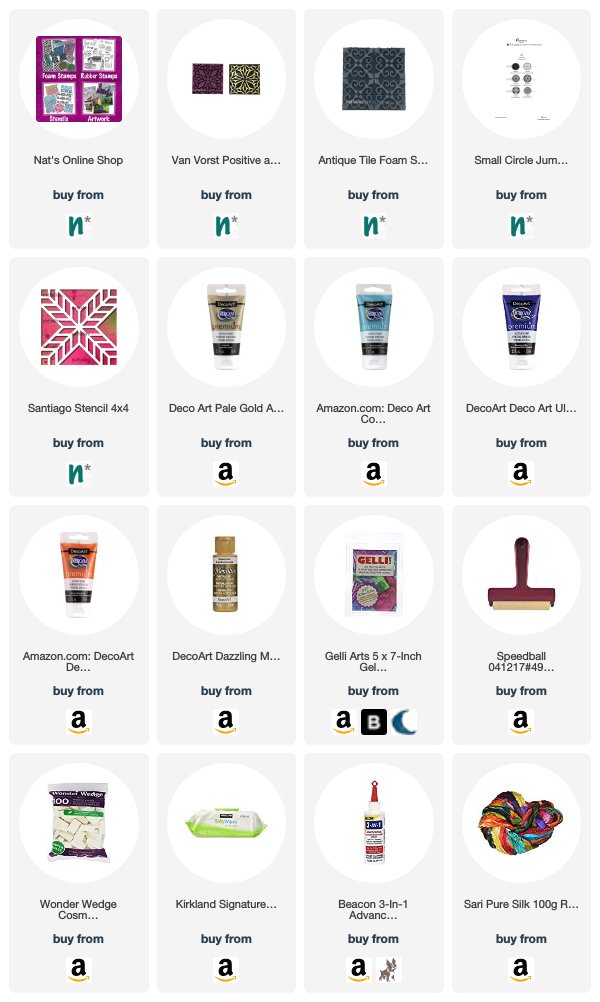
Thank you Maura – I love the idea of creating a notebook that is a shrine to creativity! And this certainly is one that is so lovely to look at :) You can find the foam stamps, stencils, and rubber stamps that Maura used in her project right here in my online shop. And in addition to the canvas notebook and various embellishments from her stash, here are some of the other supplies that Maura used:


Be sure to check out all the Creative Squad projects on the Creative Squad webpage and if you feel inspired, share your projects with us! We love to see what you’re working on. I post projects almost every month in my Inspiration From Around the Globe posts!

Comments (2)

  • Claudia

    |

    Love the stamping and stencilling on the rough fabric cover, Maura, and the beautiful layers you have created! It all comes together so beautifully!

    Claudia xxx

    Reply

Leave a comment

Raiders of the Lost Stash – Jennifer Gallagher


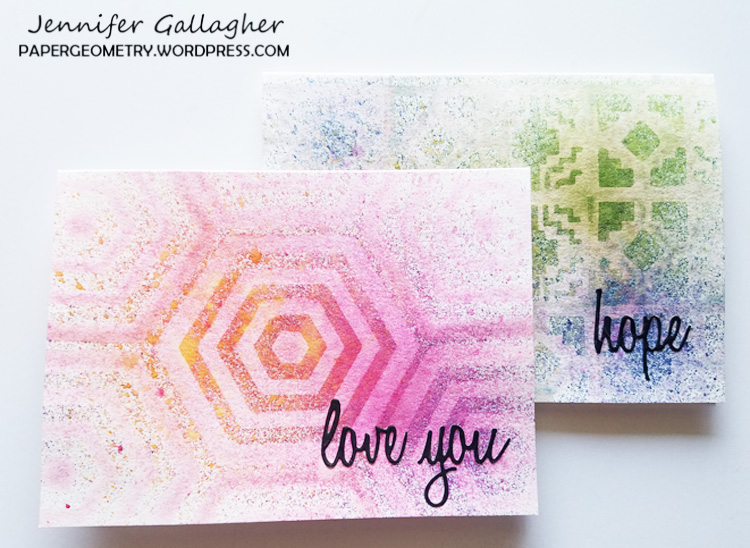
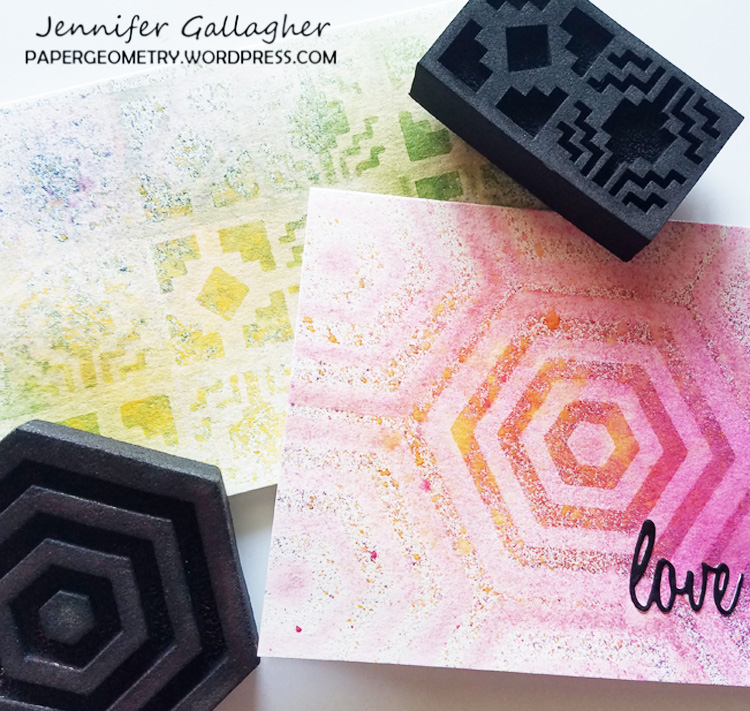
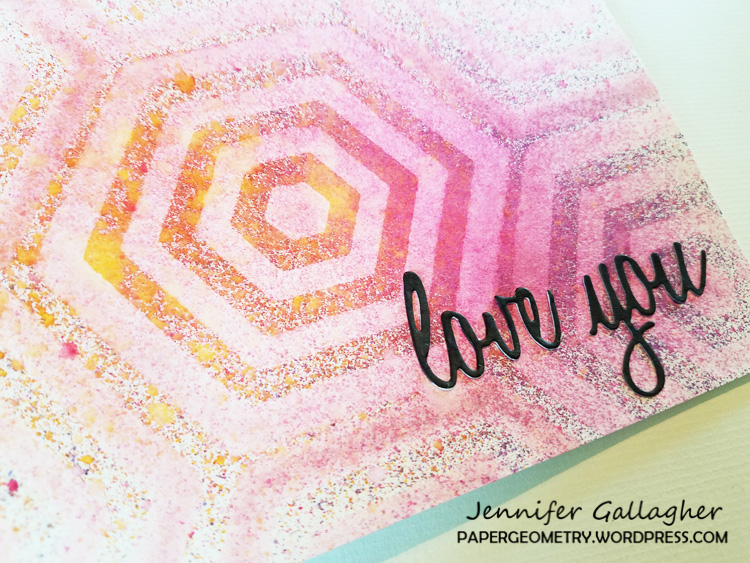
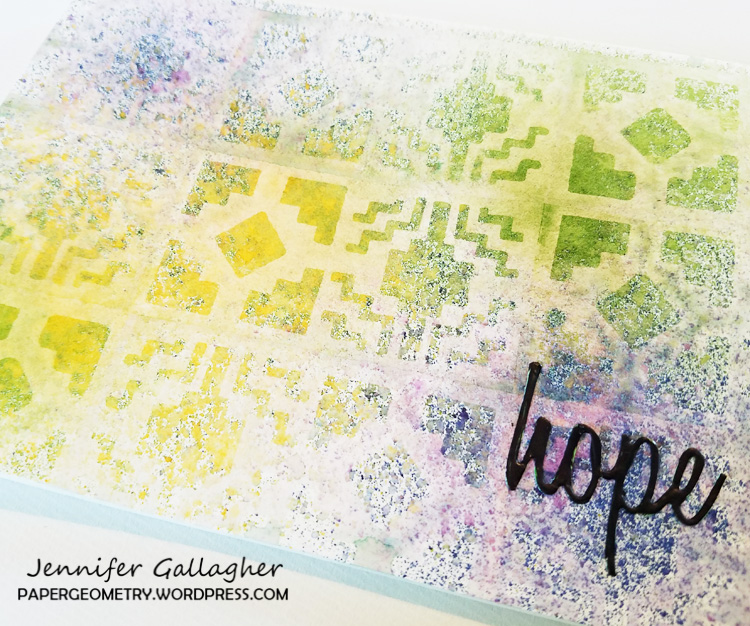
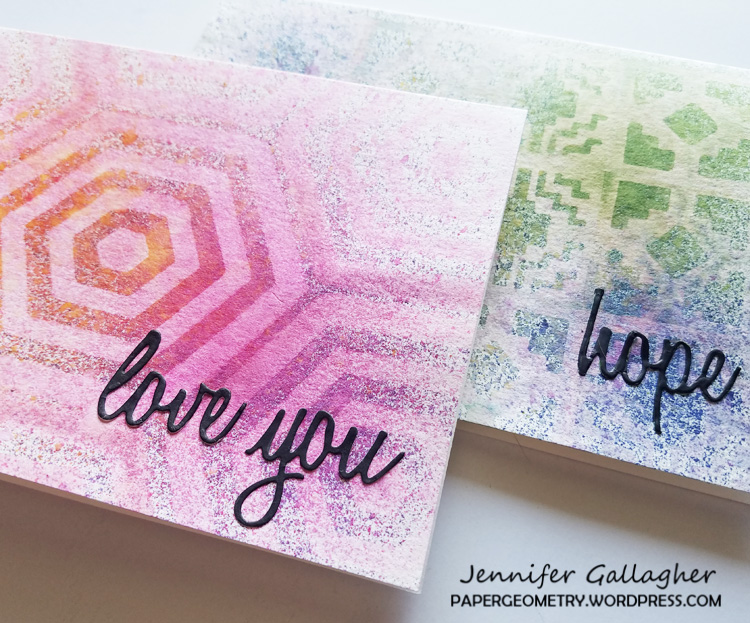
Welcome to a post from my wonderful Creative Squad! Today we have a project from Jennifer Gallagher who is using my Space Oddity and Mini Santa Fe foam stamps in a unique subtractive way to create some gorgeous cards. She was inspired by this month’s theme: Raiders of the Lost Stash – It’s time to raid your stash of art making stuff. Pick a few things you’ve tucked away for later and use them NOW. Maybe you have some leftover scraps or deli papers that you couldn’t bear to part with. Maybe you’ve squirreled away a new product that you’ve been meaning to try. The time is now! Raid your stash and try it :)


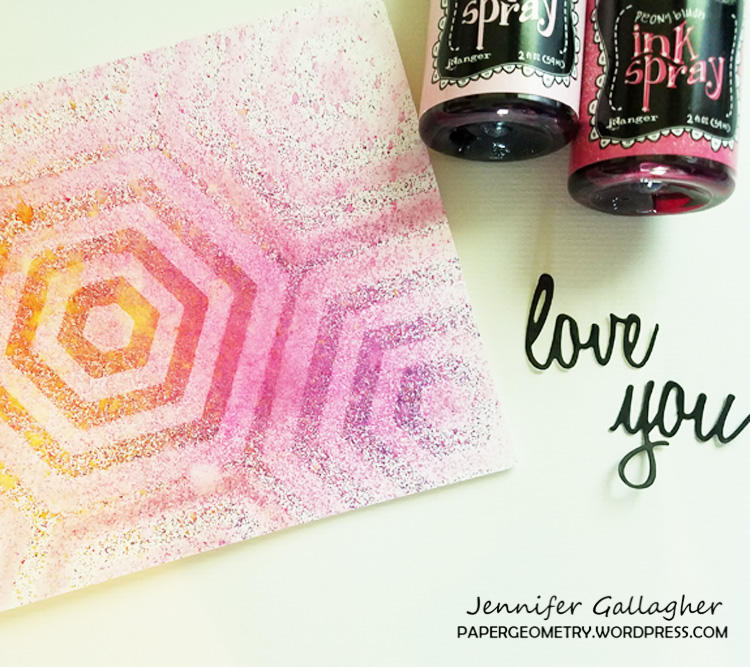
We are raiding our stashes this week. What good artist or crafter worth their salt doesn’t have a considerable stash of supplies just waiting for inspiration? In my stash I found a few sets of Sizzix thinlits dies by Tim Holtz that I haven’t used in ages. These dies, along side a few of my go-to supplies, were the inspiration for these beautiful note cards.

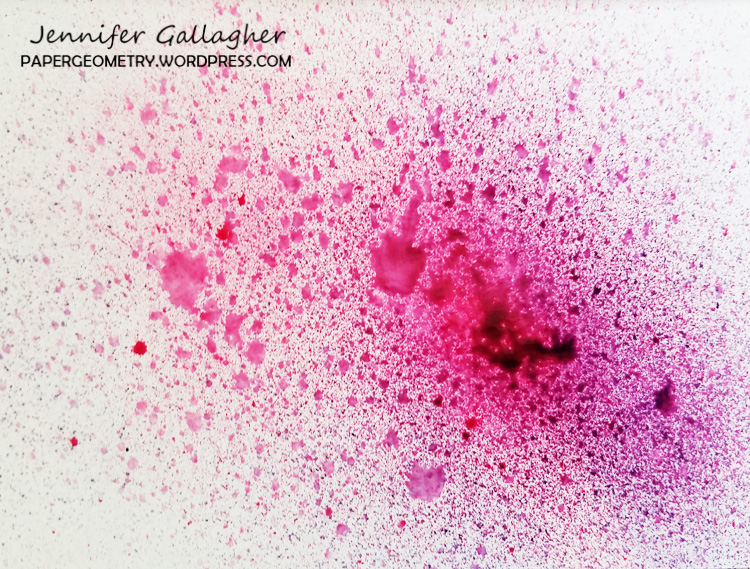
I adore my n*Studio artfoamies and wanted to show you a new way to use them. Begin by spraying a few colors of Dylusions Ink Spray onto a watercolor note card. Don’t be stingy with the spray! You will want a nice base of color to work with.

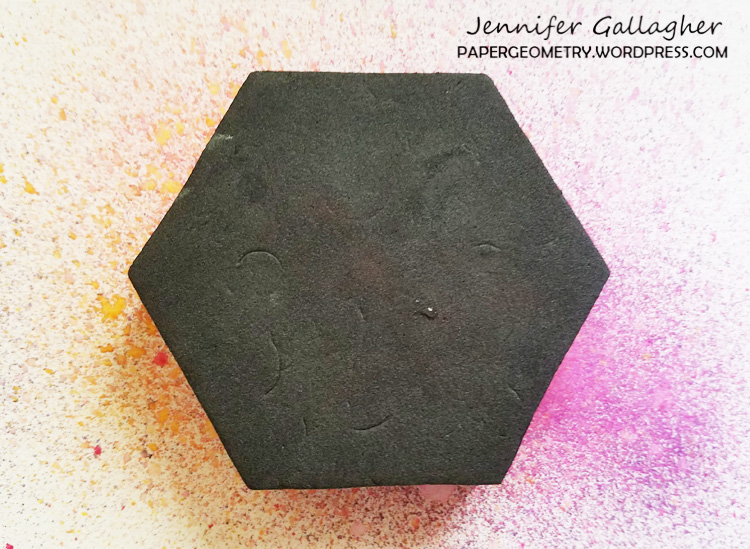
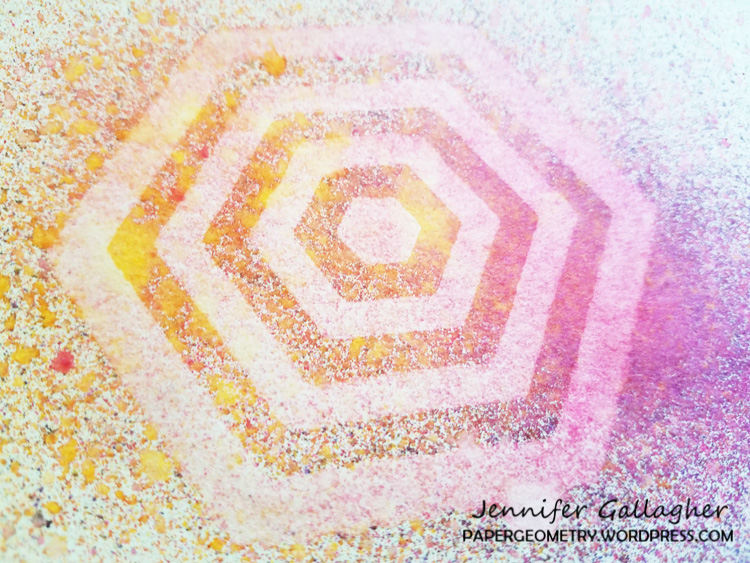
Next, spritz some water onto your artfoamie (I’m using Nat’s Space Oddity and Mini Santa Fe ArtFoamies) making sure the entire design is wet. Gently press the artfoamie onto the note card. After a few seconds, remove the artfoamie and dab a paper towel onto the card to pick up the excess moisture. (Dab – don’t wipe!) Because the ink sprays are water reactive, we will be pulling ink off of the card leaving the design of the artfoamie behind. Repeat until you have a design you like.

Choose a few sentiments from the die set and run them on black cardstock through your die cutting machine. Fix your sentiment onto your note card with a liquid glue like Tombow Mono.

This is a fun way to use your artfoamies so be sure to try this at home and share your creations with us! Get into that supply stash and get creative.


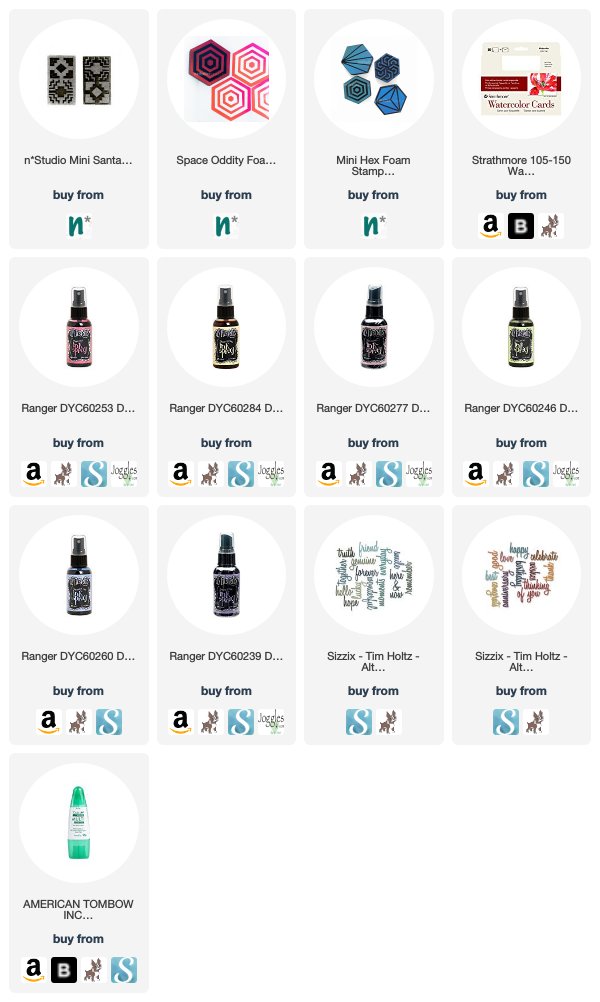
Wow these are beautiful Jennifer!!! Love the subtle variations in color and love this exciting way to use foam stamps – almost like a sponge. You can find all of my foam stamps and more in my online shop and if you’d like to try this technique, here are some of the supplies that Jennifer used:


Be sure to check out all the Creative Squad projects on the Creative Squad webpage and if you feel inspired, share your projects with us! We love to see what you’re working on. I post projects almost every month in my Inspiration From Around the Globe posts!

Comments (2)

  • lynda

    |

    Love this idea Jennifer! Question…….do you let the Dylusions spray dry before stamping with the foam stamp? Thanks!

    Reply

    • Jennifer Gallagher

      |

      Hi Lynda! I did let the layers dry. You can let them air dry or use a heat tool to speed it up a bit. Thanks for checking out my project.

      Reply

Leave a comment

Raiders of the Lost Stash – Josefine Fouarge


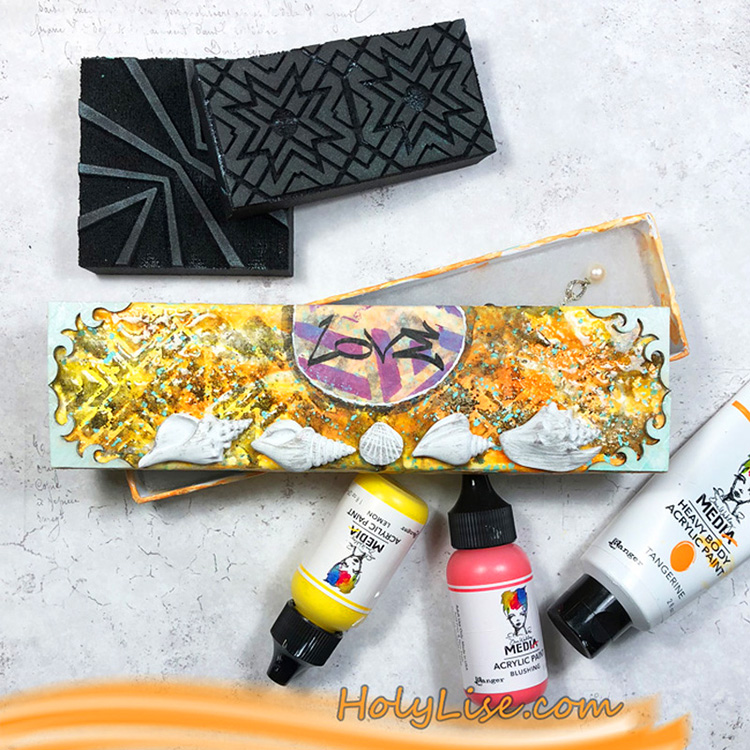
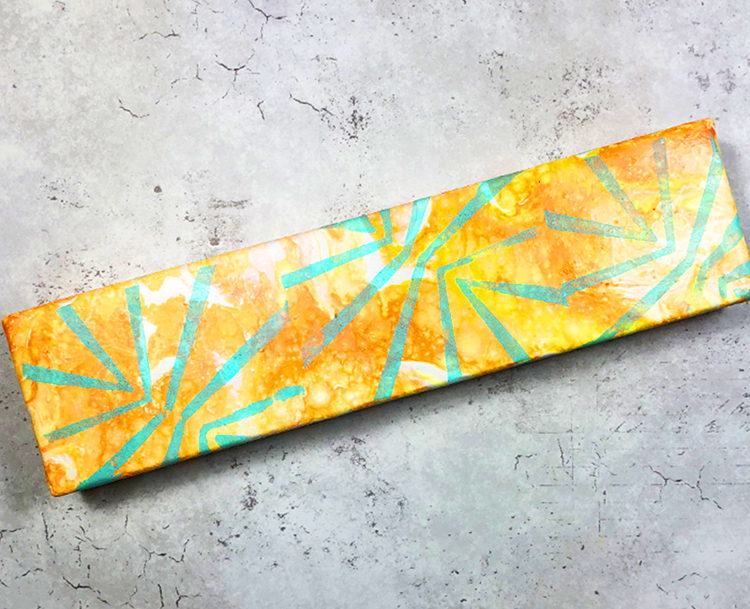
Happy Tuesday from the Creative Squad! Today we have a cool upcycled jewelry box – something I know we all have in a drawer or closet somewhere just waiting for a new life – from Josefine Fouarge. Josefine is using my Beacon and Mini Toledo foam stamps, my Love Tag rubber stamp, and this month’s theme: Raiders of the Lost Stash – It’s time to raid your stash of art making stuff. Pick a few things you’ve tucked away for later and use them NOW. Maybe you have some leftover scraps or deli papers that you couldn’t bear to part with. Maybe you’ve squirreled away a new product that you’ve been meaning to try. The time is now! Raid your stash and try it :)


Wow, what a topic. I knew that I have a lot of “lost stash” but because we are renovating our house, there is even more that has come back to the surface. So, over the last weeks, I put aside a some of those lost items, thinking that they would be perfect for this theme – and I’m telling you, that stash was a hodge podge of stuff ;)

I really like this topic though. It gets you digging and you find some really neat things. For my project for the “Raiders of the lost stash” theme, I decorated a jewelry box. My idea was to do some paint pouring and then add a few of the little items all over it. Because paint pouring is so fun to watch and because I already knew that the decorating part would be a hot mess, I recorded everything. That probably makes it a lot easier to follow the process.

You might have seen more than two hands during the pouring process. These were my husband’s hands. He got into paint pouring a few months backs and we wanted to try the new Ranger pouring medium together. Everything afterwards is just me :)

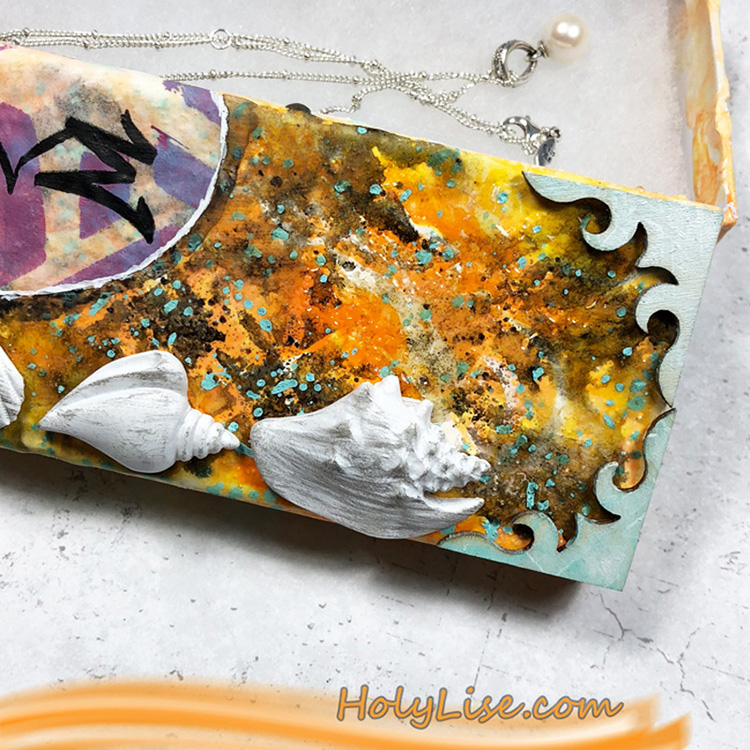
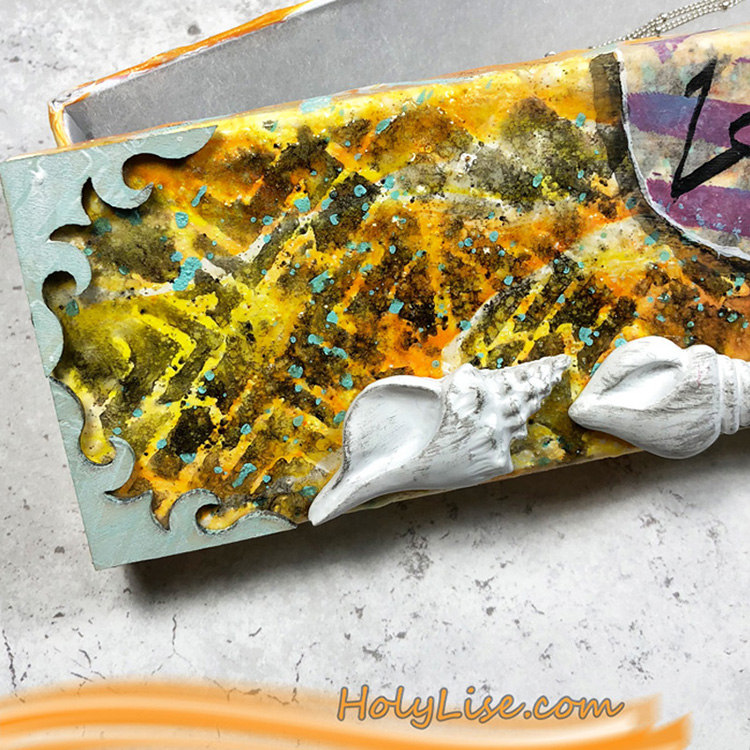
As you can see in the close ups, the embossing powder melted beautifully and helped with creating a fuzzy outline of Nathalie’s Mini Toledo stamp. This way it looks old, as if this box has been through a tough time.

I also like the subtle pattern that the Toledo stamp left on the wood pieces. It looks like there is something going on, but only with a close look you get an idea of the pattern.

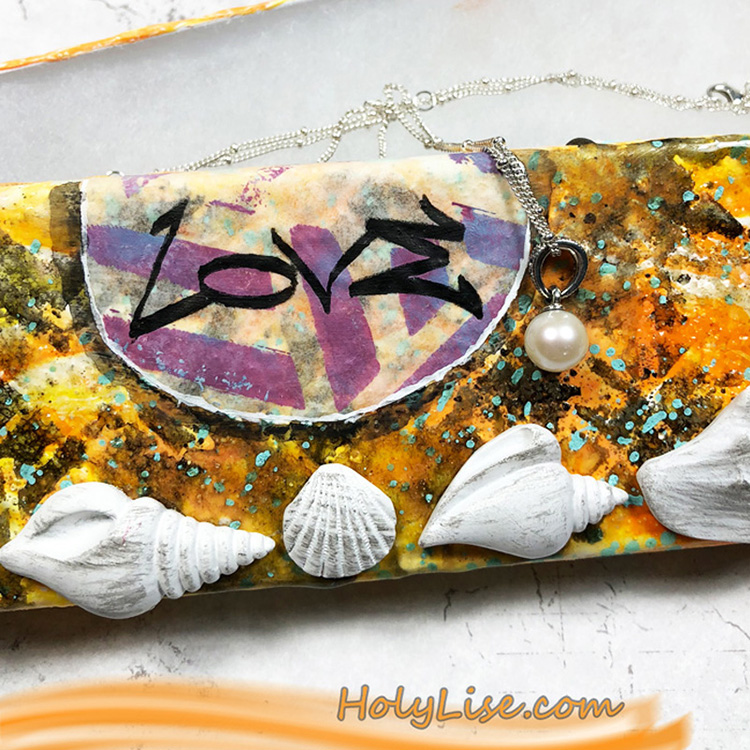
The “lost” gel print perfectly fits as a centerpiece in the middle of the jewelry box. It’s the right amount of contrast and different patterns to add to the entire look. I love contrasts and the entire box is a big contrast of everything.

I kept the bottom part simple though. At the end, you don’t see it as much and because of the pouring medium, it was already difficult to close the lids. So, I simply stamped the negative Beacon stamp all over it using a contrasting color.

I hope you enjoyed my little experiment. Don’t forget to look through your own drawers and boxes, I bet you have some amazing decorative pieces, leftover scraps, paints, pens and more laying around that just want to be tested and played with.


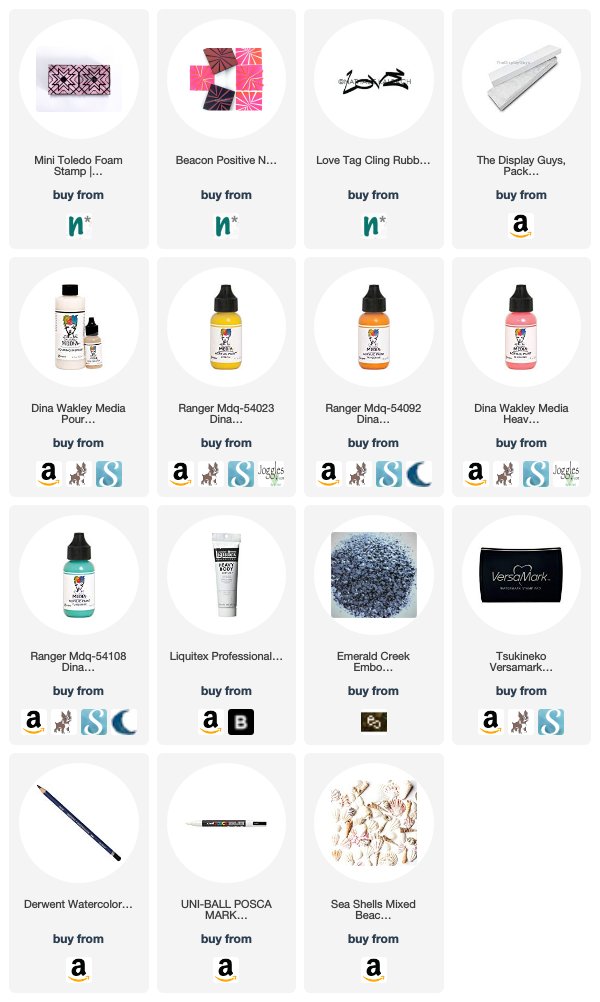
Thank you Josefine – I love watching you play in your video (and hubby too – so cool he was interested in trying out the pouring medium)! Here are some supplies that Josefine used and for my foam stamps and rubber stamps, be sure to stop by my online shop.


Feel inspired? Working on something yourself that you’d like to share?  I love to see how you interpret our monthly themes. Email me how you used my stencils and stamps with the theme and email me an image – I would love to share your projects in my next  “n*Spiration From Around the Globe“.
Leave a comment