Creative Squad

Doin’ My Thing -Jennifer Gallagher


Hello from my Creative Squad! Today we have a post from Jennifer Gallagher to inspire you this holiday season with some creative gift wrapping ideas. Jennifer is using my Mini Clam Hex foam stamp and my Small Circle Jumble stamp set, along with this month’s theme: Doin’ My Thing – We all have a unique artistic style and way of working with supplies. This is the time to rock it! Be yourself. Do your thing.


This month we are doin’ our thing over on the n*Studio blog. So, what is my thing? That is hard to nail down because I love so many products and techniques. Then I realized that using my supplies to create useful items that others will enjoy is definitely ‘my thing’.

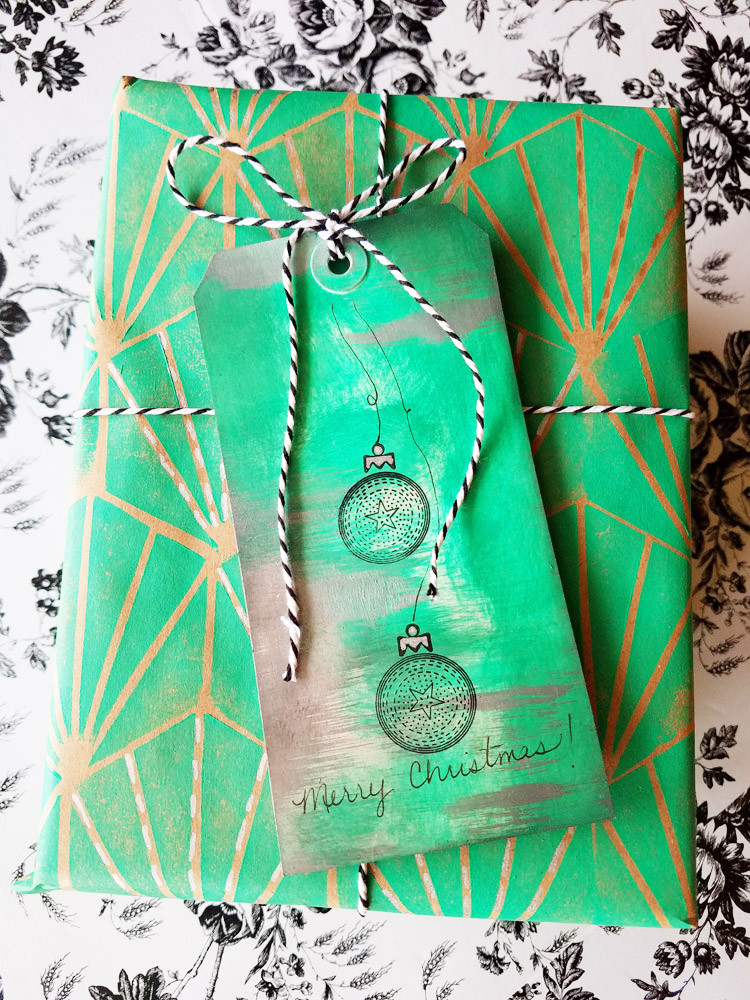
Often when we think of seasonal gift wrapping our minds go straight to decorated trees and snowmen. But who says that you can’t create beautiful, nontraditional holiday wrapping using some of your favorite n*Studio art supplies? Let’s break out our artfoamies and stamps and create some one of a kind paper!
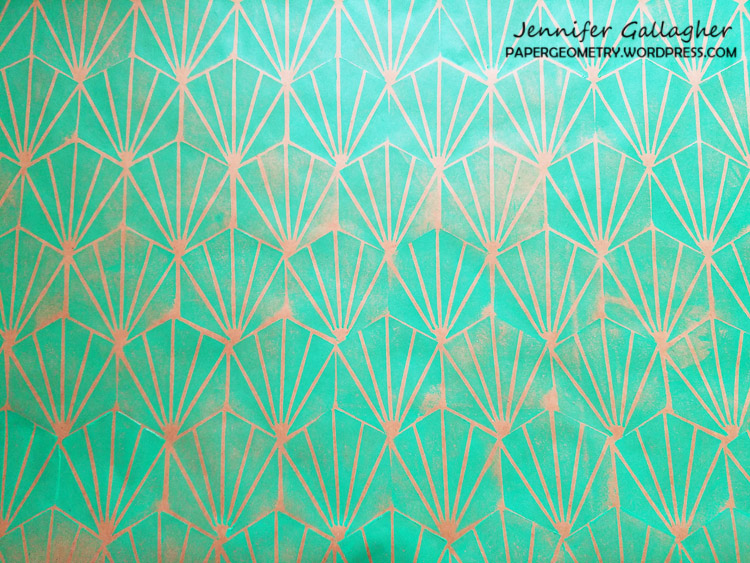
Start with an inexpensive roll of kraft paper. I found mine at a local dollar store. Lay the paper down on a flat surface and tape down the corners and edges with painters tape. This will help keep the paper from rolling up as you work. Brayer out some paint onto your gel plate and press your artfoamie into the paint. I am using Nat’s mini clam hex foam stamp. Now firmly press the stamp onto your kraft paper.
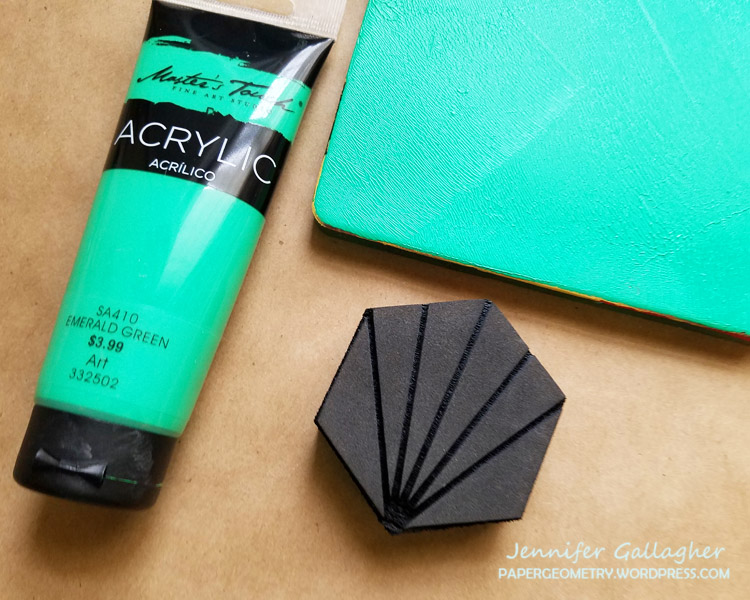
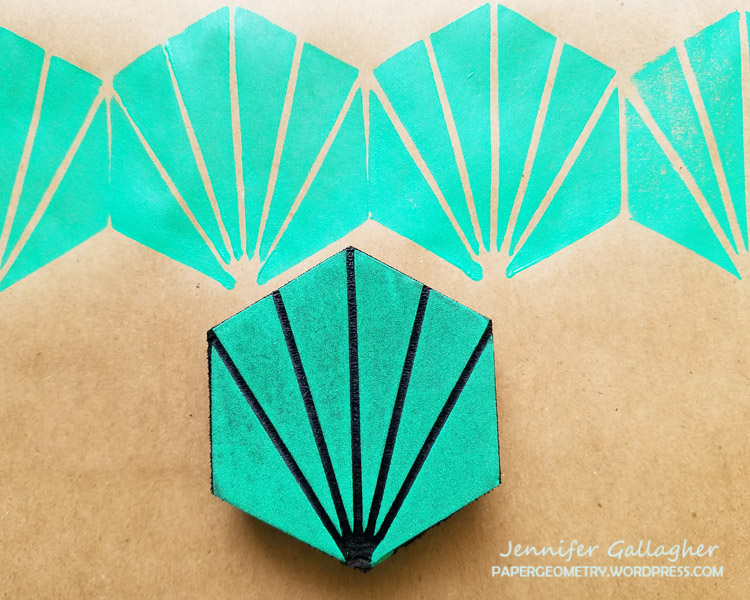
Repeat this process creating whatever design you wish.
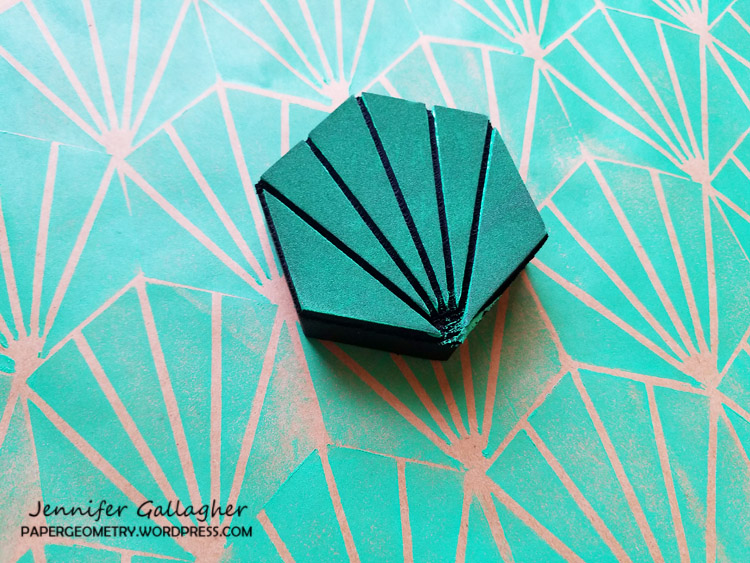
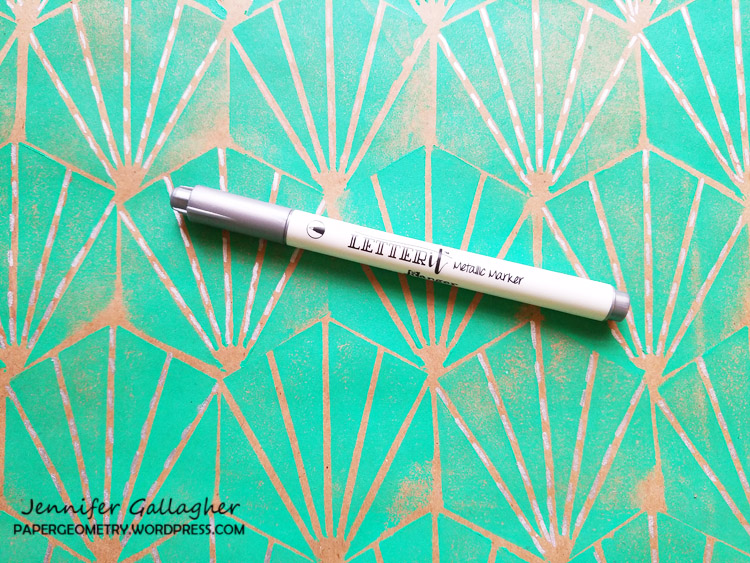
Add some pizzazz and additional interest with metallic markers. I have added dashed lines with my silver Letter It Metallic Marker by Ranger.
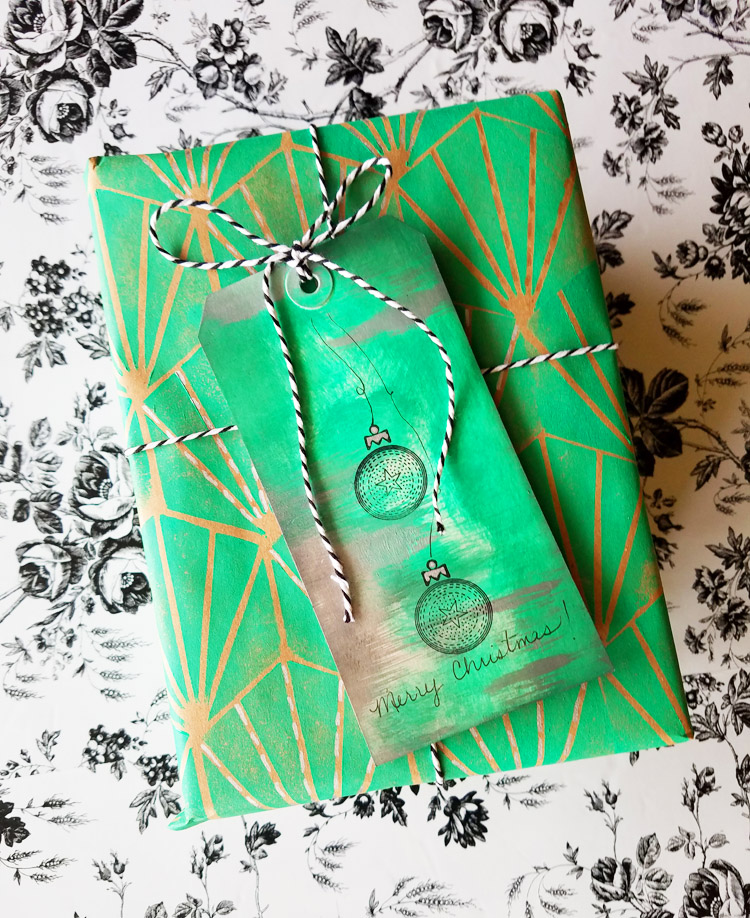
What would a beautifully wrapped package be without a gift tag? Start with a #8 mixed media tag. Apply the same emerald green paint onto the tag in a haphazard fashion using a mini blending tool.
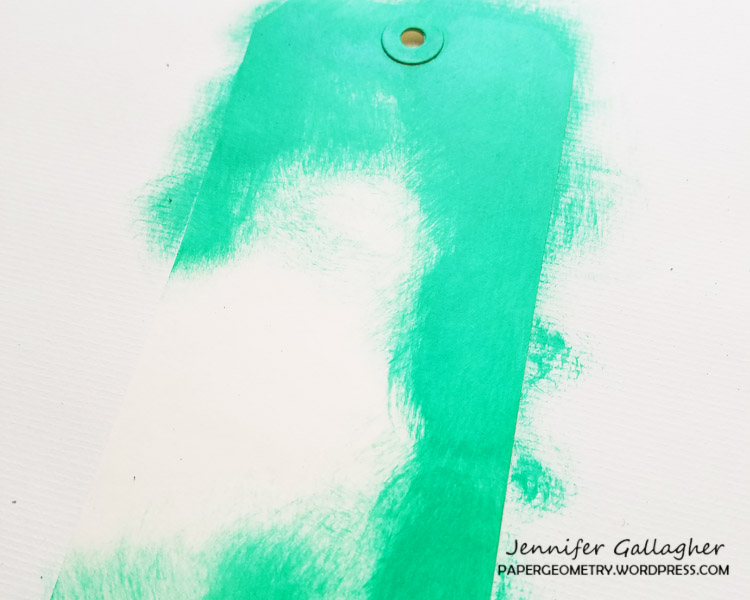
Thinly apply platinum modeling paste with a dry coarse bristled brush in some areas of your tag. You can continue to layer the green acrylic and platinum modeling paste until you achieve an affect you like.
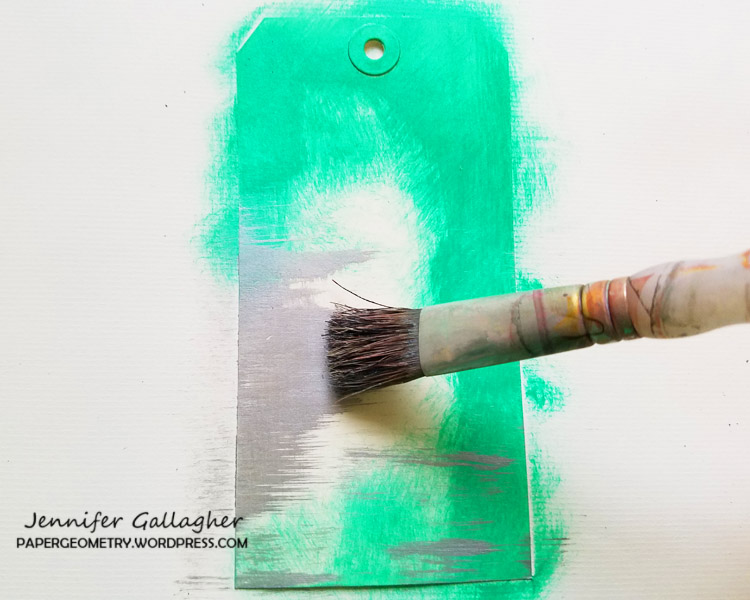
Add black soot distress ink around the edges and throughout the tag to add additional interest.
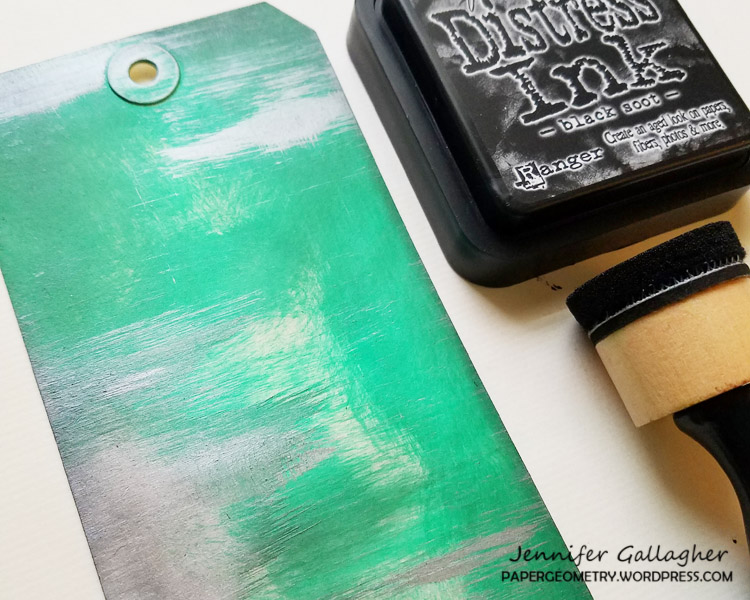
Next, stamp a few of the negative circle drive small stamps from the Small Circle Jumble Stamp Set – don’t forget to add the ornament topper. Draw a few strings from the ornaments and add a little silver highlights.
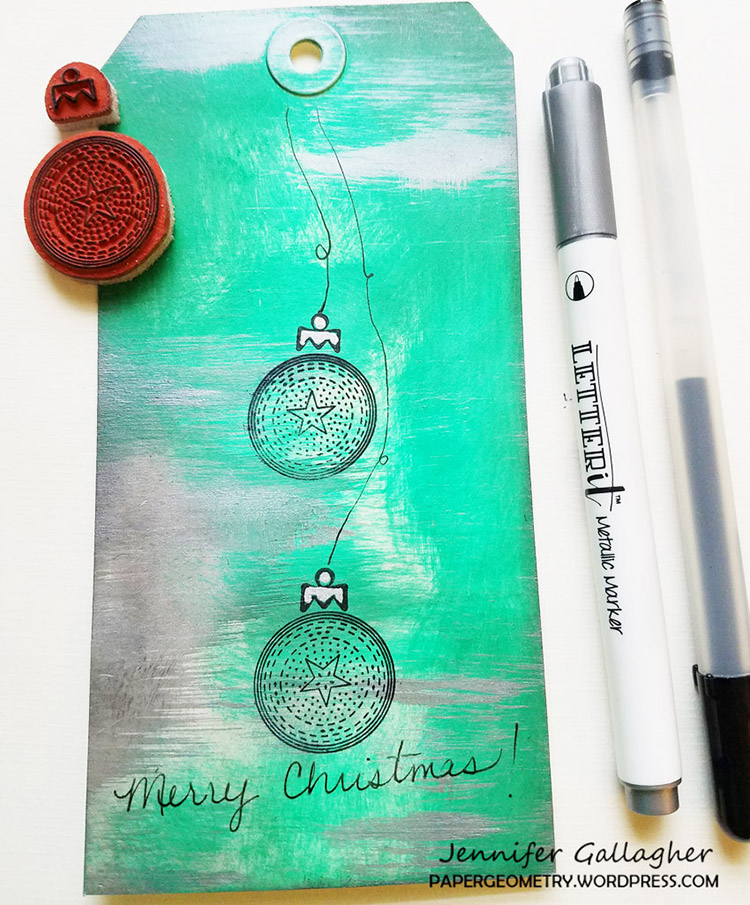
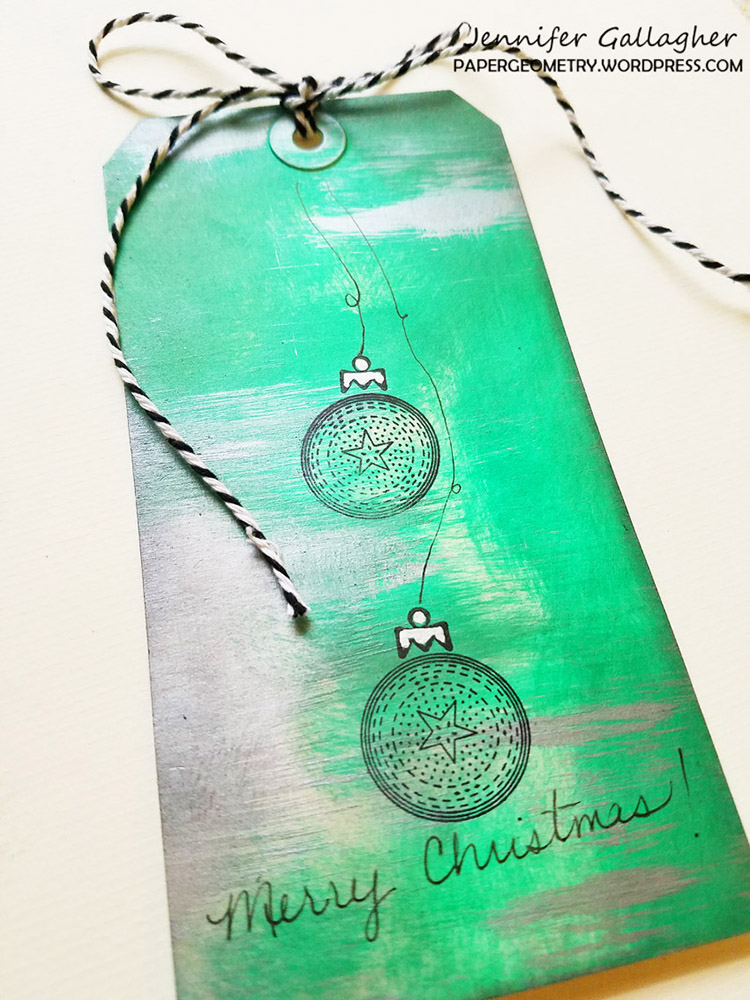
Thanks for joining us. We would love to see what unique and creative gift wrapping you can come up with using your favorite n*Studio products. And be sure to stop by each Tuesday to see what the Creative Squad is up to.


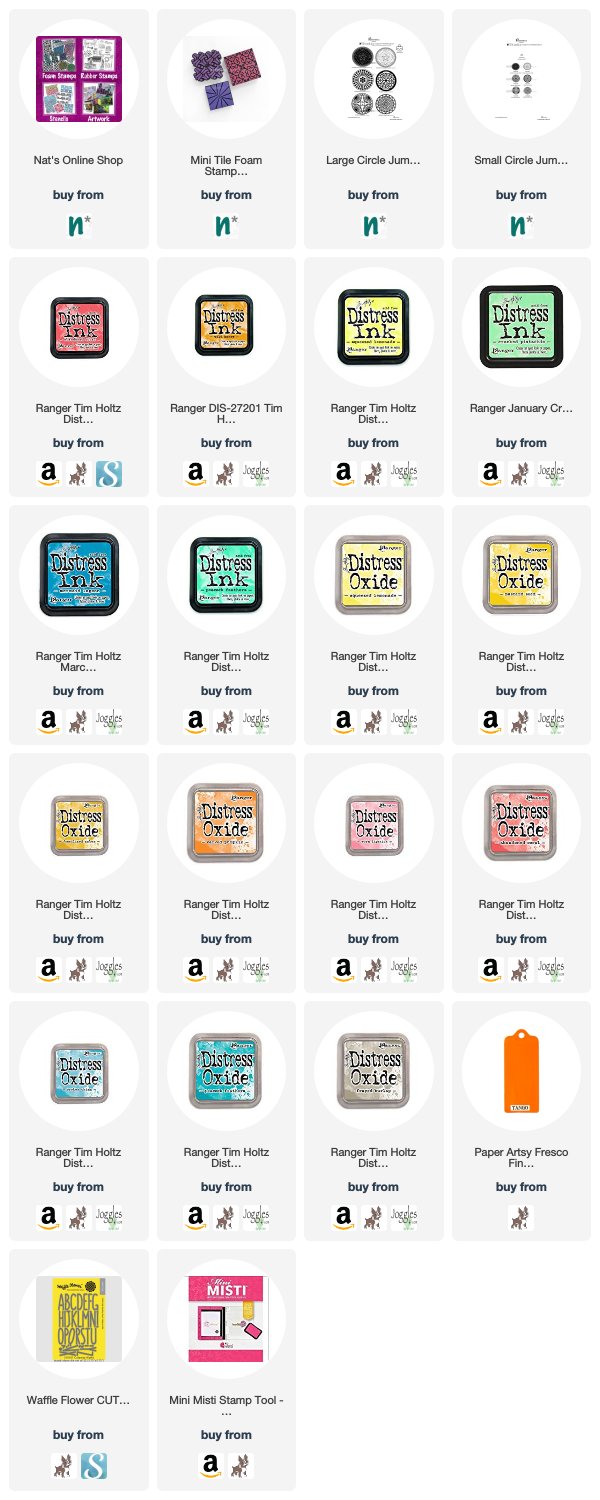
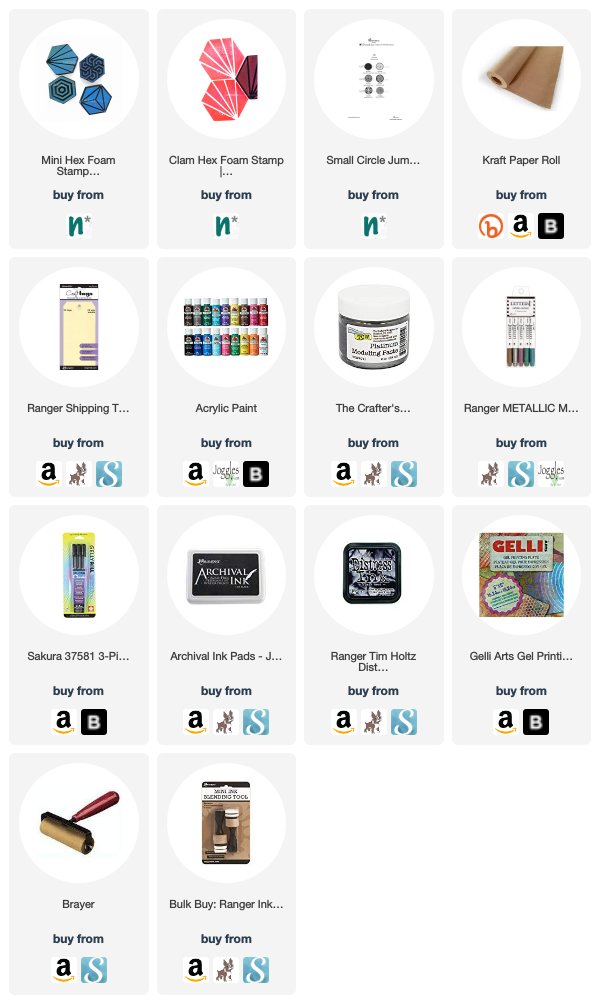
Thank you Jennifer! We can’t wait to try some papers of our own this year. You can find all of my foam stamps and rubber stamps in my online store and here are some of the other supplies that Jennifer used:


Feel inspired? Working on something yourself that you’d like to share?  I love to see how you interpret our monthly themes. Email me how you used my stencils and stamps with the theme and email me an image – I would love to share your projects in my next  “n*Spiration From Around the Globe“.

Leave a comment

Doin’ My Thing – Josefine Fouarge


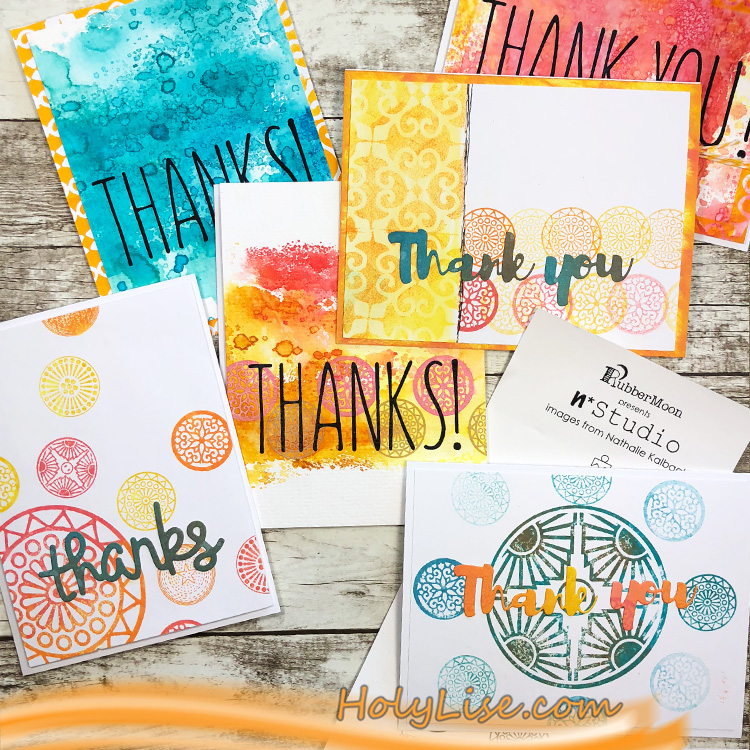
Hello my friends! Today we have a post from Josefine Fouarge from my Creative Squad. She is sharing some gorgeous techniques for making thank you cards using my Small and Large Circle Jumble stamp sets and my Mini Antique Tile foam stamp. She was inspired by this month’s theme: Doin’ My Thing – We all have a unique artistic style and way of working with supplies. This is the time to rock it! Be yourself. Do your thing.


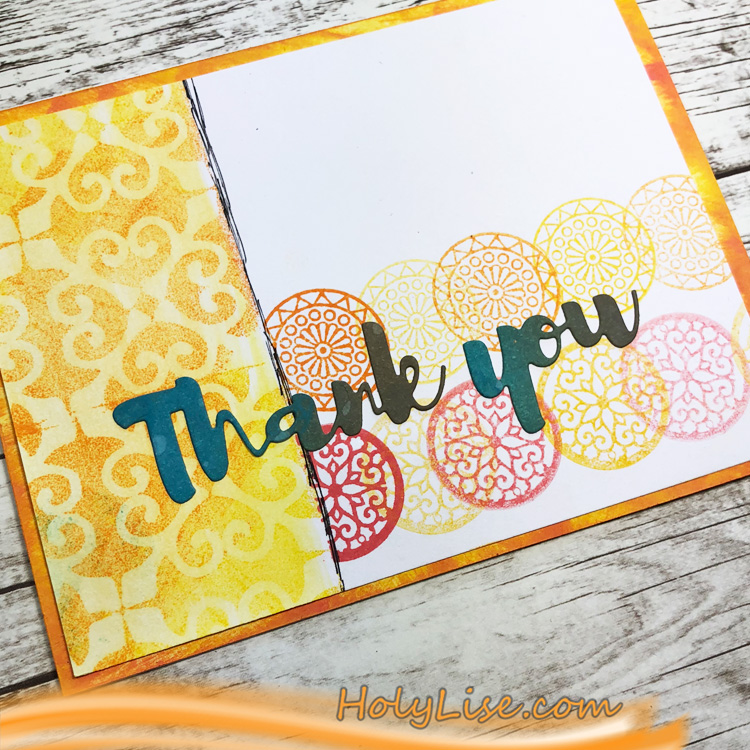
Aren’t we all good at “doin’ our thing”? Perfect theme, if you ask me. The problem was that I couldn’t decide which of my favorite techniques to show you… mono printing, layering, something snarky…? So many options. At the end, I decided to go with a variety of techniques using watercolor inks (Distress Inks, etc). I created a few “Thank You” cards as I needed them anyway ;)

In addition, I love to create videos, so here is my “doin’ my thing” video for the thank you cards that I made.

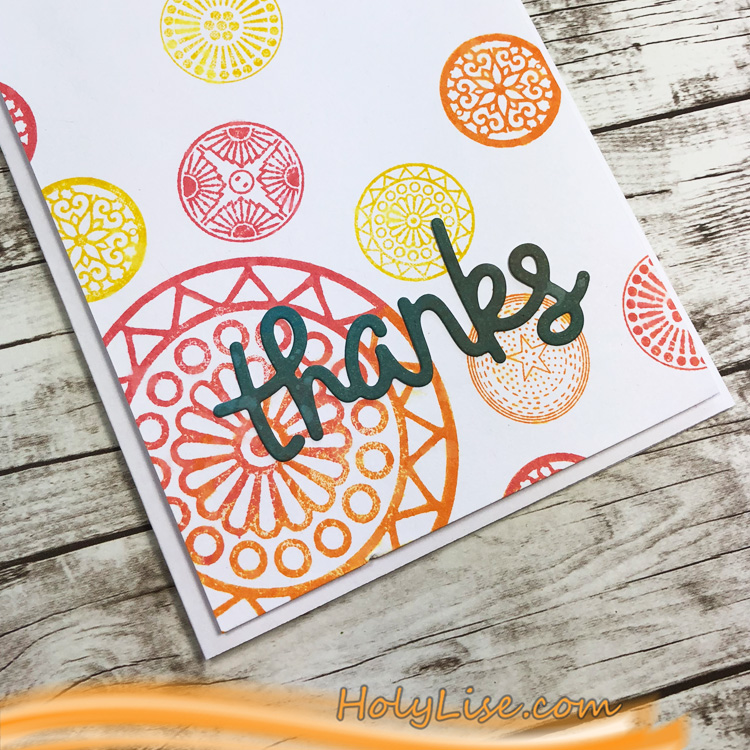
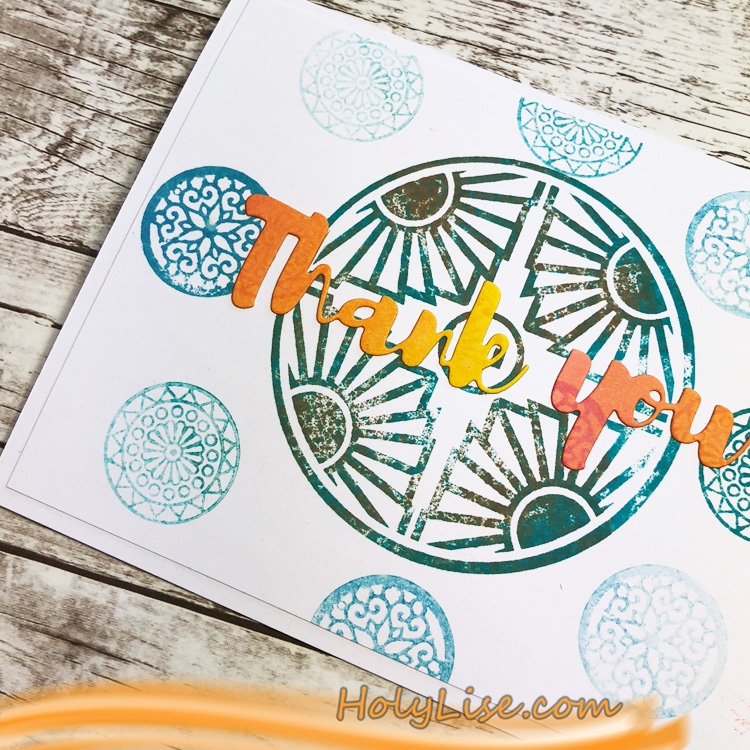
Nathalie’s Mini Tile Set foam stamps and Large and Small Circle Jumble rubber stamp sets were perfect to add that little extra bit of decoration to all of these cards.

All cards are kind of similar but have individual features, making them all very unique. I hope you enjoyed my quick tutorial and the use of Nathalie’s stamps to decorate all the cards.

Thanks so much for stopping by. Want to know what “the thing” for the rest of the Creative Squad is? Then come back every Tuesday to see all the other creations.


Thank you Josefine! To try out Josefine’s technique, you can find my Foam Stamps and Rubber Stamps in my Online Shop. Here are some of the other supplies that Josefine used:


Feel inspired? Working on something yourself that you’d like to share?  I love to see how you interpret our monthly themes. Email me how you used my stencils and stamps with the theme and email me an image – I would love to share your projects in my next  “n*Spiration From Around the Globe“.

Comments (1)

  • Kathy

    |

    Love the video and idea but, will you get the large stamps back in stock while you are having your sale?
    ❤️

    Reply

Leave a comment

Doin’ My Thing – Tania Ahmed


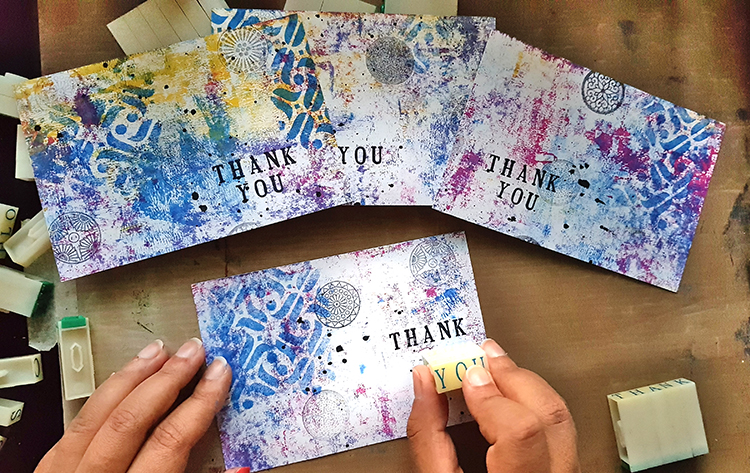
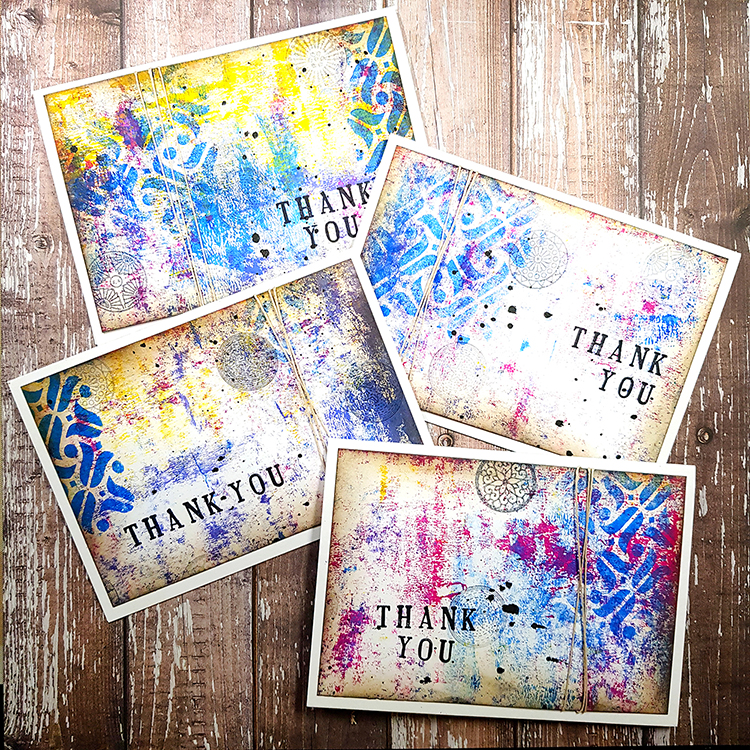
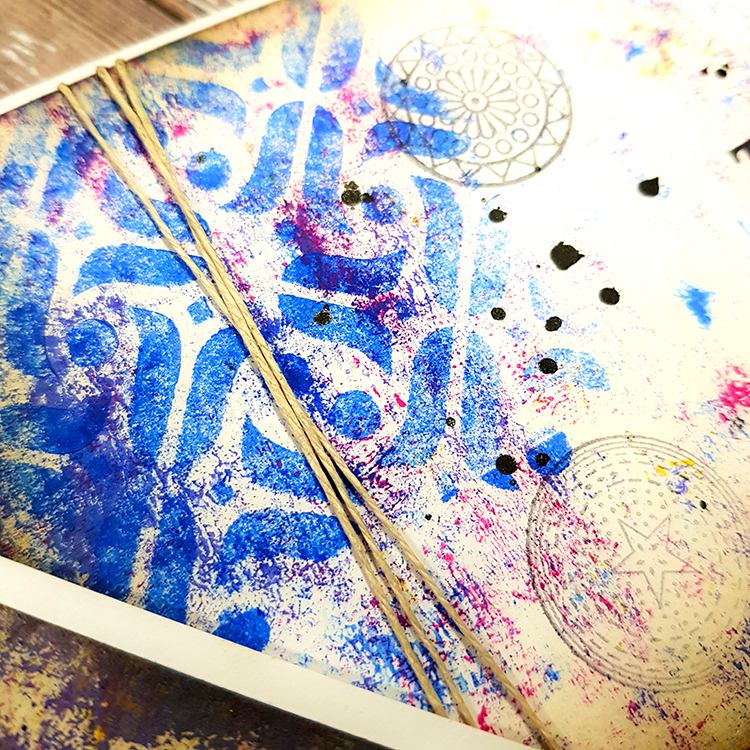
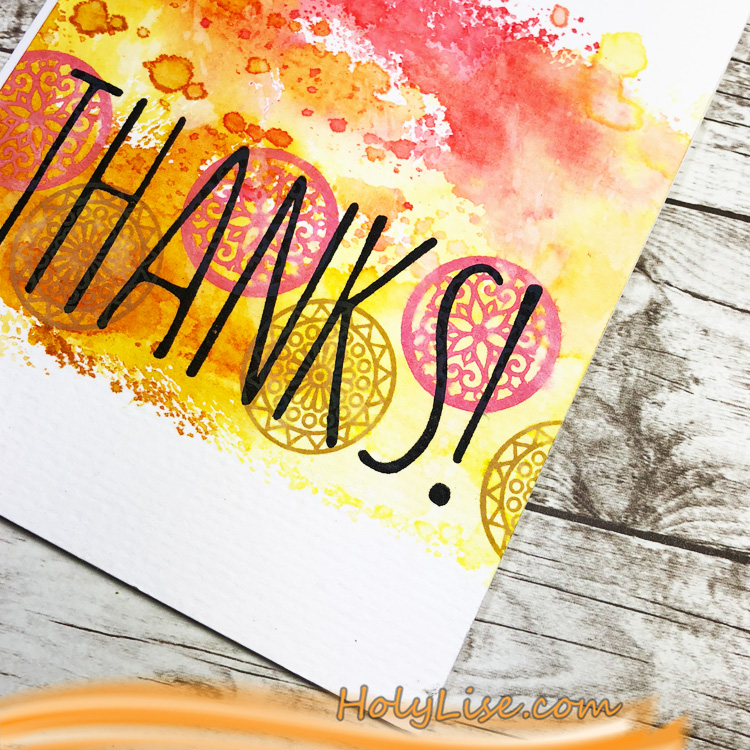
Happy Tuesday from the Creative Squad! Today we have a post from the lovely Tania Ahmed, sharing with us a set of cards using rubber stamps from my Small Circle Jumble set and my Mini Amsterdam foam stamp from the Mini Tile Set. Tania was inspired by this month’s theme: Doin’ My Thing – We all have a unique artistic style and way of working with supplies. This is the time to rock it! Be yourself. Do your thing.


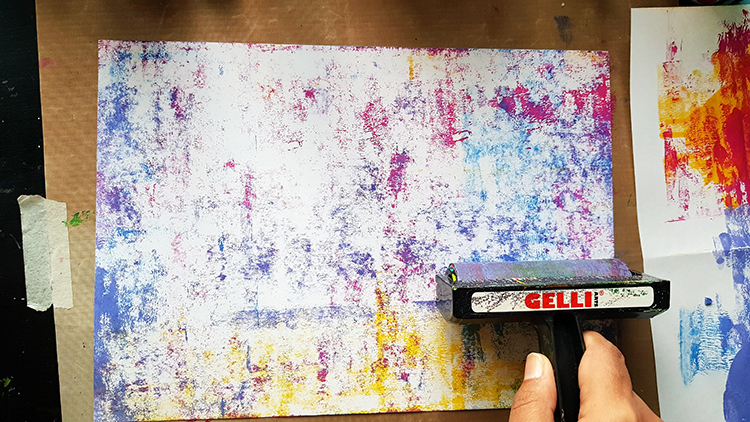
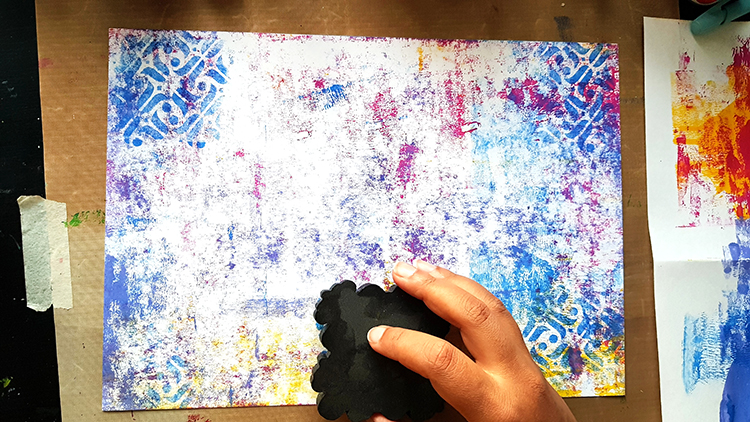
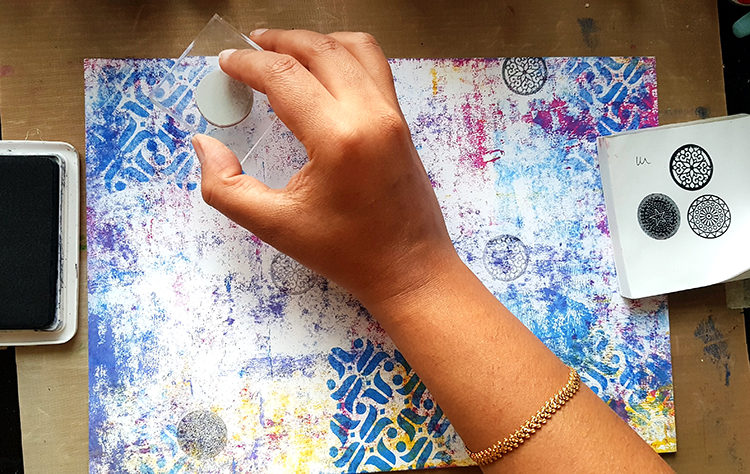
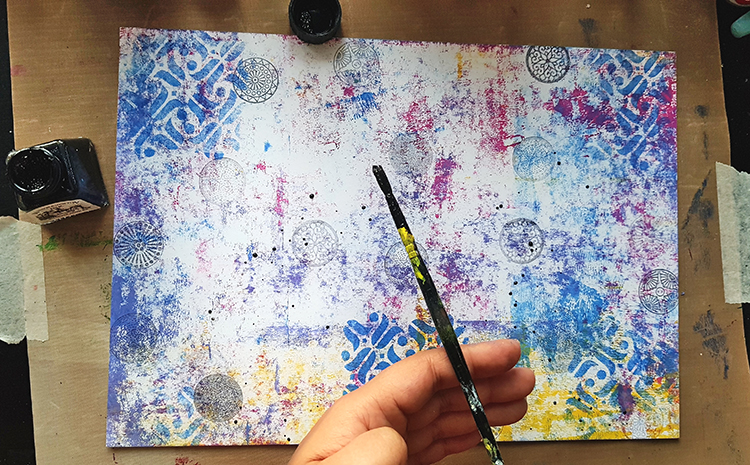
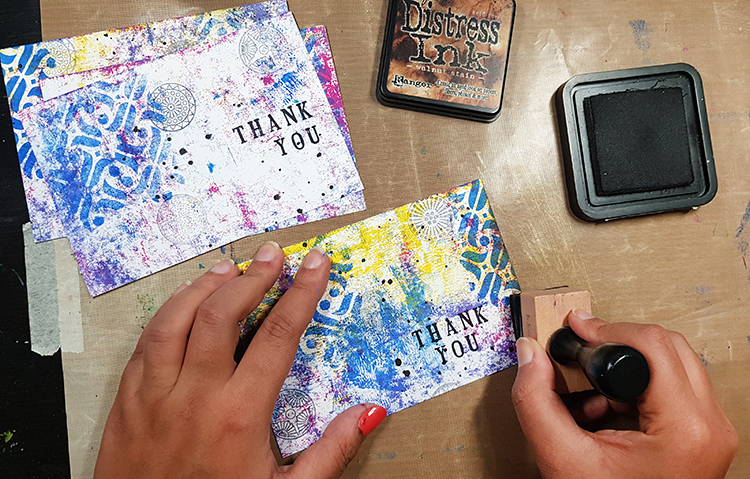
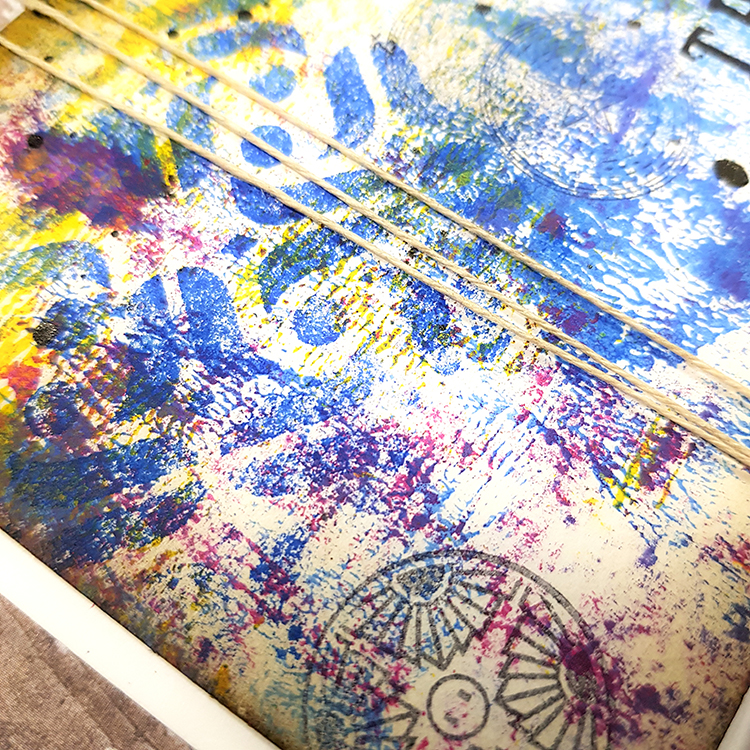
Our challenge this month was to use Nat’s Small Circle Jumble Stamps plus one of the foam stamps from the Mini Tile Set. I love using different kinds of patterns and seeing how I can make the two work together. I needed some thank you cards, so I thought this was the perfect opportunity to create a master board. A master board is basically a sheet of paper or cardstock that you create a background on with stamping, paint and mediums applied to it, which can be cut into smaller pieces to use as collage material or even cards. Also we were asked to really show off our styles so this project has all things that I love: bright colours, stamping, making cards, splatters and using brayers to create a super easy and quick background!

Lightly apply paint to cardstock with brayer. Less paint gives better effects!

Stamp lightly with the Mini Amsterdam ArtFoamie. Double stamp to create ghostly impressions.

Ink the Small Circle Jumble Stamps with Jet Black Archival Ink and stamp off on a scrap piece of paper and then stamp on your masterboard cardstock paper a few times to get light stamped images.

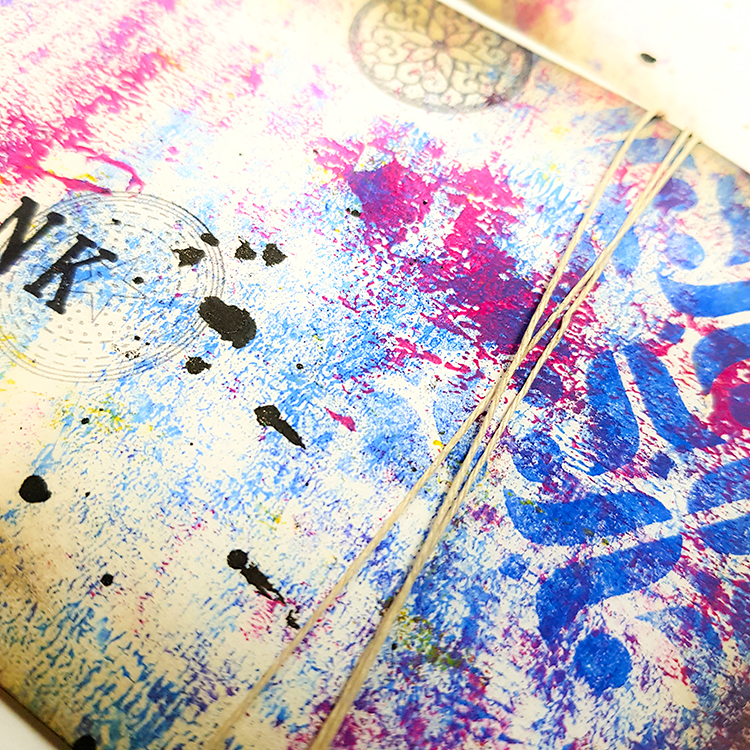
Add splatters with black ink.

Cut the masterboard cardstock into four 3.75 x 5.5 panels. Add sentiment with alphabet stamps.

Add Distress Ink around edges. Add twine and adhere to white card base.


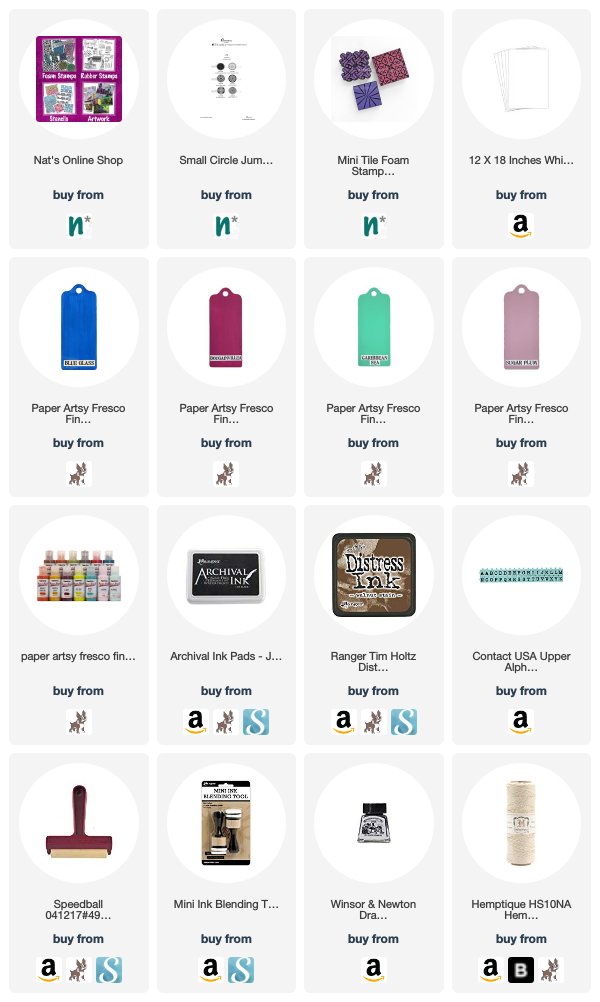
Thank you Tania – I love all those yummy layers! Want to try Tania’s card method? You can find all my Rubber Stamps and Foam Stamps in my Online Shop. Here are some of the other supplies that Tania used:


Feel inspired? Working on something yourself that you’d like to share?  I love to see how you interpret our monthly themes. Email me how you used my stencils and stamps with the theme and email me an image – I would love to share your projects in my next  “n*Spiration From Around the Globe“.
Leave a comment

True Blue – Judi Kauffman

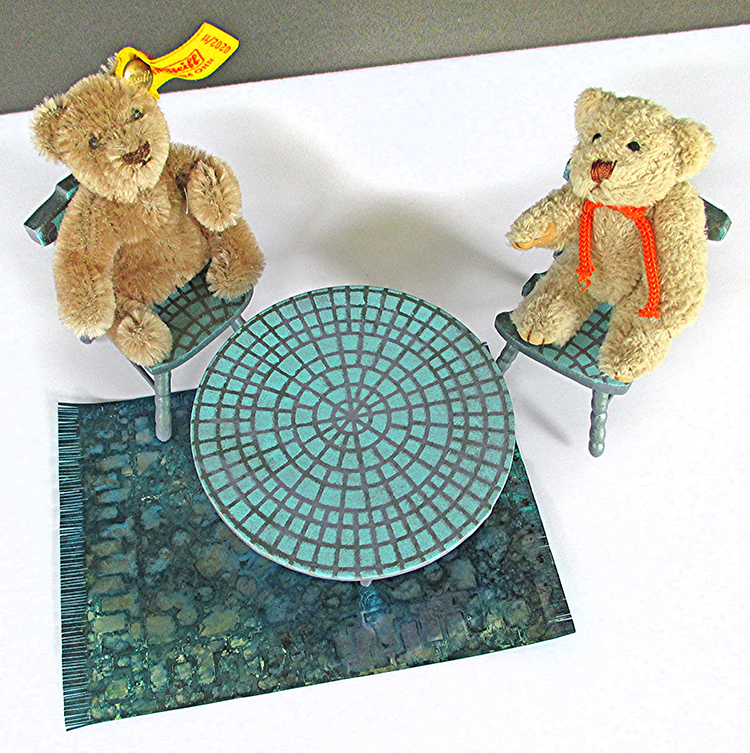
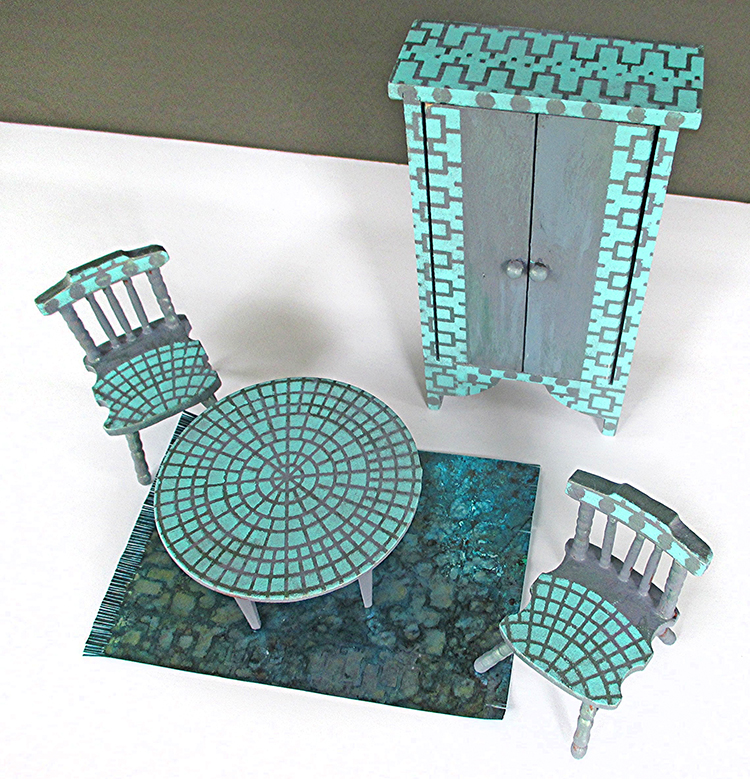
Today we have a special Creative Squad post from the super talented Judi Kauffman, an honorary member. You can learn more about Judi from our Nice to Meet You blog post featuring her creative story and artwork. This time Judi is presenting some delightful and definitely inspiring miniature decor items that will surely put a smile on your face! She worked with my Downtown and Central Ave stencils and this month’s theme: True Blue – Blue is the color of honesty and serenity. It’s calming and has even been shown to promote healing. It reminds us of the water and the sky. Let’s slow things down this month and bask in the tranquility of the color blue.


I received two stencils to use for this month’s Creative Squad theme: True Blue. Though I didn’t pick them, I was so happy when Downtown and Central Ave arrived! They are two of my favorites from Nathalie’s new release.

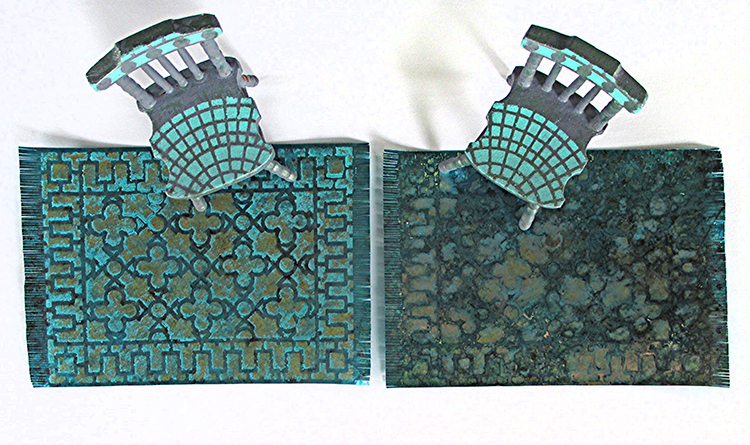
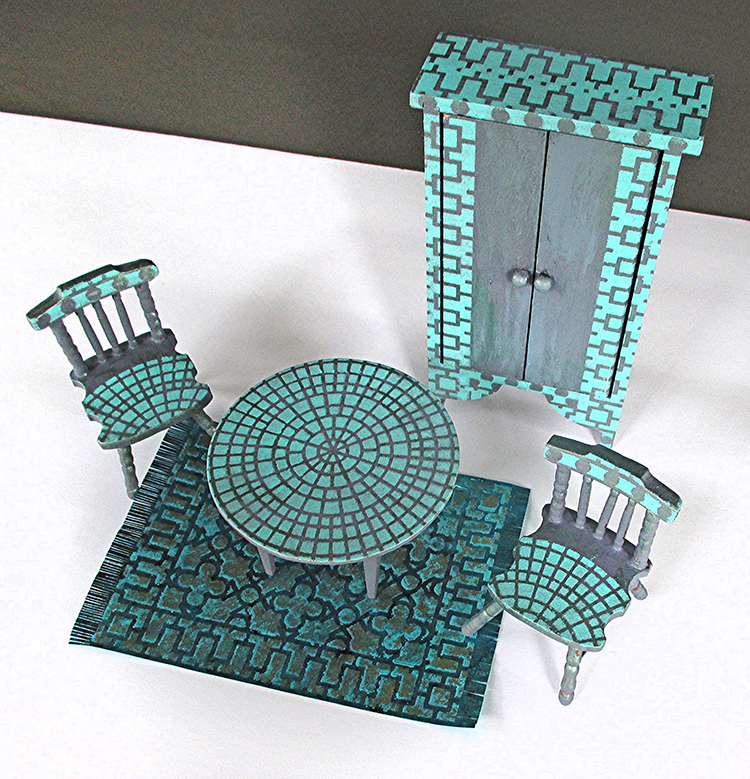
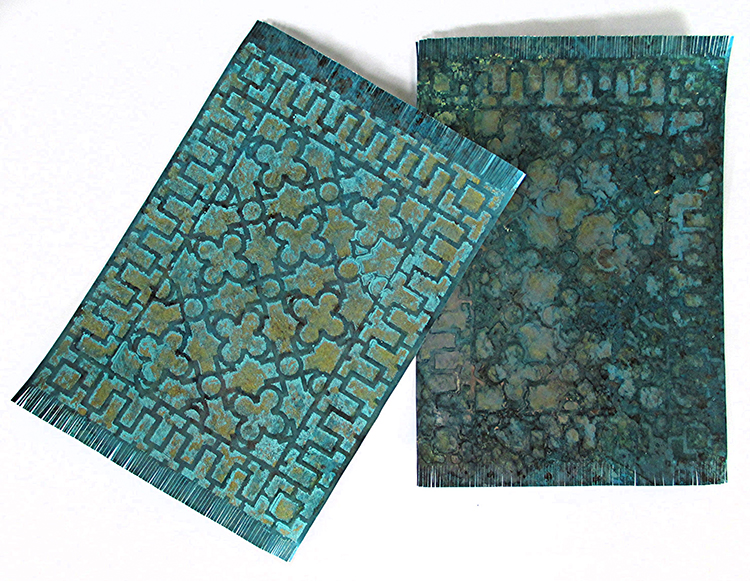
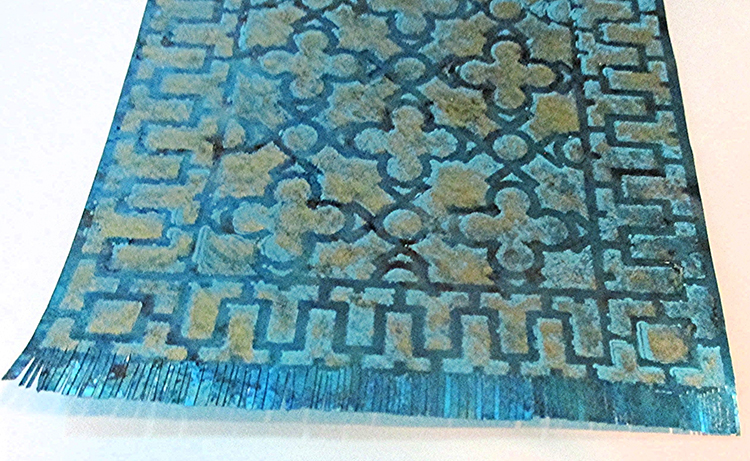
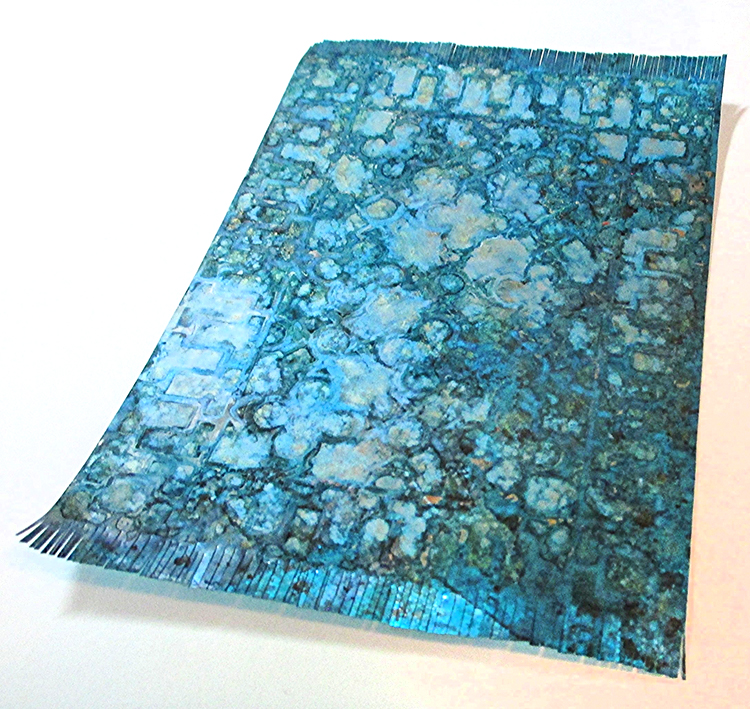
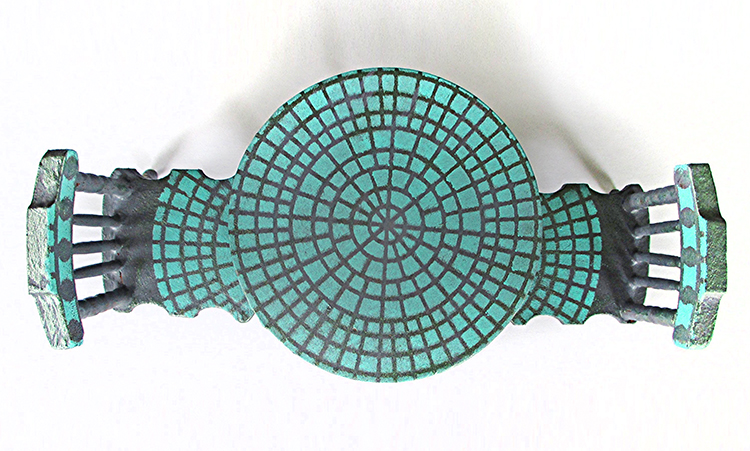
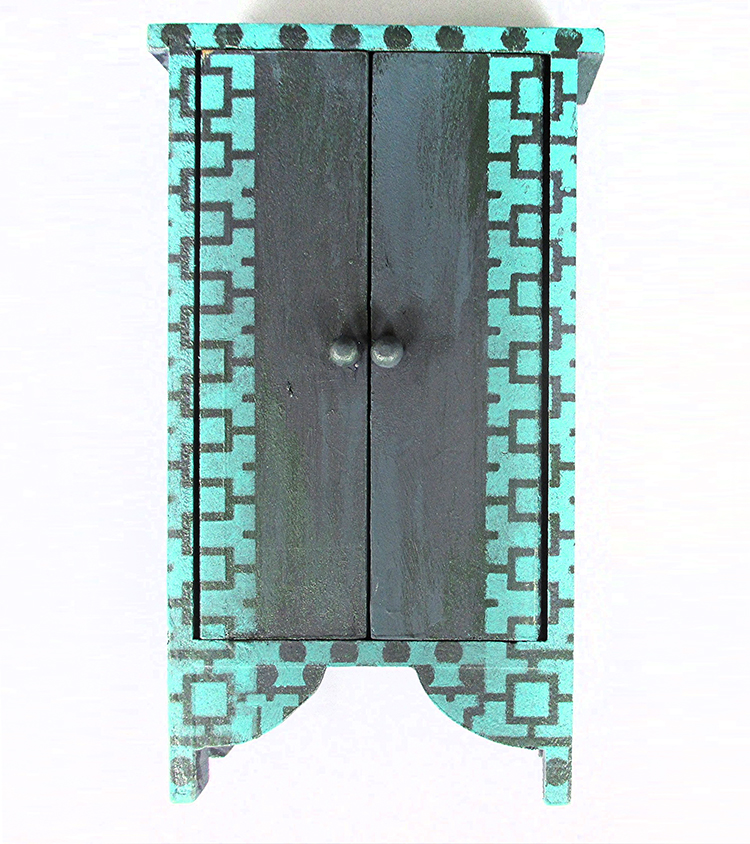
Right from the get-go Downtown looked like a rug and Central Ave evoked a mosaic table top. I’m going to stencil Downtown onto a piece of 18 count needlepoint canvas and stitch a miniature Oriental rug, but that’ll take me weeks and weeks, so meanwhile I created two stenciled Shimmer Sheetz rugs (Shimmer Sheetz is 5 x 12 so one sheet is enough for two rugs). And I stenciled some doll house furniture, sticking to a palette of blues that includes blue-gray, light teal, periwinkle, turquoise, and dark navy.

This project is fast and easy – VERY fast and easy. And it can be customized in so many ways. With the holidays fast approaching, I hope the design strategies in this tutorial will spark some fun.

The rug uses only one quarter of the 9” x 12” stencil, but it could be repeated to up-size the design. Stenciled canvas with a durable sealer would be great for a table runner or even a floor cloth.

If doll house furniture isn’t your thing, stenciled Shimmer Sheetz rugs could star on the front of a card congratulating a friend who has moved to a new home or could be sliced into strips for durable and elegant bookmarks! Instead of a 3D cabinet, stencil the front of a gate-fold card and use brads for the knobs. Instead of a table top, stencil mosaic-style chipboard Artist Trading Coins, adding collage elements. Or make flat, easy to mail holiday ornaments. (You get the idea…)

INSTRUCTIONS:

  1. For each rug – Alter the surface of a 5” x 6” piece of Shimmer Sheetz with alcohol inks in shades of blue. Allow to dry. Option A: Stencil with acrylic paint. Allow to dry. Stencil again, slightly offset, with alcohol inks in a light hue plus gold metallic. Option B: Use only alcohol inks for stenciling. For both rugs, use a craft knife, straight edge and cutting mat to trim the long sides, leaving a scant eighth-inch border. Trim the short ends, leaving three-eighths of an inch. Use sharp scissors to ‘fringe’ the short ends.

  1. For table and chairs – Base coat with a mix of French Blue Gray and Black Plum acrylic paint. Allow to dry. Using a wide, stiff almost-dry brush, add streaks of Dark Patina and French Blue Gray. Using Sea Breeze paint and a stencil brush, stencil top of table and seat on chairs with Central Ave. Stencil dot pattern from Downtown on the top of the chair back.

  1. Using the same paint and stencil brush, stencil the cabinet with portions of Downtown.


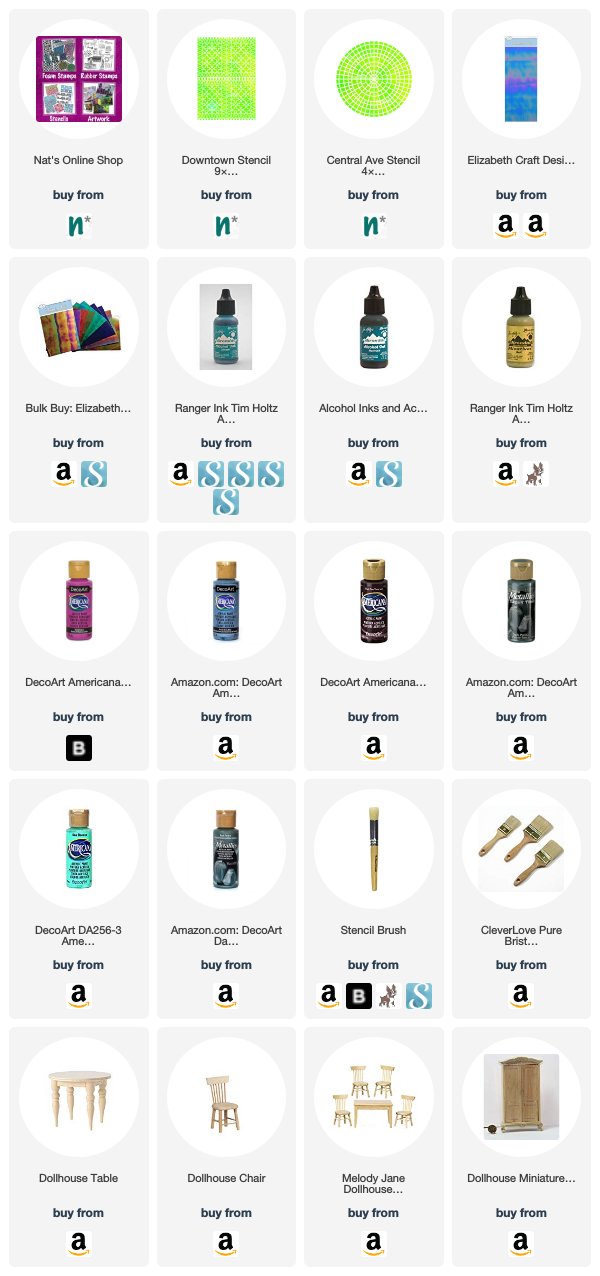
Thank you Judi! This is such a fun and unique project and it definitely brings back many happy memories from childhood, puttering around in the tiny world of the doll house :) You can find all my stencils in my Online Shop. In addition to the Dollhouse Furniture that Judi had on hand, here are some suggestions for the other supplies that Judi used:


Do you feel inspired? I’d love to see what you’re working on with my stamps and stencils. I post projects almost every month in my Inspiration From Around the Globe posts!

Comments (1)

  • Sue Clarke

    |

    Judi, that is the cutest set ever and I wish that I knew someone who would appreciate it as a gift.
    I love it and wonder if I could do that with a full size end table?

    Reply

Leave a comment

True Blue – Maura Hibbitts


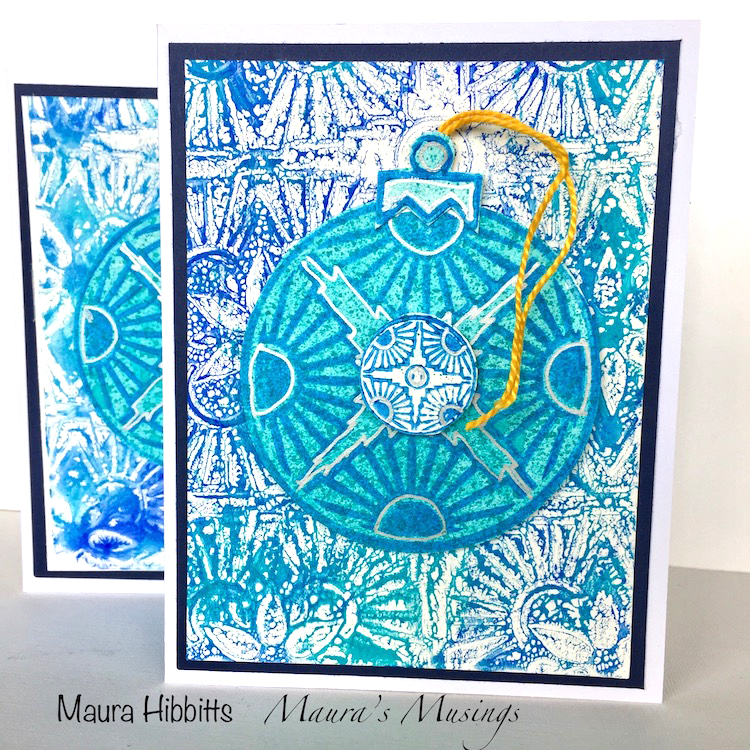
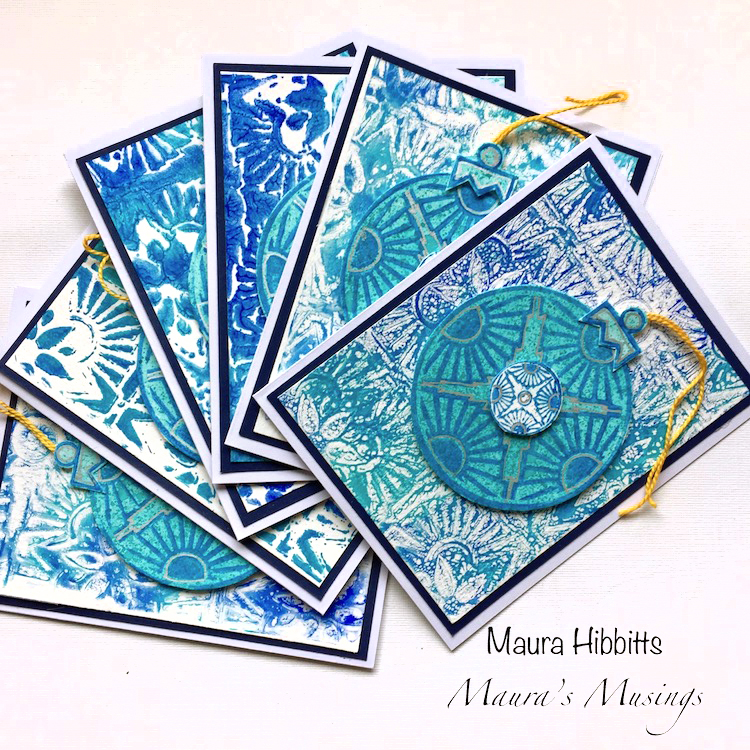
Hello my friends and welcome to a post from Maura Hibbitts from my Creative Squad! She is sharing with us a set of gorgeous holiday cards that she printed using her gelli plate and my new Hamilton stencil and some stamps from my Large Circle Jumble and Small Circle Jumble sets. This month’s theme is: True Blue – Blue is the color of honesty and serenity. It’s calming and has even been shown to promote healing. It reminds us of the water and the sky. Let’s slow things down this month and bask in the tranquility of the color blue.


There are so many blues around to inspire us to create with them. Think about the many variations of blue in the sky, from a clear sunny day, to a dark and stormy one. Think about all the blues in the water – oceans, rivers, ponds, and glaciers. Then, there are all the blues in textiles, paints, jewelry, flowers,  rocks (turquoise, bluestone…), and even trees, like the blue spruce. When you begin to think about all the places you observe blue, you truly realize it is all around you!

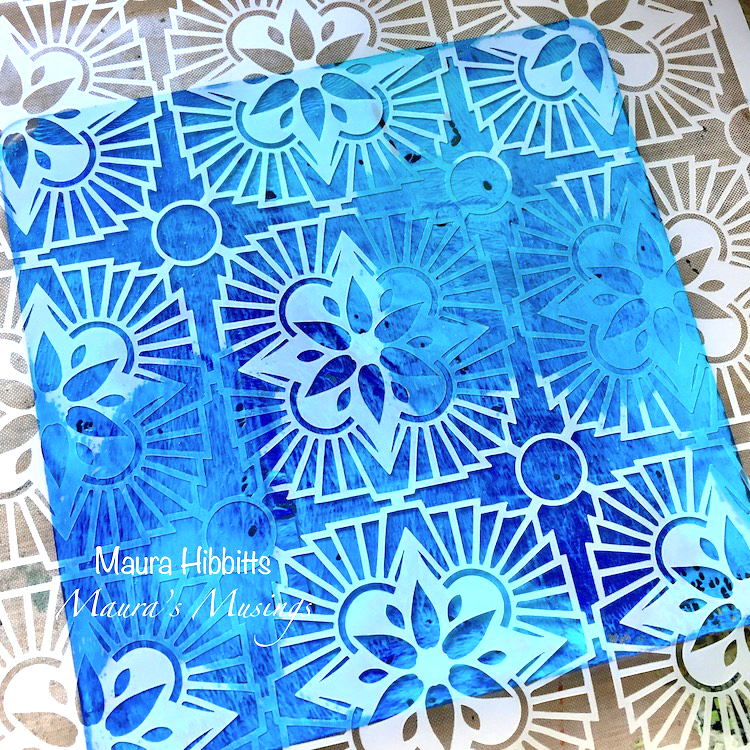
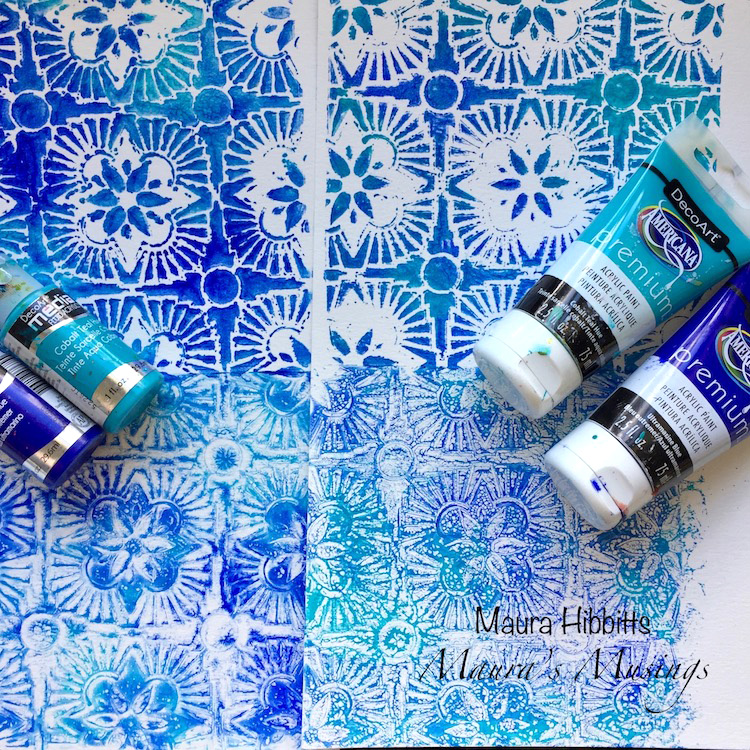
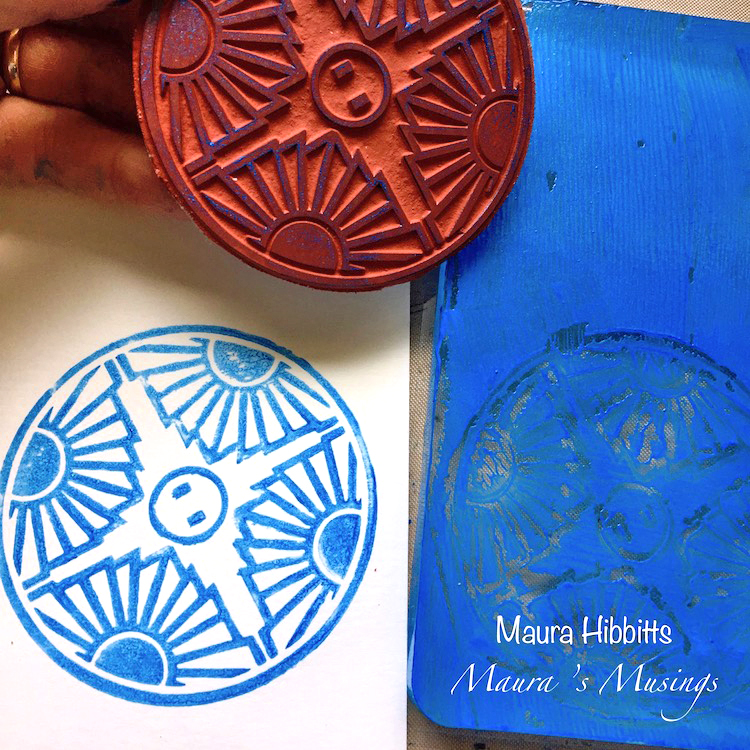
I decided to make a set of blue holiday cards, and pulled out my small 6 x 6 gelli plate to work with. To begin, I added a few squirts of the DecoArt Premium paint in Cobalt Teal Hue and Ultramarine Blue and blended it with my small brayer. Then, I laid the Hamilton Stencil down on the plate and pressed my watercolor paper down onto it.

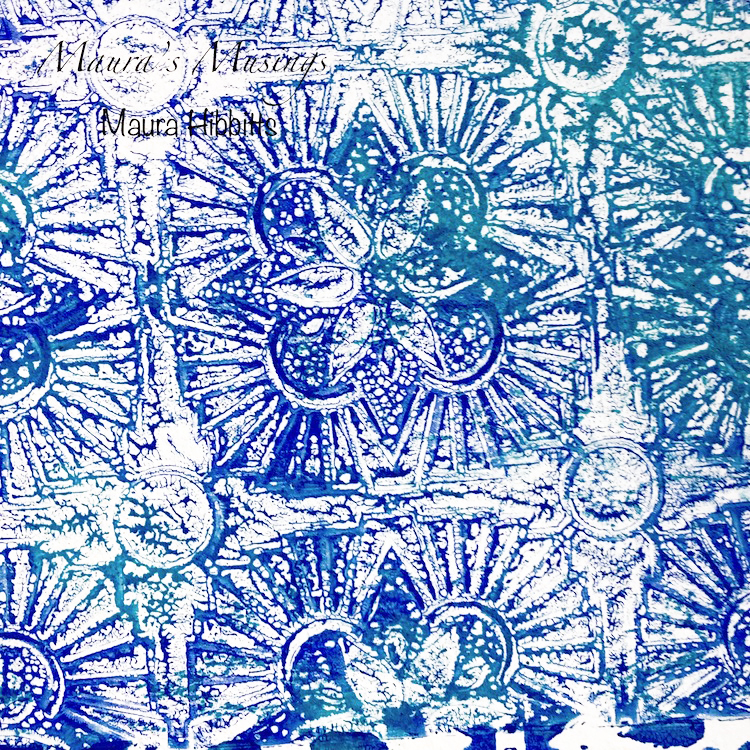
I lifted the stencil, and pressed the paper down onto the plate to get my second print (which I love!).

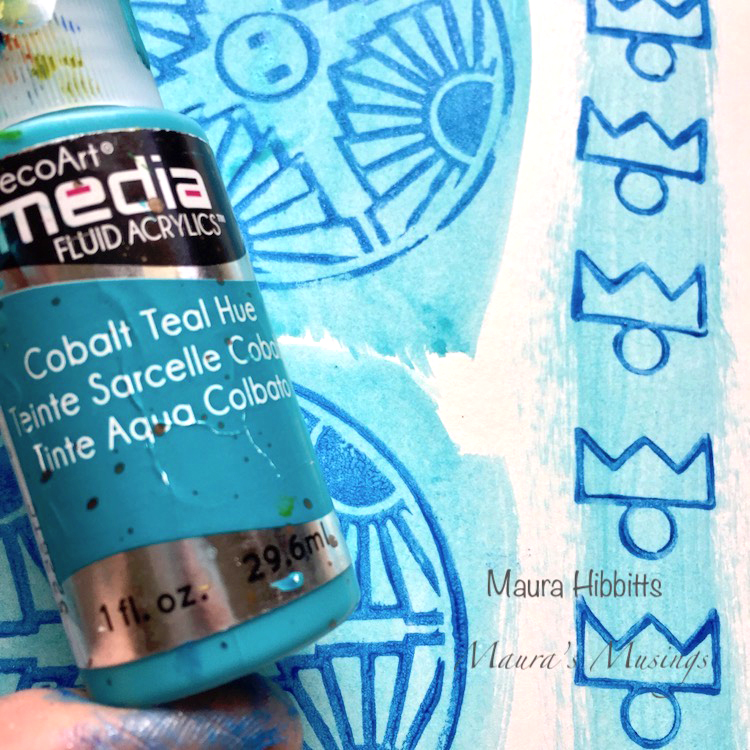
I repeated the process, this time using the fluid acrylics in Cobalt Teal Hue and Ultramarine Blue. I was curious to see the difference in the prints using the heavy body and fluid acrylics.

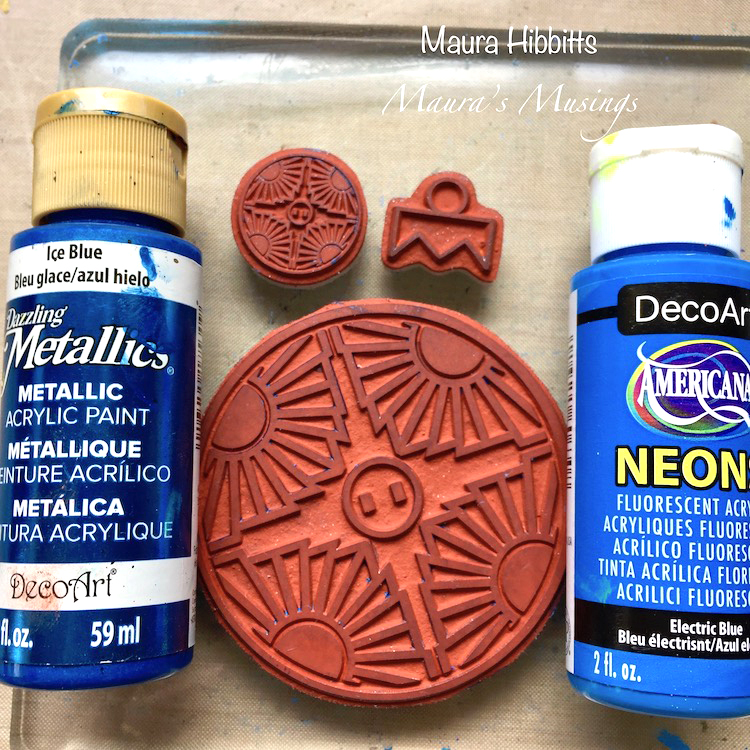
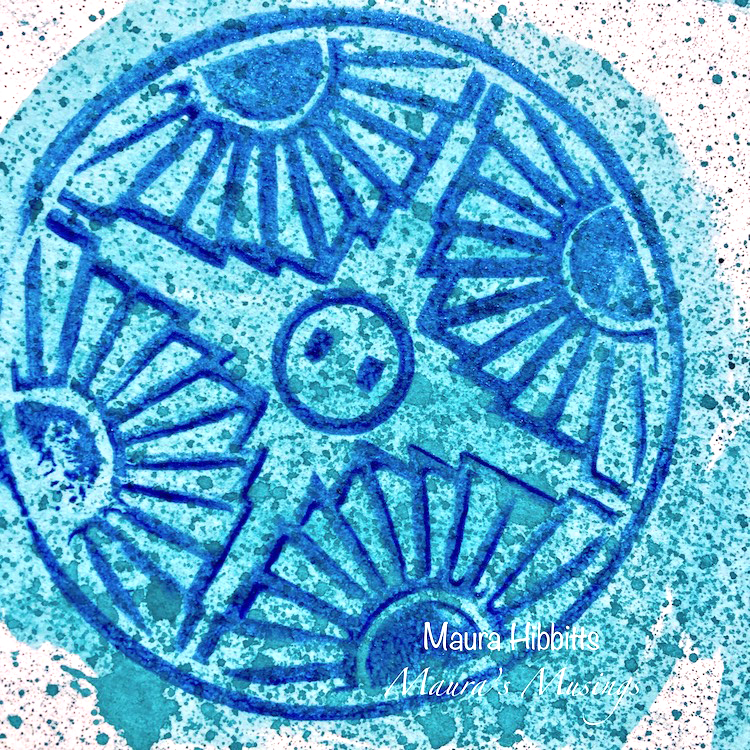
I set the backgrounds aside to dry, and prepared for stamping. I mixed Ice Blue Dazzling Metallic and Electric Blue Neon paints on the gelli plate with my brayer. The gelli plate makes a great surface that allows the stamp to easily pick up the paint to make a good impression. I used the large Broadway circle and topper, and the small Broadway circle to stamp out the designs on watercolor paper.

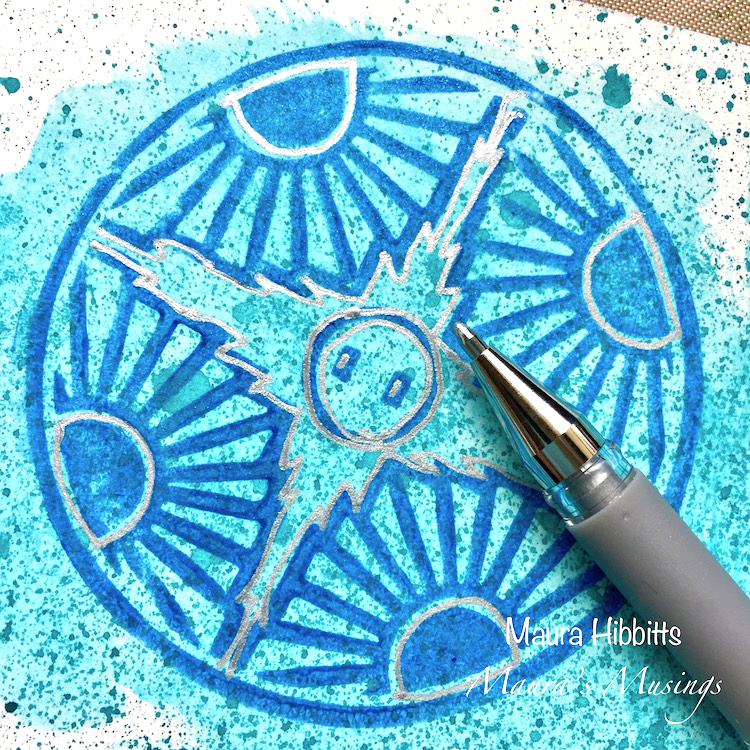
I decided to add a wash to the large circle designs, and added a bit of water to the Cobalt Teal Hue fluid acrylic and washed over the stamped areas using a  large flat brush.

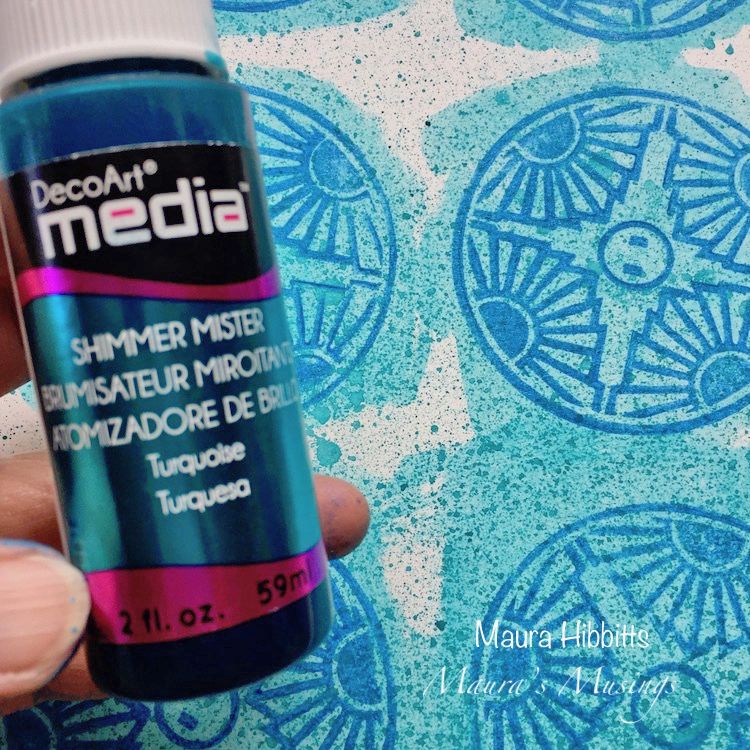
Next up, another layer, this time spritzing on Turquoise Shimmering Mister over the large circles.

The final step before assembling the cards was to add some highlights with a silver pen.

I cut a piece of navy cardstock to go behind each background, and layered the elements on top, popping them up a bit with foam tape. Then, I added a small glue dot behind the topper and attached some embroidery thread.

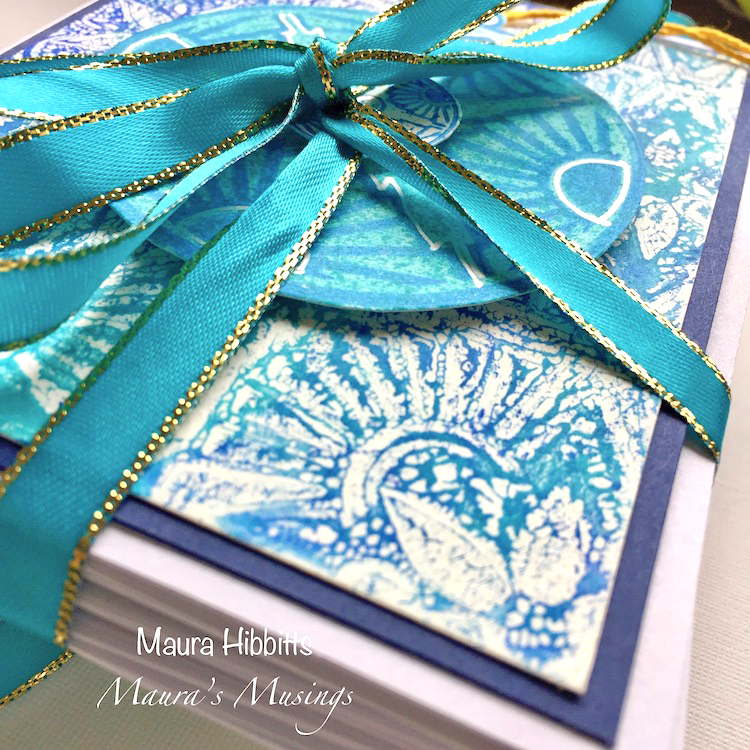
Time to package them up and tie them with a pretty blue ribbon!

I love the many variations of blue I got by just using a couple of colors and blending them, and now I have a lovely set of six holiday cards. Thanks for joining me!


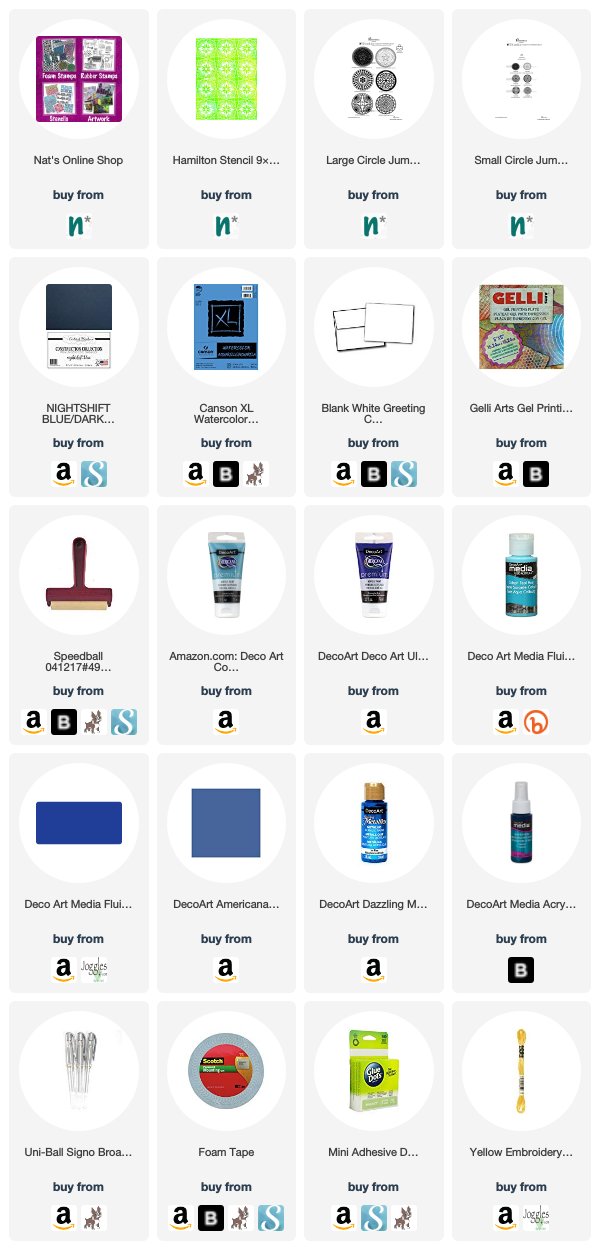
Thank you Maura – these are so beautiful and what a lovely mix of blues! You can find all my stencils and stamps in my Online Shop. Here are some of the other supplies that Maura used:


Feel inspired? Working on something yourself that you’d like to share?  I love to see how you interpret our monthly themes. Email me how you used my stencils and stamps with the theme and email me an image – I would love to share your projects in my next  “n*Spiration From Around the Globe“.

Comments (3)

  • Jo - Let's Art Journal

    |

    Wow, what a beautiful card! I love the colours and the textured background that you created is amazing ?. Creative wishes! J ? x

    Reply

  • Sue Clarke

    |

    Gorgeous cards Maura!
    I just love holiday cards that feature colors other than red and green.

    Reply

  • Maxi Moon

    |

    So cool!!! We love what you did with Nathalie’s circle stamps. They are so versatile!

    Reply

Leave a comment

True Blue – Jennifer Gallagher


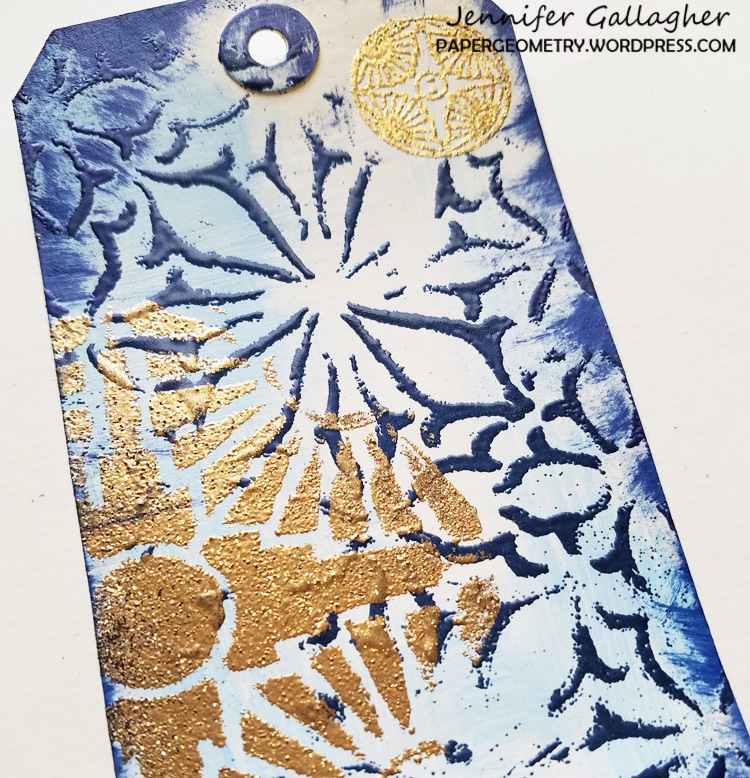
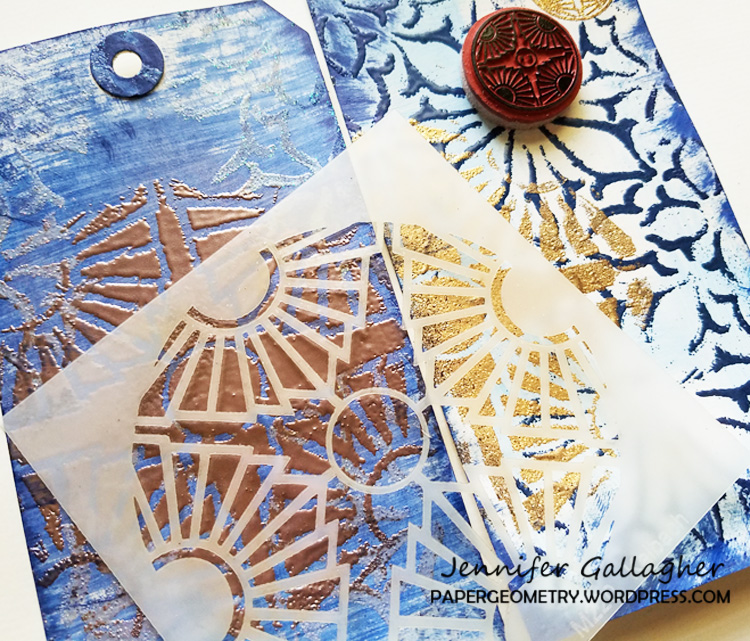
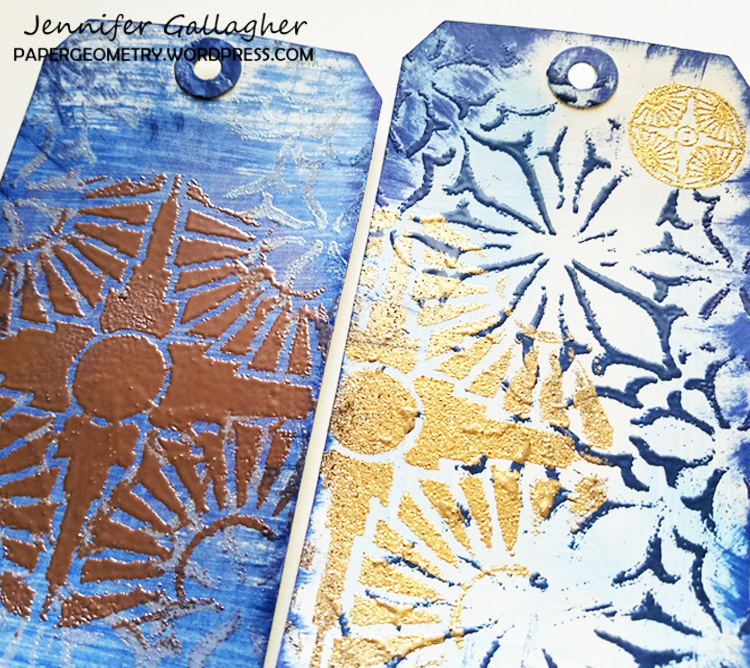
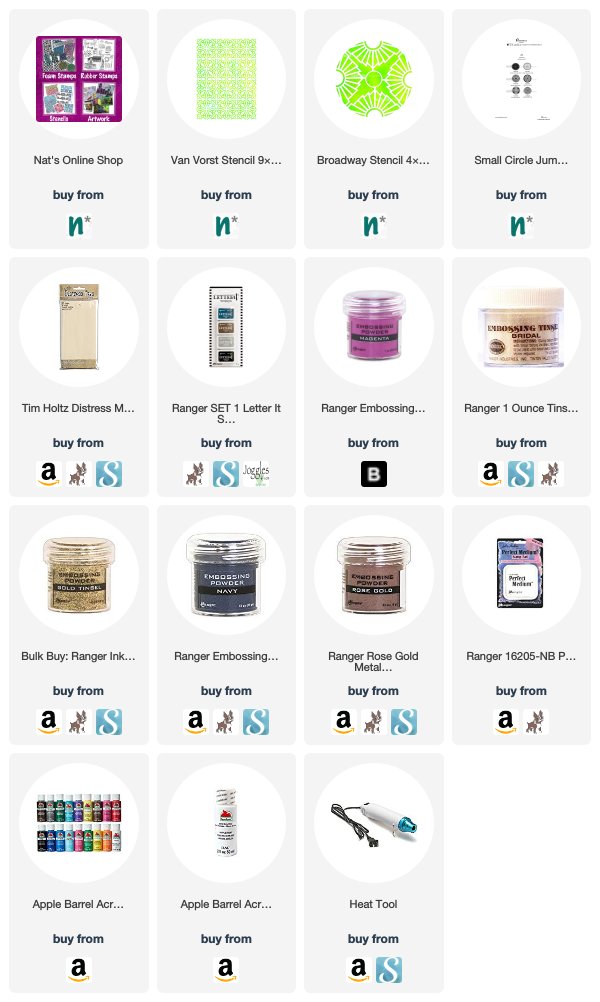
Hello from my Creative Squad! Today we have some gorgeous tags from Jennifer Gallagher that show just how well stencils work with embossing powder. Jennifer is using my new Van Vorst and Broadway stencils and my Small Circle Jumble rubber stamp set. This month’s theme is: True Blue – Blue is the color of honesty and serenity. It’s calming and has even been shown to promote healing. It reminds us of the water and the sky. Let’s slow things down this month and bask in the tranquility of the color blue.


Blue is one of my favorite colors so I was very excited to see that the creative squad would be focusing our creations on it this month. The color blue makes me think of cold weather, snowy mountain scenes and holiday time with family. These quick and easy tags would be perfect for holiday gift tags.

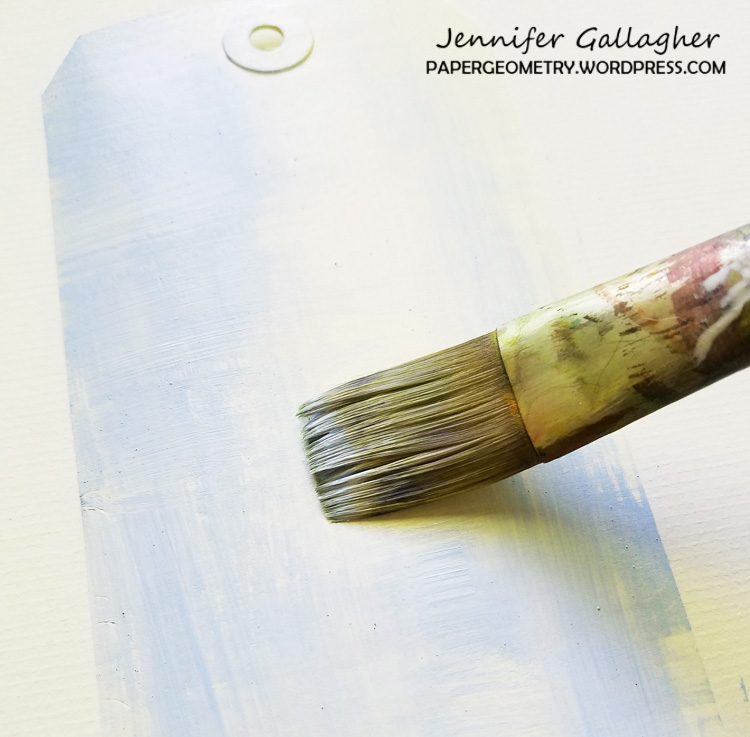
Begin by brushing on a thin layer of light blue paint and white paint onto your tag with a dry brush. We want to get a distressed look so try not to apply too much paint. Leaving areas unpainted will also add to the interest and texture of the tag.

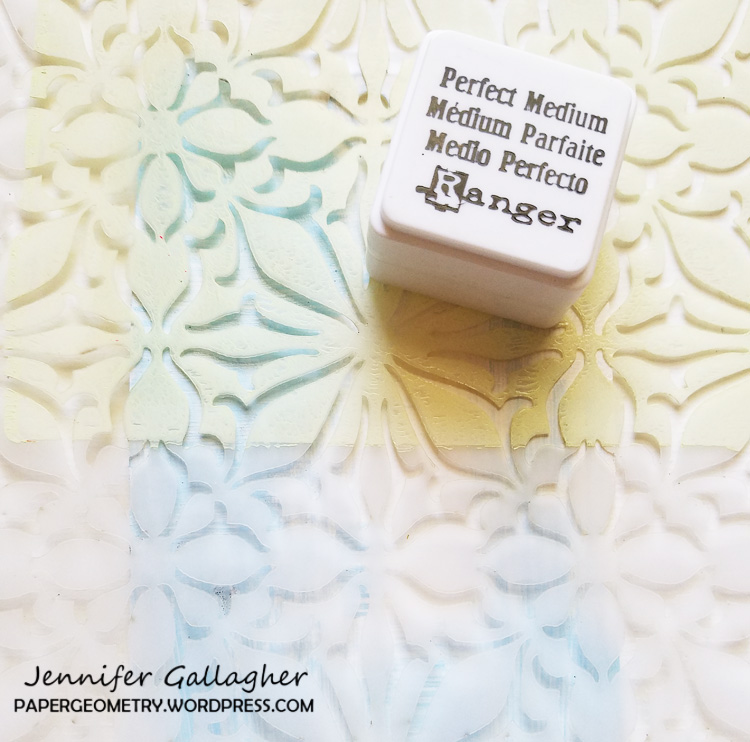
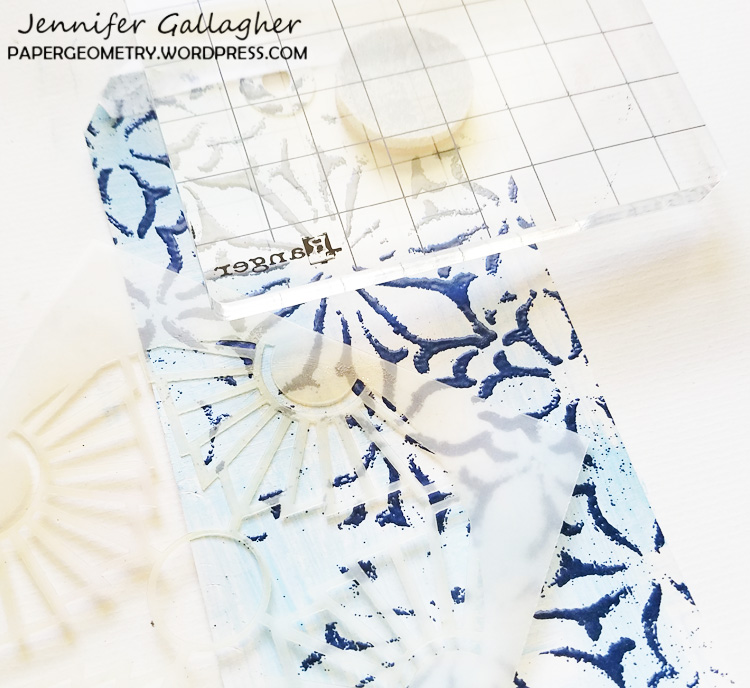
Next, place your Van Vorst stencil down onto your tag and press the perfect medium through the stencil.

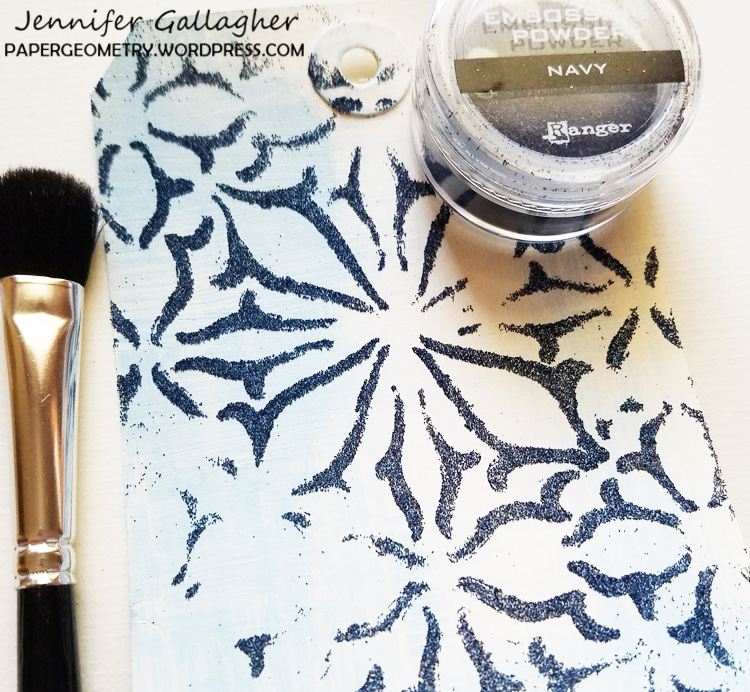
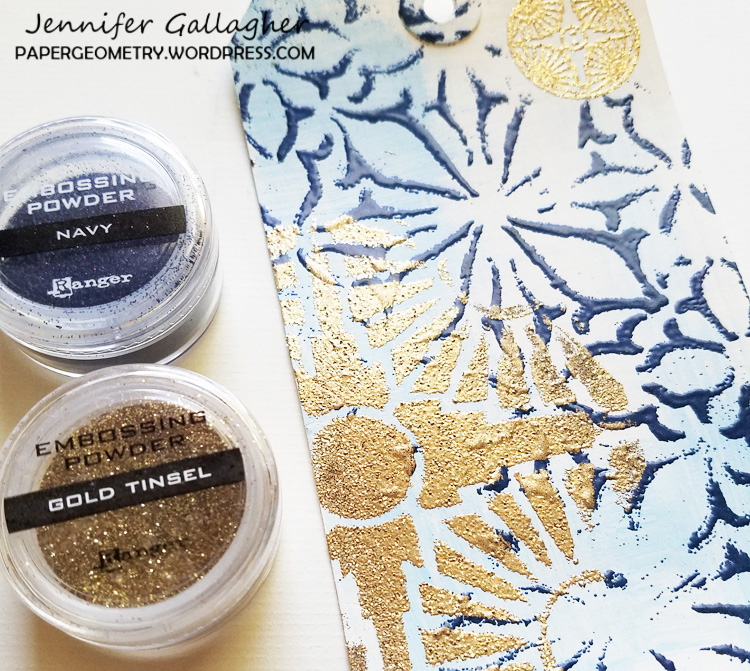
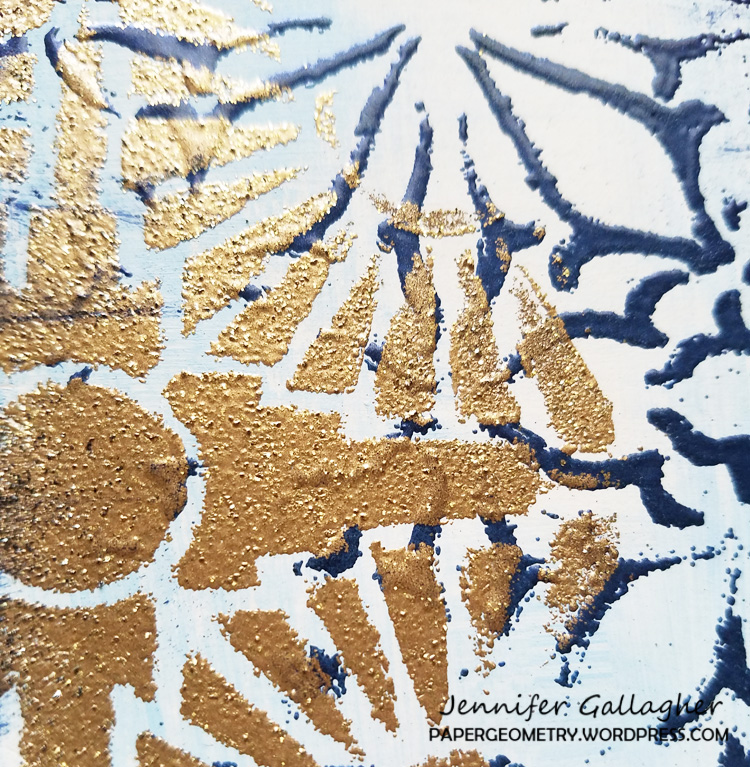
Sprinkle the navy embossing powder over the perfect medium. Use a small soft bristled brush to knock off any areas you do not want the embossing powder or to clean up any mistakes. Apply heat from your heat tool to melt the powder and set it. Let it cool.

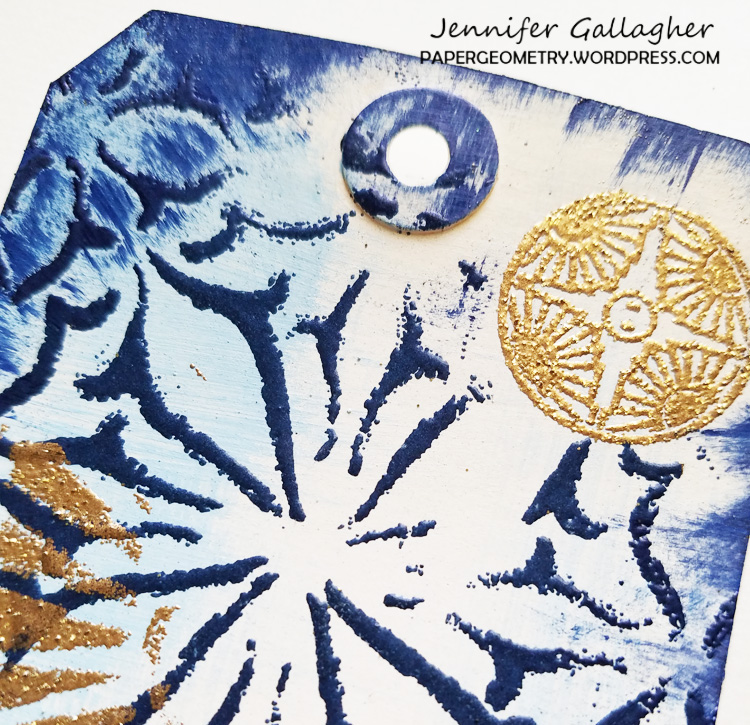
Lay the 4×4 inch Broadway stencil on the tag and repeat the same process with gold tinsel embossing powder. Then stamp the coordinating small Broadway stamp from Nat’s Small Circle Jumble stamp set with perfect medium in the top corner of your tag. Emboss it in gold tinsel as well.

Lastly, take your cobalt stamping pad and edge around your tag, smearing a bit of ink from the edge onto the tag. This will add additional interest and texture.

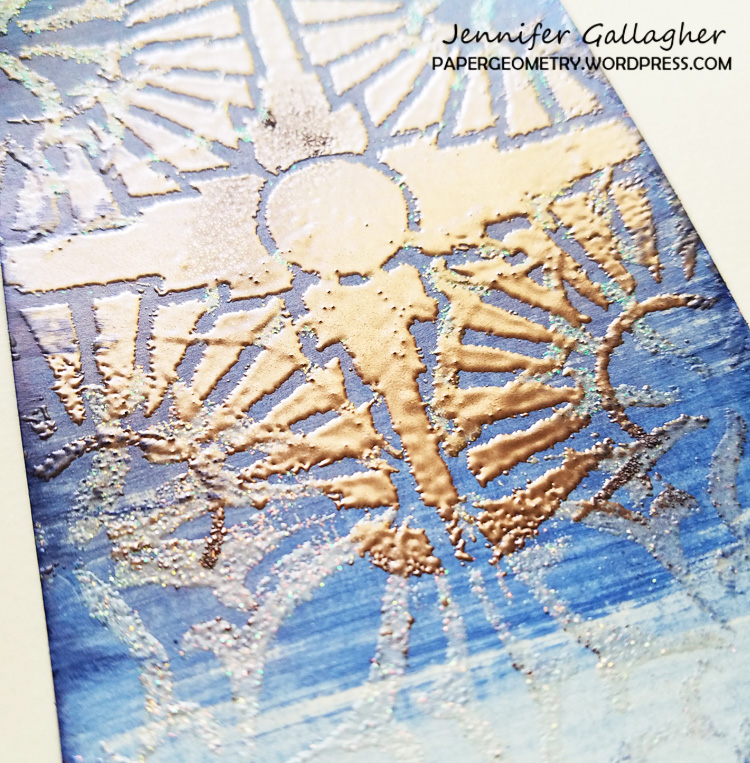
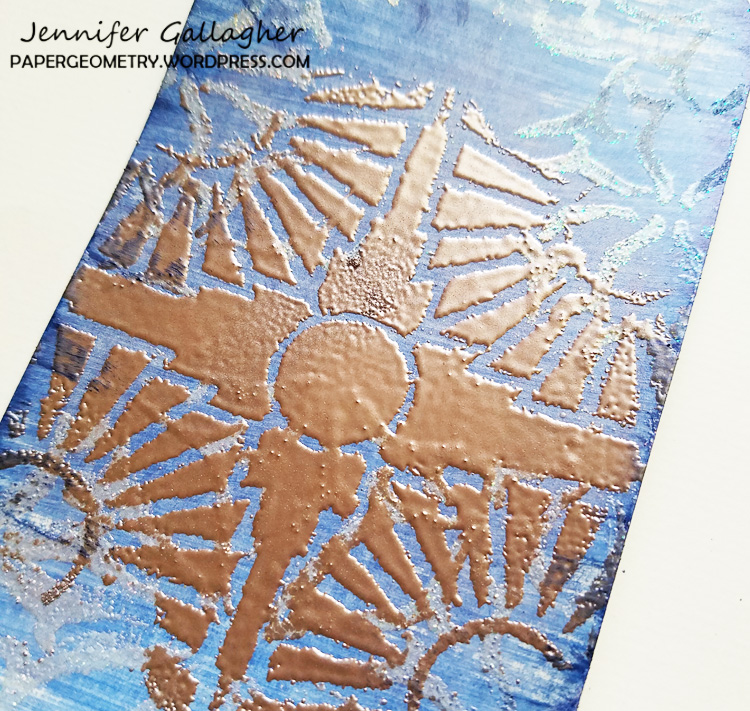
I created a second tag switching up the colors a bit. I painted the tag with real navy, embossed Van Vorst with bridal tinsel embossing powder, and embossed Broadway with rose gold embossing powder.

I hope you find these tips useful for creating your own beautiful holiday tags. You can also change up your background color and embossing powders to create non-holiday versions. Have fun and be sure to share your projects with us.


Thank you Jennifer – I just love how that gold embossed pattern looks! You can find all my stencils and stamps in my Online Shop. Here are some of the other supplies that Jennifer used:


Feel inspired? Working on something yourself that you’d like to share?  I love to see how you interpret our monthly themes. Email me how you used my stencils and stamps with the theme and email me an image – I would love to share your projects in my next  “n*Spiration From Around the Globe“.
Leave a comment

True Blue – Josefine Fouarge


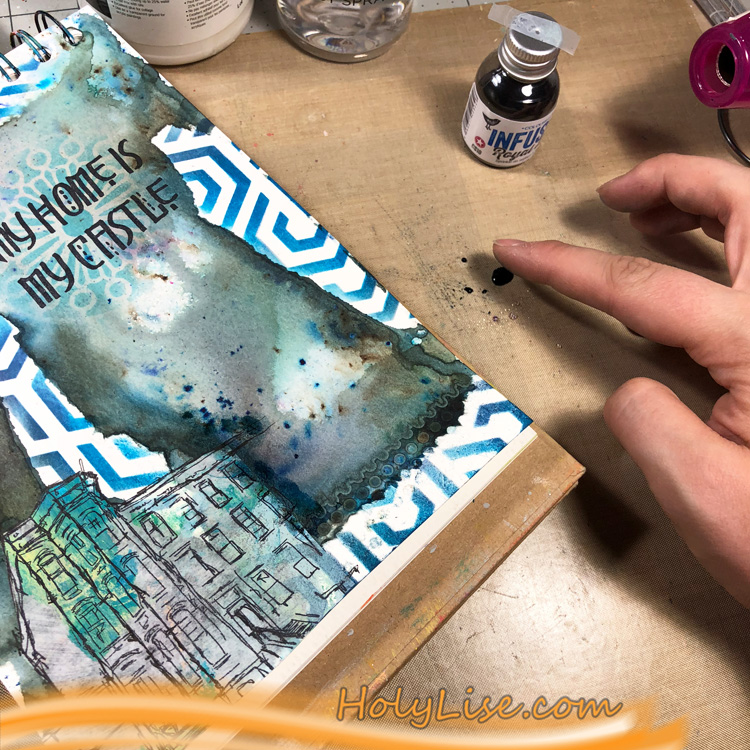
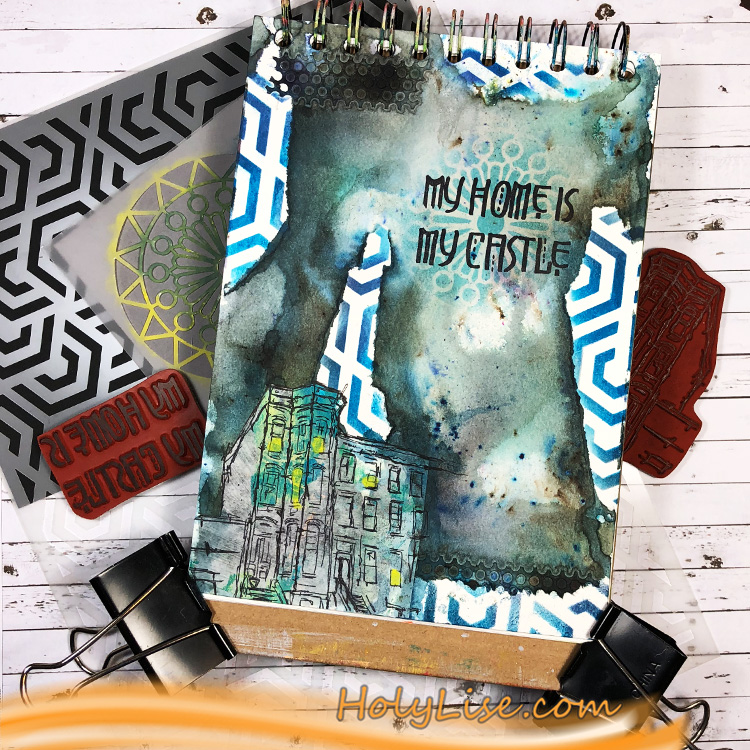
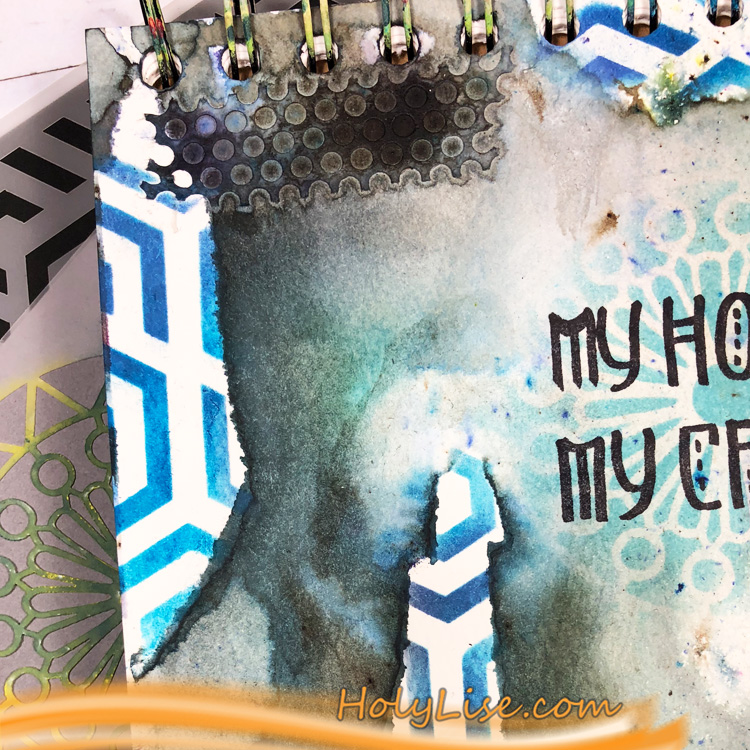
Hello my friends! Today is Tuesday so that means one of my Creative Squad posts! Here we have Josefine Fouarge sharing with us an art journal page that is a wonderful combination of colors and stamped and stenciled elements. Josefine uses my new Flower Maze and Valley Road stencils, and my Brownstone and My Home is My Castle stamps in this lovely composition. This month’s theme is: True Blue – Blue is the color of honesty and serenity. It’s calming and has even been shown to promote healing. It reminds us of the water and the sky. Let’s slow things down this month and bask in the tranquility of the color blue.


I could use some calmness this month. Life is catching up and finding those quiet moments is becoming a challenge. So, I’m looking forward to those healing effects from using the color blue (it’s probably more the process of creating itself that will do that for me ;) ).

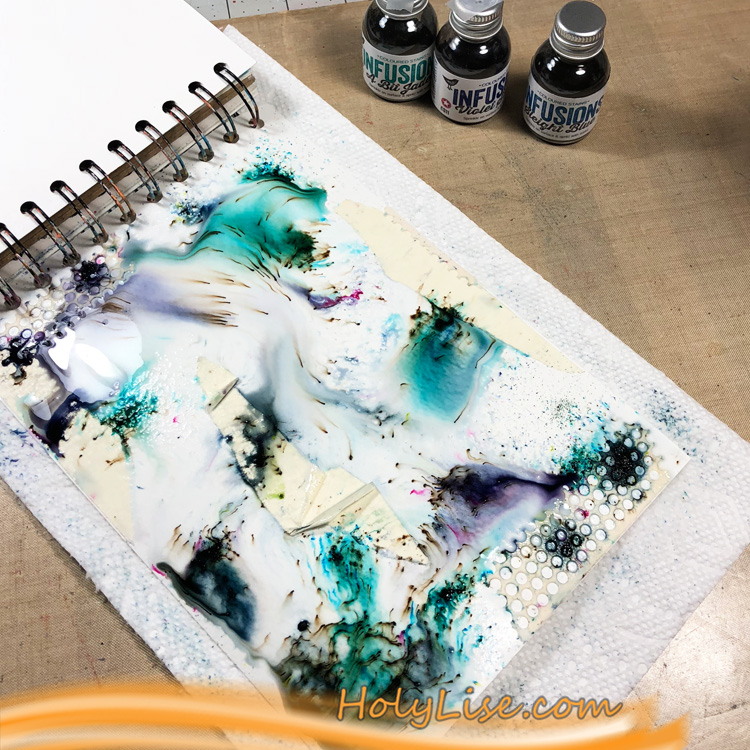
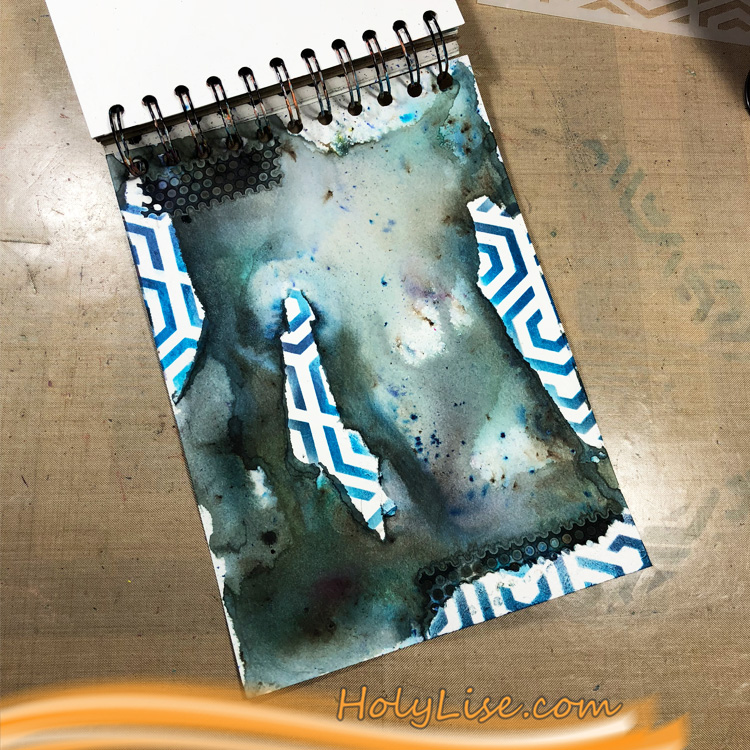
I started by adding different pieces of tape to my journal page to create some texture for the background. I was hoping for more blue from the watercolor powders, but it turned out that there were a lot of green and purple pigments in there as well.

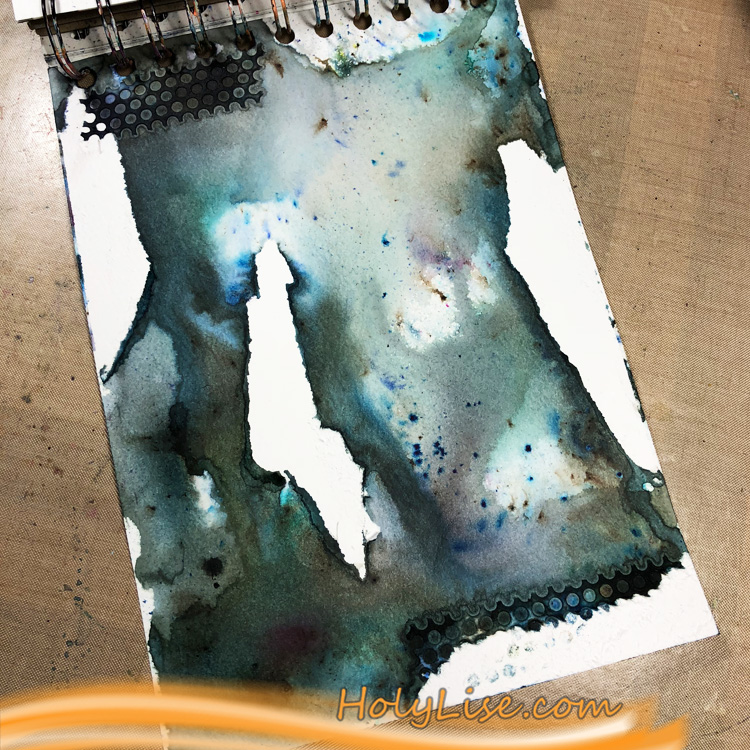
But that just made it more interesting, so I added powders and water in different layers, till I had the look that I liked. What I didn’t like was the tape that I used for the background, so I removed those, at least the majority of it.

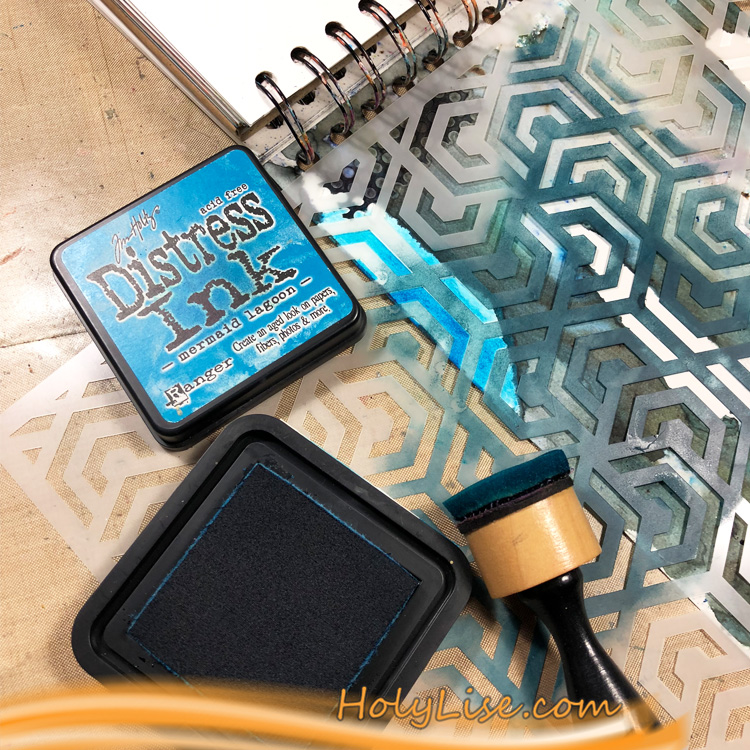
To decorate those now white areas, I grabbed the new Flower Maze stencil and blended a mix of Mermaid Lagoon Distress Ink and Blueprint Sketch Distress Oxide through them.

I made sure to blend the ink only in those white areas.

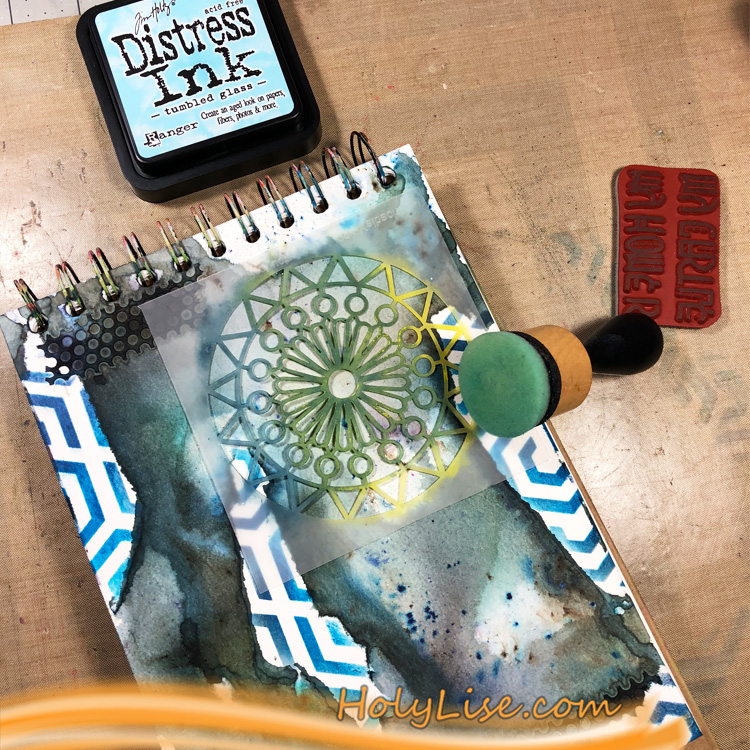
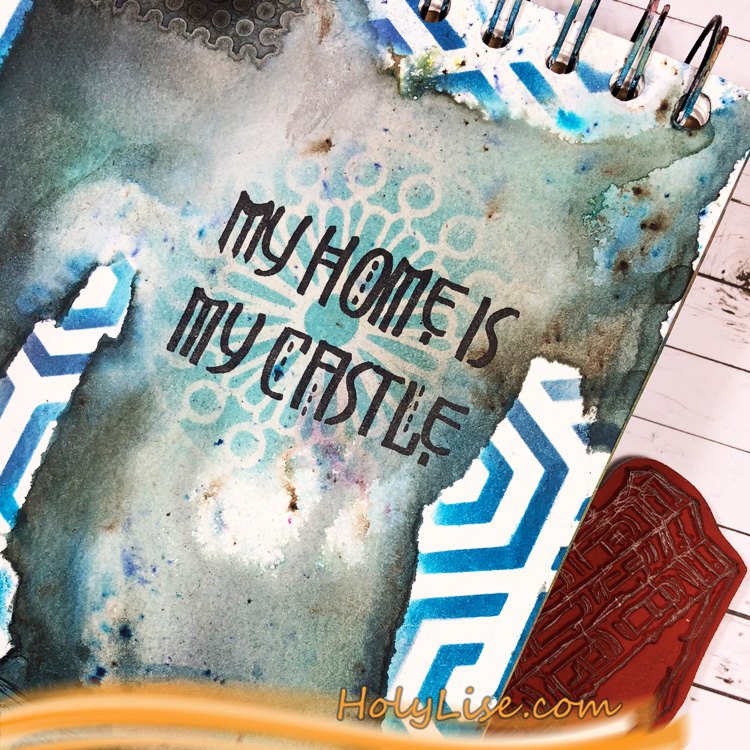
I already knew that I wanted to add the sentiment “My Home is my Castle” and I wanted it to pop a little against the background. A lighter blue blended through the Valley Road stencil helped me with that.

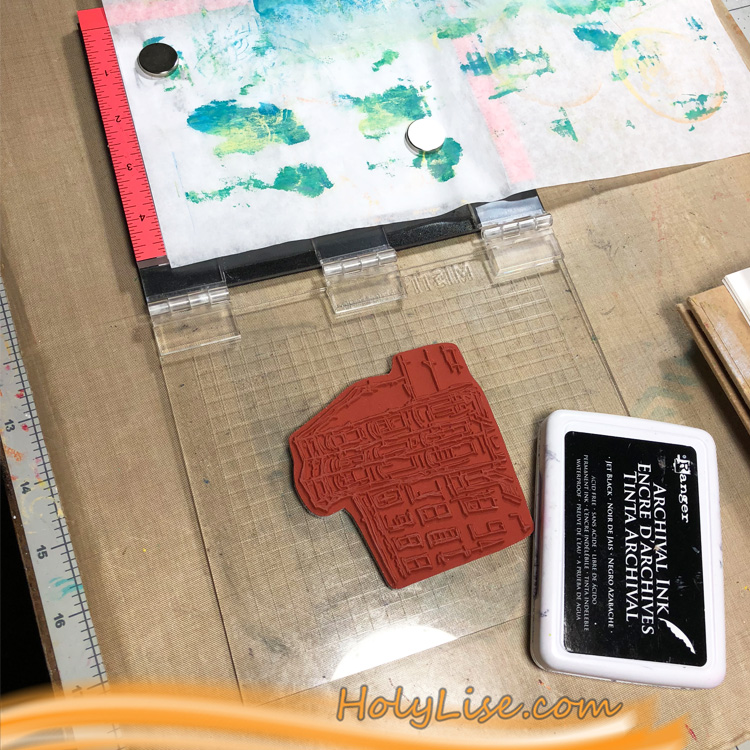
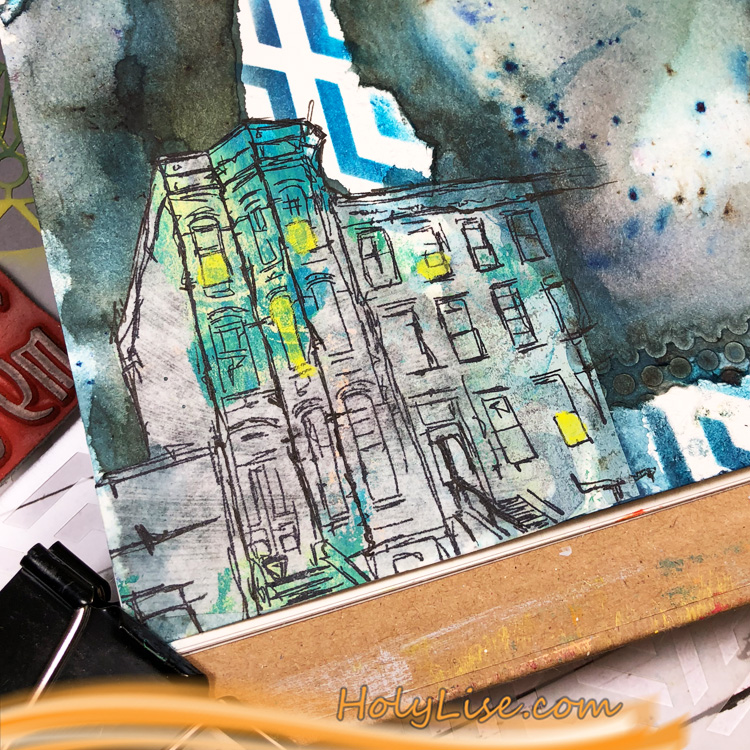
My home really is my castle and the place where I regenerate and calm down. In order to see the Brownstone stamp house in the background, I decided to stamp it onto a piece of tissue paper that had some clean up spots from a different project on it. Thankfully, they are mainly blue.

Just a few finishing touches everywhere and I was done with my grungy, blue art journal page.

I really like the look of the Flower Maze stencil in the white areas.

Here is the close up of the Brownstone. A few of the neighbors were home.

Thanks for stopping by and don’t forget to come back every Tuesday for more inspiration from the Creative Squad.


Thank you Josefine – I also love how that Flower Maze stencil pops! You can find all my stencils and stamps in my Online Shop. Here are some of the other supplies that Josefine used:


Feel inspired? Working on something yourself that you’d like to share?  I love to see how you interpret our monthly themes. Email me how you used my stencils and stamps with the theme and email me an image – I would love to share your projects in my next  “n*Spiration From Around the Globe“.
Leave a comment

True Blue – Tania Ahmed


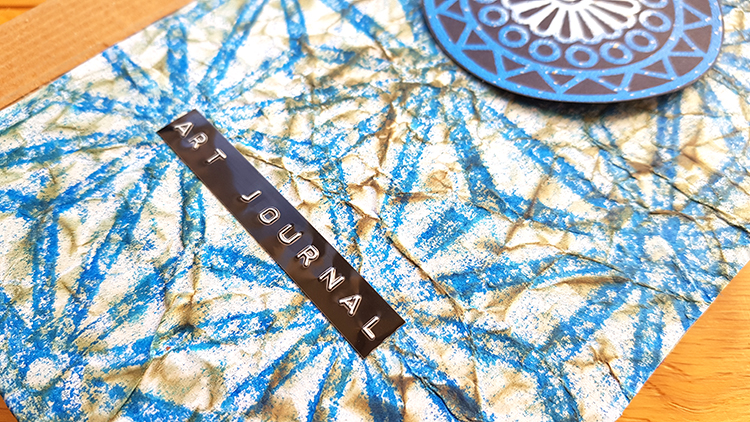
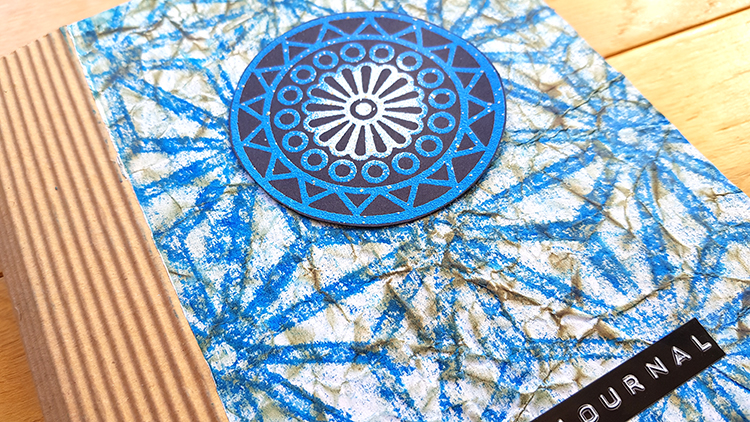
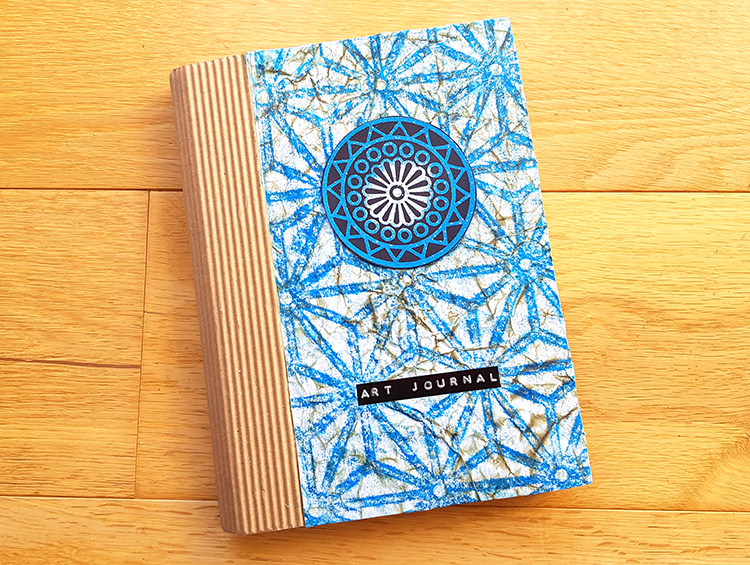
Happy Tuesday from my Creative Squad! Today we have a post from Tania Ahmed, sharing with us an awesome way to use my Star Struck stencil and Large Circle Jumble rubber stamps to decorate the cover of an art journal. Check out the video below to see Tania’s technique. This month’s theme is: True Blue – Blue is the color of honesty and serenity. It’s calming and has even been shown to promote healing. It reminds us of the water and the sky. Let’s slow things down this month and bask in the tranquility of the color blue.


Our theme this month was True Blue, and for us to use any of Nat’s new Stencil Girl designs which I had been looking forward to having a play with as soon as I saw the designs! Blue also happens to be one of my favourite colours and I use almost any excuse I can get to use it in my projects! :)

I had an art journal that I made last year in a workshop that I attended with Nat and her friend Birgit Koopsen which I still use to test new techniques. I still hadn’t made a cover for it, so I decided that it was about time that I decorated it.

I made a video showing how I decorated my art journal cover:

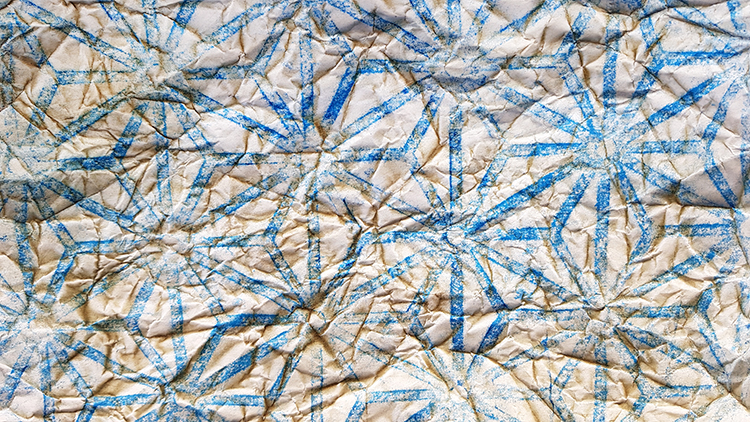
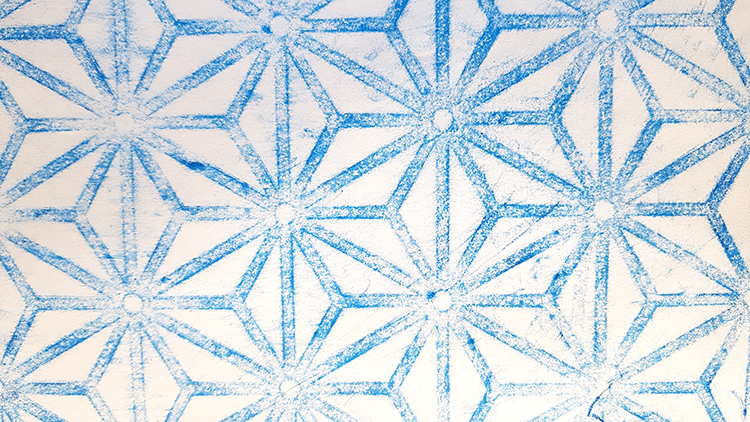
When I saw the Star Struck Stencil, I was immediately reminded of Japanese fabric and I knew that I wanted to create a print which looked like vintage cloth. I had an image of furoshiki wrapping (Japanese art of wrapping gifts and parcels with fabric) in mind and I set out to see how I could create a project as an homage to the technique.

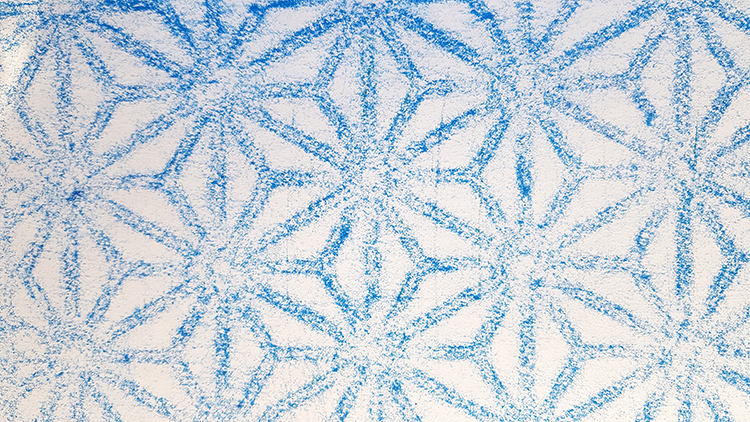
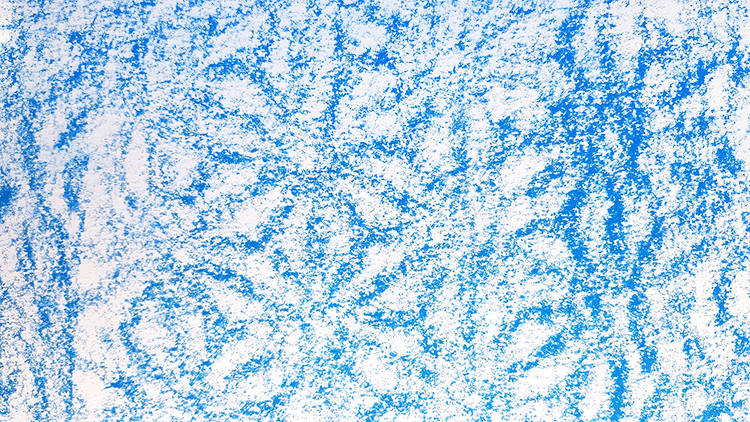
I started by taping down a sheet of printer paper to the stencil and created a rubbing of the stencil using Faber Castell Gelatos. You can create rubbings using pencils, pastels, crayons, anything that you have in your stash! Experiment with different pressures and papers to see what effects you can get. I tried the technique on printer paper, cartridge paper and thick cardstock. The thinner the paper, the better impression you will get!

Printer paper

Cartridge paper

Heavy cardstock

Thank you so much for watching and reading and have a great day!


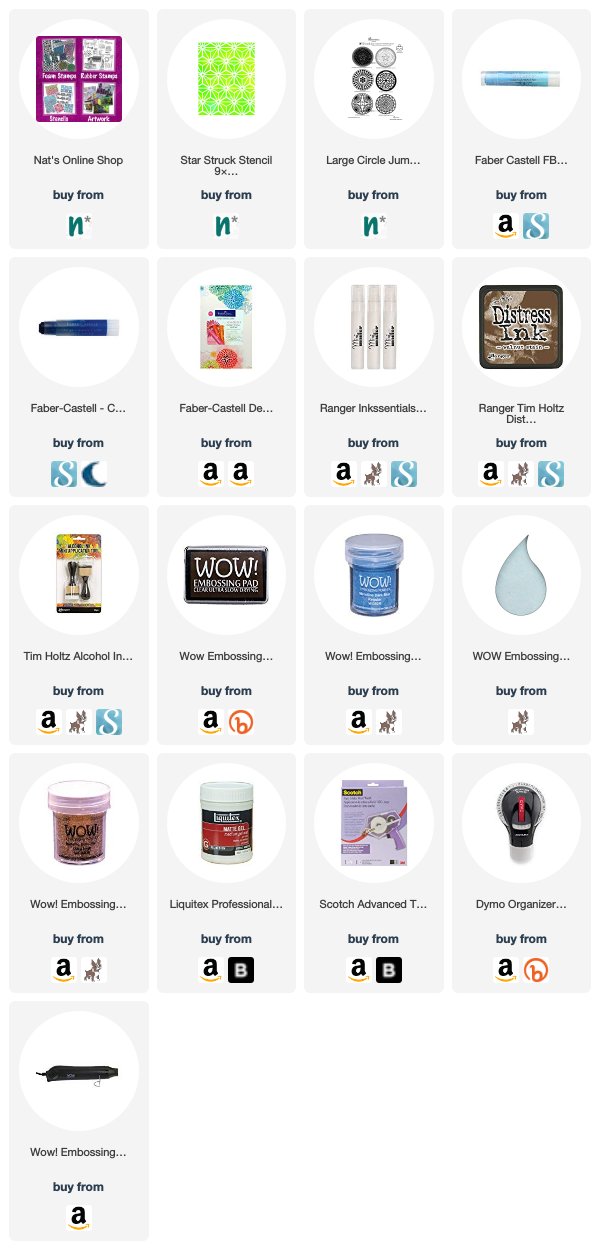
Thank you Tania! I loved watching how the stencil rubbing transformed – it really does remind me of the textiles I saw in Japan. You can find my Star Struck stencil and Valley Road stamp in my Online Shop. Here are some of the other products that Tania used:


Feel inspired? Working on something yourself that you’d like to share?  I love to see how you interpret our monthly themes. Email me how you used my stencils and stamps with the theme and email me an image – I would love to share your projects in my next  “n*Spiration From Around the Globe“.
SaveSave

Leave a comment

Never Stop Dreaming – Maura Hibbitts


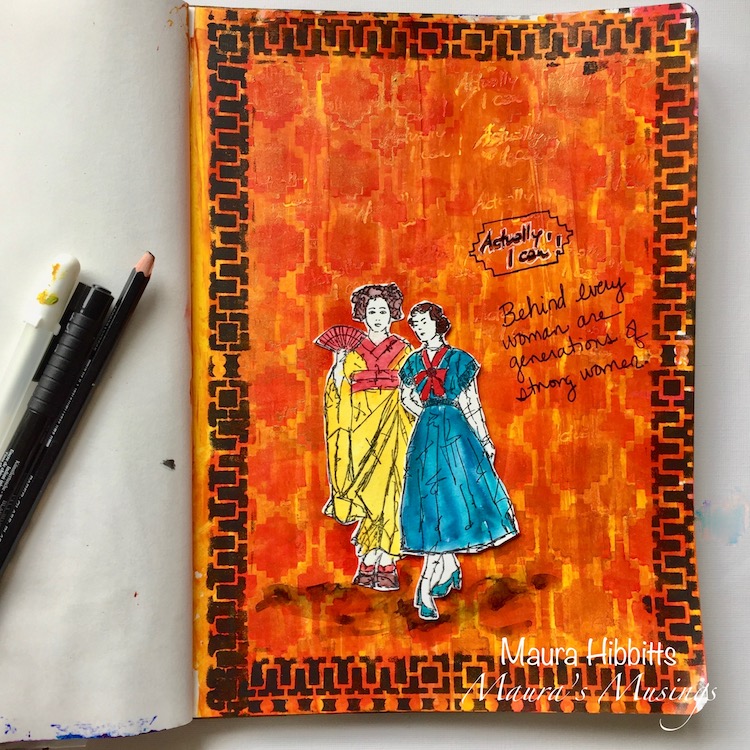
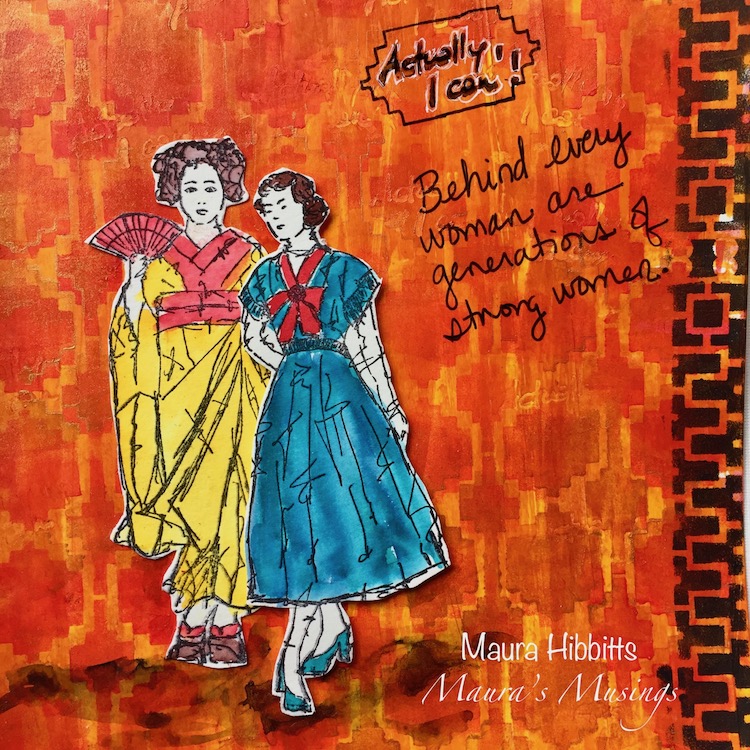
Welcome to a post from Maura Hibbitts from my Creative Squad! Today Maura is sharing with us an art journal spread that reminds us of all the strong momen who have come before us! Maura is using my Mesa Verde and Downtown stencils and my Actually I Can stamp set. This month’s theme is: Never Stop Dreaming – This month we’re sending a message of confidence and empowerment to all those in the world (near and far and maybe even you!) who have been told “You can’t”, “That’s not possible”, or “Not you”. Actually we can and we will! And we’ll never stop dreaming either :)


When I looked at this month’s theme, I began to think about all the dreams we women have in our lives…family, friends, career, health, financial, pets…so many things touch our lives. I know my mother encouraged me to become the person I am today, and I am thinking her mother did the same for her. It could be our relatives cheering us on, or friends, but just think of the many generations of women behind each of us who have believed in the next generation.

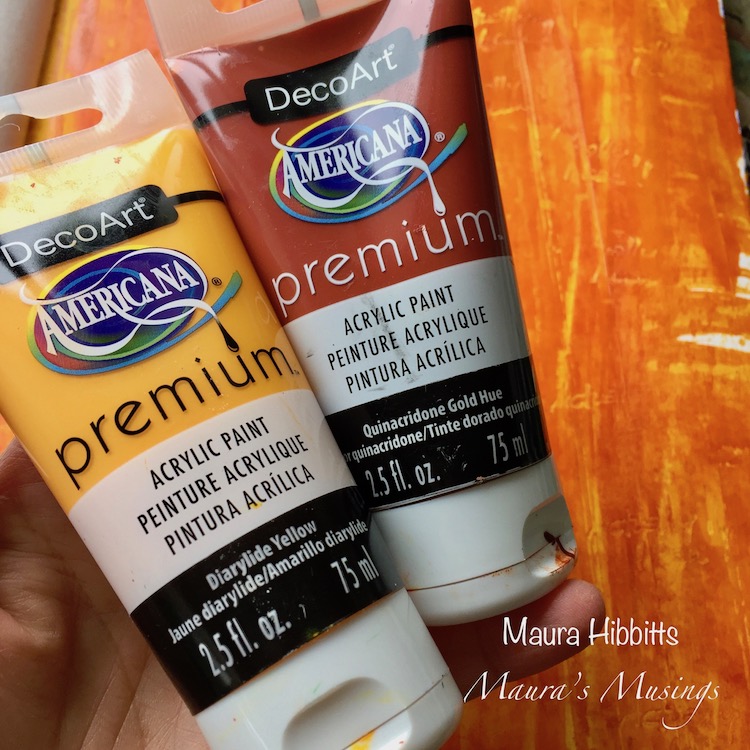
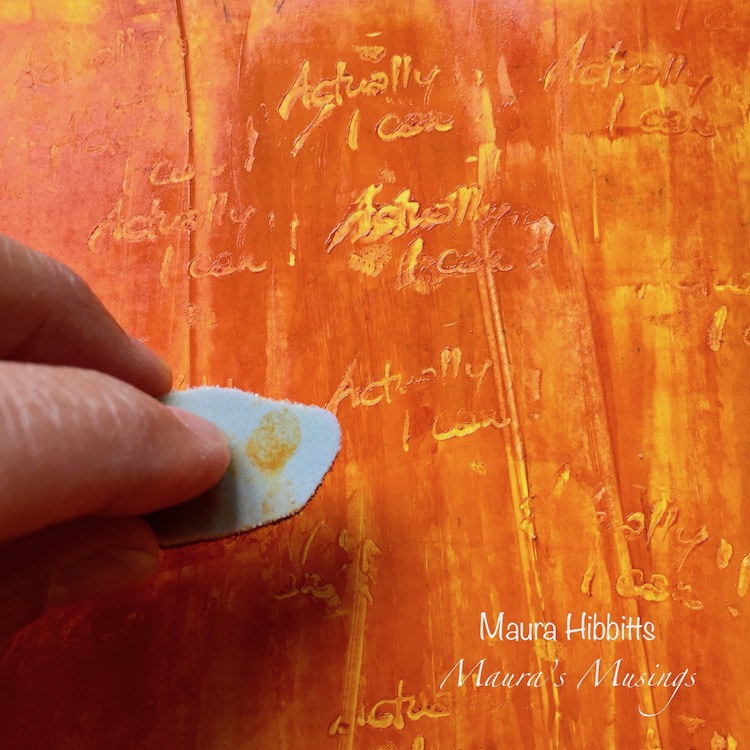
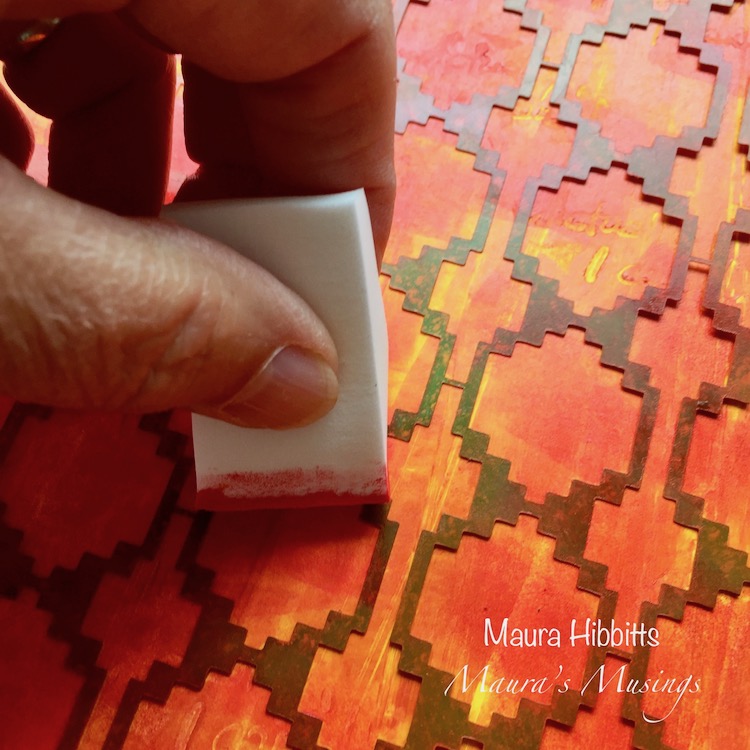
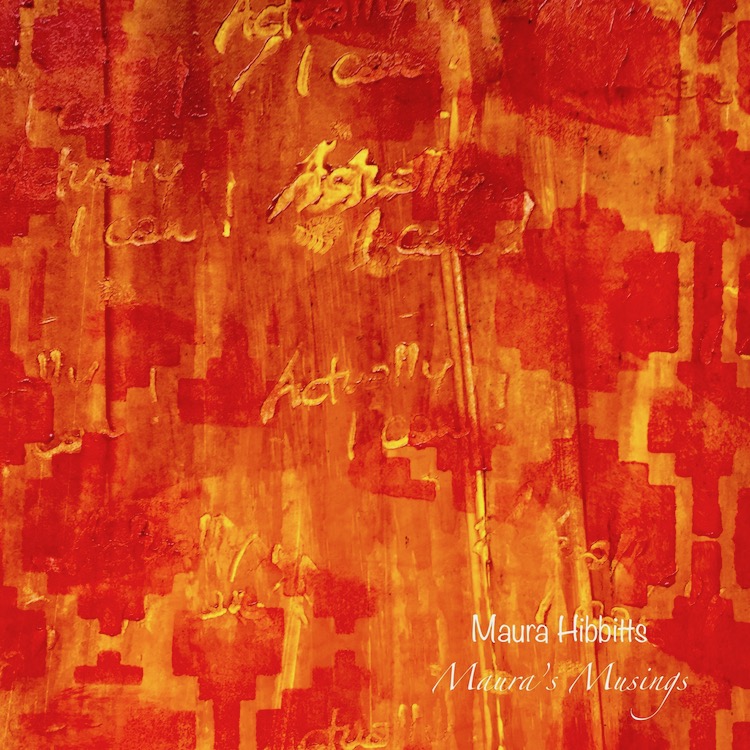
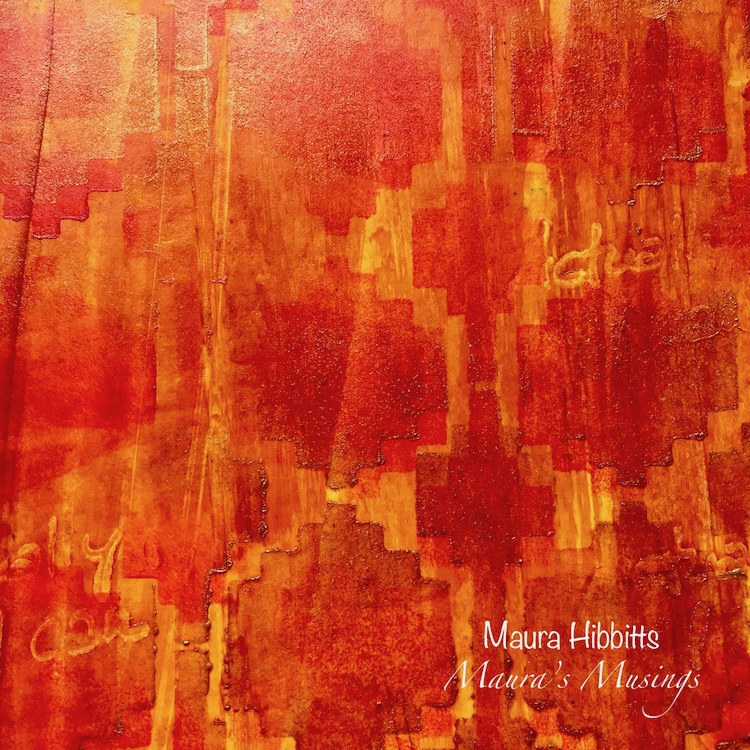
I headed to my art journal, and scraped a layer of Diarylide Yellow and Quinacridone Gold down my page with a key card. Before the paint dried, I stamped in Nat’s “Actually I can” rubber stamp a number of times.

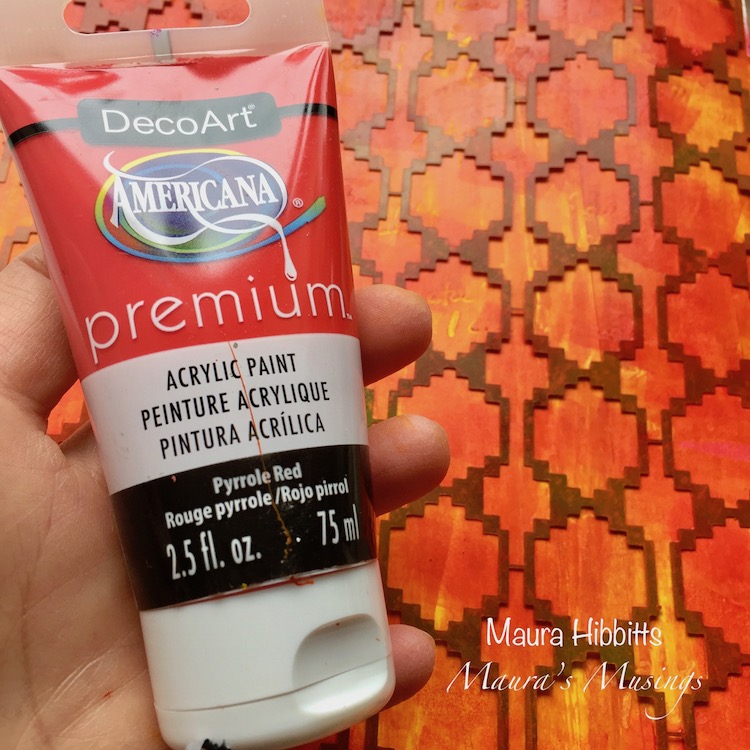
I added my next layer using the Mesa Verde stencil and some Pyrrole Red, using a light touch.I worked in a random fashion and left some areas open.

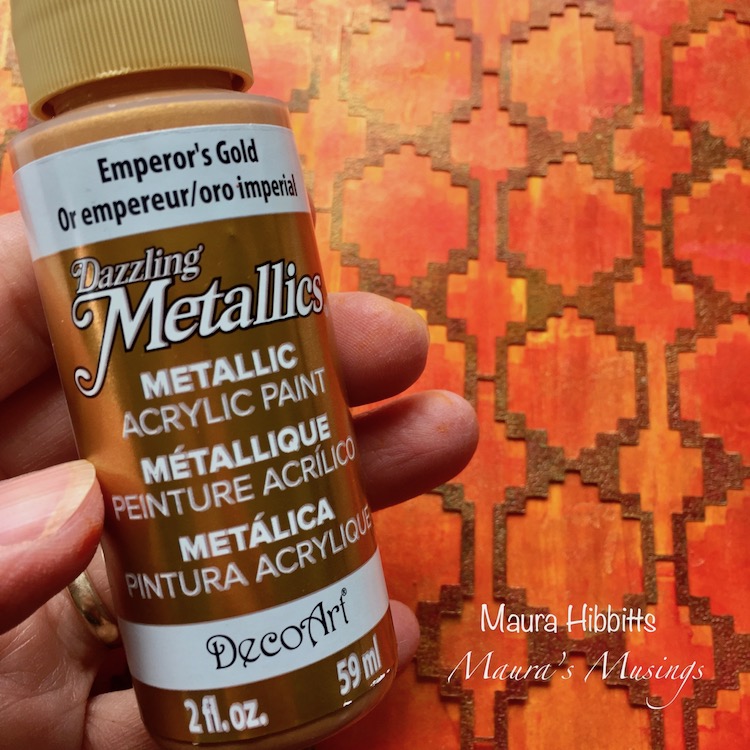
Then, I shifted the stencil down slightly and sponged in a layer of gold. Now I have a shadow effect.

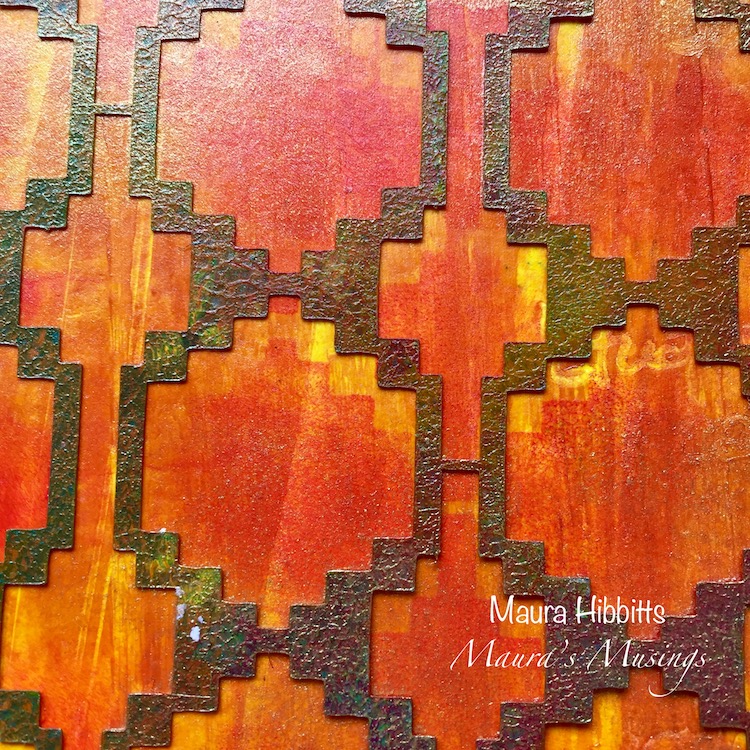
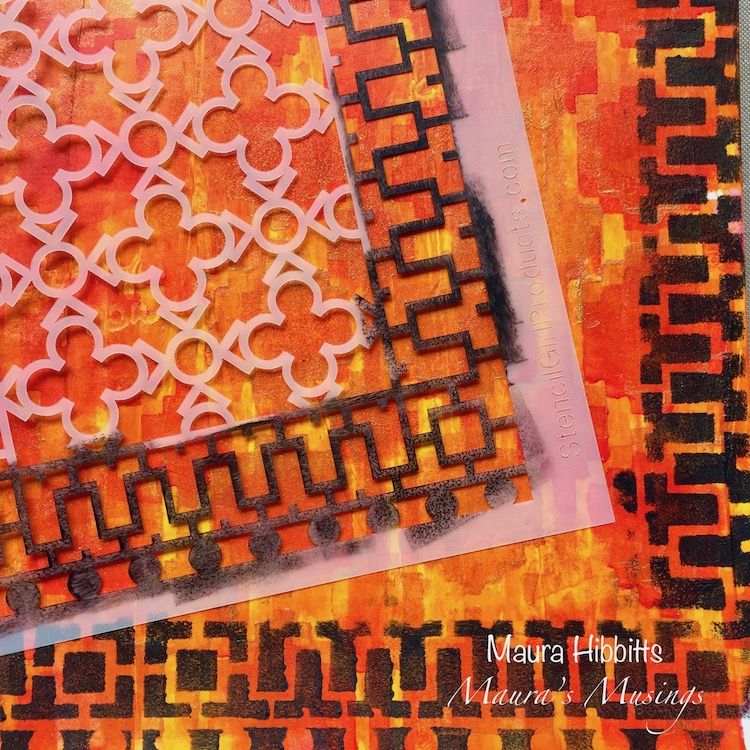
Time to add a border to my page with Nathalie’s new Downtown stencil. As you can see, I just used part of it to make my border with black.

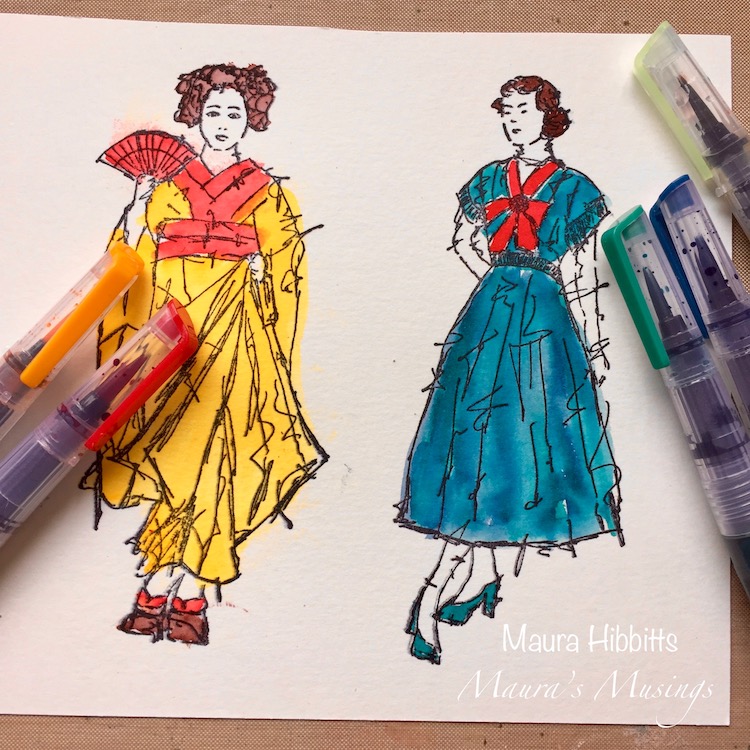
Now comes the fun part – stamping and coloring these two lovely ladies, Maiko and Millie. I wanted to tie in some of the same colors in both of their outfits to help link them together.

Time to put it all together! I put Maiko, in traditional dress behind Millie, to represent the previous generations of women. I stamped “Actually, I can” with black ink, and outlined it a bit with a white pen, and added my own thoughts. I also used the Mesa Verde stencil with the black pen to create the word box, by outlining one side, and moving it to “stretch” it. Finally, a shadow under the ladies to create a bit of depth with a graphite pencil and water brush.

Think of the many generations behind each one us, and Never Stop Dreaming!


Thank you Maura for such a thoughtful project! You can find my stencils and my stamps in my online shop. Here are some of the other supplies that Maura used:


Feel inspired? Working on something yourself that you’d like to share?  I love to see how you interpret our monthly themes. Email me how you used my stencils and stamps with the theme and email me an image – I would love to share your projects in my next  “n*Spiration From Around the Globe“.
Leave a comment