Creative Squad

Creative Squad: Creating Connections – Maura Hibbitts

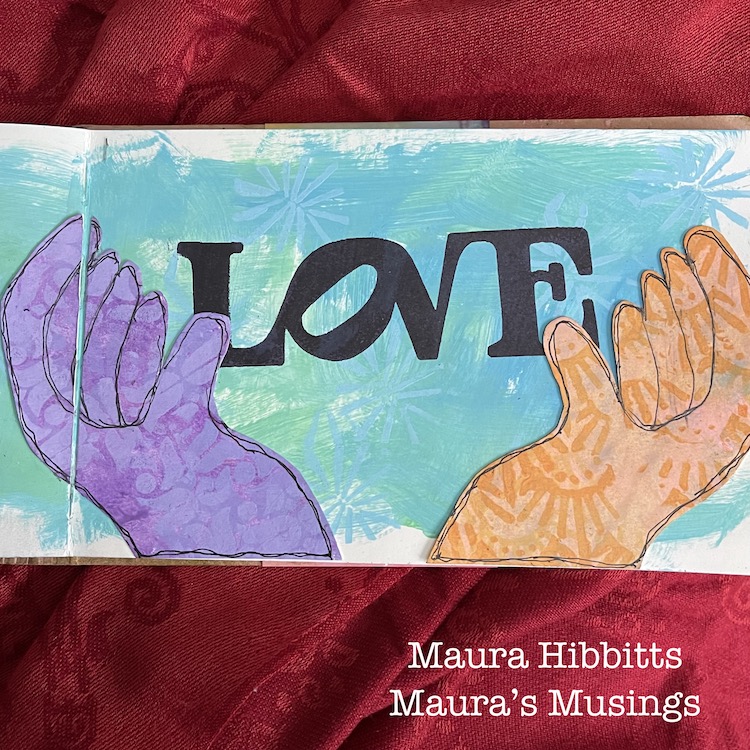
Hello from my Creative Squad! Today we have a gorgeous art journal spread from Maura Hibbitts using the CJS22 Limited Edition LOVE foam stamp and my ATC Mixup stencil. Our theme is Creating Connections – We’re playing along with the Creative JumpStart 2022 theme Creating Connections and exploring how our artwork connects us to the world around us, our community, our favorite supplies, or maybe our artmaking choices. Connections are everywhere when we create!


Hello 2022! Wishing each of you a joyous and healthy new year! What a fun month this will be as we play along with Creative Jumpstart. I love the theme of Creating Connections: it opens up so many ideas. Just think about the many connections we each have – family and friends, the cashier at the grocery, coworkers, art muses, neighbors, ancestors… no matter where we live on this planet, we are connected to each other.

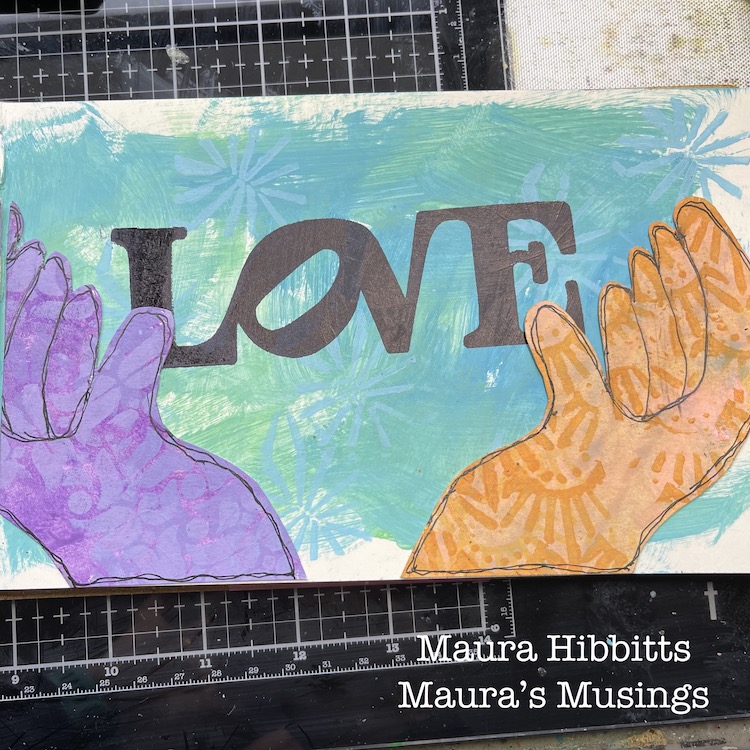
I headed to my art journal to work out my idea of hands holding love. I was thinking about how we need to nurture love and keep it safe for it to grow. I chose to work in rainbow colors to symbolize the diversity of humans around the world and how love connects us all.

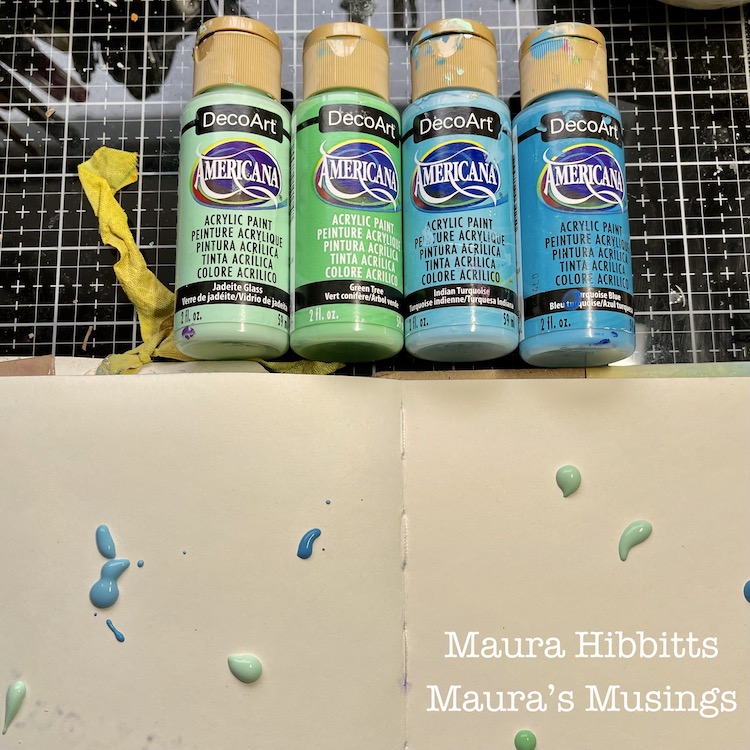
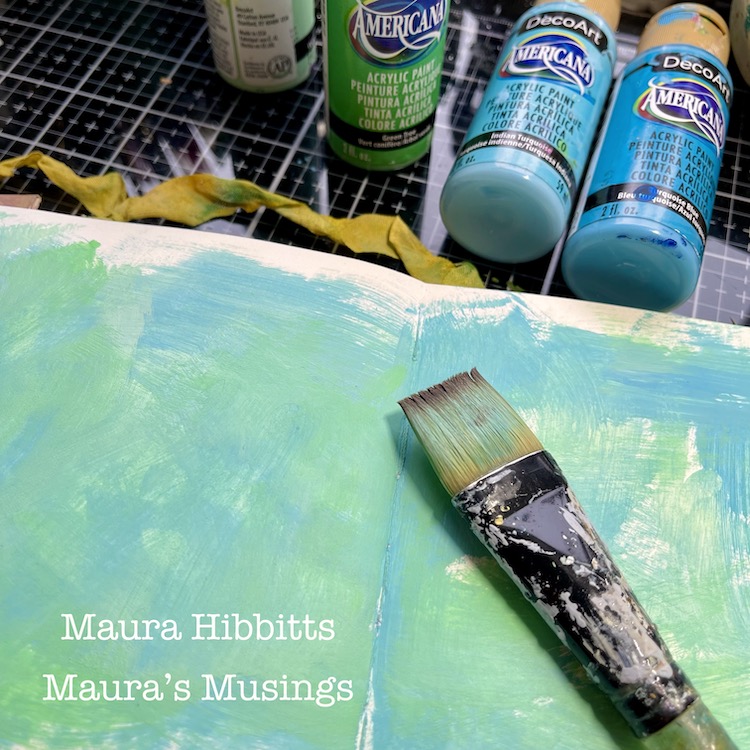
Begin in your art journal with a few dabs of acrylic paint in blues and greens. Use a dry brush and spread and blend it across the page(s). Add more of a color if the other seems to dominate until you are happy with the background.
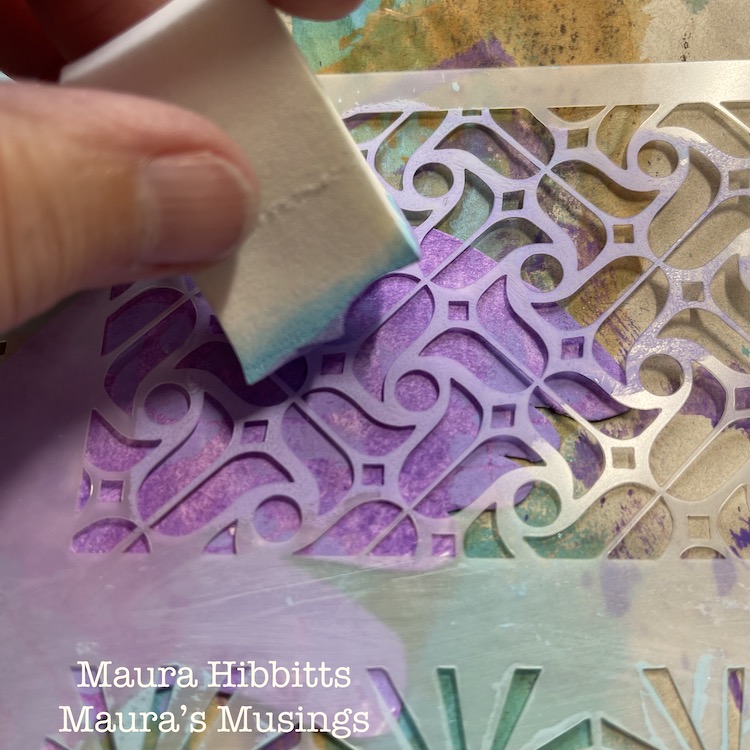
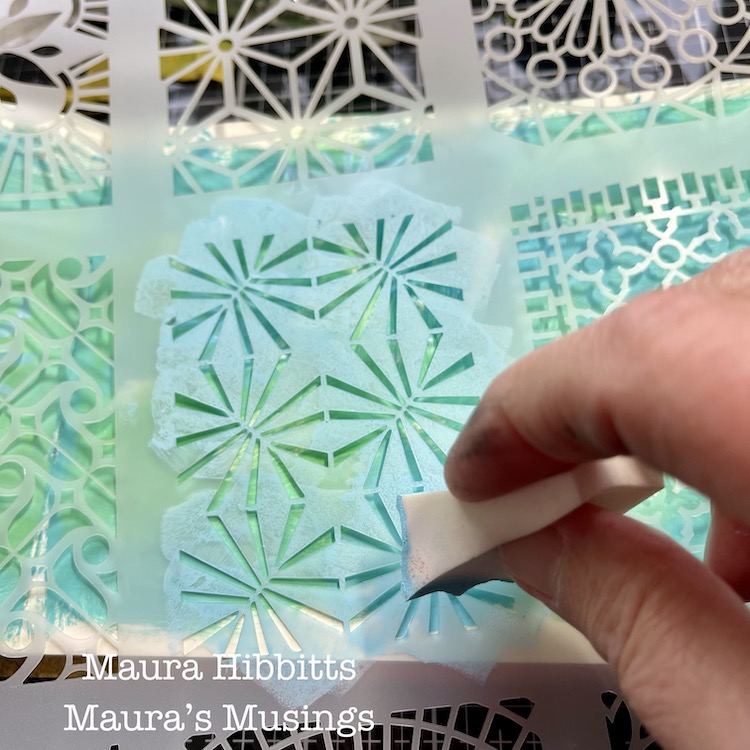
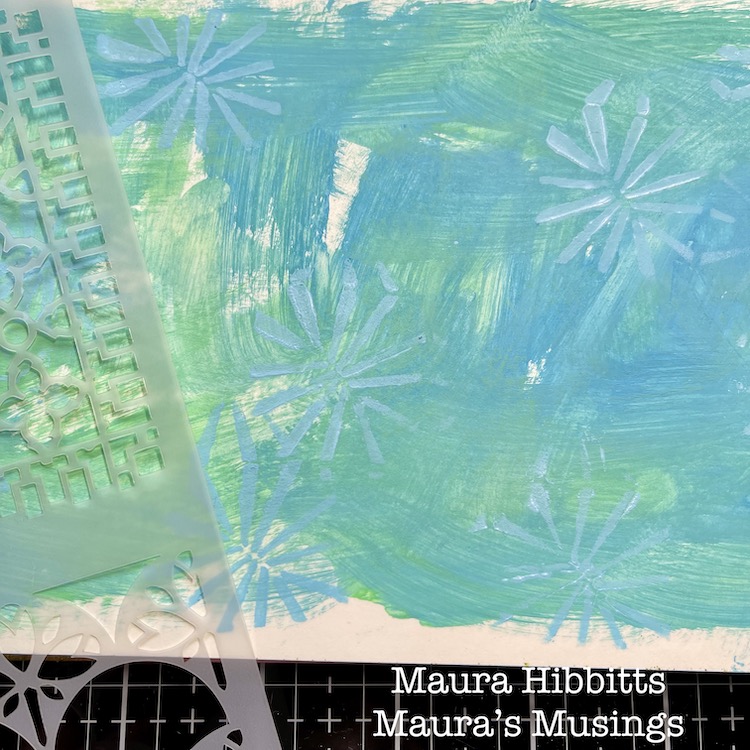
Blend one of the blues with white paint to lighten it. Use a cosmetic sponge, a bit of paint, and Nathalie’s ATC Mixup stencil to add another layer to the background. Just add the image here and there on your pages.
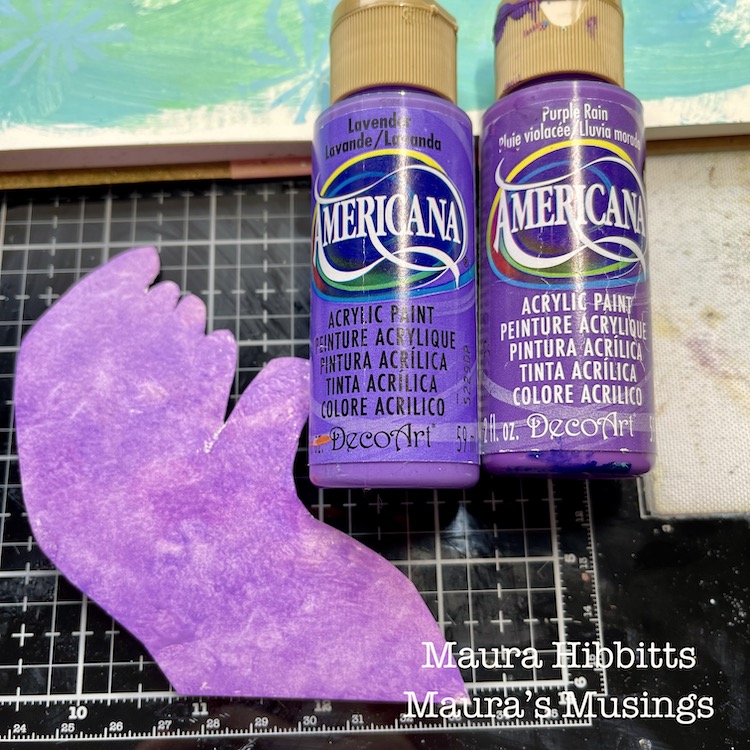
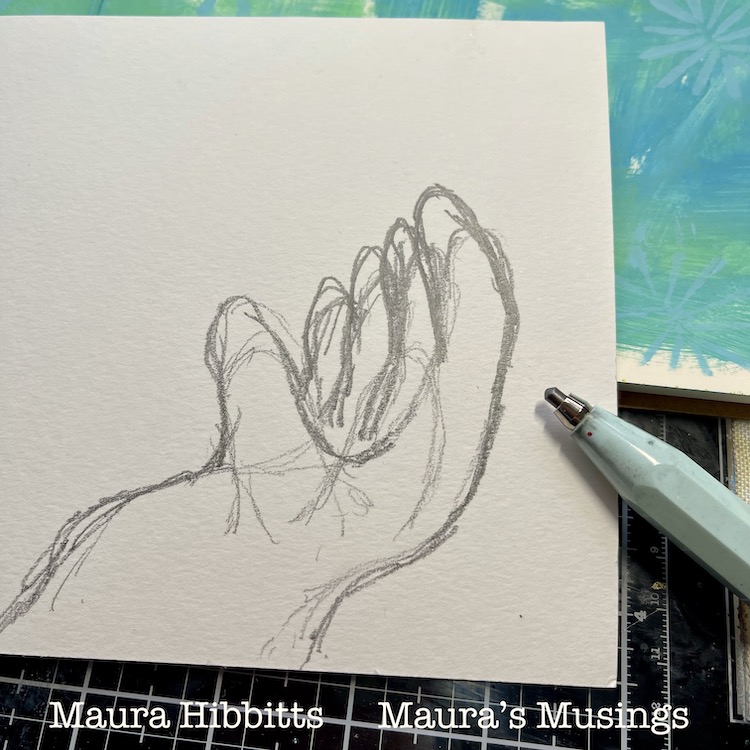
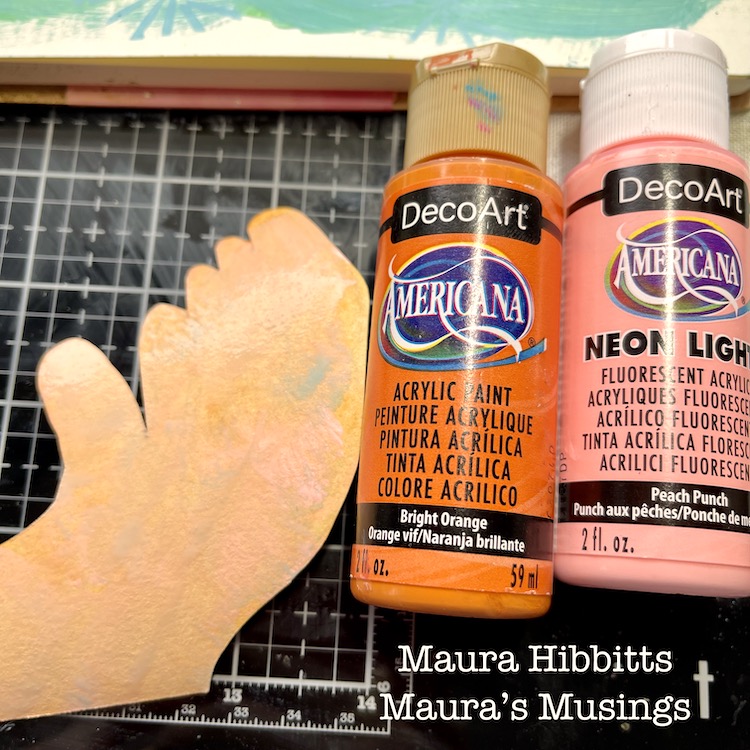
Time to make some hands! Sketch out a hand that looks cupped to hold something, onto watercolor paper…don’t worry too much about it, mine are far from perfect, but do give the idea. Cut out the hand, then flip it over and cut a second – this will give you the opposite hand. Paint the hands. (I used oranges and purples for contrast.) Stencil a design onto each hand with the ATC Mixup stencil. I added white to purple paint to lighten the color for the purple hand, and used a darker orange for the stenciling on the other one.
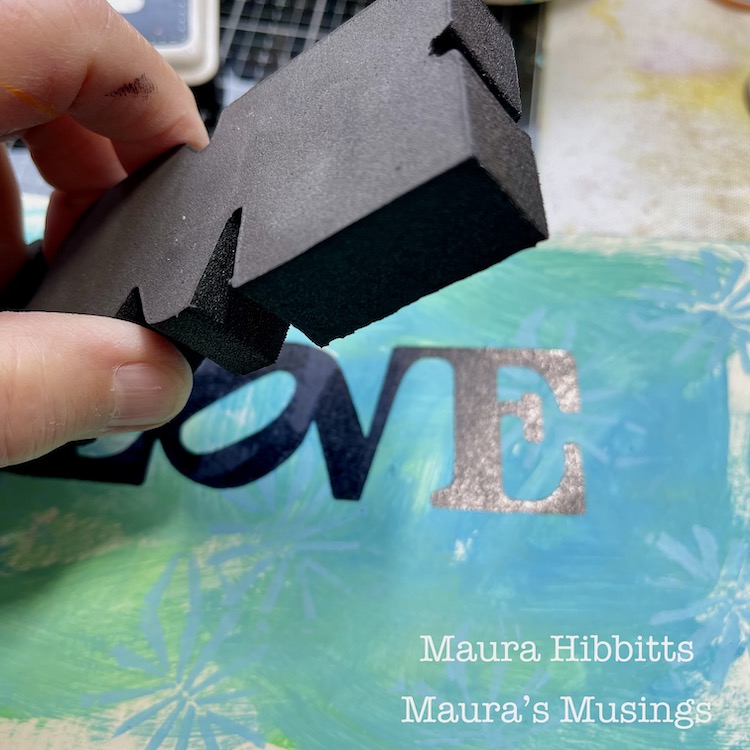
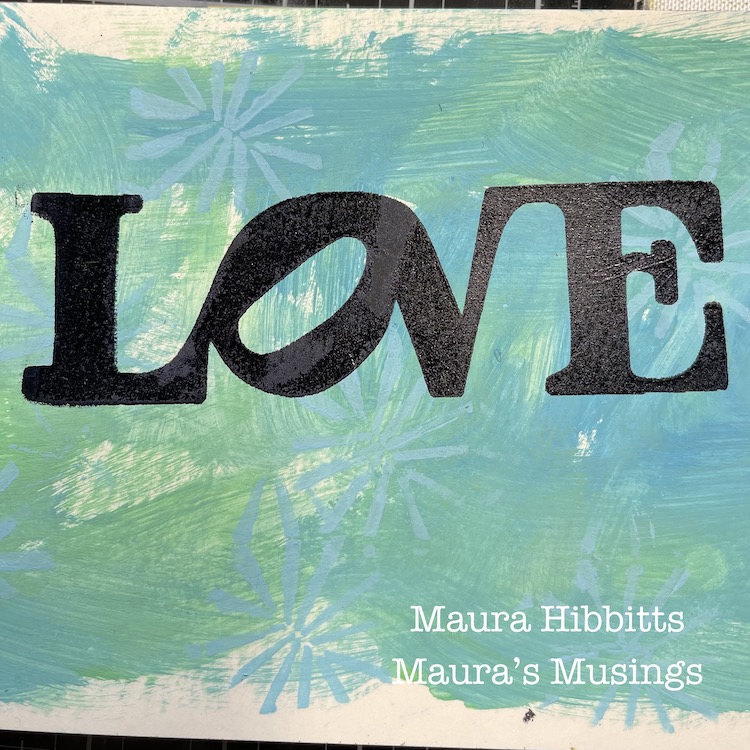
Use black archival ink with the Art Foamies Love stamp, and stamp it directly onto your page. Be sure the paint is dry first. (You can always speed it up with a heat tool if you are impatient like me.)
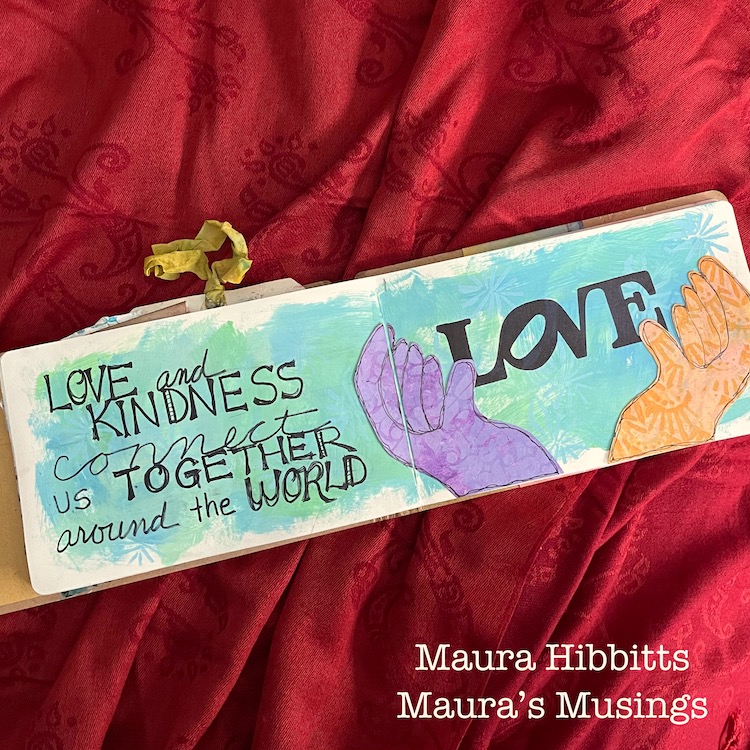
Adhere the hands so they look like they are holding the word Love. You can use a glue stick or adhesive tape for this. Outline them with a black pen to give them some detail.  Note – one hand went across the center fold, so I cut a bit off, and lined up each piece with a bit of space so the book will close.
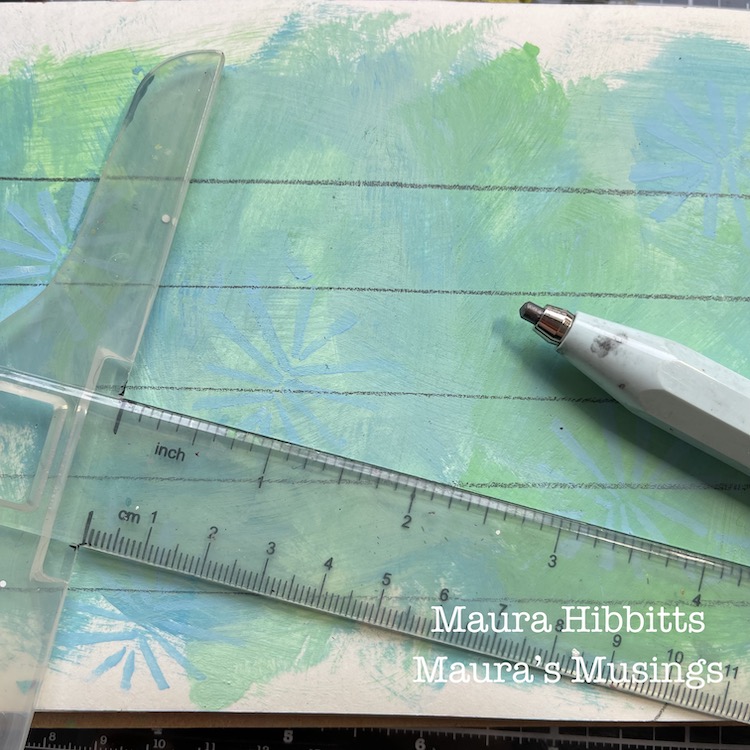
Add some journaling to the opposite page.  I like to use a T square to eyeball some lines and sketch them with a pencil. Next, pencil in your words. Now, you can go over them with a black marker or pen. Once you are finished with the lettering and it is completely dry, erase the lines and penciled letters.
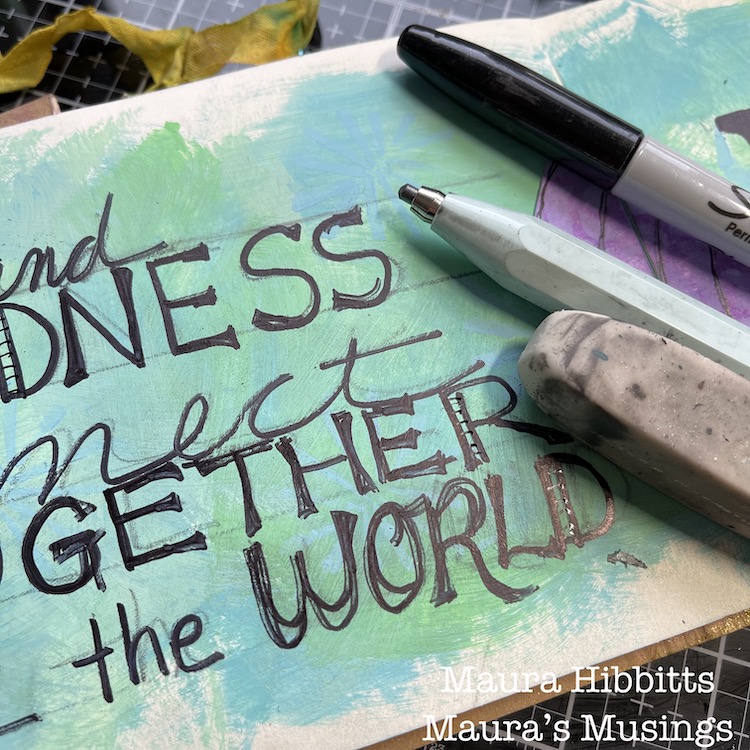
I wanted a positive focus for my journaling, and added “Love and kindness connect us together around the world.” As you can see, I varied the type faces and sizes to add interest.
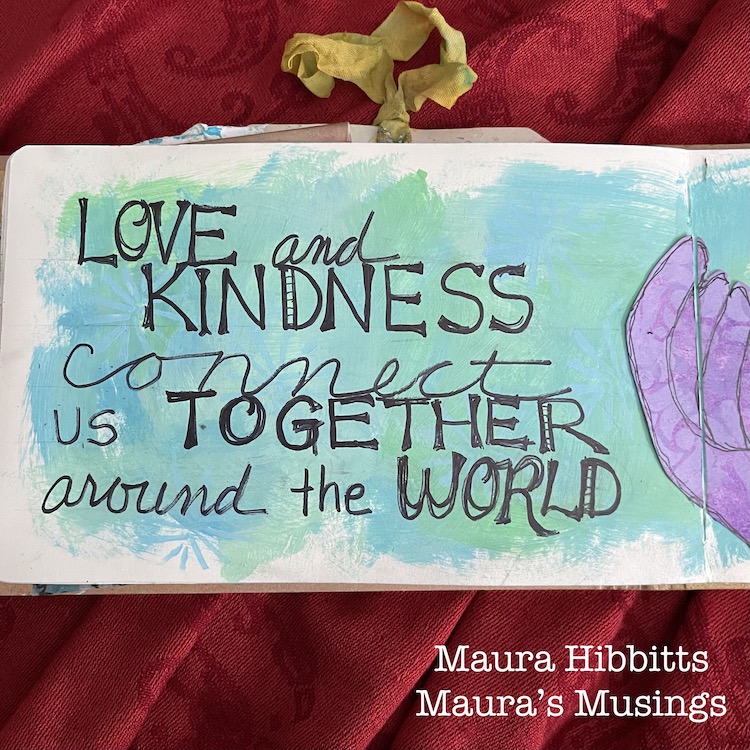
Love is such a powerful connecting force and we can sure use more of it in our lives and around the world.
Let’s support and nurture the connections we have, with love and kindness, and make our world brighter for everyone in 2022. Happy New Year! Maura

Thank you Maura – such a perfect message as we begin the new year and I love how those hands are nurturing that LOVE stamp.

Give it a try: you can find all my Stencils and Foam Stamps in my Online Shop and here are some of the supplies Maura used:

Looking for more projects? Follow the Creative Squad on Instagram here.

Leave a comment

Stenciled Papers from my Creative Squad

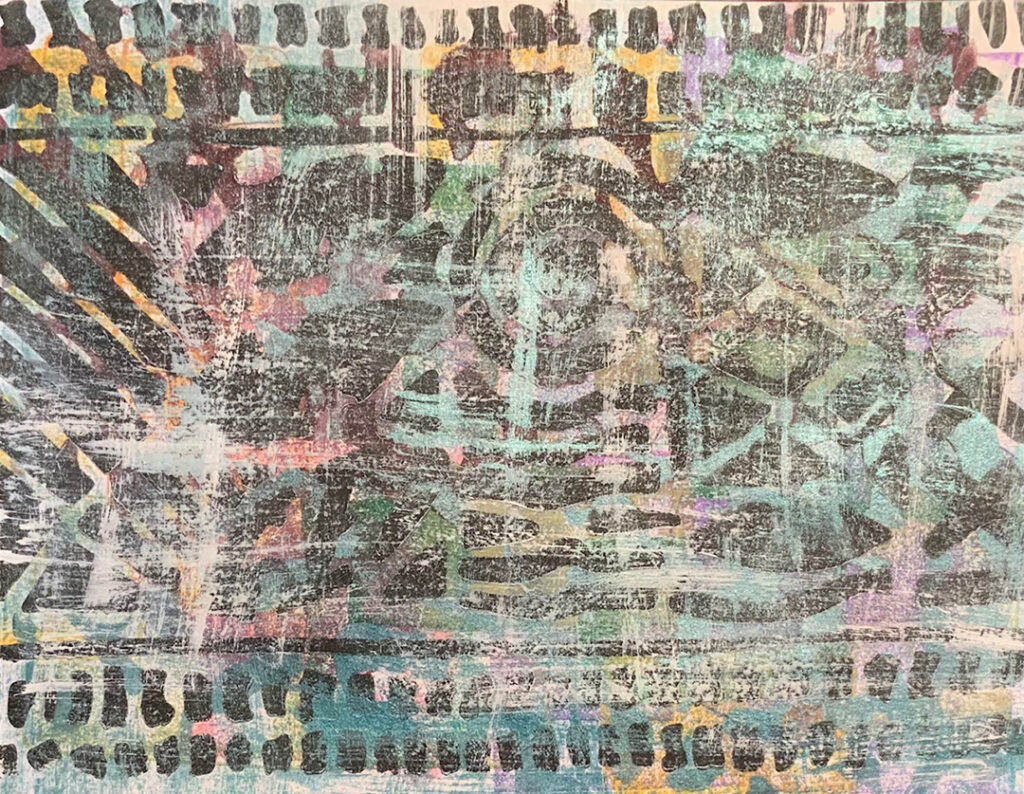
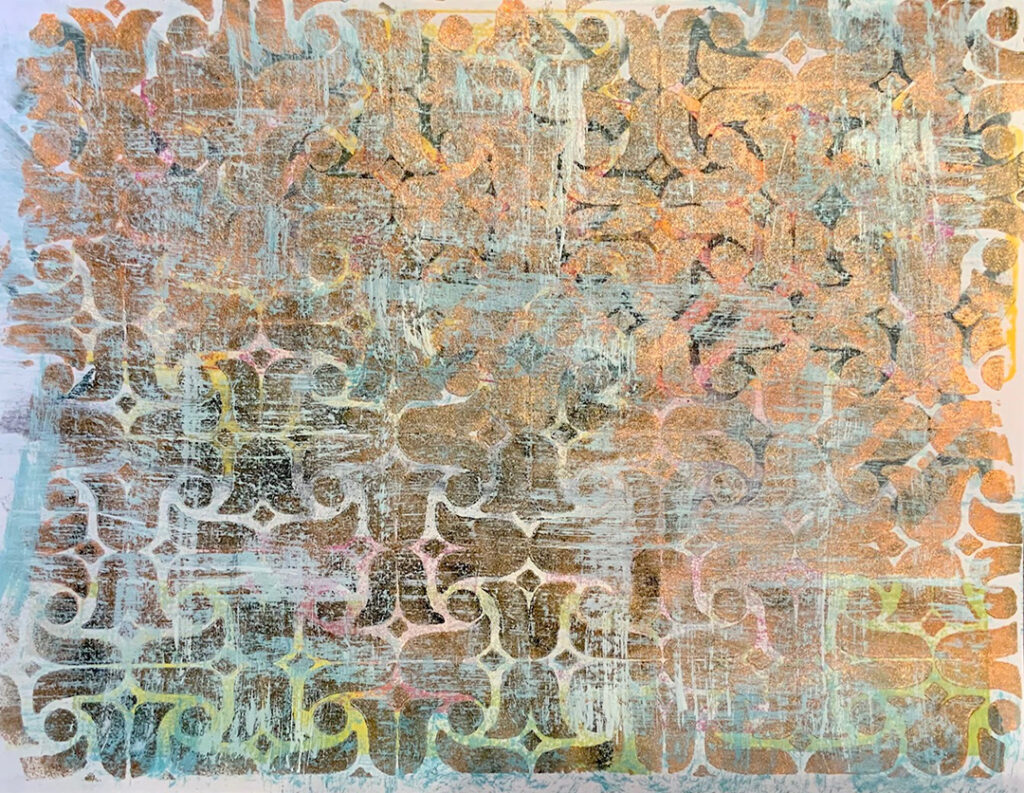
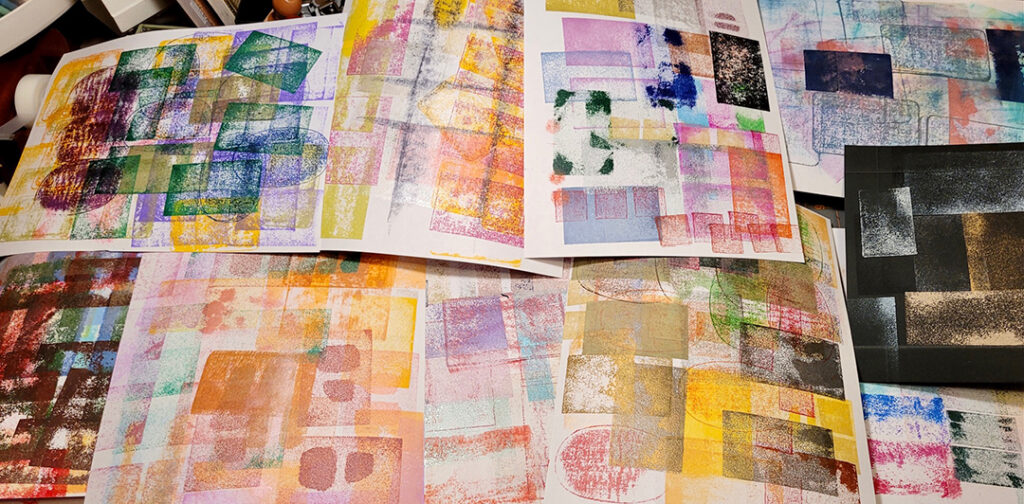
Last month our Creative Squad member Judi Kauffman shared some stenciled papers she made while going through her stack of ink pads. Here is what she did with my Batik and Amsterdam stencils and the beautiful patterned papers that resulted:


I had started out testing my old ink pads to see which ones were worth keeping. Some of the foam on ancient pigment pads had disintegrated, others were dry and discontinued so re-inkers weren’t possible. (The first photo with lots of sheets show where things started.)

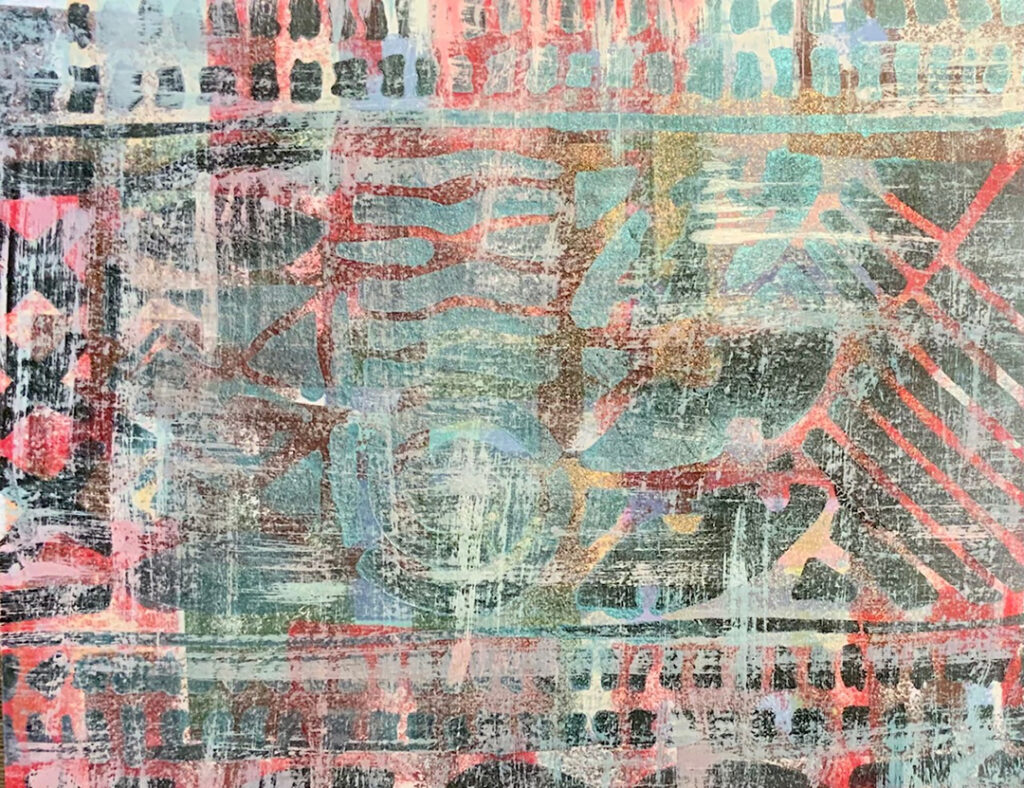
The rest of the photos show sheets that I stenciled and dry-brushed. 

Not shown: I trimmed the sheets, cut them into randomly-sized rectangles, and put the prints onto white and ivory card bases in three sizes ranging from A2 to 5×7. Also kept one scrap for a bookmark and made one card with the tiny slivers that were leftovers from trimming. I left one sheet as-is and made Mark Rothko-style cards, another sheet is waiting for some stamping. And I did use a stencil from another company for one sheet as well. (Last week’s Big Project was organizing ALL of my stencils – egad!)


Thanks for sharing Judi! What a great way to get organized and to make something beautiful from the process. And I love that the sheets then went into other card projects and a bookmark etc.

You can find all of my stencils in my Online Store. Here are some of the supplies that Judi used:

Comments (1)

  • Yvonne Marchant

    |

    Think I need to go through long forgotten ink pads hummm big and juicy ones spring to mind though they might be all mud lol

    Reply

Leave a comment

Creative Squad: Celebrate the Season – Jordan Hill

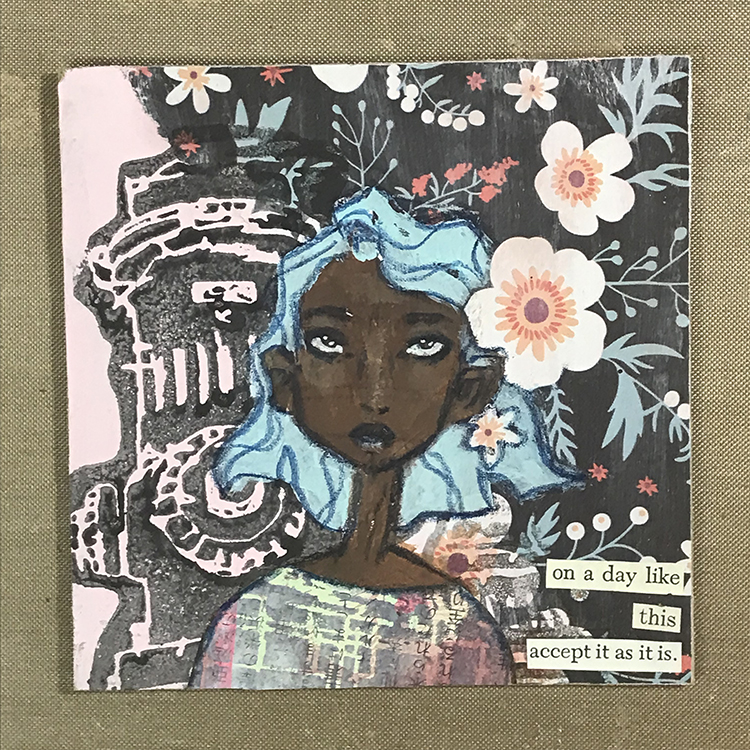
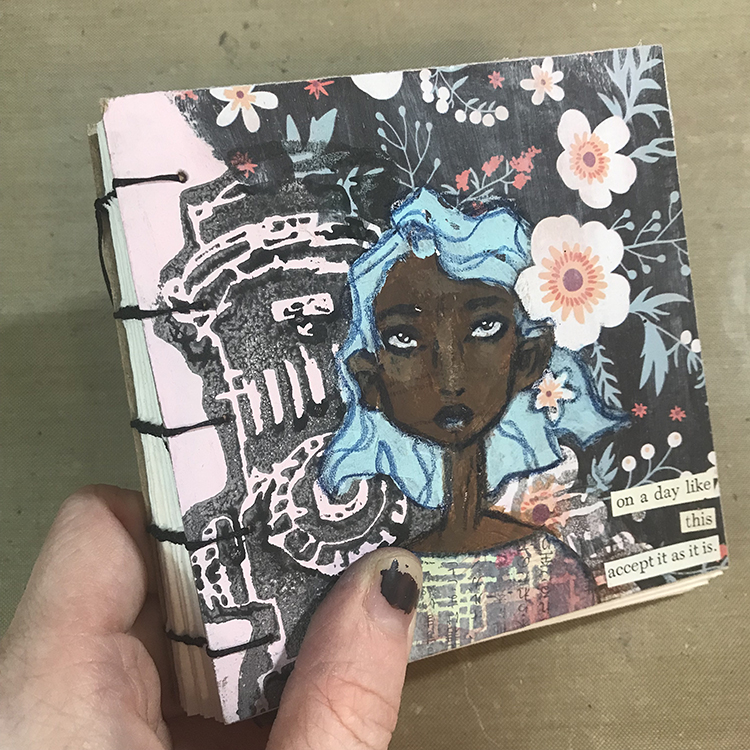
Happy Holidays from my Creative Squad! Today we have a post from Jordan Hill who is sharing a mixed media piece that she turns into the cover of a mini journal. She is using my Hydrant and Powerhouse foam stamps and our theme: Celebrate the Season – Many cultures celebrate in December so let’s do some celebrating ourselves with our favorite art supplies and the holidays that make this season so festive.


When confronted with this month’s theme of “Celebrate the Season”, I found myself really wanting to try to encapsulate the holiday season as a whole. Here in the United States where I am located, January 1st marks the start of the new year. Since that day falls so near to other holidays, that is personally where I mark the end of the season. With the new year comes the idea of reflections, and so I wanted to create a little journal that I could use to reflect on the past year as well as prepare for the new! With that explanation out of the way, let’s get into it!

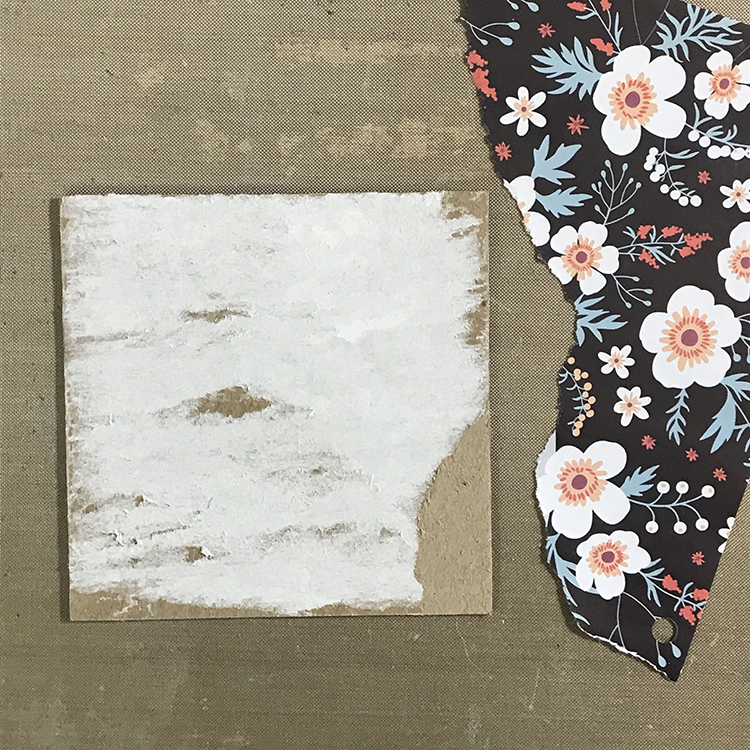
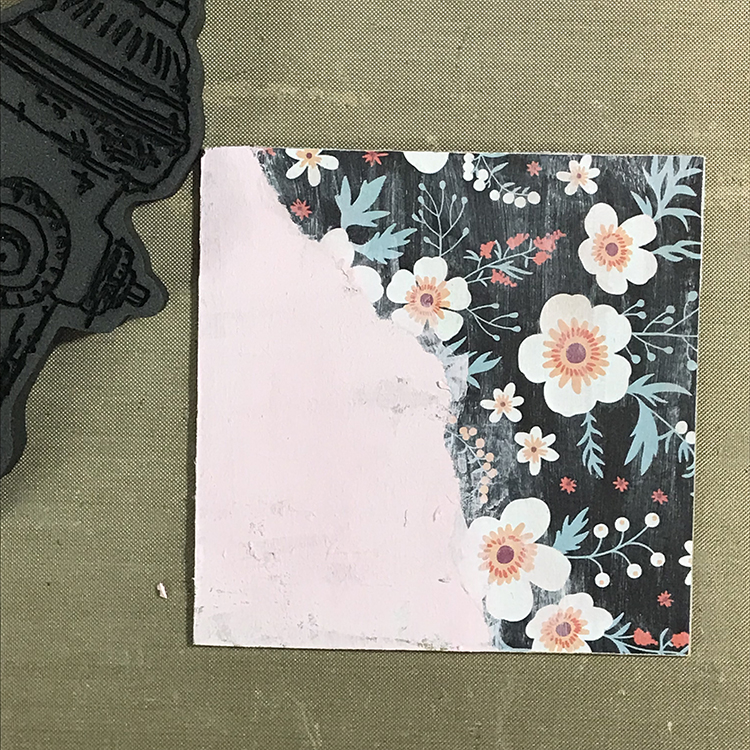
Recently, I created a handful of little journals, but one of the covers backfired on me. The wrapping paper I had originally used to try to glue to it wrinkled and tore, so I ended up removing as much of it as I could. I decided to try to use this as my base for this project, so none of this chipboard went to waste!

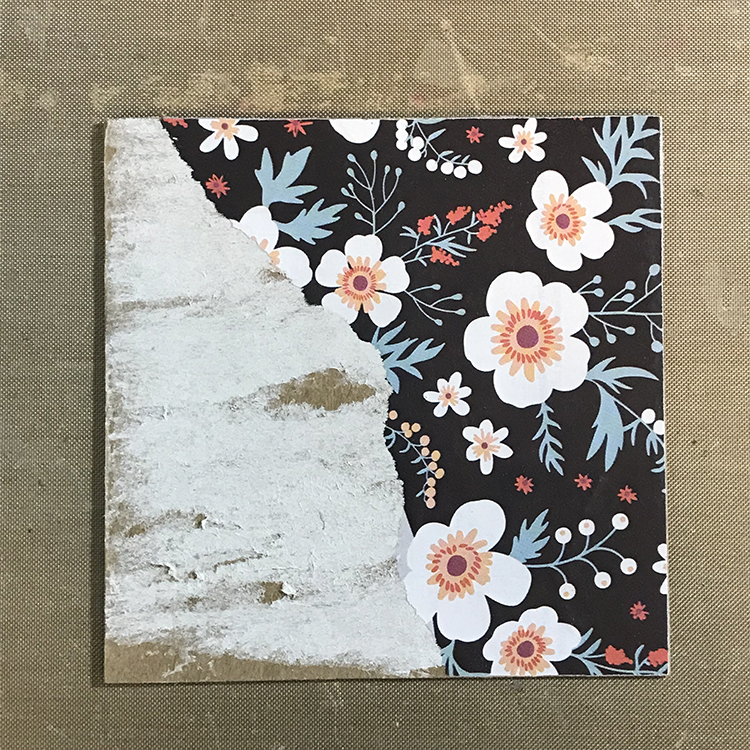
Once I had selected my base, I then tore a piece of floral paper and glued it to one of the edges of my chipboard piece using a glue stick. This piece of paper is from a 2021 wall calendar; it seemed like a good choice for a project revolving around the idea of reflecting! Once the paper had been glued to my chipboard, I trimmed the excess and then used a small piece of sandpaper to smooth out the edges.

Next, I used some light pink acrylic paint to cover the remainder of the chipboard. While I was adding the paint, I also used a bit of clear gesso over top of the floral paper. Since the paper was originally from a wall calendar and wasn’t intended to be used as collage fodder, it had a bit of a slick surface. The clear gesso dealt with this and gave me a great surface to work on top of.

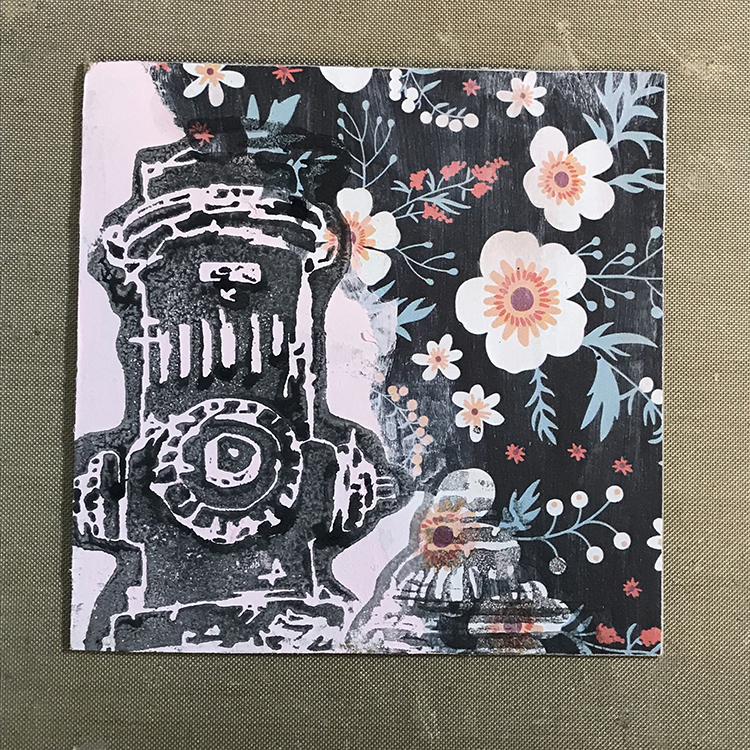
I then used Nathalie’s Hydrant Foam Stamp and some watered down black acrylic paint to add some patterning and texture to the left side of my page. I love reimagining stamps and finding new ways to incorporate them; I thought this one would be a great way to add some interesting detail to my background. I also placed the stamp upside down to further disguise the nature of the original image.

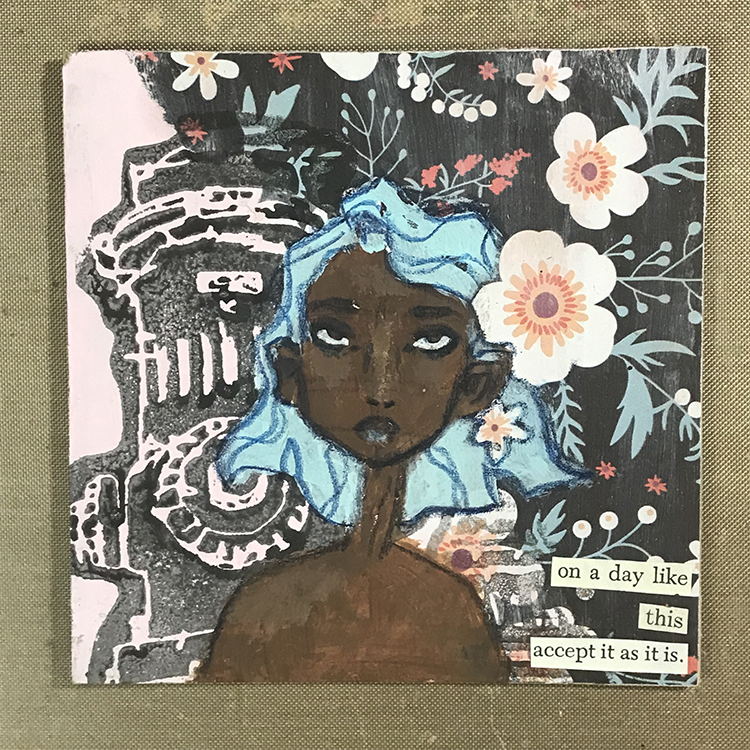
It was then time to add my focal image. When painting this particular figure, I tried to keep the background stamping visible by placing my image a little more towards the center of my page. I also tried to incorporate the flowers from the background paper into my character by painting the hair around the flowers as opposed to on top of them. At this point I also decided to add a few words in the lower right to further incorporate the idea of reflecting on the past year.

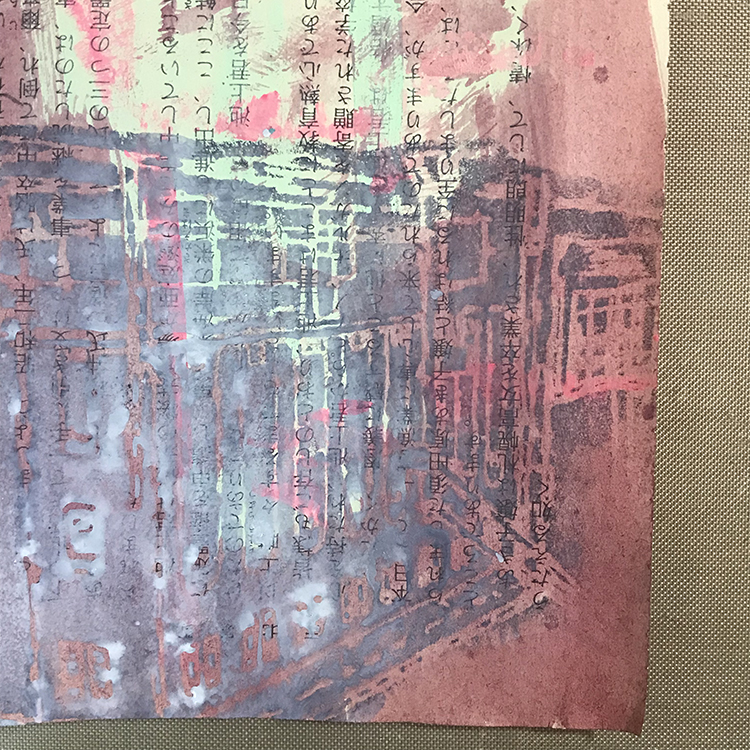
Next, I wanted to create a paper to use for my figure’s shirt. I started off by selecting a piece of Japanese book paper that I had previously cleaned some of my brushes off on. Then, using Nathalie’s Powerhouse Foam Stamp and a gray colored paint, I added it over top of my painted paper. I again stamped the image upside down, in order to get some interesting bits of the stamp where I wanted them.

I then cut a piece from my stamped patterned paper, making sure to choose an area where the stamping was visible, and adhered it to my page. Using the same colored pencil I used to sketch in the face, I went over the edges of the shirt in order to further blend them in.

Finally, I punched some holes along the side of my chipboard panel and stitched it onto the front of a little coptic stitched journal. I’m very excited to start working in this little journal and I hope you enjoyed following the process of making it with me!


Thanks Jordan – love the idea of using these stamps as pattern elements and especially that Powerhouse turned blouse!

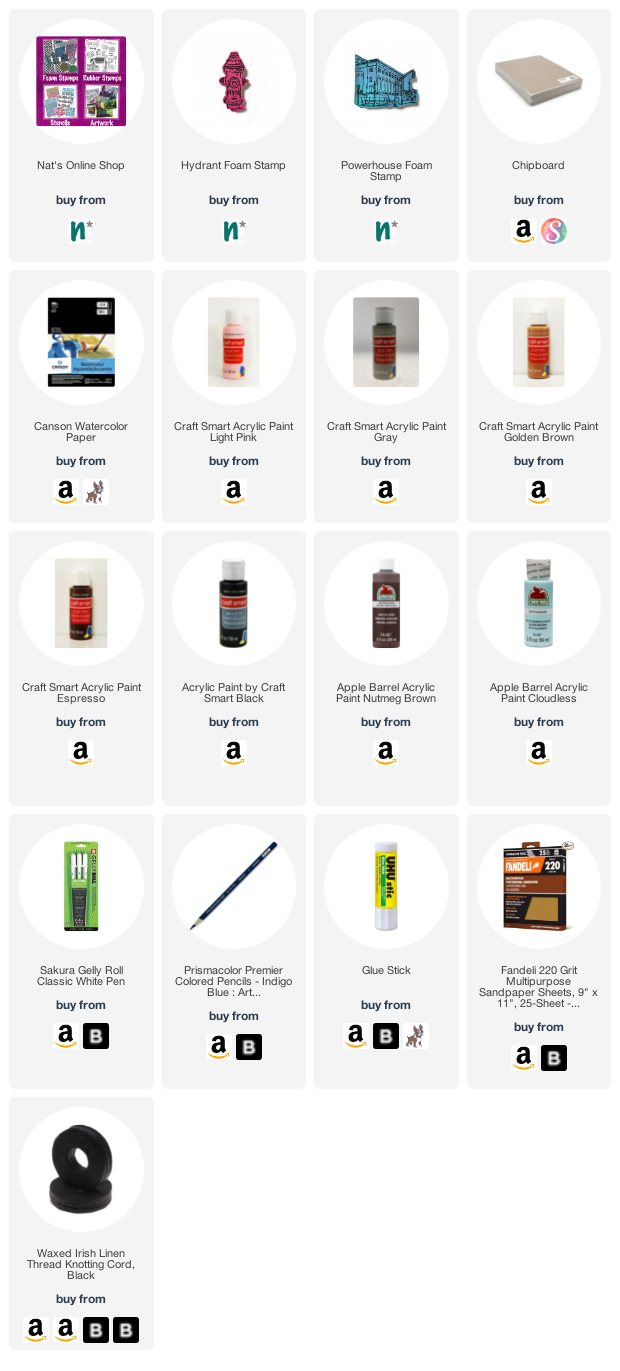
Give it a try: you can find all my Foam Stamps in my Online Shop and in addition to collage papers, here are some of the supplies Jordan used:

Looking for more inspiration from the Creative Squad? Follow them on Instagram here.

Leave a comment

Creative Squad: Celebrate the Season – Robin Seiz

Happy Holidays from my Creative Squad! Today we have a festive post from Robin Seiz who is sharing a mixed media piece using my Hydrant foam stamp, Small Circle Jumble rubber stamps, and my new ATC Mixup stencil. Our theme is Celebrate the Season – Many cultures celebrate in December so let’s do some celebrating ourselves with our favorite art supplies and the holidays that make this season so festive.


Hello friends, This month we are celebrating the season! I love bling; my friends know this and always expect me to show up with just a little “extra something”. As I thought about this project, I knew it had to have some sparkle for the holidays.  

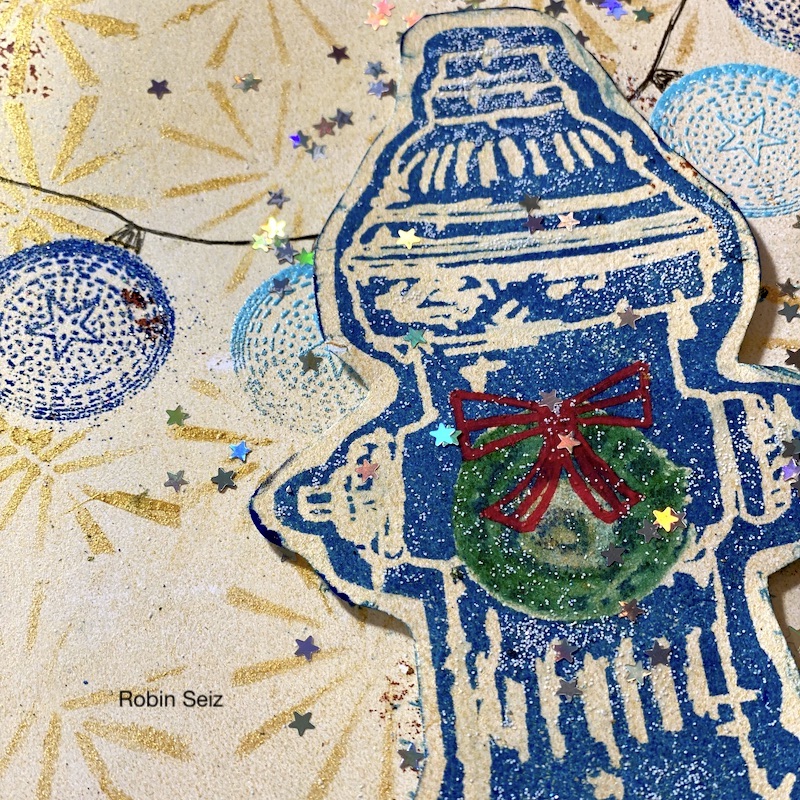
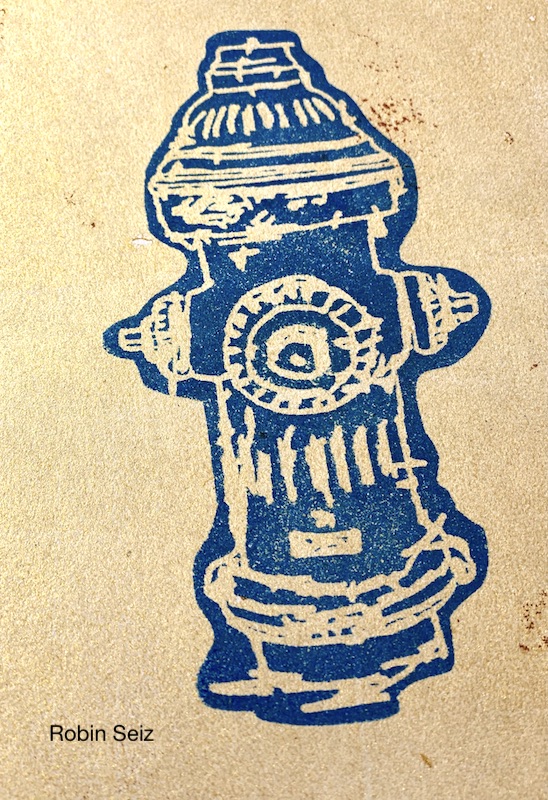
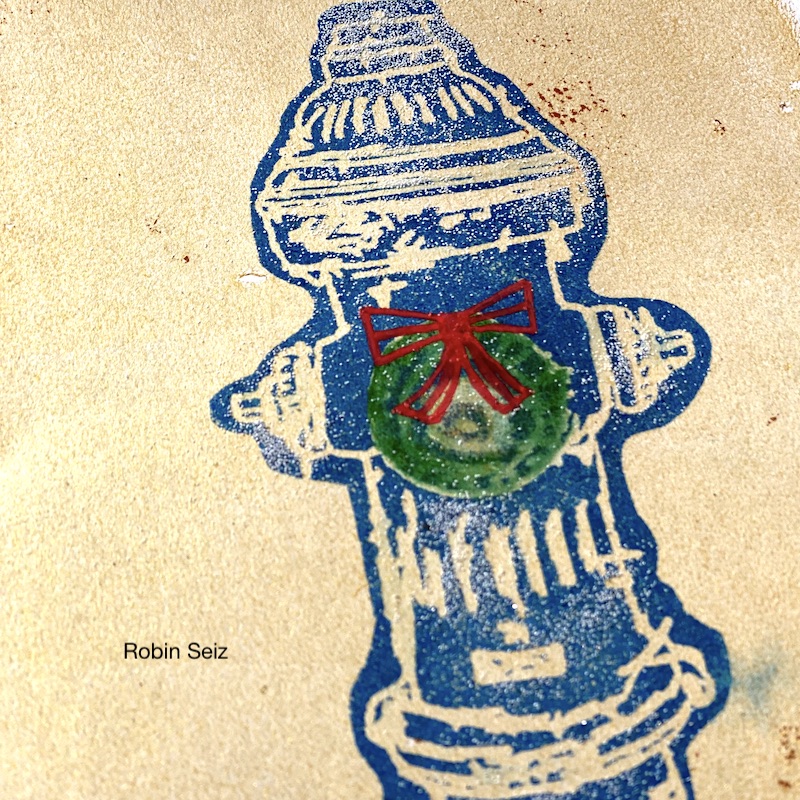
We were encouraged to use some foam stamps from Nat’s last release; I hadn’t used the Hydrant that much. It’s such a fun foam stamp! When I stamped it, the front looked like a wreath to me… so that’s where I started. 

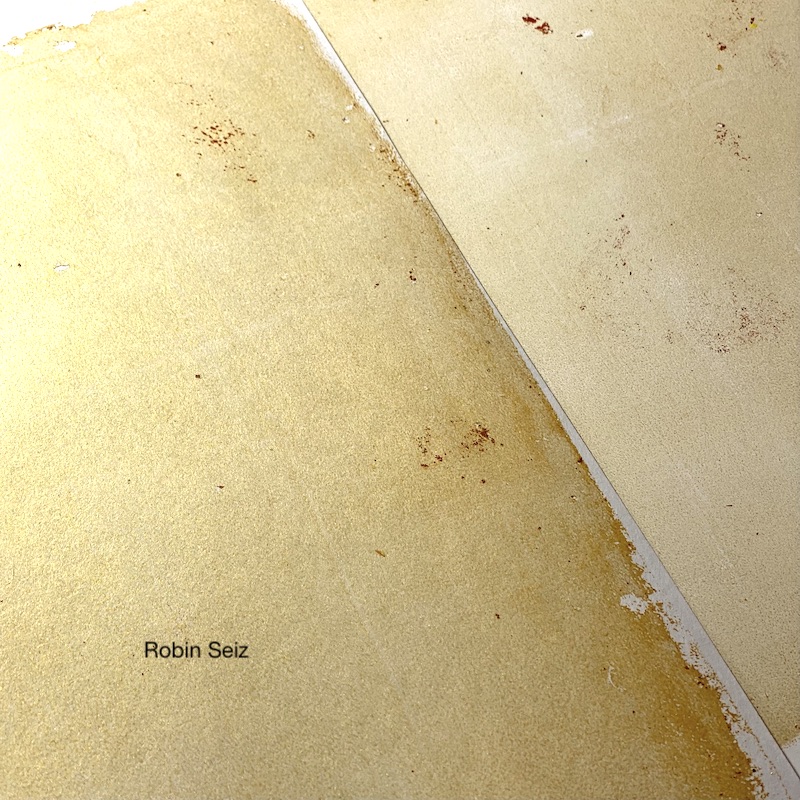
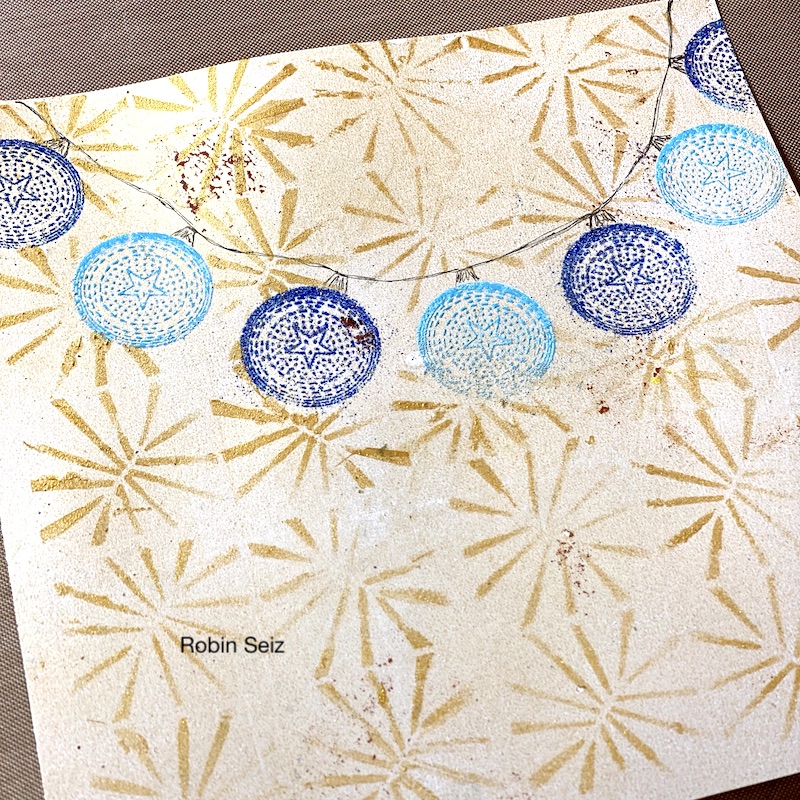
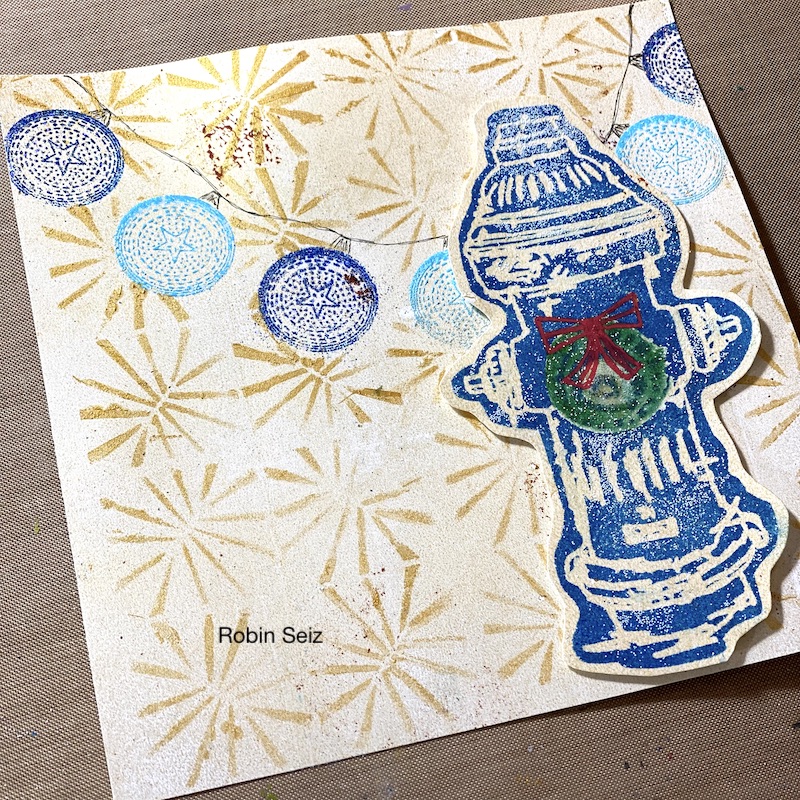
The first thing I did was use my Gelli plate to pull two gold papers, one darker than the other. (You’ll see there are red marks on the gold paper; that’s from a previous project and I don’t mind those little bits and pieces. If you are more of a perfectionist; I suggest cleaning your plate before you start, but I rarely do.) The lighter piece would be the background paper for my piece, the darker piece would be the background for the fire hydrant stamp. I wanted the gold to show through the stamp and I knew I would be fussy cutting the hydrant. That’s the wonderful thing about foam stamps, they often have the lines you can see through and play with the color in the background. I used Versa Fine Clair Paradise to stamp the hydrant.

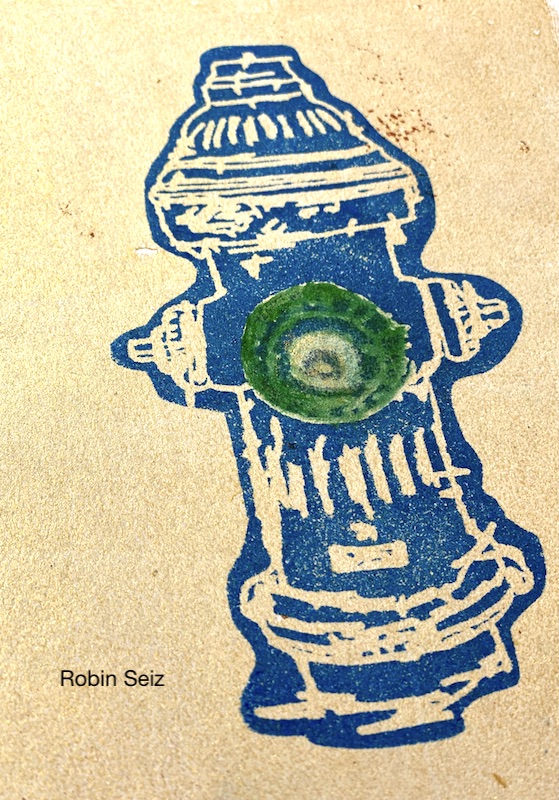
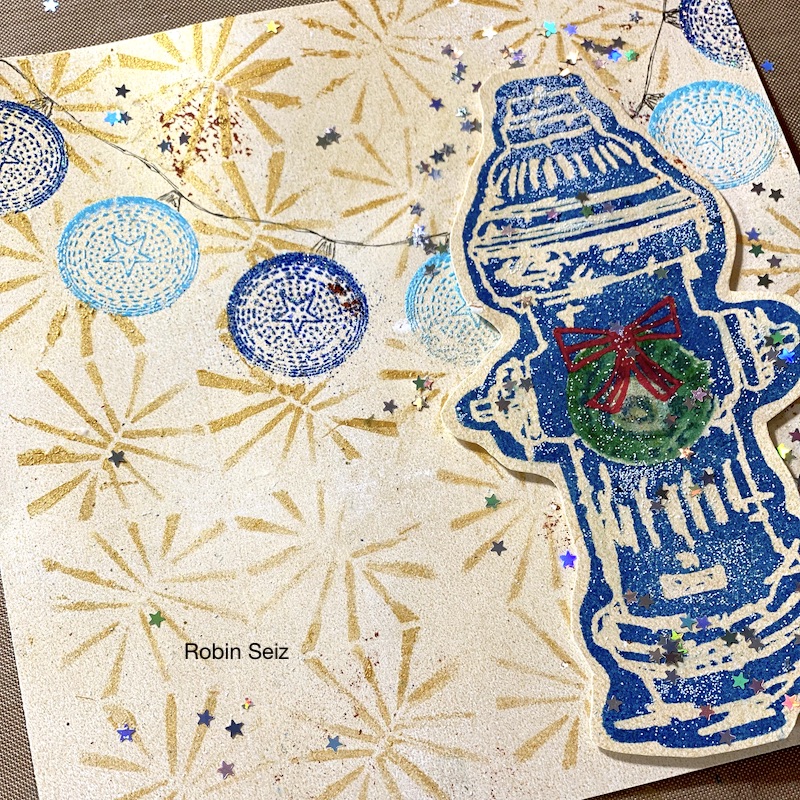
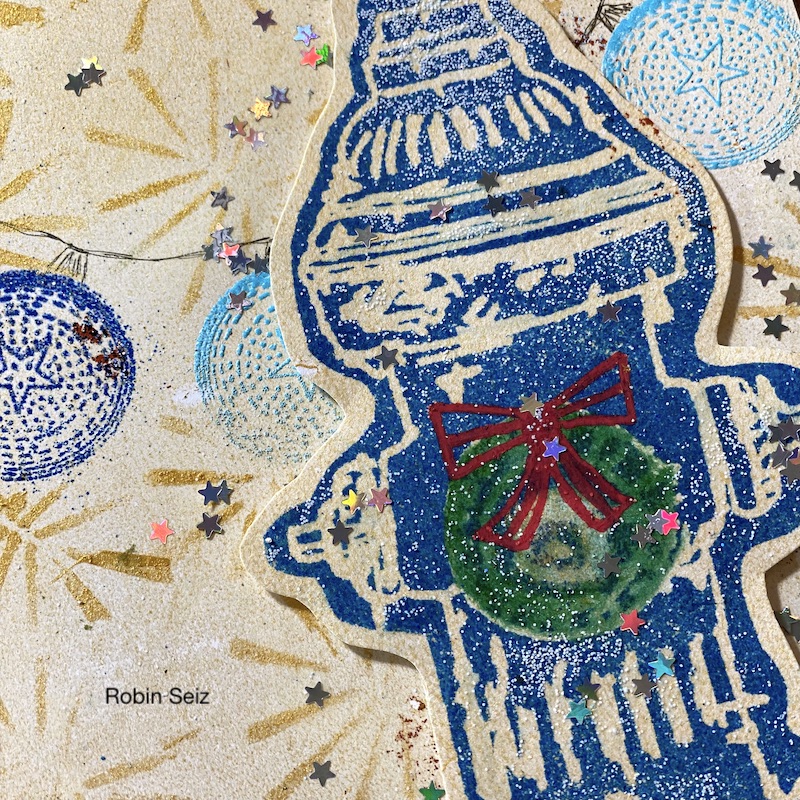
Next, I took a very small flat tipped brush and dipped it on the Versa Fine Clair Green Oasis and painted the “wreath” on the front of the fire hydrant. Once it was dry (and that’s a super important step) I drew a ribbon with a red Posca paint pen. If you are like me and really don’t have drawing skills, then I would suggest a few simple books to help you out. They come in super handy. I will list them in the supplies. Once the wreath was finished I wanted it to have the look of fresh fallen snow. I don’t often use glitter because it’s so bad for the environment, but sometimes, I just have to break it out! If you look closely at picture 4, you will see the “snow” both on the wreath and the hydrant. It’s subtle, but it does show up.

I moved to the lighter gold background paper for the next steps. 

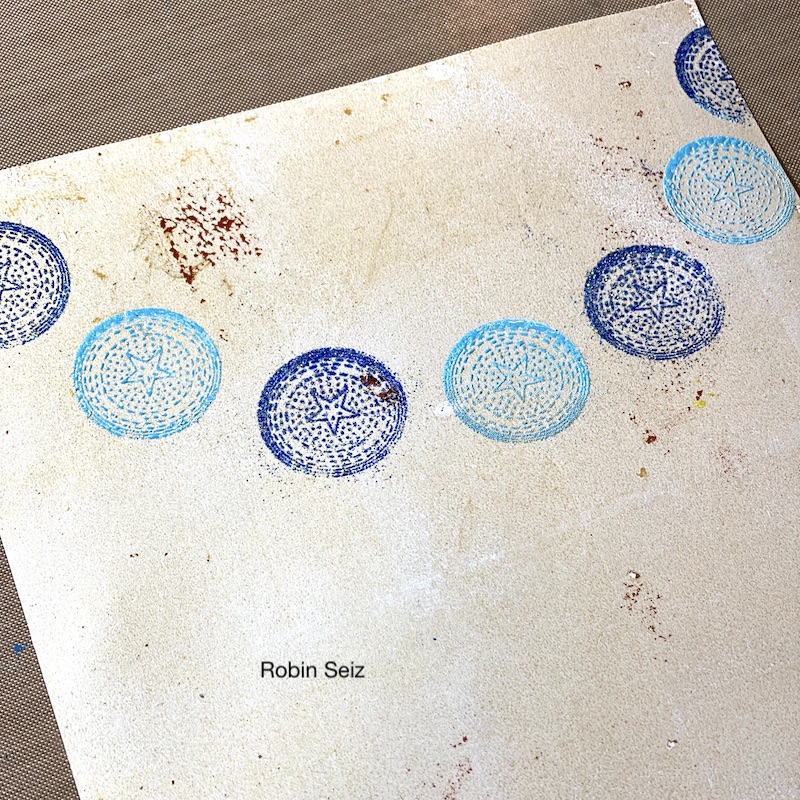
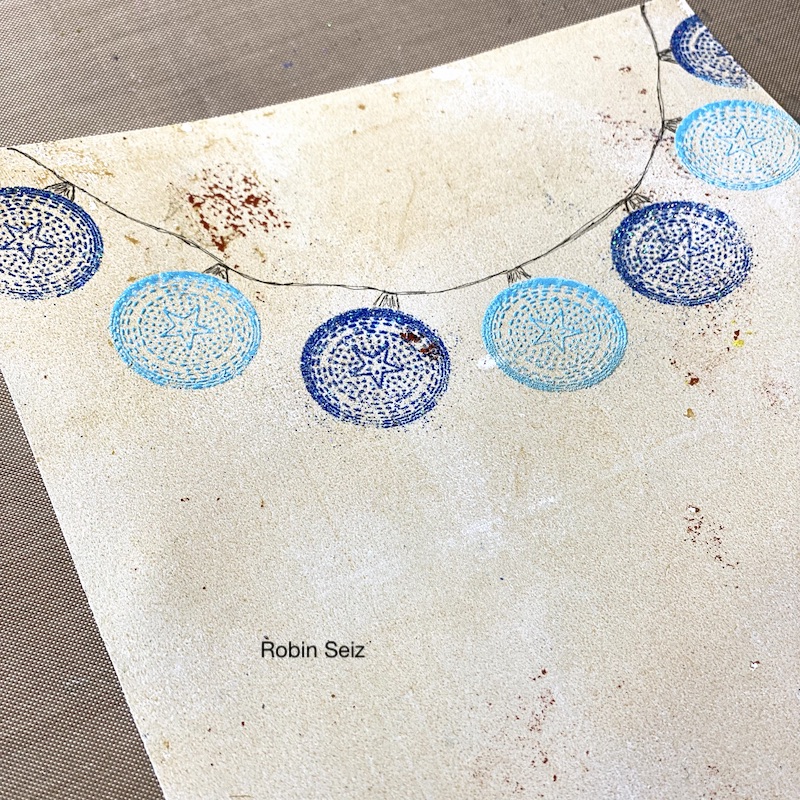
I recently ordered Nathalie’s Small Circle Jumble Set and hadn’t yet used them. They were the perfect stamp for the hanging lights. I rarely use embossing powders, but I did so in this project. Embossing always feels like a “little something special” and gives a piece a lovely dimension. I then drew in some string for the lights with a micron pen; I did later go back over it with a little heavier line. 

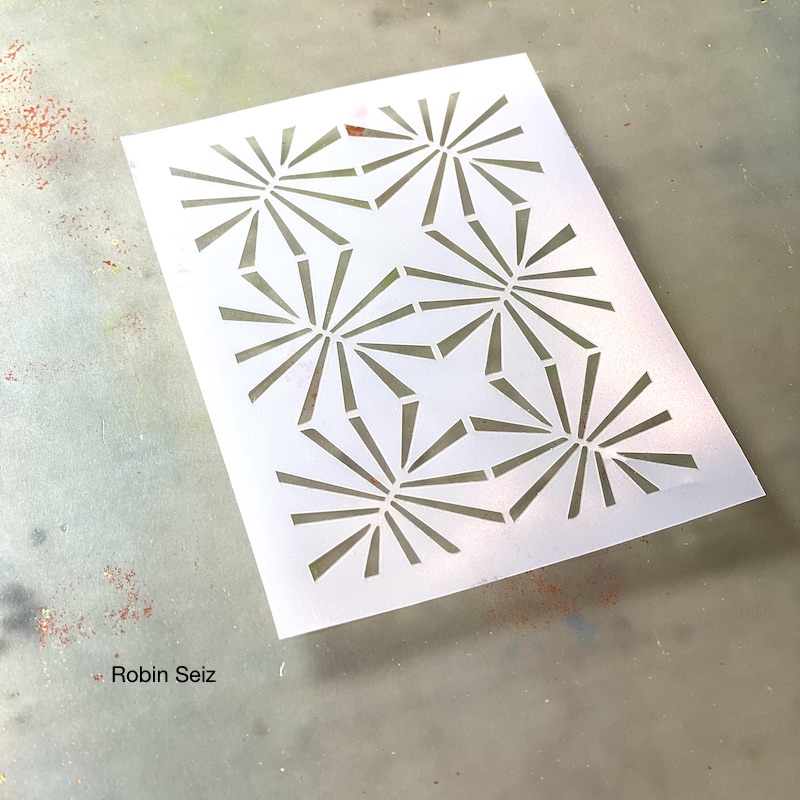
Next, I fussy cut the hydrant and auditioned where it would be placed on the paper. It’s quite bold, so I needed something to counter balance it compositionally. Nathalie recently gifted her Creative Squad the new ATC Mixup stencil sheet and it has a wonderful star pattern on it. I thought this would be the perfect background to balance the hydrant. I used the stencil with gold acrylic paint. I worked more boldly in the upper left corner to balance the hydrant. 

When I was finished with the background, I attached the hydrant with dimension tape. I think it adds so much to a piece when there is  dimension. I still felt like the piece needed a little more of “something” (some bling) I added glitter stars and the piece was finished. As I looked at it more, I thought that perhaps I should outline the hydrant in the Versa Fine Blue. This never works well for me, I seem to get it all over everything. If that works for you, it definitely adds even more dimension. I have included both pictures, ( 10 and 11) with and without. You see which you prefer. 

This piece could be a card (it’s 6×6) or a add-on for your journal. It could even be framed and brought out during the holidays, which is what I might do.

I wish you all a wonderful holiday. I hope it’s filled with joy, love and perhaps even some creative time! See you in the New Year! Peace, Robin


Thank you Robin for such a lively composition – feels perfect for celebrating the holidays!

Give it a try: you can find all my Foam Stamps, Rubber Stamps and Stencils in my Online Shop and here are some of the supplies Robin used:

Looking for more inspiration from the Creative Squad? Follow them on Instagram here.

Leave a comment

Creative Squad: Celebrate the Season – Riikka Kovasin

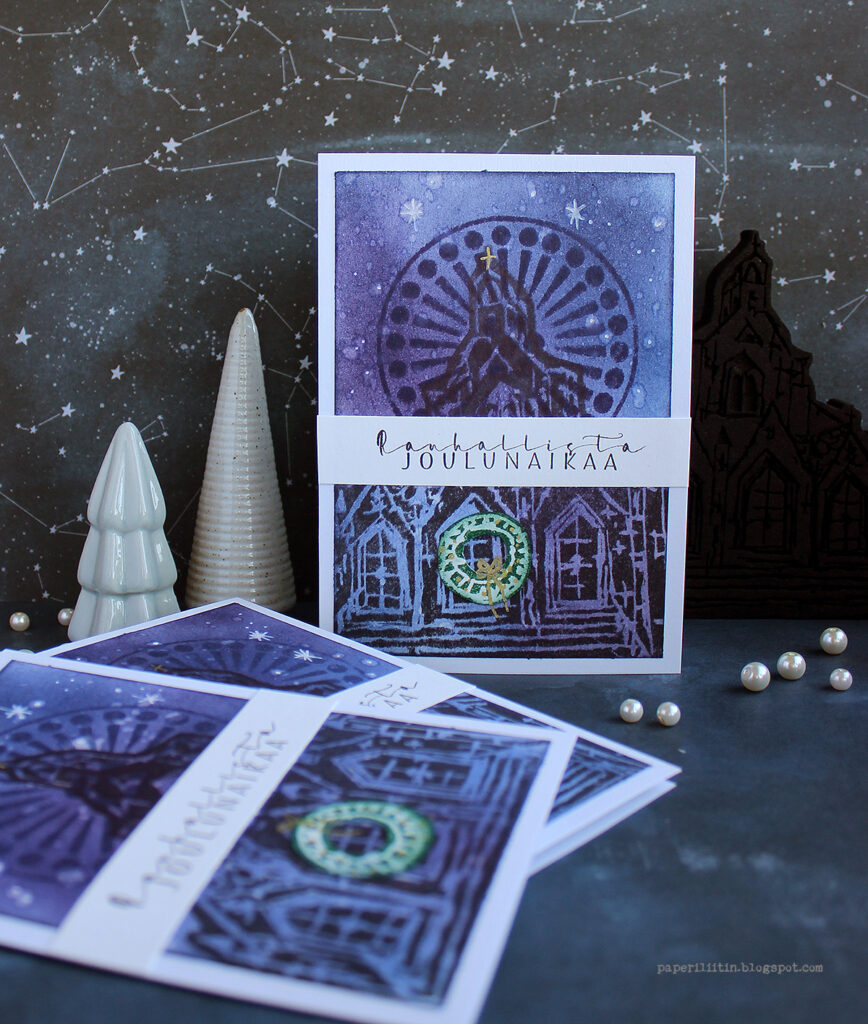
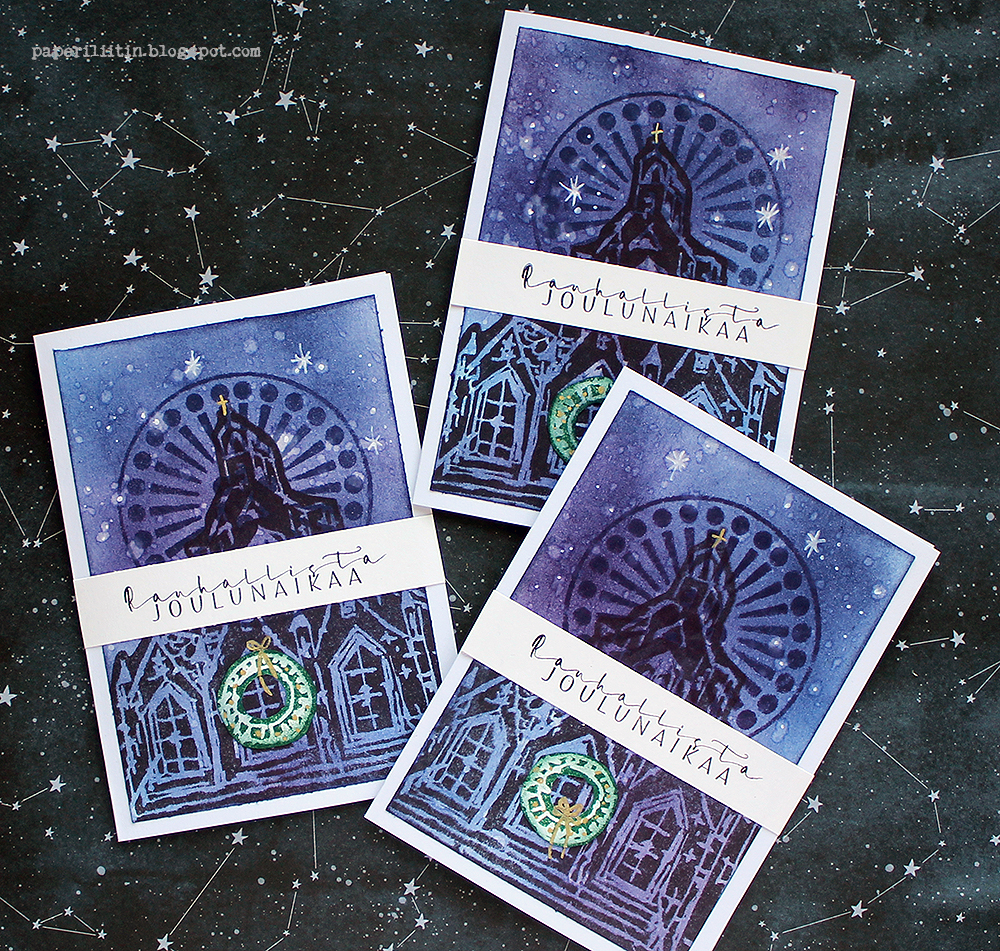
Hello from my Creative Squad! Today we have a post and video from Riikka Kovasin who is sharing some lovely cards with us using my Church, Hydrant, and Grove Street foam stamps and our theme: Celebrate the Season – Many cultures celebrate in December so let’s do some celebrating ourselves with our favorite art supplies and the holidays that make this season so festive.


Peaceful Holidays

Hello there everyone! Can you believe it’s already December? I think I say this at least once every month, but it really seems that time is flying. 2021 seems to have passed in a blink of an eye. It was just weeks ago when it was summer, and I was filming my CJS22 video!

This month we’re “Celebrating the Season”. Winter is my favourite season. I would take minus degrees Celsius over hot temperatures any day as then I can just layer clothing and snuggle with my cup of tea. With sub-zero temperatures I can cope, with blazing hot, not that much! In my mind winters are cold and white. I don’t like the warm winters which are dark and gloomy, with sun barely visible, but the white snow and brisk temperatures are the thing!

I also love Christmas time – the preparations, anticipation and hustle to get everything done and then the lovely peace when the Turku Cathedral chimes twelve times, and the Christmas Peace is declared from the old capital of Finland. I grew up in Turku, so this tradition is important to me, it marks the transition from the preparing to the enjoying. The Christmas Peace has been declared from Turku since the 14th century. The wording of the current document is from 1827, though, when a secretary of the magistrate wrote it from memory after the Great Fire of Turku.

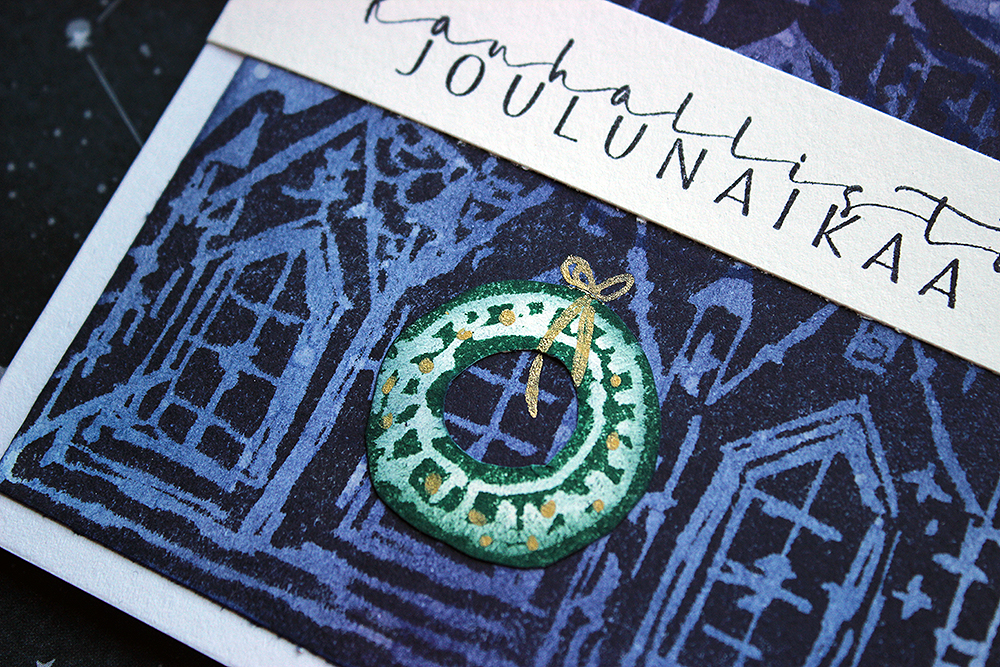
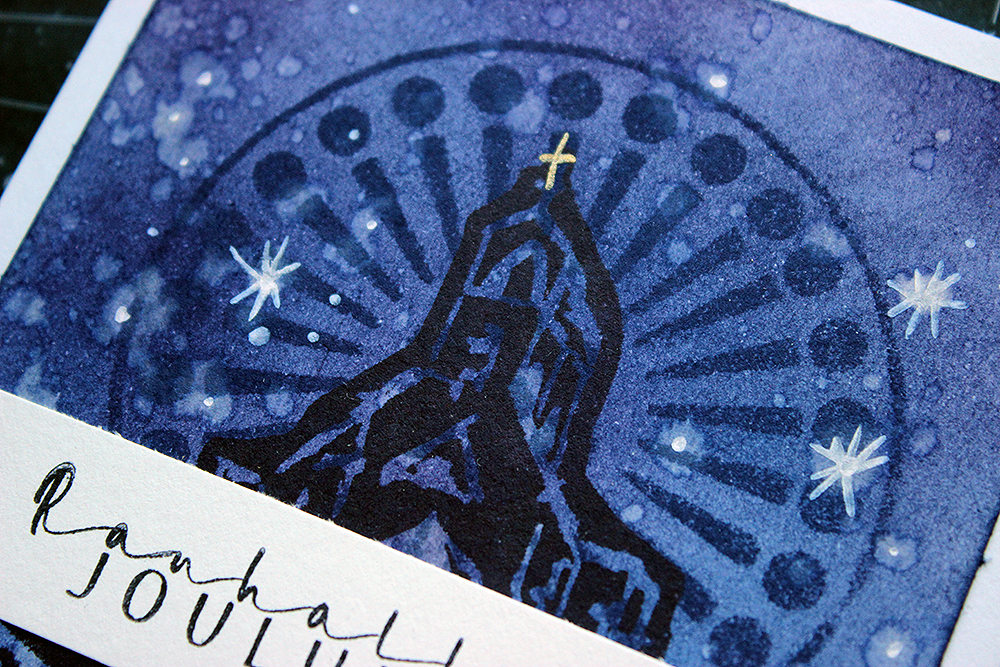
I chose to do a little Christmas scene for my cards to celebrate the inky blue skies of winter and the Christmas time. I chose to use the “Church” foam stamp, probably inspired by Turku Cathedral. To add a little something to the background, I added a halo or a rose window kind of pattern using “Grove Street” foam stamp. And to decorate the church for the winter, I stamped a huge wreath using a part of the “Hydrant” design. If you wish to see how I made the cards, please see the video below!

I use acrylic paints as my “go-to” medium so this time I wanted to use another medium instead. As you could see from the video, I chose inks this time. One reason was the way dye inks react to water – I knew I could use that to my advantage to make a starry sky! Just apply a layer of ink and then lift it up with water splashes. I then emphasized the look more by adding some white paint marker doodles on top. I placed the bigger stars on top of the splashes so that the lighter area makes kind of a halo to the star.

With these cards I’m wishing you all Peaceful Holidays and a warm, heartfelt times with your loved ones whether you celebrate Hanukkah, Kwanzaa, Diwali, Christmas or any other Holiday! 

I’ll see you next year with another project for Nat’s Creative Squad!

Xoxo Riikka


Thank you Riikka – love how you used the Hydrant stamp to make your wreath! And hearing about your traditions was such a treat.

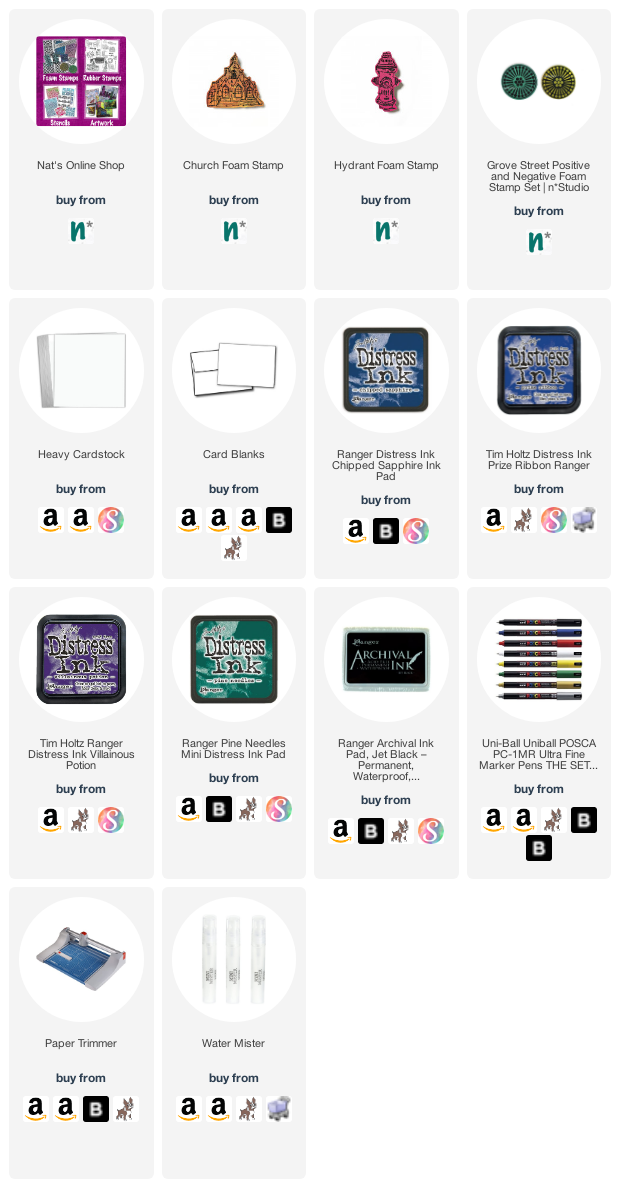
Give it a try: you can find all my Foam Stamps in my Online Shop and here are some of the supplies Riikka used:

Looking for more inspiration from the Creative Squad? Follow them on Instagram here.

Leave a comment

Creative Squad: Celebrate the Season – Maura Hibbitts

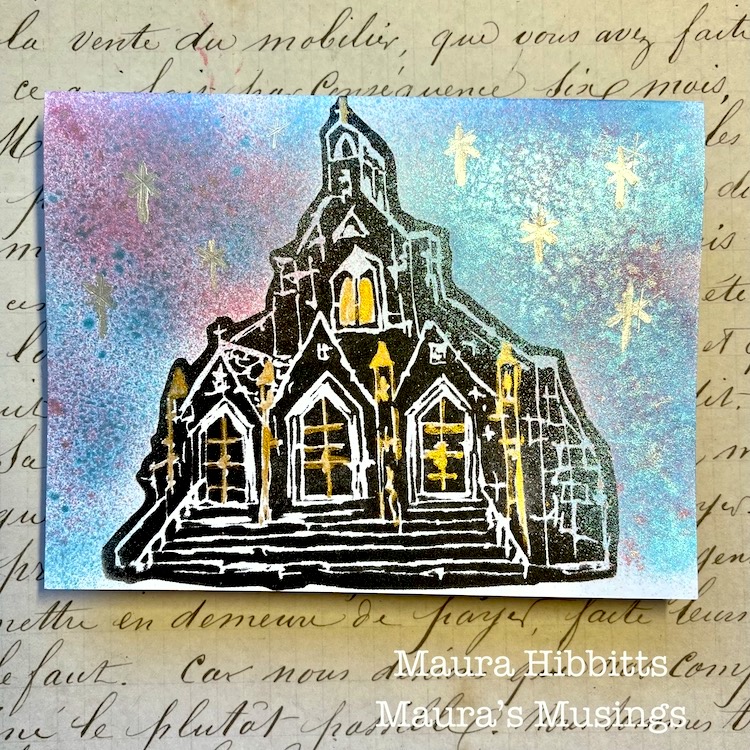
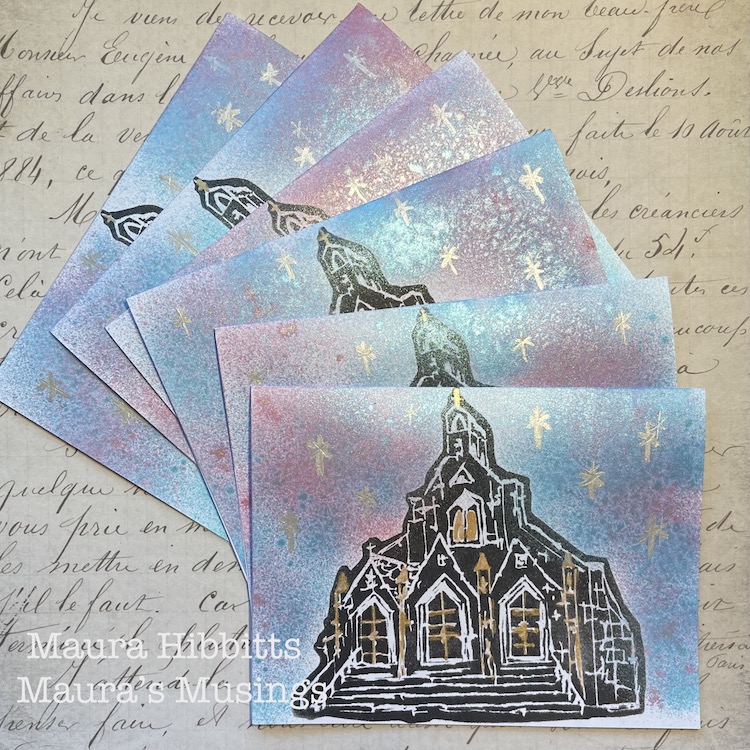
Hello from my Creative Squad! Today we have a gorgeous card idea from Maura Hibbitts using my Church foam stamp and getting us into the season with our theme: Celebrate the Season – Many cultures celebrate in December so let’s do some celebrating ourselves with our favorite art supplies and the holidays that make this season so festive.


May I wish you a joyous and blessed holiday season. We share diverse beliefs and ideas, and celebrate in a multitude of ways, but for many of us, this time of year is special. Share the season with family and friends and enjoy the celebrations!

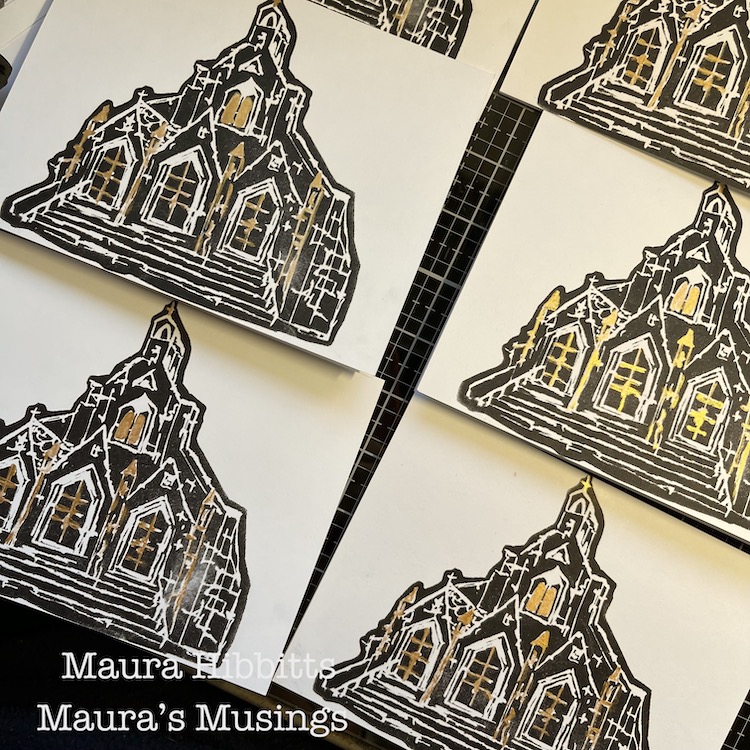
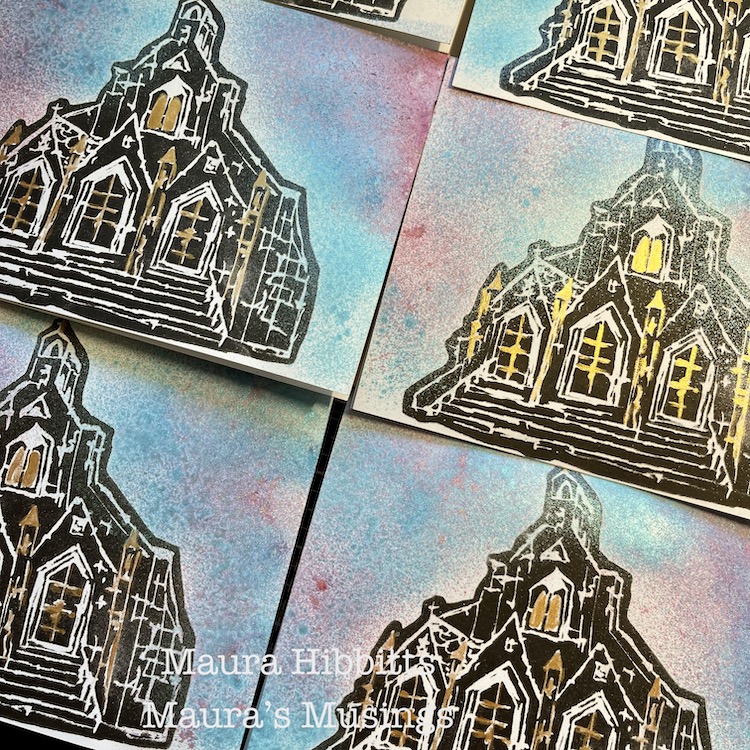
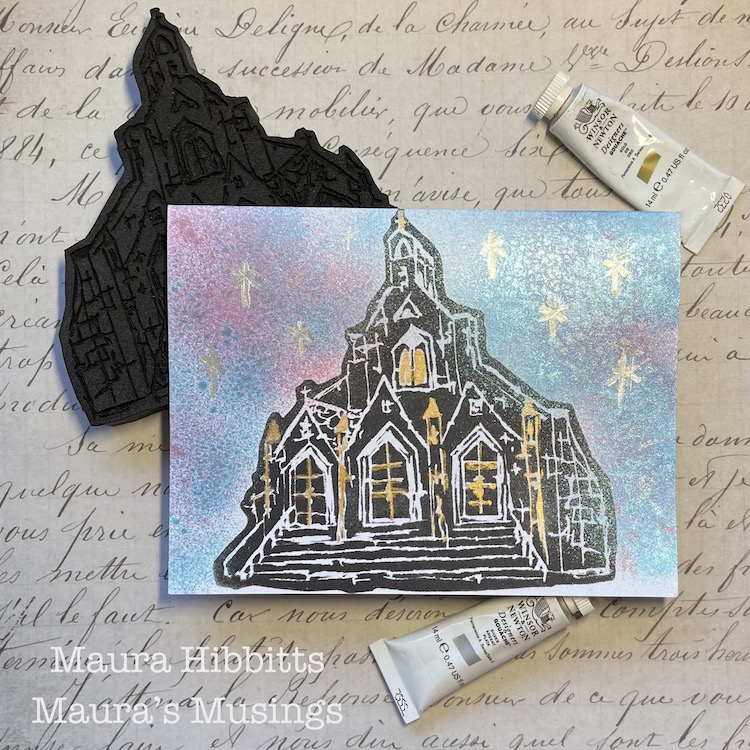
I like to make cards for Christmas and send them out with a note to friends and family. I’ve made a simple set of cards with Nathalie’s ArtFoamies Church stamp.

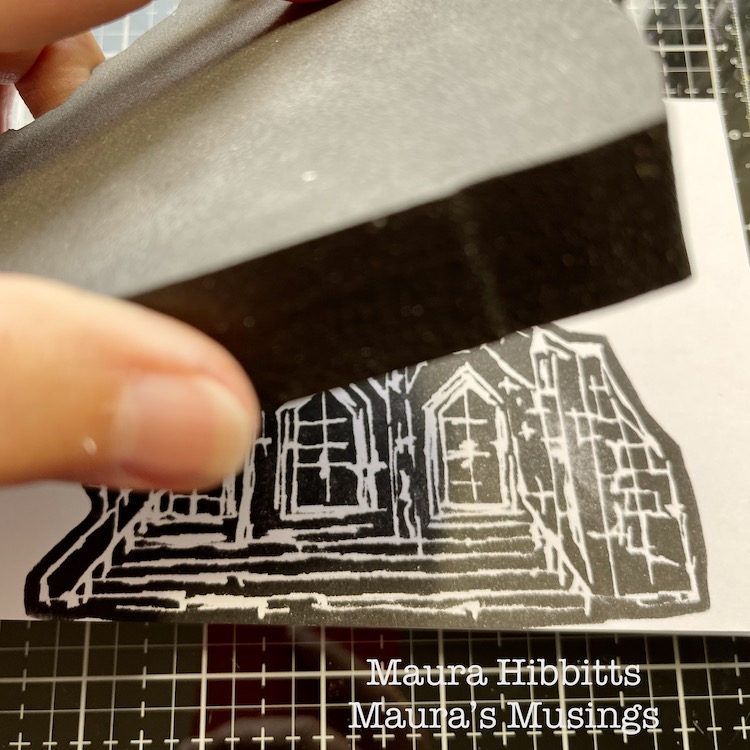
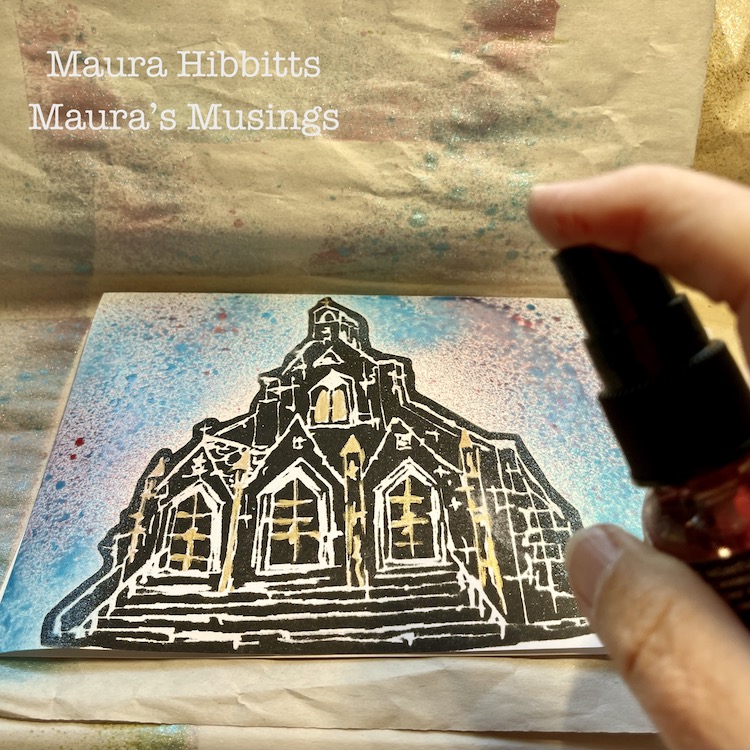
Start by stamping the church image onto A7 cards with black ink and let dry. Of course, you can use any color ink you wish for the image.

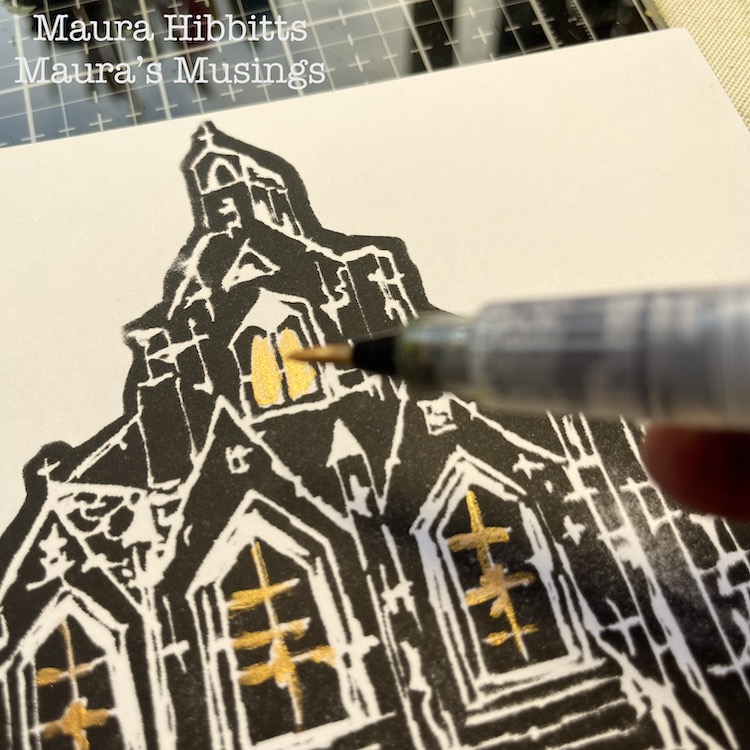
Add gold details to the image with a water brush and gold gouache. I squeeze out a bit of the gouache onto a craft sheet and pick up a bit with a detailed water brush.

Set up an area to add some sprays. I like to use a paper bag, or packing paper for this. Spritz on the mica stains around the church image and let dry.

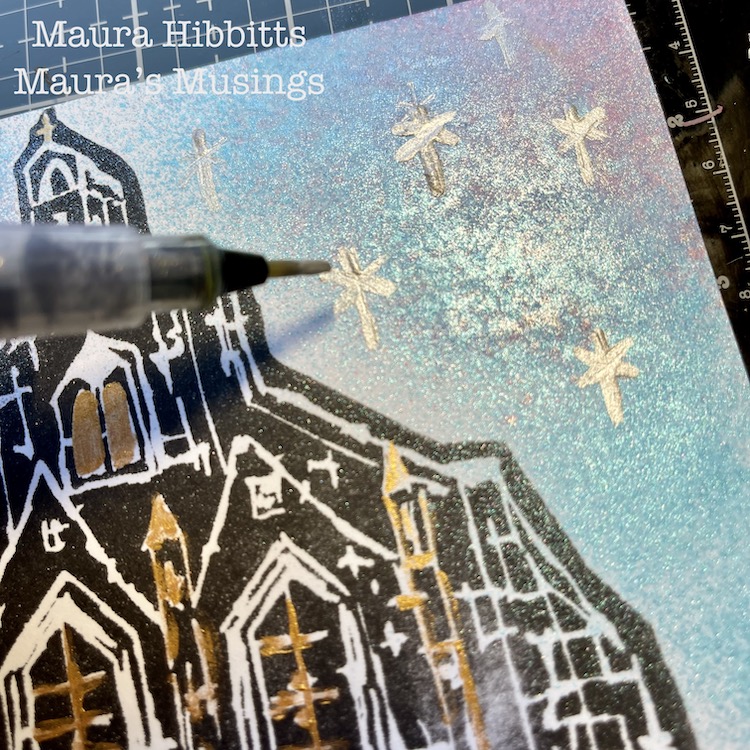
Once the mica stains have dried, use your water brush and silver gouache to add in some “stars”. I make these by painting a longer line, then an x shape across the line near the top.

Sometimes it is really nice to create simple cards with just a few products. I’ve been struggling with vision problems this year which has made it more difficult for me to work on complex or detailed projects. I’ve also had difficulty keeping my creative flow these past couple of years, so it helps to keep work simple and just enjoy what you can do. Maybe you have struggled with health issues and creativity too, and I hope you find keeping things simple helpful.

I have a set of cards ready to add notes and greetings and mail out. I wish you each a wonderful holiday season!

– Maura


Thank you Maura for this beautiful project idea and you are so right – sometimes we have things in our lives that can make creating more difficult, and a great way to handle that is to just do what you can. That way you still get to do what you love and feed your creative spirit :)

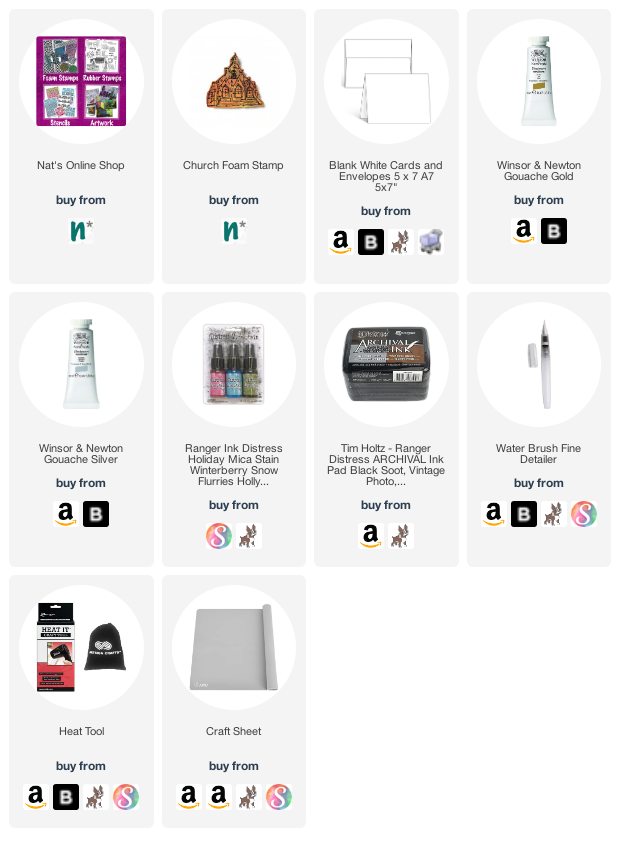
Give it a try: you can find all my Foam Stamps in my Online Shop and here are some of the supplies Maura used:

Looking for more inspiration from the Creative Squad? Follow them on Instagram here.

Leave a comment

Creative Squad: Gratitude is my Attitude – Judi Kauffman

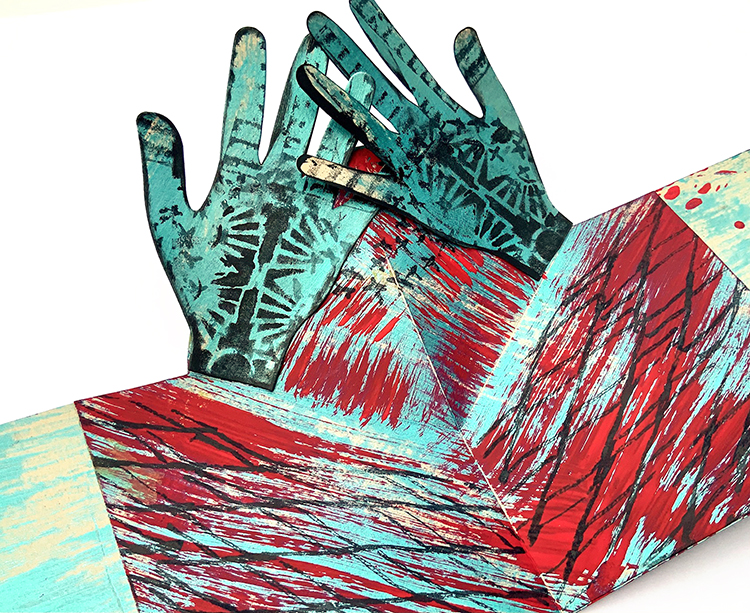
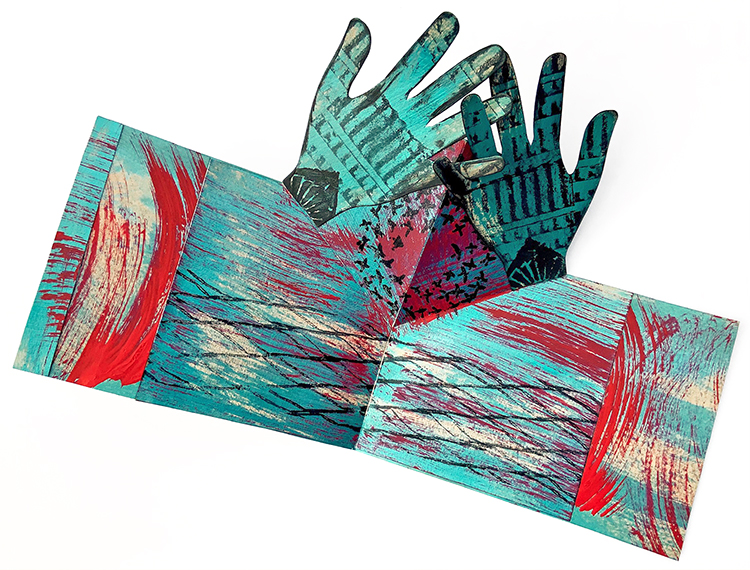
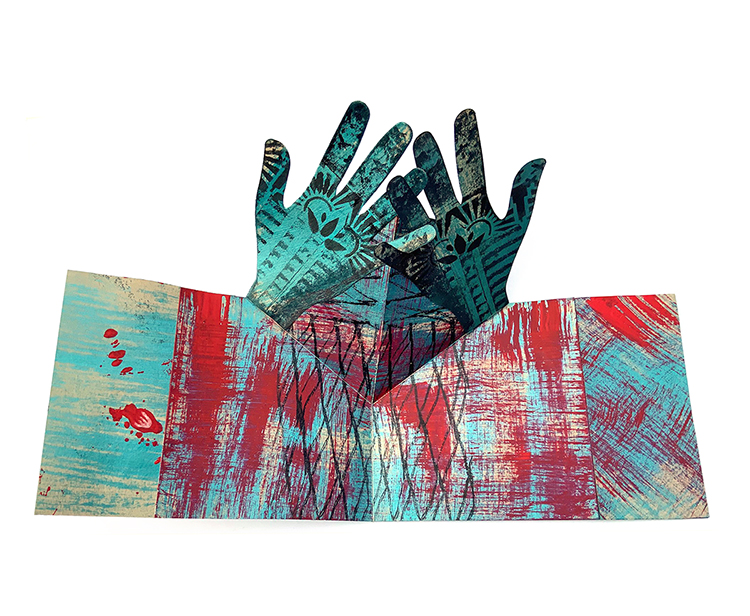
Hello from my Creative Squad! Today we have a post from Judi Kauffman who is sharing with us some super clever cards that use my Hamilton stencil, my Cardboard and Embroidery rubber stamps and that are absolutely perfect for our theme: Gratitude is my Attitude – This month we are playing along with the November ArtCollab: Showing Gratitude – and specifically giving thanks to those who have helped us along the way in our artistic journey. Who was crucial in helping you become the artist you are today? Let’s give these amazing souls a shout out!


Applause – Cards for People Who Matter!

I’m endlessly grateful to all of the people who have supported me over the years as I grew from a little girl with crayons and fabric scraps into a designer, artist, and teacher with a career spanning over five decades! 

Some are long-gone: Mr. Motovich and Miss Weld, public school teachers who, in my book, were unsung heroes. Arnold Singer from Cornell who taught me lithography and reminded me by his actions that teaching and creating one’s own art go hand-in-hand. My parents, my grandparents. I hope I was successful in expressing my gratitude over the years.

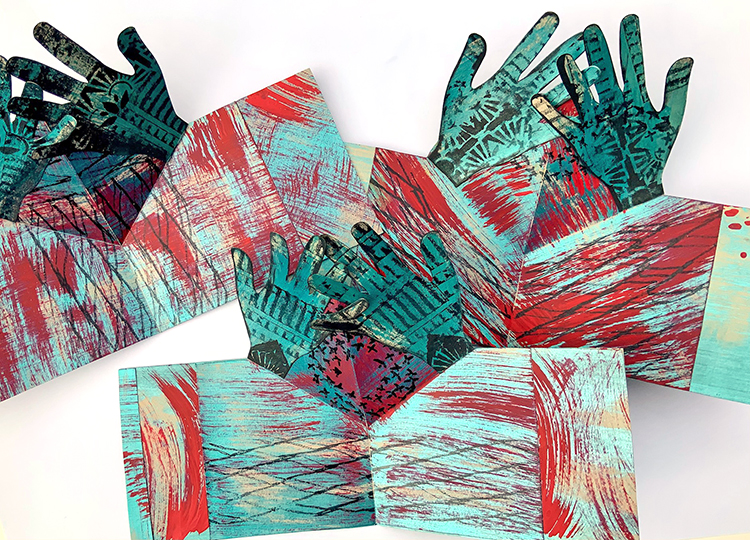
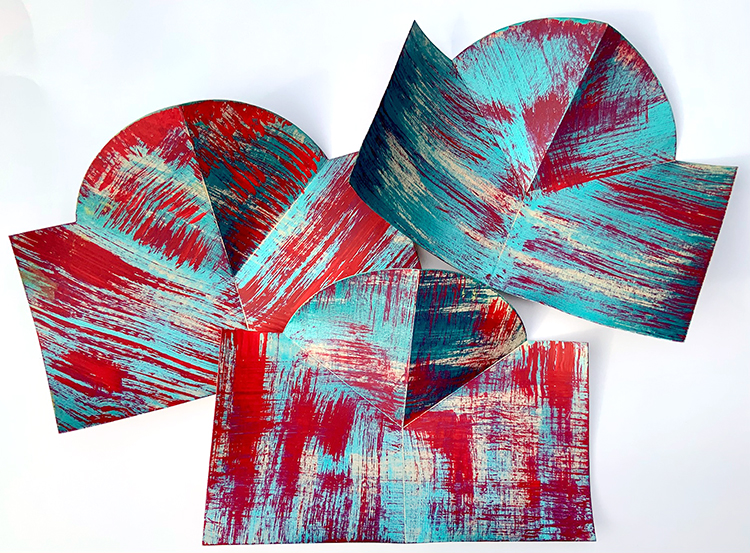
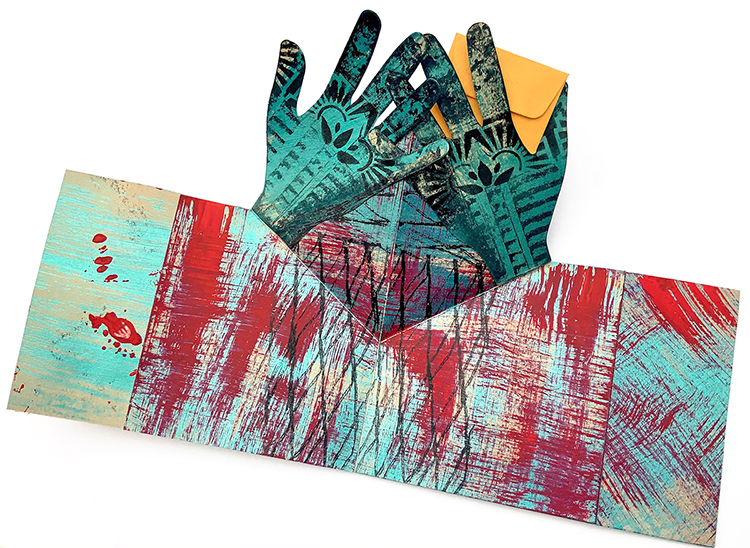
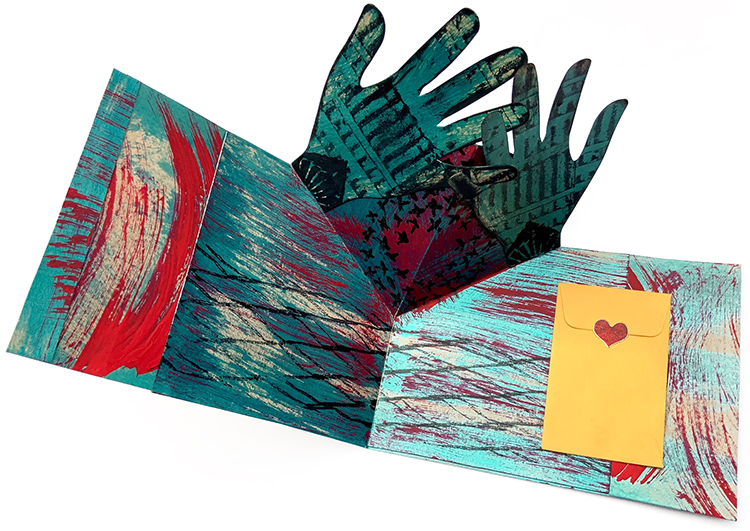
To thank those who are still in my life, people who continue to cheer me on and support my creativity, I made pop-up cards that “applaud” when opened.

Change the stamps and stencils and the color palette and this kind of pop-up could congratulate a friend who has a new job, just got chosen as captain of a sports team, survived a round of chemo, or anything else worthy of a round of clapping!

INSTRUCTIONS

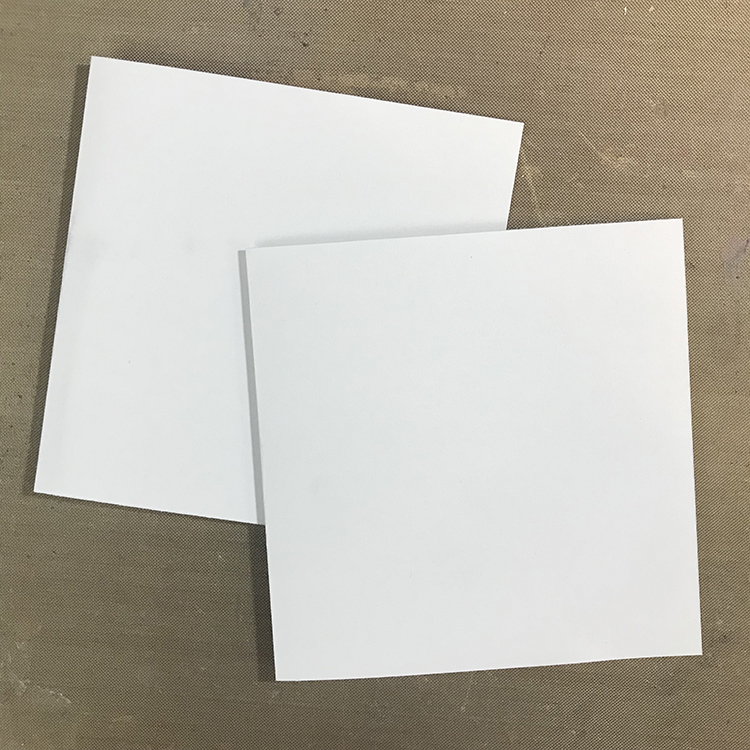
1. Each card requires a 14” x 5” strip of cardstock for the 5” x 7” side-fold card base, two 4” x 6” pieces for the hands, and one 9” x 8” piece for the pop-up structure in Kraft Brown or color(s) of choice. I find it easiest to make several cards at a time. 

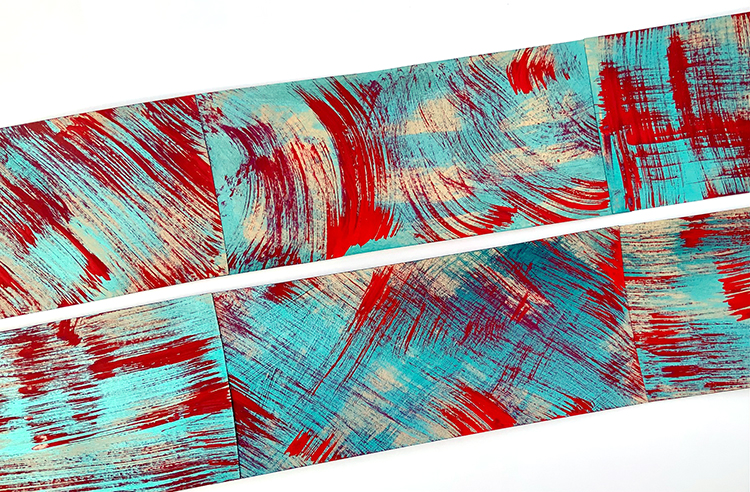
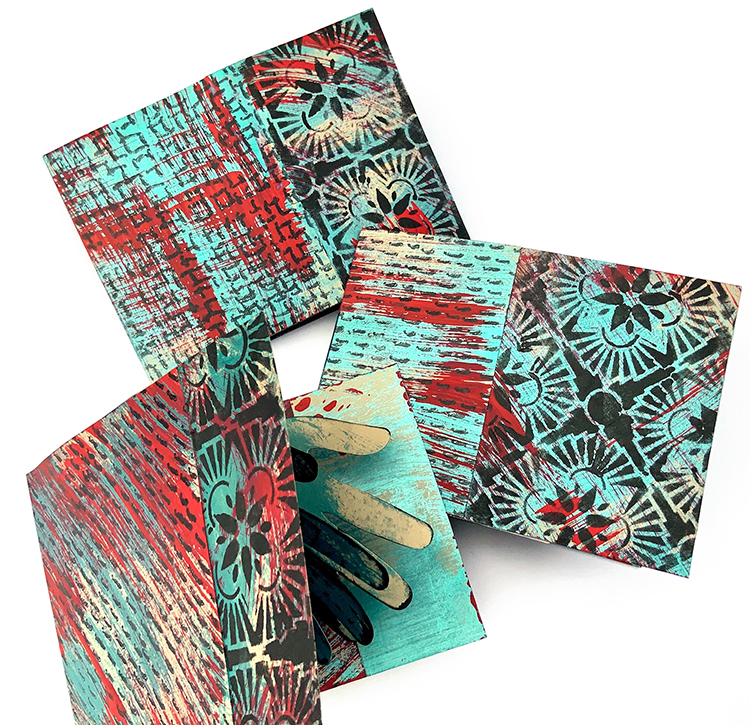
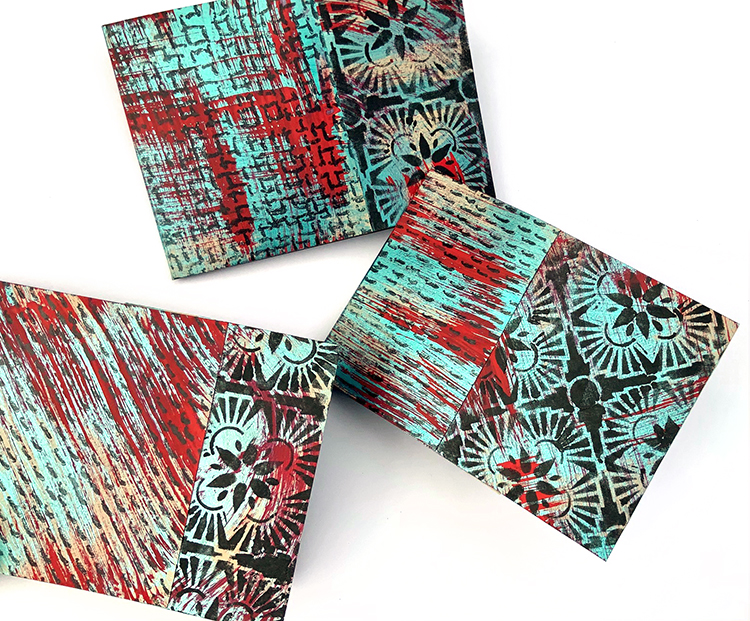
2. For the 14” x 5” strip, cut several 5” wide pieces from 12” x 12” cardstock, brush on Red and Teal Metallic paint, varying the directions of the strokes. Cut into shorter sections, overlap and glue together. Cut a 14” long piece for each card base. Hold onto scraps to decorate the inside short ends of the cards (the pop-up is shorter than the card so the hands won’t show when the card is closed).

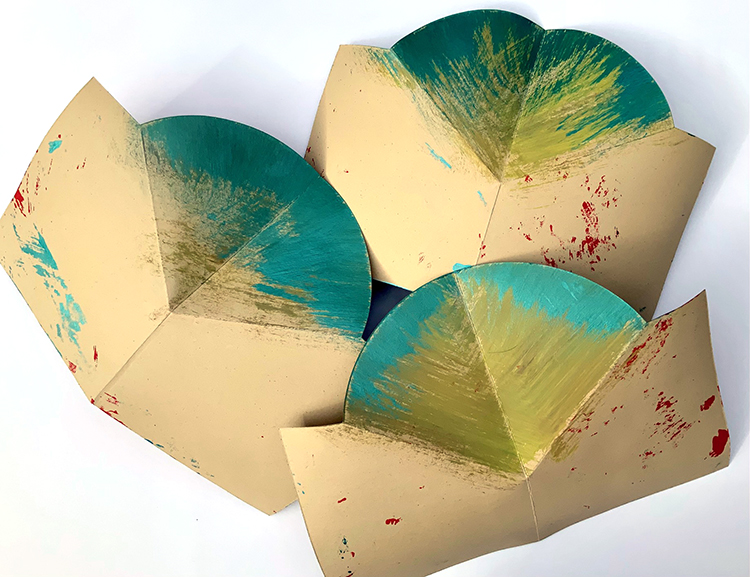
3. Brush Red and Metallic Teal paint onto the front of the pop-ups, varying the directions of the strokes. Paint the back of the rounded section of the pop-ups with Lime Green and touches of Metallic Teal. (The back of this part of the pop-up is visible when the card is open and standing.)

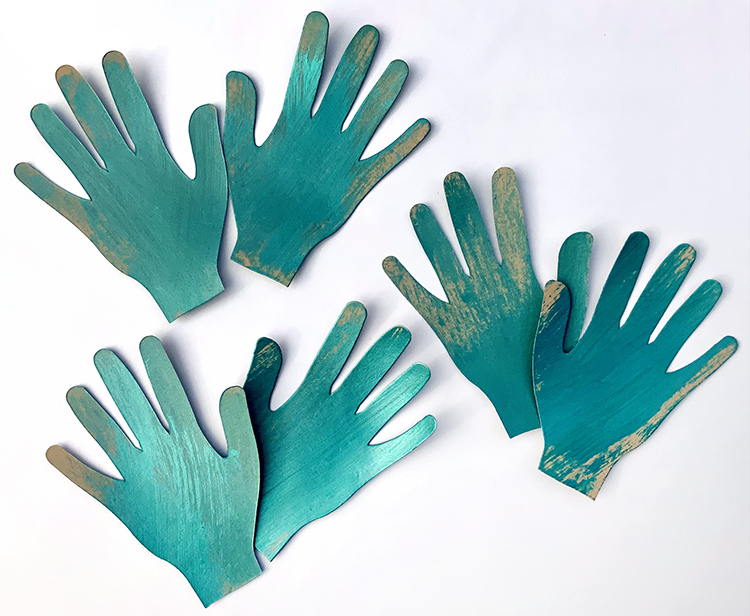
4. Brush Metallic Teal paint onto the hands.

5. Using a permanent ink pad and acrylic paint in Black, stamp and stencil patterns onto the hands and the pop-ups. Also, stamp and stencil patterns onto the outside of the card bases. I used Nathalie’s Hamilton stencil and her Cardboard and Embroidery rubber stamps.

6. Adhere a pop-up inside each card base, add 5” wide scraps at the ends. Glue the hands to the pop-up as shown so they appear to “applaud” when the card is opened and closed!

7. Options: 
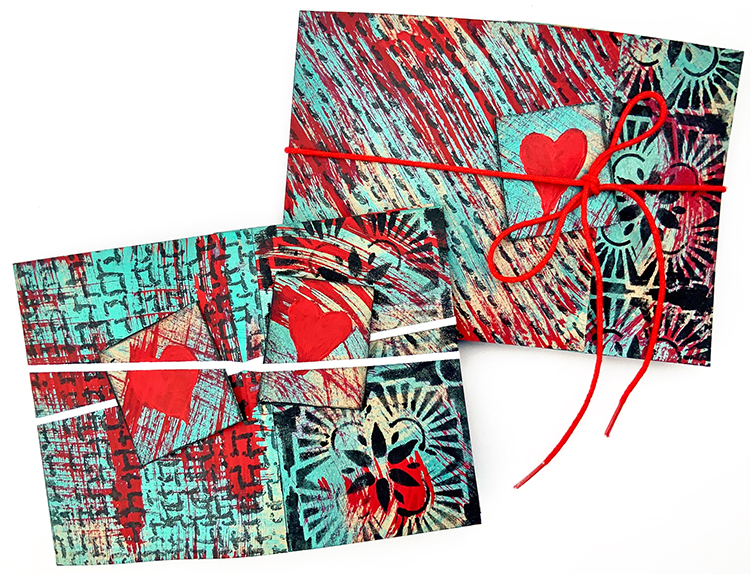
*Hold the card closed for mailing by adding a ribbon, cord, or paper “belly band”
*Paint a red heart onto a small square of painted cardstock and tuck it into the closure.
*Hide a message in a mini manila envelope and position it in one of the hands or at the side of the card base.

Keep going……..
*Change the stamps and stencils 
*Use more than three colors!
*Pick a different color palette to suit the recipient and occasion (instead of expressing gratitude, this kind of pop-up could congratulate a friend who has a new job, just got chosen as captain of a sports team, survived a round of chemo, or anything else worthy of a round of hand clapping!
*Add hand-written greetings, old photos and other collage elements.


Hands down this is one of the coolest card ideas we’ve seen in a long time! Thank you Judi!

Give it a try: you can find all my Rubber Stamps and Stencils in my Online Shop and here are some of the supplies Judi used:

Like what you see? Follow the Creative Squad on Instagram for weekly posts, artwork, and inspiration.

Comments (1)

  • jean marmo

    |

    Judi – These are just wonderful! Anyone getting this would be very appreciative. Happy Holidays!!

    Reply

Leave a comment

Creative Squad: Gratitude is my Attitude – Jordan Hill

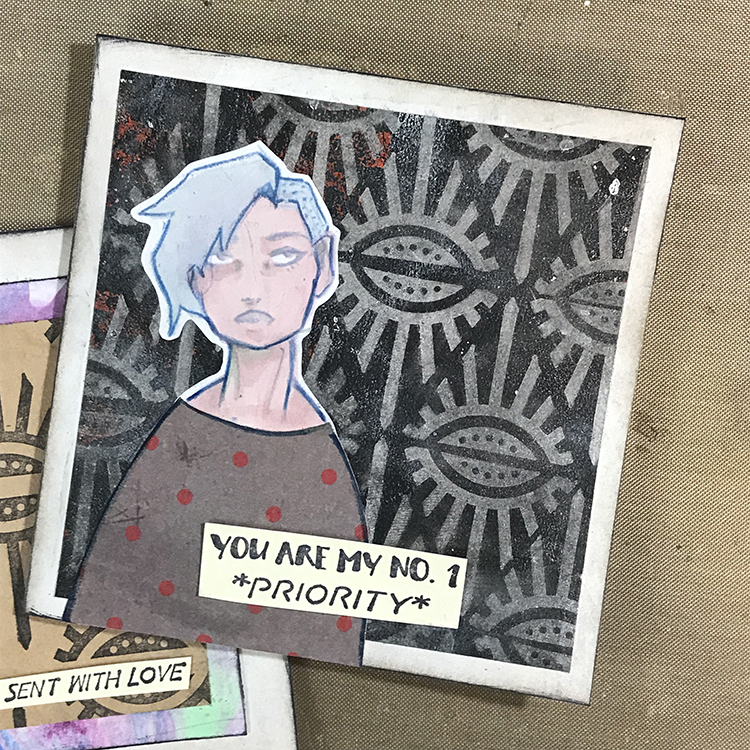
Hello from my Creative Squad! Today we have a post from Jordan Hill who is sharing with us a couple of lovely cards using my Triangle Love and #keepyouposted rubber stamps, with our very appropriate November theme in mind: Gratitude is my Attitude – This month we are playing along with the November ArtCollab: Showing Gratitude – and specifically giving thanks to those who have helped us along the way in our artistic journey. Who was crucial in helping you become the artist you are today? Let’s give these amazing souls a shout out!


Hey everyone! I’m excited to be back with a new project for the month of November. The first thing that came to mind when I heard this month’s theme of “Gratitude is my Attitude” was greeting cards! They are a great way to show you’re thinking of someone, and making that card handmade always adds a little extra touch. 

I started out my greeting cards by cutting down a piece of white card stock to 4.25″x8.5″. I chose this size because it allowed me to cut two cards from an 8.5″x11″ sheet of card stock with next to no leftover (only the 2.5″ strip at the end). Once my card stock had been cut to size, I folded the pieces in half to create two square cards.

Next, I selected a few scraps of paper and using Nathalie’s Empire Triangle stamp, I created a repeating pattern across them. For the lighter piece I used black ink and for the darker piece I used a silver pigment ink. These triangle stamps fit together nicely to create patterns! 

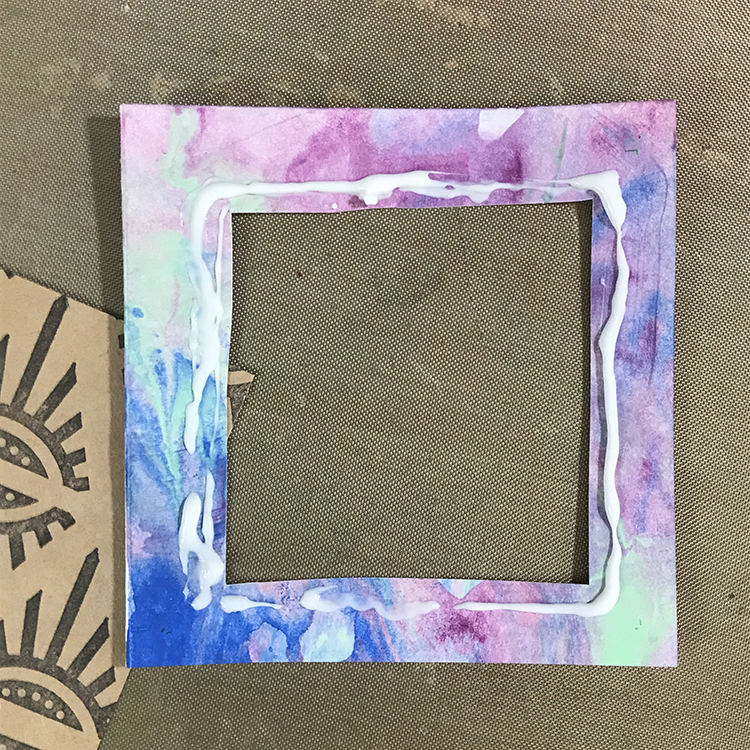
I then cut down my stamped papers into smaller square shapes. For this particular card, I chose a 3″x3″ square. Next, I selected a separate paper scrap to create a mat around that square. A trick I learned back in my scrapbooking days is that if you are having a hard time using up your pretty papers, you can cut out a square from the middle of your mat and save the scrap for another project!

Place your glue around the inside edge of your mat. I used Aleene’s tacky glue for my cards, but any sort of liquid glue, double sided tape, or adhesive runner would work for this! Then, place your patterned paper square into the center of the mat.

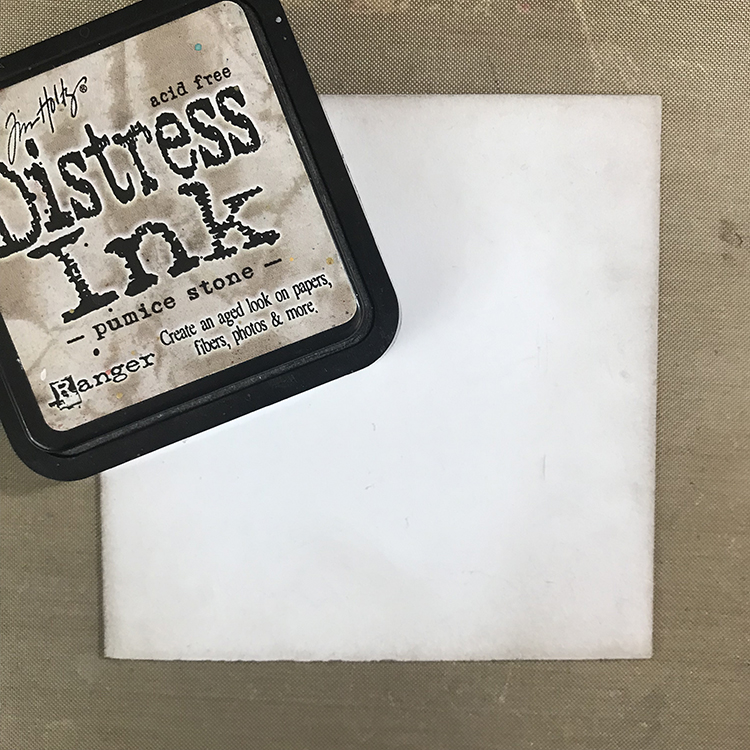
Next, I prepared my card bases for assembly by using some Distress Ink in the color Pumice Stone and a Tim Holtz Blending Tool to buff around the edges of my card. I selected this color because I felt the gray fit with my style and the other colors that I was using more than some of the browns I have in my collection.

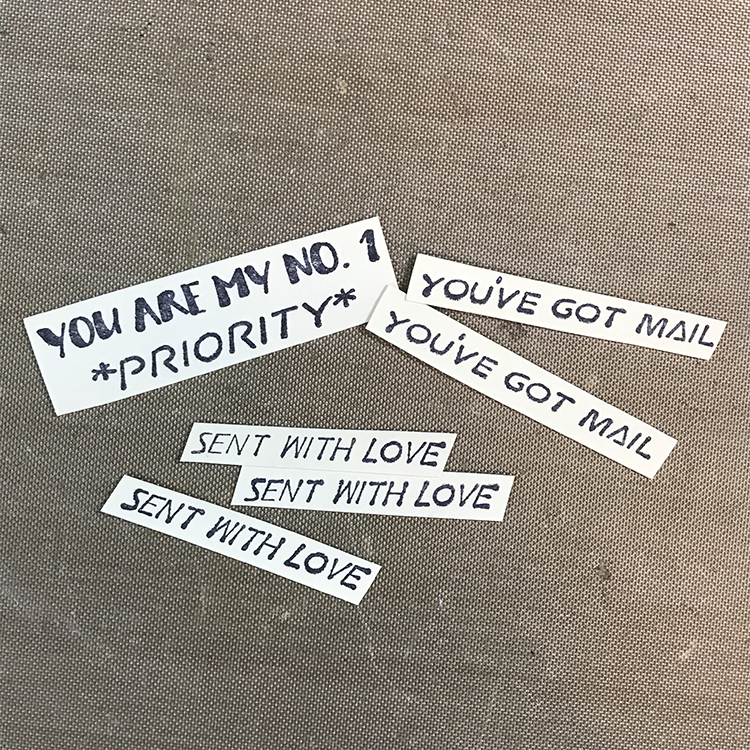
Then, using Nathalie’s #keepyouposted Cling Rubber Stamp Set and a black ink pad, I stamped some words onto a scrap of file folder and cut them out. I stamped a few extra so that I’ll have them prepared for making cards in the future!

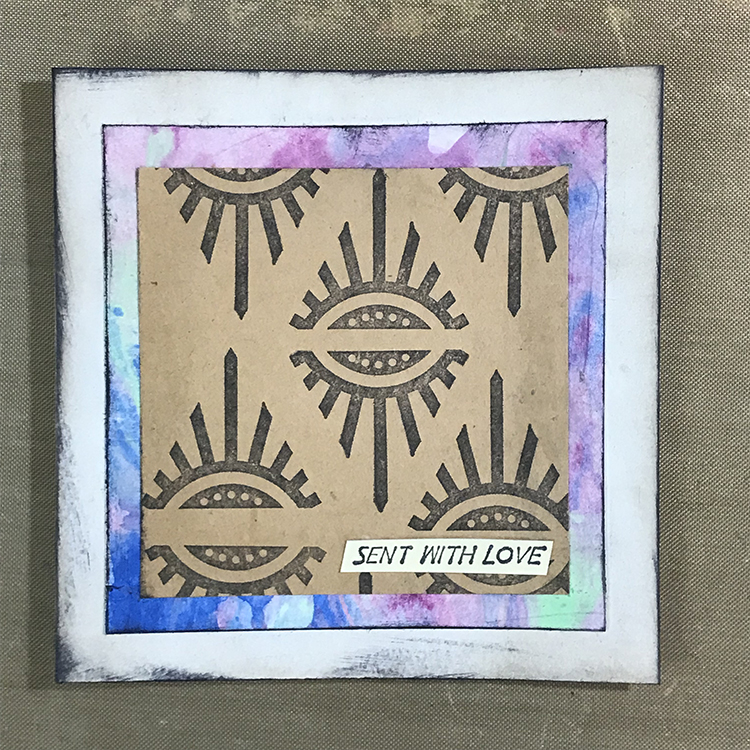
Now it’s time to assemble! Glue your matted patterned paper onto your card base, and add the words to it. Experiment with the location of the words until you get a placement you’re happy with, and you have a quick and easy card to send to your friends or family to express your gratitude for them!

I did a simple variation of this card by cutting my patterned paper down to a larger size (I chose 3.75″x3.75″) and gluing it directly to my prepared card base. I then used a couple of different elements from some of my collage sheets to add a figure before gluing down my words. This adds a little more interest to your card while still keeping it very simple.

I hope you enjoy these tips and tricks to make some simple greeting cards and that you have fun making some of your own!


Thank you Jordan, with the Thanksgiving holiday this week in the US, it is the perfect time to create some one-of-a-kind cards to thank those who are important to us :)

Give it a try: you can find all my Rubber Stamps in my Online Shop and in addition to paper scraps and collage elements here are some of the supplies Jordan used:

Follow the Creative Squad on Instagram for weekly posts, artwork, and inspiration.

Leave a comment

Creative Squad: Gratitude is my Attitude – Robin Seiz

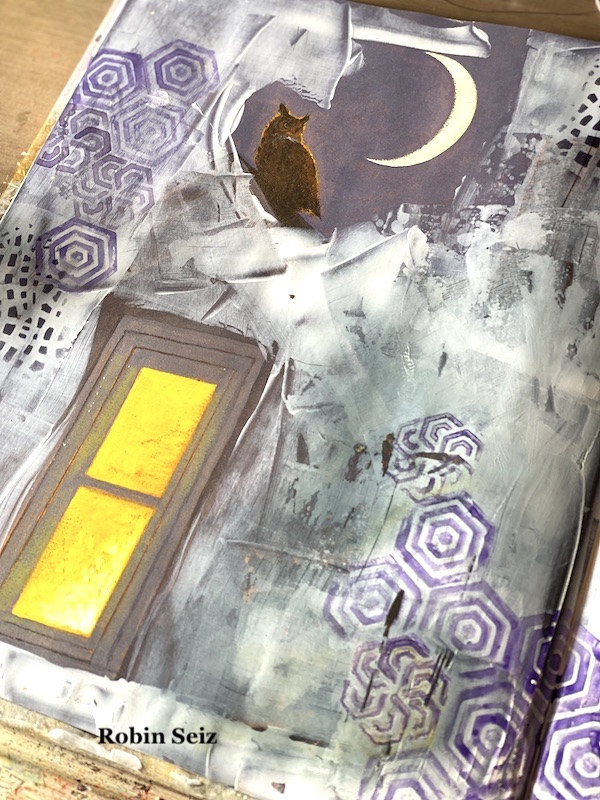
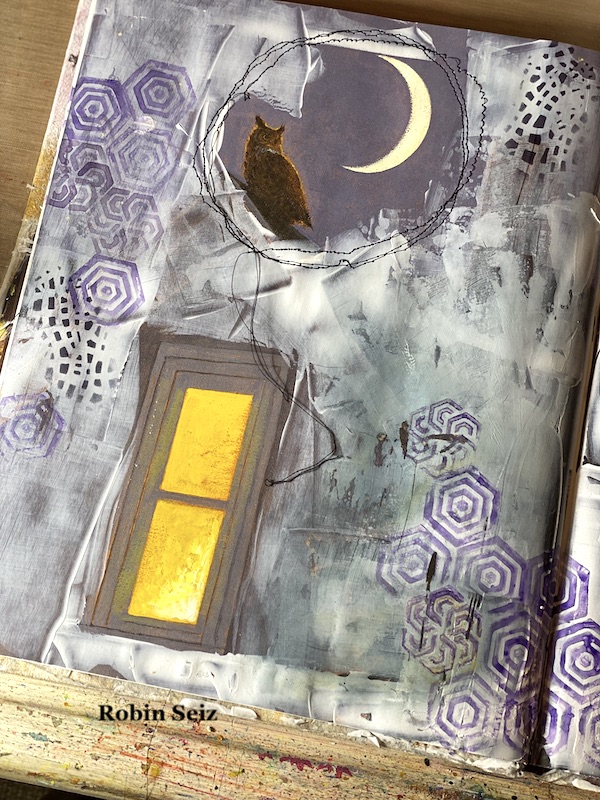
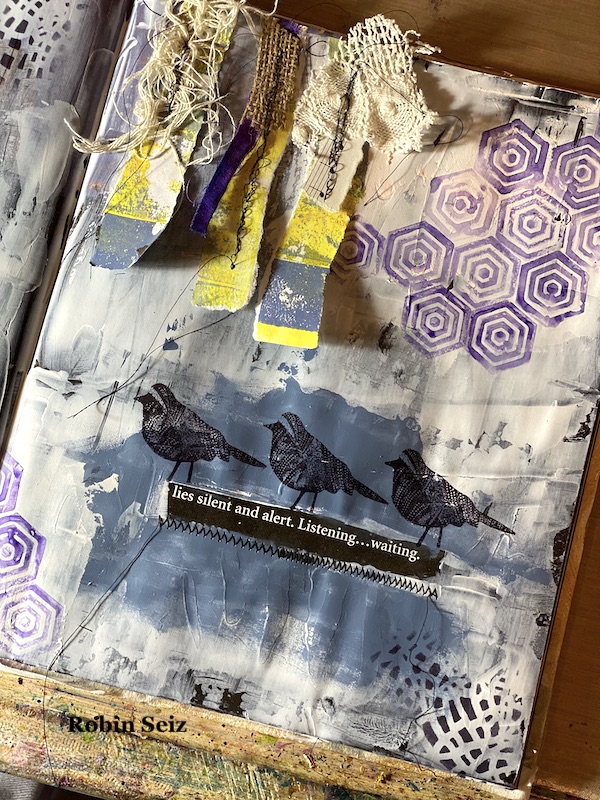
Hello from my Creative Squad! Today we have a post from Robin Seiz who is sharing her artsy gratitude with us in one of her art journals, a repurposed children’s book. She is using my Hex Set Small rubber stamps, my Crackle stencil, and my Nightingale bird stamp along with our theme: Gratitude is my Attitude – This month we are playing along with the November ArtCollab: Showing Gratitude – and specifically giving thanks to those who have helped us along the way in our artistic journey. Who was crucial in helping you become the artist you are today? Let’s give these amazing souls a shout out!


Hello everyone. I love our prompt for this month — Gratitude is my Attitude. I must say that I have so many things to be grateful for in my life that it was hard to focus my energy in one area. I love keeping my options open, but sometimes it helps to break things down into smaller, more intentional, pieces. 

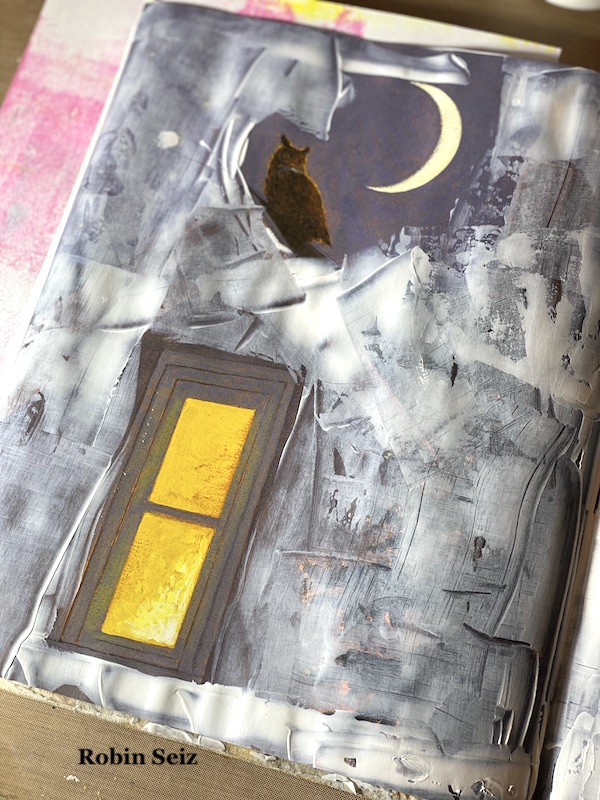
While the word Gratitude doesn’t show up anywhere on my journal pages, these two pages represent my mixed media journey while honoring those artists who have taught me and supported me along the way. They are too numerous to mention by name. My pages honor them, the process,  and the gratitude I have for having the time, resources, and excitement to pursue my passion. These pages also represent what I love most about mixed media – the fluid, grungy, imperfect aspects of this kind of art. 

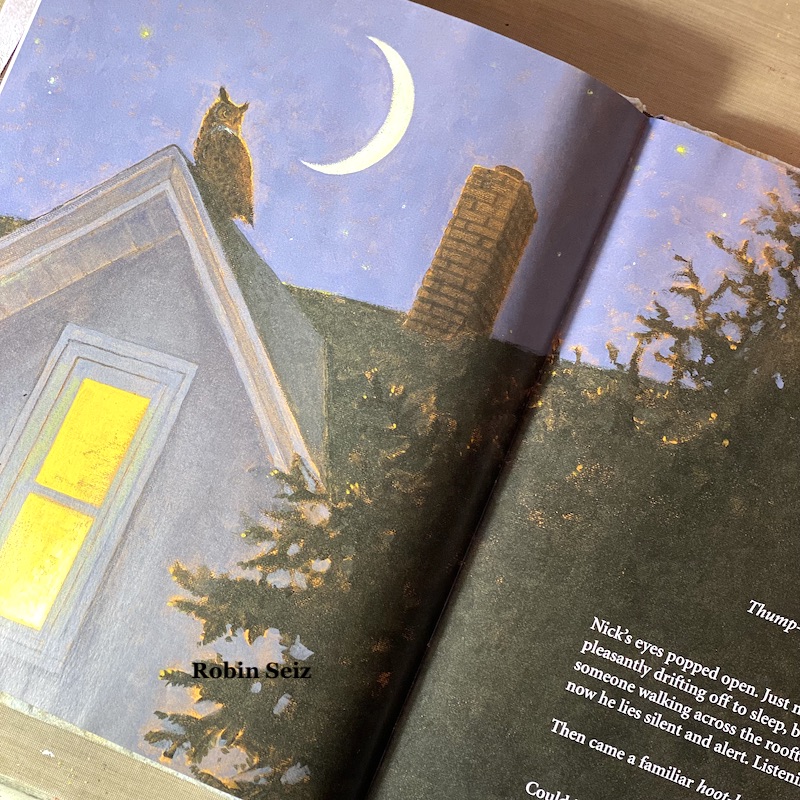
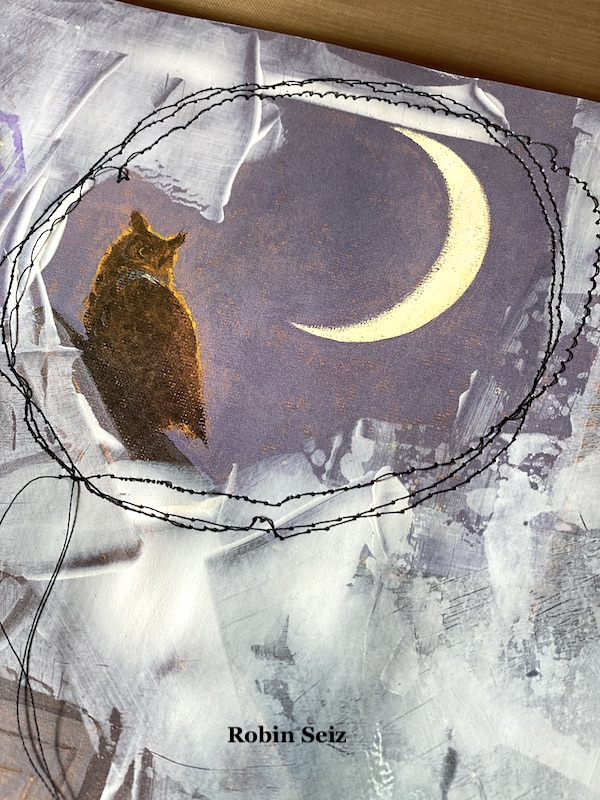
This project started with choosing a journal. I don’t do much art journaling, but when I went to pull a journal, the one that spoke to me was a journal I created for a Creative Squad blog post sometime ago. Inside the book is a beautifully illustrated story about an owl. The pictures are so lovely that I knew I wanted to incorporate some of them in my pages. I felt like this was the universe talking to me. I’m grateful for be a part of this design team and this seemed to bring it full circle.

These pages honoring my journey include some of the many materials that have become my favorites. 

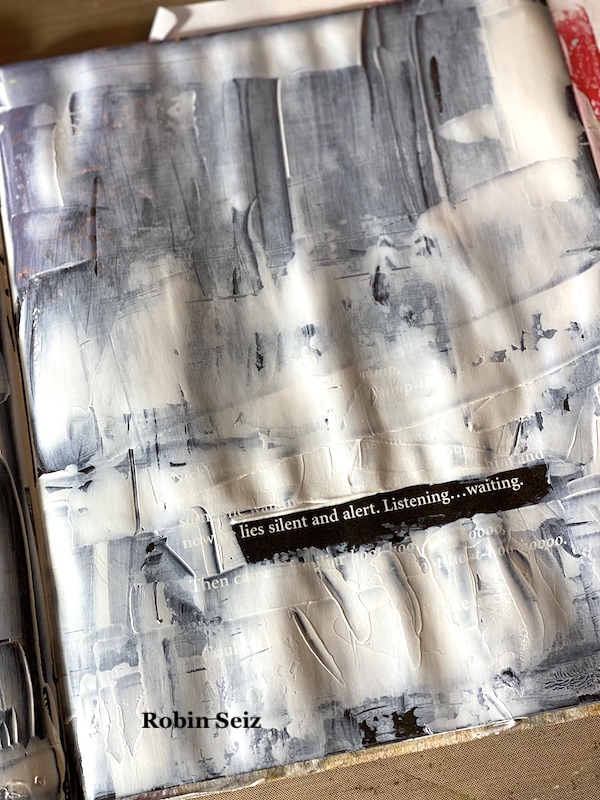
I started by covering the pages, minus the pictures and words that I wanted to use, with white gesso. I used a hotel key card to spread the gesso because I can get great coverage and create an appealing texture along the way. I also knew that I wanted some of the page color to peek through  so I made some areas thin and others thick. 

I have a love – hate relationship with water colors. I find them difficult to use; but honestly, I haven’t given them enough attention to really master their use. They are, however,  an important part of my journey.  Using this medium, was the first time I really did a study (for one month) using a mixed media product. I followed one of the artists who excels in this area and joined my first on-line community. This community has become a great sense of joy. They are incredibly supportive; I have learned a lot from them and have been given lots of opportunities beyond what I might have gotten just creating in my studio on my own. I am grateful for these artists. 

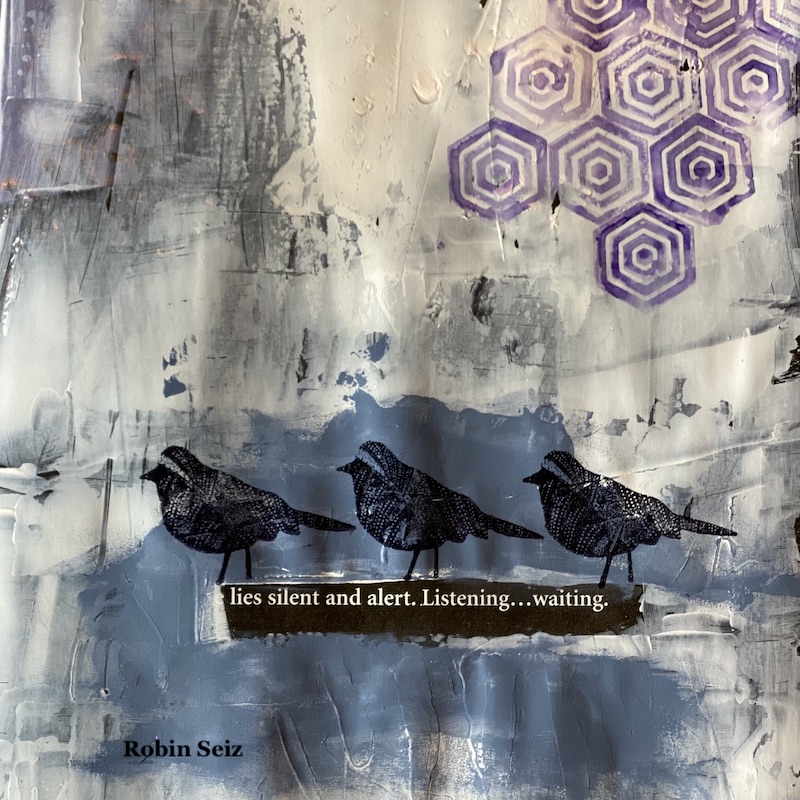
In order to use water color, I applied QOR water color grounds to the top right corner of my page. This makes it easier for the watercolor to adhere to the page. I stamped Nathalie’s Hex Set Small rubber stamp in purple.  I always use odd numbers when doing this kind of work, it’s a more pleasing composition.

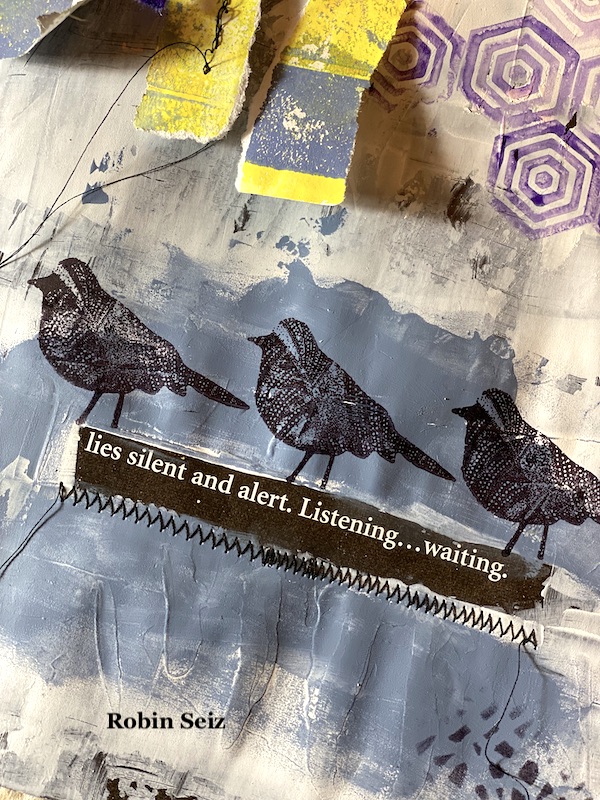
Some of the words in the middle of the right page were still visible even after I applied gesso, so I moved to acrylic paint to cover the remainder of the words that I didn’t want to see and to break up the white on the page. This also made the words that I chose to leave come to the forefront. These words resonated with me because I feel like this is what I often do —  listen and wait for inspiration to come. I used Nathalie’s Nightingale bird stamp on top. They just seemed like the right stamp given there was an owl on the left page. It’s almost like he is looking at the birds. Both of these steps used  rubber stamps, another early product that I used on my journey. I’m grateful for the artists who create these wonderful stamps.

Next, I moved to a combination of Gel Printing scraps and sewing. When I first started mixed media, I was really interested in sewing on paper. Over the years, I have incorporated sewing into my projects; I think it adds such a wonderful dimension to a piece. I am grateful for all the artists who I follow who use this combination and who I have learned from. The sky is the limit. It can be frustrating sometimes; my free motion sewing still needs lots of work. After sewing the pieces together, I attached these three strips with gel medium. I could have just as easily stapled them. I love gel printing and am grateful for all the encouragement I have received along the way for my prints. 

The left page really didn’t need much. The window, which represents how grateful I am for the rise and fall of each new day, gives such a warm glow to the page.  I applied the same hex stamp to the bottom middle and top left (again in 3’s) because it was compositionally pleasing to me. 

I also used Nathalies Crackle stencil (one of my favorites) a cosmetic sponge, and Tim Holtz Archival Black ink to fill in where just a little something was needed. This ink is good for use over acrylics and gesso. Again, I have such gratitude for  those artists who regularly use stencils and have taught me how to have fun experimenting with them. They are one of the most versatile tools that I use.

The final touches were free motion machine sewing around the owl and the moon to create an interesting border. And because compositionally I wanted sewing in 3 places, I sewed a zig zag  for emphasis under the words on the right page.

All and all, I had a loose idea of what I wanted to represent when I started and it just came together as I went. I am most grateful for the process of creating! 

Thanks so much for joining me today on my gratitude journey in mixed media. I hope you create something that honors those things for which you are most grateful. Please post your pieces on Instagram and tag me. I would love to see them. Peace to you, Robin


Thank you Robin, love how you incorporated some of those original book illustrations and text into your page – very cool effect!

Give it a try: you can find all my Rubber Stamps and Stencils in my Online Shop and in addition to her repurposed children’s book, collage papers, and scrap fabric, here are some of the supplies Robin used:

Looking for more? Follow the Creative Squad on Instagram here.
Leave a comment