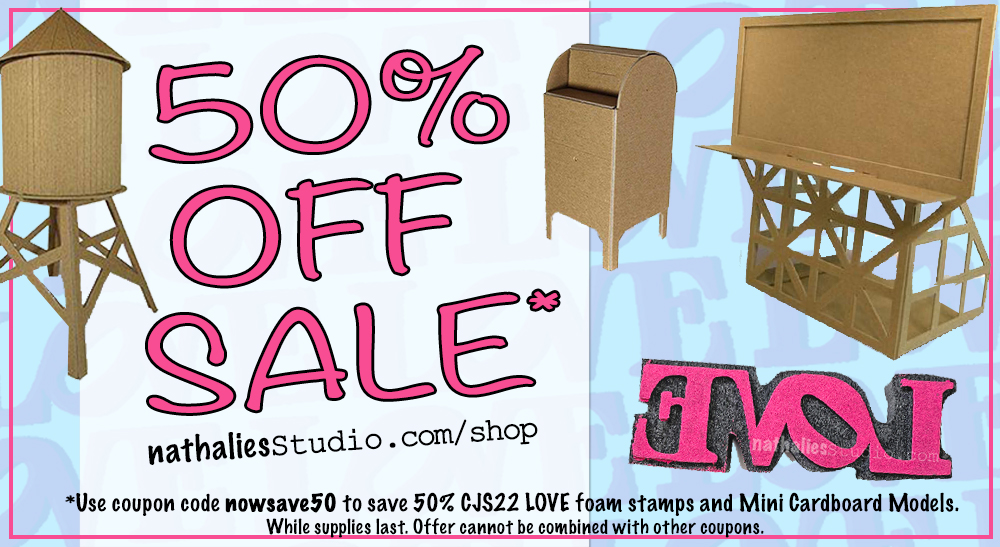
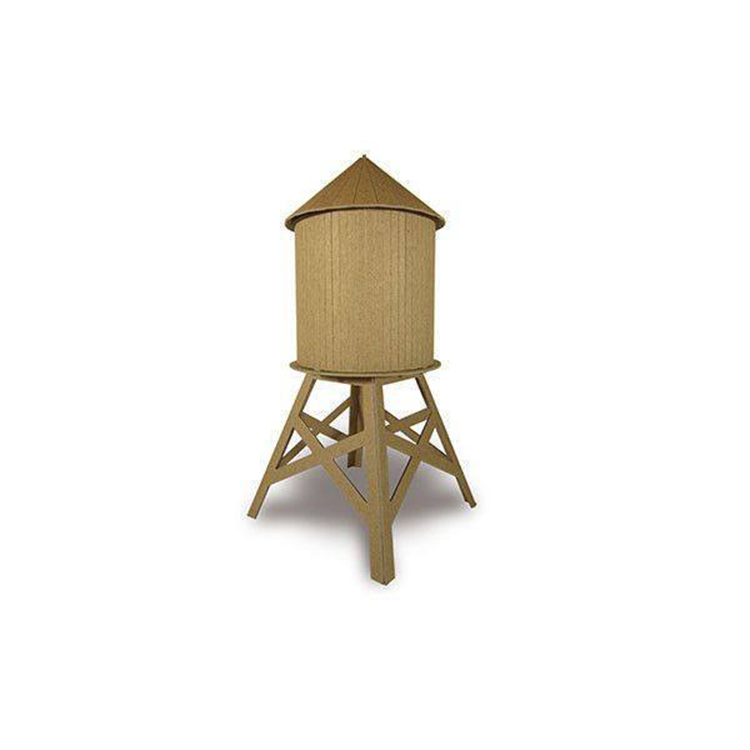
I’m running a big blowout sale on some of my products and you can save 50% off! Starting today, just use the coupon code nowsave50 at checkout to save on my CJS22 Limited Edition LOVE Foam Stamp and all of my Mini Cardboard Model kits. This offer will be good as long as supplies last :)
Here is what’s on sale:
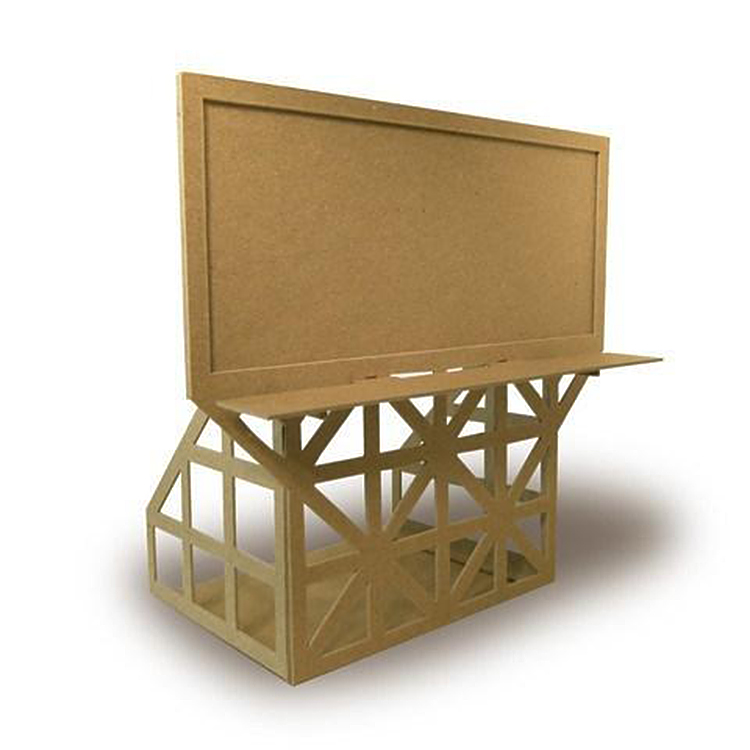
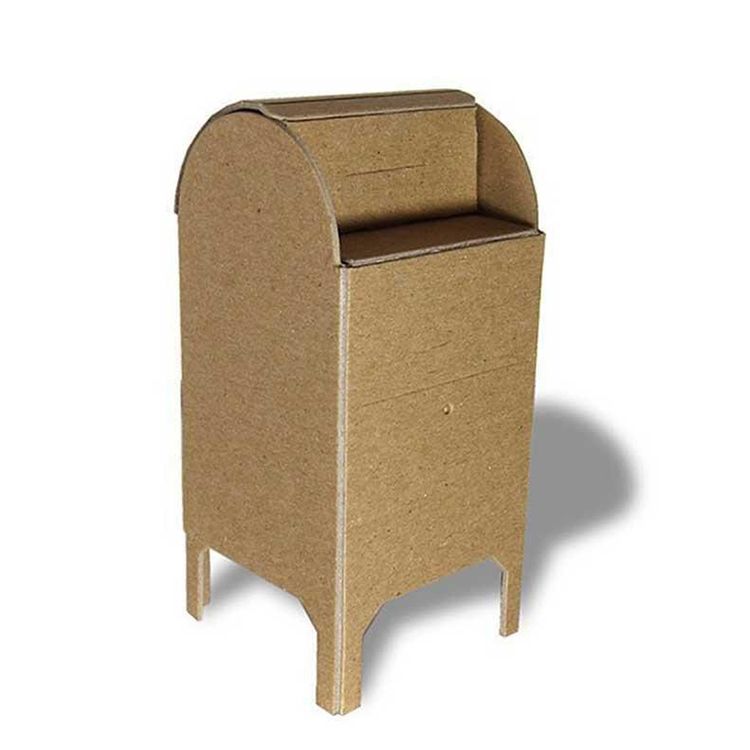
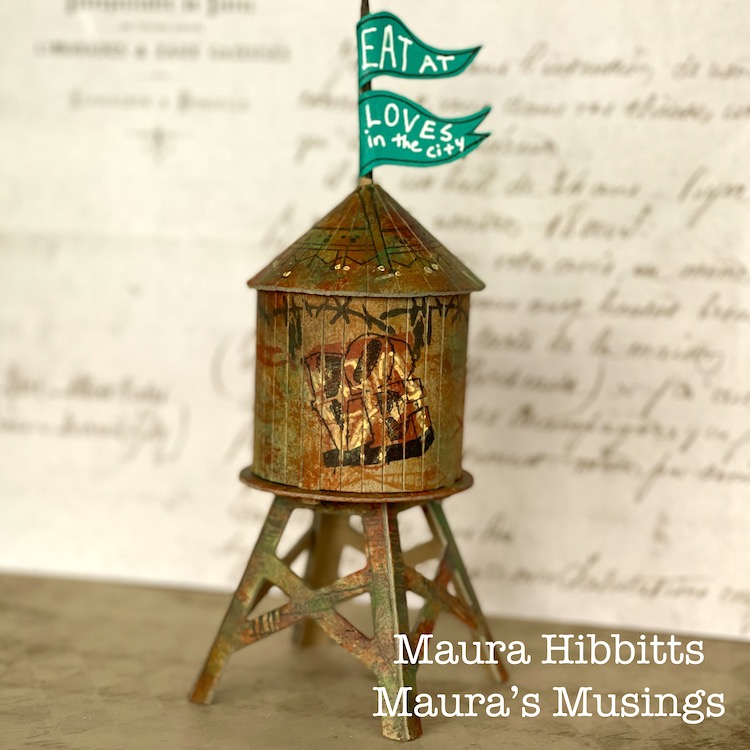
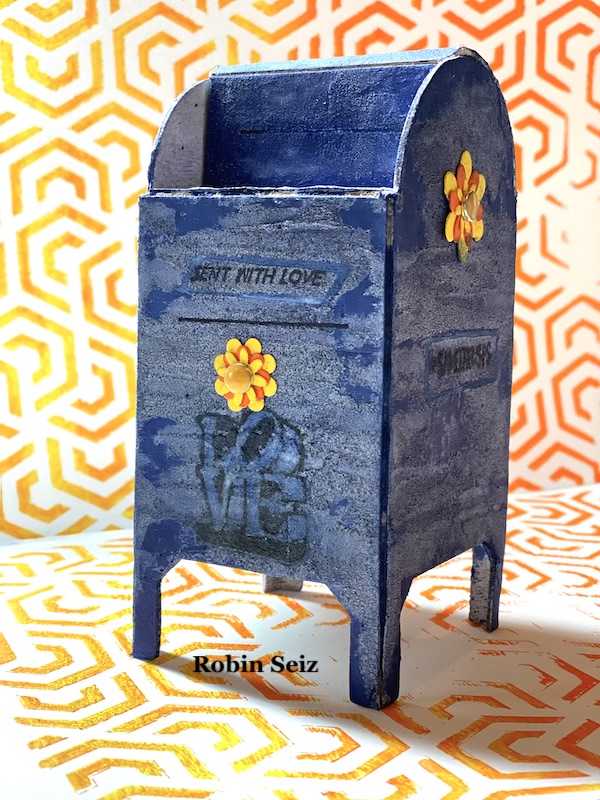
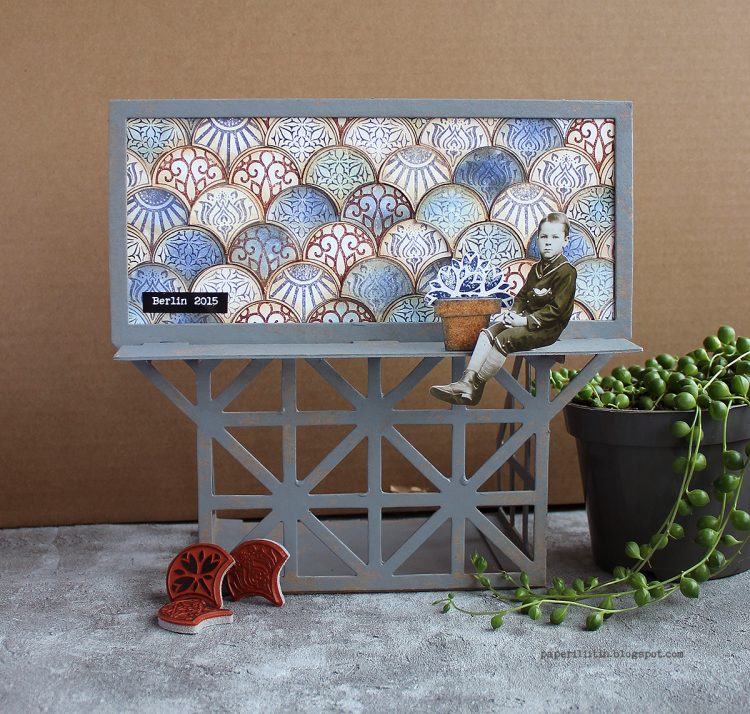
The cardboard kits are a blast to make and paint on a rainy day. We did have the Creative Squad play with those one month and look at some of the results:
They would also be a great gift idea for a young or young at heart creative in your life ;)
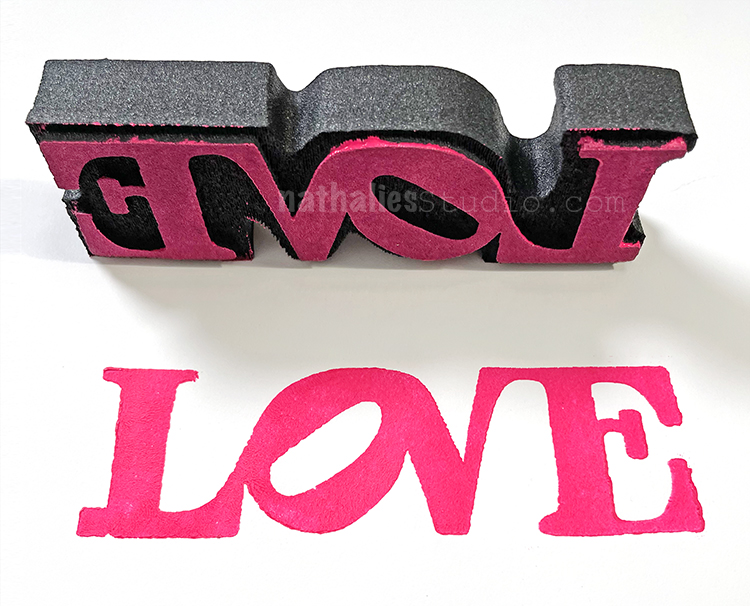
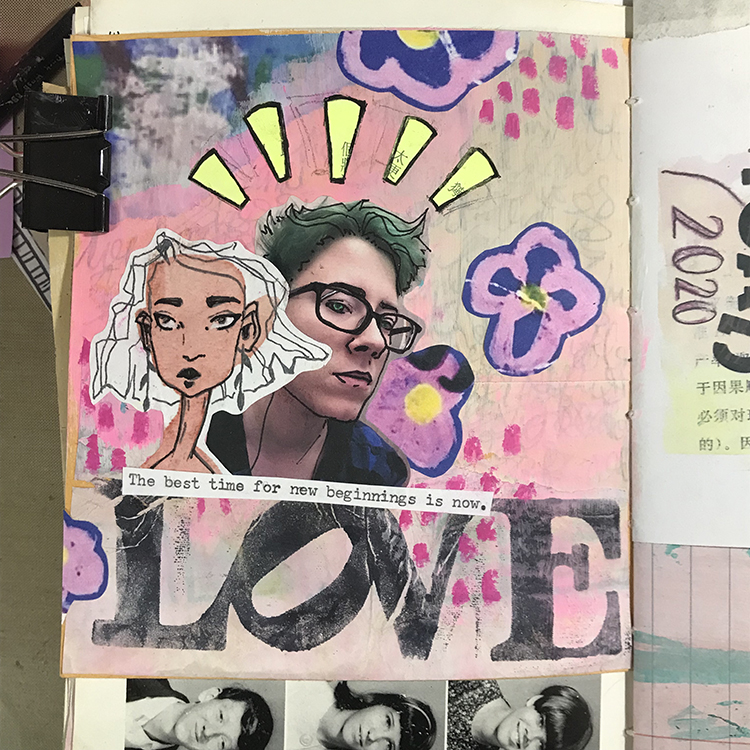
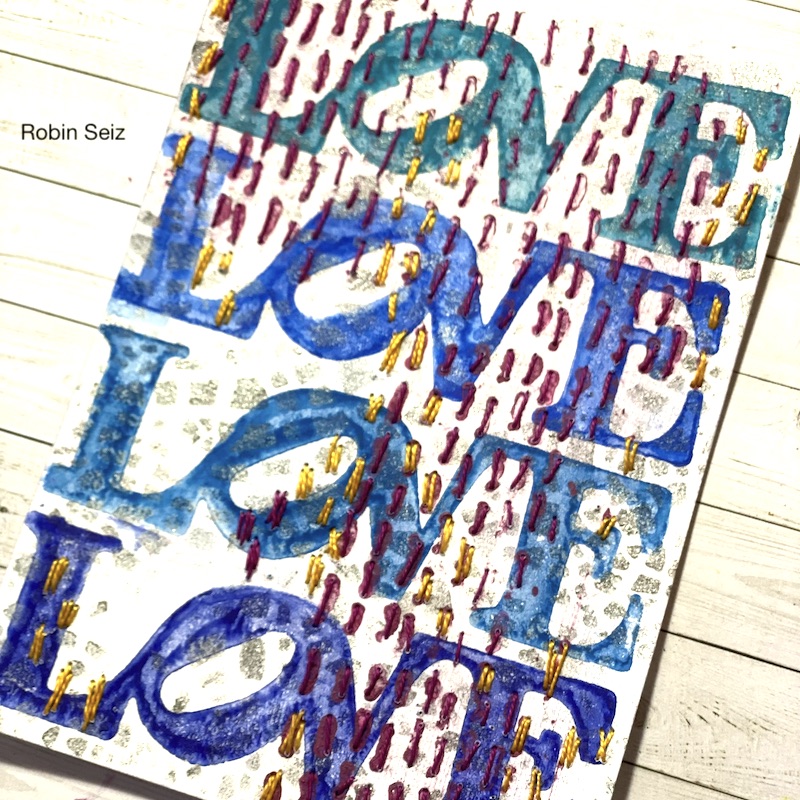
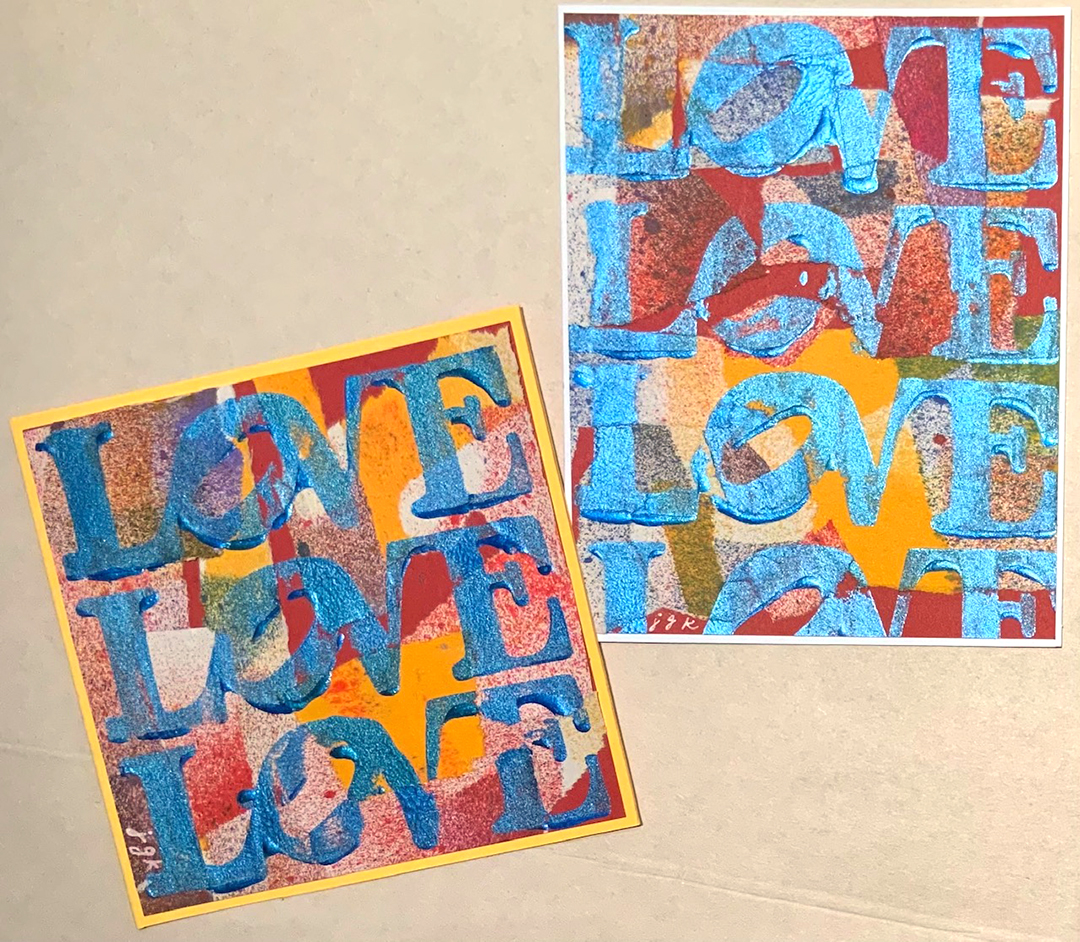
And then the iconic LOVE stamp. Don’t we all need some more of this in the world?
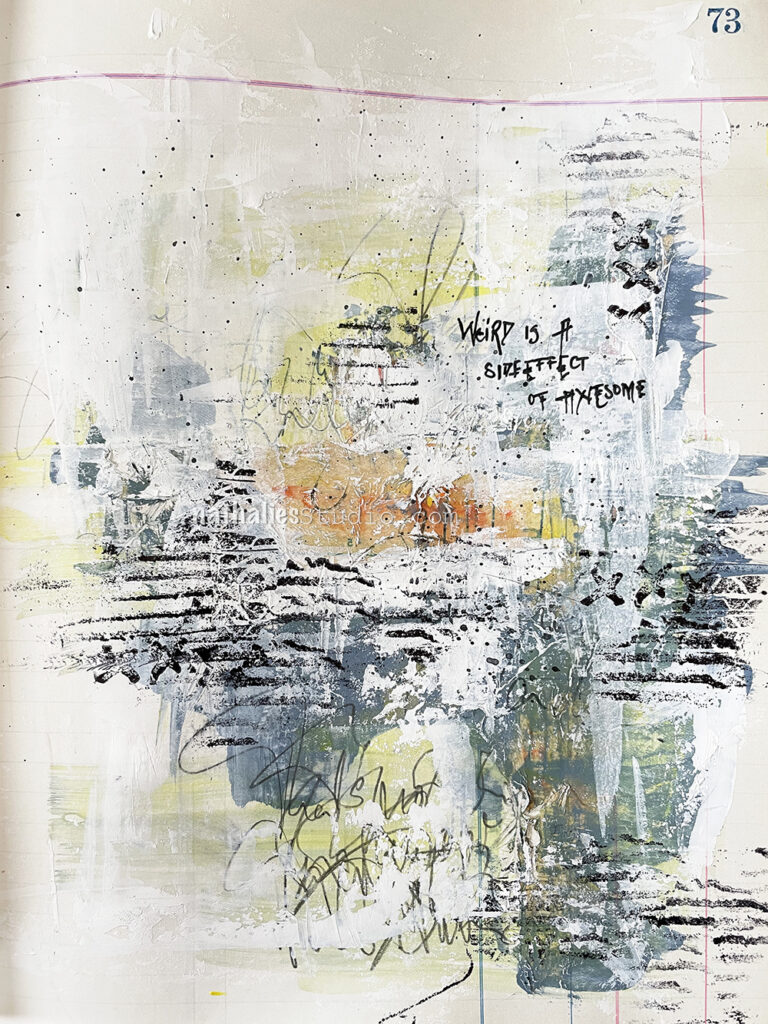
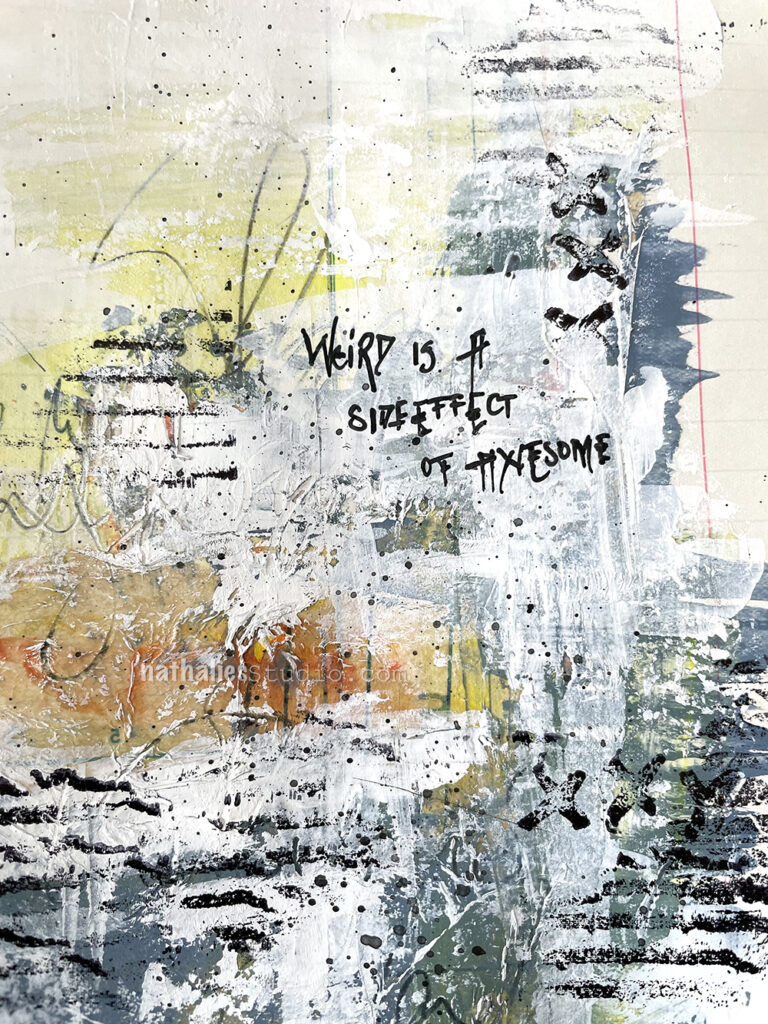
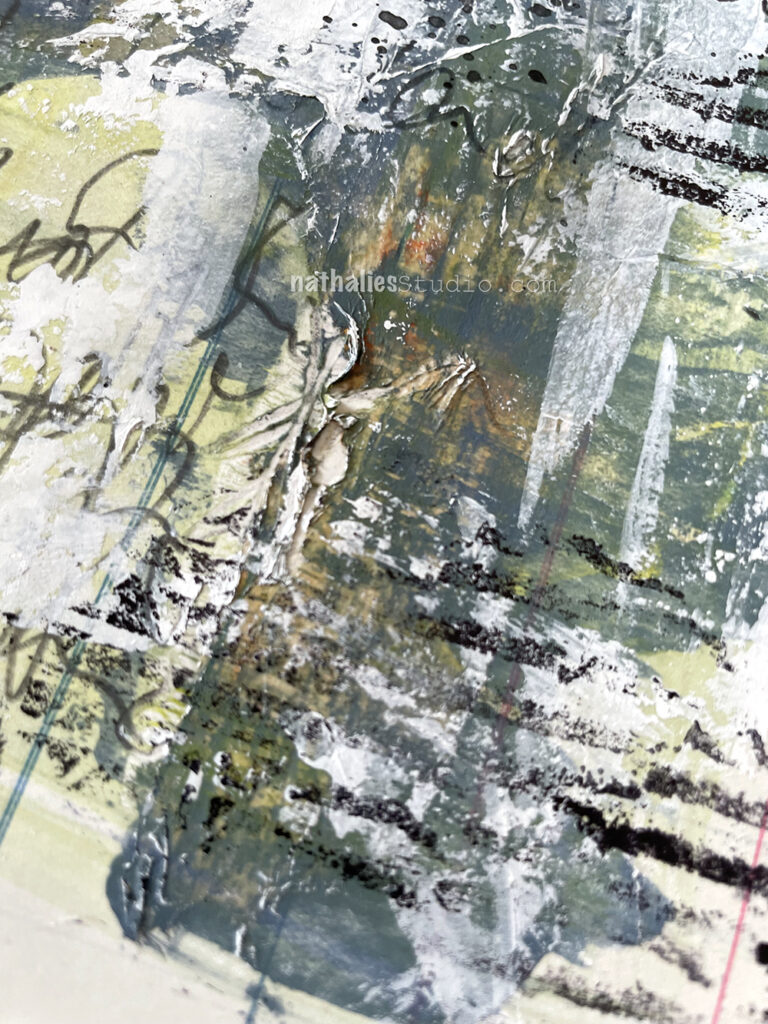
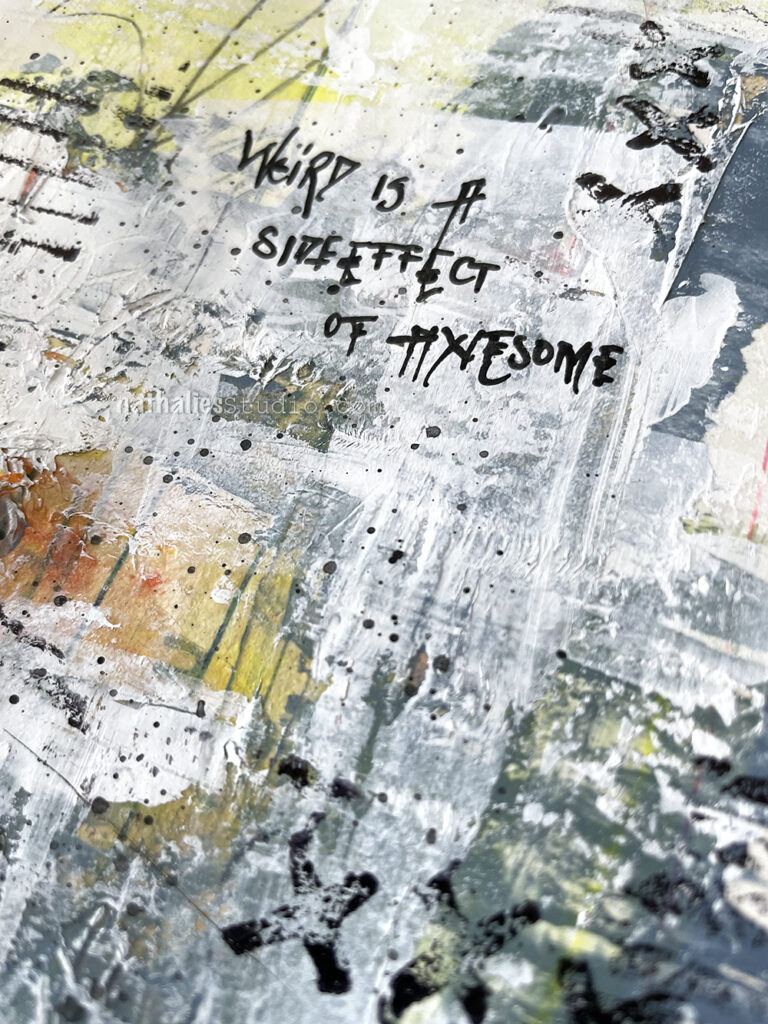
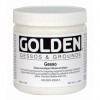
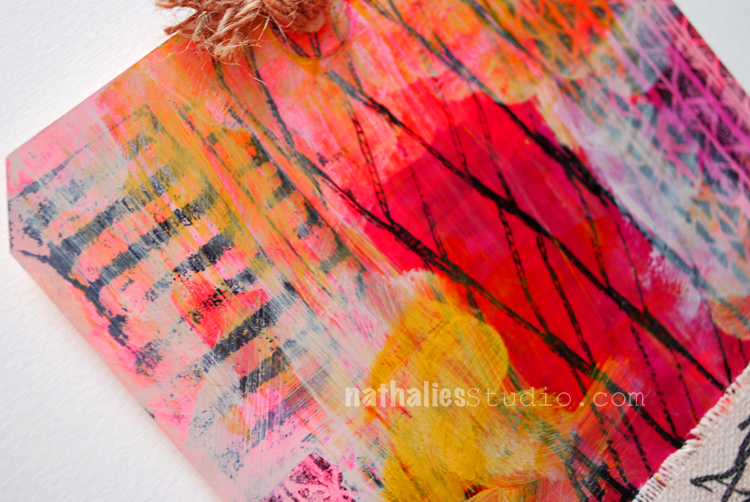
Here I used acrylic paint and dragged it with a palette knife across the art journal page, added in bits of sewing pattern, and also used Liquitex White Gesso for even more texture.
I created marks with my favorite new supply – Caran D’ache water soluble pencils.
Hello from my Creative Squad! Today we have a post from Judi Kauffman who is sharing a bunch of sweet bunny cards using my Embroidery and Cardboard rubber stamps and our theme: My Kindred Spirit – Animals are often symbols of qualities that we humans identify with, so let’s take some inspiration from them this month. Do you have an animal whose characteristics you identify with? Maybe it changes depending on your mood or what life throws. Who is your Kindred Spirit in the animal kingdom today?
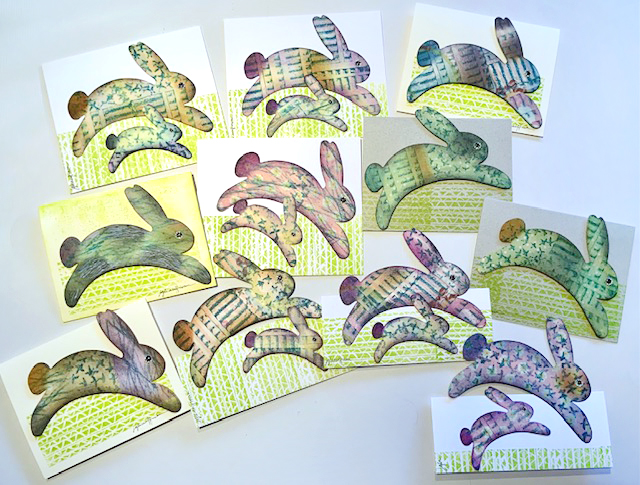
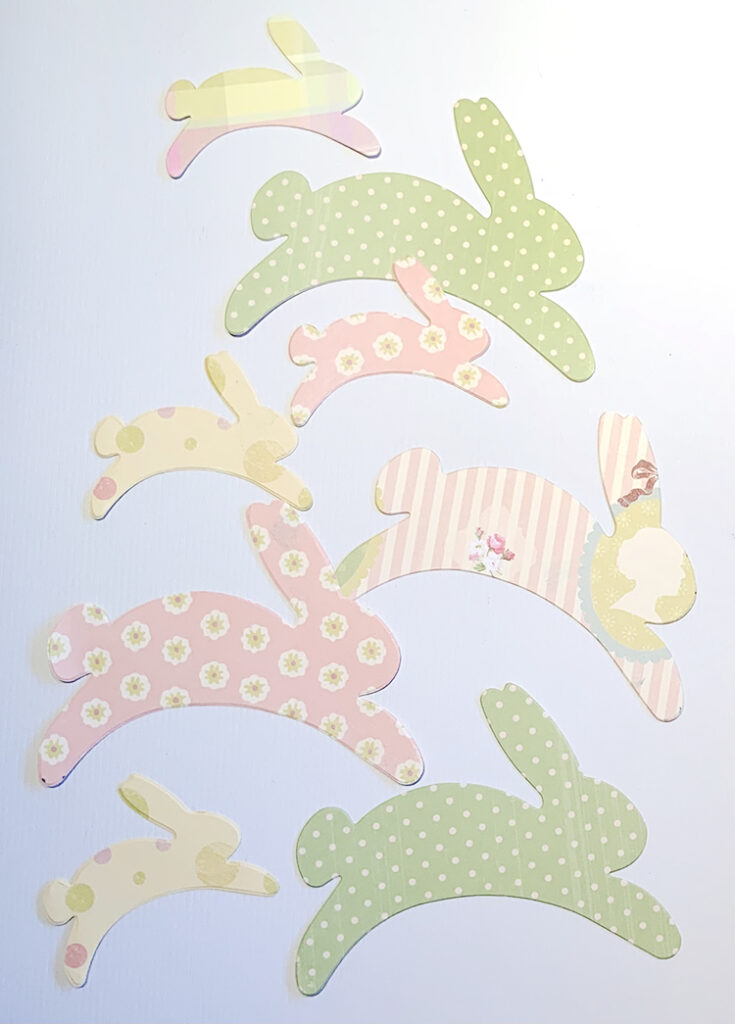
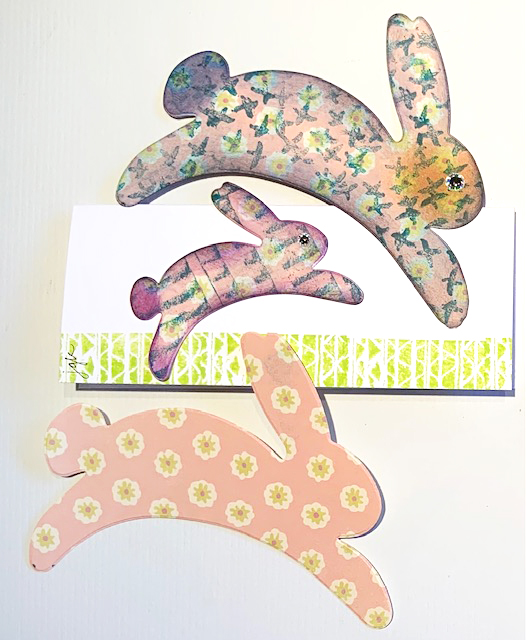
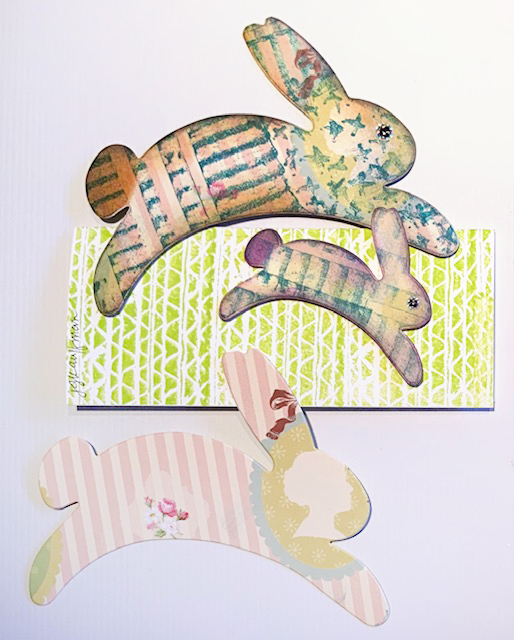
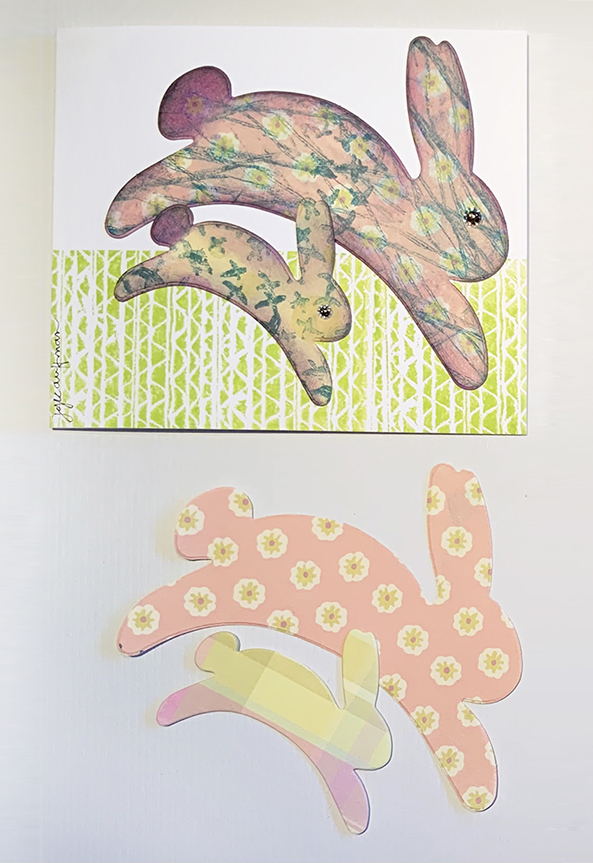
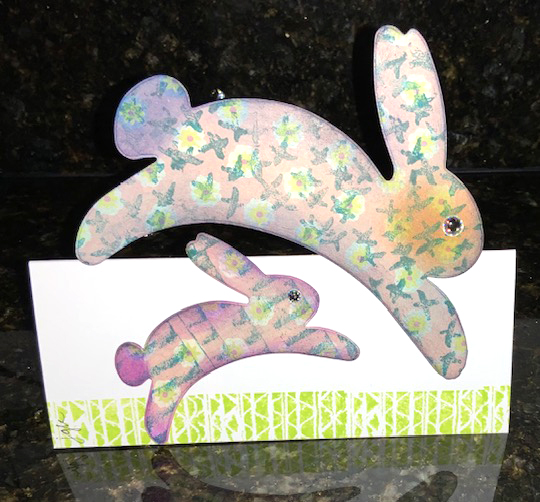
A Bunch of Bunnies by Judi Kauffman
I love this month’s Creative Squad theme. We were asked to choose the animal whose spirit we most identify with and then use exclusively Nathalie’s stamps to create a project. It was easy to choose the animal: I’m a dog, a poodle, to be precise. I’ve got curly hair, I’m obedient and I enjoy a nice meal served in a bowl; I’m fairly high maintenance. But when it came time to do a project it just wouldn’t work so I had to go to my second-favorite animal – the rabbit!
I’m not at all like a rabbit, other than being spooked by sudden, loud noises. I’m not fast on my feet, I don’t like raw veggies and I’m way too neat and private to live in an underground warren with a bunch of relatives… But I do LOVE how rabbits always seem busy, how they seem to find joy in jelly beans and Easter baskets filled with colorful eggs. And when my friends need a listener, I’m as ready as any rabbit has ever been – tuned-in and all ears. Maybe I am part-bunny after all.
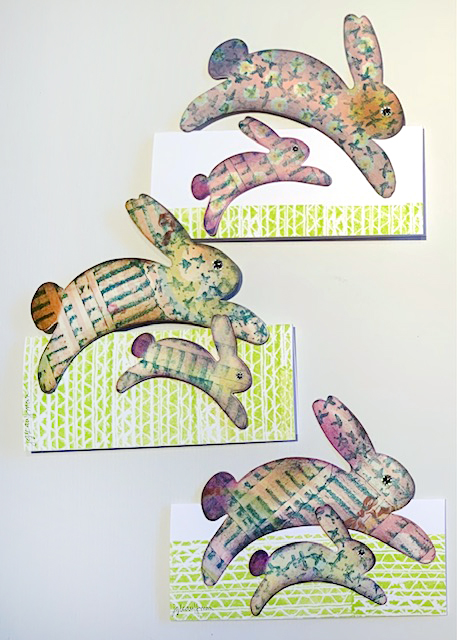
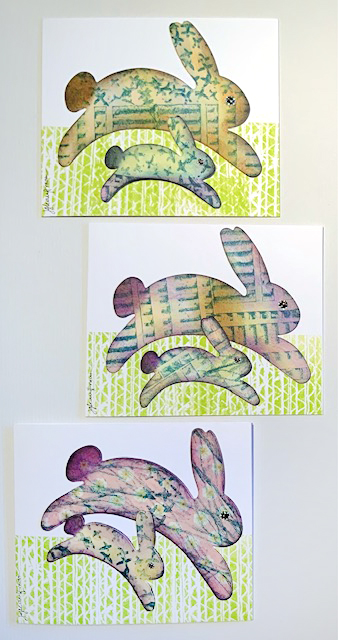
My project is a Bunch of Bunny Cards, perfect for Spring and Easter, and the ones with a pair of rabbits would even work well for Mother’s or Father’s Day. The Embroidery and Cardboard mixed media stamps I picked will totally transform your leftover scrapbook paper. I hope you’ll join me!
Instructions:
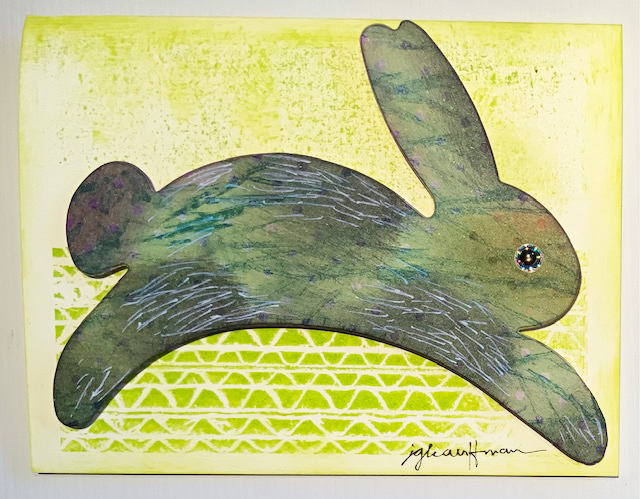
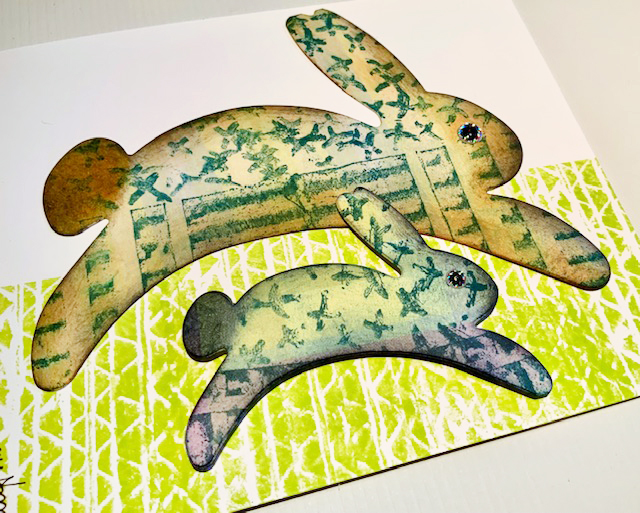
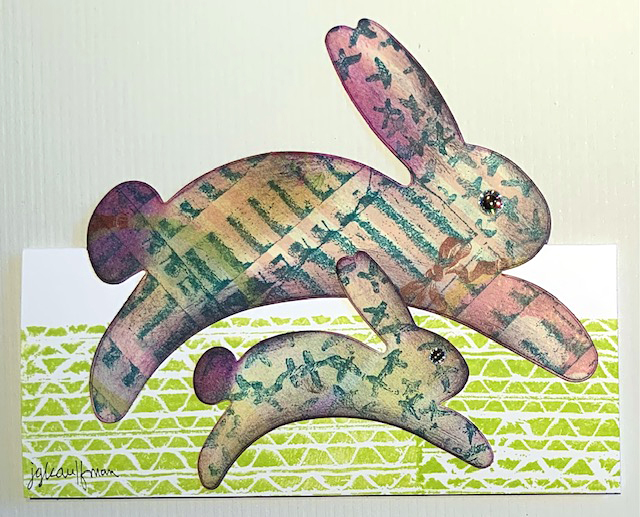
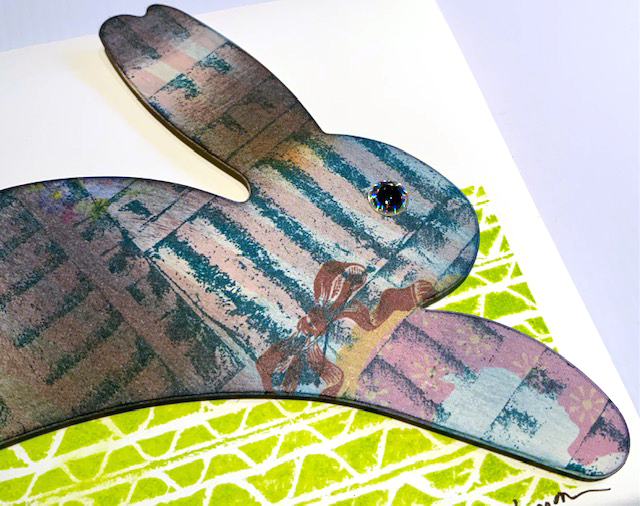
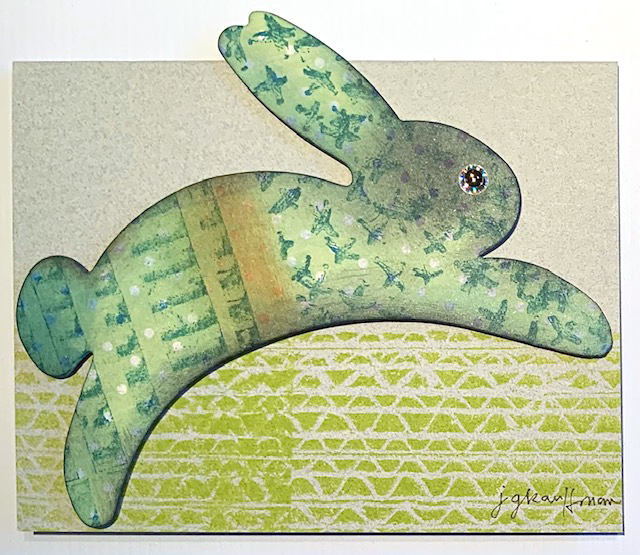
1. From spring-palette/pastel scrapbook papers die-cut, hand-cut, or machine-cut a bunch of simple bunny silhouettes in at least two sizes.
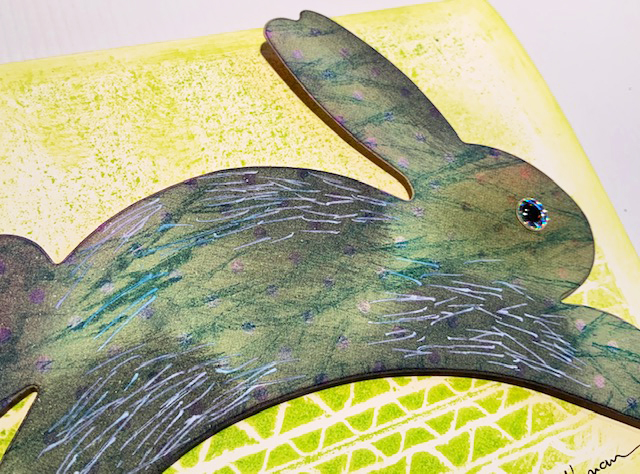
2. Using Dark Teal ink and Mixed Media stamps from Nathalie Kalbach’s “Cardboard” and “Embroidery” series/sets, cover the bunnies with random or planned patterns.
3. Using Purple, Dark Teal or Orange ink, or a combination thereof, smudge color onto the bunnies and the edges of the shapes. Make sure to darken the tail. Then add just a tad of Black ink at the edges only.
4. Add a round sticker for each bunny’s eye, or draw one! Use a white gel pen to add details to the fur if desired.
5. For the illusion of grass on all cards use Citrus Green ink to stamp Mixed Media “Tread” across the bottom portion of folded card bases. Adhere one or two bunnies to each card using double-sided adhesive tape and/or foam squares for added dimension. Refer to photos. (Be sure to sign your creations!)
Thank you Judi for sharing all these sweet bunnies with us – love the variety you created with just a few stamps and lovely spring colors!
Give it a try: you can find all my Rubber Stamps in my Online Shop and here are some of the supplies Judi used:
Looking for more projects? Follow the Creative Squad on Instagram here.
Hello from my Creative Squad! Today we have a post from Judi Kauffman who is sharing with us some super clever cards that use my Hamilton stencil, my Cardboard and Embroidery rubber stamps and that are absolutely perfect for our theme: Gratitude is my Attitude – This month we are playing along with the November ArtCollab: Showing Gratitude – and specifically giving thanks to those who have helped us along the way in our artistic journey. Who was crucial in helping you become the artist you are today? Let’s give these amazing souls a shout out!
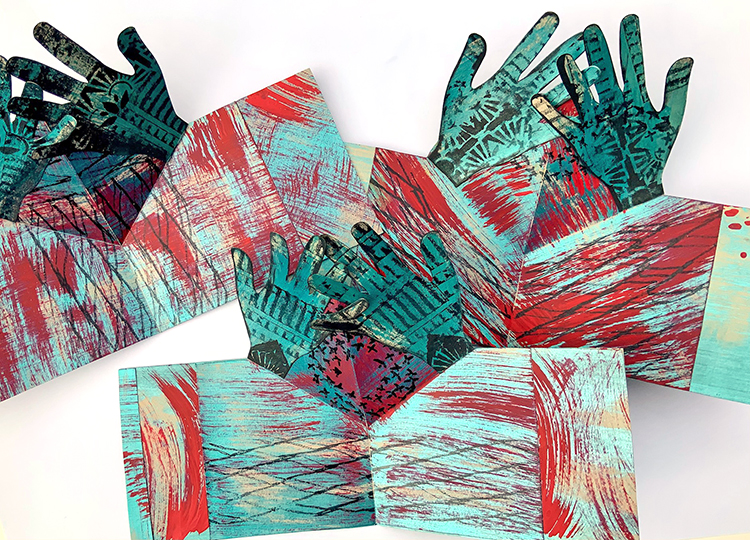
Applause – Cards for People Who Matter!
I’m endlessly grateful to all of the people who have supported me over the years as I grew from a little girl with crayons and fabric scraps into a designer, artist, and teacher with a career spanning over five decades!
Some are long-gone: Mr. Motovich and Miss Weld, public school teachers who, in my book, were unsung heroes. Arnold Singer from Cornell who taught me lithography and reminded me by his actions that teaching and creating one’s own art go hand-in-hand. My parents, my grandparents. I hope I was successful in expressing my gratitude over the years.
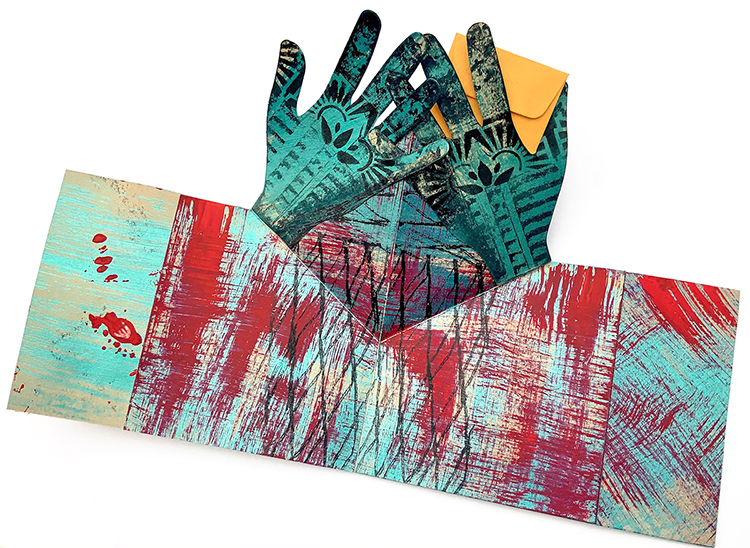
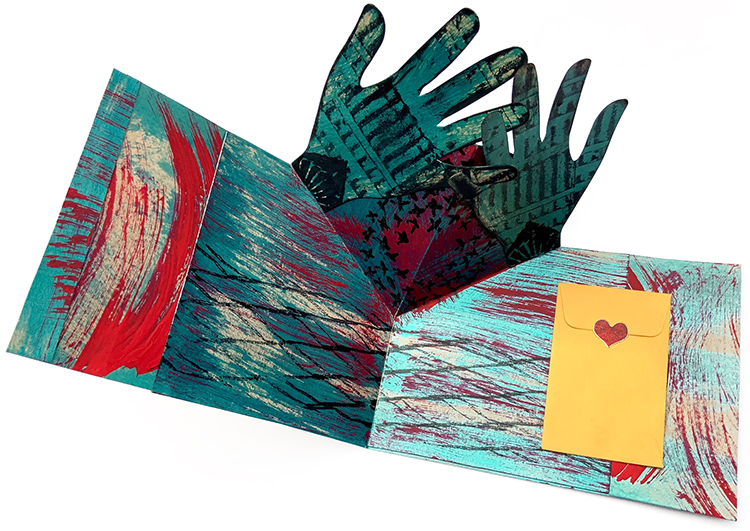
To thank those who are still in my life, people who continue to cheer me on and support my creativity, I made pop-up cards that “applaud” when opened.
Change the stamps and stencils and the color palette and this kind of pop-up could congratulate a friend who has a new job, just got chosen as captain of a sports team, survived a round of chemo, or anything else worthy of a round of clapping!
INSTRUCTIONS
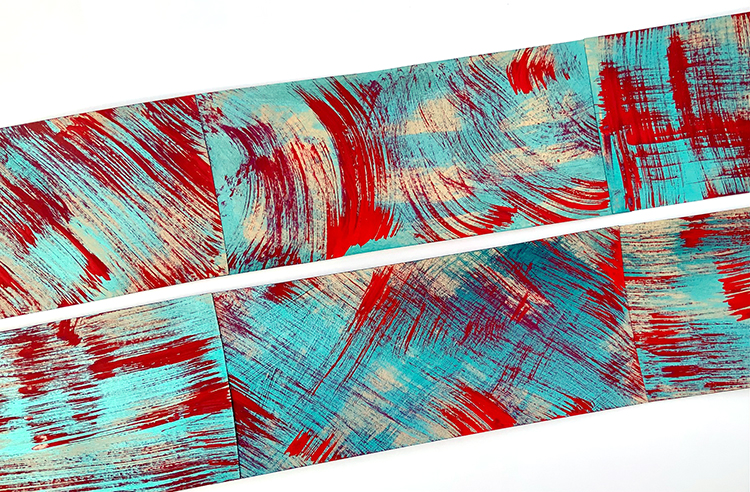
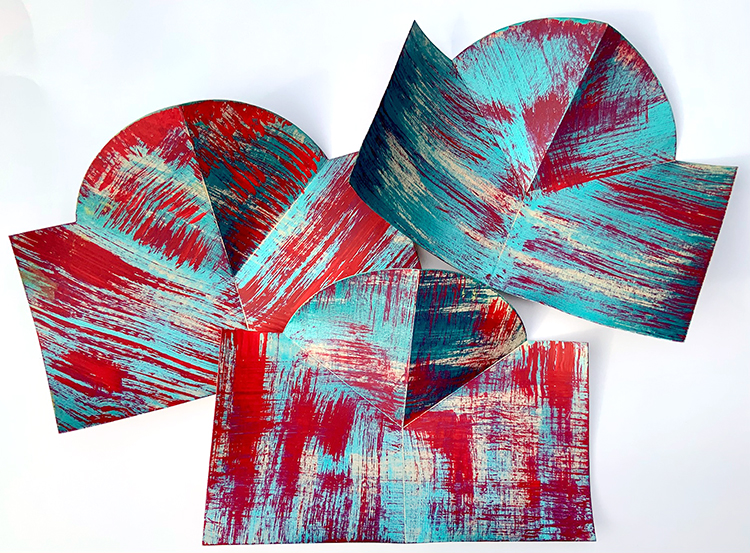
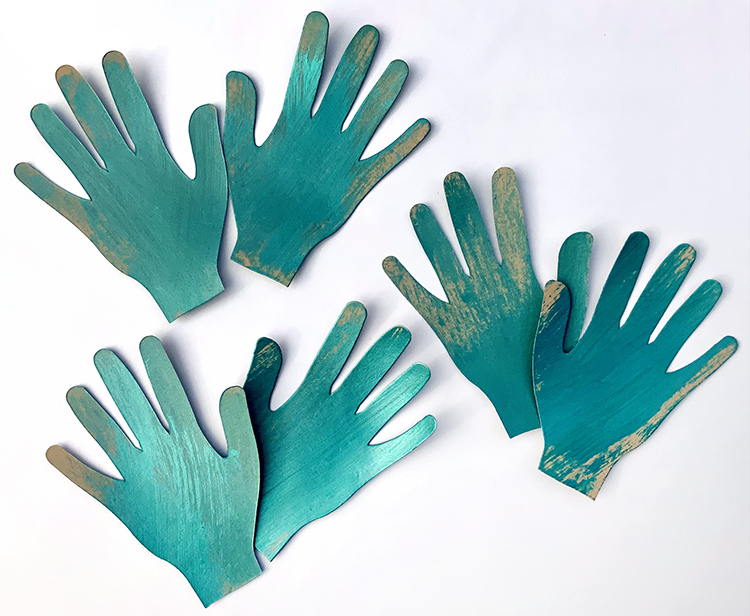
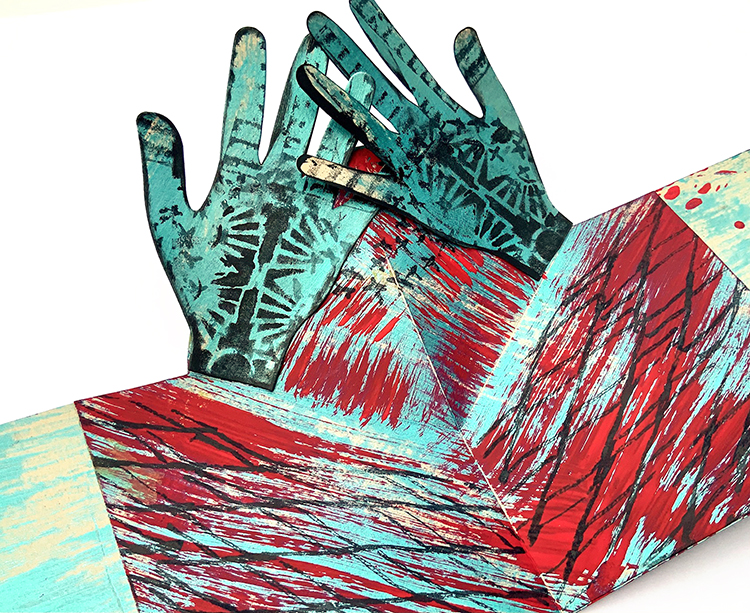
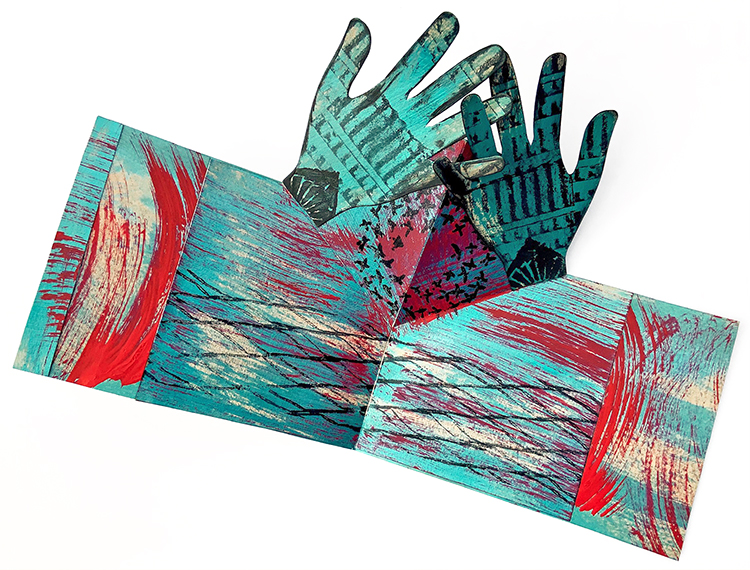
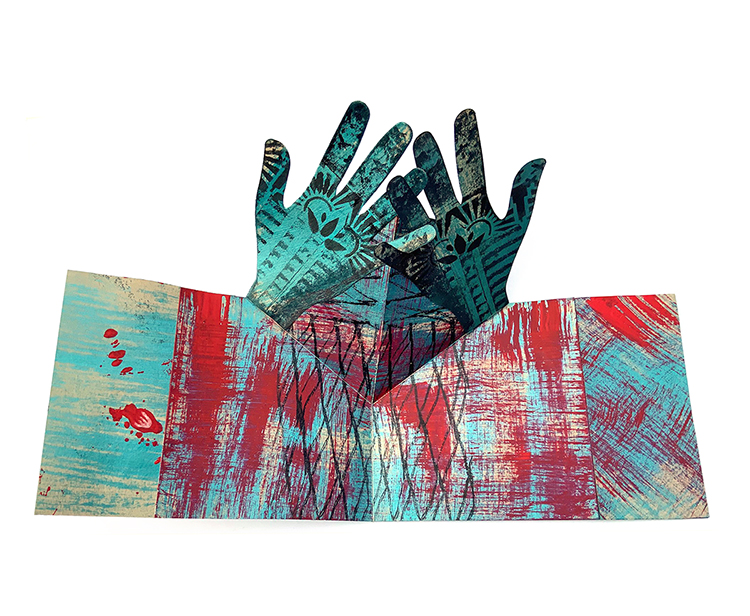
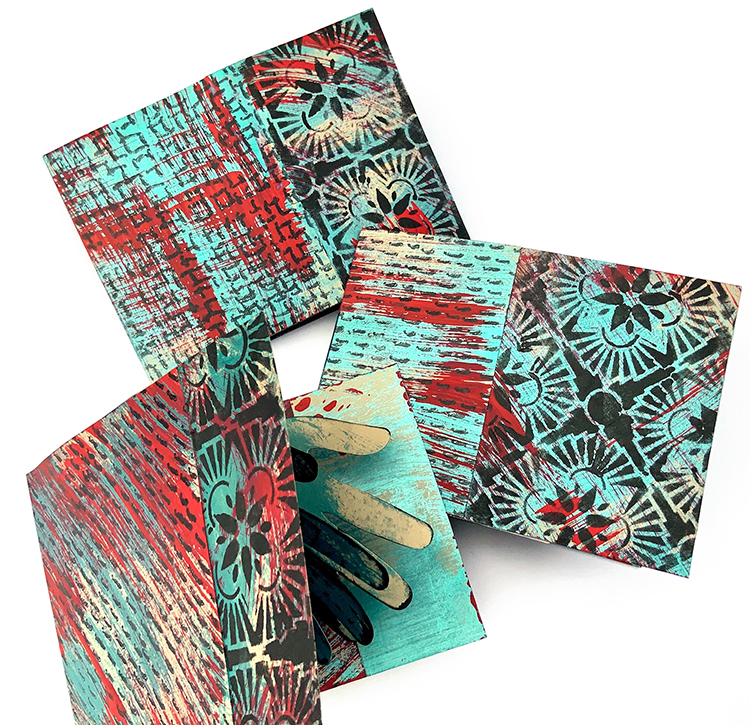
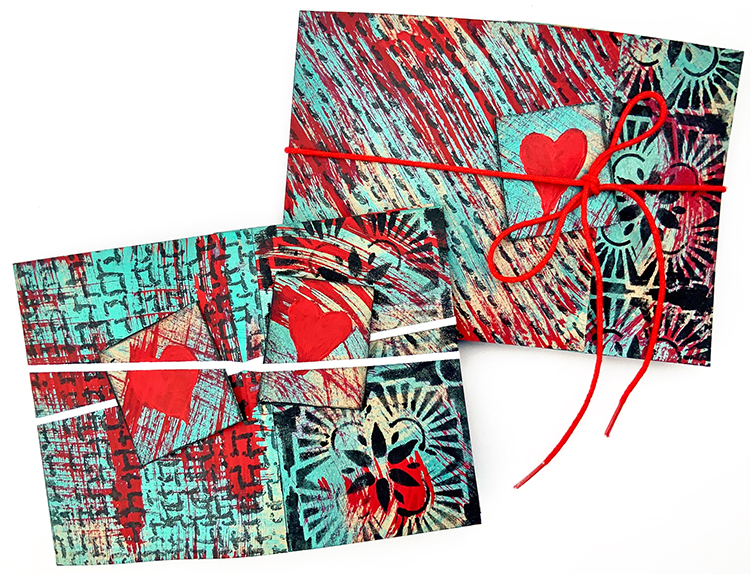
1. Each card requires a 14” x 5” strip of cardstock for the 5” x 7” side-fold card base, two 4” x 6” pieces for the hands, and one 9” x 8” piece for the pop-up structure in Kraft Brown or color(s) of choice. I find it easiest to make several cards at a time.
2. For the 14” x 5” strip, cut several 5” wide pieces from 12” x 12” cardstock, brush on Red and Teal Metallic paint, varying the directions of the strokes. Cut into shorter sections, overlap and glue together. Cut a 14” long piece for each card base. Hold onto scraps to decorate the inside short ends of the cards (the pop-up is shorter than the card so the hands won’t show when the card is closed).
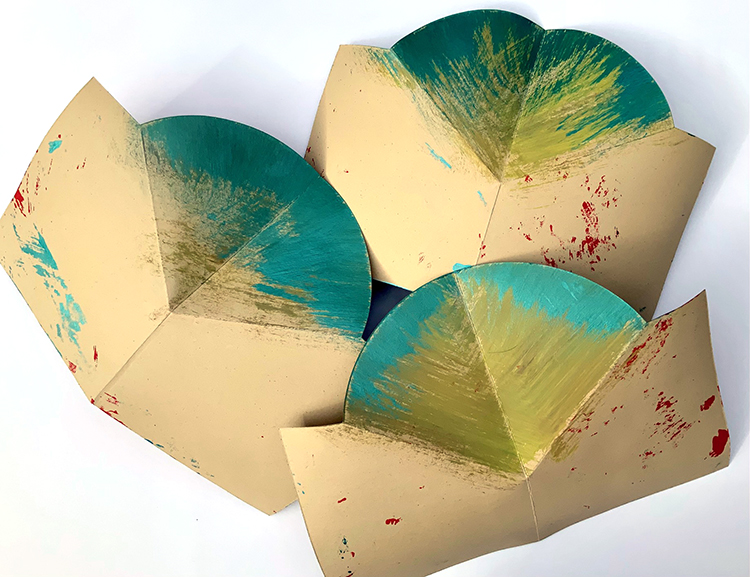
3. Brush Red and Metallic Teal paint onto the front of the pop-ups, varying the directions of the strokes. Paint the back of the rounded section of the pop-ups with Lime Green and touches of Metallic Teal. (The back of this part of the pop-up is visible when the card is open and standing.)
4. Brush Metallic Teal paint onto the hands.
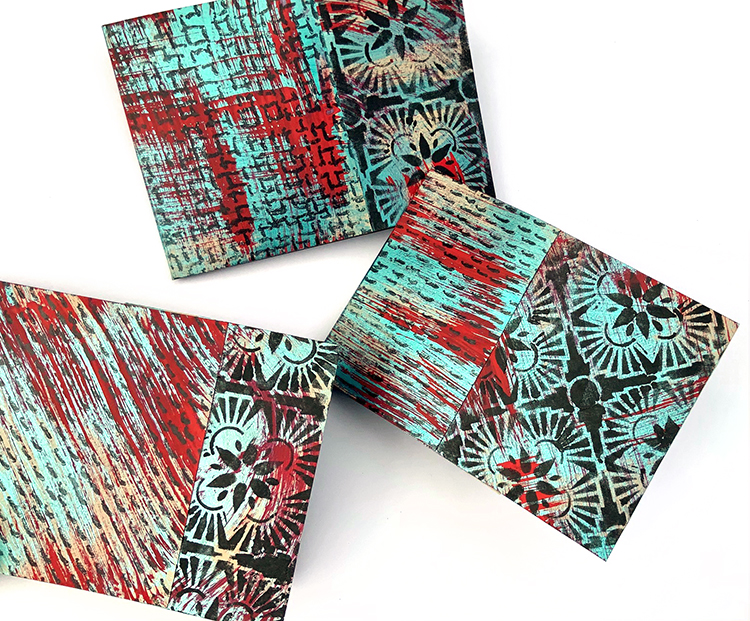
5. Using a permanent ink pad and acrylic paint in Black, stamp and stencil patterns onto the hands and the pop-ups. Also, stamp and stencil patterns onto the outside of the card bases. I used Nathalie’s Hamilton stencil and her Cardboard and Embroidery rubber stamps.
6. Adhere a pop-up inside each card base, add 5” wide scraps at the ends. Glue the hands to the pop-up as shown so they appear to “applaud” when the card is opened and closed!
7. Options: *Hold the card closed for mailing by adding a ribbon, cord, or paper “belly band” *Paint a red heart onto a small square of painted cardstock and tuck it into the closure. *Hide a message in a mini manila envelope and position it in one of the hands or at the side of the card base.
Keep going…….. *Change the stamps and stencils *Use more than three colors! *Pick a different color palette to suit the recipient and occasion (instead of expressing gratitude, this kind of pop-up could congratulate a friend who has a new job, just got chosen as captain of a sports team, survived a round of chemo, or anything else worthy of a round of hand clapping! *Add hand-written greetings, old photos and other collage elements.
Hands down this is one of the coolest card ideas we’ve seen in a long time! Thank you Judi!
Happy Tuesday from the Creative Squad! Today Tina Walker is starting us off on a new theme for June with a super cool canvas and a fun art journal spread using my Hamburg stencil and my Cardboard stamp set. This month’s theme is: Pattern Lovers Love Patterns: We admit it – sometimes we go a little crazy over cool patterns. We see them everywhere and whether it’s in the human-made stuff all around us or in the designs by Mother Nature, we love them all. So this month we’re playing with pattern and giving it the attention it deserves!
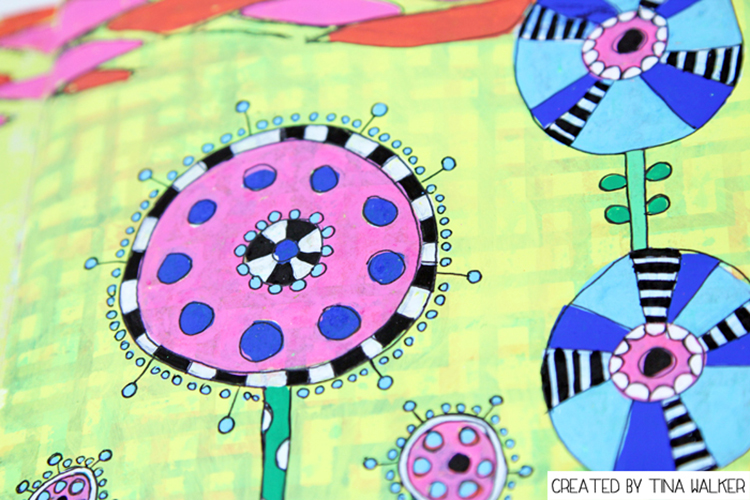
Hi! Tina Walker here today with a new month and a new theme. June’s theme is a theme that I am super excited about – Patterns!
Patterns and repeating images are some of the best ways to create interesting and eye-catching art. I am always looking for patterns in nature and for ways to create patterns out of patterns. My main project this month uses 1 stencil and 1 stamp to create an interesting piece full of pattern on pattern. Not only was it fun to make, it was quick and easy.
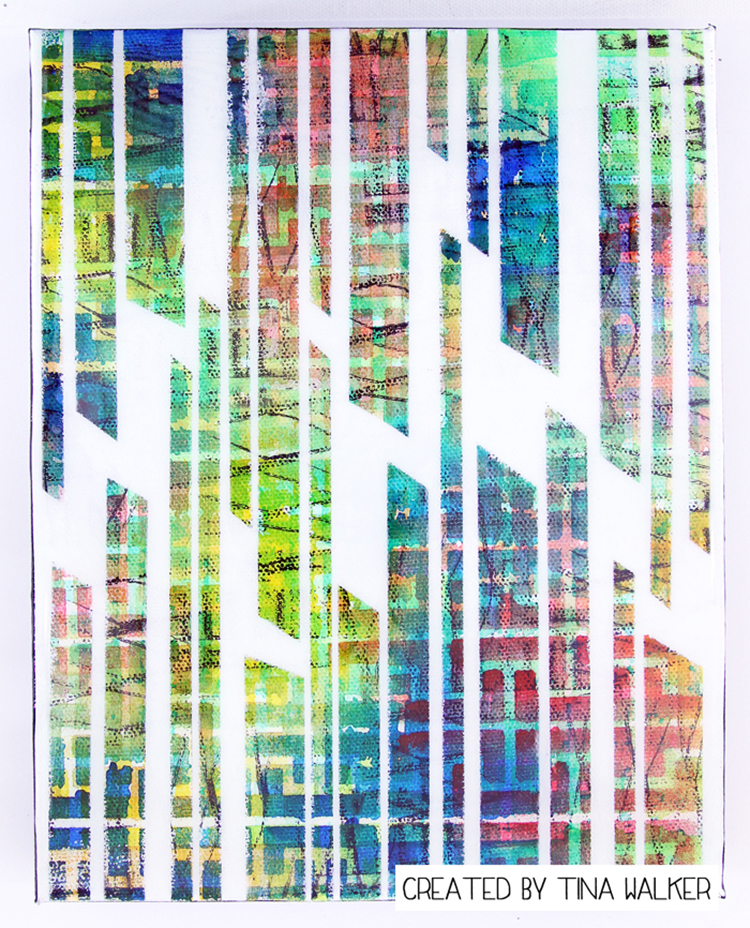
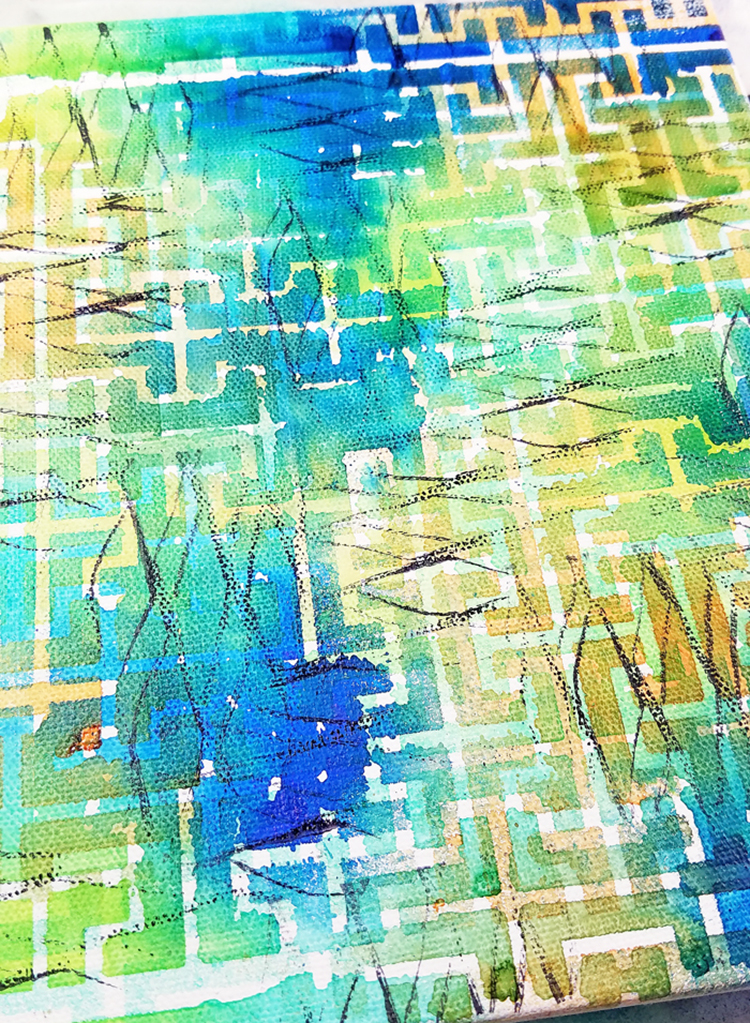
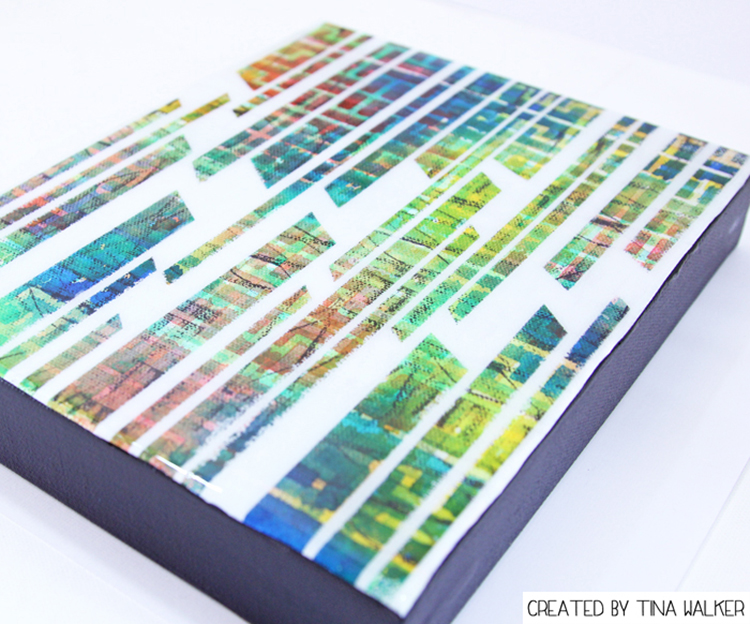
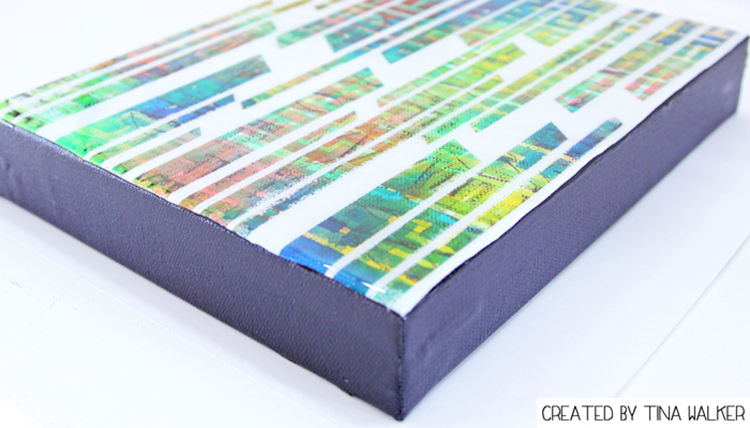
Place your favorite Nat StencilGirl stencil over a primed canvas, I used Hamburg. Using spray-mist, acrylic paint, or inks, paint over the entire canvas. I used Marabu Acrylic Art sprays that are permanent. Once they dry, you can layer one spritz over another without creating a muddy brown color. Love!
Randomly stamp canvas. Here I used Pie Top from Nat’s Cardboard stamp set.
Repeat this step, rotating the stencil 90 degrees so that the stenciled image overlaps the previous layer.
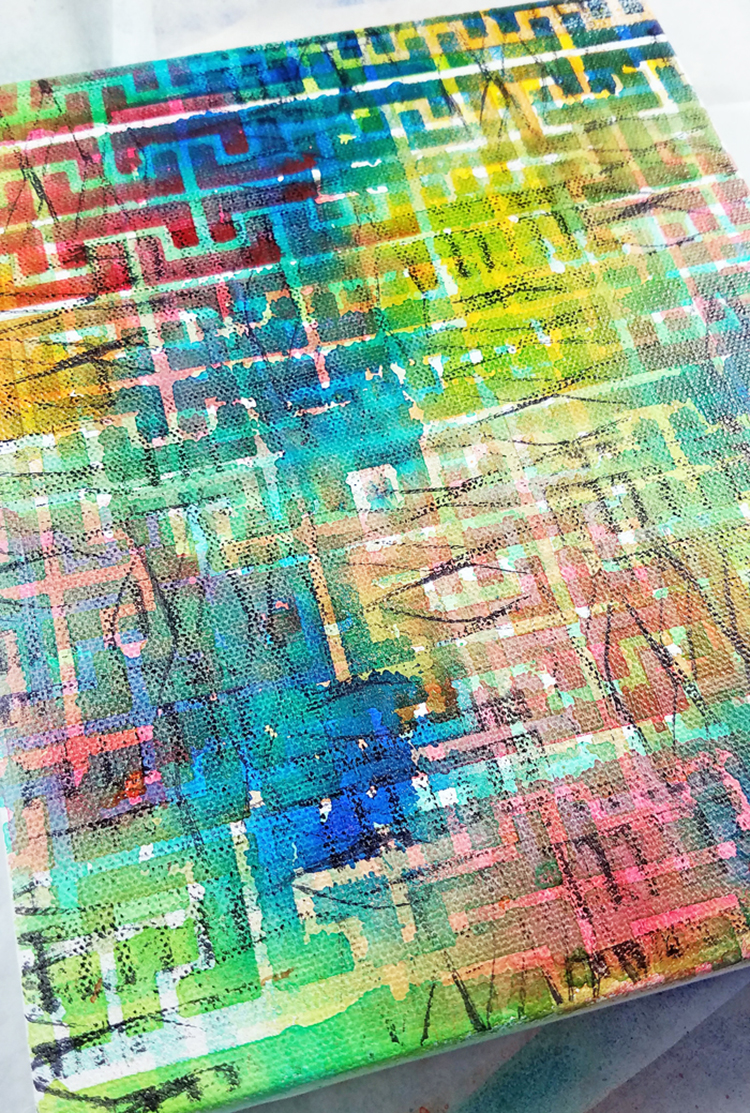
Repeat until you have a base that is full of yummy layers and pattern on pattern.
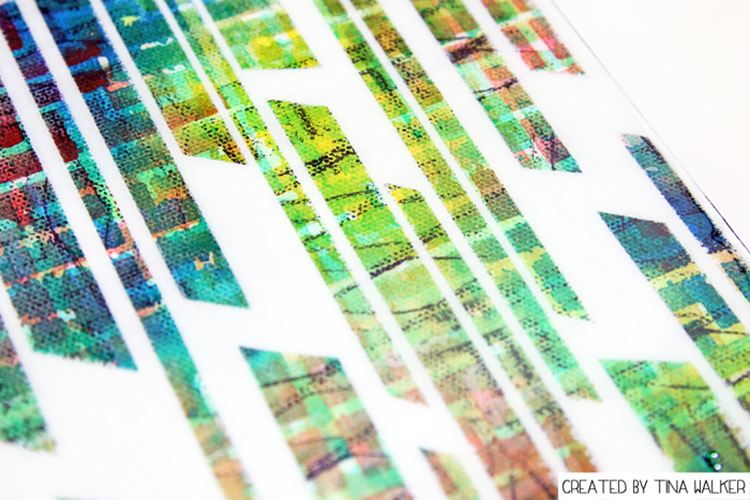
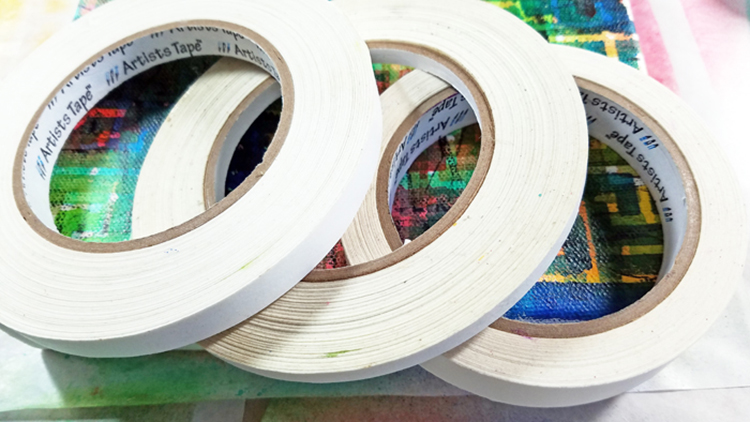
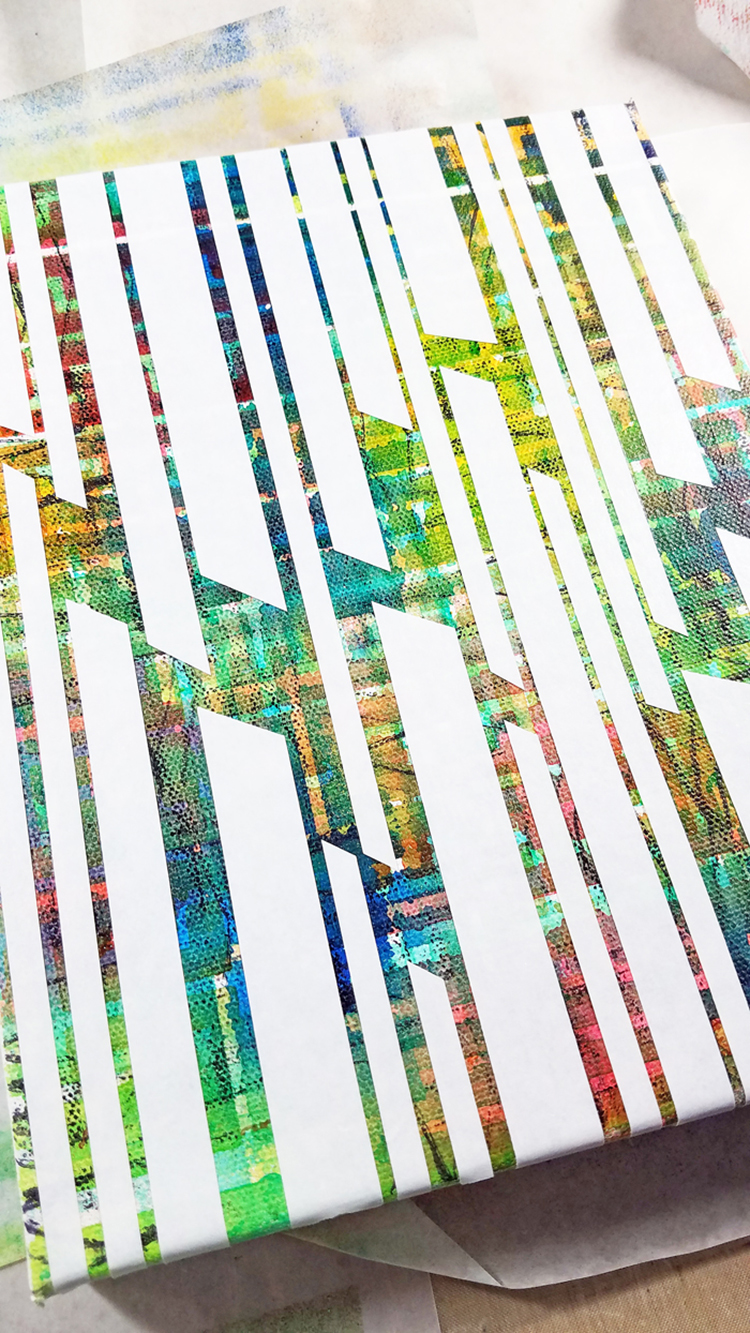
Place several widths of artist or masking tape over your stenciled/stamped canvas to create a pattern. I trimmed the edge for an interesting look.
Make sure the tape is securly adhered to the canvas.
Using your favorite spray paint, spray entire canvas in contrasting or coordinating color, I chose white. Then allow to dry completely. Remove tape.
Reveal the magic of pattern on pattern. This project took approximately 30-45 minutes, from start to finish! My kind of art.
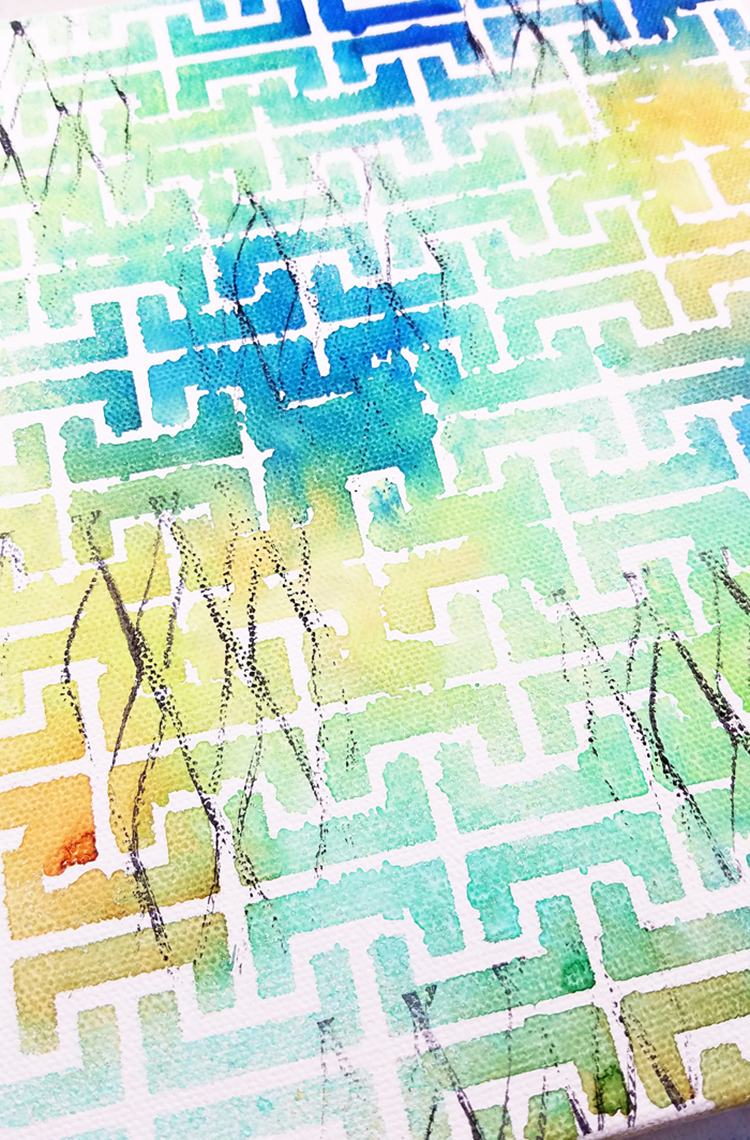
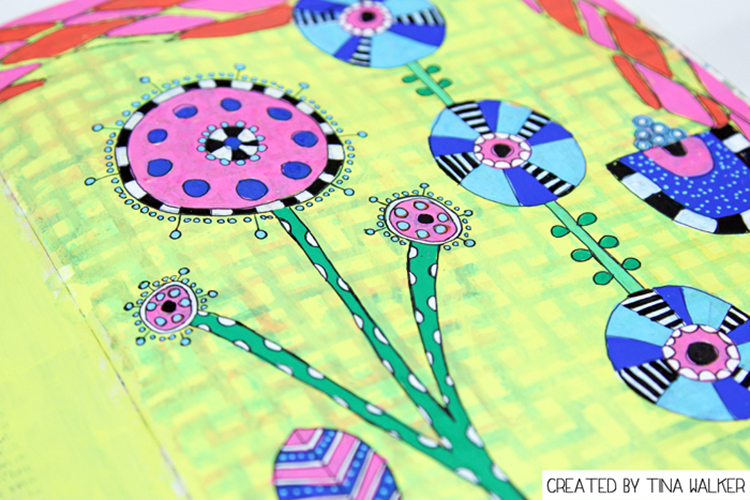
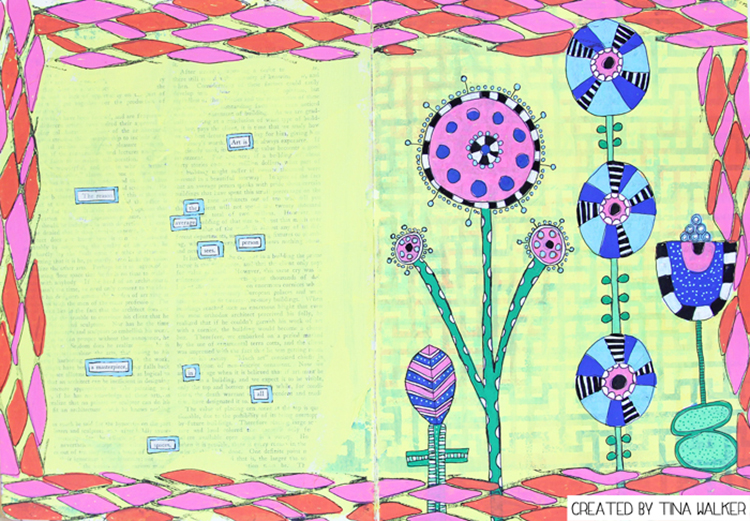
As I was adding my stenciled layers to my canvas, I didn’t want to waste the gorgeous paint on the surface of the Hamburg stencil, so I ‘stamped’ the stencil to an art journal page. Not only did my patterned canvas create a super easy and fun piece, I had an instant background started on an art journal spread.
Here’s the spread I created with ‘stamp off’.
I love it when one project creates another. And pattern on pattern…be still my heart! ♥
I hope you enjoyed my projects today. Have a great day!
Thank you Tina for two projects that definitely celebrate PATTERN! Tina used these supplies – some links are affiliate links:
Play along with us this month and join the 30 day Artful Adventures Stroll Challenge! I love to see how you interpret our monthly themes. Email me how you used my stencils and stamps with the theme and email me an image – I would love to share your projects in my “n*Spiration From Around the Globe“.
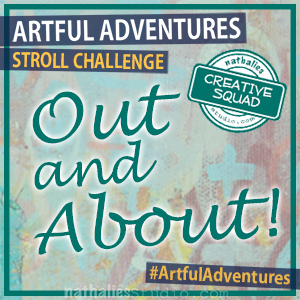
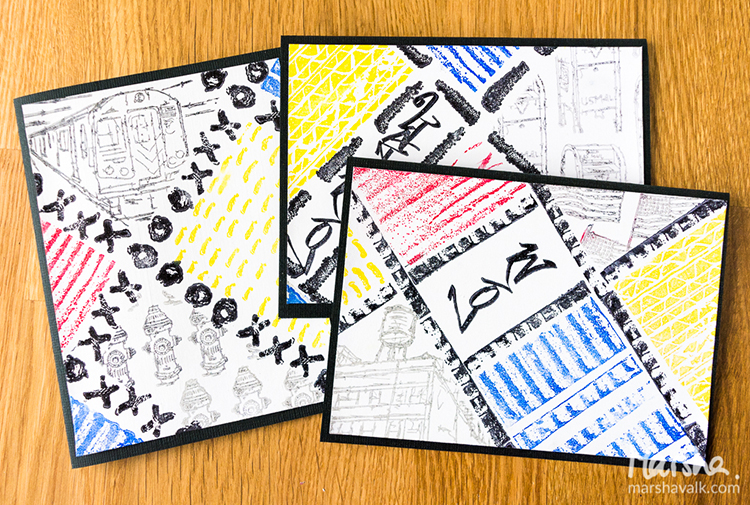
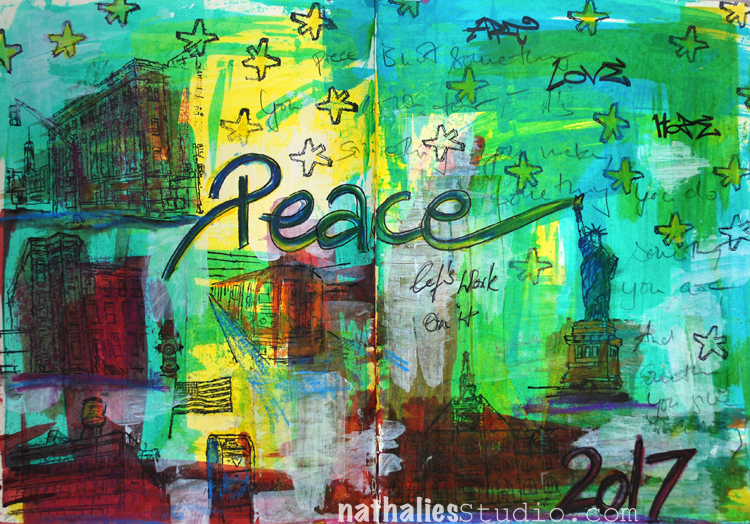
Hello my friends! This month the Creative Squad is playing along with my Stroll Challenge and today Marsha Valk is sharing some super cool cards. She’s using my Stroll Through the Hood #1 & #2, Cardboard, and Embroidery stamp sets, and working with the prompt word Pattern and the theme Out and About – Sometimes it’s hard to see all the cool and inspiring stuff that’s right under our noses. This month we hope you will join us in our 30 day Stroll Challenge and get Out and About where you live, and find some local inspiration.
Merriam-Webster has 11(!) definitions for the word ‘Pattern’. One of these is: 3: an artistic, musical, literary, or mechanical design or form, the geometrical pattern of the carpet, the strict pattern of rhythm and rhyme for a sonnet — Gigi Marino
…and it’s super fitting for the pattern I saw whilst Out and About.
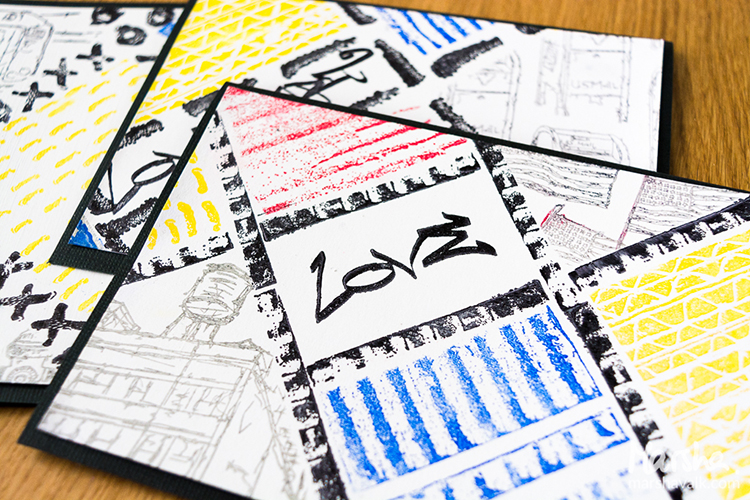
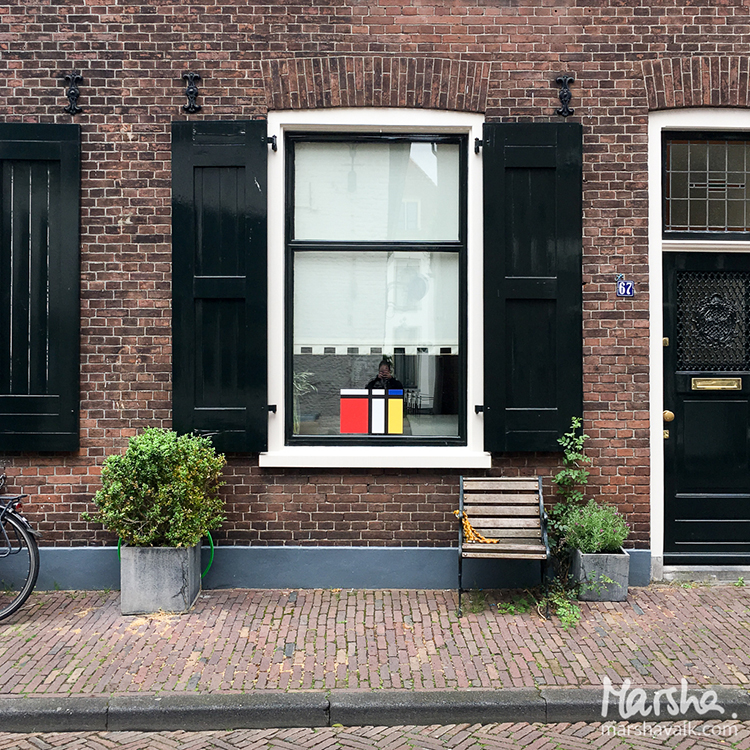
I see patterns everywhere and all the time: tiles, bricks, grids, shadows, on flora and fauna… and I have quite a library of photos of patterns found right here where I live in Amersfoort, the Netherlands. But… there is a different pattern plastered all over my city right now and this particular pattern ties my place of residence to New York. And as my assignment was to combine today’s Stroll Challenge prompt with the Stroll #2 stamps, going with this pattern made sense to me.
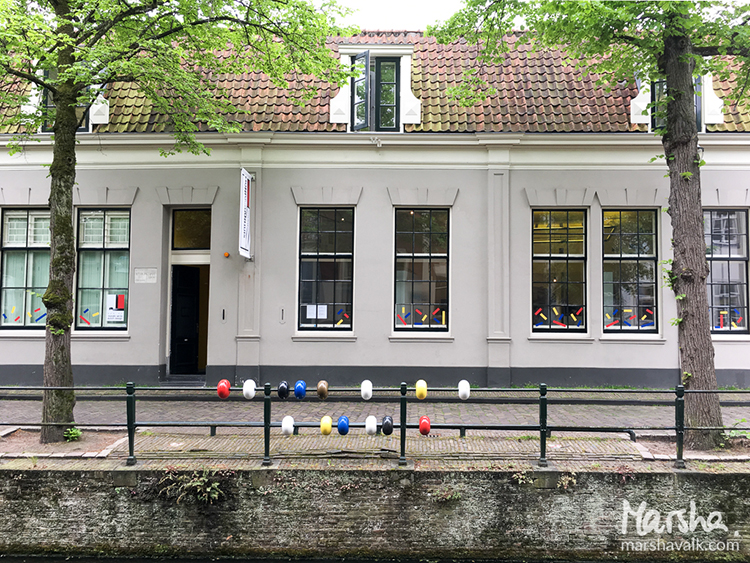
2017 has been declared the national year of De Stijl, because the art group was founded a hundred years ago, in 1917. Amersfoort is taking this opportunity to celebrate one of its most famous former residents: Piet Mondriaan (or: Mondrian).
Mondriaan was born in Amersfoort in 1872 and he died in Manhattan in 1944. He lived in Amersfoort until 1880, when his family moved to another part of the Netherlands.
His birth house in now a museum where you can see some of his early (still naturalist) works and learn about his life.
Now onto the project!
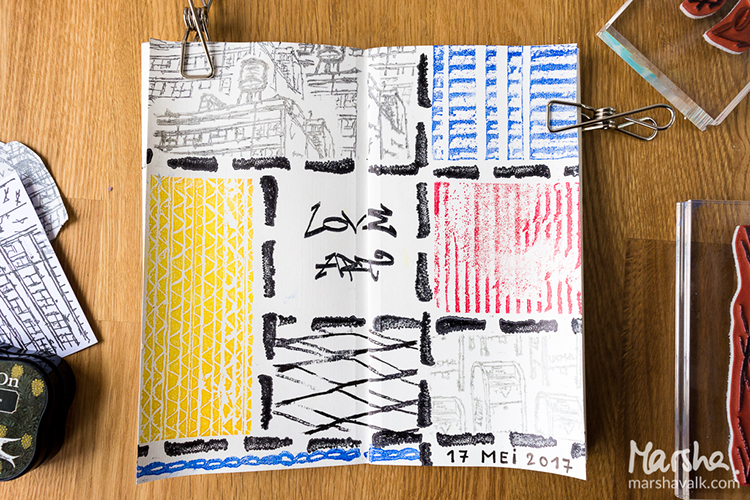
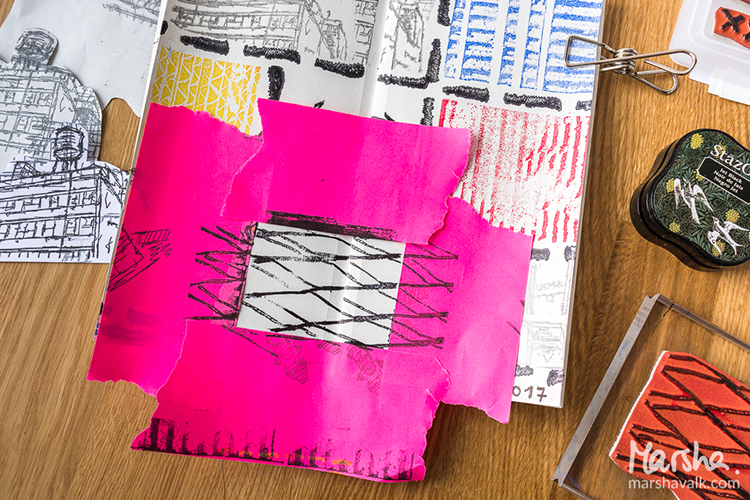
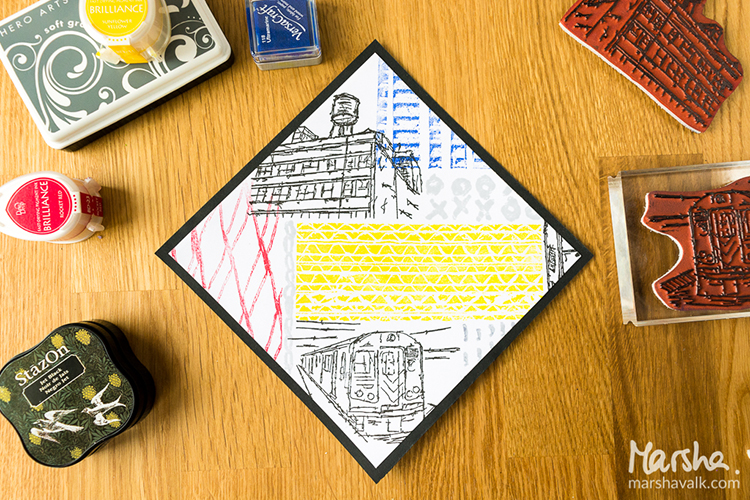
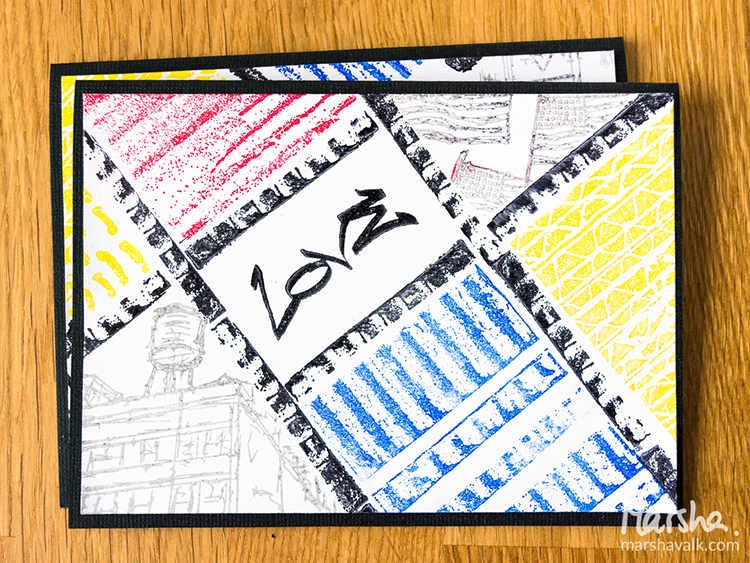
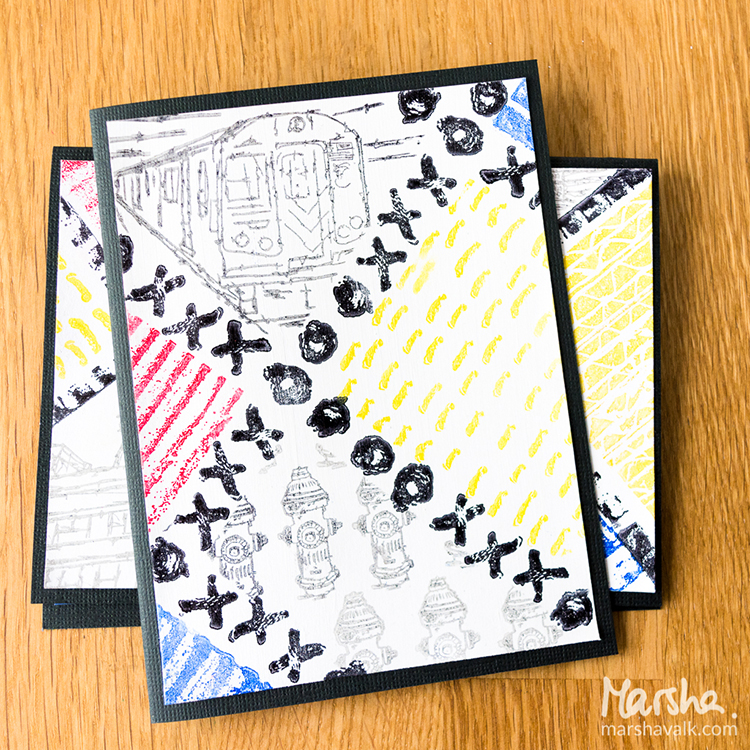
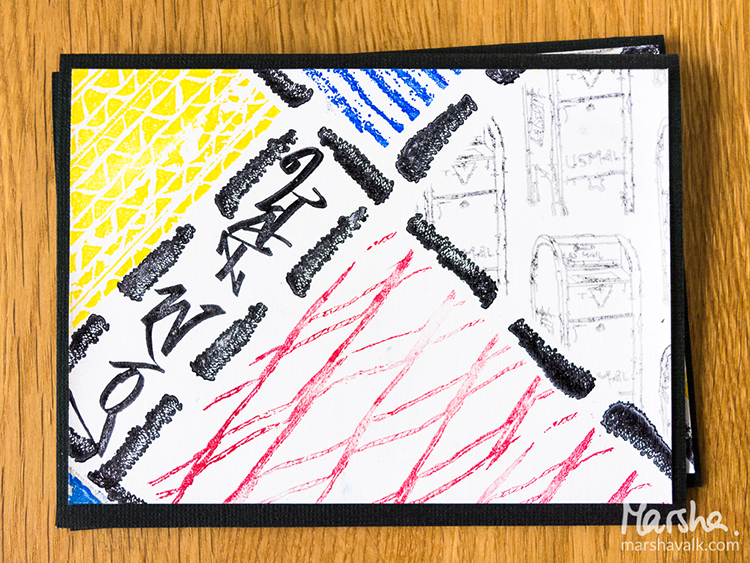
I started out playing in the journal I keep for the Stroll Challenge prompts and then moved on to square and rectangle pieces of cardstock. I didn’t have to think about colours. I searched my stash for suitable stamping inks in the De Stijl colour palette: red, yellow, blue, black, grey and white. I covered each base with gesso first because I felt the plain white paper was too flat and stark.
And then I just stamped my compositions on top, starting with the grids and then filling in the spaces with colour and pattern, using post-it tape and scraps of paper to mask off and protect parts of the design whilst stamping. I’m not sure why, but I didn’t feel that the compositions with straight lines looked right. So I tried some more on a diagonal square piece of cardstock, which I liked much better.
But then it occurred to me that having the paper diagonal wasn’t very practical for, for instance, making cards. So I continued to play with diagonal lines and blocks of colour and left the paper straight.
Once the ink was dry, I adhered the cards I liked best onto black folded notecards.
Conclusion: creating pleasing compositions with just blocks of colour and lines is much harder than you might think. I hope you try it too. It’s an interesting and fun exercise!
Thank you Marsha – these rock! And so cool that your ‘hood is celebrating such an important artist! Marsha used the following supplies (some are affiliate links):
Play along with us this month and join the 30 day Artful Adventures Stroll Challenge! I love to see how you interpret our monthly themes. Email me how you used my stencils and stamps with the theme and email me an image – I would love to share your projects in my “n*Spiration From Around the Globe“.
This is so much fun. I’m from The Hague (also in the Netherlands) and my city is also covered in Mondriaan prints. The “gemeentemuseum” has a year long Mondriaan exhibit.
I love your interpretation of all this and how you translated it into your own art, Marsha!
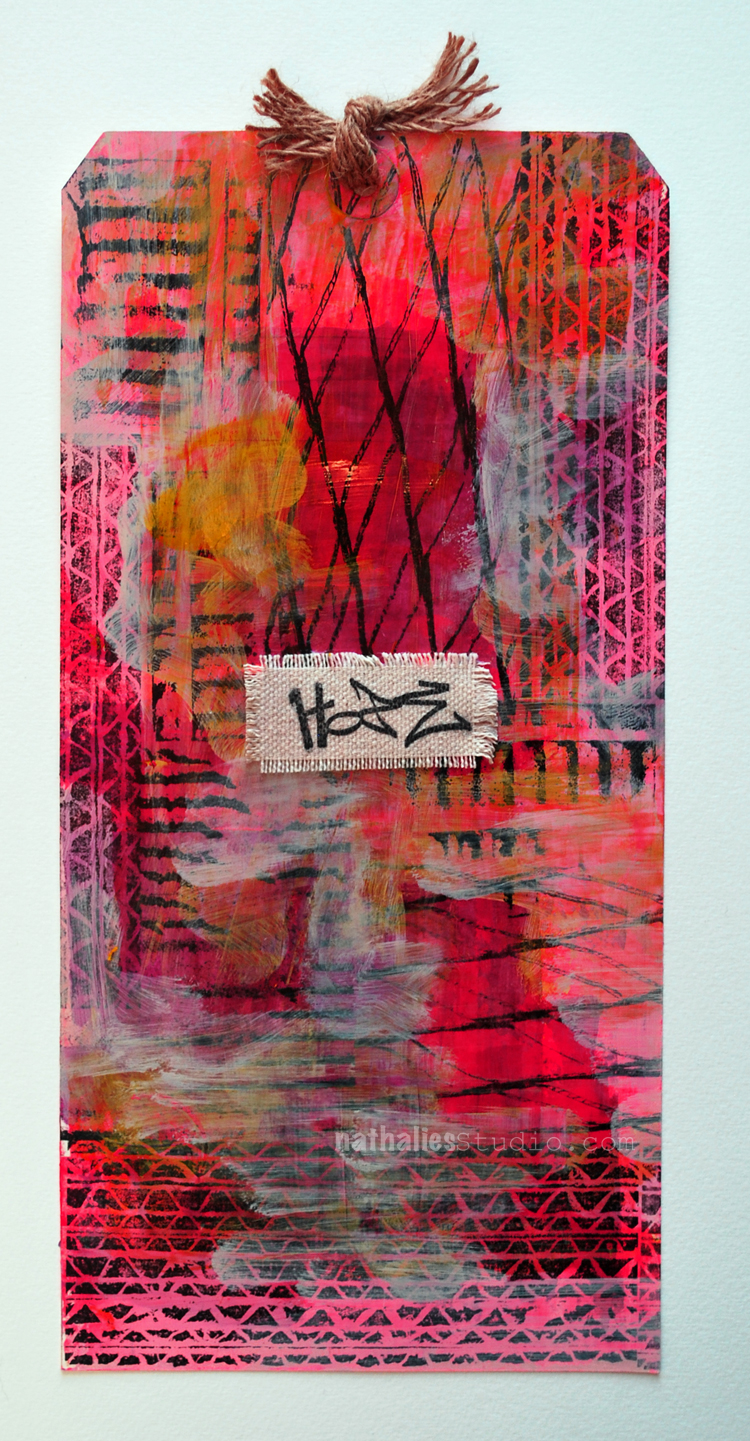
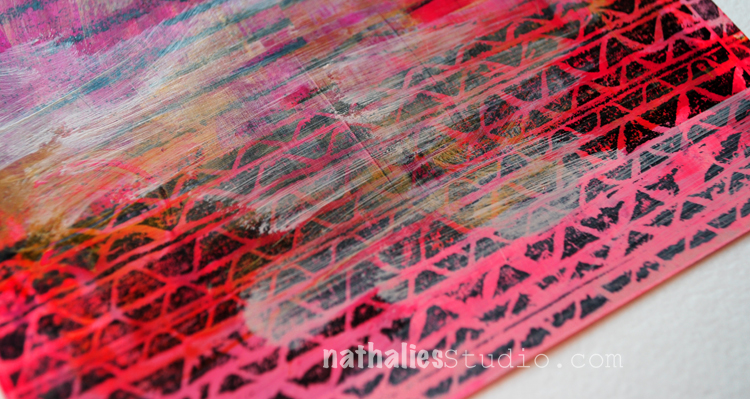
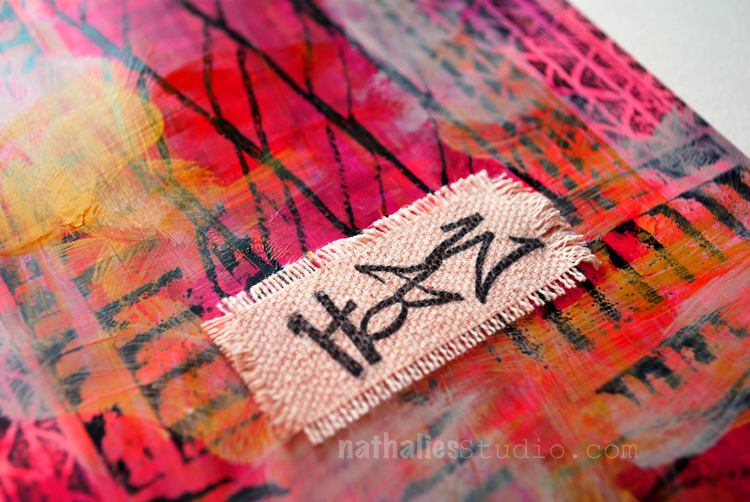
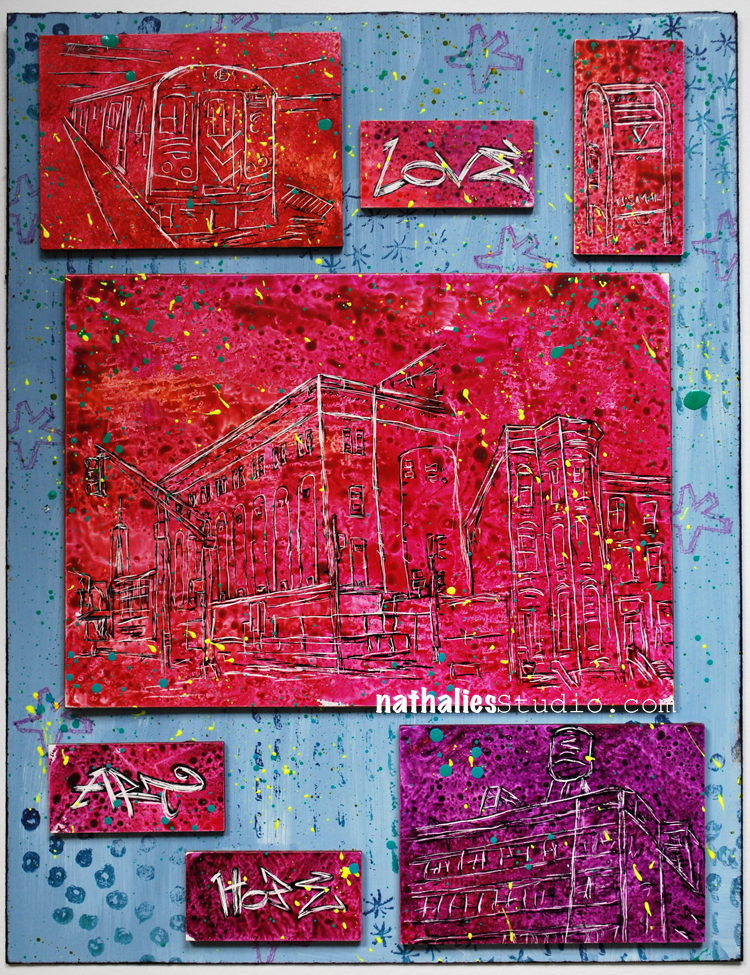
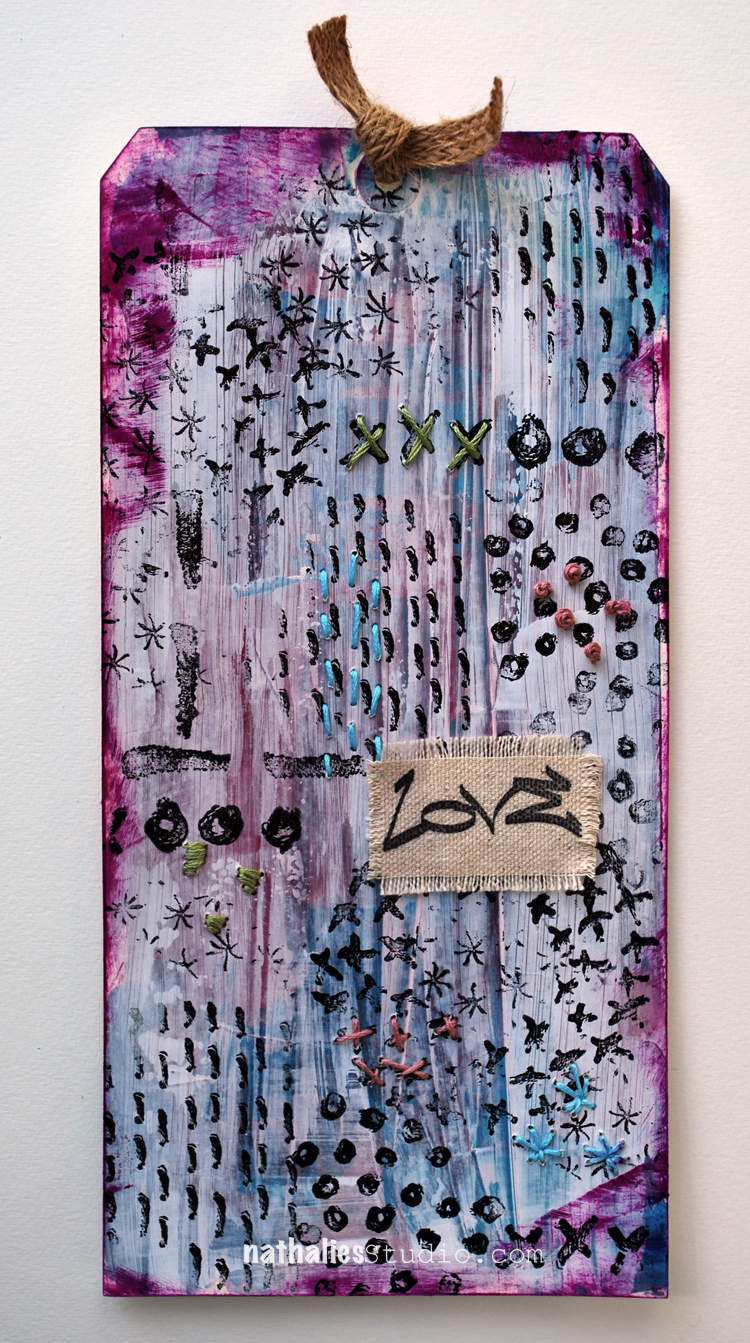
Love making tags that I can use for gifts or just as card to give to someone. For this I tag I used the Cardboard Stamp Set
and stamped with archival ink on the the tag, then used acrylic paints and scraped them over the tag. I like when the stamped images are part of the background
I stamped the Hope Tag Stamp on top of some left over raw canvas and then fringed out the edges and applied it with Gel Medium to the tag.
I usually ink up the cling stamps and press them not perfectly onto the background to get bits and pieces of the imagine blending into each other onto the background.
Here is a short list of supplies I used for this tag – some links are affiliate links
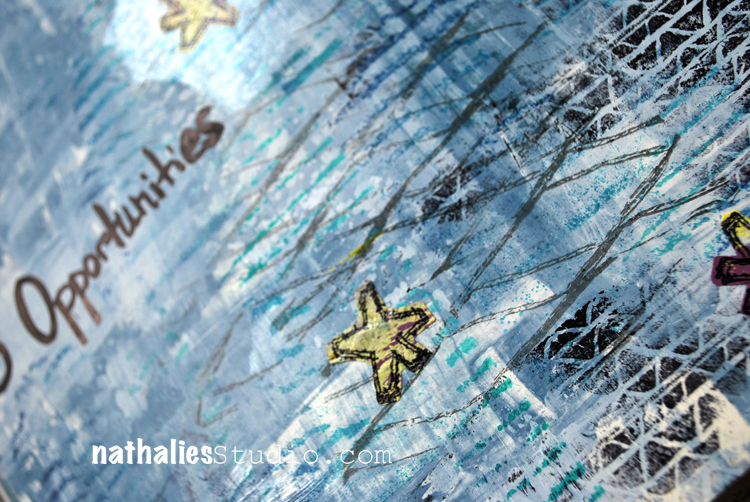
Love this – so uplifting when you think about it, right? 1 Year = 365 Opportunities. I used my new Cardboard Stamp Set for this art journal spread. I stamped the background with some of the stamps and then painted over some areas with acrylic paint and gesso to push them back.
Then I stamped over the painted areas again with different ink pads and repeated the steps.
I stamped some of the stars onto formerly painted deli paper and cut those out and applied those with Matte Medium.
Love the look of this – it is a fun way to create a background with a lot of visual texture.
Here are some of the supplies I used for this art journal spread – some links are affiliate links:
I am so excited to start this New Year with lots of fun things. Here is one of my biggest secret the last couple months
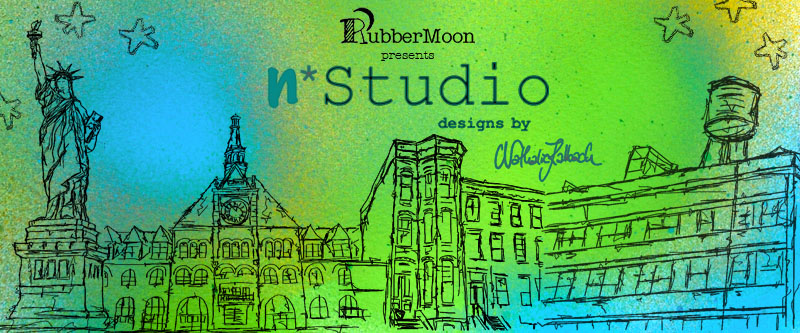
RubberMoon is a wonderful company in the USA owned by the amazing Kae Pea. RubberMoon creates hand crafted, red rubber stamps. I am so over the moon that we teamed up and here are the four sets of stamps I designed and RubberMoon made, which are available as cling stamp sets, single wood mounted stamps and single cling stamps:
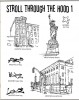
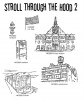
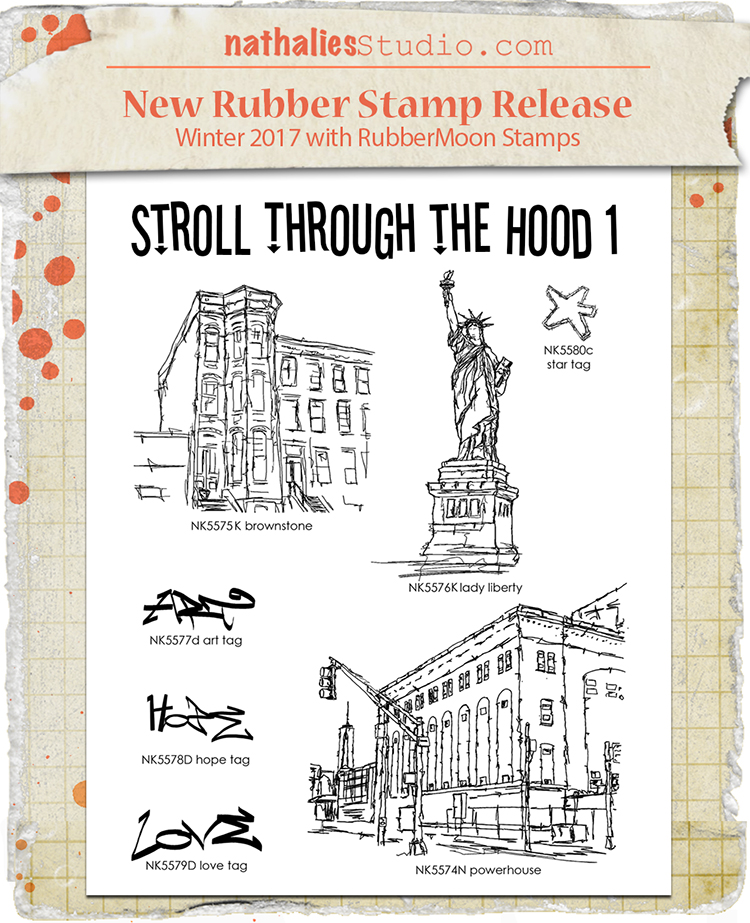
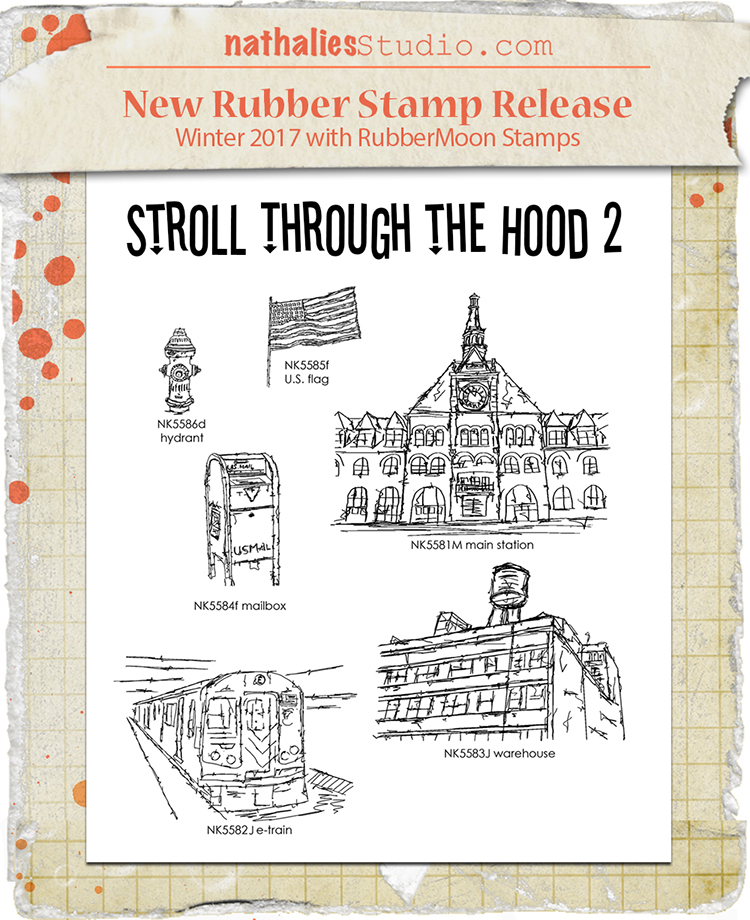
The Stroll Through the Hood stamps are inspired by places and objects in my neighborhood of Jersey City, as well as by my blog series of the same name. I gather inspiration as I sketch and photograph on my strolls, and I am attracted to the historic architecture, forgotten landmarks, and the street art that I pass along the way. These original hand sketched stamp designs are reminiscent of things you might find in towns and cities across the US.
The stamps come in two sets – and as separate cling stamps as well.
here are some samples created with the Stroll Through the Hood stamps:
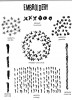
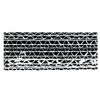
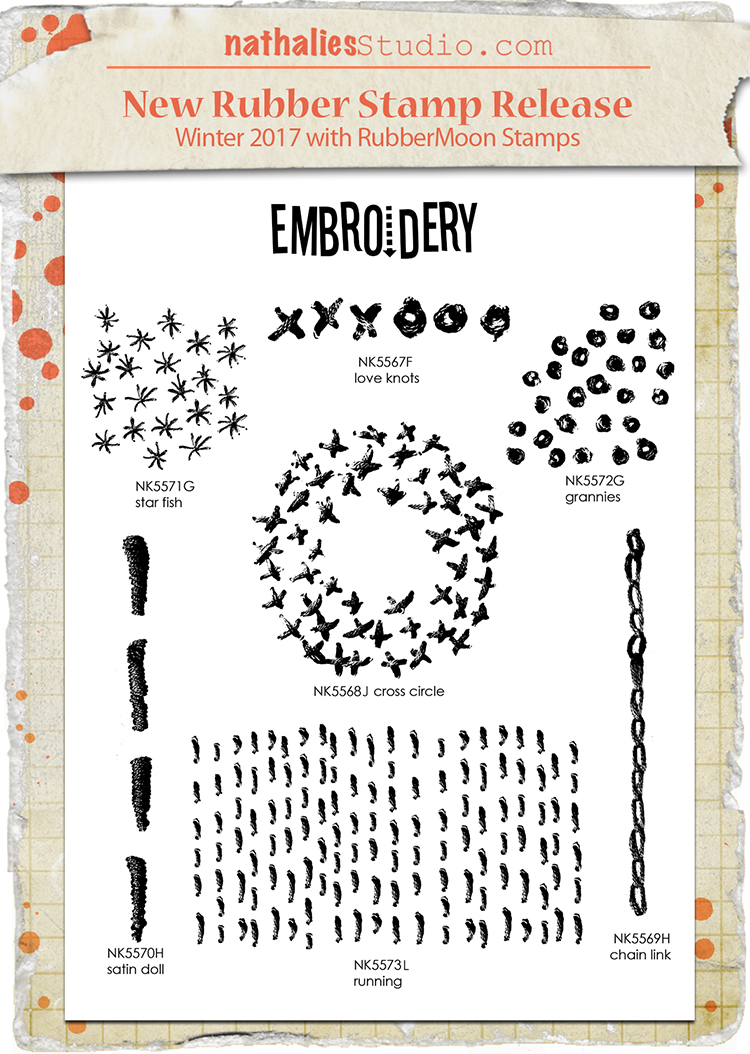
The Embroidery series of stamps are inspired by the art and design of the needle crafts. I was always attracted to the combination of mixed media and fiber arts, and have recently begun some projects that focus heavily on embroidery and stitching as the end goal. In addition to adding faux elements of embroidery to projects, these stamps can also be used as pattern making tools and guides on which to stitch upon.
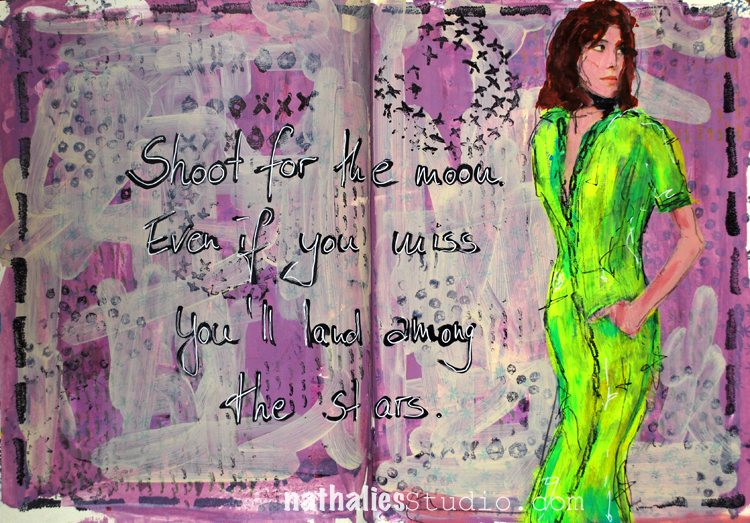
Here are some samples with the Embroidery Set
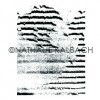
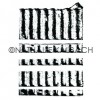
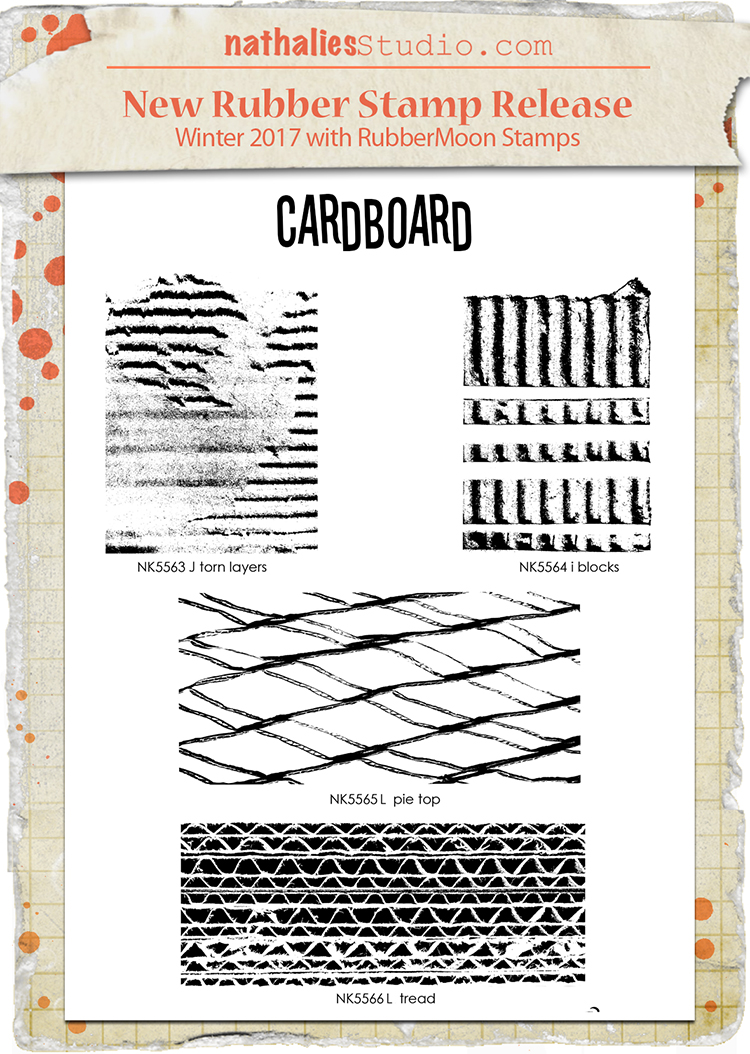
The Cardboard series of stamps are inspired by the interesting patterns and surfaces I observed while playing with cardboard packaging materials in my studio. These stamps capture my love for found objects, repurposing materials, and that grungy edge I love to add in my work.
And a sample with the Cardboard set
All of the sets and all of the single stamps are available as red rubber cling stamps from my store as well as from RubberMoon direct. RubberMoon also sells all of the stamps as wood mounted stamps.
I hope you like these new stamps- I am so so excited about them and cannot stop playing with them.
If you wanna hear and see more about them watch the recording of my Facebook Live Kaffeeklatsch with Nat from my Facebook Page
These stamps are really cool Nat, will they be available in Australia (Rachel Greigg, Darkroom Door)? Or do I purchase them from the US? Happy 2017 xox
Oooooh! These are so inspiring! I haven’t stamped in ages and have been thinking I need to make time to get back to it. These might be the nudge I need.


Judi – These are just wonderful! Anyone getting this would be very appreciative. Happy Holidays!!
Reply