nathalie-kalbach

The Grass is Greener Where You Water It or…PanPastel Metallics

NatKalbach_GreenerGrass01

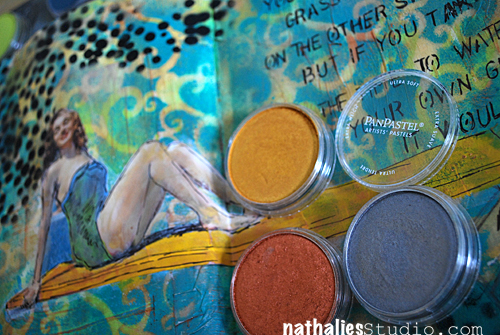
The wonderful people at PanPastel sent me three pans with their new metallic colors to try out and since it is not a big secret that I really love PanPastels, I was looking forward playing with them.

NatKalbach_GreenerGrass02


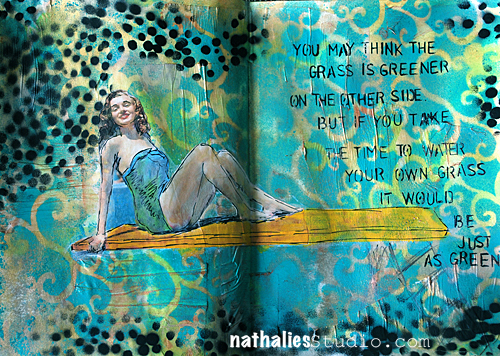
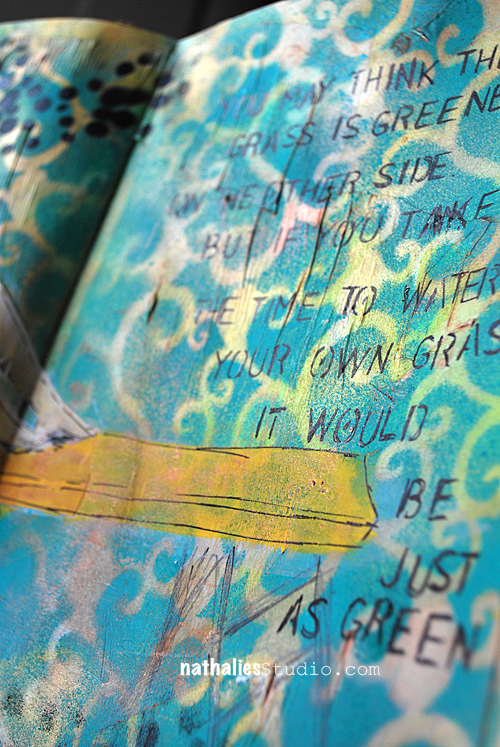
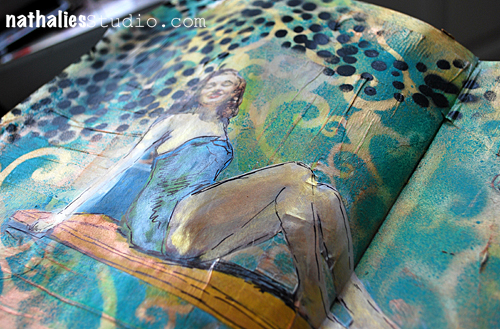
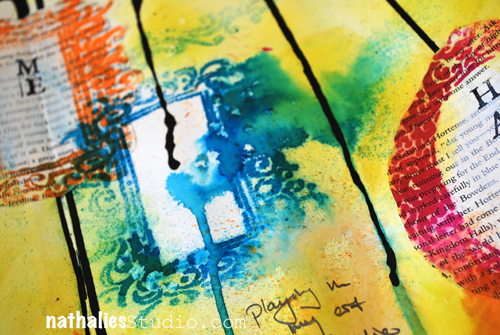
I created a PanPastel Background and then layered here and there some Parchment Paper over it with Matte Gel Medium. This also sealed the background, so that I wouldn’t have to use any fixative. On top the the texture that was created with the parchment paper I added some of the metallic colors . Then I layered my Arabesque Stencil over it and sprayed with Spray Paint.

NatKalbach_GreenerGrass03

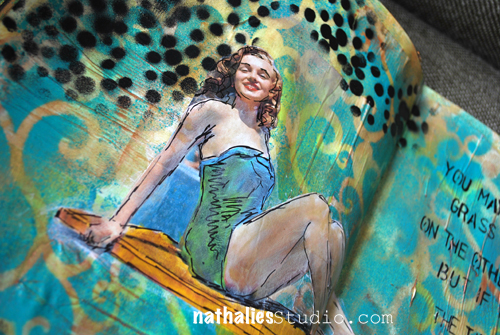
I also used the PanPastel Metallics for accents on the drawings on top of the acrylic markers. I love how you can achieve nice sparkly accents- although…it is so hard to photograph and capture this.

NatKalbach_GreenerGrass04


I almost wish it was make up as those colors are so nice but let’s face it…I might be better painting on paper then in my face ;)

NatKalbach_GreenerGrass05


Here are the supplies I used for this art journal spread

nSupplies

have a gorgeous day and don’t forget to water your own grass today :)

Nat

LogoBlogSignature

Comments (9)

  • Mary C. Nasser

    |

    Nathalie, I absolutely ADORE these pages and seeing your process!
    Think I’m in trouble (in a good way!) because Pan Pastels come in metallics now! :)

    Reply

  • Laura Strack

    |

    Love this post…I was in need of a good laugh! Thank you. You’re too funny. Love that quote and I so want some pan pastels. I haven’t invested in them, yet, but they are on top of my want list. I know I will love them and from what I’ve read, they are a great bang for your buck. Got to get them soon!

    Reply

  • Sue Clarke

    |

    Love the quote and the page but wish that I could see the sparkle/metallic more.

    Reply

  • Denise Spillane

    |

    You are too funny about painting your face. Love this page and I am going to get some metallics soon. I have to get my colors and play. The sentiment on the page is so true!

    Reply

  • Michell H.

    |

    Love this Nat!! Great sentiment and wonderful composition! Leaving comments has gotten really hard on my iTouch- I’d leave love on every post otherwise. you are kicking booty!

    Reply

  • Kirsten Alicia

    |

    Gorgeous page, love the stencilling & colours. I do not need metallic PPs… I do not need metallic PPs………

    Reply

  • Kathy P

    |

    Very cool pages, Nat—-love that quote, and the sparkle and texture! Thanks for the push to get out my pan pastels and play!

    Reply

  • Gerd Andersson

    |

    Just love this page! Your Arabesque stencil and the PanPastel Metallics are a must have!

    Reply

Leave a comment

Foam Stenciling Technique

CJSUberMediaOWSLOGO

Those of you who were part of the Creative JumpStart 2013 saw the videos that me and my artist friends posted on my website throughout January. The videos are not available here anymore, since I have to make room for new fun things to come ..still thinking ;) …but I thought it would be nice to repost my 10 technique videos over the next couple weeks- so that you have access to them whenever you want.

And now let’s jump to the second video in my Über*Media Creative JumpStart 2013 Workshop which was a Foam Stenciling Technique- which I love a lot :)

If you have no external speakers on your pc – turn up the volume a lot (the audio is very low in this video)

This and the other techniques are part of some of myÜber*Media Online Classes. They are there to free your creativity with techniques and how-to’s that go beyond one certain project. I want you to learn something new that you can adapt to your own style and can use for many projects to come.

Über*Media classes are dedicated to different kinds of media that cross a variety of materials.

I do have several Über*Media Workshops available right now for example Über*Media -PanPastel, -Acrylic Paint, -Gesso, -Acrylic Ink and -FoamStamplifier.

For my Creative JumpStart Über*Media Workshop I showed some of my favorite Über*Media Techniques that can be used in your Mixed Media, Scrapbooking, Altered Art and/or ArtJournal Projects.


And here are the supplies I used in the video:

nSupplies

I hope you enjoyed this little technique.

Have an amazing day!

nat


Comments (6)

  • Amante del Papel

    |

    Thank you for this opportunity!

    Reply

  • Denise Spillane

    |

    Thanks for sharing, this is pretty great. Can’t wait to try, I want to try on gelli plate too!

    Reply

  • Kathy P

    |

    Thanks so much for re-posting these, Nat! I need a refresher and this comes at a perfect time! You are so good to us….loved this series! Learned so much!!!

    Reply

  • Dara Lynn

    |

    Loved revisiting one of my favorite techniques ! I looooooove the Creative Jumpstart series….. I am a 2 year veteran and looking forward to next year!

    Reply

  • Madeline Rains

    |

    I LOVED your Creative Jumpstart series. I’ve used the techniques often this year. I hope you do some adaptation of it again.

    Reply

Leave a comment

Whatevers Round 2 #4 or Happily Ever After

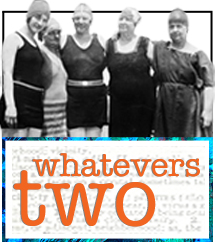
the WHATEVERS 2 A

Are you ready for the 4th photo of the Second Round of Whatevers? If you missed what the Whatevers is all about or want to see all the past photos and takes…check it out here.

Click here to see what CatVickiMartha and Cuchy made out of the photo and which story they tell.

Here is my take:

NatKalbach_HappilyEverAfter01


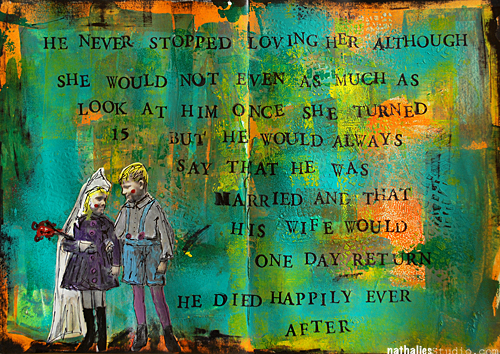
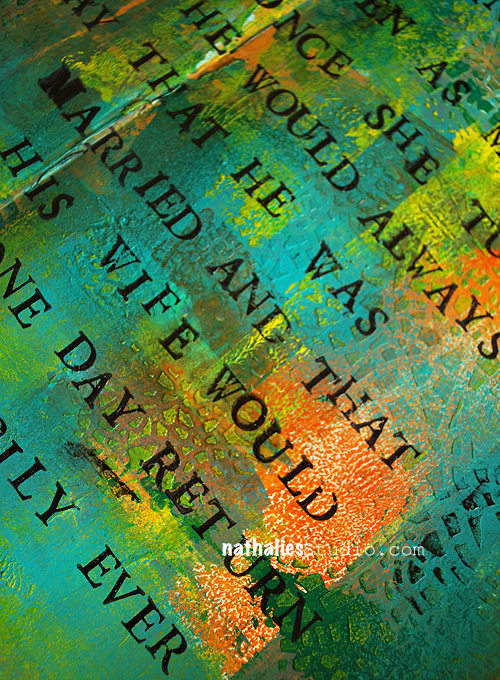
Journaling: He never stopped loving her although she would not even as much as look at him once she turned 15. But he would always say that he was married and that his wife would one day return. He died happily ever after.

NatKalbach_HappilyEverAfter02


I used Liquitex Heavy Paints and my What’s The Point Stencil to layer up a background. Since my stuff is still in the container I am limited to my wooden alpha stamps which I love so much.

NatKalbach_HappilyEverAfter03


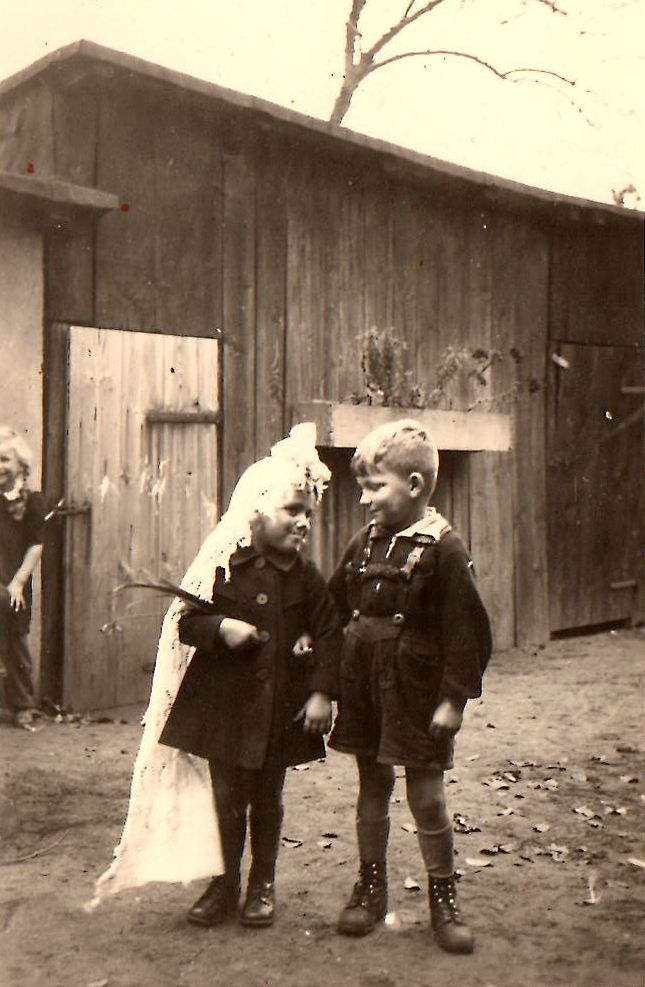
And here is the photo of this month’s Whatever for you:

NatKalbach_Whatevers4


Here is how it works

  • Vicki, Cat, Cuchy (Carmen), Martha and I and I have made a one-year commitment to each other and picked twelve photos with Whatevers whom we will give a story.
  • Every month – if possible always on the 15th –  each of us will do a post with an individual story that goes along for us with the same photo.
  • If you want you can play along and we will have the photo for you to download and show us your version of The Whatevers. The photo will be posted at the end of our blogposts- not on Facebook!
  • There is no rules to the story itself- it can be funny, sad, uplifting, breathtaking- WHATEVER
  • There is no rules on the length or the form of the story– it can be a short sentence, an essay, a poem or a soap opera – WHATEVER
  • There is no rules on the artform you choose – it can be a scrapbook layout, an altered art project, an artjournal page – WHATEVER
  • Here is a rule though: if you take the photo you have to link back to us and show us your story.
  • These pictures are from our personal stash and are for personal use for you only! If you want to use them for a publication whether a book or magazine in print or digital form please ask for permission!
  • If you want to participate we’ll have a linky list for each Whatever Post.
  • You can also join our The Whatevers -Facebook Page


Two Button

thank you :)

Nat

LogoBlogSignature


Comments (9)

  • Vicki Chrisman

    |

    loving this Nat.. especially the sketchy sketch around them…. perfect! Amazing background as always!

    Reply

  • Maria Luisa Naval

    |

    tears in my eyes …I like so much your background colors.

    Reply

  • Cuchy

    |

    ohhh so sad, but you made him happy for a while

    Reply

  • Catherine Scanlon

    |

    I love your background Nat — so bright and colorful!! Love your story.

    Reply

  • Martha Richardson

    |

    Love your take with this photo. GREAT colors on your page!

    Reply

  • Julie

    |

    Oh Nat! You made me cry! Reminded me of the George Jones song – He Stopped Loving Her Today.

    Reply

  • Jean A Marmo

    |

    I just love where you go with these photos!!

    Reply

  • Sue Clarke

    |

    What a sweet story you have created Nat.
    Happy and sad at the same time.

    Reply

Leave a comment

Sketch Show

NatKalbachSketchShow


So…I realized that if you do not sketch for a while it get’s harder…so I will keep on going- LOL

NatKalbach_JC01


NatKalbach_JC02


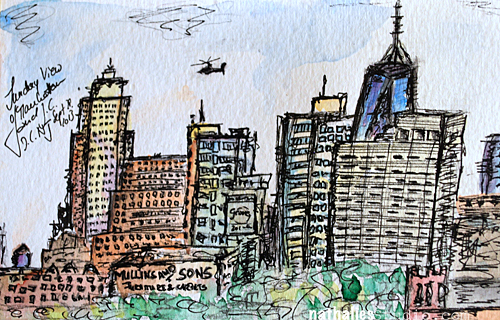
These are different views from the roof top..well kind of – LOL

nat

Comments (7)

  • Jackie

    |

    WOW!

    Reply

  • Laura Strack

    |

    Wonderful detail and that little helicopter caught my eye. Glad you are inspired to sketch in your new home!

    Reply

  • Carmen Lucero

    |

    Yes, so much detail! Love the watercolor!

    Reply

  • Sue Clarke

    |

    The detail on that second sketch is so detailed.

    Reply

  • Nurse Ratchet

    |

    What an amazing view!! Is it just yours or do you have to share the deck?? No matter ..the sketches are so fab!!

    Reply

Leave a comment

Coming to the InkPad in NYC

Weeeheee I am teaching a class in two session at the InkPad in New York City in October and November- here is the scoop

Über*Media Layered Backgrounds


Join Nathalie for this 2-night class where you’ll learn some of her best techniques for backgrounds, layering and more!

You’ll go home with a pocket book über-full of ideas filled with your own work.

Learn about the unique features and possibilities of acrylic paints, wax bars, ink blocks and other media, making this class a true mixed-media experience!

$90. *Please note, this is a 2-part class and will meet on two separate evenings.

Required Supply List

  • Acrylic Paint (8-12 colors, including black & white)
  • Watercolor Paper I recommend: Canson XL 11 x 15 – 140 lbs – bring at least 5 pages (but more is great too – how much you do is up to you)
  • Brayer
  • Old Credit card /or plastic card that size
  • Clear Embossing Enamel or UTEE
  • Versamark
  • Scissors
  • Bristle Paintbrush (1 medium flat)
  • Paper Plate or paint palette
  • Container for Water
  • Baby Wipes
  • Rag/Paper Towel
  • Tapestry Needle
  • Awl or Paper Piercer
  • Seam Binding Ribbon – natural color white/egg white preferrable
  • Heavy Gloss Gel Medium – prefer Liquitex
  • Craft Mat

    Optional:

  • Apron
  • Gesso (white) – we won’t need that much
  • Cosmetic Wedge Sponges
  • Bone Folder
  • Favorite Stencils
  • Magazine (fashion would be best)
Cost: $ 90.00
Date(s):
#1: 

#2: 
Tue, Oct 29, 2013 at 7:00 pm to 9:30 pmTue, Nov 12, 2013 at 7:00 pm to 9:30 pm
Skill Level: Intermediate to Advanced.

There is only limited space Please call the Ink Pad to register for classes.
212.463.9876

I would love to see you there :)

Huge hugs

nat

Comments (4)

  • Michelle

    |

    Yayyyy!!! This is great news! Sounds like a great class too. I won’t be there for October but maybe next time. :)

    Reply

  • Madeline Rains

    |

    Man! I got so excited for a second there. I will be in NYC Nov. 3-6 , so right in between!! Oh well. Someday. : )

    Reply

  • Nurse Ratchet

    |

    Do not ponder…,do not try to decide…just go and have an amazingly inspiring and creatively challenging, fabulous time . Nat is a joy to be with even for a few hours!!!

    Reply

  • Sue Clarke

    |

    Wish that I could attend! I so love that photo of you and how you are clearly en joying working in your studio.

    Reply

Leave a comment

Stencil Test Drive Cascading Frames or…Picture Me Happy

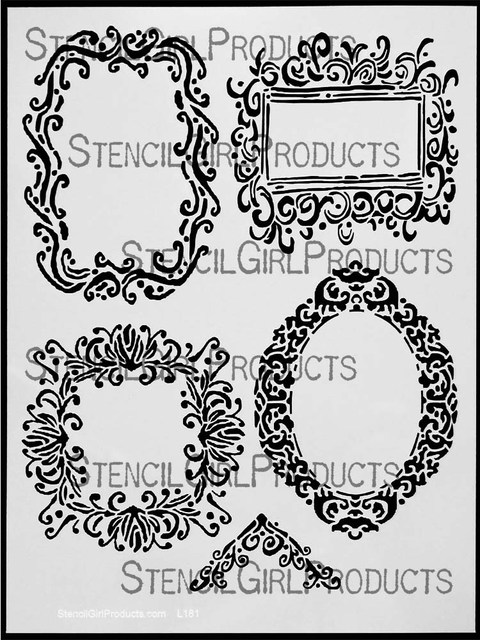
So thrilled to be part again of the Stencil Test Drive featuring Jessica Sporn‘s Frames Stencil for StencilGirl Products.

Stencil Test Drive Logo

Today along with some others I show you what I created using her Frames Stencil.

954


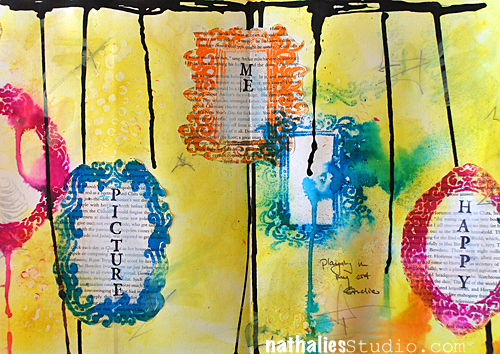
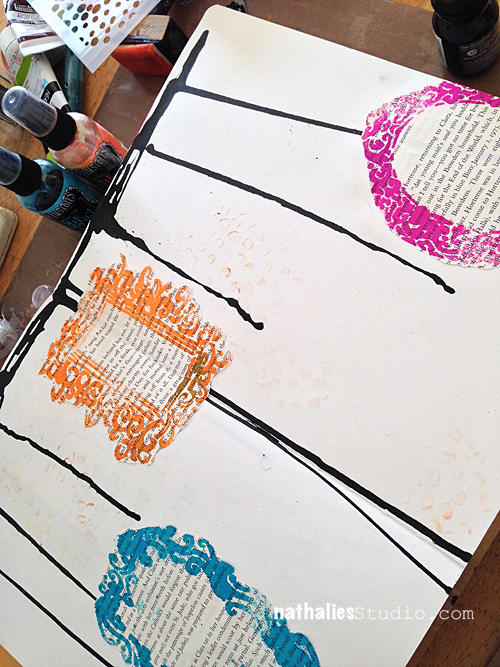
Here is my art journal page

NatKalbach_PictureMeHappy01


And here is how I created this

NatKalbach_PictureMeHappy02


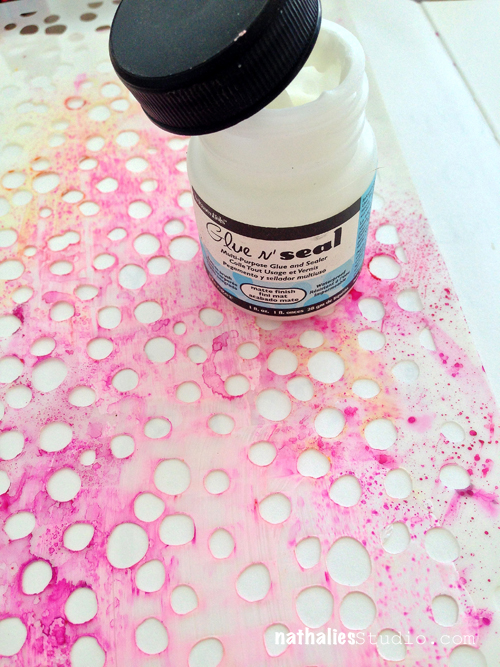
I used some Glue N’ Seal over my What’s The Point and while it was drying

NatKalbach_PictureMeHappy03


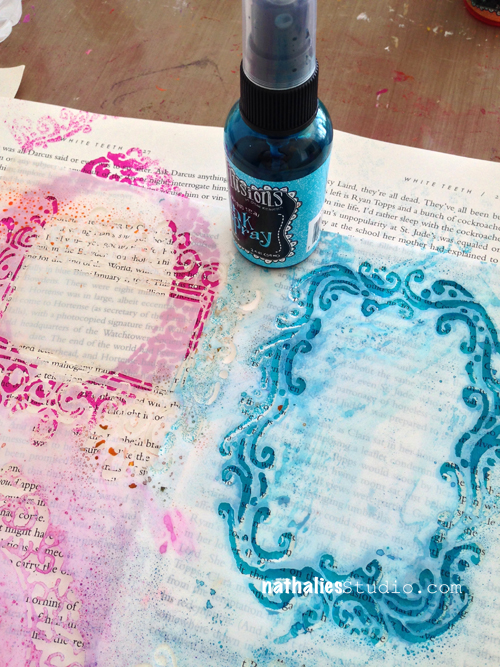
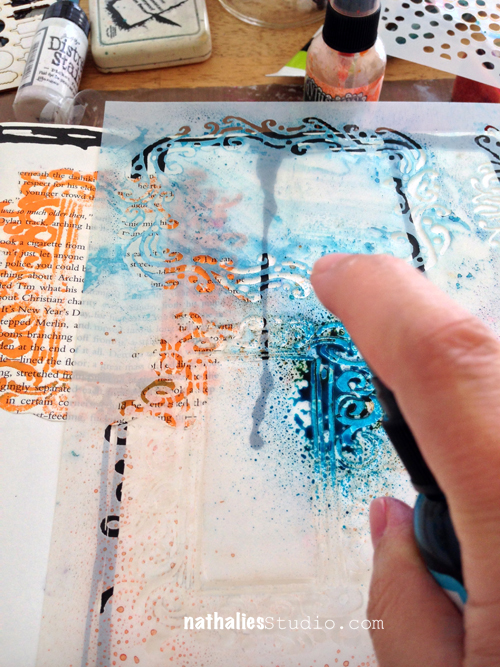
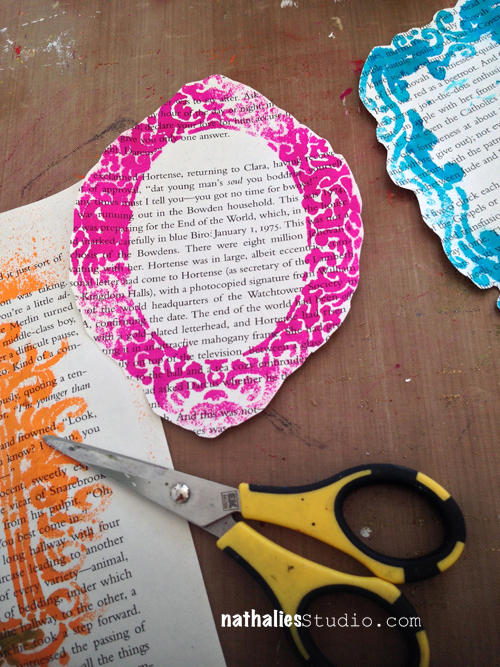
I used spray paints through the frame stencil on book paper that I had just as a left over from a different project.

NatKalbach_PictureMeHappy04


I added some Ink to the top of the artjournal page and let it run down

NatKalbach_PictureMeHappy05


I cut out the frames out of the book paper

NatKalbach_PictureMeHappy06


and adhered them with a glue stick

NatKalbach_PictureMeHappy07


and then I sprayed through the frames stencil again – quite a lot- I wanted to have a more runny and non perfect image

NatKalbach_PictureMeHappy08


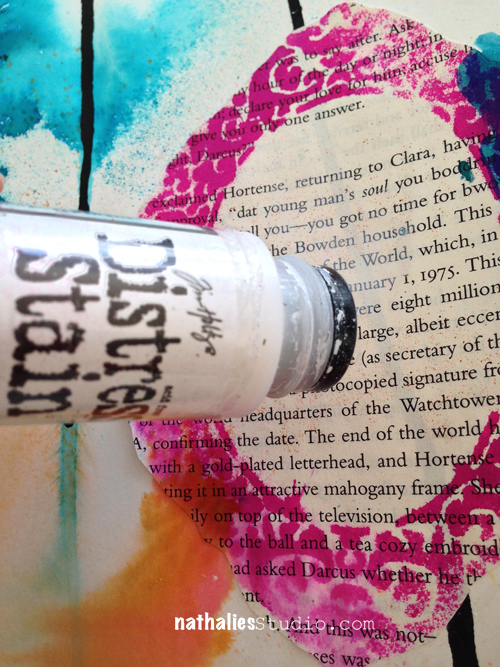
to tone down the book paper a bit I used some distress stain on it

NatKalbach_PictureMeHappy09


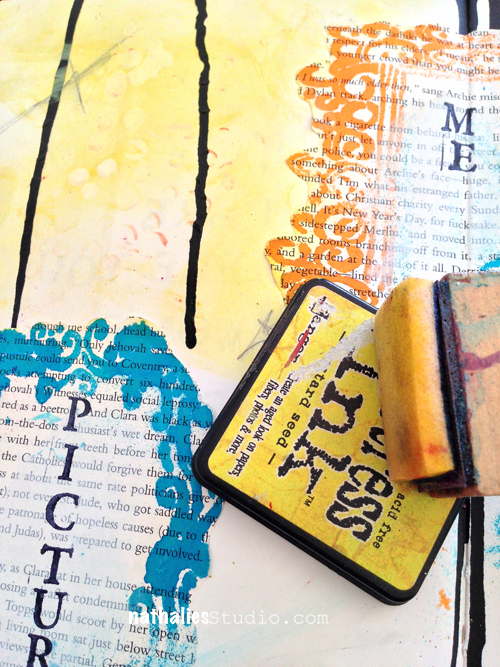
and then I used some Distress Ink to pop the What’s the Point Bits and the frames out a bit more :)

NatKalbach_PictureMeHappy10


Now go see what the other artists did with the Frames stencil!  But before you do, be sure to leave a comment  by midnight EST 10/13here because Jessica is giving away a Frame stencil to one lucky winner, and EVERY comment in the test drive will be eligible to win.  The more times you comment, the more chances you have to win!

Kristin Van Valkenburgh:  www.TwinkleTwinkleLikeAStar.blogspot.com


And for those of you who want a complete list of supplies- here you go:

nSupplies

have a wonderful day
Nat


LogoBlogSignature


Comments (32)

  • Jessica Sporn

    |

    sorry I am getting to you so late Nat… Love your drippy, colorful journal page. Thank you for sharing the step out photos and participating in the test drive. With everything you have going on, I am especially honored that you said yes! xo

    Reply

  • Maria McGuire

    |

    LOVE your bright HAPPY colors Nat! FUN FUN journal page :)

    Reply

  • Debbie House

    |

    So glad I pulled up your blog today. Loved the frames page you did. So many possibilities and it makes me want to work in my art journal again after an extended period away. I NEED to play.

    Reply

  • Nancy Sapp

    |

    Always enjoy your blog & love your great ideas with the frames!
    Wish you could pick my name for the frame stencils. I’d love to win them.
    Thanks for the chance,
    Grandma Nancy

    Reply

  • Jackie

    |

    You are so talented Nat! Love love your bright colors!

    Reply

Leave a comment

Heel Porsche or…Put an Elephant on it

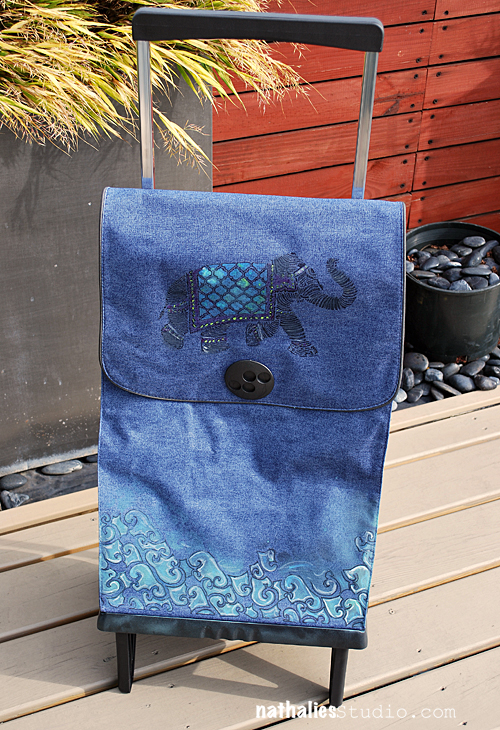
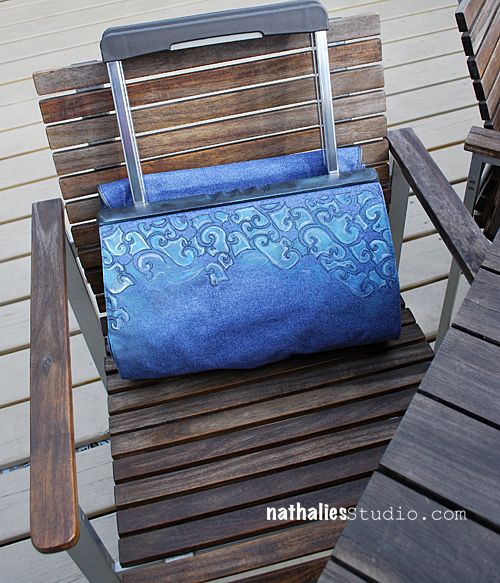
Let me introduce you to my newest little helper…my Heel Porsche :)
NatKalbach_Shoppingbag01


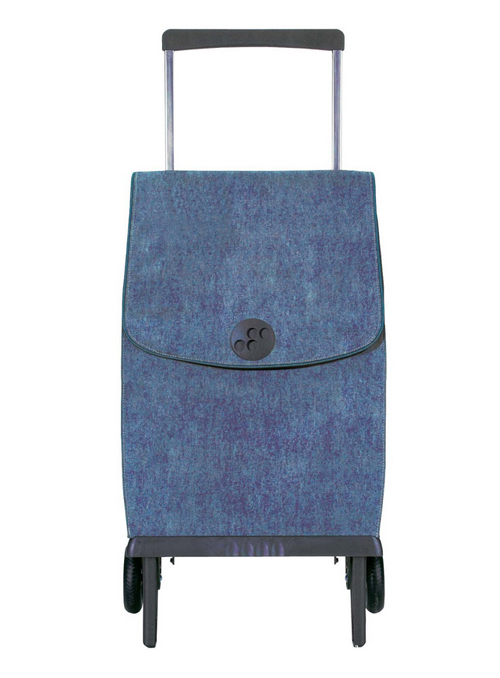
That is actually the nickname of those shopping bags literally translated from German. I love my new Heel Porsche. We don’t own a car and the next bigger supermarket is a couple blocks away- close enough to walk but for bigger shopping trips long enough to make my arms feel miserable carrying stuff. I did a lot of research on these rolling shopping bags and finally I fell in love with this Rolser Bag because it folds easily and you can carry it on your shoulder and it also unfolds like a charm. It comes in all kinds of patterns and colors but I chose it so that I could add my own little twist to it.

NatKalbach_Shoppingbag02


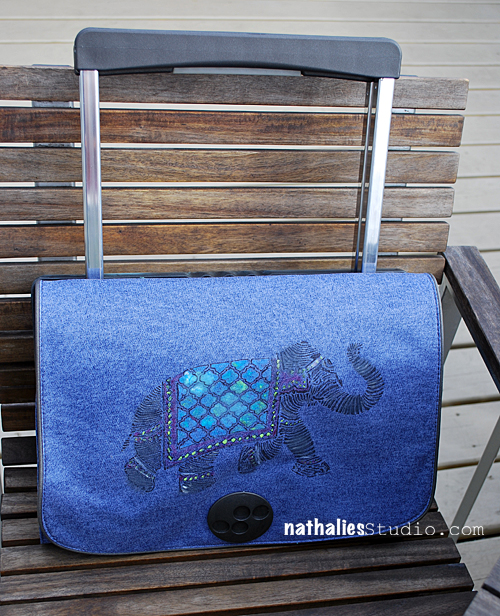
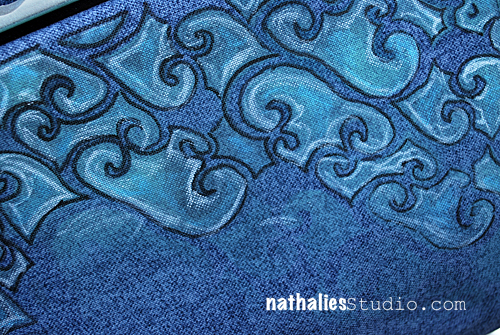
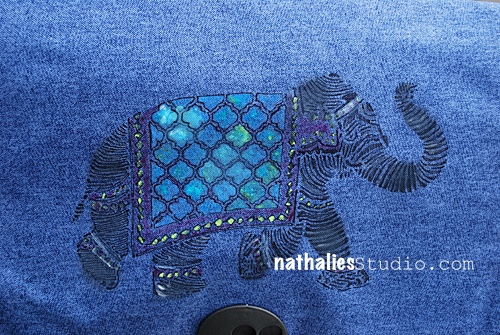
I used Liquitex Professional Markers and Liquitex Professional Spraypaints with my Arabesque and Elephant March Stencil on the flap and on the bottom. Here you see it folded together.

NatKalbach_Shoppingbag04


and from the other side- which is the bottom

NatKalbach_Shoppingbag03


It was such a fun and quick project and it also works like perfect – 6 big bottles of Water, a Gallon of Milk, 2 Gallons of Orange juice, and a lot of other stuff…and I had no problem rolling this thing back home on uneven pavement.

NatKalbach_Shoppingbag05


In Germany a Heel Porsche is really uncool- but hey…I think even in Germany that one would work – and actually …I guess with 40 I am kind of over that being uncool-problem anyway ;)

NatKalbach_Shoppingbag06

What image would you put on a Heel Porsche?

Have a wonderful day!

Huge hugs

nat


Comments (26)

  • Rolser

    |

    Hi Nat!

    I contact you from Rolser, the company that produce your shopping trolley and we are glad with the success that the trolleys have in the US.
    Nat, we are very happy to help you on your day-to-day task!
    Regards ;)

    Reply

Leave a comment

Coming back to Scrappers Cove, NJ – Nov 16, 2013

wohoo – so thrilled to announce that I will be back at Scrappers Cove on November 16

Here are the classes I will teach

Saturday, Nov 16, 2013 
Mixed Media Season Canvas   

In this Workshop with Nathalie, you will create a stunning and unique canvas that will be a wonderful home decor item. Learn how to create dimension and texture with tissue paper, items of daily life, acrylic paint, lace, burlap, and gesso. Learn how to reveal the interesting and eye-catching texture with acrylic paints and acrylic inks and add some fun stamping techniques on top. We will be adding lots of layers and dimension to make this a spring, summer, fall or winter canvas… just as you like. All the techniques can easily be applied to future projects.  Please bring stretched canvas (12×12 to 12×16), 3-4 acrylic paints plus black, white gesso, gel medium, 3D foam squares, brushes, water container, water mister, scissors, and palette knife.
Instructor – Nathalie Kalbach
From: 10:30am – 2:00pm
Cost  $32.00

 Saturday, Nov 16, 2013 
Be Awesome! Altered Book Class   

Dr. Seuss knew it: there is something magic about books. Each book is a beauty in and of itself – a story that leads you into a new world of fantasy. Books also have a feeling of importance to them, such as with a fabric coated hard cover or just the paper itself.  But sometimes a book loses its fascination and ends up at a flea market or at the back of your bookshelf never to be opened again. Why not breathe life back into those books again and fill them with your own stories? You can alter them in a way that these treasures bring unique joy back. Nat will show you how to create either a funky or a simple style altered book. You will learn beautiful folding techniques, such as ways to create pockets for treasures or hidden messages that go along with your story. You will learn how to use adhesive in unexpected ways and learn fun embossing techniques. This book will be a personal keepsake or a special present to a loved one.  What’s more, it can function not only as a mini album but also a home decor item. Please bring an old book, double sided tape, colored embossing powders, scrapbook papers, ruler, pencil, sharp box cutter, trimmer, scissors, and stapler.
Instructor – Nathalie Kalbach
From: 3:00pm – 6:00pm
Cost  $40.00


Please call the store (732-745-1000) during business hours, or email info@scrapperscove.com to reserve your space.

I hope I will see some of you there!

Cannot wait!

Huge hugs

Nat


LogoBlogSignature

Leave a comment

Paper Art Blog Hop

Logo_BlogHop_stamps

Welcome to the Paper Art Blog Hop!

A couple of months ago I saw Stephanie doing some really amazing sketching and the first thing that came to my mind was- wow – she should be doing stamp designs and there she is now with her own amazing stamp sets. I was very thrilled that she asked me to participate in her blog hop today and play with her wonderful Paper Art Stamp Set. I created an art journal page.
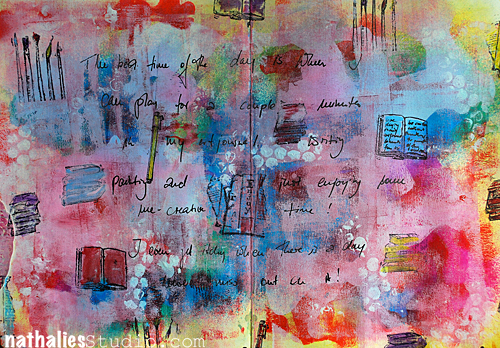
NatKalbach_paperArt01

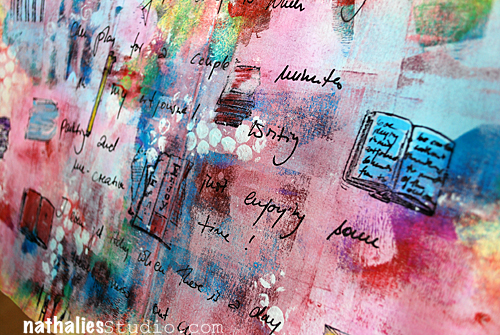
I just layered some acrylic colors and worked them together and then stamped with some Archival Ink and the Paper Art Stamp Set. I loved all the images so I wanted them all on my page about how much I enjoy art journaling.

NatKalbach_paperArt02


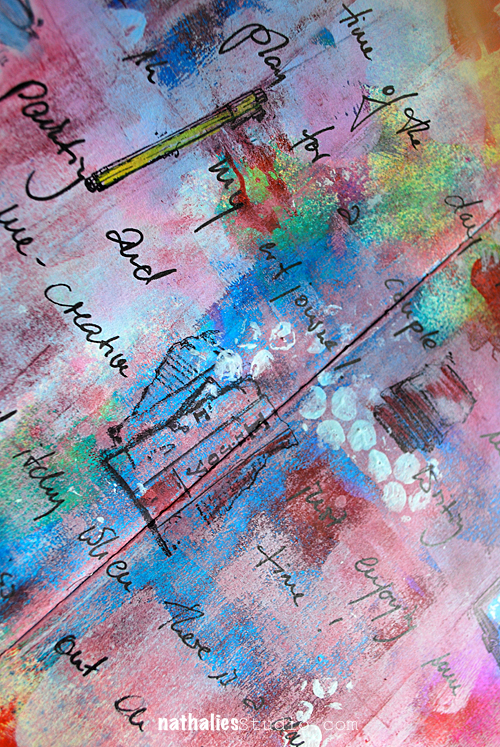
I then took my Liquitex Paint Markers and painted the insides of the stamps – it gave them more dimension and added another layer – Love it. Don’t be too afraid that you cover up the stamped image too much- you can always use your finger to distribute it thinner.

NatKalbach_paperArt03


Love those stamps! And you know the best thing…before you hop further – I tell you a secret ;) :

paperart


Stephanie gives away one of the paper art stamp collection. Leave a comment on each of the listed blogs and on my blog and let us know how you like the projects and Stephanie will pick randomly one lucky winner. You have time to comment till October 8th, 2013 – midnight EST.

But now…hop on to these super talented girls and see what they created with this amazing stamp set:

Viktoria Klabukova: – http://by-fleer.blogspot.com/
Have an amazing and artsy day!

nat

Comments (35)

  • Felicia Aaron

    |

    Nat, this was great fun! I love the opportunity to see other blogs and have a look at all their creative ideas!! Thanks for the opportunity to win such wonderful stamps that would be such a treasure to anyone’s stash!! Thanks!

    Reply

  • Felicia Aaron

    |

    So glad I found your blog! I love all your colorful ideas! I have already incorporated some of your style in my own journals! Hope that’s okay ;)! LOL!!! Thanks for the opportunity to win!

    Reply

  • Amante del Papel

    |

    Nathalie alway is a pleasure see your pages, are amazing!!!

    Reply

  • Janelle Rourke

    |

    Oh this piece really “talks” to me. I love the colors and the stamps are just amazing on this. This is one for me to study. Those stamp sets are too cool. Ones I would use alot! Thanks for sharing!

    Reply

  • Jackie Beeman

    |

    I love these beautiful stamps, so excited to see your journal pages, and have a chance to win them! Thank you!

    Reply

  • Thea Gringhuis

    |

    I like the bright collours you have chosen for this project. Also like the stamps.

    Reply

  • hege meland

    |

    Love your art. I follow you alredy and love all your work.
    Thank for the oppotunity to win the new stamp-set :)

    Reply

  • Jean A Marmo

    |

    Such amazing projects! Love how these stamps can be used!!!

    Reply

Leave a comment