Blog: Liquitex Professional Spraypaints

Do Things Different – Art Journal Spread

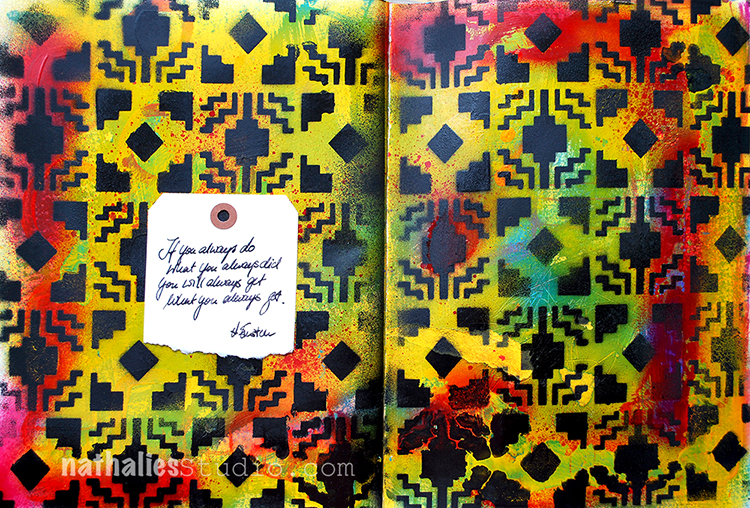
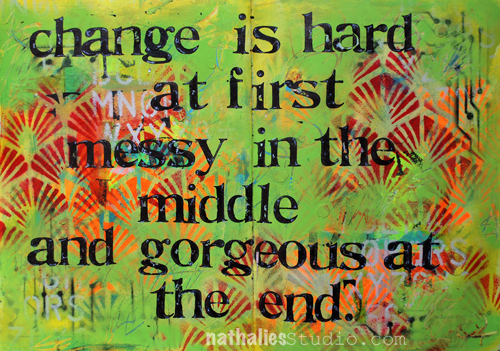
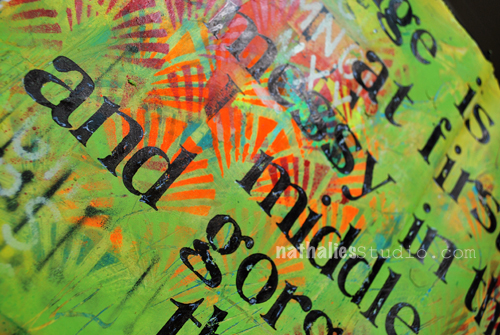
“If you always do what you’ve always done, you will always get what you’ve always got” attributed to many- including Albert Einstein. Regardless who said this…smart ! A good reminder to change things up once in a while!

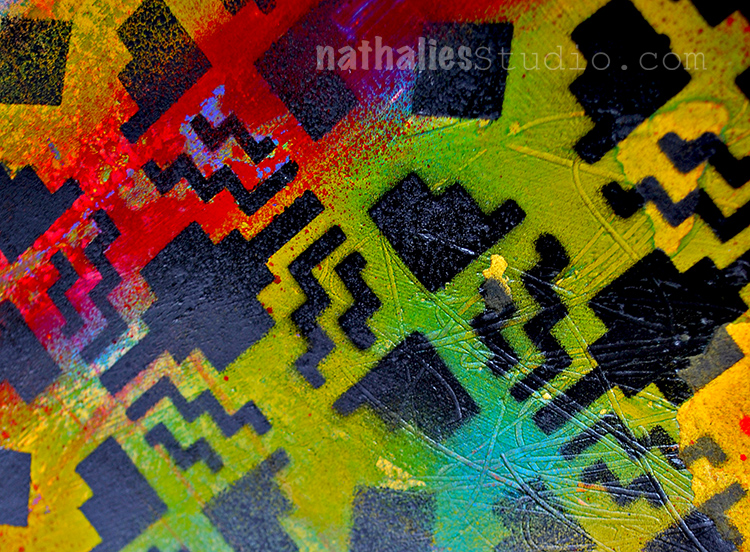
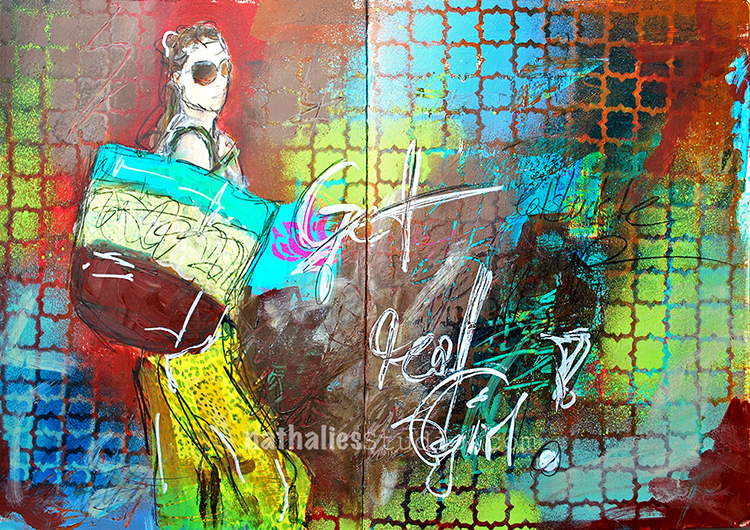
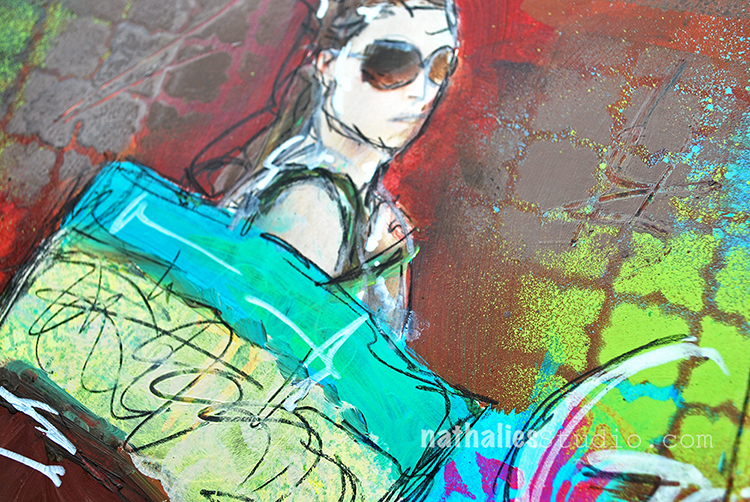
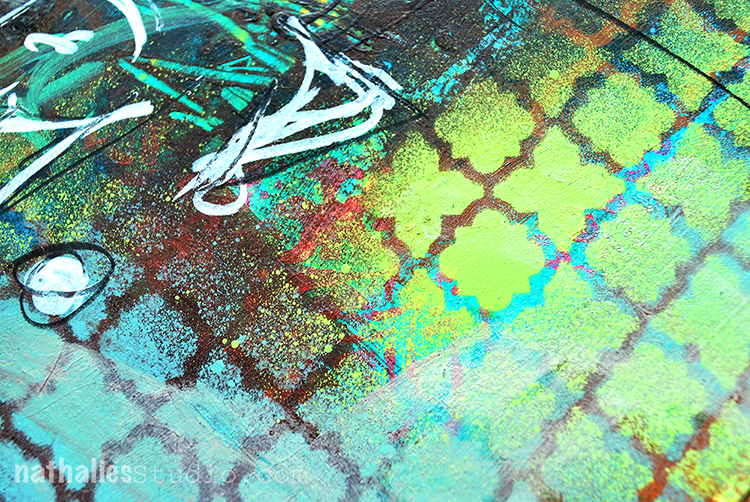
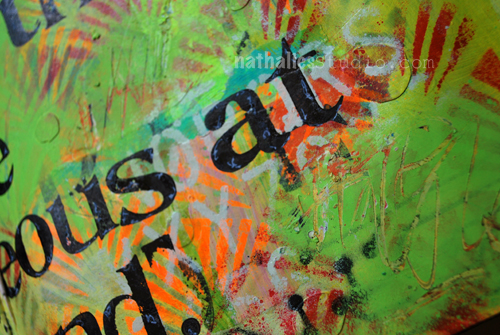
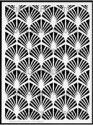
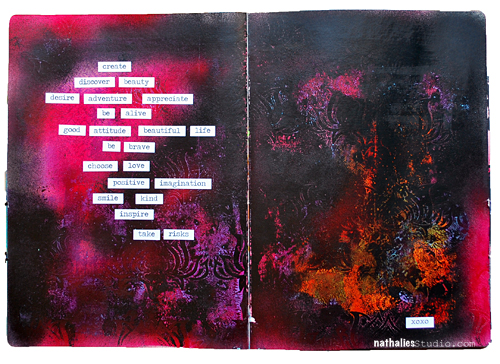
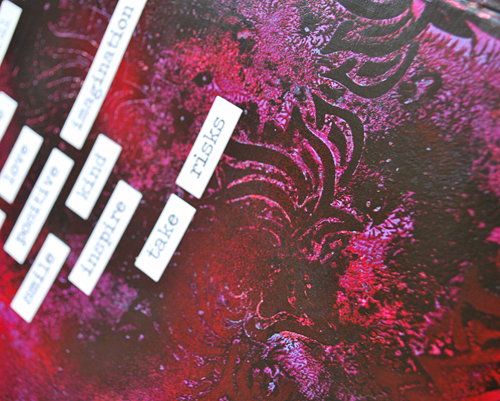
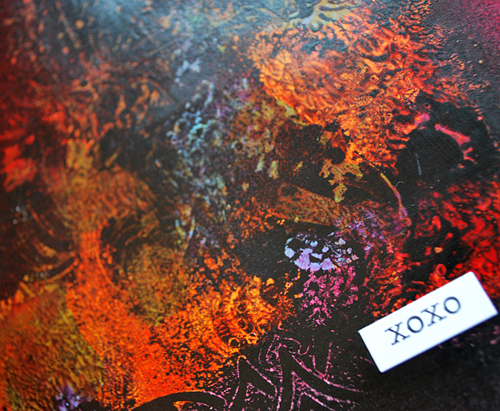
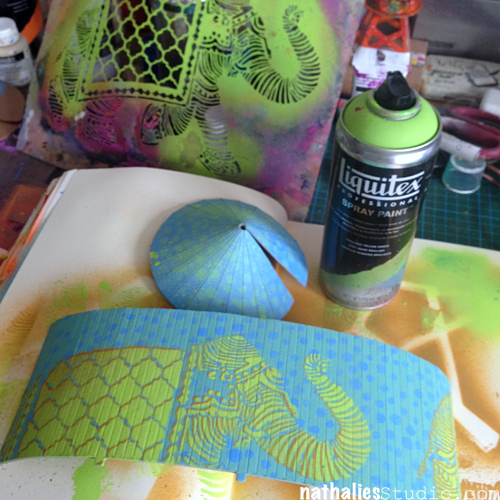
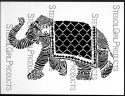
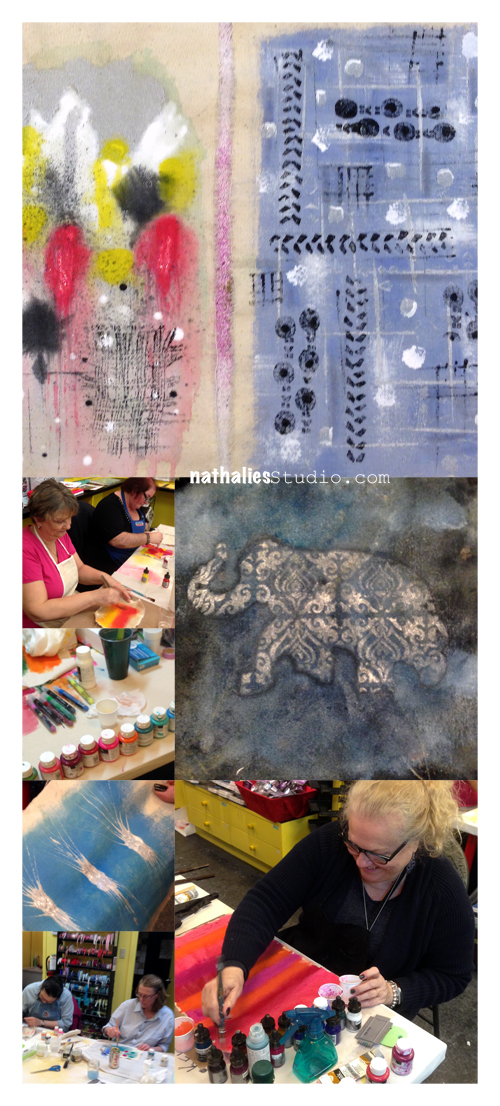
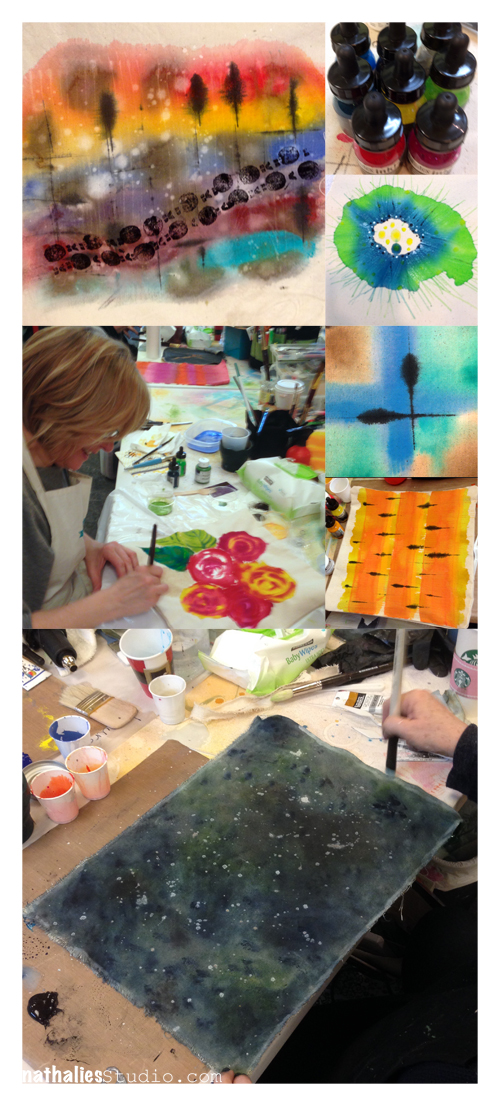
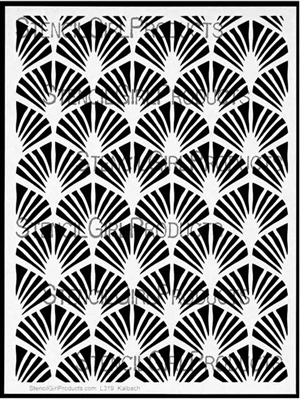
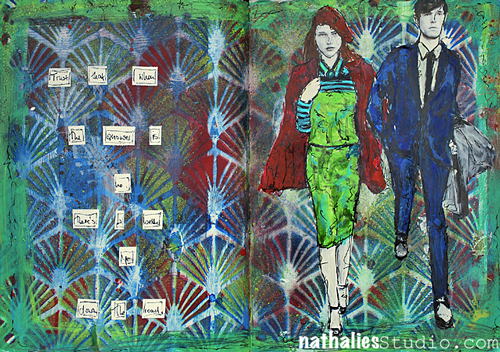
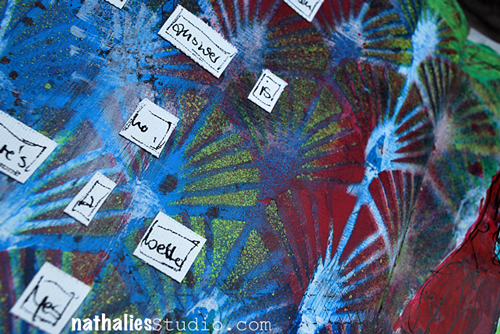
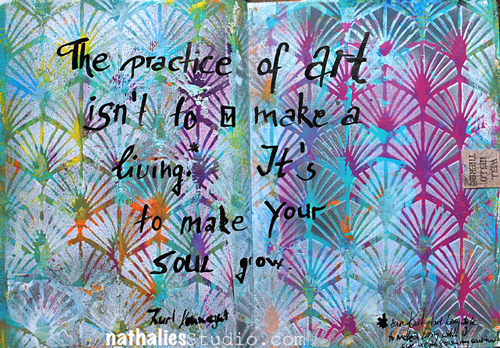
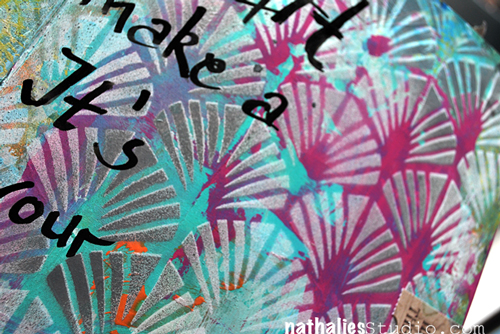
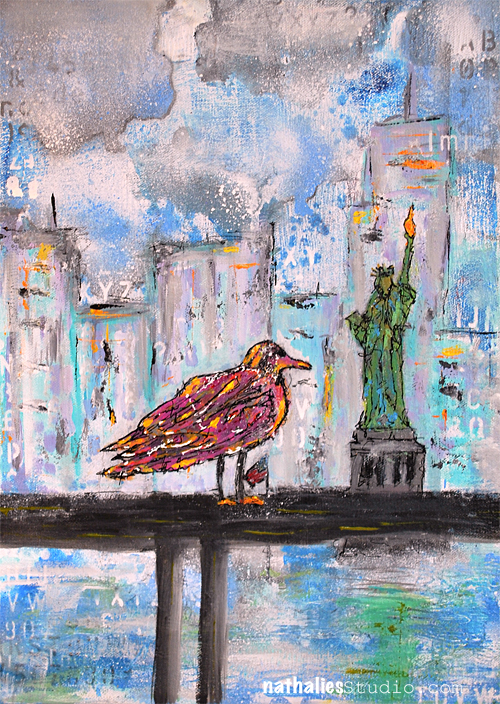
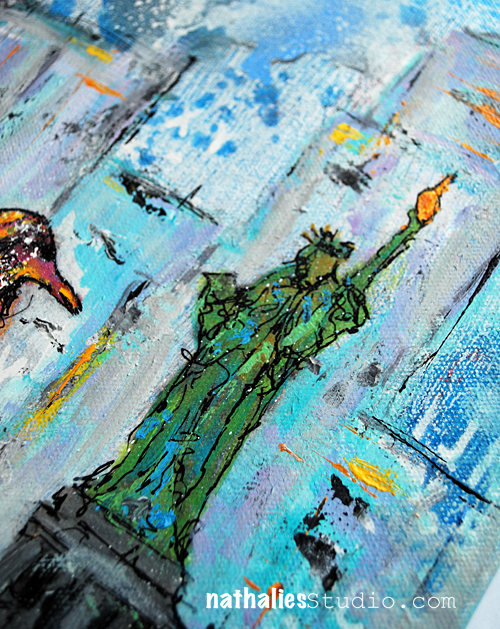
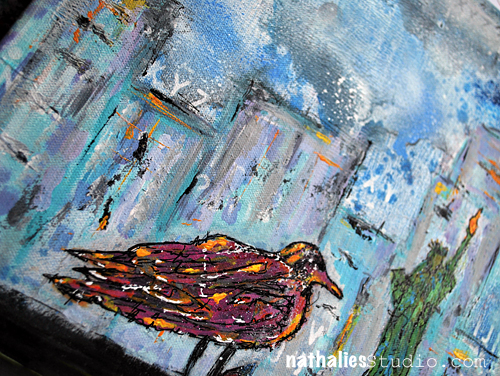
I saturated the background with different colors of acrylic spray paints and used the back of a brush to scratch some marks into it. I layered the Santa Fe 9×12 Stencil on top and sprayed over it with black spray paint. As you can see some of the areas – on the right bottom – are a little bit blurred- that is because I did not wait until the background was totally dried …- I am so impatient sometimes. But, I am ok with this. This page was a 10 minute affair and it made me happy to just do something creative that morning that was followed by loads of paper- and computerwork. 

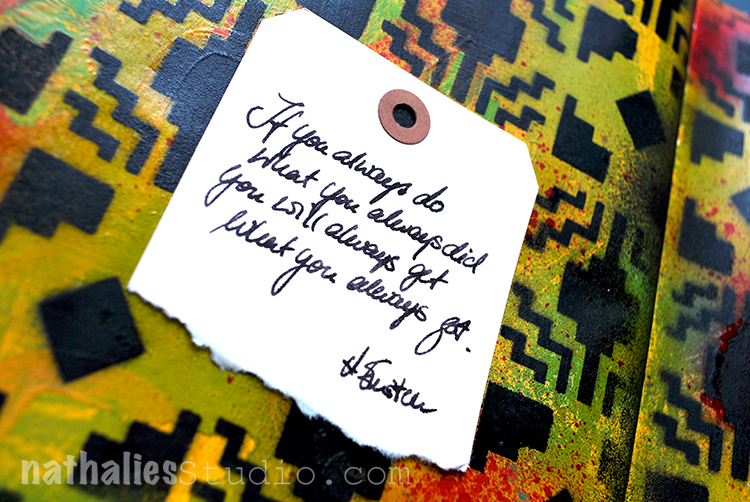
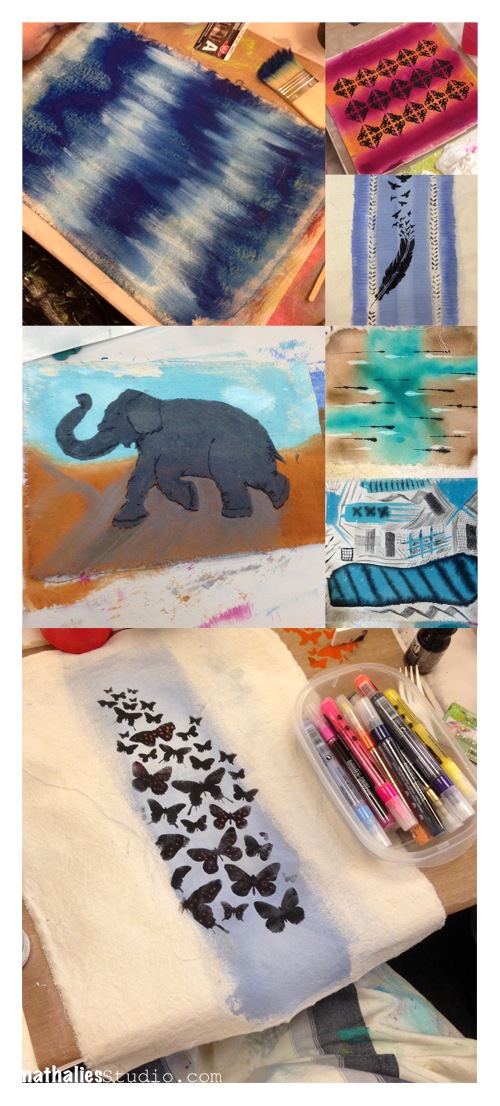
I tore a manilla shipping tag and added the journaling with my fountain pen. Anyone else still loves to write with a fountain pen, besides me? I just love the feel of a fountain pen.

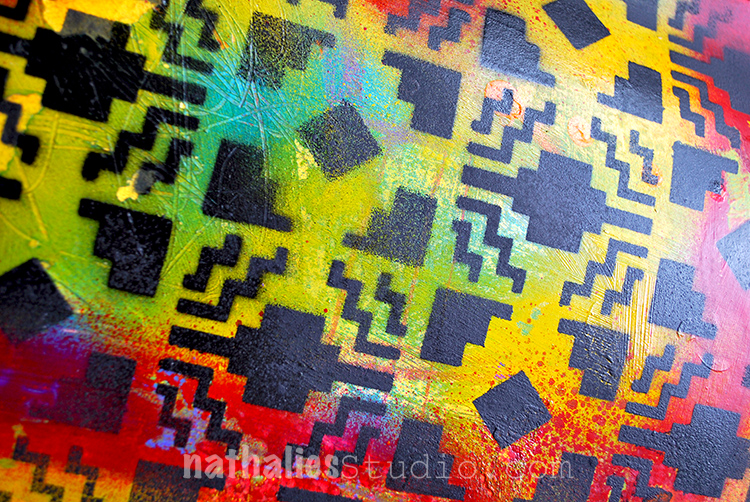
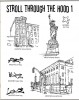
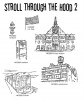
I like how the black pops the pattern off the colorful background. This spread makes me long for some traveling in the South West, yummie food and summer :)

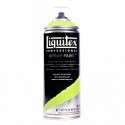
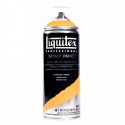
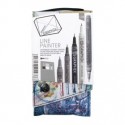
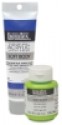
Here are the supplies I used for this super quick art journal spread- some links are affiliate links:


Wishing you a fantastic day!

Leave a comment

A Stroll Through the Hood – Art Journaling Page

Strolling through my hood really makes me happy – I love my city and I love the inspiration I get from it. I wrote a little about these warm feelings towards my home city in this journaling spread. For the page I painted with white gesso over a spread which I had used before to clean off some paint during painting on a canvas. I applied the gesso in areas more like a wash, as I like to have the underlaying background showing through for visual interest, but it does look way better knocked back a lot.

I had used the Beacon 9×12 Stencil on a different art journal spread with spray paint and cleaned off the access paint on the stencil with a deli paper sheet, resulting in the negative imagery of the Beacon Stencil- I love it- I love both versions. I ripped out an area of the printed deli paper and applied it with Gel Medium to the Background.

I also used the Granada 9×12 Stencil after using it on a different spread to clean it off on this page. Since it has the same colored red spray paint those marks here and there add some nice marks.

I stamped  using black archival ink with the stamps included in the Stroll Through the Hood 1 and Stroll Through the Hood 2 and applied them around the page- I love how the black ink makes the images really pop off the page

I also used a red ink pad to stamp with the Love Knots Stamp here and there and to repeat the read color used yet again.

I like this spread a lot- it is a bit different from my usual very paint filled page – but I think you can still see me :)

Here are the supplies I used in this spread- note that some links are affiliate links:


Comments (4)

  • gerriejohnnic

    |

    Had to wipe my keyboard off…..I drooled on it staring at this print you made! Really, really love your work GF!

    Reply

    • nathalie-kalbach

      |

      LOL- Gerrie that made me laugh! Thank you so much for your sweet words! have a fantastic weekend!!!

      Reply

  • Joi@RR

    |

    Oh yes… even though it’s different – definitely can see YOU all over these pages Nat. And… this is SPECTACULAR. Love the openess but with so much dimension and hidden treasures to discover. One of my favorites now!! Xj.

    Reply

Leave a comment

Get Real Girl – Art Journal

This was a little reminder for me at the time I created this art journal spread. It worked ;)

The background of the art journal spread was ugly from some scraped of left over paint – but a stencil like the Granada Stencil is the perfect stencil to work on such a background and make it work. I layered it on top of the background and then used different colors of spraypaint in different areas of the stencil.

I love to scratch into the still wet acrylic spray paint too as it gives such a nice texture.

Awe- spray paint- you make me happy.

Here is a list of the supplies I used for the art journal spread – some links are affiliate links:


If you art journal, do you use your journaling sometimes to prepare yourself for something like I do?

Comments (1)

  • joi

    |

    WONDERFUL! Rich colors blended so incredibly with the stencil design. Love the freedom! j.

    Reply

Leave a comment

The 3 Stages of Change or … In My Art Journal Today

Change_01_NatKalbach

Change is hard at first, messy in the middle and gorgeous at the end.

Lots of changes in my life and lots of changes this year …all of the old ones turned out gorgeous in the end and so I am confident this will be the same for the new changes – I am confident :)

Change_02_NatKalbach

For this art journal spread I broke out my acrylic spray paints again – I so love them. The Liquitex Spray Paints I used, are low odor, but you still have to work in a very well ventilated area and I usually wear a mask if I spray a lot. I had a background from an old paint-scrape-off paint, which I totally covered with spray paint, and layered over with the Art Deco, Circuit and some Alphabet Stencils.

Change_03_NatKalbach

While the Spray Paint was still wet I used the back of a brush and added some word scribbles. I used my old vintage sign maker stamp set to try out the lower case letters in there (oh man I love it) and added some white marks with a white signo pen and filled in some of the irregularities in the letters with black marker.

Change_04_NatKalbach

Are you good in dealing with Changes?

Here are the supplies I used for this art journal spread- some of the links are affiliate links:

SuppliesCJS


P.S. If you are in the New York City Area – I am teaching an Art Journaling 101 Class at the Manhattan Campus at Pratt on July 16th! It is a very fun and great place to come for a class – here are the details:

Comments (4)

Leave a comment

XOXO … or …In My Art Journal Today

NatKalbach_XOXO01

create, discover beauty, desire adventure, appreciate, be alive, good attitude, beautiful life, be brave, choose love, positive imagination, smile, kind, inspire, take risks !

XOXO

NatKalbach_XOXO02

I used one of my favorite quick texture techniques for the background. I painted the background with different Soft Body paints, let it dry, and then used Liquitex Spray Paint over it in black and magenta. Using my Lilly Wallpaper Stencil I pressed into the still wet spray paint and lifted the stencil off right away – sometimes I just pressed the stencil down, sometimes I moved it a bit. The pressing and lifting actually lifts off the spray paint under the Spray Paint creating a gorgeous stencil effect revealing the background again (picture above). The pressing and moving creates a wonderful marbled effect (picture below).

NatKalbach_XOXO03

I used some Tim Holtz Ranger Stickers (supplies in detail below) and since they wouldn’t stick for a long time on the acrylic painted background I applied some Matte Medium underneath and on top the sticker area.

Here are the supplies I used

nSupplies


Have a beautiful day!

Comments (3)

  • Sue Clarke

    |

    LOVE the colors and the texture.
    I’ve been playing around more with paints these days in my art journal.

    Reply

  • Joi@RR

    |

    I can always count on you Nat for some new teachings!! Wow – this is soooo fun. Your background is FABULOUS… you did it so wonderfully. Ok – going to read this again…. love it. Thanks bunches… happy weekend. j.

    Reply

    • nathalie-kalbach

      |

      Glad you like it Joi – hope you will give it a try- it is really fun! <3

      Reply

Leave a comment

Water Tower Fun

Watertower_NatKalbach05

A couple weeks ago I stumbled upon these cardboard water towers on an instagram feed by Boundless Brooklyn. They come blank, are made out of 100% recycled material and you can paint and decorate them as you wish. I was super excited as I love those iconic water towers around NYC and Jersey City. I ordered them right away and 12 hours later I had them in my hand. Nice flat envelopes with scored chipboard pieces and glue dots inside, easy to assemble.

Watertower_NatKalbach04

I had ordered two different sizes – The Medium Water Tower comes in 10 3/4” H x 5”  . I spray painted the chipboard using my Elephant and What’s The Point Stencil and added the text on the water tower roof. 

Watertower_NatKalbach06

while adding layers to the chipboard I made sure that I would move the folds so that the cardboard would not become stiff. It was really easy peasy and the whole design made it to simple to put together in a very short time once it was painted.

Watertower_NatKalbach01

For the small water tower which comes in 5 1/4″ H x 2 5/8″ W x 2 5/8″ D,  I used Spray Paint and marbled it on the background by spraying wet in wet and then moving the pieces around. Then I added parts of the Batik and the Lilly Stencil with some acrylic paint.

Watertower_NatKalbach03

I sealed off the water towers with some Pouring Medium which gives them a nice shiny glass finish. You can take of the top and put some small stuff in there. Loved this. I have one more water tower and a billboard sign to play with – cannot wait for it.

Watertower_NatKalbach02

What would you do with these water towers- ideas?

Here is a list of supplies.

nSupplies


Comments (8)

  • Stampendous Stamps

    |

    OH MY, Nathalie, these are just adorable… I think they might be a MUST BUY item! And it looks so real and perfect on your balcony! Finally, the act of spray painting them for that graffiti thrill without the crime is just perfect! What a terrific project!

    Reply

    • nathalie-kalbach

      |

      Awe- thank you! LOL- love your analogy of graffiti thrill without doing something illegal- I would probably though not do it because I am not the right person to climb up high ;)

      Reply

  • Boundless Brooklyn

    |

    Thanks so much for the amazing writeup and support, Nathalie. The towers looks incredible, and they’re all so different. Especially love the supplies’ list; makes it so much easier to see what’s needed to make this magic.

    By the way, the elephant tower is beyond cool!

    Reply

    • nathalie-kalbach

      |

      Thank you so much :) Looking forward to play more if your products in the future!

      Reply

  • Sue Clarke

    |

    LOVE that quote and love LOVE love the water towers as well.
    I would use them as centerpieces for tables for an event.
    Names could go on them such as “friends”, “family”, “bride’s side”, etc…
    They are such fun!

    Reply

    • nathalie-kalbach

      |

      What a great idea to have them as centerpieces for an event- Love that Sue!!!

      Reply

  • Heidi

    |

    Nathalie ~ These are the coolest! I love what you have done with them & I love the idea of the water towers!

    Reply

Leave a comment

Photos of the Workshops in Toronto, Canada

It was so much fun to be back for the fourth time at Bizzy B’s in Toronto. I taught an Altered Book Class and as full day classes “Acrylics Demystified” and “Raw Canvas Staining” – it was messy colorful fun!

NatkalbachCA03

NatkalbachCA04

NatkalbachCA05

NatkalbachCA01

NatkalbachCA02

Thank you for an amazing weekend ! It was very inspirational to spend a whole weekend with those talented and wonderful students and my super hosts!

If you want to take an in-person class with me- I am teaching at My Heart’s Fancy in Oklahoma City on March 27-29 serval classes, and at The Ink Pad in New York City on May 16 I will teach the Raw Canvas Staining Class (mega fun!) . I hope you will join in!

Have a wonderful day!

Comments (6)

  • Joi@RR

    |

    Our precious grandchildren were here this week and we only see them once a year due to expense etc so I am behind leaving my comment this week! Having too much fun playing in a different way! Although two of them did do a journal page – woooo whoooo!!! BUT… just a note to tell you Nat that I just LOVED seeing all these pics from your workshops in Canada. WOW – it looks like everyone did some wonderful work and were having so much fun. Lots of smiling going on. You are so sweet to include so many pictures. I just looked and looked at them. So many different creations and colors and combinations. I know they all just loved having you there. Thank you so much for bringing it home to us! j.

    Reply

    • nathalie-kalbach

      |

      Thank you Joi- I am glad you enjoyed the photos! How fun to do something creative with your grandchildren- such a precious time!

      Reply

  • Peggy Oliver

    |

    Looks like so much fun!! wish I were there!

    Reply

  • Stampendous Stamps

    |

    This looks like it was soooo much fun, Nathalie! Thanks so much for sharing it with everyone!

    Reply

    • nathalie-kalbach

      |

      Thank you :) It was loads of fun and we used loads of your stamps :)

      Reply

Leave a comment

Art Deco Wallpaper – NEW STENCIL

L319-2T

So loving my new 9×12” Art Deco Wallpaper Stencil I designed for StencilGirl Products – I know, I know…I’m full of myself- LOL. But seriously it is a stencil I wanted for a long time!

I love Art Deco Design – in my travels through Europe, especially to Paris – I made a lot of sketches from wallpapers in museums and hotel rooms from this era.

NatKalbach_artdeco01

In this Art Journal Page I used the stencil as a background and spray painted over it with several different Liquitex Spray Paints. I love how dimensional you can get with different color layered up.

NatKalbach_artdeco02

Here is another sample using it as a whole on both art journal pages …as …a …wallpaper for the quote :)

NatKalbach_soul01

I painted the background first with different acrylic paint colors and then layered the stencil over the background spraying with white and grey Liquitex Spray paint.

NatKalbach_soul02

I wrote the quote with Liquitex Acrylic Ink and a Bamboo Sketching Pen.

I will show some other ways on how to use this stencil in the next weeks :)

Here are the supplies that I used for those two pages

nSupplies


Hope you like the stencil- have a gorgeous day!!!


Comments (11)

  • Laura S

    |

    Woohoo, I too am looking forward to that bamboo pen video. I remember you mentioning the bamboo pen at Create but I never made time to ask you more. I love that art deco stencil and seeing your design ideas only motivates me to go into my studio and play. Hugs!!!

    Reply

    • nathalie-kalbach

      |

      Thank you Laura! So glad to hear that this motivates you to get into your studio and play! Get them tiger :) hugs!

      Reply

  • Rebecca Buchanan

    |

    Glad you will be doing a video about the pen, but came here to comment that I also love this art deco stencil. You can be as full of yourself as you want because we are all sharing in the benefit of your creativity–can’t wait to get my hands on this. Kudos to you!

    Reply

  • Linda K

    |

    I was wondering about the bamboo pen also. I will be watching for your video on how you use this and any tips you may have. Thanks much.

    Reply

  • Kim T

    |

    Adore the colors in the second one and the way you used the stencil over it … I went to a Liquitex demo a couple of weeks ago and it was so fun seeing all the different products, amazing, the colors are just yummy.
    I also bought a bamboo pen and cannot figure out how to use it … I got it because Iove the way you use it in your journal, but there is nothing online on how it works … any insight? Love your blog!

    Reply

    • nathalie-kalbach

      |

      Thank you Kim! The Bamboo Pen is a Dip Pen – you dip it into ink – that is the whole secret :) I will do a video about this soon though as you are not the first one to ask :) will try to do it soon :) Have a gorgeous day ,Nat

      Reply

  • Nurse Ratchet

    |

    Love that stencil and will be ordering it from Bizzy B. have never seen the Prima Writers tape before..looks intriguing !

    Reply

    • nathalie-kalbach

      |

      Wohooo – glad you like the stencil! BTW- the Writers tape might be not available anymore. Basically you can just cut up raw gessoed canvas pieces and fringe the sides and use those adhered with Gel Medium :)

      Reply

  • Sue Clarke

    |

    I love the colors in that second page and your stencils layer quite nicely.
    Have a splendid day Nat.

    Reply

Leave a comment

Whose Front Yard? – Canvas

NatKalbach_WhoseFrontYard01


A new canvas finished – I had a great time painting. It took me quite a while to finish it deciding when to finish :) That is always the hardest part, don’t you think?

NatKalbach_WhoseFrontYard02

I used Liquitex Soft Body and Heavy Body Acrylic Paints as well as Markers, Inks and Spray Paints. I made a lot of marks with the Liquitex Freestyle Palette knife – I love using it to create texture and marks into the wet but also into the dried paint.

NatKalbach_WhoseFrontYard03

I am thinking about having this one scanned, too, and make it available as prints. What do you think? (I will add the prints to my shop as soon as they are ready.)

nSupplies


Wishing you an amazing start into the week!

Comments (2)

  • Nurse Ratchet

    |

    I love that in your world the sea gulls are pink and orange!!

    Reply

Leave a comment