Up in the Air

Sometimes everything is up in the air …but you gotta just keep on going …

I mixed up stamping the patterned and solid sides of my Midtown Foam Stamp Set buildings with some Stroll Through The Hood buildings and hand painted buildings. I used various acrylic paint colors to stamp with the foam stamps and pain the buildings.

I painted over some area with a light gesso wash which helped making the fine lined stamps show better

I like how this came together and it is fun to use the Midtown Set from both sides- so many possibilities.

Besides acrylic paint , I used the following supplies for this spread:


Have a gorgeous day!

Leave a comment

Small Business Saturday (through Cyber Monday) Sale!

Small Business Saturday at Nathalie’s Studio!

It’s that time of the year :) We’re celebrating the start of holiday shopping madness with a little bit of madness of our own: 25% off stamps, stencils, books, and DVDs in the online shop. Sale runs from Saturday, November 25th at 8am EST to Monday, November 27th at 11:59pm EST. Shop and save big. Just enter the coupon code SMALLSAT25 when you check out.

Support small businesses this holiday season!

Leave a comment

Keep Your Eyes on the Price – Art Journal

Another sketch on deli paper with ink and a bamboo sketching pen which I pasted into my art journal.

I used the Grove Street Foam Stamps with the Artgraf Primary set- oh gosh – I love how the blue and yellow mixed into the green. Simply rub the graphite blocks onto your slightly wet foam stamps, mist it again and stamp.

I mixed the titanium acrylic paint with a hint of blue and stenciled it through the Amsterdam Stencil.

Love how the different paint media, flat and dimensional, shiny and matte work together.

Here are some of the supplies I used


Hope you had a wonderful week and you are ready for the weekend. Watch this place for the next couple days- there is a lot of stuff coming up – starting tomorrow :)

Comments (2)

  • Karen Bearse

    |

    Very cool art journal page! Love how the colors blend on the foamies.

    Reply

    • nathalie-kalbach

      |

      Thank you so much Karen- it is really fun to blend different paint media on the ArtFoamies that are not acrylic paint- so many possibilities here.

      Reply

Leave a comment

To all of you!

Comments (2)

  • Jill

    |

    Happy Thanksgiving to you and your family Nat!

    Reply

  • Sue Clarke

    |

    Happy Thanksgiving to you as well Nat!
    Thank you for another year of creativity and inspiration.

    Reply

Leave a comment

Integrity – Art Journal Spread

This was another spread that I had started in a class to show some techniques and when I came home I finished it up

I used Derwent Art Bars on top of my Grove Street Pos and Negative Foam Stamps 

Simply wet the foam stamps a bit, rub any water soluble wet wax bars/sticks on top of the stamp and then mist the stamp again and stamp. I love the effect.

The lady was sketched with ink and then used some Neo pastels to add some color to her hair and clothing. Love how this came together from a kind of raw weird class sample page :)

Here are some of the supplies I used for this spread.


Have a wonderful day!!!

Leave a comment

Each Day is a New Adventure – Jennifer Gallagher


Hello from the Creative Squad this fine Tuesday! Today we have a super creative way to dress up some storage boxes with Jennifer Gallagher. Jennifer is using my Mini Batik Pattern 1 foam stamp and my Batik stencil, as well as this month’s theme: Each Day is a New Adventure – Be adventurous this month and try something new in your art-making! Use a new tool, medium, or technique that you’ve been meaning to try for too long now. Go on a new adventure TODAY!


I am so excited to be back with you again this month for another creative squad post. This month our team is focusing on new artistic adventures. Each day really is a new adventure! Keeping that theme in mind, I decided to try something I have always wanted to try. I have always wanted to decorate a few pre-made paper mache boxes for some decorative storage. I figured this was the perfect time.

I began this project on my 8×10 inch gelli printing plate. After selecting several shades of blues, greens, and oranges, I decided to go with a Batik design. (Color list: Sunbeam, Nectarine, Laguna, Key West, Cool Blue, Parakeet, Black) Lucky for me, Nat has a great Batik stencil and set of Batik foam stamps. I used my 9×12 inch Batik stencil and gelli printed multiple pages on white paper.

I picked through my gelli-printed papers and chose my favorites. I then used my large Dylusions journal block and a black fine tip sharpie and drew alongside the outside edge of the journal block. I saved a few sheets of batik paper for another step.

Then I cut along the drawn lines. These strips will eventually be glued down the paper mache box in alternating strips.

While I had my gelli plate out, I thought it would be quicker to use it instead of a stamp buddy. I brayered the black paint out in a small spot. I then pressed my Mini Batik Pattern 1 foam stamp onto the black paint and pressed the design on the paper I had reserved earlier. I continued this design all along the paper. I then cut the papers into strips.

I painted the inside of both containers and their lids with Dylusions paint. One box I painted with cut grass and the other with vanilla custard. Let the acrylic paint dry before moving on.

Using matte finish mod podge, I glued the strips down to both of my boxes while alternating the colors and patterns. Patience during this step is the key to a nice finished piece. Do not try to glue too many at once and allow sections to dry before moving on. I also glued down strips to the top of the small box. Using the leftover paper, I cut out all of the x’s. I then arranged them on top of the large box top. Once I had them arranged how I wanted, I glued them down too.

After gluing down all of the strips to the containers and their lids, and allowing them to thoroughly dry, I decided to add some final details. Using black Dylusions paint I added some fun designs to the interior of each container. I also did some dashed lines alongside the strips on the outside.

I hope this post has inspired you to try something new. I am very happy that I did! Be sure to comment and let us know how you intend to try something new. See you next time.


Thank you Jennifer – I love your colors! In addition to white paper, Jennifer used the following supplies (some are affiliate links):


Play along with us too: I love to see how you interpret our monthly themes. Email me how you used my stencils and stamps with the theme and email me an image – I would love to share your projects in my next  “n*Spiration From Around the Globe“.

Leave a comment

Inspired By: Coventry, England

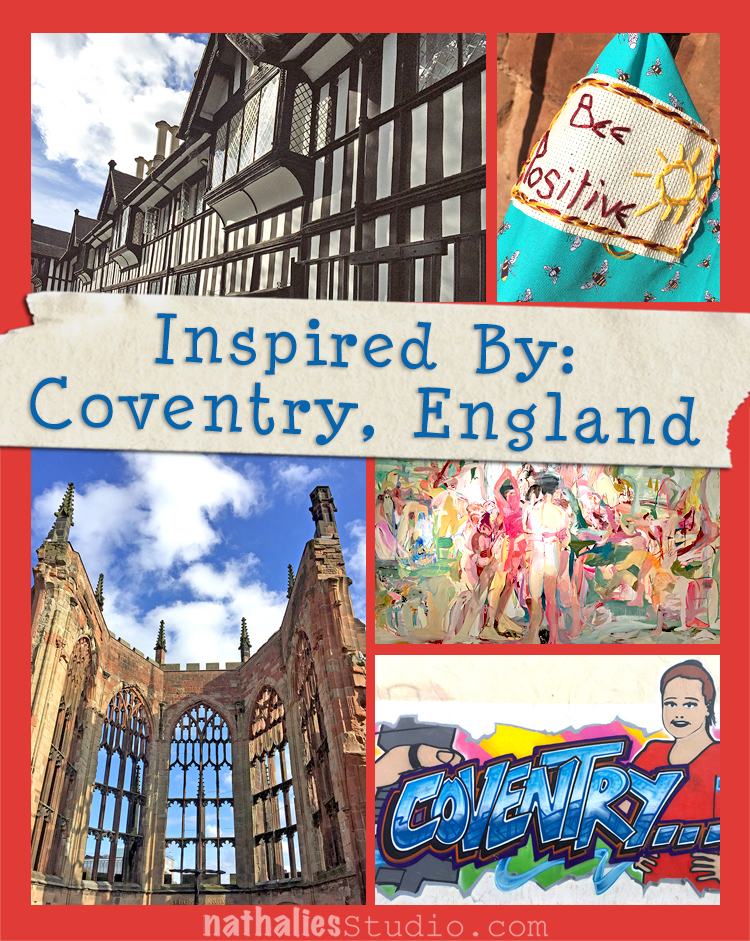
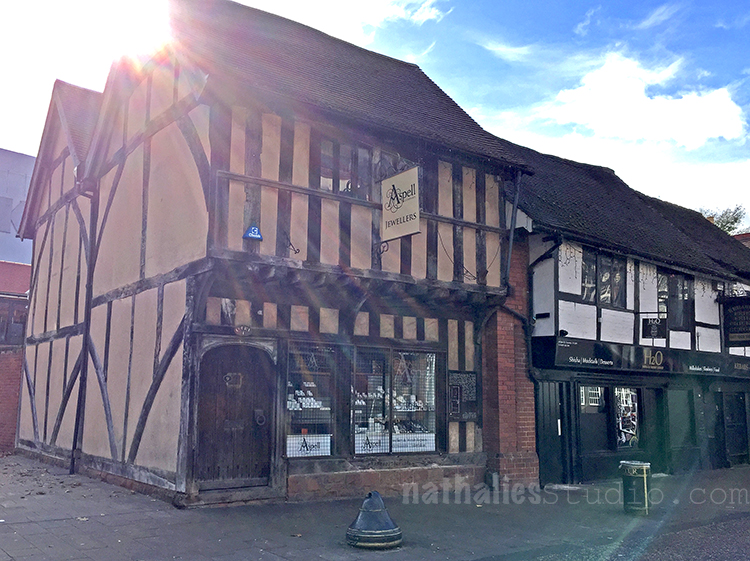
When Birgit Koopsen and I taught our Workshop in Coventry, we took a little trip to the city center to check it out.

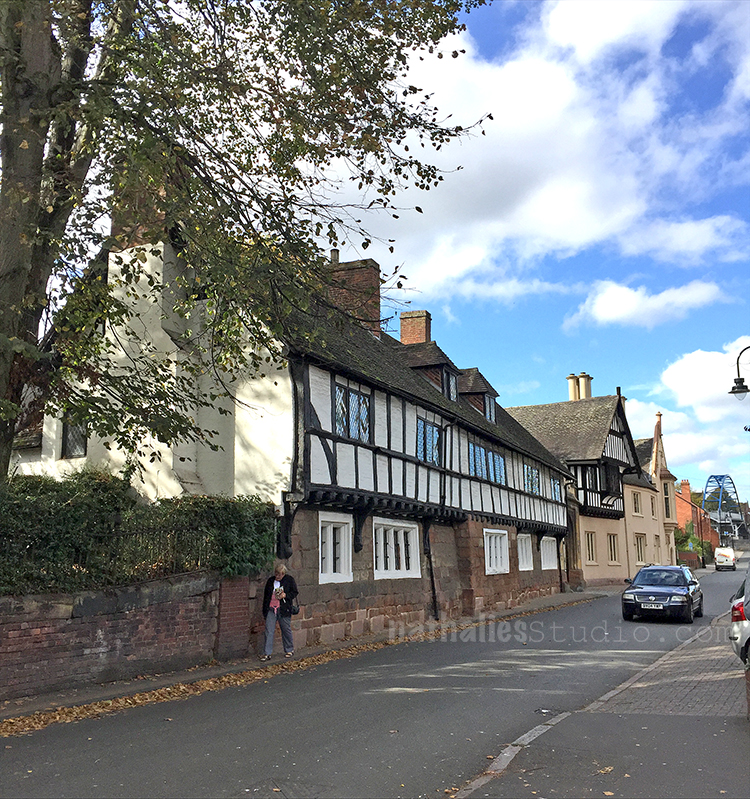
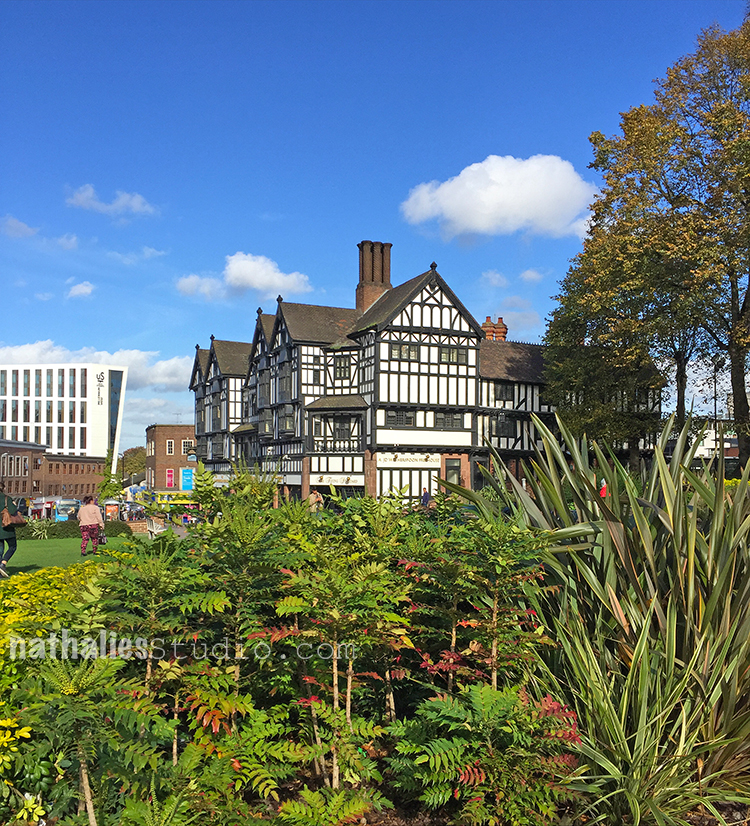
The city was founded in 1043 with some beautiful medieval houses still intact.

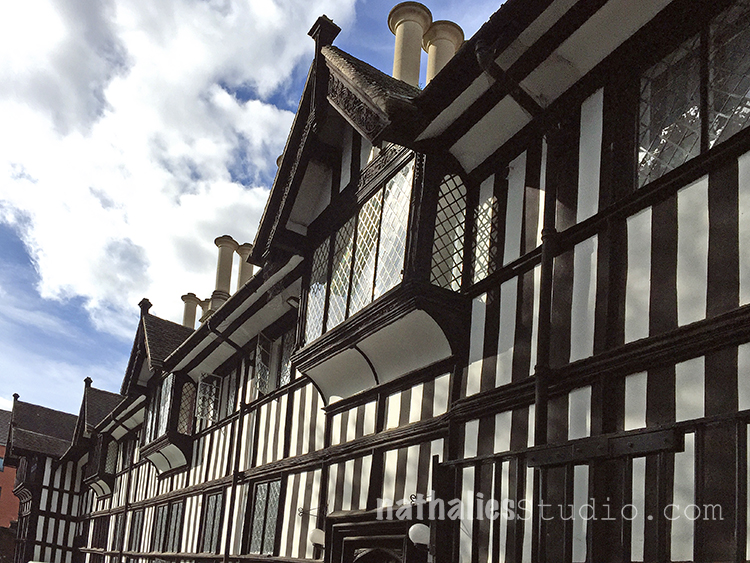
Love the lines and those beautiful windows.

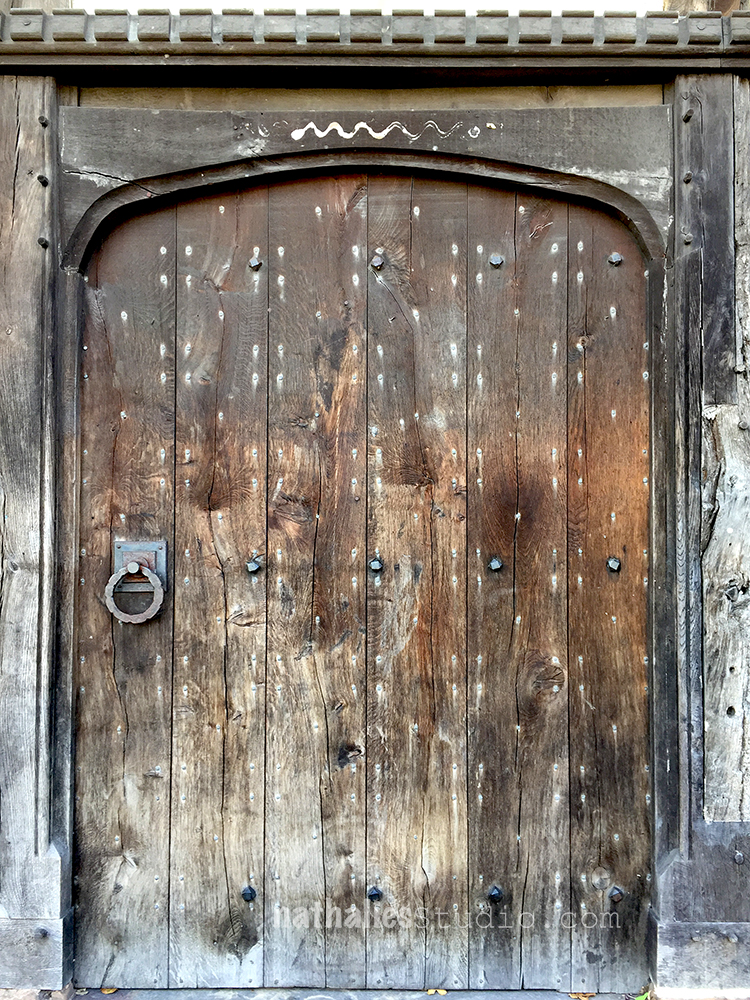
And I love old doors and door knobs- aren’t those cool?

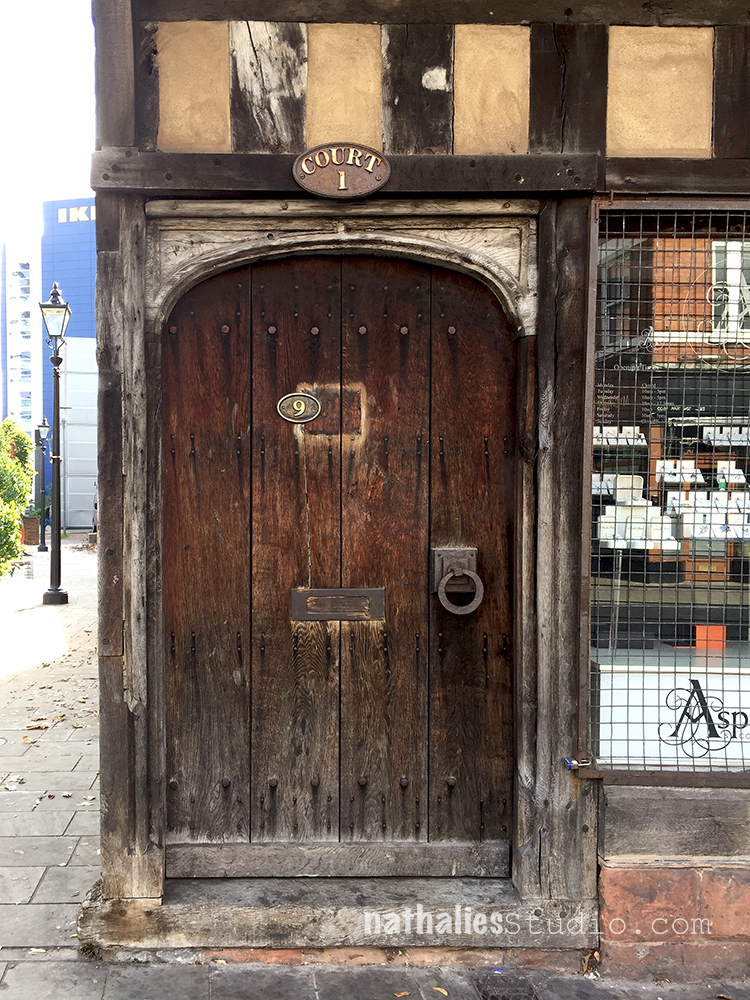
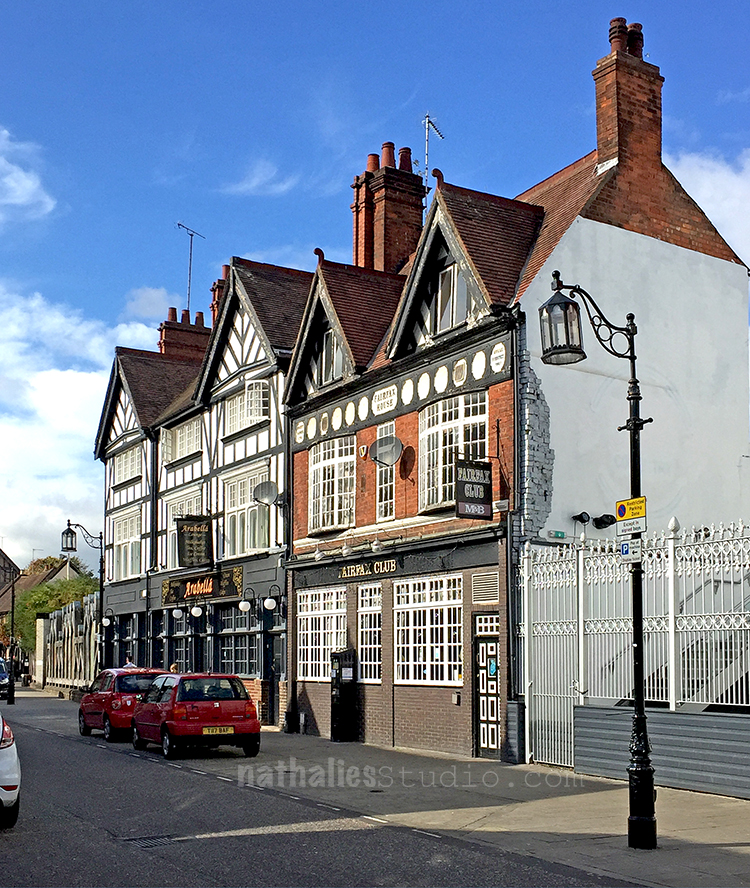
And the timber wood house facades.

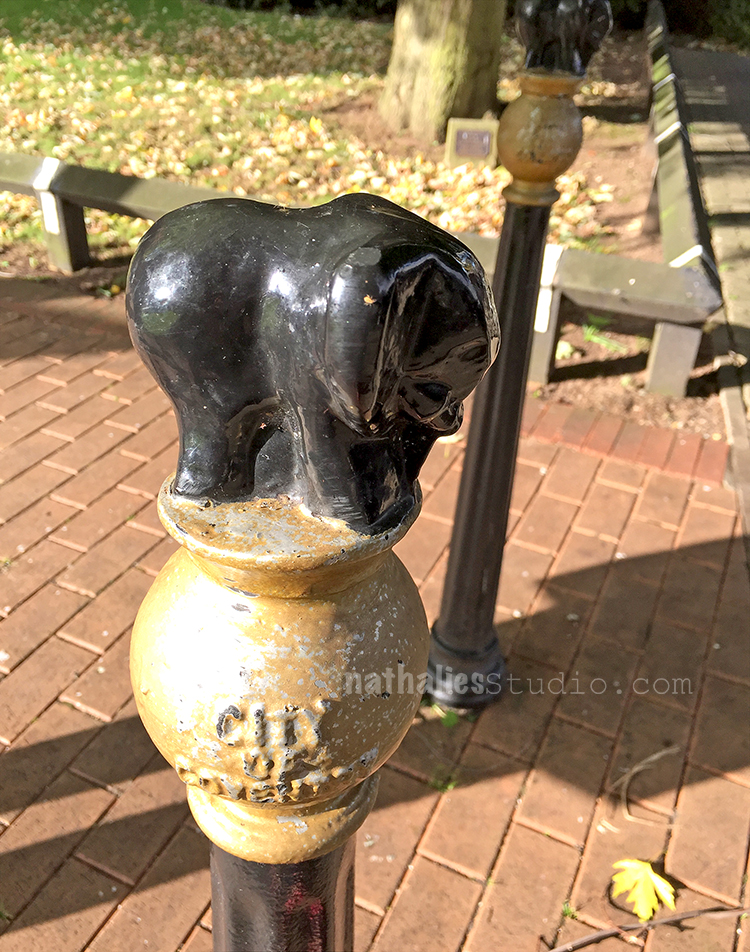
The crest of Coventry shows an elephant carrying the castle- as you can imagine I love that :)

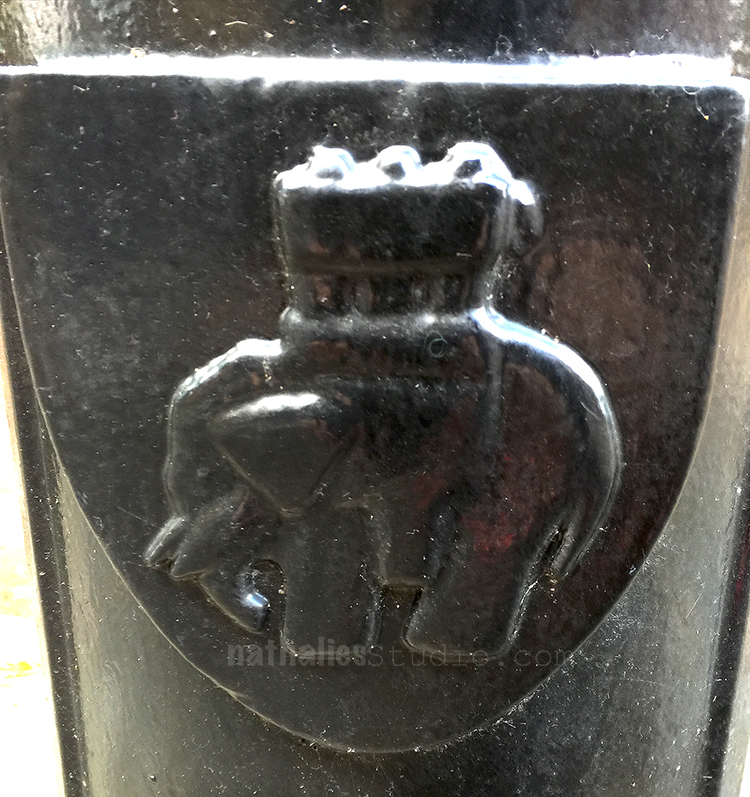
You can find the Elephant everywhere

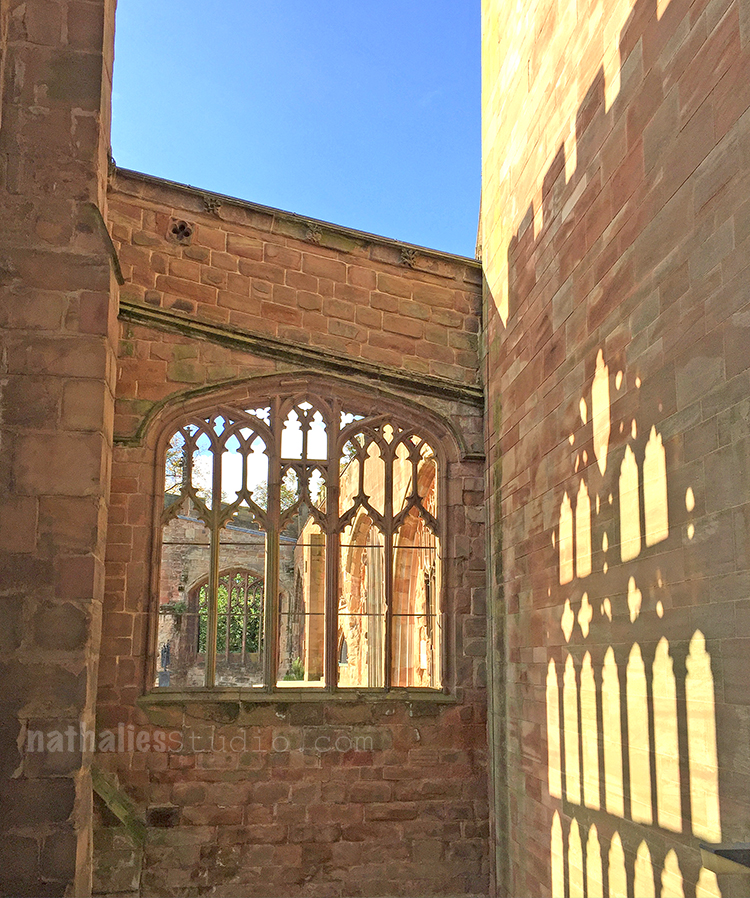
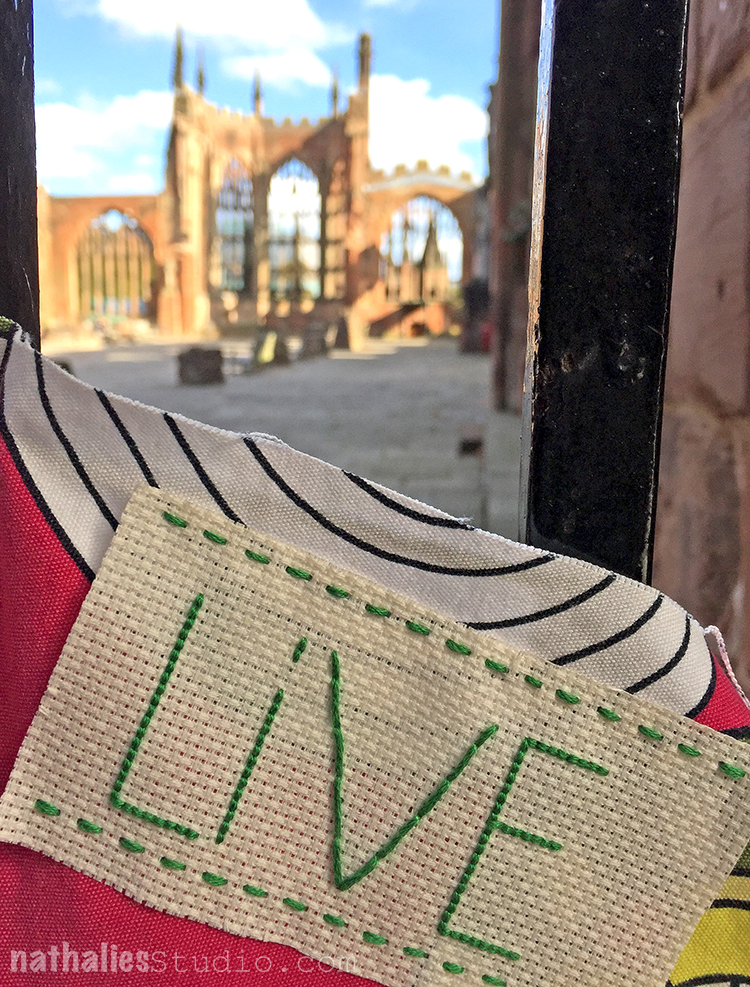
Coventry was devastatingly destroyed during the German Blitz in 1940 during World War II and many people died during the attacks and many lost their homes. Coventry Cathedral was destroyed as well and remains as a ruin in the middle of the city.

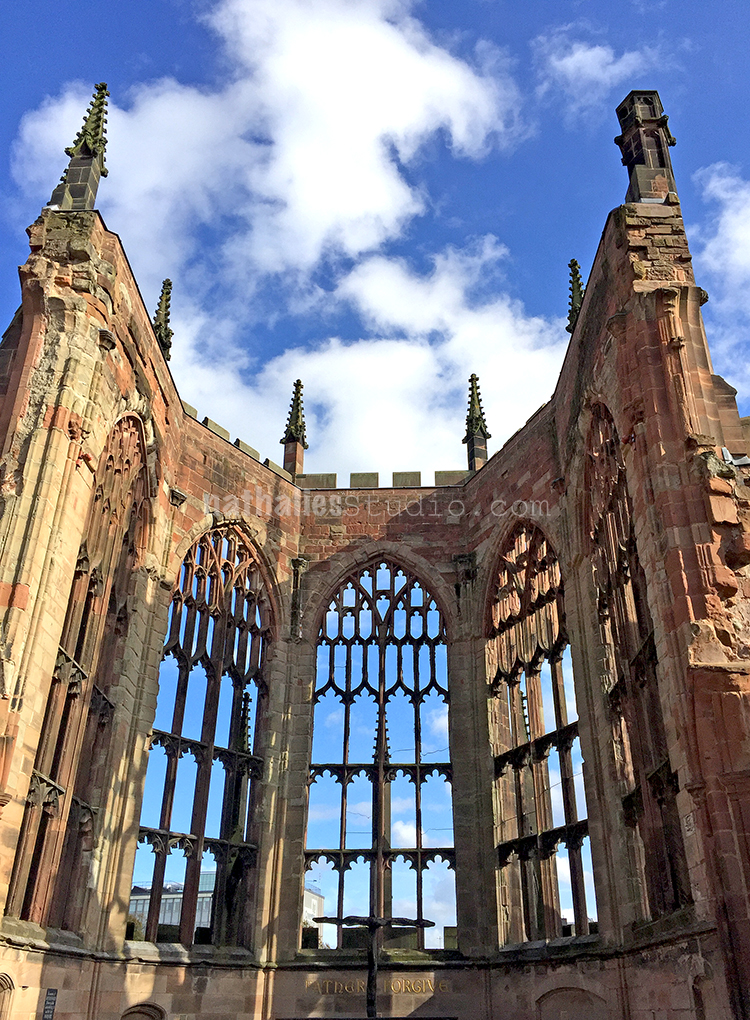
It is a haunting experience and yet there is so much beauty in this place!

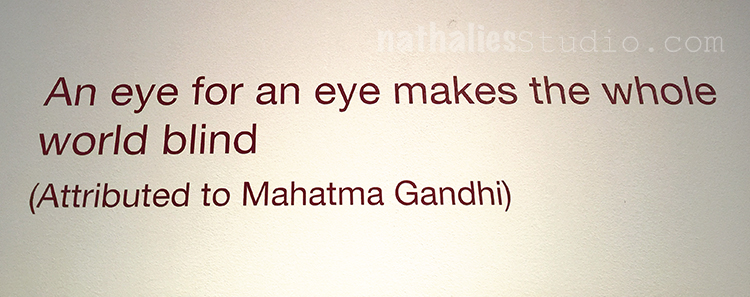
“Coventry Cathedral is one of the world’s oldest religious-based centres for reconciliation. Following the destruction of the Cathedral in 1940, Provost Howard made a commitment not to revenge, but to forgiveness and reconciliation with those responsible.

Using a national radio broadcast from the cathedral ruins on Christmas Day 1940 he declared that when the war was over he would work with those who had been enemies “to build a kinder, more Christ-child-like world.”


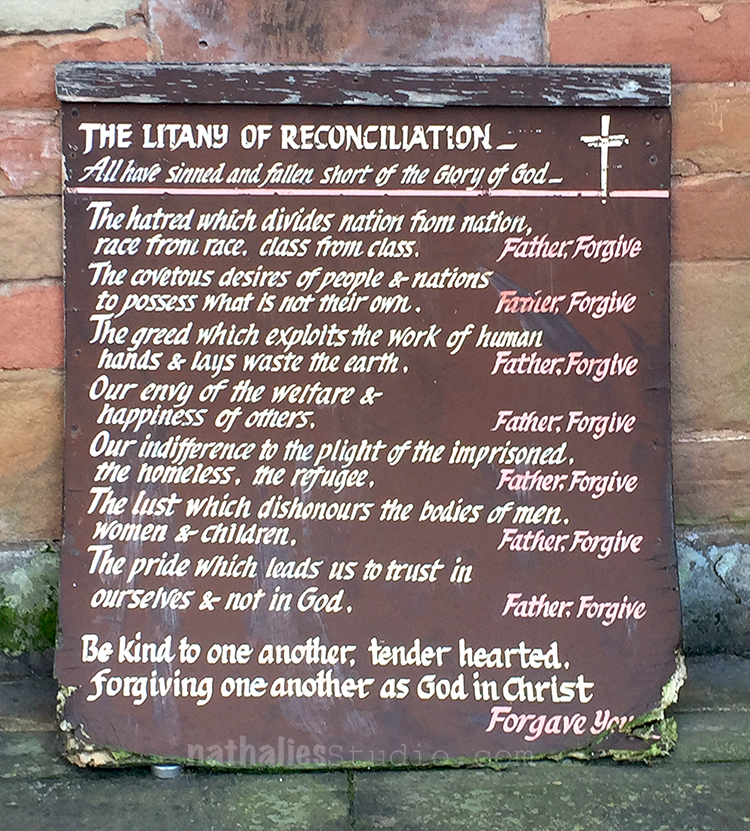
“Today the medieval ruins of Coventry Cathedral continue to remind us of our human capacity both to destroy and to reach out to our enemies in friendship and reconciliation. In 2011, the ruins were designated as a memorial to all civilians killed, injured or traumatized by war and violent conflict world-wide.” (from the Coventry Cathedral Website)

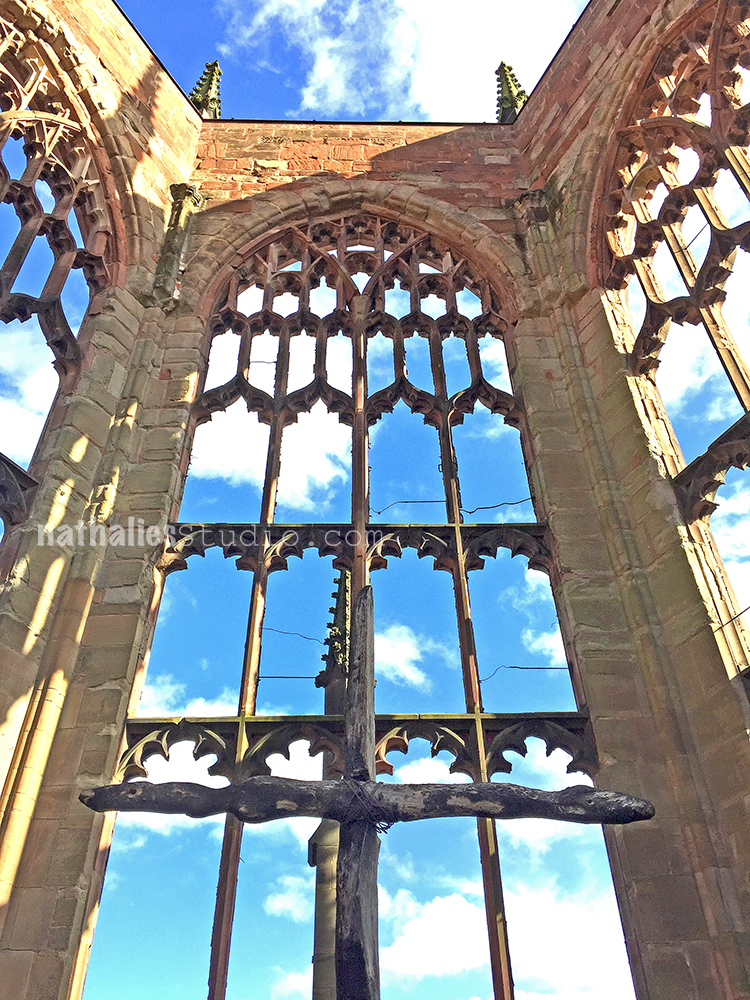
“The Charred Cross and the Cross of Nails were created after the cathedral was bombed. The cathedral stonemason, Jock Forbes, saw two wooden beams lying in the shape of a cross and tied them together.

It has become a symbol of peace and reconciliation across the world. There are over 330 Cross of Nails Centres all over the world, all of them bearing a cross made of three nails from the ruins, similar to the original one. When there were no more of these nails, a continuing supply have come from a prison in Germany. They are co-ordinated by the International Centre for Reconciliation.”

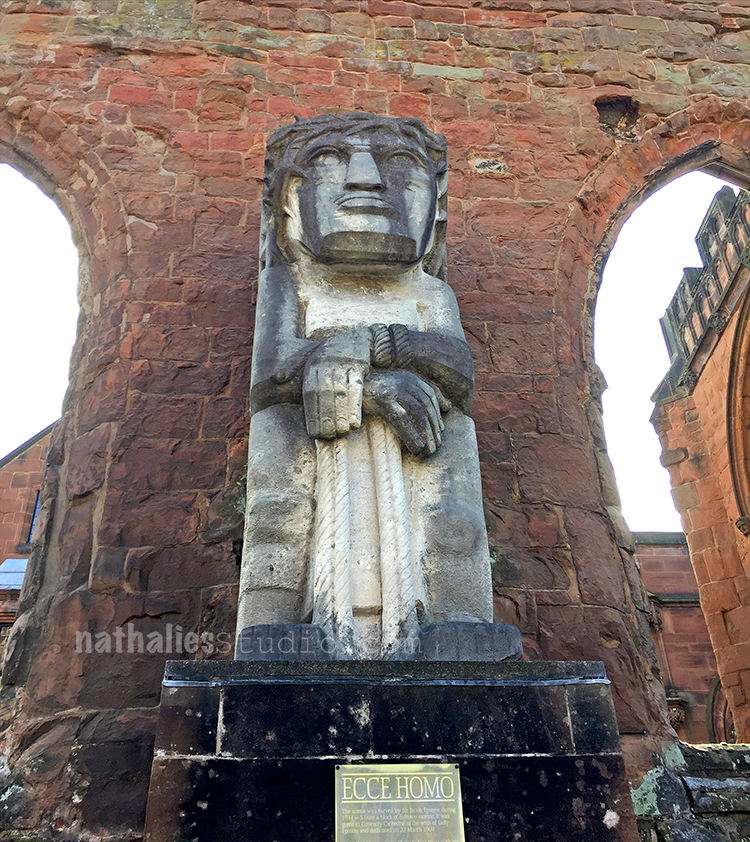
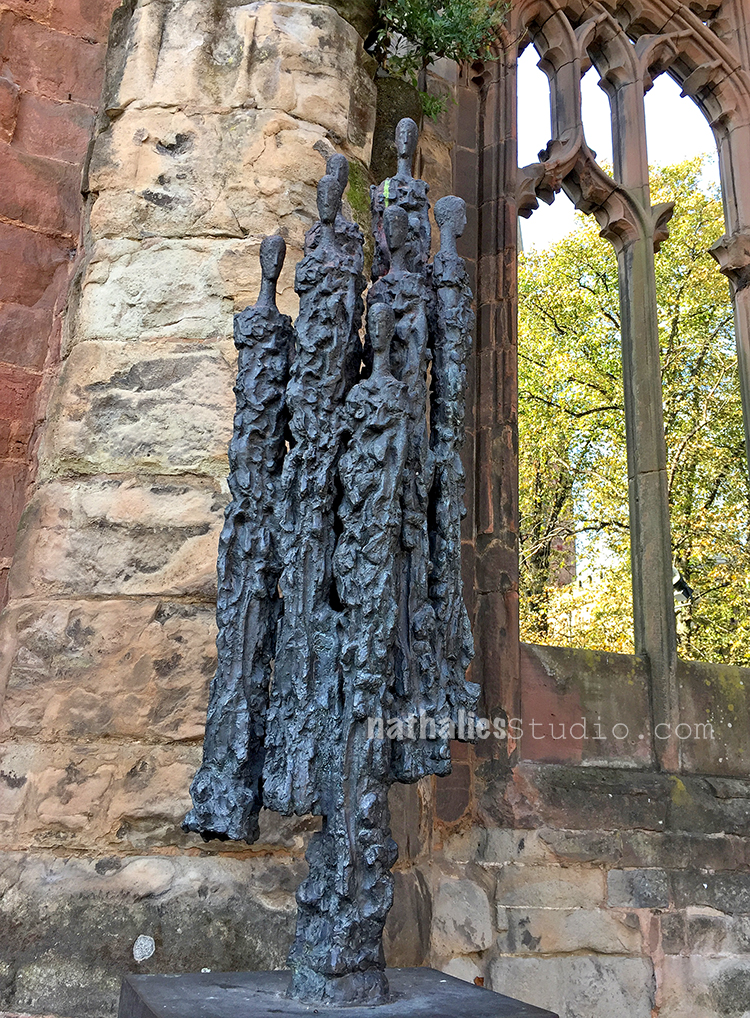
Shadow and Light and a lot of amazing and touching statues.

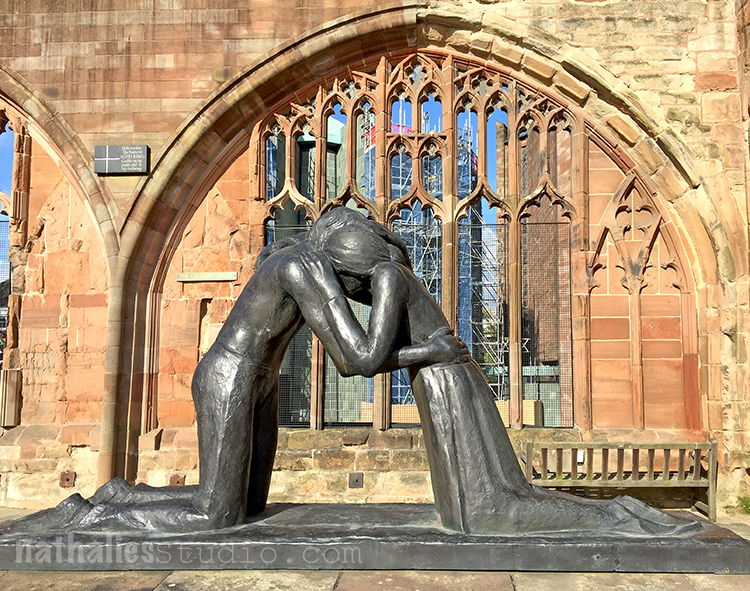
The artist Josefina de Vasconcellos about her statue above: “The sculpture was originally conceived in the aftermath of the War. Europe was in shock, people were stunned. I read in a newspaper about a woman who crossed Europe on foot to find her husband, and I was so moved that I made the sculpture. Then I thought that it wasn’t only about the reunion of two people but hopefully a reunion of nations which had been fighting.”

For someone born in Germany visiting places like these are always very emotional and a reminder that anyone in our country – and actually in any country is responsible to work towards that none of this can happen again !

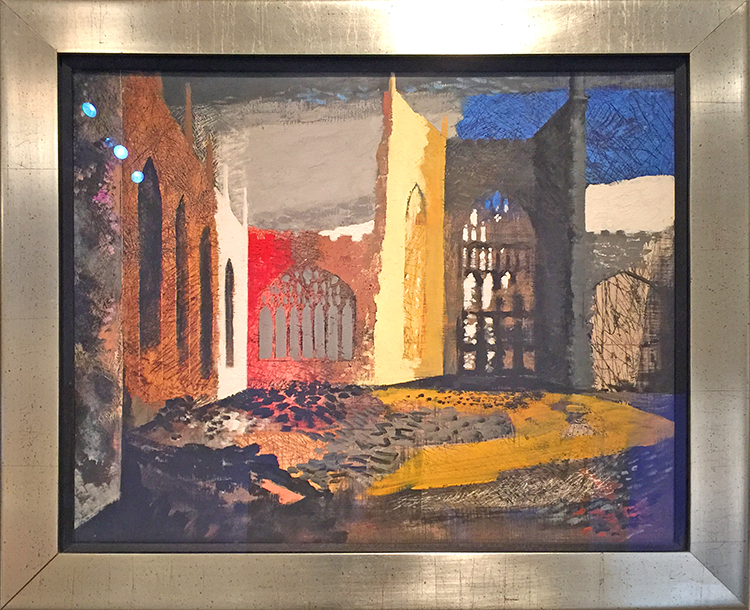
Birgit and I also visited the Herbert Art & Gallery next to the Cathedral – the painting below was created after the painter visited the ruins a day after it got destroyed.

It was a beautiful yet solemn time and yet again there is something so soothing knowing that 70 years later a German with a Dutch friend visits this place and talks about all that happened and all that hopefully never happens. To see that Coventry after all this became a city of reconciliation is inspiring.

I hope that despite the sad topic this post was inspiring to you too. My blog is about my creative journey and life as an artist, and this is part of it. Peace and Love to all of you!
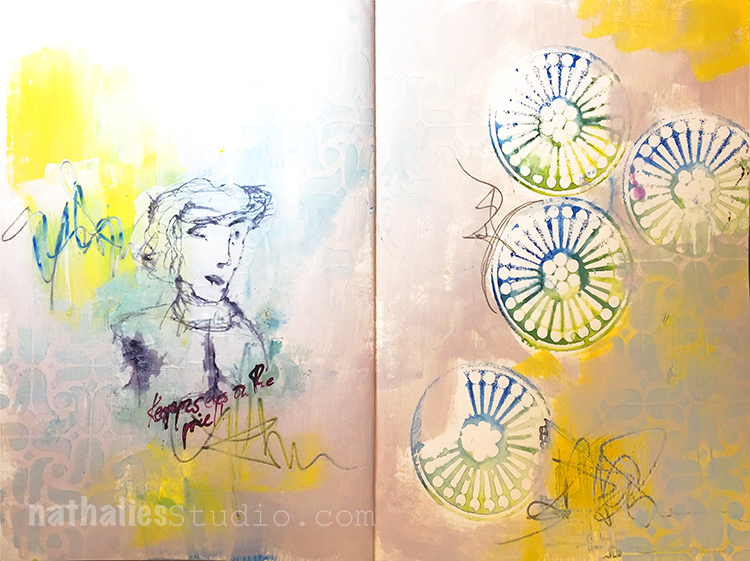
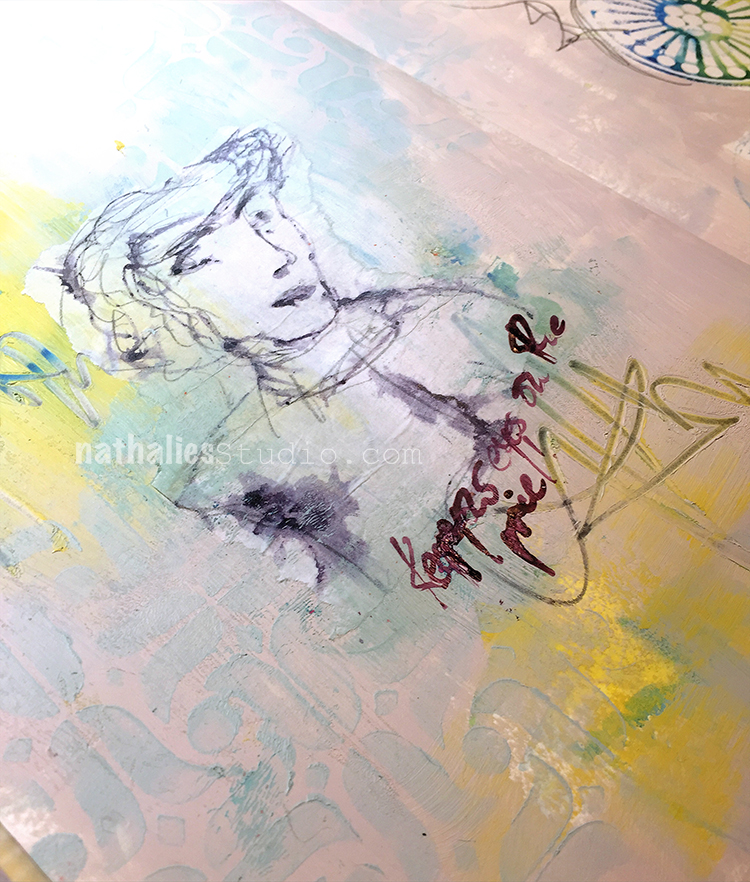
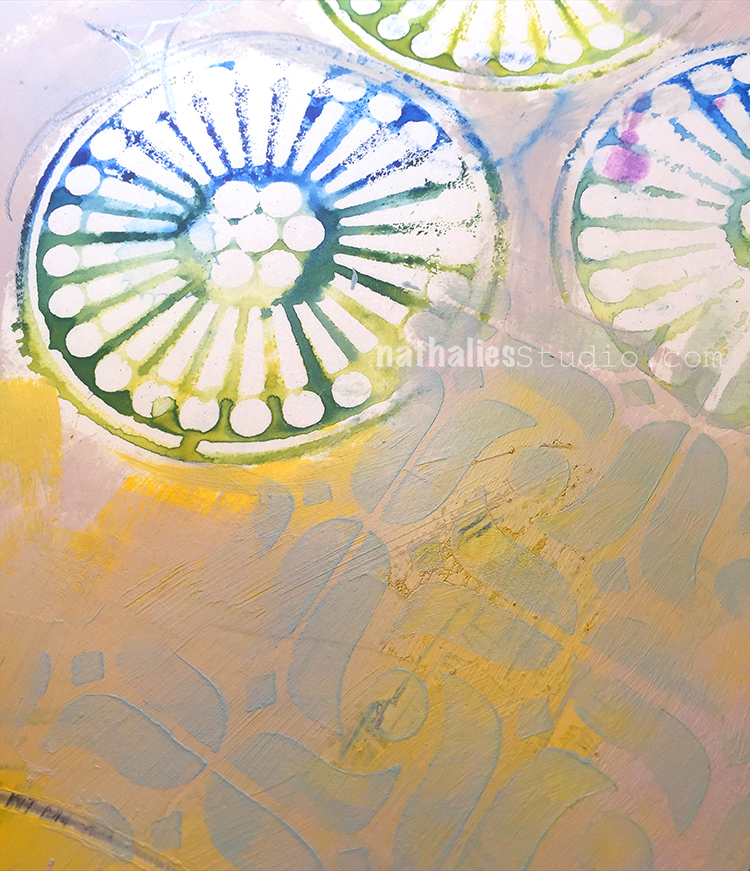
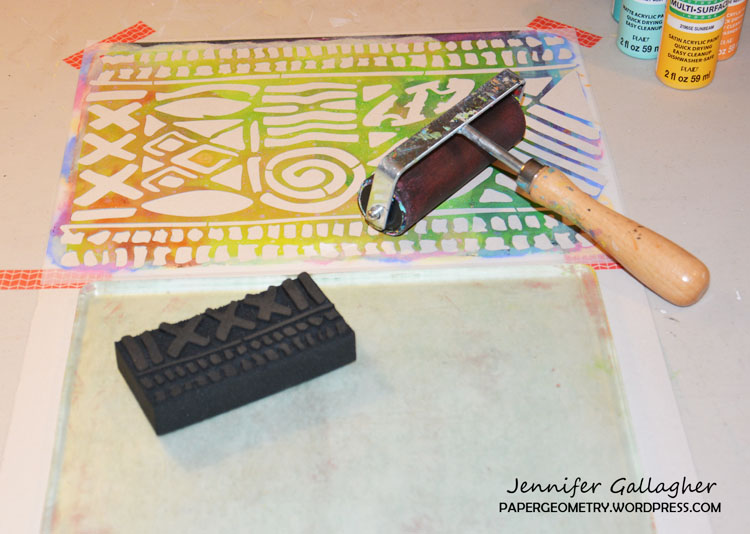
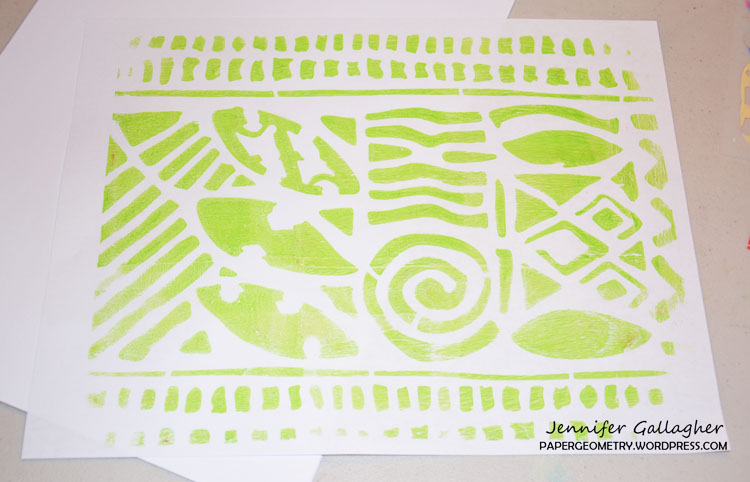
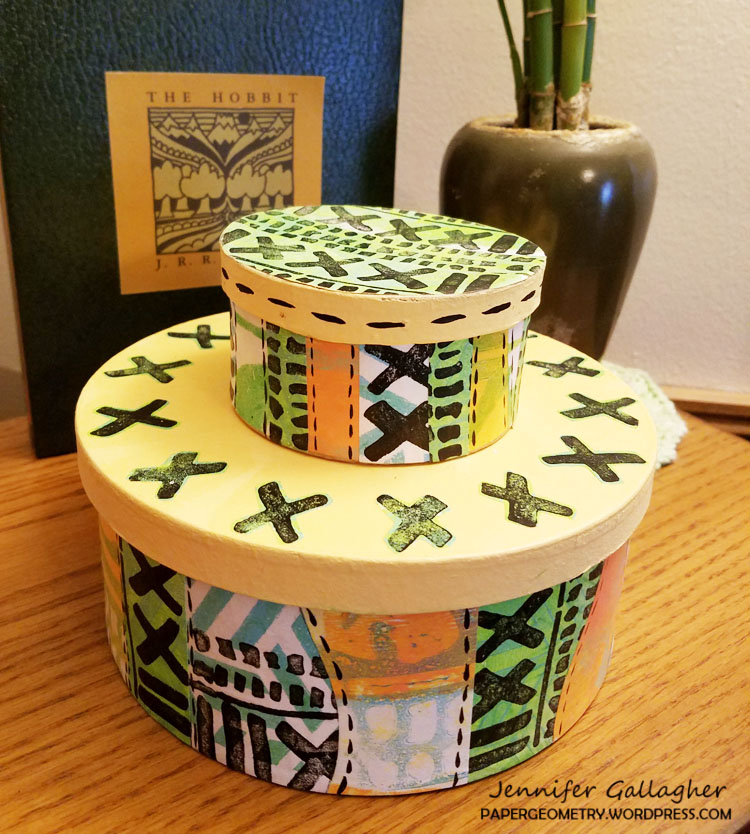
Comments (5)

  • Cheryl

    |

    As a woman who most likely will be unable to travel, I want you to know I was brought to tears looking through these photos as well as the newer visit at the new cathedral. Very moving. Thank you so much for sharing your shining heart with us. And. This thank you goes for Julie, too. You don’t know the joy you share with us all. Thank you. I will create in my art journal forgiveness in mind.

    Reply

  • Zoe Gregg

    |

    Did you have time to go into the new cathedral as well. There are some incredible pieces of art in there too.

    Reply

    • nathalie-kalbach

      |

      Zoe- I wil go def. next year when I am back- we didn’t manage this time but this sounds wonderful! Thank you for the tip!

      Reply

  • Deb

    |

    Kudos to you Natalie for yet another touching, inspiring and thoughtful post with amazing photography. Blessings to you. Keep doing all that you do with your sense of Love and Artful Adventure. Now that you are American….Happy Thanksgiving!
    Deb

    Reply

    • nathalie-kalbach

      |

      thank you Deb- I am glad you liked the article. Have a wonderful and special weekend!

      Reply

Leave a comment

Workshops in San Jose – January 17th & 18th!

I’m coming back to A Work of Heart in San Jose in the New Year! I had an absolute blast the last time I was out there, so I’m really looking forward to returning. Hopefully I will see some familiar faces and meet some new ones too :) Here is what I have planned:

Mono Print Painting

Wednesday, January 17th, 10am – 5pm

Join me for a day long class in Mono Print Painting. We will dive into the basics of mixed media mono printing first and I will introduce you to the Mono Print Painting technique inspired by H.N. Werkman. I will show you different ways on how to create elaborate and layered mono printed paintings using self made tools as well as stamps and stencils. I will share with you my thinking process on developing the technique and how we you can put your own personal spin on it, so that you can take your art to a whole different level.

Art Rules: Art in Translation – Art Journaling

Thursday, January 18th, 10am – 5pm

In this day long class, we’ll explore several master artists and get inspired by their artwork and techniques to create wonderful and unique art journal pages. Whether it be the Impressionist’s amazing color combinations or some of the Surrealist’s fun collage techniques, there are many different Master Artists whose skills can serve as a starting point for your own artwork. Find out what you like and what works for you. Learn about opacity and layering, colors, troubleshooting, mixing materials, making your own tools, creating backgrounds and patterns. We will work with acrylic paints, inks, markers, wax bars and other paint media to create dimension and texture. We will make the most of stencils, stamps, mono printing plates and generic tools to make our own mark.

Get ready to Rule Your Art Journal!

Comments (2)

  • Mari Zeleznik

    |

    I wish you would come to Honolulu… I know a space.. Deb Zeleznik’s (no relation) Stamp Plantation. She does workshops and has playdates there.

    Reply

    • nathalie-kalbach

      |

      Oh I would love to come to Honolulu some time Mari! Do they have classes there?

      Reply

Leave a comment