In Nat’s Studio: Gallery Wall

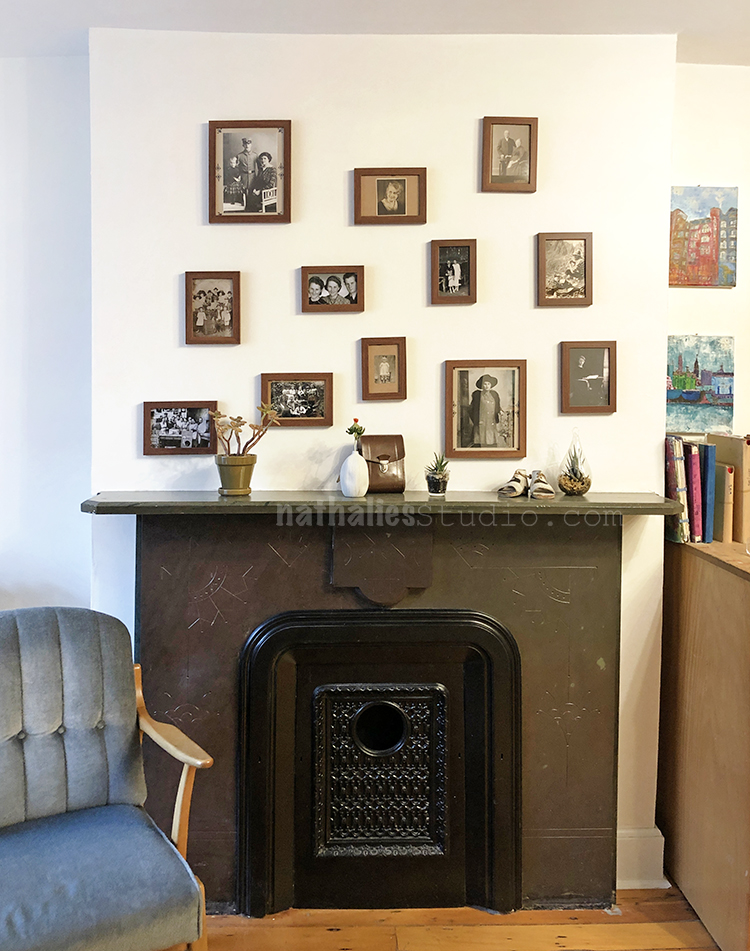
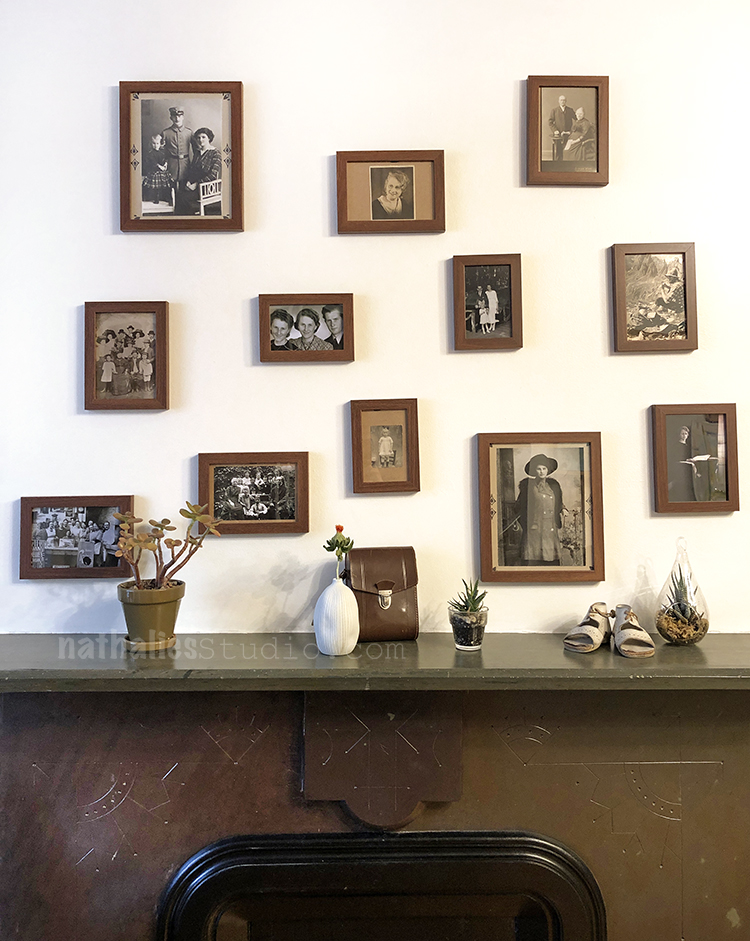
Now that we live for about a month in our new house, my studio is taking shape. One of the early decoration projects I knew I would want to do was a gallery wall right above the fireplace in my studio – because- come on …that space was screaming for it. 

I have a lot of very dear-to-my-heart photos of my ancestors and lots of those photos are tied with memories of my grandaunt Margot telling me all those background stories when I was a child and also when I was an adult. We both shared a deep love for photos.

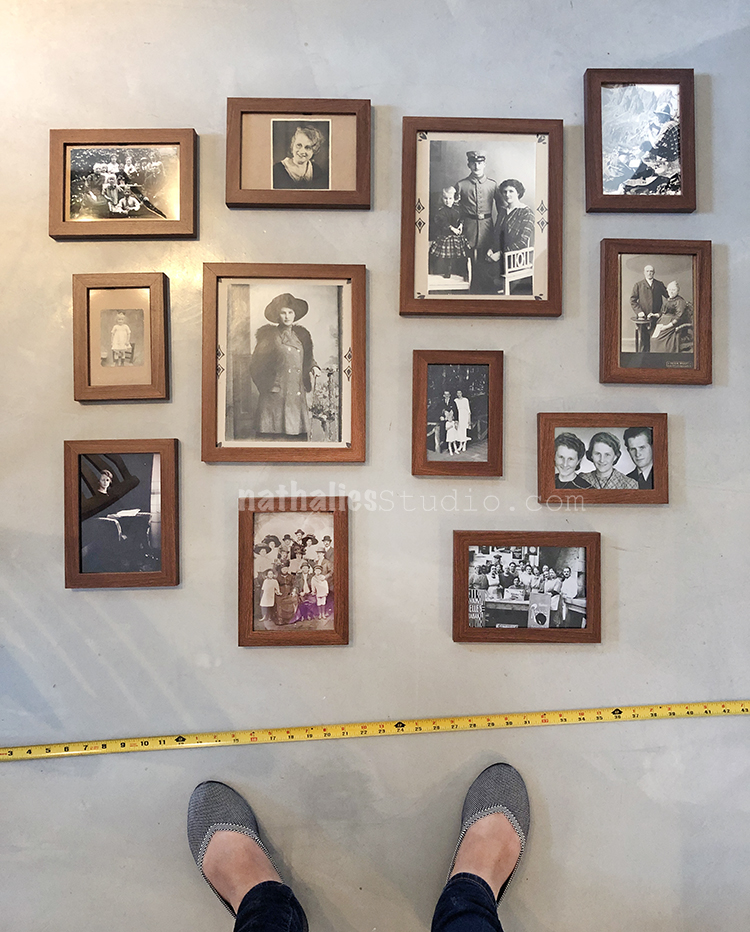
So still back in my old apartment I framed all the photos – I bought a pack of differently sized frames for that matter and started laying them out on the floor. I realized really quickly that was not the way to go – how do you arrange different sized photos in a way that it is balanced but doesn’t look contrived?

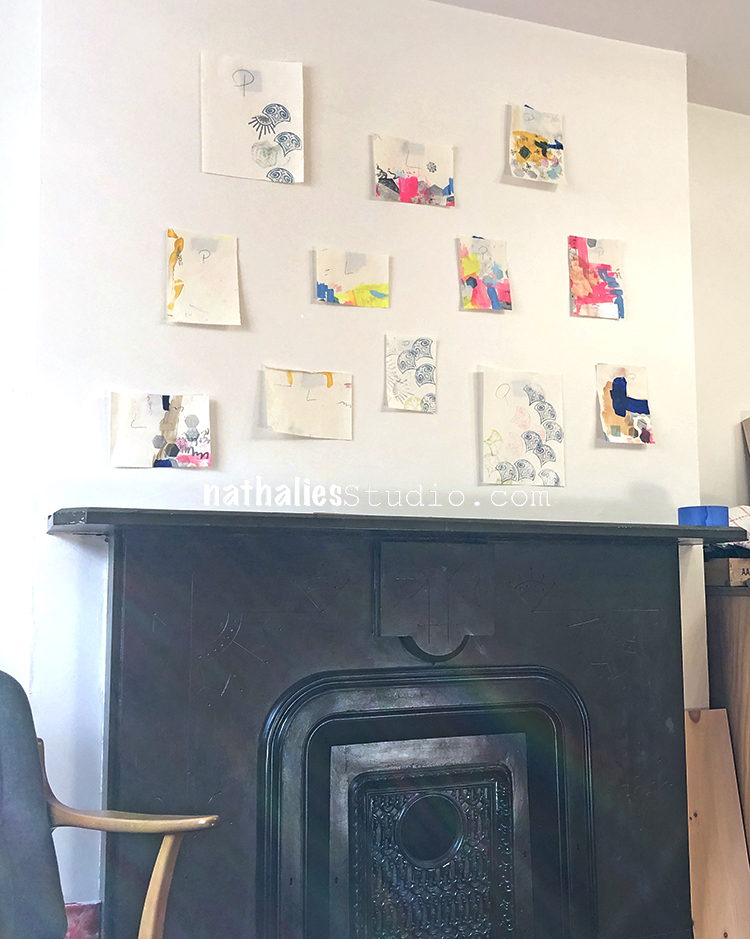
So I asked around on Instagram and some of my friends and it came down to one valuable tip or me: cut out paper mock ups of the different frames and start arranging them on the wall with masking tape until you are satisfied. Easy peasy when you think of it …but I didn’t …

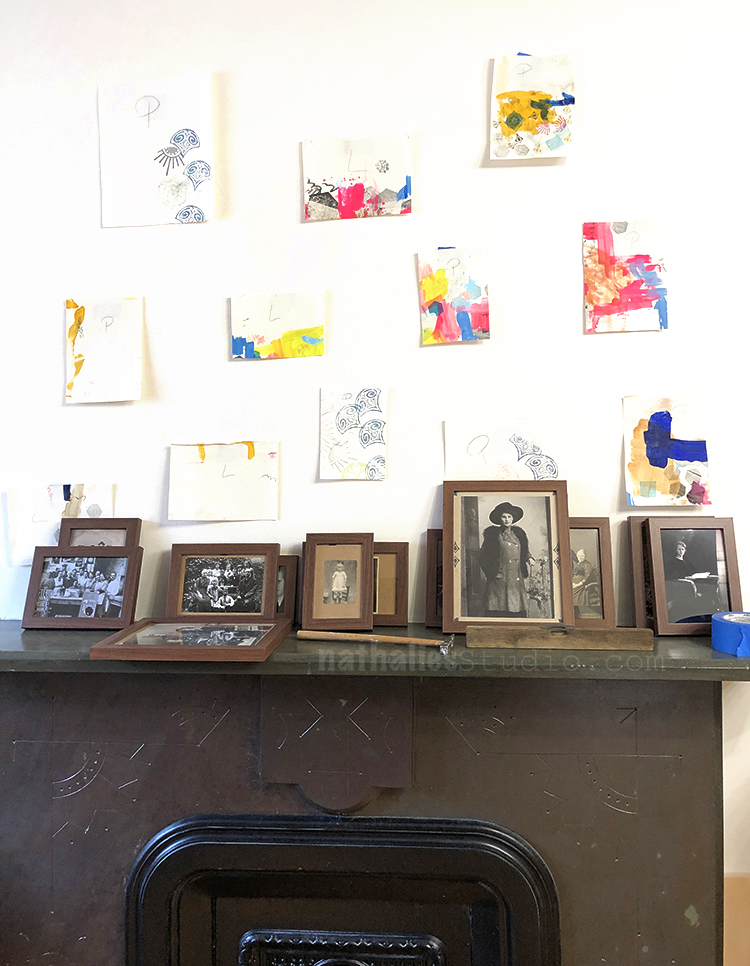
What a great practical tip though – I was able to let different arrangements sit for a couple hours, step back and look from different angles and rearrange until I was satisfied. It also made the placements of the nails easy.

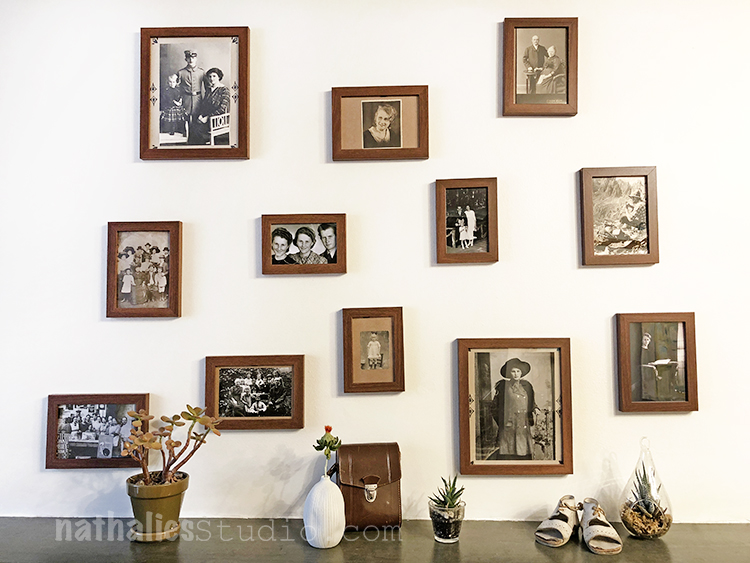
It makes me really happy to see those pictures of my grandparents, great-grandparents, great-great-grandparents, granduncles and grandaunts on the wall .

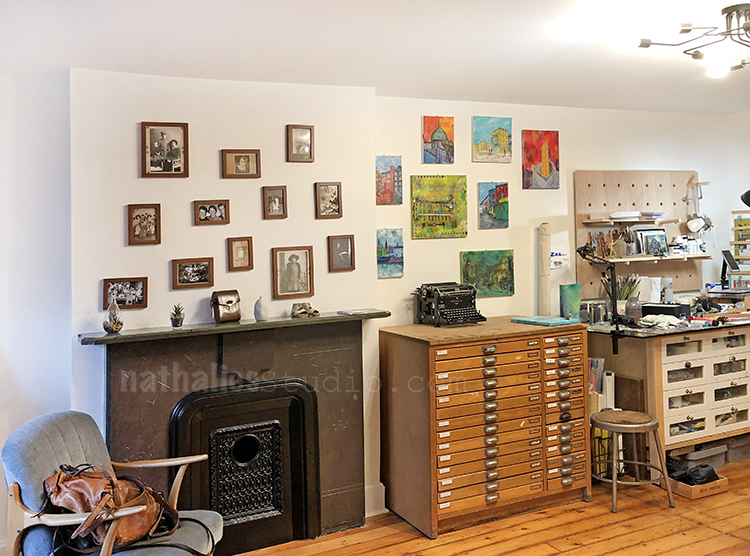
My studio still needs some adjustments and work – but overall it is coming together and I love it very much. I love that now I have also a little reading-sitting area …still finding a spot for my many bags that are inhabiting the chair.

I think my grandaunt Margot would have approved :) 

Have you created a gallery wall? Do you have any tips on how to arrange it? I would love to hear!

Comments (2)

  • Laura Weed

    |

    Great tip for a gallery wall. I wouldn’t have thought of it either. How about a decorative basket under the chair for your bags?
    Soooo jelly of a fireplace in your studio…that is amazing! Loving seeing how your new house is coming together. Thank you for sharing it with us!

    Reply

    • nathalie-kalbach

      |

      Great idea Laura- the bag was just temporarily there- it has a home LOL. So glad you enjoy the pix of the house

      Reply

Leave a comment

Deck of Cards Challenge – Prompts 5,6 & 7

Today I am recapping Day 5, 6, and 7 of my Deck of Cards Challenge that is running this month on Instagram. We are finishing up a week of Thank You cards and patterns. Check it out and play along with us to make your own “deck” of greeting cards.

Here is the overview of prompts 5-7:

Day 05 – Wallpaper

Welcome to Day 5 of the challenge and today is all about pattern. I love the bold patterned wallpaper of the Art Deco era and so I thought hey, why not use this concept for a card? A continuous design for the background AND the sentiment.

I got my Art Deco Wallpaper stencil and some spray paint and put that down. Then for a bit more delicacy and detail I went back in with one of my Fantastic Small rubber stamps. I kept everything in the magenta/pink family and finally I added my Thank You as if it were part of the repeating design too.

Day 06 – Overlapping

I hope you are playing along with us in the challenge. Today is a fun technique that you can do with rubber stamps, especially my building stamps like the Stroll Through the Hood ones, to build a cityscape.

You start by stamping the foreground, next stamp on and mask with something like post-its, and continue stamping to build your scene.

I love to create a 3D look this way. For my lettering I used this nifty type ruler that gives a funky font. I think this card is perfect for after a move or reno like we went through, where so many people helped us. Time to say thank you :)

Day 07 – Funky

Today we have a card idea for one of those groovy people on your list.

I created a random pattern background with funky colors using my Hex Small and Large stamps and some of my solid shape stamps. I started with the solids and then layered some of the patterns on top. A random background is always a little tricky to balance but fun to try. Then I added my thank you in a super funky font – reminds me of those psychedelic posters from the 1960s!

Tune in tomorrow on Instagram for the next prompt and I hope you share what you are working on using #docchallenge

Here are some of the supplies that I used in these prompts:

Here is the prompt list so you can play along too! Follow the daily prompts on Instagram and tag your creations with #docchallenge

Leave a comment

Mirror Mirror – Jennifer Gallagher

Hello from my Creative Squad and today we have Jennifer Gallagher starting us off this month with a new theme and a bold and funky art journal page for you. Jennifer is using my Kassel stencil and my Broadway 4×4 stencil and our November theme: Mirror Mirror – A mirror can be a reflection of many things. We look into them every day and can see who we are outside and in. But they can also just be a fun visual tool to play with as we flip and reverse images and patterns. Play with reflection this month.


This month the creative squad is focusing on reverse images and patterns as we celebrate the fun in reflection. I’ve taken the theme quite literally and created a positive and negative background using Nat’s stencils for a bold and bright art journal page. This technique is fun and easy and gives new life to even your most loved stencils. Let’s get started.

I am using my small rectangular dylusions journal for this spread. I began by stenciling quinacridone magenta acrylic paint through Nat’s Kassel stencil on the left side. On the right side I am penciling in the design for the next step.

Using a small square bristled brush, I hand painted in around the penciled design in the same color, quinacridone magenta. I am creating the opposite design that I did on the left hand side.

Next, I stenciled black acrylic paint through Nat’s four inch Broadway stencil on both pages. I did not exactly mirror the location of the two sides, but you can do so if you wish.

Using a black and white Gelly Roll Pen, I added dashes and lines around the designs on both pages.

Next, I added tissue paper collage elements from Dina Wakley Media. I’ve used the same elements on both sides but not exactly mirrored. Again, you could mirror it if you wish.

Using a mini blending tool, I rubbed black acrylic paint around the edges and center of the pages.

I typed up a quote on the computer, cut it out, and placed it where I wanted it. I adhered it with matte medium.

I hope you’ve enjoyed this tutorial. Be sure to play along each month with the creative squad and the n*Studio themes.


Thank you Jennifer! What a cool looking spread!

Give it a try: you can find all my Stencils in my Online Shop and here are some of the other supplies Jennifer used:

Feel inspired? Working on something yourself that you’d like to share?  I love to see how you interpret our monthly themes. Email me how you used my stencils and stamps with the theme and email me an image – I would love to share your projects in my next  “n*Spiration From Around the Globe“.

Comments (1)

  • Linda Wyatt

    |

    Beautiful pages! Love the way you mirrored and mixed the other elements. The color combo is perfect❤️

    Reply

Leave a comment

Deck of Cards Challenge – Prompts 3 & 4

Today I am recapping Day 3 and 4 of my Deck of Cards Challenge that is running all month long on Instagram. Join us for some fun and relaxing card making!

Here is an overview of Prompts 3 and 4:

Day 03 – Floral

It’s Day 3 of the challenge and I am thinking about floral patterns and that reminds me of bouquets and maybe even beautiful wallpaper… but today I am making cards lol.

So I used my Fantastic Small rubber stamps and stamped up charming little bunches on a card. Maybe they are flowers or maybe they are balloons… you can decide. I also used the Topper stamp from the Small Circle Jumble set to tie things together.

Day 04 – Retro

Today I am looking at some pics from a trip we took to the American Southwest and finding some color inspo for my card. I love the super blue sky here and then those earthy muted colors in this nifty mid century adobe place we stayed.

I used my Mid Century Squared foam stamp with both of those colors, rotated the pattern and layered it up.

Could be a great thank you card for the host after you stay somewhere really unique.

Tune in tomorrow for the next prompt and I hope you share what you are working on using #docchallenge

Here are some of the supplies that I used in these prompts:

Here is the prompt list so you can play along too! Follow the daily prompts on Instagram and tag your creations with #docchallenge

Leave a comment

Deck of Cards Challenge – Prompts 1 & 2

Yeah so excited for the Deck of Cards card making challenge that got started yesterday. I cannot wait to see what you do throughout the month – please share using #docchallenge. If you want to play along with us just check out my prompt in my insta feed and join us all month long as we make greeting cards of all types.

Here is an overview of Prompts 1 and 2:

Day 01 – Ombre

Welcome to my Deck of Cards Challenge and hope you are ready for a month of cardmaking prompts to get your creative juices flowing. Today we kick things off with a week of Thank You cards and patterns. Here is one of my favorite ways to play with color and pattern – creating an ombre where one gorgeous hue runs into the next, highlighting a pattern.

I’m using that technique with my Amsterdam stencil, Distress Oxide inks, and a foam blending tool. Thank you for tuning in!

Day 02 – Geometric

This is Day 2 of the challenge and today we are playing with geometric patterns. I think of tile floors and patterns in architecture and I love to use my Hex Set Small rubber stamps to play with patterns like these. A hex is a great shape to use because you can tile them up side by side and they fit together perfectly.

Here I used Moonlight Duo inks with my stamps for a nice Geometric Thank You card.

Tune in tomorrow for the next prompt and I hope you share what you are working on using #docchallenge

Here are some of the supplies that I used in these prompts:

And here is the prompt list so you can play along too! Follow the daily prompts on Instagram and tag your creations with #docchallenge

Leave a comment

Greatest Discovery – Art Journal

“The greatest discovery of all times is that a person can change his future by merely changing his attitude.” -Oprah Winfrey

I love the opaque quality of Holbein Acrylic Gouache for a background, and used them here along with acrylic paint for one in lovely muted tones. Then I stamped some of my Stroll Through the Hood stamps. I sketched a trio of vintage style ladies using acrylic ink on deli paper and decorated their clothing with my Fanfare stamps.

Finally I added this awesome quote with a Fude pen. Hope I remember how transformative a simple attitude adjustment can be :)

Here are some of the supplies I used:

Leave a comment

Expect Nothing – Art Journal

“Expect nothing. Appreciate everything!” 

For the background I used a hand carved stamp inspired by a door I saw on one of my strolls through the hood. I stamped with Archival inkk over some acrylic paint, and then layered up my Manhattan stencil with spray paint.

I sketched in a figure with acrylic markers on deli paper so the background still peeks through.

And then my quote with acrylic markers :)

Here are some of the supplies I used:

Leave a comment