Blog: Tutorial

Brayer Background Technique

CJSUberMediaOWSLOGO

Those of you who were part of the Creative JumpStart 2013 saw the videos that me and my artist friends posted on my website throughout January. The videos are not available here anymore, since I have to make room for new fun things to come ..still thinking ;) …but I thought it would be nice to repost my 10 technique videos over the next couple weeks- so that you have access to them whenever you want.

And now let’s jump to the 6th video in my Über*Media Creative JumpStart 2013 Workshop which was the Brayer Background Technique  – one of my faves :)

If you have no external speakers on your pc – turn up the volume a lot (the audio is very low in this video)

CJS 2013 Technique6 Brayer Background from Nathalie Kalbach on Vimeo.

This and the other techniques are part of some of my Über*Media Online Classes.

They are there to free your creativity with techniques and how-to’s that go beyond one certain project. I want you to learn something new that you can adapt to your own style and can use for many projects to come.

Über*Media classes are dedicated to different kinds of media that cross a variety of materials.

I do have several Über*Media Workshops available right now for example Über*Media -PanPastel, -Acrylic Paint, -Gesso, -Acrylic Ink and -FoamStamplifier.

For my Creative JumpStart Über*Media Workshop I showed some of my favorite Über*Media Techniques that can be used in your Mixed Media, Scrapbooking, Altered Art and/or ArtJournal Projects.


And here are the supplies I used in the video:

nSupplies


I hope you enjoyed todays technique :)

Nat

LogoBlogSignature

Comments (4)

  • Amante del Papel

    |

    i love this technique, thanks for sharing

    Reply

  • Kathy Gledsdale

    |

    Oh yay I can see it now and how pretty it is too!

    Reply

  • Maggie M

    |

    I agree, a 2014 Creative Jumpstart video series would be AWESOME! I loved the 2013 series:) Hugs and Happy Holidays Nat.

    Reply

  • Christine Szekeres

    |

    Will there be a Creative JumpStart 2014?!? I had a wonderful time learning and playing this year so I’m hoping there will be! Thanks for sharing these with us again!

    Reply

Leave a comment

Spackle Tackle Technique

CJSUberMediaOWSLOGO

Those of you who were part of the Creative JumpStart 2013 saw the videos that me and my artist friends posted on my website throughout January. The videos are not available here anymore, since I have to make room for new fun things to come ..still thinking ;) …but I thought it would be nice to repost my 10 technique videos over the next couple weeks- so that you have access to them whenever you want.

And now let’s jump to the 5th video in my Über*Media Creative JumpStart 2013 Workshop which was the Spackle Tackle Technique  – one of my faves :)

If you have no external speakers on your pc – turn up the volume a lot (the audio is very low in this video)

This and the other techniques are part of some of my Über*Media Online Classes. They are there to free your creativity with techniques and how-to’s that go beyond one certain project. I want you to learn something new that you can adapt to your own style and can use for many projects to come.

Über*Media classes are dedicated to different kinds of media that cross a variety of materials.

I do have several Über*Media Workshops available right now for example Über*Media -PanPastel, -Acrylic Paint, -Gesso, -Acrylic Ink and -FoamStamplifier.

For my Creative JumpStart Über*Media Workshop I showed some of my favorite Über*Media Techniques that can be used in your Mixed Media, Scrapbooking, Altered Art and/or ArtJournal Projects.


And here are the supplies I used in the video:

nSupplies


Hope you enjoyed this :) have a gorgeous weekend
Nat

LogoBlogSignature

Comments (8)

  • Tami Howse

    |

    Thanks so much for the “refresher”, Nathalie. I didn’t take notes during Creative Jumpstart (my first year this year to attend) and I’m sorry I didn’t. I loved it, though! I can’t wait to try this technique again!
    Fondly, Tami

    Reply

  • ลиqεŁล

    |

    Gracias por tus clases! La técnica es genial!!! Te deseo unas Felices fiestas!! besitos

    Reply

  • grandscraperona

    |

    Nat…i have used this tech several times, because always the effect is different depending on on the colors and the spots of water created. !…thanks for replaying all your ten techs. Waiting for 20l4 Jumpstart!…Have nice Xmas time…

    Reply

  • Nurse Ratchet

    |

    One of my faves and I had not remembered it for awhile….TX LGL!!

    Reply

  • Pam in New Jersey

    |

    I forgot how much fun Creative Jumpstart is !!!!!

    Reply

  • rillamom

    |

    I hope you are planning to have a Creative JumpStart Summit 2014! I just loved CJSS 2012…..

    Reply

  • Dee in NH

    |

    Thanks for the revisit. I love it!

    Reply

Leave a comment

Cocoa Daisy Kits Project Art

My friend Christine has recently introduced an Project Art Kit into her Cocoa Daisy Kit Club. A Project Art Starter Kit includes all necessary items to start you on artjournaling and each month there is a Project Art Kit released. So love this idea and concept! I was a happy camper to be invited to play with the August Project Art Kit.
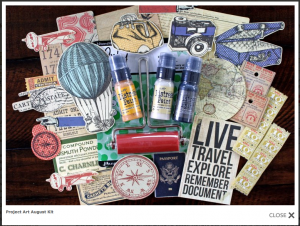
Bildschirmfoto 2013-08-20 um 15.09.36


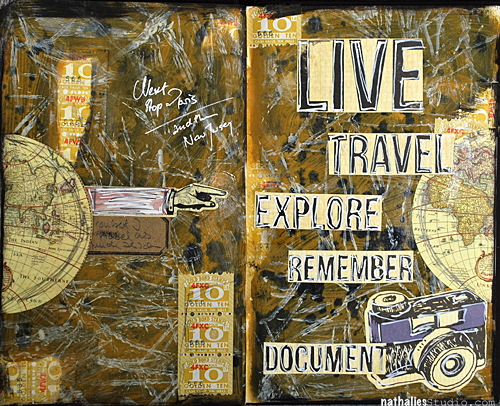
Yumminess -first of all it comes with a brayer…and if you know me…you know I tell everyone who wants to know or can’t walk away fast enough, that a brayer is one of my favorite tools. And then the gorgeous tags and the Ranger Distress Paints. But ok…let me first show the spread in my art journal I created
NathalieKalbach_Explore01


Grungy…as I like it :) Now…let’s see how this page came together.
NathalieKalbach_ExploreTut01


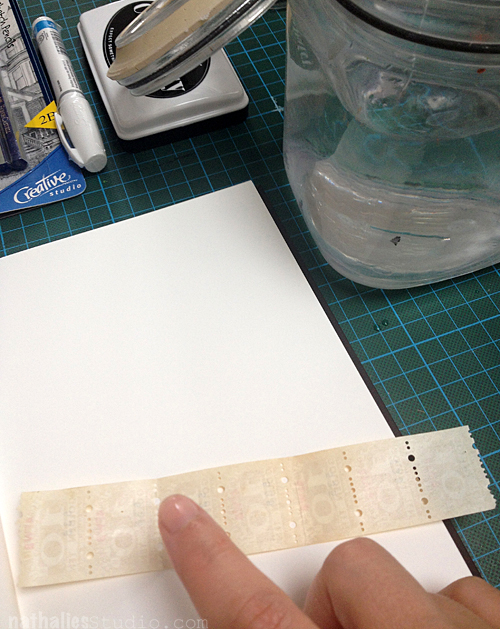
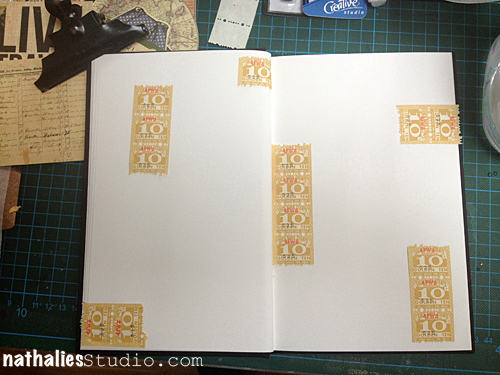
I took the vintage savings booklet stickers and realized that they are actually like stamps have an adhesive in the backing, which you can activate with water. So I simply took a couple, spread some water on the back with my finger and then adhered them to the page.
NathalieKalbach_ExploreTut02


Now there…better. I often times do things like this so that the terrible “don’t ruin the white page in my beautiful journal”-fear  cannot creep up on me ;)
NathalieKalbach_ExploreTut03


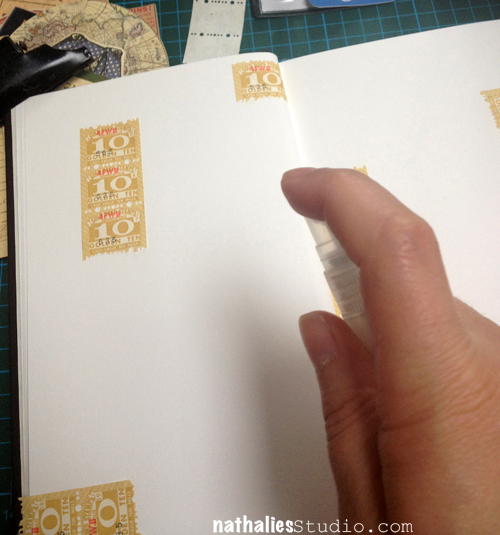
I took a water mister and applied some water spritzer to the paper in order to have the paint not soap right in. I used the Black Soot Distress Paint and spread it across the pages, making sure to no entirely cover up the savings stickers. Don’t forget to shake your Distress Paints before you use them – and do not squeeze them too tight, so that the paint is not leaking out on the bottom of the cap. It runs by itself no force needed.
NathalieKalbach_ExploreTut04


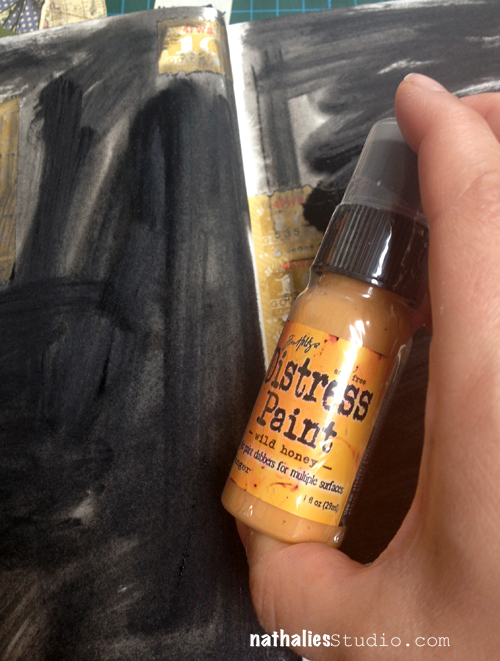
After the Black Soot dried, I took the Wild Honey and applied it right over the black – you want to work quickly- as the paint shouldn’t dry.
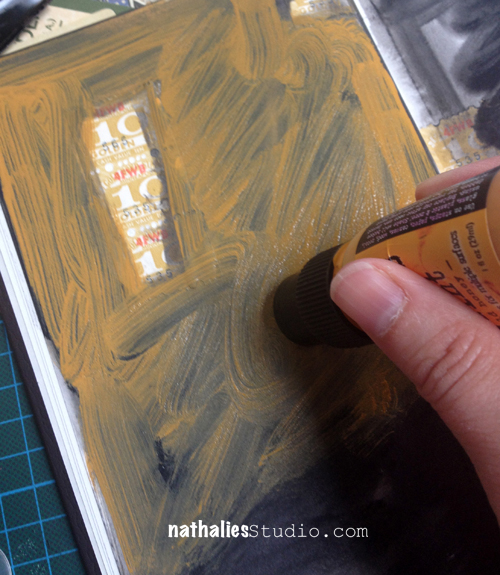
NathalieKalbach_ExploreTut05


If you are in a very hot or sunny area of the world- you might start with the one half of the book first and do the other half later.
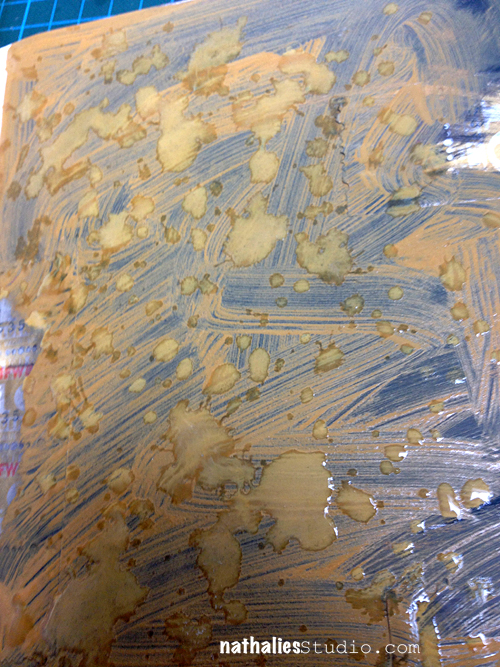
NathalieKalbach_ExploreTut06

Next I cupped my left hand and spritzed some water through the water mister into it and then flicked the water over the wet paint. You want to have the area not covered with the water drops dry and the water drops still wet- you can see this pretty well in light.
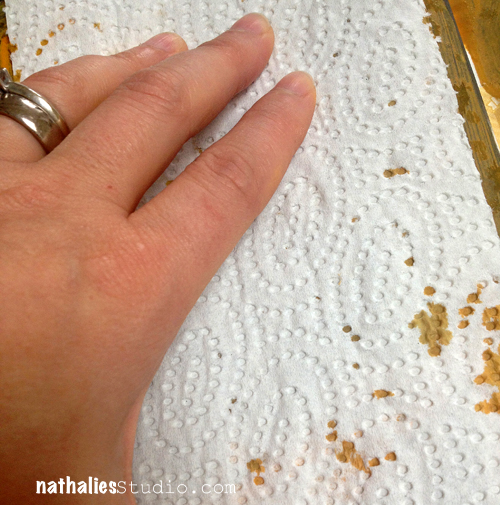
NathalieKalbach_ExploreTut07


Then you take a paper towel and layer it over the page- press it down and lift off the water drops – which will also lift the Wild Honey paint lifted in those areas.
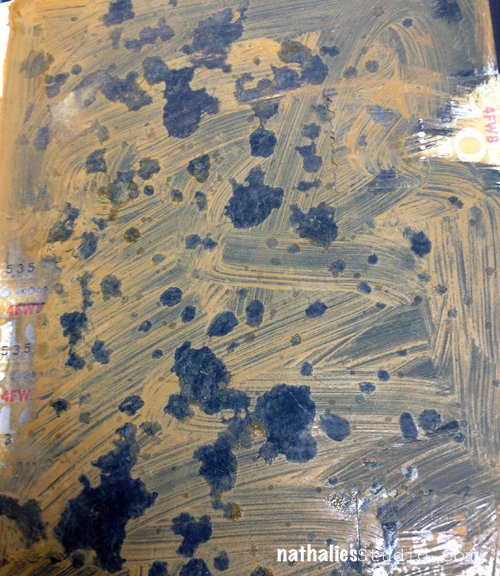
NathalieKalbach_ExploreTut08


Now- how cool is this speckled look?

NathalieKalbach_ExploreTut09


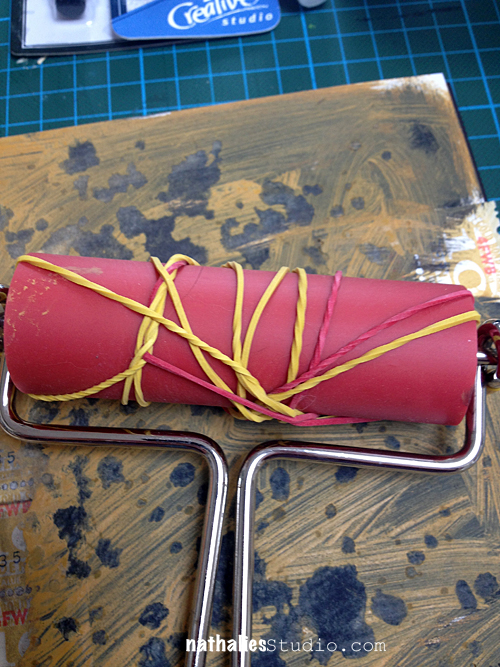
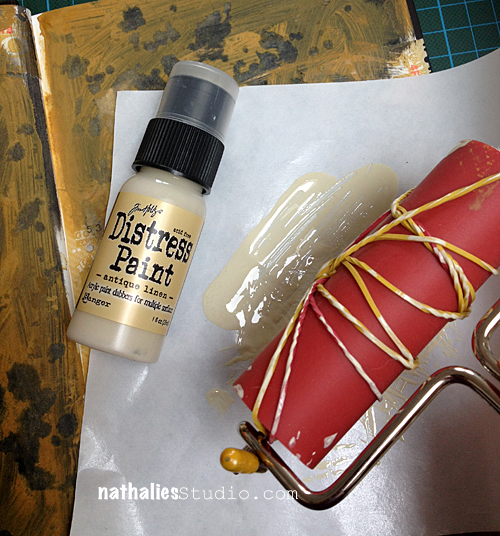
Next I took a couple rubber bands, took of the roller of the brayer – wrapped the rubber bands in a “kinda fancy” way around the roll and snapped it back into the handle.
NathalieKalbach_ExploreTut10


I put some Antique Linen Paint onto a piece of freezer paper (you can use a palette or do it on a craft mat – anything that is a surface where the paint doesn’t dry too fast) and then rolled the brayer with the rubber bands through it
NathalieKalbach_ExploreTut11


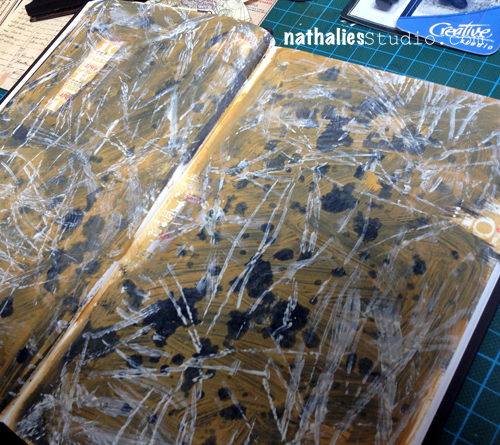
And then I rolled it like a maniac over the pages- that was fun – and I love the result :) It also lightens up the whole page.
NathalieKalbach_ExploreTut12


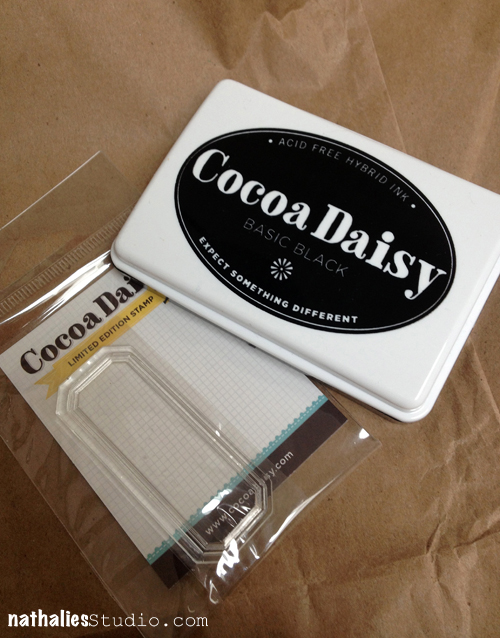
I love using packaging stuff – and as the kit comes in these beautiful kraft paper bags, I stamped with the Cocoa Daisy Hybrid Ink on the Stamp – also both in the Starter kit on top of the bag and then cut the image out.
NathalieKalbach_ExploreTut13


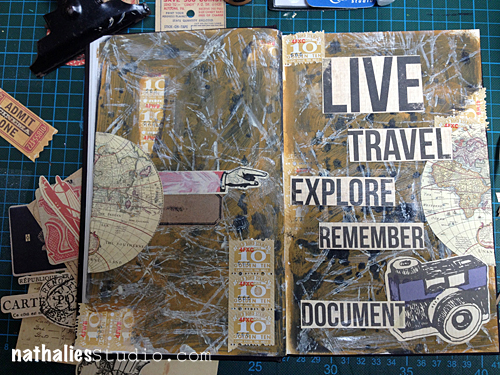
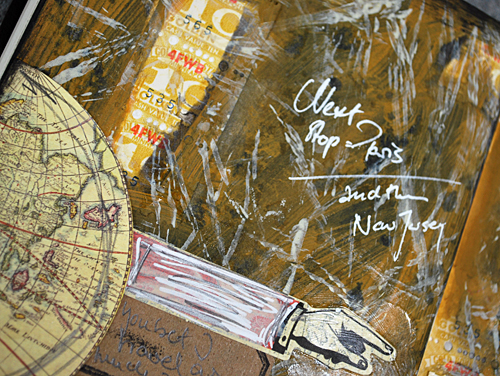
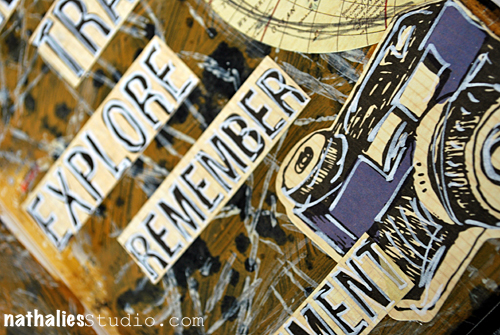
then I layered some of the travel die cuts, the rest of the savings stickers and the stamped lable and applied them with Gel Medium. As you can see I cut the tag apart, as I wanted to spread the words out more and also wanted to show more of the background.
NathalieKalbach_Explore02


I made some marks with the pencil and the sharpie which are included in the starter kit .
NathalieKalbach_Explore03


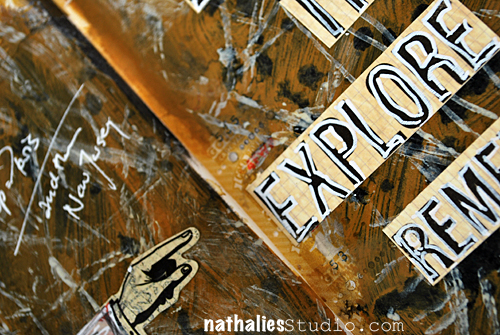
It ties the elements together with the rest of the page
NathalieKalbach_Explore04


Love the many possibilities of the kit – and how ever you layer the colors- the result will always be different. Hope you enjoyed this little tutorial for your Project Art Kit.

Have a wonderful day


Nat


LogoBlogSignature


Comments (8)
  • ลngεŁล

    |

    WOWW! Me encanta!!! El fondo queda increible!!! Muchos besitos

    Reply

  • Louison

    |

    Thanks for sharing!! Your page is so beautiful!!!

    Reply

  • Mila

    |

    I love this page!! and I love working with the rubber chicken on the roller and also use them as stamp.
    Hughs

    Reply

  • Kathy P

    |

    Awesome work, Nat….love that brayering idea! Hopped over to Cocoa Daisy, too….I am going to have to subscribe to that PL kit! Very cute things in there!
    And welcome to the East Coast!!!

    Reply

  • Sue Clarke

    |

    What fun and I keep on forgetting to do the elastics on the brayer technique. I must try it soon.

    Reply

  • Jean A Marmo

    |

    Never thought to put rubber bands on a brayer! How cool!!!

    Reply

  • lisa

    |

    Love this Nat. What fab techniques x

    Reply

Leave a comment

Stencil Hop – Oldtimer

NatKalbachStencilbloghop


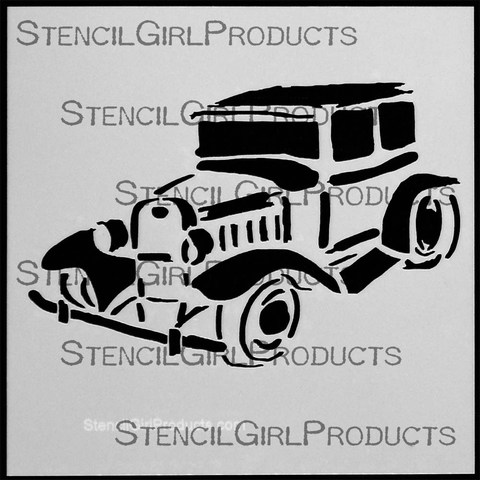
Welcome to my first Stencil Blog Hop! I invited four wonderful artist friends to hop along with me today and play with my StencilGirl Products Oldtimer Stencil which is a 6 x 6 Stencil:

NathalieKalbach_OldtimerStencil


You have four chances to win this stencil. Leave a comment on each of the listed blogs (Jamie’s comment function didn’t work in the morning – so if you posted on all blogs a comment that worked I will count them as if you did comment on hers too;) ) and on my blog  and let us know how you like the projects and I will pick randomly one lucky winner. You have time to comment till July 30th, 2013 – midnight EST.

Edited August 4, 2013: The winner is Gerd Andersen – Congratulations. Gerd please email me with your postal address so I can get this stencil sent out to you :), Nat


Here are my friends joining me:

Jessica Sporn who does wonderful Mixed Media art and has her own amazing range of StencilGirl Product Stencils.

Stephanie Schütze – a super talented Scrapbooker from Switzerland

Jamie Dougherty – who is a super good workshop teacher and does stunning Mixed Media- and Scrapbooking-Projects

Maria McGuire – she does beautiful scrapbooking and Mixed Media Projects and coordinates also the awesome StencilGirl Products Blog called StencilGirl Talk


I am a big fan of oldtimer cars and so I knew I wanted to do this stencil for all kinds of projects. Check out some samples here:

OldtimerStencilProjects


Here is what I created for today:

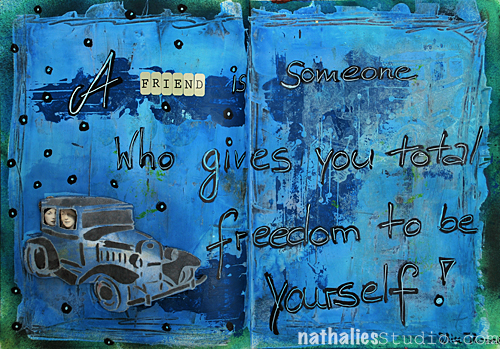
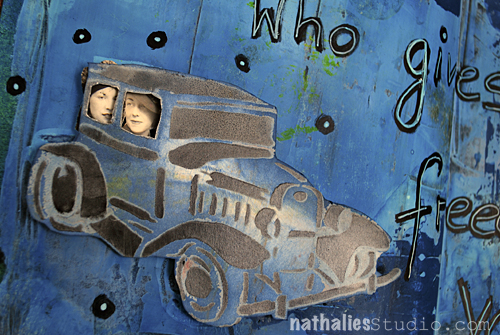
NatKalbach_OldtimerStencil01

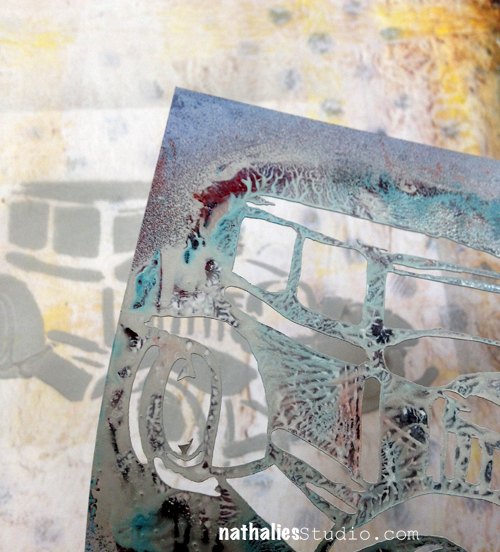
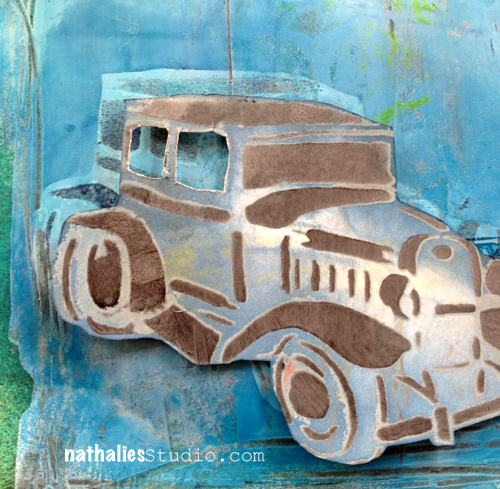
I do love to create some depth with my stencils -so here is how I did it here. I sprayed through the Stencil with Liquitex Spraypaints- but you can use any other paint media.

NatKalbach_OldtimerStencil03


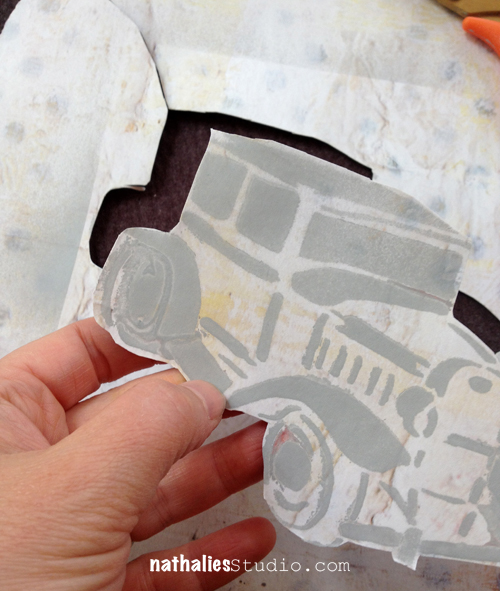
Then I cut out the car – just around the outline

NatKalbach_OldtimerStencil04

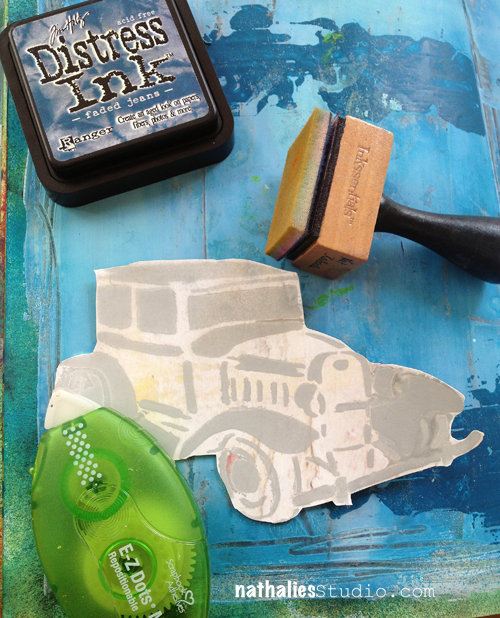
I picked a page in my art journal where I had already played a bit with a background and gathered some repositionable double sided adhesive, distress ink and a blending tool.

NatKalbach_OldtimerStencil05

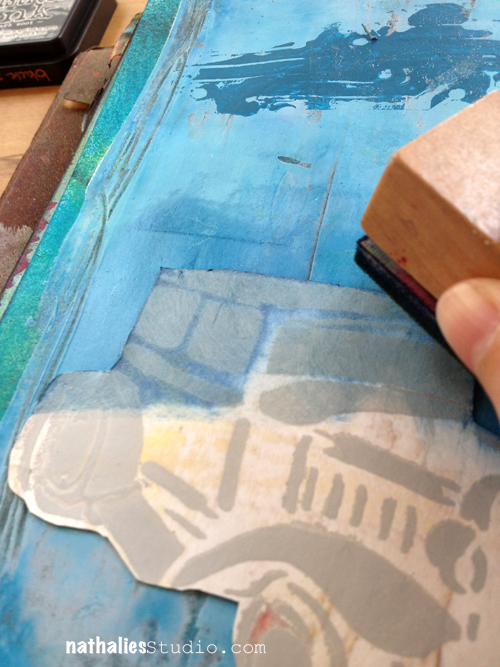
I adhered the old timer with the repositionable adhesive  and then applied a bit darker distress ink with the blending tool – to outline the car.

NatKalbach_OldtimerStencil06


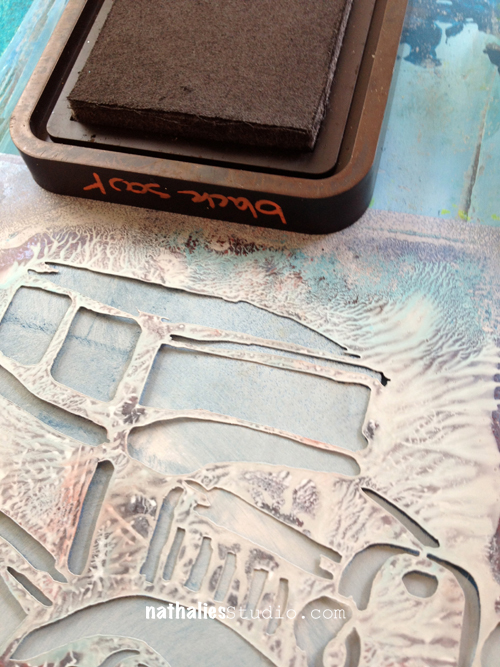
I used another distress ink color and the stencil again, which I laid over the car again and went over it again with the blending tool.

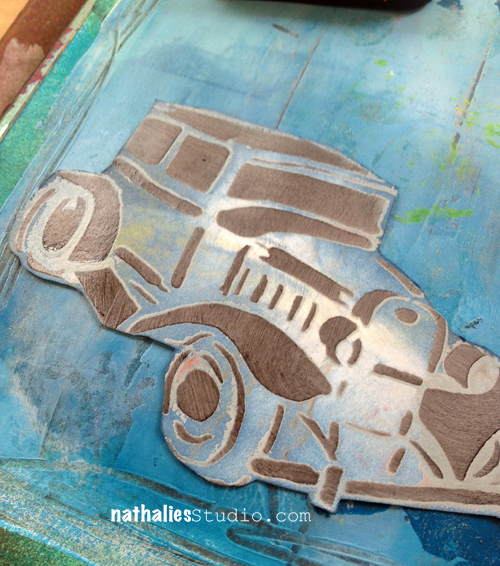
NatKalbach_OldtimerStencil07

As you can see it gave a another shadow- as the first sprayed stencil image still peaks through- and it adds already more depth to the oldtimer

NatKalbach_OldtimerStencil08


Now I peeled of the oldtimer car and then carefully rubbed off the adhesive dots.

NatKalbach_OldtimerStencil09


Next I placed the car directly onto the background into the before outlined borders-

NatKalbach_OldtimerStencil10


I do this so later when you raise the car with foam pads- there is a shadow visible.

NatKalbach_OldtimerStencil11


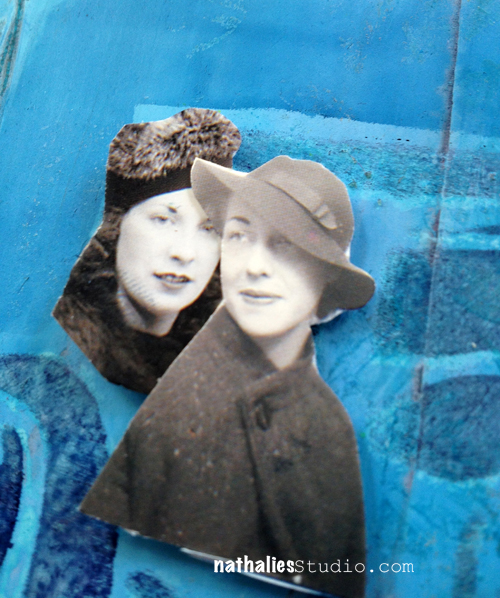
Then I cut out some faces that would fit behind the windows

NatKalbach_OldtimerStencil12


and I cut out two windows of the oldtimer car on the paper

NatKalbach_OldtimerStencil13


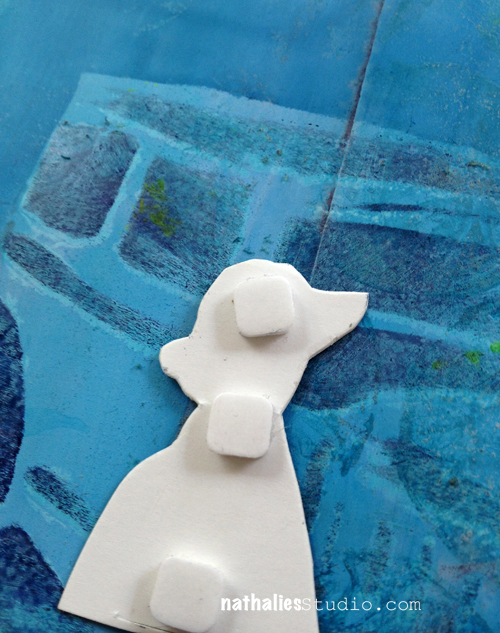
I applied foam pads to the backs of the faces

NatKalbach_OldtimerStencil14


adhered them using the image of the oldtimer on the background and slightly a bit off

NatKalbach_OldtimerStencil15


then I stacked two foam pads on top of each other- to give more height -to the back of the oldtimer car on the paper

NatKalbach_OldtimerStencil16


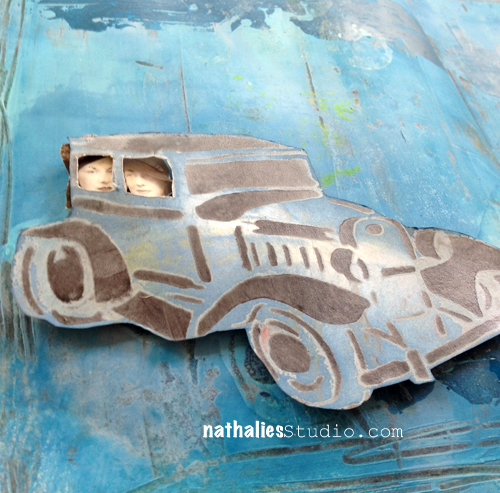
and adhered the car also slightly off

NatKalbach_OldtimerStencil17


and there you have it :) I think it is a great way to add dimension and depth with stencils.

NatKalbach_OldtimerStencil02


Here are the supplies I used:

nSupplies


Now hop on over to my friends and check what they did and comment for some changes to win the stencil :)

Edited August 4, 2013: The winner is Gerd Andersen – Congratulations. Gerd please email me with your postal address so I can get this stencil sent out to you :), Nat

Jessica Sporn 

Stephanie Schütze

Jamie Dougherty 

Maria McGuire

Nat

LogoBlogSignature

Comments (39)

  • Jacalyn Claes

    |

    Nat, What a cute page. I love the idea of putting people in as passengers

    Reply

  • Glenda Hoagland

    |

    Oh My Gosh, I just love what you did, The people in the car just thrilled me and it was so simple, but lifting the card on dots you could put the passengers in. I just love it.

    Reply

  • Vicki Romaine

    |

    This piece is amazing. I just love that car stencil! So different!

    Reply

  • Deleted User

    |

    After this, i started loving those vintage stencils, in special this car. As soon as i finish with the Acrylic Paint workshop, (which i am delighted with) will let my juices flow! ! Love also the Blog Hop!…

    Reply

  • Sue Clarke

    |

    I had to come back and leave another comment after visiting the other blogs. Oh my. Such a variety of ways to use the car stencil. Each one more unique than the last. Thanks for the chance to win and the inspiration is wonderful Nat!

    Reply

  • donna

    |

    Great dimensional look Nathalie, thanks for sharing with US!
    Peace,
    Donna

    Reply

  • Stephanie C.

    |

    Hi Nath,

    I love what you did with the old timer! Btw, I have just purchased your crackled stencil and cannot wait to play with it! Thanks :-)

    Reply

  • Janelle R

    |

    Wow – a whole new way to use the stencils. Would love to win that stencil! Following your blog for a while now, and I can get lost in your work. Can’t wait to try this!

    Reply

  • Johanne L.

    |

    I love your page. Great tutorial. And I love the design of your stencil. Thanks for the chance,

    Reply

  • Jeanne Kelly

    |

    Funny, I just found the “stencil girl” stencils site and now I am directed to your site by artist Julie ….like all of this was meant to be. I read your post re the Jewish Museum and could not comment as my stomach was just sick…thank you for having the courage to post about your experience and share with all of us…that was brave in so many ways.
    Thank you for also sharing your beautiful art work!!!

    Reply

  • Pat

    |

    Stencils, spray paint, and masks, oh my! I love the how you used dots to enhance the 3D effect! Very cool!

    Reply

  • Rhonda Strickland

    |

    Thanks for the awesome tutorial and the chance to win. You have some very AWESOME friends too. Thanks! :o)

    Reply

  • Andrene

    |

    Your spread is awesome – love all the blues! The stencil is too cool but then again all of your stencils are great!

    Reply

Leave a comment

Prima Make ‘n Take Summer CHA 2012- Keepsake Boxes

As promised I share with you the Make n Take Keepsakes Box I did at the CHA Summer 2012 Prima Booth. Thanks to all the people that came by and joined me :) – I had a lot of fun with you!

Supplies:
My Prima Place Freebie Paper or other Prima Paper
3 Prima Flowers- white and light yellow roses
1 Cherub Resin #891404
20 inches lace # 541125 or  # 529420
1 sheet of Say it in Chystals 560331 or Item# 553944 or Item# 554194

Prima Letterpress
Prima Chalks:
Teal Damask #89120,
Summer Field #891329,
Rusty Bucket #89109,
Tin Can #891152

papercutter, pencil, bonefolder, ruler, scissor, MyStik Permanent Scrapbook Adhesives by 3L

Have an amazing and wonderful day

Nat

Comments (5)

Leave a comment

Maya Road Guest Designer- Canvas- Tutorial

For my guest designer spot with Maya Road this month I created this 12 x 12 canvas using lots of Chipboard DoorwaysMaya Mists, and Gesso.

I created a video sharing how I made this canvas:

[youtube=https://www.youtube.com/watch?v=rH5MHQMMgmY&feature=youtu.be]

So love those colors :)

And I totally love those doors…yum yum!

Hope you enjoyed the tutorial :)


hugs

Nat

P.S.: psst

Comments (12)

Leave a comment

Guest Artist Video for Stampington & Company


Guest Artist for Stampington & Company

Here is my latest published video as a guest artist for Stampington & Company. It shows how to create these Canvases featuring Tattered Angels Glimmer Mist and Glimmer Glam as well as Vintaj Altered Blanks and Sakura Pens.

Guest Artist for Stampington & Company


I love the look that the Gel Pens create on those Vintaj Blanks and those cracks are my favorite.
Guest Artist for Stampington & Company

Guest Artist for Stampington & Company

Guest Artist for Stampington & Company

Guest Artist for Stampington & Company

hope you like it! Have a wonderful day!

huge hugs
Nat

Comments (8)

Leave a comment

Wear your Adhesives on the Outside – Part II

Welcome to the second week of Liz Hicks’ and my blog hop with fun techniques using the “Scrapbook Adhesives by 3L” Products. If you missed what it is all about – read here.

Today it is all about Photo Corners and the Craft & Photo Tape.


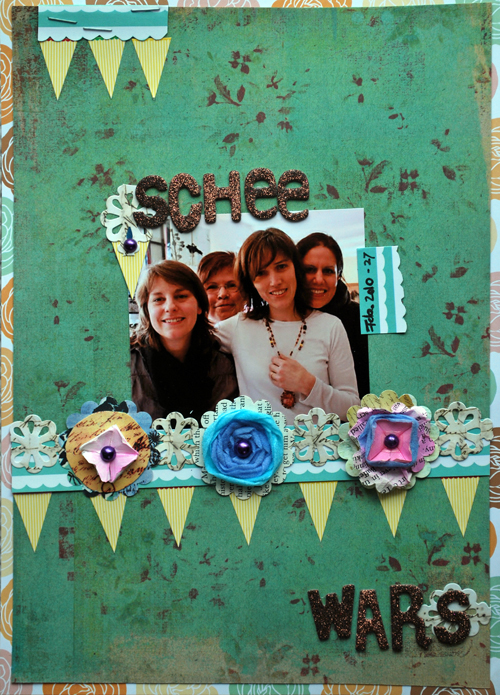
Here is the layout I created with the techniques in the video as well as some detail views.

*Schee Wars*

This layout was created with the wonderful Kenner Road Feb. AddOn Kit.

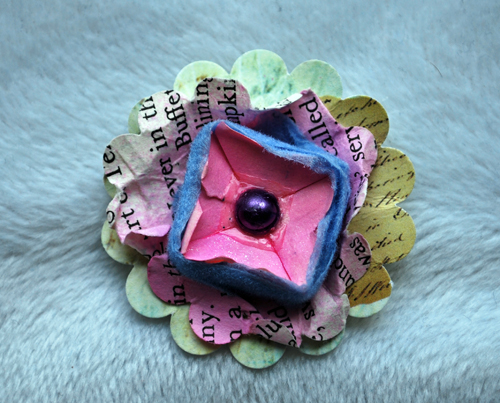
*Photo Corner Flower*

*Photo Corner Flower with Craft&Photo Tape Velvet Ribbon*

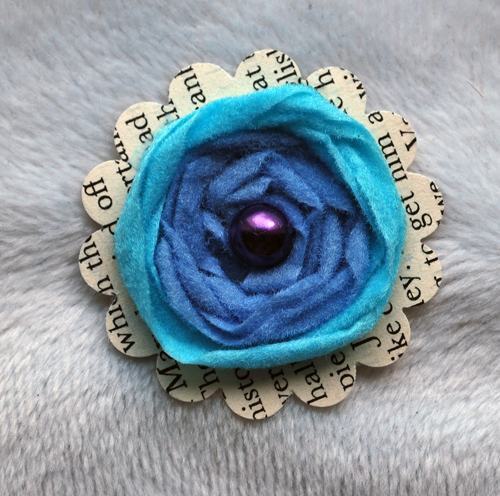
*Craft&Photo Tape Velvet Ribbon Flower*

Here is a little project I did with Liz’ technique last week and a little sneak of my technique next week.

I hope you have fun and wish you a gorgeous week!

Nat

Comments (15)

Leave a comment

Wear your Adhesives on the Outside

There are so many fun things that you can do with products by SCRAPBOOK ADHESIVES BY 3L . So this month I am teaming up with my wonderful friend Liz Hicks on a month long quest to share with you just how much fun you can have “Wearing your adhesive on the Outside”. I’m really fortunate to work with Liz on several different teams and I love her gorgeous work and amazing ideas and skills! Check out her blog If you don’t know Liz, YOU NEED TO! She is awesome and totally talented, I absolutely adore her.. Check out her blog here. When Liz found out that I joined the  SCRAPBOOK ADHESIVES BY 3L design team she told me about her cool idea of doing a blog hop, asked me if I would join and we decided to make March our month to share some of our favorite techniques using this fabulous adhesive.

Here is my video for this week


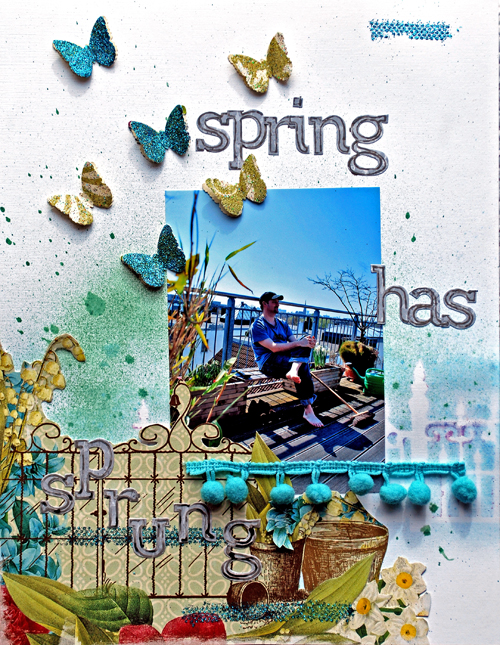
Here is my layout *Spring has sprung* using some of the techniques in the video:


Supplies: Scrapbook Adhesives by 3L products: E-Z Dots, Adhesive Sheets, E-Z Runner.

Tattered Angels Glimmer Mist and Glimmer Screen, Webster’s Pages Paper, Rose Moka Stickers

*Details*

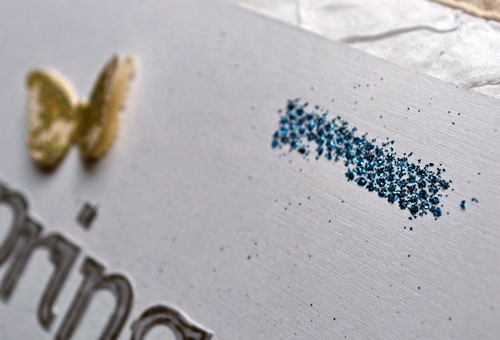
Some texture on the background with the E-Z Dots embossed with Glitter Embossing Powder

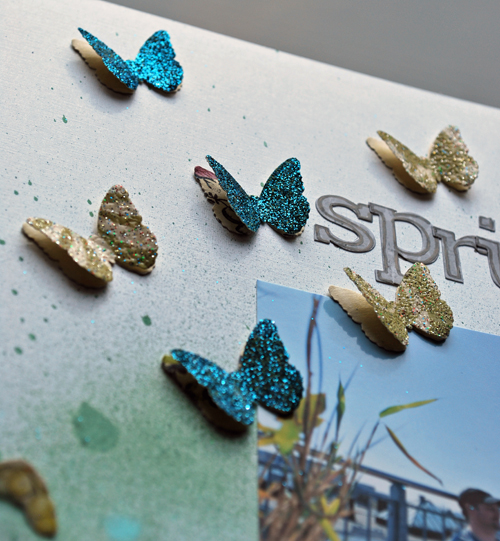
Butterflies punched through the Adhesives Sheets.

So be sure to check us out each Monday as we share our favorite techniques with SCRAPBOOK ADHESIVES BY 3L products. Next week we will be using the craft and photo tape!

Liz and I will both be doing a giveaway on our blogs for all of you who join in through out the month on our little blog hop. Just take the techniques that we are sharing with you and apply them to on of your projects. The more times you try the more chances you have to win! Link back to your project on a comment here through out the month or you can tag us to your pic on Facebook, both will count. All entries will need to be dated March 1st 2010 or after and we will be picking our winners Monday, April 5th. The winners will be given an assortment of goodies from our stash (and are sure to include some of the wonderful products that we are demonstrating).

I hope you have fun and wish you a gorgeous week!

Nat

Comments (22)

Leave a comment