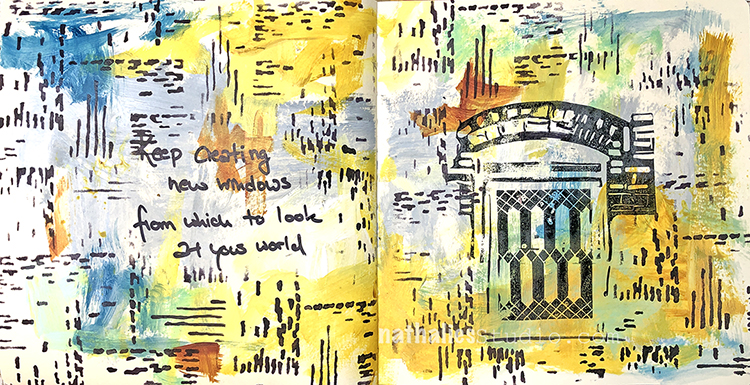
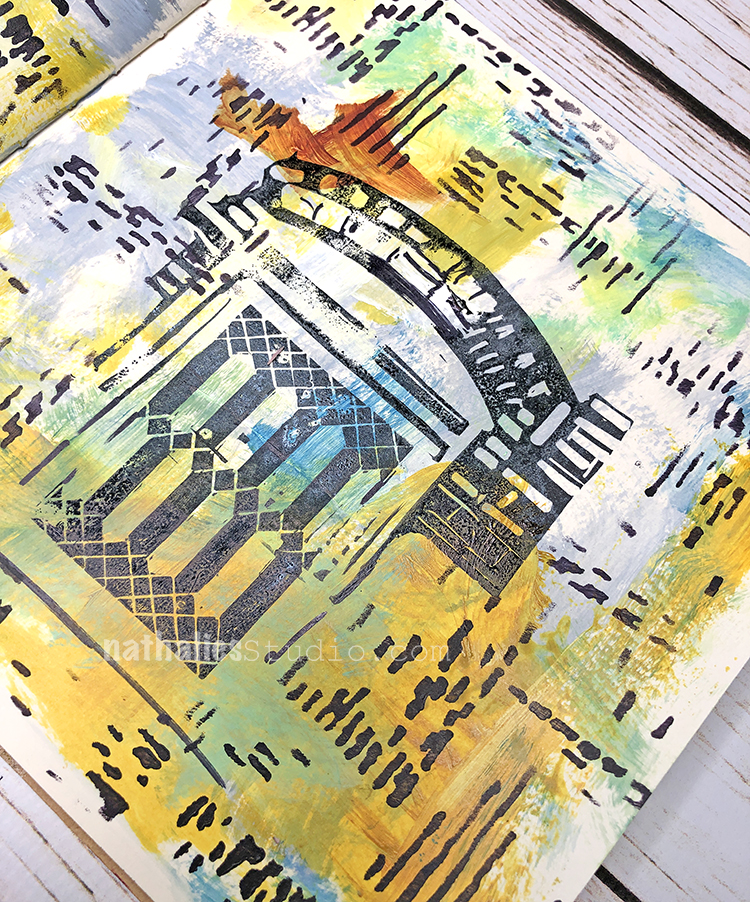
“Keep creating new windows from which to look at your world.”
This was a fun page to make – I used acrylic paints and my new Signals stencil for the background and then I carved stamps for the window and architectural elements.
Hello from my Creative Squad and a post from Linda Edkins Wyatt today! Linda is sharing a unique project with a special New Year message. She’s using my Manhattan and Broadway stencils and my Versailles foam stamps, and this month’s theme: Happy Holidays – It is a time of year where we are celebrating and coming together and enjoying some merriment. Create something holiday related (whatever holiday you may be celebrating) and enjoy the season!
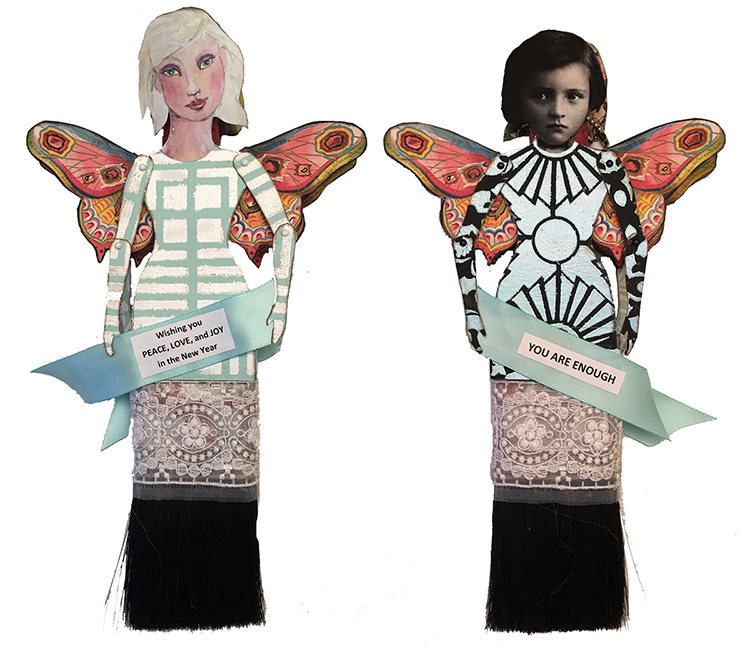
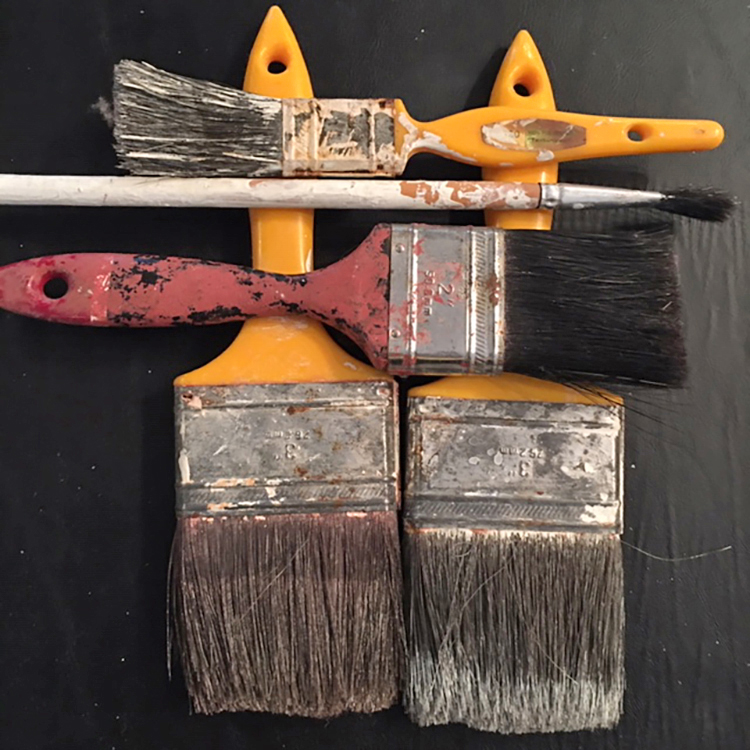
This month’s theme for Nat’s Creative Squad is Happy Holidays, and we’re honoring the time of year where we not only reunite with friends and family, but also hope and plan for the coming year. One of the traditions in the art community is choosing a “word of the year” to represent the artist’s hopes and dreams for the year ahead. In my online Facebook Paper Doll Trading group, we are exchanging flat paper dolls with New Year’s wishes. I decided to go a step further and make a 3-D paintbrush doll to usher in the New Year.
My fascination with paintbrush dolls really started a few years ago when I began seeing them on Instagram and Facebook and in art and craft magazines. I finally broke down and ordered a kit from Retro Café Arts, and I’m sure glad I did. I have made two so far, and they adorn my studio storage space and paintbrush caddy. I recently rifled through our toolboxes and found an assortment of deliciously grungy used paintbrushes.
Naturally I wanted to use Nat Kalbach’s stamps and stencils for my New Year’s Paintbrush Doll. The trouble was deciding…which of her stamps and stencils should I use? And in what colors and textures?
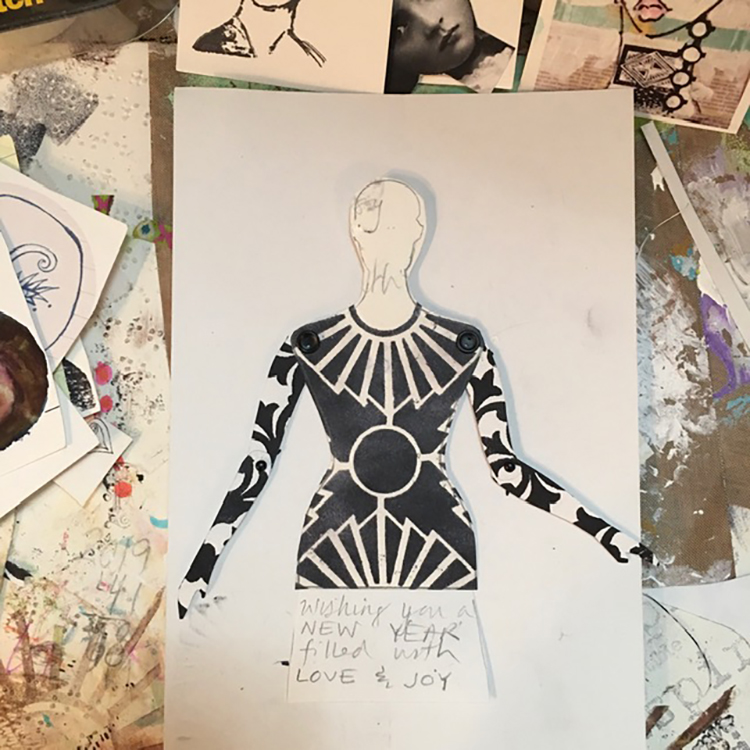
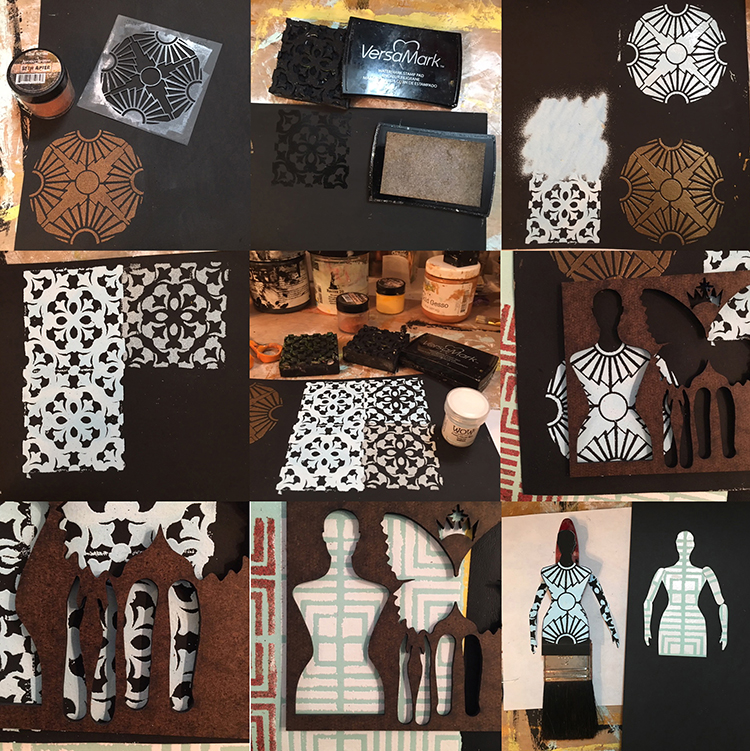
I started by doing a quick test of my paintbrush doll idea using an assortment of Nat’s stamps and stencils with black ink on white cardstock and created a working model of what I had in mind with her Broadway stencil.
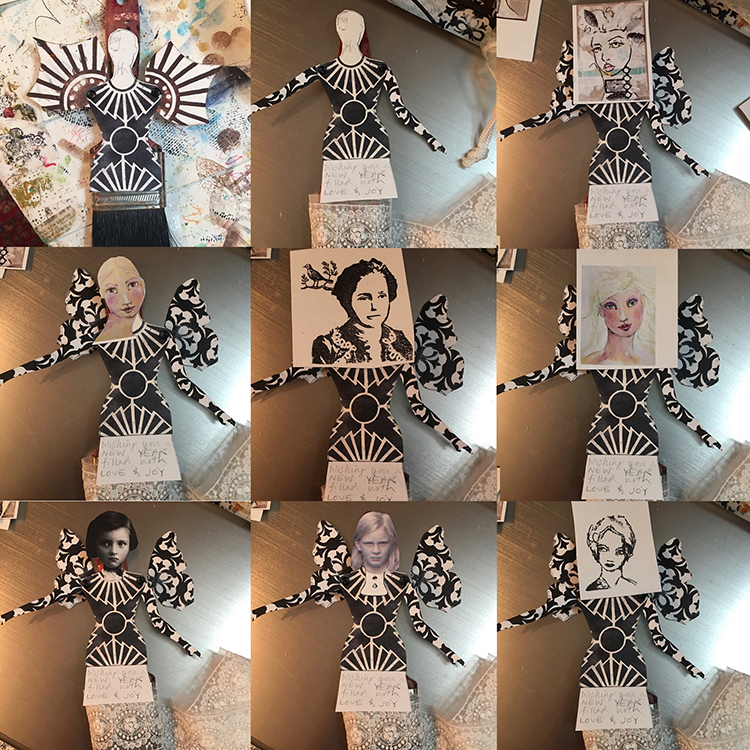
Next, I tested faces. Since I make a lot of paper dolls, I keep a box of parts handy. I rifled through it looking for just the right face. I had trouble deciding as you can see in the “audition” photo.
I snapped photos of each, then put the faces aside for later and concentrated on the body. I mixed up my favorite paint colors, got out my favorite embossing powders, and got to work. I placed the Retro Café Arts template over the finished papers to decide what I liked best.
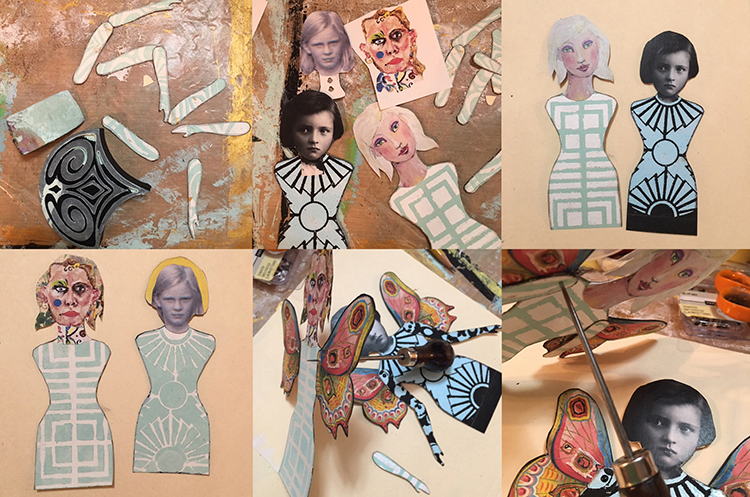
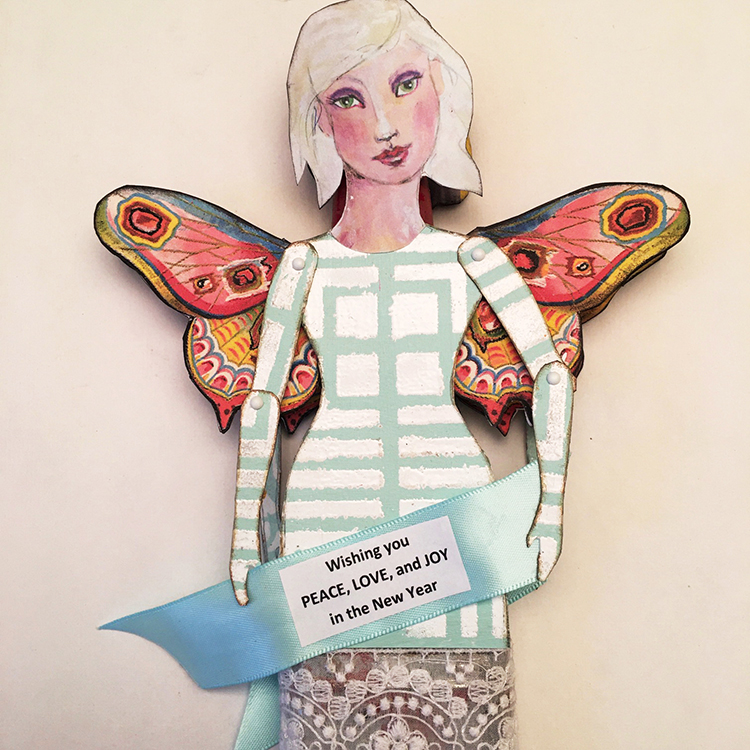
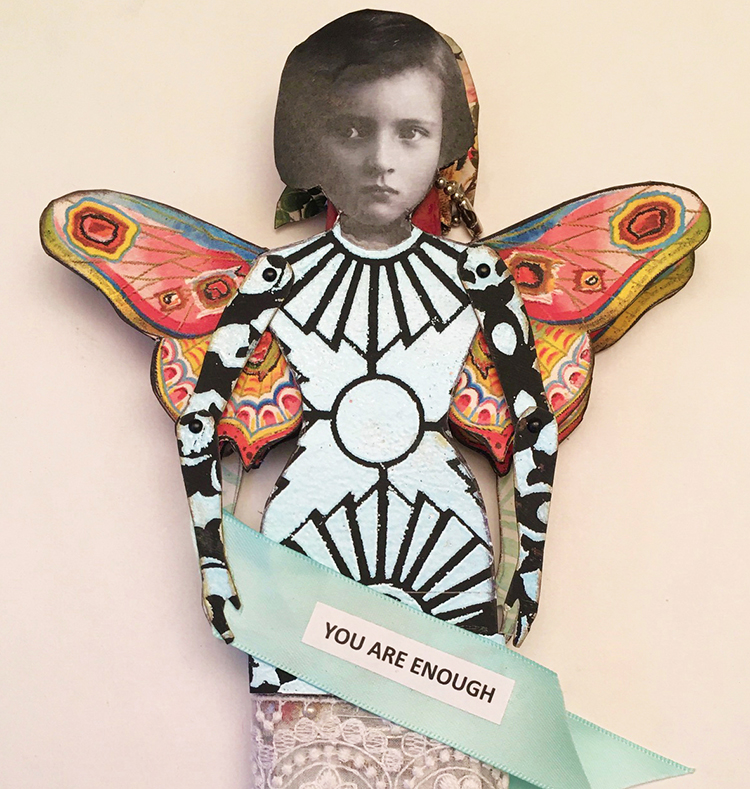
It turned out that I had two favorites (the Manhattan stencil done in white embossing powder on pale green painted paper, and the Broadway stencil done with ice-blue embossing powder on black cardstock), so I decided to try something I had never done before: making a two-sided doll! I also decided to use printouts of butterflies from The Graphics Fairy for wings rather than the wings that came with the kit.
For the black and ice-blue Broadway stenciled body, I cut arms from the mini Versailles art foamie, also printed in blue embossing powder on black paper. I added a strip of the mini Versailles print under the body.
Due to the width of the paintbrush, there would be about a ¾” gap between the two sides of the paintbrush doll. The backsides were a bit messy, so I decided to use some of the extra stenciled paper and extra faces to “line” the back of both dolls. (The reverse side is mostly hidden, but the extra elements add a little mystery to the finished piece.) You can see the interior section on the bottom left photo.
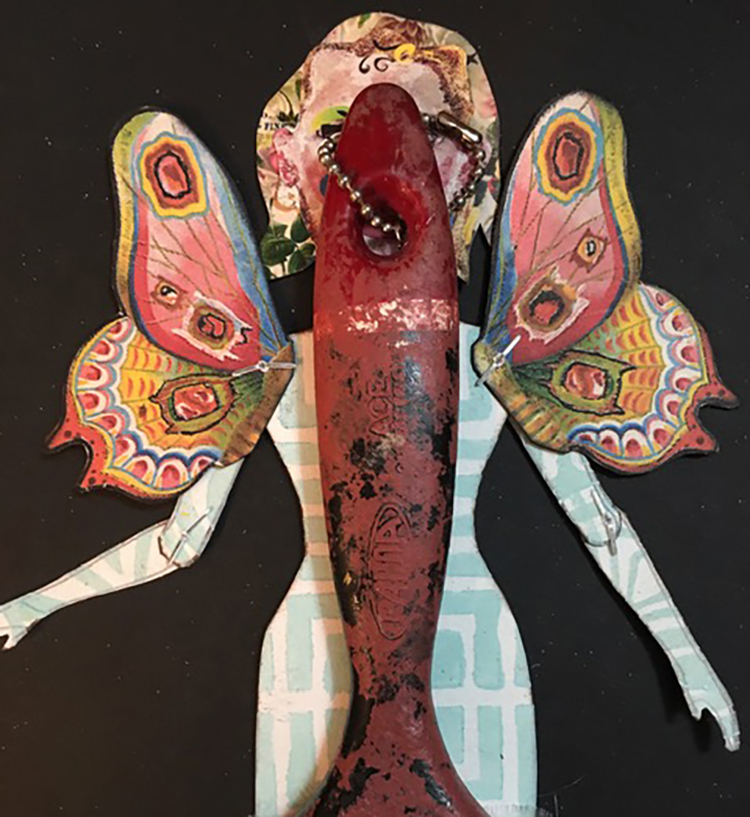
Once I selected the face, cut the bodies, and attached the arms and wings with mini brads (so they could be moveable and posable), I used E6000 glue to attach the doll bodies to the paintbrush handle. So that the doll could be hung, a short length of ball chain was threaded through the hole in the paintbrush handle; a tiny metal connector was used as a closure.
Once both sides were glued on, I added some beautiful sheer 2” lace and wrapped it around both sides, then carefully glued it in place.
The final touch was the New Year’s words of encouragement. Side one, which has a doll-sized printout of a face I painted using Jane Davenport’s beautiful faces method, holds a satin ribbon banner that says: “Wishing you PEACE, LOVE, and JOY in the New Year.” Side two, which has a sweet vintage child’s face from the Graphics Fairy, has a satin ribbon banner with the words “YOU ARE ENOUGH.”
This two-sided paintbrush doll can be used on a tree, doorknob or mantle as a seasonal ornament, or displayed throughout the year as a little angel of encouragement.
Thank you Linda! This is such a cool project and what a great way to give a paintbrush a new life :)
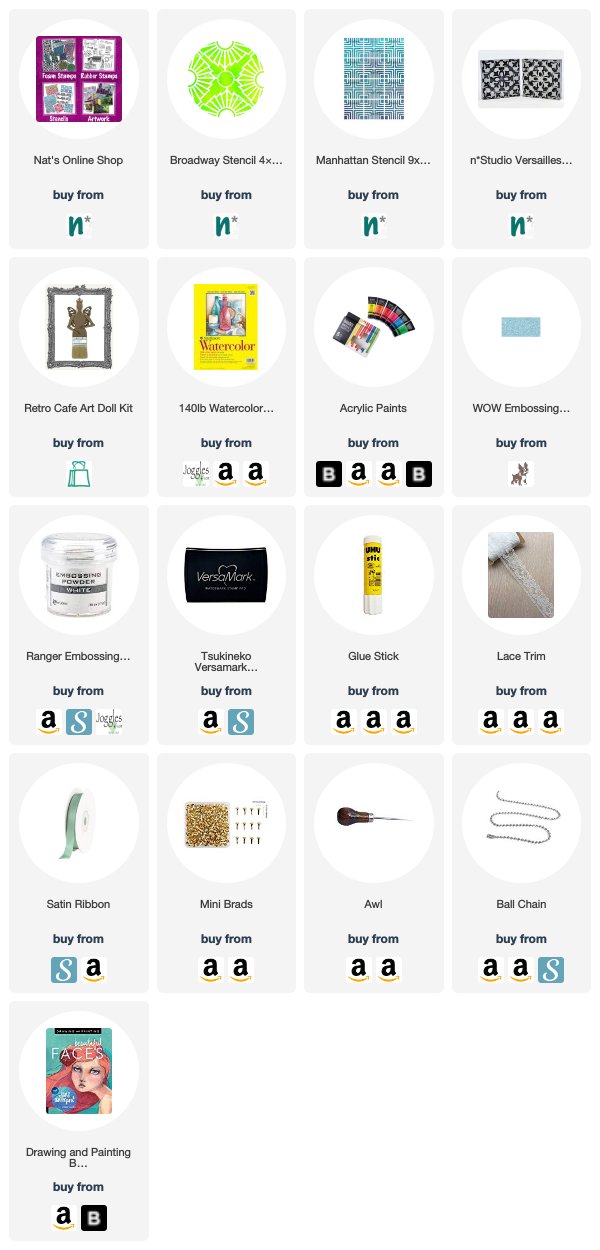
Want to give Linda’s project a try? You can find all my Stencils and Foam Stamps in my Online Shop and in addition to some old, well loved paintbrushes, here are some of the other supplies she used:
Feel inspired? Working on something yourself that you’d like to share? I love to see how you interpret our monthly themes. Email me or tag me #natkalbach how you used my stencils and stamps – I would love to share your projects in my next “n*Spiration From Around the Globe“.
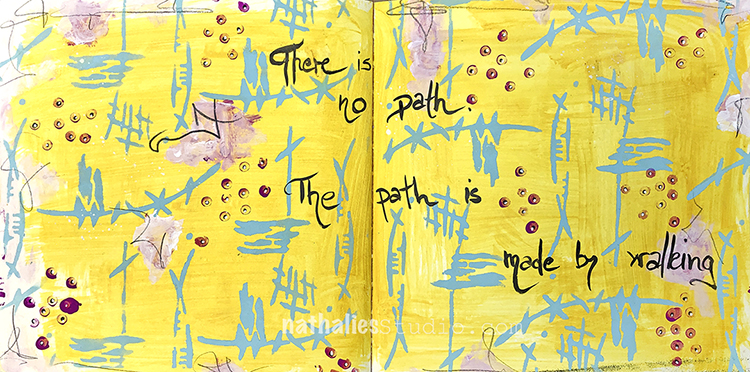
“There is no path. The path is made by walking.” Time to get out there and blaze some new ones :)
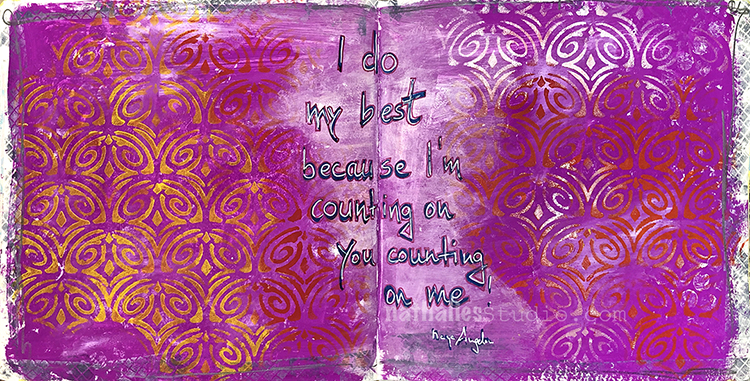
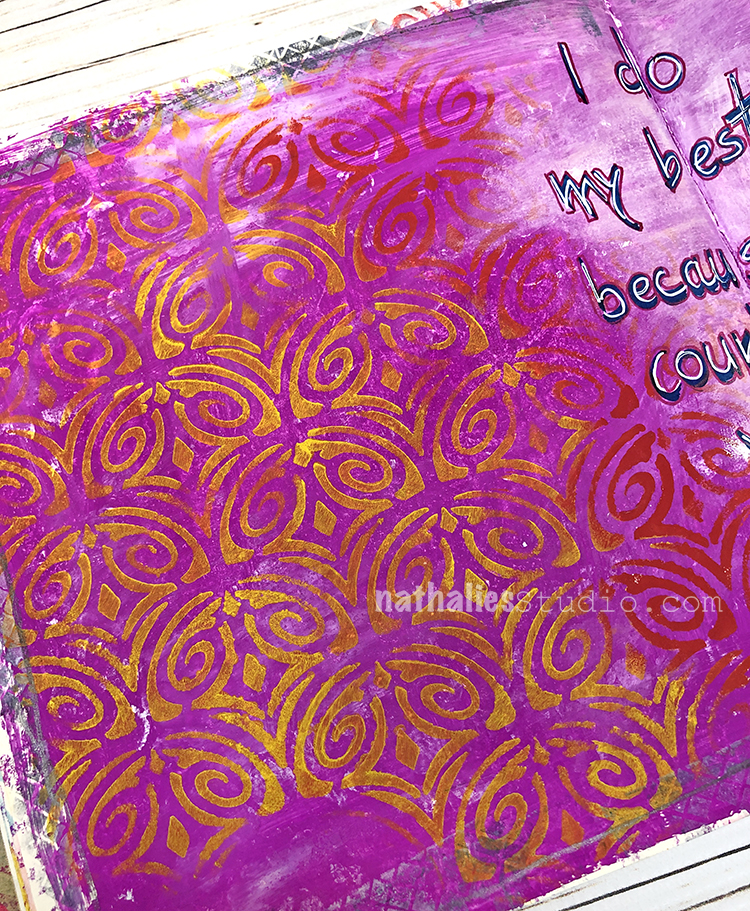
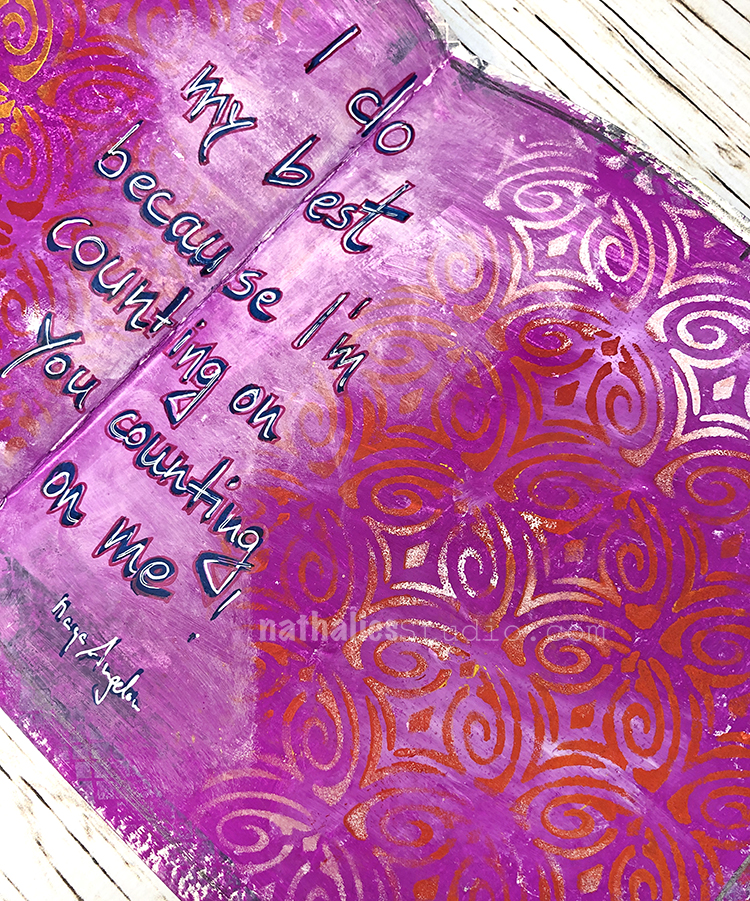
For this I used Liquitex and Golden paints with my new Kyoto stencil. I love this color combination of a warm background and then a nice cool pattern on top – really makes things pop.
I used a pencil eraser dipped in paint for the dots (a good trick) and a Fude pen for my journaling.
Here are some of the supplies I used:
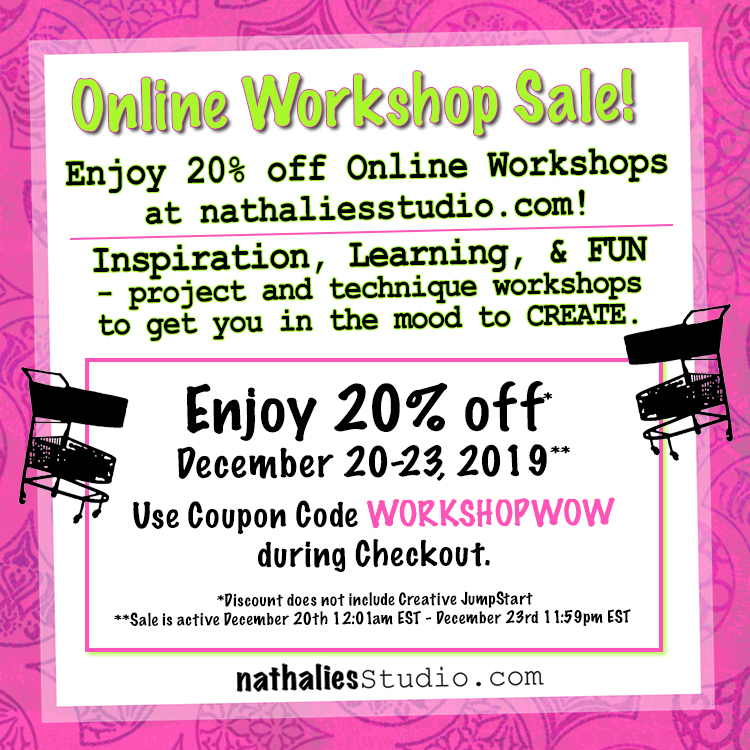
And don’t forget my Online Workshop Sale – ends tonight at 11:59pm EST – great savings on every online workshop except CJS20:
So happy to share with you today some video interviews I did with some of our Creative JumpStart 2020 teachers: Birgit Koopsen, Rae Missigman, and Joe Rotella. Three very sweet and talented artists to hear from :)
First up is my good friend Birgit Koopsen from The Netherlands who I have known as a friend for many years and who’s artwork I have always admired. In this interview Birgit discusses her journey into art journaling and mixed media, her natural ability to work with color, and how her artwork reflects her personality. She talks about the influence of travel on artistic choices and the lessons she’s learned from her students around the world.
Next we have Rae Missigman, who I have also known for years and who has such a wonderful fun personality that I think shows through in her art. Learn how she came to mixed media and art journaling from an interest in writing and crafting as a hobby, while today still keeping other hobbies outside her regular artmaking as a catalyst for creativity. Rae talks about carving out small amounts of time for art in a busy modern life, trying new materials without worrying too much about how they are “supposed” to be used, and the joys of her pocket journals.
Finally we have Joe Rotella, who I have also known for years and who is so much fun to hang out with that it is always a blast to have him on CJS. In this interview we joke and laugh the whole way through, but you will also learn how his mischievous and curious mind as a child sowed the seeds for his creative life to come. He talks tools, tech and magic. He encourages viewers to not be intimidated by new tools and tech. And he discusses how he visualizes and plans projects ahead in his style of working. There is definitely a bit of magic in the interview and for the ultimate laugh at the end, be sure to watch the bloopers :)
I hope you will join Birgit, Rae, and Joe and all the amazing teachers for this fun and inspiring challenge beginning in January: Sign up TODAY for Creative JumpStart 2020 and get 31 different mixed media lessons from 31 Super Hero Artists. Hope to see you in the CJS classroom soon :)
It’s the most wonderful time of the year, so I’m running a Workshop Sale ALL weekend. From December 20-23 at 11:59pm EST you can save 20% off my online workshops. This sale excludes Creative JumpStart 2020 but wait, that is still on sale for $50 through the end of the month so you don’t have to miss out on that either.
So happy to share with you today some video interviews I did with some of our Creative JumpStart 2020 teachers: Julie Fei-Fan Balzer, Mary Beth Shaw, and Carolyn Dube. Wow what an amazing group to hear from :)
First up is Julie Fei-Fan Balzer, who I have known now for many years as a friend and colleague. Her artistic style is unmistakable and her talents cover so many areas so chatting with her is always fun and informative. In this interview we talk about how to manage time in our busy lives, how her fiber art connects with her mixed media work, and how she loves to try new things and explore her curiosity for creativity.
Next we have Mary Beth Shaw, who has been a teacher with Creative JumpStart now for a long time and is a wonderful artist with an abstract style. Mary Beth is also the woman behind Stencil Girl Products so she is very busy with everything that she does. In this interview Mary Beth discusses ways to carve out time for artmaking even when time is tight and how her art journal helps with that. She also talks about different phases she’s gone through in her abstract work, and the importance of knowing what other art is out there (past and present) to be an informed artist.
And finally we have Carolyn Dube, who has been a part of CJS for a few years now and who always brings color and play to the world through her art and personality. In this interview she talks about her current obsession with gelli plate printing, the liberation and fun that comes from embracing “mistakes”, and how she found confidence working with color. Carolyn also hints at what her cjs video will be about and describes it as that glorious moment where chocolate met peanut butter :)
And now it is your turn to go after a fun and inspiring challenge beginning this January: Sign up TODAY for Creative JumpStart 2020 and get 31 different mixed media lessons from 31 Super Hero Artists. Hope to see you in the CJS classroom soon :)