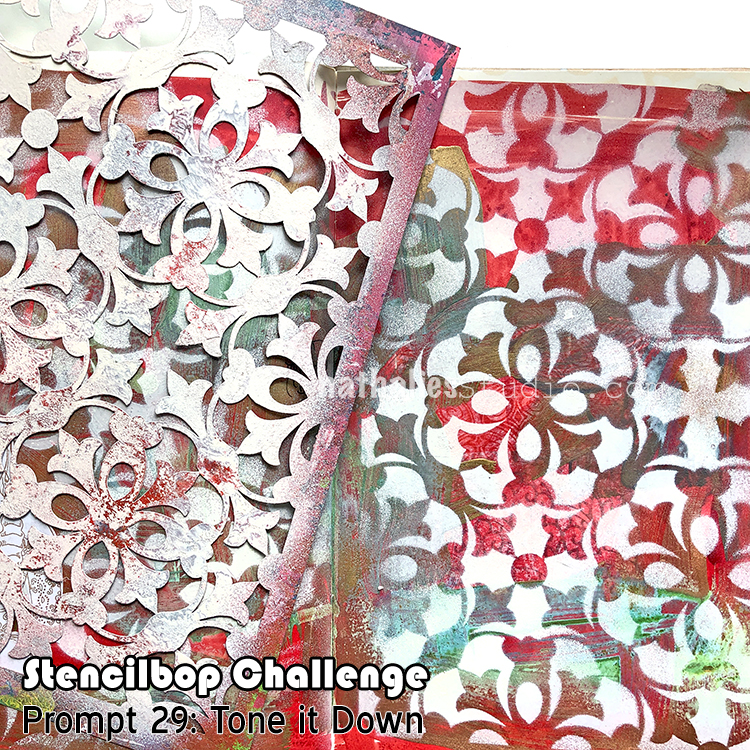
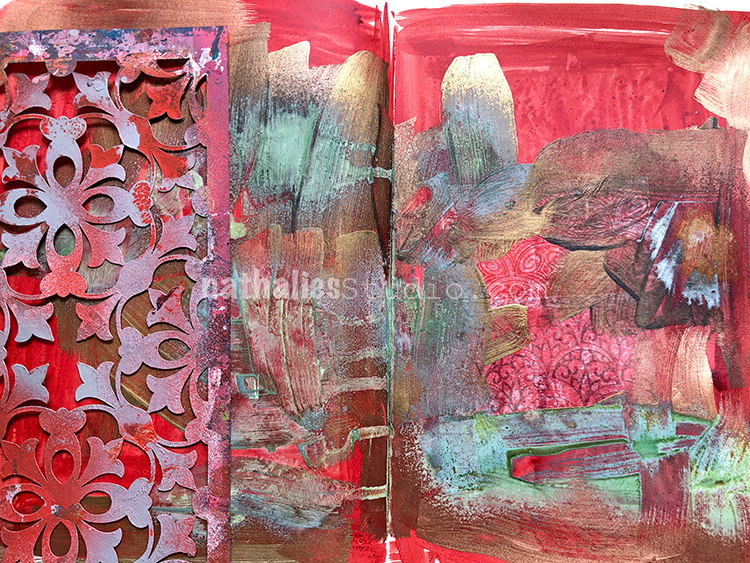
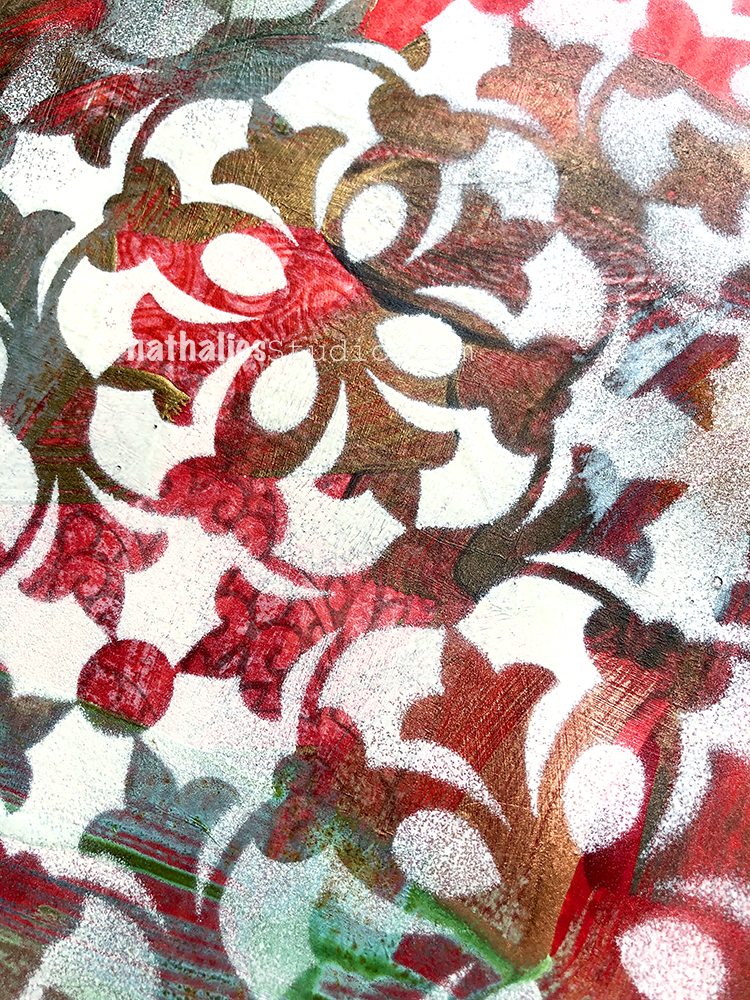
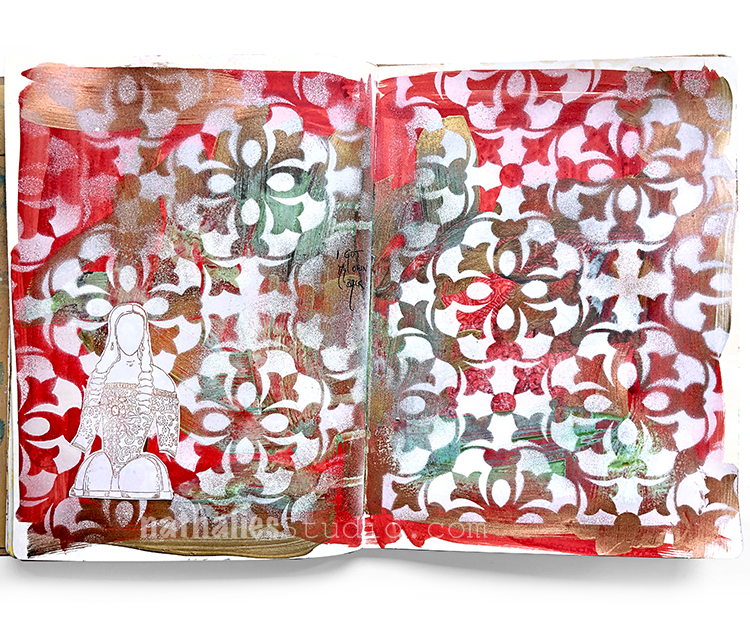
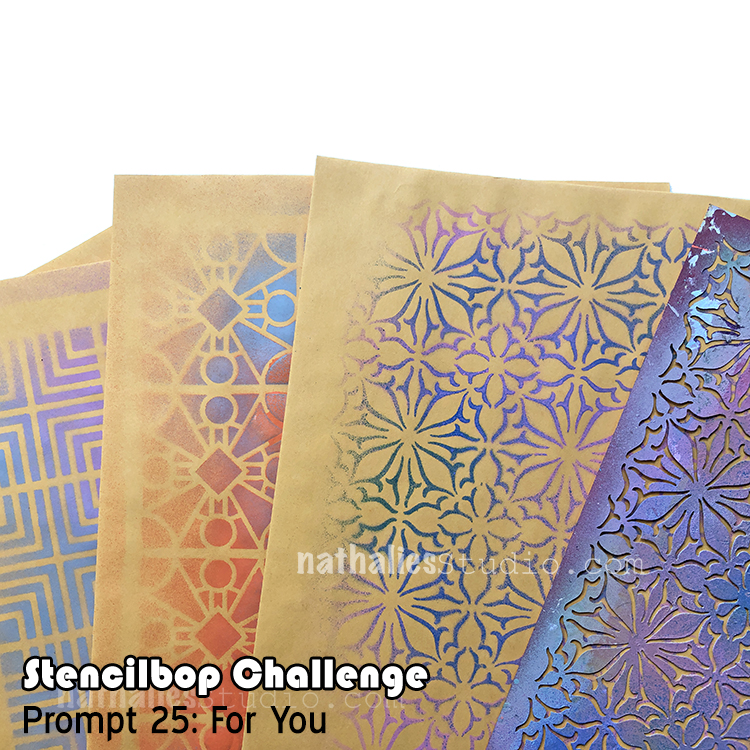
This is a recap of today’s Stencilbop prompt, August 29 – Tone it Down
Often times I use my left over page in a second art journal or try new things out and the spread then looks kind of crazy but also kind of interesting.
Instead of painting over the spread I love to tone it down with a stencil – usually using one with bigger openings and a lighter color paint.
Here I used the Versailles Stencil with white spray paint.
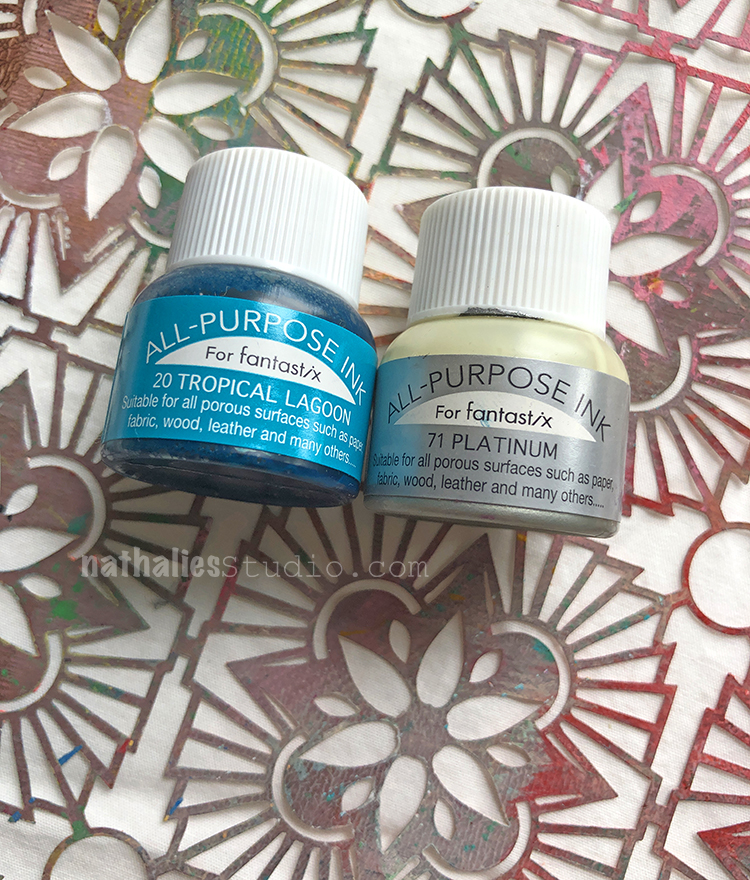
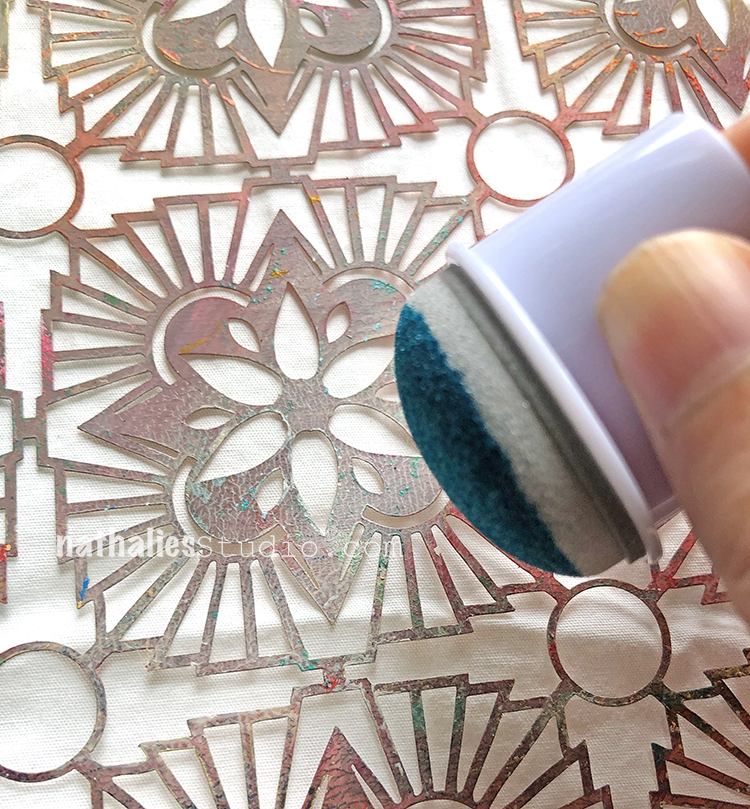
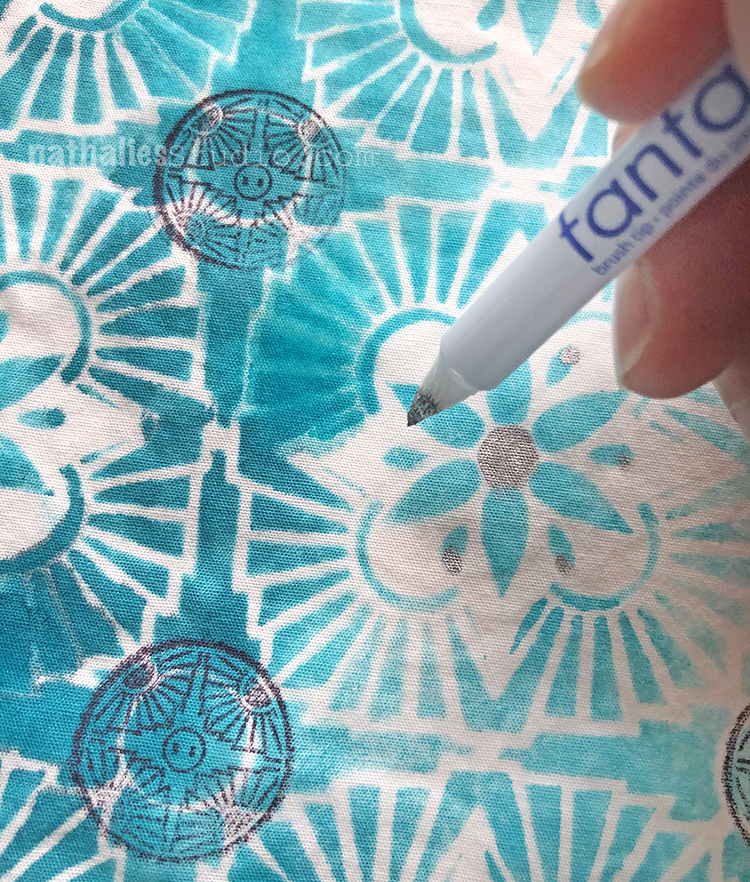
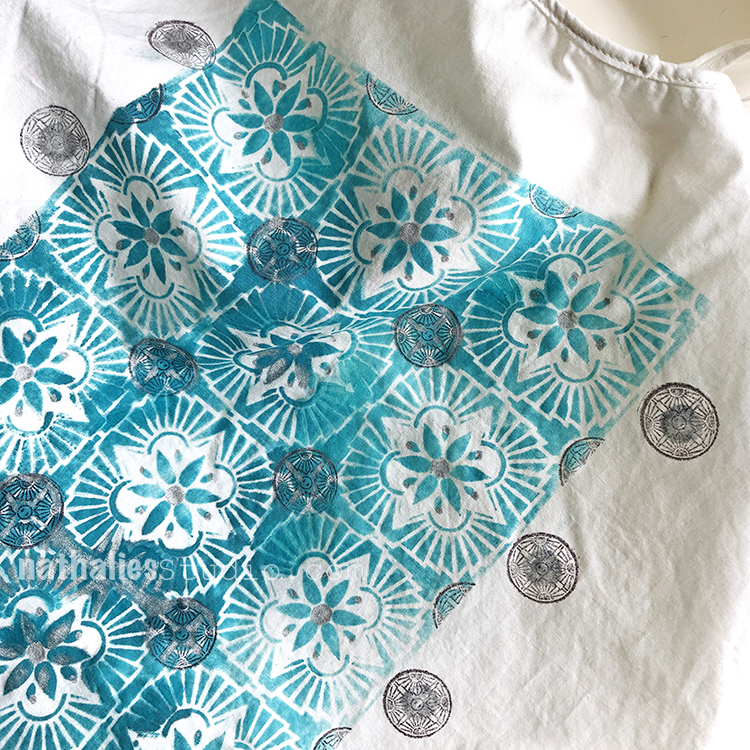
Here are some of the supplies I used in this prompt:
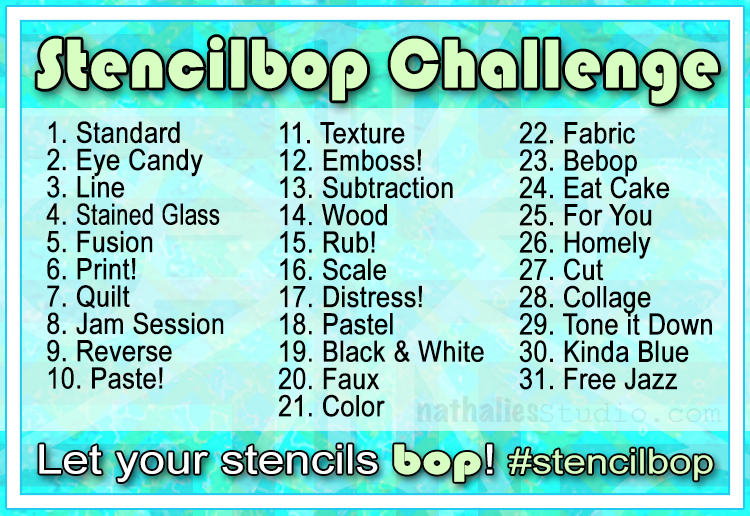
There’s still time to play along with us on Instagram! Here is the prompt list:
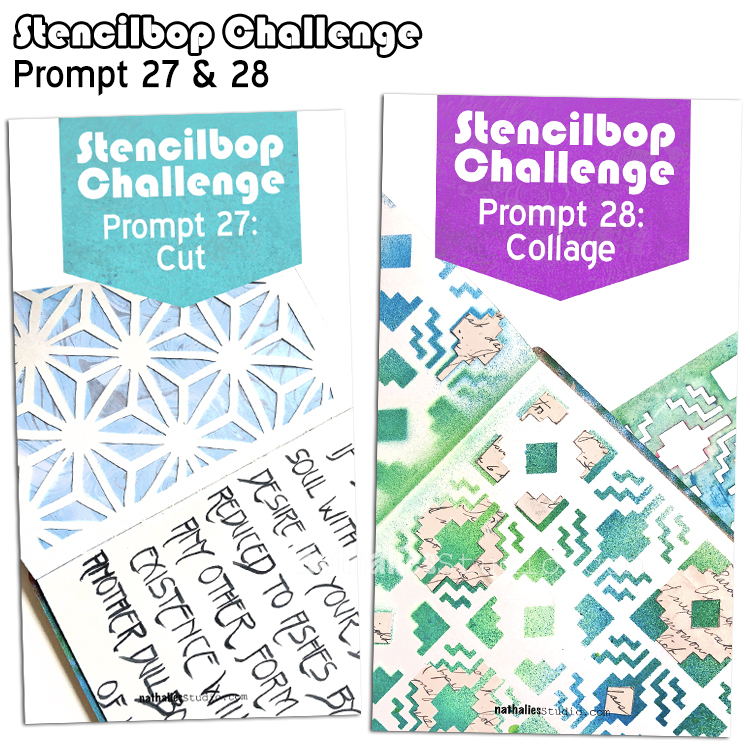
Here is your recap for Stencilbop prompts 27 and 28:
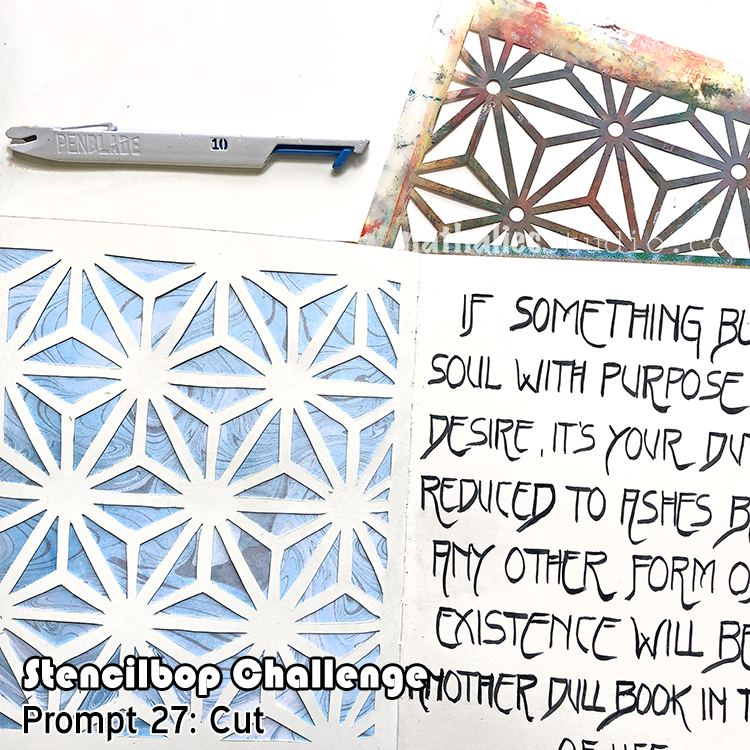
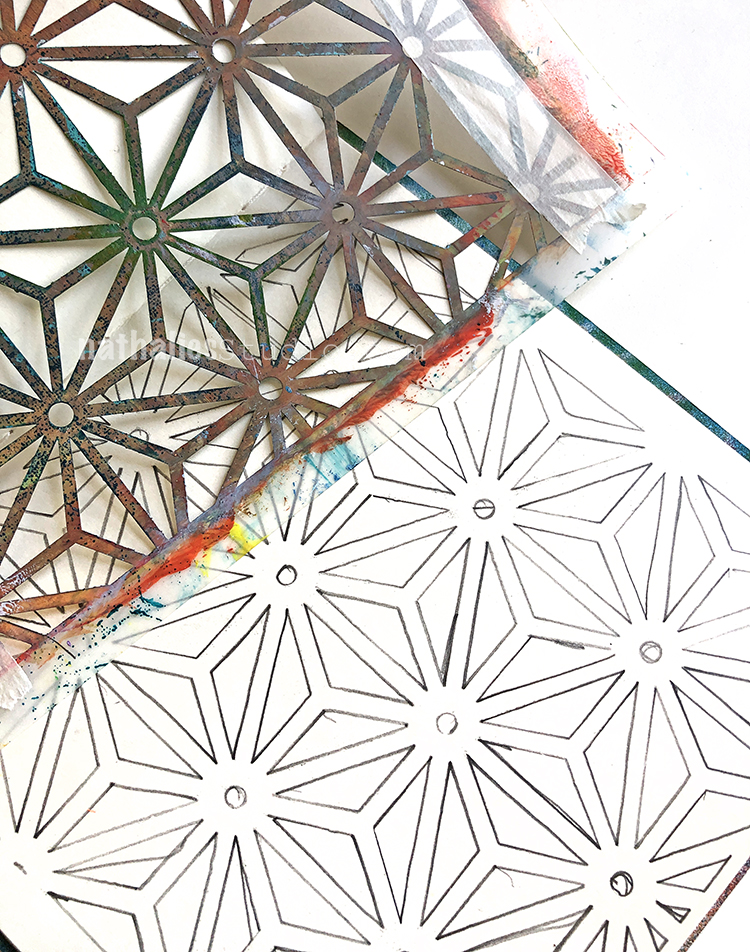
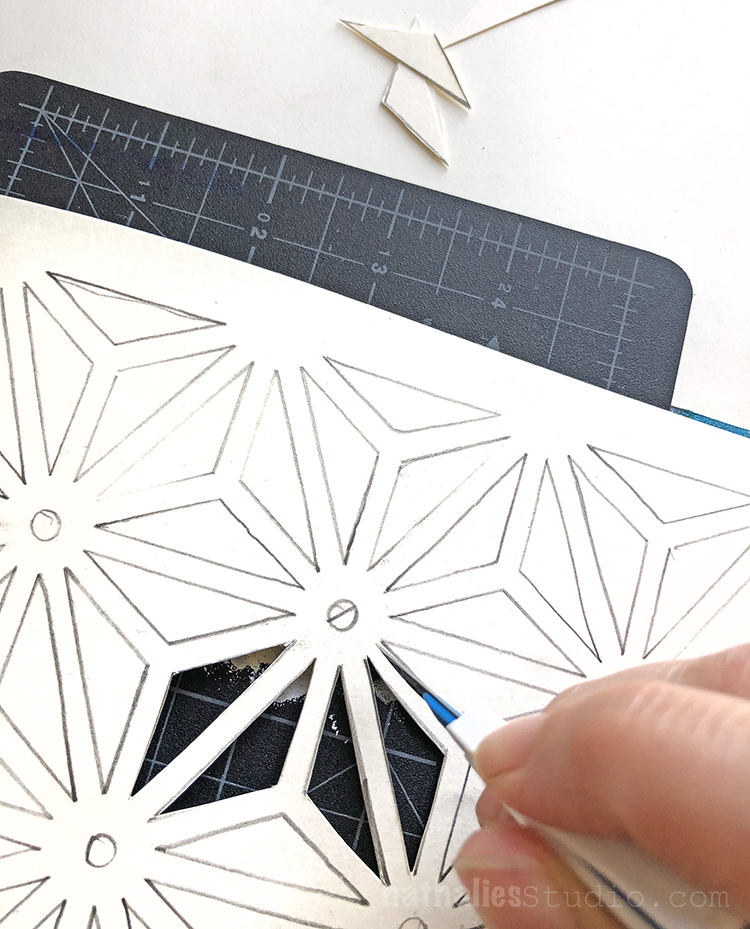
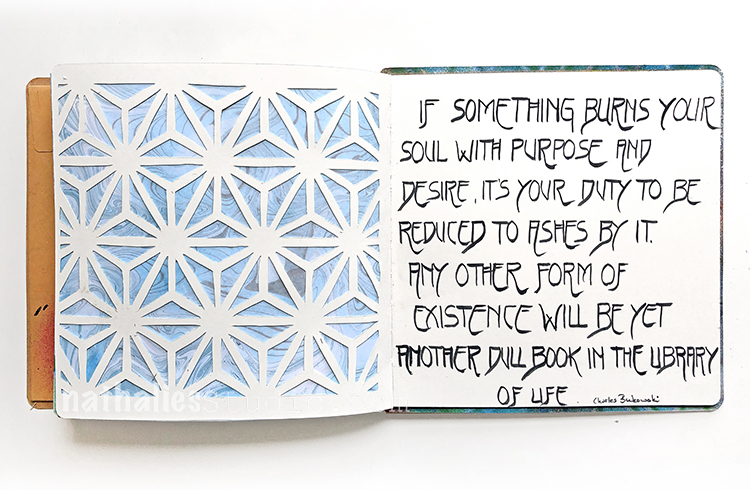
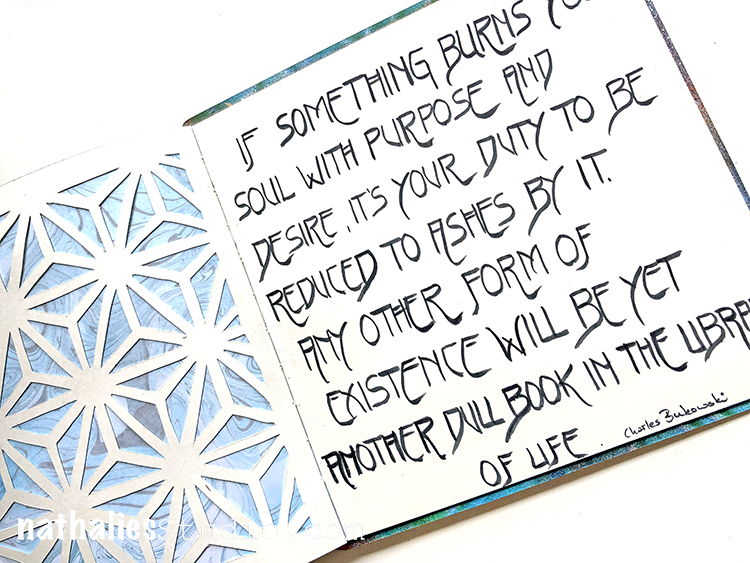
August 27 – Cut
It’s so much fun to use Stencils as a cutting template in your art journal.
For this art journal spread I used my Star Struck Stencil and traced it into my journal.
Then I cut the openings out of the paper with a craft knife…
…and mounted one of the Suminagashi papers that I printed a while ago behind it.
I really like the simple look of this.
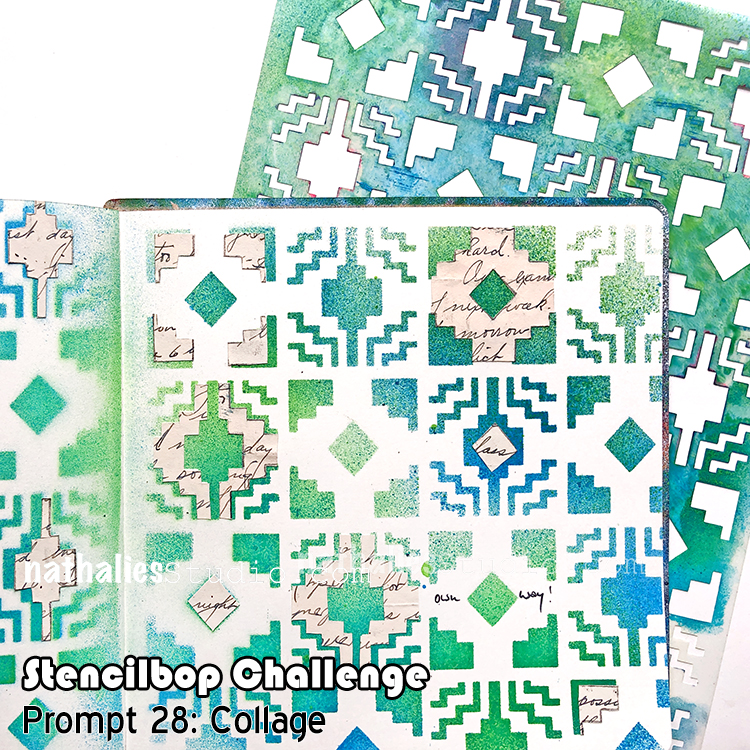
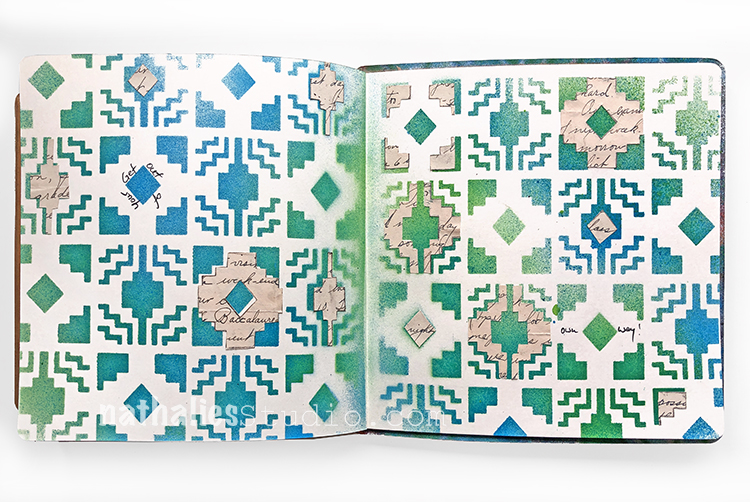
August 28 – Collage
Collage is such a classic artmaking technique. I wanted to combine it with the use of stencils.
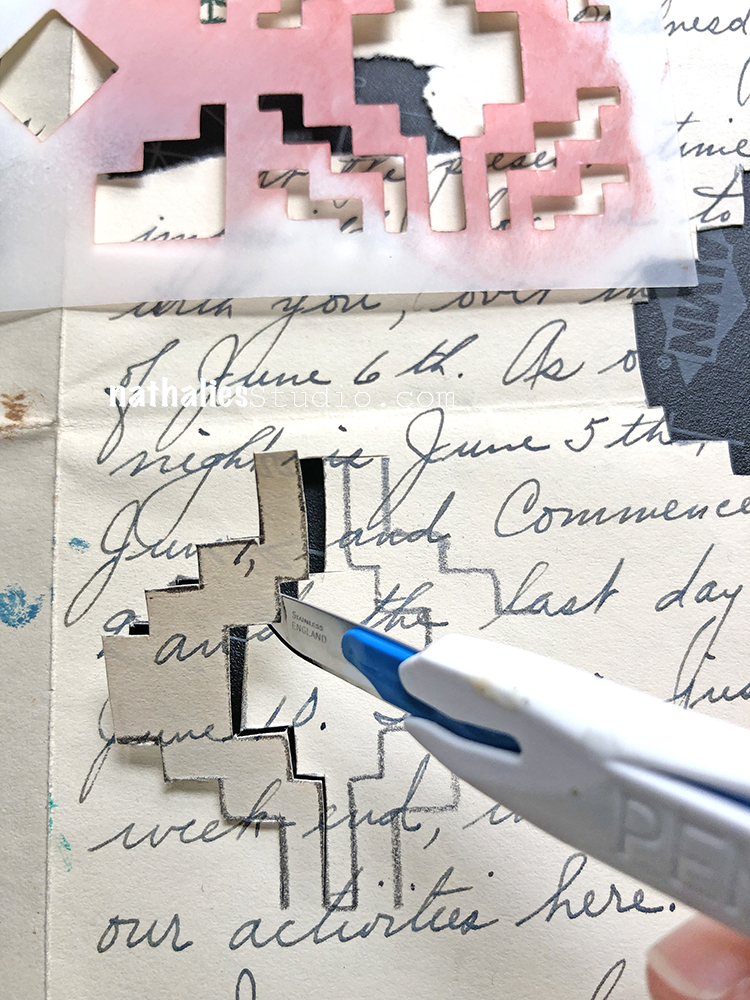
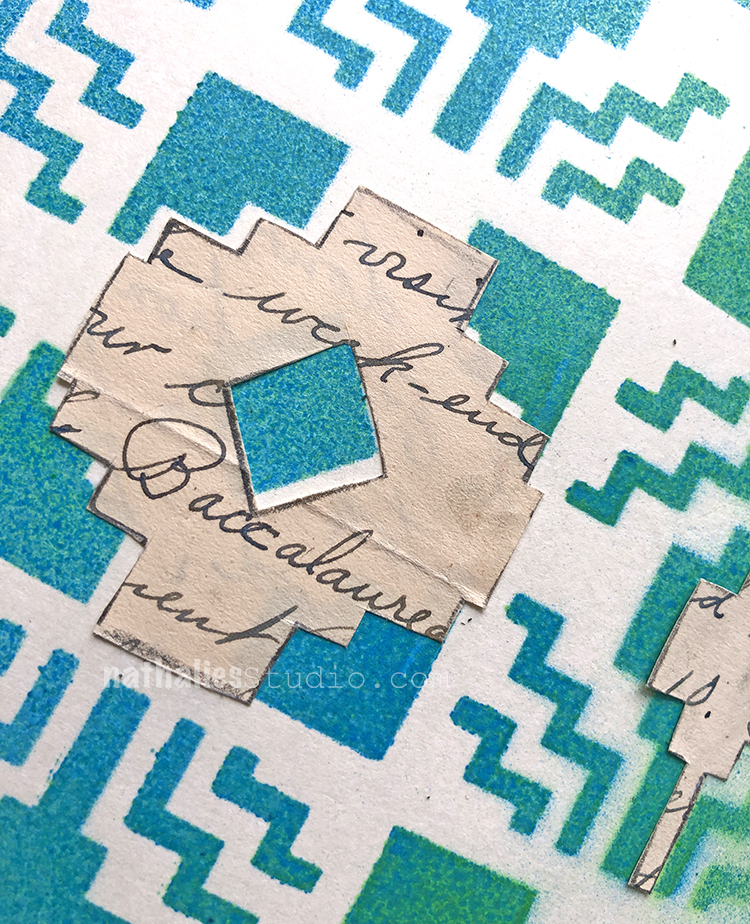
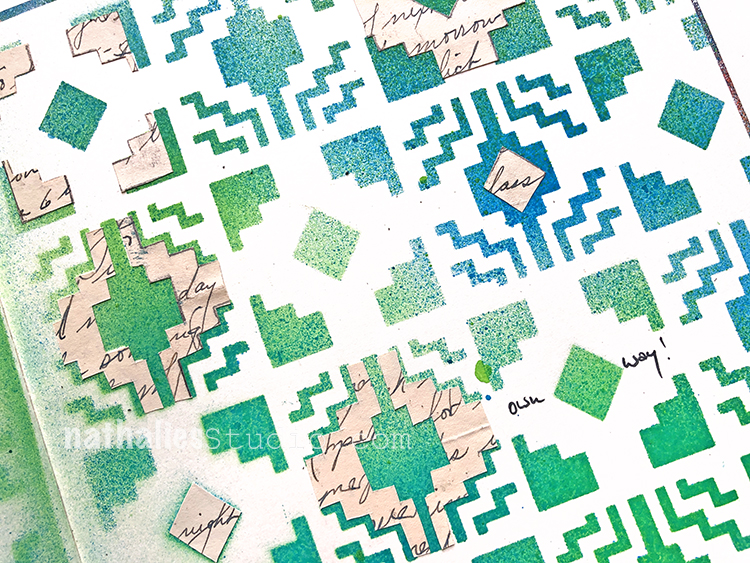
For this art journal spread I used some spraypaint through my Santa Fe stencil and then traced some of the elements of the stencil onto an old letter that I had found in an antique store.
I cut the pattern elements out and applied them- sometimes offset with a glue stick to the spraypainted pattern.
Another fun and easy way to use stencils.
Here are some of the supplies I used for these prompts:
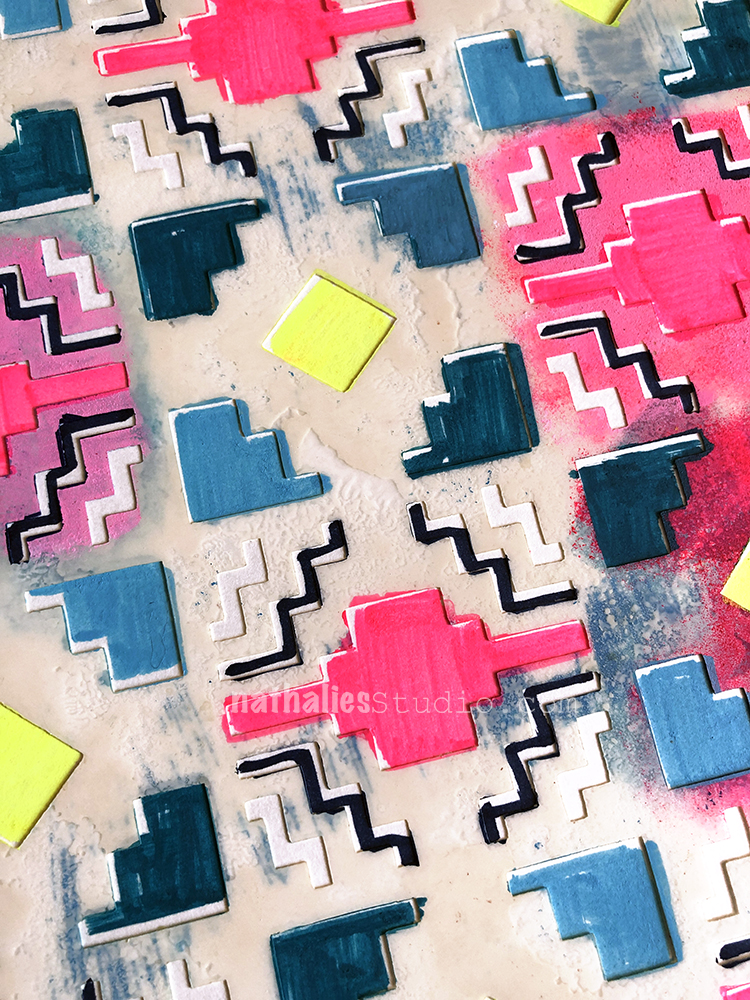
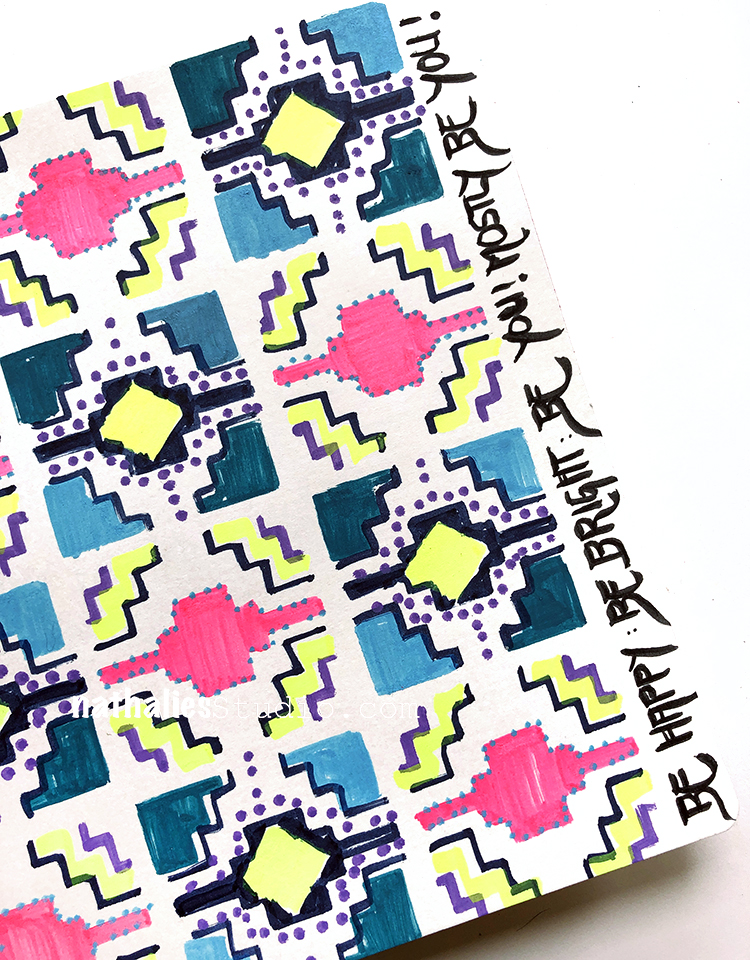
Happy Tuesday from the Creative Squad! Today we have a grouping of handmade cards from Maura Hibbitts that will really catch your eye! They feature bold colors and patterns including my Maze Hex and Groovy foam stamps and are inspired by the theme this month: Boldly Going – Go BOLD with color or pattern this month and really make something that is packed with visual POP! This is no time to be subdued or subtle. Go Bold!!!
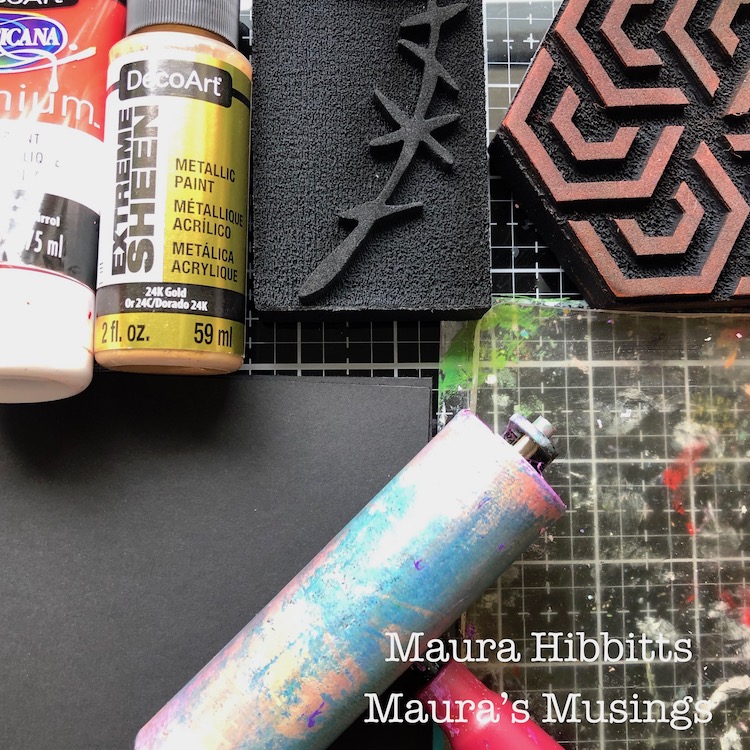
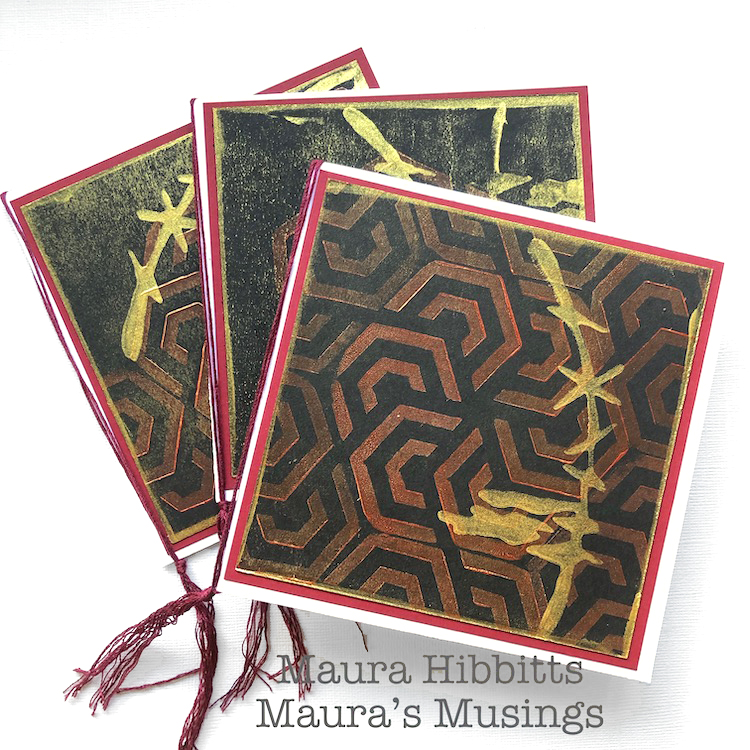
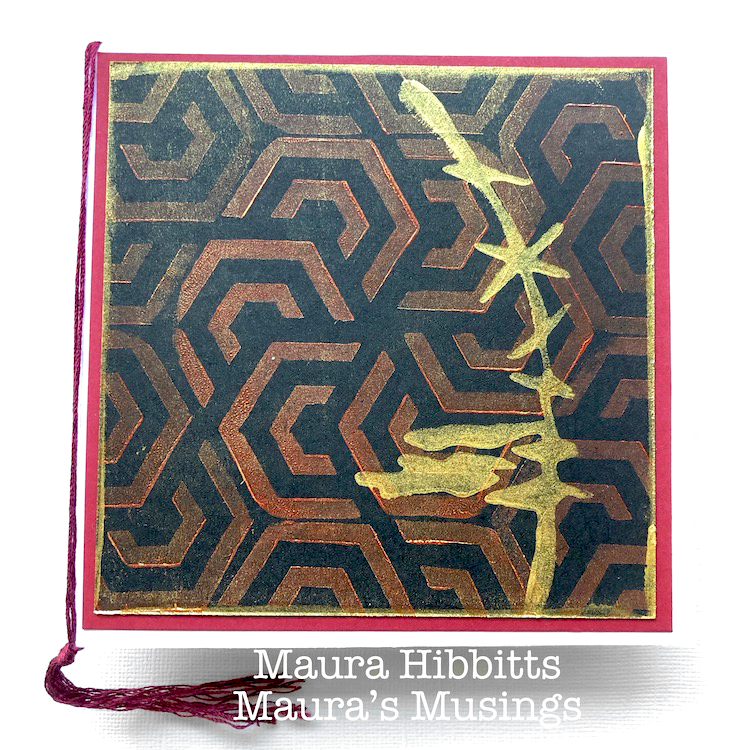
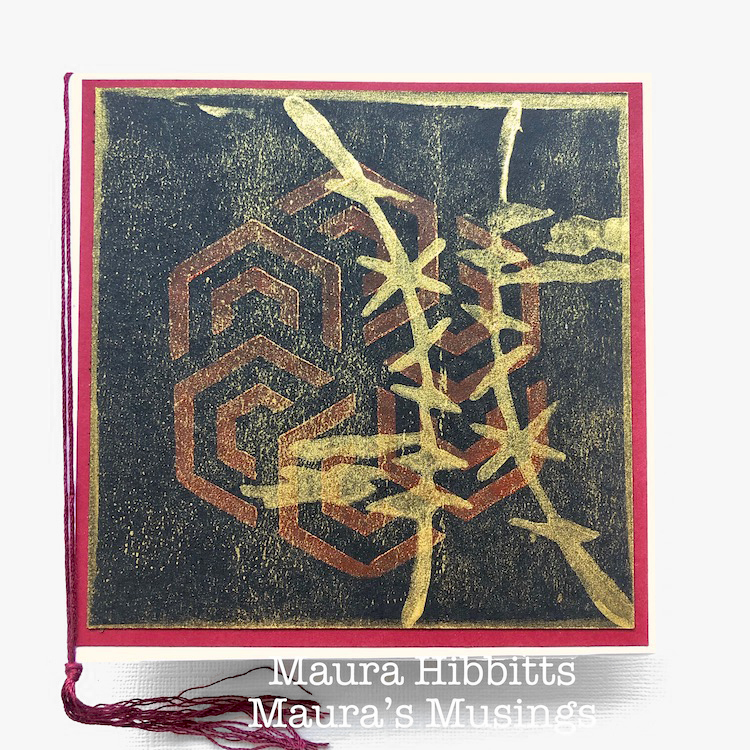
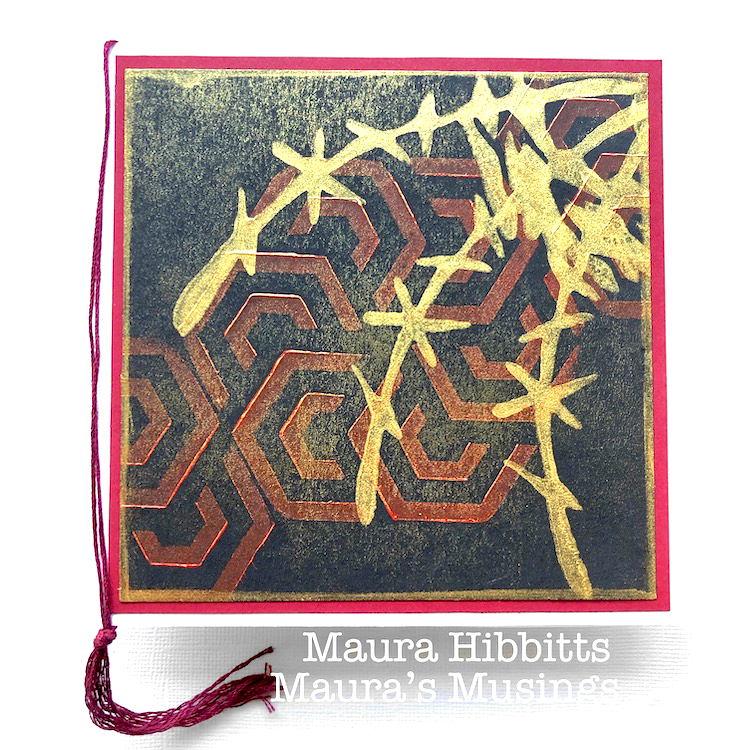
Why not make a statement with some bold, handmade cards? There are a lot of cute and pretty cards out there (I know, because I make some too), but every once in awhile, you just need an attention grabber. That’s when going bold with your design can be a lot of fun! I made a trio of square cards, shimmering with possibility.
My project uses a few simple materials. I began by cutting the white card stock into the card base to make a 5.5 inch square card. (5.5” x 11”, and fold in half) The dark red paper is a 5.25 inch square, and the black is a 5 inch square.
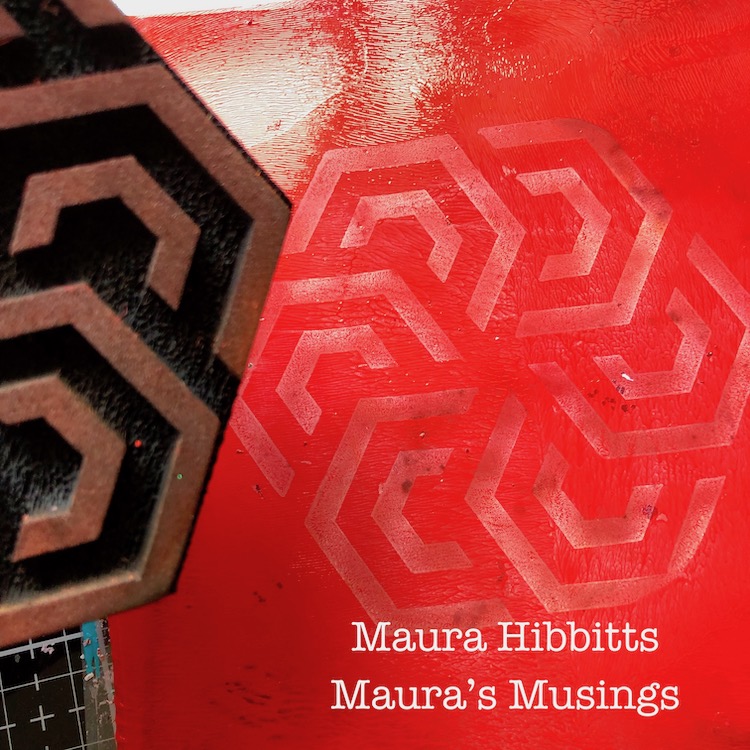
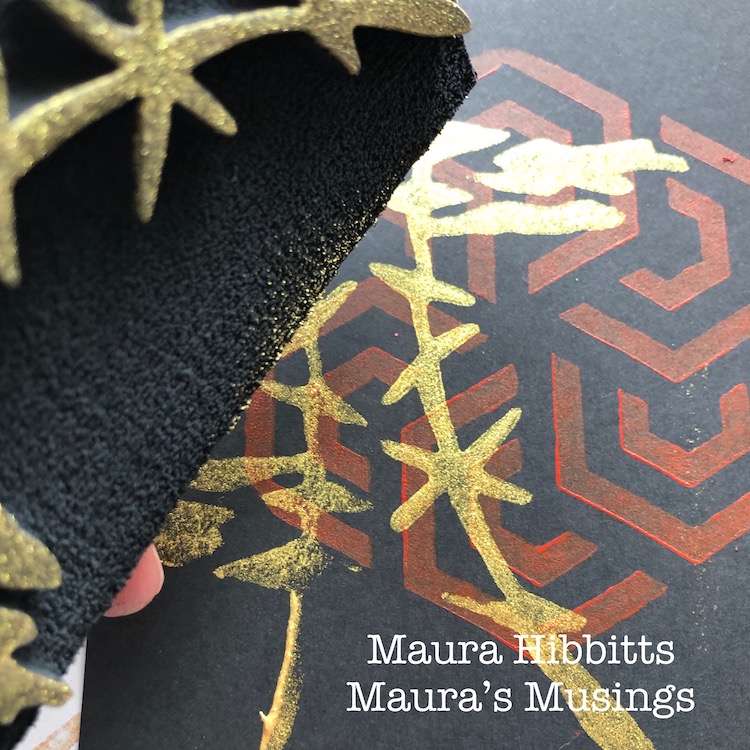
Whenever I am stamping with paint, I reach for a gel plate. This is the perfect tool to lay the paint on and smooth it out with a brayer, then stamp into, to pick up the paint. The foam stamps are amazing with paint, just be sure to clean the paint off right away, using a baby wipe or soap and water.
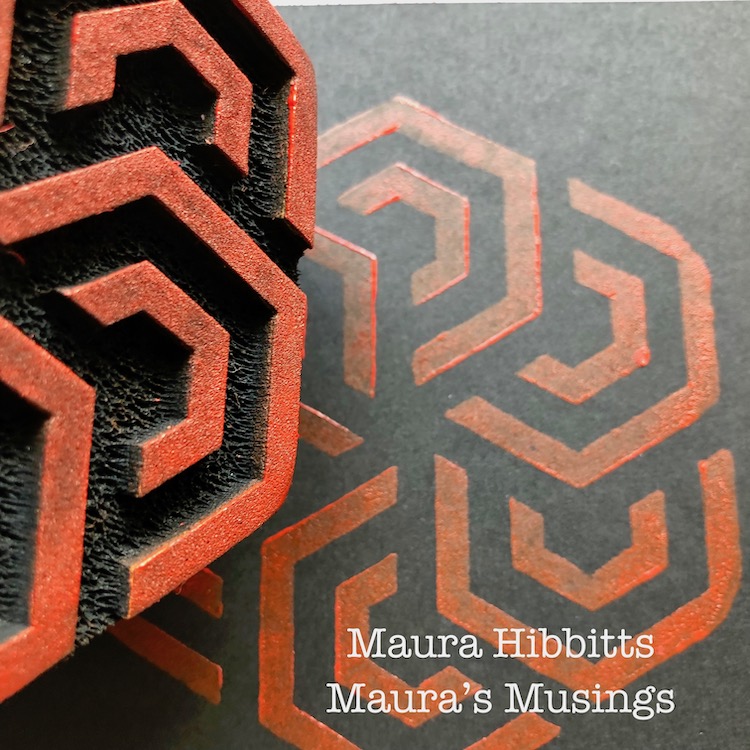
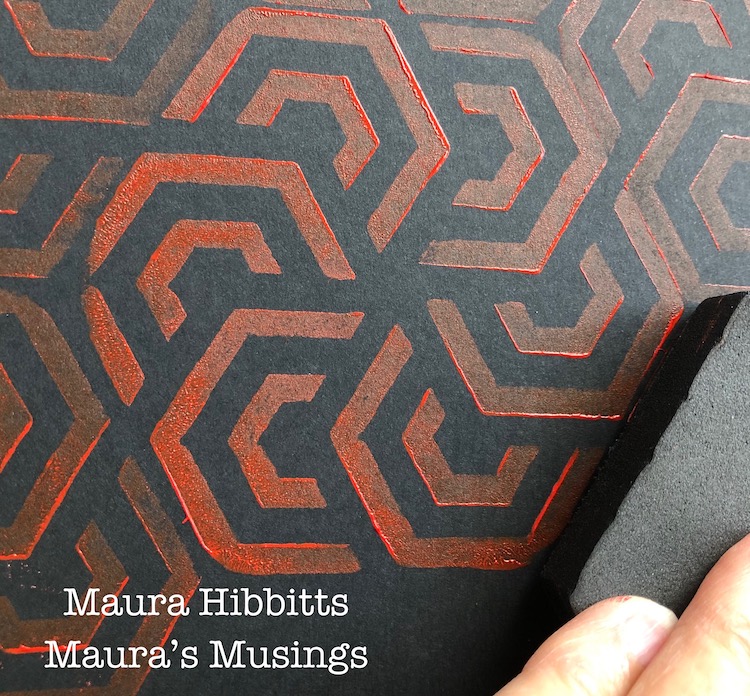
I’m using Pyrrole Red acrylic with the Maze Hex foam stamp. Since I am stamping the red onto black card stock, I got the paint nice and juicy on the stamp, so it would show up against the black. I made a single image on one card, and a diagonal image by stamping two partial prints on the edge. The third card has a central image, and then I stamped partial images all the way around.
When I look at the Groovy stamp, I see an Asian image or a tree with clouds, which inspired me to stamp with Gold acrylic for a bold statement. Once again, you can brayer the gold onto the gel plate and stamp into it, to pick up a nice even coat of paint. Your other option is to use the brayer and roll it over the stamp. I varied the number of images on each card to create variety.
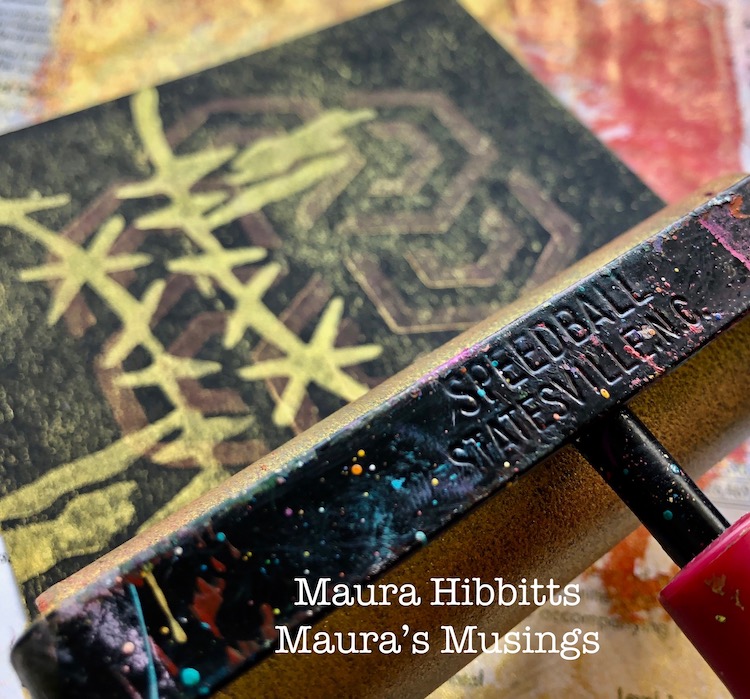
I had a bit of gold left on the gel plate, so decided to experiment by rolling a very light layer of paint with the brayer over my stamped images. Since, the red paint had some depth to it, edges of the hex design picked up the gold, giving it more definition.
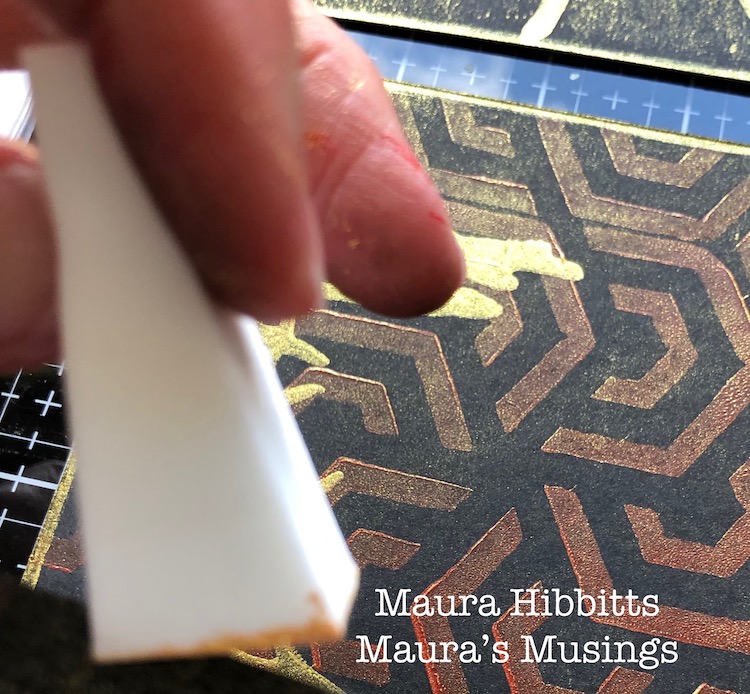
I went around the black card stock with gold paint using a cosmetic sponge to frame the design.
Finally, I tied a double layer of maroon embroidery floss around the card, tied it at the bottom, and separated the strands to create a tassel.
Now, I have a trio of bold and shimmery cards ready for the perfect occasion. Why not try making an easy set of stamped cards with paint, yourself?
Layer several colors of paper, use a couple of stamps and paint colors, and just imagine the variety of cards you could create! What occasions would you use these for? It’s time to Go Bold!
Thank you Maura! Love this combination of black red and gold! You can find all of my Foam Stamps in my online shop. Here are some of the other supplies Maura used:
Feel inspired? Working on something yourself that you’d like to share? I love to see how you interpret our monthly themes. Email me how you used my stencils and stamps with the theme and email me an image – I would love to share your projects in my next “n*Spiration From Around the Globe“.
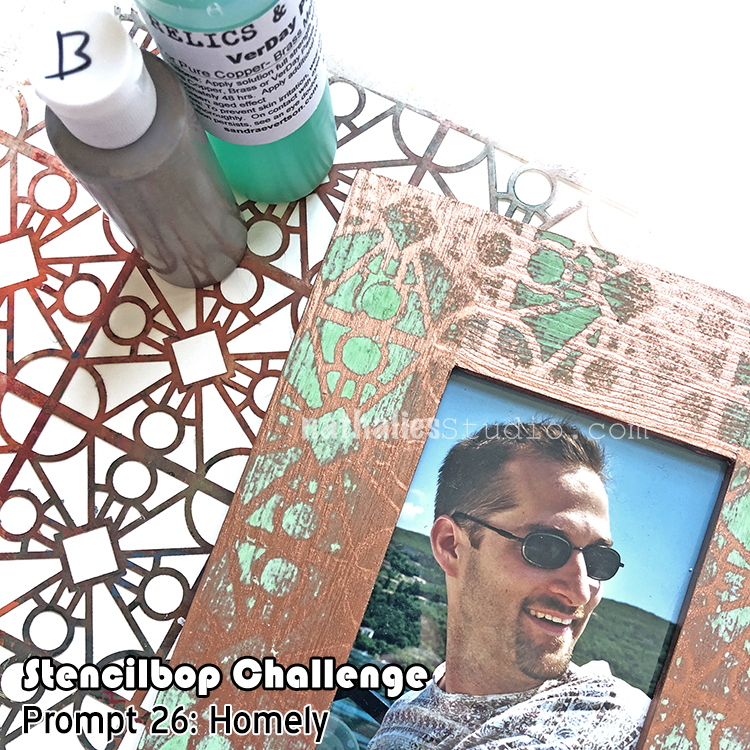
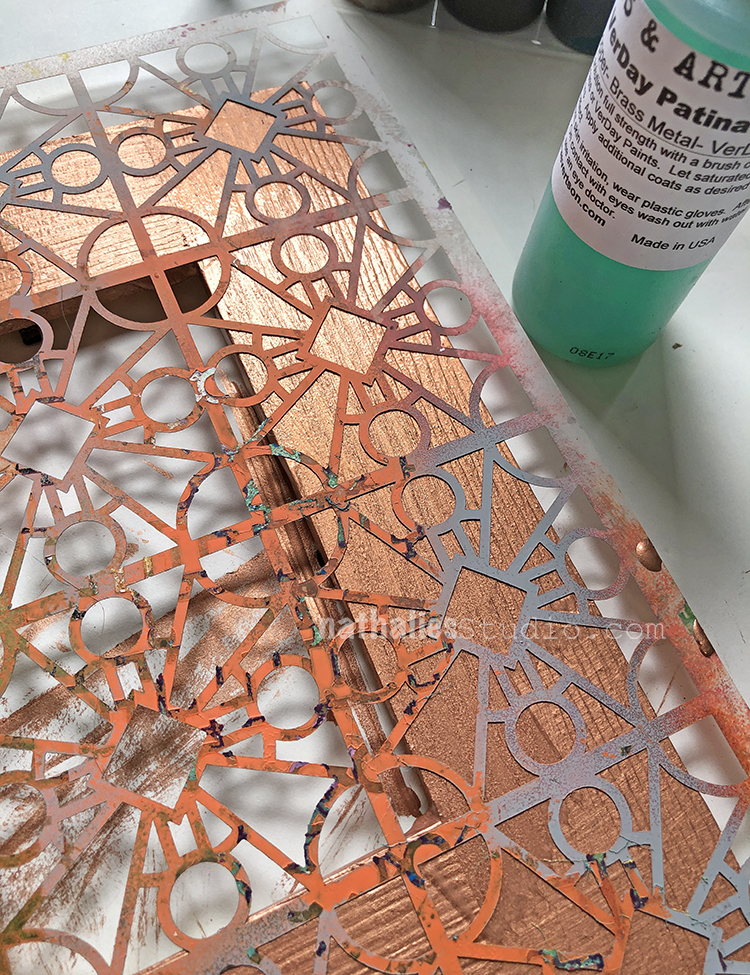
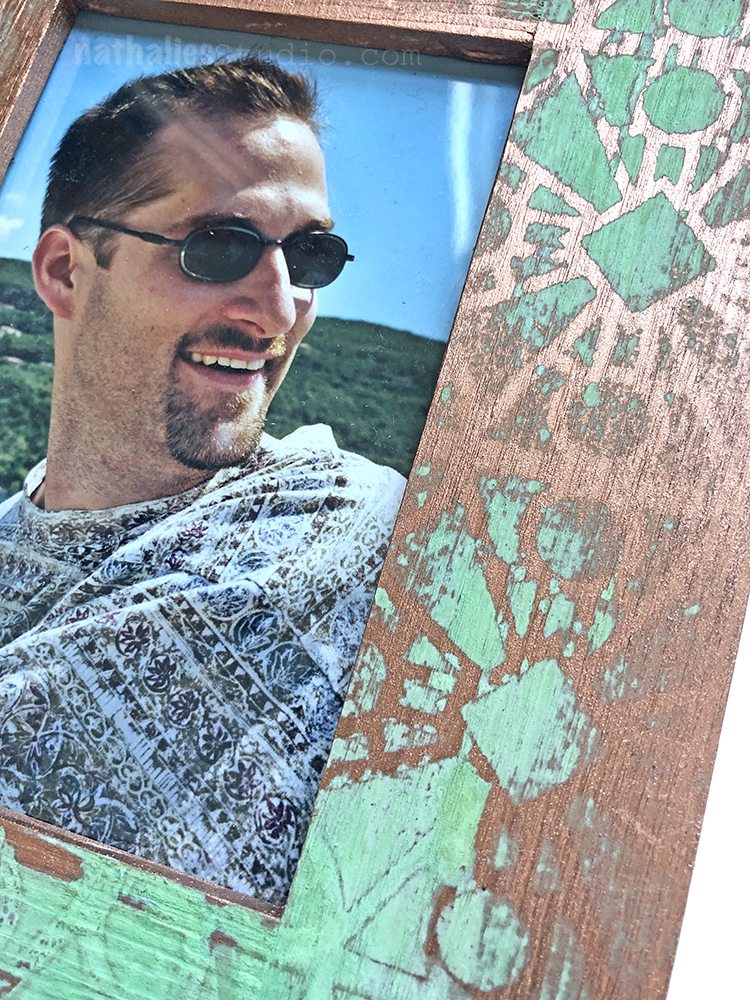
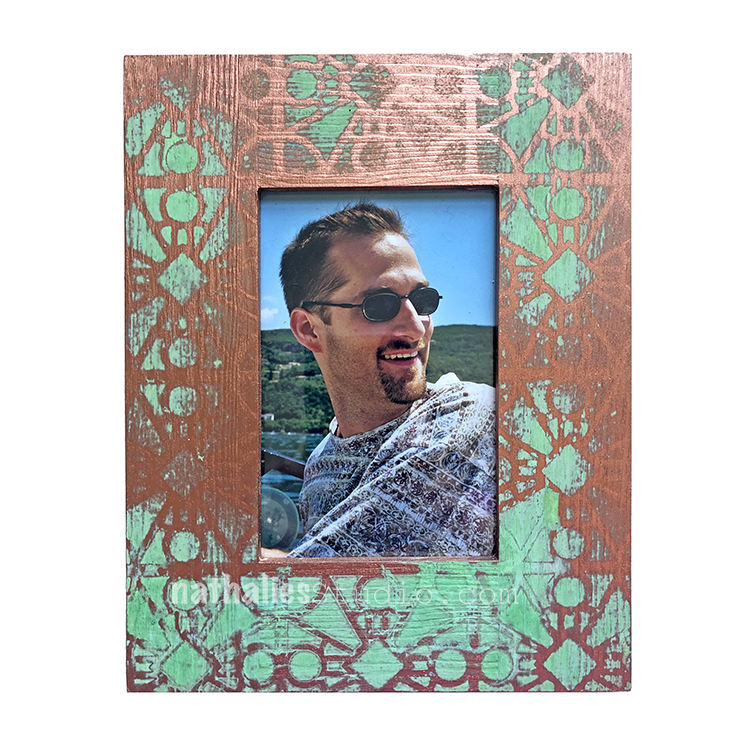
This is a recap of today’s Stencilbop prompt, August 26 – Homely
I just recently purchased an awesome VerDay Metal Paint kit by Relics and Artifacts which let’s you create different patinas on a variety of surfaces.
I thought it would be fun to use Bronze and create patina with my Buenos Aires Stencil. I painted the frame in Bronze, let it dry, repainted it, then added the stencil on top and sprayed with the patina solution over the stencil.
After a couple hours the reaction was complete and I love the out come on the frame. I added a picture of my other half and cannot wait to put the frame onto my new studio mantle.
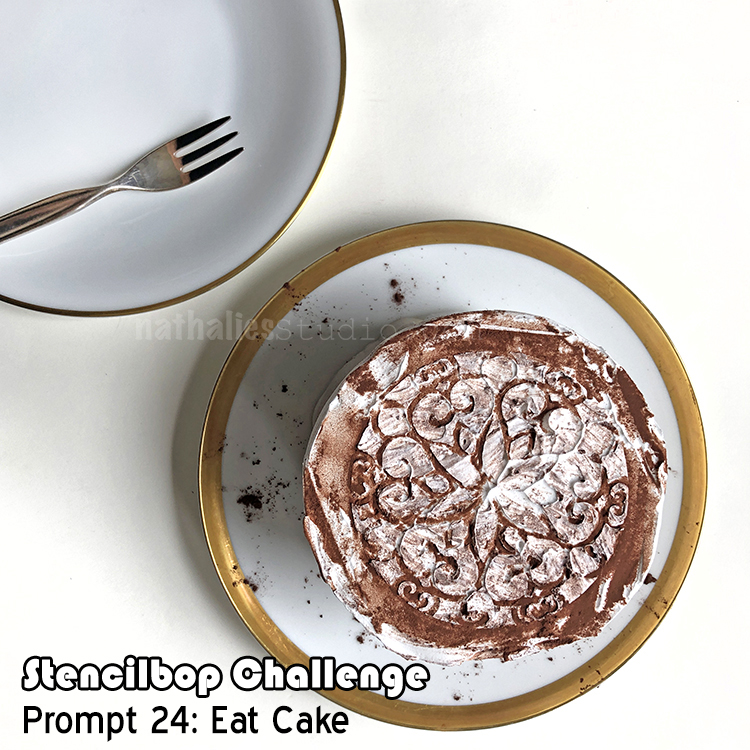
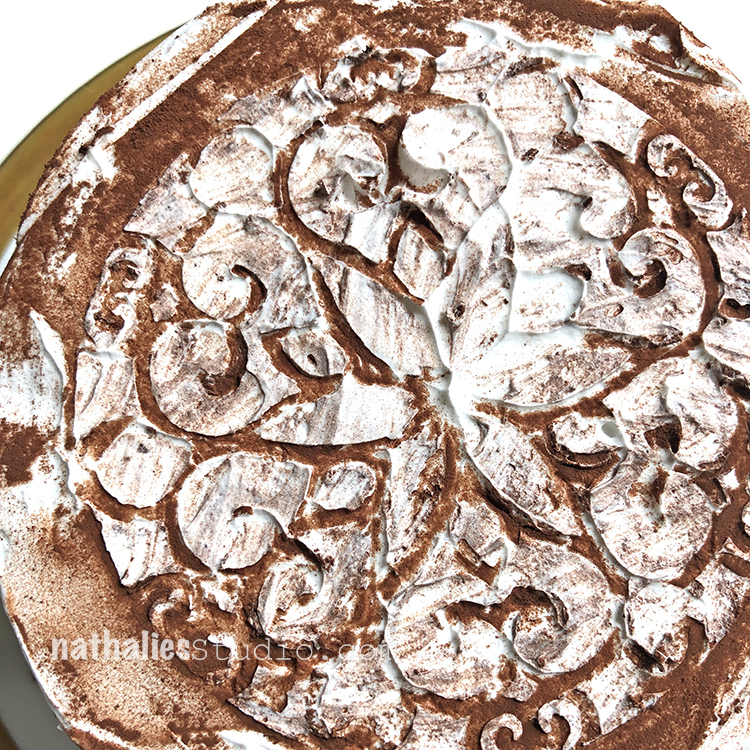
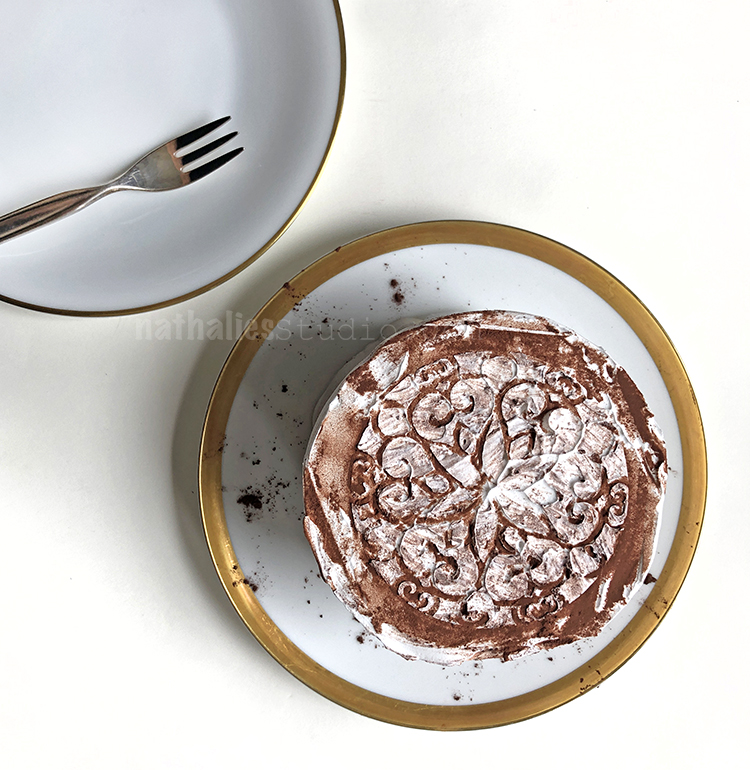
This is the recap for today’s Stencilbop Challenge prompt: Eat Cake
Oh boy- this one could easily be renamed into “Eat Cake and Keep Calm” See I thought oh gorgeous idea, I am going get a wonderful plain ice cake from my favorite local ice cream shop Torico’s here in Jersey City…
…and then use one of my small 4×4 stencils (I used the Park Blvd stencil here) with cacao powder to decorate on top myself.
Now – I am not a cake decorator and there is a simple reason for that ….hahahaha- I screwed it up. I looked at it and thought “oh maybe this is a sign and I need another one” –but I decided , nah that would be cheating and in the future I might leave the decorating to the awesome peeps at Torico’s as well . Anyway – LOL- here is the result with a little bit of a scrapping action using my Park Blvd Stencil. Just so you know…no ice cream cake was harmed during this prompt –it was delicious as always and has been devoured soon after ;)
In addition to a small ice cream cake, here are the supplies I used for this prompt:
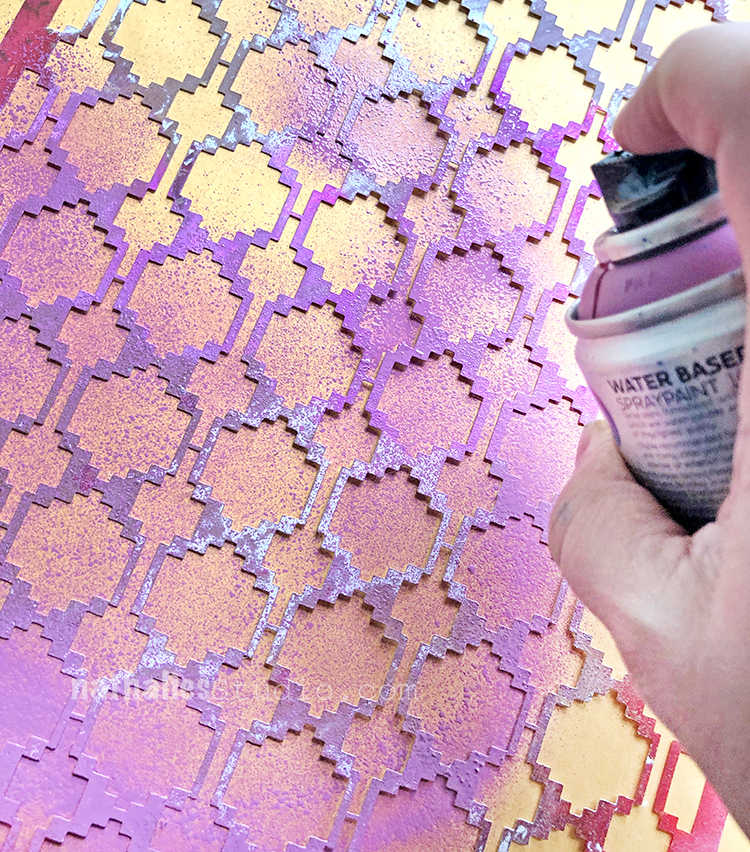
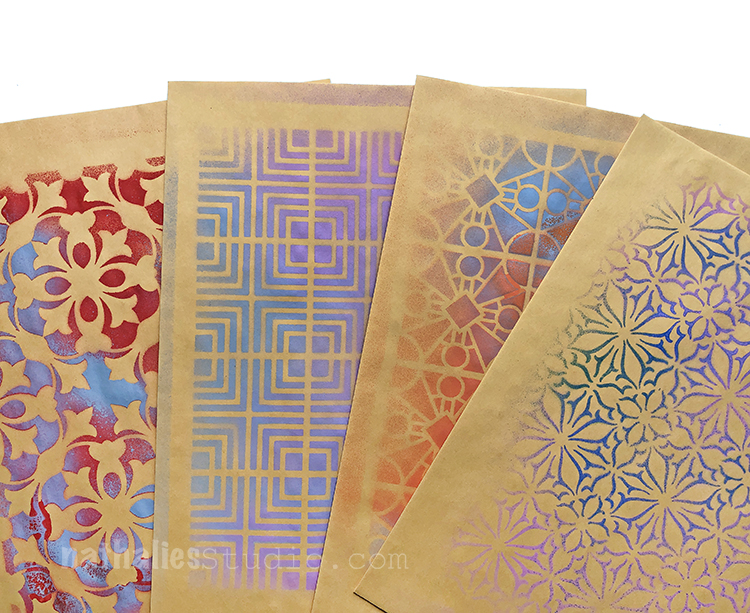
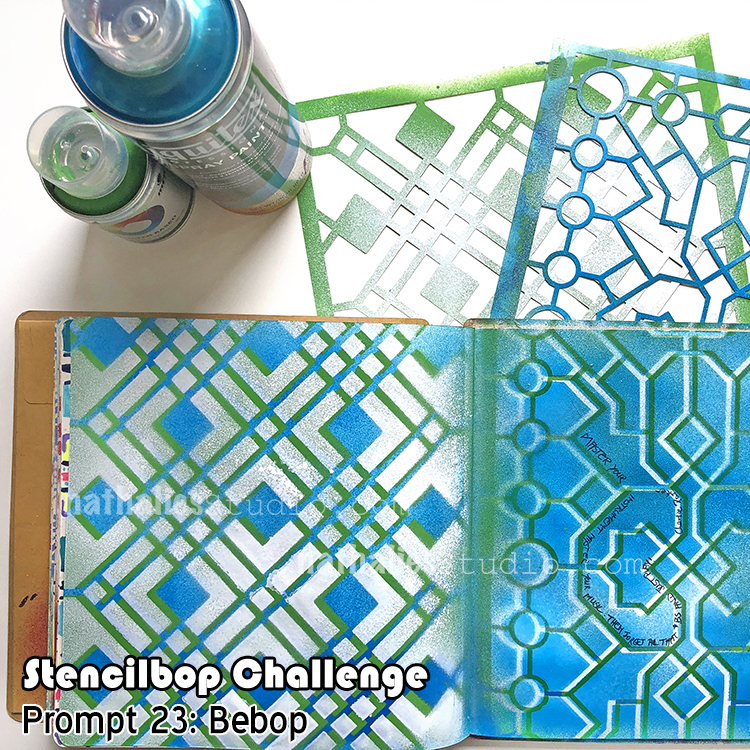
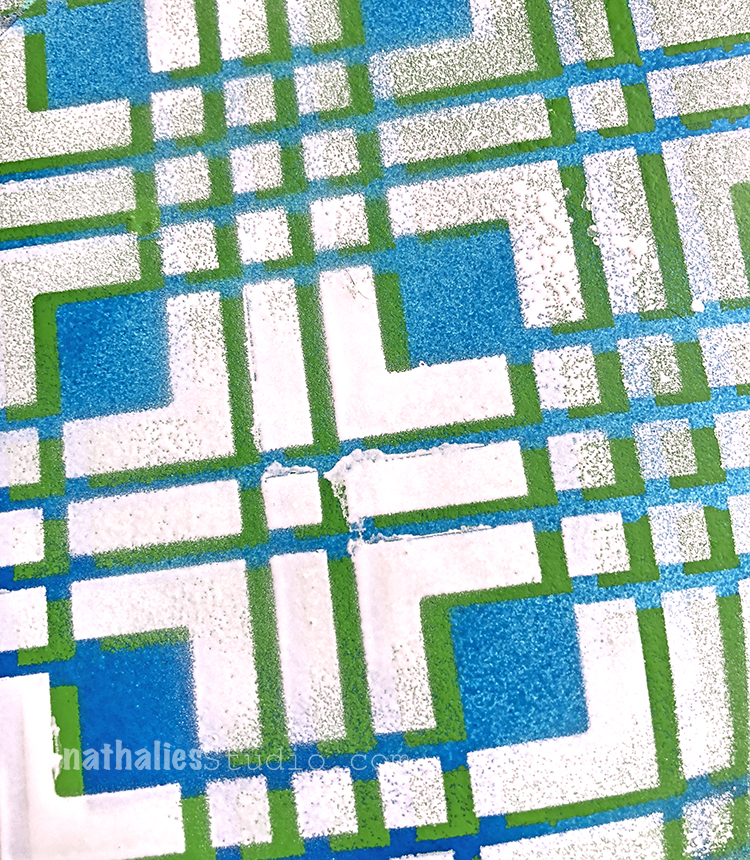
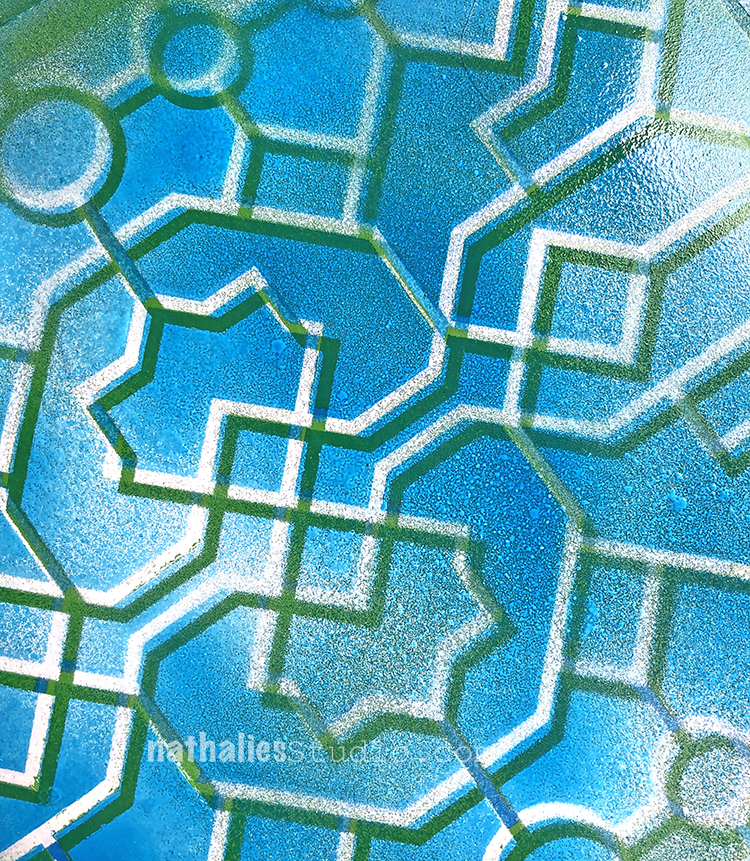
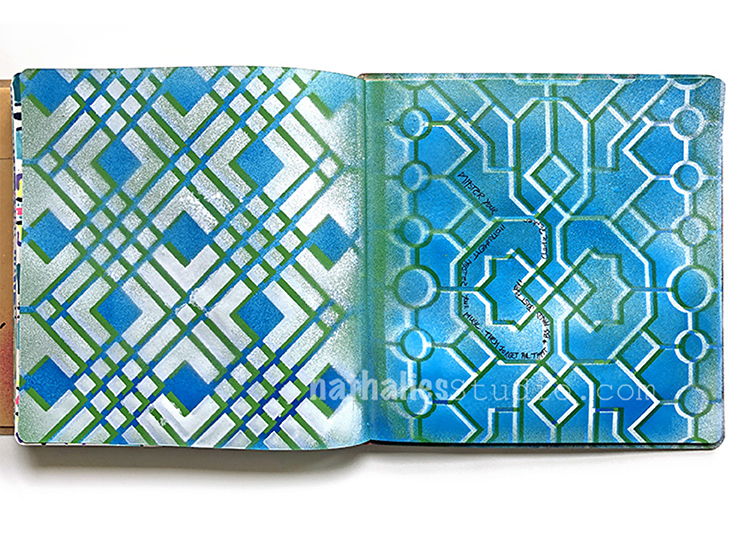
Here is the Stencilbop Recap for today, August 23 – Bebop
Did this one give you a headache? I hope not :)
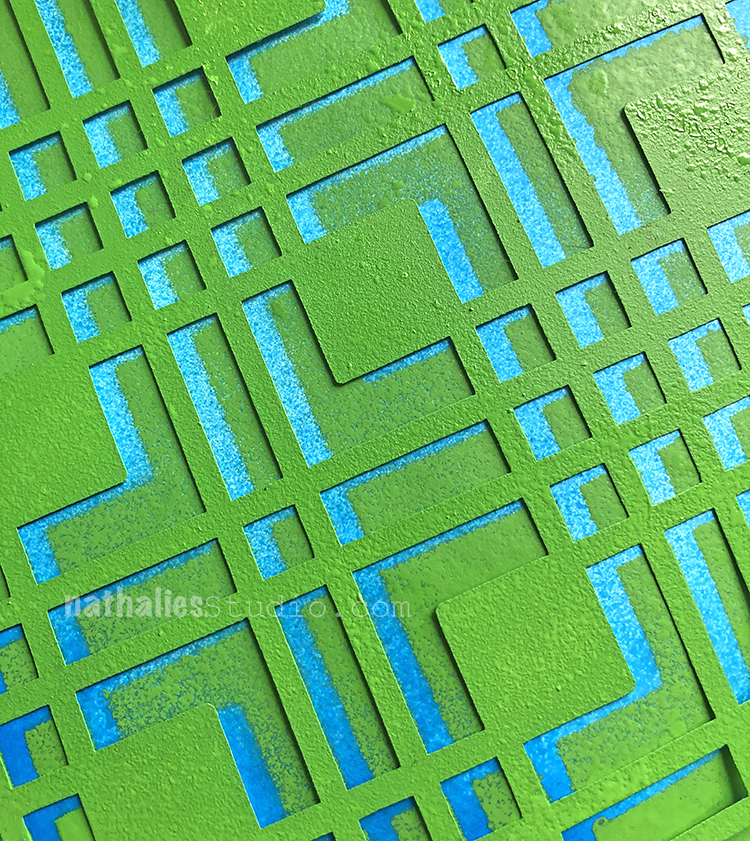
Dance the Stencilbop with me by applying paint through a stencil like maybe my Chicago stencil here…
… then move it slightly to the left or right and apply a different color.
You can do this with any paint media but by far the most bopping results come with acrylic spray paint –I love the dimension this gives. This one is my Exchange Place stencil.
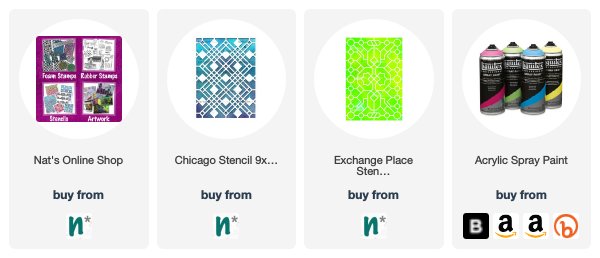
Here are some of the supplies I used in this prompt:
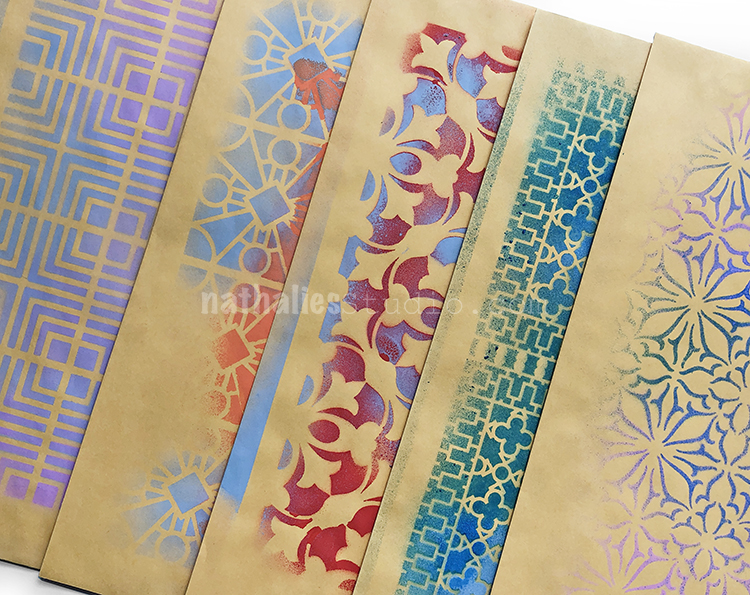
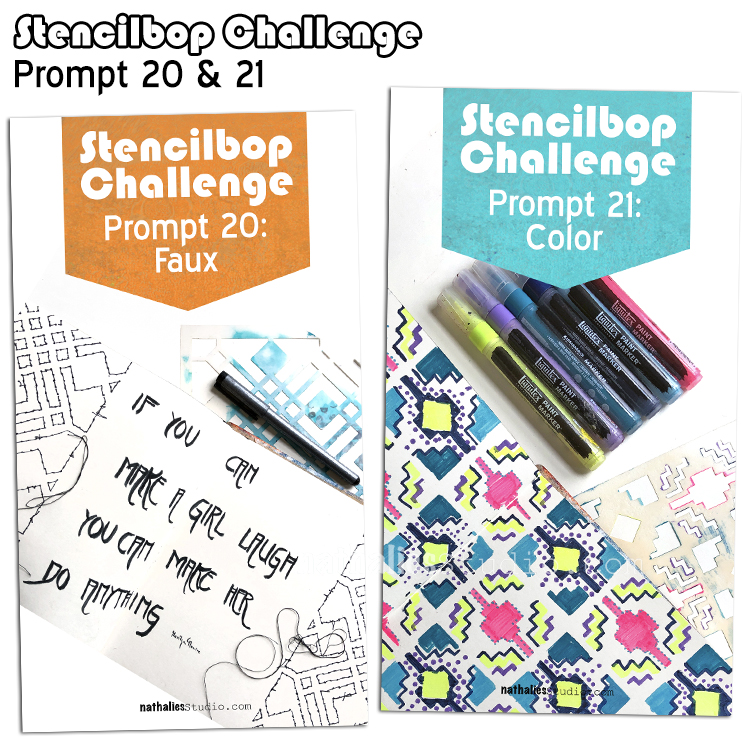
Are you playing along with us? All month on Instagram we have been doing the Stencilbop Challenge and wow it’s been fun playing with our stencils in so many ways! Here is the recap for Prompts 20 and 21:
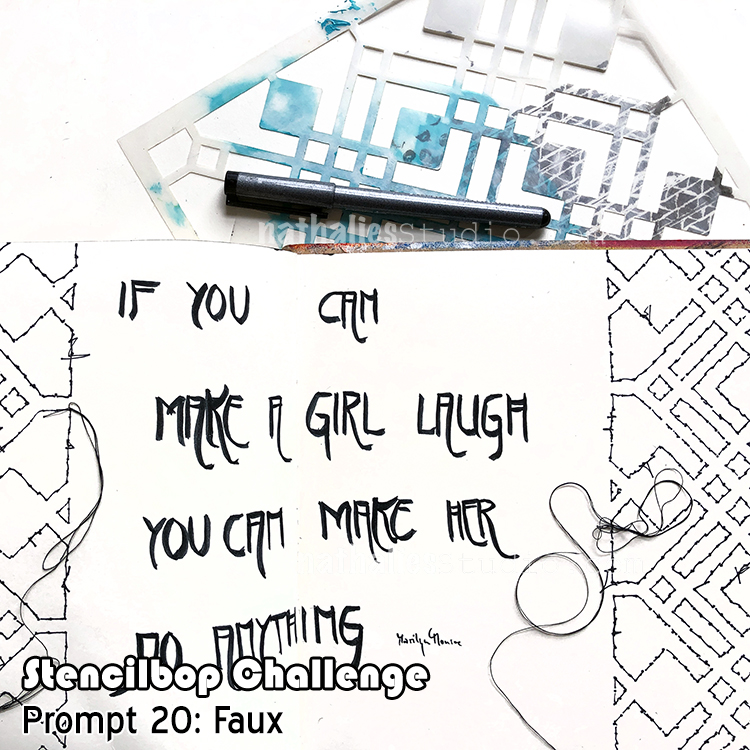
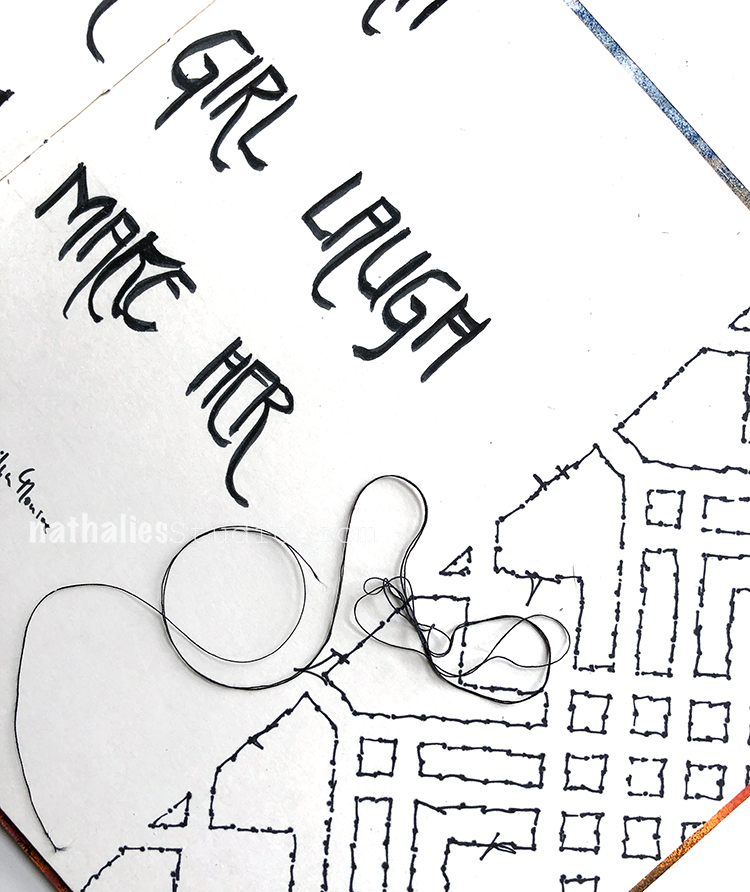
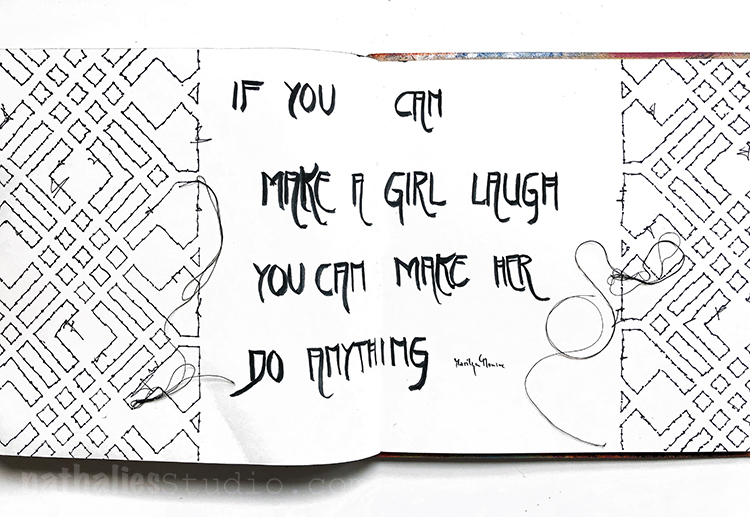
August 20 – Faux
Stitching on paper was always something I loved to do but I haven’t used my sewing machine in ages- and to be honest part of it is just the dread of having to set it up and then pack it away again after just a couple minutes of fun.
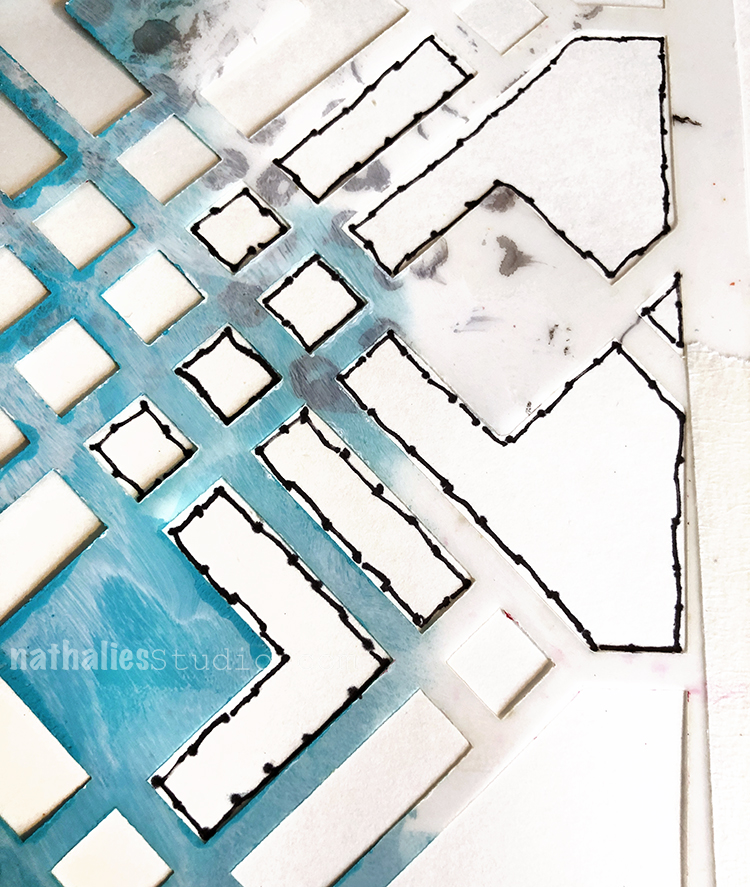
So I thought for this prompt I would do a bit of faux stitching – using my Chicago Stencil as a template. I just created little dots along the stencil and then added some loose lines with the pen from dot to dot.
I glued down some actual thread and voila – wouldn’t fool anyone hahahah- but hey it was fun.
August 21 – Color
Ha that is a good one – right ?
I thought I would just go with some nice bright colors and I used different colored acrylic markers to fill out and add elements to my Santa Fe Stencil.
I love how this came out – I def. will use the markers with stencils more. It is such a fun way to add some stenciling to a journal or sketchbook while traveling and they are part of my Art-On-The-Go- Kit anyway.
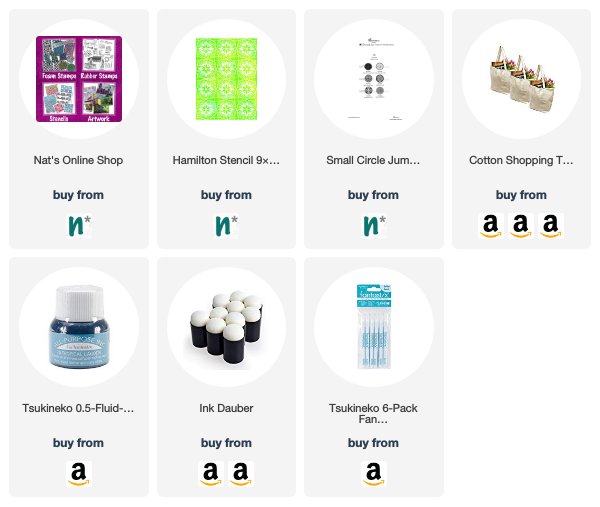
Here are some of the supplies I used for these prompts:
Play along with us – here is the Prompt List in case you missed it:


Love the fussy cutting with that stencil. Looks great and perfect for a unique page in an art journal or on a project.
Reply