Blog: Stampendous

Blogging in Color Hop with Stampendous & Faber-Castell – Part II

GELATOS_hop_banner_960x480

Stampendous and Faber-Castell® Design Memory Craft have teamed up for a Blog Hop and the Faber-Castell® Design Memory Craft Design Team and some are playing with my Stampendous stamps and some yummie Faber-Castell Products – Wait until you see the colorful inspiration they have for you this week! We are all Blogging in Color!

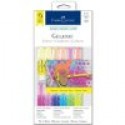
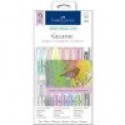
I am back to play with some Gelatos – and for today’s post I created a couple Graduation/Achievement Tags which I will use as Gift Hangers :)

NatKalbach_Tags01

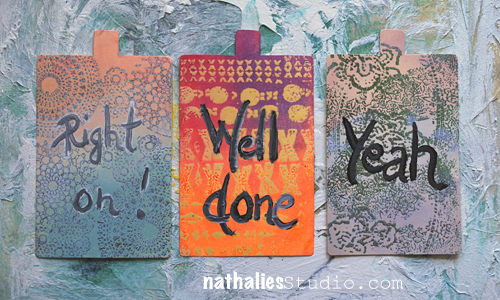
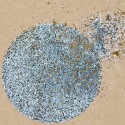
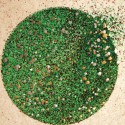
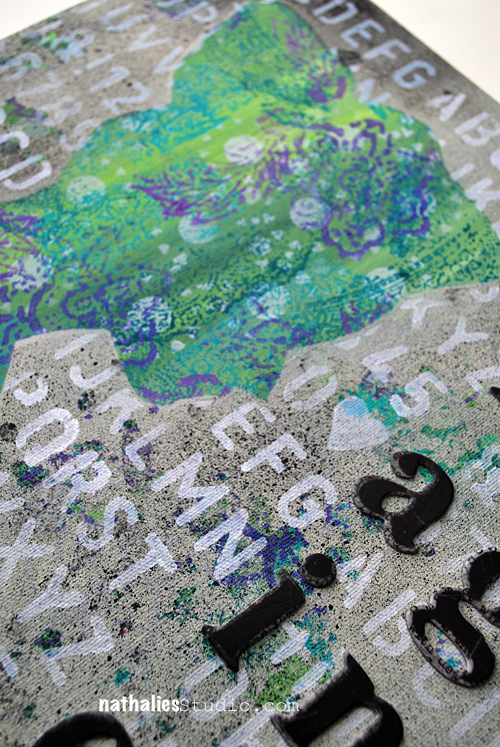
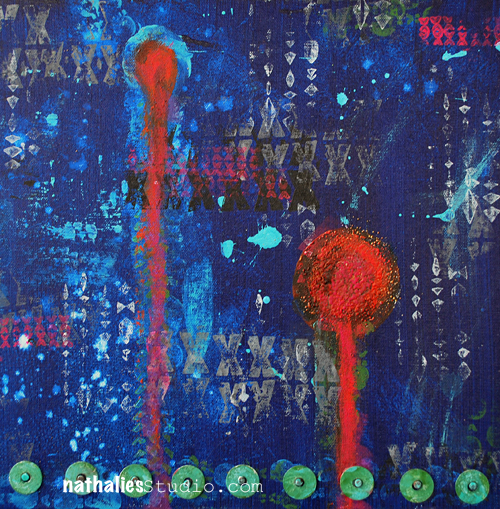
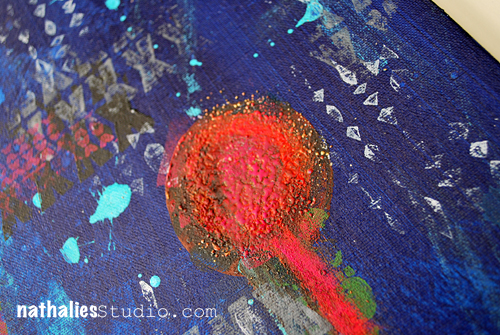
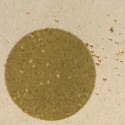
I stamped each tag with different stamps from my stamp sets and embossing ink and then used different Embossing powders on top and heat embossed them. The Gelatos rubbed over went wonderfully into the creases and not embossed areas, being resisted by the embossed areas themselves.

NatKalbach_Tags02

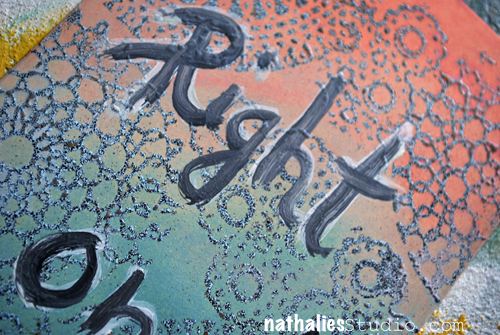
For the “Right On” tag I used the Kaffee Klatsch Stamp Set,  Aged Aqua Enamel and Gelatos from the Pastel Kit.

NatKalbach_Tags03

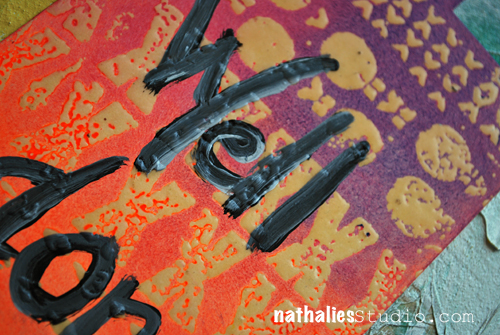
“Well Done” was created by using the Mark Maker Stamp Set, Deep Impression Chunky Enamel and Gelatos from the Bright Kit.

NatKalbach_Tags04

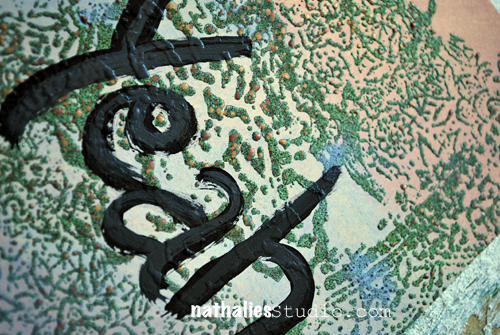
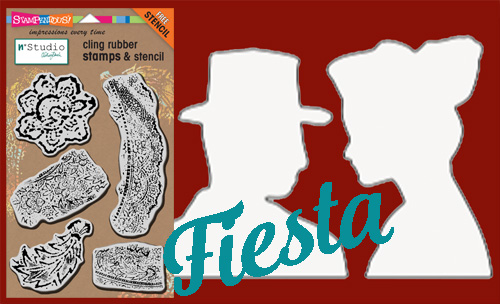
And for the Yeah tag I created a funky background using the Fiesta Stamp Set, Aged Green Embossing Enamel and again some colors from the Pastel Kit.

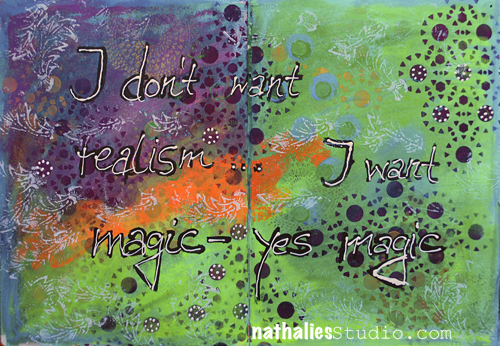
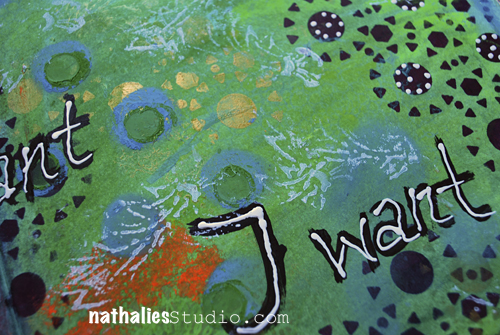
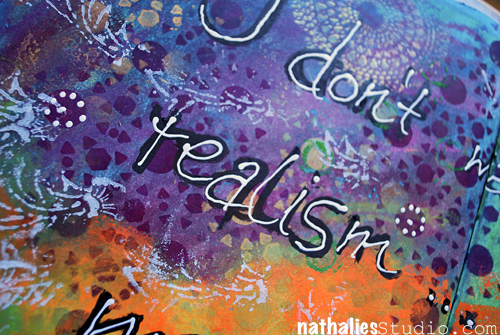
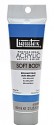
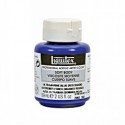
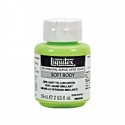
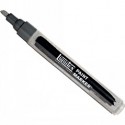
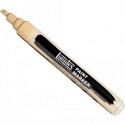
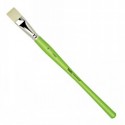
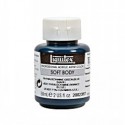
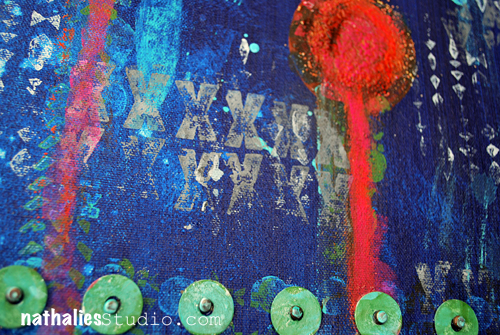
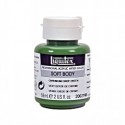
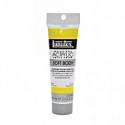
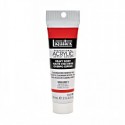
The titles were written with a brush and Soft Body paint. That was fun :)

Here are the supplies I used on this page

nSupplies


Don’t forget to check out all the different projects from the Stampendous and Faber-Castell® Design Memory Craft Design Team this week – I heard there might be prizes involved ;)

Comments (32)

  • Dot

    |

    Hi Nat. Wow, I love the rich backgrounds! The words really pop. The embossing with the gelato’s is a great combination.
    Dot (Aus) x

    Reply

  • Janine Rudnick

    |

    Such cute tags! This gives me a lot of ideas.

    Reply

  • Judy B

    |

    Great tags. Love the different looks on each of them. Thanks for sharing.

    Reply

  • Beth Williams

    |

    this is a technique I know I can do and use. Thank you for sharing it with us.

    Reply

  • Jade Passmore

    |

    Love these tags! So perfect for a graduation gift.

    Reply

  • Kathy P

    |

    I really like the look of the embossing with the gelatos on top. Definitely going to give this technique a try! TFS!

    Reply

  • 1aquagirl

    |

    Love these!

    Reply

Leave a comment

Blogging in Color Hop with Stampendous & Faber-Castell – Part I

GELATOS_hop_banner_960x480

Stampendous and Faber-Castell® Design Memory Craft have teamed up for a Blog Hop and the Faber-Castell® Design Memory Craft Design Team and some are playing with my Stampendous stamps and some yummie Faber-Castell Products – Wait until you see the colorful inspiration they have for you this week! We are all Blogging in Color!

I got to play with some Gelatos – and for today’s post I created an Art Journal Page.

NatKalbach_Magic01

Using the Kaffee Klatsch Stamp Set and the Fiesta Stamp Set Stencil and Soft Body Acrylic Paints I stamped and stenciled several images onto the blank page.

After the images dried I went over with several colors out of the Gelatos Brights Color Kit.

NatKalbach_Magic02

Using a wet brush I blended the colors together – dissolving the Gelatos. Where every I had used acrylic paint before- the paint resisted the Gelatos. I really love the bright creamy colors.

NatKalbach_Magic03

I used the Fiesta Stamp Set Stencil again this time with the Gelatos and used my fingers get crisp details. I finished the page by stamping one of the Fiesta Set Images several times in white on top and then writing a quote with a marker on top. As long as the Gelatos are not too thickly on the background it is still easy to apply acrylic on top – but you want to be careful. I used a mixture of white ink and soft body paint in a fine liner to add the white writing on top.


I will be back on Friday with another Blog Hop Post – but until then – here are the supplies I used on this page

nSupplies


Don’t forget to check out all the different projects from the Stampendous and Faber-Castell® Design Memory Craft Design Team this week – I heard there might be prizes involved ;)

Comments (32)

  • Dot

    |

    Hi Nat, I really like how you use the acrylic paints as a resist with the gelatos…I am just starting to play around with paints so this is wonderful inspiration! And I just looove the colours.
    Dot (Aus) x

    Reply

  • KathyP

    |

    Love this look…beautiful colors, great blending and layering!

    Reply

  • Linda Chidster

    |

    G O R G E O U S !!!
    LOVE this!!!
    TFS!!!

    Reply

  • Brenda Shreves

    |

    Nice ideas.Thanks.

    Reply

  • TracyM #6773

    |

    MAGICAL page Nathalie!!!
    LOVE the colours & design of your background, LOVE your sentiment too!!!

    Reply

  • Katie B.

    |

    I love all of your Stampendous Nstudio stamps! And your pages today are wonderful!! Thanks for sharing.

    Katie B. (USA)

    Reply

  • Regina Furman

    |

    Gorgeous project! I love the colors you chose, and all of the stamping and stenciling are beautiful highlights!

    Reply

Leave a comment

Paper Clay Play

FiestaPlate_NatKalbach_02

A couple months ago I was looking for some little bowls or plates that I could use for dropping of my bling in the evening but nothing really made me truly wanna spent money as colors or shapes weren’t what I was looking for.

So I remembered a tutorial that I had seen a long time ago on Pinterest on using Paper Clay and Lace to make your own little bowls and decided to give it a try with my newly arrived Stamp Sets. The Paper Clay I used doesn’t need any firing or heating and just air dries. Easy peasy :)

KaffeeKlatschPlate_NatKalbach01

For this bow I rolled a piece of Paper Clay to a little ball and then rolled it out with a rolling pin to a flat wonky circle. I then stamped into the clay with some of my Kaffee Klatsch Stamps. You don’t need to press to hard to get a nice sharp impression. I found a bowl where I liked the shape on the bottom as a guide – since I wanted mine to be not a high bowl and a bit quirky – and pressed the top onto the clay to cut out a nice circle. Next I  formed the clay circle into the bottom of the bowl.  I let everything in the bowl dry for 12 hours and then carefully took the new paper clay bowl out. Since the moisture in the paper clay mostly is evaporated by then it shrinks a bit so that it is easy to get it out of the template bowl. It was still a bit moist on the bottom since now air could get there so I just put the paper clay bowl upside down and let it dry for another 12 hours.

I did the same steps with this plate – just using a plate as a template and the Fiesta Stamp set for the Impressions

FiestaPlate_NatKalbach_01

Once they both were dry I used Liquitex Soft Body paint thinly over the surfaces, waited a couple seconds and then using a paper towel rubbed some of the paint off again, so that the impressions were more colored and more prominent. That way the texture really popped off. For the plate I used two colors to and blended them. I painted outside of the bowl and the bottom of the plate and then everything dry again. I applied some Liquitex Transparent Raw Amber Acrylic Ink over the circle impression of the bowl to have it pop up even more and to give it some patina and let that dry again. To finish everything off I coated the bowl and plate with Liquitex Pouring Medium which gave it a nice shiny glossy and glass like look and feel. I coated it twice leaving a couple hours in between for curing.

Done :) Hope you like this little crafty fun project – I also made some christmas ornaments using the same technique…there is a lot of potential in this – you just have to play . Here is the full supply list:

nSupplies


Comments (11)

Leave a comment

Be a voice not an echo

NatkalbachBeAVoice01

This is a watercolor paper page mounted on a piece of cardboard which I made for CHA a couple months ago, in order to show my new stamps with acrylic paints. I also used some canvas letters that I altered with acrylic paint and a pen.

NatkalbachBeAVoice02

I used the Kaffeeklatsch and Mark Maker set set with this one and I love how the white and green pop off the ultramarine blue.

nSupplies


I wish you an amazing day

Comments (3)

Leave a comment

Fiesta Stamp Set Giveaway – Closed

FiestaGiveaway

Let’s have some fun ! I give one n*Studio Stampendous Fiesta Stampset including a free stencil away.

FiestaSet

Simply leave a comment between now and Friday, February 13, midnight EST –  here in the blog post and let me know what kind of project you would create with this StampSet.

I will draw one random winner and email the winner directly. (psst…there might be more give aways coming up in the next couple weeks ;) )

Update February 14th, 2015: Congratulations to Joi – I sent you an email to send me your address!

Screen Shot 2015-02-14 at 11.31.47 AM


Comments (99)

  • Regina Furman

    |

    These would be perfect for wedding, engagement or anniversary cards!

    Reply

  • Linda

    |

    I would love to make some mixed media cards with these… :) I love the design and looks.

    Reply

  • Kaylee Cammack

    |

    I absolutely love your Fiesta Girl Canvas from your February 7th post. That green with the blue on the woman’s silhouette are gorgeous! I also really like the lace like look of the stamps in this set. Oh the places one could go with these stamps in her collection!

    Reply

  • Denise Luscan

    |

    Love this set!! I would do some art journaling and maybe a canvas would be cute. Thanks for the chance to win!

    Reply

  • Heather

    |

    This is very cool! Great opportunity.

    Reply

  • Gail Bassett

    |

    What great designs! I would definitely use these on an art journal page. It would be so much fun.

    Reply

  • amy o'malley

    |

    I would love to use these stamps in my art journals!!!

    Reply

  • fotogirl

    |

    Would love to be able to play with these in the Art Journal that i am playing in, and am playing, so that is a good thing. You have made me look at it all differently when i get in there and start throwing paint and stuff around….thanks for that

    Reply

  • Anisa Haddad

    |

    i would use it in a layout about Malaysia. Sound strange? I can see the flower being used to mimic a Rafflesia flower that grow here in the jungle.

    Reply

  • Jeane Walker Sliney

    |

    I love your use of stencils and I would love to have these!

    Reply

  • Linda N.

    |

    I can envision using this collection of stamps on my Gelli plate. I would pull a print and then use them again to stamp on the print.

    Reply

  • smokeysmom

    |

    I would love to use these products in a mixed media canvas I am working on for my granddaughters to hang in their bedroom. Love the silhouette, I’d use the female side. Thanks for offering this giveaway Nat. Hugs, Maggie

    Reply

  • Selene Carroll

    |

    Wow, how cool! I would love to use these stamps in my art journal, and then maybe in a canvas piece! They look great for layering!

    Reply

  • Marta

    |

    I really would like to have the set to do a background forma a Lo. Web Will see ……. if it is possible.

    Reply

  • Audrey Mislan

    |

    I would use silhouettes and stamps to create journal pages and mixed media canvases. I would the stamps separately to add texture to art journal pages and canvases

    Reply

  • Francine Groulx

    |

    I would do an Art journal page featuring your samps and stencil… LOve those!

    Reply

  • Fran Weinberg

    |

    Oh, these stamps are wonderful! I don’t have any of your stamps or stencils, but see loads of possibilities. I would start by playing with them on my gelli plates. Then, I’d probably make somes cards and then use in my journal. Please pick me!

    Reply

  • Rhonda Strickland

    |

    I would probably make a card or a canvas. VERY Fun!! Thanks for the chance to win. :o)

    Reply

  • Judy Meeker

    |

    Oh, I would definitely use these products on an art journal page. Can’t wait to get my paint smudged hands on them!

    Reply

  • Linda on the Prairie

    |

    Ole! These shout texture in the best possible way. I would use them to add dimension to some red and black Gelli prints I’ve been saving.

    Reply

  • Lura Brown

    |

    oh yes….sure would love to have these delivered to my door. i could put them to very good use for sure. LOVE THEM!! thank you for the chance to win. xoxox

    Reply

  • yankeegirl

    |

    Awesome stamp set….I would definitely find lots of spaces to use it in my art journal!!!! Thanks for a chance to win it here!

    Reply

  • Sabine Schneider

    |

    Hallo Nat,
    Da versuche ich doch mein Glück! Ich habe inzwischen einen Shop in good old Germany mit deinen neuen Stempeln gefunden. Wenn ich hier gewinne, kaufe ich die Anderen :-))))
    Liebe Grüße, Sabine

    Reply

  • tesa

    |

    I love your stamps!. That set is awesome and I like very much their name. I would like to use them in my art journal pages. Cross my fingers!!!

    Reply

  • Sue W

    |

    i would use it in a layout for my grandsons album!! Love your stamps!!

    Reply

Leave a comment

Fiesta Girl Canvas

NatKalbachFiesta01

I created this canvas board with my new Stampendous Fiesta Stamp Set for the CHA Booth.


NatKalbachFiesta02

I first painted the background with different green shades. Then I stamped the background with different acrylic colors and the Fiesta stamps. Next, I masked off the background with the woman silhouette and used Parchment and a light mist of Black Liquitex Spray Paint over it.

NatKalbachFiesta03

I took some paint at some areas off again and then used Titanium White Spray Paint and an alphabet stencil moving over the whole canvas with the lady still masked off. The letters were applied in the end with Gel Medium.

Here are the supplies I used:

nSupplies


have a wonderful day and do something creative!

Comments (16)

Leave a comment

Hipster Wall Decor or Upcycled Embroidery Hoop

NatKalbachModernVintage01

When I was looking at my new Fiesta Stamp Set I all of a sudden was thinking of those paper cut silhouette wall decors of the 18th century and I started thinking about how this could be translated into a modern form.

Here is how the stencil and the masks look like :

Screen Shot 2015-01-20 at 4.19.02 PM

And the idea was born for this Hipster Version ;) I mono printed the background by placing the two masks that are included in my Fiesta Stamp Set on top of the Mono Printing Plate and then rolled different colors on top and printed several times also imprinting the stamps themselves to give some texture.

NatKalbachModernVintage02

using Liquitex Iridescence Gold Acrylic Paint I stamped the Fiesta Stamps over the masks.

NKCRS01_INSERT_FRONT

I spray painted the embroidery hoop in black – which was easy peasy and fast and then cut out the paper so it would fit to the back of the hoop. Using a Journaling Pen I started loosely writing text into the silhouette figures. To make sure that I would really write loosely but not overwrite the edges I placed the stencil for the men and the woman on top to protect the background.

NatKalbachModernVintage03

I adhered the Paper to the hoop with double sided tape and voila ….done :) That was fun.


Here are the supplies I used

nSupplies


hope you like the Hipster Wall Decor :) 

Have a gorgeous day

Comments (8)

Leave a comment

Mark Maker

NatKalbachMarkMaker01

This Canvas was created for the CHA Show (Craft and Hobby Association – which has a yearly trade show in Anaheim) and where my new Stamps with Stampendous are released at the moment…I am waving from there right now.

NatKalbachMarkMaker02

I used the Mark Maker Stamp Set with it- that also includes a stencil

The stamps will be available soon. I used them with acrylic paint on top of the canvas – my favorite way to use stamps.

NatKalbachMarkMaker03

For texture I added Frantage Aged Embossing Powders and smoothed and mixed some acrylic paint over the heat embossed areas with my finger. The washers and metal pins are also heat embossed with Frantage Embossing Powder.

NatKalbachMarkMaker04

Here is a list of all the supplies I used

nSupplies


Hope you like it – have a great day!


Comments (31)

  • susan salyer

    |

    wow wonderful canvas love the layers and the wonderful goodies you used to make this happen

    Reply

  • Liz Lumsden

    |

    Wonderful fabric stamping!

    Reply

  • Autumn

    |

    What an amazing mixed media project – oh makes me want to get into some paint! ;0

    Reply

  • D.Ann C

    |

    LOVE the look and ingenuity of embossing the washers!! Warm hugs from Florida

    Reply

  • Linda on the Prairie

    |

    Nathalie, you make everything fun! These sets are so versatile.

    Reply

Leave a comment

Stay Out Of The Drama or … In My Art Journal Today

Natkalbach_OutofDrama01

Some great words to live by.

Natkalbach_OutofDrama02

This art journal spread is one of my faves I did the past couple months – and funny enough it was one of those pages where I was just trying out my new stamps and stencils some other new stuff , and I was using up left over paints and boom – as I was layering and layering I started to really love the grunge and then I dived full force into it and embraced it.

Natkalbach_OutofDrama03

I used some left over Liquitex Super Heavy Gesso from a different project and spread it over the  Stencil in my Kaffee Klatsch Stamp Set to tie the background together.

Here are the supplies I used

nSupplies


Have a beautiful day :) 

Comments (3)

Leave a comment