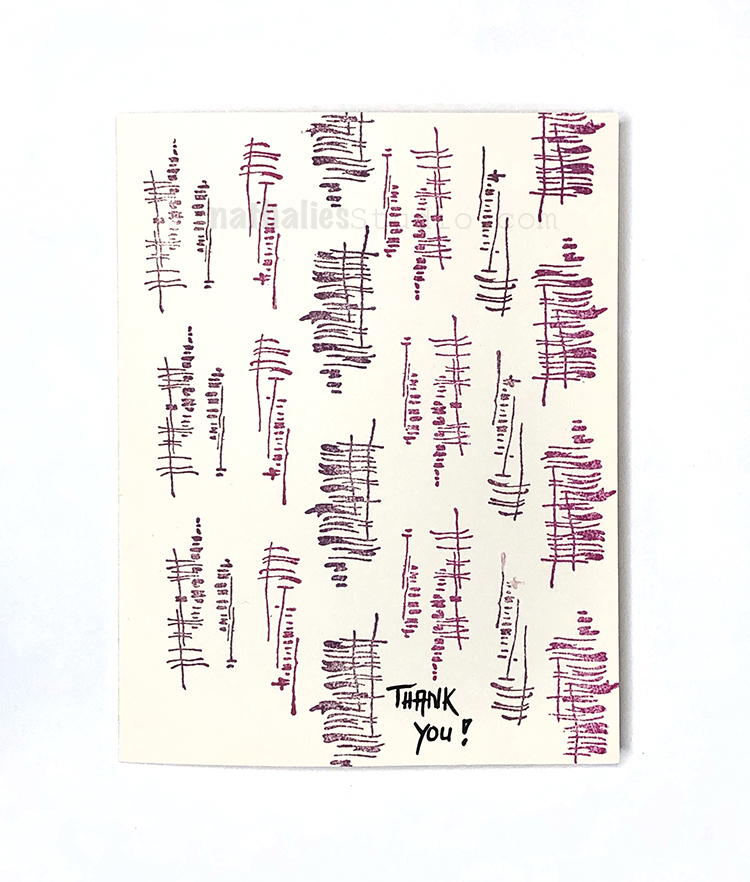
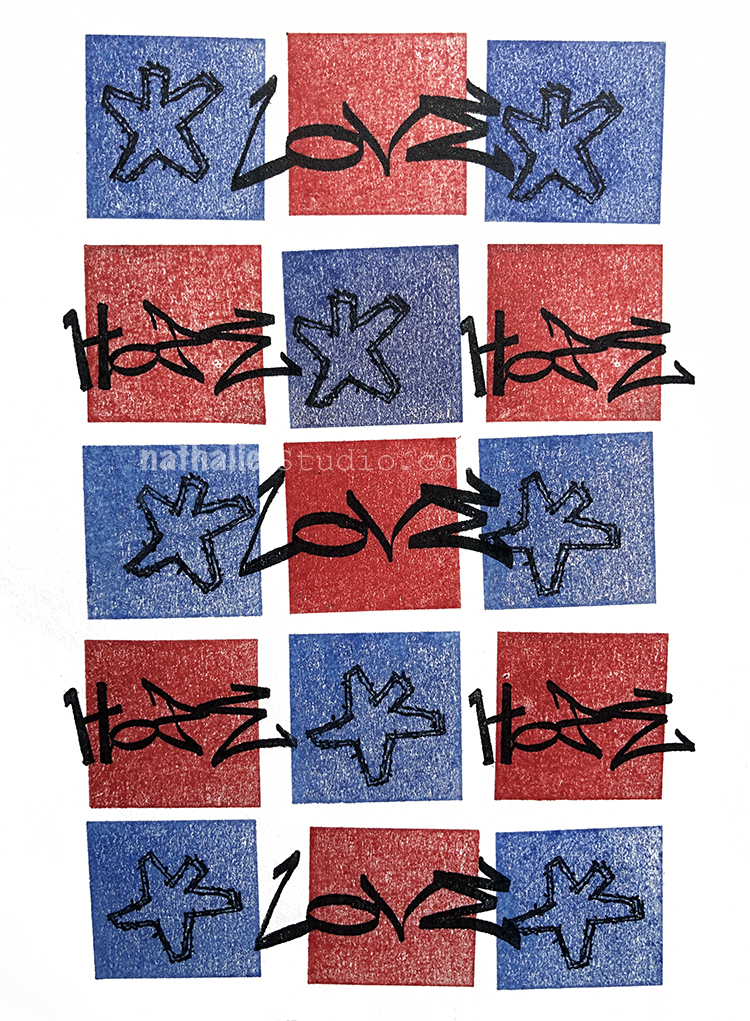
I’m keeping up the pattern play in my big vintage ledger that I started last month with the April ArtFoamies Challenge. Here’s one to get you going for the week using my Triangle Love rubber stamps:
When I received my new RubberMoon Stamp Designs I once again couldn’t stop making samples and patterns (remember last year’s April Patterns — well it happened again this year lol). I decided to record a short video for some of them and post them on my Instagram.
These videos are short and sweet – You can see what I use and how I pull the pattern together. I hope it inspires you to give some of them a try and maybe come up with your own too.
Here is a recap of Patterns 8-14 – I hope you enjoy :)
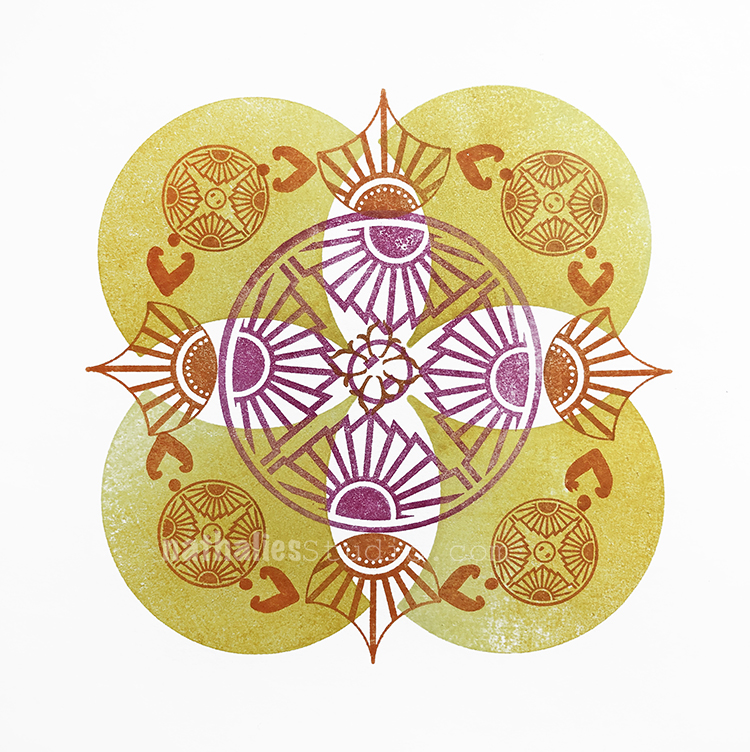
Pattern 08: First up is a simple linear pattern using my Mini Motifs and Fan-fare stamp sets. 2 colors + 2 stamps = Pattern Success
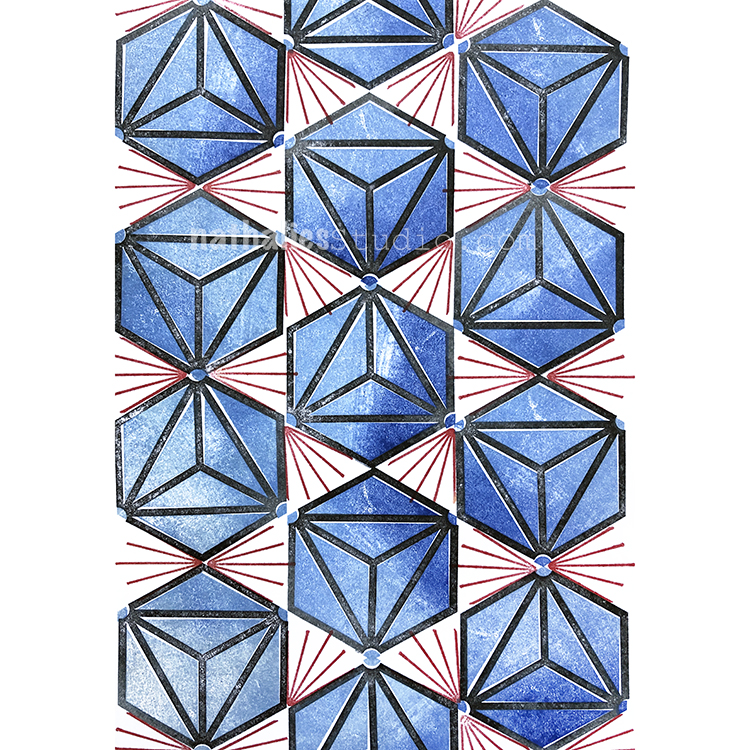
Pattern 09: Next up is another duo – I love when stuff fits nicely together and that is the key with this pattern. I’m using one stamp from my Hex Set Small along with one stamp from my Triangle Love set.
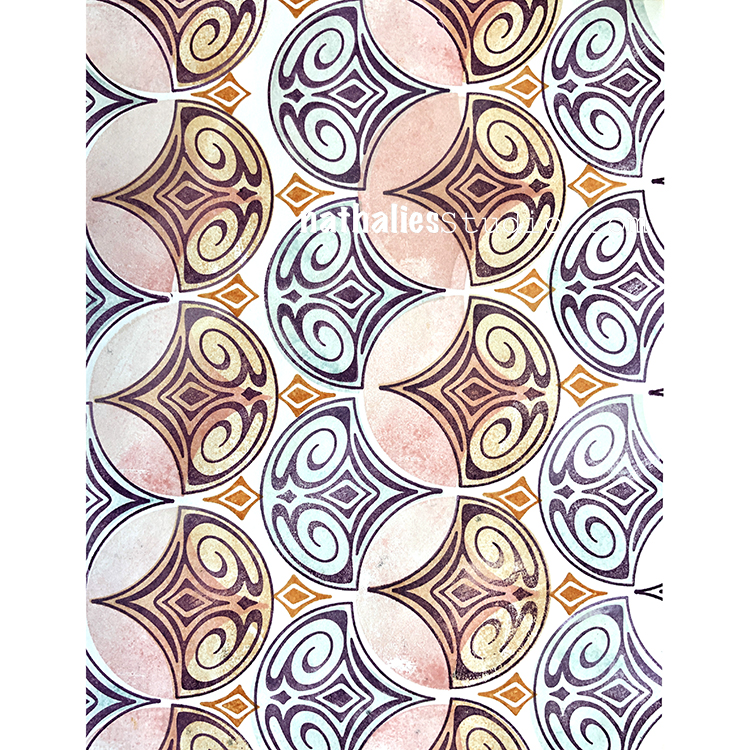
Pattern 10: How about Diamonds and … Pearls? I made this pattern with one of my Triangle Love stamps and one of my Small Circle Jumble stamps.
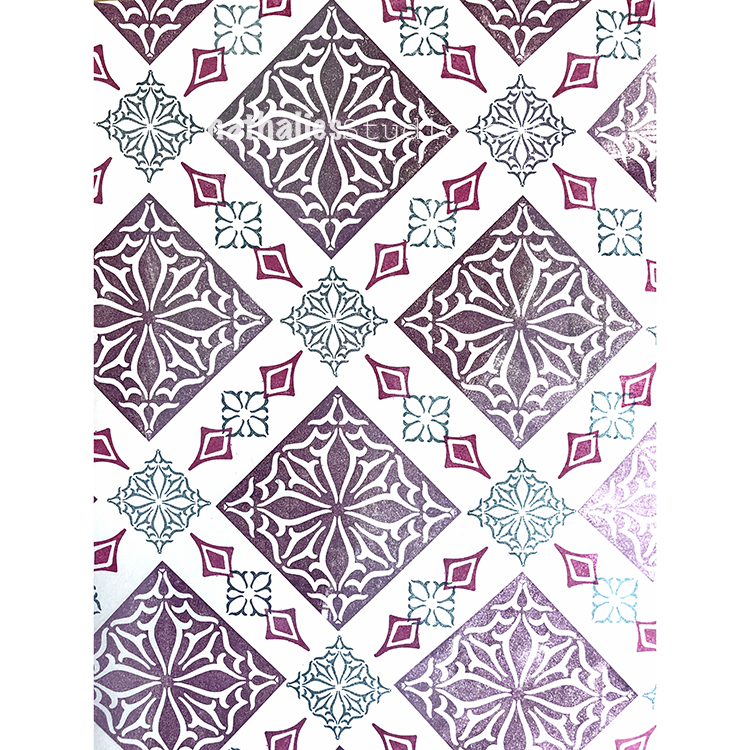
Pattern 11: Another fits-just-right combo is my Solid Hex Large with my Triangle Love stamps overtop. This pattern also has a stamp from my Floral Tile Small set in there too. Hexes, triangles, and squares.
Pattern 12: Balancing delicate and bold is a winning strategy for patterns. In this one I use some stamps from my Mini Motifs set and the Solid Triangle Large stamp from my Triangle Love set.
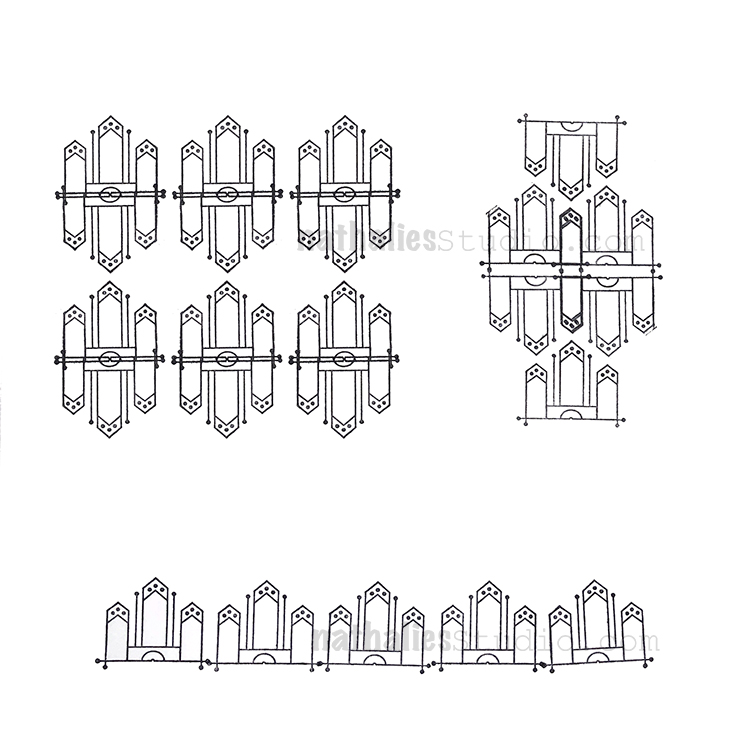
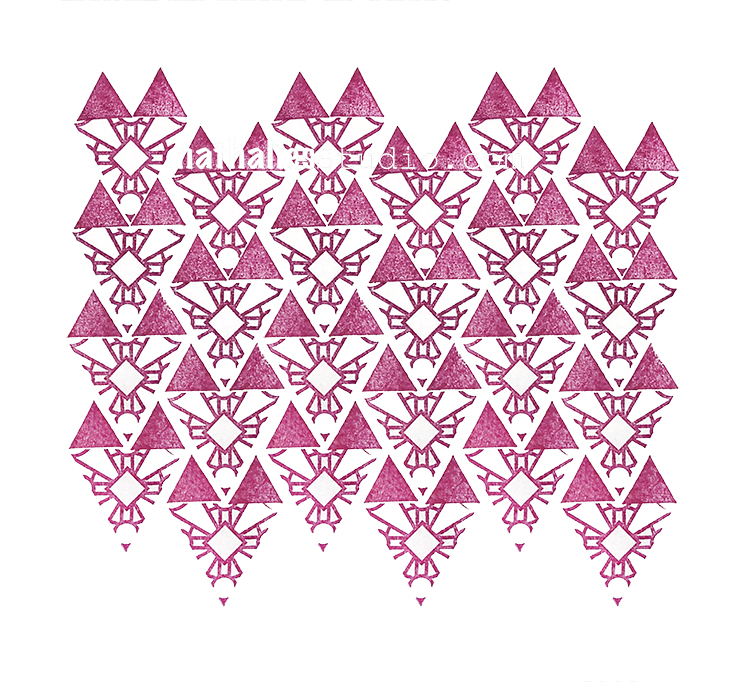
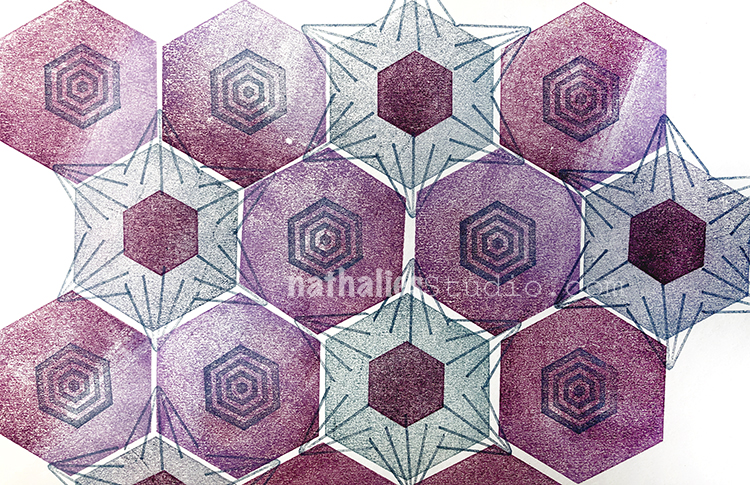
Pattern 13: My Triangle Love stamps are also designed to play really well with my Hex Set Large rubber stamps: the sides of the triangles are the same length as that of the hexes. Look how that can translate into a great field of pattern!
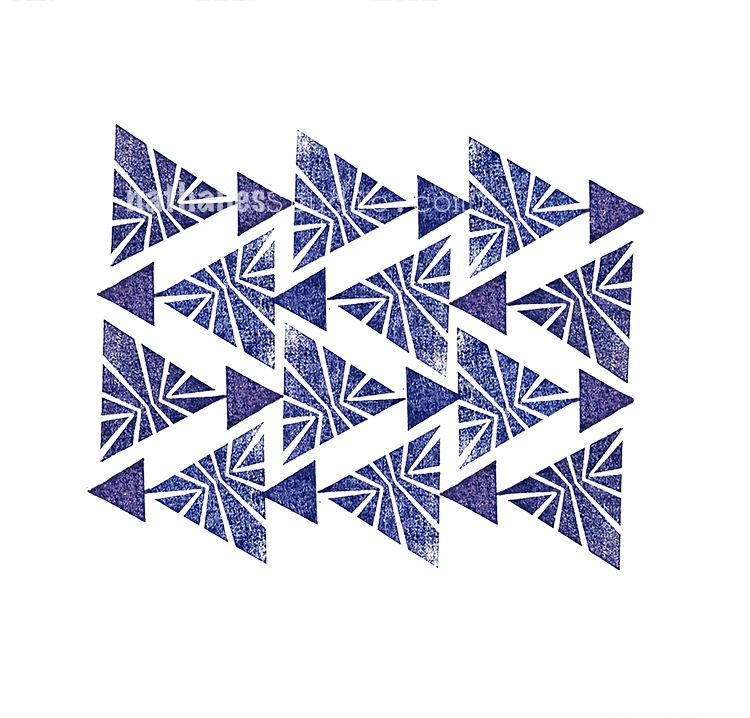
Pattern 14: How easy is it? All you need is a couple triangle stamps and 2 different ink colors to make a field of pattern.
Here are some of the stamps I used for these patterns:
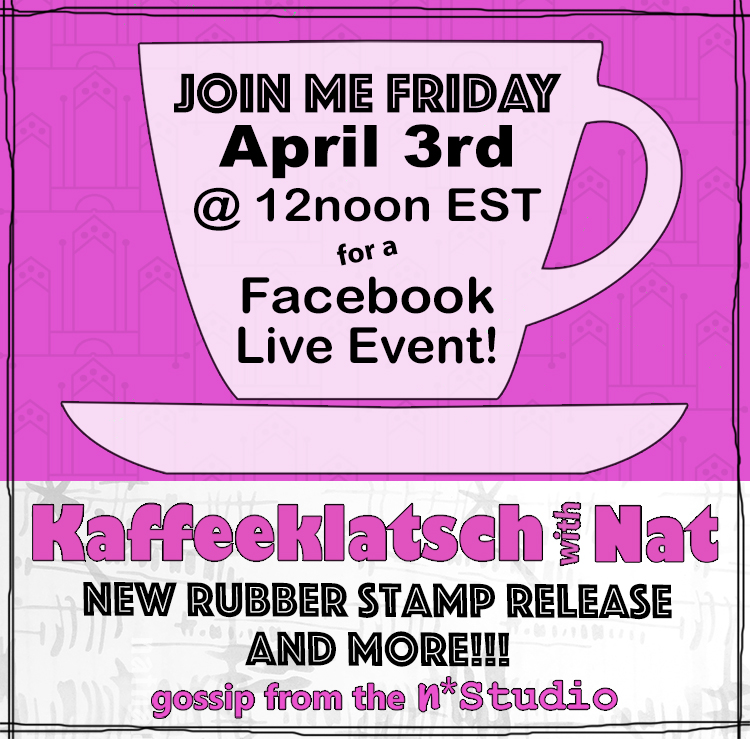
I have some NEW rubber stamps coming out today! It’s a big exciting group and I am very happy to be sharing them with you. AND if you are around today (April 3rd) at 12noon EST be sure to catch me LIVE on Facebook for my Kaffeeklatsch where I will be showing the new guys :)
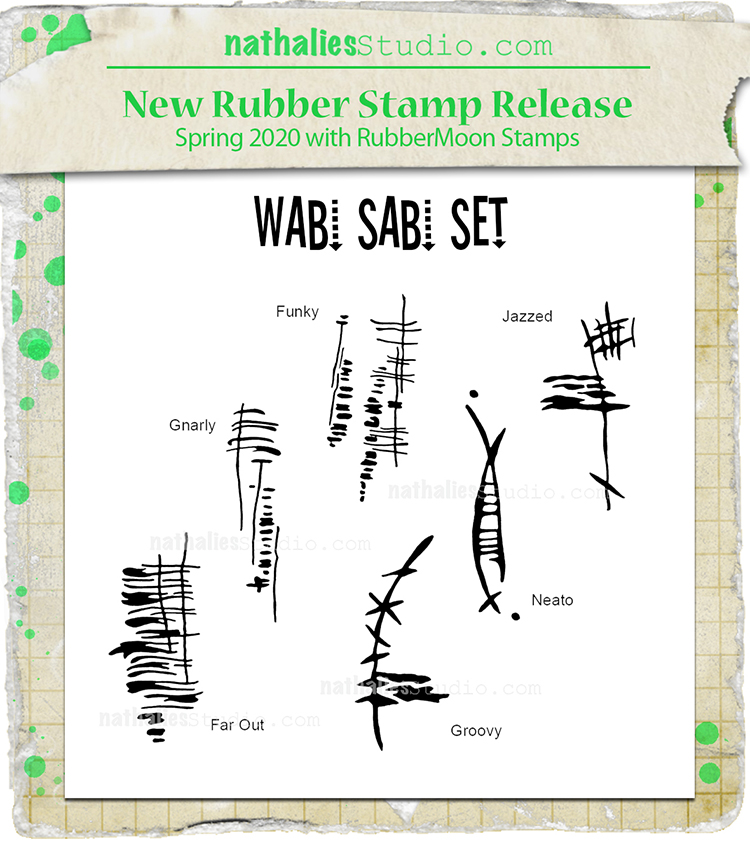
In the meantime, here we go. Here is the Wabi Sabi set, a fun set of 6 little stamps that are perfect for adding abstract, mark making to your artwork:
And here are some of these stamps in action:
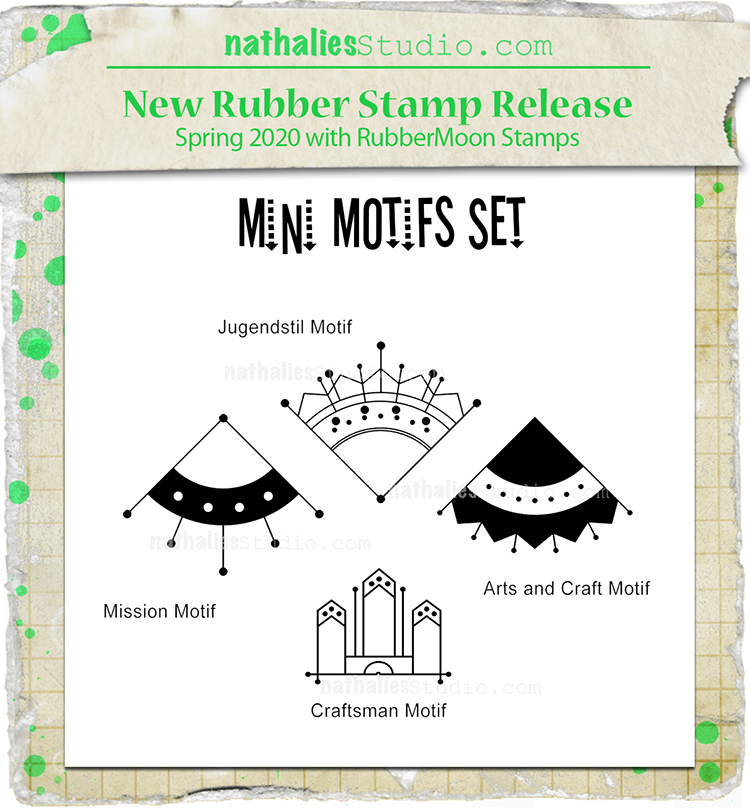
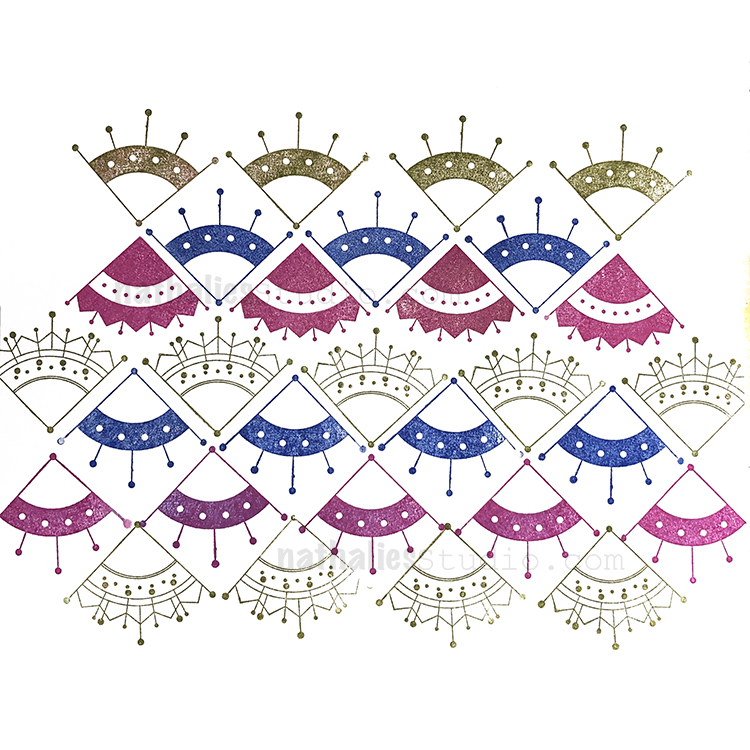
Next up is the Mini Motifs set – all these were inspired by designs that I found on my fireplaces at home!
The Mini Motifs can be used for so many patterns or for a little ornament here and there:
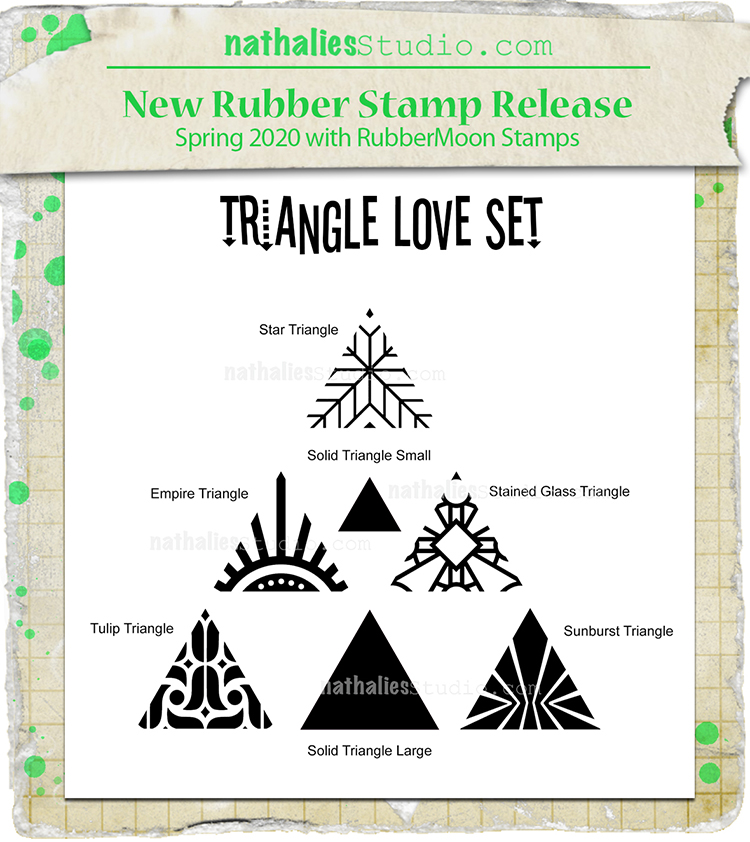
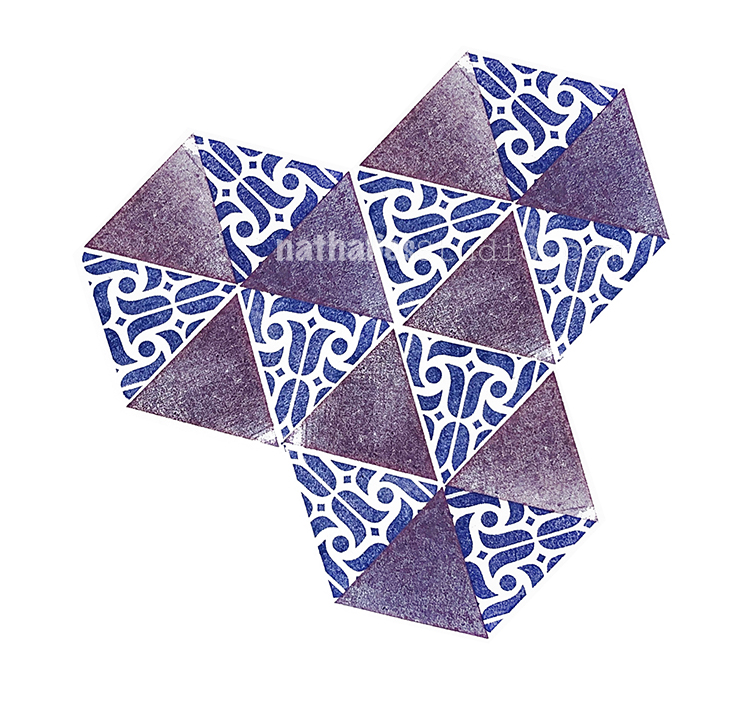
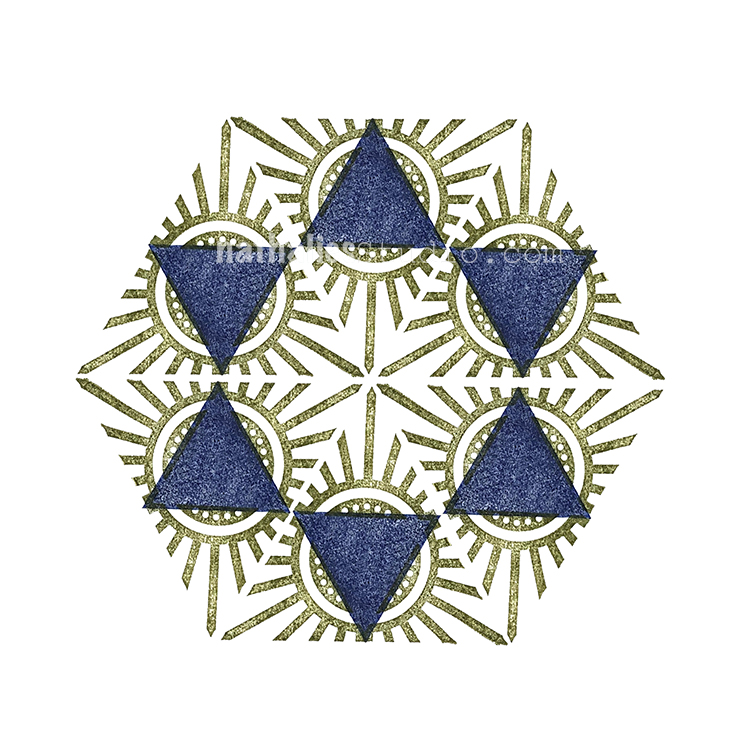
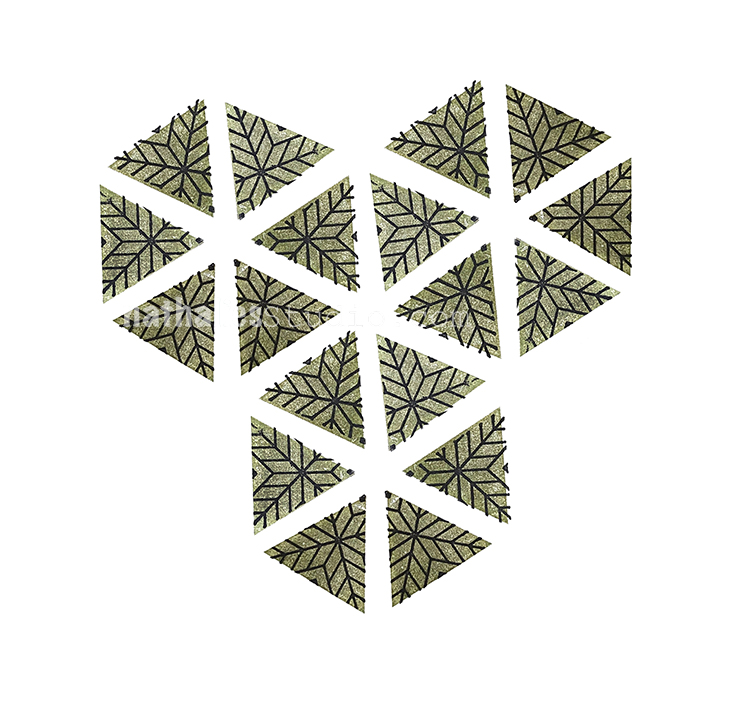
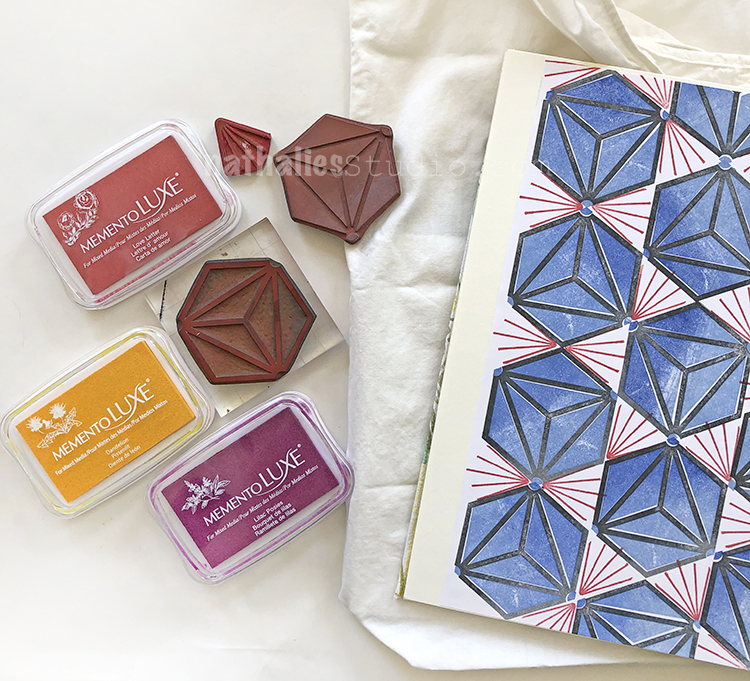
And then there is the Triangle Love set – wow these are fun to use for making patterns. I will show you in a bit how you can make kaleidoscope-like patterns by rotating and stamping the triangles…
These are amazing to play with to create patterns:
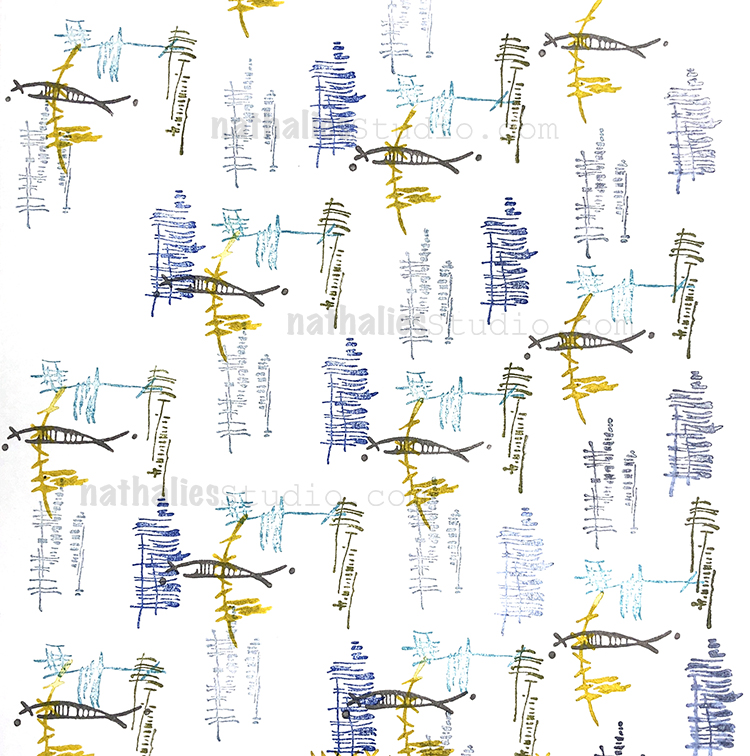
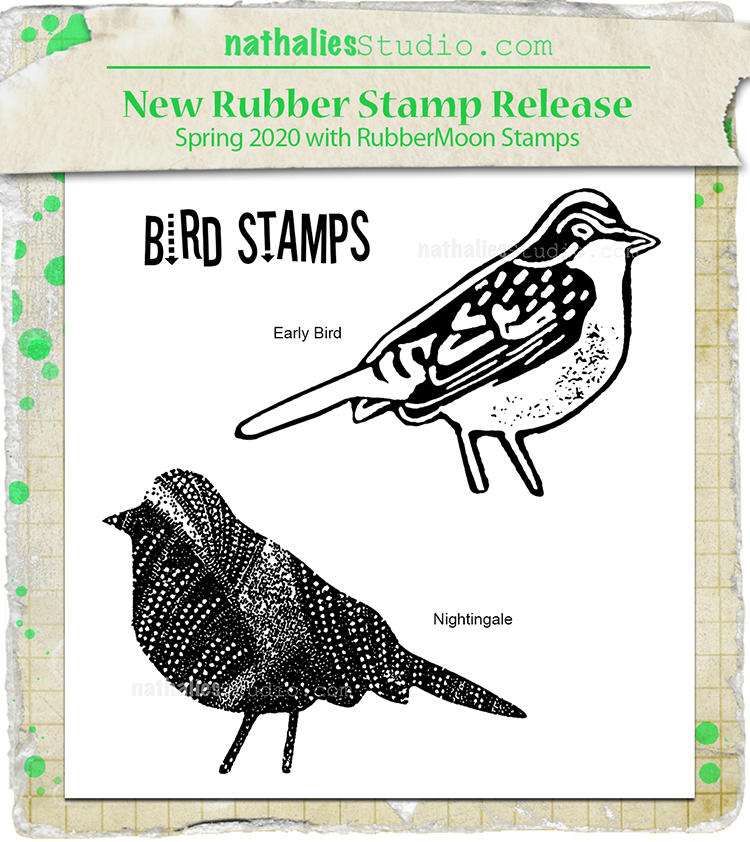
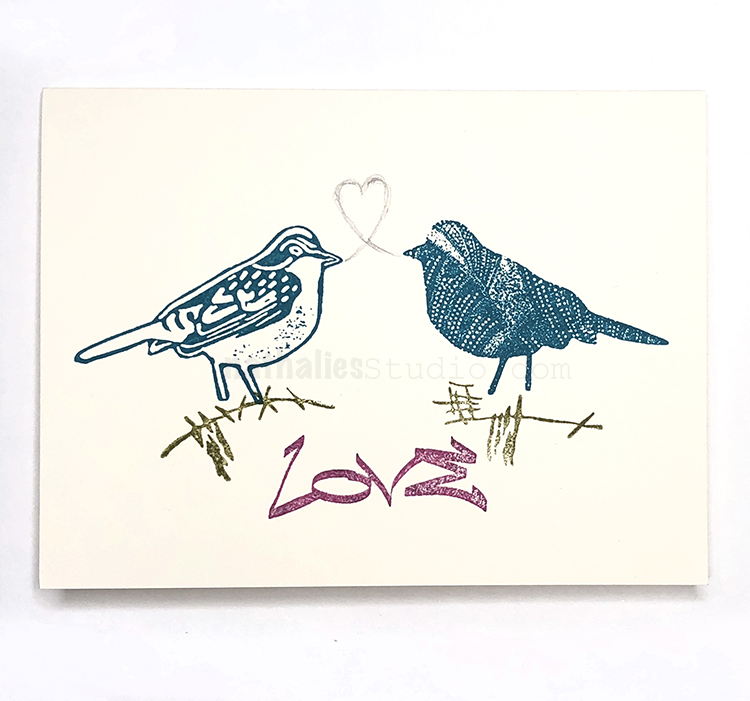
And finally two different birds in the Bird Stamps set – Early Bird and Nightingale so you can “put a bird on it” ;)
Here are these lovelies:
I hope to see you at the Kaffeeklatsch later today to see the new stamps and just to catch up on everything:
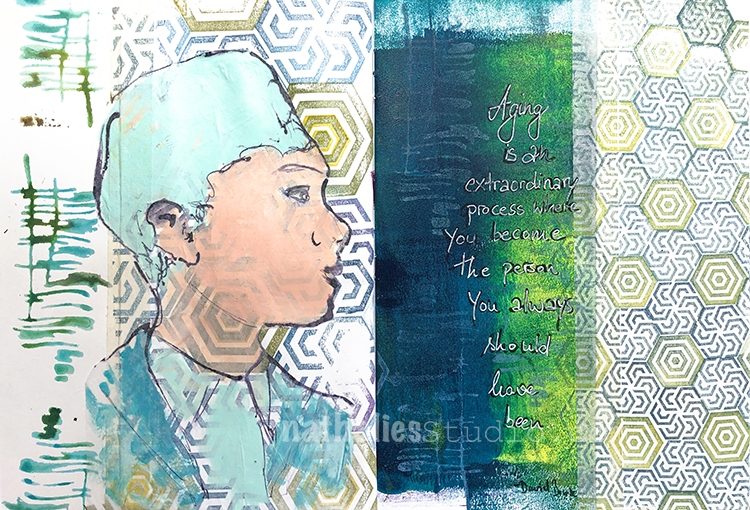
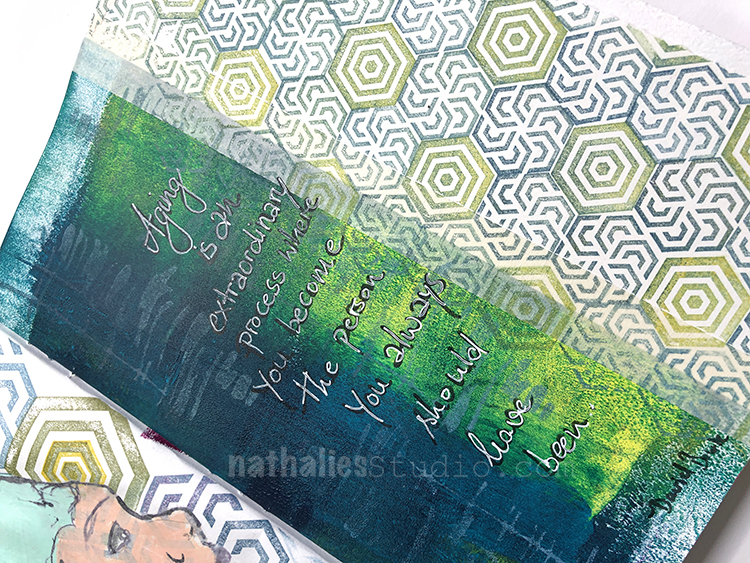
“Aging is an extraordinary process where you become the person you always should have been” David Bowie
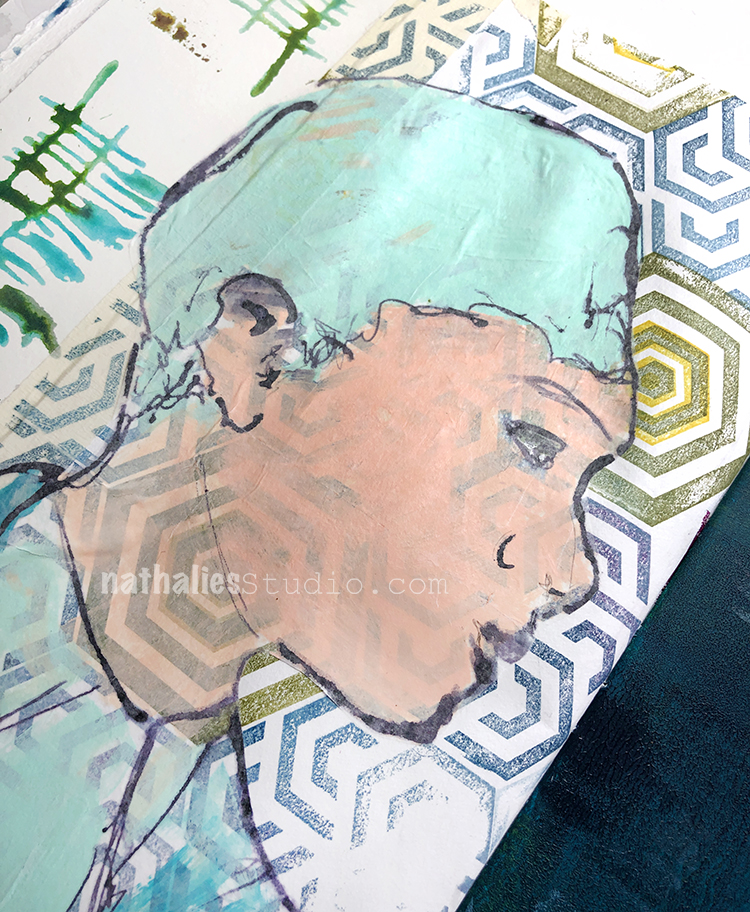
This spread was tons of fun. I used dye spray paints on the left to stamp with my Far Out Stamp, then I used the Large and small Hex Rubber stamps with an inkpad to create a pattern. The area that is painted in acrylic and green was over stamped with white ink and the Far Out stamp- it is very subtle but I like the repetition of the pattern.
Some ink and acrylic paint for the lady and voila ..another very mixed media spread.
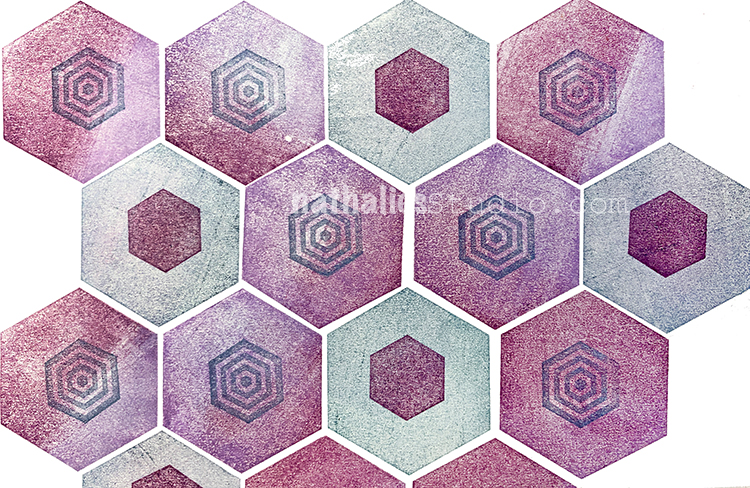
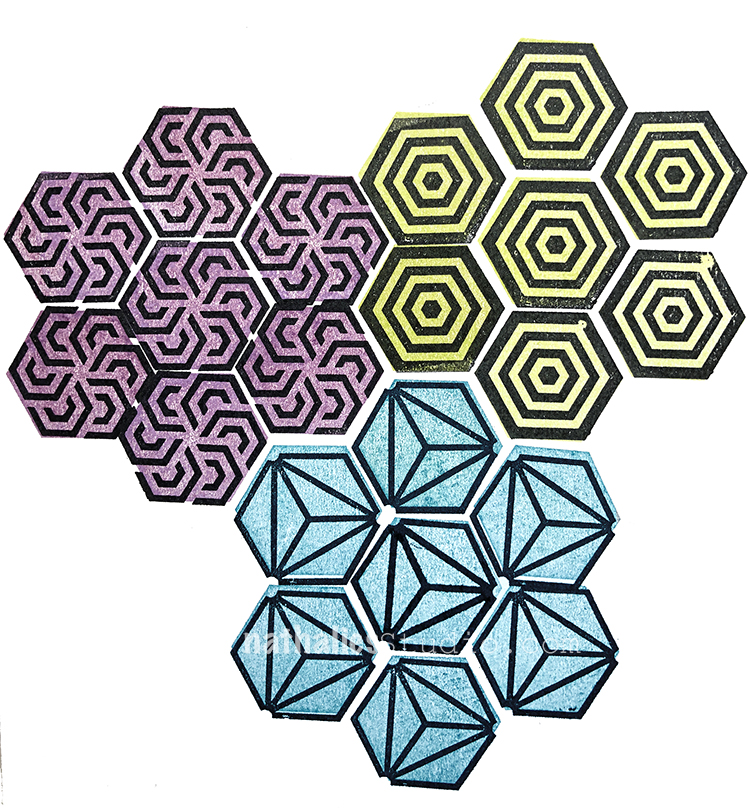
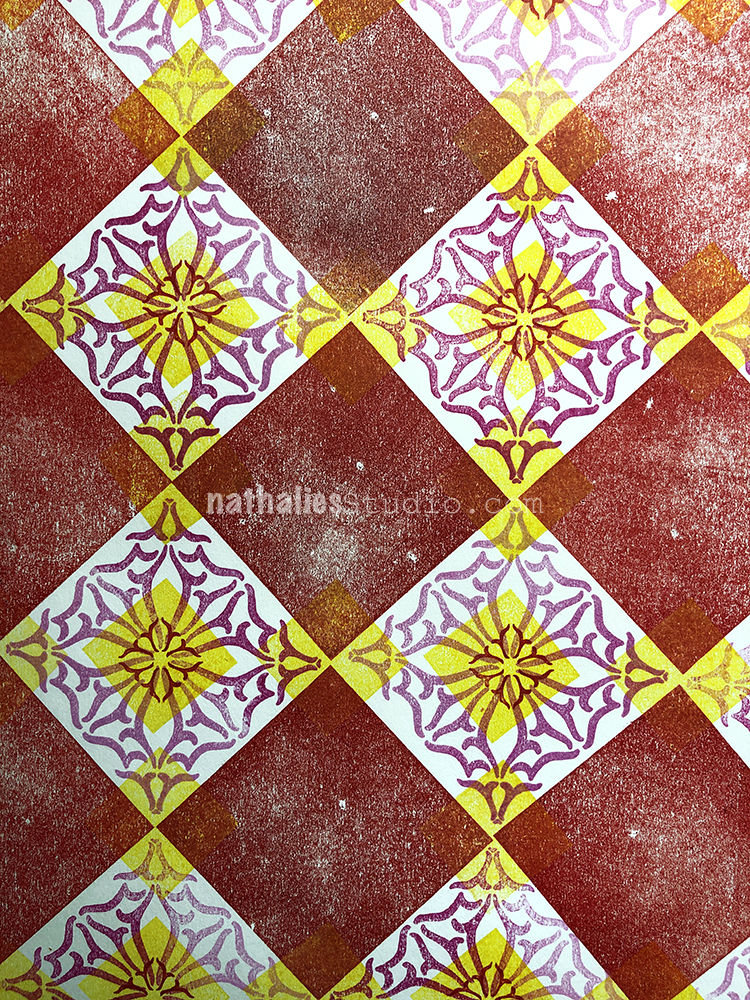
I am happy to announce that the 4 new rubber stamps in the collection are here! This makes the “family complete” as these new Solid stamps are a great addition to the Hex and Floral Tile sets.
The Solid Hex Large is fun to use on its own with different color inks or even black and white. But as with all these new stamps, it is an amazing partner with its patterned counterpoint… the Hex Set Large stamps and as seen below the Hex Set Small stamps.
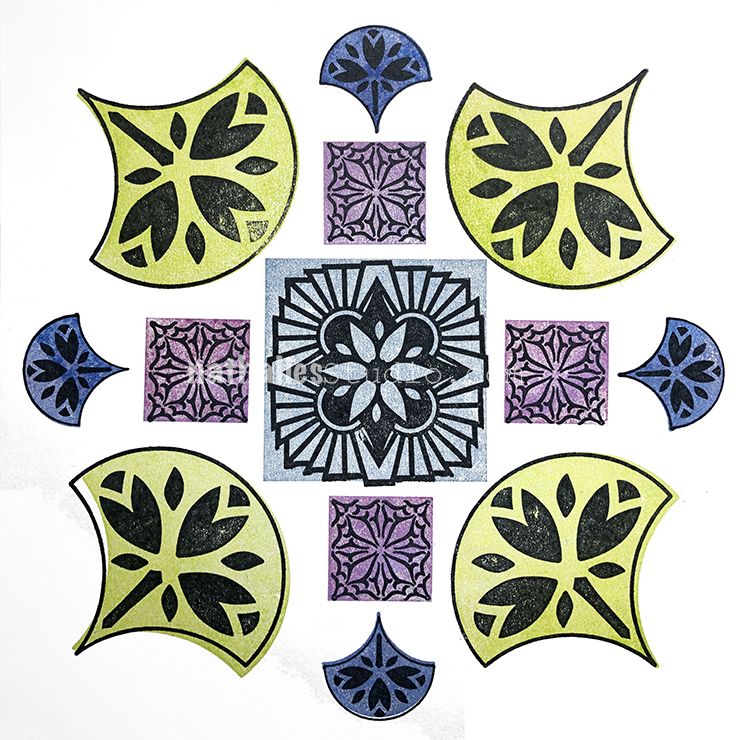
You can stamp a field of them and then add the patterned stamps overtop:
The pattern above also includes the cute little Solid Hex Small stamp:
This is again, great on its own…
… but WOW is it fun to pair up with the Hex Set Small stamps:
You can find all my rubber stamps in my shop here and here are some of the supplies I used for these samples:
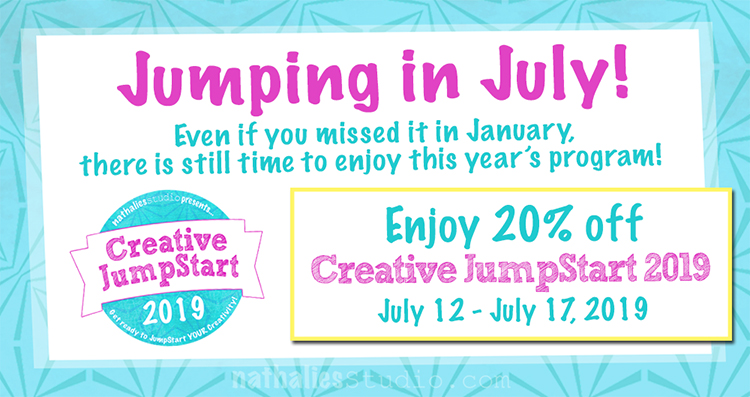
And don’t forget that now is a great time to get the online workshop Creative JumpStart 2019 – on SALE!!! Sale ends July 17th at 11:59pm EST so SIGN UP HERE TODAY. JumpStart YOUR creativity this summer!
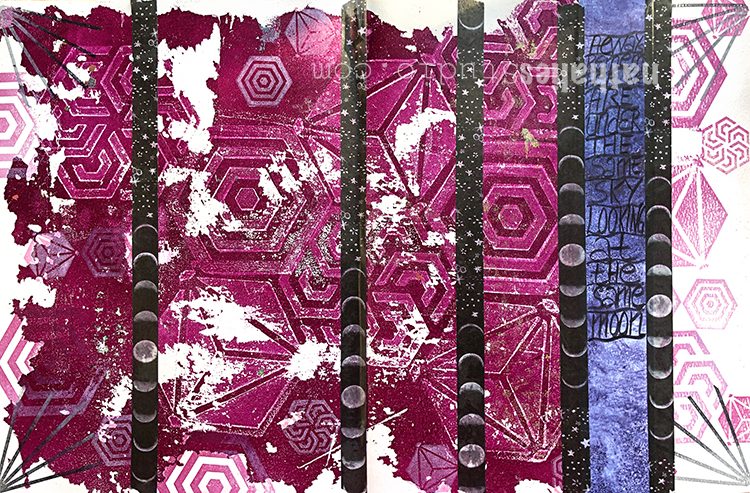
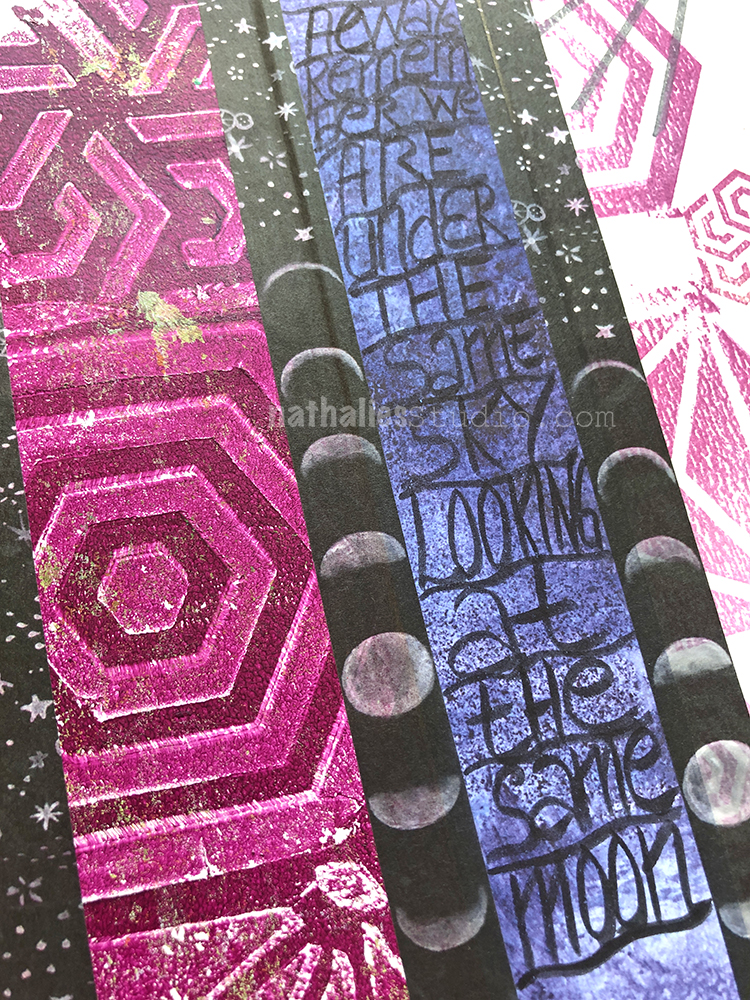
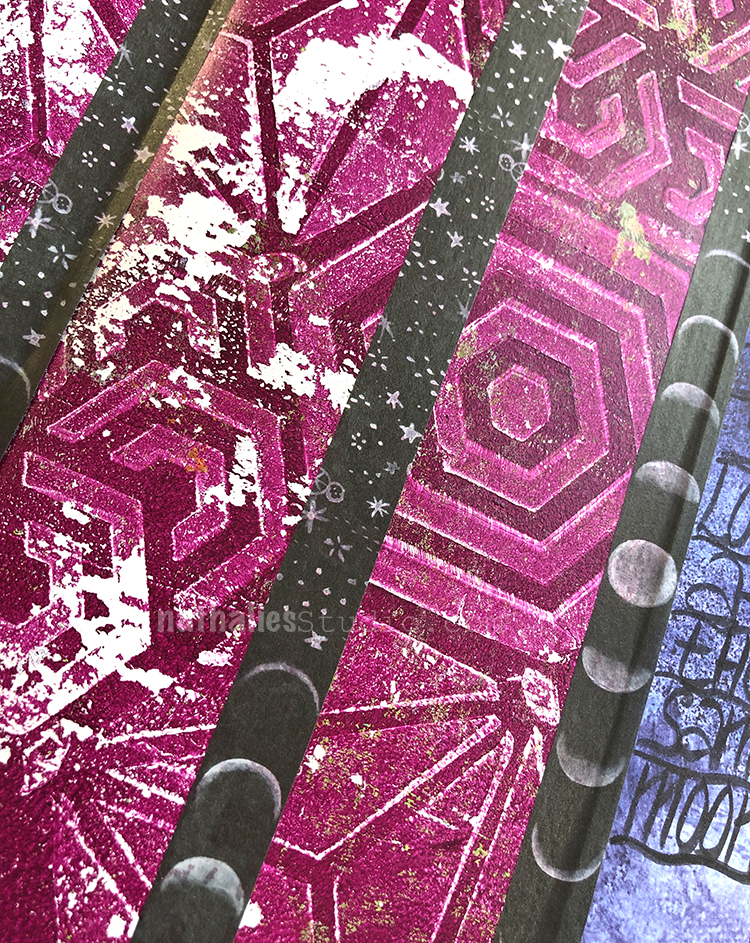
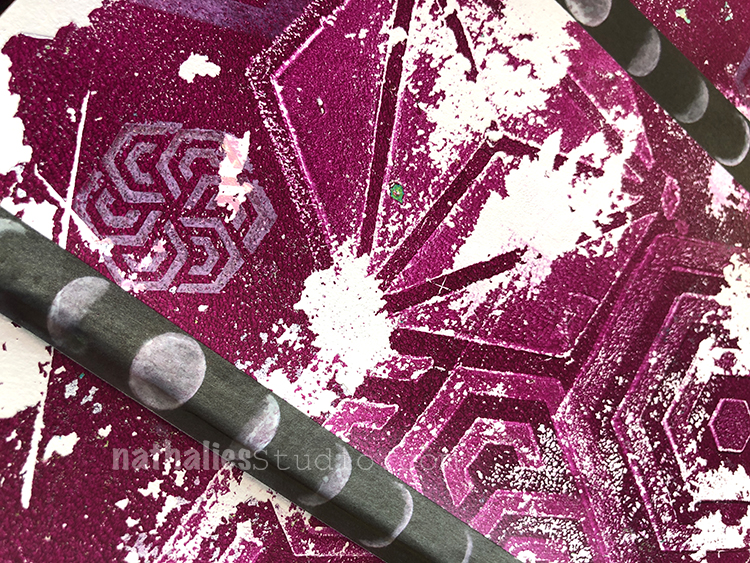
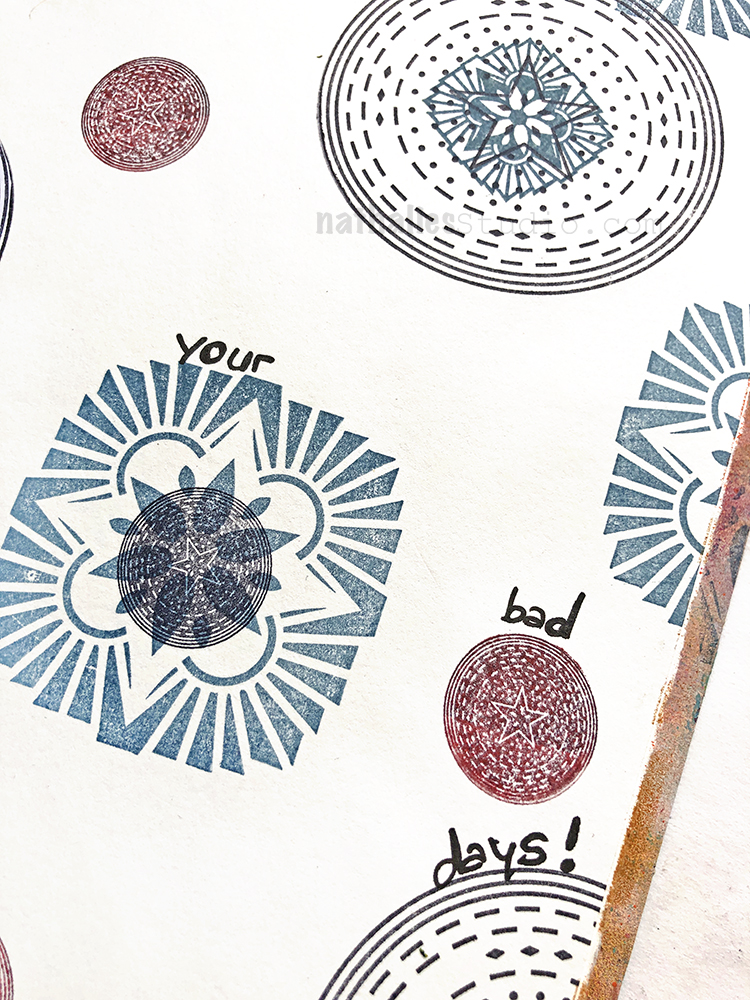
“Always remember we are under the same sky looking at the same moon”
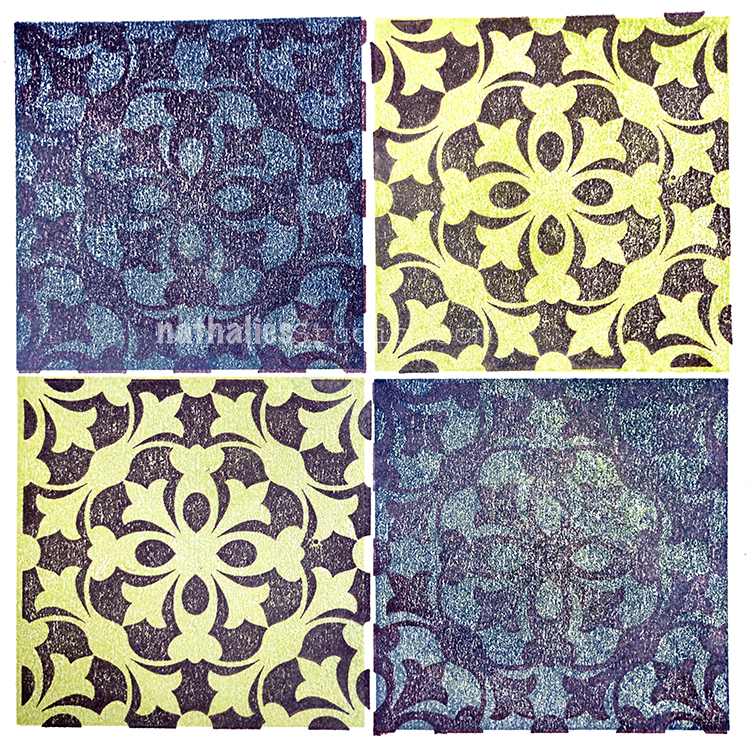
The background started with some mono printing with a gelli plate. I had taken off the magenta acrylic paint with my Hexagon Foam stamps.
I added the beautiful washi tape with the moon and stars . The blue paper is actually a strip of scrapbooking paper which I created for a french Company many many years ago.
I also used my differently sized Hexagon Rubberstamps and stamped with white onto the background. Love how this came together. Here are some of the supplies I used:
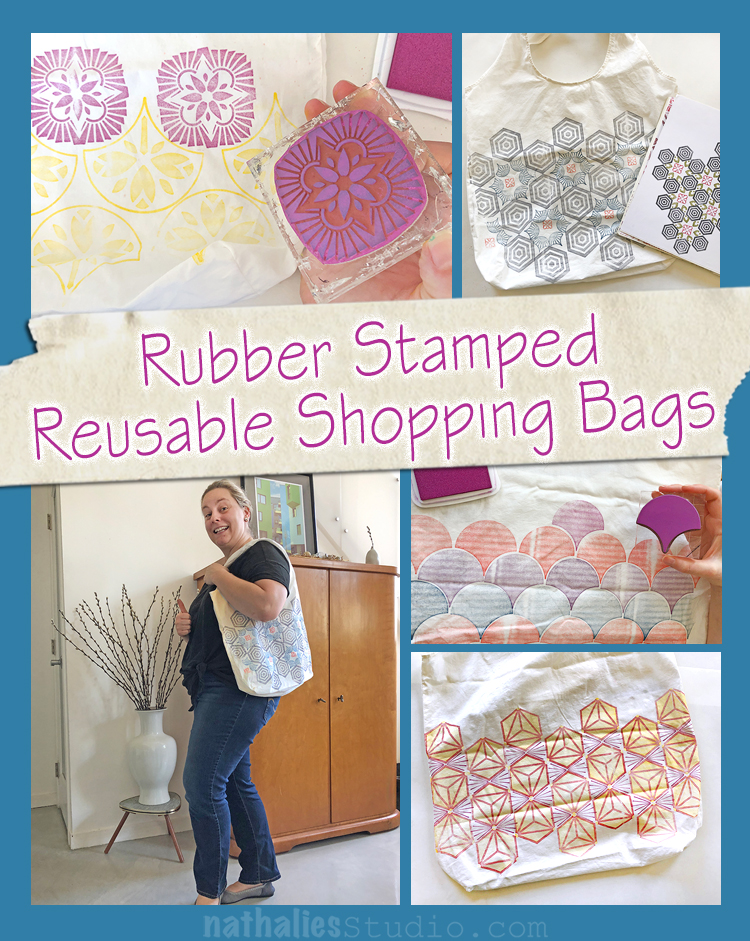
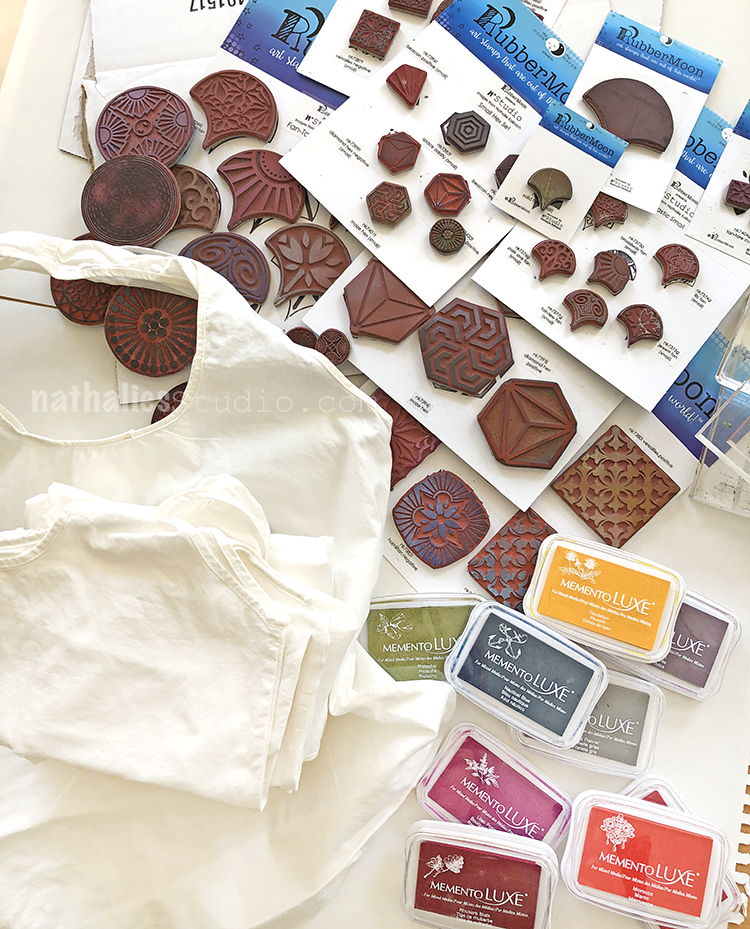
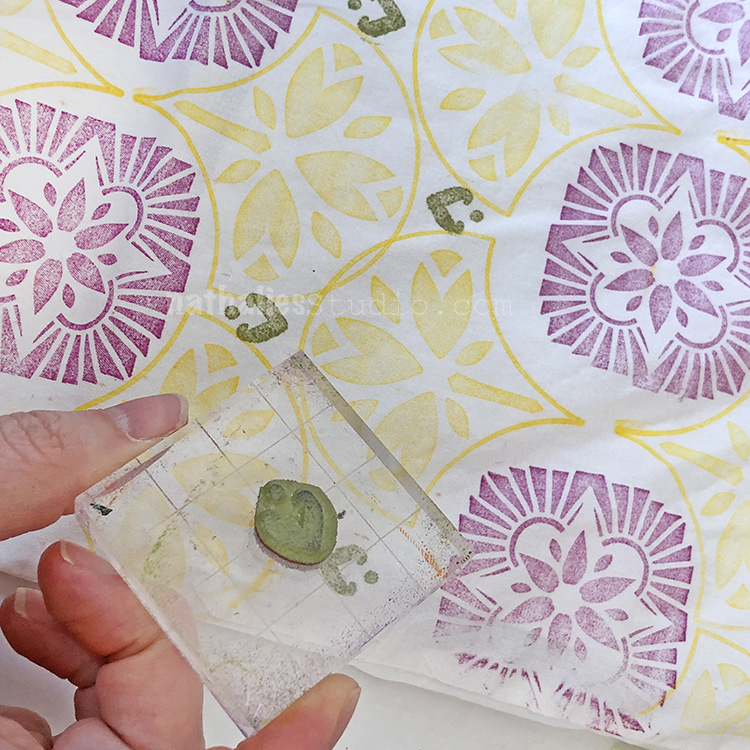
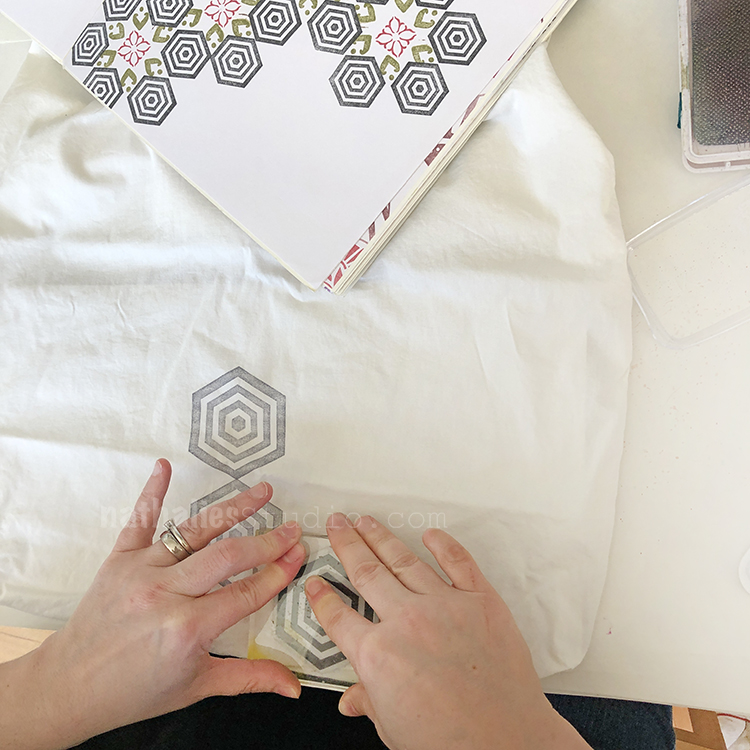
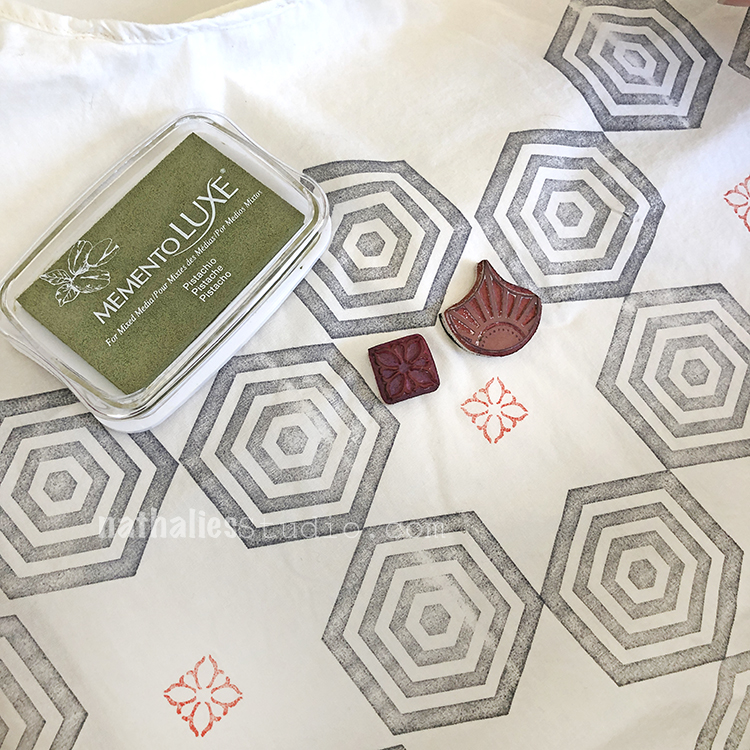
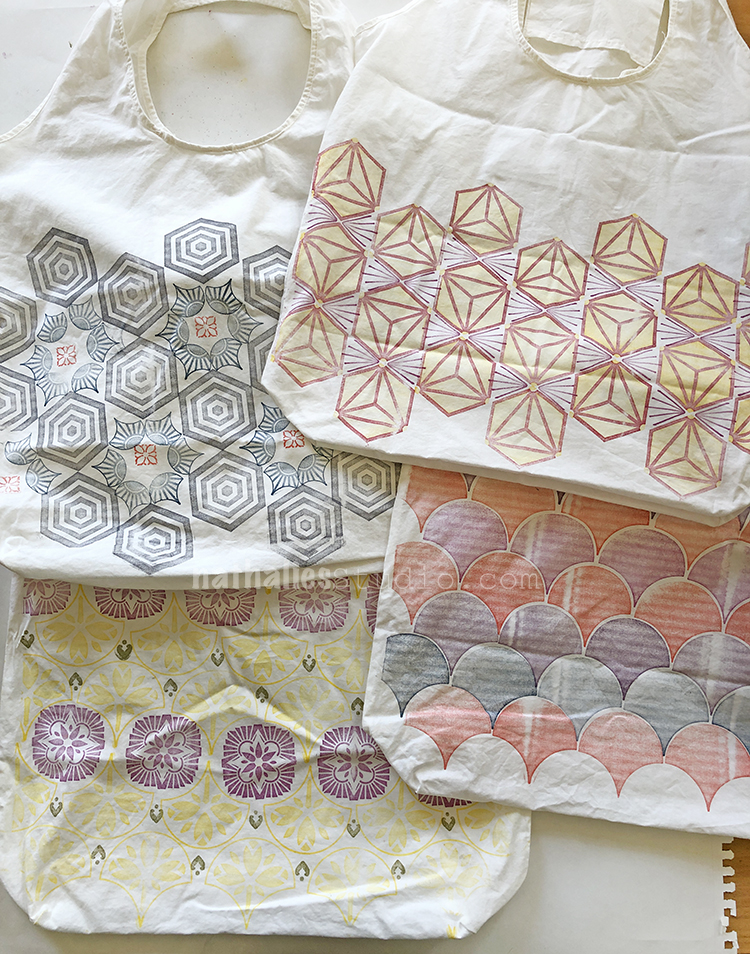
After getting into making patterns with my rubber stamp sets, I knew I wanted to take that idea and use it on a couple fabric projects. Kim and I got together to put some of those lovely patterns to use on reusable shopping bags. Our neighborhood is getting rid of plastic bags in June so we wanted to be ready to shop with a unique tote or two.
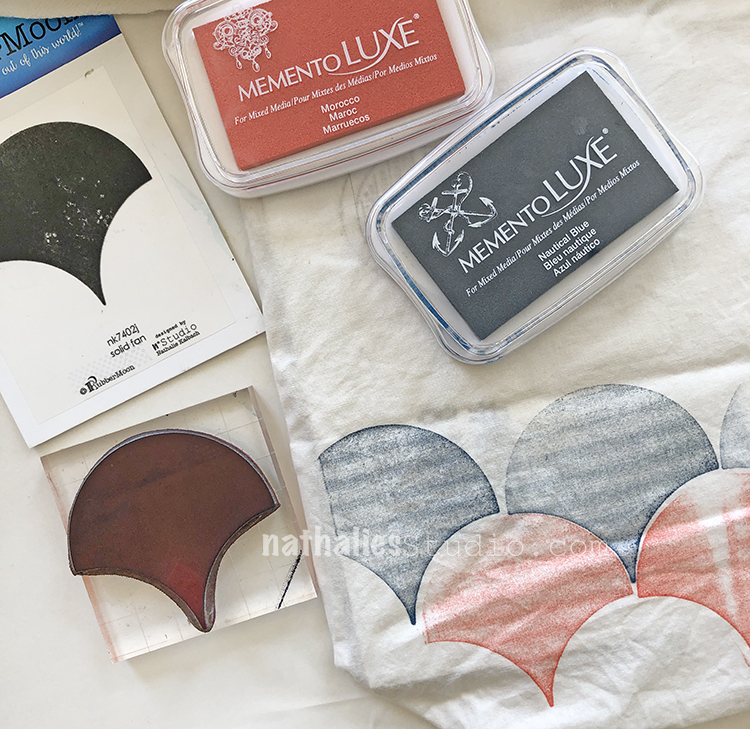
The supplies couldn’t be simpler: white (pre-washed and pre-ironed) cotton tote bags, a selection of my rubber stamps, and ink pads that are for stamping on fabric. We used Tsukineko Momento Luxe inks – you can find the links for those below.
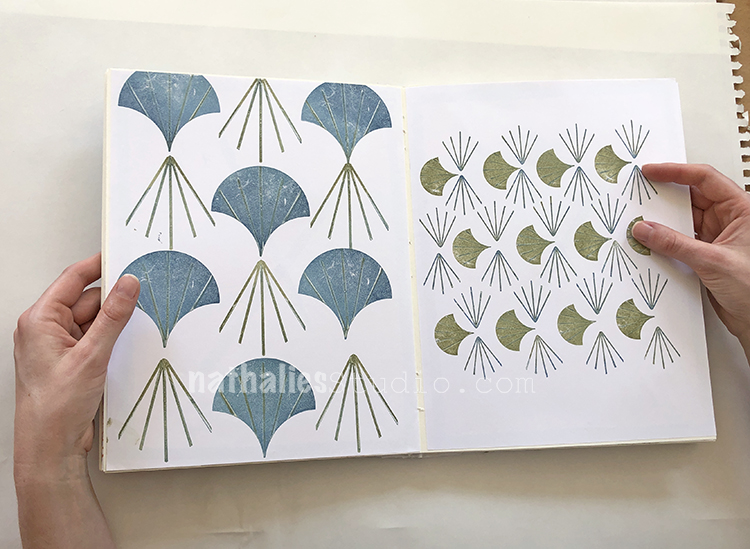
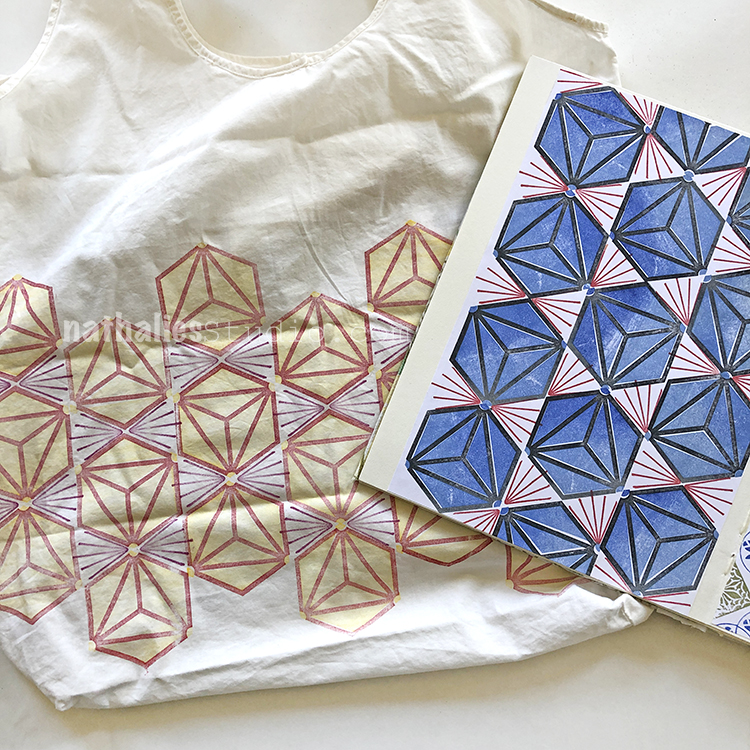
We both took a minute to page through the pattern book I made with all those Nat’s April Patterns. It has become a great source to go to for inspiration.
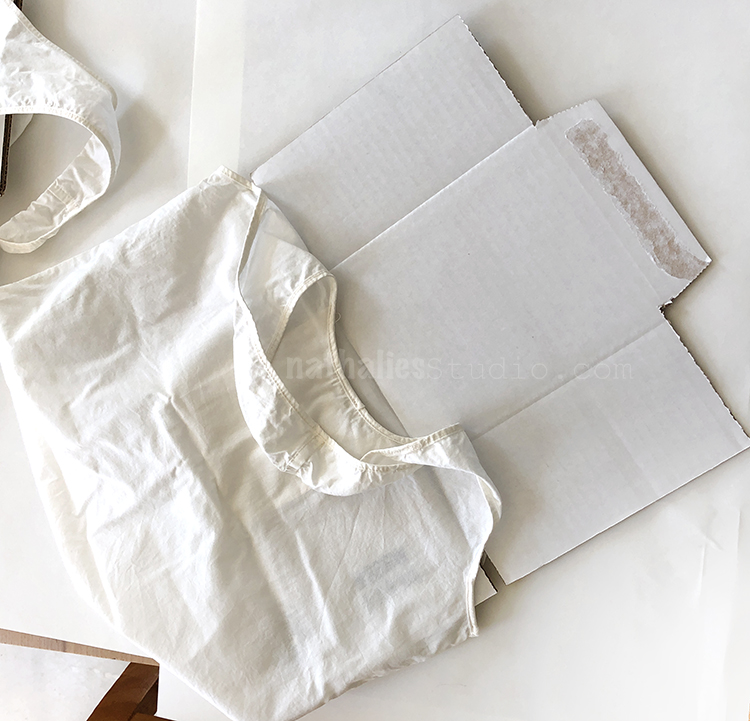
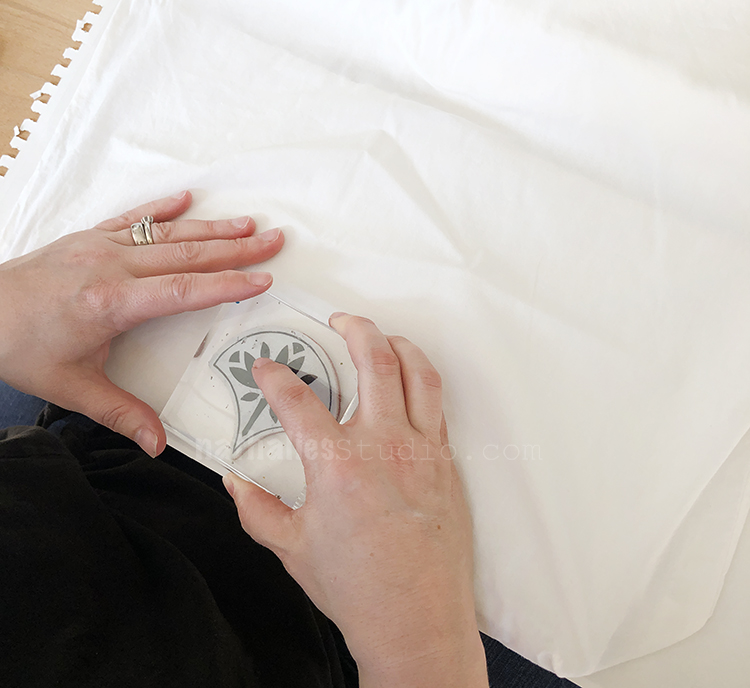
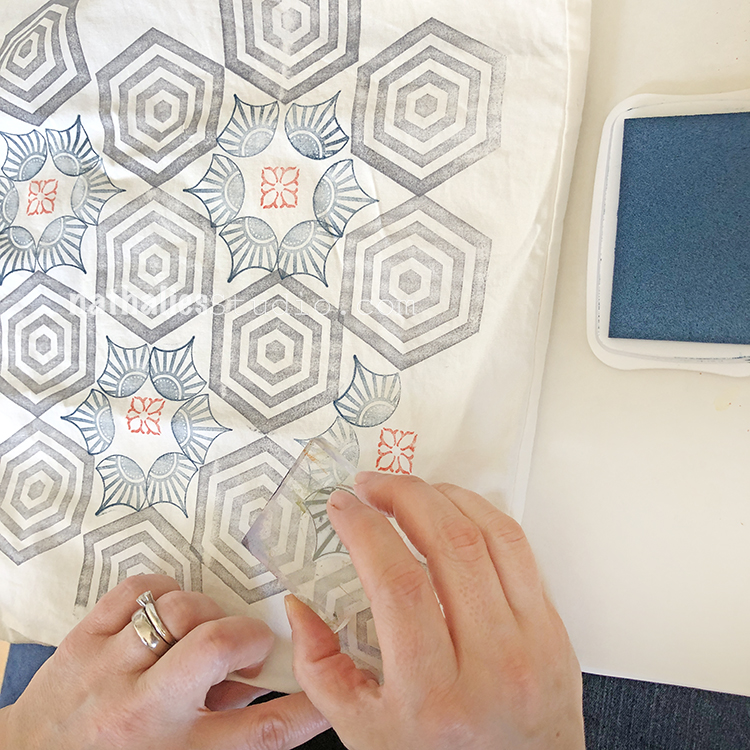
Before you begin stamping, put some cardboard or a magazine in between the layers of your bag so it doesn’t bleed through. Be careful of any creases or gaps or textures in this – it can show up in your stamping. It is best to find something smooth for in there.
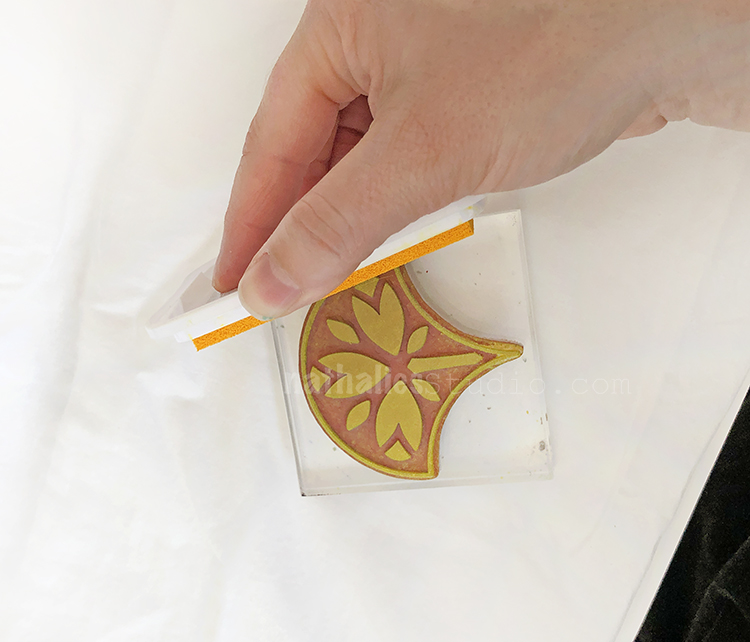
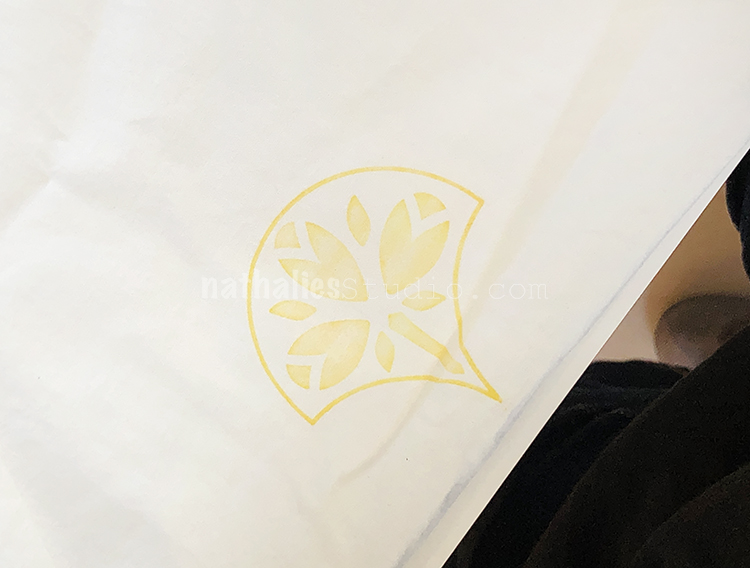
I started with the Jewett stamp from my Fan-tastic Large set and inked it up in yellow. The fabric ink is kind of sticky and you have to be a bit fast and also thorough with the inking.
It is easiest to start your pattern in the center of the bag and then work your way out. That way it will be even left to right and you can decide how close to the edges you want to go.
The ink colors can be light in some cases and bolder in others.
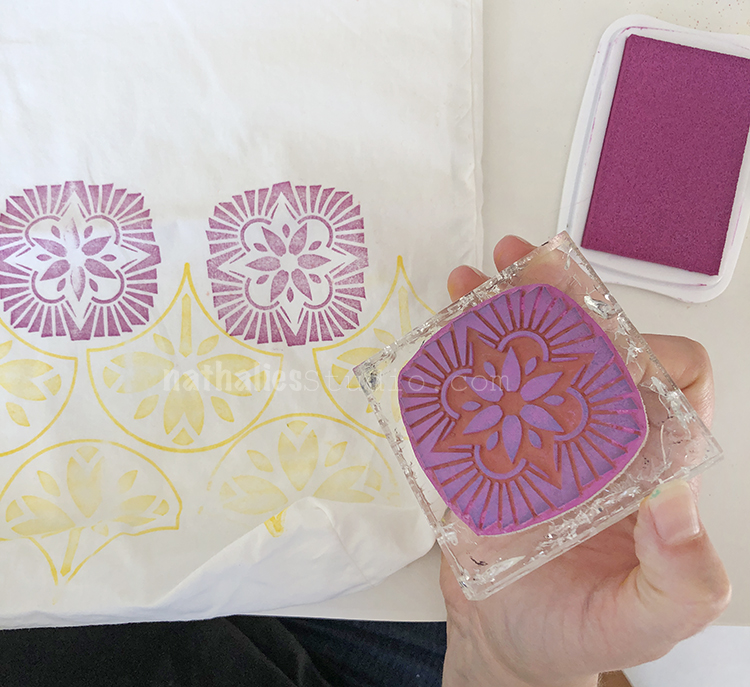
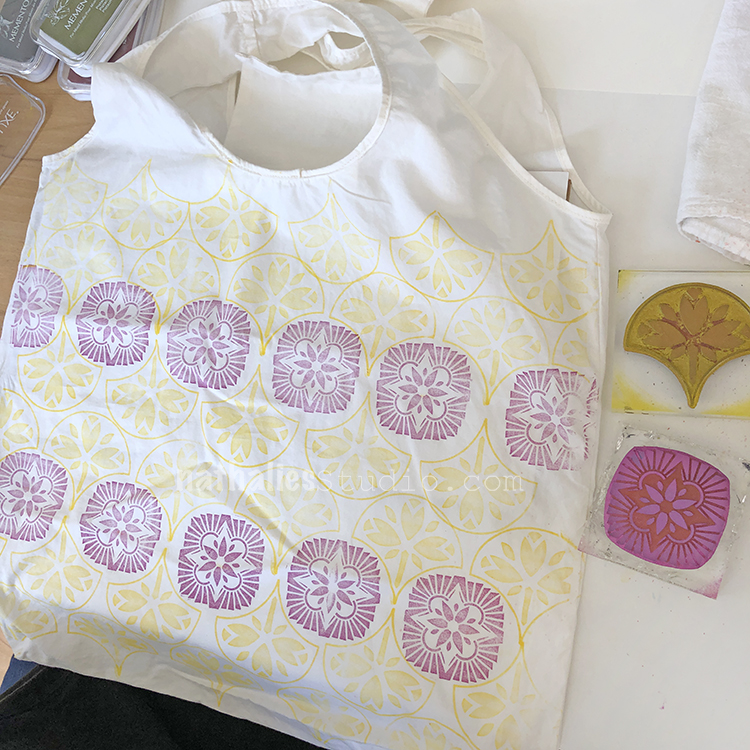
After two layers of the Fan-tastic Jewett Fan, I switched to the Hamilton design from the Floral Tile Large set and started stamping in a magenta color.
Looks great already but needs something more…
I finished off the pattern with a stamp from the Fanfare set.
Kim jumped in with my Solid Fan in the large size to do a simple but cool scallop pattern.
She chose a lot of different fun colors – don’t forget to clean your stamps in between colors. Also, you can see that with the solid stamp, the texture of the cardboard insert shows a bit – not a bad effect but something to consider when choosing a liner.
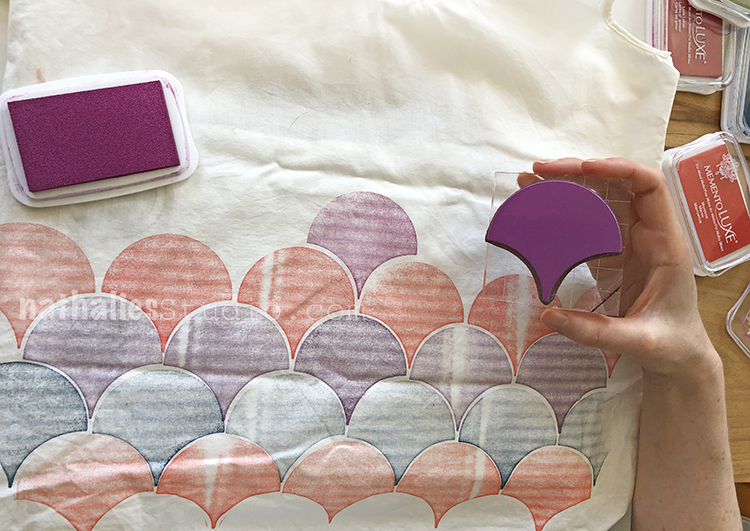
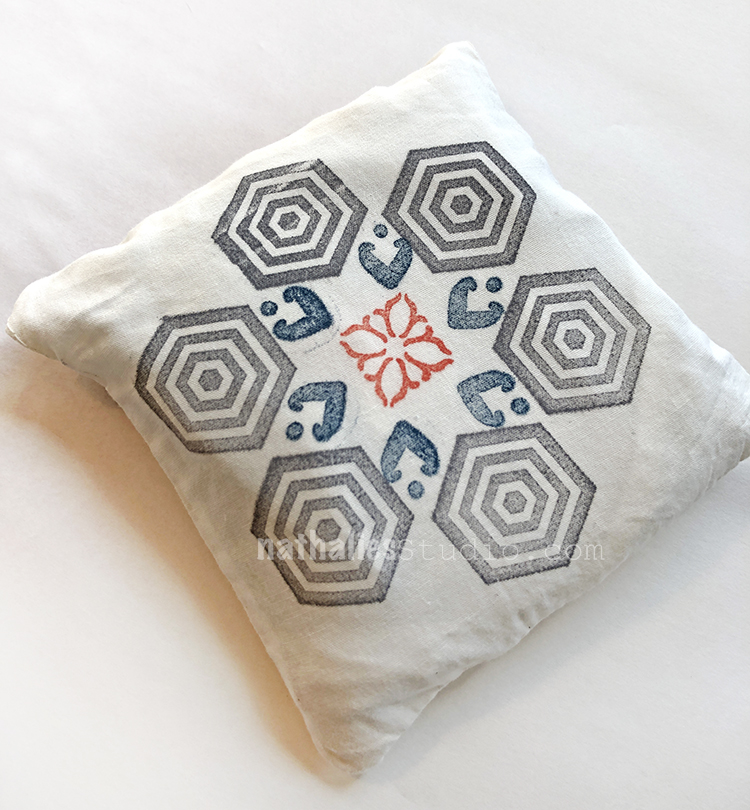
Kim found another pattern in my book that she really liked. She chose three ink colors. And the pattern needed one stamp from the Small Hex set and the two Diamond Hex stamps from the Large Hex set.
She started with the red ink and then filled in with yellow.
Looks awesome! And shows you don’t have to cover the entire bag.
Kim’s bag and the pattern inspiration.
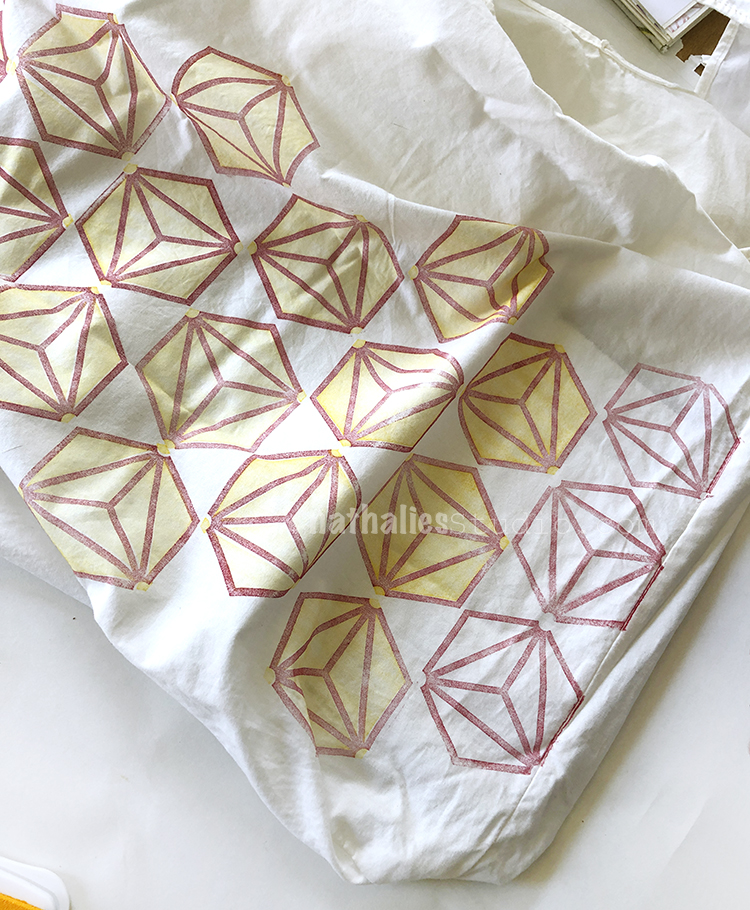
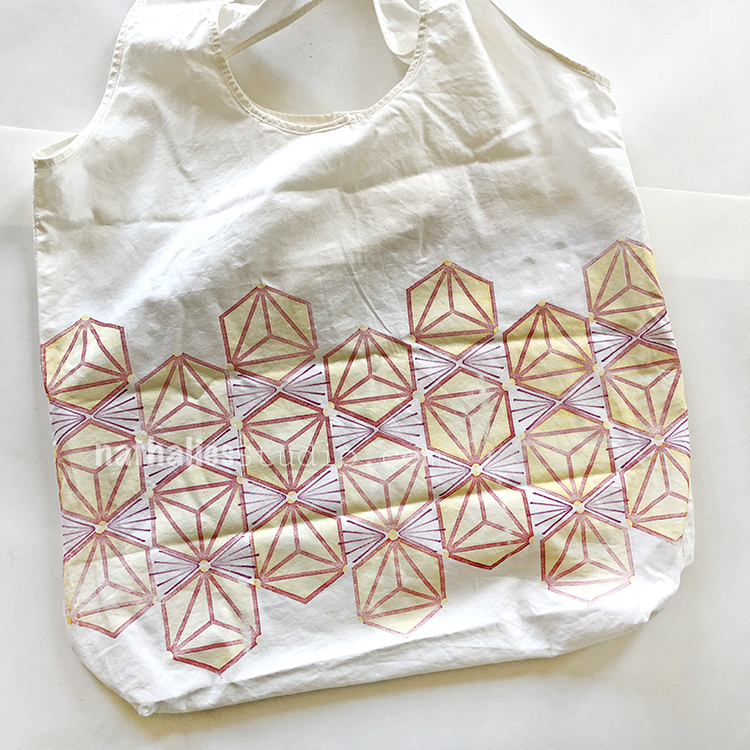
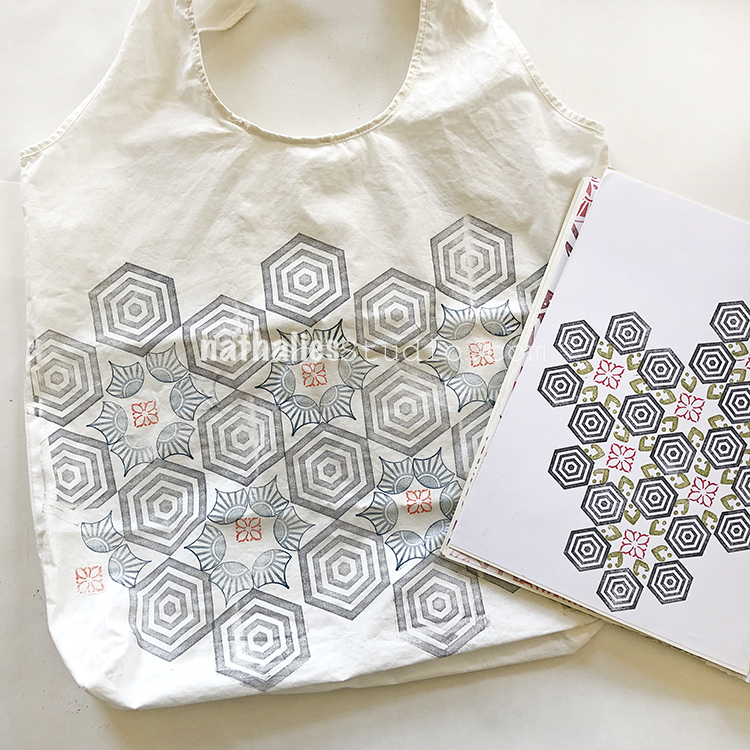
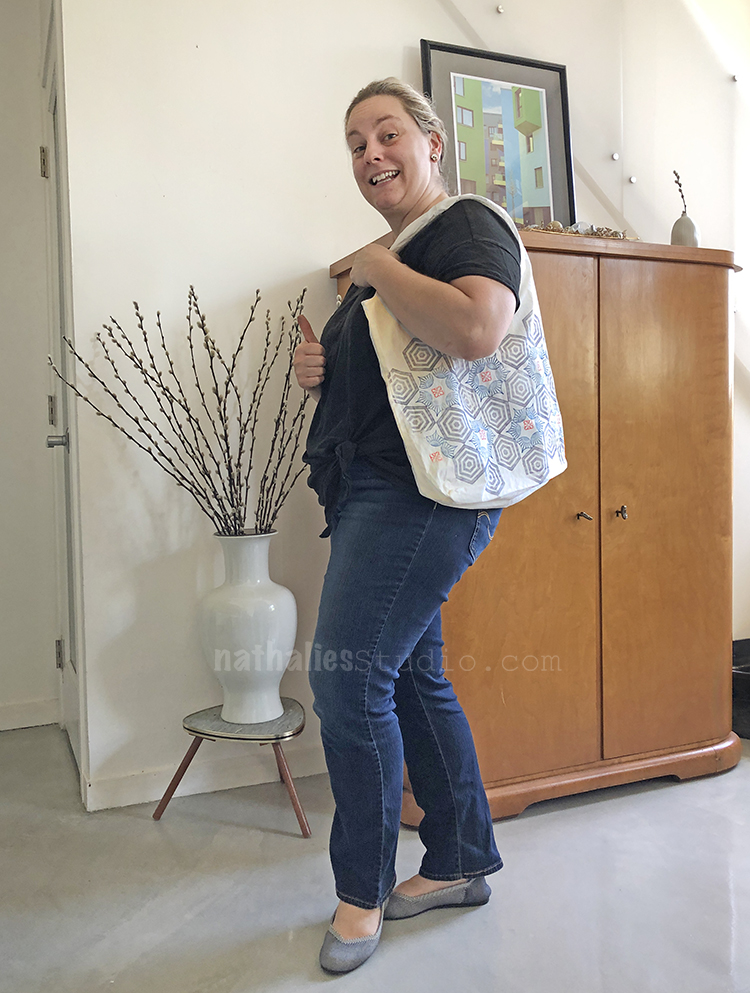
For my second bag I chose a pattern and decided to make it bigger. Tip: You will get a lot more done if you go with a larger stamp ;)
I began with the Space Oddity stamp from the Large Hex set, added a red Fan-fare stamp in the middle, and then I took a minute to choose my next stamp. More Fan-fare or the Broadway Fan from the Fan-tastic Small set?
I went with Broadway Fan :)
And here is the finished bag next to the inspiration.
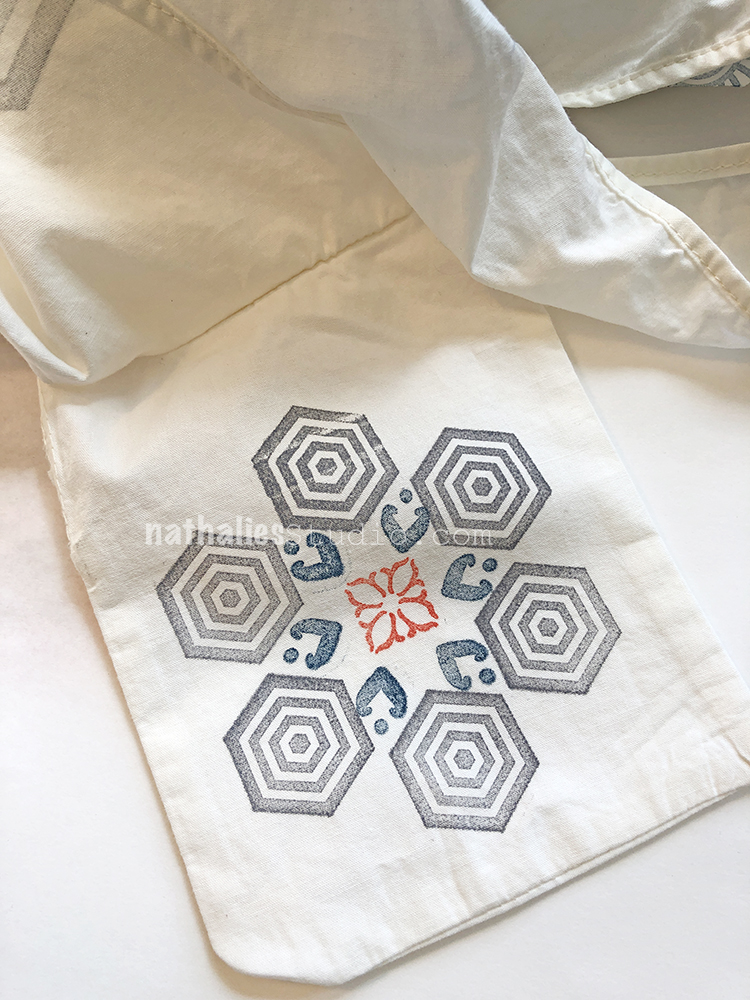
Our bags included a little pocket pouch to fold the bag into for storage. We decided to stamp that too. Here I used the Fan-fare stamps and the Small Hex set.
Then you can store them like this.
They look pretty awesome! Remember to follow your ink instructions for setting the ink. Every fabric ink is different. These will need to be ironed to heat set the ink.
This is fabulous!
I sew Boomerang bags http://www.boomerangbags.org for our local community to make people aware of plastic bag issues in our environment.
I think printing with your foamies will add an artistic touch to our bags! I will give it a go with the inks you mentioned. I do have some of you foamies and hope there is more at a local craft fair next week!
Thank you Nathalie
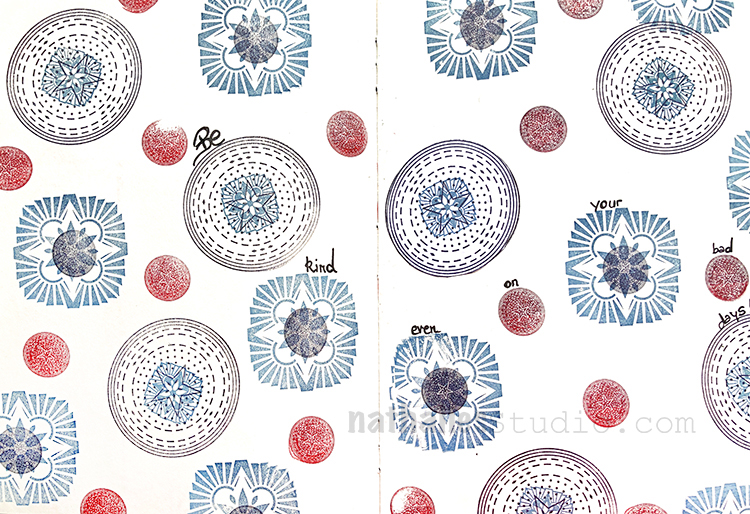
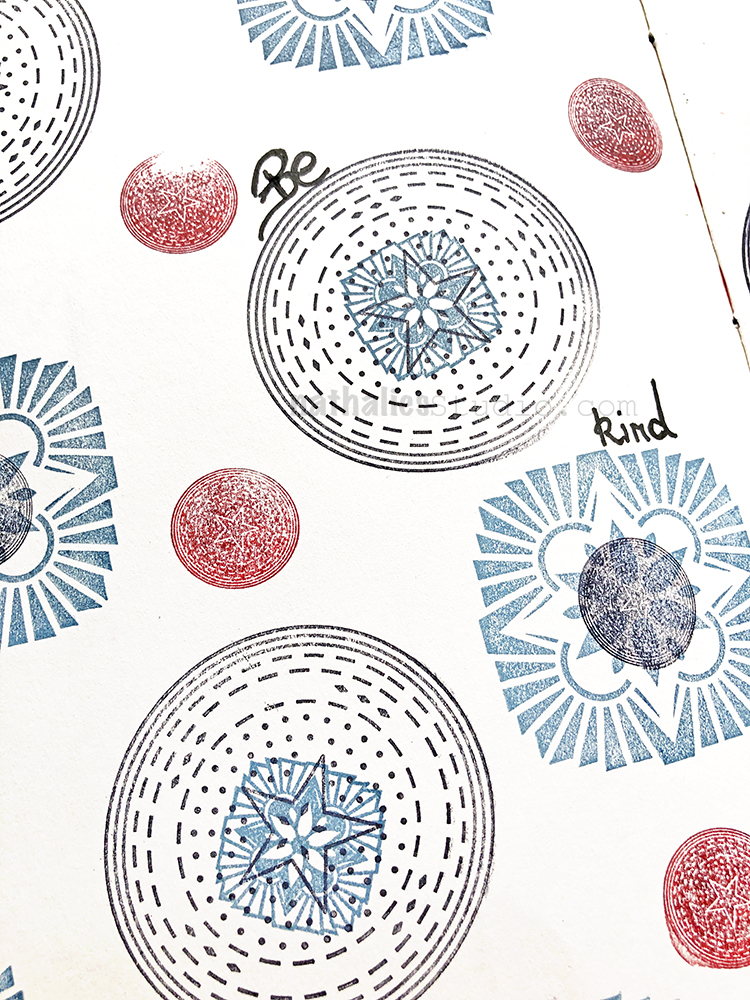
I wanted to share a little Flip Through video of my newly finished Pattern Sample Book. I started Nat’s April Patterns back at the start of April with my new rubber stamps and decided to bind them together in one book. It was relaxing and super fun to create the patterns and now I have an awesome resource for inspiration. Enjoy the flip through!
I hope you enjoyed this and are inspired to try some patterns of your own. All my new Rubber Stamps can be found in my Online Shop. Here are the supplies I used for these patterns:
Such a great quote to live by. I had fun mixing my Floral Stamp Sets up with my Circle Jumbles and layering them in different ways on top of each other.


I love the colors and the quote!
Happy Furry Mother’s Day Nat.
Reply