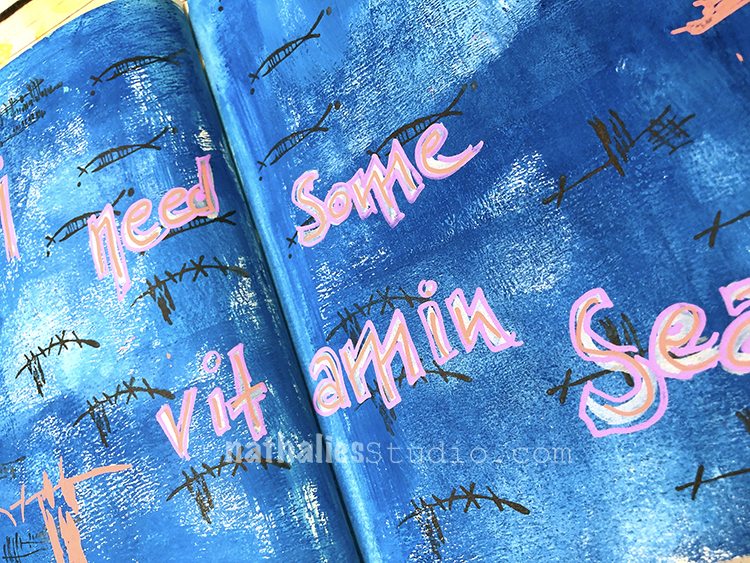
I need some vitamin Sea! How about you? I was inspired by our Creative Squad theme this month – Under the Sea. Are you longing for the ocean too?
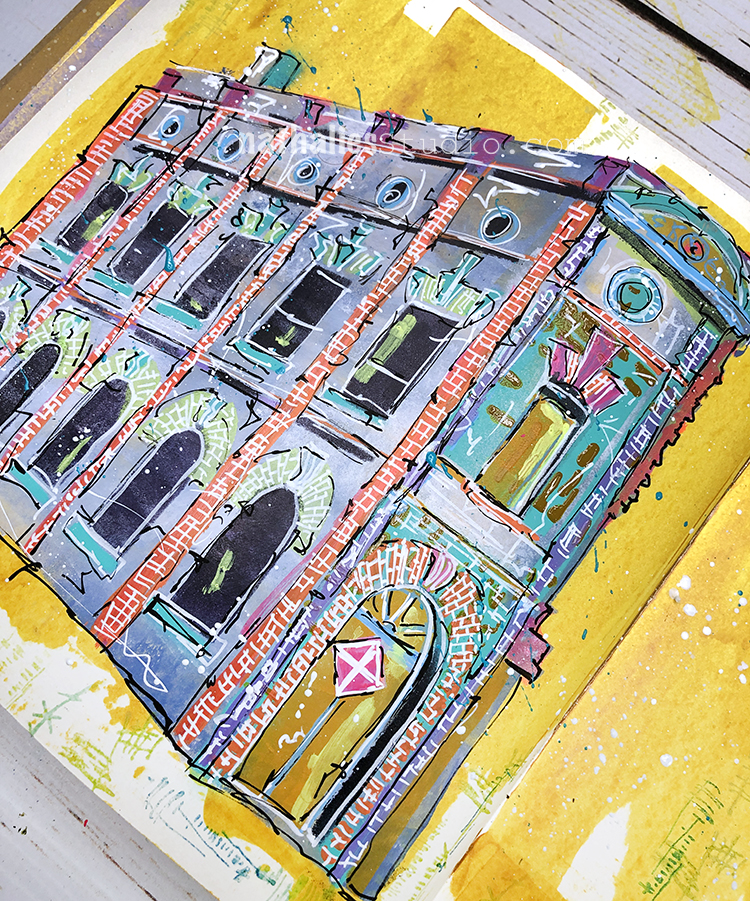
I used acrylic paints for my background and posca markers with my Kyoto and Star Struck stencils. I also threw in my Wabi Sabi rubber stamps with archival ink so a little play with changing up scale with the same design elements.
I tried out a new set of Posca markers and really like the colors and pastel shades of them. You can find those in the links below.
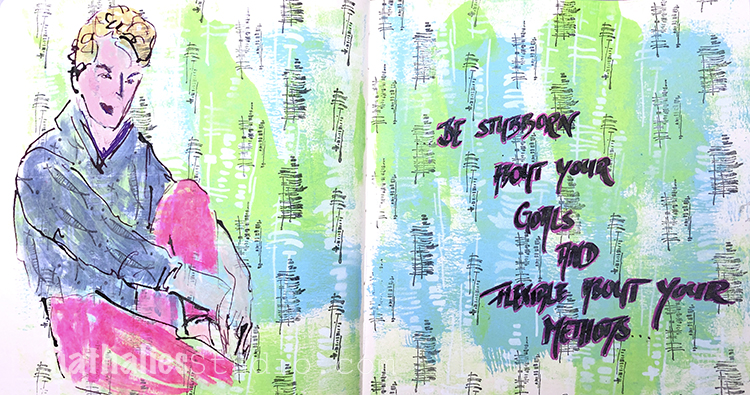
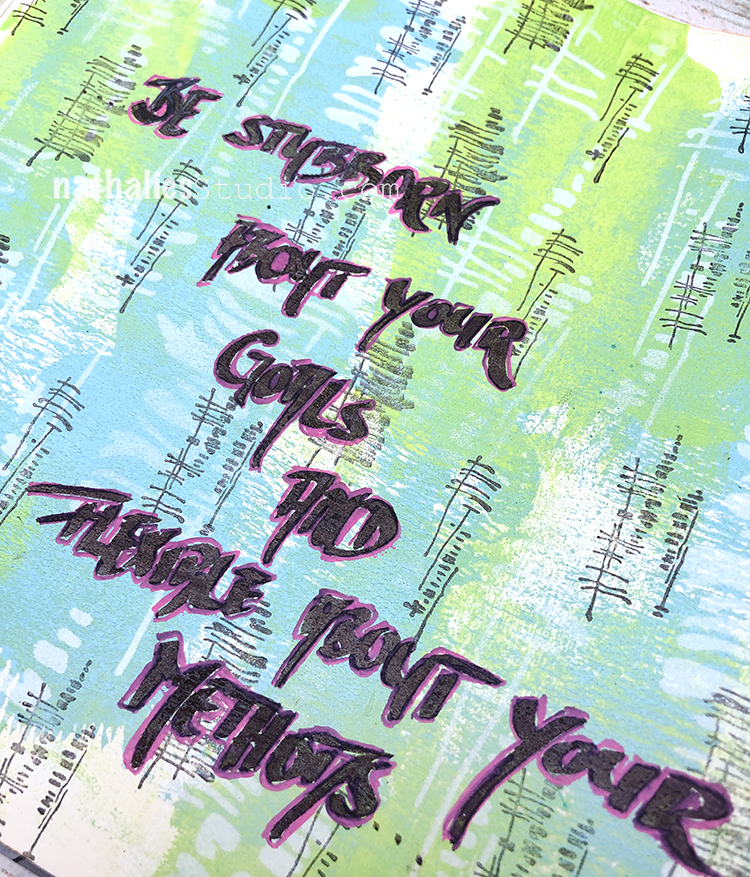
“Be stubborn about your goals and flexible about your methods…”
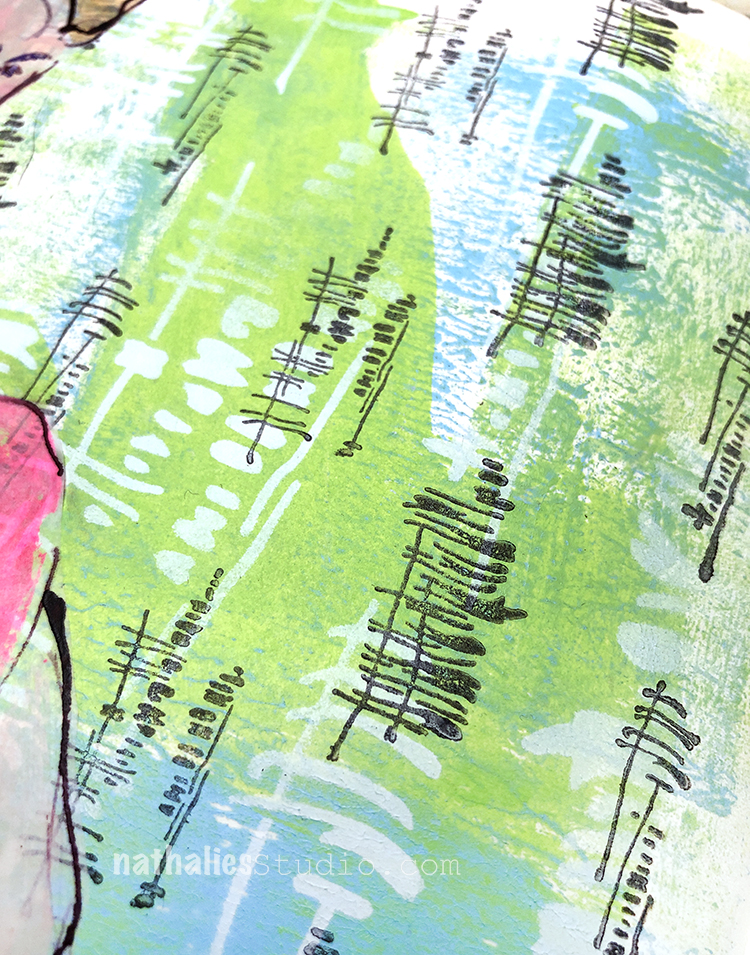
For my background I used some bright colors of acrylic paint and gouache, my Wabi Sabi rubber stamp set, my Tokyo stencil, and spray paint. I think having the two scales of this pattern together with the Tokyo stencil and the Wabi Sabi stamps is a nice visual mix.
For the figure I used a bamboo sketching pen and I stamped the back of the deli paper and painted over it, then I pasted it down with gel medium.
I used one of my favorite calligraphy journaling pens and posca markers for a little color.
Hi from my Creative Squad! This time we have a really cool art journal page from Emilie Murphy that layers up my Triangle Love and Wabi Sabi rubber stamps. This months theme is: Rise & Shine – Sometimes it is inspiring to think of each new day as an opportunity to do something good – to shine. Create something that will encourage others to do the same and let’s all bring a little more light into this world!
Hi there! Hope you are doing well. The theme for this month really inspired me and I had fun playing with Nathalie’s new stamp sets.
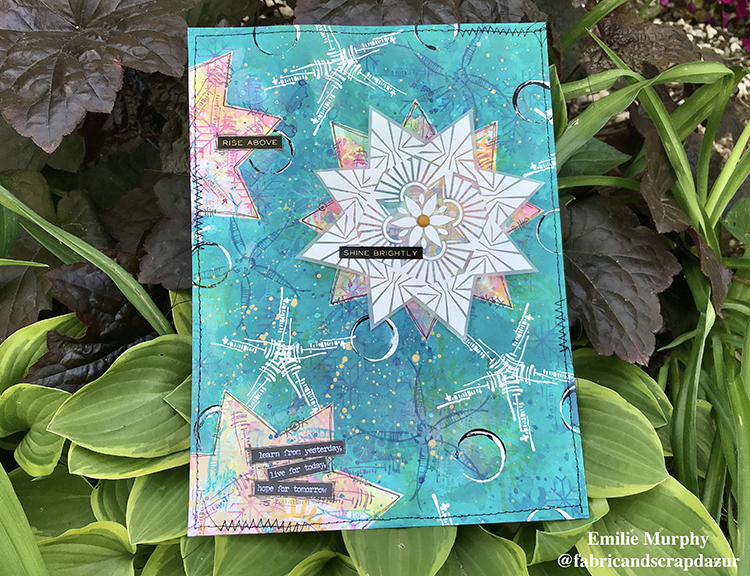
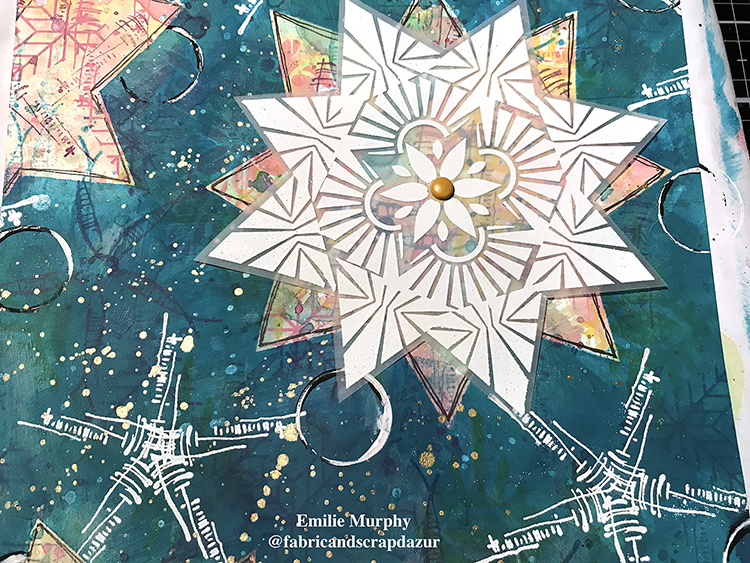
The first idea that came to my mind about the “Rise and Shine” theme was having a star in my project. So here is it!
Let me guide you on how I made this journal page!
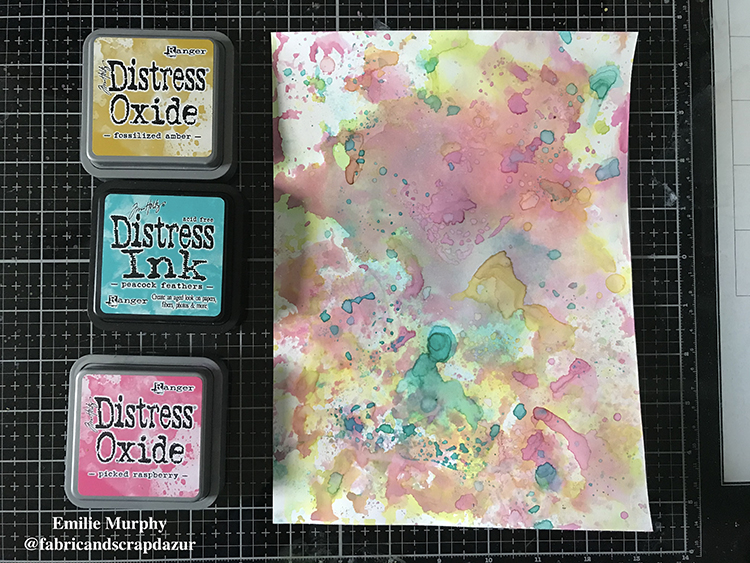
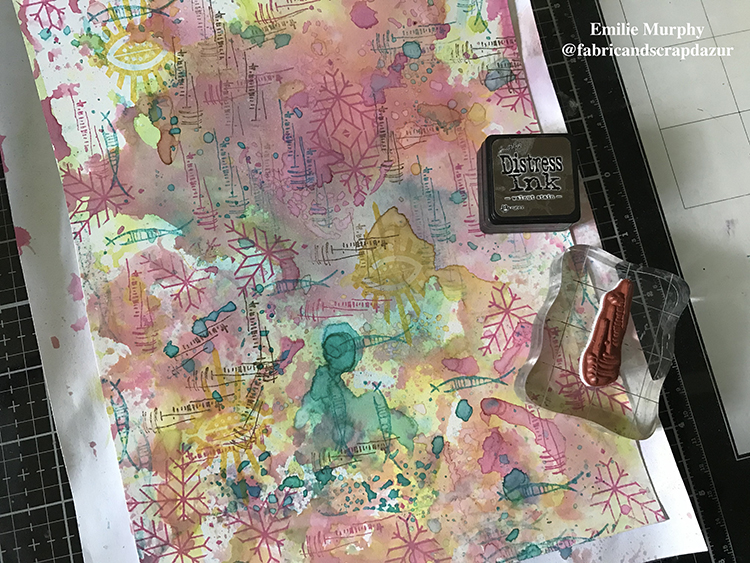
I started with applying some Distress ink on a white cardstock with a piece of packaging. I then used some white cardstock because I wanted a smooth surface for this project. By applying the distress ink on a piece of packaging, it allowed me to get a random watercolor effect.
I limited my color palette to 3 colors for not having too many different colors. That is what I got.
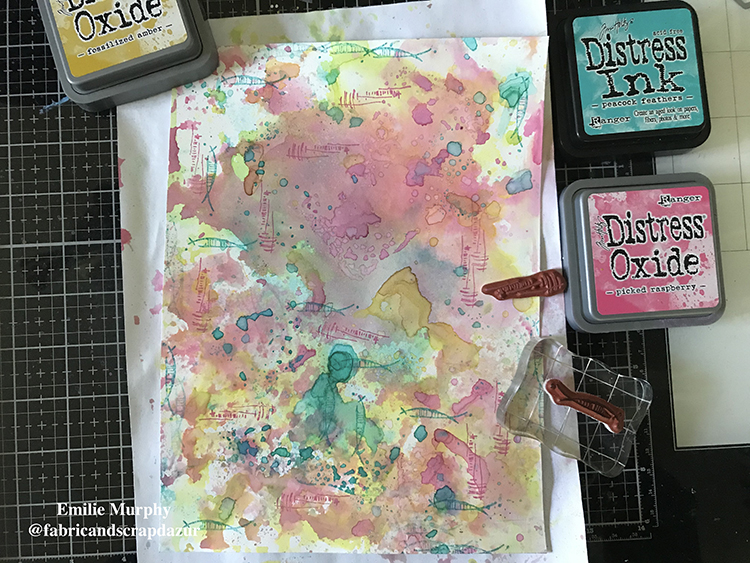
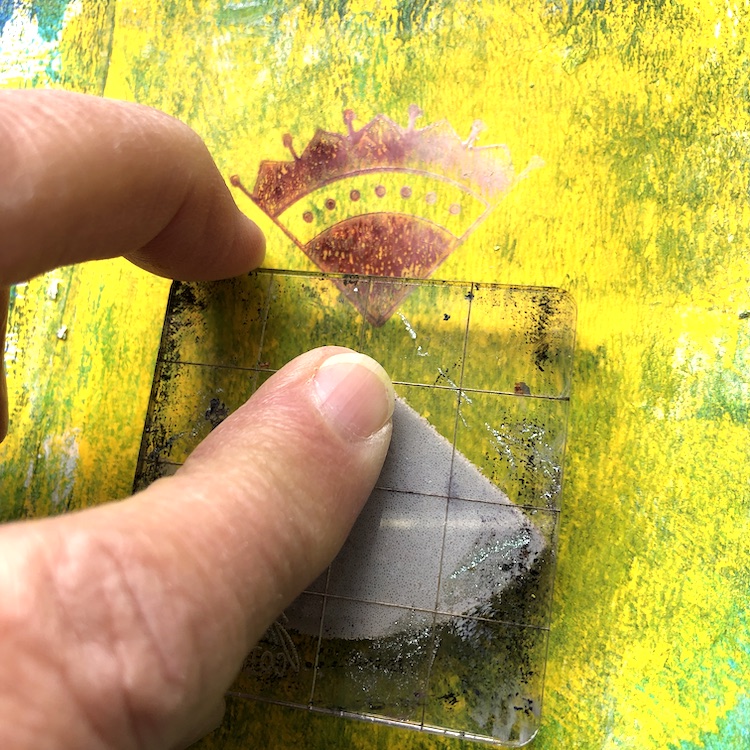
The next step was to add texture by stamping with some stamps from the Wabi Sabi stamps set and some triangle stamps from the Triangle Love stamps set. I used the same colors as before.
Then I repeated stamping with a darker color to add some contrast.
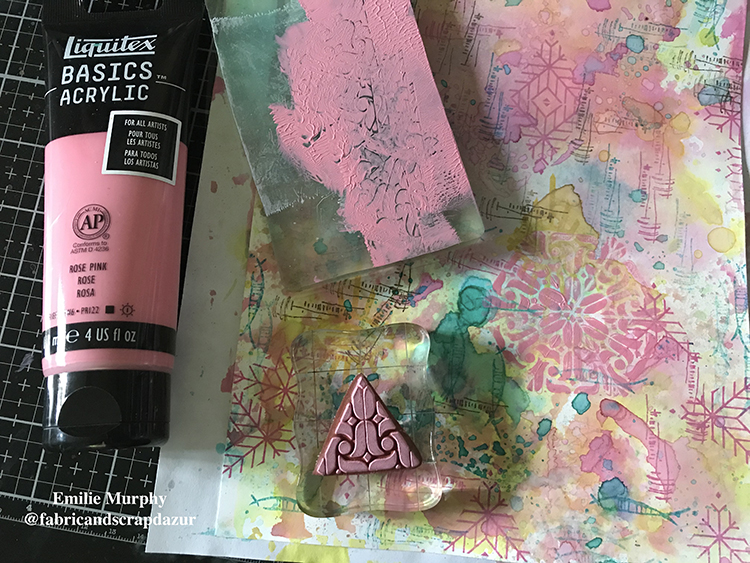
As I love texture, I kept stamping with acrylic paint with the same color tone “light pink” and kind of “light beige” than the distress inks. I like doing this with my gelli plate but I could have simply spread some paint out of my craft /glass mat.
Then I added some splatters.
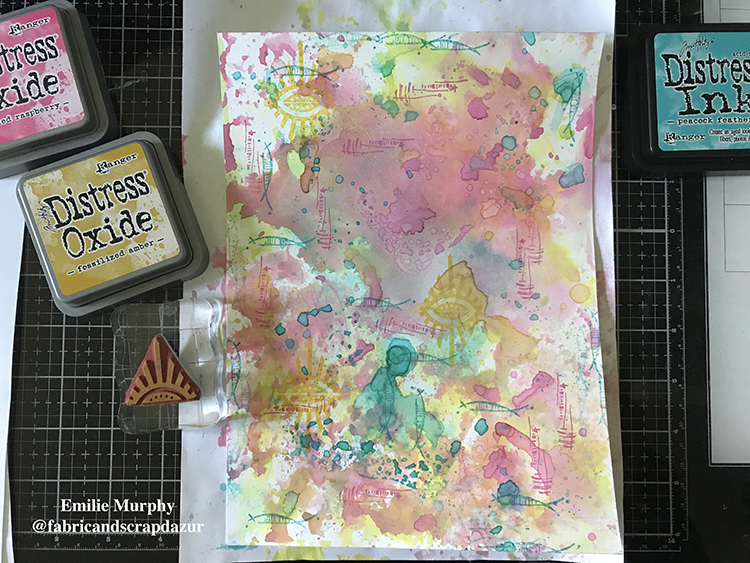
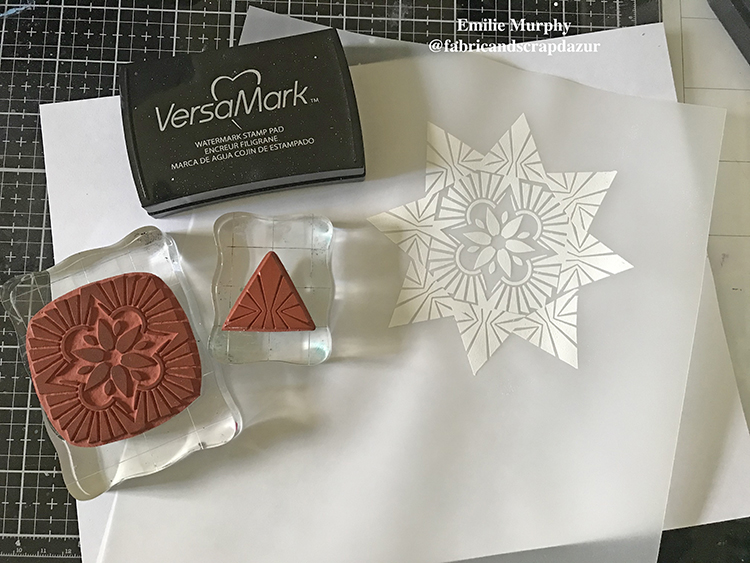
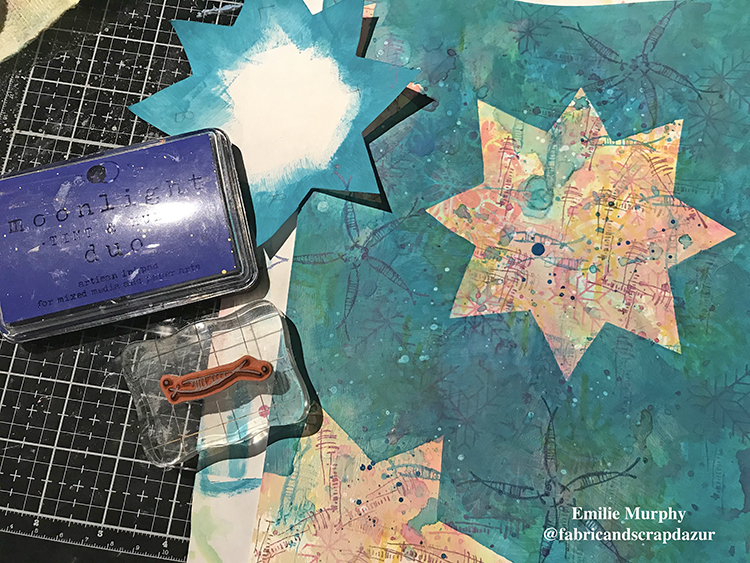
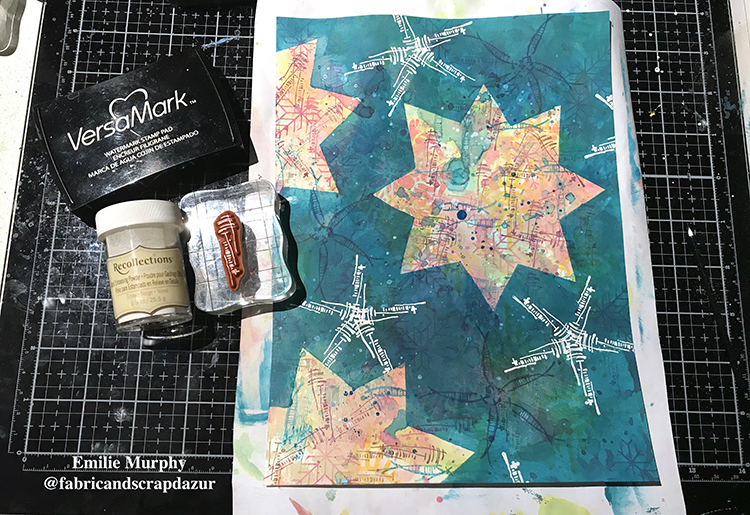
At that stage, I was satisfied with the texture of my background. It was time to take care of the focal image in my journal page. I embossed a star with Nathalie’s “Hamilton Negative Floral Tile (Large)” stamp and the “Sunburst” triangle stamp with white embossing powder on vellum paper. The secret to emboss without making your vellum wrinkle too much is to wait for your heat gun to be very hot.
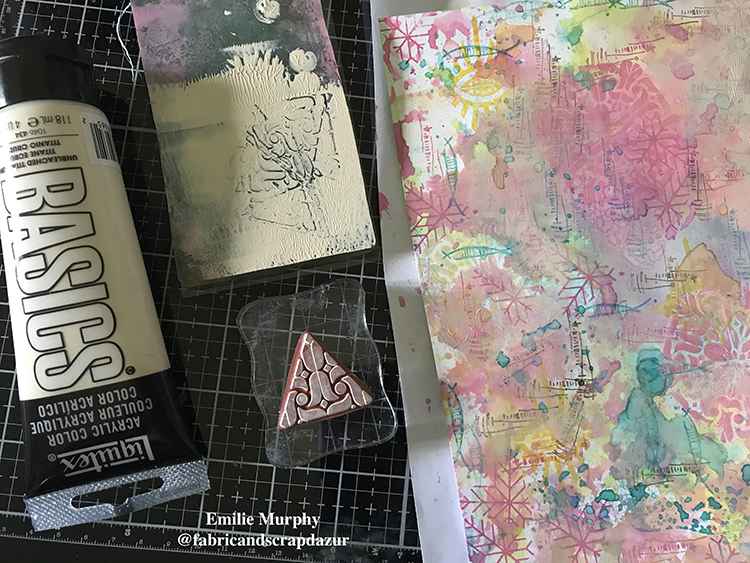
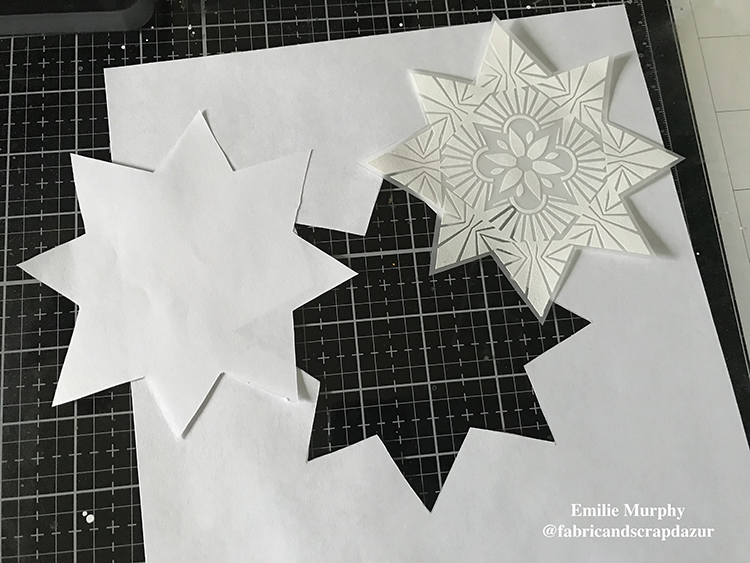
I cut my star and used it to make a mask and stencil template.
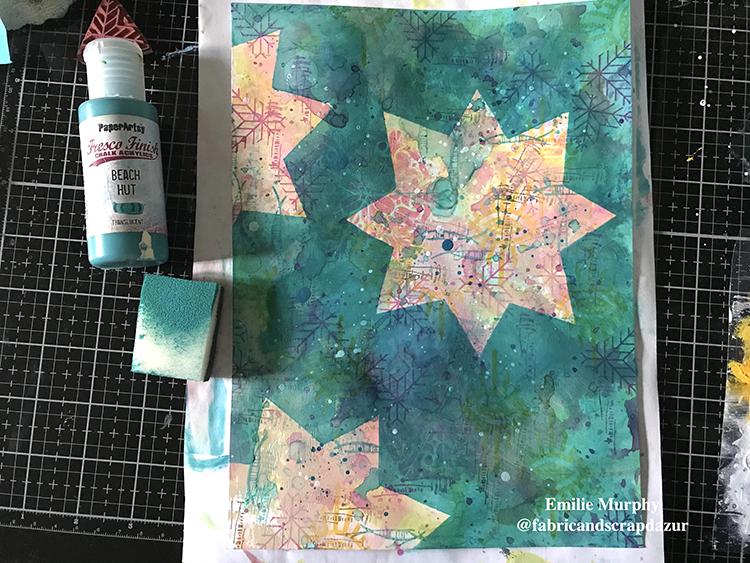
I put down my star mask where I wanted it and applied with a sponge some acrylic paint all around. Very important step here! I chose a translucent acrylic paint because I wanted my background to be see-through.
Here is a tip: you can make an opaque acrylic paint translucent by simply adding some matte gel medium or glazing medium.
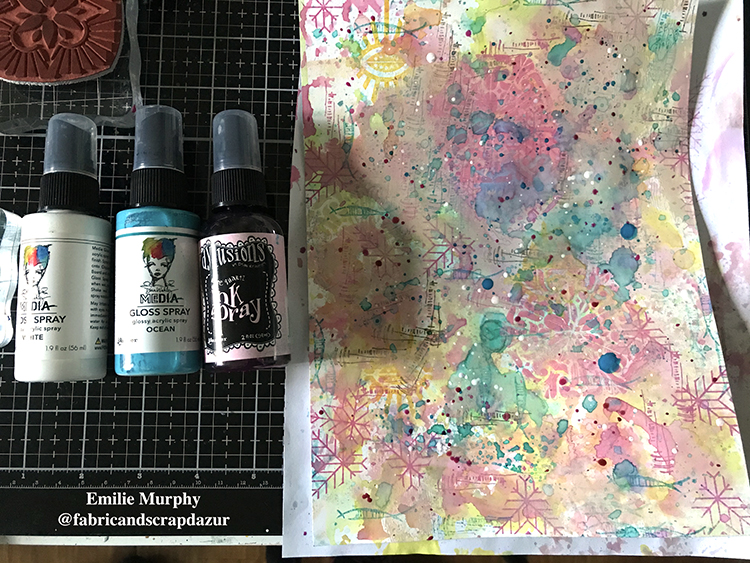
Here is the final result.
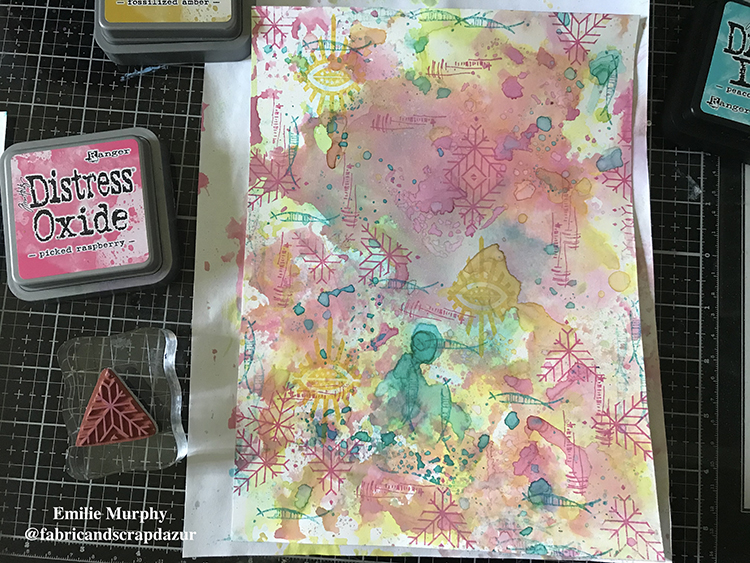
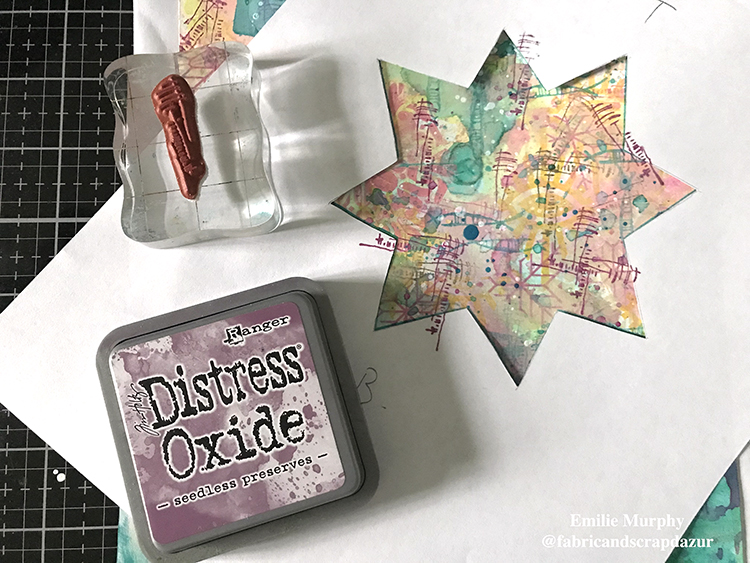
In the next step, I used the star stencil to add more stamping (just a matter of taste).
Personally, I don’t think that my journal page would have been completed if I had let the page like that, and had glued down my embossed star.
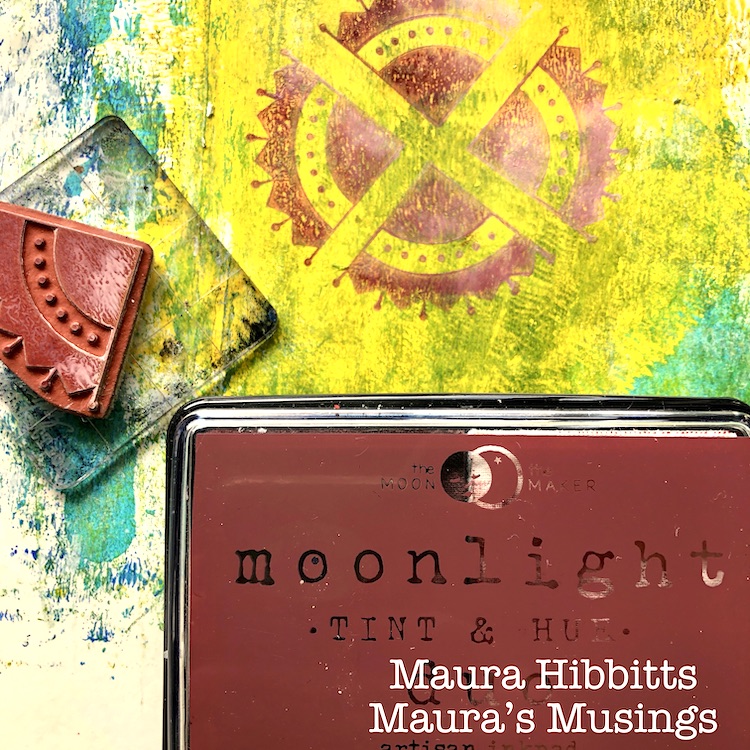
When I was playing with the Wabi Sabi stamps, I found out that I could make some other star shapes. Isn’t that awesome! These stamps are so versatile . . .
So I stamped some star shapes with Moonlight Duo Ink pad, which were slightly darker than my blue-teal color background, and some with white embossing powder. And voila, I just loved it!
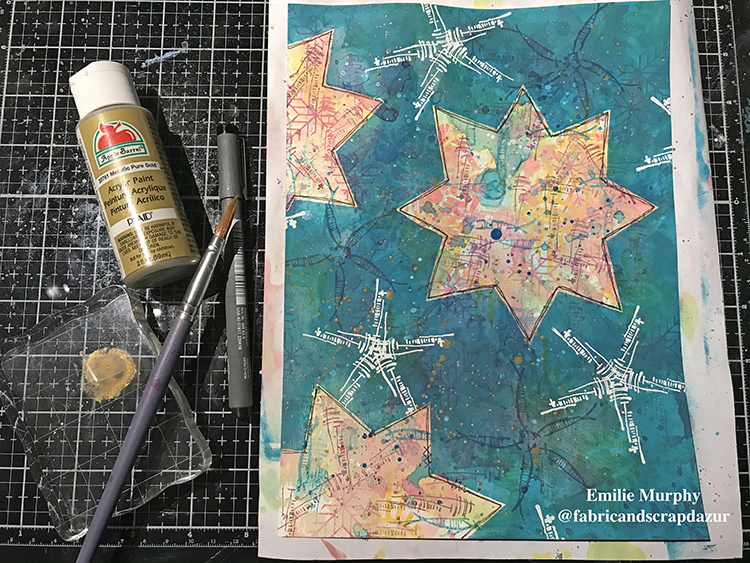
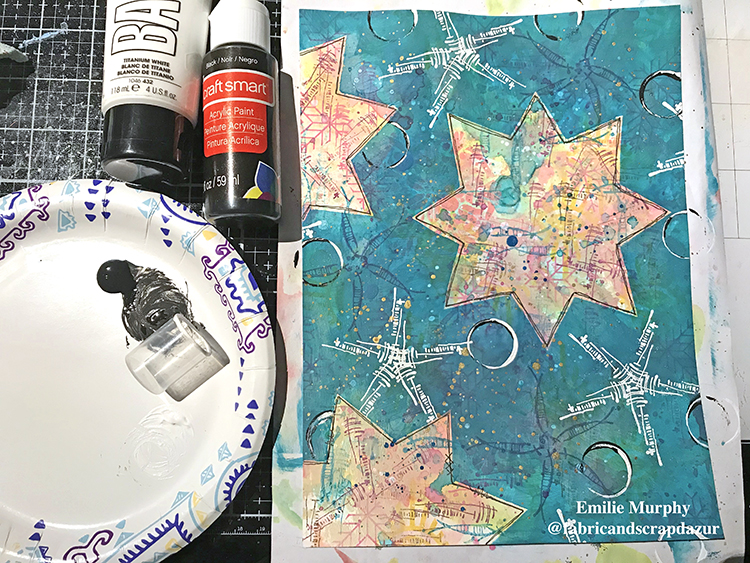
Then, to finish it up, I added some splatters (metallic gold acrylic paint), drew the contours of my stars with a black pen, and added circles with a recycled cap.
Finally, I attached my star with a brat and glued down some “chit chat” stickers from Tim Holtz.
Here is another tip: I usually fix my vellum with double side tape instead of liquid glue because the vellum wrinkles badly and personally I don’t like the look of that.
My very last touch was to stitch all around my page.
Hope you have enjoyed this tutorial. It was all about layers.
Have a good rest of the week and see you next month!
Thank you Emilie – loved seeing your layering process and how you made your stars using the stamps!
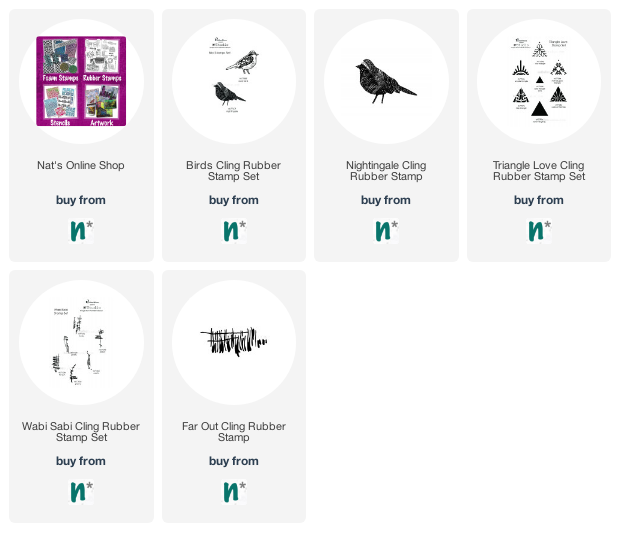
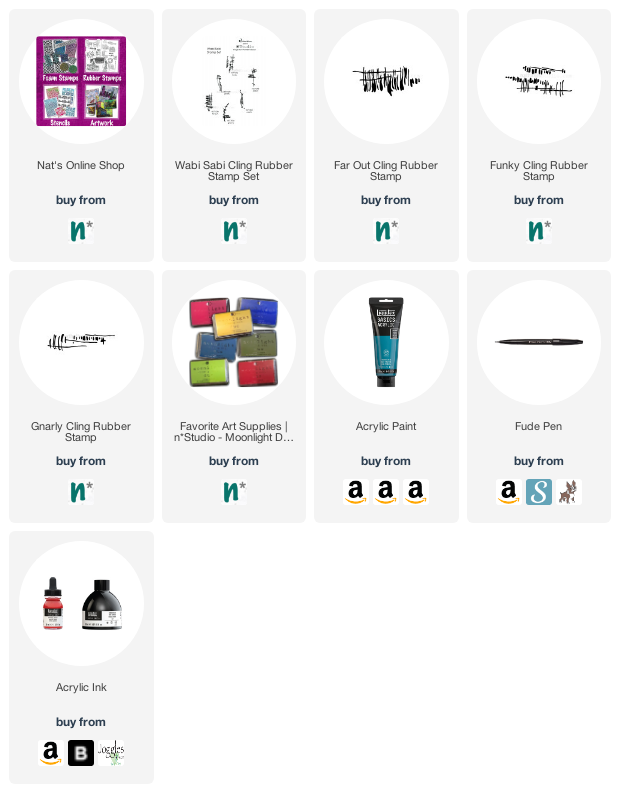
Give it a try: you can find all my Rubber Stamps in my Online Shop and here are some of the other supplies Emilie used:
Feel inspired? Working on something yourself that you’d like to share? I love to see how you interpret our monthly themes. Email me how you used my stencils and stamps with the theme and email me an image – I would love to share your projects in my next “n*Spiration From Around the Globe“.
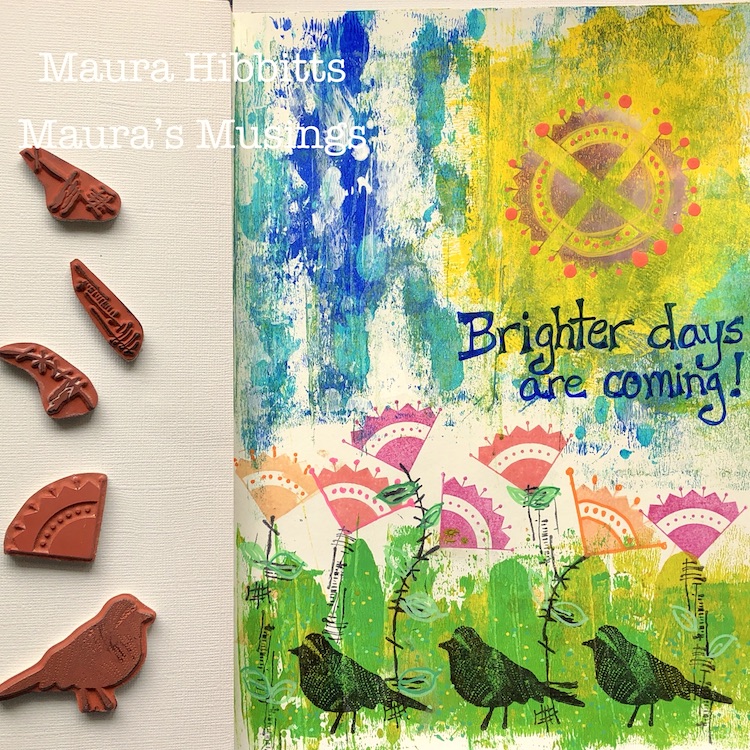
Hello from my Creative Squad! Today we have an art journal page from Maura Hibbitts to lift you up a bit. Maura is using my new Mini Motifs, Nightingale, and Wabi Sabi rubber stamps with this month’s theme: Rise & Shine – Sometimes it is inspiring to think of each new day as an opportunity to do something good – to shine. Create something that will encourage others to do the same and let’s all bring a little more light into this world!
“Rise and Shine” bring back strong childhood memories of my mother using these exact words to get me out of bed in the morning and off to school. Some days I can remember grumbling to myself, “what is there to shine about today?” Those were the days I was so cozy and snug, I just did not want to get up. Today, I am thinking about these words a little differently. Right now, we need things to look forward to in our daily lives, things that shine brighter. Perhaps it is a beautiful sunny day, or the flowers starting to bloom (at least here in upstate NY) that bring some joy to us, so we want to rise and start our day. I am also hopeful that there are brighter days ahead for all of us!
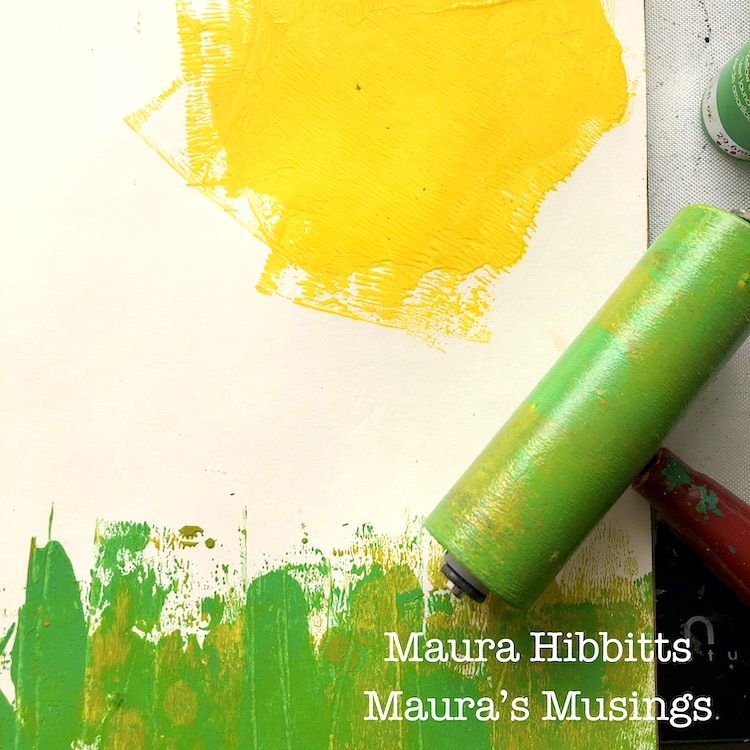
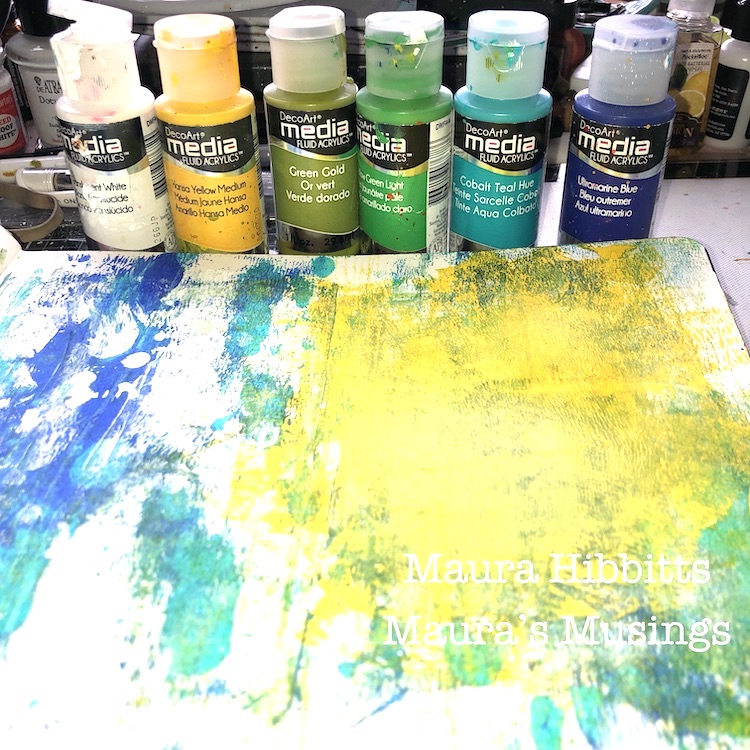
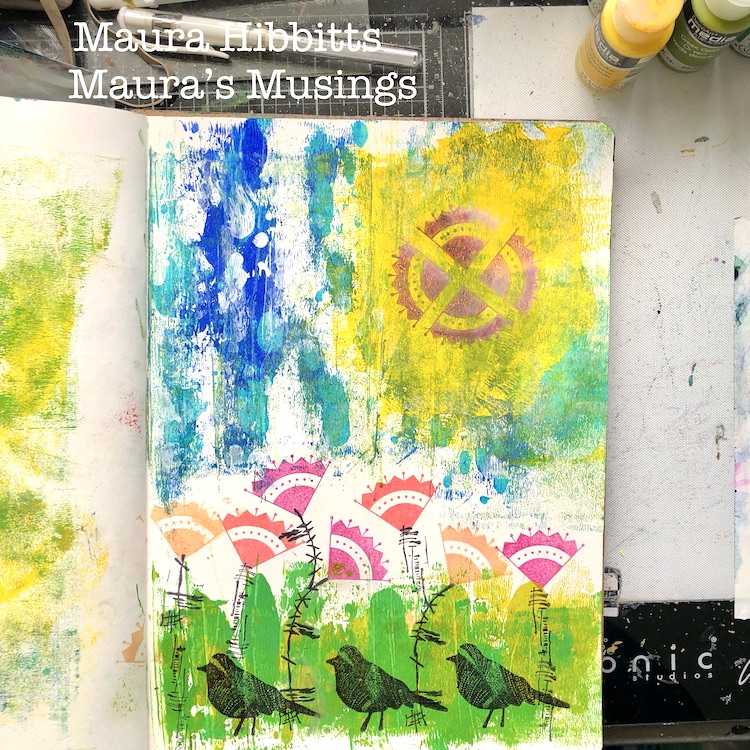
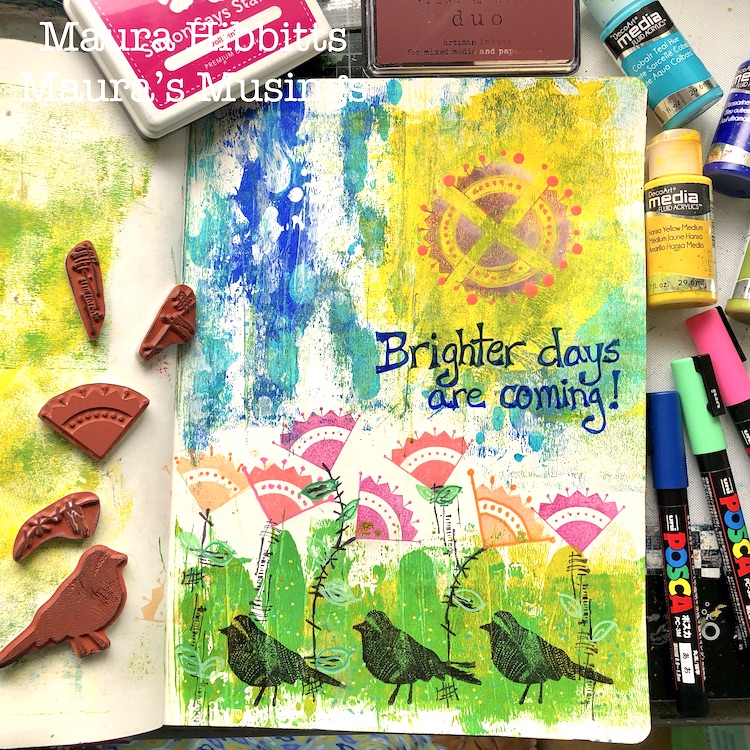
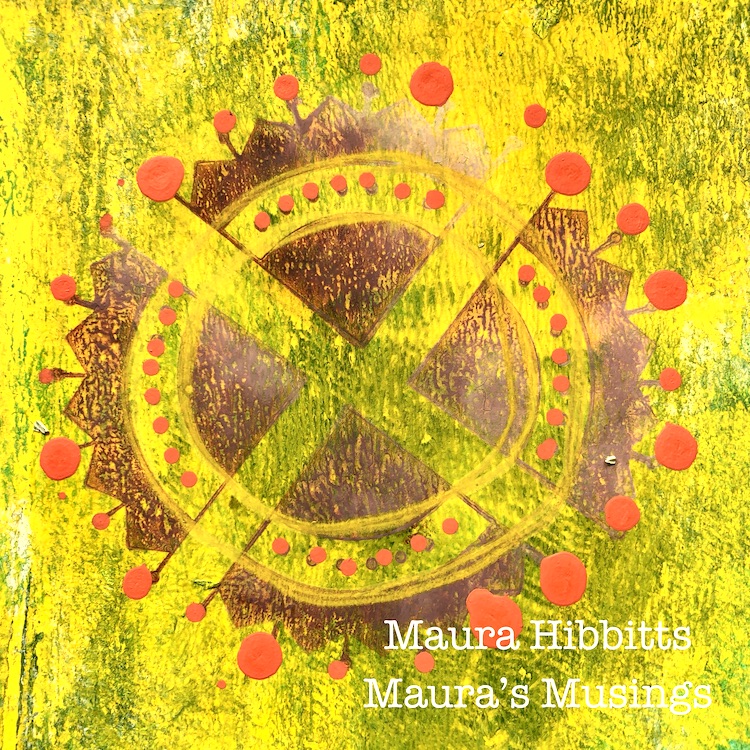
I started off in one of my large art journals with fluid acrylics and a brayer. I began at the top with a good squirt of Hansa Yellow Medium, and rolled the brayer in several directions, to create an area for my sun. Next, I added some drops of Ultramarine blue and Cobalt Teal Hue for my sky area, and rolled the brayer vertically to blend a bit. I also went in and added a bit of Translucent White. I repeated the same vertical strokes with the brayer and Yellow Green Light and Green Gold at the bottom of the page for the grass area. Any extra paint, I just rolled onto the page next to this one, no use wasting any of it.
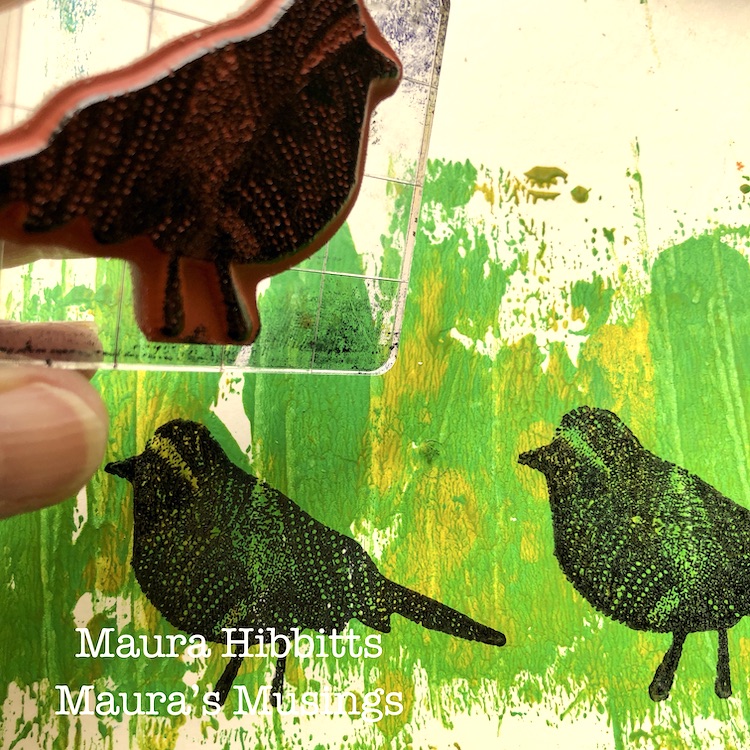
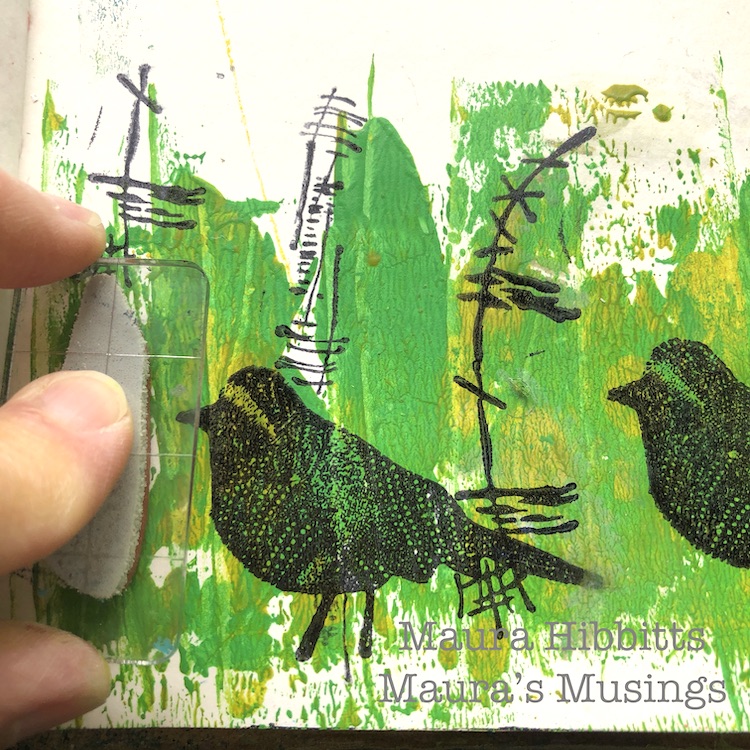
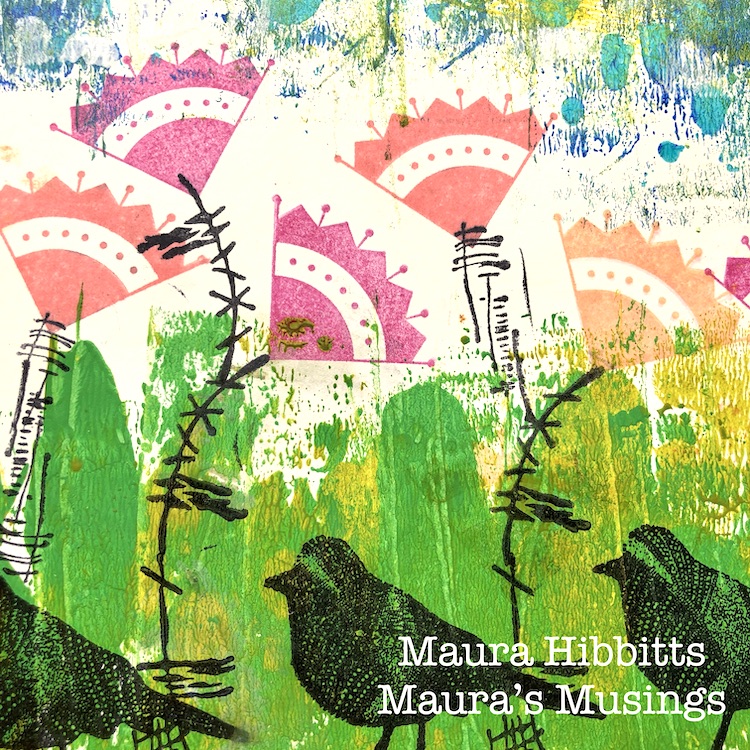
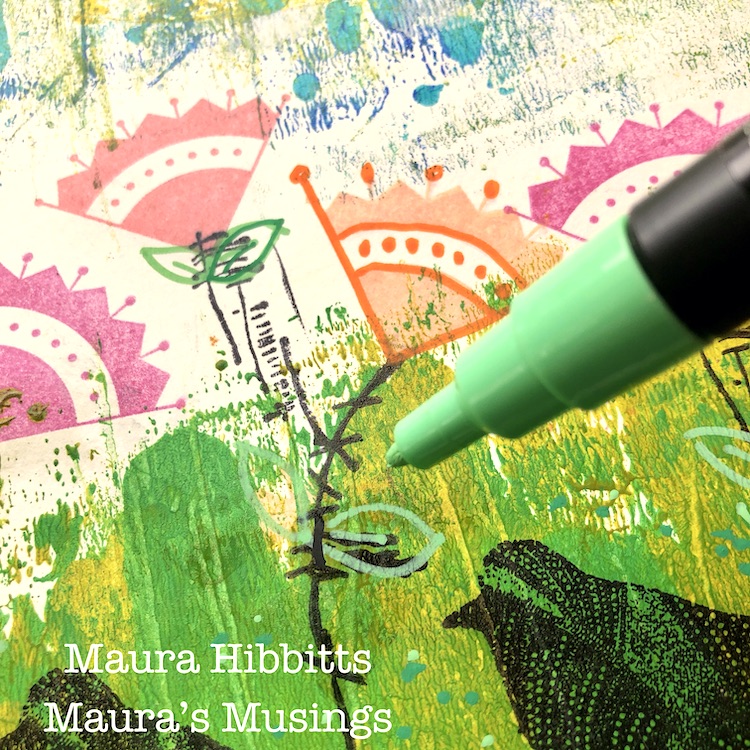
I stamped three Nightingale images in the grassy area with black ink. One great tip I have learned over the years, is to use an uneven number of objects. One bird didn’t feel like enough. Remember that saying, the early bird gets the worm? (another rise and shine moment) Well, my trio of birds is out early looking for them!
Next, I stamped a variety of “flower stems” with the Wabi Sabi stamps – Jazzed, Groovy and Gnarly and black ink.
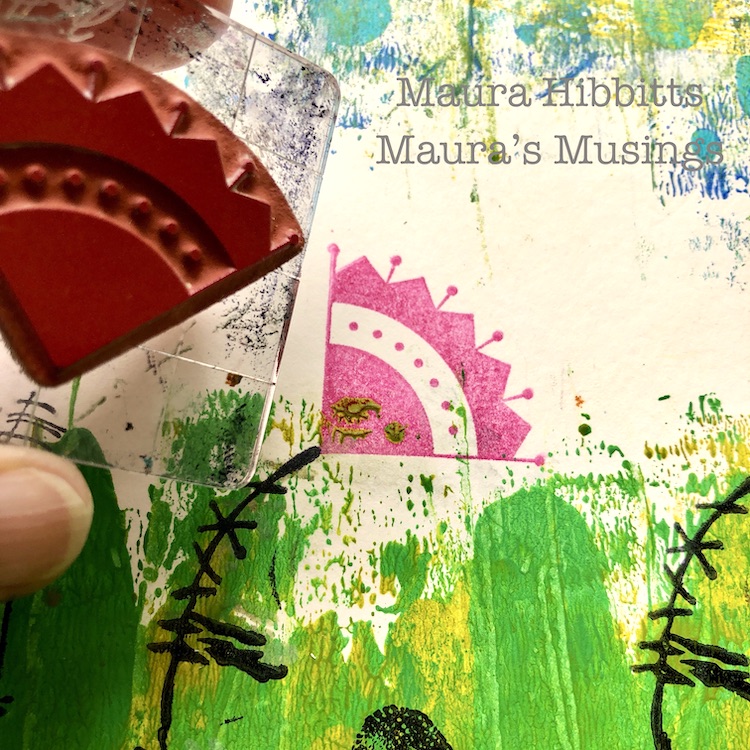
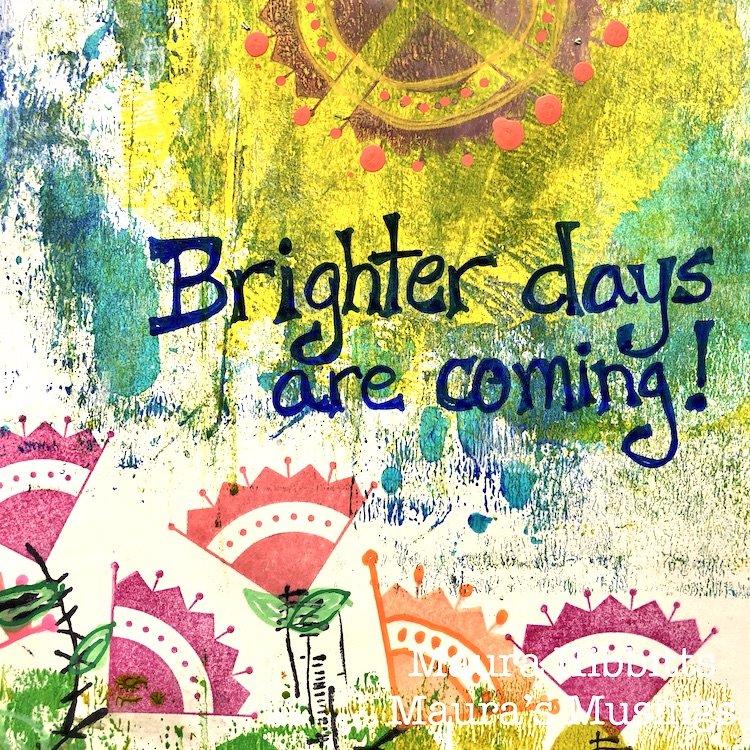
I turned the Arts and Craft Motif stamp into flowers, and stamped them with bright inks, using pinks and oranges, on the end of the stems. I don’t know about you, but colorful flowers always make me smile.
Next, I took several colors of Posca paint pens to add in a bit of detail on the sun and flowers. I also drew in a few leaves for the stems, and added some dots into the grass.
Final step was to hand letter “Brighter days are coming!” with a Posca pen.
I try to live my life in a positive and optimistic way, and even when times are really difficult like now, I have to believe bright days will be here again. Creating a cheerful art journal page helps uplift my mood.
What helps you to Rise and Shine each day? Children, grandchildren, spouse, friend, pet? A sunny day, your garden, art, birds singing outside your window? Look for the special joys in your life to help lift your spirits. I wish you the best! – Maura
Thank you Maura! We are definitely ready for some brighter days ahead :)
Want to give Maura’s project a try? You can find all my Rubber Stamps in my Online Shop. Here are some of the other supplies Maura used:
Feel inspired? Working on something yourself that you’d like to share? I love to see how you interpret our monthly themes. Email me how you used my stencils and stamps with the theme and email me an image – I would love to share your projects in my next “n*Spiration From Around the Globe“.
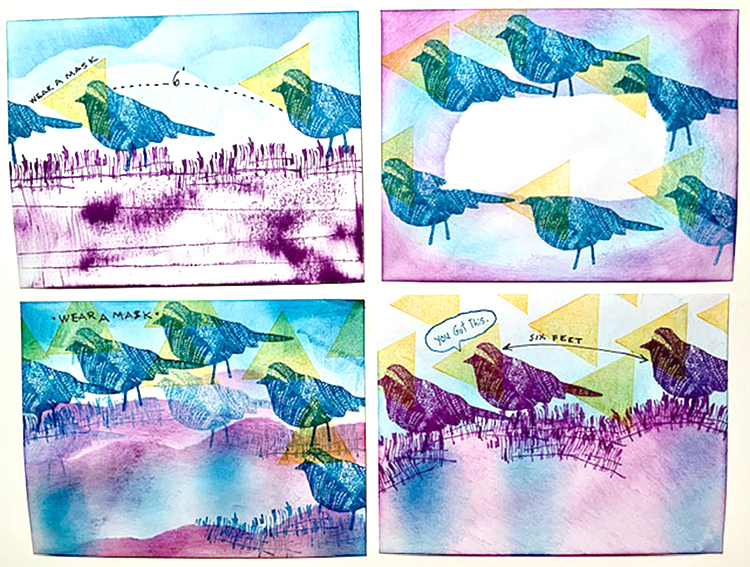
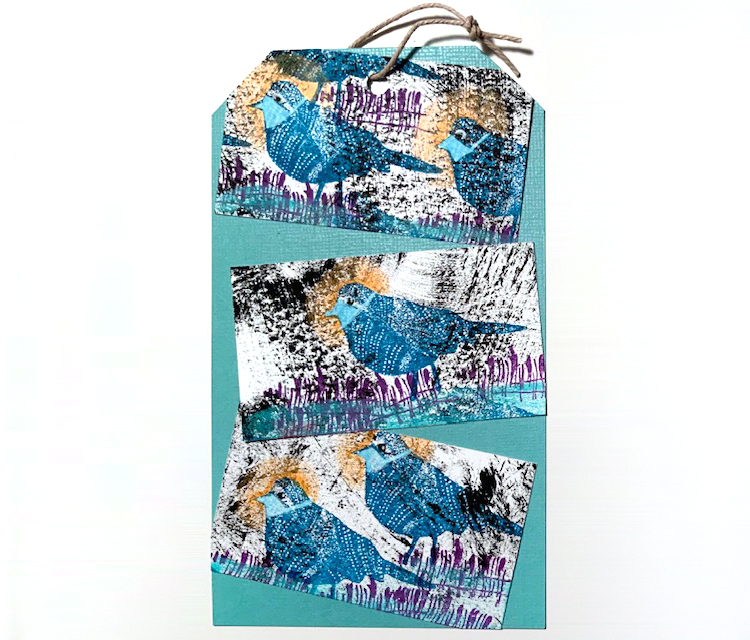
Today I have some lovely cards, envelopes and a tag to share with you from Creative Squad member Judi Kauffman. When Judi received her rubber stamps in the mail, her super creative mind went right to work and I just love the results!
What a treat to get Nathalie’s new stamps in the mail – her signature style in a petite and very versatile size! I reached for a stack of envelopes, my go-to with all new stamps, got out some colorful inks, and when I looked at the finished batch I was shocked to see how my worry about covid-19 had taken over. The triangles I’d stamped on and around the Nightingale looked like masks and on most of the envelopes the birds looked like they were practicing social distancing.
I stamped three business cards for the tag, this time using white ink to paint tight-fitting masks on the birds. It really is scary how our subconscious takes over. I set out to make something spring-like and happy! But the cosmos had other ideas.
I love ‘Far Out’! In fact, I love all of them. It’s a new thing to have the petite size and I think that’s a feature worthy of attention.
Thank you Judi! It is funny how what is pressing in our minds can come through in our artwork. Regardless, these are a wonderful abstract use of the stamps and in any other time would just be really awesome compositions!
Love the designs. I am one of the lucky friends of Judi to receive her “bird” envelop. She always amazes me with her creativity and now more so using her subconscious thoughts. I am a firm believer that our actions are a result of our inner thoughts.
Kudos to Judi!
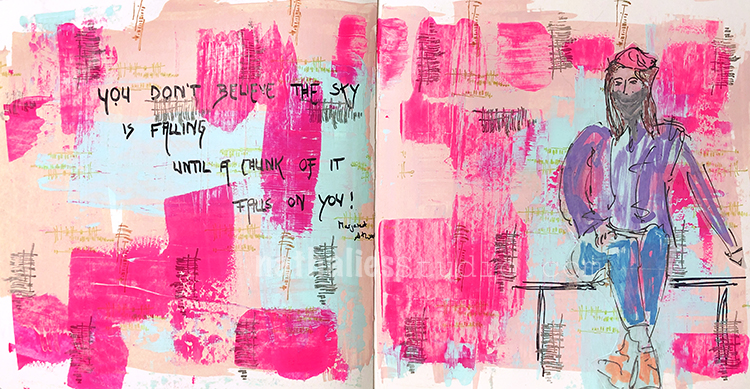
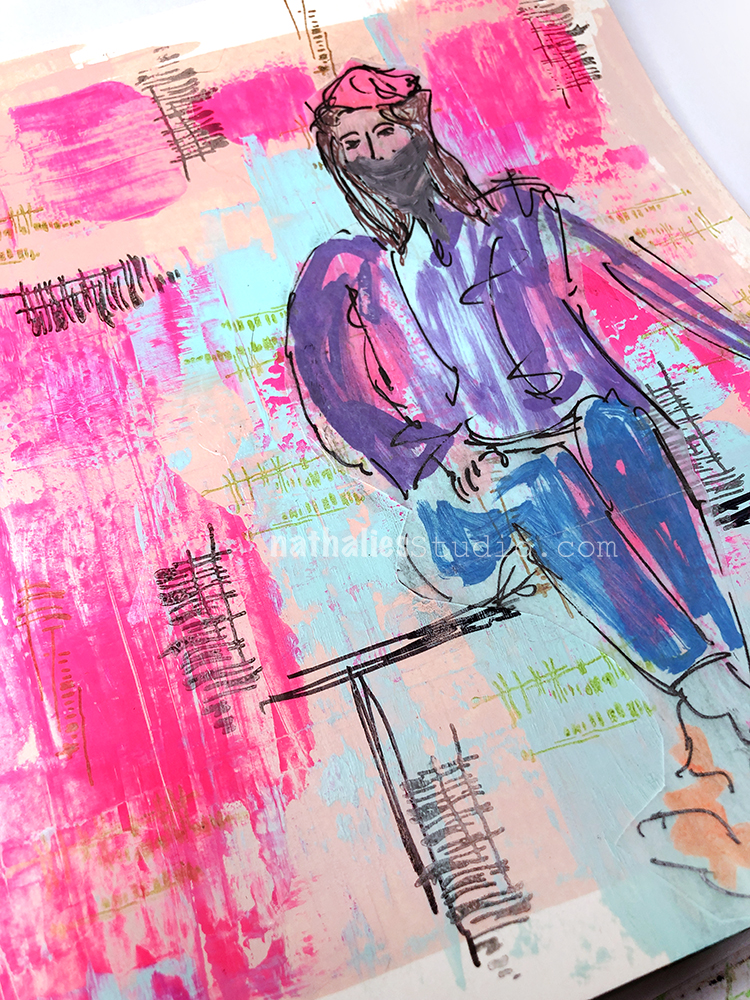
“You don’t believe the sky is falling until a chunk of it falls on you!” – Margaret Atwood
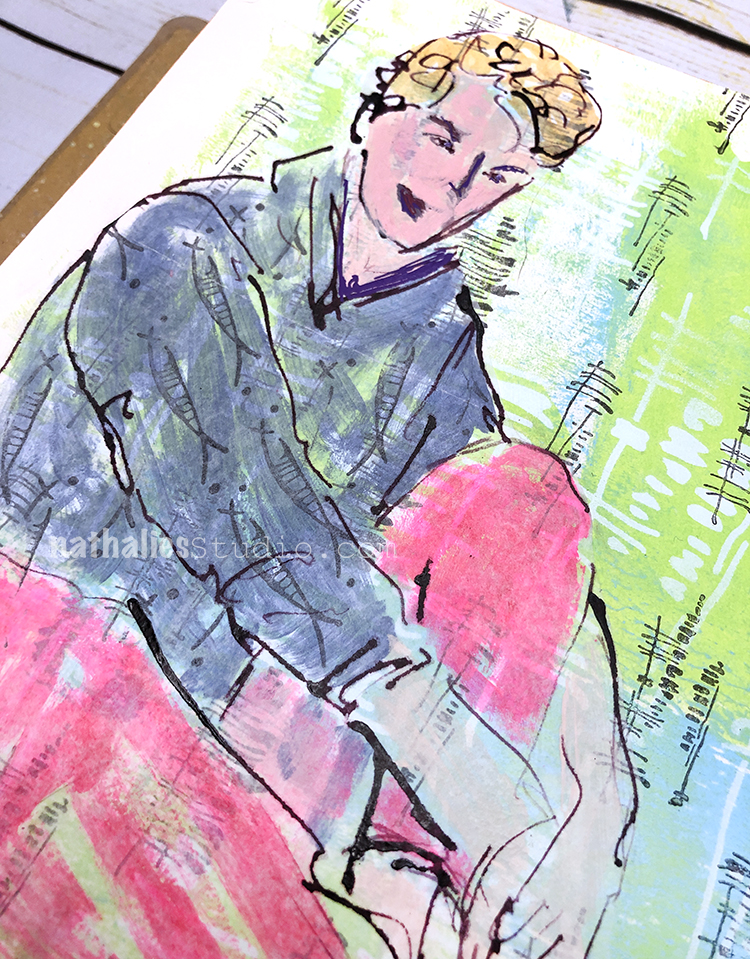
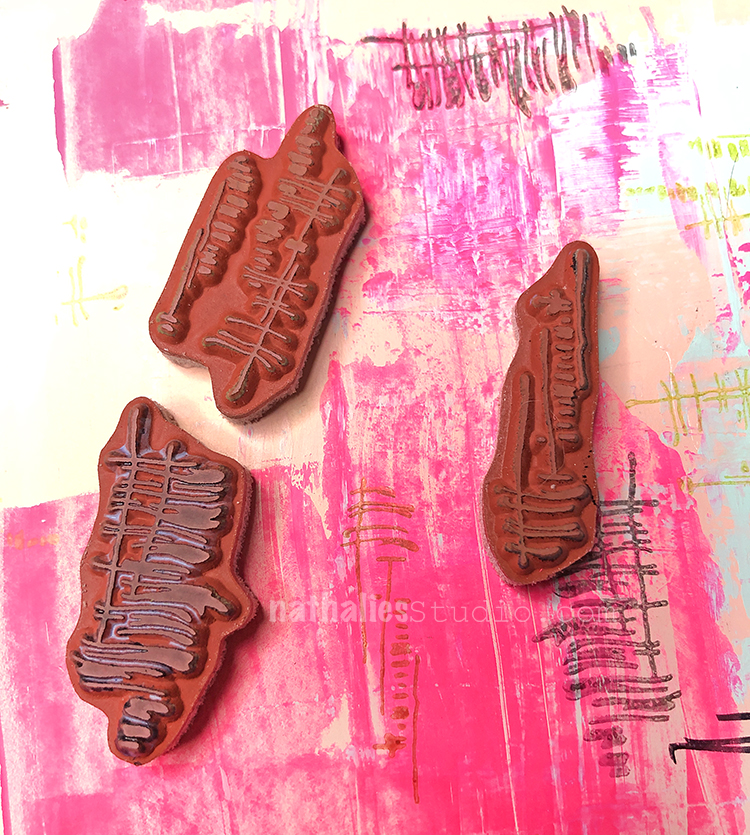
My background is acrylic paint and then some of my new Wabi Sabi rubber stamps and MoonLight Duo ink pads.
I used a fude pen for the journaling…
And I sketched my figure in ink.
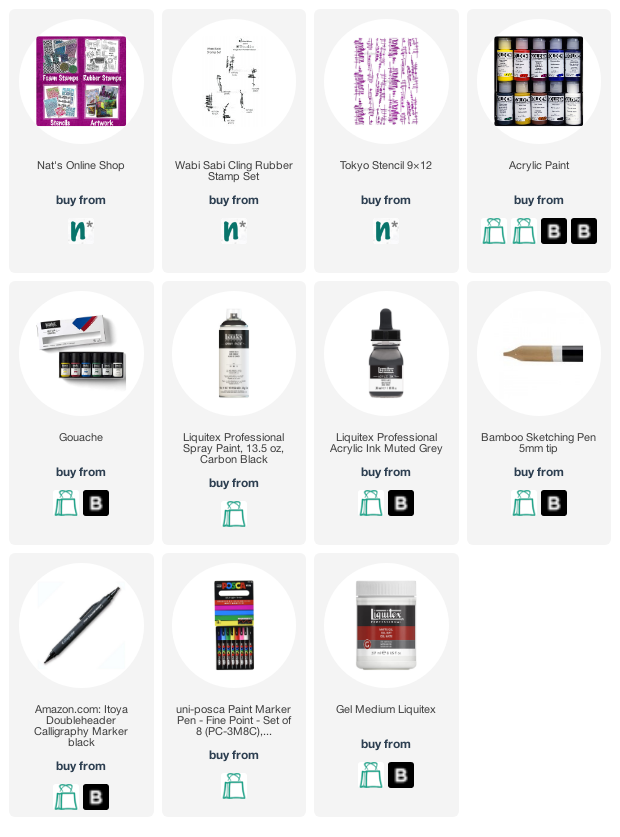
Here are some of the supplies I used:
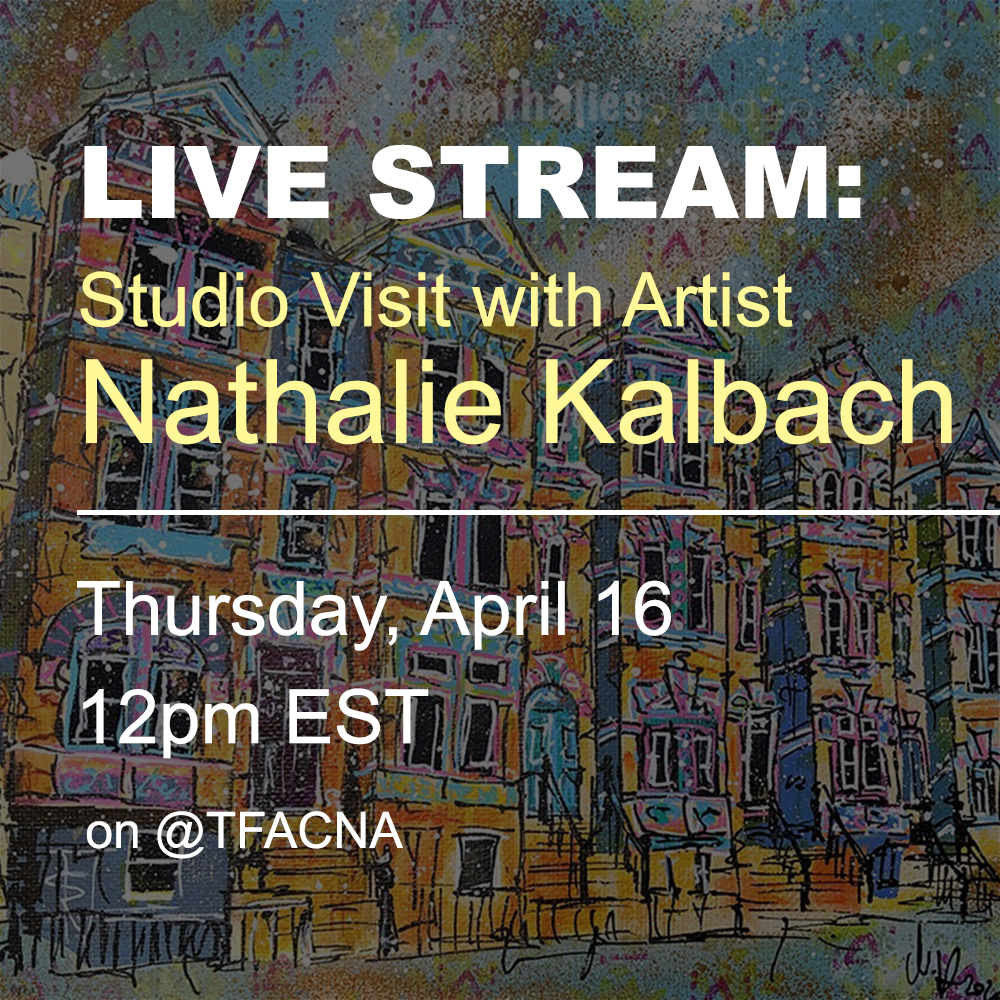
Tune in at 12noon EST today to catch my Live Stream interview on The Fine Art Collective instagram @TFACNA. Artist and friend Jimmy Leslie will be interviewing me and we’ll open it up to questions from viewers too! Join us!
And… tomorrow, Friday April 17th at 12noon EST please join me for a Kaffeeklatsch Get Together chat LIVE here on Facebook. I’ll be showing a new painting that I’m working on and also talking about some of the Artist in Residence interviews I’ve been doing.


Love the designs. I am one of the lucky friends of Judi to receive her “bird” envelop. She always amazes me with her creativity and now more so using her subconscious thoughts. I am a firm believer that our actions are a result of our inner thoughts.
Kudos to Judi!
Reply