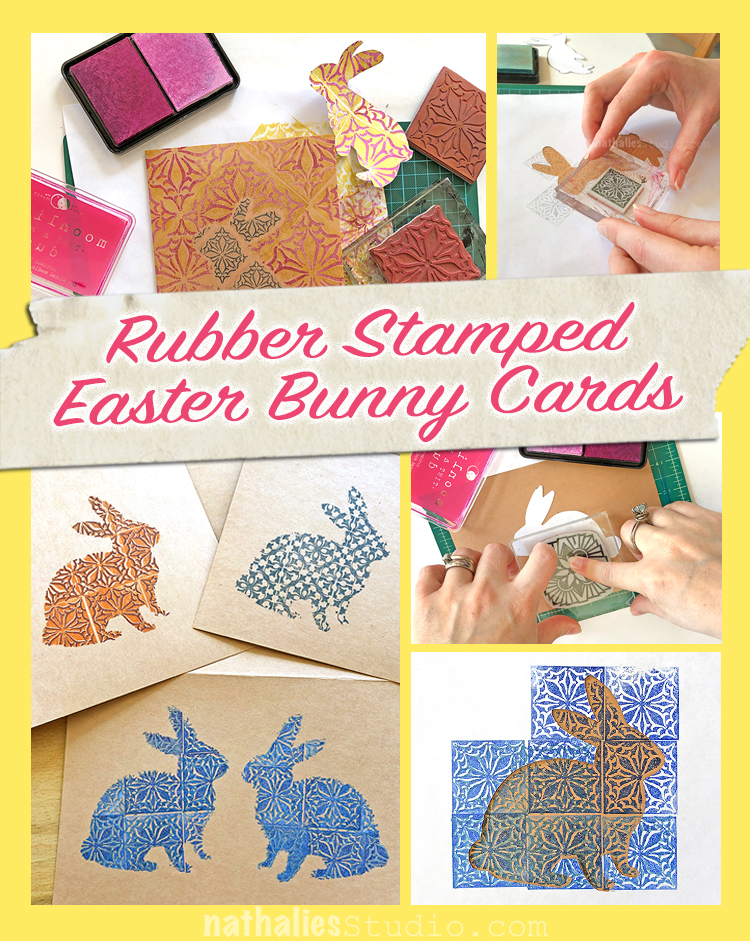
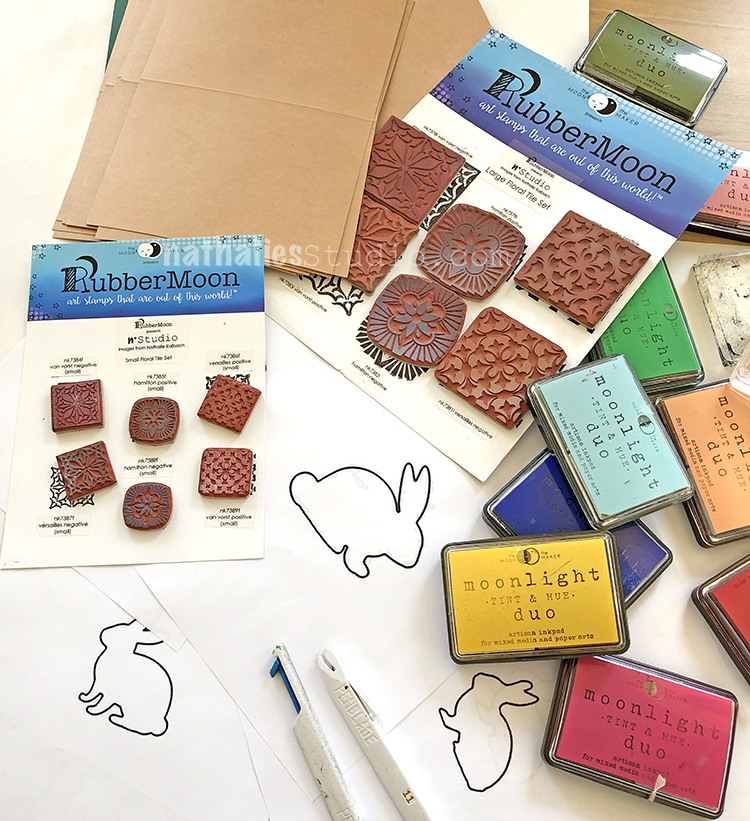
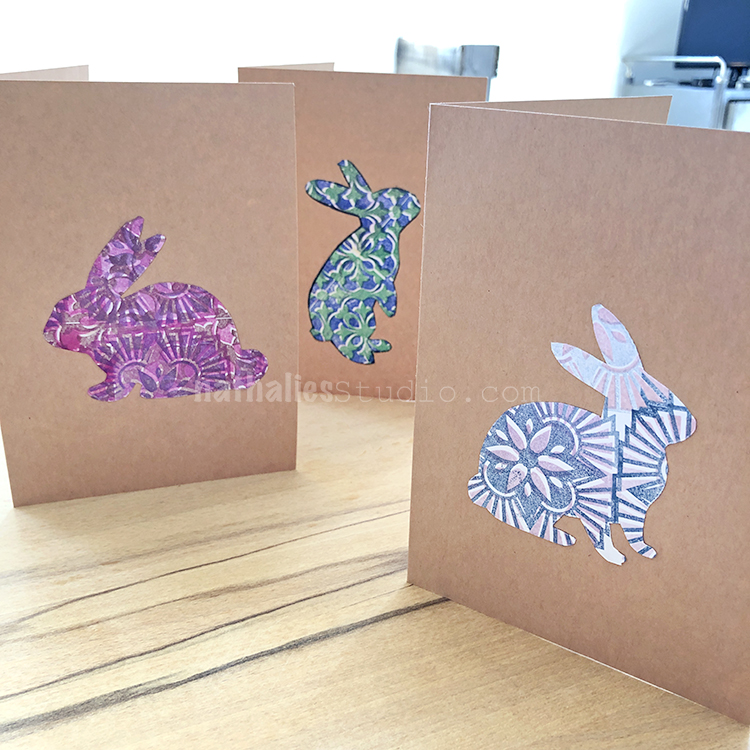
Hippity Hoppity :) Kim and I got together for a Play Date with some of my new Rubber Stamps for the upcoming Easter holiday. We had a nice morning stamping some Easter Bunny Cards for friends and family.
For supplies we had my new Floral Tile Large and Floral Tile Small stamp sets, blank cards, colorful ink pads, some bunny images we printed off the internet, a craft knife, and repositionable tape.
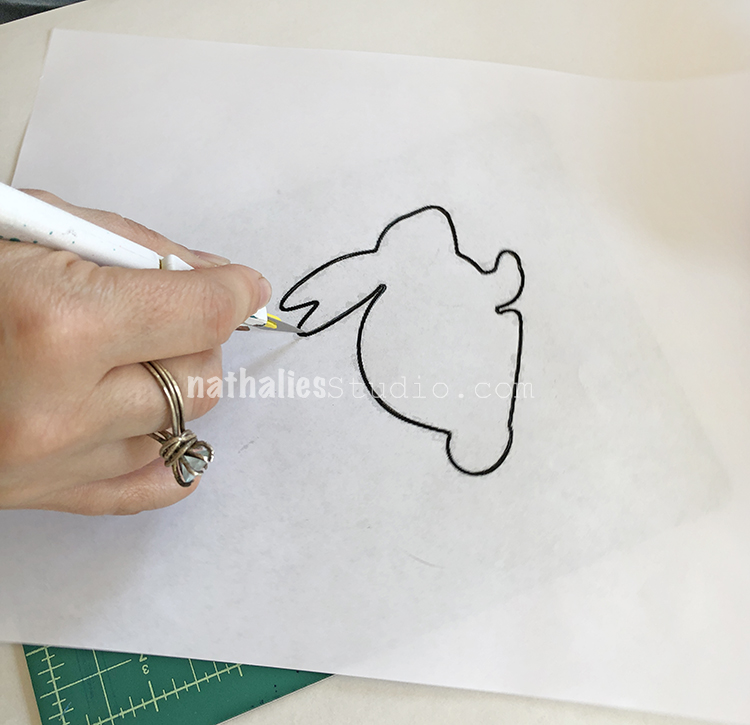
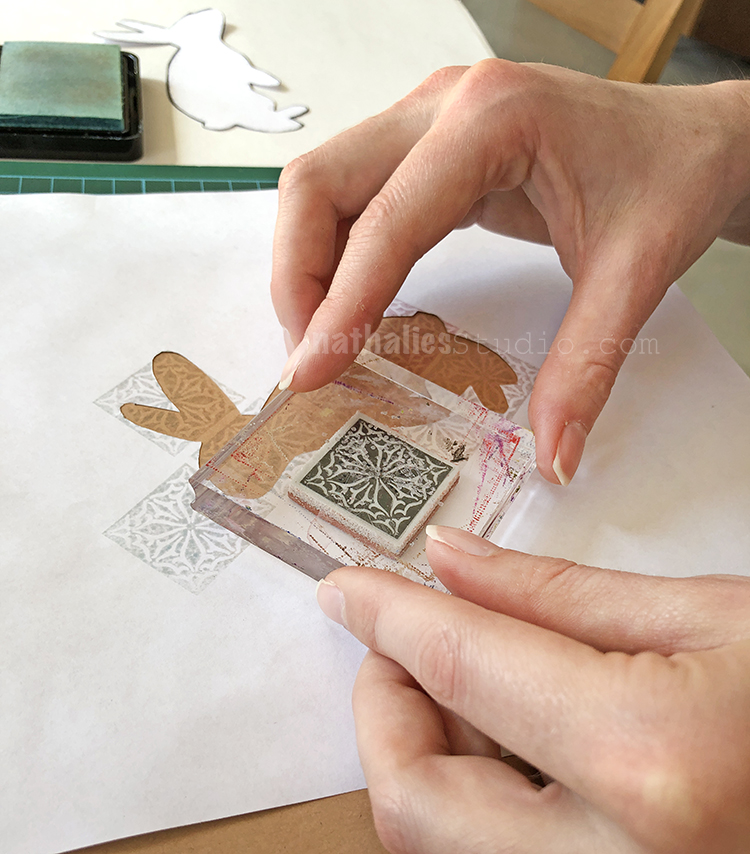
First we carefully cut out some rabbit shapes, leaving both the outside and inside intact. These became our stencils and masks.
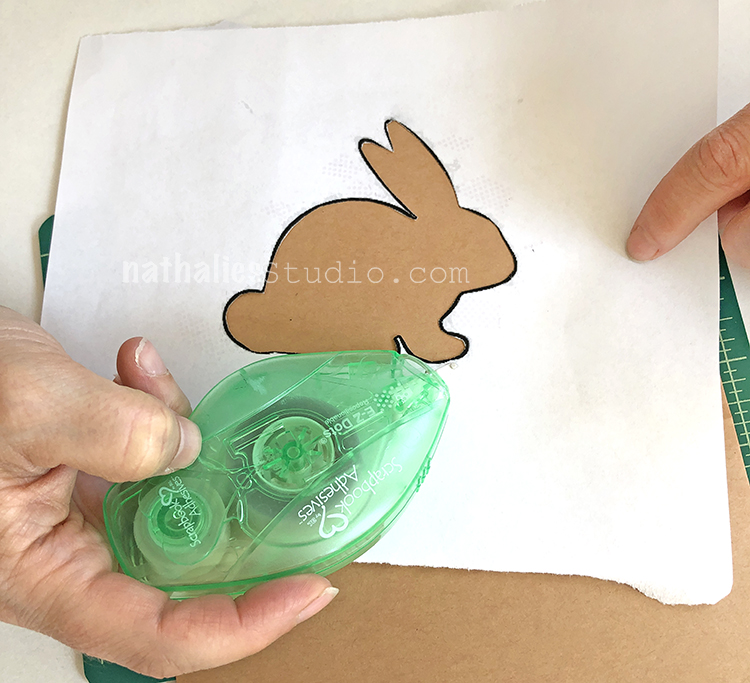
We used Scrapbook Adhesives E-Z Dots to temporarily stick our stencil to the front of the card. I love this tape – it’s easy to apply, sticks well, and comes off easily too!
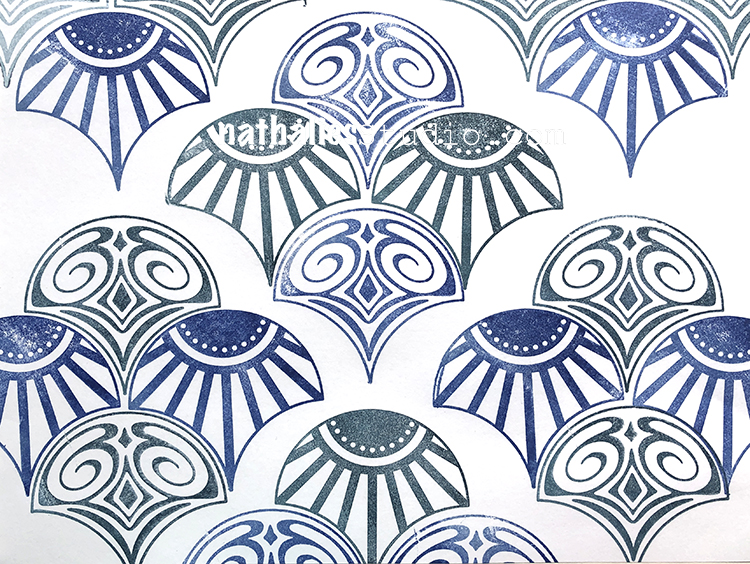
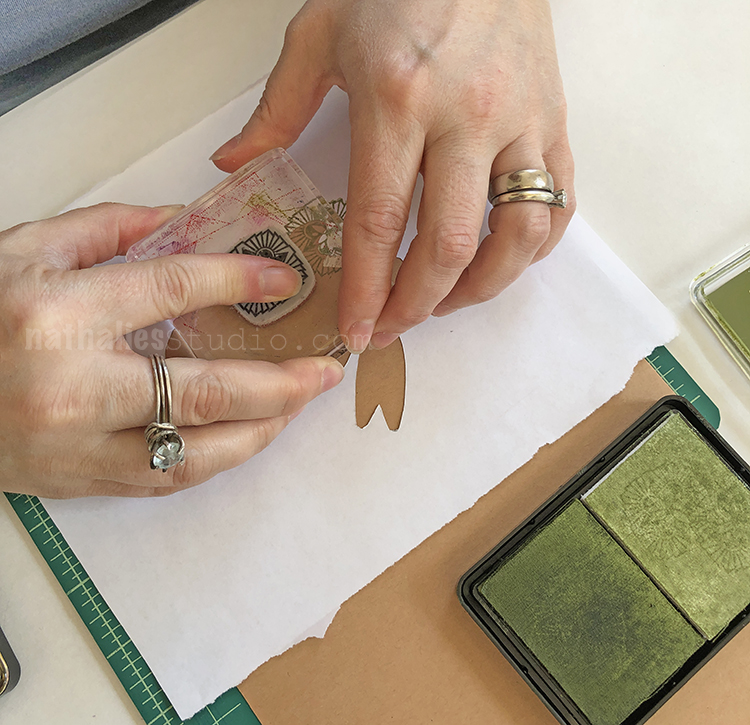
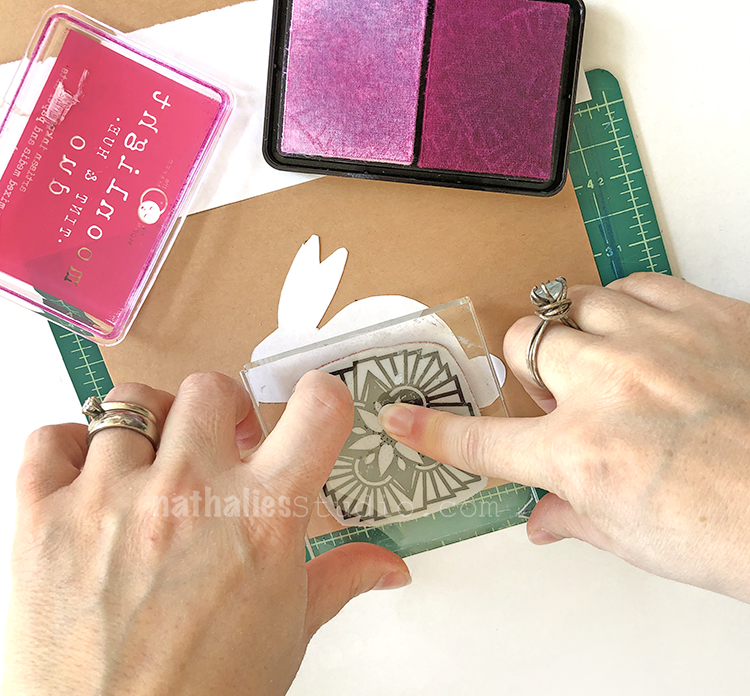
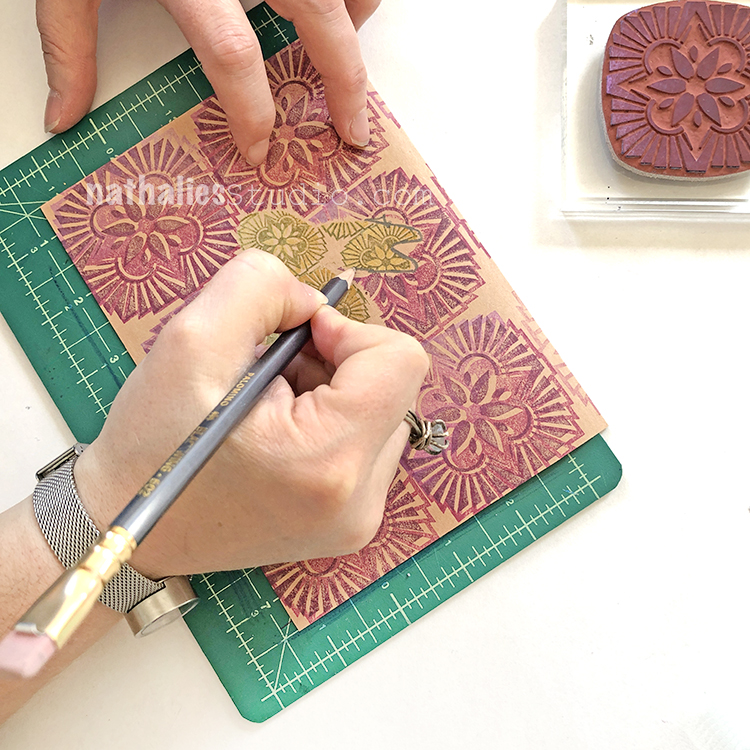
We stamped into our bunny “stencil” with stamps from my Floral Tile Small set – the scale is just perfect for tiling into small areas. Here I am using one of the Hamilton designs.
Kim began with one of the Van Vorst designs from the Floral Tile Small set.
I used both the Positive and Negative Hamilton stamps from the small set and filled in the entire bunny.
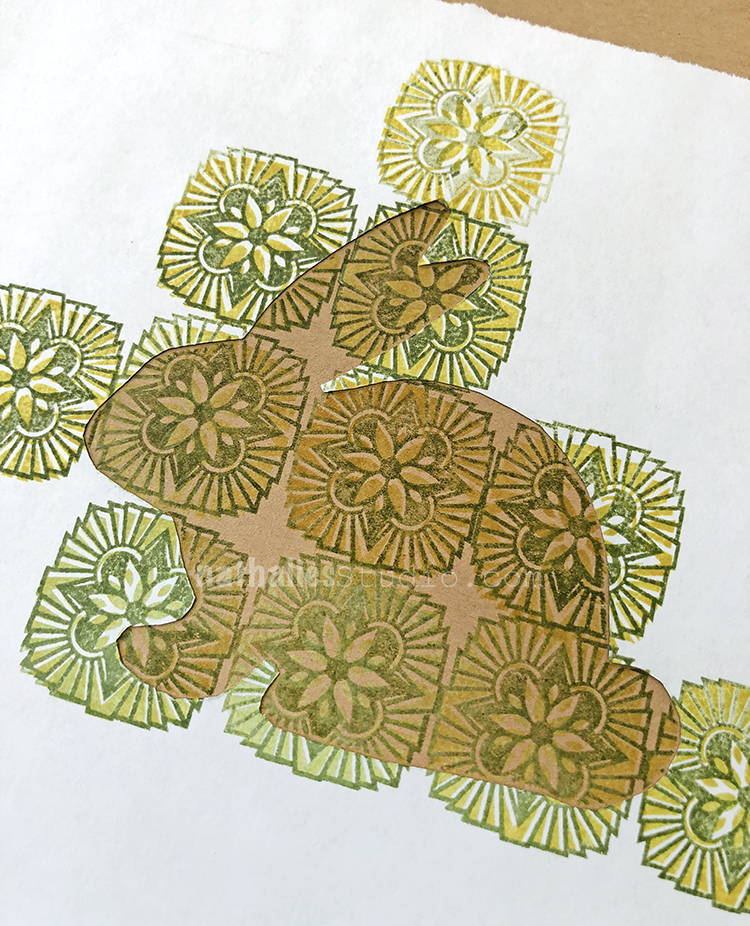
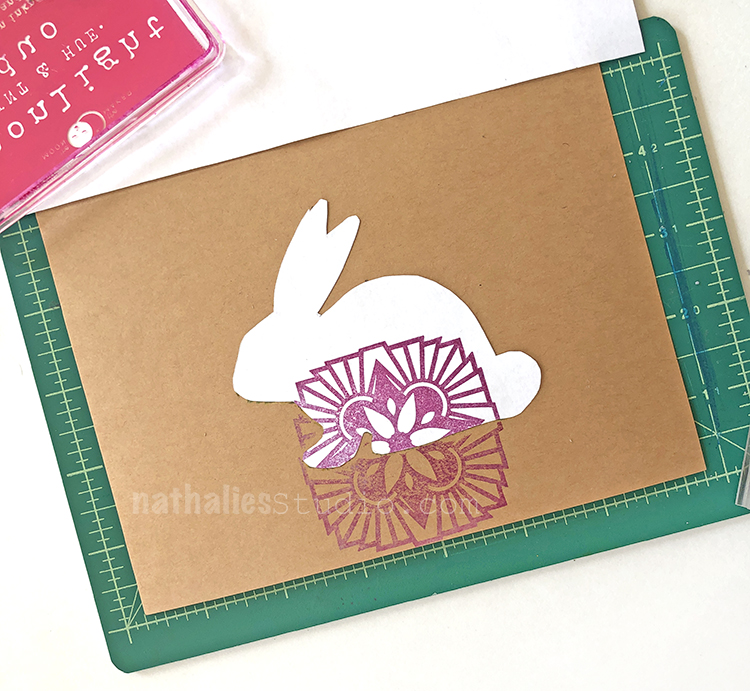
And here is the big bunny reveal! Now to fill in the rest…
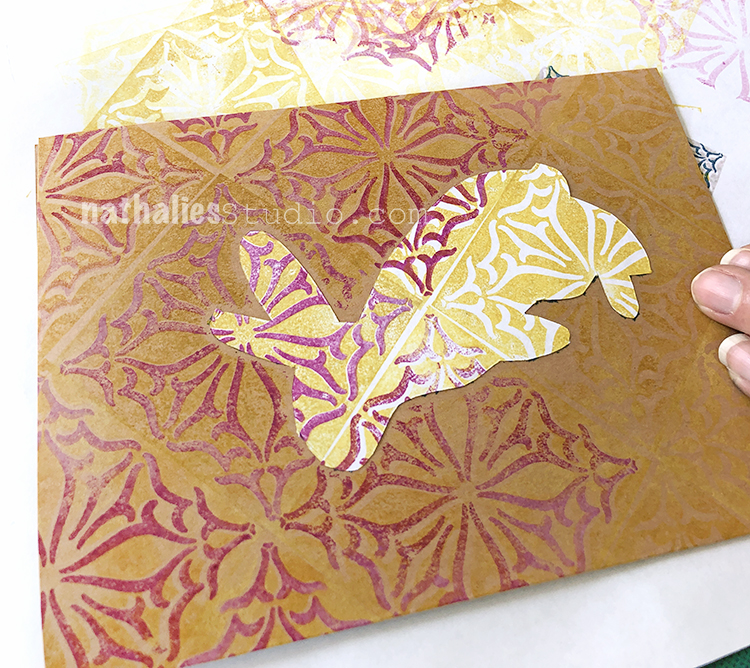
Put a bit of repositionable tape onto the bunny mask and place on top of your stamped image.
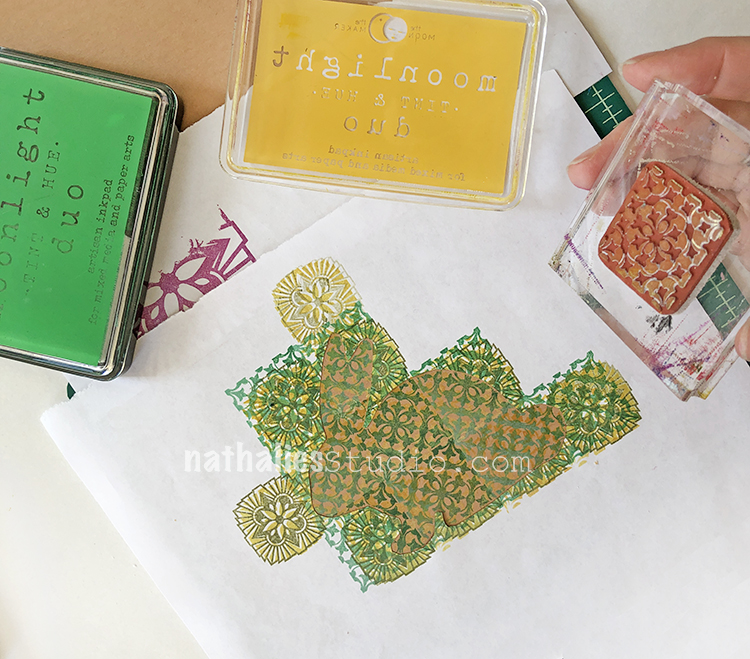
Begin filling the area around the bunny. Here I decided to use the Hamilton stamps from the Floral Tile Large set.
It becomes quick work with the large size stamps.
Kim worked with the Van Vorst stamps from the Floral Tile Large set to fill in the area surrounding her masked off bunny.
Looks pretty awesome when it is all done!
I experimented with outlining the bunny too – there are a lot of ways you can take these cards to another level.
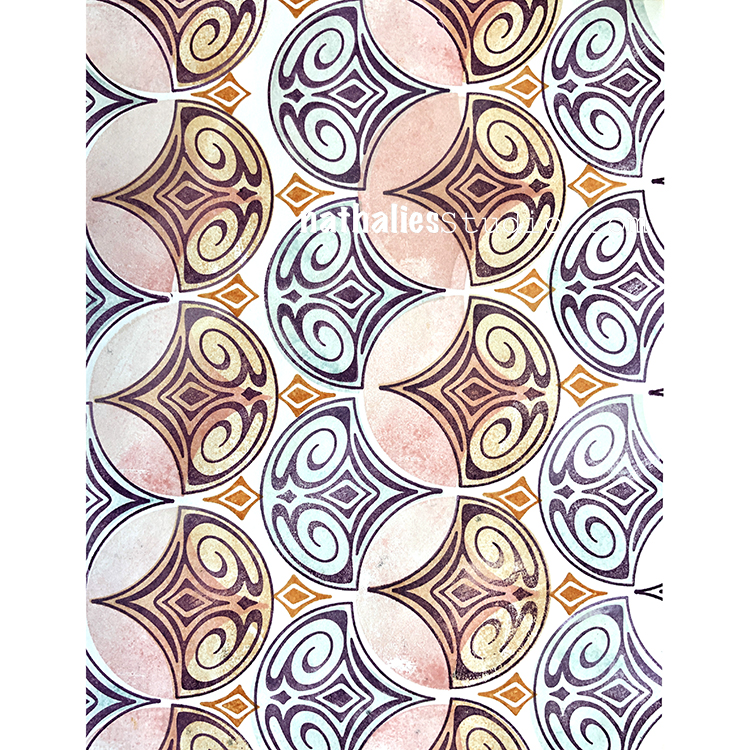
Another card beginning with the outside, using the Versailles Positive and Negative stamps from the Floral Tile Large set.
And another using the Versailles Positive and Negative stamps from the Floral Tile Small set.
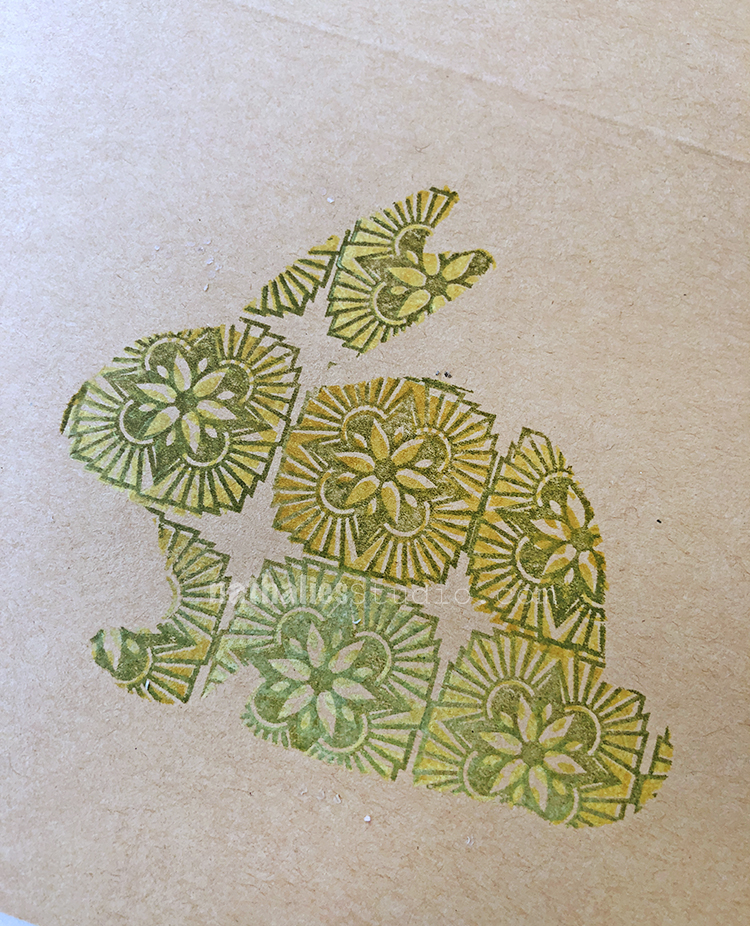
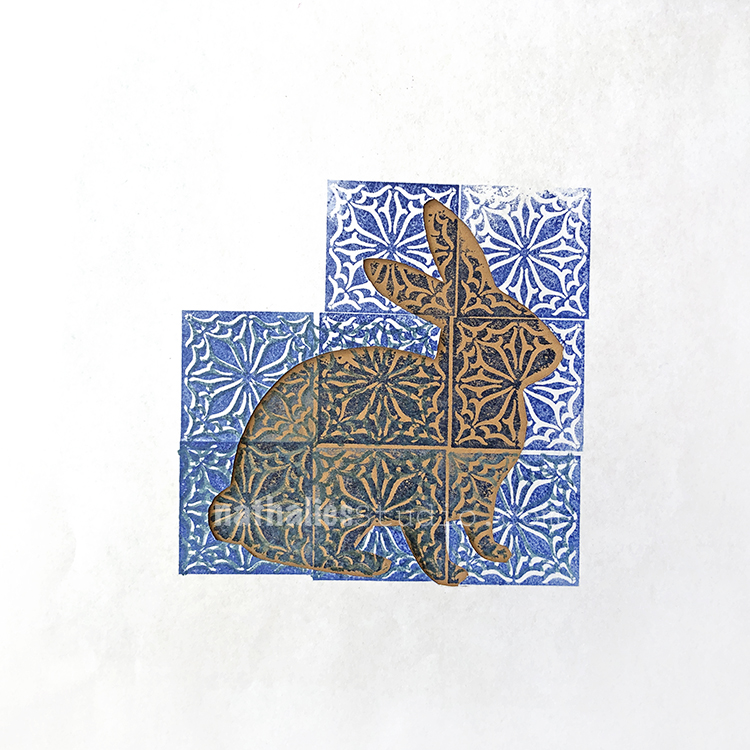
A very sweet bunny in blue using the Van Vorst Positive and Negative stamps from the small set. This dense pattern worked really well to define the bunny shape.
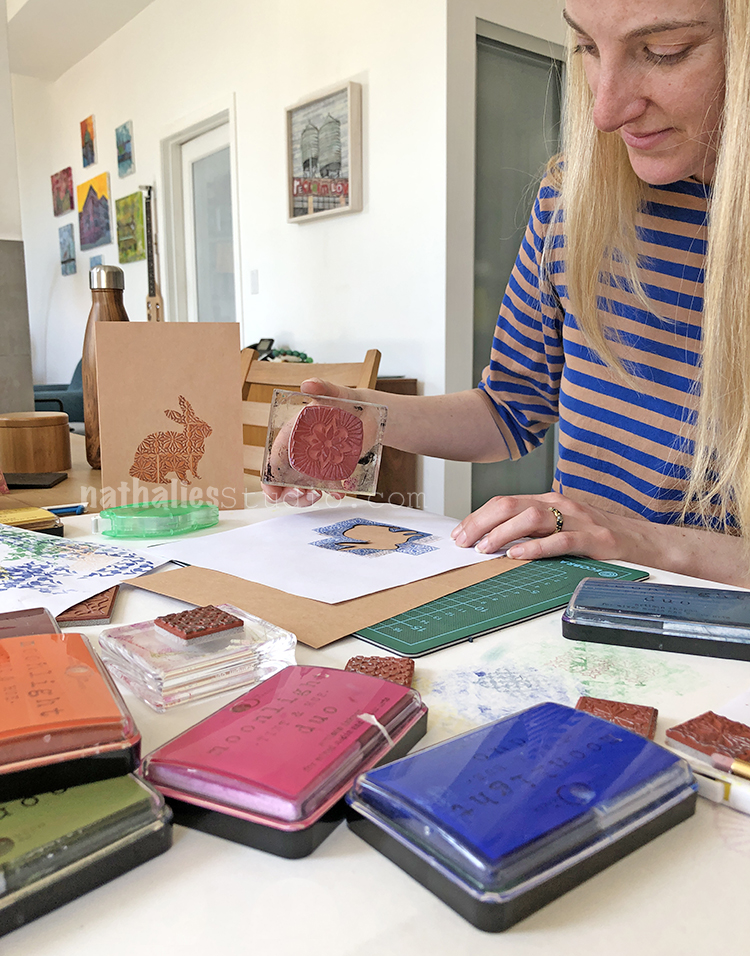
Kim getting into it – so fun with a lot of different stamp pad colors to choose from!
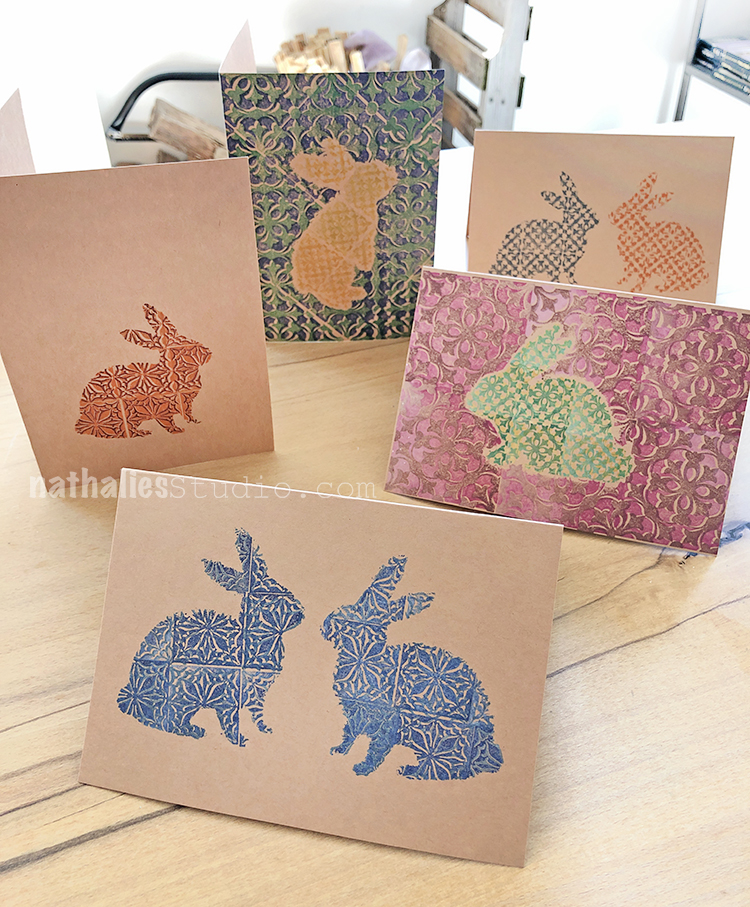
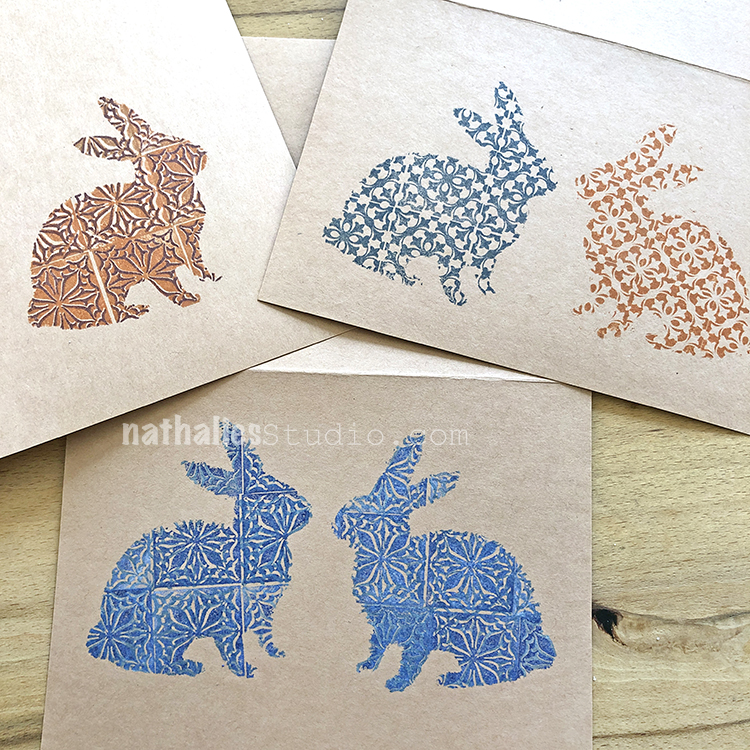
In the end we made quite a few cards – some that are really wonderful!
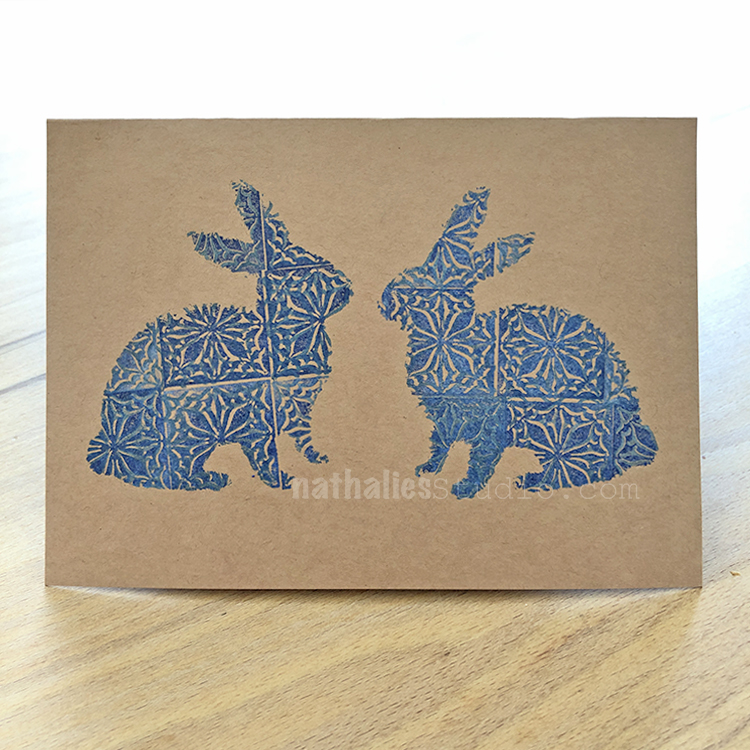
I just love this one I made with 2 bunnies!
Kim made a sweet orange one…
So fun to play with different iterations!
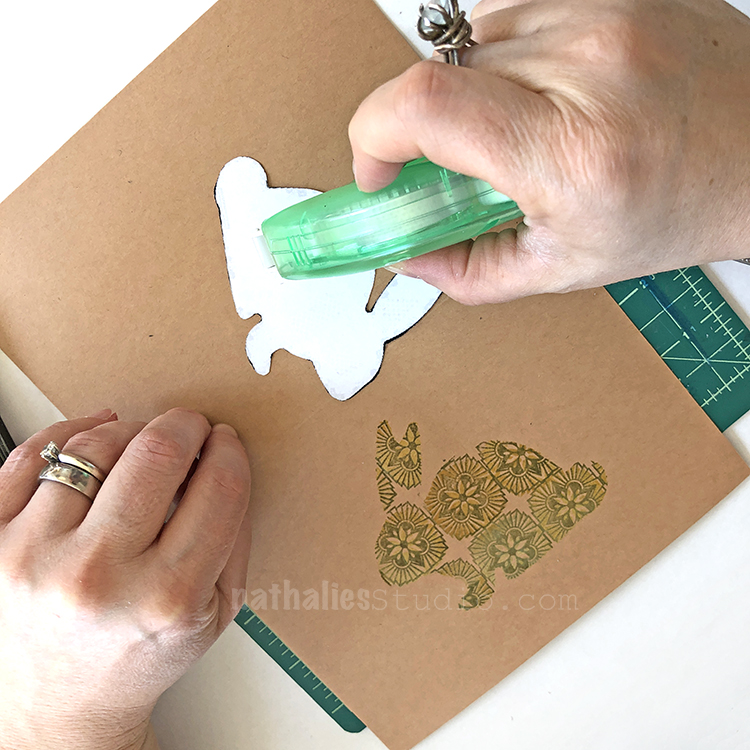
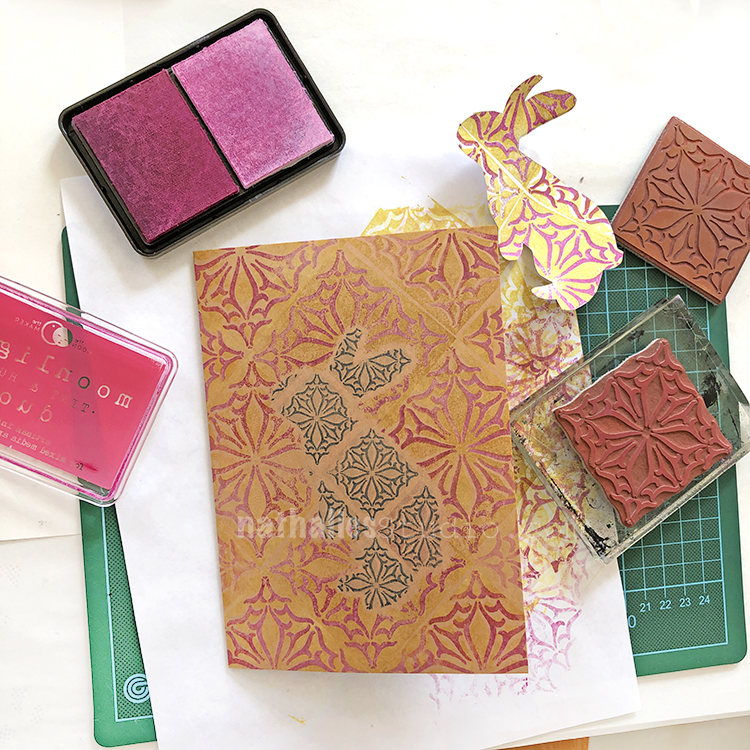
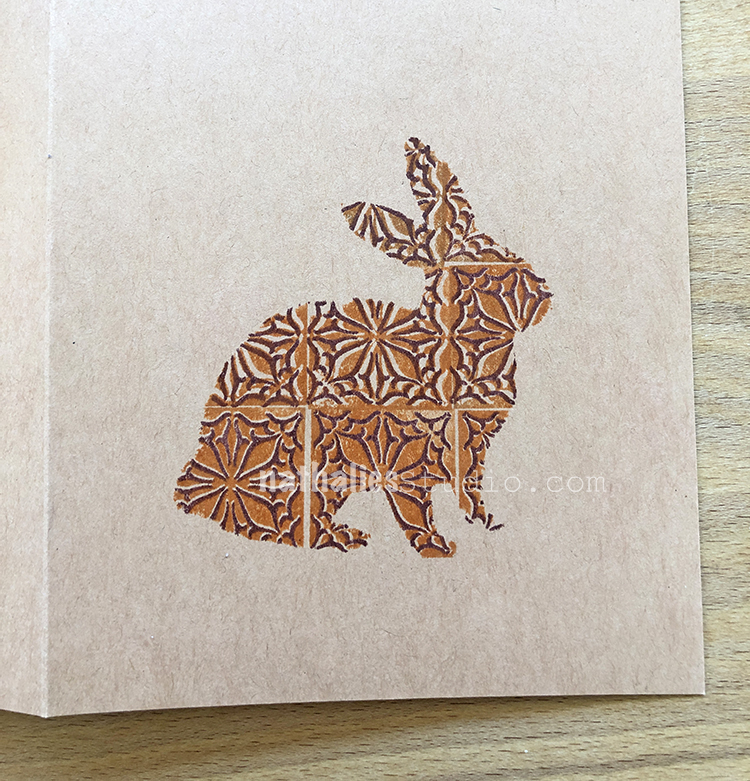
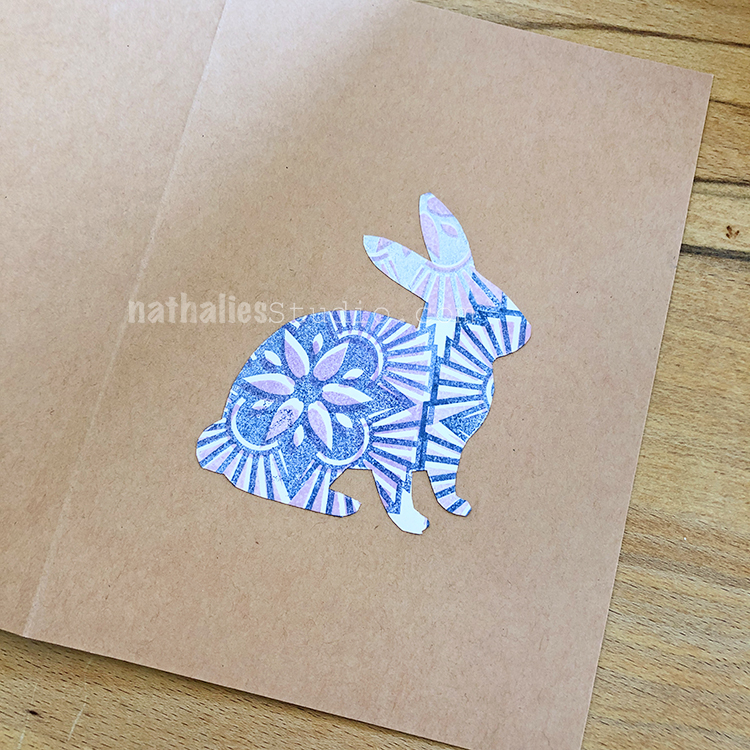
And then I realized that the stamped bunny masks should not go to waste – they looked great on the cards too!
Last one :)
We hope you try some of these techniques with my new stamps. Try mixing up different colors, playing with the positive and negative designs, and work with both sizes. We had a blast and can’t wait to spread a little Easter cheer with our cards.
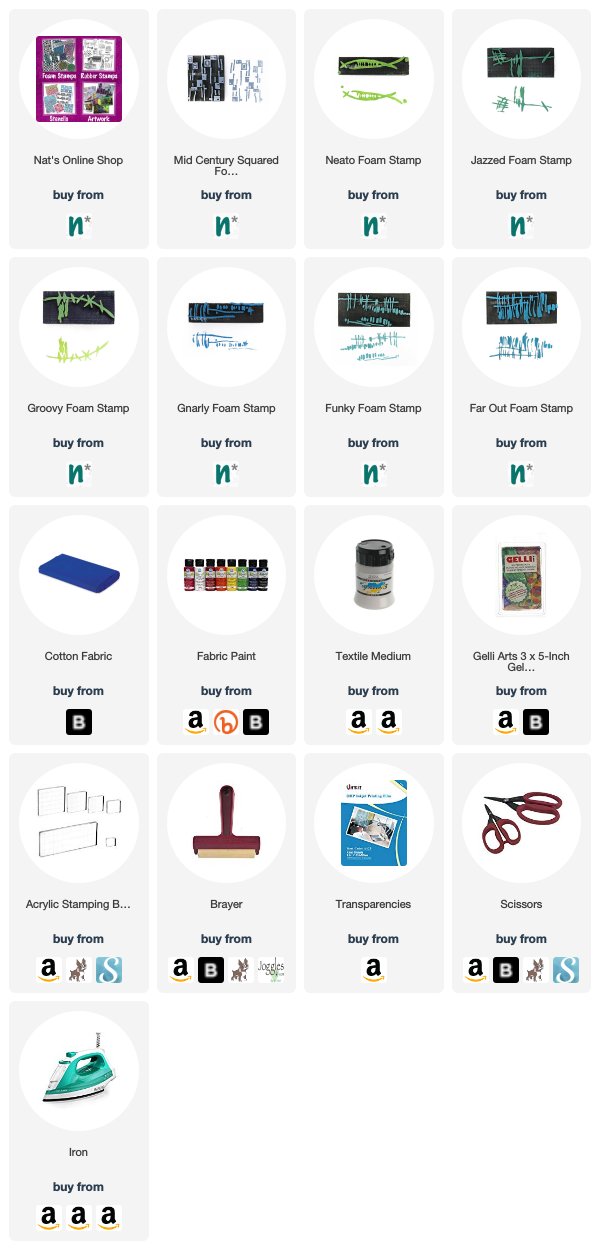
You can find my rubber stamps in my online shop. Here are some of the supplies that we used in this play date:
Don’t forget! Now is a great time to shop in my Online Store and use the coupon code SWEEPSALE to get 20%off all physical products. Hurry! The sale ends April 15th at 11:59pm EST.
We’re having a sale! Yes 20 % off all physical products in the Online Shop now through 11:59pmEST on April 15th. Just enter the coupon code SWEEPSALE when you check out and enjoy!
AND – All domestic (in the US) orders over $200 will ship FREE!
I’m doing a bit of Spring Cleaning and passing some great deals on to you :) Maybe you’ve had your eye on some of my foam stamps?
Hurry while they are still in stock. You can find all my foam stamps here.
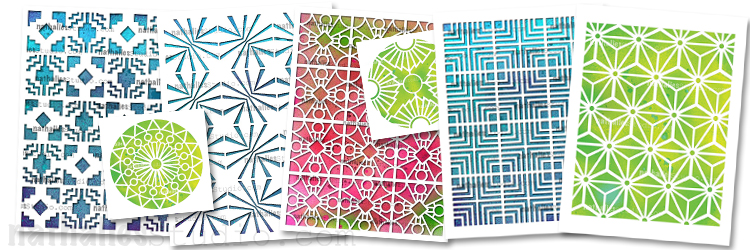
There are lots of patterns to choose from – many inspired by my travels and my own neighborhood. You can find my Stencils here.
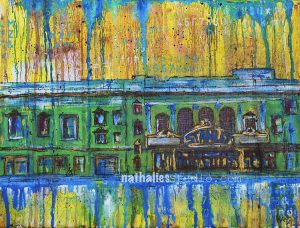
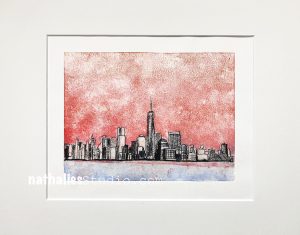
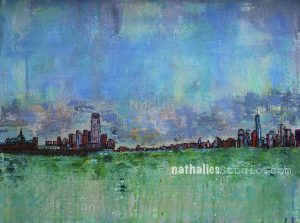
I’ve also added a lot of my Artwork to the store. And whether you are looking for a nice Giclee Print or an original painting, there are lots of options and price points to choose from. I even have quite a few original drypoint prints of mine available – a very affordable way to begin collecting original artwork.
Don’t forget, my shipping calculator has vastly improved and International shipping is now also very simple. If you have a question please always ask :)
Beautiful artwork, and the sentiment is probably true. I don’t see a lot of figurative art featuring women of color — I’ll make it a point to seek it out.
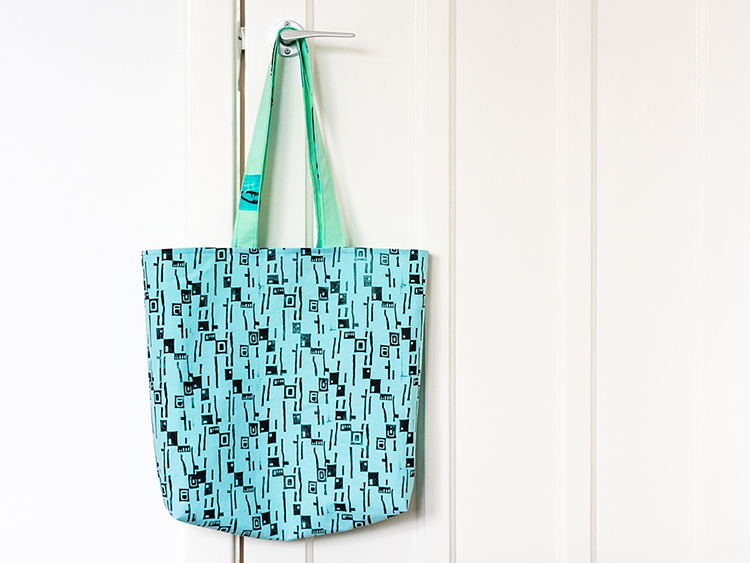
Here’s a post from my Creative Squad! Today we have Marsha Valk back with us again for another round of fun. Welcome back! Marsha is using my Mid Century Squared, Neato, Funky, Gnarly, Groovy, Jazzed and Far Out foam stamps for this awesome tote… and our theme for April: Feel the Rhythm – We’re thinking about patterns this month and using stamps to create a rhythm of marks. Show us your sense of rhythm!
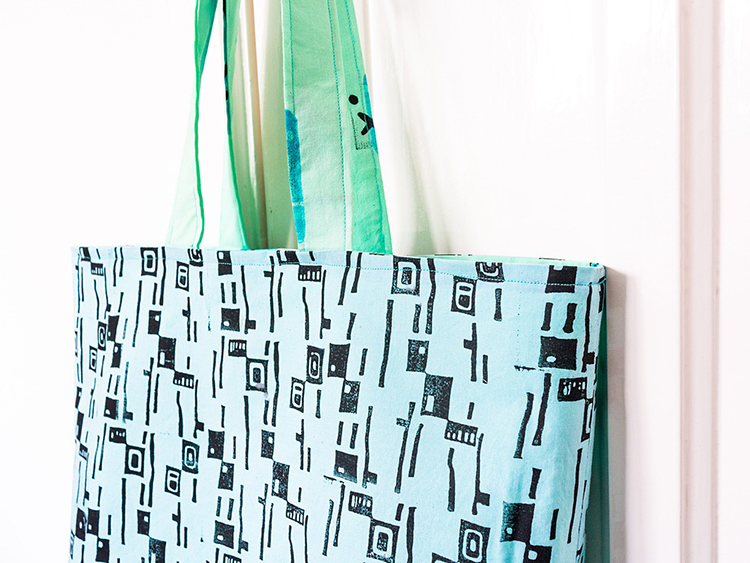
I remember that when I saw Nat’s new stamp designs for ArtFoamies I immediately thought of stamping them on fabric. So that’s what I did!
When it comes to stamping fabric designs, I always like to think about what I want to do with the fabric. This time I thought it would be cool to try and sew a simple tote bag.
You can find tons and tons of great sewing tutorials on YouTube these days. So what I tend to do is to look for a tutorial that matches my sewing skills, gather all the materials and then go from there.
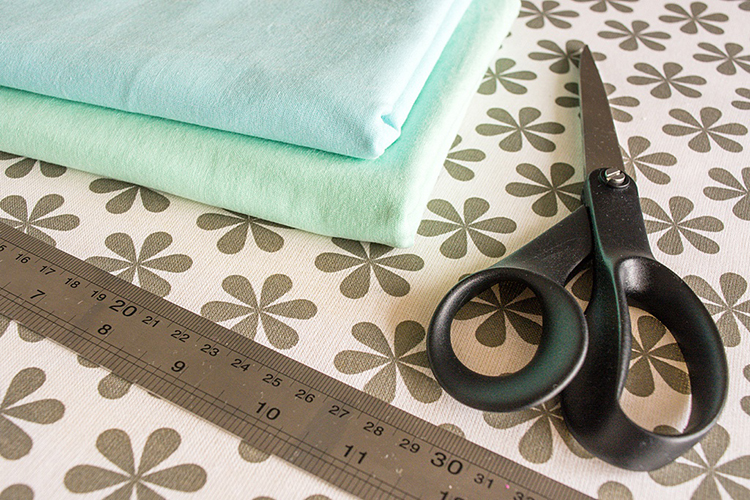
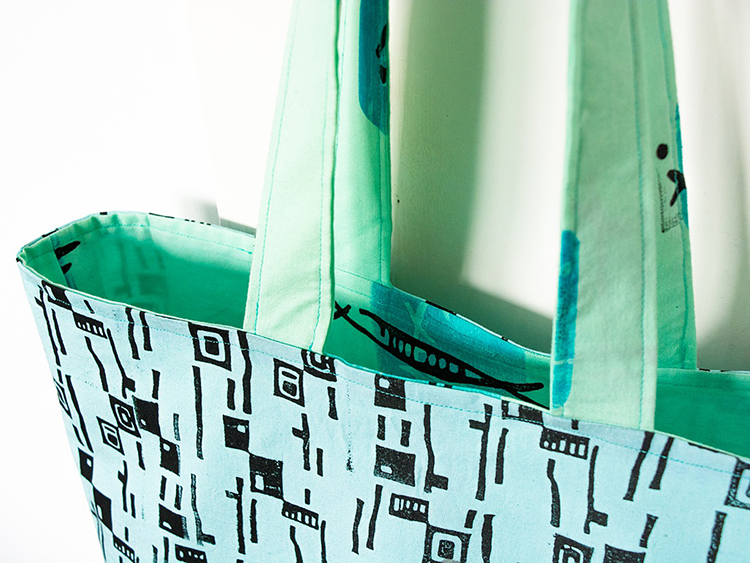
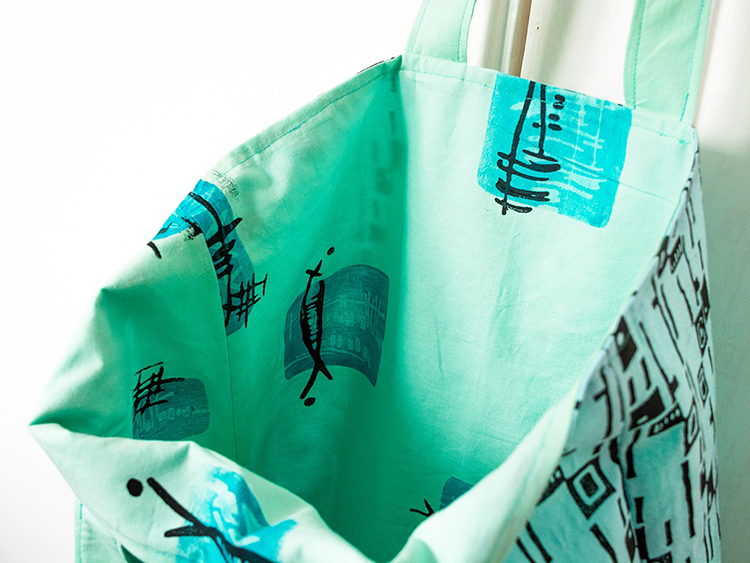
For the tote bag pattern I chose, I needed two different fabric designs, so I bought two slightly different colours of cotton fabric.
Step 1 Pre-wash and iron the fabric before printing. The paint will grab the cotton fibres a lot better when all the sizing is washed out.
If you already know what you are going to make with the fabric once it’s printed, you can cut it to the sizes needed for your project at this point.
Step 2 Set up your printing station. Protect your work surface if needed. The paint usually seeps through the fabric onto the underlying surface, so make sure you can easily wipe it clean.
Choose the paint colours you want to use. Limit your colour palette to a maximum of two colours plus a neutral.
You can use regular acrylic paint to print on fabric, but if you want it to be washable, you’ll need to use fabric paint or acrylic paint mixed with a fabric medium.
Follow the instructions on the packaging to make sure you are mixing the correct amount of paint/medium for the best result.
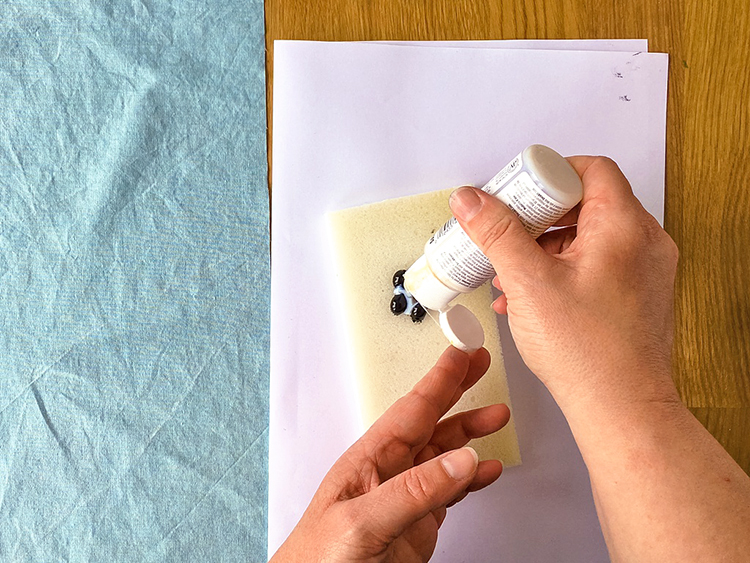
I’m using acrylic paint mixed with a fabric medium. You can mix it on an inking palette and use a brayer to apply the paint to your foam stamps or you can create a custom stamp pad using an ArtFoamies StampBuddy.
Step 3 Start stamping!
Step 4 For my second fabric design I also used one of my smaller gel printing plates to print with.
First I handcut three stencils from transparencies slightly larger than the gel printing plate and I placed the stencils on my fabric to help me determine the pattern I wanted to print.
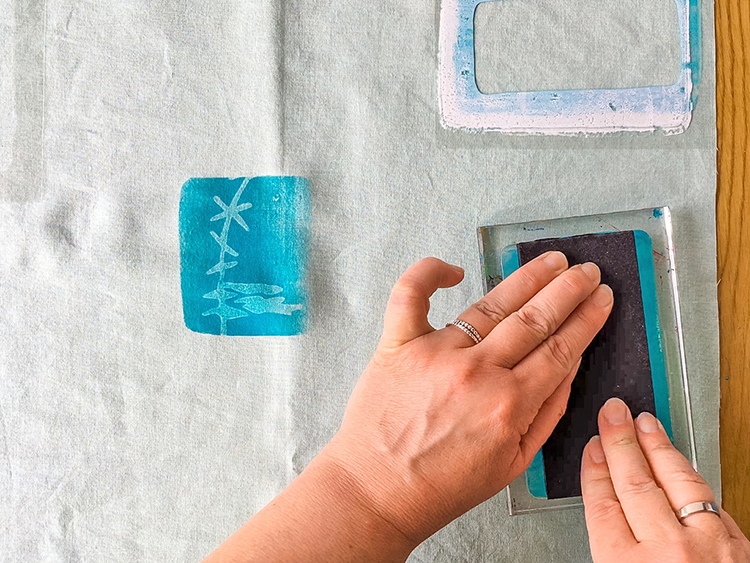
Cover the brayer with paint and then roll the paint out over the gel printing plate.
Take a foam stamp and stamp it into the paint. Here I am using Nat’s Groovy stamp.
Press the gel printing plate paint-side down onto the fabric on top of the stencil. Lift up the gel printing plate.
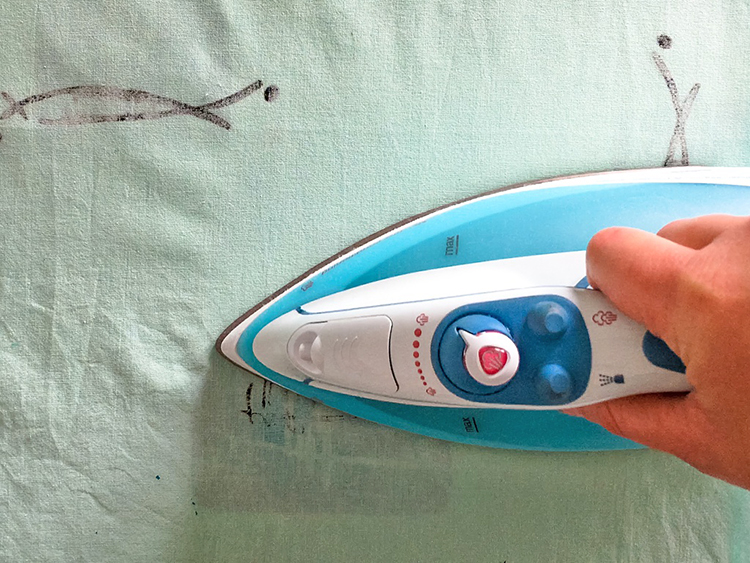
Step 5 Leave your gel printed fabric to dry entirely before heat setting the paint with an iron. Consult the label of your fabric paint or fabric medium for the exact instructions.
Be sure to protect your ironing board cover with a cloth or parchment paper before ironing printed fabric. This will prevent the paint from accidentally staining the cover.
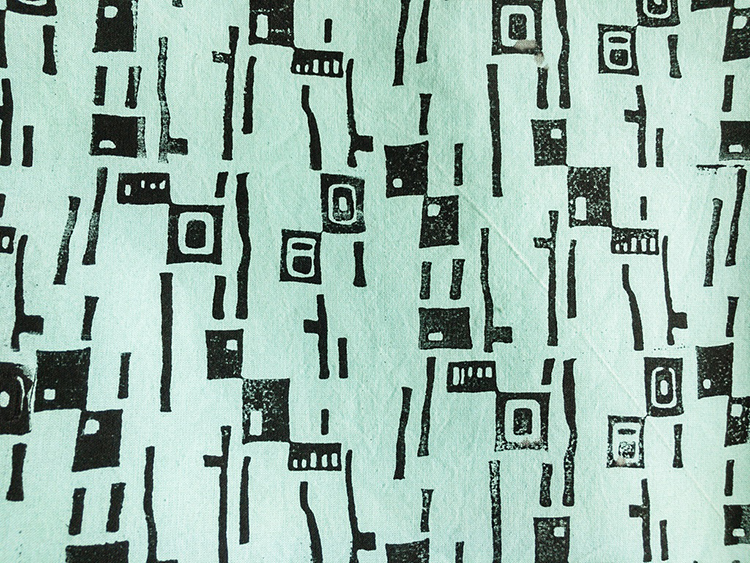
Step 6 Now your fabric is ready for the sewing project of your choice! This one I printed with Nat’s Mid Century Squared stamp.
Happy foam stamping!
Thank you Marsha for inspiring us to create some of our own printed fabrics for sewing projects! You can find my foam stamps in my online shop if you’d like to create the patterns that Marsha shows. In addition to sewing equipment, here are some of the other supplies that she used:
Feel inspired? Working on something yourself that you’d like to share? I love to see how you interpret our monthly themes. Email me how you used my stencils and stamps with the theme and email me an image – I would love to share your projects in my next “n*Spiration From Around the Globe“.
Fabulous and one-of-a-kind! I love the stamp patterns and the colors used. I might have to get out my sewing machine and give it a try. It’s been awhile since I’ve sewn anything, but I think I can manage the straight lines of a tote bag. :-)
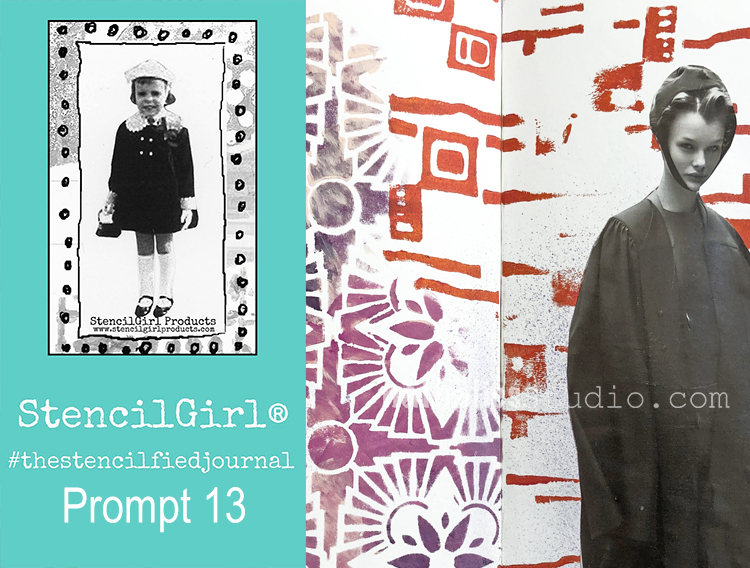
My wonderful friend Tina Walker is at it again – she invited several people to join her Stencilfied Prompts. The prompts are music related and each week she is posting a song. You can be inspired by the lyrics, the video, the album cover or anything related and the only restriction is that you have to use StencilGirl Product Stencils. Here is my take on Prompt 13
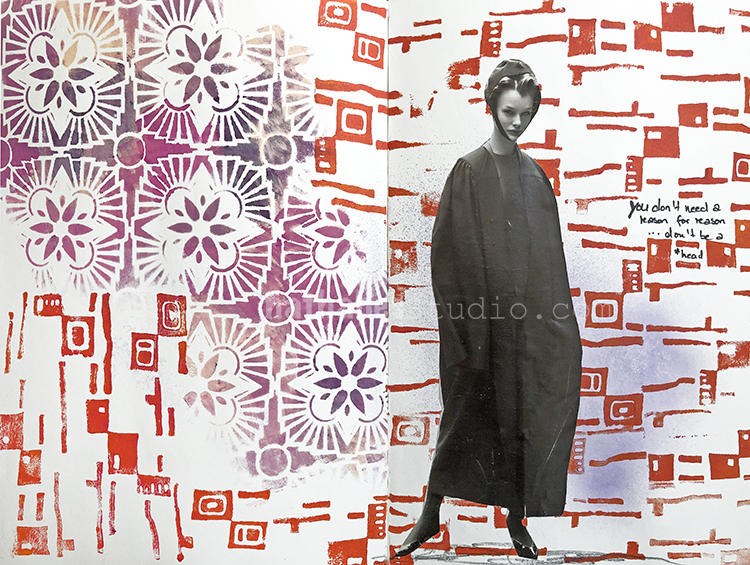
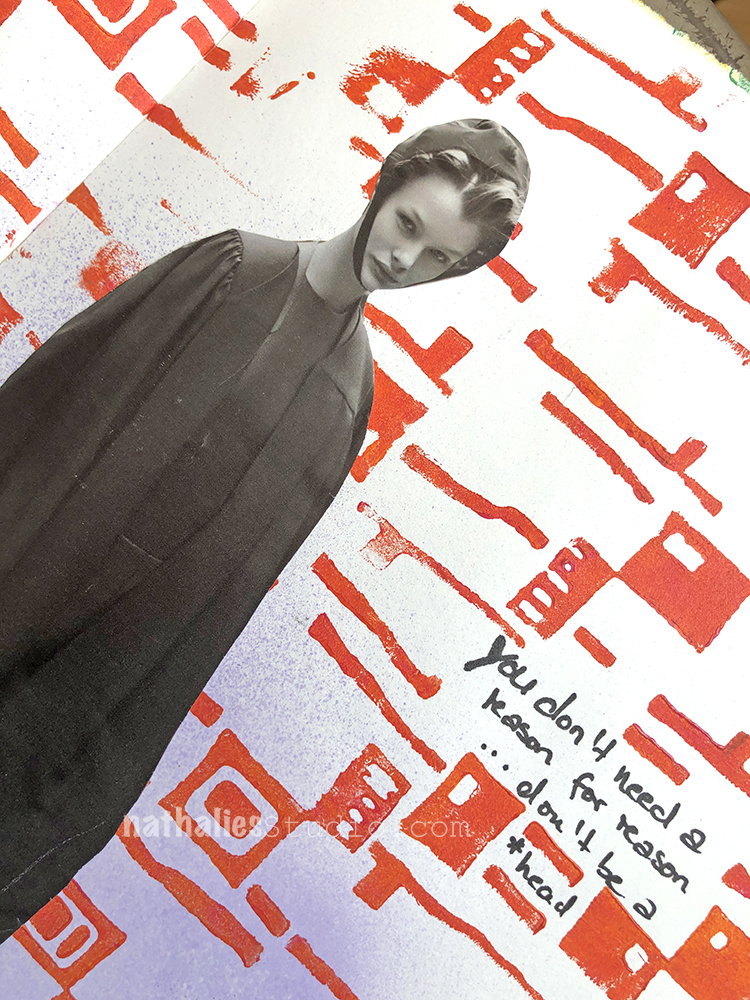
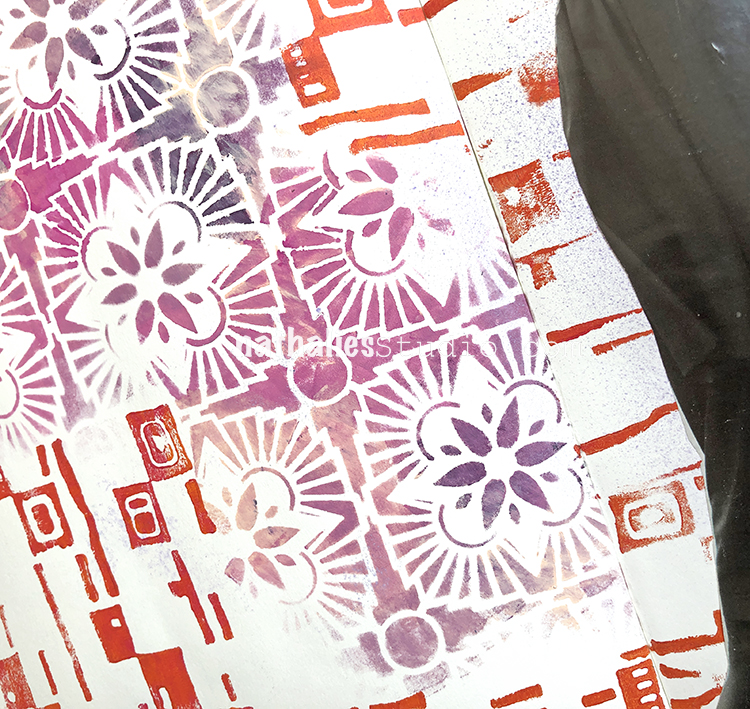
This week’s song is Smooth by Santana . I loved the image I found in a magazine that shows a woman in a lawyer/judge rope …and well ….let’s say “you don’t need a reason for reason …don’t be a ****head” came to my mind
I used my Hamilton Stencil on the left with Acrylic paint and then stamped also with my Mid Century Squared Foam Stamp. I love how those two patterns come together even though they are so different …. wouldn’t it be great if that would work in real life like that too?
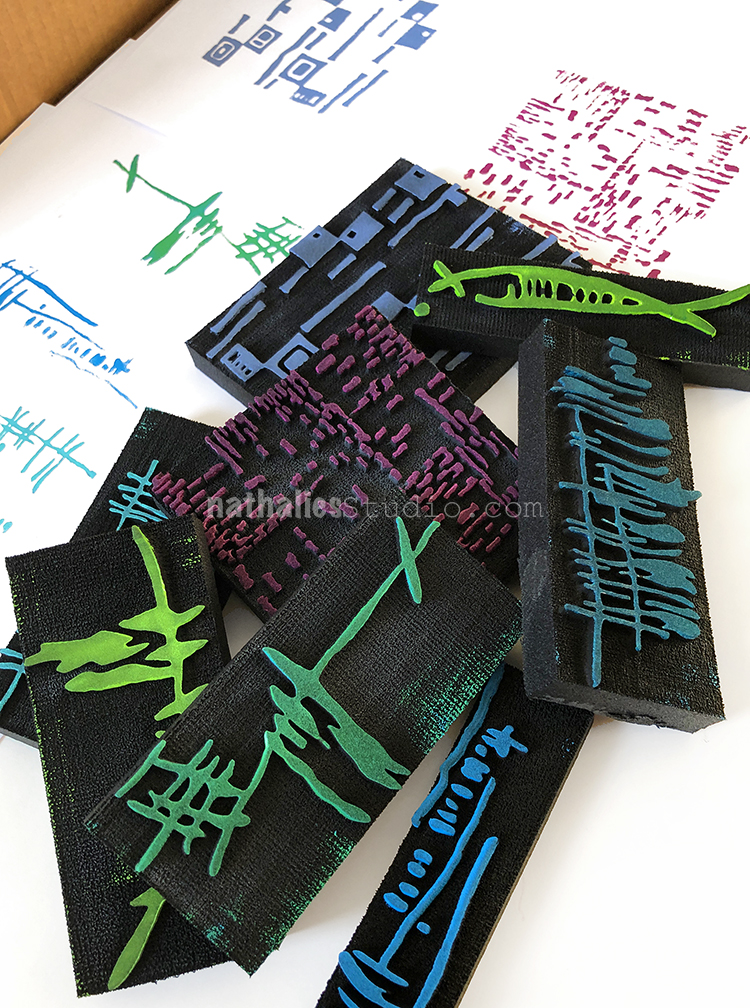
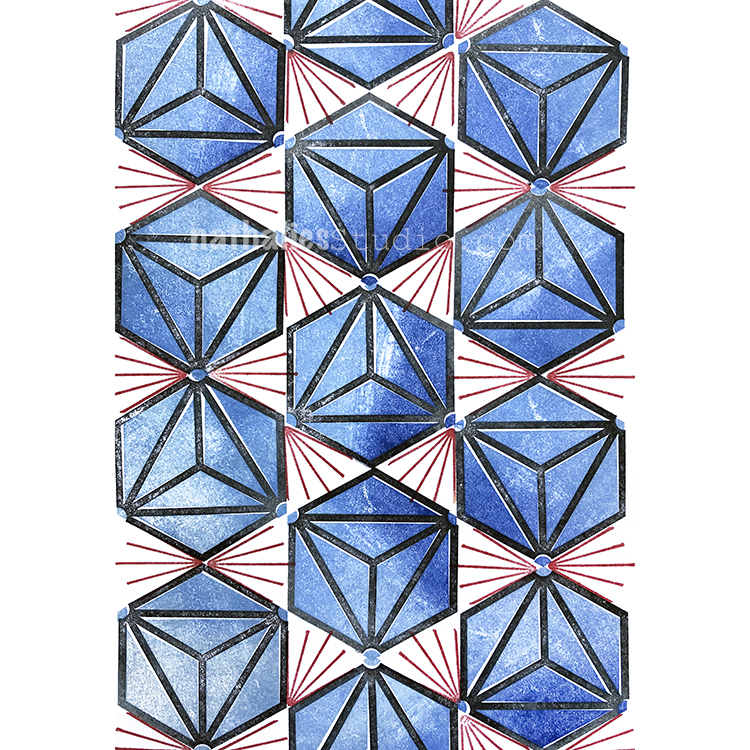
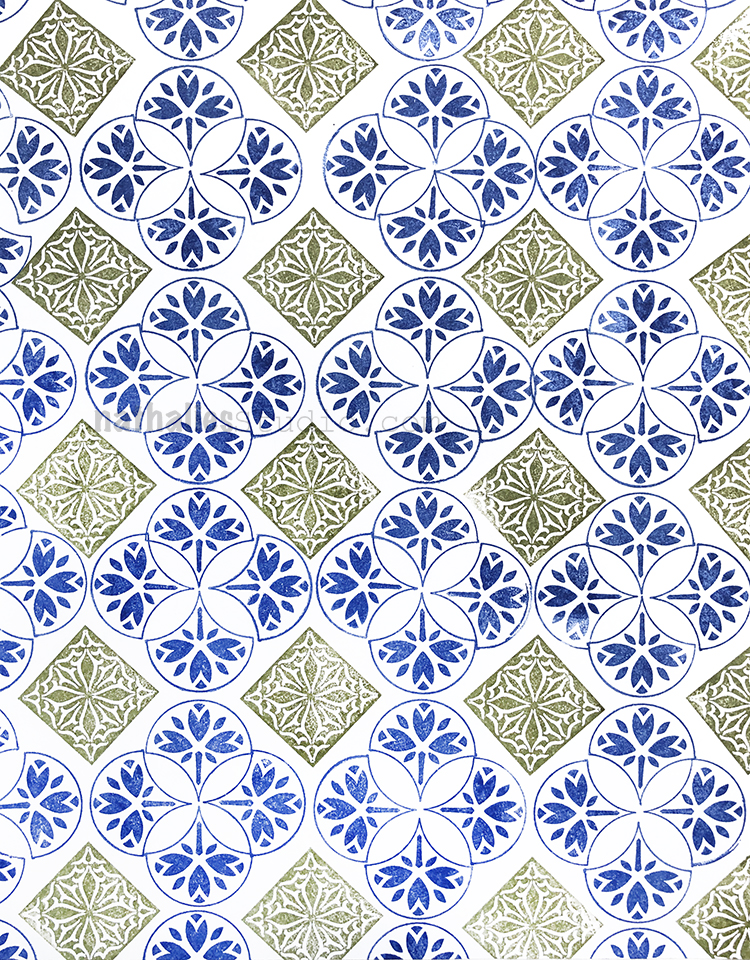
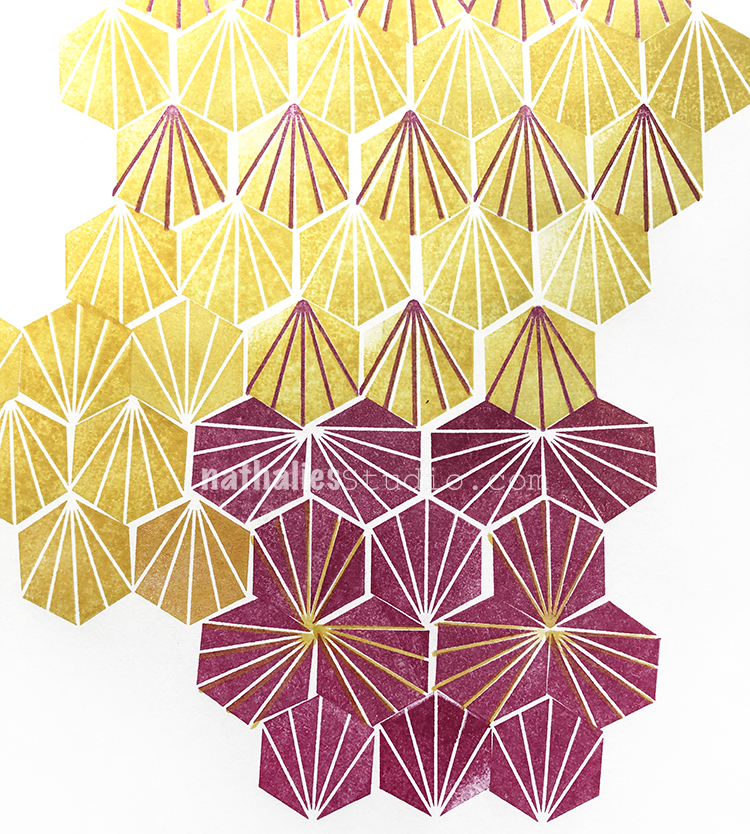
Still playing with my new RubberMoon Stamp Sets and patterns – I am having so much fun with it and I hope you will find some inspiration with it too – here is a summary for Day 5-7
Ever wondered how those beautiful rubber stamps you use are made? Join me in this Behind the Scenes Interview with RubberMoon. RubberMoon is a family owned company in Missouri and I am so happy that they are turning my designs into beautiful stamps.
I hope you enjoyed this interview and the little view behind the scenes. All the work that goes into the rubber stamps makes me even more happy to be part of the RubberMoon family. If you are like me and trying to make smart choices by supporting the little guys, you can do that with every purchase here. I am proud of the quality of my stamps, the design effort that goes into them, and the many hands that make them possible. Check them out here :)


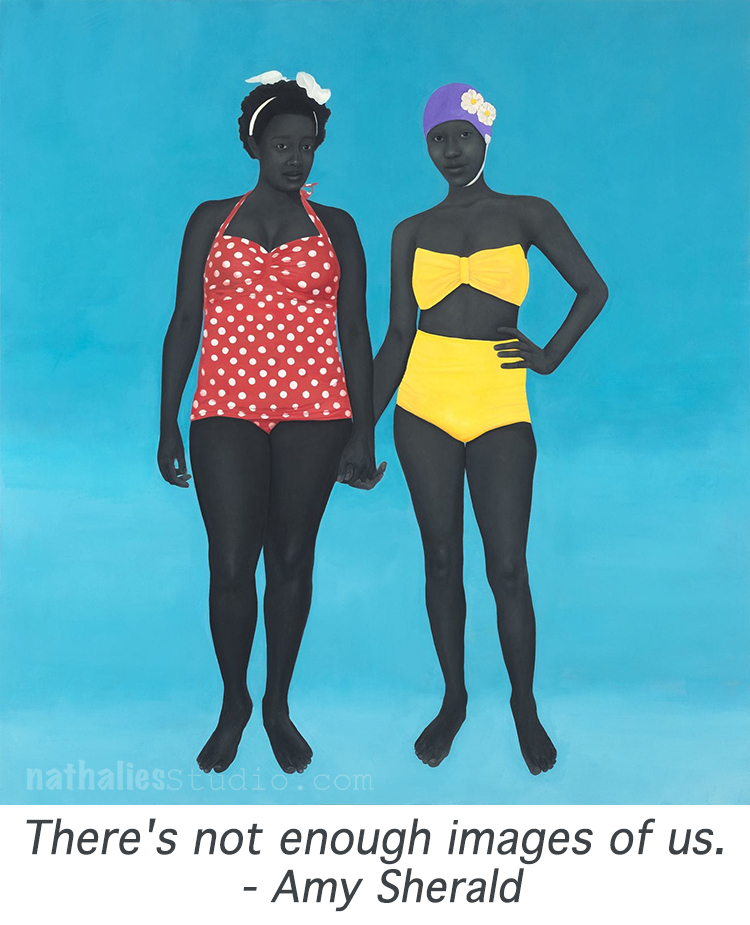


Beautiful artwork, and the sentiment is probably true. I don’t see a lot of figurative art featuring women of color — I’ll make it a point to seek it out.
Reply