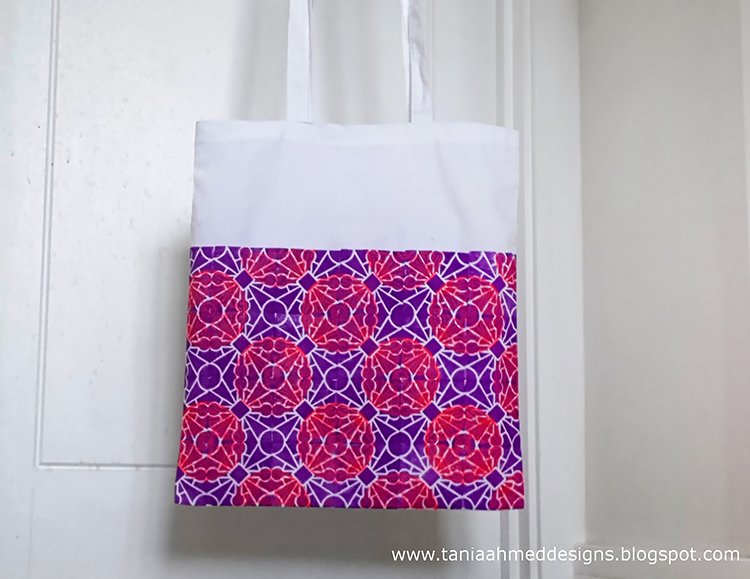
Welcome to a post from my wonderful Creative Squad! This week we have Tania Ahmed and her super cool tote bag project using my Buenos Aires and Broadway ArtFoamies stamps. I love using these foam stamps on fabric and Tania shares a video with us that shows just how easy it can be to get a great looking result. Tania was inspired by the new theme this month: All Shapes and Sizes – Circles and squares, big and small, let’s mix it up and play with different shapes and sizes this month. Just because things are different doesn’t mean they can’t look great together!
I have had a love for block prints all my life and have grown up wearing colourful prints with handmade patterns. Nat’s Art Foamies are perfect for creating backgrounds and patterns and are so very easy to line up.
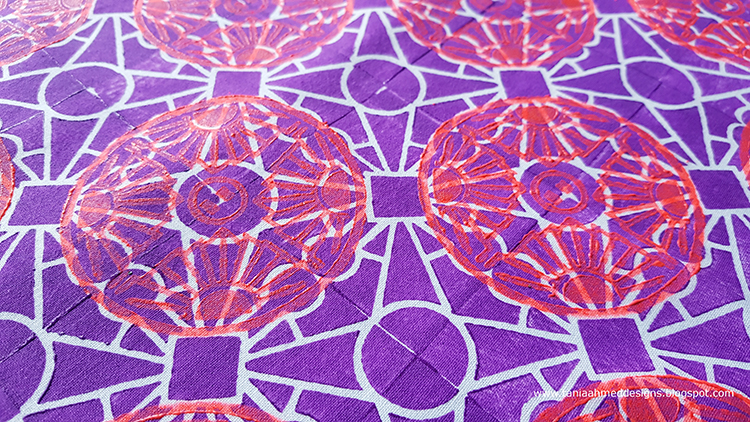
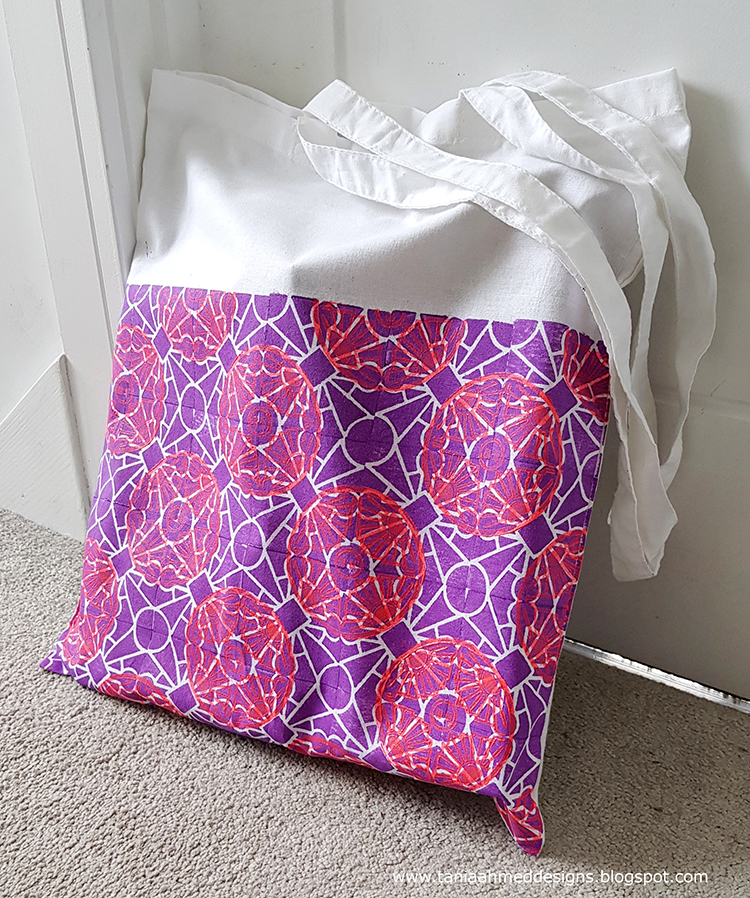
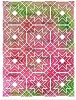
The challenge this month was “All Shapes and Sizes” and I was inspired to create a repeating pattern on a canvas bag that I had been saving for a while.
I made my own fabric paints using some fabric medium that creates paint that is the perfect texture for stamping on to cloth. Plus it makes it more durable.
Watch the video below to see how I decorated the canvas bag:
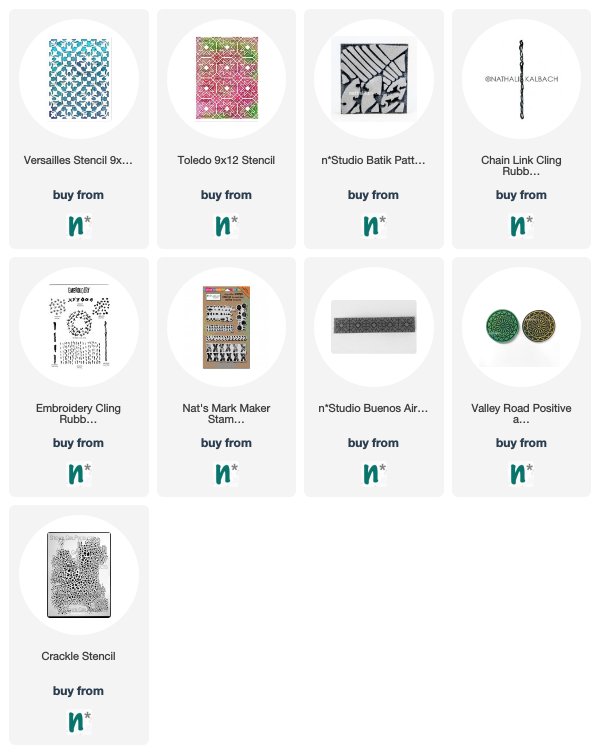
Thank you Tania! There are so many ideas for this one – spiffing up those shopping totes, maybe a new summer beach bag, or even a tote for summer library books. Here are some of the supplies that Tania used:
Feel inspired? Working on something yourself that you’d like to share? I love to see how you interpret our monthly themes. Email me how you used my stencils and stamps with the theme and email me an image – I would love to share your projects in my next “n*Spiration From Around the Globe“.
Ready for some inspiration? Today we have some projects from around the globe. It’s always fun to see how you’re using my stamps and stencils and I am so happy to share some examples today. So let me know if you’re doing something cool with my products, and you might see yours on the next Inspiration from Around the Globe!
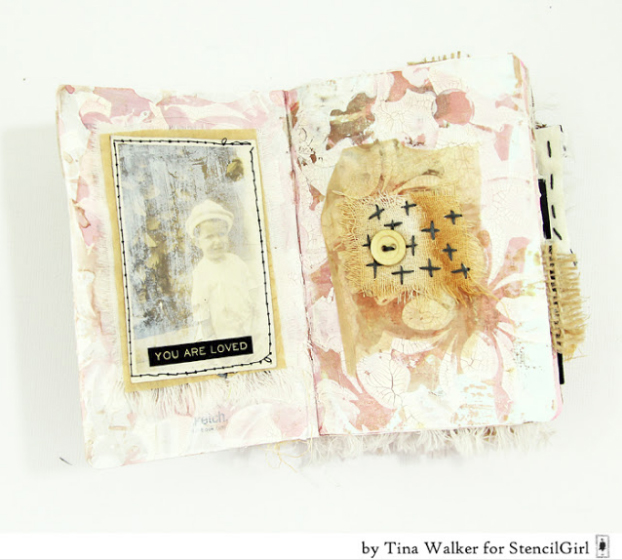
First from the US we have a gorgeous little book for Earth Day by Tina Walker (who was a member of our Creative Squad and you can check out some of her other projects HERE). On this page she is using my Versailles stencil for the background.
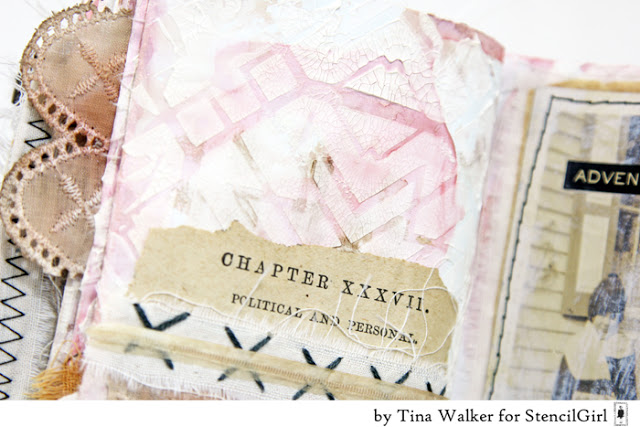
Here she uses my Toledo stencil as a background pattern for another page.
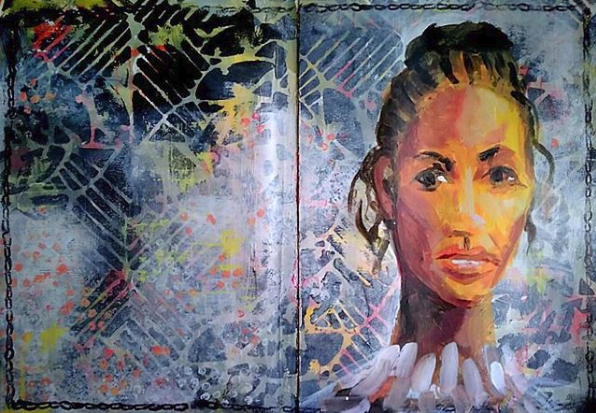
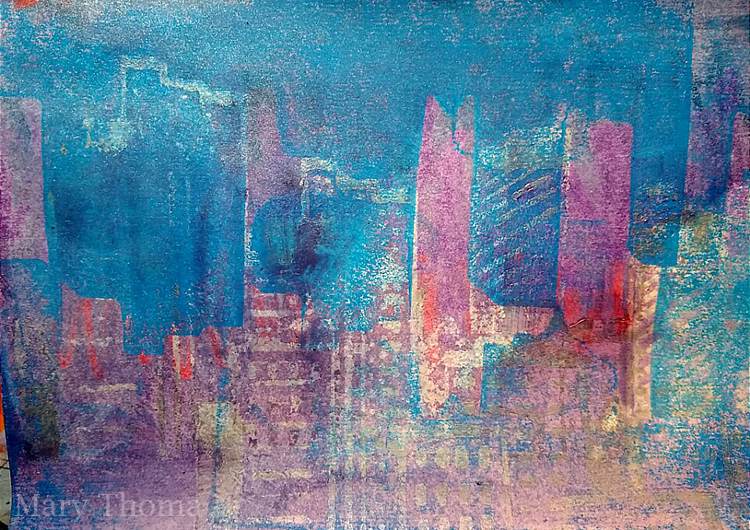
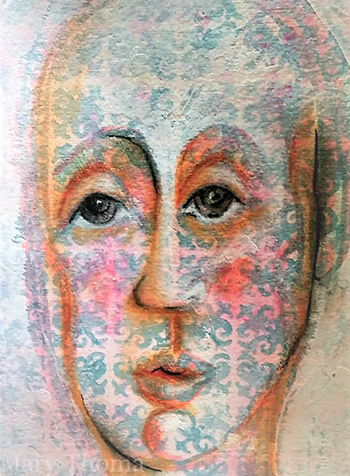
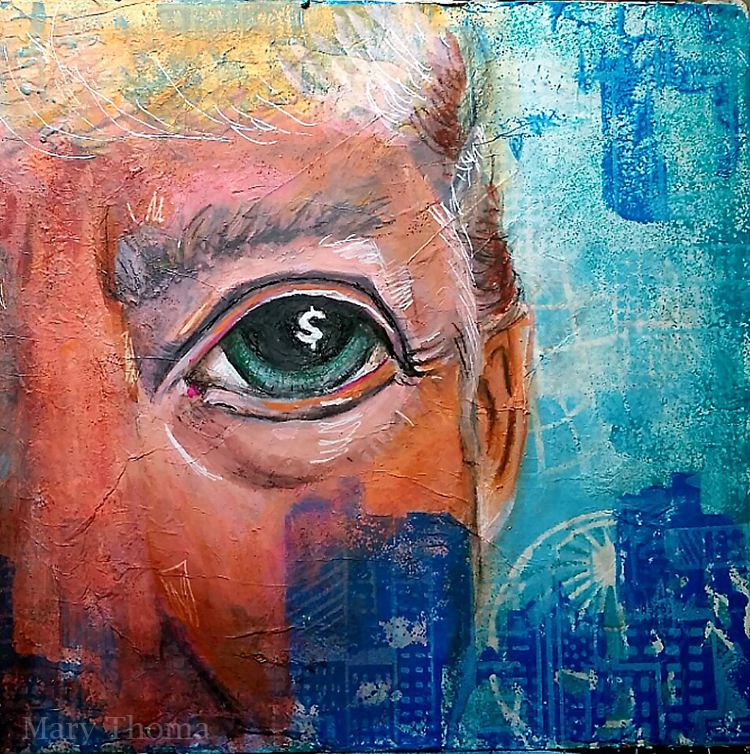
Next is an art journal spread from Mary Thoma in the US also. I love this portrait and the use of my Batik Pattern 4 foam stamp for the bold background and that little chain border is my Chain Link rubber stamp from the Embroidery set. What a beautiful page!
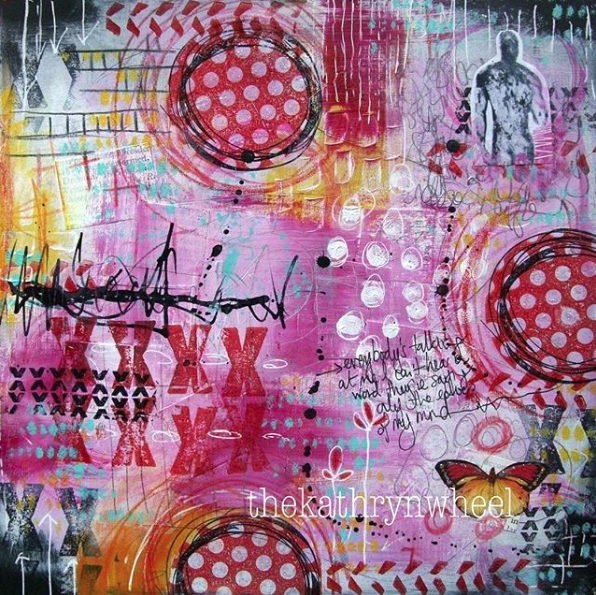
Loving all these patterns from Kate Crane in the UK! She’s using my Marks stamp set for those red and black xxx marks and hash marks.
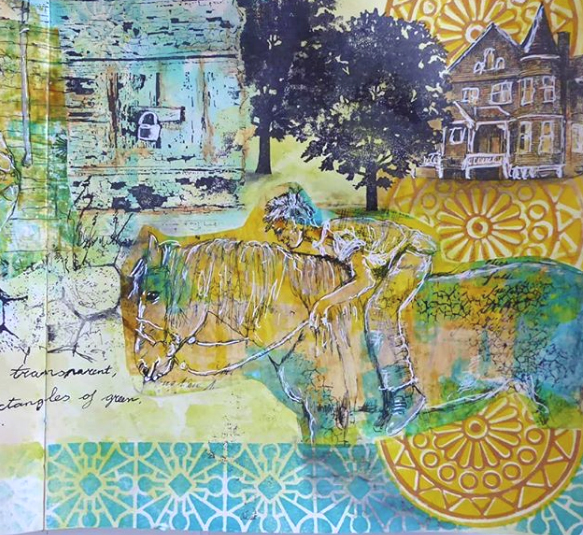
Here is a beautiful page from Ellen Captijn from the Netherlands, inspired by this year’s Creative JumpStart online workshop. Be sure to visit her Instagram page to see the full art journal spread. I love how she’s incorporated by Buenos Aires Border foam stamp along the bottom in blue and my Valley Road foam stamps along the right side.
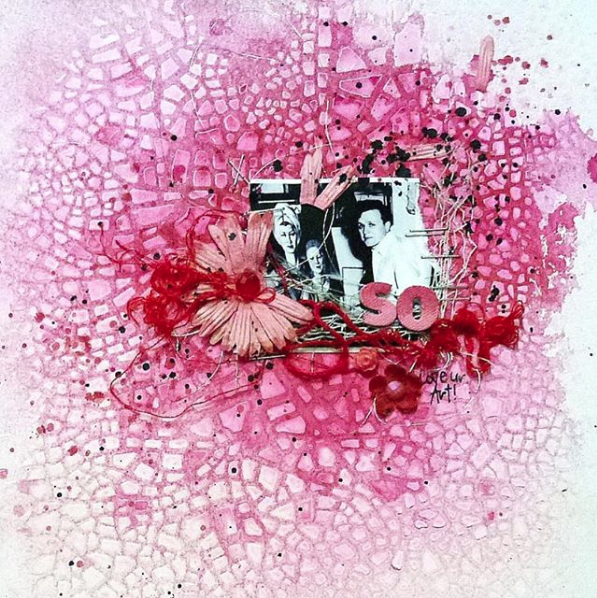
And finally we have an “oldie but a goodie” from Louise Nelson in Australia. She reposted this layout from 2013 so we thought we’d give it some love too :) That awesome texture in the background is none other than my Crackle stencil – one of my first stencil designs and always a fan favorite after all these years! Thank you Louise!
Thank you to all the talented artists! If you’d like to give some of these ideas a try, here are the stamps and stencils that they used:
Don’t forget to tag me when you post your projects! I’d love to include your work in my next Inspiration From Around the Globe post!
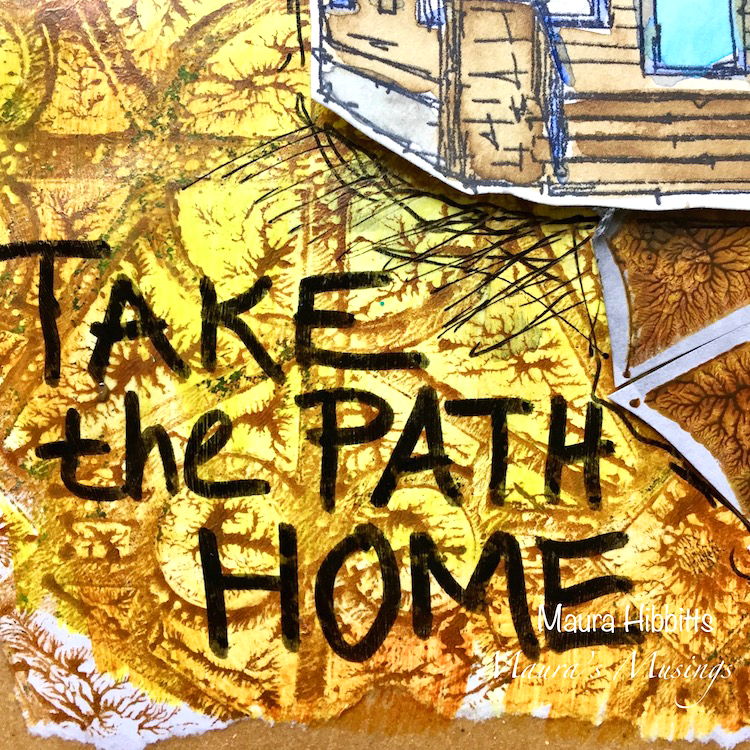
Happy Wednesday my friends! Today we have a post from Creative Squad member Maura Hibbitts to brighten your day. Maura is using my Stroll Around the Block, Snail mail, and Cross Circle stamps and my Buenos Aires stencil to create a lovely art journal page that definitely has me thinking “Home Sweet Home”! The theme this month is Inside Outside – Inside can be cozy and warm. Outside is about fresh air and freedom. Are you a homebody or do you suffer from cabin fever? We’re creating with these opposites in mind.
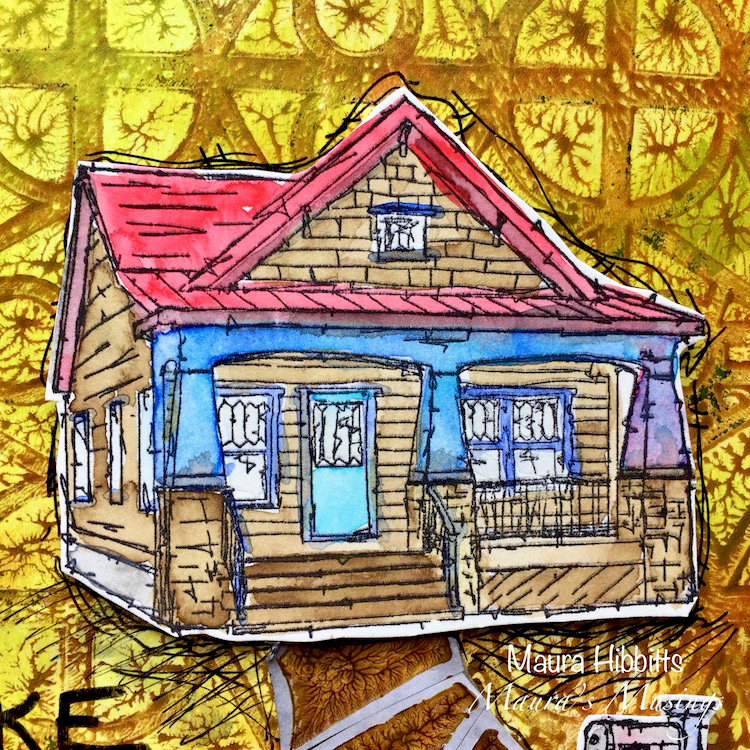
I have long been an admirer of the Arts and Crafts Movement, the pottery, wallpaper, furniture, and love the Craftsman style homes. The outside details of Nathalie’s Craftsman house stamp make for a delightful little cottage, one I would love to live in. I do have several pieces of furniture inside my home made in this style, that we enjoy every day, and I can foresee passing these on in the family, they are so sturdy and well made.
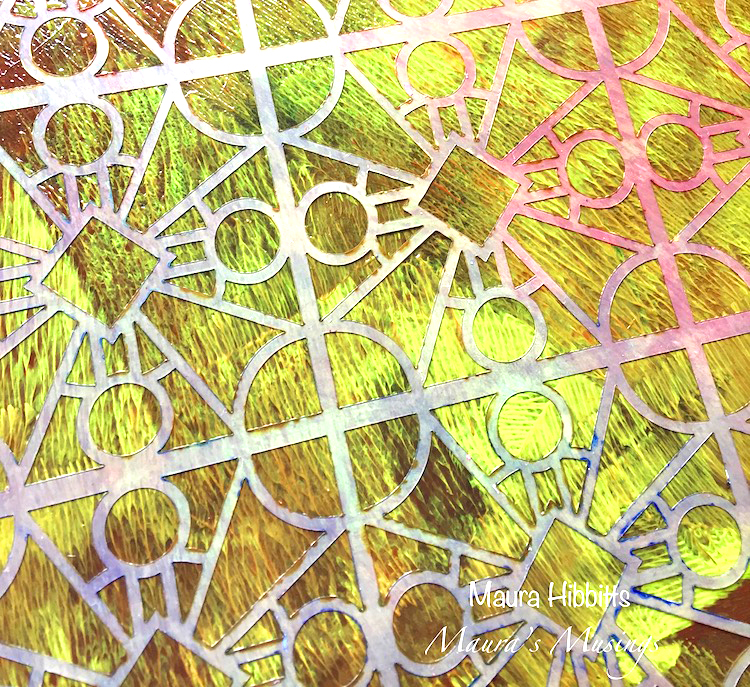
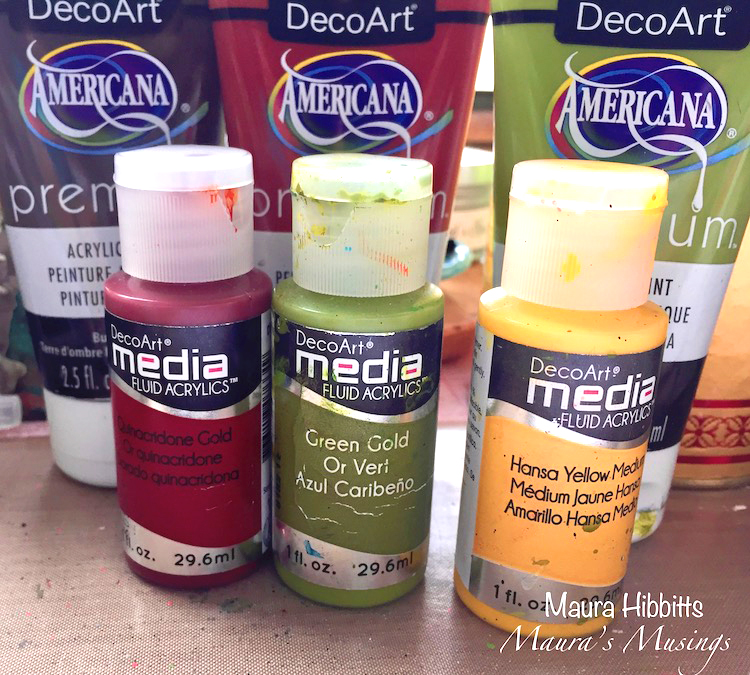
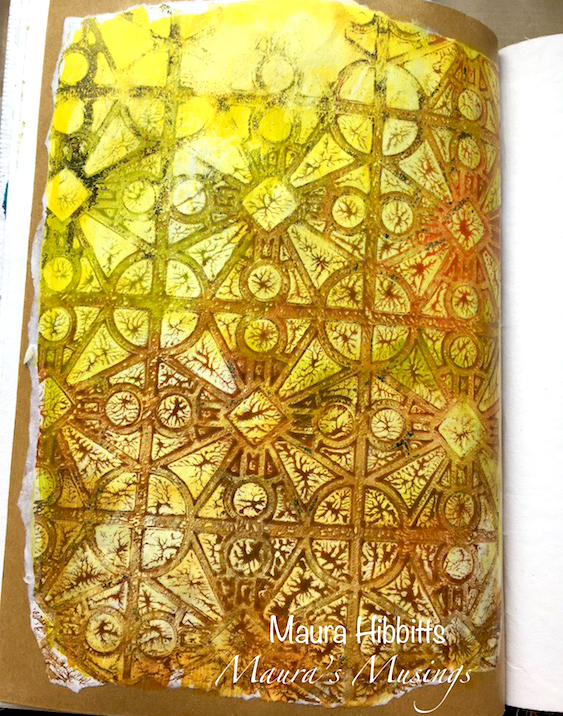
I started with my gel plate and squirted on a bit of burnt umber, green gold, and quinacridone gold with my heavy body paints, then used the brayer to blend them out a bit. Next, I laid the Buenos Aires stencil down onto the plate and pressed a sheet of copy paper over it, then lifted the stencil. Be sure to clean the stencil right away and not leave it too long on a sheet of paper. (I learned the hard way that they will stick together. If that happens, just soak the stencil in water.)
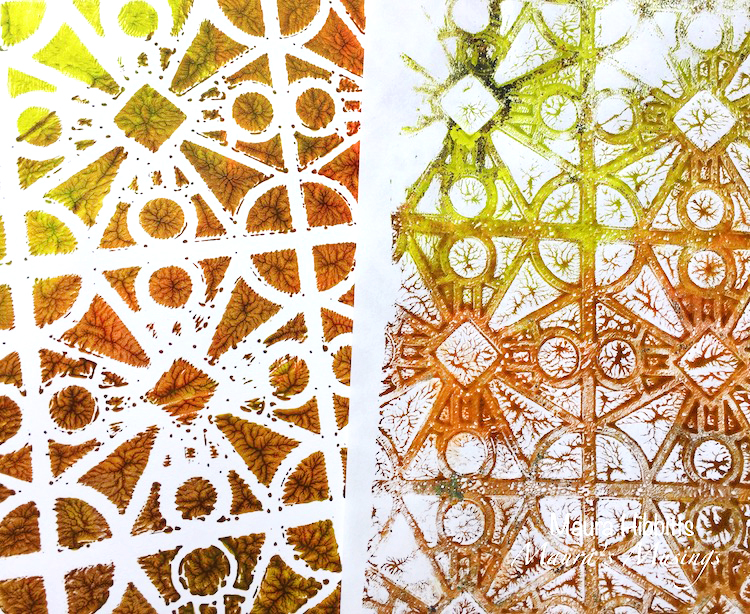
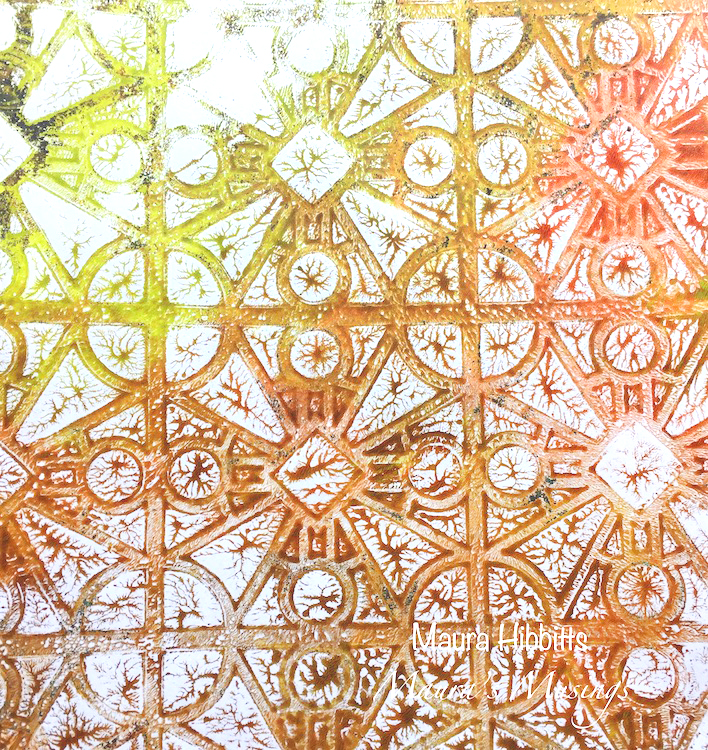
I pulled two prints from my gel press to use in my project. The print on the left made from laying the paper down on the stencil and paint, and the one on the right is the second pull directly from the plate.
I tore the edges of my print, and adhered it onto a kraft page in my Dina Wakley Media Journal with matte medium. Once dry, I brushed on several transparent colors, then wiped them away in some areas with a baby wipe. I used Hansa Yellow Medium, Quinacridone Gold and Green Gold for this layer.
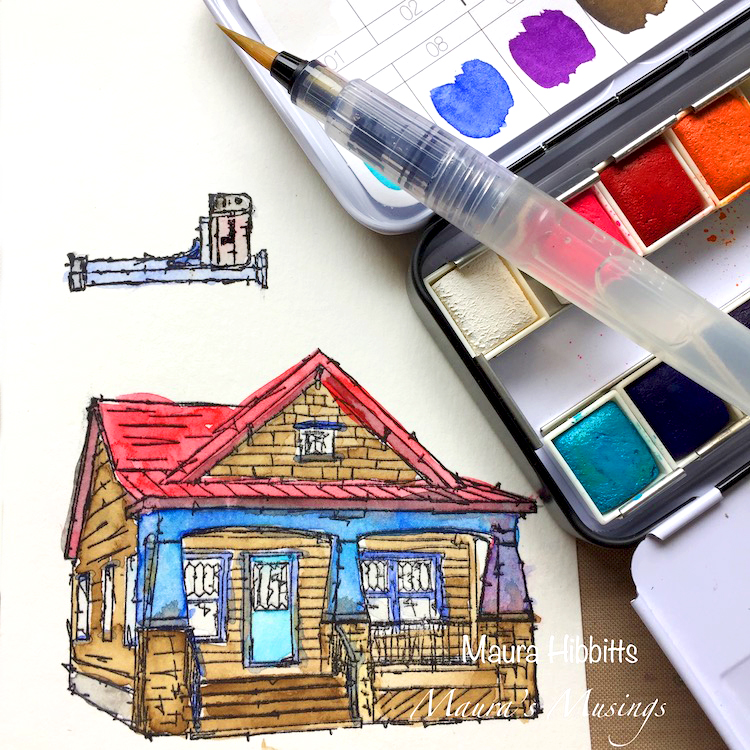
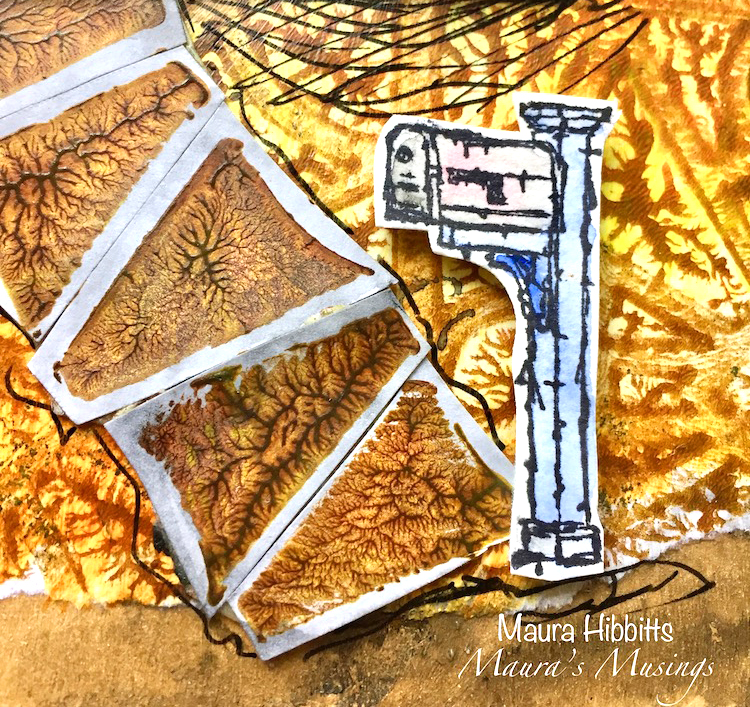
While that was drying, I stamped the house and mailbox on watercolor paper, and colored them with Prima watercolors and a water brush. Once they dried, I cut them out.
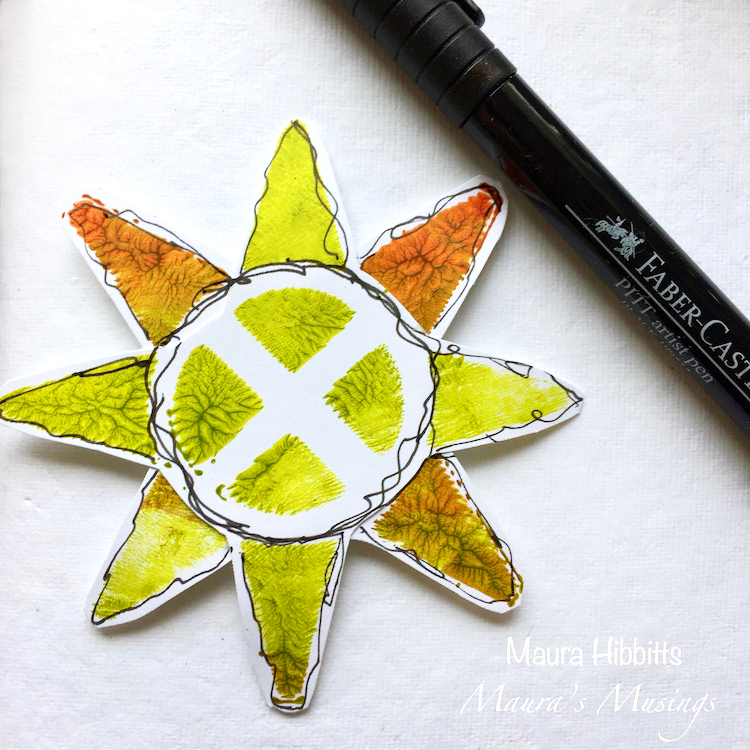
I used my other print to cut out part of the stencil to layer and create my sun, and the stone pathway to the house. I added a bit of doodled lines, and watercolor to the stones.
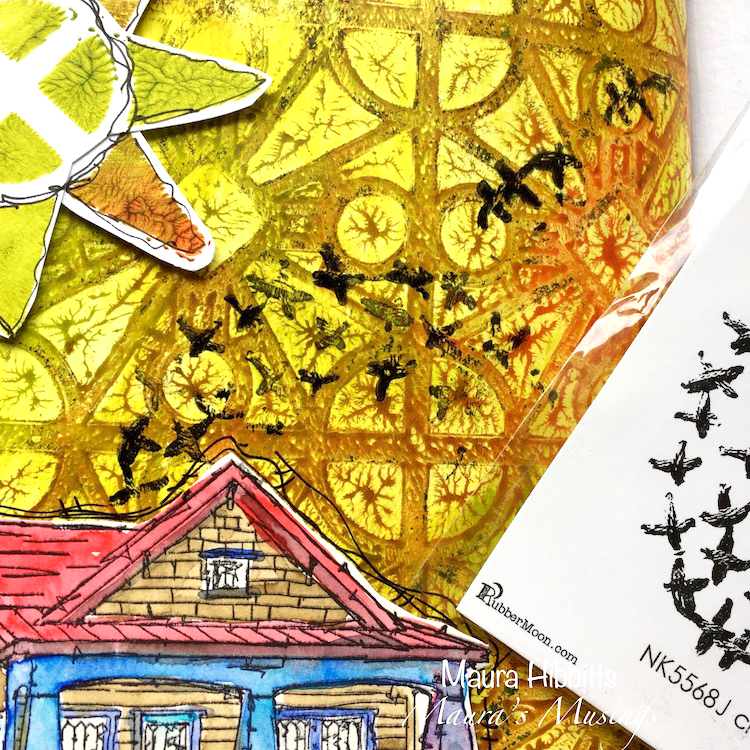
When I first looked at the Cross Circle stamp, I saw flying birds, so I used part of the stamp to add some birds to the page.
The house, sun and mailbox are attached with foam tape. I also scribbled a bit around the house, mailbox, and stone path, and wrote Take the Path Home onto my page as this seemed appropriate. After all, I know my home always calls me back, especially if I’ve been away for a while.
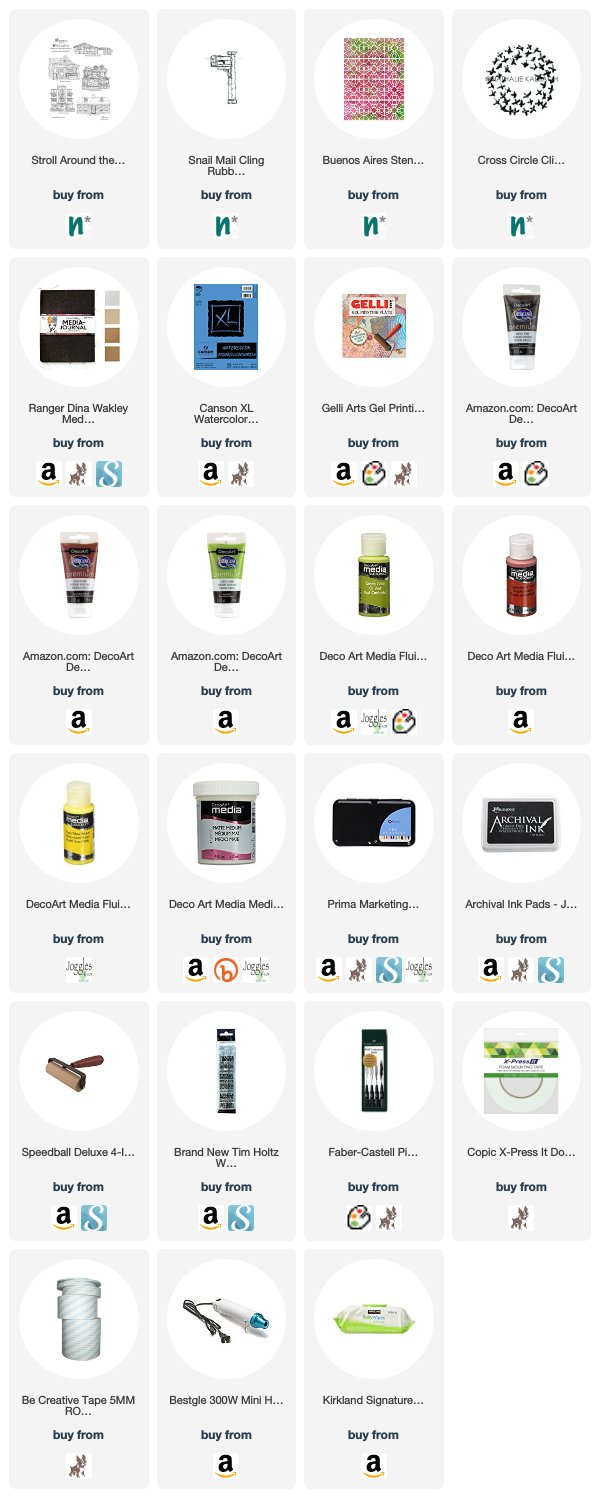
Thank you Maura! I love the little scene you’ve created and so cool that you interpreted my Cross Circle stamp as a flock of birds – I love that idea! Here are some of the supplies that Maura used in her art journal:
Do you feel inspired to create now? Are you working on something yourself that you’d like to share? I love to see how you interpret our monthly themes. Email me how you used my stencils and stamps with the theme and send me an image – I would love to share your projects in my next “n*Spiration From Around the Globe“.
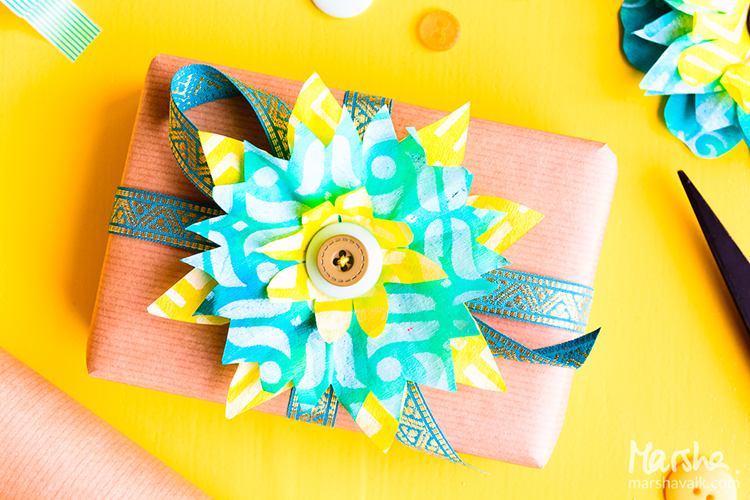
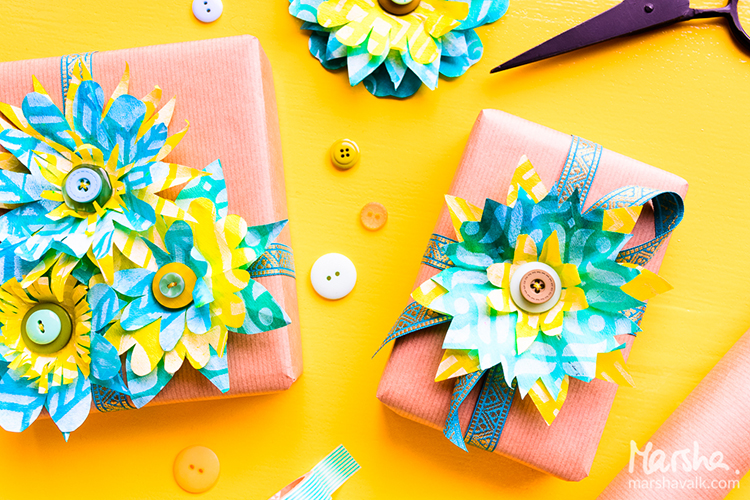
Hello again from the Creative Squad! Today we have a gorgeous gift wrapping project from Marsha Valk that is sure to send you running to your kitchen for some coffee filters :) Marsha used a whole slew of my stencils on this one (so be sure to check the materials list at the bottom) to rock the theme: Reduce, Reuse, Recycle – Let’s do Mother Earth a favor this month and use what we already have. Maybe we’ll dip into our stash of leftovers from other creative projects or maybe we’ll repurpose something unexpected. This month we’re thinking about how artmaking can impact the environment and we’re trying to make our footprint just a little bit smaller.
Reduce, Reuse, Recycle – that’s a topic that has been on my mind a lot lately. I have a lot of different craft supplies. I like to donate any excess supplies I have, but I still have plenty left that I’m reluctant to get rid of because I don’t want to waste it and it may come in handy someday…
The upside to this is that I’m never short on stuff when it comes to gift wrapping!
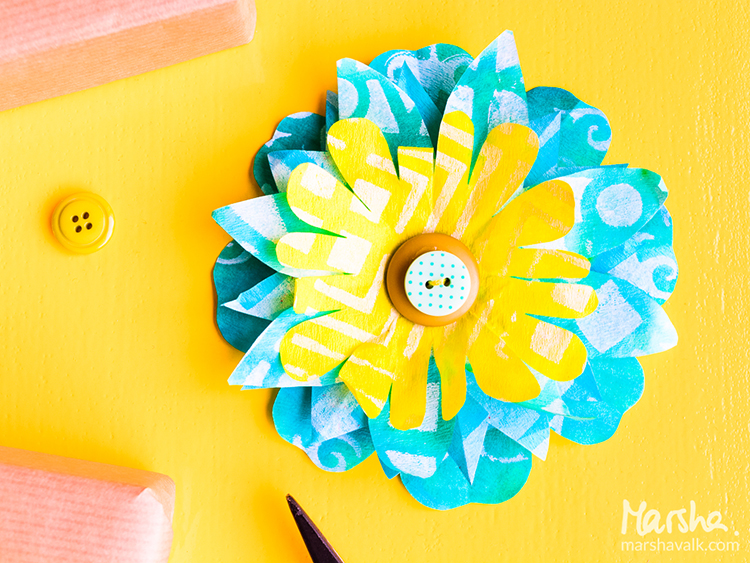
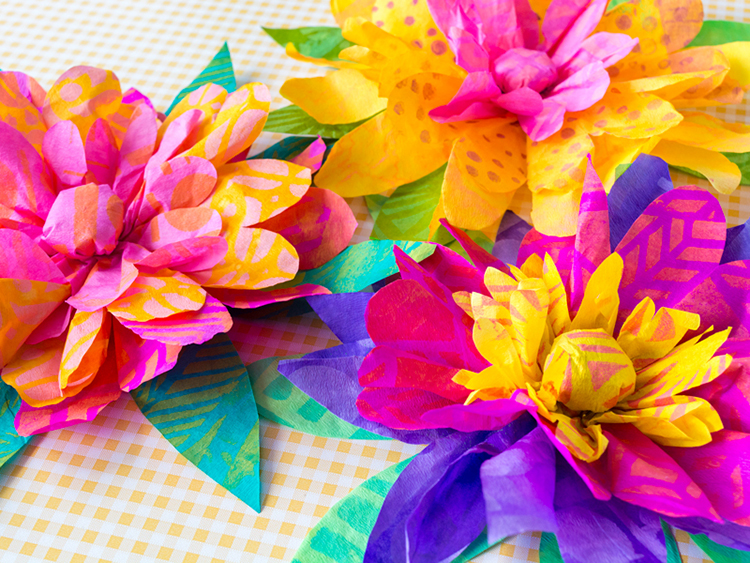
Paper flowers make fun and easy gift toppers, so I for this month’s prompt I decided to make coffee filter flowers.
I’ve shared how to create similar flowers on the Gelli Arts® blog before:
Using brand new (bleached) coffee filters for a craft project probably isn’t the greenest choice you can make. If you are looking for an environmentally friendlier option, you can recycle used coffee filters.
Unfortunately I don’t have access to a coffee maker that uses filters like these, so I haven’t tested it for you, but I believe you can rinse and dry them. They will be stained, but that will actually add interest to the paper (and the flowers).
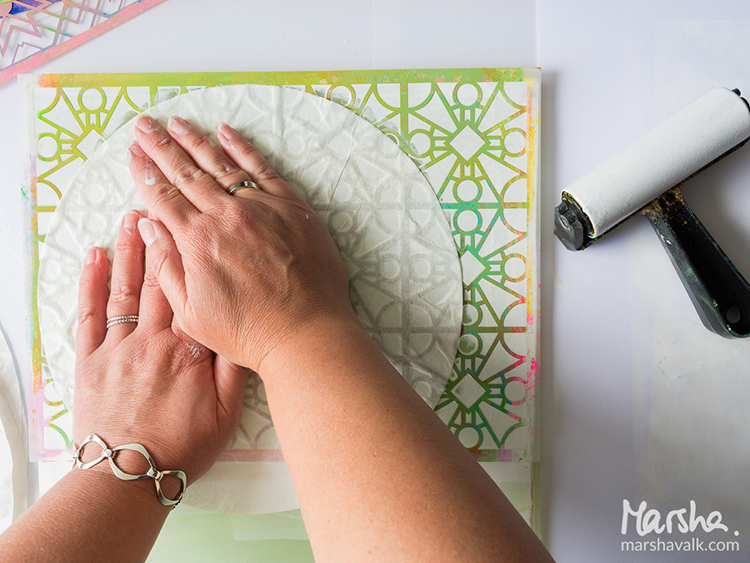
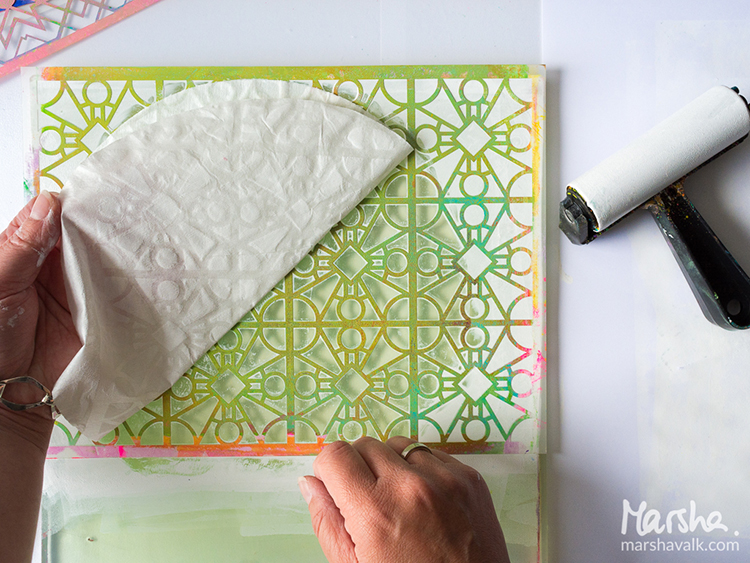
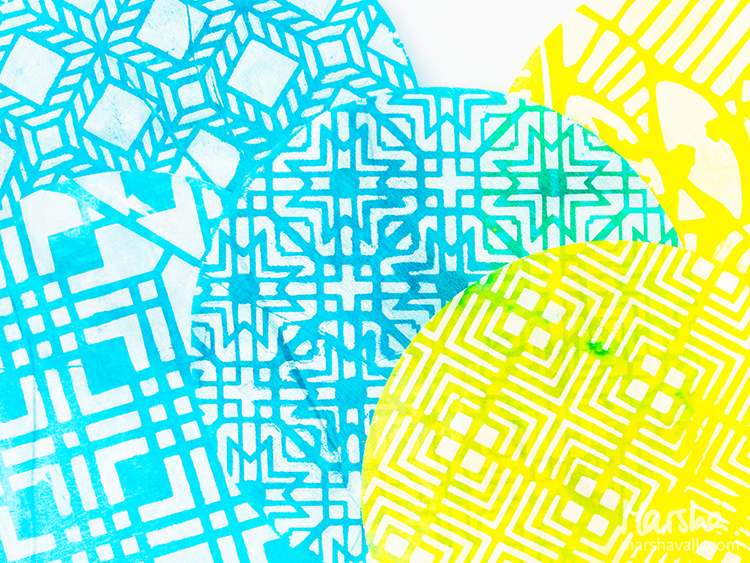
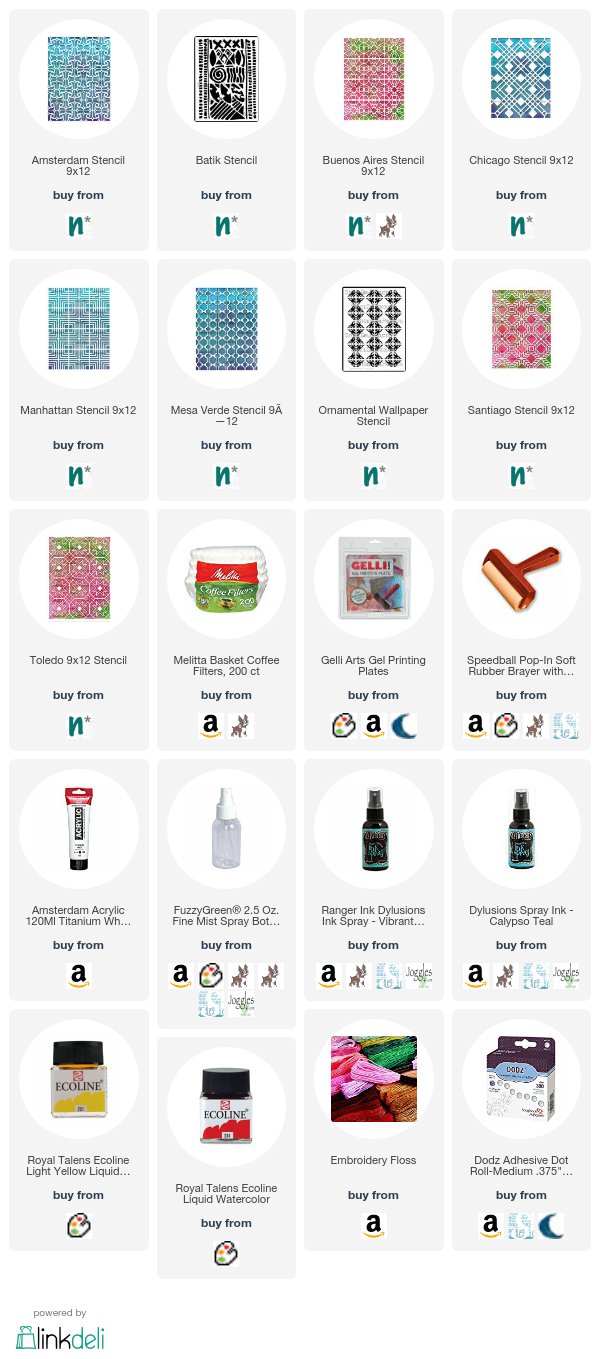
Step 1: Monoprint a couple of coffee filters with your Gelli Arts® printing plate using stencils and (white) acrylic paint. Here I’m using Nat’s Buenos Aires stencil.
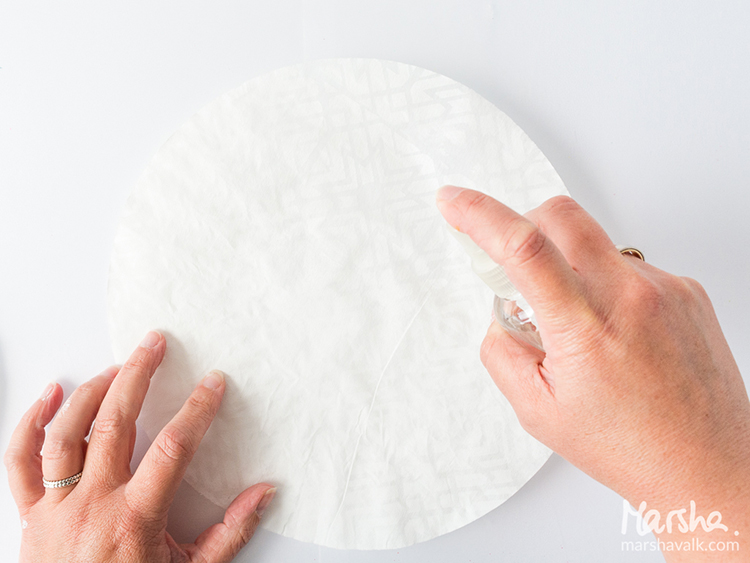
Step 2: Stain the monoprinted coffee filters with spray inks.
Wet the coffee filter with a spray bottle of water before you spray on the spray ink. The water will help the spray ink spread across the coffee filter, this one has Nat’s Toledo stencil pattern on it.
You can stack the coffee filters you want to have the same colour while spraying. Each new filter will absorb the excess ink from the already sprayed ones!
Leave the coffee filters to dry completely.
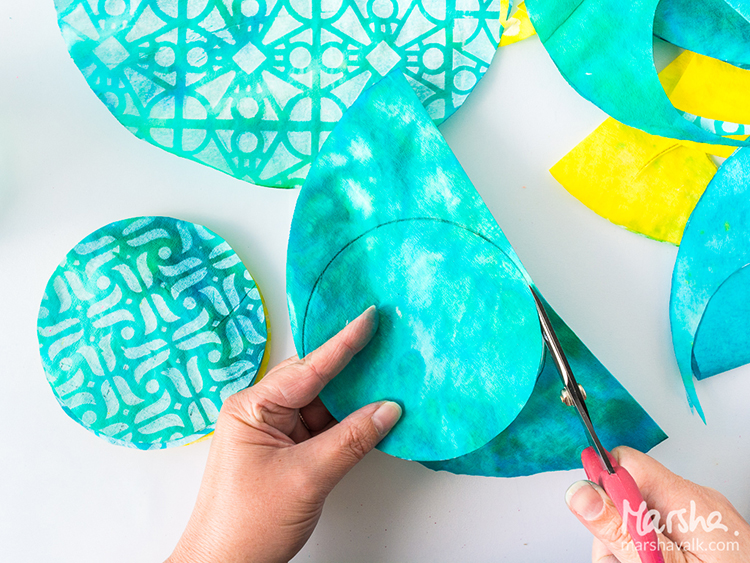
Step 3: Cut two smaller circles out of each coffee filter. I folded each coffee filter in half and used a jar to trace a circle shape onto them to get a uniform size.
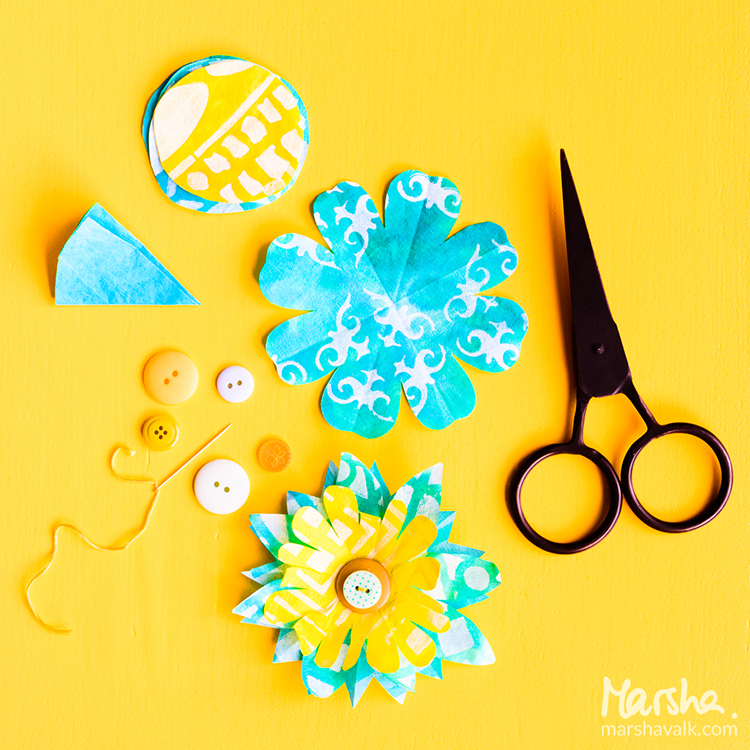
Step 4: Fold the circles into eighths (or more) and cut leaf shapes. Make sure to cut some larger and some smaller.
Step 5: Unfold the coffee filter flowers and stack two or three on top of each other. Secure them by sewing one or two buttons in the middle of each stacked flower.
Fluff the petals until you are happy with the result.
Step 6: Use a glue dot or double-sided tape to adhere the flowers to your gifts!
I love this Marsha – such a great way to dress up a gift! In addition to buttons and ribbon, Marsha used the following supplies (some are affiliate links):
Play along with us too: I love to see how you interpret our monthly themes. Email me how you used my stencils and stamps with the theme and email me an image – I would love to share your projects in my next “n*Spiration From Around the Globe“.
Hello from the Creative Squad! Today we have a spooky card from Cheiron Brandon to get you thinking about Halloween :) She uses my Buenos Aires stencil to help her pull together this month’s theme: Reduce, Reuse, Recycle – Let’s do Mother Earth a favor this month and use what we already have. Maybe we’ll dip into our stash of leftovers from other creative projects or maybe we’ll repurpose something unexpected. This month we’re thinking about how artmaking can impact the environment and we’re trying to make our footprint just a little bit smaller.
Hi there, it’s Cheiron here with my September post. This month we are using the theme Reduce, Reuse, Recycle and I thought it would be fun to challenge myself just to use all the leftover paper bits that were on my desk. The easiest way for me to do this was to make a card.
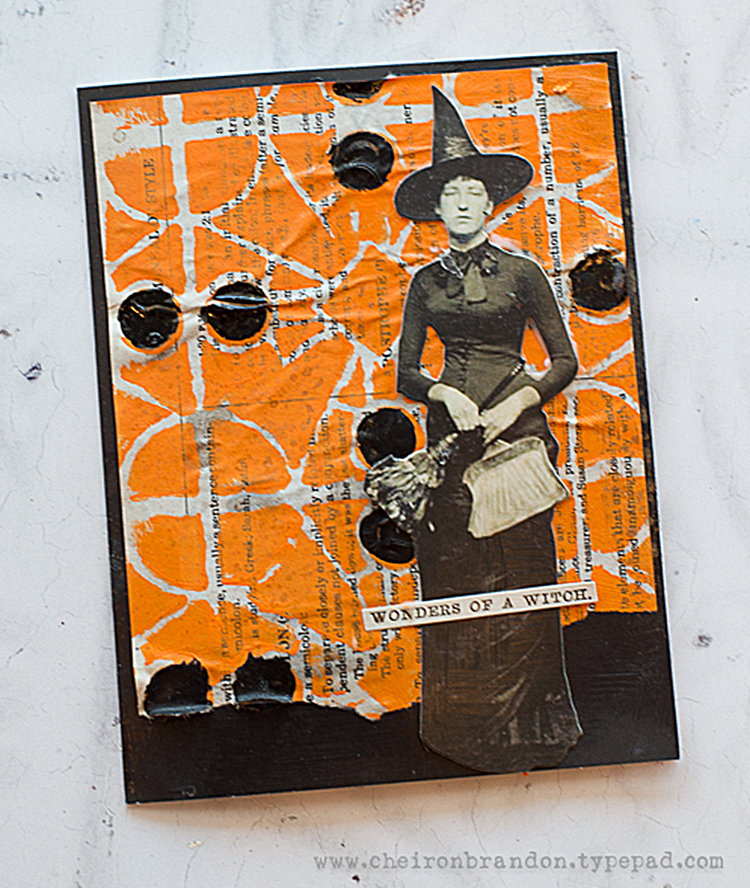
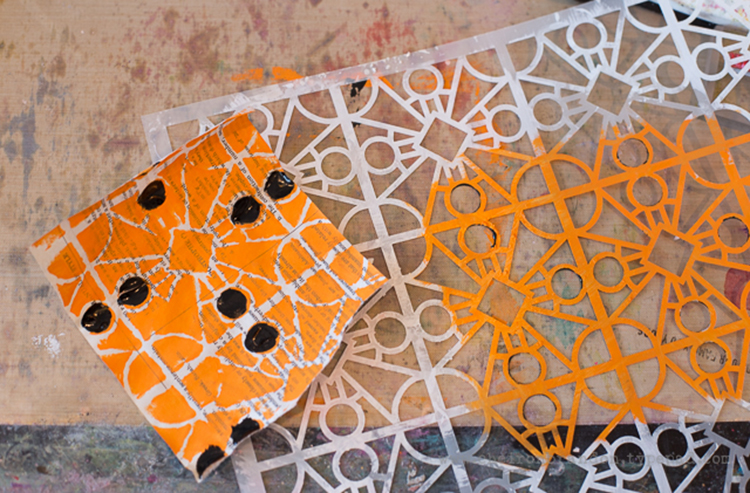
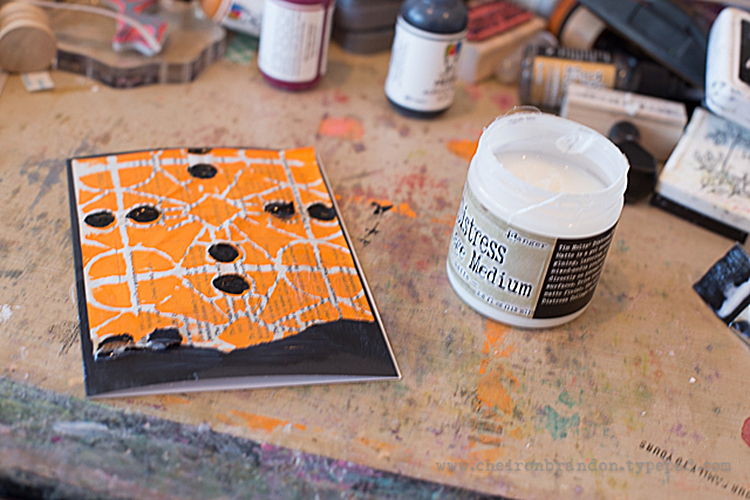
I took a scrap of book paper and applied some Tangerine paint through the Buenos Aries stencil. I used some black slick paint to fill in the dots. I thought this color combo would be perfect for Halloween, as I have a ton of Halloween bits and pieces on my table right now.
Once the paper was dry, I collaged it to a blank note card. I love using painted and stenciled papers as backgrounds on my cards. I had some parts of paper dolls that I had cut out, so I used this fun witch and added a simple sentiment. I love the handmade, whimsical look of cards like this and its so easy to incorporate all those scraps that we tend to save!
Hope you enjoyed this fun and simple way to recycle your scraps into new creations :)
Thank you Cheiron for showing us a great way to incorporate some leftovers into seasonal cards! In addition to some leftover papers, Cheiron used the following supplies (some are affiliate links):
Play along with us too: I love to see how you interpret our monthly themes. Email me how you used my stencils and stamps with the theme and email me an image – I would love to share your projects in my next “n*Spiration From Around the Globe“.
Hello from the Creative Squad! Today we have a cool art journal spread from Michelle Rydell that uses my Buenos Aires stencil and this month’s theme: Free for All!It’s time for summer vacation and relaxing so around here the Creative Squad is taking a break from themes this month. They’re just going with the flow and making a project of their choosing. It’s a Free for All!
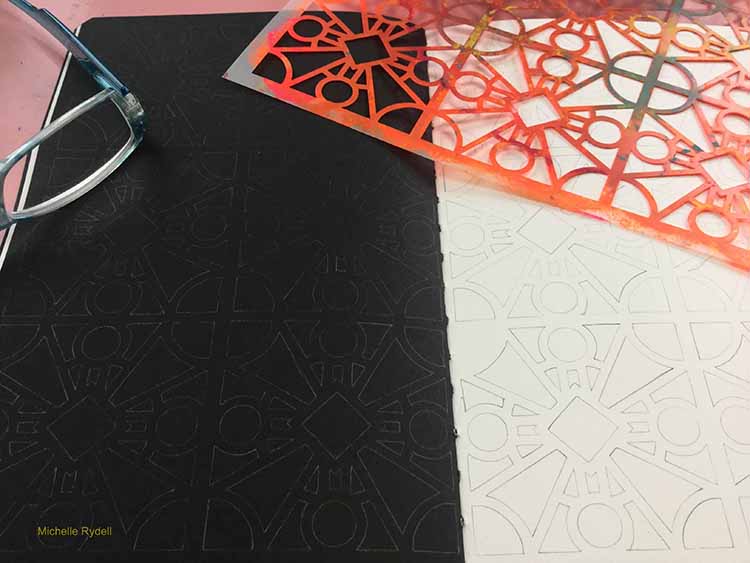
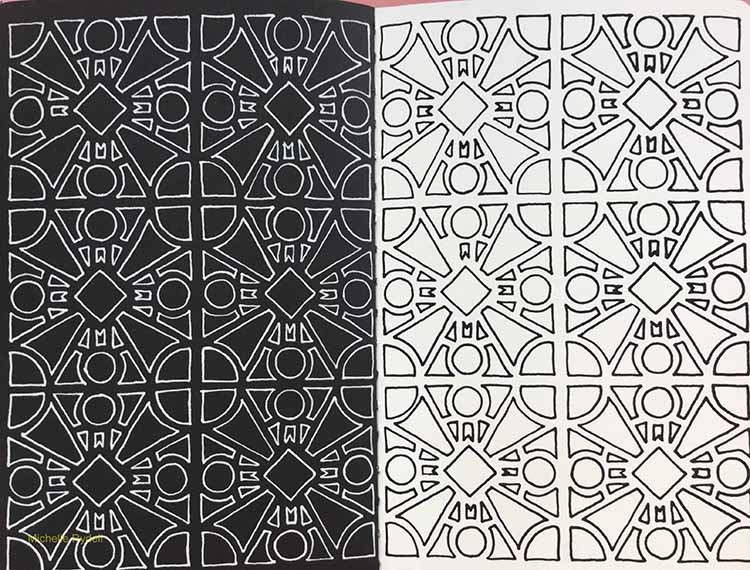
One of my favorite stencils of Nat’s is the Buenos Aires. I love how the shapes connect in so many different ways – creating different patterns, depending on how you look at it. I’m taking a class that focuses on black and white journaling, so I thought it might be fun to play with the positive and negative shapes…
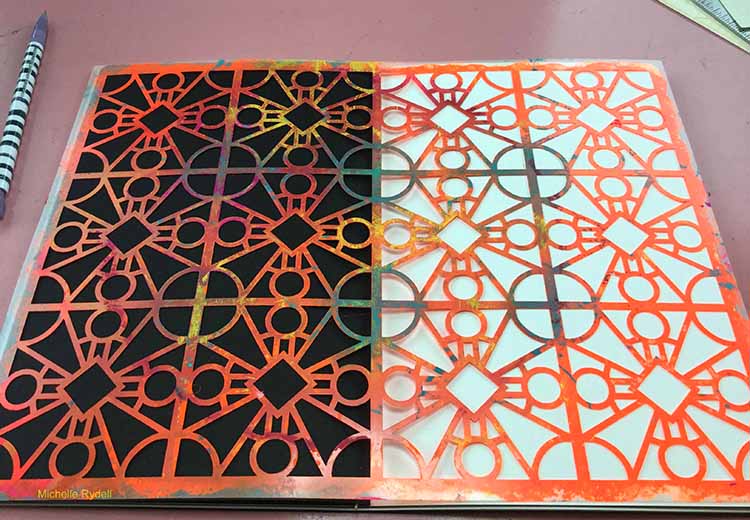
I started by placing the Stencil down on a spread in my journal that has black paper on one side and white on the other; and tracing all the shapes with a pencil.
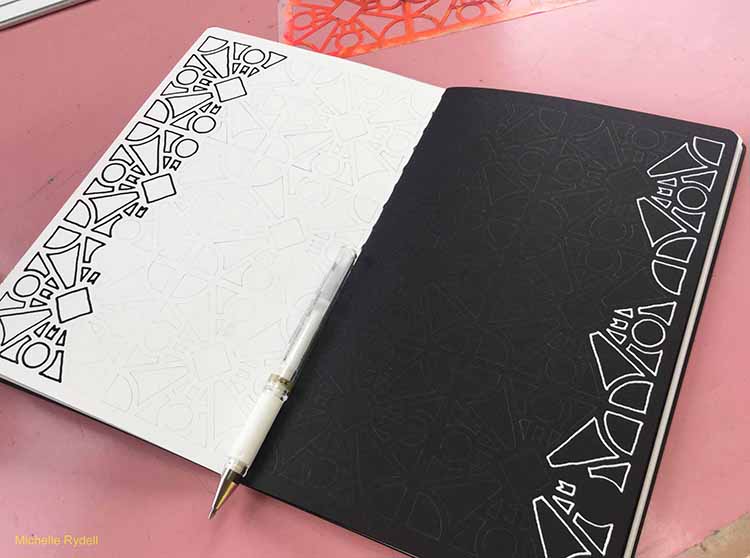
Then, I started drawing over the pencil lines with black and white gel pens. Because the gel pens take a minute to dry, I started on the outside shapes and worked inwards, so as to not get my hand in the wet ink.
Here’s how it looked when phase one was done. Do you see where I missed a few shapes?
It was easy to put the stencil back over the drawing and trace in the shapes I missed. Here’s the completed initial phase…
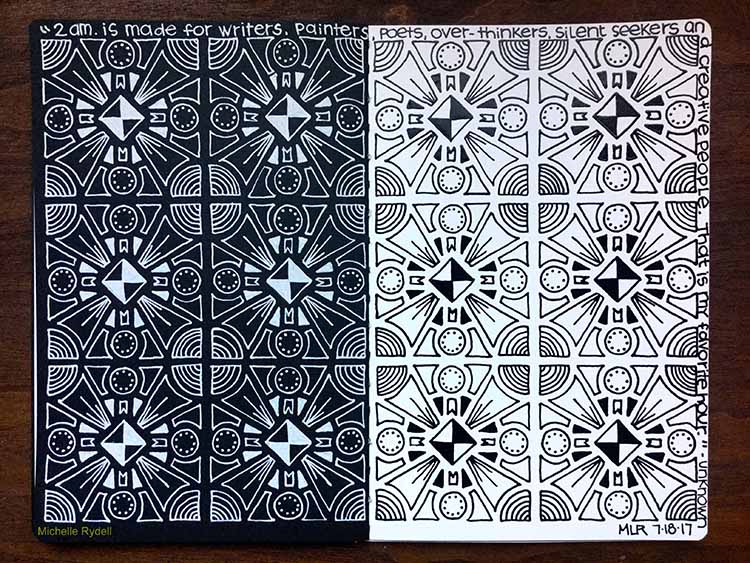
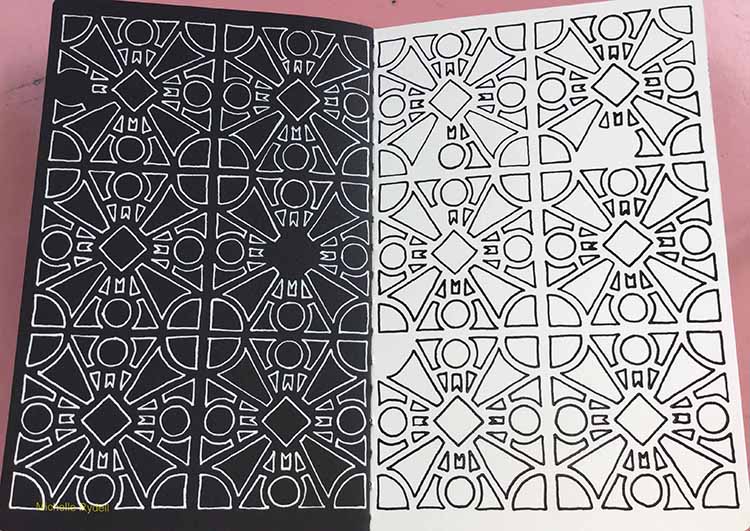
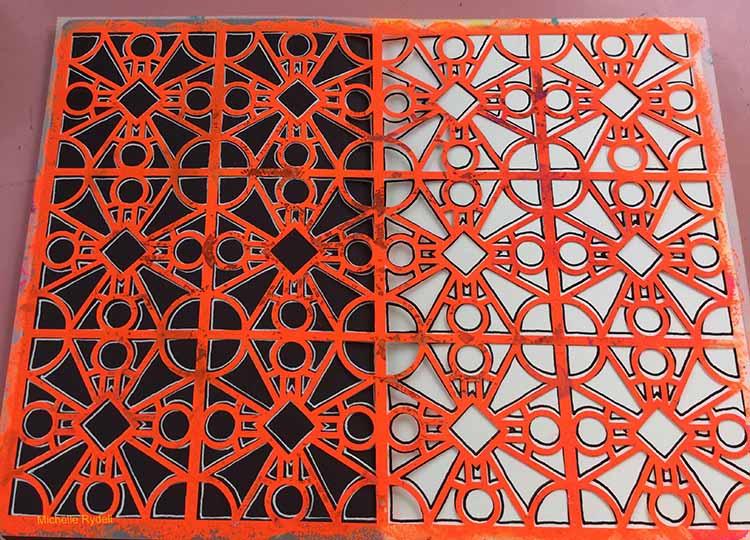
From here, I just started doodling. Whatever I did on the white side of the page, I repeated on the black side. This was so much fun and very meditative. When I felt like the doodling was complete, I added a quote around the border and called it done. Here’s the finished page…
Since it doesn’t require many supplies, or deep thought, this is a great technique to do on the couch, watching your favorite tv program! I hope you’ve enjoyed this tutorial, and will consider giving the technique a try sometime!
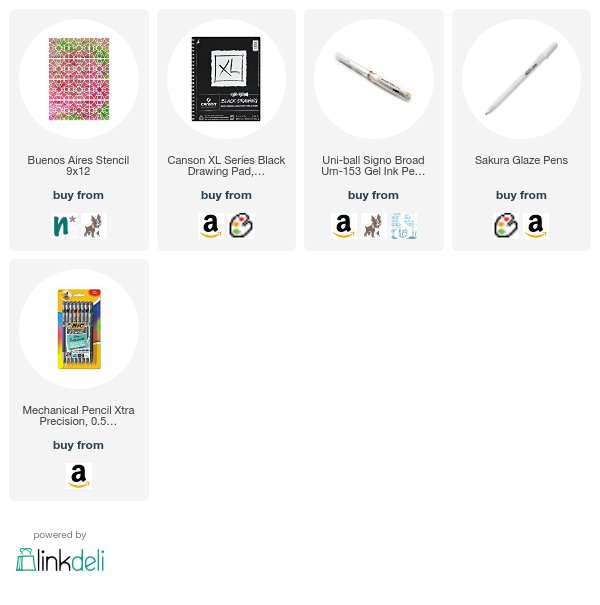
Thanks Michelle! I love how the simple color palette shows off the gorgeous pattern. In addition to white drawing paper, Michelle used the following supplies (some are affiliate links):
Play along with us too: I love to see how you interpret our monthly themes. Email me how you used my stencils and stamps with the theme and email me an image – I would love to share your projects in my “n*Spiration From Around the Globe“.
Hello from the Creative Squad! Today we have a cool mixed media piece from Marsha Valk that smartly uses up some of those extra stenciled and stamped papers we all have in our stash. She combined my Buenos Aires Tile and Santa Fe ArtFoamies with a bunch of my rubber stamps and this month’s theme: Free for All!It’s time for summer vacation and relaxing so around here the Creative Squad is taking a break from themes this month. They’re just going with the flow and making a project of their choosing. It’s a Free for All!
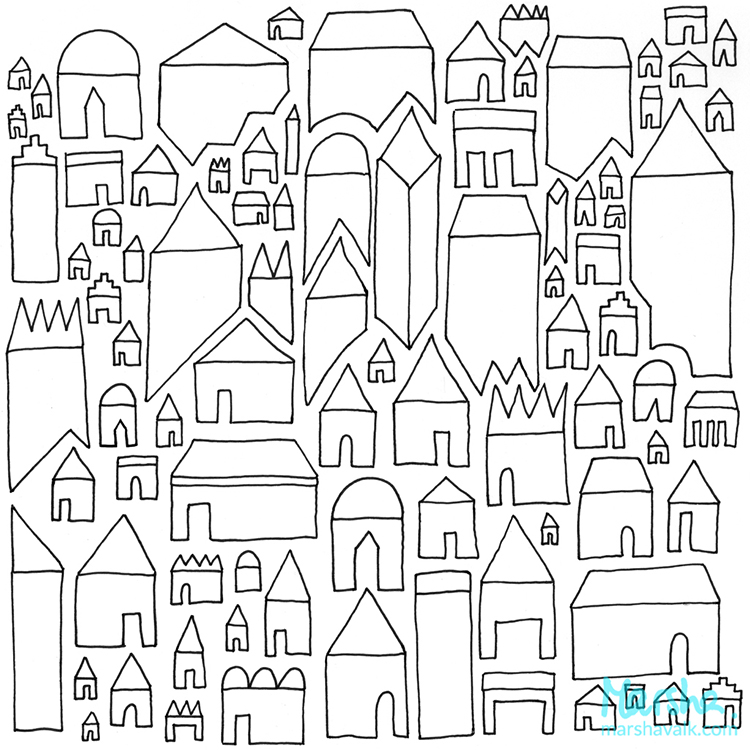
I have piles and piles of prints sitting under the desk in my workspace, waiting for a fun project to use them on. So for this month’s theme, I dug out a couple of prints I made previously using Nathalie’s Buenos Aires and Santa Fe ArtFoamies! I wasn’t sure what I was going to do with them, but whilst sorting through the pile of prints, I came across an illustration I did a couple of years ago. I decided to use it for my project.
I scanned the illustration, loaded the image into the Silhouette Studio software on my laptop and traced the image and made it into a cut file.
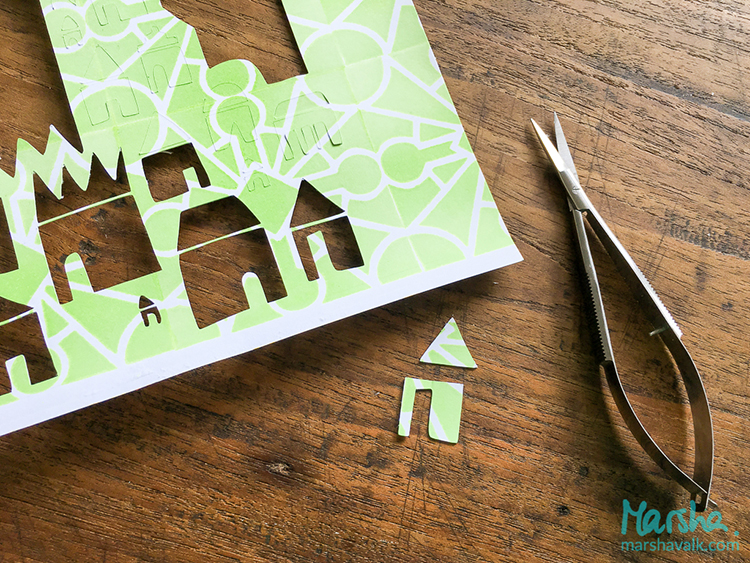
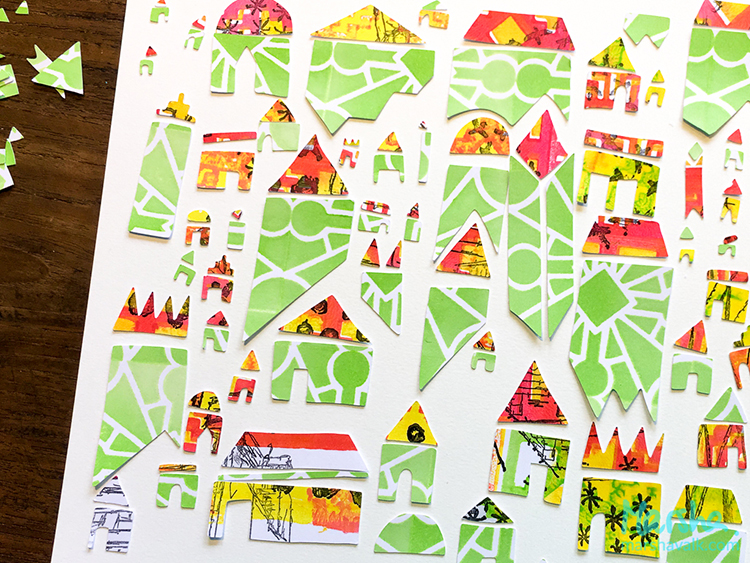
Then I mounted one of the stamped sheets of paper onto a Silhouette cutting mat, fed it into the machine and let the machine cut out all the little houses. I let the Silhouette cut the same houses from three different sheets of stamped paper. I added more stamped images from the Stroll Through the Hood 1 & 2 sets, the Embroidery set, and the Cardboard set with black ink to two of the sheets before cutting.
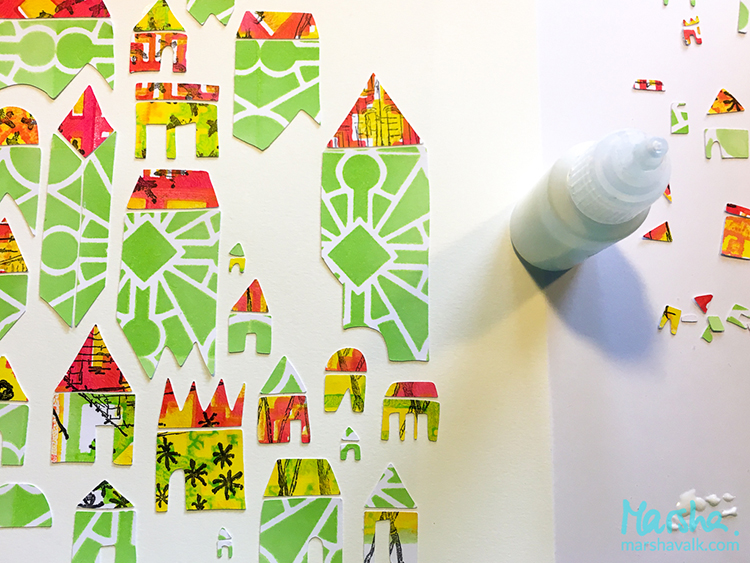
With all houses cut three times, I started arranging the little village onto a blank piece of paper, mixing parts from all of the different background papers.
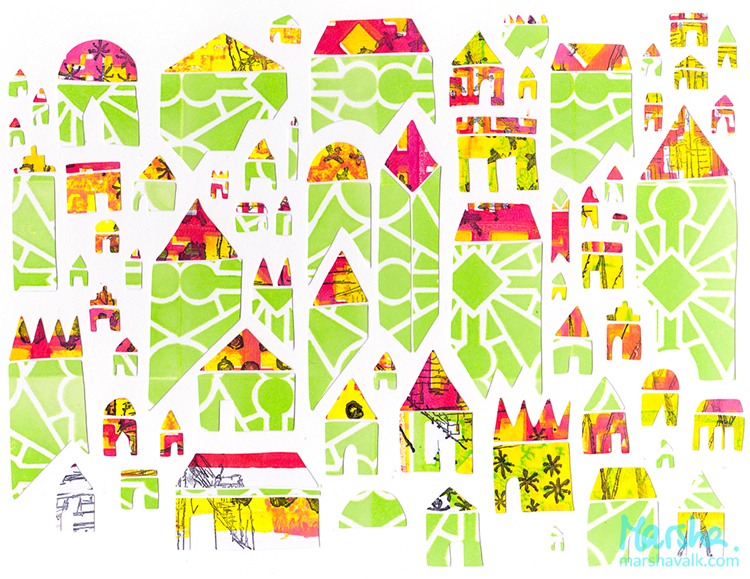
Once I was happy with the arrangement I glued everything down.
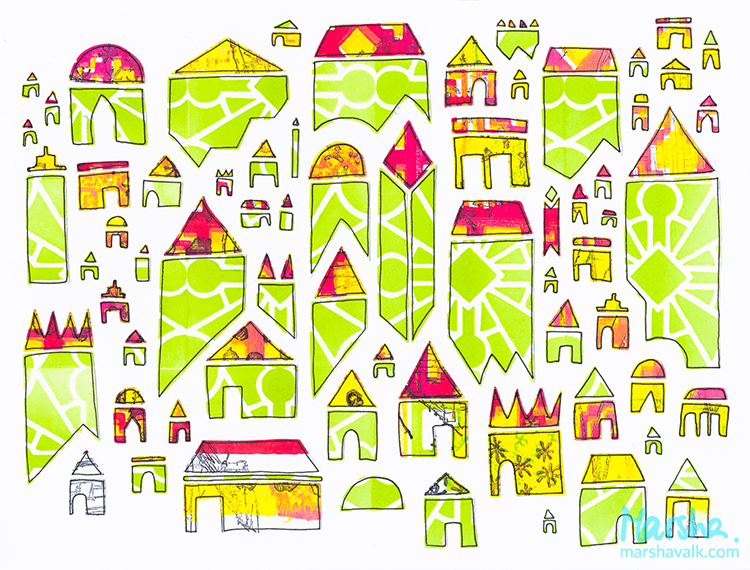
I wanted to add black outlines to the cut-outs, but because some of them are super tiny, I was afraid my pen would slip. I didn’t want to mess up the original, so I scanned the collage and doodled on top of a print instead.
Thank you Marsha for such a unique project! In addition to a scanner, Marsha used the following supplies in her project (some are affiliate links):
Play along with us and share how you interpret our monthly themes. Email me how you used my stencils and stamps with the theme and email me an image – I would love to share your projects in my “n*Spiration From Around the Globe“.
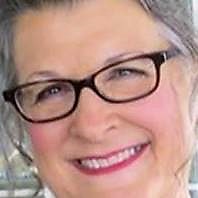
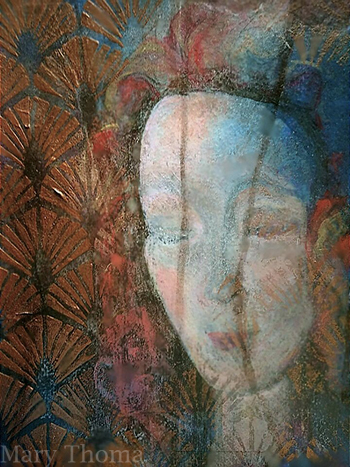
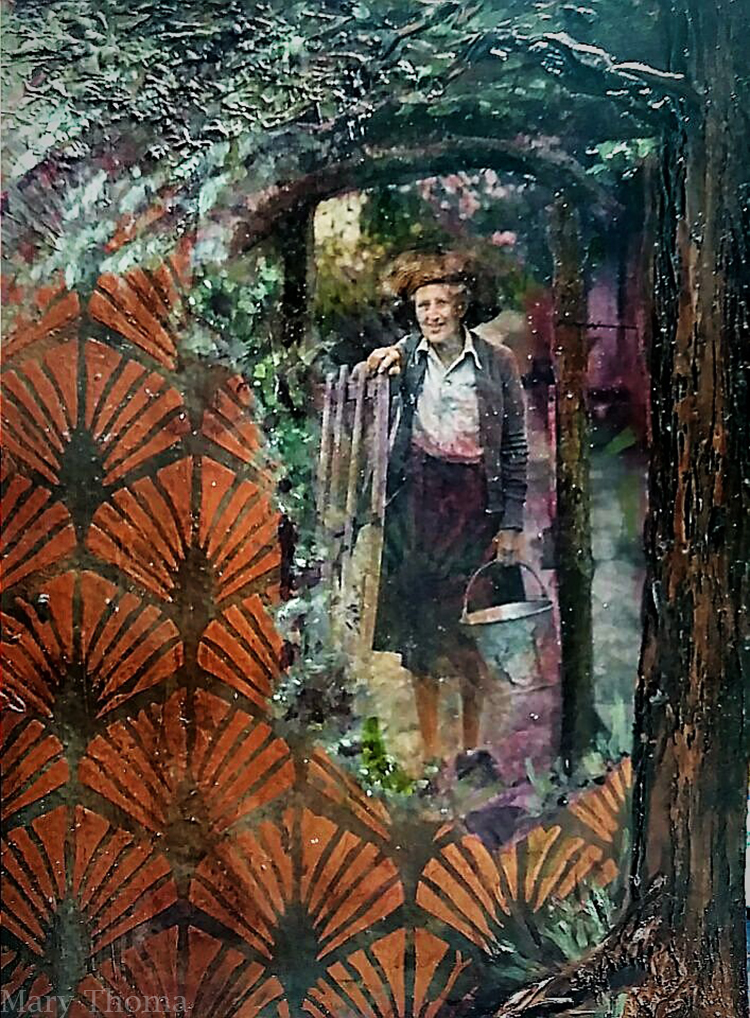
Hello and welcome to a blog feature I call Nice to Meet You! From time to time I learn about some amazing artists out there who are working with my stamps and stencils and are creating some pretty fun and exciting projects. It’s always inspiring to see what others do with my designs. Sometimes they even introduce me to a new way of seeing the pattern or a new technique to try on my own. Today I’d like to introduce to you Mary Thoma:
Please introduce yourself to our readers:
My name is Mary Thoma. I am a native Oklahoman, making art in my own home in the small rural and diverse community of Spencer, Oklahoma. I am a recreational activities director at an adult day center and I am called on daily to use my creative energy. I consider myself an artist serving other artists living with dementia or other cognitive disorders. Many times, the artists I serve just don’t know they are artists until they are engaged in creative opportunities.
How do you make time to be creative?
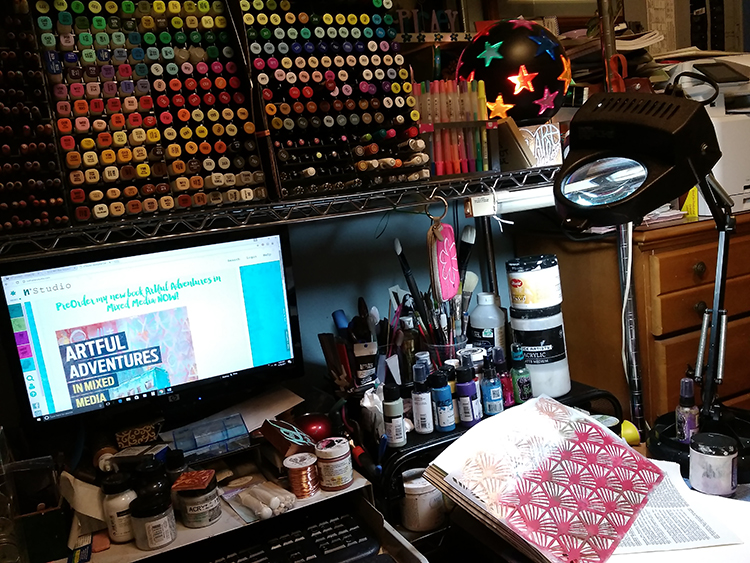
I am an early riser, before the phone, TV, food or even coffee some mornings. 4AM many days I can usually get 3 good hours of standalone art time even on work days. There are mornings I barely have time to get my hands washed up before it’s time to run out the door. I get lost in “artistic flow” and the time just rockets by. Recently a Facebook follower asked me to illustrate a children’s book she had written so I will be adding illustration to my creative time as well.
What are some of your favorite n*Studio stamps / stencils?
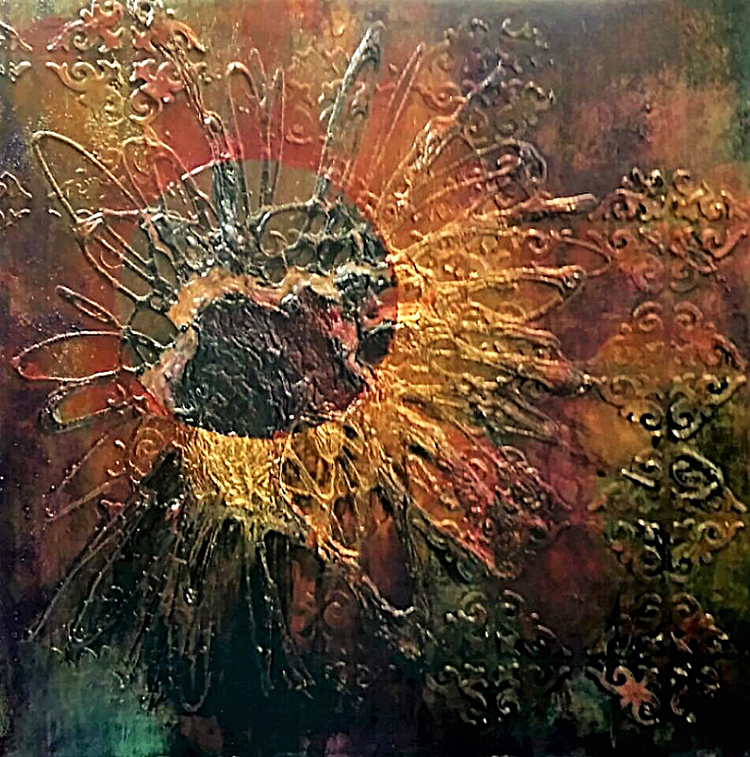
I usually stamp with acrylic paint, not ink so Nathalie’s foam stamp designs hold up well in that application. I love using the stencil designs with my abstract work and with texture paste for incorporation into collage work. The structure of n*Studio Designs are beautifully and perfectly repeated so I don’t have to reinvent or recreate these dynamic elements to add to my own work.
What is your favorite medium to work in?
Mixed Media, graphite, pastel pencils, markers, color pencils, acrylic paint, Marabu Art Sprays, Ink and spray inks, texture pastes, watercolors, and collage. My art combines representational work with abstraction and Nathalie’s designs add a structured accent to my compositions.
What inspires you to be creative?
I will say it’s hard to beat Creative Jump Start. I also start running through emails and social media, I listen to audio books about great artists, I watch You Tube documentary videos on art and artists, and also manufacturers’ and retailers’ demonstration videos. I am very blessed to have a job that calls on my creativity. I take art tools like stencils and stamps to work with me to help my Adult Day Center Participants create artwork.
Do you have a favorite artist?
Presently, I am studying the work of Francis Picabia. It’s likely I am just too fickle to name just one favorite artist. I find the mid-century modern artists awe inspiring and continue to be highly motivated to study them and their work.
How did you get into art-making?
I think it might be the same way I started breathing. I must make art, it is sustenance for my soul. My parents encouraged my talent. Around 1959, I watched an advertisement for a mail order art course and drew the subjects demonstrated from memory. My father said, “You didn’t do this, you traced it” I reacted viscerally to his accusation. He finally concluded I did the work. He and my mother provided me with art supplies. My mother was quick to take me to art exhibits. I saw Jackson Pollock’s work in person on a national tour in the 1960’s. Western art by Catlin, Remington and Russel were introduced via the National Cowboy Hall of Fame and Western Heritage Center right here in my home town. I was a smart kid, but, not a very good student. My public-school arts education kept me engaged academically sufficient to get me to graduation and into college with a major in fine arts. Otherwise you would be interviewing a high school dropout. I do not suffer “artist’s block” everything blank looks like a canvas to me. I am looking forward to working full time as an artist and teaching artist. I have my very understanding family to thank for my artistic encouragement, now that my parents are gone, I have my husband, siblings, children and friends to cheer me along on my artistic journey.
In three words, how does art-making make you feel?
Art-making, makes me feel like an “artistic living fountain” flowing deep and wide.
Thank you Mary for sharing your art and story with us! Stay tuned for more Nice to Meet You! posts to learn about other artists!
Hello from the Creative Squad! Today Marsha Valk is officially ushering in spring with a collection of gorgeous collages using a whole bunch of my stencils and the monthly theme Live Like it’s Spring – Springtime is when Mother Nature kicks it into high gear. It’s the time to wake up and approach life with renewed energy. Let’s join Mother Nature in this reawakening and create some things in the Spirit of Spring!
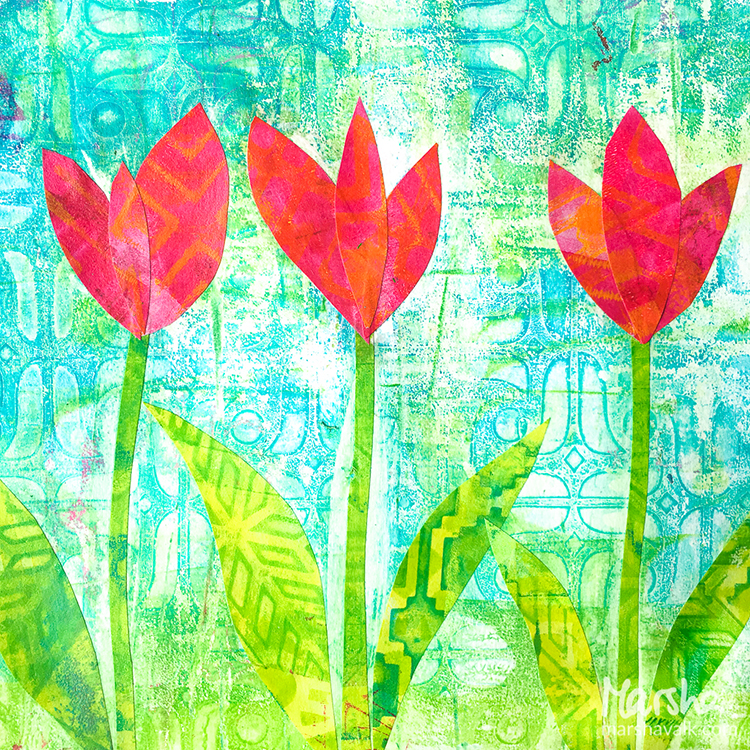
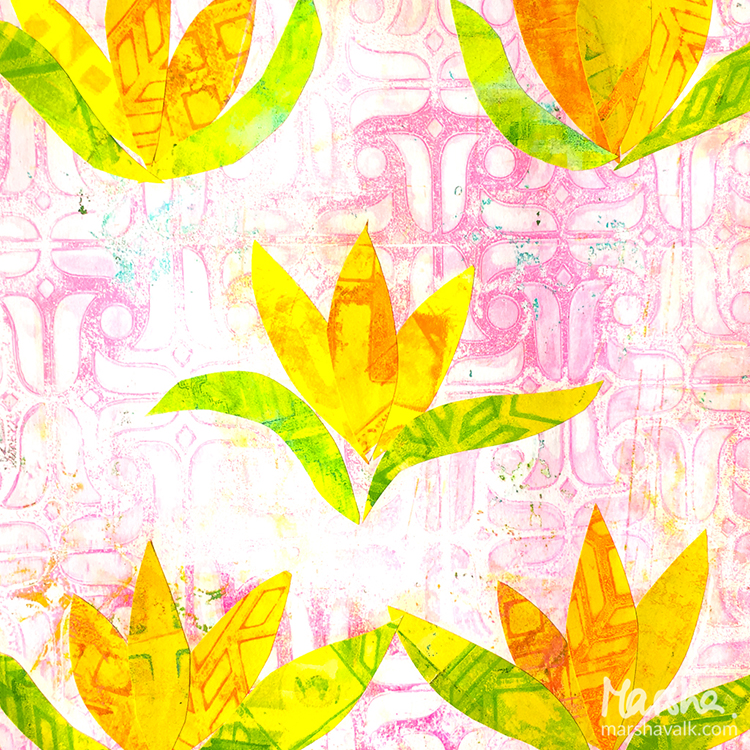
When it’s Spring again I’ll bring again… Tulips from Amsterdam! They’re actually from my craft room about 50 km east of Amsterdam… but that’s near enough I think ;-).
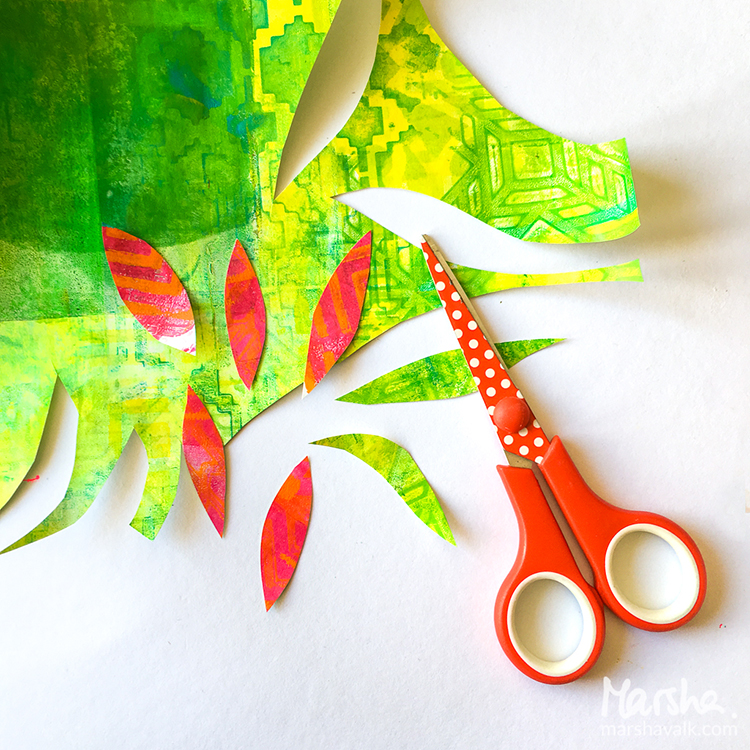
I started with mono printing a bunch of greenish, reddish and yellow/orangey prints on copy paper with my Gelli plate and Nathalie’s Buenos Aires, Manhattan, Mesa Verde, Santiago, and Toledo stencils. Once dry I cut them up into tulip leaves and stems.
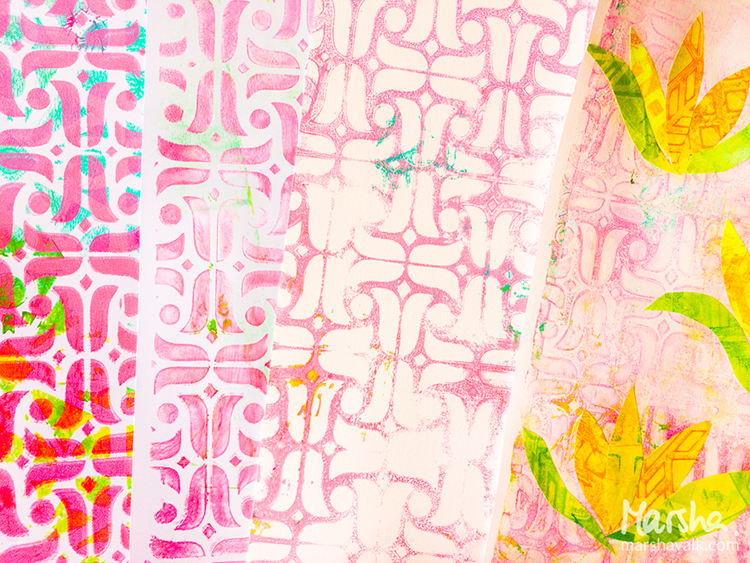
I wanted to use Nat’s ‘Amsterdam’ stencil, with the tulip pattern, for the background. To achieve a softer ‘ghost’ print, I had to pull four prints: I applied paint onto the Gelli plate, layered the stencil on top and pulled two prints to remove most of the paint.
Then I removed the stencil and pulled another print to remove even more paint. And then for the final print I applied white paint onto the Gelli plate and pulled a last ghost print. And this last print is what I used for the background.
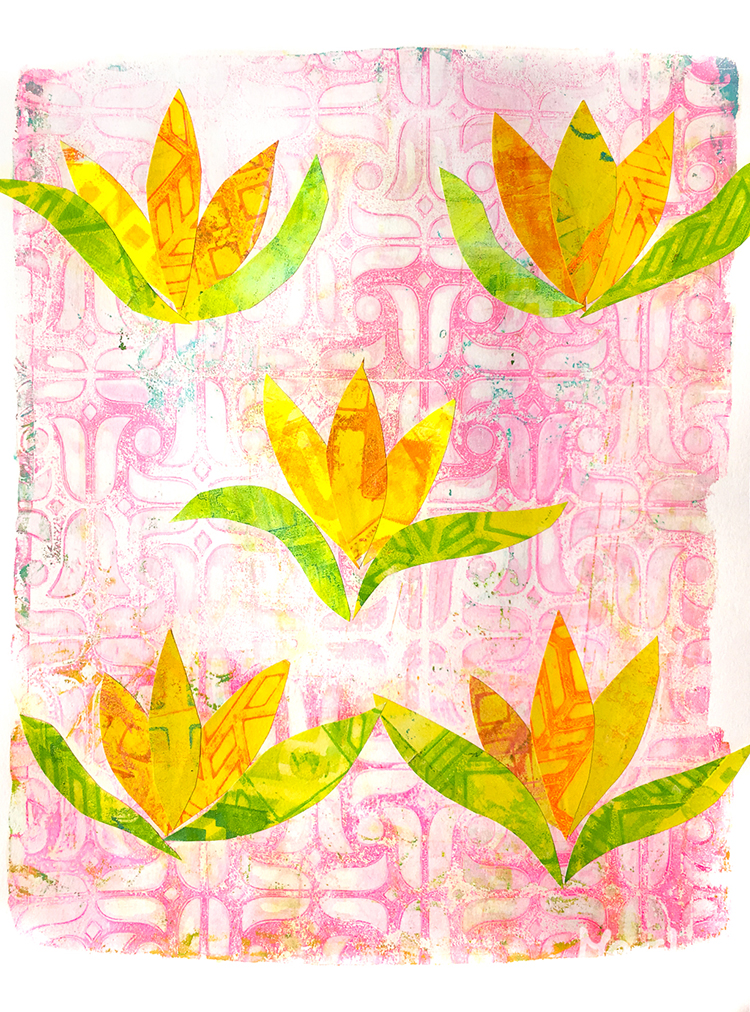
The last step was to collage the tulip parts onto the Gelli printed backgrounds.
Thank you Marsha! I love how you combined all those different stencil patterns with those gorgeous spring colors. In addition to some white copy paper, Marsha used these supplies – some links are affiliate links:
Play along with us! I love to see how you interpret our monthly themes. Email me how you used my stencils and stamps with the theme and email me an image – I would love to share your projects in my “n*Spiration From Around the Globe“.


Comments (2)
Tracy Evans
| #
Fantastic project , colours and step by step video. Thank you. Tracy x
Reply
maura
| #
Awesome bag, Tania! Love the colors you used, and how you left part of the bag natural. Maura
Reply