Nat

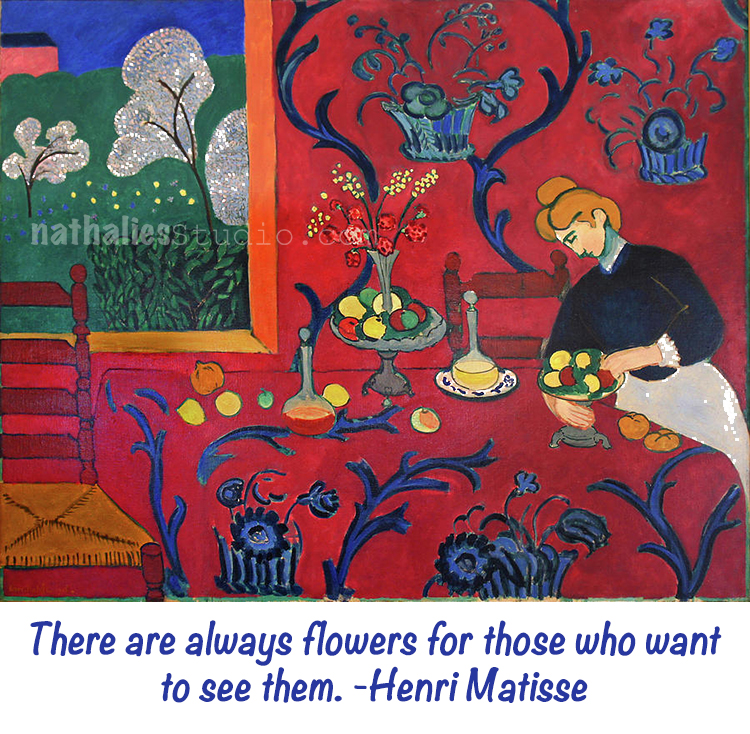
Hello from the Creative Squad! Today we are continuing on our Mail Art month with Robin Seiz. She brings us “happy mail” that will brighten anyone’s day. She’s using my #keepyouposted stamps and our theme: Mail Art – During these times of social distancing, old fashioned mail is a fun way to keep in touch and lift someone’s spirits. Create some mail art, and then actually send it off! Address it, put a stamp on it, and put it in the mailbox. You will make someone’s day :)
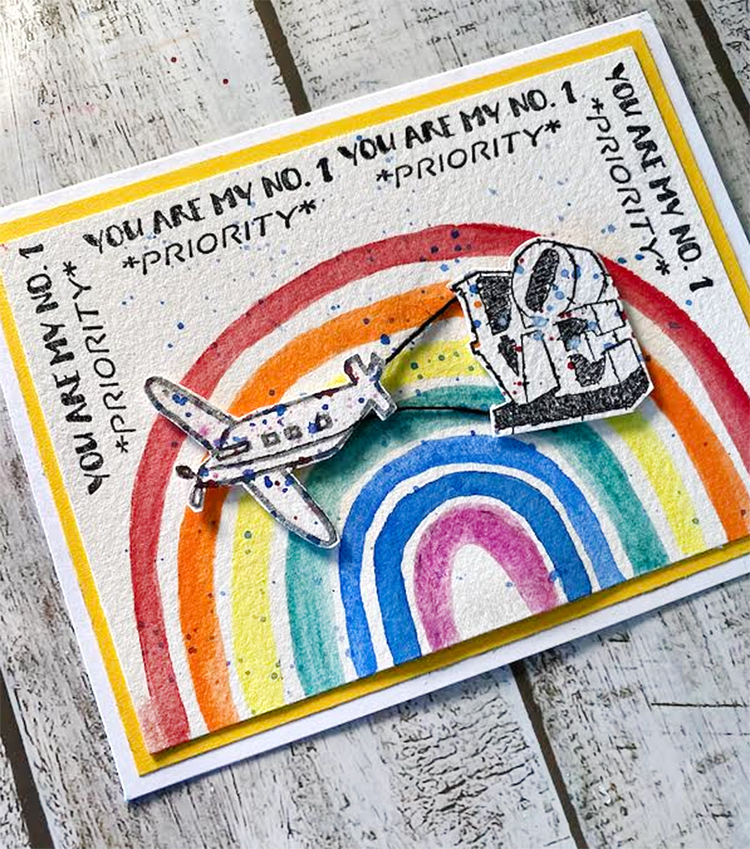
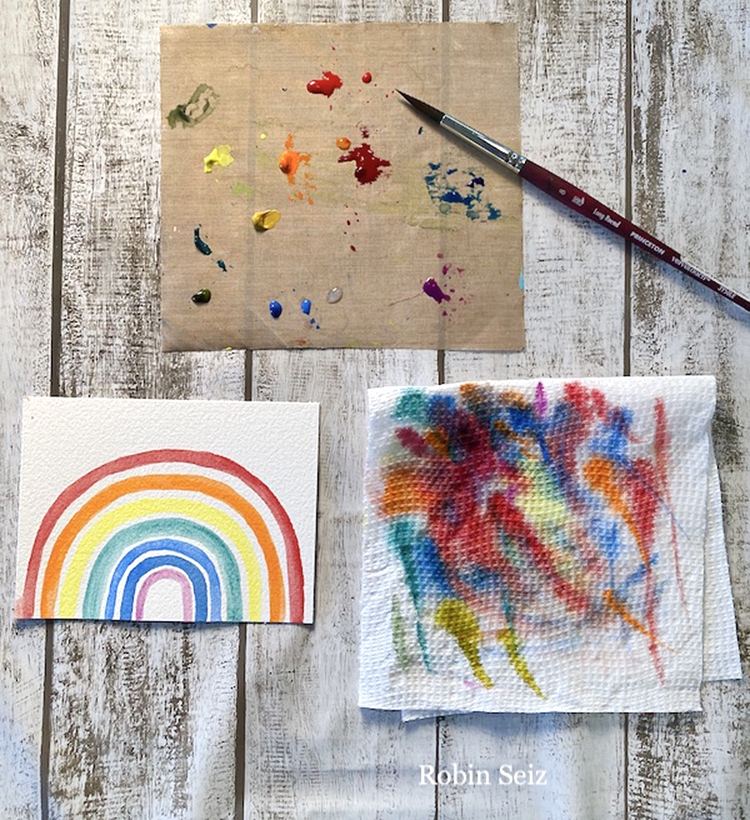
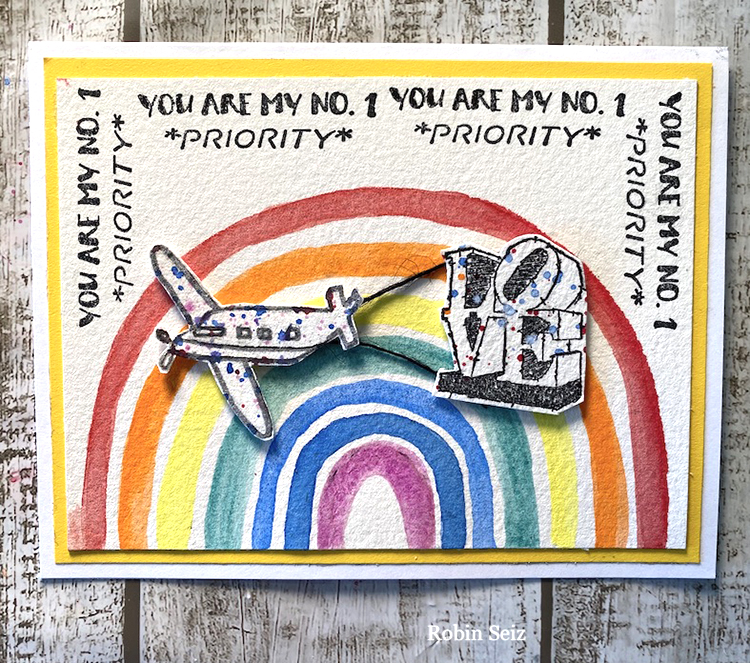
I absolutely love this new collection of #keepyouposted stamps by Nathalie; it’s so versatile. Although we are past voting day, this stamp collection has some great messages about LOVE. Honestly what could be more important than LOVE right now. (or anytime for that matter!) When I started playing with this idea of LOVE, I thought about rainbows. I don’t know about you, but whenever I see a rainbow, I stop and admire it. It gives me a warm, peaceful feeling, which feels like LOVE.
I have been sending lots of Happy Mail out to friends and family since the pandemic began. It’s been a wonderful way to keep in touch and I love making cards. The combination of a great stamp collection and the desire to make Happy Mail was perfect for this project.
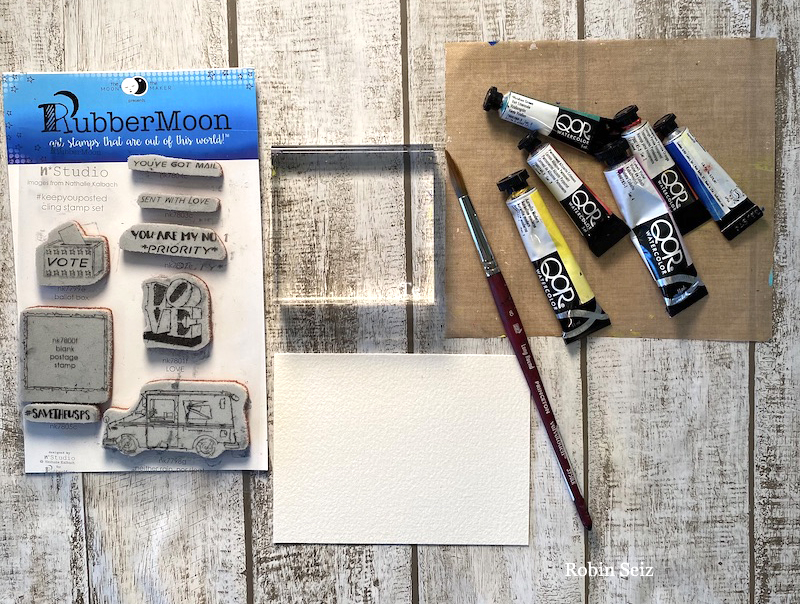
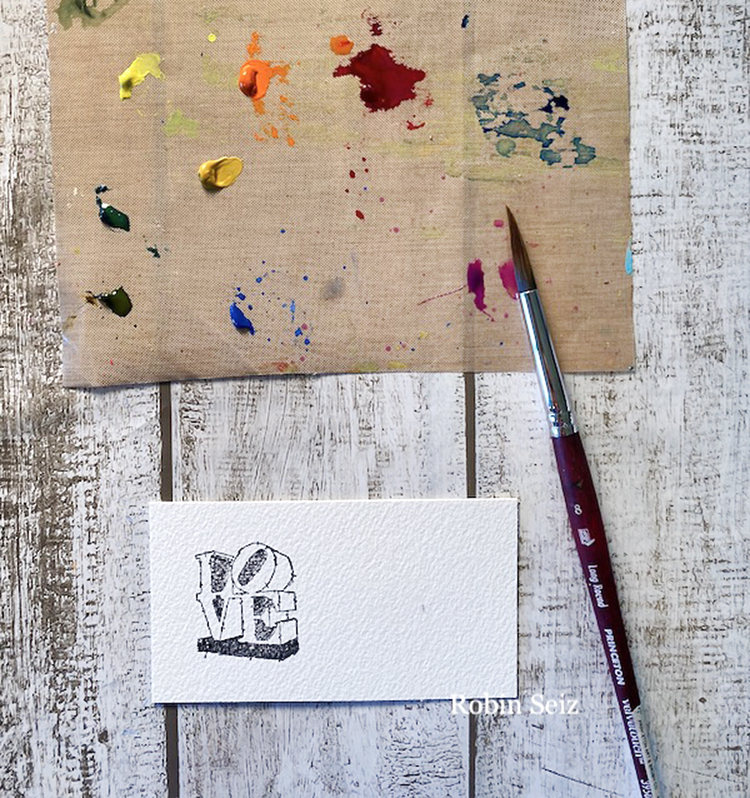
I began with some watercolor paper, (5″ x 3/34″) a brush, Nat’s stamp collection, Golden Qor watercolors, and my acrylic block.
Next, I painted the rainbow. Painted rainbows always look so child-like to me, but I like the simplistic symbol of LOVE.
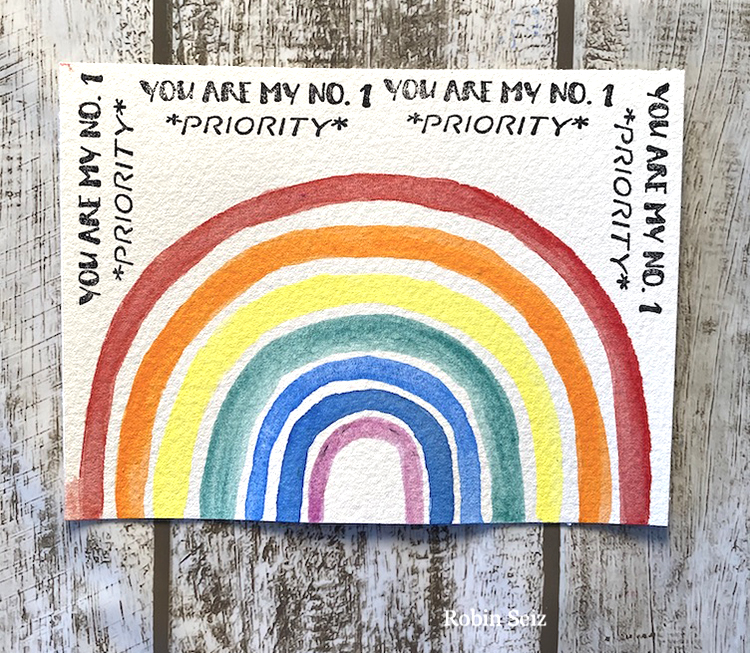
Since there was quite a bit of white space at the top — the message, “You are my #1 priority” was perfect to fill the space and support the message of LOVE.
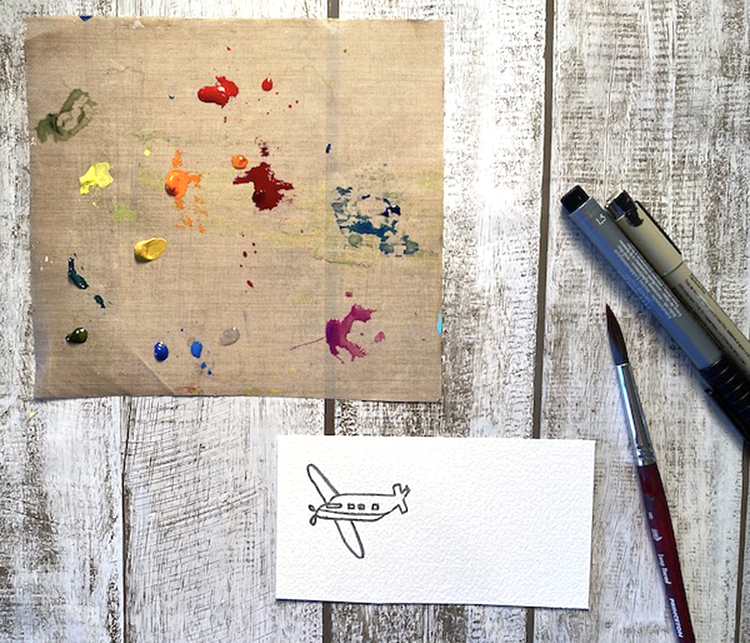
I immediately thought the message of LOVE should be crossing the rainbow and what better way than to have it flying behind a small plane. I drew the plane free-hand, again in that rudimentary style to mirror the rainbow. I splattered it with paint. This is a technique I often use to add a little pazazz to something, whether it’s a card or a project.
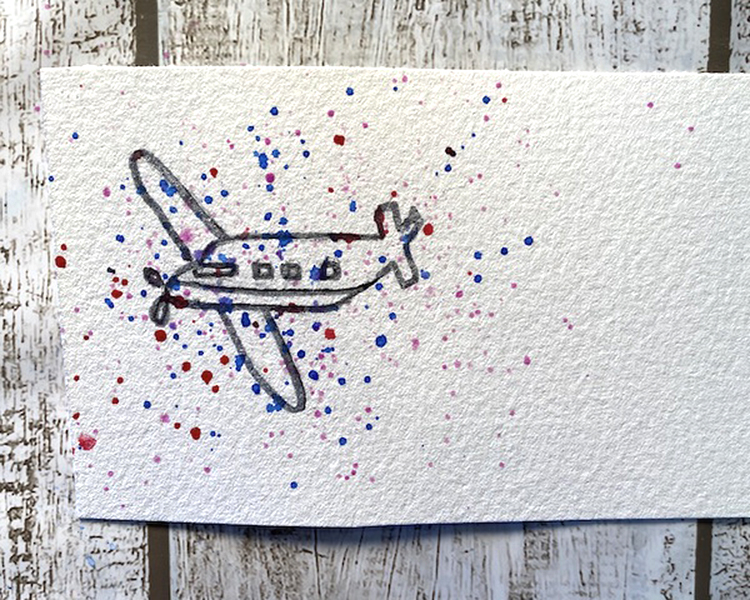
I stamped the LOVE stamp and also splattered the LOVE image with paint for consistency.
I wanted these pieces to be out in front of the rainbow so I used some dimensional tape and adhered two small pieces of black string so it would look like the plane was pulling the LOVE sign. Lastly, I did some more splatter to the entire card to make it celebratory. I cut the border out of yellow construction paper (5 1/4″ x 4”) and adhered it to the card and then put the watercolor paper on top of the construction paper for a layer card look. While this card has lots of steps; it’s easy to accomplish.
Thank you Robin! I love the idea of a plane pulling the LOVE sign all over the skies :)
Give it a try: you can find all my Rubber Stamps in my Online Shop and here are some of the other supplies Robin used:

Feel inspired? Working on something yourself that you’d like to share? I love to see how you interpret our monthly themes. Email me how you used my stencils and stamps with the theme and email me an image – I would love to share your projects in my next “n*Spiration From Around the Globe“.
“The Lombard” is inspired by my Strolls through the Hood in Jersey City.
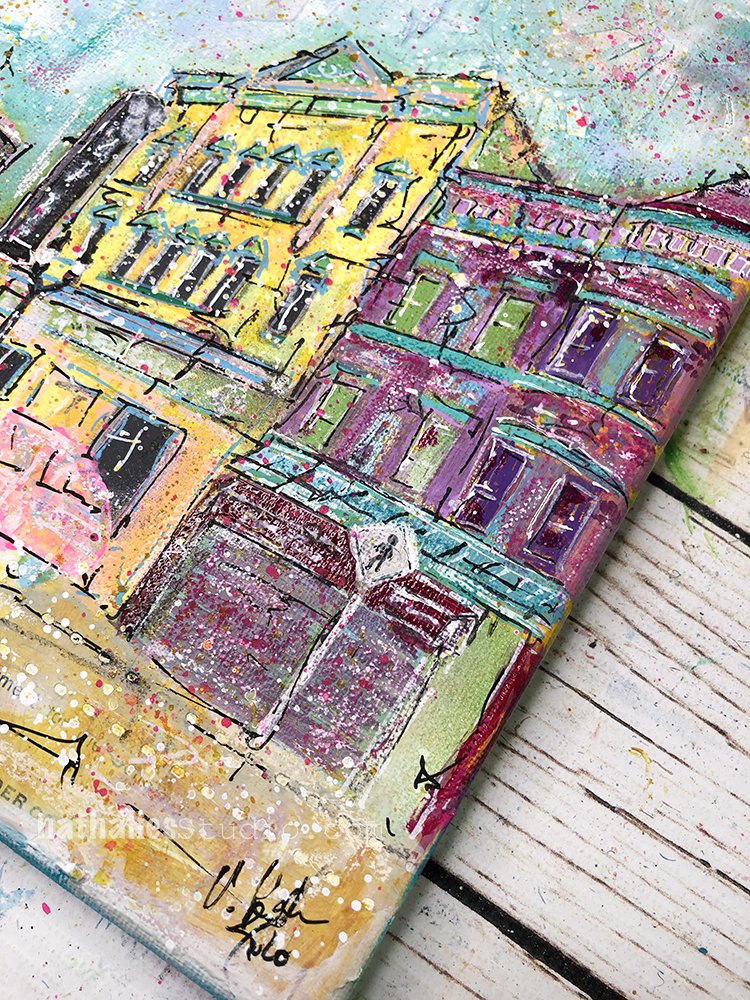
It shows a street view of the oldest pawn shop in NJ – H. Schoenberg, founded in 1895. I was thinking about how while this is type of business is a lifeline for folks, it also conjures sad feelings when I pass it and see the things in the window. So many complex stories and circumstances are in plain sight.
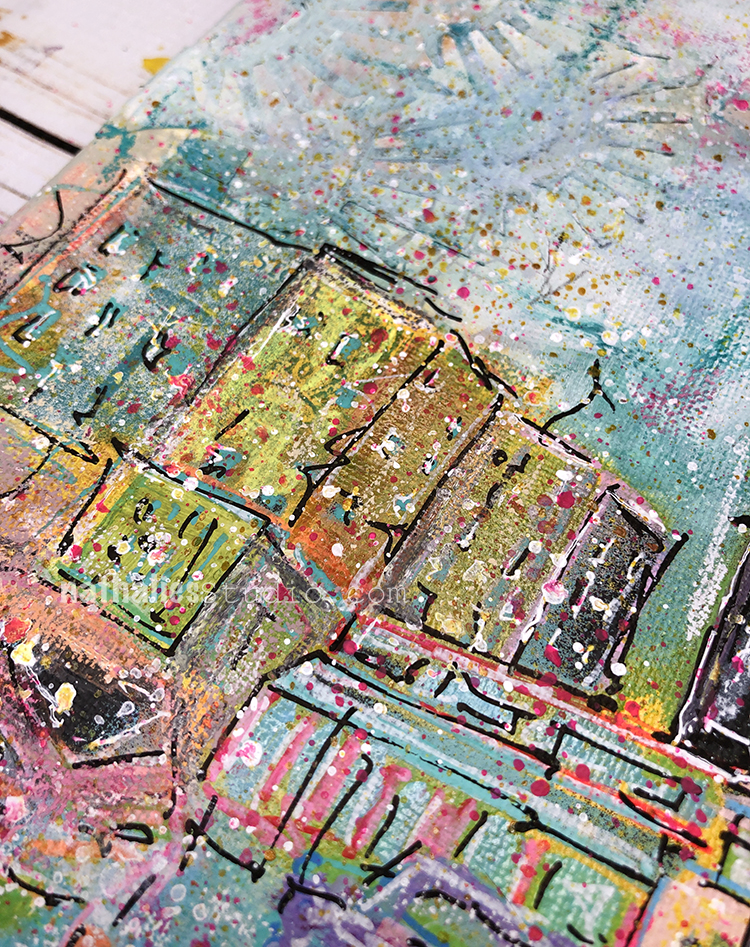
My overarching mood however is one of hope, and better times ahead, and hopefully the souls who visited the shop will be able to return once again and claim their instruments and heirloom jewelry as their own.
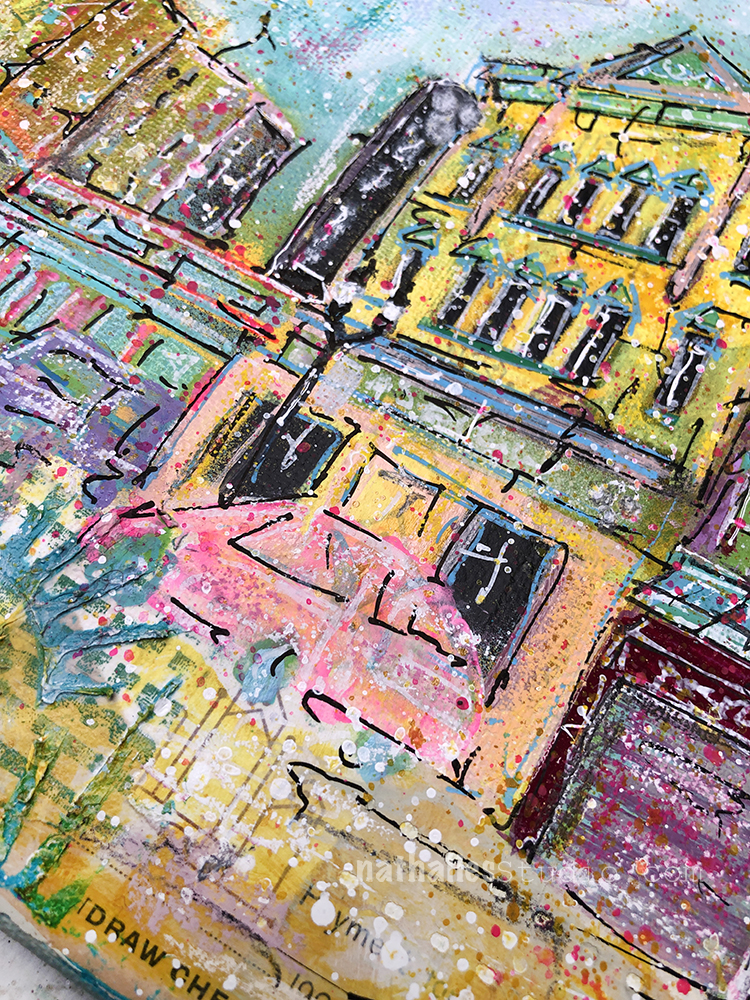
This original painting was made with spray paint, acrylic paint, gouache, ink, pencil, markers, pastel, and collage on canvas.
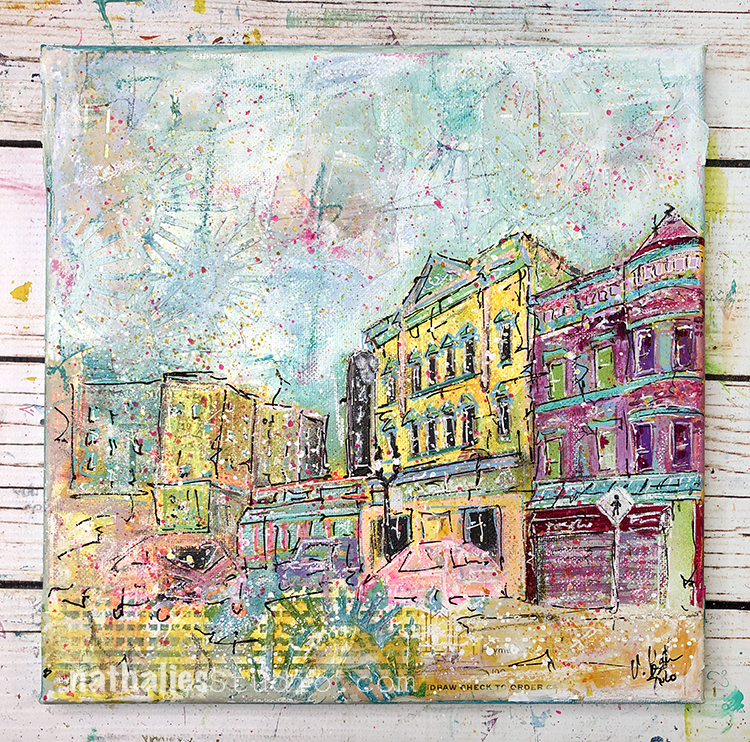
“The Lombard” is available in my Shop and would love to find a new home.
Hello from my Creative Squad! Today we are continuing with our Mail Art month and today we have a wonderful project (love her envelope!!!) from Emilie Murphy using my #keepyouposted rubber stamps. This month’s theme is: Mail Art – During these times of social distancing, old fashioned mail is a fun way to keep in touch and lift someone’s spirits. Create some mail art, and then actually send it off! Address it, put a stamp on it, and put it in the mailbox. You will make someone’s day :)
Hi there! Hope you are doing well.
What can I say except that I’m totally fond of Nathalie’s new stamps set called #keepyouposted. Art mail is my favorite theme. I just love to make cards and send them to family and friends.
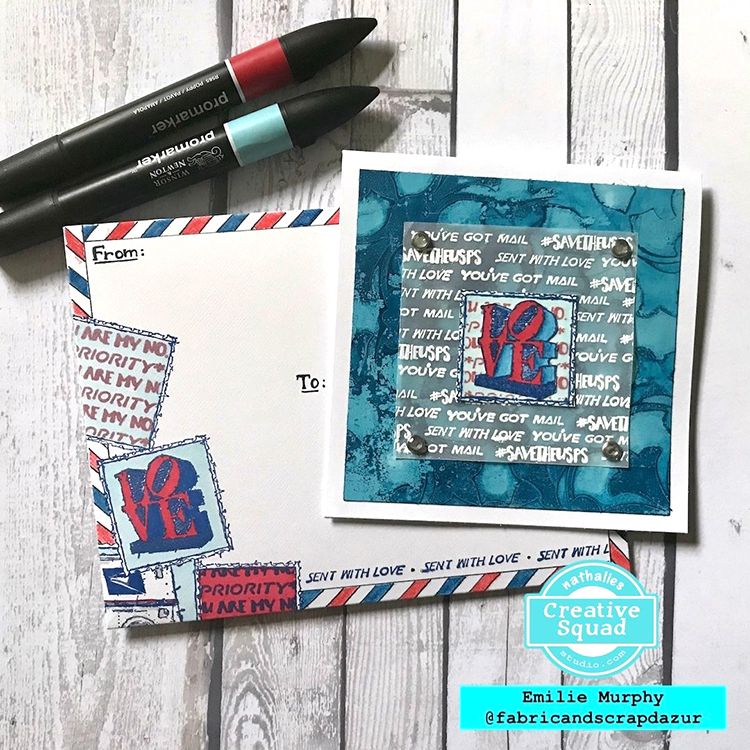
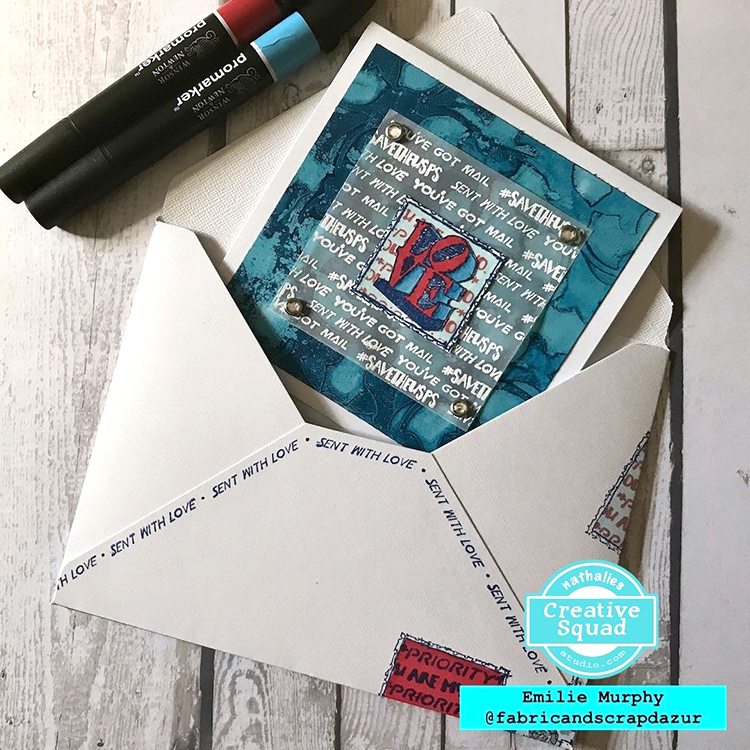
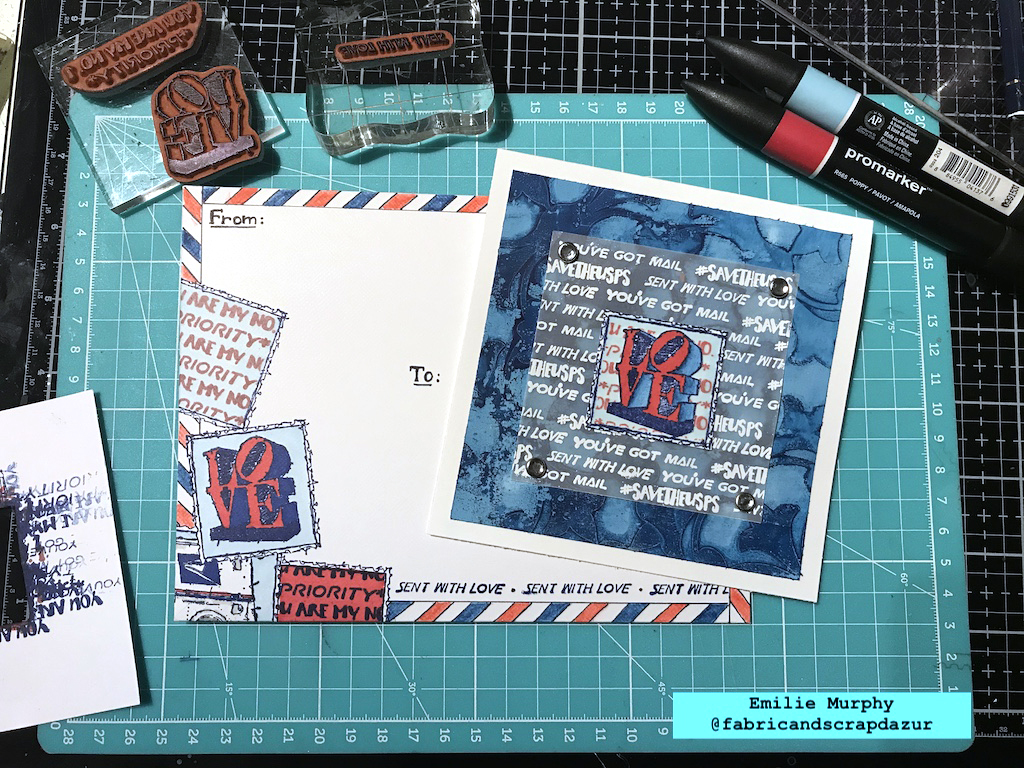
I decided to stay “classic” and chose a blue and red color palette for the whole project, card and envelope.
Starting with the card, I made a super easy 5×5 inches squared one.
I embossed with white embossing powder a 3 ¼ x 3 ¼ inches piece of vellum using the “you’re got mail”, “sent with love” and “#savetheusps” stamps.
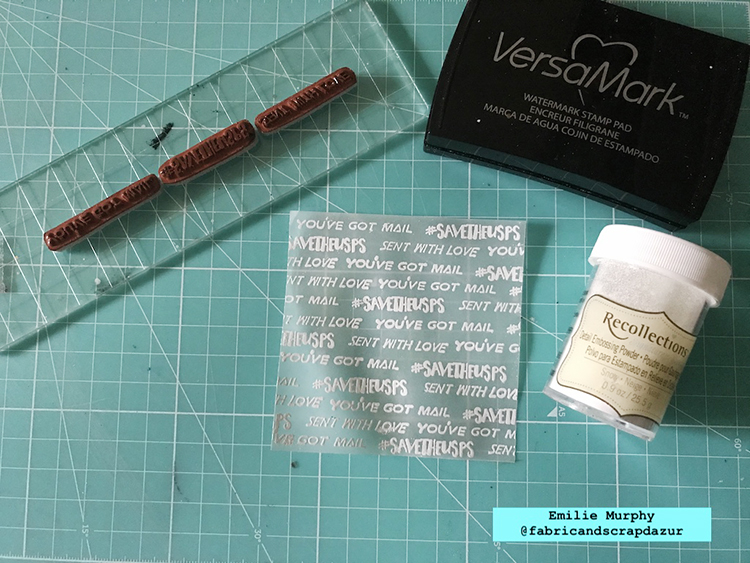
I stamped “You are my NO. 1 priority” with Crimson Red ink pad inside the “blank postage” stamp and colored it with an alcohol marker as well as the “LOVE” stamp.

I cut a 4 ½ x 4 ½ inches piece of gelli print that I had made for a previous project with Nathalie’s Versailles 9×12 stencil.
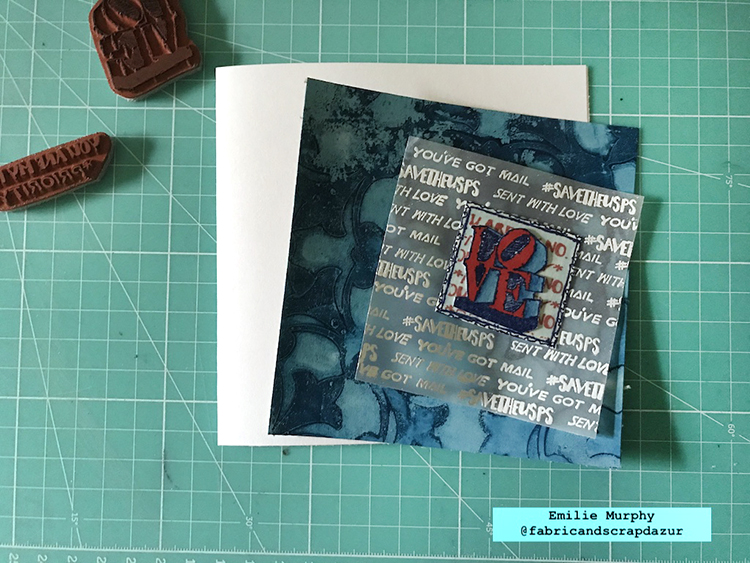
To assemble the card, I first glued down the embossed vellum piece on the gelli print piece. I applied some double-sided tape only in the center of the vellum. This way, the glue is hidden by the “postage” and “love” images glued on top. I attached a brad at the four corners of the vellum. That’s a cute and practical way for not having the glue or tape showed off through the vellum. To finish, I glued the whole piece on my 5×5 inches base.
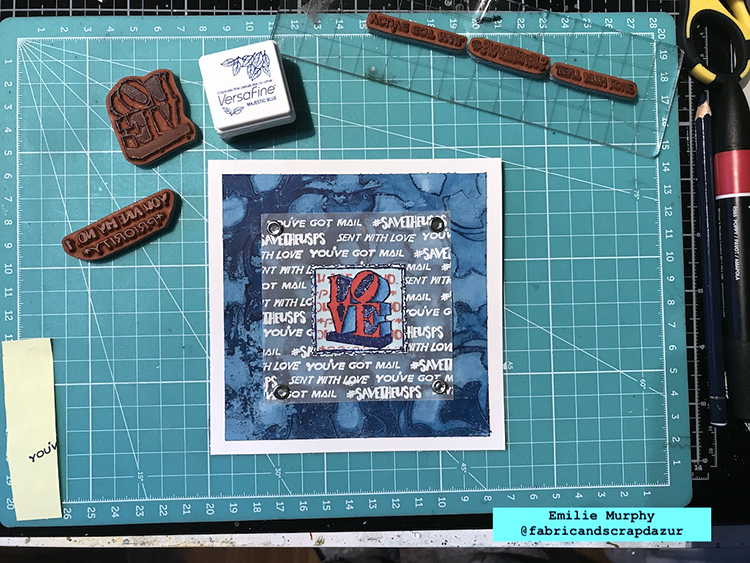
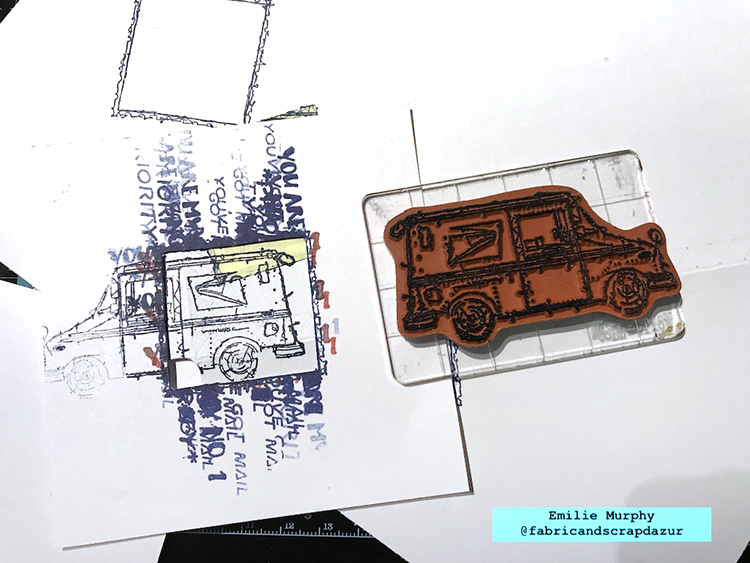
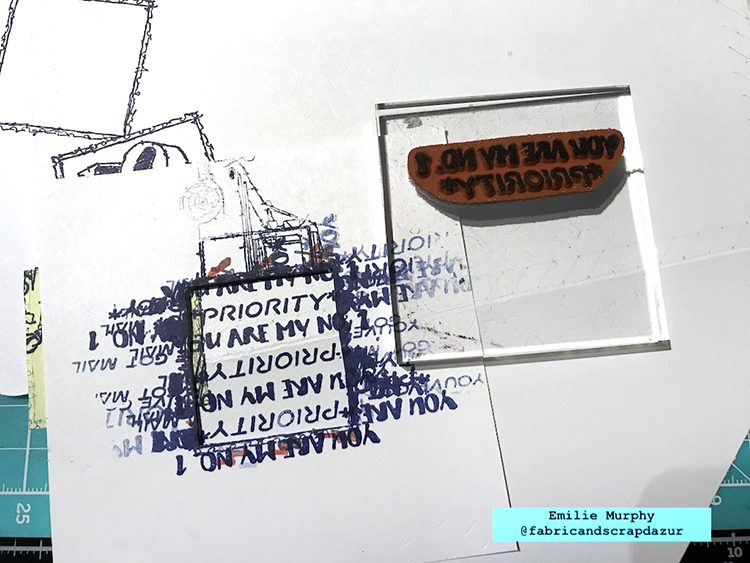
About the envelope, I made my own 5×7 one with a piece of 12×12 white cardstock. I used an envelope tool (because I have one) but it is easy to use a template from a purchased envelope. I started to trace with a graphite pencil some straight and diagonal lines spaced by ¼ of inch to get a classic “mail postal” border. Then, I stamped several time the “blank postage” stamp using the technique of masking.
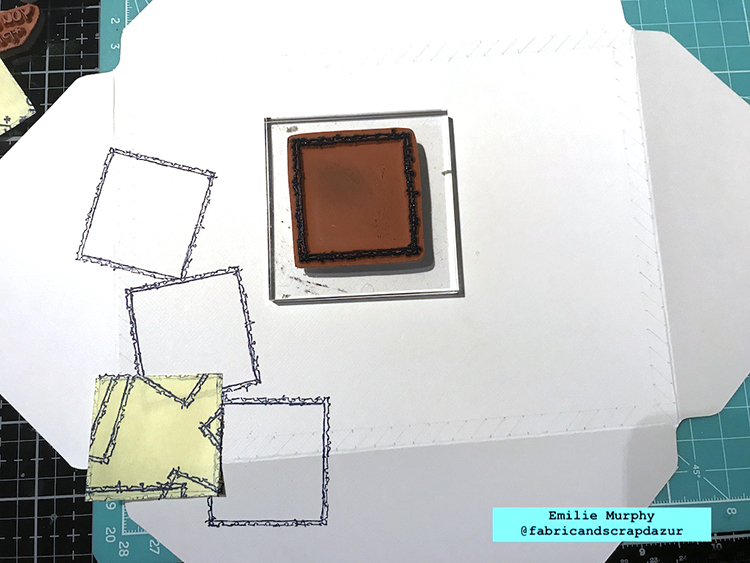
I made a frame template to be able to stamp inside the postage stamp space.
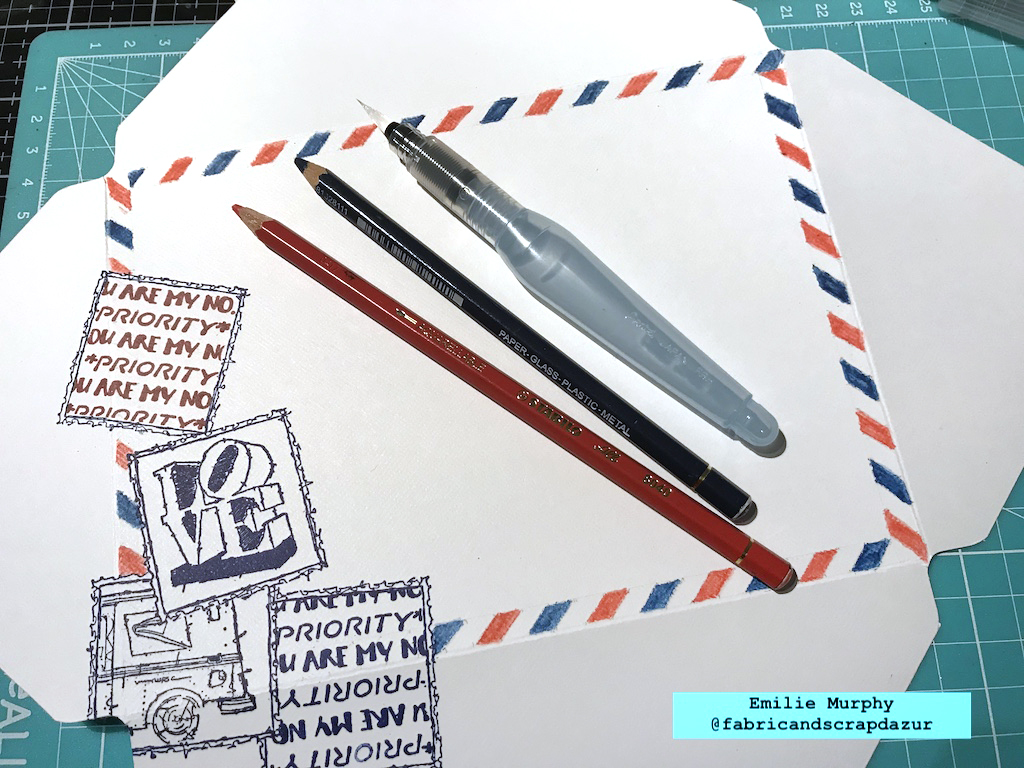
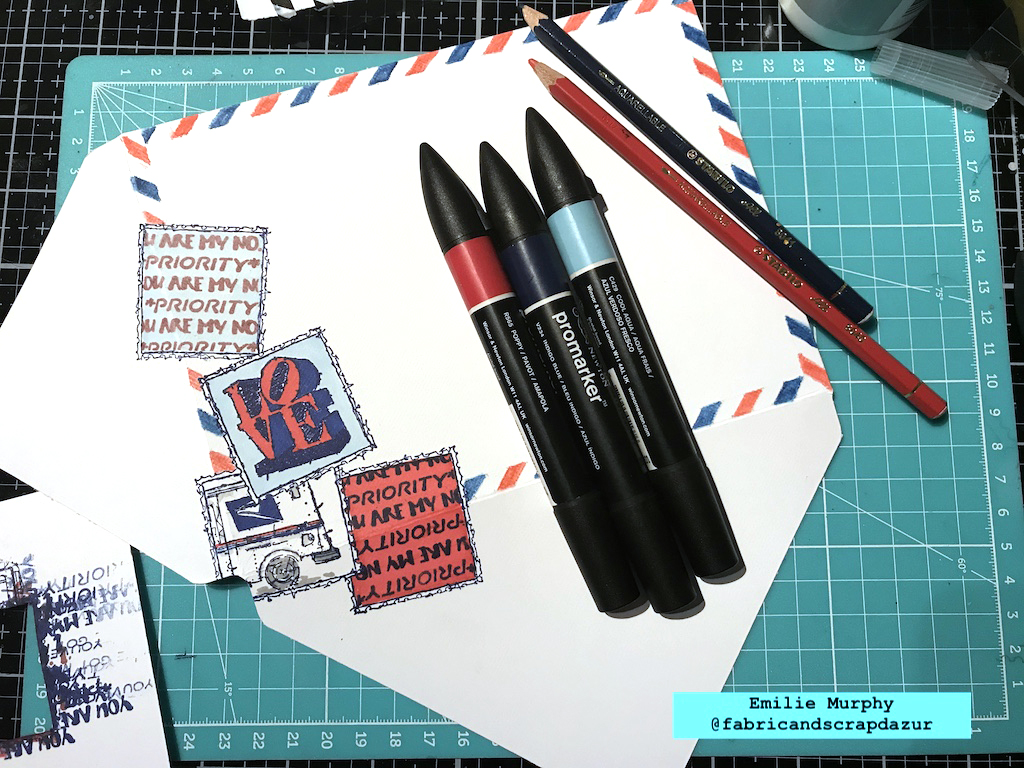
I colored the border with a blue and red stabilo pencils and the postage stamps made with some alcohol markers.
For the back of the envelope, I simply stamped the “sent with love” and “you’re got mail” along the edges.
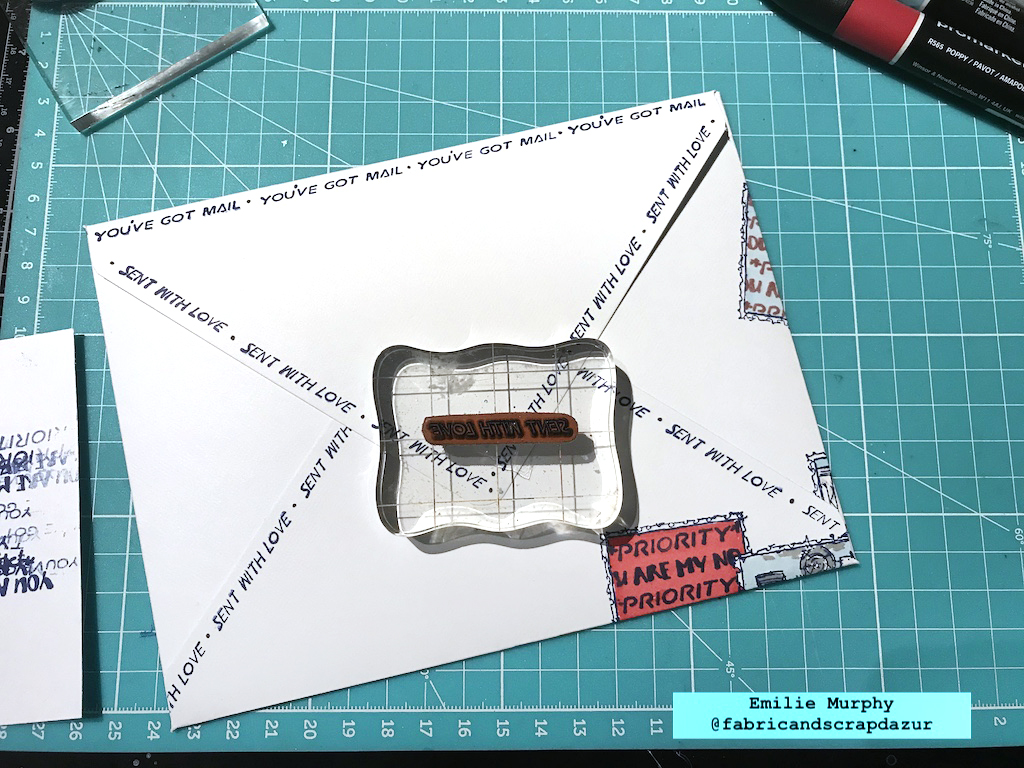
At the end, I outlined the border lines with a black micron pen. I like the look of it. And Voila!
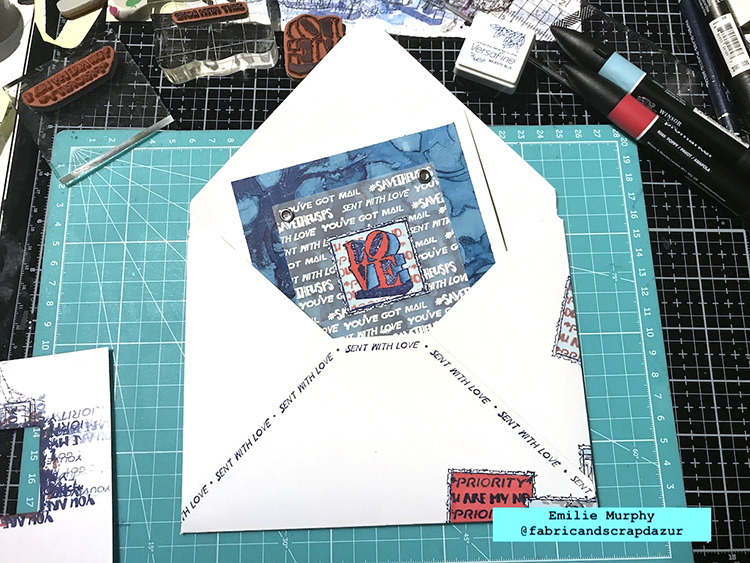
This is a simple card/envelope project to make just for the pleasure of stamping and coloring. I really enjoyed playing with this new stamps set. Once again, the possibilities are endless, only imagination is the limit.
Have a good rest of the week and see you in December!
Thank you Emilie! What a fantastic way to layer up the stamps to create something really special!
Give it a try: you can find all my Rubber Stamps and Stencils in my Online Shop and here are some of the other supplies Emilie used:

Feel inspired? Working on something yourself that you’d like to share? I love to see how you interpret our monthly themes. Email me how you used my stencils and stamps with the theme and email me an image – I would love to share your projects in my next “n*Spiration From Around the Globe“.
“The middle is messy but that is where the magic happens.” -Brene Brown
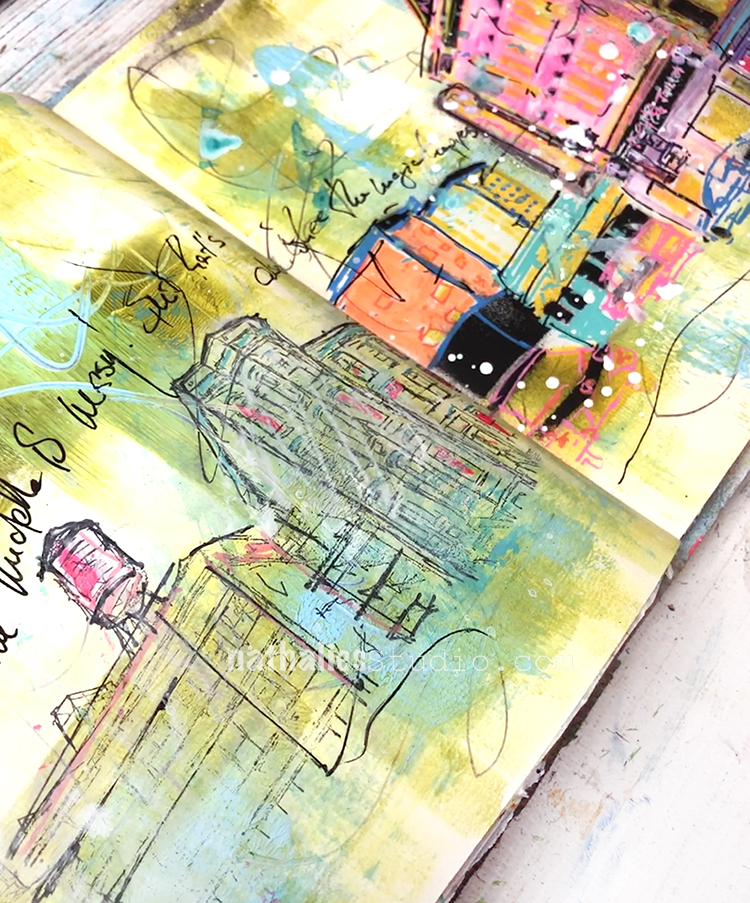
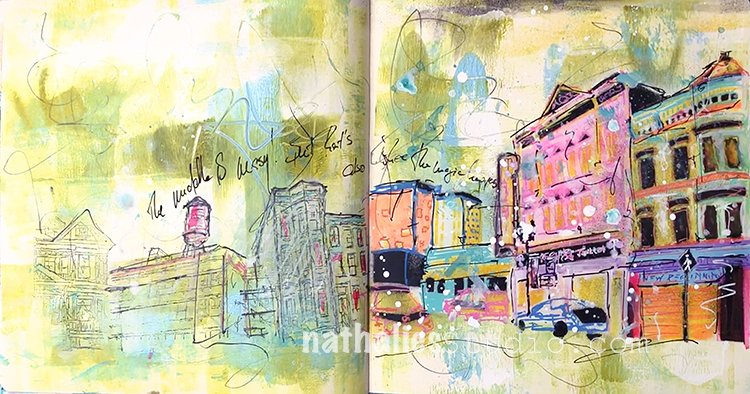
I used spray paint, gesso, and acrylic paint for my background and then began creating my scene. On the left is my Warehouse and Brownstone rubber stamps, even further than this image shows is my Queen Anne rubber stamp starting the row.
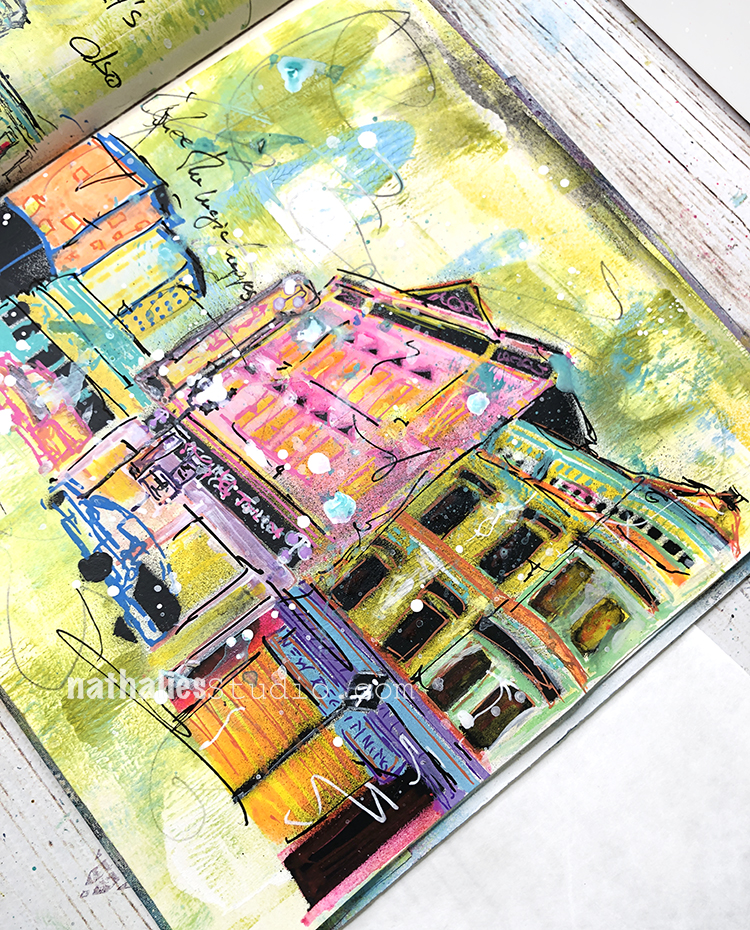
I continued the cityscape with some of my own building sketches, with acrylic markers and adding details here and there.
Here are some of the supplies I used:
It’s time to get to know an artist with… Nice to Meet You! Today I’d like to introduce you to the inspiring art and story of Jill Russell!
From time to time I learn about some amazing artists out there who are working in mixed media and creating some fun and exciting projects. It’s always inspiring to see what others do. Sometimes they even introduce me to a new way of seeing my own materials. That’s why today I’d like to share with you Jill Russell:
Please introduce yourself to our readers and tell us where you live:
I am a librarian, artist and educator from Alameda, California. I love to garden, read, swim, craft and sew. I like to take what I have on hand and transform it into useful, colorful and beautiful art.

How do you make time to be creative?
I’m at my most creative in the early mornings, so every day I carve out dedicated time to create art, even if it’s just for 10 minutes. I feel at my best when I am creating, so it really is an act of self care. Everything I need to make art is set up in my home at several work stations, so I am always able to create when the mood hits.
What is your favorite medium to work in?
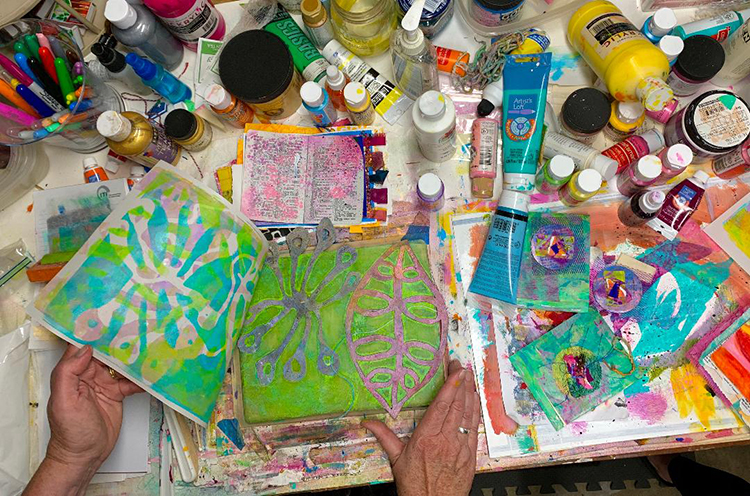
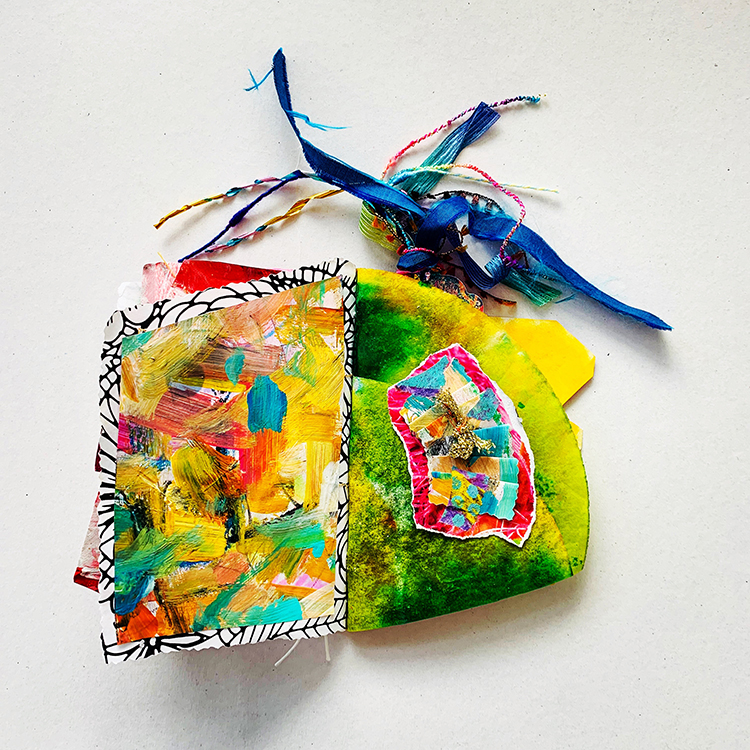
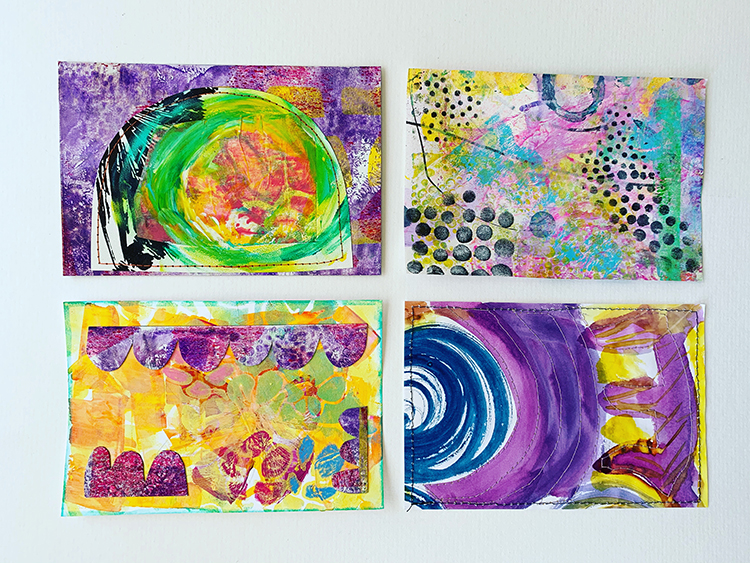
My current love is Gelli printing on a variety of papers using acrylic paints and stencils. I love creating brilliant colored paint layers with my handmade stencils and Caran d’ache wax pastels. I also enjoy the process of creating collage layers in my art journals using a variety of my handmade and collected papers. Being a lifelong sewer, both hand and machine stitching often add the finishing touch.
What inspires you to be creative?
Nature is one of my biggest inspirations. I am drawn to the beautiful patterns that nature creates. I love the idea of taking design elements from nature and incorporating them into my work. My art is inspired by other artists, art books and magazines. Cloth, Paper, Scissorswas one of my favorite magazines and I was so sorry to see it go. Other inspirations include YouTube videos, blogs and the Instagram community. Trips to museums also keep my creative flow inspired. I surround myself with local creative artists as often as possible.
Do you have a favorite artist?
I am fascinated with the work of the painter and ecological activist, Friedensreich Hundertwasser. I love his bold colors, irregular architectural designs and how he incorporated the natural features of the landscape into his work.

How did you get into art-making?
I have been creating since I can remember. My interests include collage, abstract art, sewing and contemporary quilting. After college, where I studied Food Science, I dove into the arts of papermaking, loom weaving, yarn spinning and dying, batik and shibori. These artistic experiences were a welcome change after studying for a rigorous science degree.
While teaching elementary school in 2008 I swapped art journals weekly with a creative friend and became hooked into the expansive world of art journaling. I still love swapping and collaborating with other artists and have made several friends on Instagram continuing this creative path.
In three words, how does art-making make you feel?
Expansive, free and delighted.
Thank you Jill for sharing your unique artwork and your story with us!
Be sure to check out all our Nice to Meet You! posts to learn about all the inspiring artists we’ve featured.
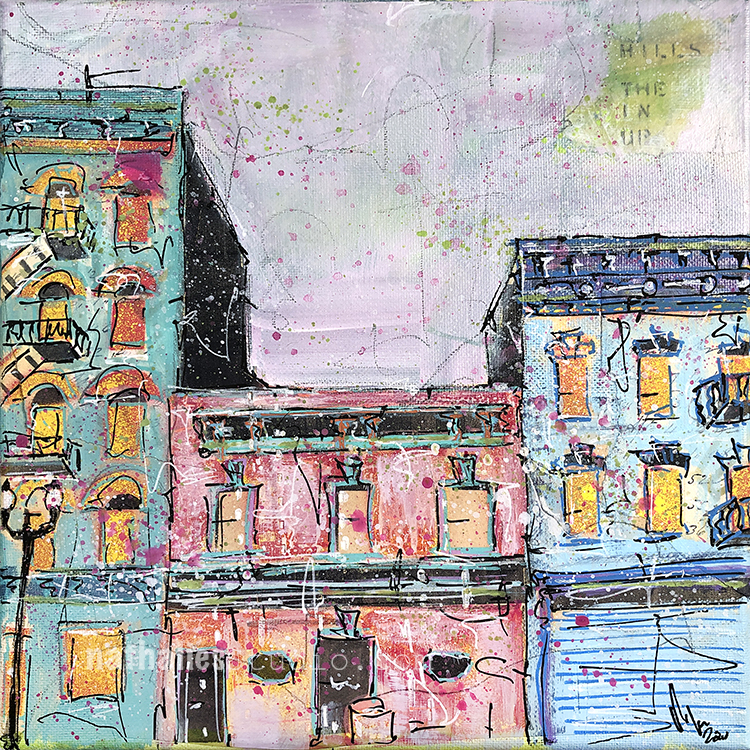
“Up in the Hills” is a new painting inspired by my Strolls through the Hood in Jersey City.
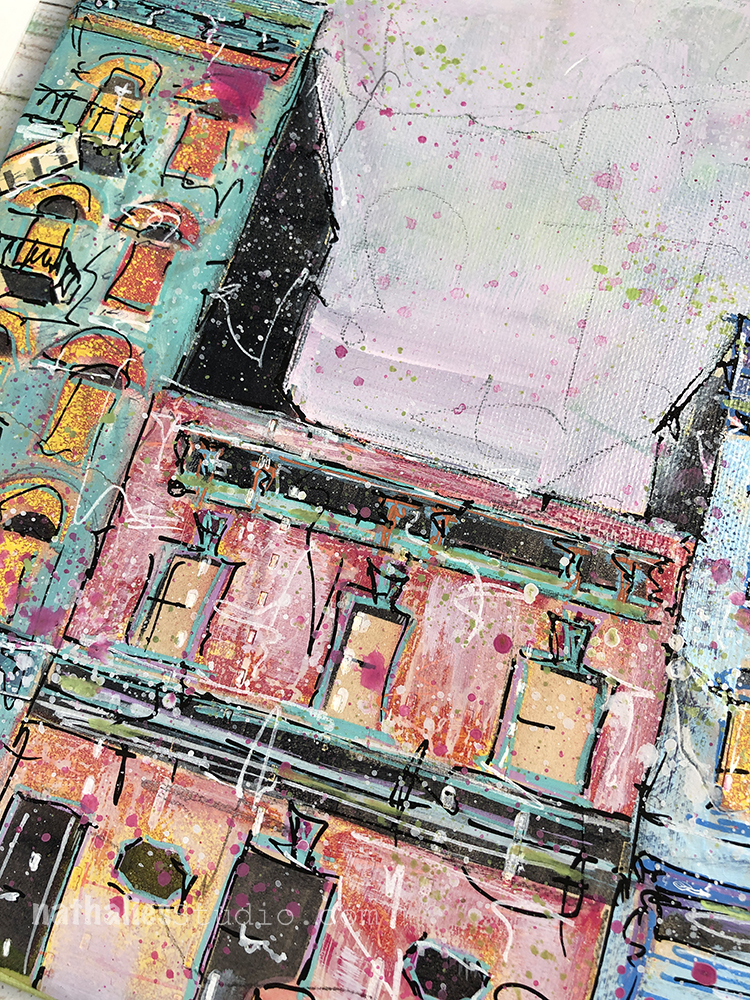
Moore’s Place, a bar and jazz club run by Mrs. Ruth, has been here for over 60 years as part of the neighborhood, and now during the pandemic has become a special, magical space with live jazz music outside every weekend to soothe our souls.
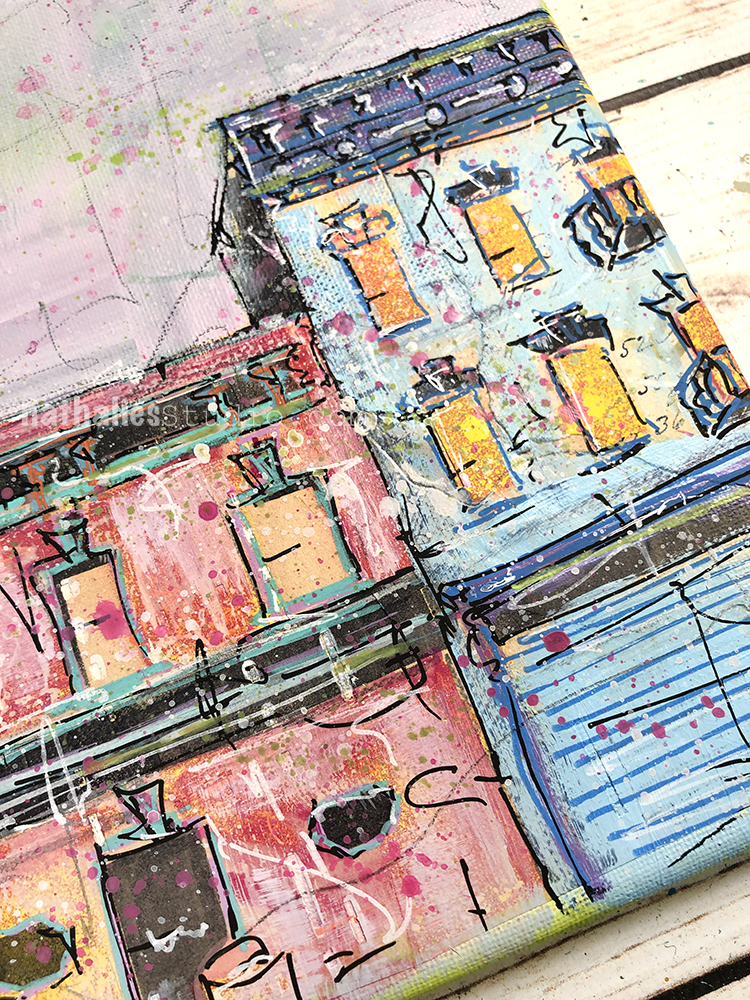
The building itself used to have a different life long before the music arrived – there is still machinery in the basement.
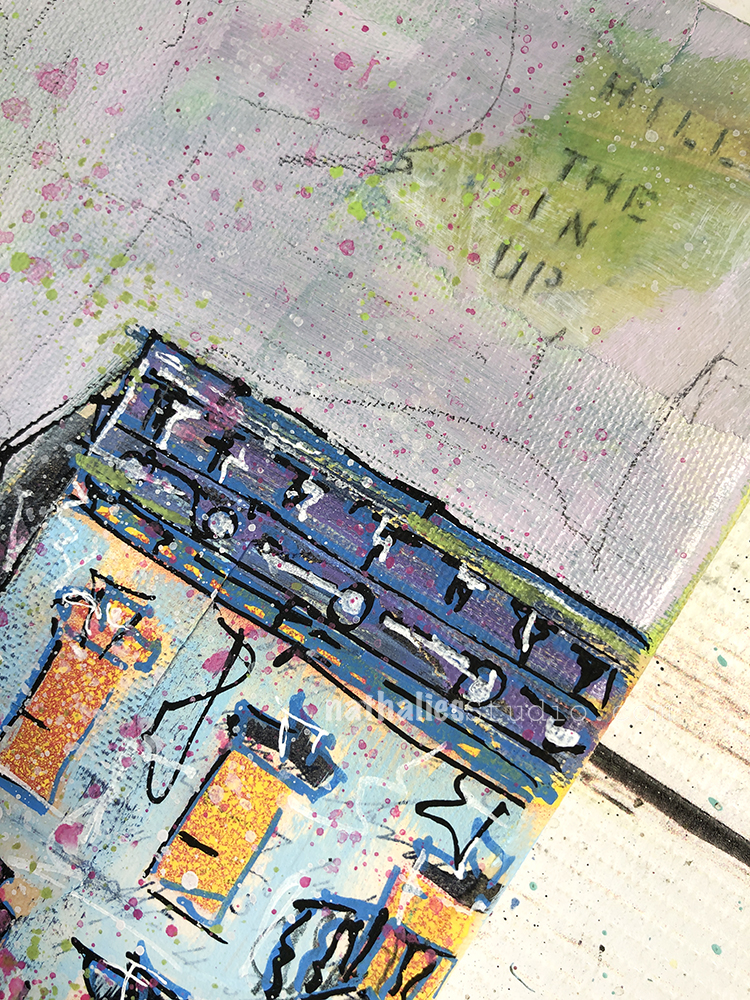
I have yet to uncover the history of this building – one day I will ask Mrs Ruth, but right now I let her hustle and bustle around us lucky happy faces when we are here to listen to the music and see the people of the neighborhood, while eating Mrs Ruth delicious fish fry.
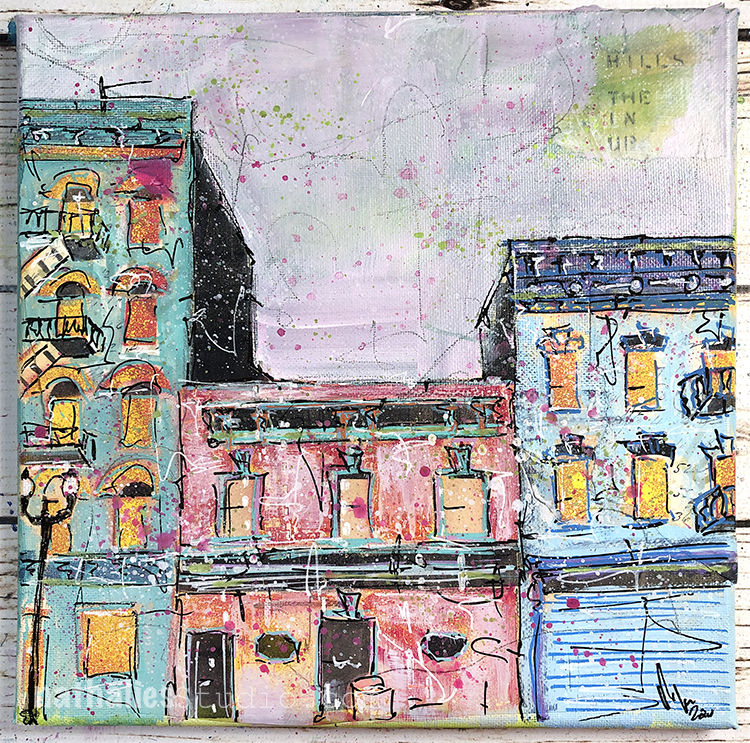
For this painting I used spray paint, acrylic paint, gouache, and markers on canvas. Give Moore’s Place a new home – and purchase it here in my store. edited: So stoked this painting found a new home at home here in Jersey City !!!
I thought you would like seeing the recording of my Jersey City Art and Studio Tour – A Stroll Through the Hood. Let me take you on a virtual stroll with some narrative and paintings in context.
Nathalie Kalbach – JCAST 2020 from Nathalie Kalbach on Vimeo.
It was a lot of fun putting it together- although making it work for 8 minutes was a tough one as you know – I am not good in keeping myself short LOL. Let me know what you think – I would love to hear from you!
Hi! Ich finde es super, wie du dich für die Geschichte deiner neuen Nachbarschaft interessierst! Und dein “kleines” Art Journal – ich wünschte, wir könnten hier auch an solche Schätze rankommen! Bis bald und alles Gute!
Ganz lieben Dank Susu! Liebe Grüße!
Robin, this is so adorable and colorful!
Reply