Blog: art journal techniques

Photo Painting Technique

CJSUberMediaOWSLOGO

Those of you who were part of the Creative JumpStart 2013 saw the videos that me and my artist friends posted on my website throughout January 2013.  The videos are not available here anymore, since CJS 2013 was only available till June,  but I thought it would be nice to repost my 10 technique videos over the next couple weeks- so that you have access to them whenever you want and see what CJS 2013 was all about.

And now let’s jump to the 7th video in my Über*Media Creative JumpStart 2013 Workshop which was the Photo Painting Technique :)

If you have no external speakers on your pc – turn up the volume a lot (the audio is very low in this video)

CJS 2013 Technique 7 Photopainting from Nathalie Kalbach on Vimeo.

As you might have seen I just proposed Creative JumpStart 2014 !

CJS2014Lable

It will work slightly different this year and has some major improvements like a forum and an easier access- and I can tell you already the line up of artists and the videos are AWESOmE!!! For 20 Dollars -that is less than 1 Dollar per video (23 videos by 21 artists) it is a great deal! Check out the information here :)

I would love to have you!

And here are my supplies I used for the Photo Painting Video above:

nSupplies

Have a gorgeous and wonderful day!
hugs
nat
LogoBlogSignature

Comments (2)

  • Sue Abell

    |

    This is great news Nathalie! Thanks so much for doing Creative Jumpstart again, I can’t wait! Have a wonderful Christmas, see you in January!

    Reply

  • smokeysmom

    |

    I’m signed up for CJS2014! I can’t wait for it!

    Reply

Leave a comment

New Class Series at The InkPad in NYC

NatKalbach_ArtvergnugenAd


So excited about this new series of once a month Art Journaling workshops with different topics which I will teach at The InkPad in New York City.


It starts the moment you sit down, an experience that is distinctly Art Journaling. A quick exhilaration, a sense of control, the art media’s surprising responsiveness as if they were simply an extension of you.

There is a word for this creative experience: Artvergnugen ! Artvergnugen is what makes your journal a piece of art.

Join Nathalie once a month and play each time with a different art medium or supply. Learn techniques, tips and tricks to take your art journaling further and turn it into Artvergnugen.

You will have to bring basic supplies – list below – while Nathalie will bring the art medium/supply of the month for you to share. Sign up for as many of the sessions you want but be quick – space is limited.

  • Session One: Stamps – January 31st
  • Session Two: Monoprinting – February 20th
  • Future Sessions to be Announced

Required Supplies:

  • Art Journal (your choice- I use a Ranger Dylusions Art Journal)
  • Acrylic Paint (3 colors, plus black & white)
  • Brayer
  • Old Credit card /or plastic card that size
  • Scissors
  • Bristle Paintbrush (1 medium flat)
  • Paper Plate or paint palette
  • Container for Water
  • Baby Wipes
  • Rag/Paper Towel
  • Heavy Matte (or gloss) Gel Medium – I prefer Liquitex
  • Gesso – I prefer Liquitex
  • Apron -optional
  • Heat Gun, extension cord, power strip – optional
  • Cosmetic Wedge Sponges
  • Favorite Stencils – optional
  • Magazine (fashion would be best) -optional
  • Black Journaling Pen
  • Water Mister
  • Whatever you feel is a must have in any of your art journal pages
  • Watercolor paper – just 1 or 2 sheets for trying things
Cost: $ 45.00


The other topics and dates will be announced soon . We have planned about six in total so far :)

Have a gorgeous day

Nat


LogoBlogSignature

Comments (5)

  • cheiron

    |

    I’m all signed up! Can’t wait for class to begin.

    Reply

  • Nurse Ratchet

    |

    Ahhhh…lucky New Yorkers!! Don’t think about it..SIGN UP!!! Nat is FAB!!

    Reply

  • Sue Clarke

    |

    Oh to live in NYC! Looks like a fun ongoing time Nat.

    Reply

  • jenny

    |

    That’s great Nat
    congratulations on your classes they look like so much fun

    Reply

Leave a comment

Brayer Background Technique

CJSUberMediaOWSLOGO

Those of you who were part of the Creative JumpStart 2013 saw the videos that me and my artist friends posted on my website throughout January. The videos are not available here anymore, since I have to make room for new fun things to come ..still thinking ;) …but I thought it would be nice to repost my 10 technique videos over the next couple weeks- so that you have access to them whenever you want.

And now let’s jump to the 6th video in my Über*Media Creative JumpStart 2013 Workshop which was the Brayer Background Technique  – one of my faves :)

If you have no external speakers on your pc – turn up the volume a lot (the audio is very low in this video)

CJS 2013 Technique6 Brayer Background from Nathalie Kalbach on Vimeo.

This and the other techniques are part of some of my Über*Media Online Classes.

They are there to free your creativity with techniques and how-to’s that go beyond one certain project. I want you to learn something new that you can adapt to your own style and can use for many projects to come.

Über*Media classes are dedicated to different kinds of media that cross a variety of materials.

I do have several Über*Media Workshops available right now for example Über*Media -PanPastel, -Acrylic Paint, -Gesso, -Acrylic Ink and -FoamStamplifier.

For my Creative JumpStart Über*Media Workshop I showed some of my favorite Über*Media Techniques that can be used in your Mixed Media, Scrapbooking, Altered Art and/or ArtJournal Projects.


And here are the supplies I used in the video:

nSupplies


I hope you enjoyed todays technique :)

Nat

LogoBlogSignature

Comments (4)

  • Amante del Papel

    |

    i love this technique, thanks for sharing

    Reply

  • Kathy Gledsdale

    |

    Oh yay I can see it now and how pretty it is too!

    Reply

  • Maggie M

    |

    I agree, a 2014 Creative Jumpstart video series would be AWESOME! I loved the 2013 series:) Hugs and Happy Holidays Nat.

    Reply

  • Christine Szekeres

    |

    Will there be a Creative JumpStart 2014?!? I had a wonderful time learning and playing this year so I’m hoping there will be! Thanks for sharing these with us again!

    Reply

Leave a comment

Spackle Tackle Technique

CJSUberMediaOWSLOGO

Those of you who were part of the Creative JumpStart 2013 saw the videos that me and my artist friends posted on my website throughout January. The videos are not available here anymore, since I have to make room for new fun things to come ..still thinking ;) …but I thought it would be nice to repost my 10 technique videos over the next couple weeks- so that you have access to them whenever you want.

And now let’s jump to the 5th video in my Über*Media Creative JumpStart 2013 Workshop which was the Spackle Tackle Technique  – one of my faves :)

If you have no external speakers on your pc – turn up the volume a lot (the audio is very low in this video)

This and the other techniques are part of some of my Über*Media Online Classes. They are there to free your creativity with techniques and how-to’s that go beyond one certain project. I want you to learn something new that you can adapt to your own style and can use for many projects to come.

Über*Media classes are dedicated to different kinds of media that cross a variety of materials.

I do have several Über*Media Workshops available right now for example Über*Media -PanPastel, -Acrylic Paint, -Gesso, -Acrylic Ink and -FoamStamplifier.

For my Creative JumpStart Über*Media Workshop I showed some of my favorite Über*Media Techniques that can be used in your Mixed Media, Scrapbooking, Altered Art and/or ArtJournal Projects.


And here are the supplies I used in the video:

nSupplies


Hope you enjoyed this :) have a gorgeous weekend
Nat

LogoBlogSignature

Comments (8)

  • Tami Howse

    |

    Thanks so much for the “refresher”, Nathalie. I didn’t take notes during Creative Jumpstart (my first year this year to attend) and I’m sorry I didn’t. I loved it, though! I can’t wait to try this technique again!
    Fondly, Tami

    Reply

  • ลиqεŁล

    |

    Gracias por tus clases! La técnica es genial!!! Te deseo unas Felices fiestas!! besitos

    Reply

  • grandscraperona

    |

    Nat…i have used this tech several times, because always the effect is different depending on on the colors and the spots of water created. !…thanks for replaying all your ten techs. Waiting for 20l4 Jumpstart!…Have nice Xmas time…

    Reply

  • Nurse Ratchet

    |

    One of my faves and I had not remembered it for awhile….TX LGL!!

    Reply

  • Pam in New Jersey

    |

    I forgot how much fun Creative Jumpstart is !!!!!

    Reply

  • rillamom

    |

    I hope you are planning to have a Creative JumpStart Summit 2014! I just loved CJSS 2012…..

    Reply

  • Dee in NH

    |

    Thanks for the revisit. I love it!

    Reply

Leave a comment

Gesso Stamping Technique

CJSUberMediaOWSLOGO

Those of you who were part of the Creative JumpStart 2013 saw the videos that me and my artist friends posted on my website throughout January. The videos are not available here anymore, since I have to make room for new fun things to come ..still thinking ;) …but I thought it would be nice to repost my 10 technique videos over the next couple weeks- so that you have access to them whenever you want.

And now let’s jump to the fourth video in my Über*Media Creative JumpStart 2013 Workshop which was a Gesso Stamping Technique – which I love a lot :)

If you have no external speakers on your pc – turn up the volume a lot (the audio is very low in this video)


This and the other techniques are part of some of my Über*Media Online Classes. They are there to free your creativity with techniques and how-to’s that go beyond one certain project. I want you to learn something new that you can adapt to your own style and can use for many projects to come.

Über*Media classes are dedicated to different kinds of media that cross a variety of materials.

I do have several Über*Media Workshops available right now for example Über*Media -PanPastel, -Acrylic Paint, -Gesso, -Acrylic Ink and -FoamStamplifier.

For my Creative JumpStart Über*Media Workshop I showed some of my favorite Über*Media Techniques that can be used in your Mixed Media, Scrapbooking, Altered Art and/or ArtJournal Projects.


And here are the supplies I used in the video:

nSupplies

I hope you enjoyed this little technique.

Have an amazing day!

nat

LogoBlogSignature

Comments (4)

  • Gerd Andersson

    |

    Thank you Nat, for reminding me of this technique! I really hope for a new CJS 2014!

    Reply

  • Laura Strack

    |

    Thank you for a blast from the past! Love Creative Jumpstart 2013!

    Reply

  • selena

    |

    merci pour cette bonne idée!

    Reply

Leave a comment

Embossing Tape Technique

CJSUberMediaOWSLOGO

Those of you who were part of the Creative JumpStart 2013 saw the videos that me and my artist friends posted on my website throughout January. The videos are not available here anymore, since I have to make room for new fun things to come ..still thinking ;) …but I thought it would be nice to repost my 10 technique videos over the next couple weeks- so that you have access to them whenever you want.

And now let’s jump to the first video in my Über*Media Creative JumpStart 2013 Workshop which was on how to create Embossing Tape- a technique I do love a lot for the fun effects you can get.

If you have no external speakers on your pc – turn up the volume a lot (the audio is very low in this video)

This and the other techniques are part of some of my Über*Media Online Classes. They are there to free your creativity with techniques and how-to’s that go beyond one certain project. I want you to learn something new that you can adapt to your own style and can use for many projects to come.

Über*Media classes are dedicated to different kinds of media that cross a variety of materials.

I do have several Über*Media Workshops available right now for example Über*Media -PanPastel, -Acrylic Paint, -Gesso, -Acrylic Ink and -FoamStamplifier.

For my Creative JumpStart Über*Media Workshop I will show you some of my favorite Über*Media Techniques that you can use in your Mixed Media, Scrapbooking, Altered Art and/or ArtJournal Projects.


And here are the supplies I used in the video:

nSupplies

I hope you enjoyed this little technique.

Have an amazing day!

nat


Comments (9)

  • Carmen Lucero

    |

    Thanks for making these videos available – I wasn’t able to complete the projects, so it’s nice to have a second opportunity! You rock!!

    Carmen L

    Reply

  • Amante del Papel

    |

    Nat thank you so much, for sharing this videos is very useful!

    Reply

  • Denise spillane

    |

    Loved this. I like to make my own tapes so this is another to add to my bag of techniques

    Reply

  • Denise spillane

    |

    Loved this. I like to make my own tapes so this is another to add to my bag of techniques

    Reply

  • Kathy Gledsdale

    |

    Thanks for sharing this! x

    Reply

  • Kathy P

    |

    Thanks for bringing this back, Nat! I need the refresher for sure….there were so many awesome techniques in this class, and I missed seeing it here!

    Reply

  • muriel

    |

    How nice to post the techniques again. It helps to refresh inspiration. I can’t wait to see what you are preparing.

    Reply

  • Donna

    |

    Thanks for sharing this technique here, I saw it and tried it in January and somehow FORGOT about it shortly thereafter!
    Hope you are settling in well here in USA.
    Peace,
    Donna

    Reply

  • Gunvor

    |

    That technique is soo cool! Thanks for reminding me!

    Reply

Leave a comment

Cocoa Daisy Kits Project Art

My friend Christine has recently introduced an Project Art Kit into her Cocoa Daisy Kit Club. A Project Art Starter Kit includes all necessary items to start you on artjournaling and each month there is a Project Art Kit released. So love this idea and concept! I was a happy camper to be invited to play with the August Project Art Kit.
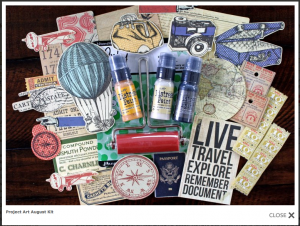
Bildschirmfoto 2013-08-20 um 15.09.36


Yumminess -first of all it comes with a brayer…and if you know me…you know I tell everyone who wants to know or can’t walk away fast enough, that a brayer is one of my favorite tools. And then the gorgeous tags and the Ranger Distress Paints. But ok…let me first show the spread in my art journal I created
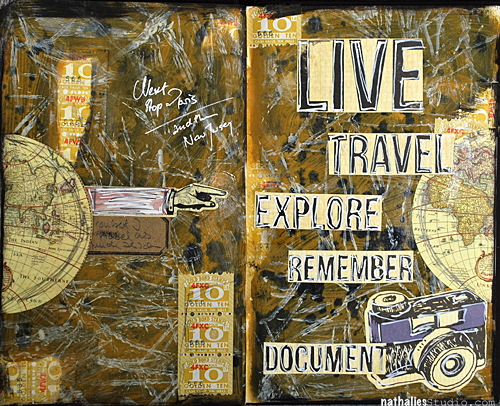
NathalieKalbach_Explore01


Grungy…as I like it :) Now…let’s see how this page came together.
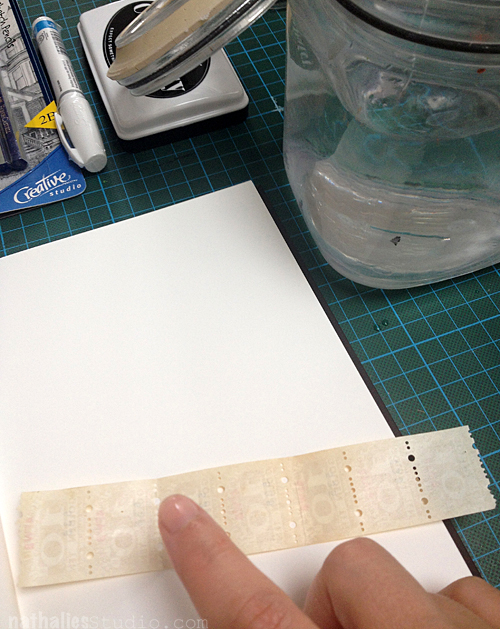
NathalieKalbach_ExploreTut01


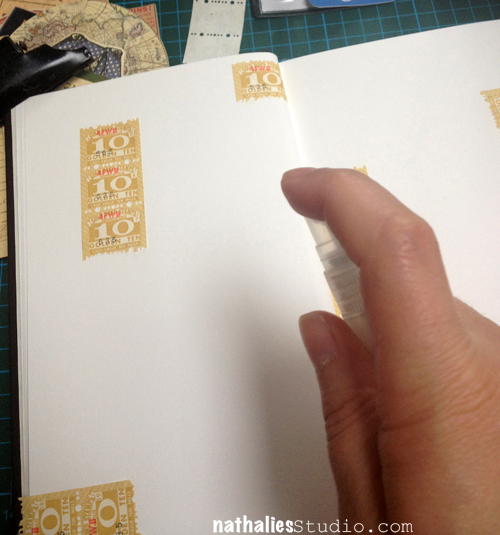
I took the vintage savings booklet stickers and realized that they are actually like stamps have an adhesive in the backing, which you can activate with water. So I simply took a couple, spread some water on the back with my finger and then adhered them to the page.
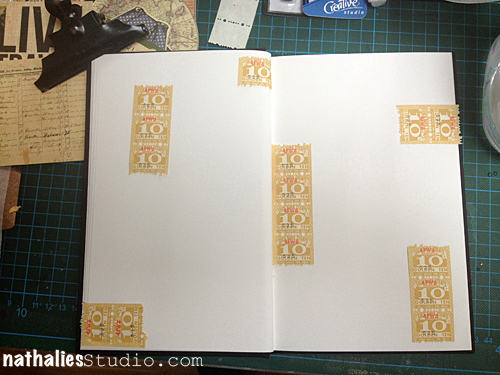
NathalieKalbach_ExploreTut02


Now there…better. I often times do things like this so that the terrible “don’t ruin the white page in my beautiful journal”-fear  cannot creep up on me ;)
NathalieKalbach_ExploreTut03


I took a water mister and applied some water spritzer to the paper in order to have the paint not soap right in. I used the Black Soot Distress Paint and spread it across the pages, making sure to no entirely cover up the savings stickers. Don’t forget to shake your Distress Paints before you use them – and do not squeeze them too tight, so that the paint is not leaking out on the bottom of the cap. It runs by itself no force needed.
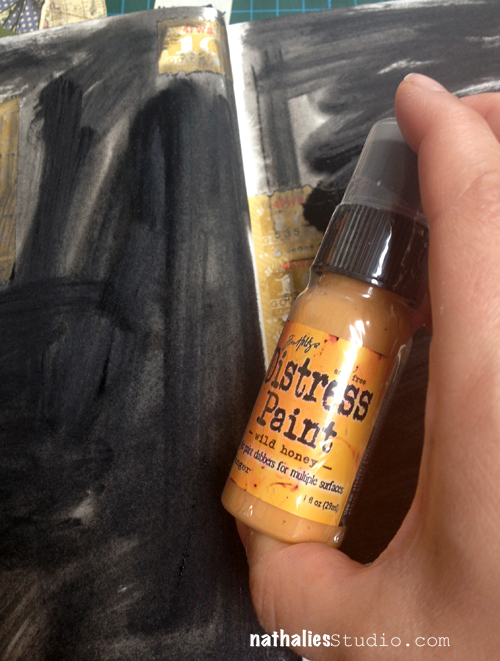
NathalieKalbach_ExploreTut04


After the Black Soot dried, I took the Wild Honey and applied it right over the black – you want to work quickly- as the paint shouldn’t dry.
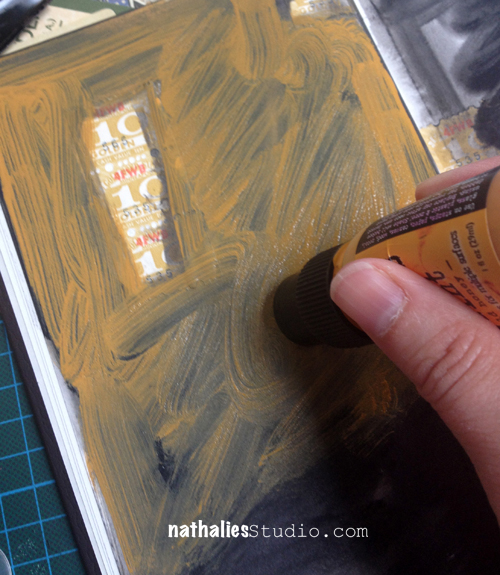
NathalieKalbach_ExploreTut05


If you are in a very hot or sunny area of the world- you might start with the one half of the book first and do the other half later.
NathalieKalbach_ExploreTut06

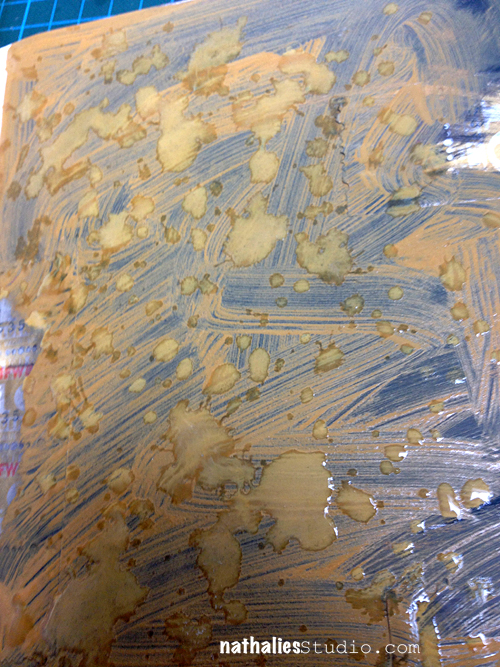
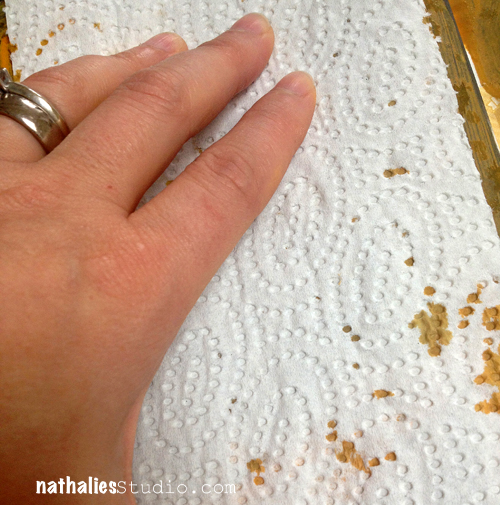
Next I cupped my left hand and spritzed some water through the water mister into it and then flicked the water over the wet paint. You want to have the area not covered with the water drops dry and the water drops still wet- you can see this pretty well in light.
NathalieKalbach_ExploreTut07


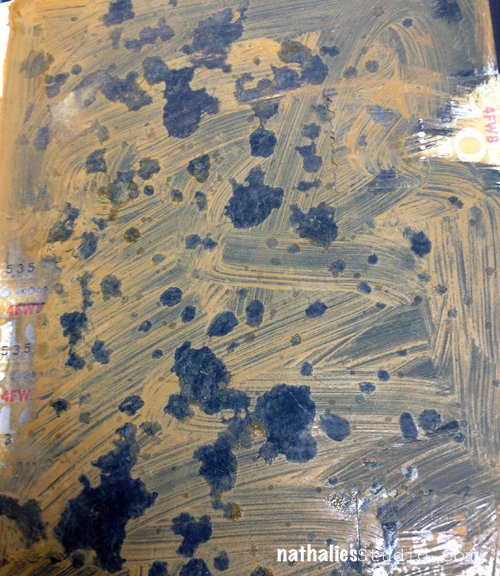
Then you take a paper towel and layer it over the page- press it down and lift off the water drops – which will also lift the Wild Honey paint lifted in those areas.
NathalieKalbach_ExploreTut08


Now- how cool is this speckled look?

NathalieKalbach_ExploreTut09


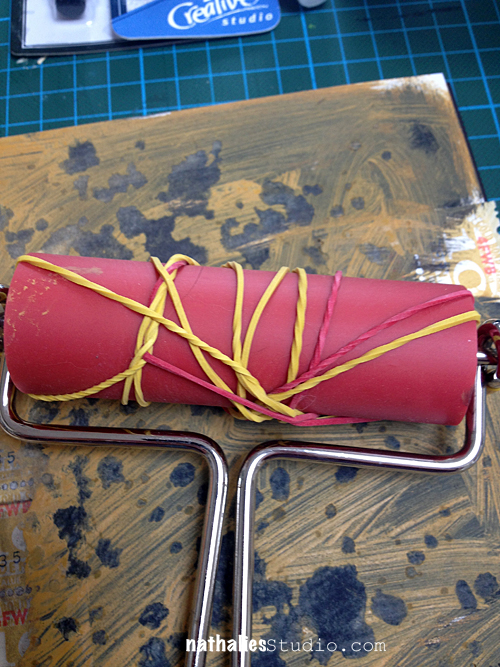
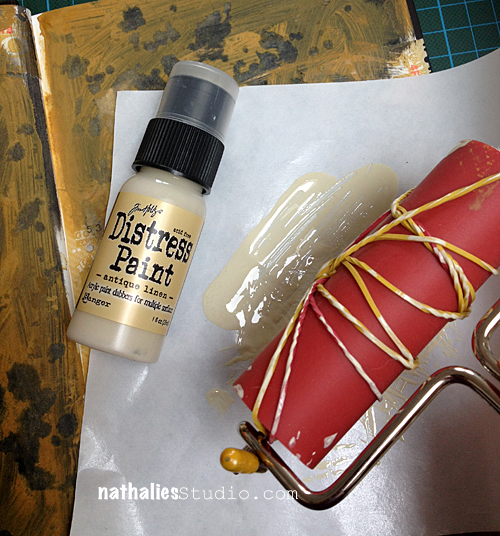
Next I took a couple rubber bands, took of the roller of the brayer – wrapped the rubber bands in a “kinda fancy” way around the roll and snapped it back into the handle.
NathalieKalbach_ExploreTut10


I put some Antique Linen Paint onto a piece of freezer paper (you can use a palette or do it on a craft mat – anything that is a surface where the paint doesn’t dry too fast) and then rolled the brayer with the rubber bands through it
NathalieKalbach_ExploreTut11


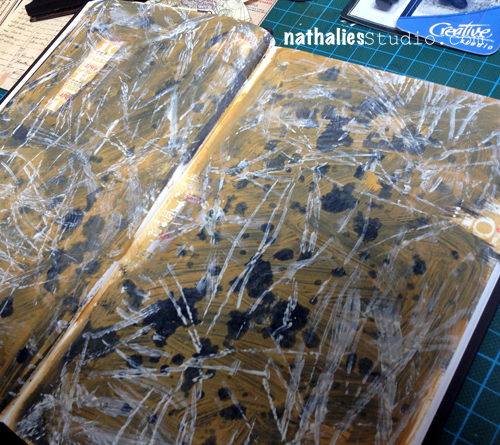
And then I rolled it like a maniac over the pages- that was fun – and I love the result :) It also lightens up the whole page.
NathalieKalbach_ExploreTut12


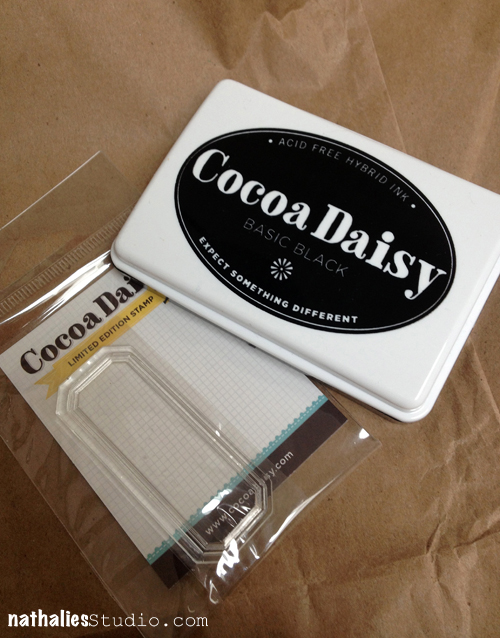
I love using packaging stuff – and as the kit comes in these beautiful kraft paper bags, I stamped with the Cocoa Daisy Hybrid Ink on the Stamp – also both in the Starter kit on top of the bag and then cut the image out.
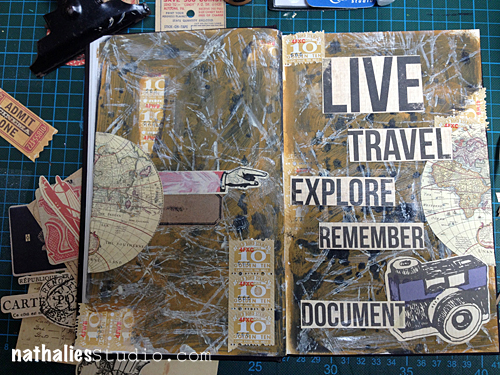
NathalieKalbach_ExploreTut13


then I layered some of the travel die cuts, the rest of the savings stickers and the stamped lable and applied them with Gel Medium. As you can see I cut the tag apart, as I wanted to spread the words out more and also wanted to show more of the background.
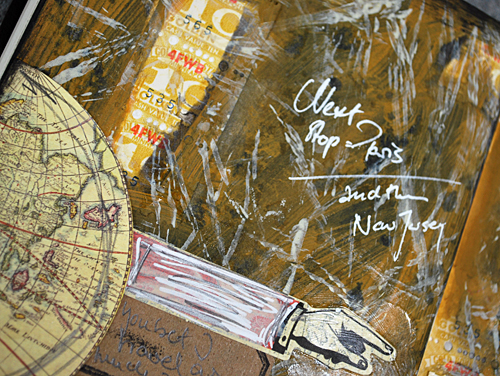
NathalieKalbach_Explore02


I made some marks with the pencil and the sharpie which are included in the starter kit .
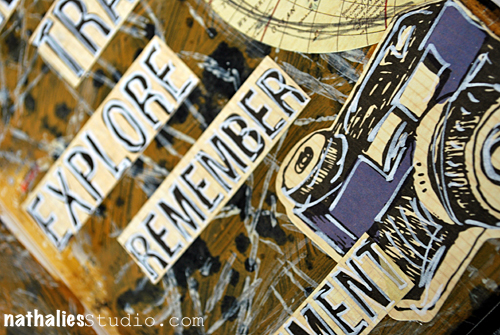
NathalieKalbach_Explore03


It ties the elements together with the rest of the page
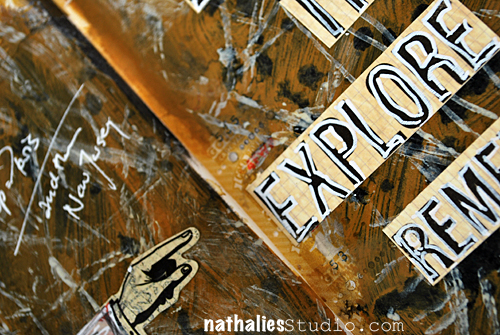
NathalieKalbach_Explore04


Love the many possibilities of the kit – and how ever you layer the colors- the result will always be different. Hope you enjoyed this little tutorial for your Project Art Kit.

Have a wonderful day


Nat


LogoBlogSignature


Comments (8)
  • ลngεŁล

    |

    WOWW! Me encanta!!! El fondo queda increible!!! Muchos besitos

    Reply

  • Louison

    |

    Thanks for sharing!! Your page is so beautiful!!!

    Reply

  • Mila

    |

    I love this page!! and I love working with the rubber chicken on the roller and also use them as stamp.
    Hughs

    Reply

  • Kathy P

    |

    Awesome work, Nat….love that brayering idea! Hopped over to Cocoa Daisy, too….I am going to have to subscribe to that PL kit! Very cute things in there!
    And welcome to the East Coast!!!

    Reply

  • Sue Clarke

    |

    What fun and I keep on forgetting to do the elastics on the brayer technique. I must try it soon.

    Reply

  • Jean A Marmo

    |

    Never thought to put rubber bands on a brayer! How cool!!!

    Reply

  • lisa

    |

    Love this Nat. What fab techniques x

    Reply

Leave a comment

Stencil Blog Hop – What’s The Point Stencil

NatKalbachStencilbloghop


Welcome to my 6th Stencil  Blog Hop! This time I invited 5 wonderful artist friends to hop along with me and show case my StencilGirl Product What’s The Point Stencil. It is a 9×12 inch stencil.

WhatsthepointKalbach


And I give away one What’s The Point Stencil! Comment here for an entry into this giveaway! And if you also comment on all the other listed blogs I will  give you an entry into the giveaway for each blog you comment on–how cool is that! You have six chances to win it. Leave a comment on each of the listed blogs and on my blog  and let us know how you like the projects and I will pick randomly one lucky winner. You have time to comment till September 3, 2013 – midnight EST.

 Edited on September 23, 2013: Congratulations to Jean A Marmo- you win the stencil- please contact me till October 10, 2013 with your snail mail addy so I can have this send out to you :) – Nat

Here are my friends joining me this time :

Jamie Dougherty: my wonderful mixed media artist friend from California- check also out her latest painted skateboards…too die for!

Carolyn Dube: who rocked the StandUp Bass last week already!

Andrea Gomoll: my super talented German friend from Berlin – we taught and organized a couple workshops together and she is one of my old Craft Mafia Gang Memberfriends;)

Marsha Valk: from The Netherlands who does AMAZING projects and photos and who I know pretty long now too :)

Maria McGuire: Let’s see what this talented lady does this week- she always surprises me with out of the box and cool projects!!!


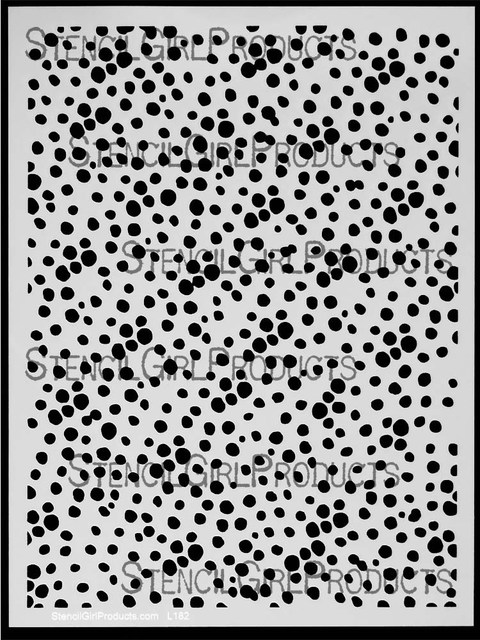
What’s the point about this stencil? Man…there is never enough dots- LOL. I love dots – and I use them all the time to tie things together – and I love the possibility of a nice background with it.  Check out some samples here:

Bildschirmfoto 2013-08-14 um 16.25.12


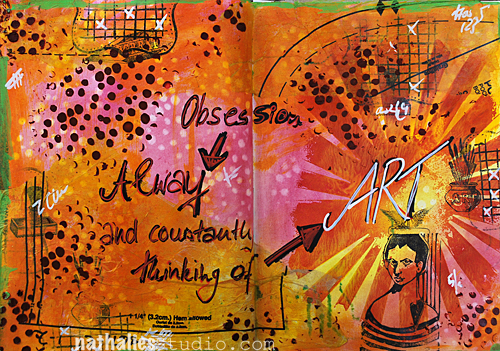
Here is what I created for today:

NathalieKalbach_Whatsthep01


I played a bit in my art journal -first creating a background with PanPastels.

NathalieKalbach_Whatsthep02


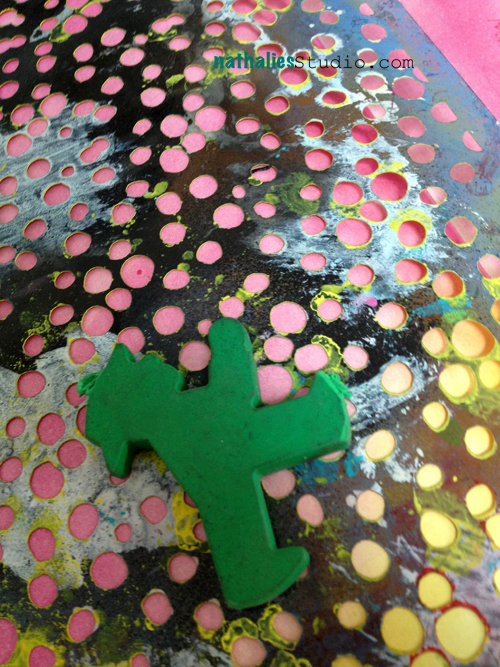
Then I placed the stencil on top of the panpastel background and used an eraser through the stencil.

NathalieKalbach_Whatsthep03


Here you can see how this erased the panpastel through the stencil. I fixated the background afterwards.

NathalieKalbach_Whatsthep04


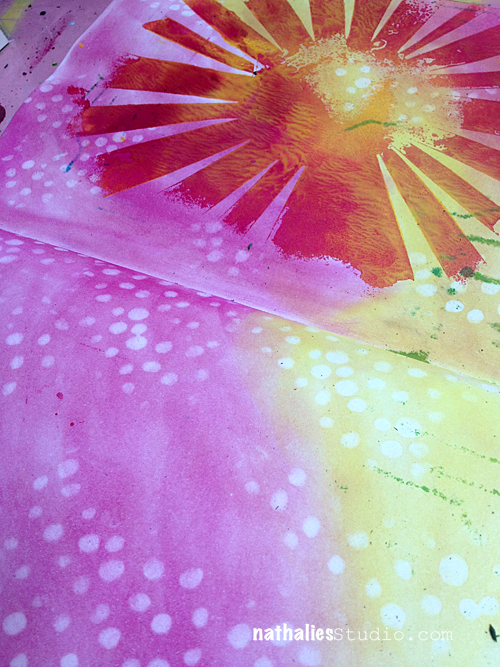
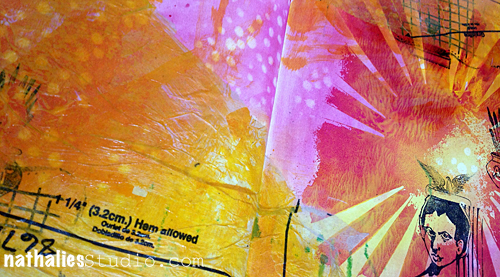
Then I added some old sewing pattern paper on top here and there and blended that in with some acrylic inks- as you can see..this lets the dots still shine through.

NathalieKalbach_Whatsthep05


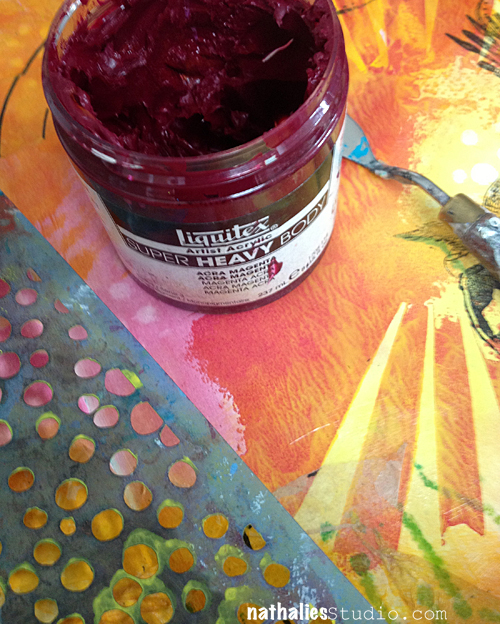
After spicing it up a bit here and there with stamps I used some Heavy Body Paint and applied this for texture over the Stencil too.

NathalieKalbach_Whatsthep06


So much fun to layer it with different media to get some depth on an art journal page

NathalieKalbach_Whatsthep07


Here are the supplies I used:

nSupplies

Now hop on over to my friends and check what they did and comment for some changes to win the stencil :)

Jamie Dougherty

Carolyn Dube

Andrea Gomoll

Marsha Valk

Maria McGuire


Have a wonderful day

hugs

nat


LogoBlogSignature


Comments (71)

  • Susan Brannon

    |

    So simple..and so cool..lots of uses..Thanks!

    Reply

  • Nancy Lee

    |

    This is really a super stencil. Love your piece.

    Reply

  • Tricia

    |

    Great project, Nat – love this stencil and the colors!

    Reply

  • Marilyn Kaye

    |

    Love the layering you created with your stencil. The bright colors are right up my alley!

    Reply

  • JudyG

    |

    I agree! There are never enough dots!

    Reply

  • Barbara I.

    |

    Wow! I so LOVE this stencil. Thanks for a chance to win it and for sharing how you used it to create your journal page. Awesome techniques. I like the use of the Heavy Body Paint. Crossing my fingers!

    Reply

  • angi eharis

    |

    love these circles, especially everything you did with them! tx for the chance to win them, aloha, angi in hana

    Reply

  • Nancy Sapp

    |

    Nat – Would LOVE to win 1 of your stencils!! And we can never have enough DOTS in our lives!

    DOTS of love!
    Grandma Nancy Sapp

    Reply

  • Cat

    |

    I love the way you used the What’s the Point stencil on your journal page! And, the color are awesome! Now I have to own this one as well. If you keep introducing me to more stencils, it’s going to start taking a serious bite out of my paycheck!.

    Reply

  • Ivonne

    |

    Super!

    Reply

  • Kathy

    |

    Love the bright colors! Question: did you use fixative to set the Pan Pastels before adding paint? I rarely incorporate Pan Pastels because of the mess, although I love them. I’m inspired to use them!

    Reply

  • Trena in Naperville

    |

    Very cool design Nathalie! Love your colors and how to you add splashes of color.

    Take care and STAY POSITIVE!

    Reply

  • Jeannette

    |

    Sorry for THE weird comment. Autocomplete made THE stringent words …

    Reply

  • Jeannette van Dongen

    |

    Love THE work you did urinegewogen thuis stencil! Hope to win one ….

    Reply

  • Jeannette van Dongen

    |

    Love THE work you did urinegewogen thuis stencil! Hope to win one ….

    Reply

  • Gillian Pearce

    |

    Love the look of that super heavy body paint. I’ve never seen it before. Looks perfect for stencils.

    Reply

  • ina

    |

    I’m just starting out with stencils. Love this one!

    Reply

  • Lissa

    |

    Love it! You can never have enough colors or stencils!

    Reply

  • Lissa

    |

    Love it! You can never have enough colors or stencils!

    Reply

Leave a comment

Stencil Blog Hop – Circuit

NatKalbachStencilbloghop


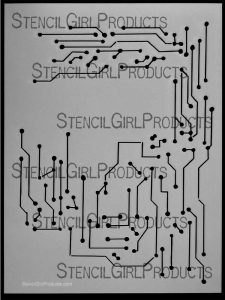
Welcome to my second Stencil  Blog Hop! Again I invited four wonderful artist friends to hop along with me and play with my StencilGirl Products Circuit Stencil which is a 9 x 12 Stencil

Circuit Stencil S161


And I give away one Circuit Stencil!Comment her for an entry into this giveaway! And if you also comment on all the other listed blogs I will  give you an entry into the giveaway for each blog you comment on–how cool is that! You have five chances to win it. Leave a comment on each of the listed blogs and on my blog  and let us know how you like the projects and I will pick randomly one lucky winner. You have time to comment till August 6, 2013 – midnight EST.


Edited August 8, 2013: The winner is Dorothy McCarthy – Congratulations. Dorothy please email me with your postal address so I can get this stencil sent out to you :) , Nat

Edited September 23, 2013: Although I tried hard to get the winner’s addy – I never heard back. I will do a new drawing from a different post soon as I am sure someone else will be happy to receive the stencil :)


Here are my friends joining me:

Stephanie Schütze who joined me last week already and did some amazing cards and a layout- I love her style!

Birgit Koopsen a close friend of mine, not only do I love teaching together with her…she is also super duper colorful in her work!

Marjie Kemper, I met Marjie in NYC a while back when I was teaching workshops- and she is doing amazing things on her blog – check her out!

Samie Harding  – is a huge art journaler who also does a lot of fun videos on her art journaling.


I designed the Circuit Stencil because I do love technical signs in my work -I love when something is whimsy and then you can put some straight technical background to it. I also wanted to have a stencil which you can use as a background stencil but also to frame your work.

Check out some samples here:

Bildschirmfoto 2013-07-29 um 14.31.15

Here is what I created for today:

NatKalbach_CircuitStencil01

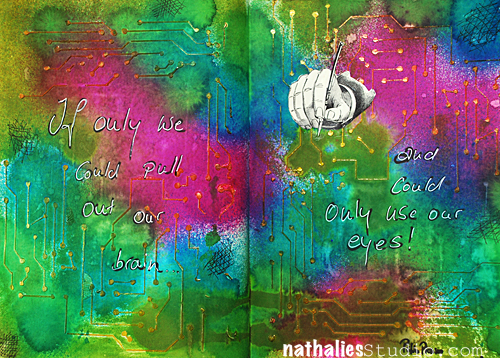
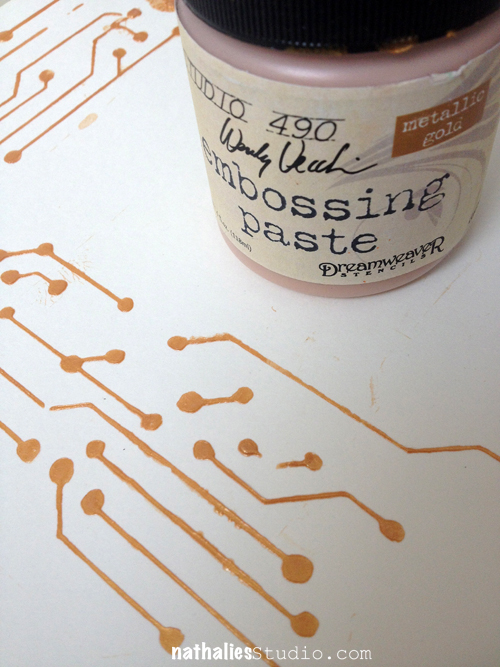
It is a very simple yet colorful sparkling art journaling page :) I used Wendy Vecchi’s Golden Embossing Paste over the Stencil- simply scrape it over with an old credit card or hotel key card.

NatKalbach_CircuitStencil03

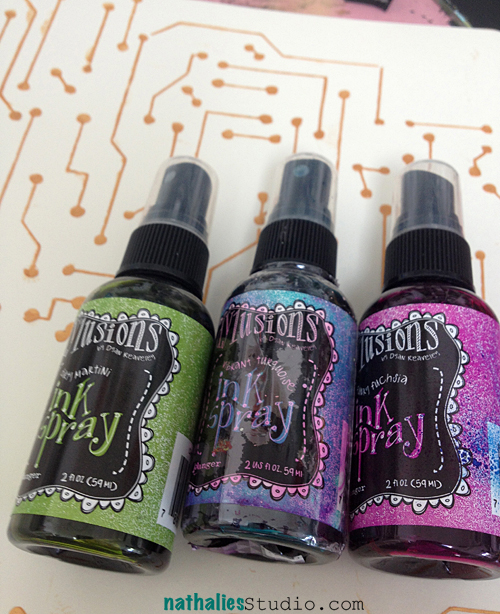
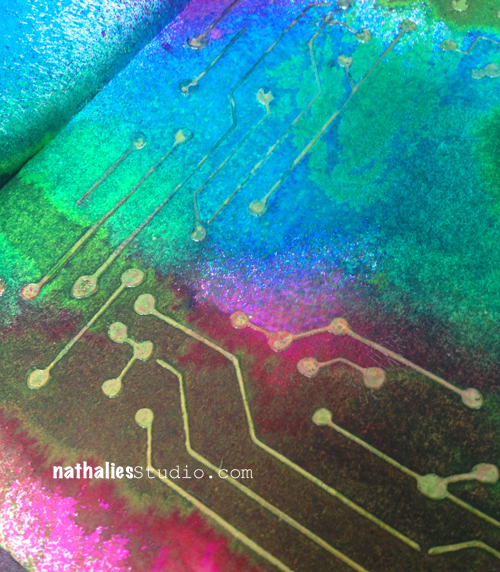
I let it dry and then used three different colors of Dylusion Sprays over it.

NatKalbach_CircuitStencil04

At some areas I dabbed the color off while still wet – so it got sparkly gold again, at some areas I just let the color sit and dry on top of the circuit pattern.

NatKalbach_CircuitStencil05

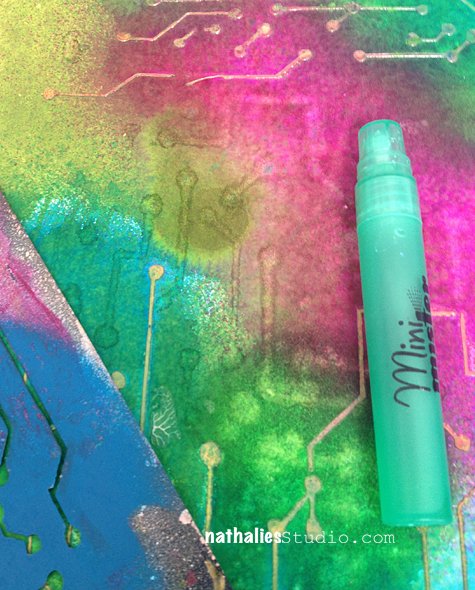
Next I used a water mister and laid out the Circuit Stencil over areas that weren’t covered yet with the pattern, spritzed over the stencil and used a rag to rub through the stencil. As the Dylusions get reactivated by water, you take off some of the colors and get a little Circuit Ghost Effect :)

NatKalbach_CircuitStencil06


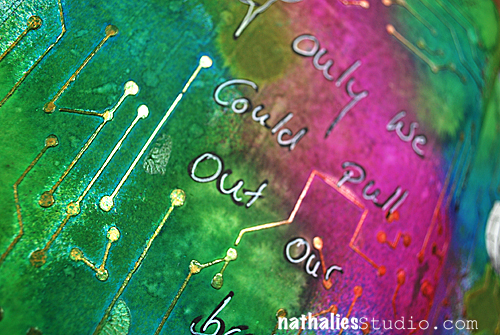
Voila- a nice background that you can add photos, journaling, stamping etc. I simply used a little quote I liked, by Pablo Picasso – I love filling my art journal with quotes.

NatKalbach_CircuitStencil02

Here are the supplies I used:

nSupplies

Now hop on over to my friends and check what they did :)

Stephanie Schütze

Birgit Koopsen

Marjie Kemper

Samie Harding


Have Fun

Nat

LogoBlogSignature

Comments (98)

  • loey

    |

    “processing” the possibilities of those circuits! if used as layers will the route be “circuitous”?! my muse is feeling a kinship to overlapping neural circuits!!

    Reply

  • Tameko

    |

    Fabulous journal page. Love the way you used the stencil with the embossing paste.

    Reply

  • Tricia

    |

    This stencil makes brilliant backgrounds. Congratulations!

    Reply

  • Miriam Prantner

    |

    Gorgeous page and I really love this stencil, it’s such a great size and the pattern is so versatile!

    Reply

  • Ann Jobes

    |

    What a beautiful bright page that just pops off the screen! Congrats on your stencil design – it looks very fun to work with.

    Reply

  • Devin

    |

    I absolutely love what you did with this stencils and all those bright colors!!! Thank you for sharing.

    Reply

  • Toni Leli

    |

    What a great stencil — right up my Techie style!

    Reply

  • Sue Pompetti

    |

    What a variety of beautiful images made with this very cool stencil!

    Reply

  • Carolyn Dube

    |

    Love these circuit lines and dots! So perfect in so many ways! Love it here with all the bright colors!

    Reply

  • eSeN

    |

    Oooh! I love the stencil and I love your page! So colourful and then a pop of elegance with the gold embossed stencil design.

    Reply

  • Ruth

    |

    I’m a software developer and love this stencil!

    Reply

  • Nurse Ratchet

    |

    This stencil is so versatile …fabulous art!!

    Reply

  • Kate

    |

    I love the use of this circut stencil. The colors are amazing and I love the composition!

    Reply

  • Tecla

    |

    Hi Nat, what a cool use and combo of mediums and of the stencils. My mother’s maiden name was Kaulbach. I wonder if we’re related. she was dutch. thanks!!

    Reply

  • Kay Wallace

    |

    Since I am taking a class with Wendy Vecchi this weekend, I was especially interested in your use of her embossing paste and your oh-so-brilliant stencil! They work so well together to create both texture and interest! Love the result, Nat! Bravo!

    Reply

  • Julie G.

    |

    Great journal page! Love this stencil. I work in a tech environment and when I see the CAD designs I see art :)

    Reply

  • Marjie Kemper

    |

    How cool is that??? Love your page! Thanks so much for inviting me to play with your awesome Circuit stencil. But hey ~ who said you could use a hand? *wink*

    Reply

  • Caroline D.

    |

    Beautiful page and the circuits look great with the colors over the gold embossing paste!

    Reply

  • Jane

    |

    layers, layers, layers… and awesome color!… the shadows add a lot.

    Reply

  • angi eharis

    |

    amazing! i saw this stencil and did not think too much, and of course after seeing what u did my head is spinning with endless possibilities! i want it! tx for sharing and inspiring, aloha, angi in hana

    Reply

  • Gayle Price

    |

    Such a cool little stencil and I love how you have used it in combination with a metallic and those gorgeous bright colors.

    Reply

  • Sandy

    |

    The WV Embossing paste is new to me. Bet that gold just glitters! Great stencil design. Thanks for sharing your techniques, Nat!

    Reply

  • Amie

    |

    Nathalie, This is my favorite stencil so far. Just perfect for a bit of a tease towards all of the tech in our worlds. I am surprised to see you so active prior to the big move. Wonderful.

    Reply

  • Robin

    |

    Love the circuit stencil. As an Imaging equipment engineer, I’d love to try these!

    Reply

  • Yvonne

    |

    What beautiful color. So bright and vibrant. At first I wasn’t sure what I would use your stencil for but after being at the hop, I realized all the wonderful things that it would make. Love it.

    Reply

    • emilie

      |

      Love this stencil – makes me think of all the energy and wiring in my head! As an artist and someone with bipolar, neural pathways really interest me. I would live to use this stencil to explore the pathways of my marination and creativity

      Reply

Leave a comment