Blog: Downtown

Stencilbop Challenge Prompts 3-4

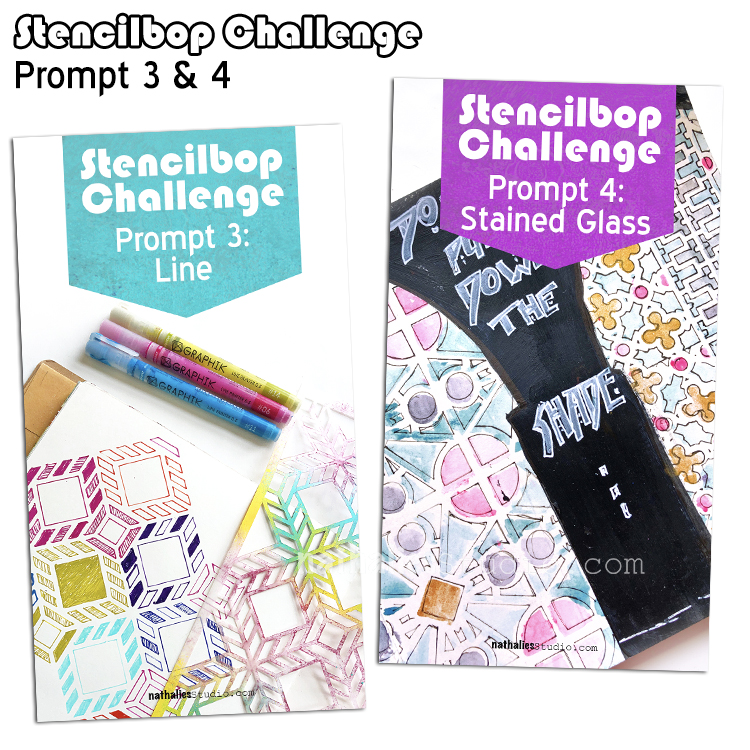
Here is an overview of Prompts 3-4:

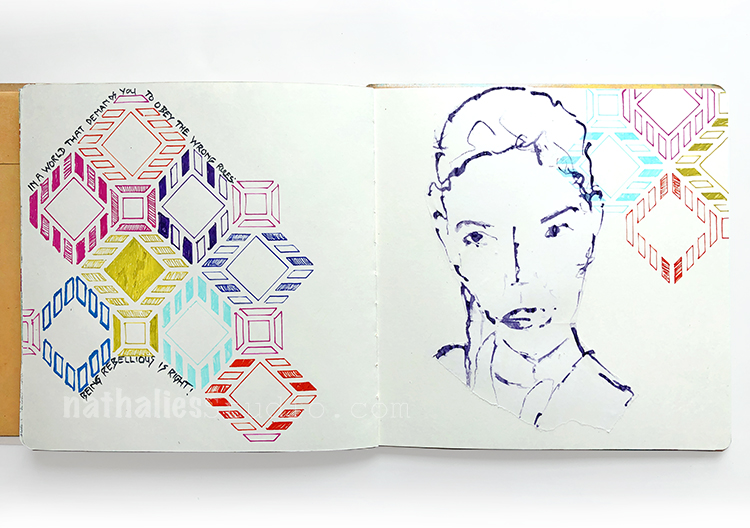
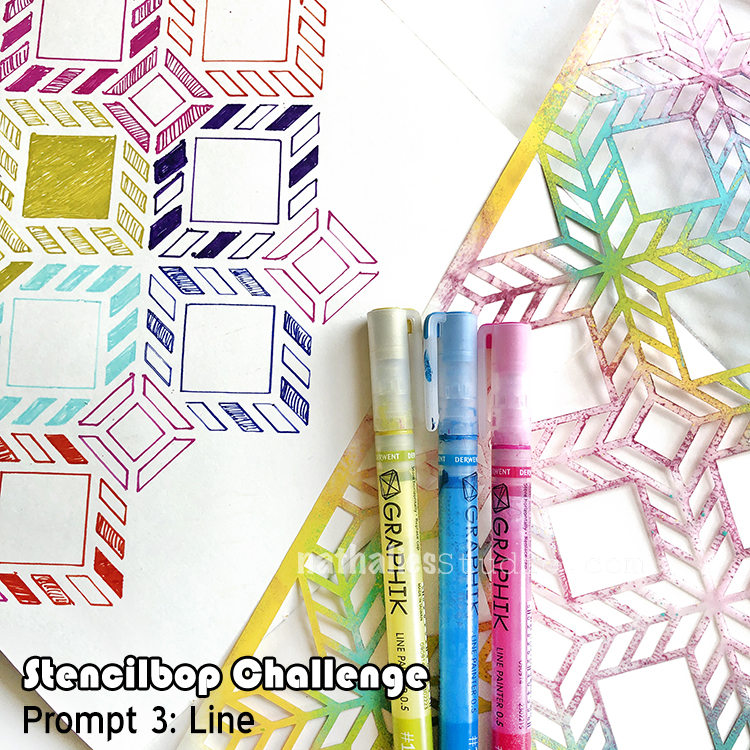
August 3 – Line 

I love using my stencils with markers and create different variations of lines- it is a total zen approach – better than a coloring book in my opinion ;)

Here I used my Santiago Stencil and some Derwent Graphik Liners and just lined up some colors  – pun intended ;)

Easy peasy but don’t be fooled …this takes a while.

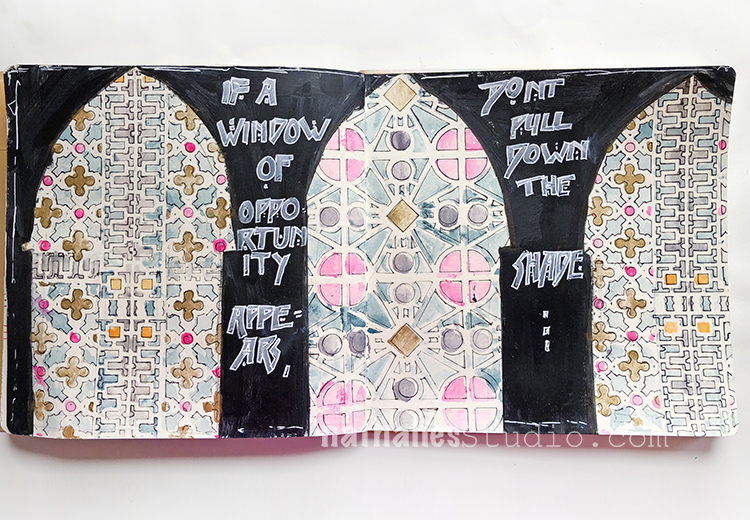
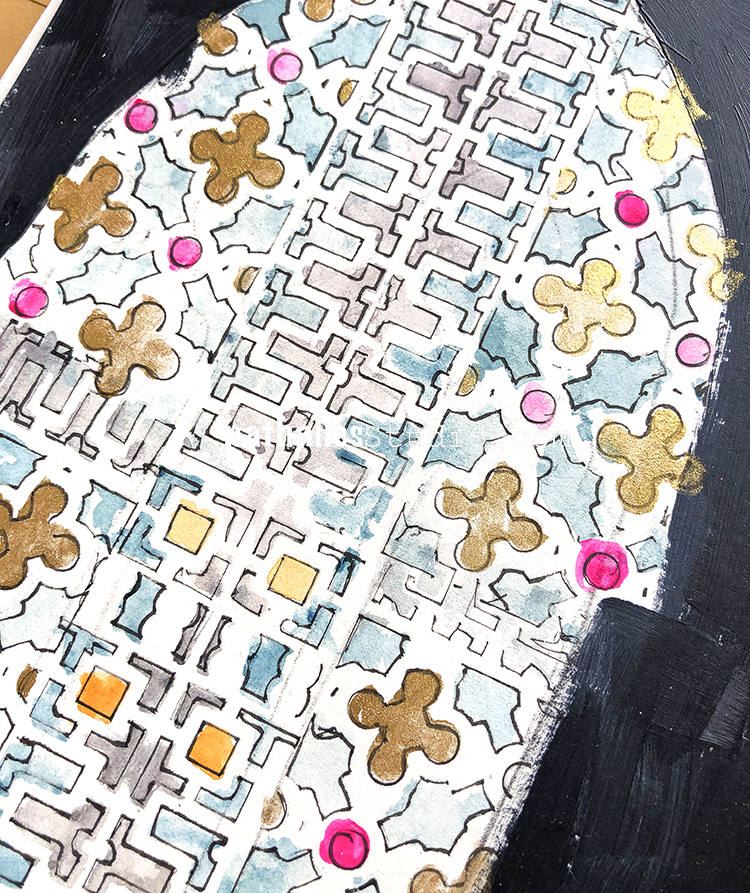
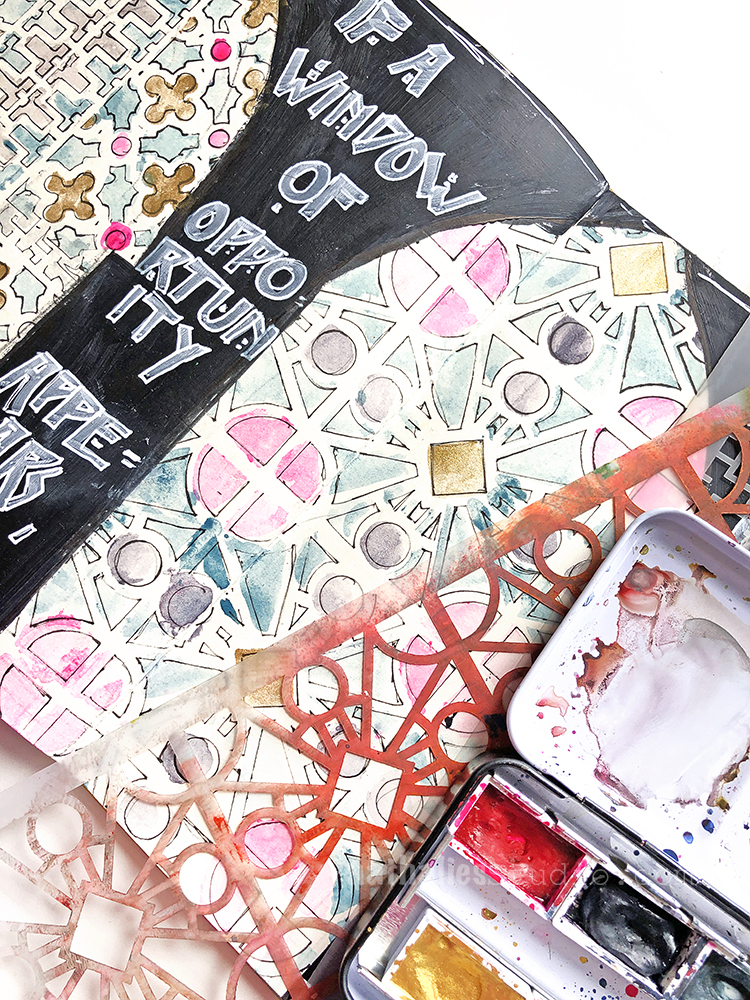
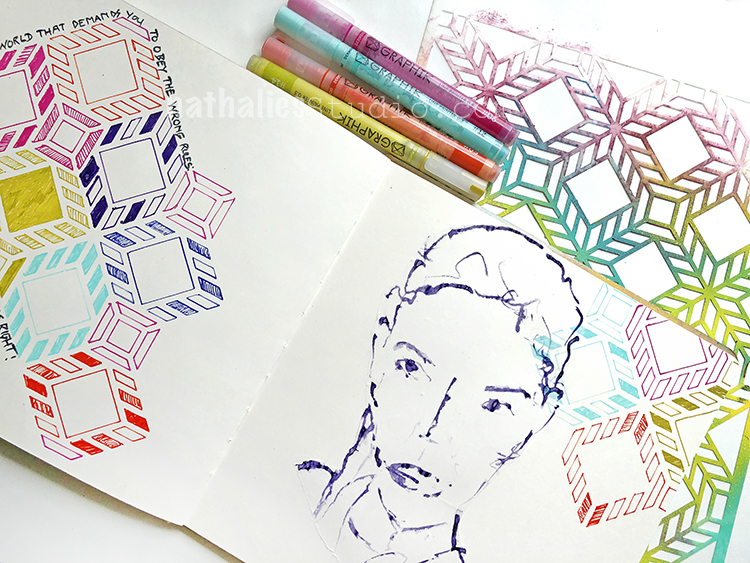
August 4 – Stained Glass

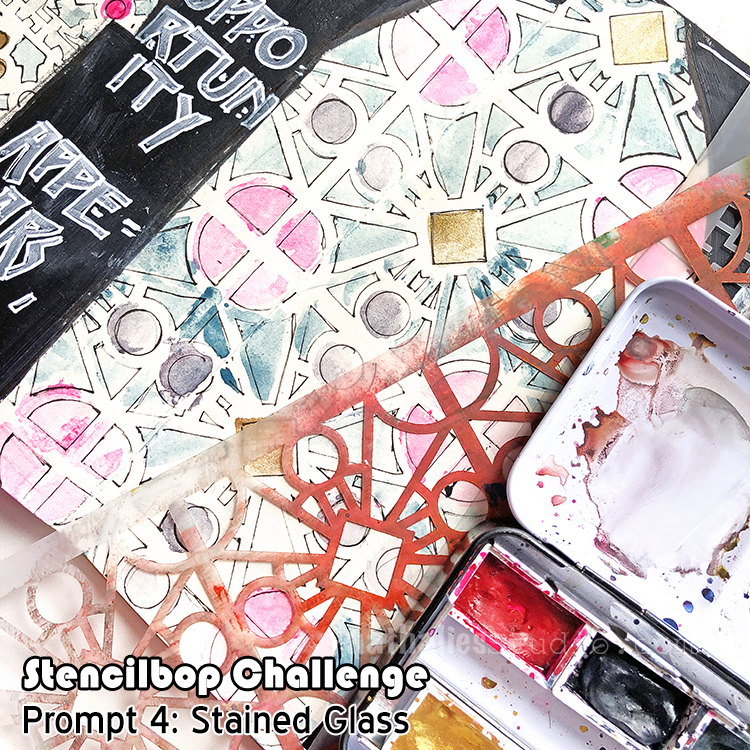
Watercolor might not be the first medium to use with stencils that comes to mind but I do love the stained glass effect.

For this journal spread I added some watercolor very loosely through the Downtown and through my Buenos Aires Stencil – I didn’t care too much about crisp lines but always started spreading the paint out from the middle of the opening towards the edges of the stencil.

Later I defined the stencil pattern by using a thin black micron pen. 

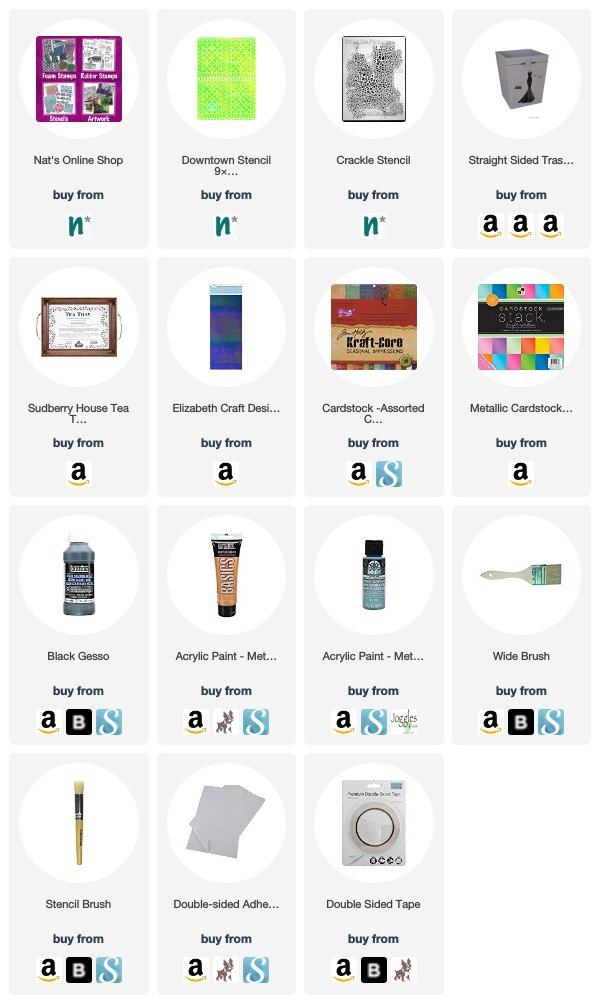
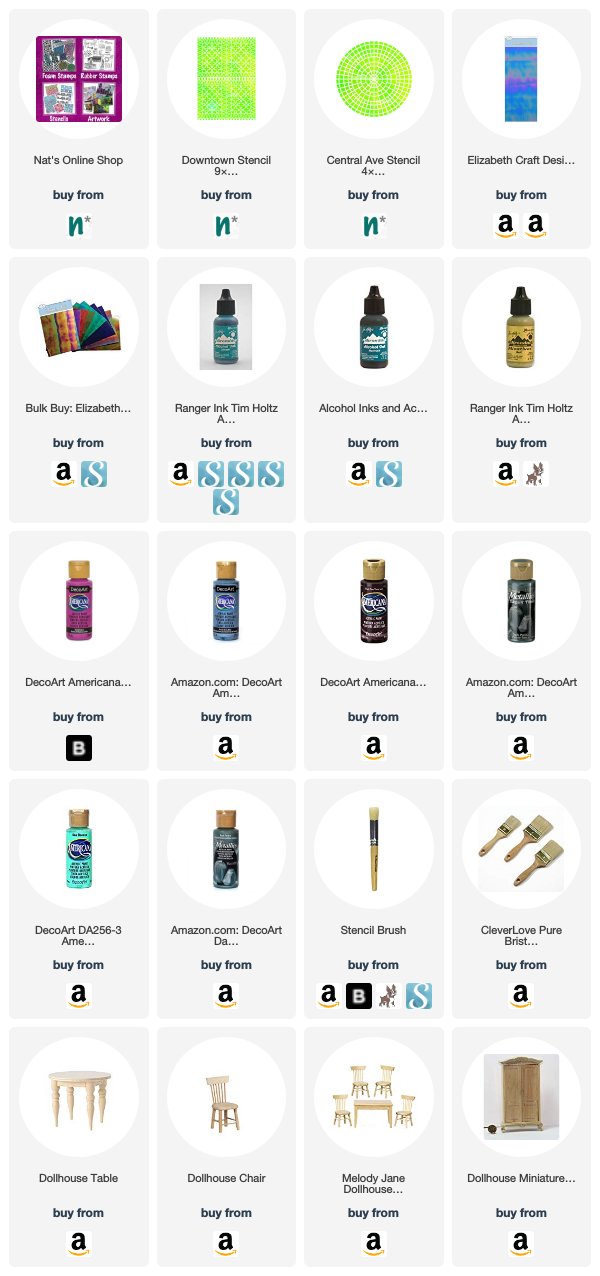
Here are some of the supplies I used in these prompts:

Follow along on the prompt list and on my insta feed!

Leave a comment

Food for Thought – Judi Kauffman

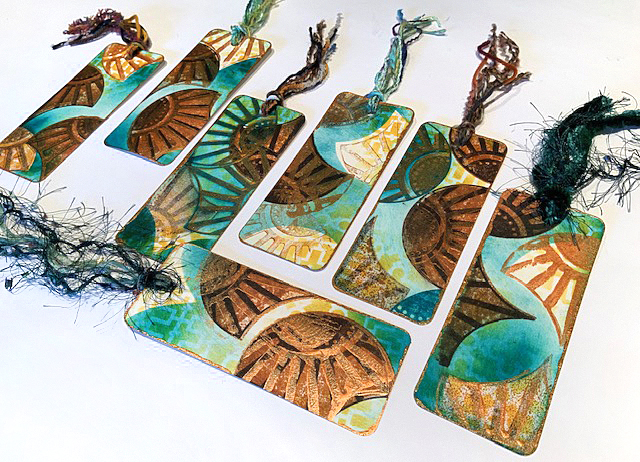
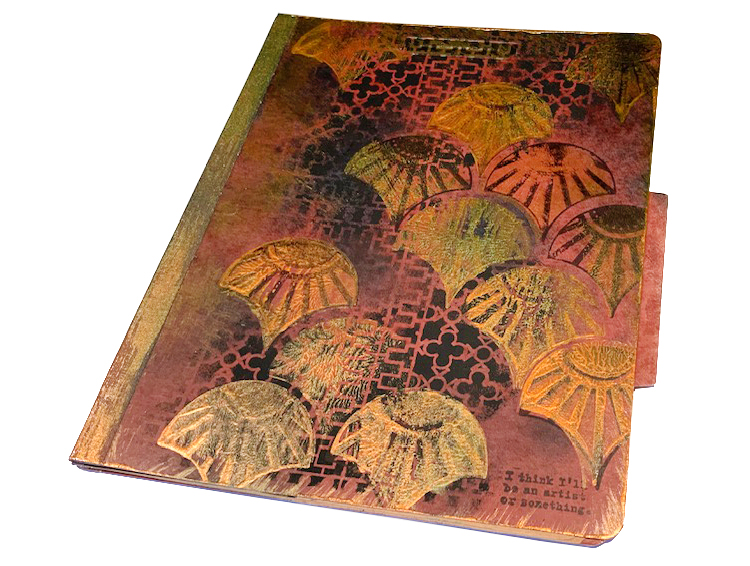
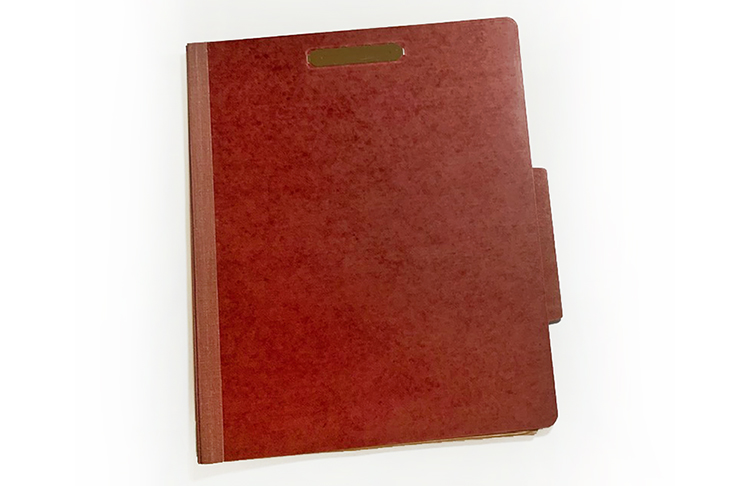
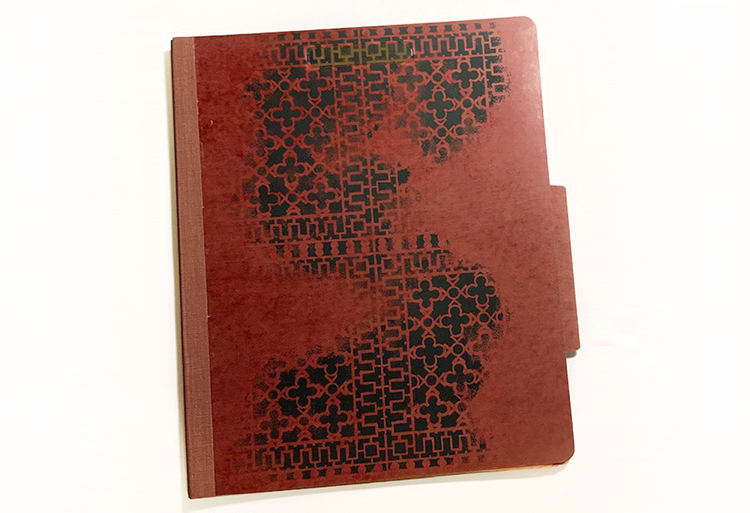
Hello from my Creative Squad! Today we have a post from Judi Kauffman. You can learn more about Judi from our Nice to Meet You blog post featuring her creative story and artwork. This time Judi is sharing some upcycled folders and some new bookmarks that she creates using my Downtown Stencil and my FANtastic Large and Solid Fan rubber stamps. This month’s theme is: Food for Thought – Let’s take a lighthearted look at food! While the culinary world has become an art and a science in terms of preparation and presentation, sometimes it is the simplest foods that bring us the most joy. Simple fare or elaborate family traditions, we all have our favorite foods. What is yours?


Food for Thought is such a great theme. I asked a neighbor, age 8, what it meant to her and she said it was about reading because reading is food for your brain! Out of the mouths of babes, right? 

I’d been considering recipe cards and a mixed media spoon doll, but her comment took me in a different direction: Bookmarks and a folder for storing newspaper articles, drawings cartoons, clippings from magazines! Of course the bookmarks could be tucked into recipe books, making it easy to find favorites, and the folder could be used for recipes, but I think if I went that route I’d use lighter, brighter (more ‘appetizing’) colors.

Instructions for Folder:

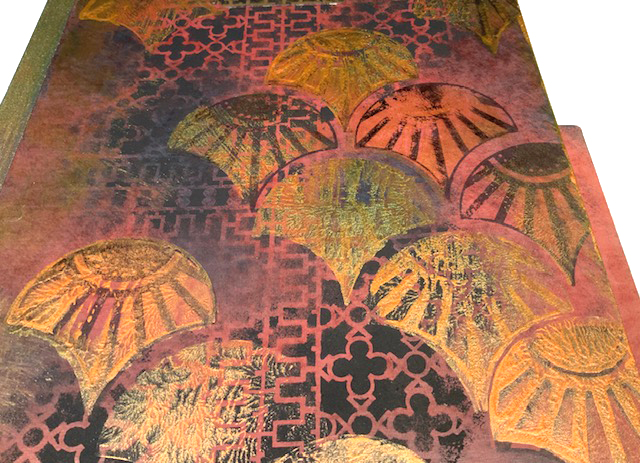
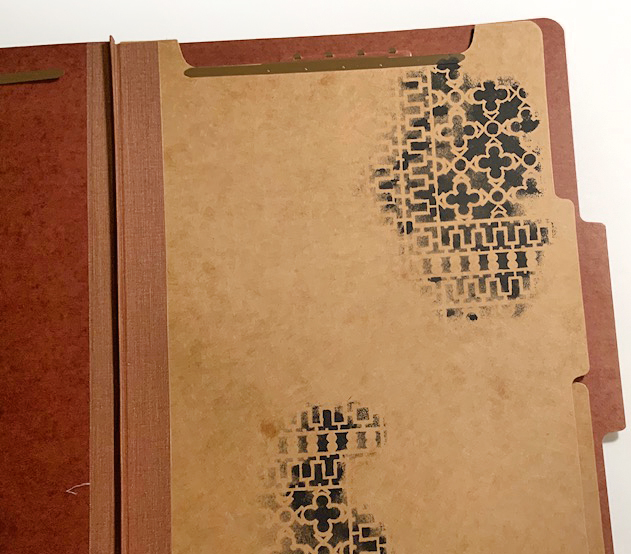
1. Using black acrylic paint, randomly add portions of the 9×12 Downtown stencil to the front and inside flaps of the folder.

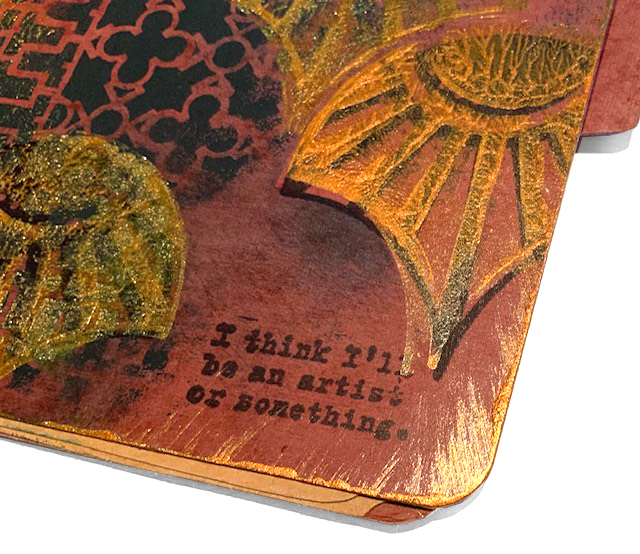
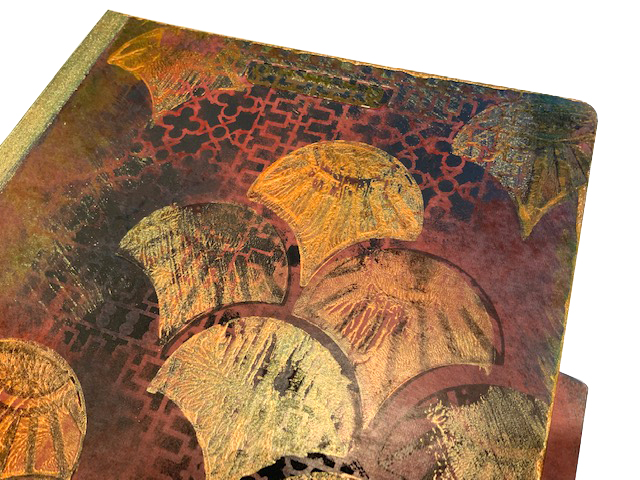
2. Using copper metallic acrylic paint and black permanent ink, stamp Solid Fan and Broadway Fan onto the cover and inside flaps of the folder. 

3. Using a stiff brush, add copper paint to the left side and all edges of the folder, and randomly on top of the stamped and stenciled areas. 

4. Using a craft sponge, add teal ink here and there, masking some of the fans to add color around the shapes.

Instructions for Bookmarks:

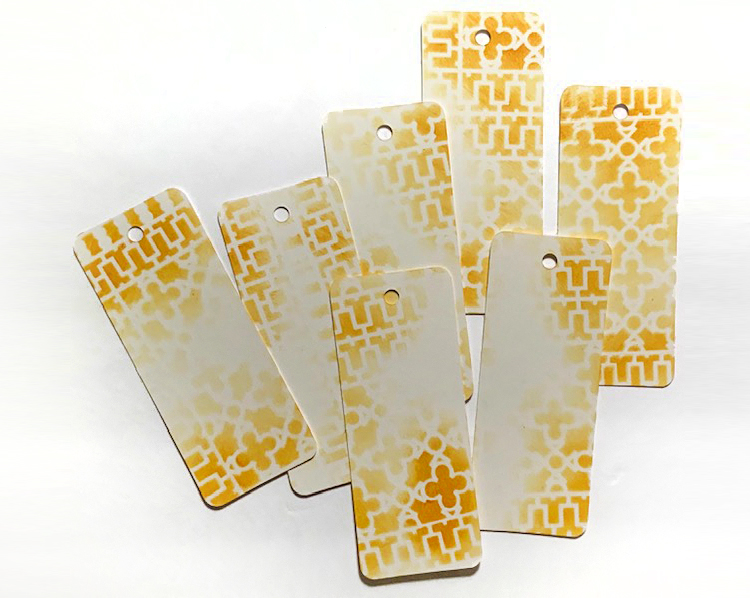
1. Using a light butterscotch ink, randomly stencil portions of the 9×12 Downtown stencil onto a batch of bookmarks. 

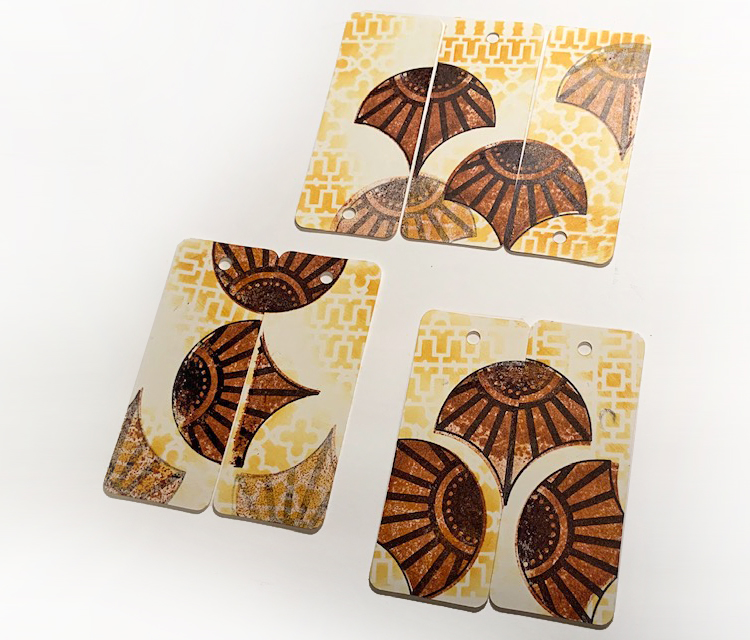
2. Using ginger and black inks, randomly stamp Solid Fan and Broadway Fan onto the bookmarks.

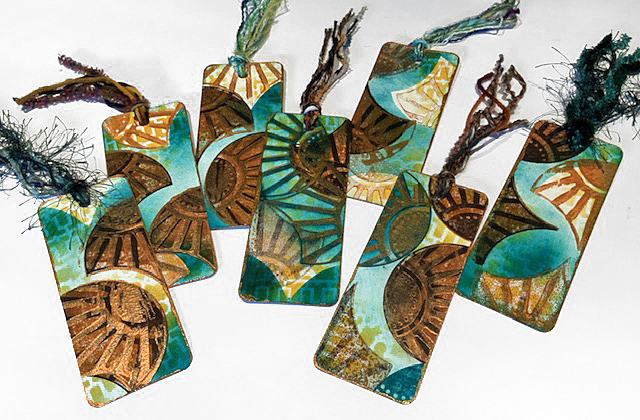
3. Using teal ink followed by copper metallic acrylic paint, stamp Broadway fan on top of inks from step 2. Allow to dry.

4. Stamp a fan, cut it out to use for a mask, and use teal ink to smudge around some of the fans for contrast and to create a mottled background.

5. Add copper paint around the edges of each bookmark. Allow to dry.

6. Add fibers to the hole at the top of each bookmark.


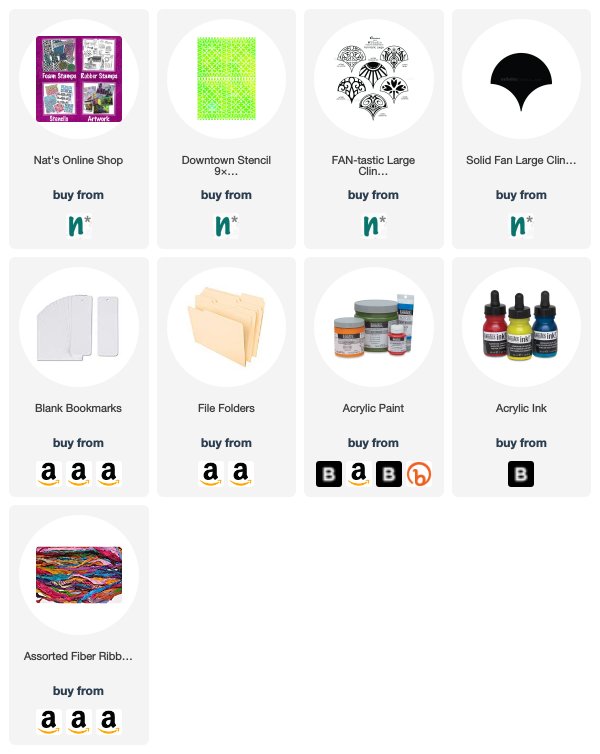
Thank you Judi! I love this take on our monthly theme! You can find all of my Rubber Stamps and my Stencils in my online shop. Here are some of the supplies Judi used:

If you are working on something yourself that you’d like to share, please do! I would love to share your projects in my next  “n*Spiration From Around the Globe“.

And TODAY is the last day to buy Creative JumpStart 2019 (the one that was released back in January of this year) so if you haven’t yet you can sign up here. It is an amazing lineup of artists, full of inspiring and fun content, and you have until November 15th to download all the videos.

Leave a comment

The Stencilfied Journal – Prompt 18

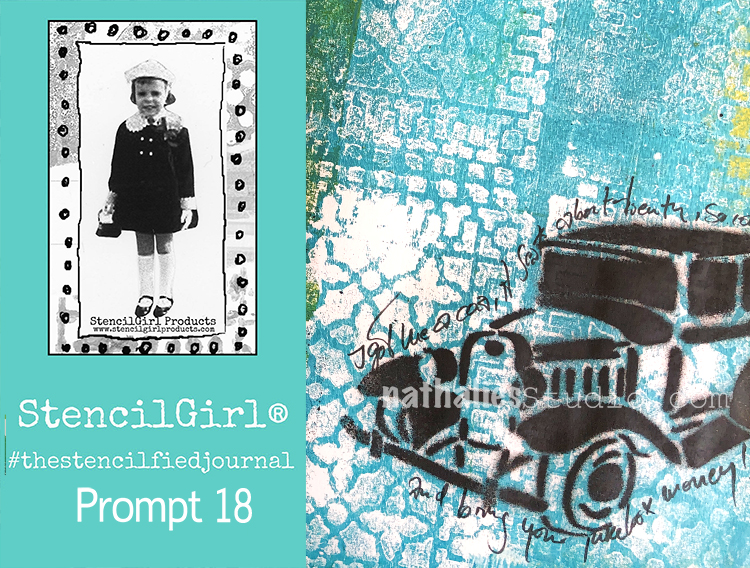
My wonderful friend Tina Walker is at it again – she invited several people to join her Stencilfied Prompts. The prompts are music related and each week she is posting a song. You can be inspired by the lyrics, the video, the album cover or anything related and the only restriction is that you have to use StencilGirl Product Stencils. Here is my take on Prompt 18

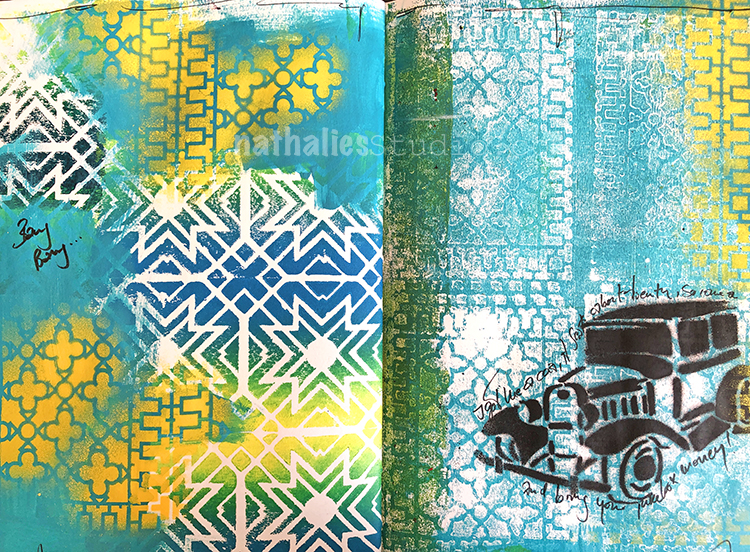
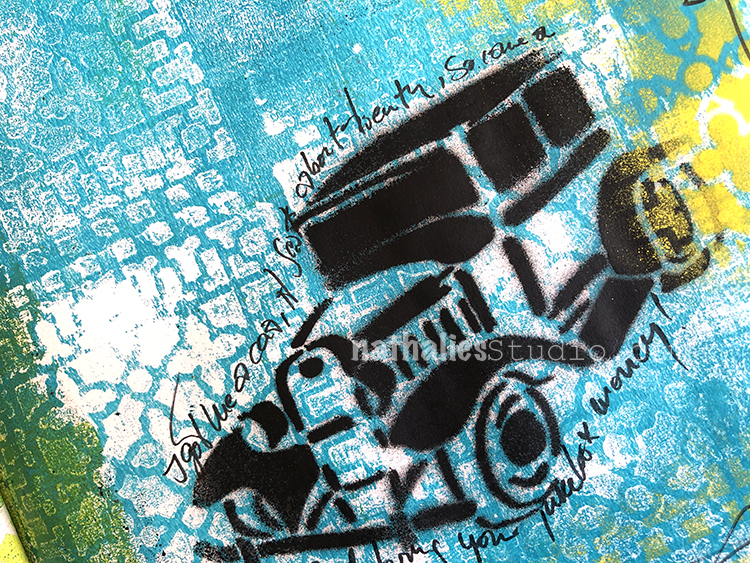
This week’s prompt was The B-52’s Love Shack and I love it! Super fun and great video so I was inspired to really play up some bold patterns and colors with this one.

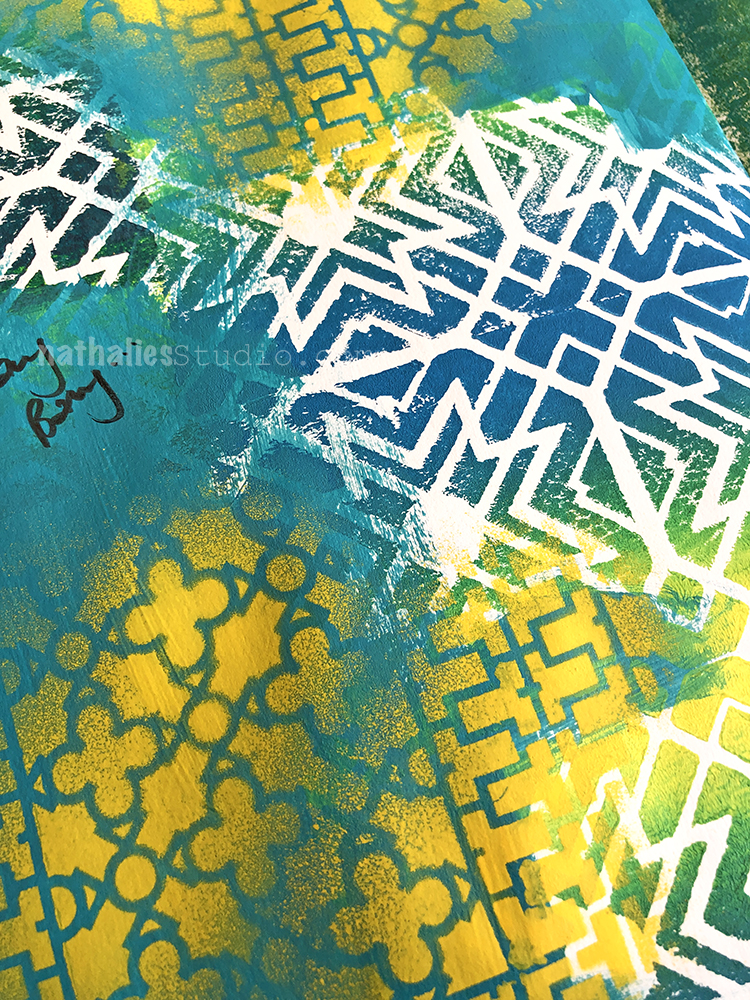
I used acrylic paint over spray paint with my Downtown stencil and my Toledo foam stamp. It’s an energetic song so an energetic background here.

My Oldtimer stencil was a must for the song, and then I repeated the Downtown pattern with my foam stamps. ” I got me a car, it seats about twenty, so come on and bring your jukebox money !”

Here are some of the supplies I used:


Leave a comment

Let’s Jump with the Creative Squad – Judi Kauffman

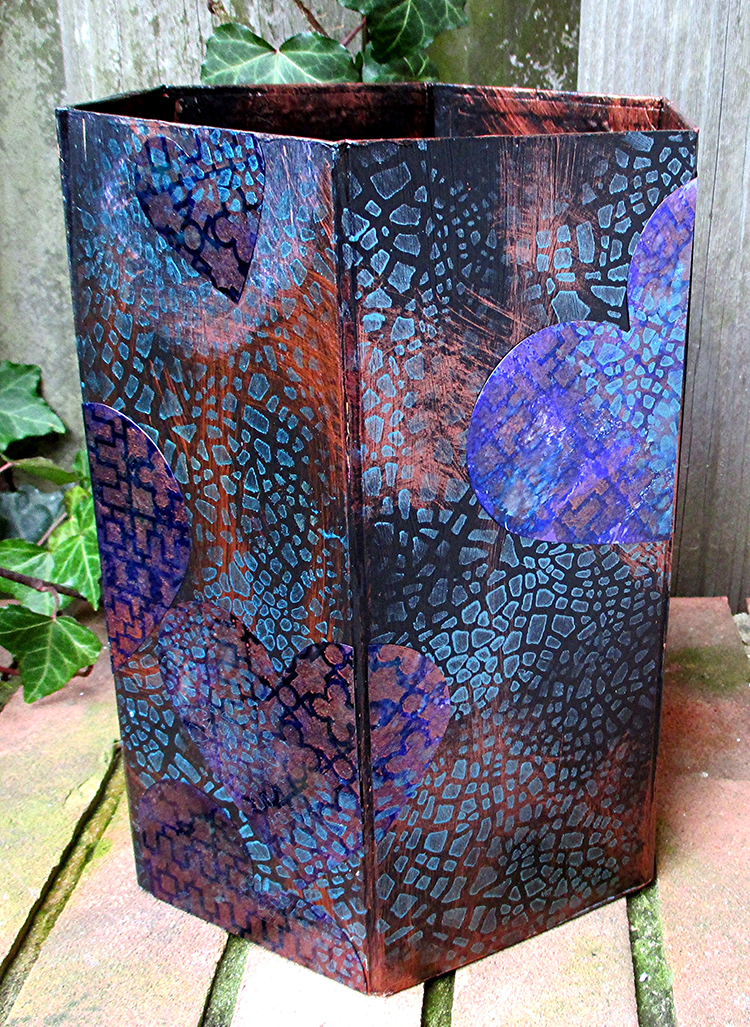
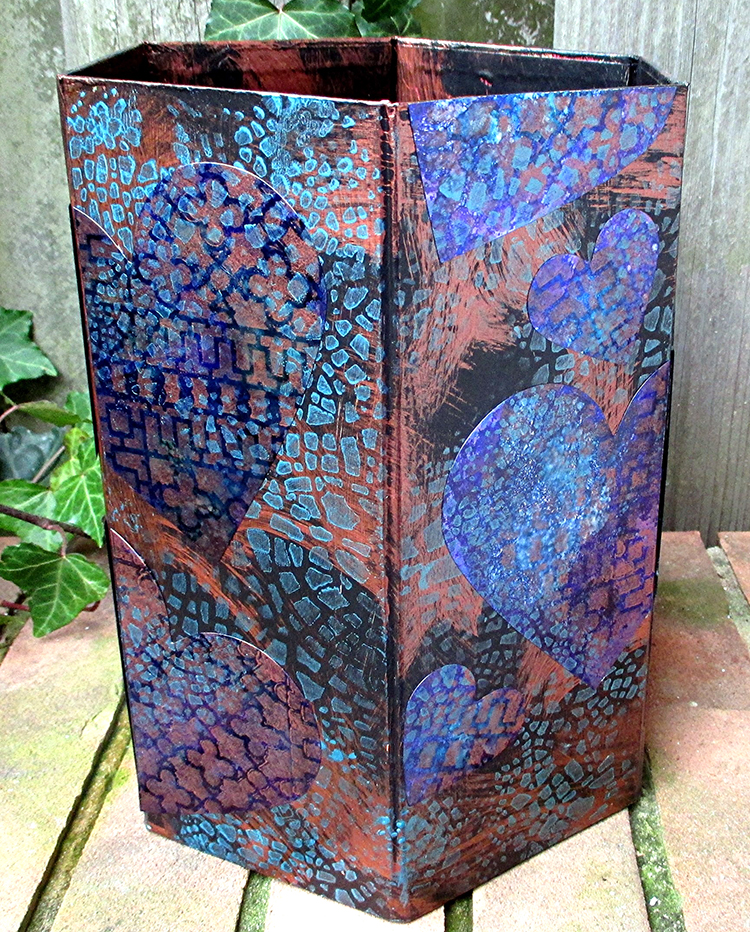
We’re Jumping with the Creative Squad today with a post from Judi Kauffman. You can learn more about Judi from our Nice to Meet You blog post featuring her creative story and artwork. Judi is transforming some home decor items for us today and wow what a miraculous transformation indeed :) She is using my Downtown and Crackle stencils and this month’s theme: Let’s Jump! – The Creative Squad is joining the fun of Creative JumpStart 2019 this month. They’re creating objects for the home, inspired by the CJS19 theme My Home is My Castle.

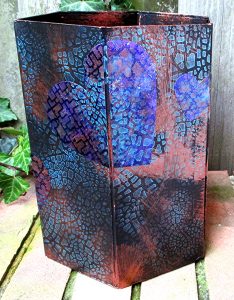
I loved the shape, so I bought a rather garish paper-covered trash can with teddy bears all over it. I tucked it under my sewing machine where it has served me well.
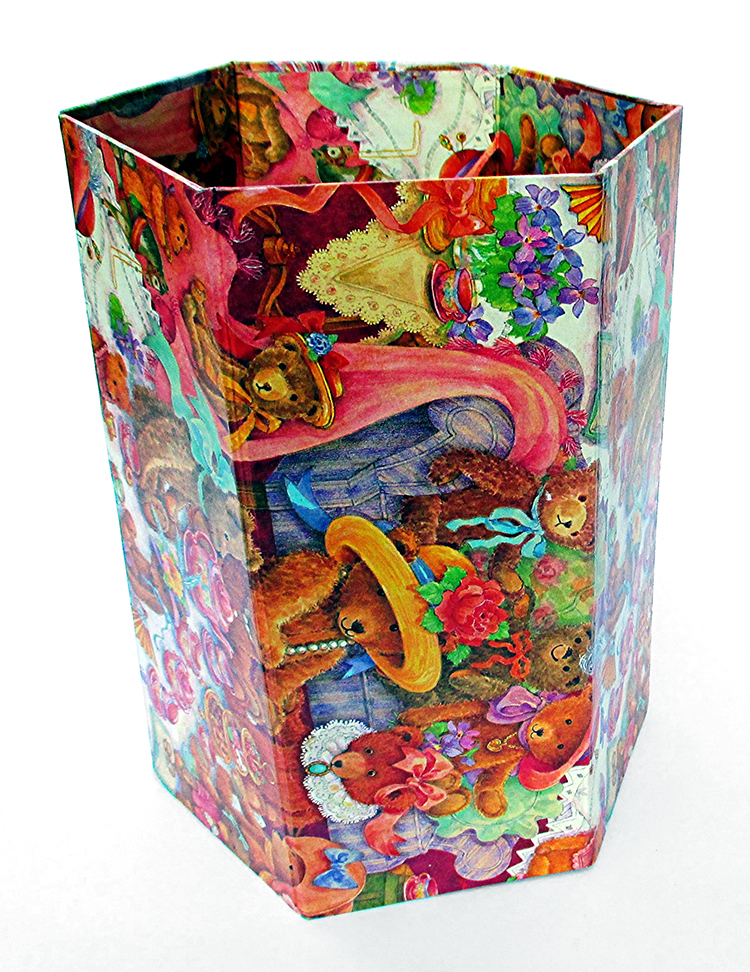
There it sat in all its pink and orange glory until this week, when it was time to start on my Home Décor project for Nathalie’s Creative Squad January Challenge. Bye bye, bears! Hello, Downtown and Crackle stencils!

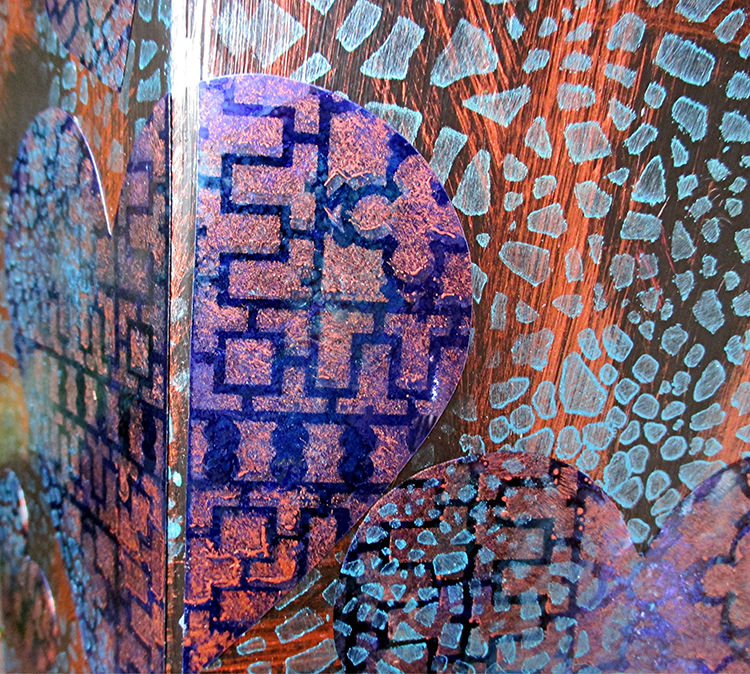
I gave myself a challenge within a challenge – to incorporate hearts, a shape usually thought of for Valentines and weddings, to create an offbeat, upscale, graphic design. Using a deep, rich, unexpected palette and stencils that helped take things to a new level made it easy to accomplish.

The hearts aren’t immediately obvious, the overall effect pleases my eye. I’m almost sorry that the trash can is going right back under the sewing machine. Maybe I should use it for a big bouquet of dried flowers instead!
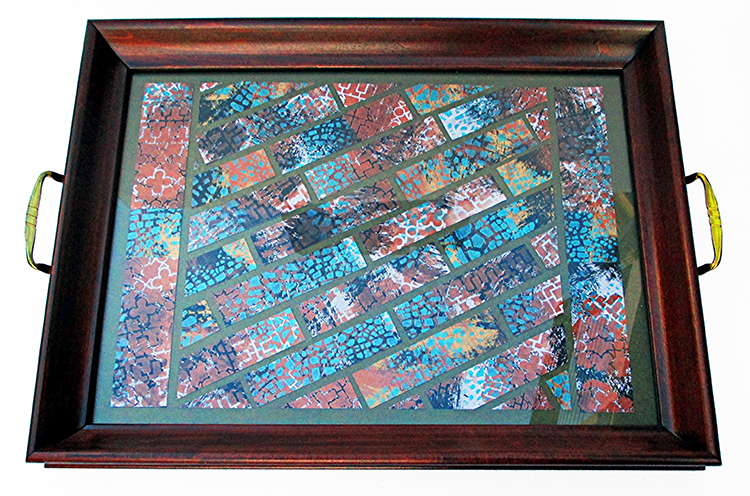
While I was at it, I wiped my brushes onto pieces of cardstock and stenciled on top of the brush marks. That gave me a second project – a mosaic style tray, an extra bonus.
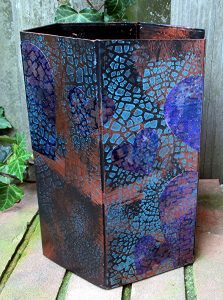
Instructions for Trash Can:

To customize the project, pick a color palette that suits your décor. Alternatively, duplicate the project as shown by using the paints and Shimmer Sheetz that I chose. Either way: You will need two stencils (a graphic pattern plus a crackle pattern), metallic acrylic paint in two colors, black or white gesso, and Shimmer Sheetz that coordinates with the paints and gesso.

Choose a trash can with smooth sides. Base coat with black gesso. Randomly brush with copper metallic acrylic paint, leaving much of the black visible. Randomly stencil with Crackle pattern in teal metallic acrylic paint. Allow to dry. (Choose paints appropriate for the trash can – mine is paper-covered, but yours may be metal.) *Wipe brushes onto quarter sheets of cardstock before washing them. (8.5” x 11” cut into four pieces.)

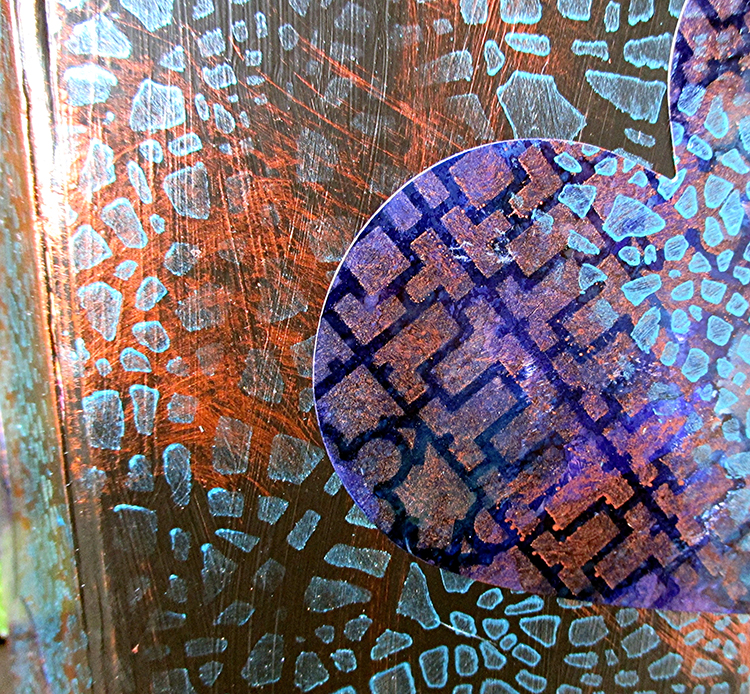
Freehand or die-cut hearts from Amethyst Gemstone Shimmer Sheetz in assorted sizes. Back the Shimmer Sheetz with double-sided adhesive sheet prior to cutting. Size of hearts is determined by the size and shape of the trash can. Keep the scraps for other projects. Note: I used the AccuCut GrandeMARK machine with standard cutting dies. If you use a Big Shot or other personal-size machine with thin dies, a metal adaptor plate is required– follow Els van de Burgt’s YouTube tutorial for this technique. *While you’re at it, stencil onto the cardstock that was wiped with paint in Step 1. Set aside stenciled cardstock to use for Tray.

Stencil the hearts with various sections of the Downtown Stencil using copper metallic acrylic paint. Randomly stencil with Crackle pattern in teal metallic acrylic paint. Allow to dry.

Arrange and adhere the hearts as shown or as you prefer. Note that many of the hearts have been cut where they move from one side of the trash can to the adjacent side, and some are cropped so they appear to extend at the top and bottom edges. This will not be necessary if using a round or oval trash can.


Instructions for Tray:

Find a tray with a glass insert or make one with a frame, handles, glass and sturdy backing. (Shown: Tea Tray from Sudberry House). Cut a background for the tray from metallic finish cardstock, carefully piecing together strips if the tray is larger than a single piece of cardstock.
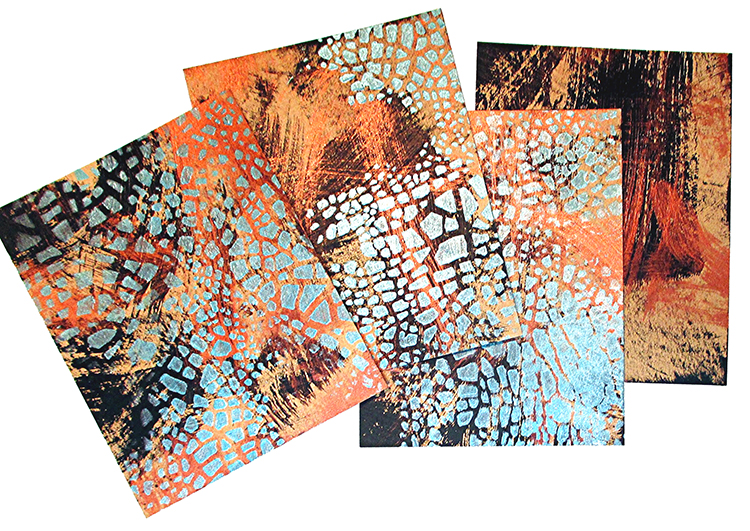
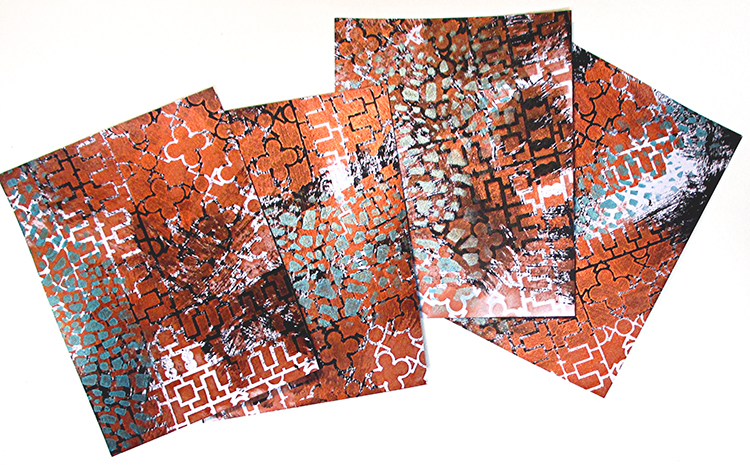
Cut each piece of stenciled cardstock into four 1” x 4.25” strips and one 1.5” x 4.25” piece. Using the project photo below as a reference, piece together and adhere the 1.5” strips at the right and left sides of the tray, close to the handles. (This hides the seam where I joined bands of background cardstock.) Angle and trim the 1” strips to cover the remainder of the tray, leaving space between the strips for a mosaic effect.

Assemble the tray.

Options:

*Instead of simple strips, cut the cardstock into square mosaic ‘tiles’ or randomly cut mosaic pieces.

*Instead of backing the pieces with glue, adhere them to cardstock that has exposed double-sided adhesive sheet on top. Leave very little space between the pieces; use embossing powder and a heat tool to create the effect of textured grout! (This is time-consuming, but fun.)


Thanks Judi! You really turned that teddy bear trash can into something great to look at! Feel inspired to try dressing up your own home decor items? You can find all my Stencils in my Online Shop. Here are some of the other supplies that Judi used:


Working on something yourself that you’d like to share?  I love to see how you interpret our monthly themes. Email me how you used my stencils and stamps with the theme and email me an image – I would love to share your projects in my next  “n*Spiration From Around the Globe“.
Leave a comment

True Blue – Judi Kauffman

Today we have a special Creative Squad post from the super talented Judi Kauffman, an honorary member. You can learn more about Judi from our Nice to Meet You blog post featuring her creative story and artwork. This time Judi is presenting some delightful and definitely inspiring miniature decor items that will surely put a smile on your face! She worked with my Downtown and Central Ave stencils and this month’s theme: True Blue – Blue is the color of honesty and serenity. It’s calming and has even been shown to promote healing. It reminds us of the water and the sky. Let’s slow things down this month and bask in the tranquility of the color blue.


I received two stencils to use for this month’s Creative Squad theme: True Blue. Though I didn’t pick them, I was so happy when Downtown and Central Ave arrived! They are two of my favorites from Nathalie’s new release.

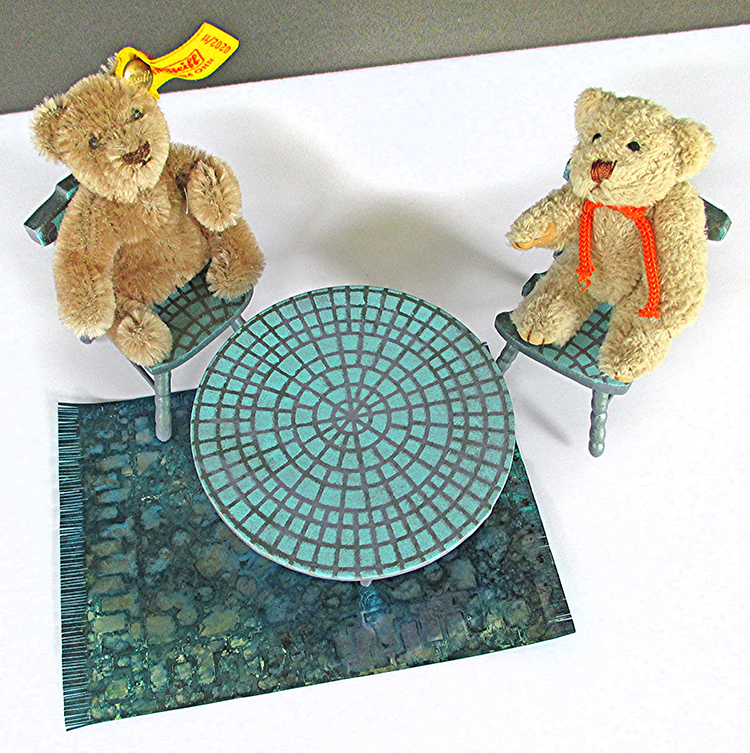
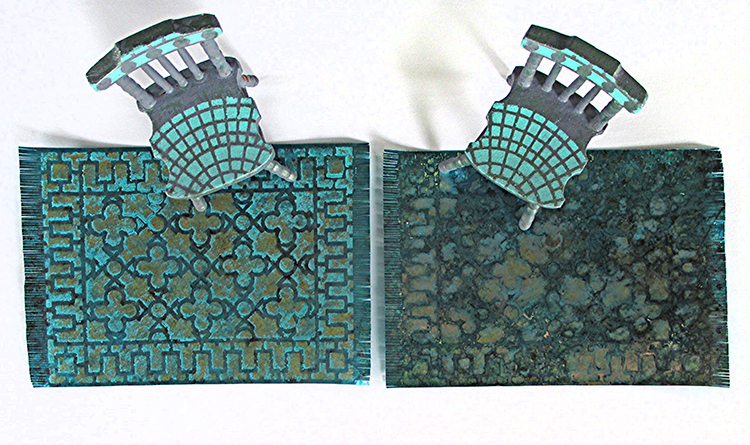
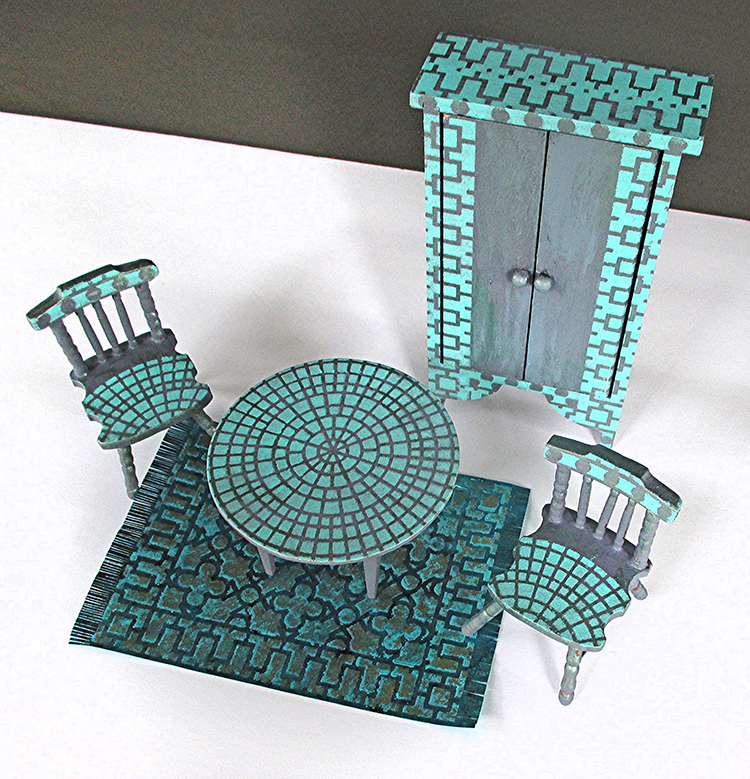
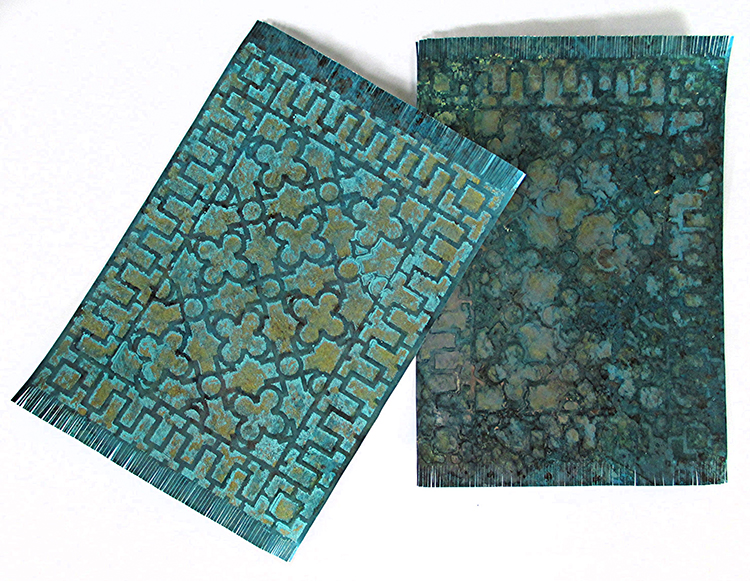
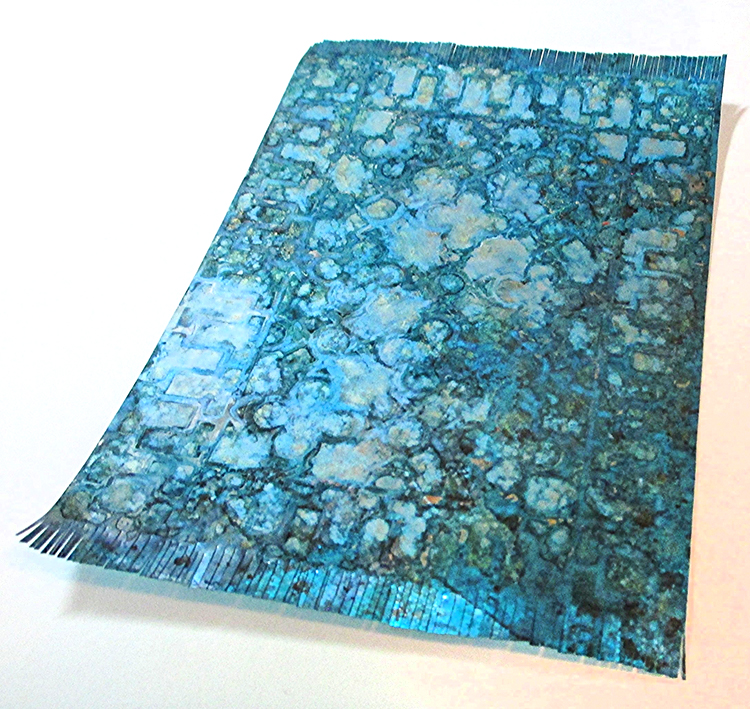
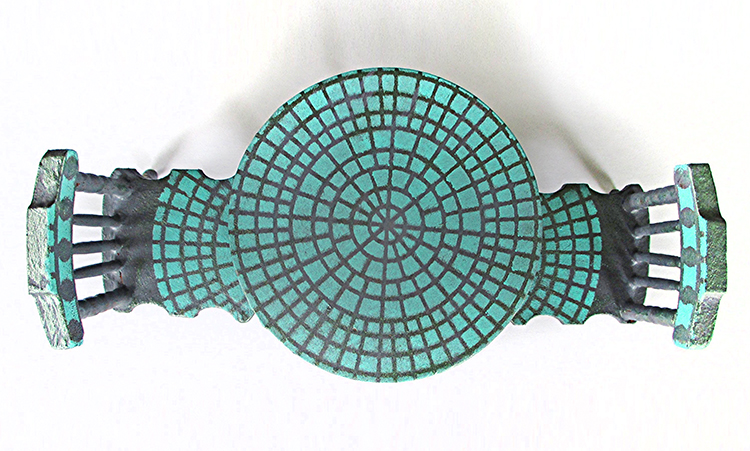
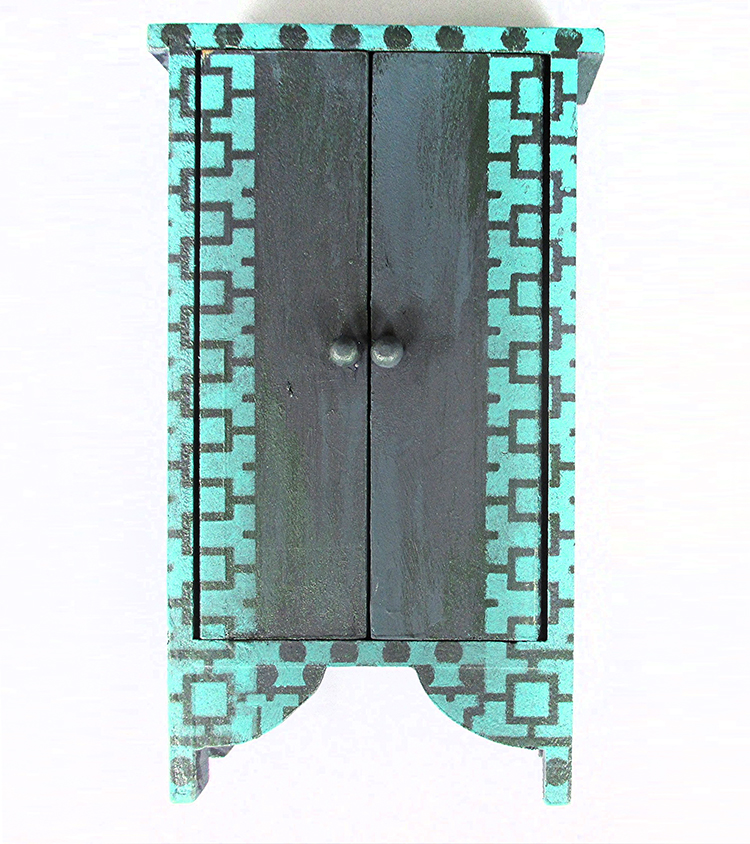
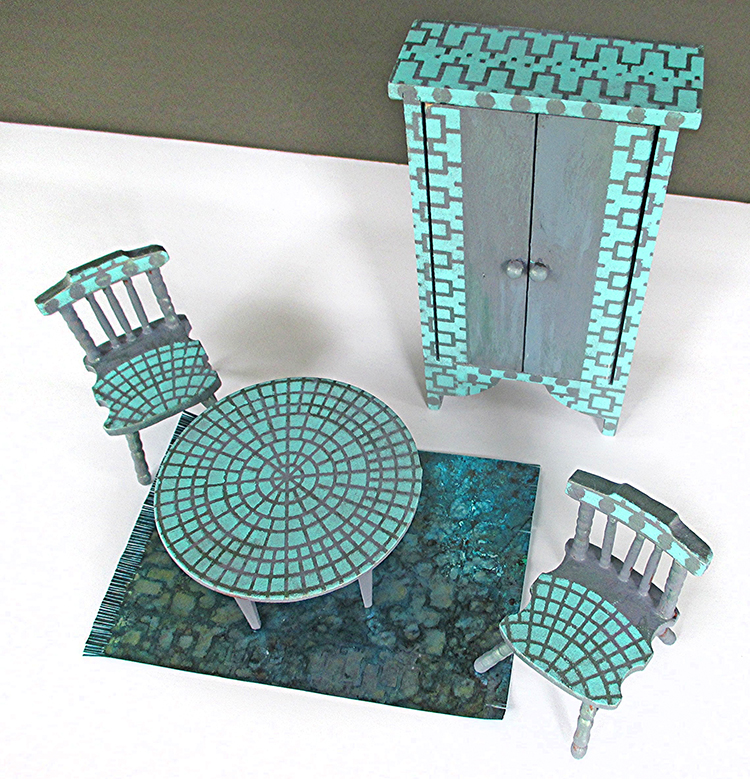
Right from the get-go Downtown looked like a rug and Central Ave evoked a mosaic table top. I’m going to stencil Downtown onto a piece of 18 count needlepoint canvas and stitch a miniature Oriental rug, but that’ll take me weeks and weeks, so meanwhile I created two stenciled Shimmer Sheetz rugs (Shimmer Sheetz is 5 x 12 so one sheet is enough for two rugs). And I stenciled some doll house furniture, sticking to a palette of blues that includes blue-gray, light teal, periwinkle, turquoise, and dark navy.

This project is fast and easy – VERY fast and easy. And it can be customized in so many ways. With the holidays fast approaching, I hope the design strategies in this tutorial will spark some fun.

The rug uses only one quarter of the 9” x 12” stencil, but it could be repeated to up-size the design. Stenciled canvas with a durable sealer would be great for a table runner or even a floor cloth.

If doll house furniture isn’t your thing, stenciled Shimmer Sheetz rugs could star on the front of a card congratulating a friend who has moved to a new home or could be sliced into strips for durable and elegant bookmarks! Instead of a 3D cabinet, stencil the front of a gate-fold card and use brads for the knobs. Instead of a table top, stencil mosaic-style chipboard Artist Trading Coins, adding collage elements. Or make flat, easy to mail holiday ornaments. (You get the idea…)

INSTRUCTIONS:

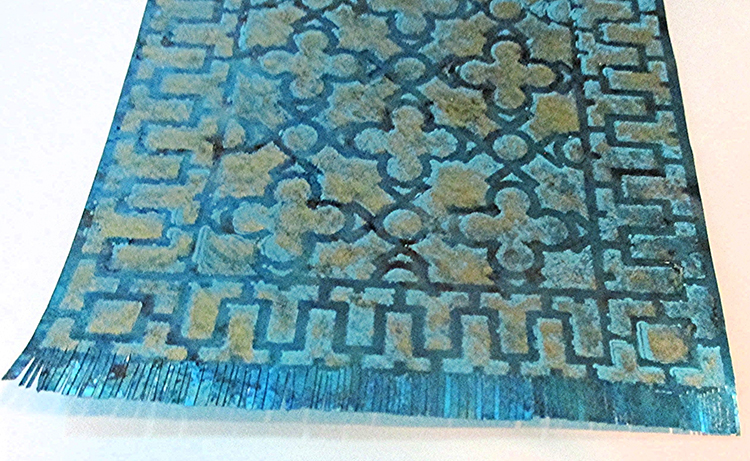
  1. For each rug – Alter the surface of a 5” x 6” piece of Shimmer Sheetz with alcohol inks in shades of blue. Allow to dry. Option A: Stencil with acrylic paint. Allow to dry. Stencil again, slightly offset, with alcohol inks in a light hue plus gold metallic. Option B: Use only alcohol inks for stenciling. For both rugs, use a craft knife, straight edge and cutting mat to trim the long sides, leaving a scant eighth-inch border. Trim the short ends, leaving three-eighths of an inch. Use sharp scissors to ‘fringe’ the short ends.

  1. For table and chairs – Base coat with a mix of French Blue Gray and Black Plum acrylic paint. Allow to dry. Using a wide, stiff almost-dry brush, add streaks of Dark Patina and French Blue Gray. Using Sea Breeze paint and a stencil brush, stencil top of table and seat on chairs with Central Ave. Stencil dot pattern from Downtown on the top of the chair back.

  1. Using the same paint and stencil brush, stencil the cabinet with portions of Downtown.


Thank you Judi! This is such a fun and unique project and it definitely brings back many happy memories from childhood, puttering around in the tiny world of the doll house :) You can find all my stencils in my Online Shop. In addition to the Dollhouse Furniture that Judi had on hand, here are some suggestions for the other supplies that Judi used:


Do you feel inspired? I’d love to see what you’re working on with my stamps and stencils. I post projects almost every month in my Inspiration From Around the Globe posts!

Comments (1)

  • Sue Clarke

    |

    Judi, that is the cutest set ever and I wish that I knew someone who would appreciate it as a gift.
    I love it and wonder if I could do that with a full size end table?

    Reply

Leave a comment

Never Stop Dreaming – Maura Hibbitts


Welcome to a post from Maura Hibbitts from my Creative Squad! Today Maura is sharing with us an art journal spread that reminds us of all the strong momen who have come before us! Maura is using my Mesa Verde and Downtown stencils and my Actually I Can stamp set. This month’s theme is: Never Stop Dreaming – This month we’re sending a message of confidence and empowerment to all those in the world (near and far and maybe even you!) who have been told “You can’t”, “That’s not possible”, or “Not you”. Actually we can and we will! And we’ll never stop dreaming either :)


When I looked at this month’s theme, I began to think about all the dreams we women have in our lives…family, friends, career, health, financial, pets…so many things touch our lives. I know my mother encouraged me to become the person I am today, and I am thinking her mother did the same for her. It could be our relatives cheering us on, or friends, but just think of the many generations of women behind each of us who have believed in the next generation.

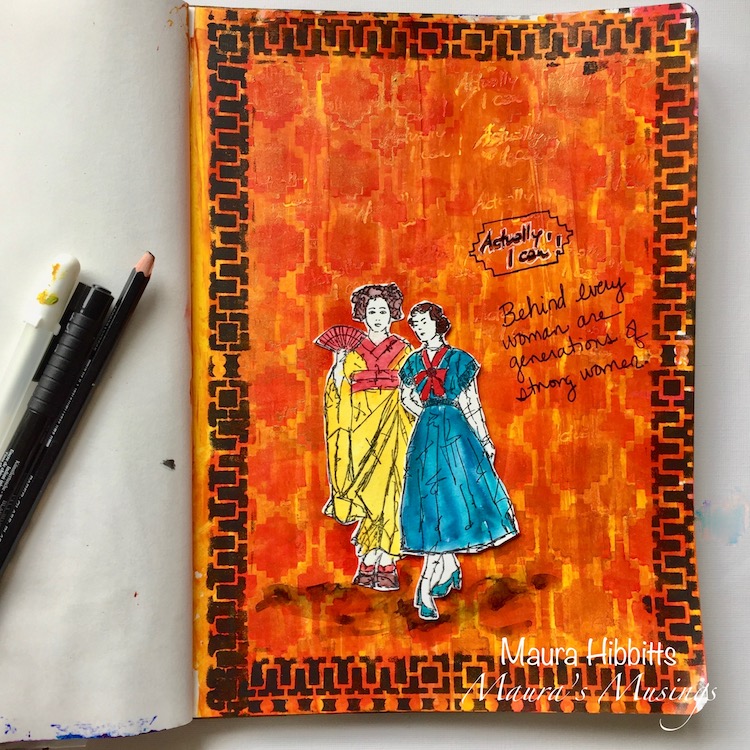
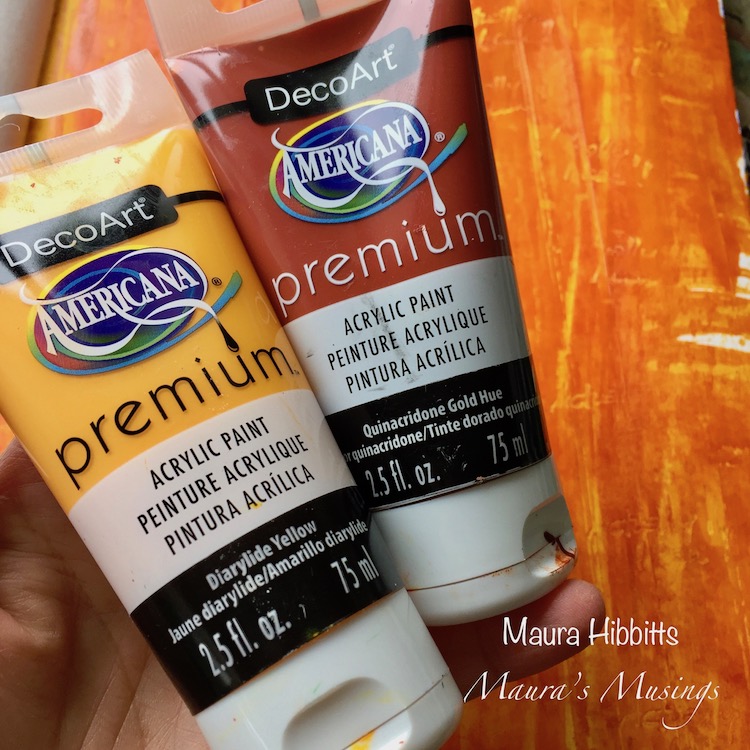
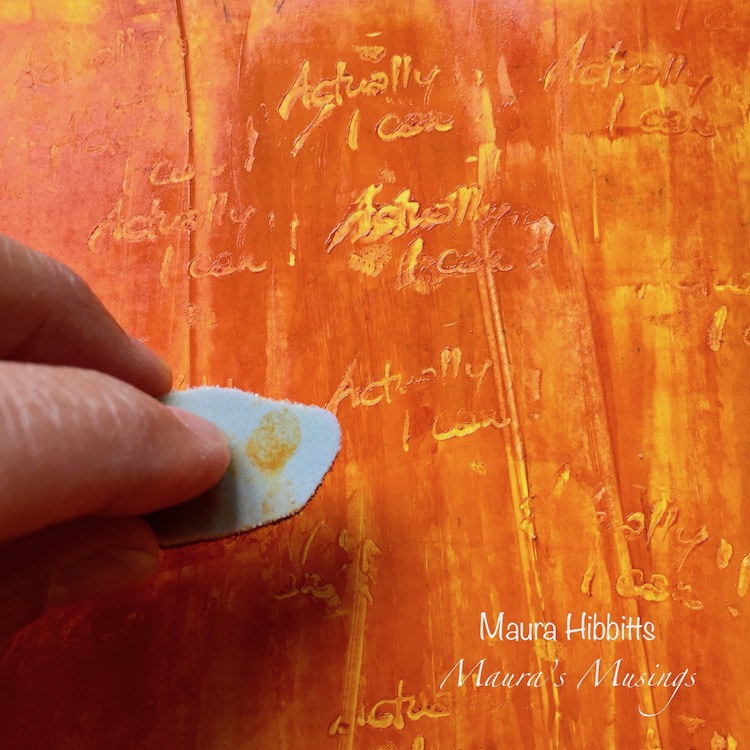
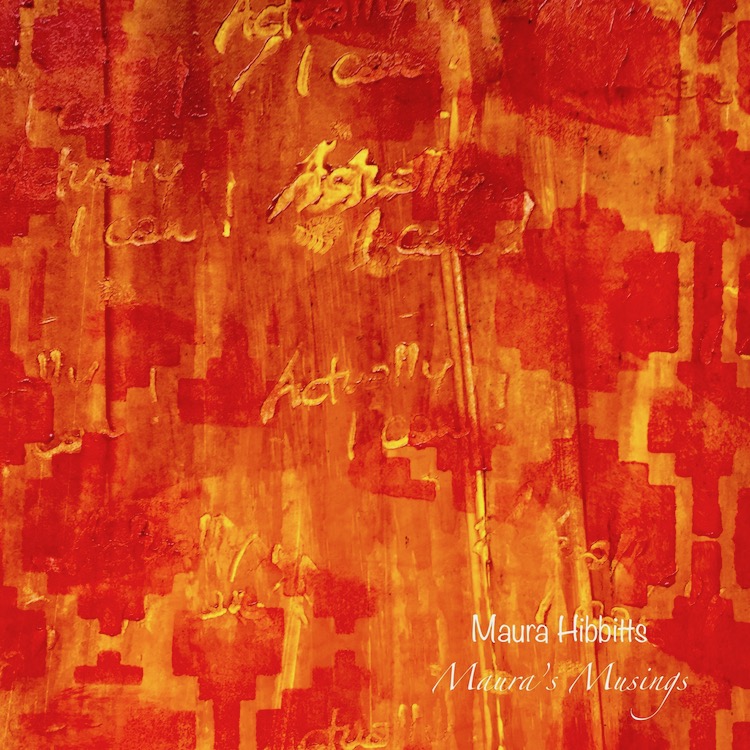
I headed to my art journal, and scraped a layer of Diarylide Yellow and Quinacridone Gold down my page with a key card. Before the paint dried, I stamped in Nat’s “Actually I can” rubber stamp a number of times.

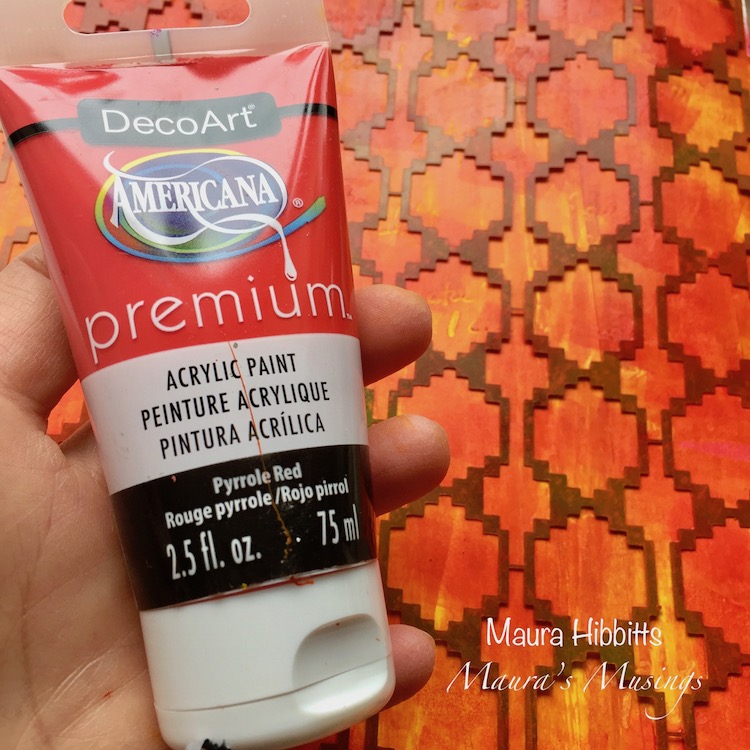
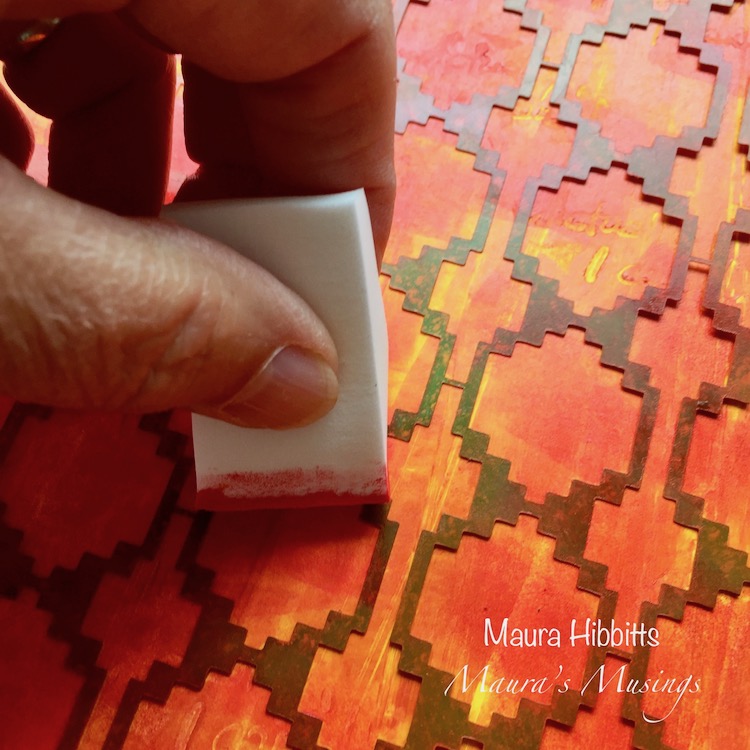
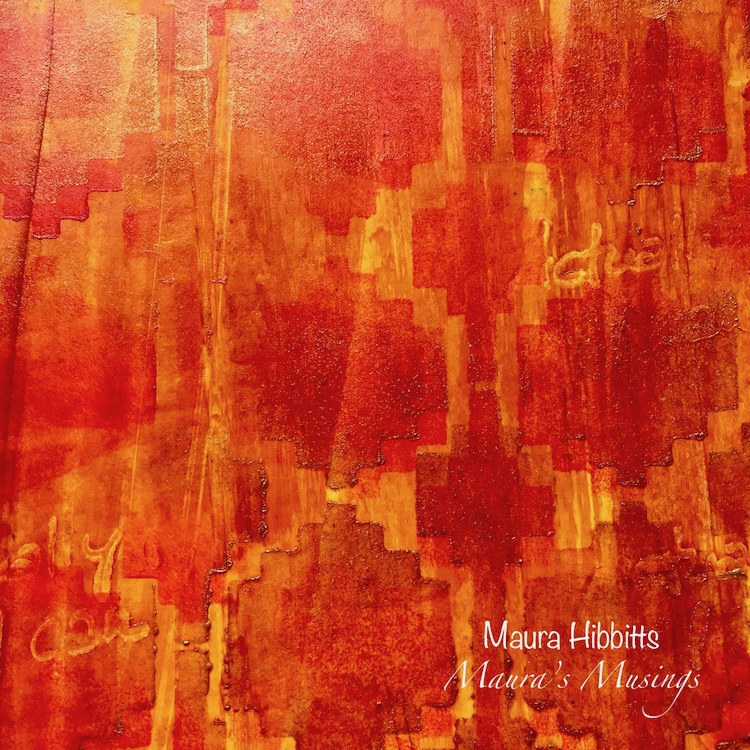
I added my next layer using the Mesa Verde stencil and some Pyrrole Red, using a light touch.I worked in a random fashion and left some areas open.

Then, I shifted the stencil down slightly and sponged in a layer of gold. Now I have a shadow effect.

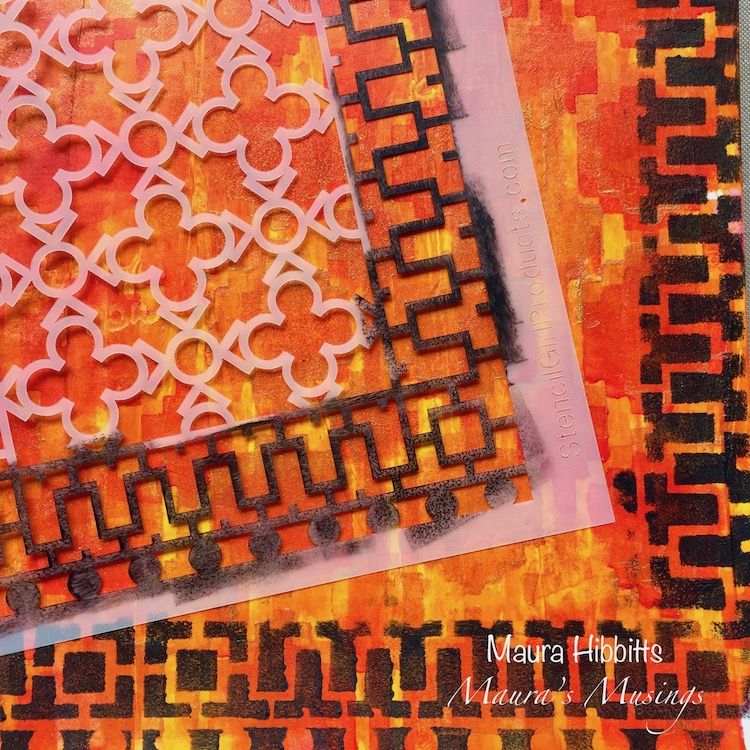
Time to add a border to my page with Nathalie’s new Downtown stencil. As you can see, I just used part of it to make my border with black.

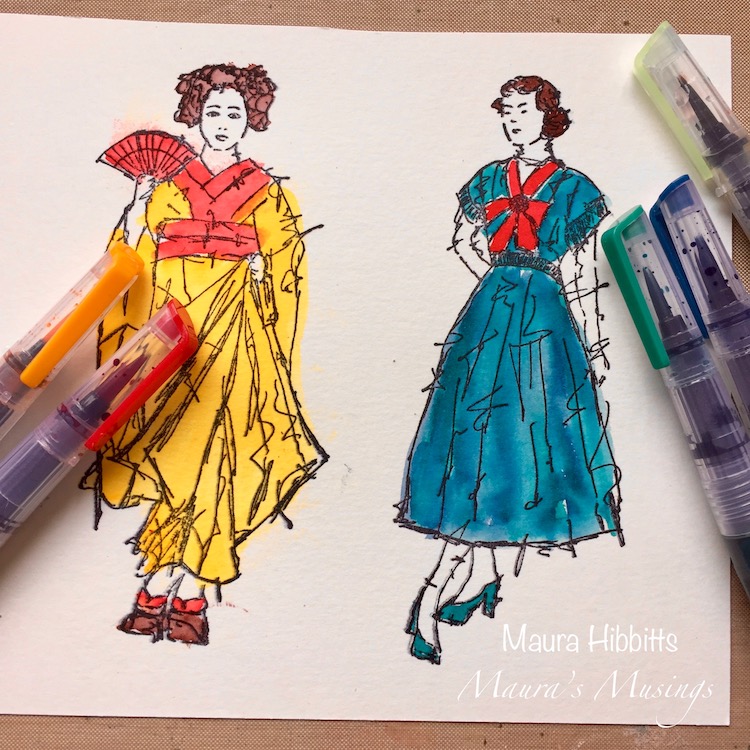
Now comes the fun part – stamping and coloring these two lovely ladies, Maiko and Millie. I wanted to tie in some of the same colors in both of their outfits to help link them together.

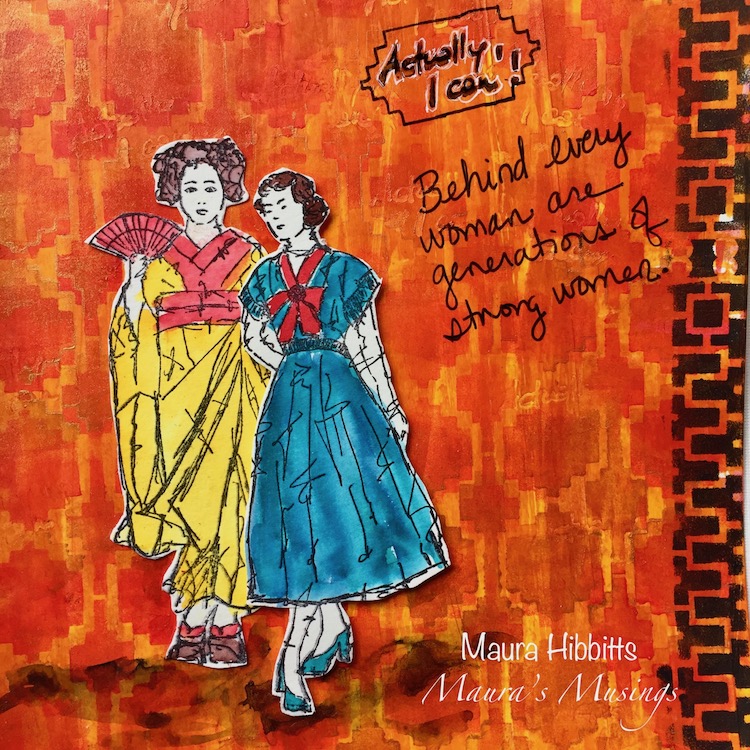
Time to put it all together! I put Maiko, in traditional dress behind Millie, to represent the previous generations of women. I stamped “Actually, I can” with black ink, and outlined it a bit with a white pen, and added my own thoughts. I also used the Mesa Verde stencil with the black pen to create the word box, by outlining one side, and moving it to “stretch” it. Finally, a shadow under the ladies to create a bit of depth with a graphite pencil and water brush.

Think of the many generations behind each one us, and Never Stop Dreaming!


Thank you Maura for such a thoughtful project! You can find my stencils and my stamps in my online shop. Here are some of the other supplies that Maura used:


Feel inspired? Working on something yourself that you’d like to share?  I love to see how you interpret our monthly themes. Email me how you used my stencils and stamps with the theme and email me an image – I would love to share your projects in my next  “n*Spiration From Around the Globe“.
Leave a comment

Vacation Mode – Marsha Valk


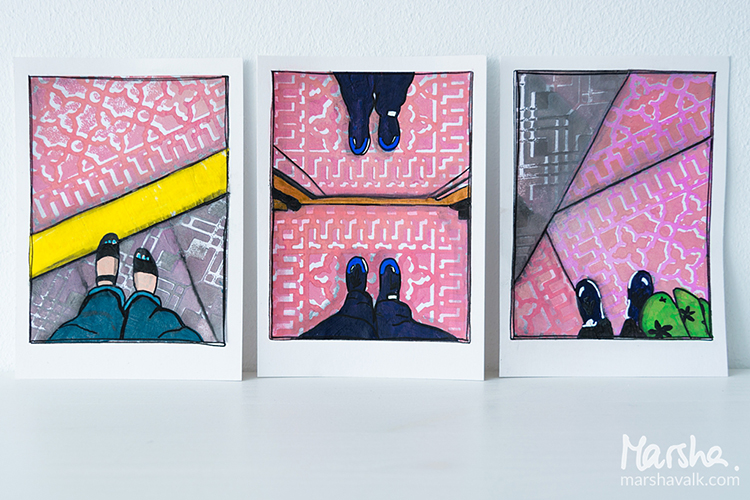
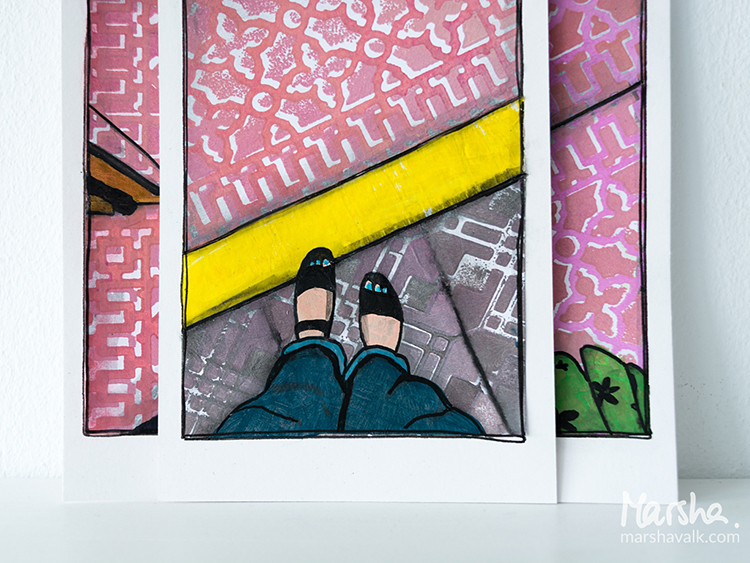
Hello from the Creative Squad and a big farewell hug to stellar squad member Marsha Valk! This will be her last post with us and we thank her so much for all the inspiring, creative, and amazing projects that she has made for us. She has been on the Creative Squad since the very beginning and has always gone above and beyond with her posts and her unique way of using my stamps and stencils. We wish her all the best as her Artful Adventure continues :) So for her last post, Marsha brings us a suite of prints celebrating patterns with my Downtown foam stamp set and my Mini Chicago foam stamp set and inspired by our theme: Vacation Mode – Here in the Northern Hemisphere, we are slogging through winter with only one thing on our minds – vacation! Whether it’s Spring Break, a weekend getaway, or an hour with a good book, everyone needs an escape to Vacation Mode now and again.


Vacation Mode to me means: Slowing down. Reading a lot. Perhaps doing some sketching (but only if I feel like it). Eating yummy food. Seeing the sights and visiting at least one museum. Enjoying the sun! It has been a while since my last vacation abroad.

Much like Nat does on her travels, when I’m on vacation I observe and photograph lots. And because many of Nat’s ArtFoamies are inspired by her travels, I thought about my last vacation and had a look at the photos I took.

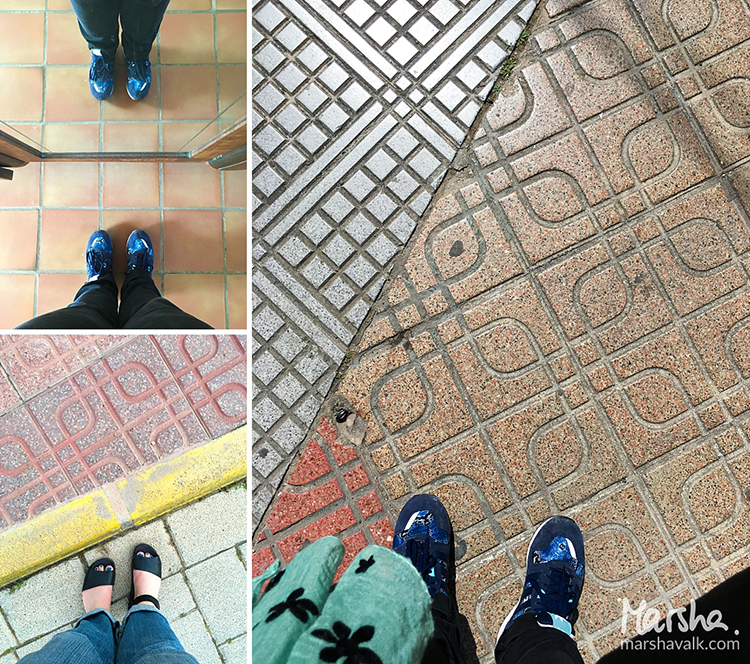
Among them I found three of my feet. I always take ‘fromwhereIstand’ / ‘Ihavethisthingwithfloors’ type photos wherever I go. In fact, I remember taking pictures of my feet in foreign places well before hashtags and even before digital photography!

Nat’s positive/negative ArtFoamies always remind me of pavement and flooring, so that’s how I came up with the idea of recreating my #fwis pictures with collage.

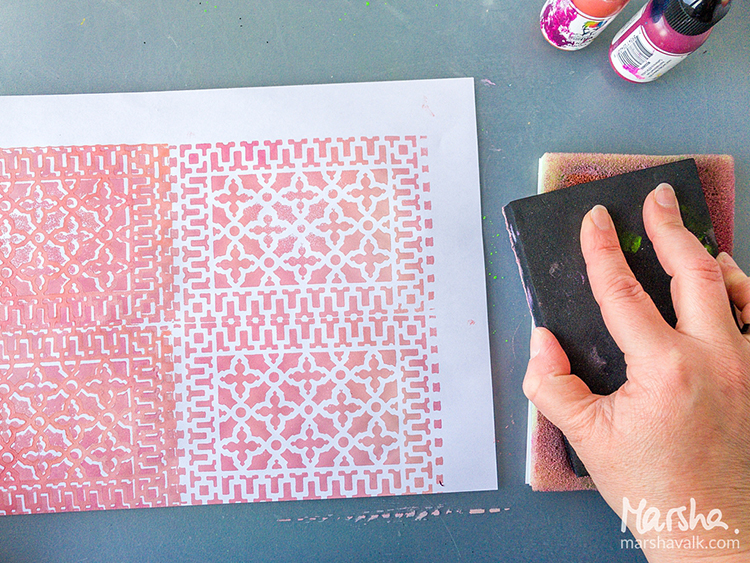
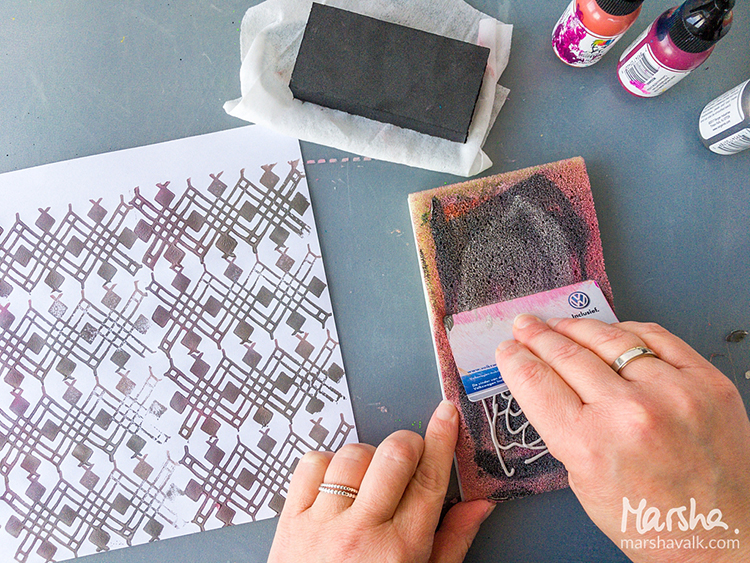
I started creating the pavement with the Downtown Positive and Negative Foam Stamp and the Mini Chicago Positive and Negative Foam Stamp Set.

Because I’m not very fond of cleaning, I only used one Stamp Buddy and mixed my paint colours directly on there using an old plastic card.

For a lighter shade I added more white, and when I switched stamps, I added more grey. I stamped on regular printer paper because it’s nice and thin for collage.

I cleaned the ArtFoamies with a baby wipe in between stamping, and I rinsed them with water once I was done stamping altogether.

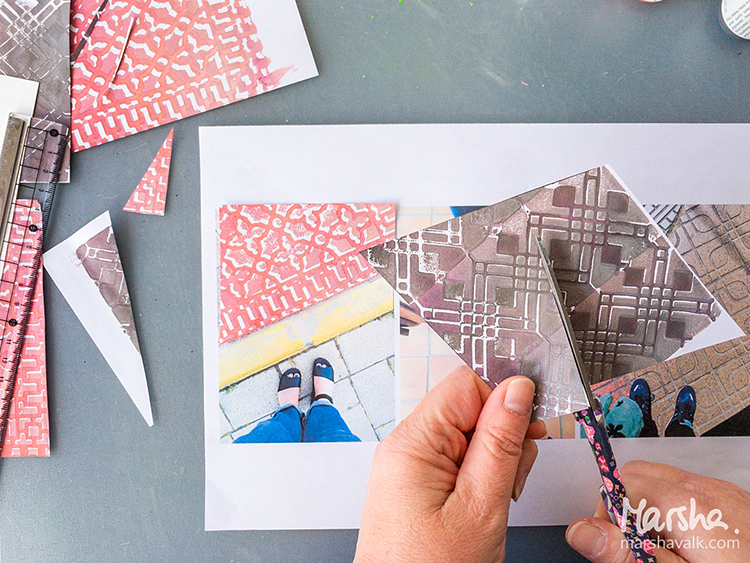
Once the prints were dry, I cut them into the shapes of the pavement in the photos, using the pictures as my guide. I adhered the shapes to heavyweight cardstock cut to 4.1” x 5.8” (A6) sized pieces.

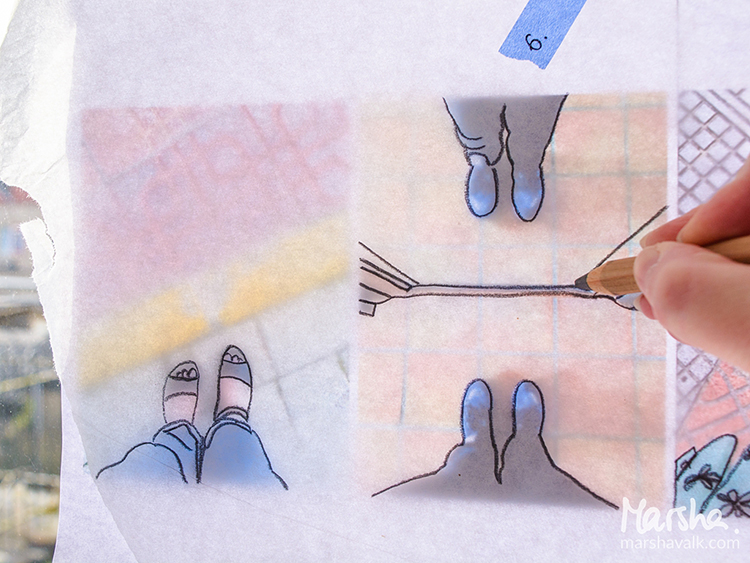
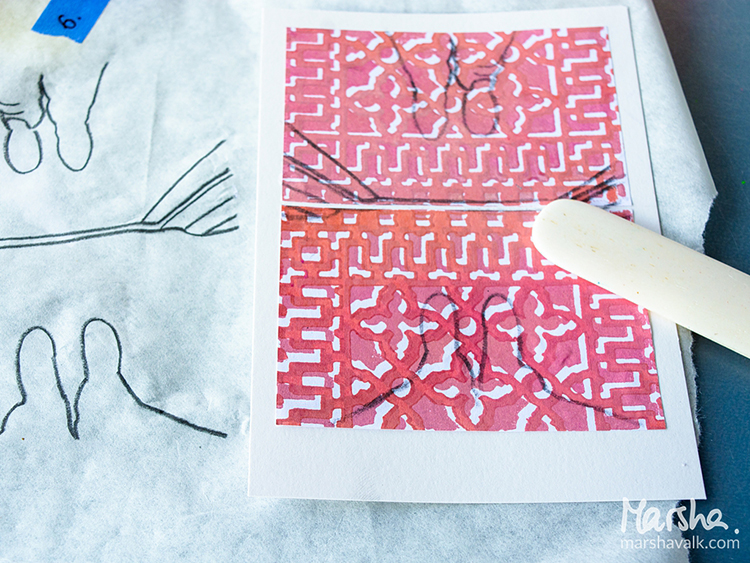
I traced my feet and any relevant details in the photographs onto tissue paper to transfer them onto the collaged pieces.

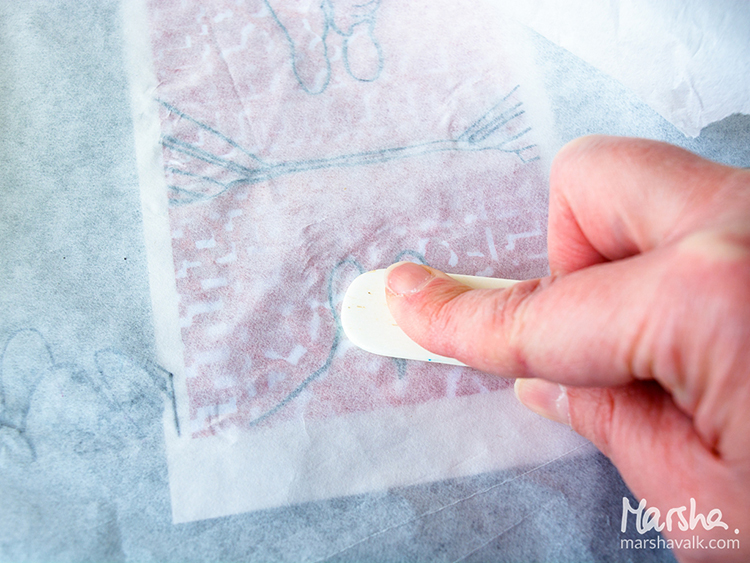
I placed the tissue paper pencil side down on top of the collage and then burnished the pencil lines with a bone folder.

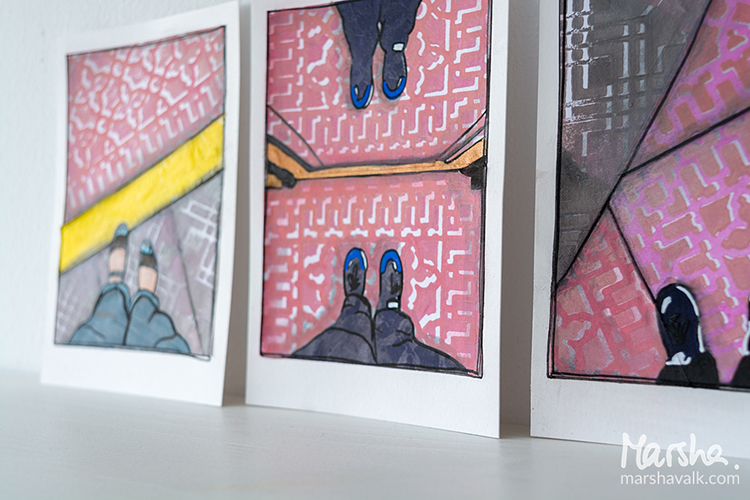
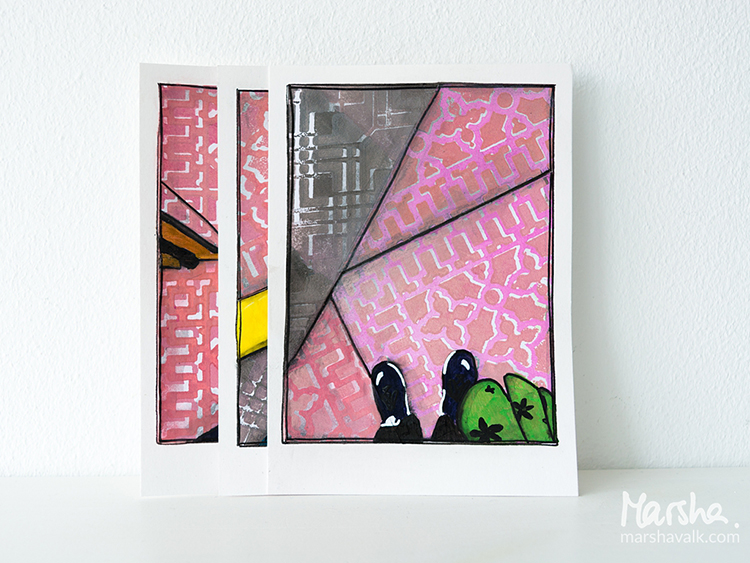
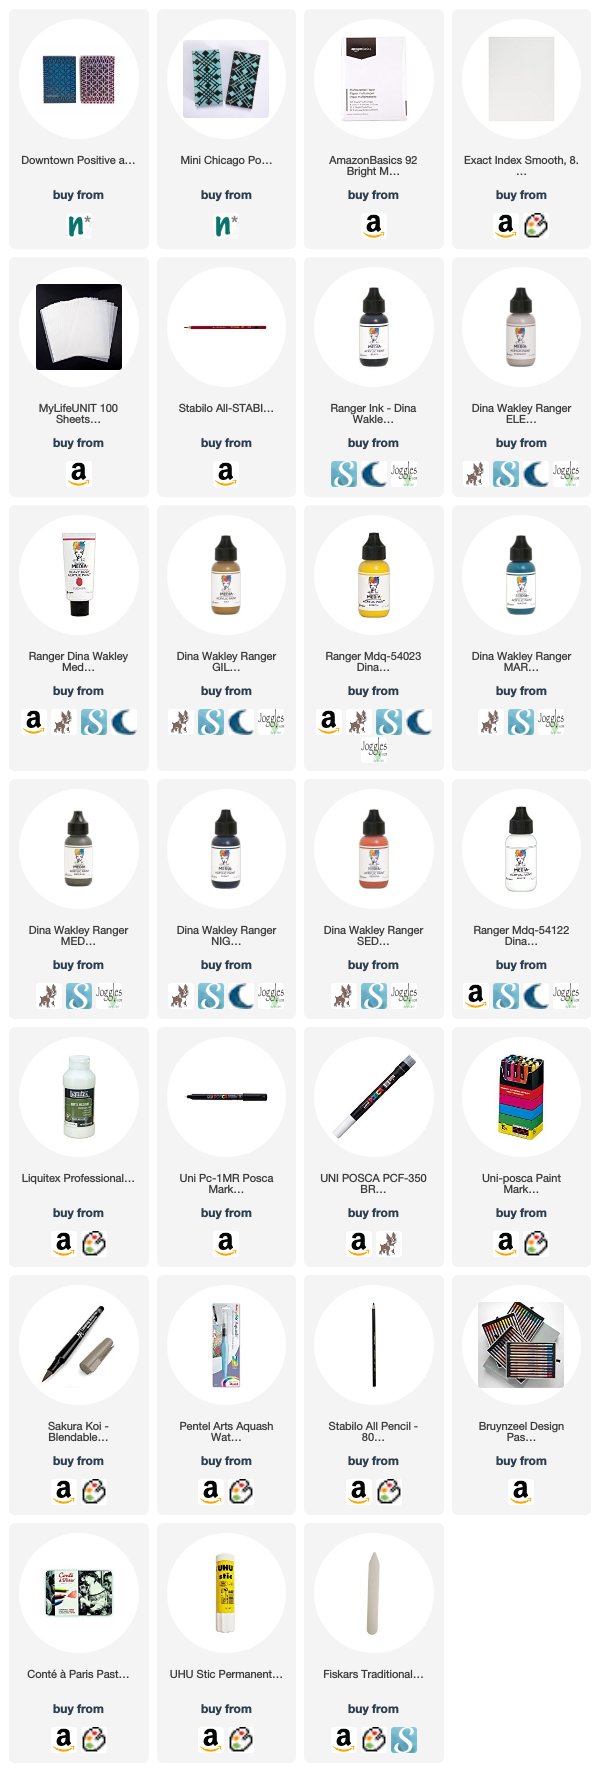
Then I used acrylic paint and paint markers to colour inside of the pencil lines and pastel pencils, Stabilo All pencil and a brush pen to add some shadows and depth.


Thank you Marsha!!! These are just so cool – almost like the drawings from a comic book :) Here are some of the supplies that Marsha used:


Feel inspired? Working on something yourself that you’d like to share?  I love to see how you interpret our monthly themes. Email me how you used my stencils and stamps with the theme and email me an image – I would love to share your projects in my next  “n*Spiration From Around the Globe“.
Leave a comment