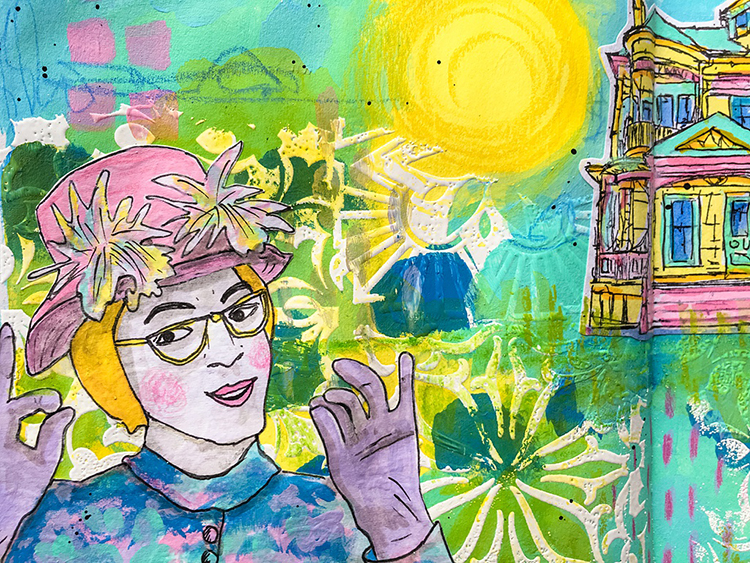
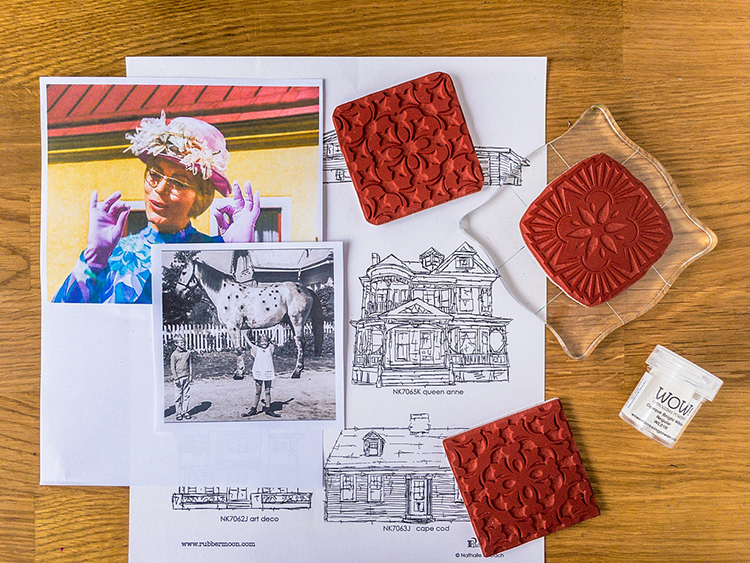
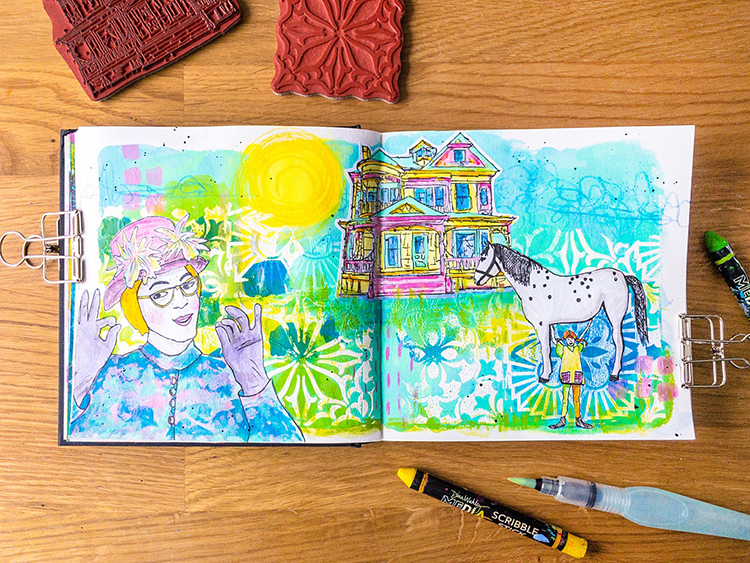
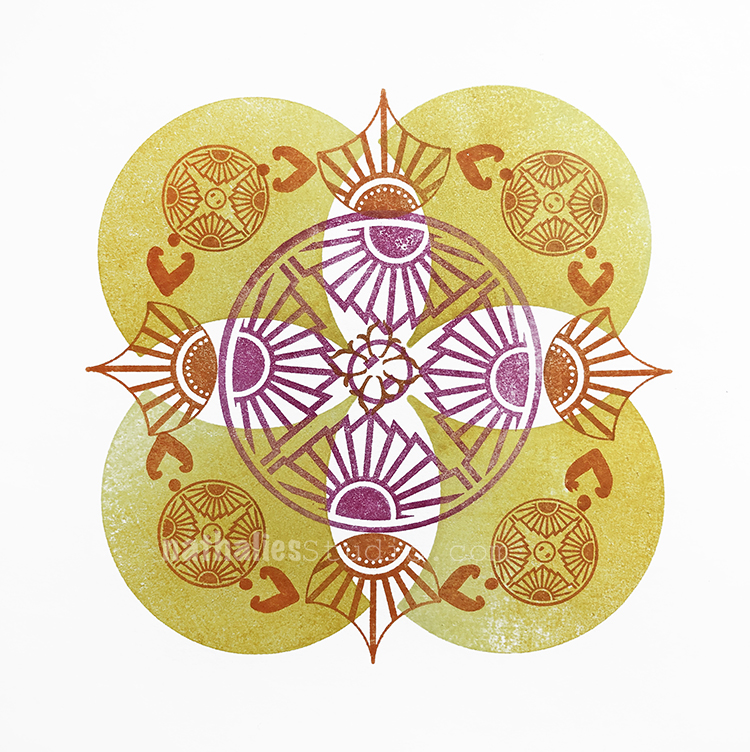
Happy Tuesday from my Creative Squad! Today we have a fun art journal video post from Marsha Valk. She used my Floral Tile Large rubber stamp set and my Queen Anne stamp from the Stroll Around the Block stamp set. She was inspired by this month’s theme: Pastel Dreams – This month we are focusing on the softer, gentler side of things and going pastel with our color palettes. These dreamy pale colors are undeniably appealing and just as powerful as their bolder cousins on the color wheel.
This month’s theme reminded me of Pippi Longstocking. Looking at my art journal spread you may think that Villa Villekula and Nat’s Queen Anne Cling Rubber Stamp are what prompted that thought, but it actually was Mrs. Prysselius. Or, rather, Aunt Pastellia, as that is her name in the Dutch translation of the Astrid Lindgren books.
In my ‘Pastellia Dream’ she loves and approves of everything Pippi does ;-). Watch me create the art journal spread step-by-step in the video!
Happy pastel dreams!- Marsha.
Thank you Marsha! You can find all of my rubber stamps in my online shop. Here are some of the other supplies Marsha used:
Feel inspired? Working on something yourself that you’d like to share? I love to see how you interpret our monthly themes. Email me how you used my stencils and stamps with the theme and email me an image – I would love to share your projects in my next “n*Spiration From Around the Globe“.
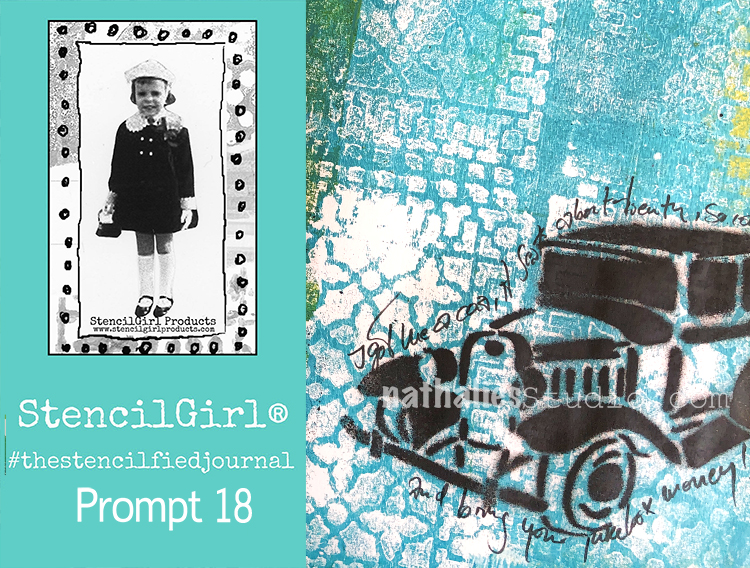
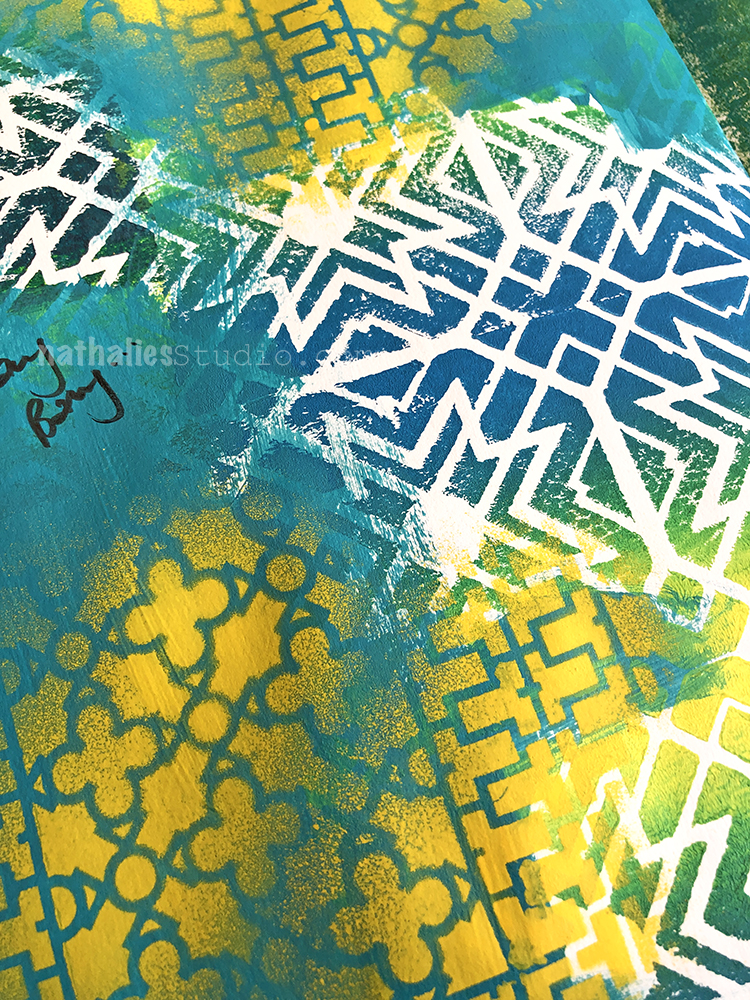
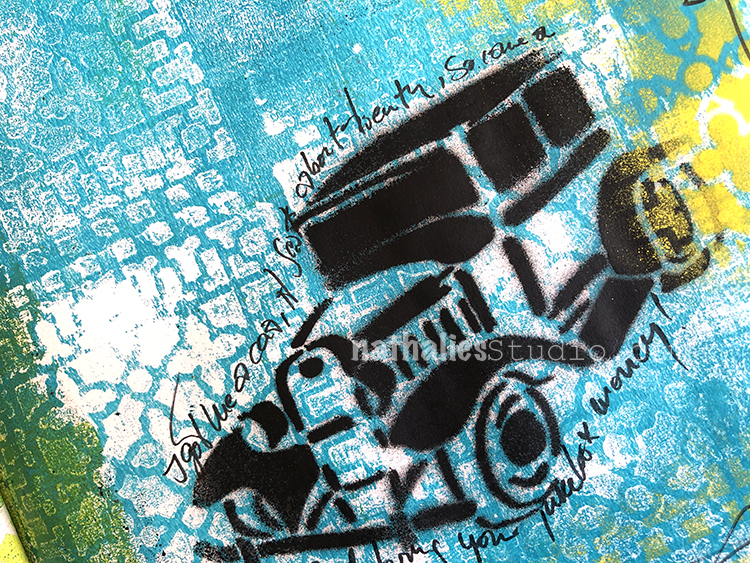
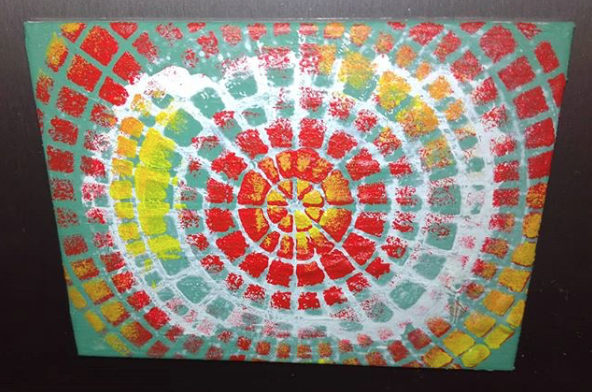
My wonderful friend Tina Walker is at it again – she invited several people to join her Stencilfied Prompts. The prompts are music related and each week she is posting a song. You can be inspired by the lyrics, the video, the album cover or anything related and the only restriction is that you have to use StencilGirl Product Stencils. Here is my take on Prompt 18
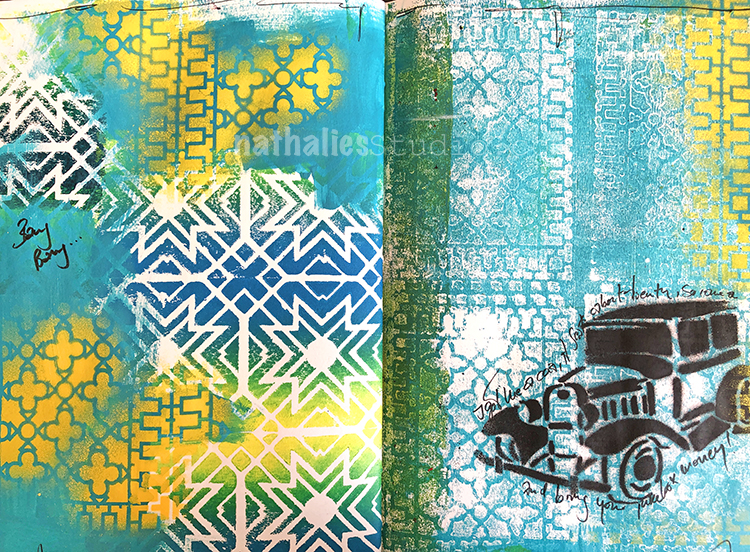
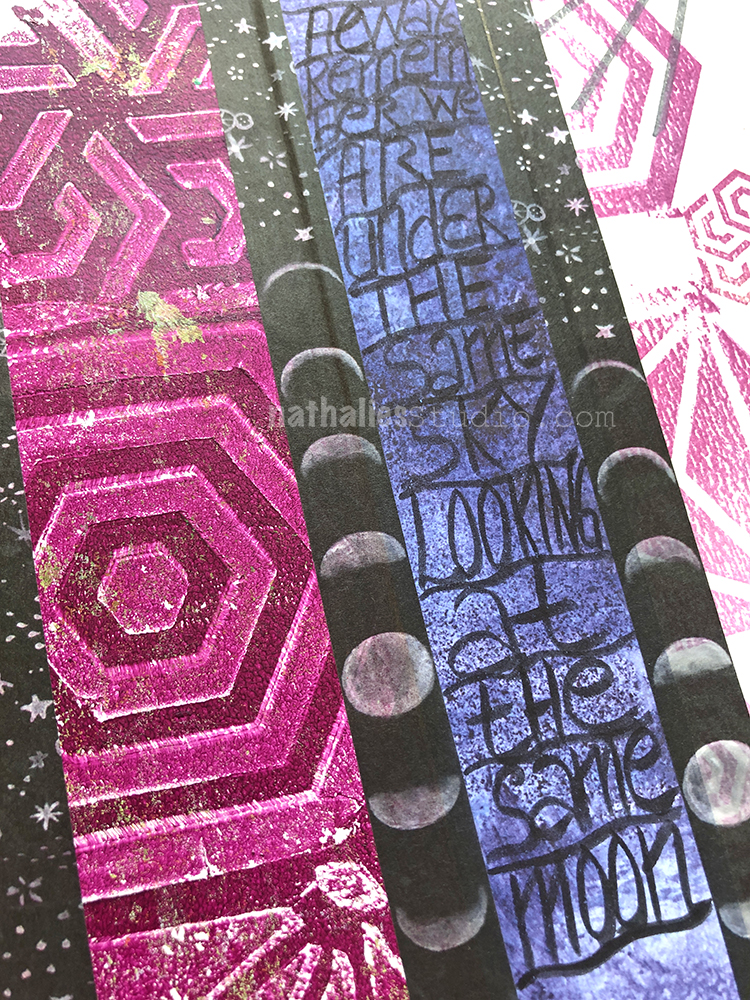
This week’s prompt was The B-52’s Love Shack and I love it! Super fun and great video so I was inspired to really play up some bold patterns and colors with this one.
I used acrylic paint over spray paint with my Downtown stencil and my Toledo foam stamp. It’s an energetic song so an energetic background here.
My Oldtimer stencil was a must for the song, and then I repeated the Downtown pattern with my foam stamps. ” I got me a car, it seats about twenty, so come on and bring your jukebox money !”
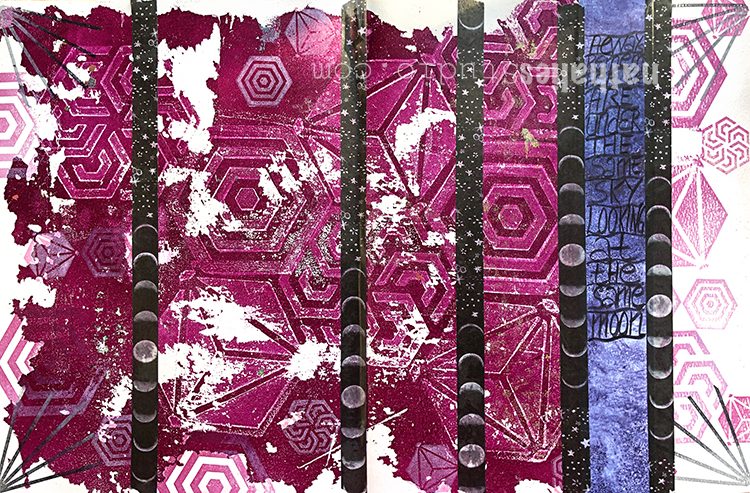
“Always remember we are under the same sky looking at the same moon”
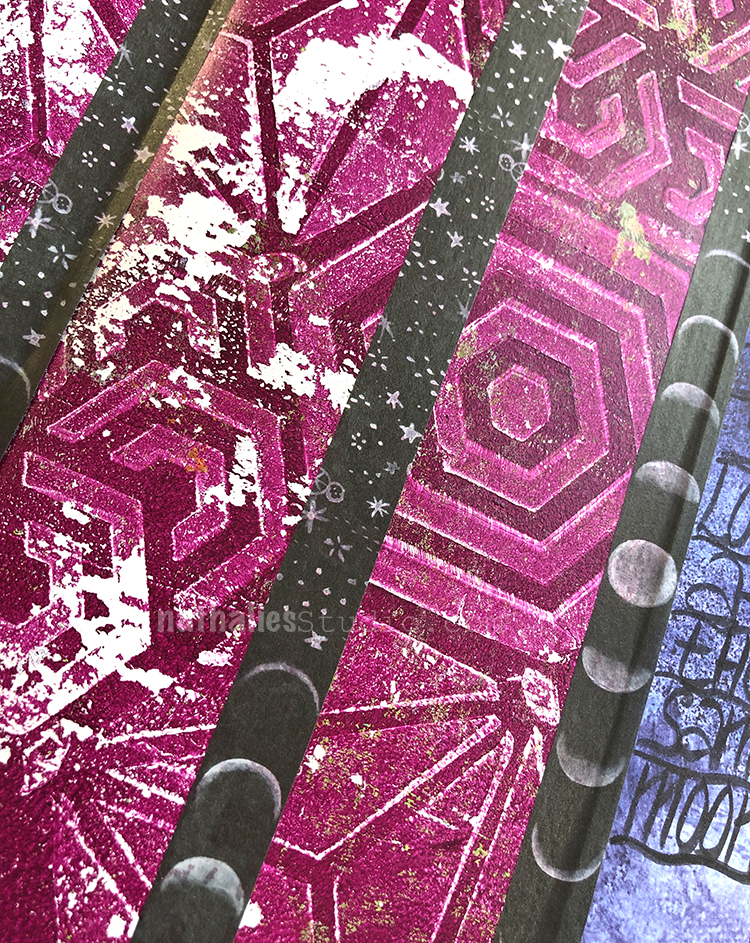
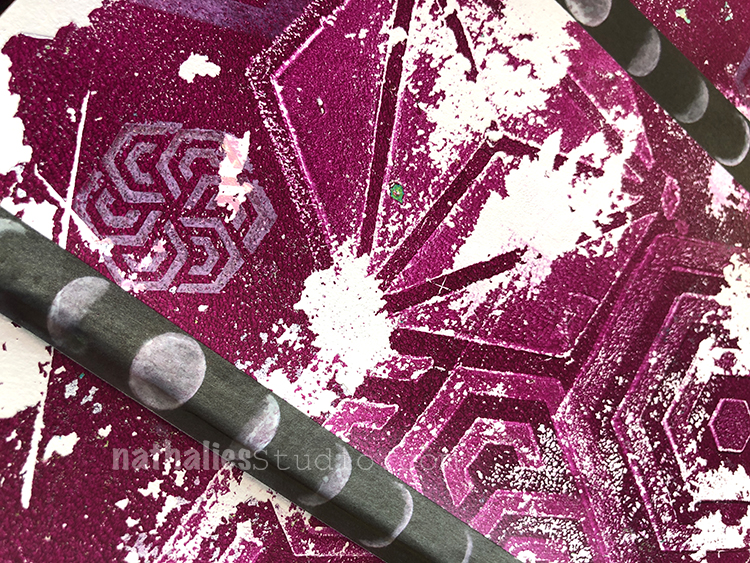
The background started with some mono printing with a gelli plate. I had taken off the magenta acrylic paint with my Hexagon Foam stamps.
I added the beautiful washi tape with the moon and stars . The blue paper is actually a strip of scrapbooking paper which I created for a french Company many many years ago.
I also used my differently sized Hexagon Rubberstamps and stamped with white onto the background. Love how this came together. Here are some of the supplies I used:
Ready for some inspiration? Today we have some projects from around the globe. It’s always fun to see how you’re using my stamps and stencils and I am so happy to share some examples today. So let me know if you’re doing something cool with my products, tag me on social media, and you might see yours on the next Inspiration from Around the Globe!
First we have from Alba S’s daughter Ellie from the US playing with my new FAN-tastic Small and Solid Fan Small rubber stamps. She decorated her physics notebook with a gorgeous pattern!
Next up is Pami from Germany using a couple stamps from my Midtown foam stamp set to build a little scene at the bottom. I love all the different elements she brought together here.
For a beautiful background in her art journal, we have Ellen from the US using my Van Vorst foam stamp in a rainbow of hues. She was playing along to Creative JumpStart when she created this!
Missy from Germany was also playing along with Creative JumpStart this year when she created this fun magnet with my Central Ave foam stamp set. Love the combination of colors!
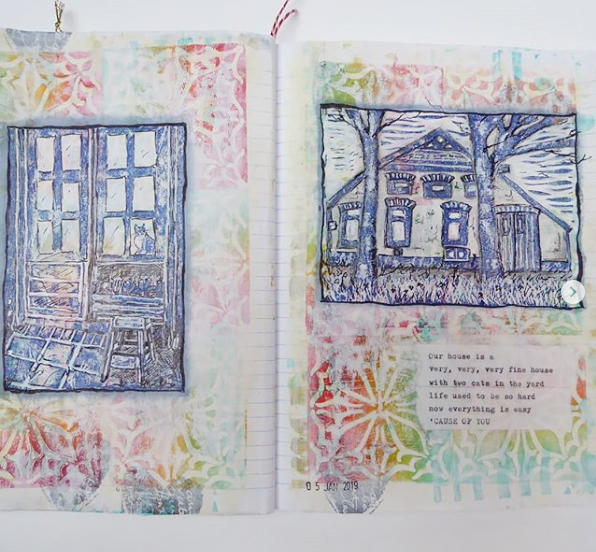
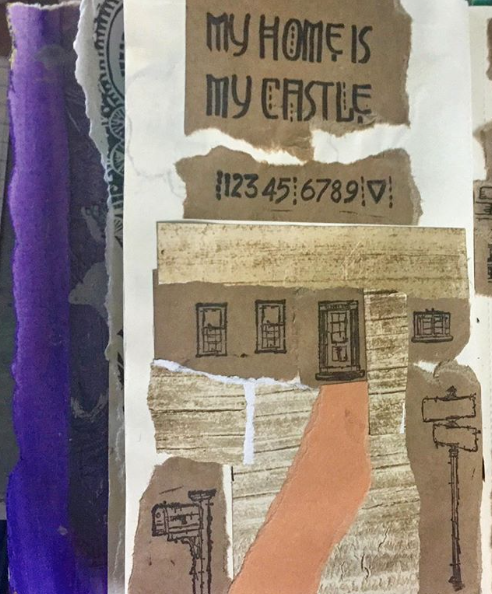
And finally we have Valerie from the US who used the stamps from my My Home is My Castle stamp set to add some touches to this awesome little collage. I love the abstract representation of a house here!
If you’re working on something fun with my stamps or stencils, be sure to tag me and share! I’d love to see! You can find all my stencils, rubber stamps, and foam stamps in my Online Shop. Here are some of the supplies used in this post:
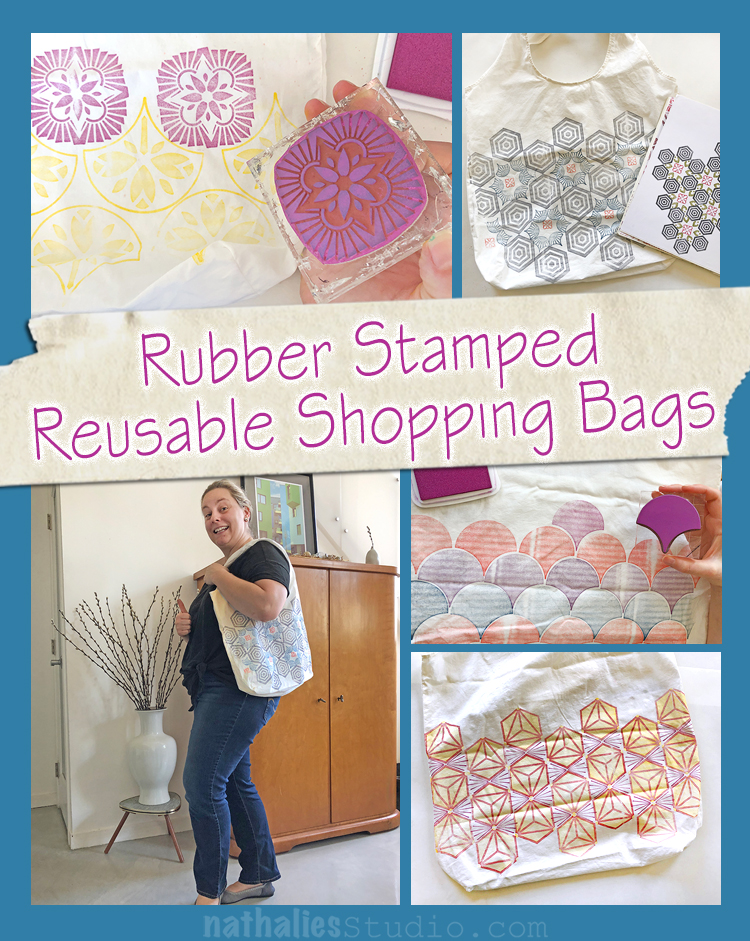
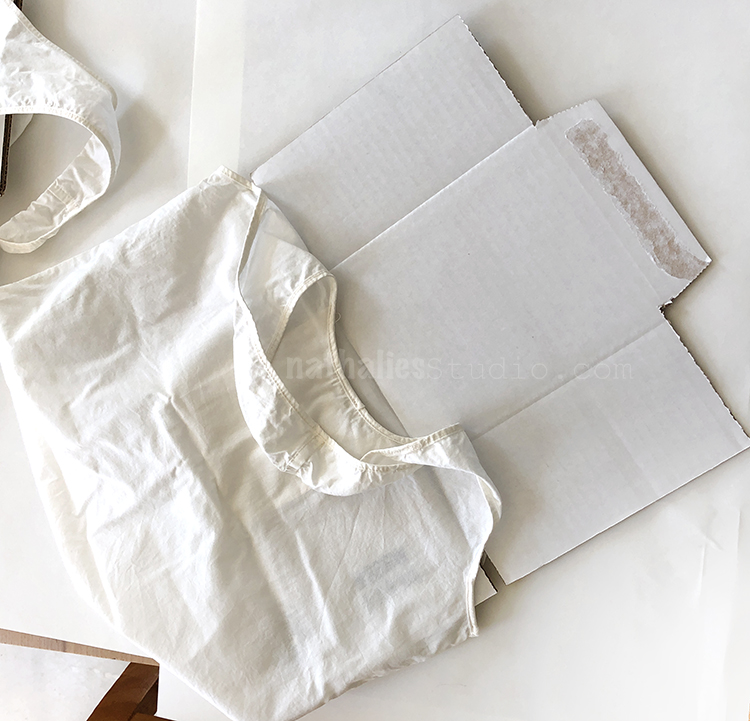
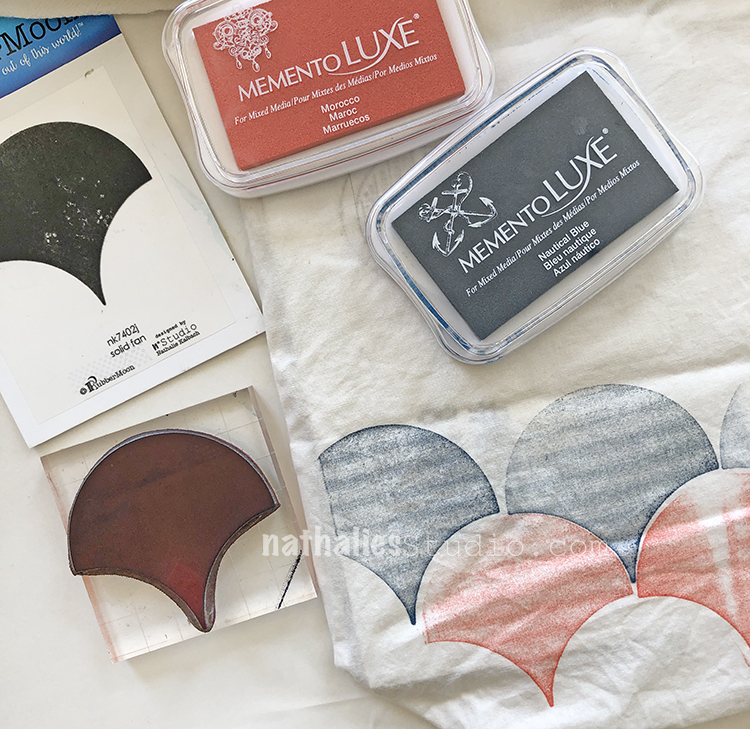
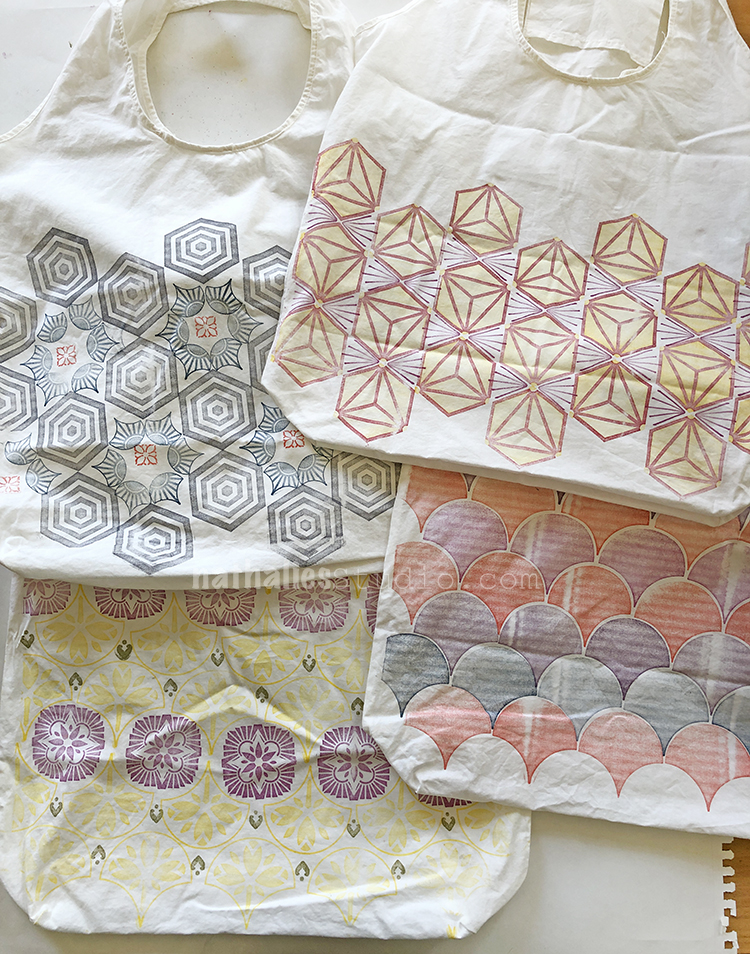
After getting into making patterns with my rubber stamp sets, I knew I wanted to take that idea and use it on a couple fabric projects. Kim and I got together to put some of those lovely patterns to use on reusable shopping bags. Our neighborhood is getting rid of plastic bags in June so we wanted to be ready to shop with a unique tote or two.
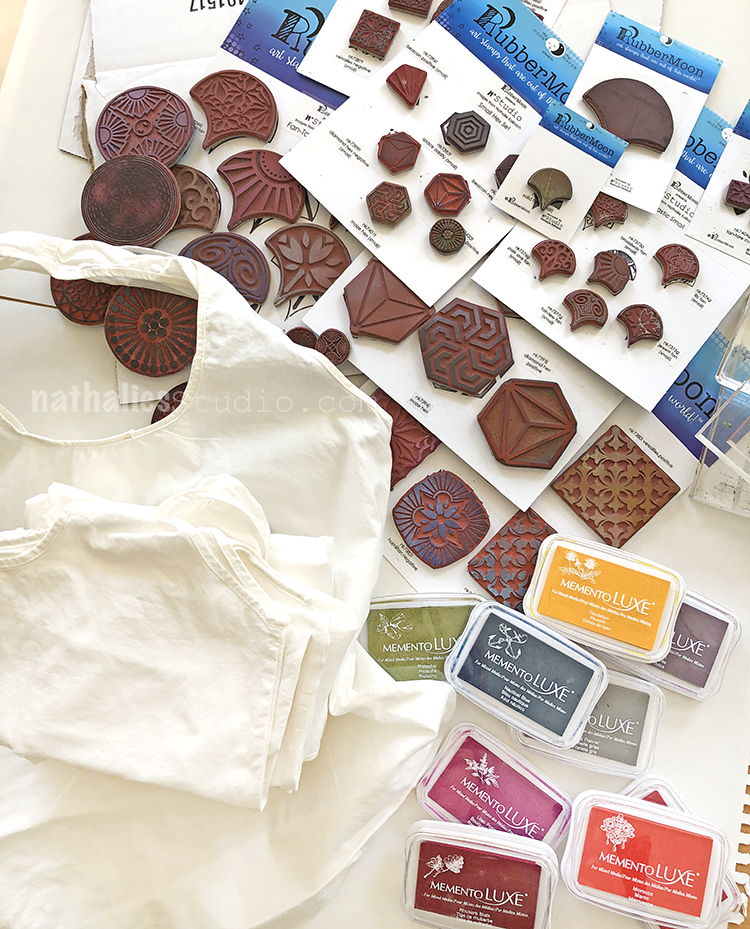
The supplies couldn’t be simpler: white (pre-washed and pre-ironed) cotton tote bags, a selection of my rubber stamps, and ink pads that are for stamping on fabric. We used Tsukineko Momento Luxe inks – you can find the links for those below.
We both took a minute to page through the pattern book I made with all those Nat’s April Patterns. It has become a great source to go to for inspiration.
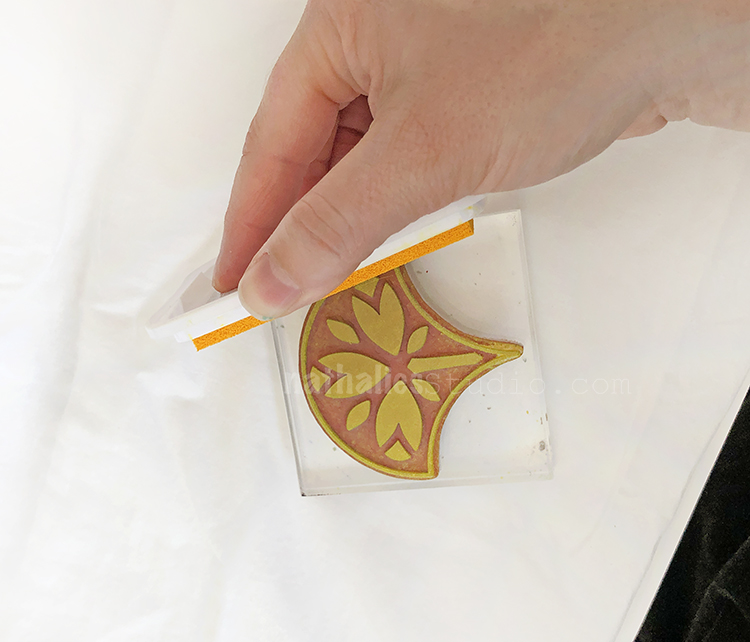
Before you begin stamping, put some cardboard or a magazine in between the layers of your bag so it doesn’t bleed through. Be careful of any creases or gaps or textures in this – it can show up in your stamping. It is best to find something smooth for in there.
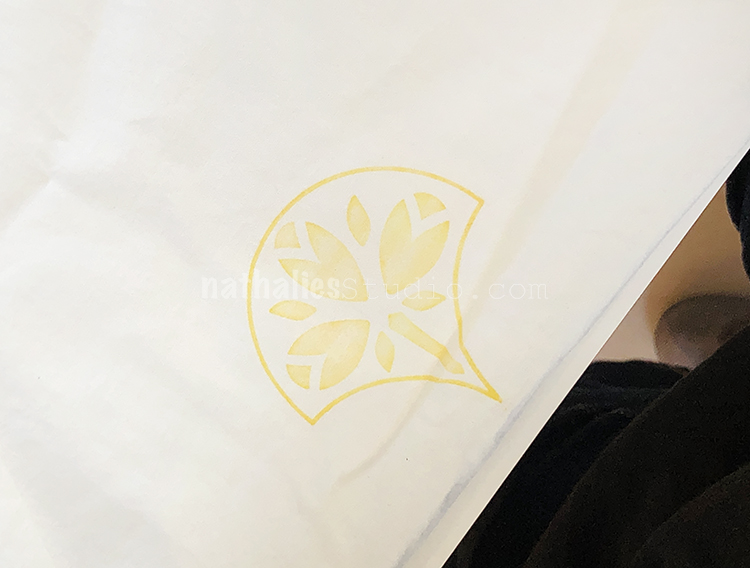
I started with the Jewett stamp from my Fan-tastic Large set and inked it up in yellow. The fabric ink is kind of sticky and you have to be a bit fast and also thorough with the inking.
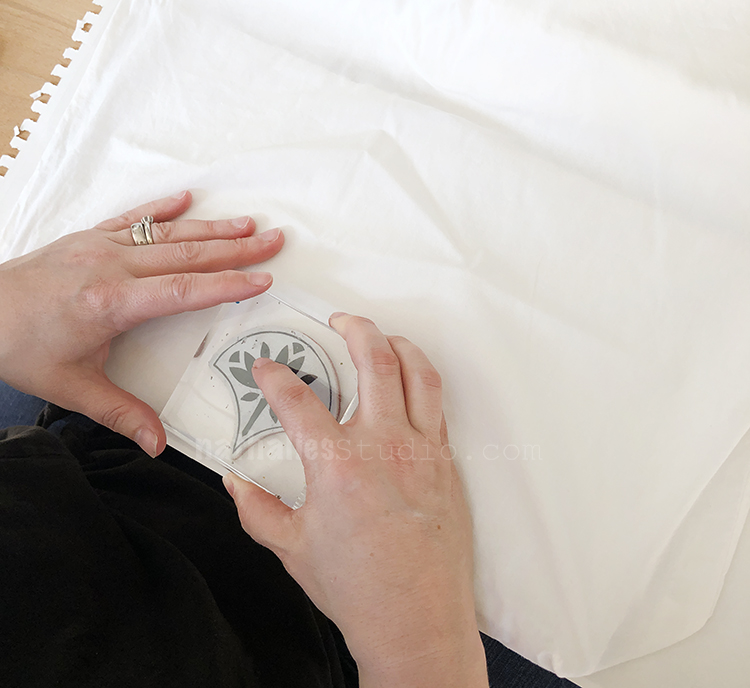
It is easiest to start your pattern in the center of the bag and then work your way out. That way it will be even left to right and you can decide how close to the edges you want to go.
The ink colors can be light in some cases and bolder in others.
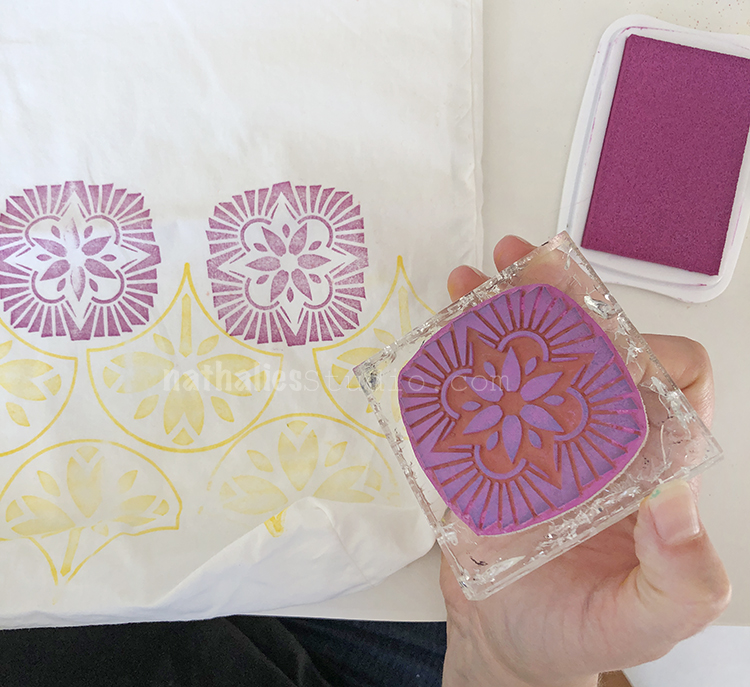
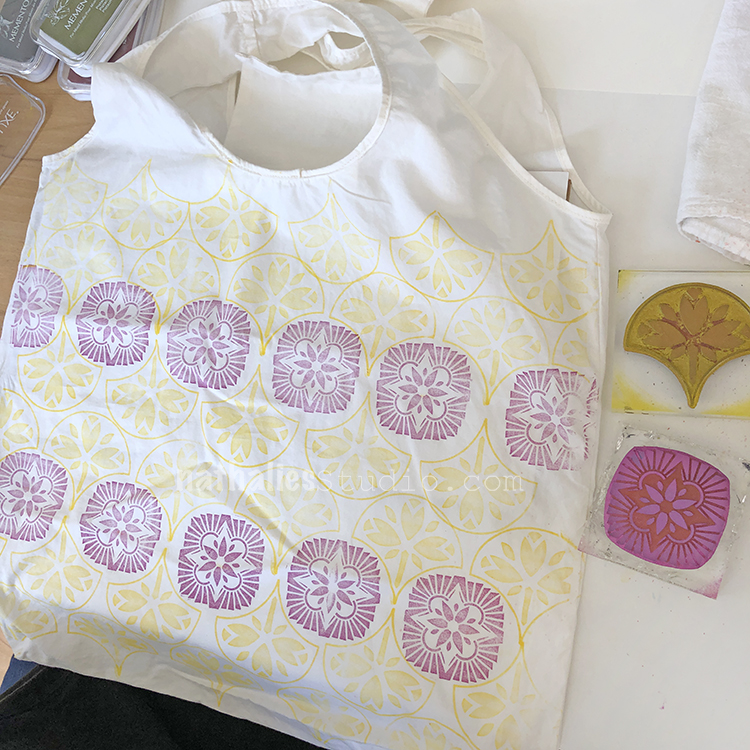
After two layers of the Fan-tastic Jewett Fan, I switched to the Hamilton design from the Floral Tile Large set and started stamping in a magenta color.
Looks great already but needs something more…
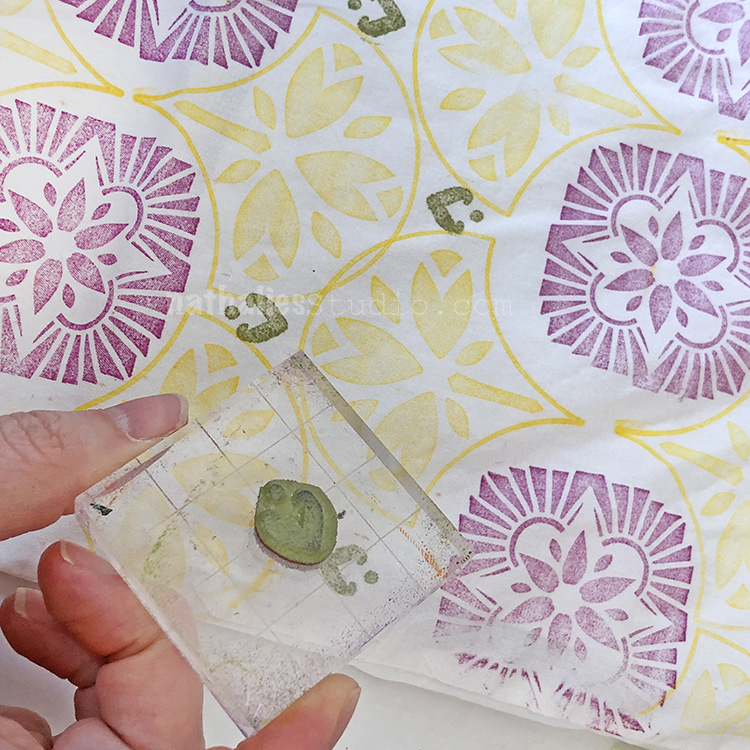
I finished off the pattern with a stamp from the Fanfare set.
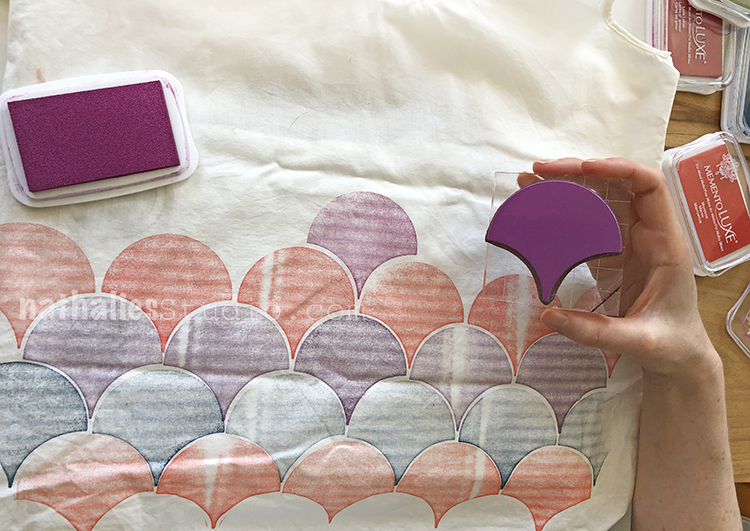
Kim jumped in with my Solid Fan in the large size to do a simple but cool scallop pattern.
She chose a lot of different fun colors – don’t forget to clean your stamps in between colors. Also, you can see that with the solid stamp, the texture of the cardboard insert shows a bit – not a bad effect but something to consider when choosing a liner.
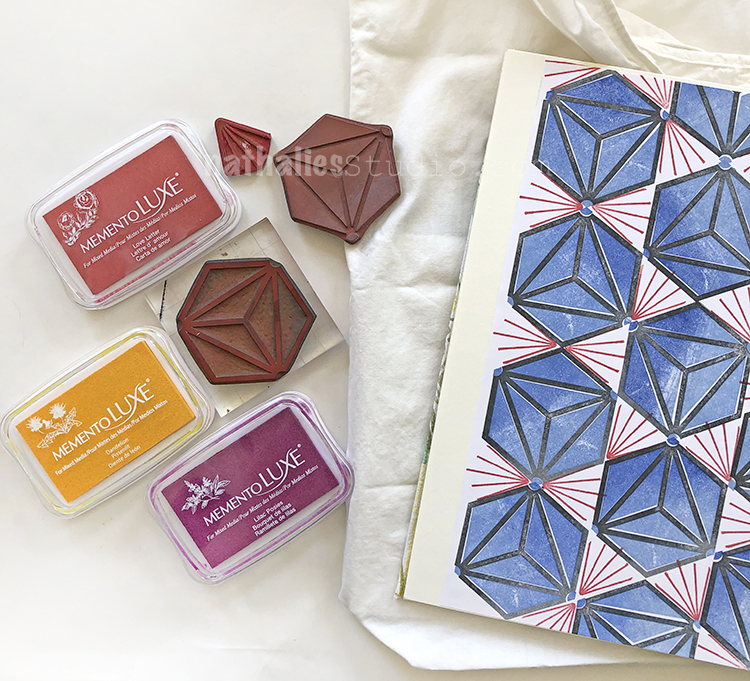
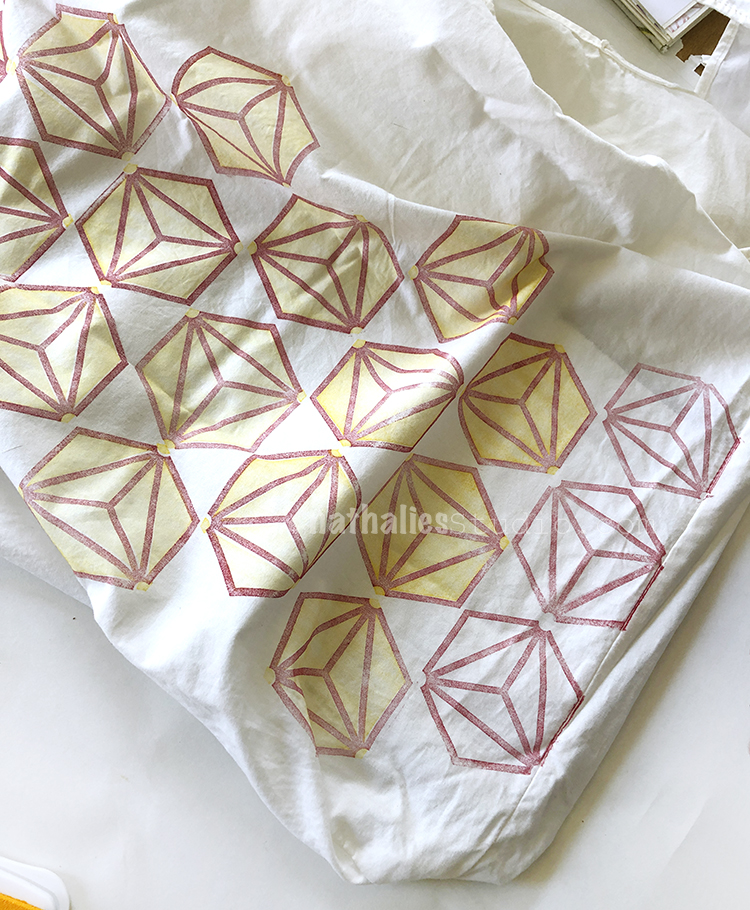
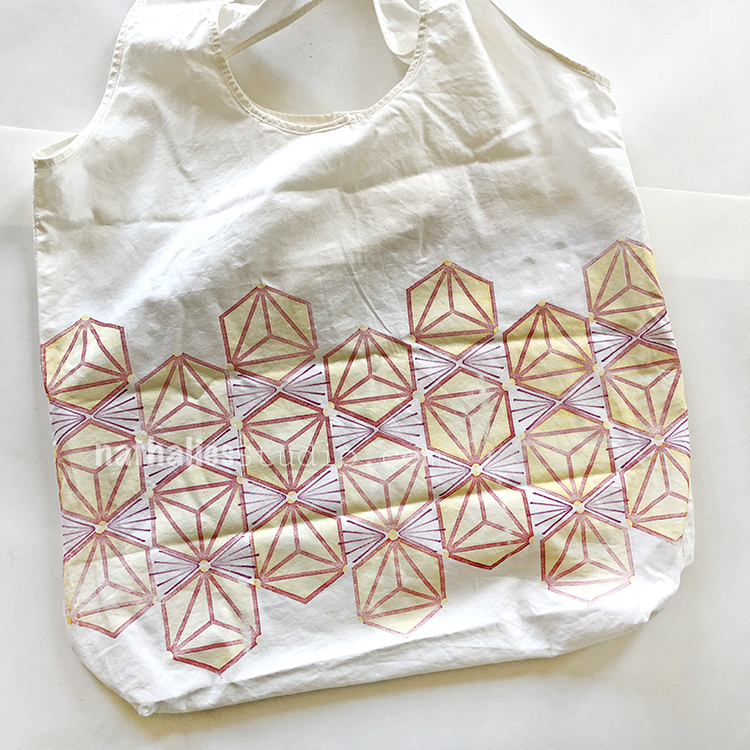
Kim found another pattern in my book that she really liked. She chose three ink colors. And the pattern needed one stamp from the Small Hex set and the two Diamond Hex stamps from the Large Hex set.
She started with the red ink and then filled in with yellow.
Looks awesome! And shows you don’t have to cover the entire bag.
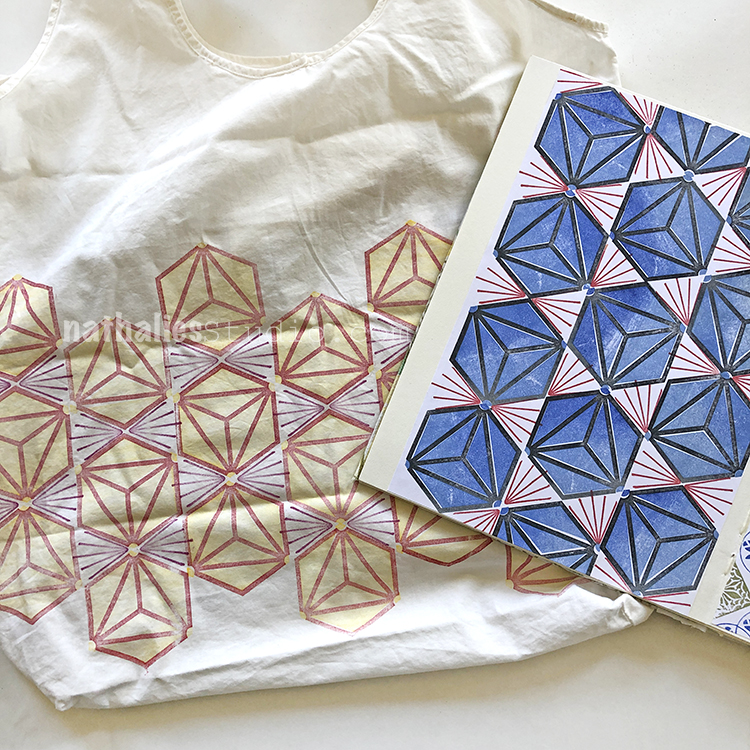
Kim’s bag and the pattern inspiration.
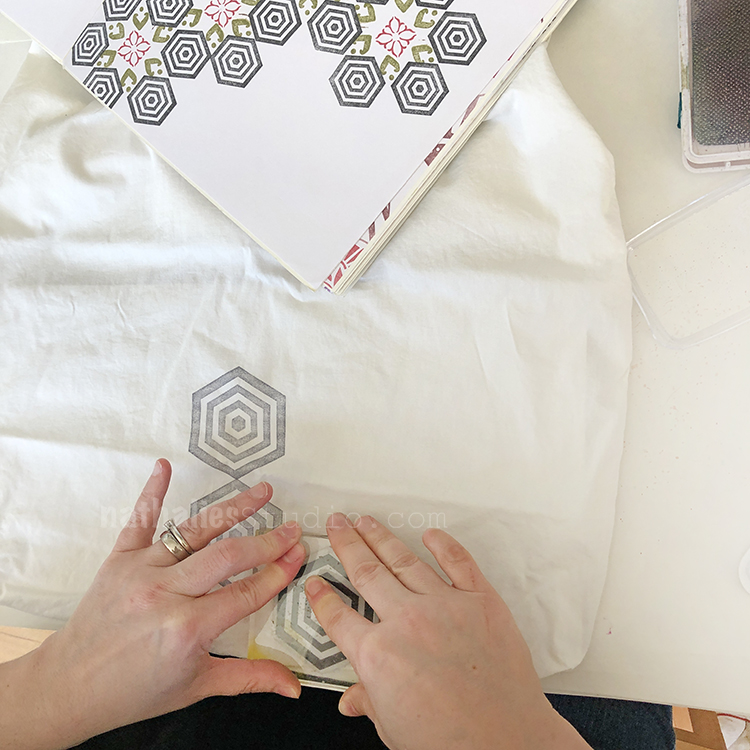
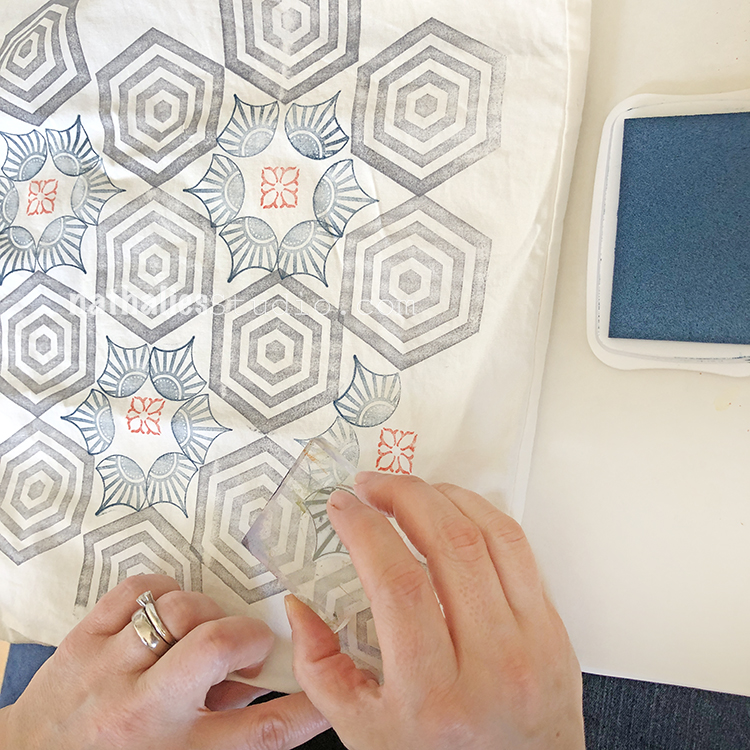
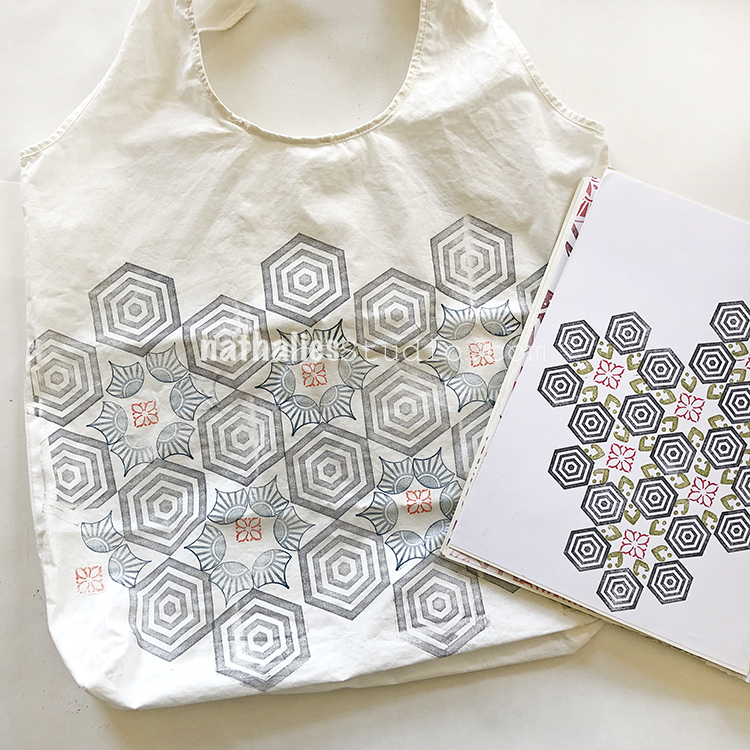
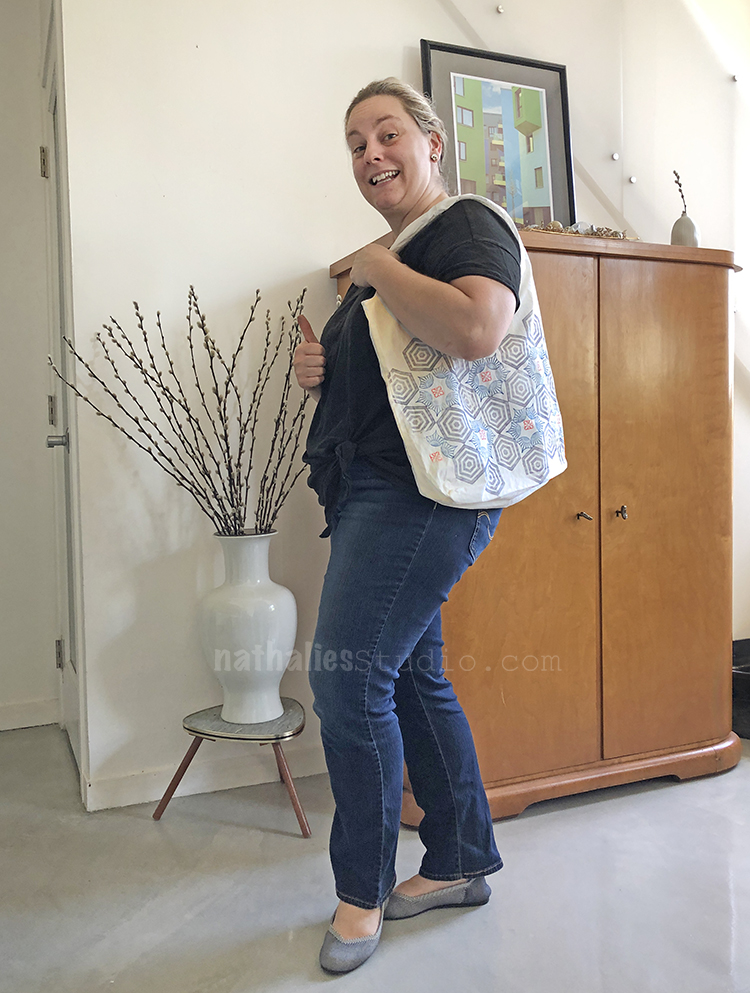
For my second bag I chose a pattern and decided to make it bigger. Tip: You will get a lot more done if you go with a larger stamp ;)
I began with the Space Oddity stamp from the Large Hex set, added a red Fan-fare stamp in the middle, and then I took a minute to choose my next stamp. More Fan-fare or the Broadway Fan from the Fan-tastic Small set?
I went with Broadway Fan :)
And here is the finished bag next to the inspiration.
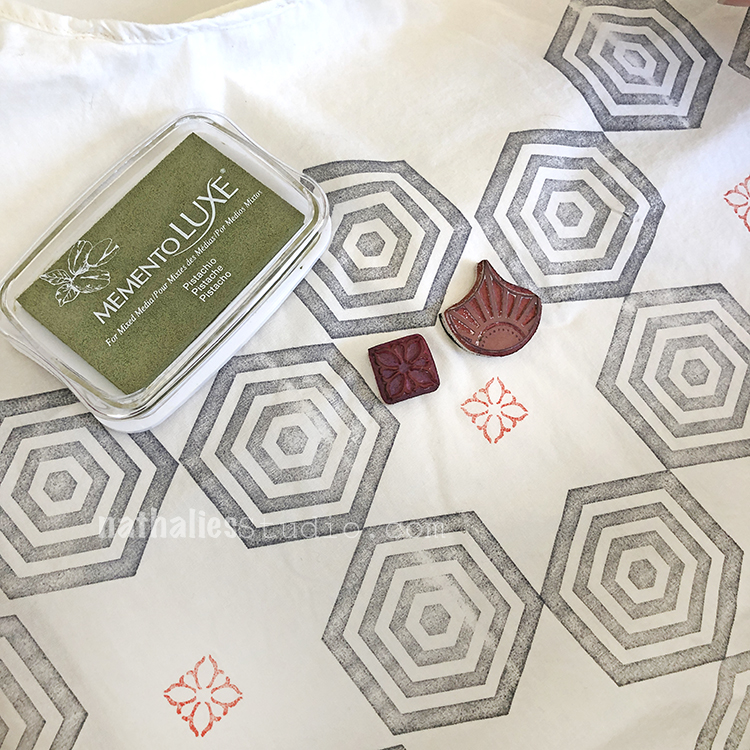
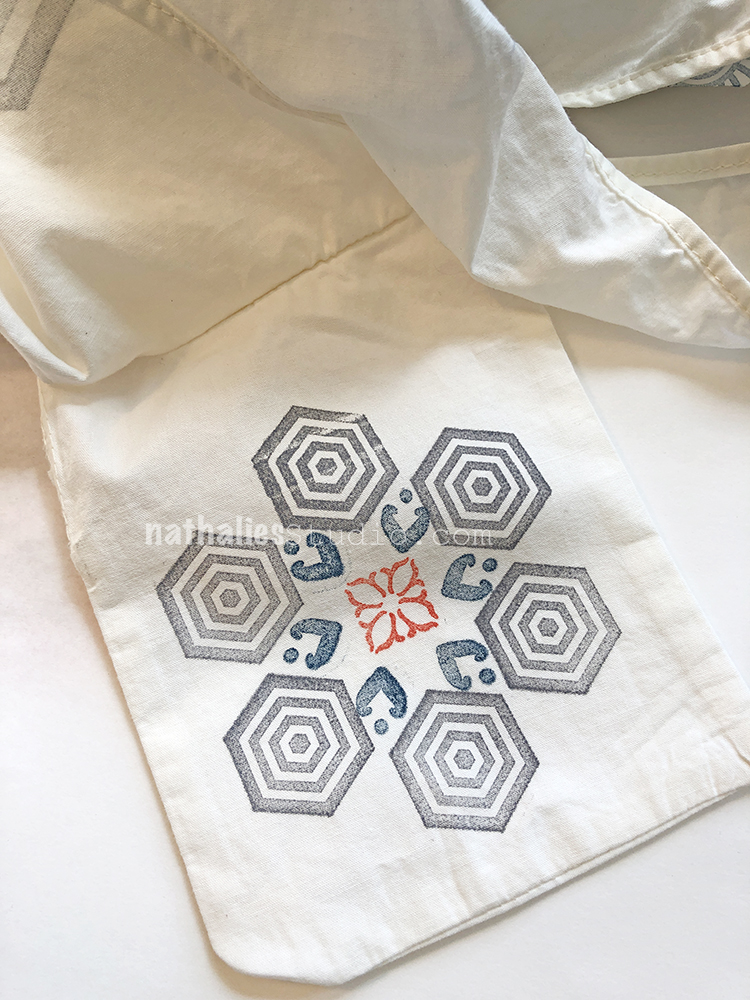
Our bags included a little pocket pouch to fold the bag into for storage. We decided to stamp that too. Here I used the Fan-fare stamps and the Small Hex set.
Then you can store them like this.
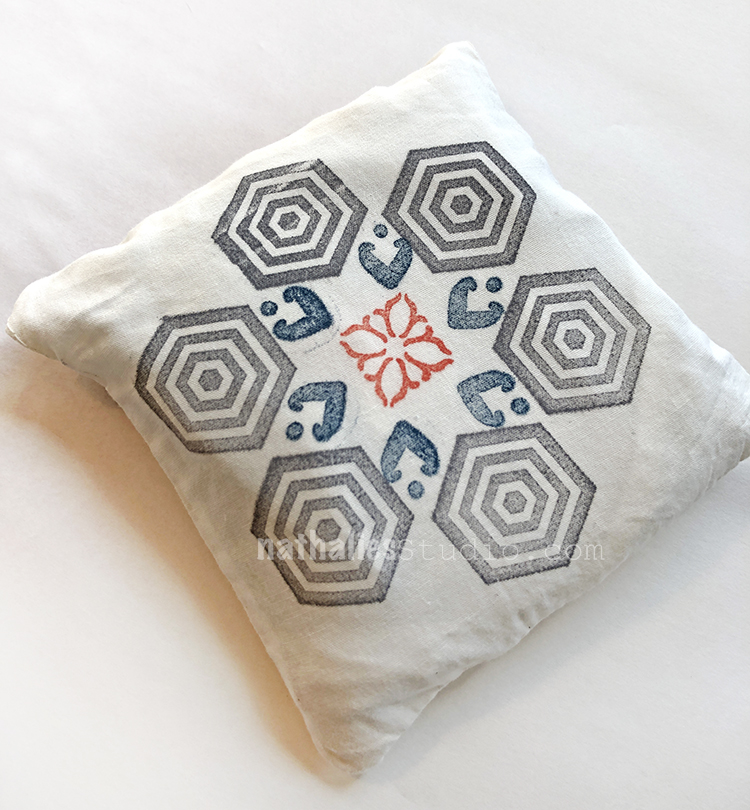
They look pretty awesome! Remember to follow your ink instructions for setting the ink. Every fabric ink is different. These will need to be ironed to heat set the ink.
This is fabulous!
I sew Boomerang bags http://www.boomerangbags.org for our local community to make people aware of plastic bag issues in our environment.
I think printing with your foamies will add an artistic touch to our bags! I will give it a go with the inks you mentioned. I do have some of you foamies and hope there is more at a local craft fair next week!
Thank you Nathalie
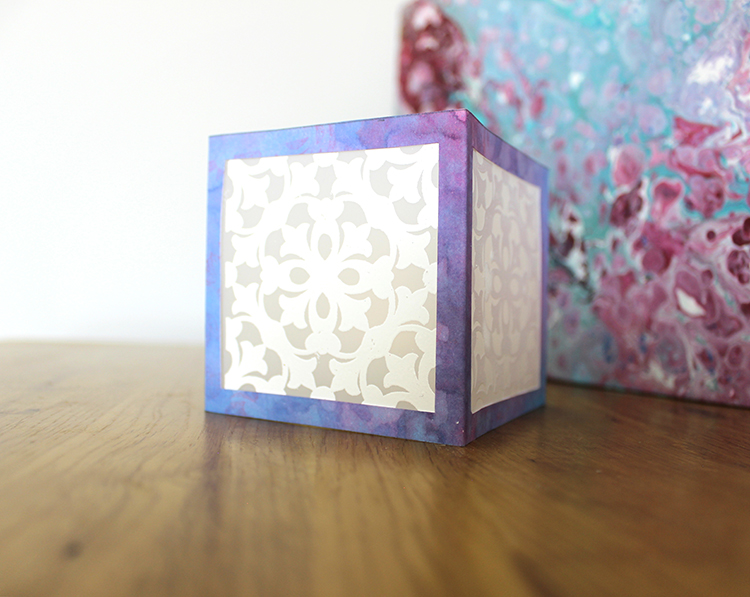
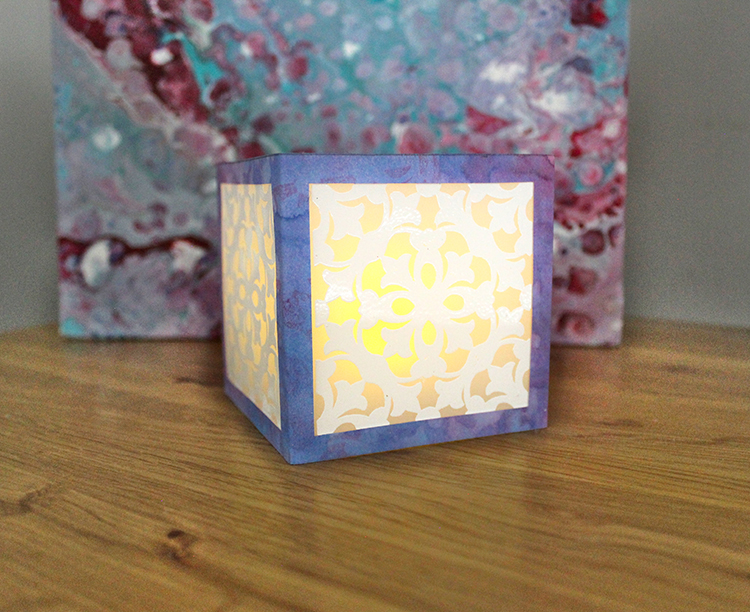
Hello from my Creative Squad! Today we have a beautiful paper lantern from Tania Ahmed that is sure to set the mood. She used my Versailles stamp from the Floral Tile Large rubber stamp set and this month’s theme: Pastel Dreams – This month we are focusing on the softer, gentler side of things and going pastel with our color palettes. These dreamy pale colors are undeniably appealing and just as powerful as their bolder cousins on the color wheel.
We love subtle mood lighting around the house and I love making little pieces like this paper lantern to use around the house as purposeful décor! I love the ornate filigree style pattern of the Versailles stamp so I knew that it would make a striking pattern for my paper lantern.
Steps:
1 Stamp and heat emboss 4 times on Duralar with Versailles Positive
2 Spray a 3” x 12.25” piece of sturdy cardstock with Distress Oxides Sprays. Mist liberally with water and lift ink with kitchen towel. Dry thoroughly
3 Stamp Versailles Negative with water to get ink to react. Lift with kitchen towel.
4 Stamp Versailles Negative with Distress Oxide in Picked Raspberry. Dry thoroughly.
5 Score cardstock panel at 3” intervals. You will be left with a ¼” flap. Cut out 2.5” square from centre of each panel with craft knife.
6 Cute out heat embossed Duralar and attach to square panel aperture. Fold and securely glue flap to assemble lantern.
7 Add battery operated tea light and enjoy!
Thank you Tania! You can find all of my rubber stamps in my online shop. Here are some of the other supplies Tania used:
Feel inspired? Working on something yourself that you’d like to share? I love to see how you interpret our monthly themes. Email me how you used my stencils and stamps with the theme and email me an image – I would love to share your projects in my next “n*Spiration From Around the Globe“.
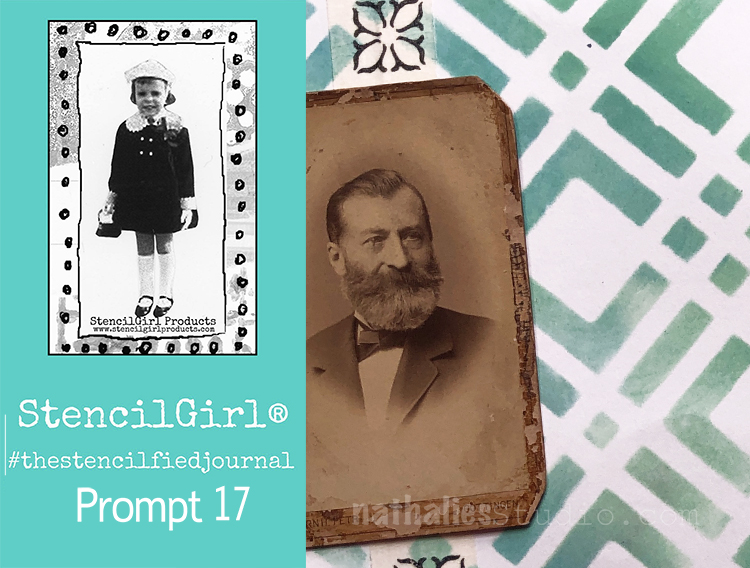
My wonderful friend Tina Walker is at it again – she invited several people to join her Stencilfied Prompts. The prompts are music related and each week she is posting a song. You can be inspired by the lyrics, the video, the album cover or anything related and the only restriction is that you have to use StencilGirl Product Stencils. Here is my take on Prompt 17
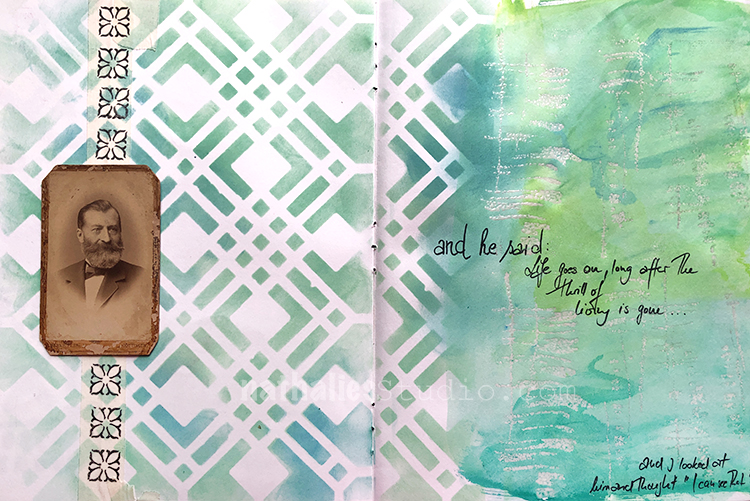
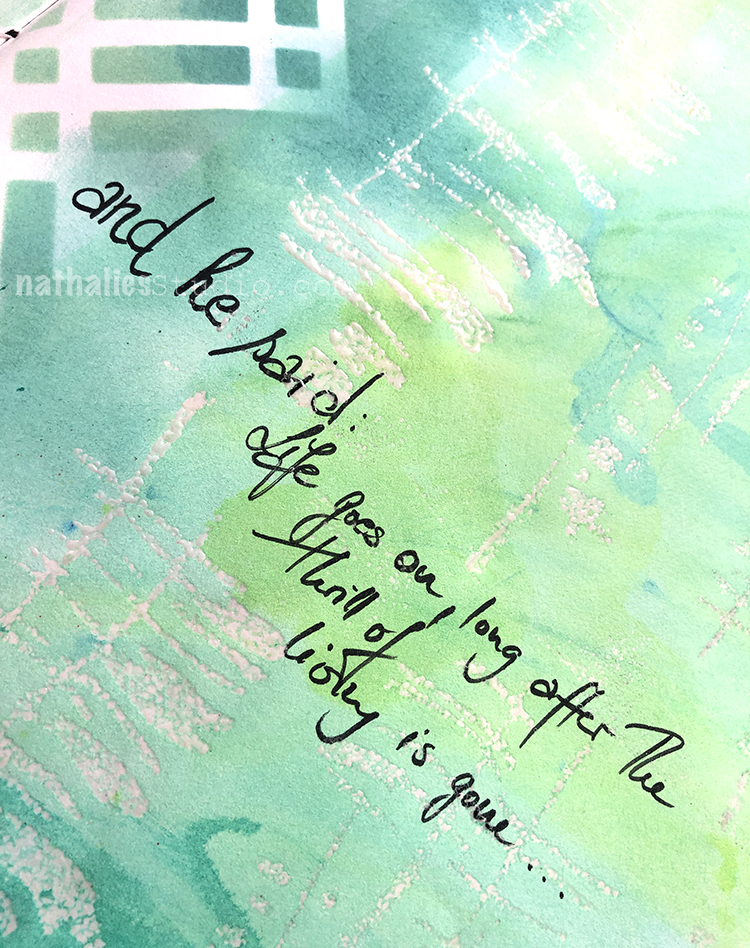
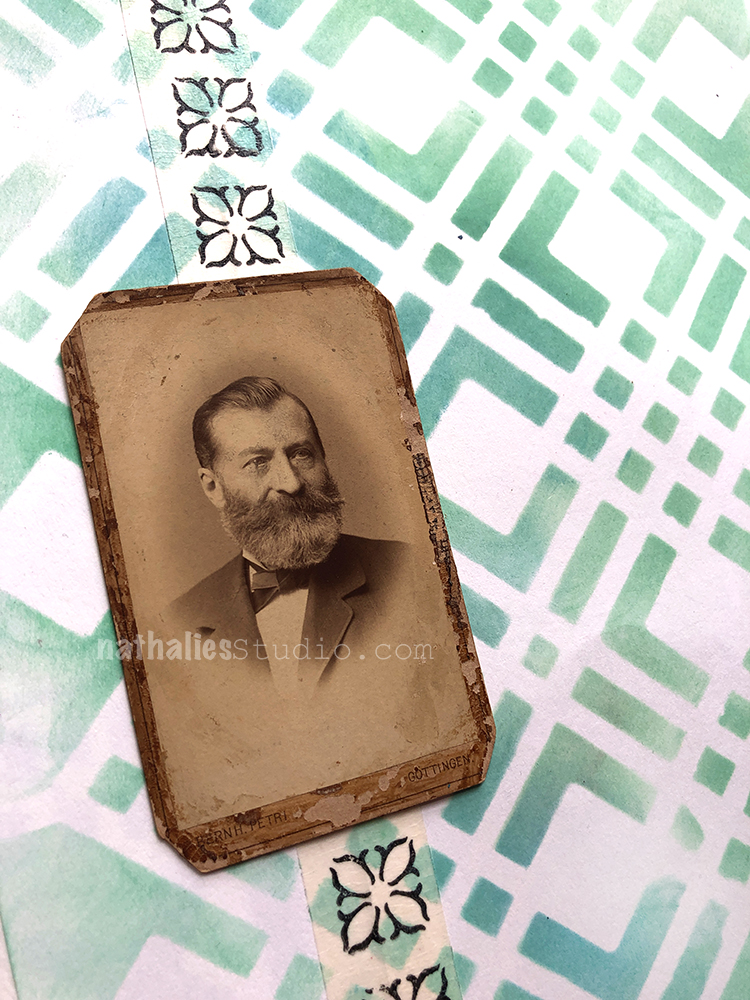
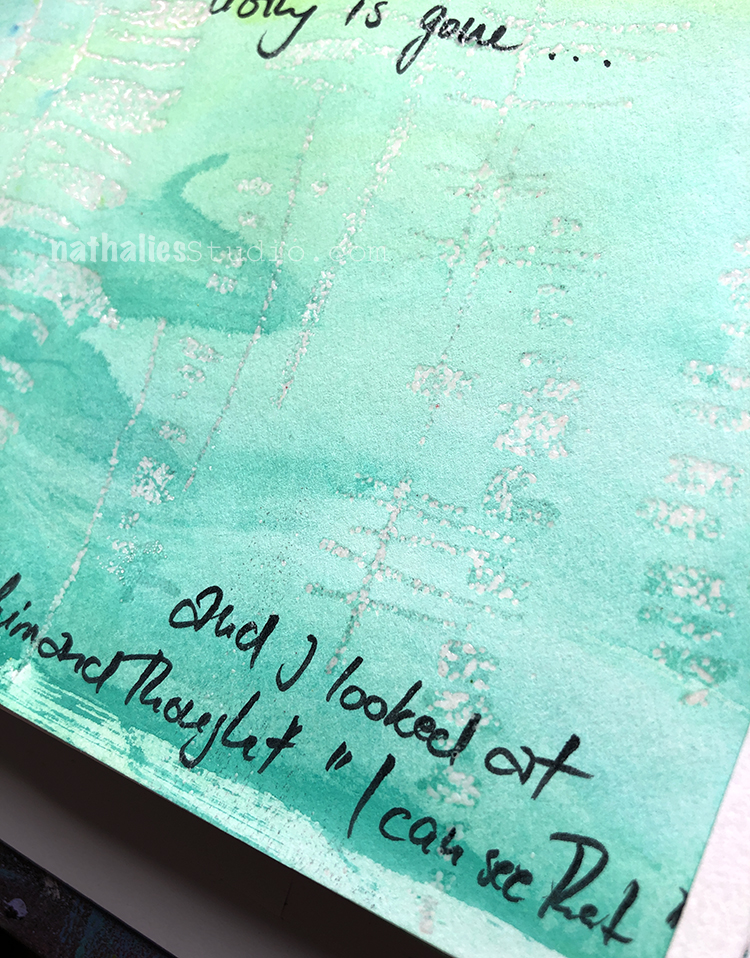
This week’s prompt was Jack and Diane by John Mellencamp. I pulled some of the lyrics into my art journal and a photo I found at a flea market.
“And he said: Life goes on, long after the thrill of living is gone…” I don’t know about that – I’ll get back to you when I get that old! :) Here I used my Far Out foam stamp with some embossing powder and a wash of acrylic ink over top.
Here is my grumpy old man lol, my Chicago stencil with Distress Inks for the pattern, and my Fanfare stamps on the tape.
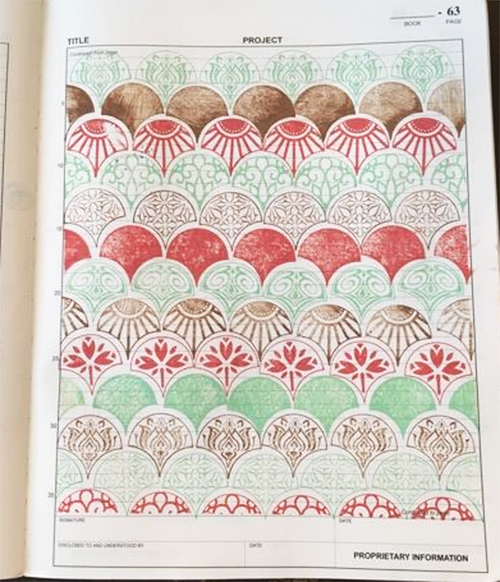
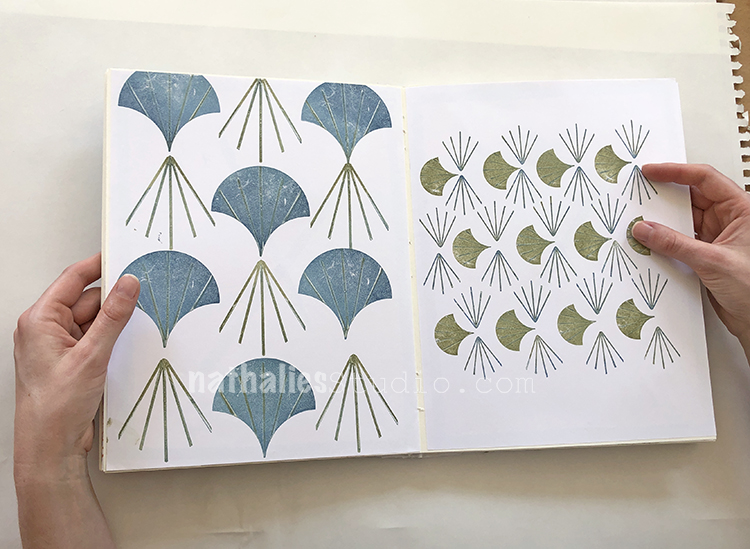
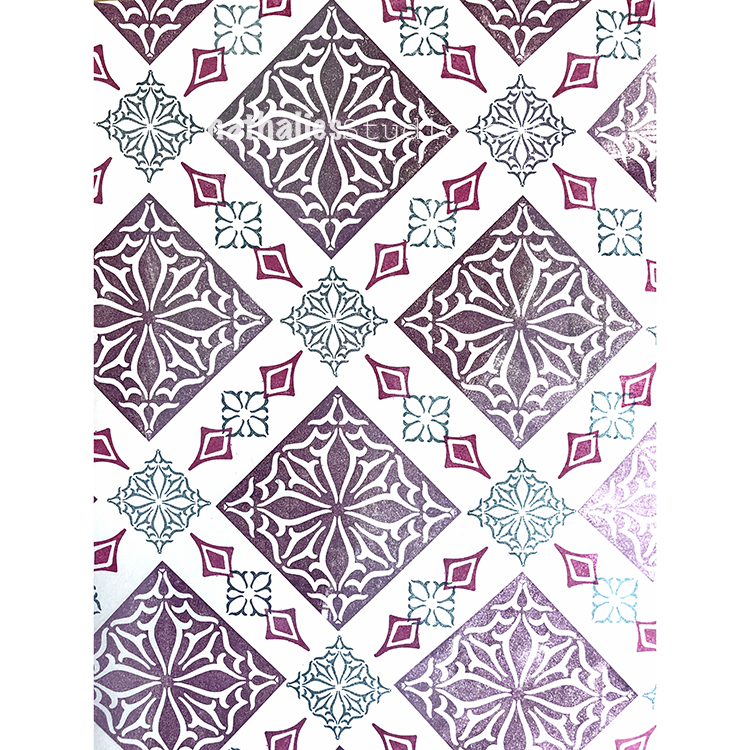
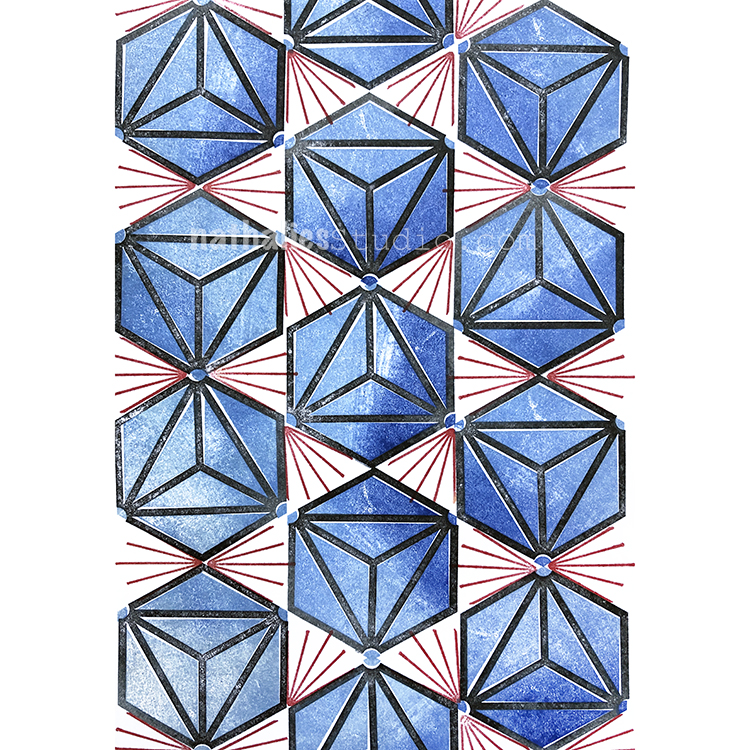
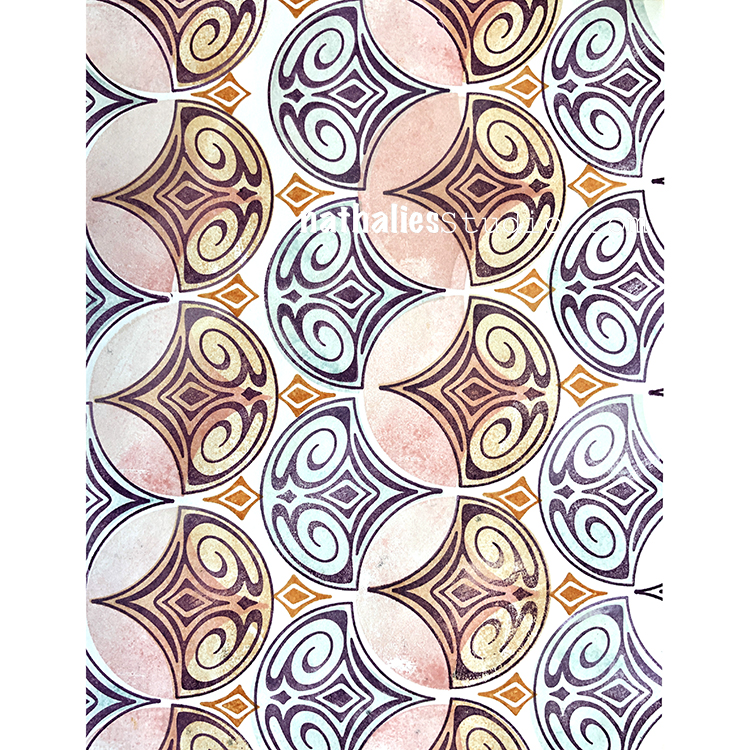
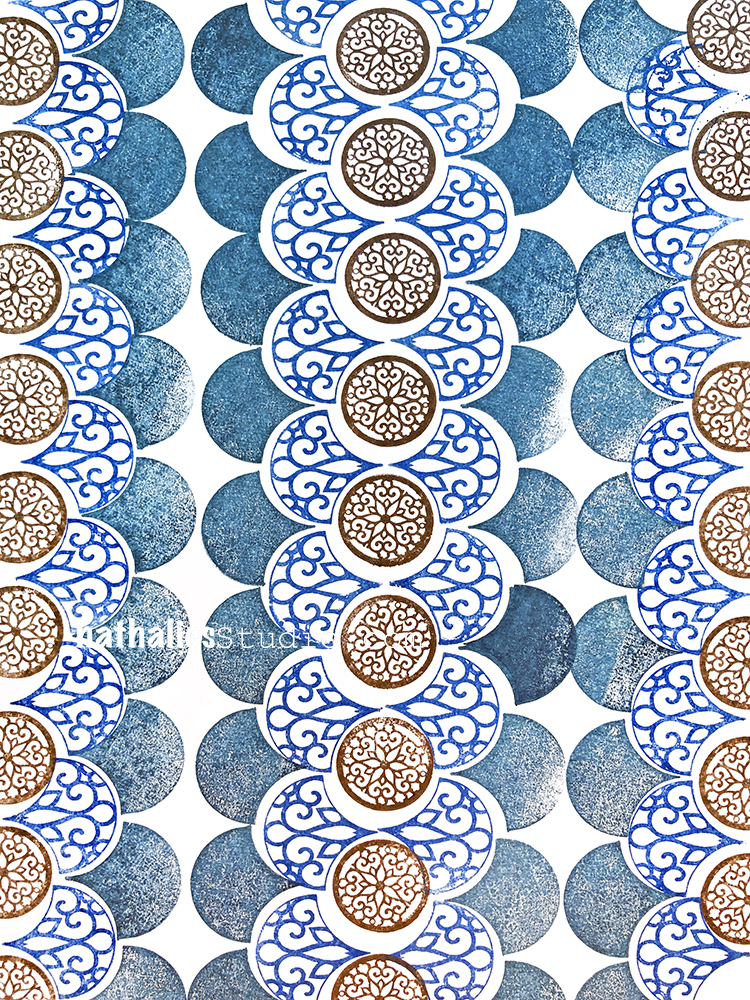
I wanted to share a little Flip Through video of my newly finished Pattern Sample Book. I started Nat’s April Patterns back at the start of April with my new rubber stamps and decided to bind them together in one book. It was relaxing and super fun to create the patterns and now I have an awesome resource for inspiration. Enjoy the flip through!
I hope you enjoyed this and are inspired to try some patterns of your own. All my new Rubber Stamps can be found in my Online Shop. Here are the supplies I used for these patterns:


I love the colors and the quote!
Happy Furry Mother’s Day Nat.
Reply