Nat

Hello from my Creative Squad and a mixed media piece by Josefine Fouarge! Josefine is using my Art Deco house, Art Tag, Chain Link, and Cross Circle rubber stamps and this month’s theme: Today We Smile – They say smiling can lift our mood and maybe improve our overall health. Let’s try it! Think about what makes you smile and share it with all of us. After all, smiles are also known to be contagious :)
Yes, let’s all smile. I smile when I can create, so surprise – I’m creating something ;) And I hope it will inspire you to create and maybe even smile yourself.
I enjoy creating the most when I can turn off my head while putting something onto paper (or in this case onto a board). Not thinking about what happens, just letting my inner joy guide me. This is what happens when I do exactly that:
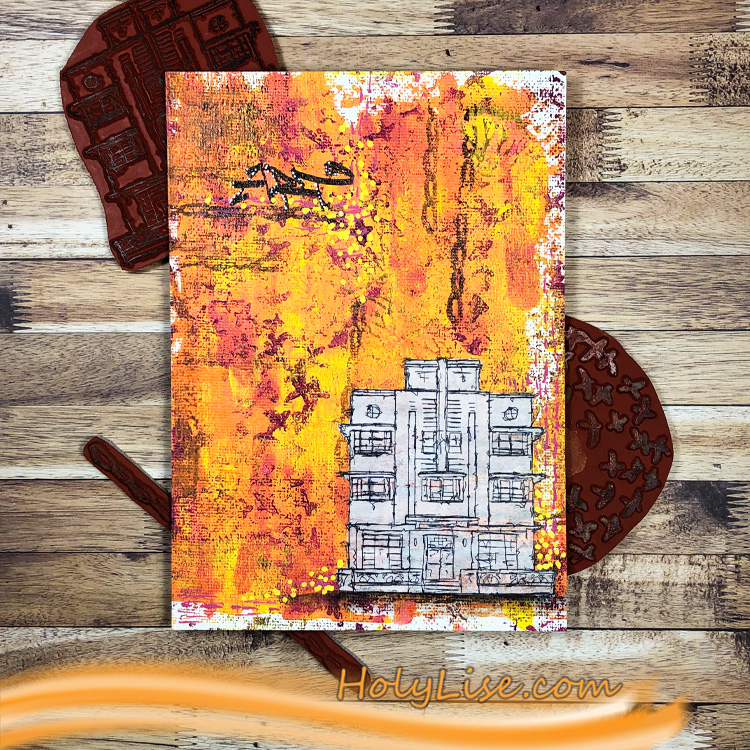
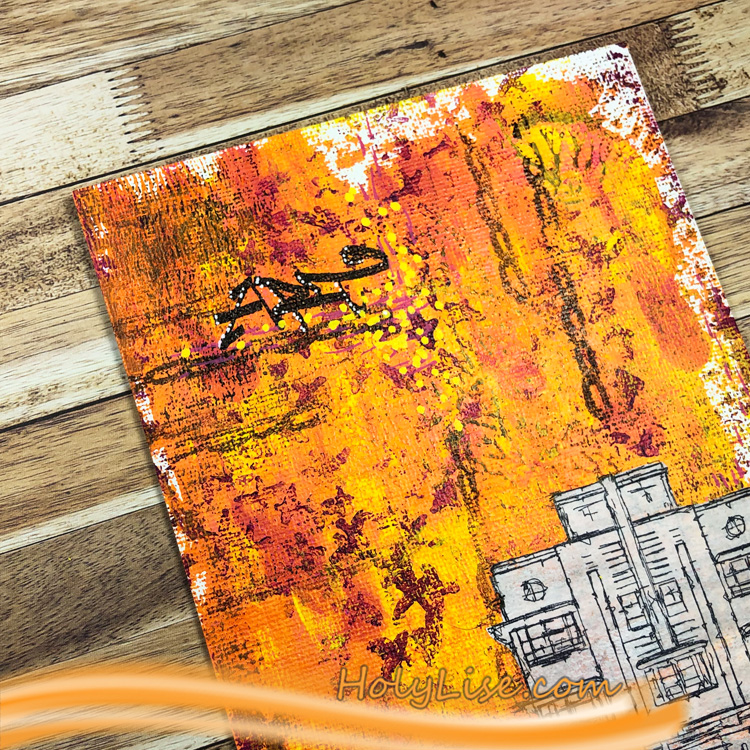
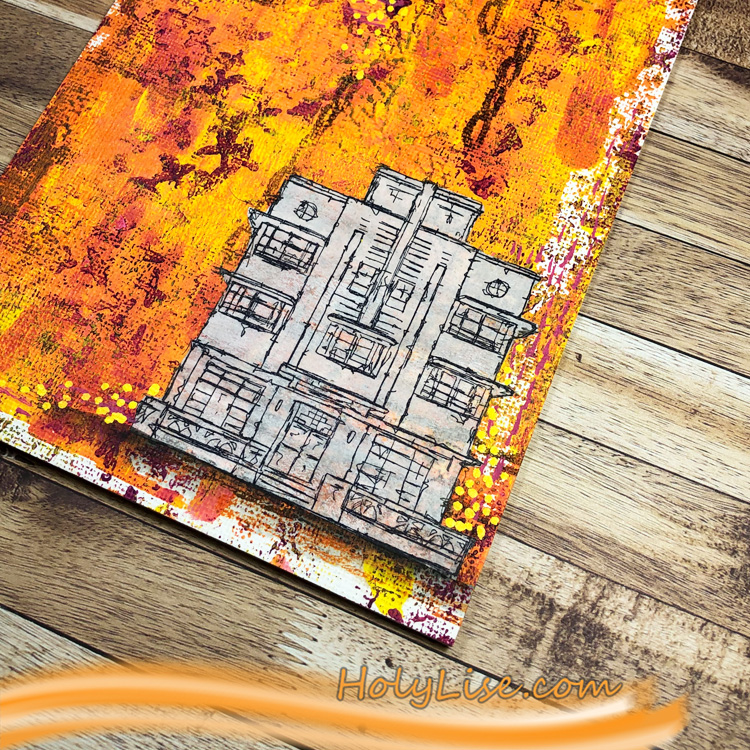
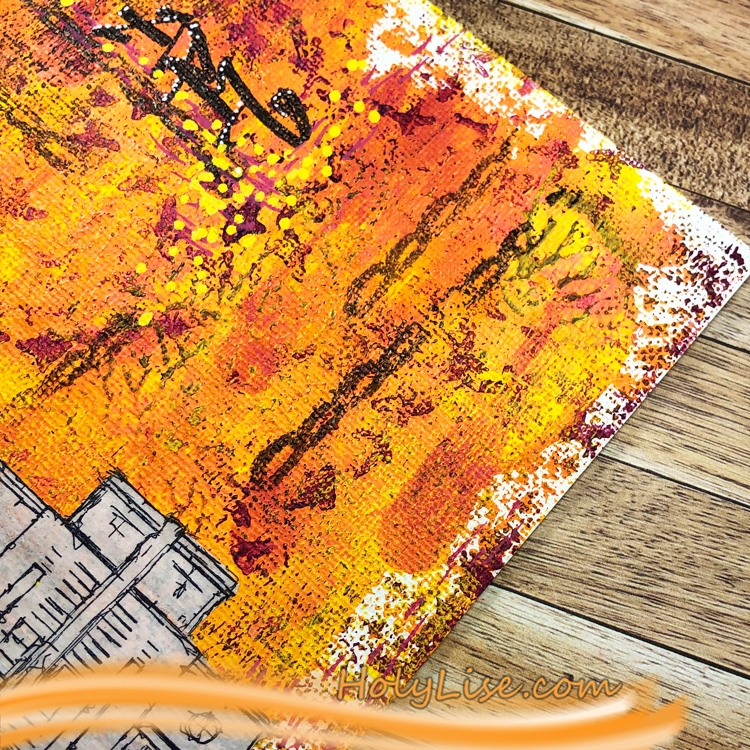
Here you can see how everything came together. Just imagine my smile on my face while I was smooshing around with paint, ink and stamps.
Can you see all the texture in the background? I really enjoy how the white house contrasts with the colorful and textured background. It’s a totally different look.
Thanks so much for stopping by. Don’t forget to take a look at all the other inspiration on Nat’s blog.
Thank you Josefine – I just love the colors in that background!!! In addition to my Rubber Stamps from my Online Shop , here are some of the supplies that Josefine used:

Feel inspired? Working on something yourself that you’d like to share? I love to see how you interpret our monthly themes. Email me how you used my stencils and stamps with the theme and email me an image – I would love to share your projects in my next “n*Spiration From Around the Globe“.
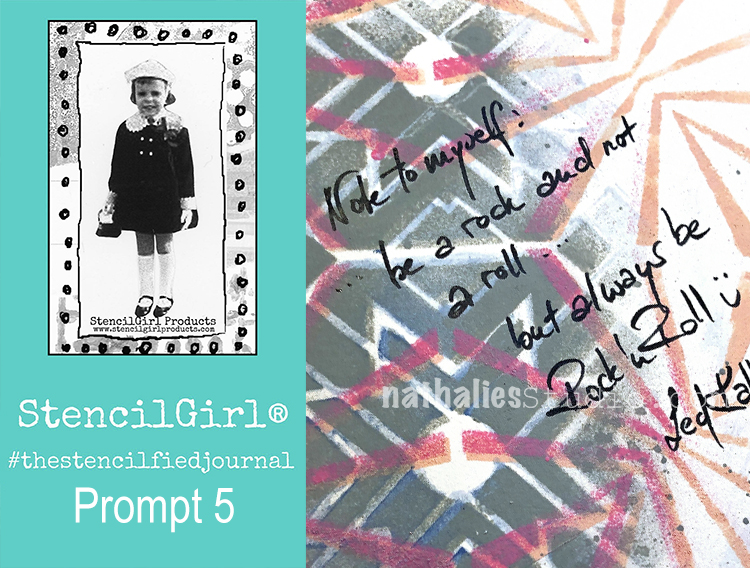
My wonderful friend Tina Walker is at it again – she invited several people to join her Stencilfied Prompts. The prompts are music related and each week she is posting a song. You can be inspired by the lyrics, the video, the album cover or anything related and the only restriction is that you have to use StencilGirl Product Stencils. Here is my take on Prompt 5:
This week’s prompt was Led Zeppelin’s Stairway to Heaven.
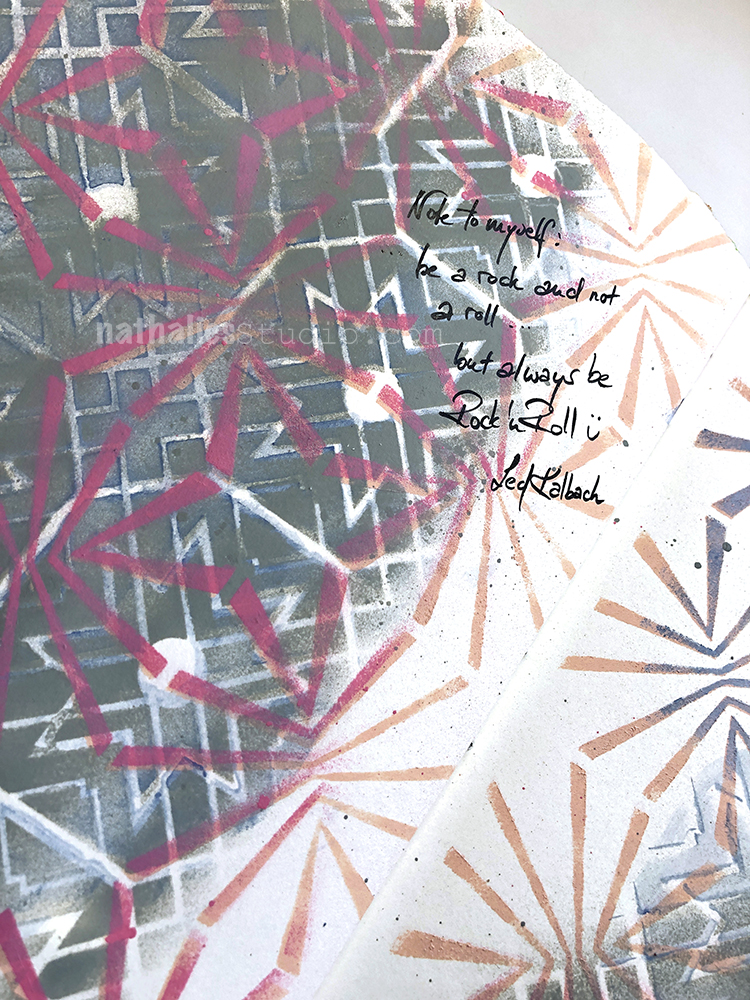
I added a bit to the lyrics ;) You know Led Kalbach – yeah stupid joke LOL
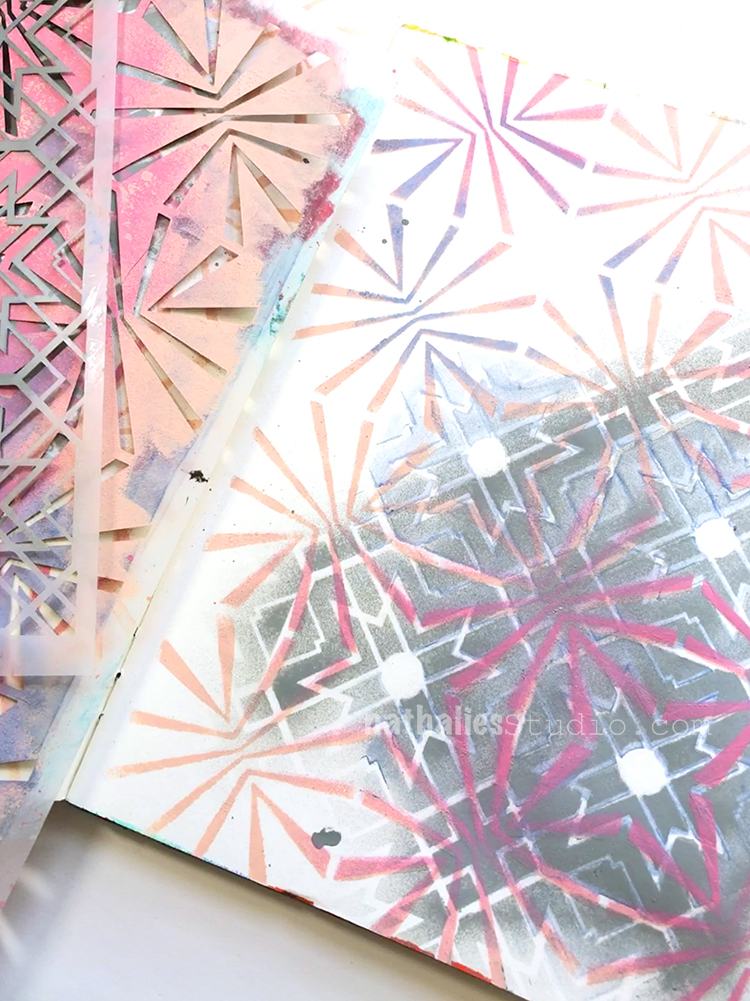
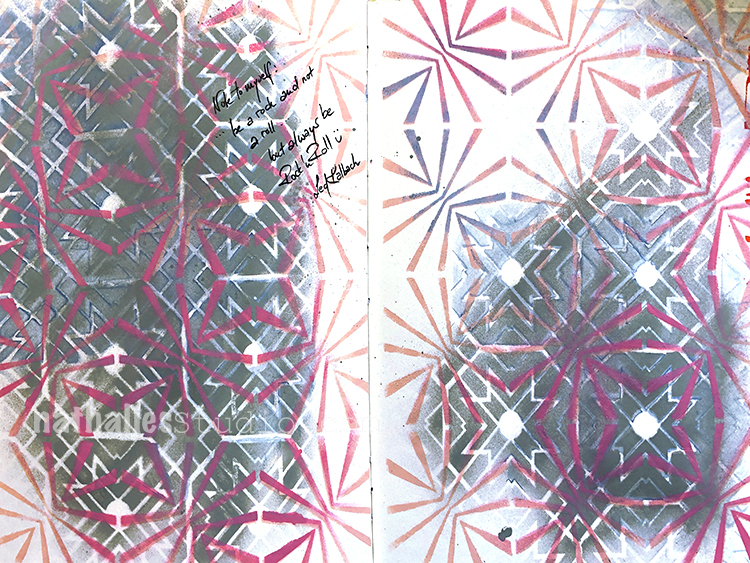
For this art journal spread I spray painted in grey over my Toledo Stencil and then layered the Beacon Stencil on top and sprayed with pink and beige as well as purple over it.
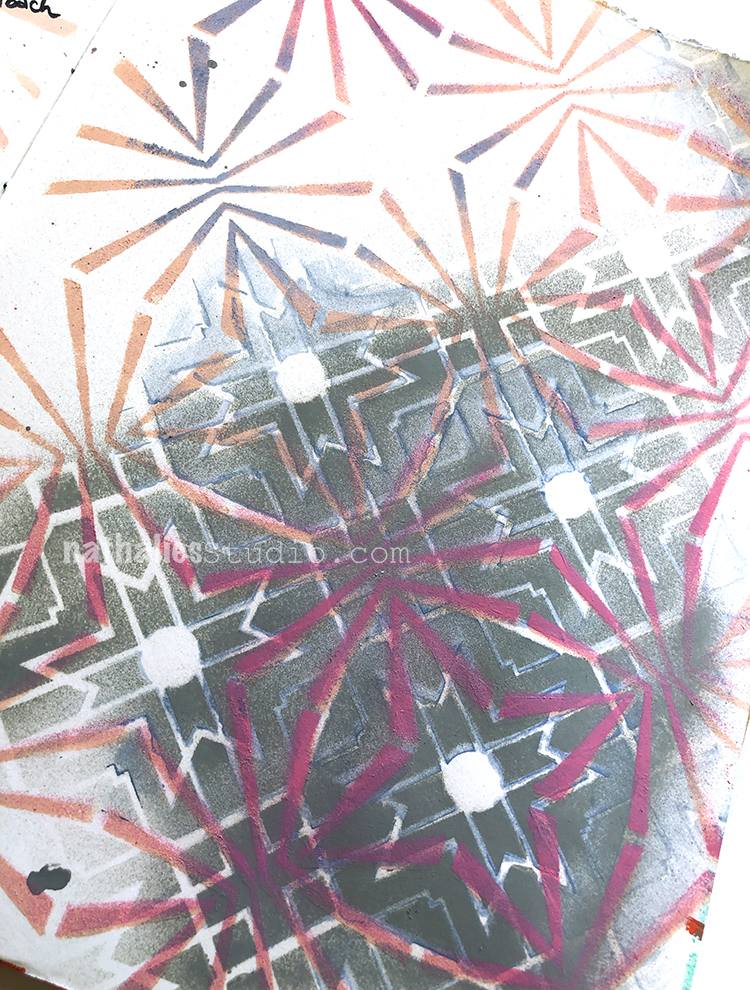
I love how the layered stencils come together. I tried it first with a lighter color as the background and then the dark color on top but I realized that it was too hard for the eye to read the background pattern that way. Always fun to play around with stencils and see how far and different you can push them :)
Wish you a Rock ‘N Roll day !!!
Here are some of the supplies I used for this spread:
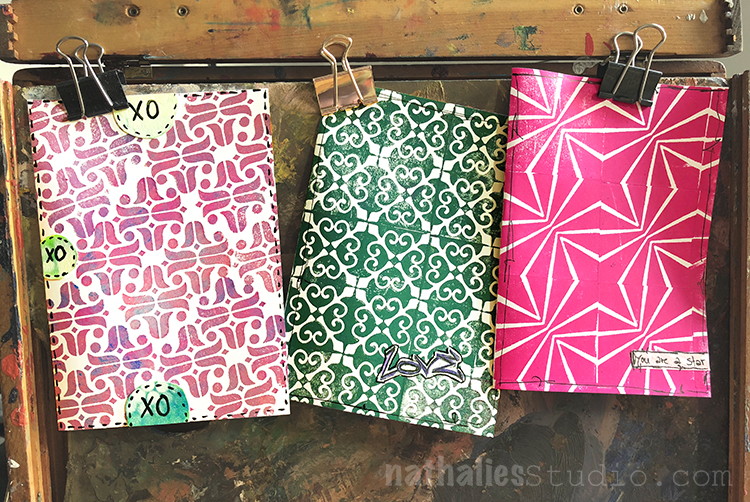
Time for some more appreciative cards -not just because Valentine’s Day is coming- but hey- who doesn’t like getting a nice card :)
This one uses Mini Amsterdam from the Mini Tile Set.
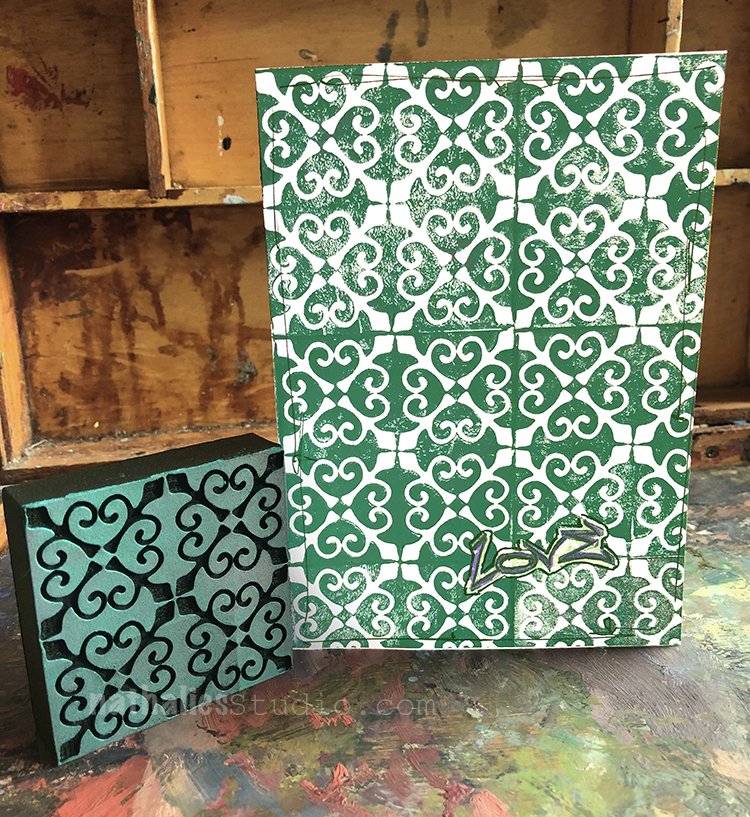
Same Set- Antique Tile and
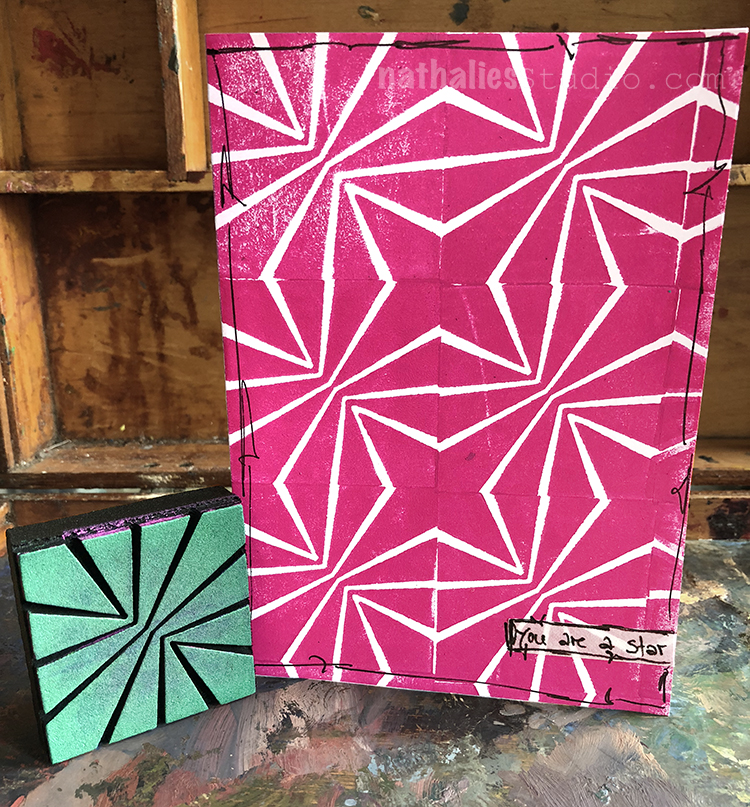
Last not least using the mini Beacon from the same set to create a fun pattern.
Are you sending cards out regularly to your loved ones or are you more an email and text kind of person?
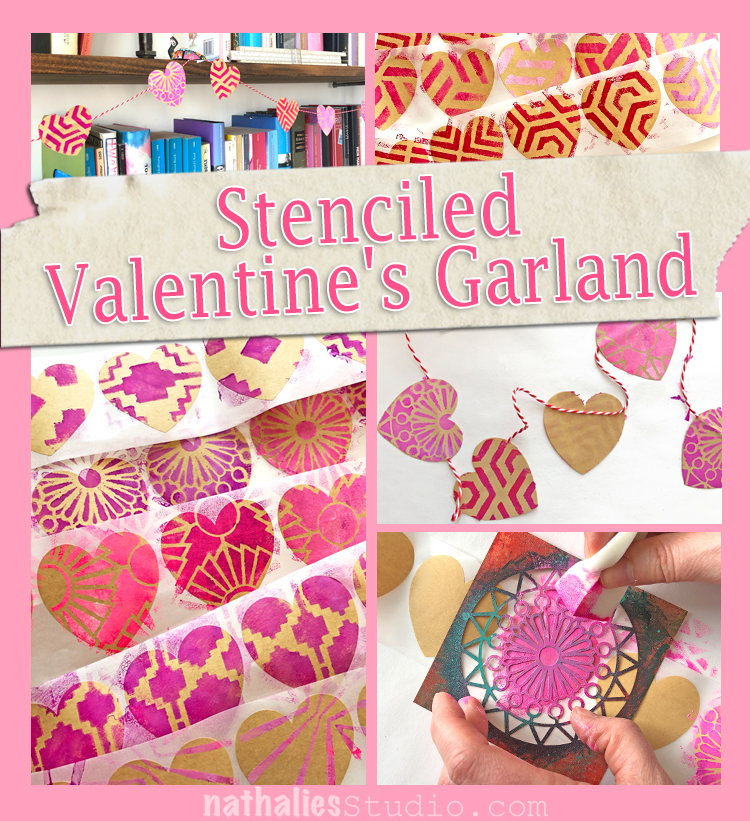
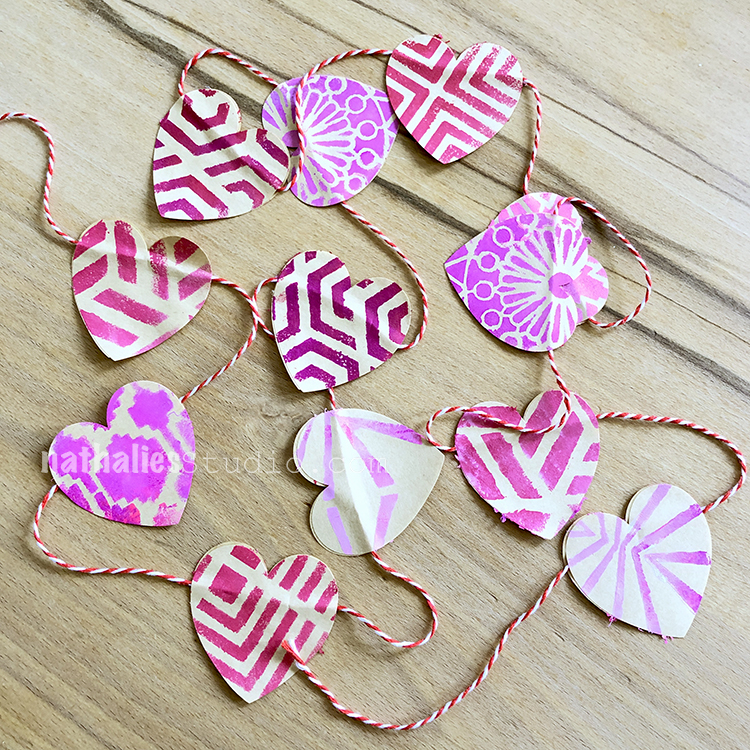
For the upcoming Valentine’s Day holiday Kim and I had a little play date to get in the spirit. This was super easy – done in an hour – and a fun way to use some stencils!
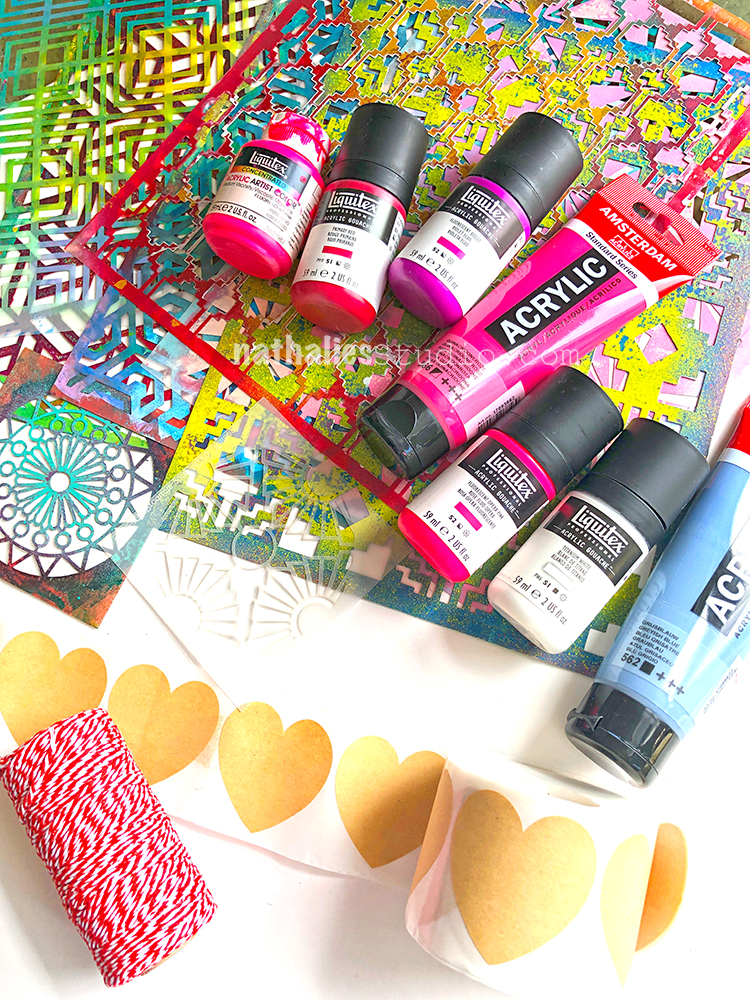
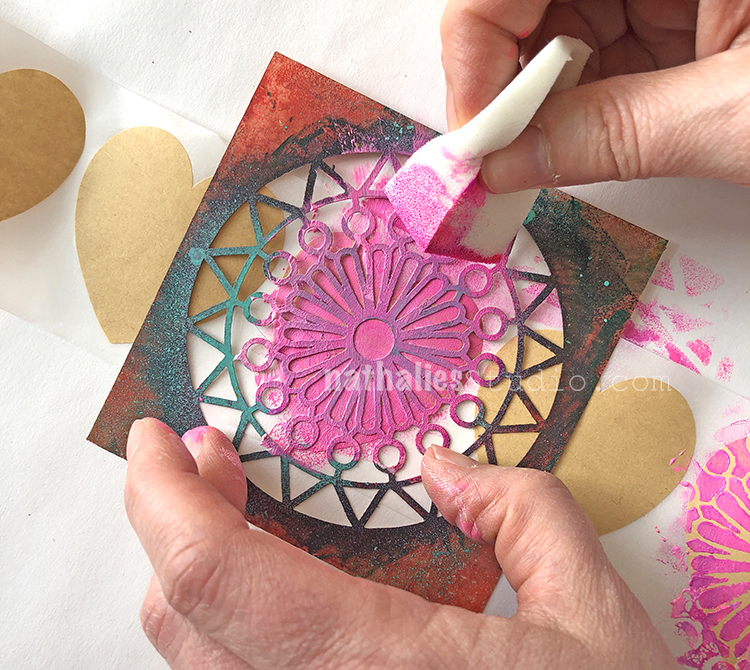
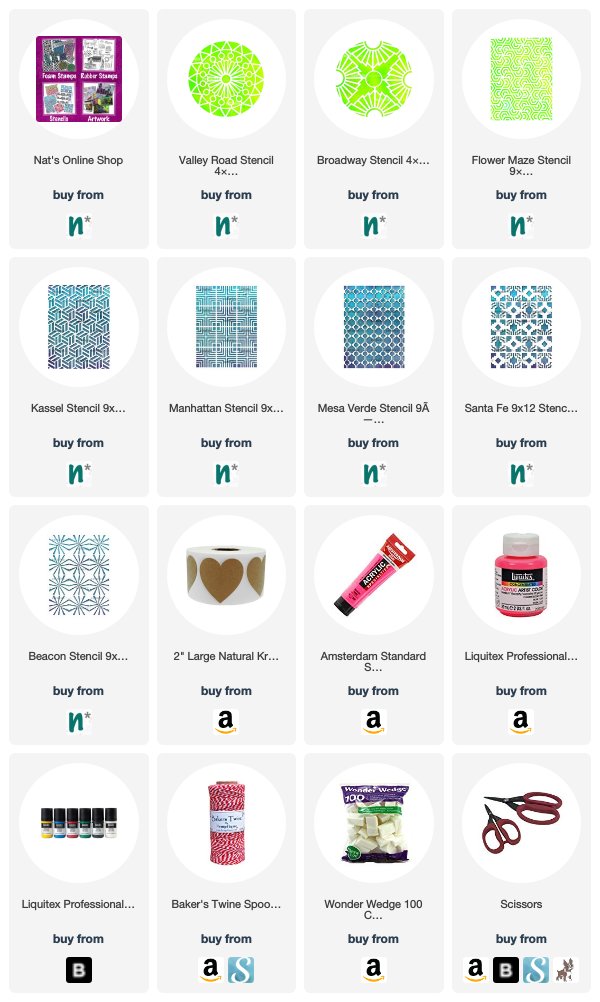
We got some heart stickers (2″ across), baker’s twine, my stencils, and acrylic paint in pinks, reds, and violet.
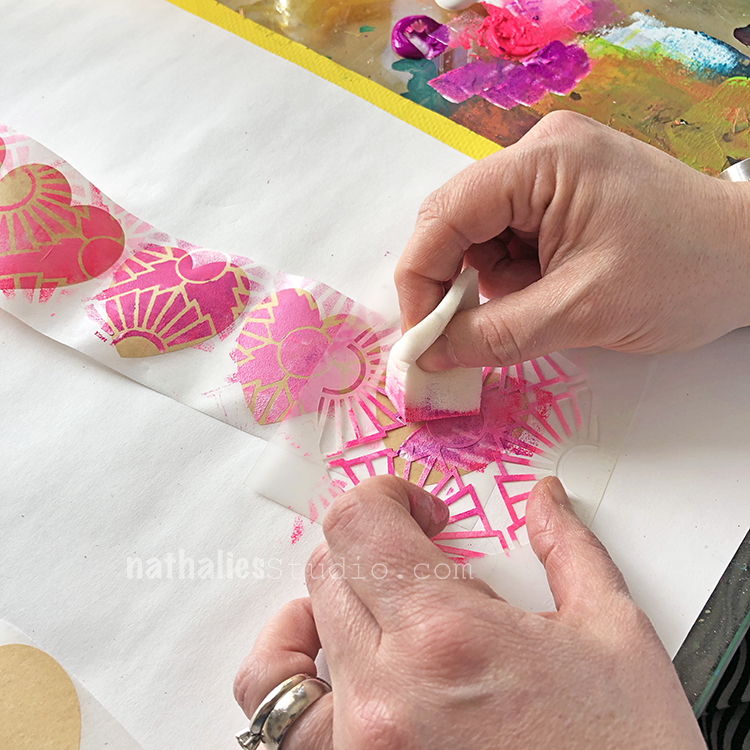
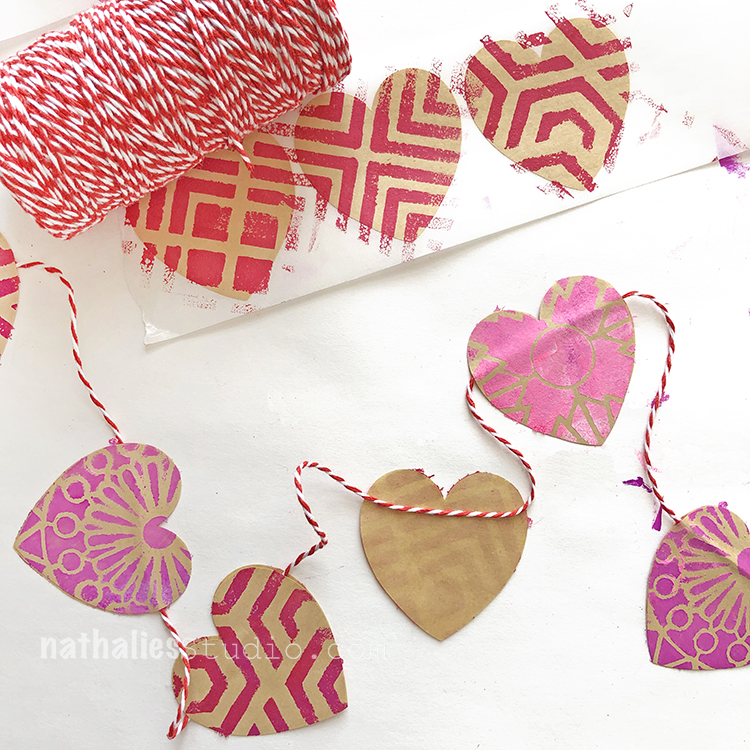
Then we started stenciling onto the hearts. Here I’m using my Broadway stencil and different pinks.
Choose a stencil with a pattern that isn’t too big, but the main point is to get some cool designs onto the hearts.
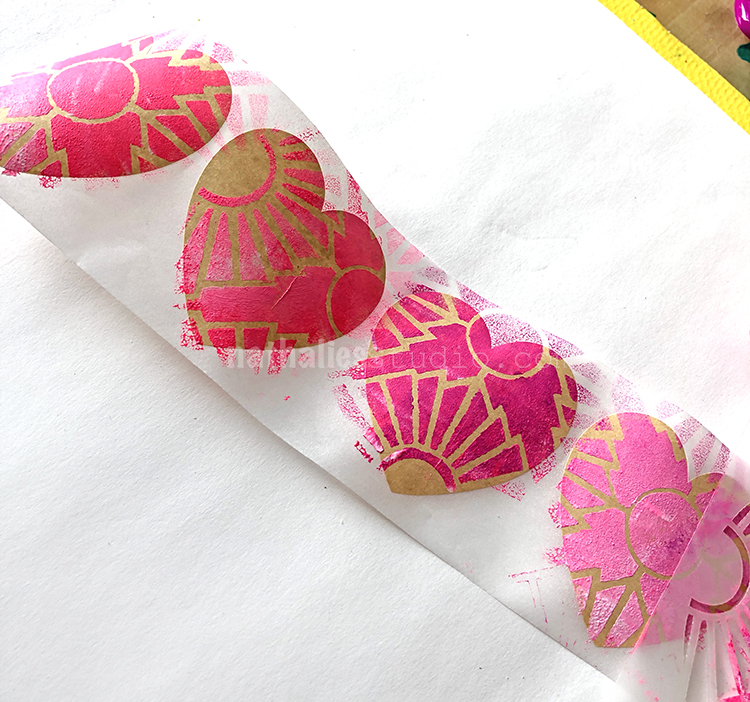
Kim used the Kassel stencil and lined up a bunch of heart stickers underneath.
This was a good way to do a lot of hearts at the same time and works nicely with a 9×12 stencil.
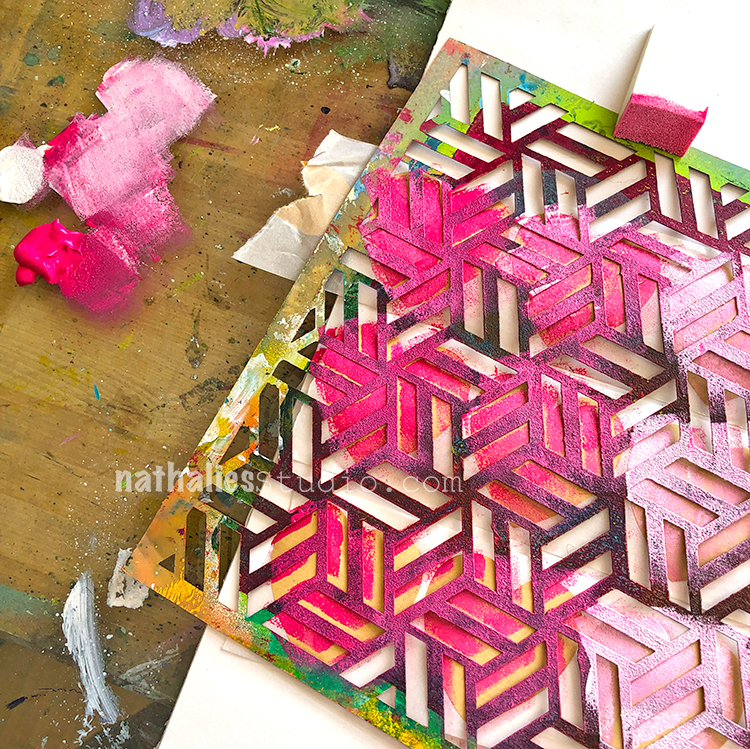
You can also work heart by heart and line up the stencil better. Here I am using my Valley Road stencil.
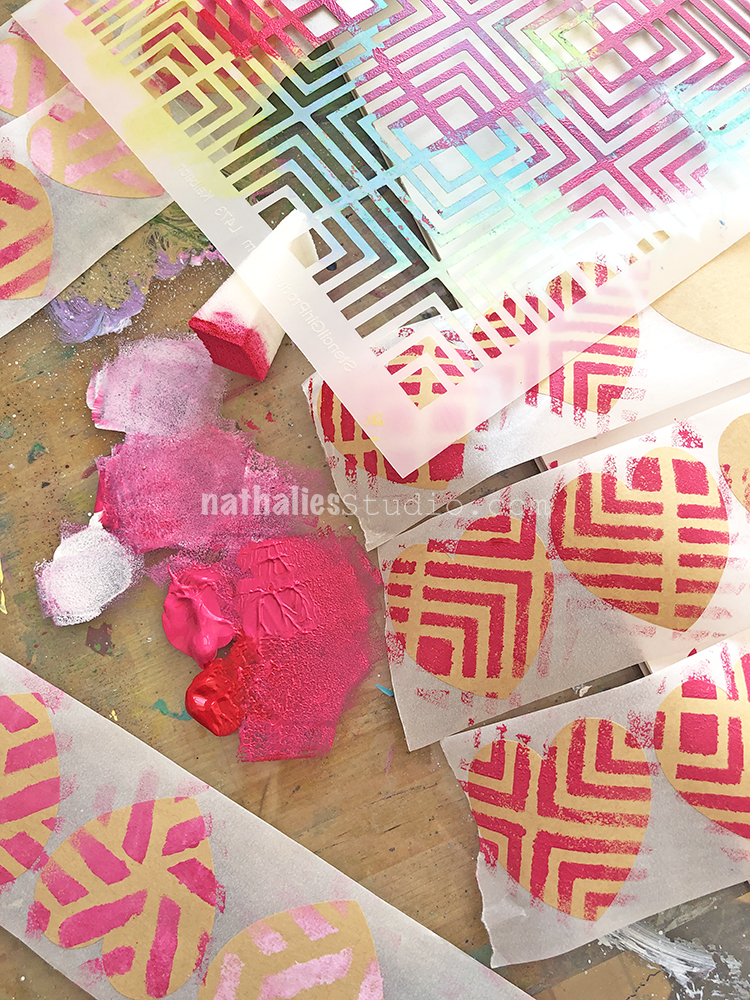
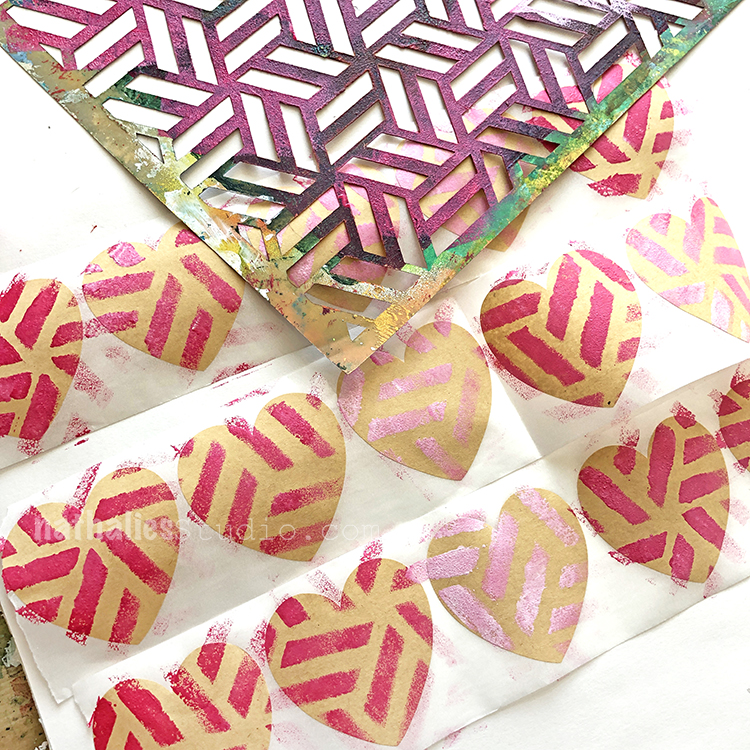
Here are some with my Manhattan stencil.
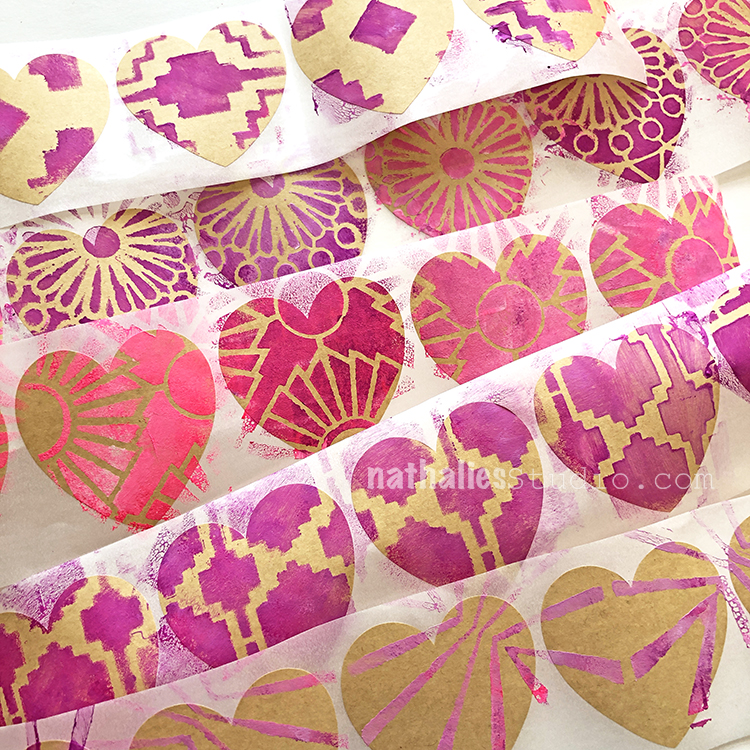
Look at all these fun designs! They are (top to bottom) Santa Fe, Valley Road, Broadway, Mesa Verde, and Beacon.
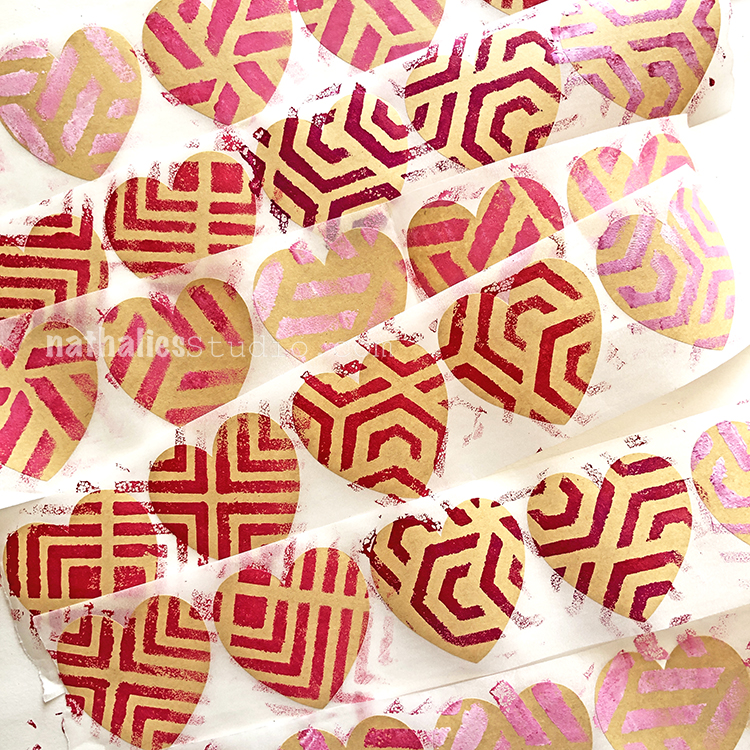
And more from Kim – Manhattan, Kassel, and Flower Maze.
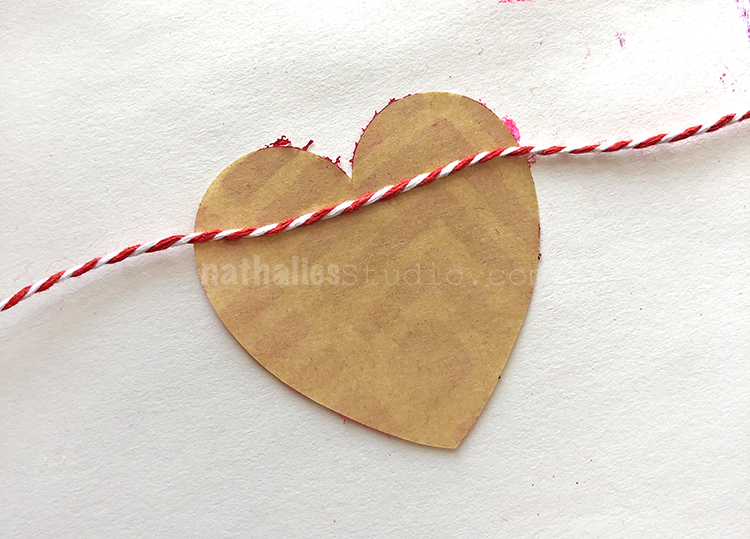
Cut a length of the baker’s twine – however long you want your garland. Then put a heart sticker down and stick the twine to it. Stick the twine close to the top so the heart hangs the right way.
Then stick another heart on top to sandwich the twine. We spaced the hearts out with about 3-4″ in between each one.
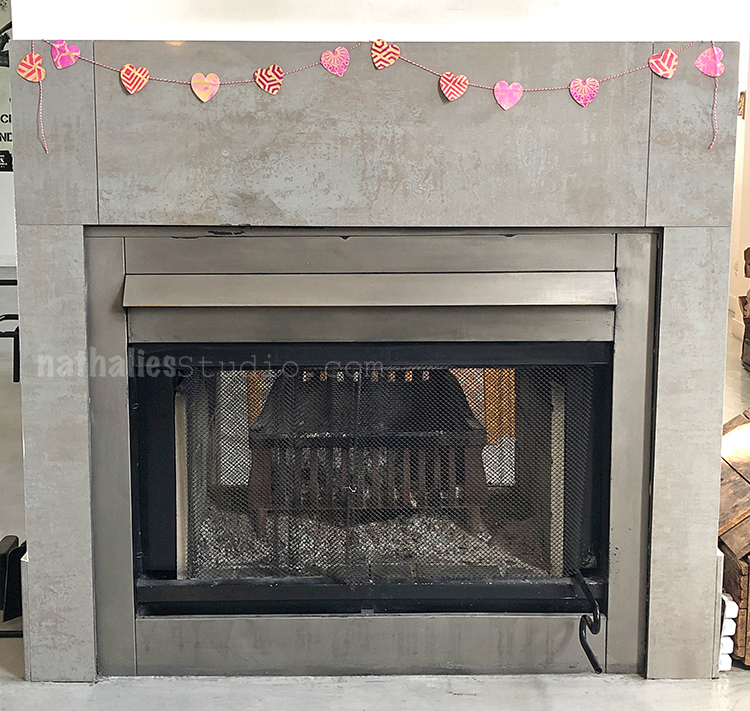
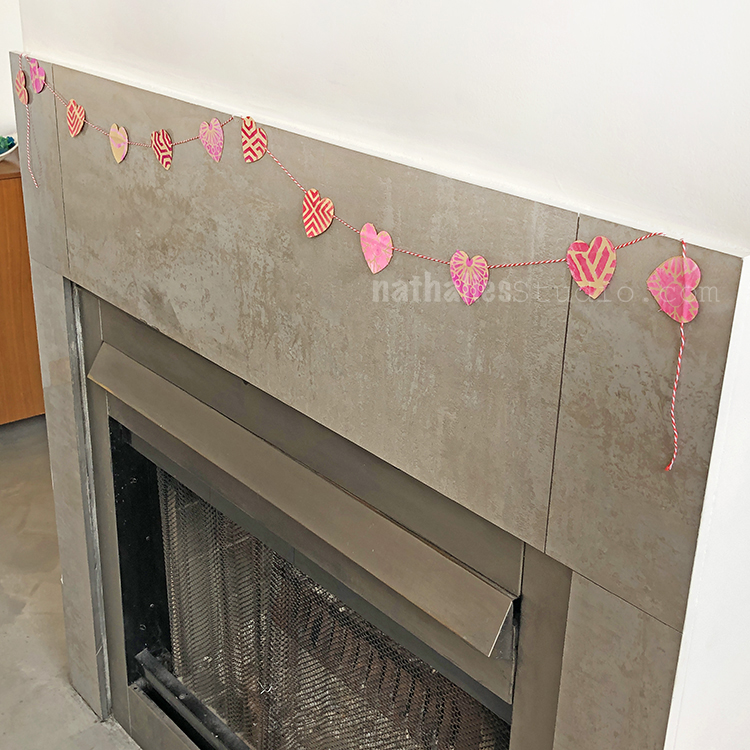
Looks nice above a fireplace…
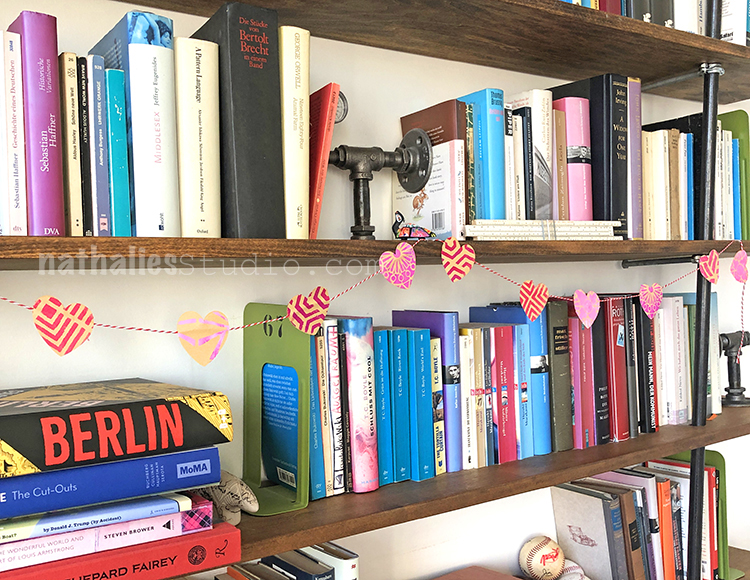
And on the bookshelf!
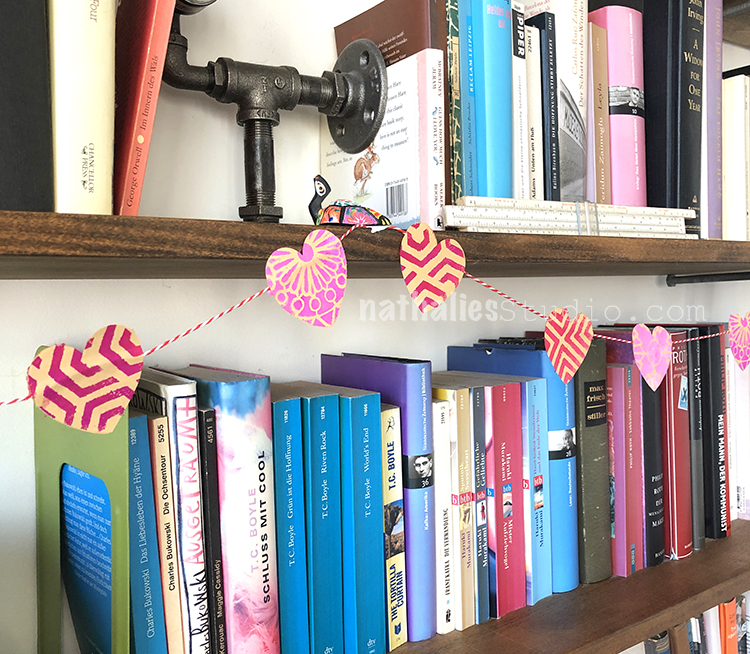
You could hang it on a chandelier or in a doorway or even on a little indoor tree.
We hope you try this one – it was great to play with color and pattern and the results are very cute :) Enjoy!
You can find my stencils in my Online Shop. Here are some of the supplies that we used:
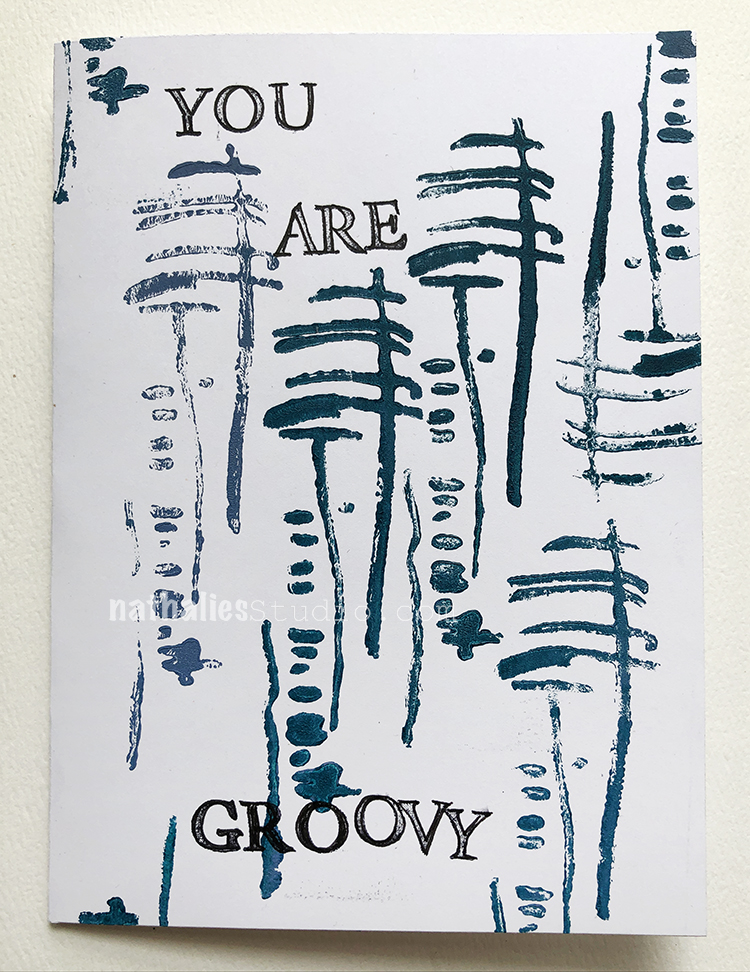
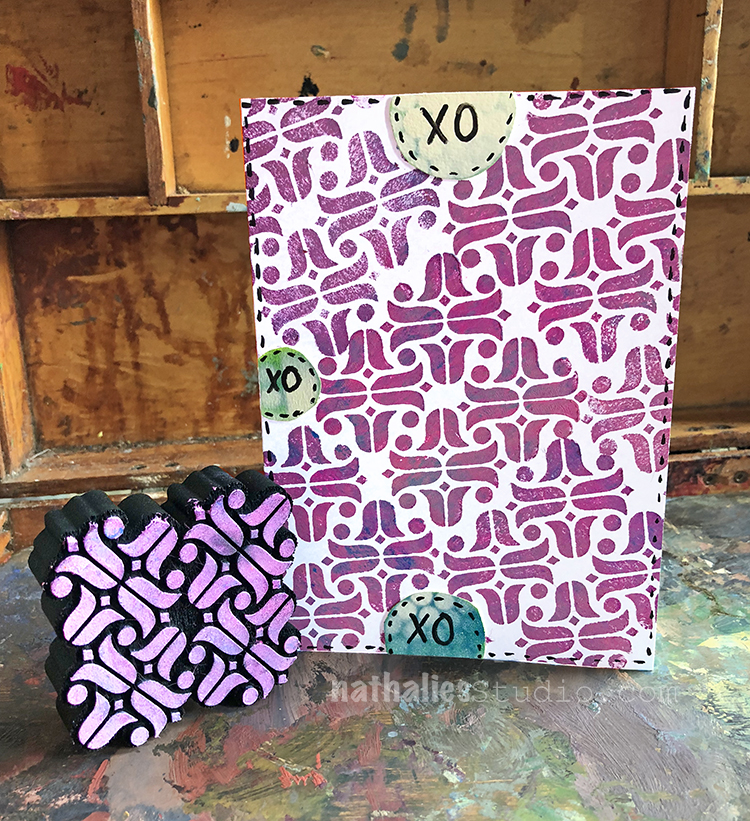
I just love making cards to have – and an playing with my new Funky Foam Stamp was a good inspiration for this sentiment ;)
Here is what I used:

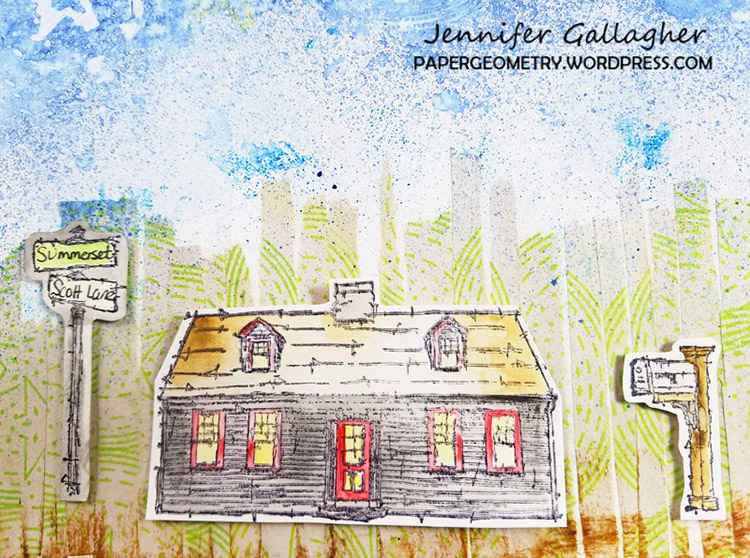
Hello from the Creative Squad and a post from Jennifer Gallagher to kick off February for us. Jennifer is using some of my Large Circle Jumble, Stroll Around the Block and My Home is My Castle rubber stamps for her charming piece on canvas. She was inspired by our theme this month: Today We Smile – They say smiling can lift our mood and maybe improve our overall health. Let’s try it! Think about what makes you smile and share it with all of us. After all, smiles are also known to be contagious :)
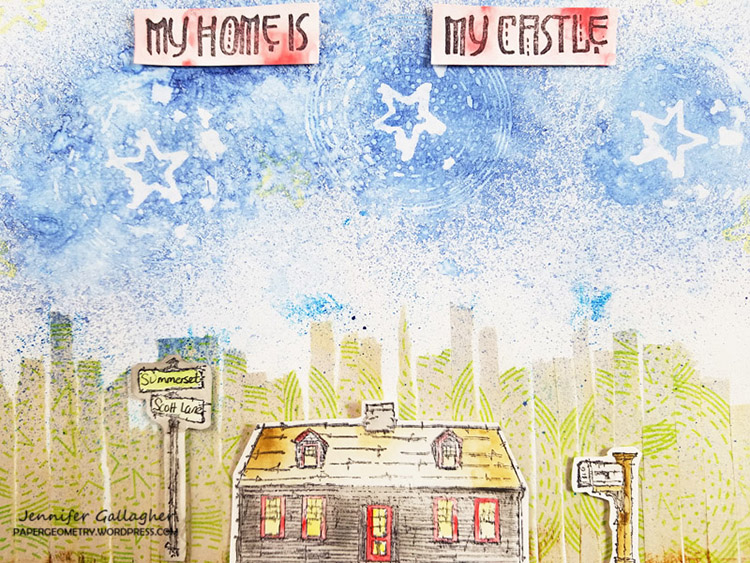
This month the Creative Squad is looking at what makes each of us smile. We are pondering what makes us truly happy and reflecting that feeling into our projects. Well, for me, the answer will always be my family. Nothing makes me happier than being at home with them. We love to cook together, play board games, and watch movies. With that in mind, I’ve put together an adorable little project that reflects my love of home.
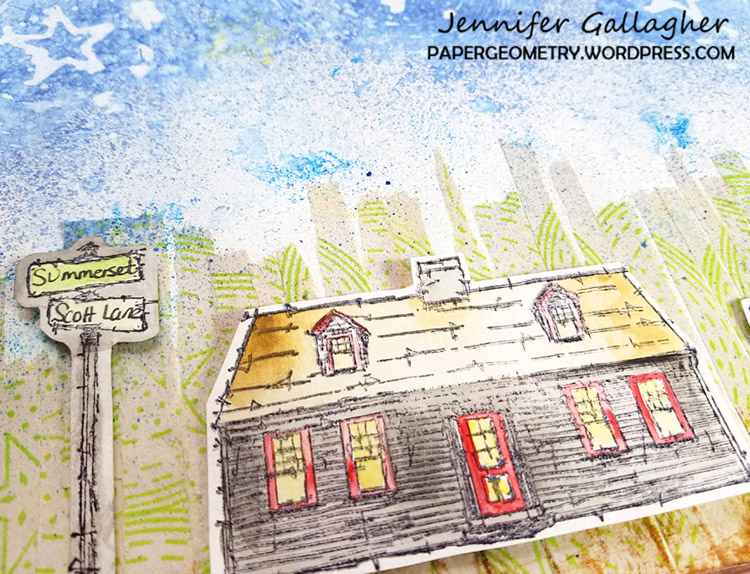
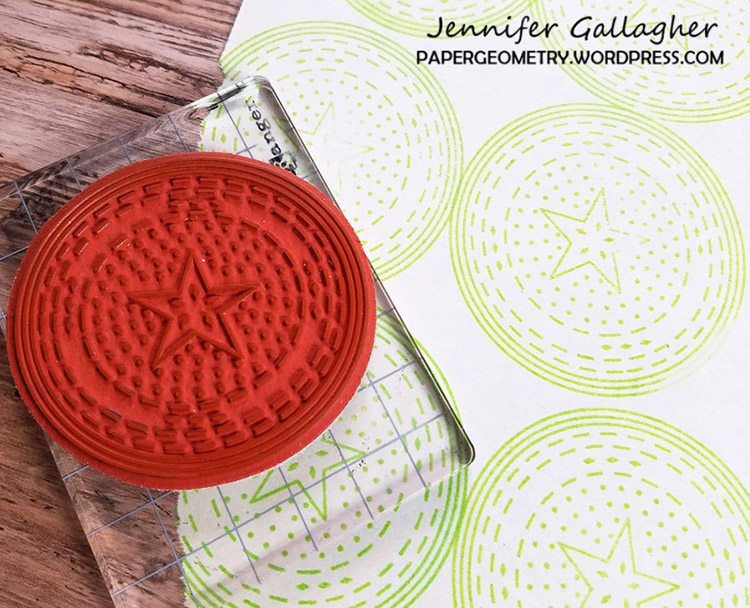
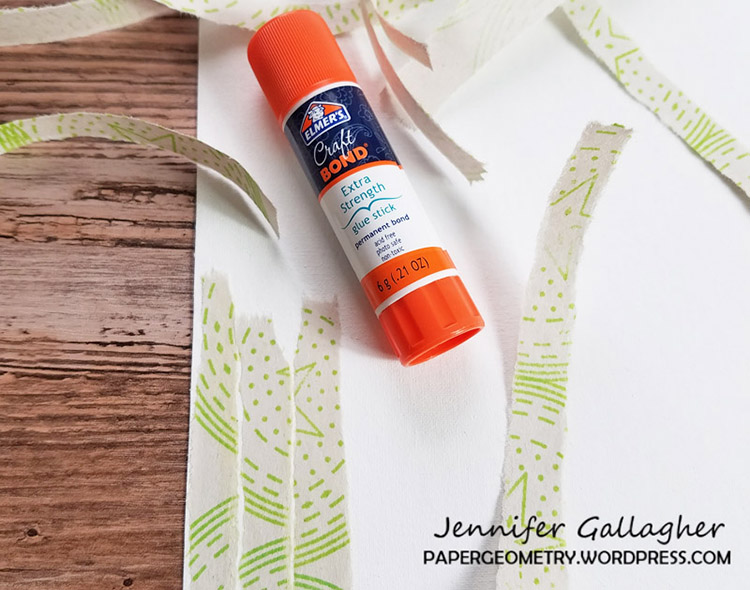
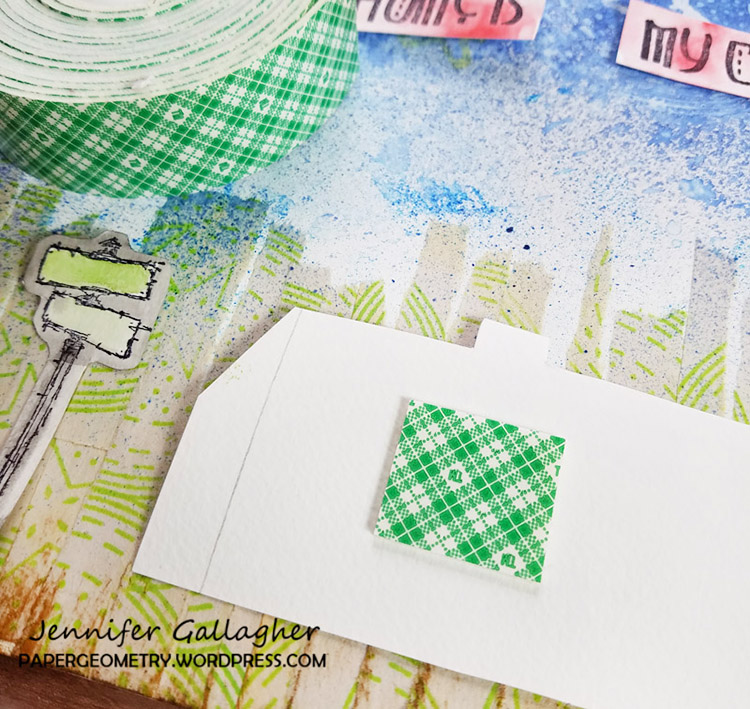
I started by stamping Nat’s Circle Drive (positive) stamp onto a sheet of newsprint in vivid chartreuse archival ink. Next, I ripped the sheet of newsprint into strips and glued them onto my canvas pad to represent grass.
Then, I sprayed my canvas with dylusions periwinkle blue ink spray to represent sky. You can adjust the depth of color by adding more spray or dabbing with a wet paper towel. Allow the ink spray to thoroughly dry. To add additional interest, I sprayed the Circle Drive stamp with a mist of water and pressed it into the blue ink spray in several spots and then dabbed the water up with a paper towel. It left behind the stamped design.
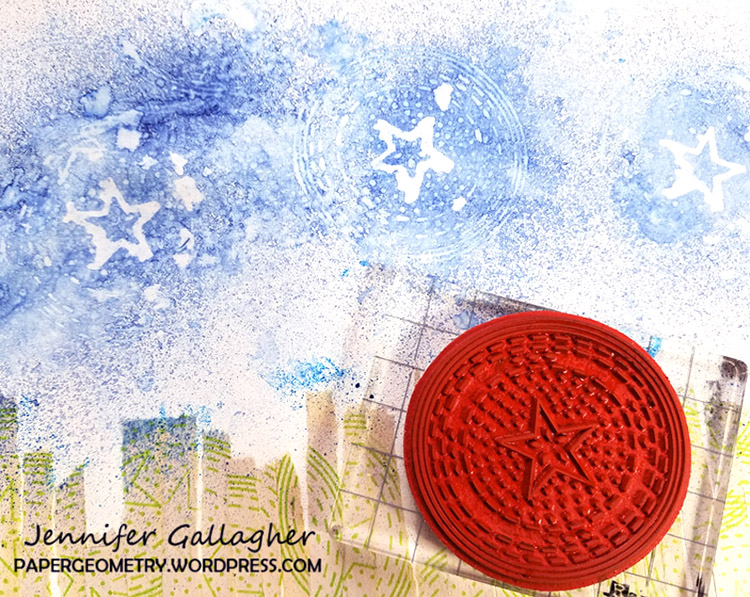
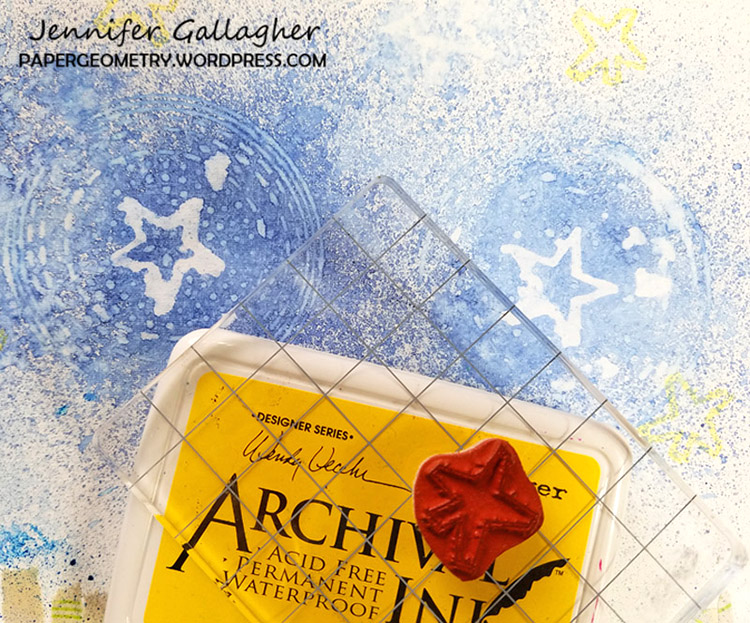
To add stars in the sky, I stamped Nat’s Star Tag stamp with buttercup archival ink and pressed it around the canvas.
For interest around the grass, I rubbed a brown ink pad on the edge of the canvas pad.
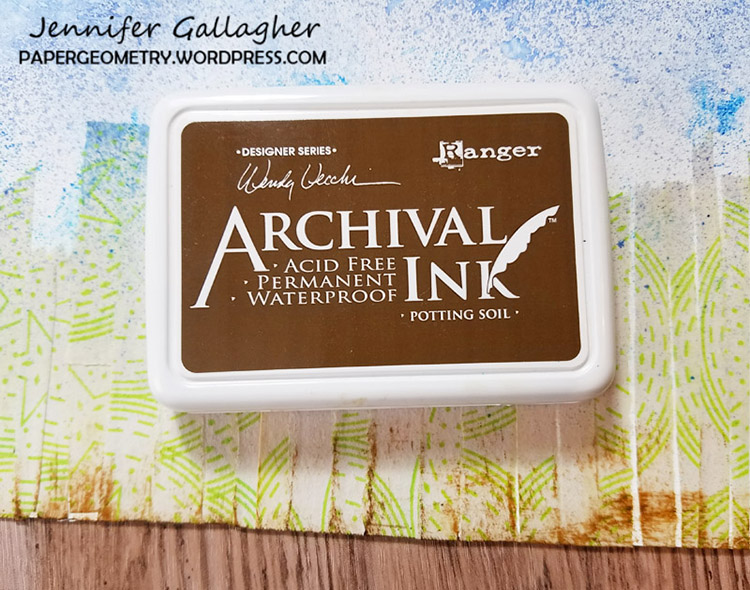
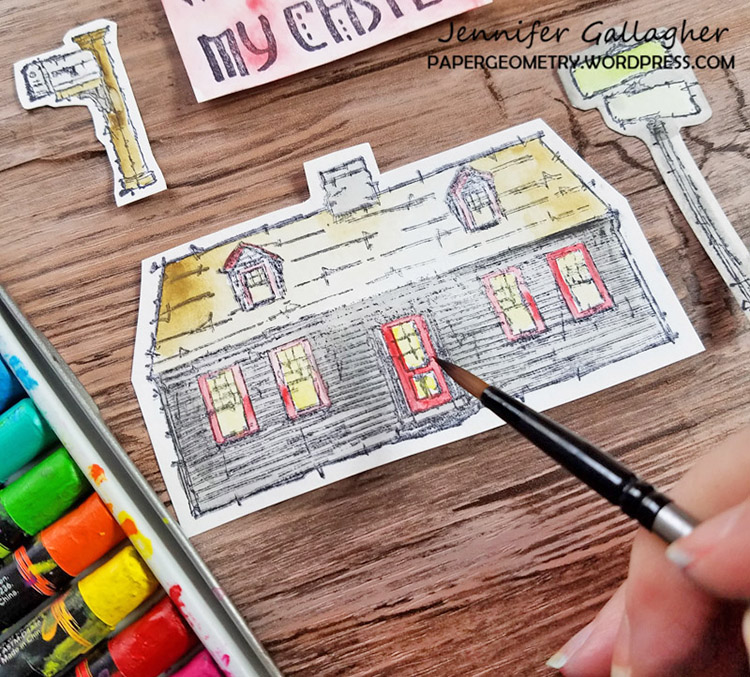
Next, I stamped Nat’s Cape Cod stamp along with the Street Sign, Snail Mail mailbox and the My Home is My Castle sentiment stamps onto scrap watercolor paper with black archival ink. Then, I colored them in with a wet paint brush and scribble sticks.
I cut each of the stamped images out and then mounted them onto the canvas pad with mounting tape.
I hope this project has inspired you to break out your favorite n*Studio stamps and make something today that puts a smile on your face. Be sure to share your creations with Nat and the creative squad!
Thank you Jennifer for sharing with us what makes you smile and for showing us this gorgeous project. You can find my Rubber Stamps in my Online Shop and here are some of the other supplies that Jennifer used:
Feel inspired? Working on something yourself that you’d like to share? I love to see how you interpret our monthly themes. Email me how you used my stencils and stamps with the theme and email me an image – I would love to share your projects in my next “n*Spiration From Around the Globe“.
I just love how you made the “grass” Jennifer!
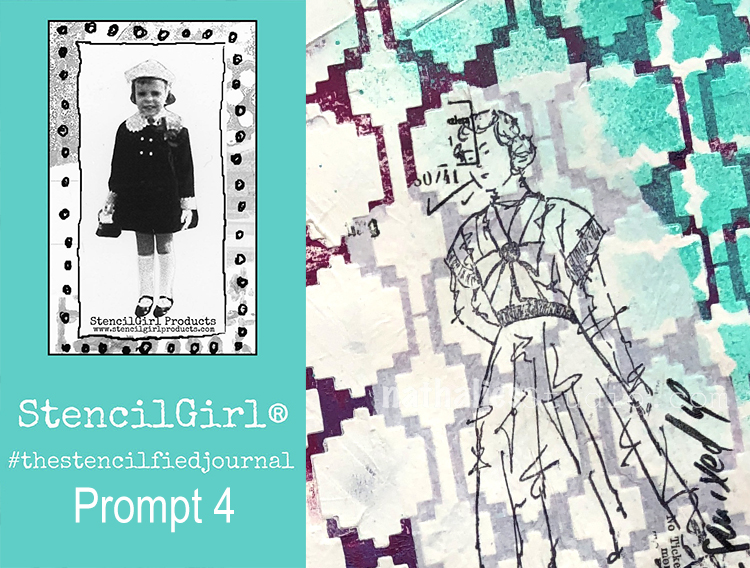
My wonderful friend Tina Walker is at it again – she invited several people to join her Stencilfied Prompts. The prompts are music related and each week she is posting a song. You can be inspired by the lyrics, the video, the album cover or anything related and the only restriction is that you have to use StencilGirl Product Stencils. Here is my take on Prompt 4:
This week’s prompt was She Used to be Mine – Sara Bareilles – another song I am not really familiar with …I do have a very grungy, alternative music style- but it was fun to listen to the music and use part of them.
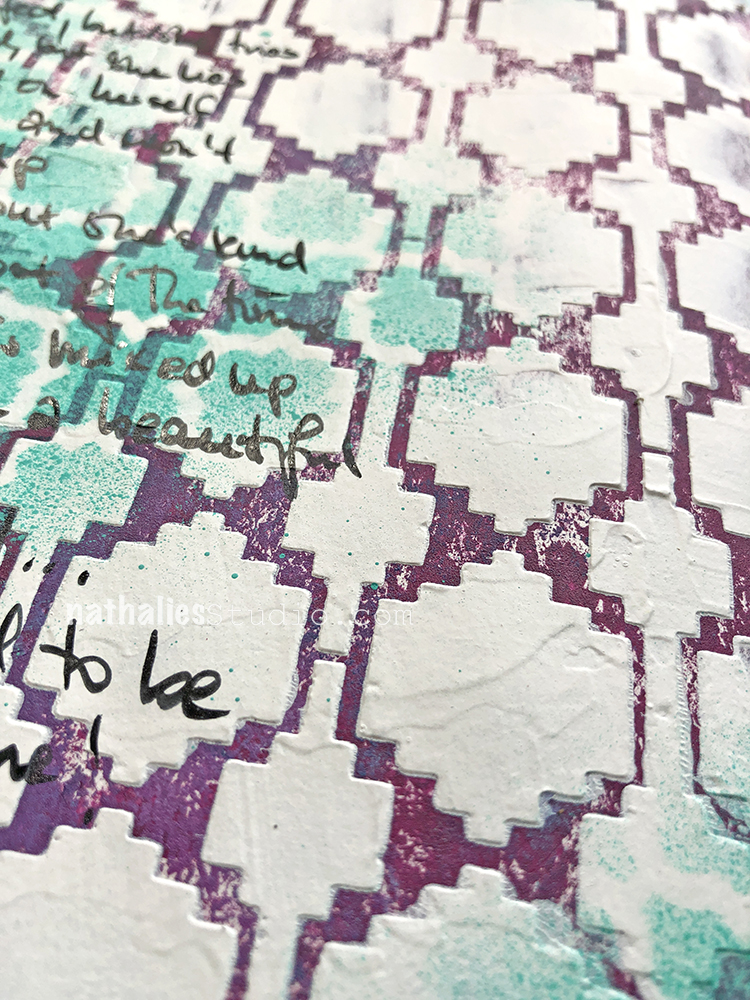
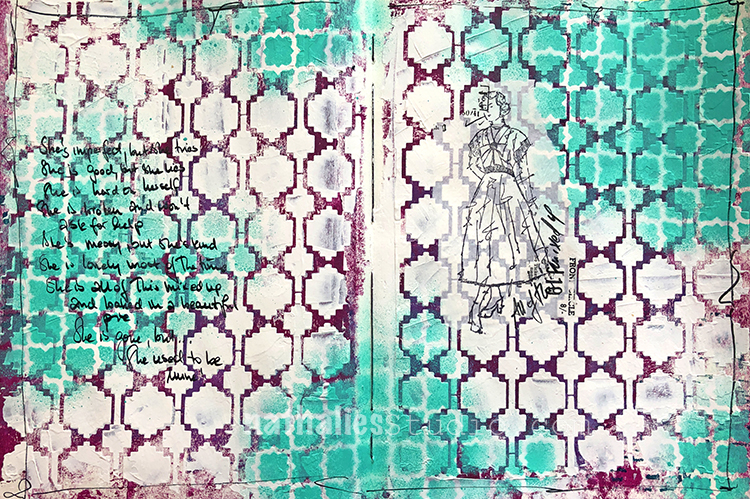
For this Spread I started by using my Mesa Verde Stencil on top of a partly painted background and spreading a thin layer of Heavy Gesso over the stencil. Using a palate knife makes sure you can apply the gesso pretty evenly.
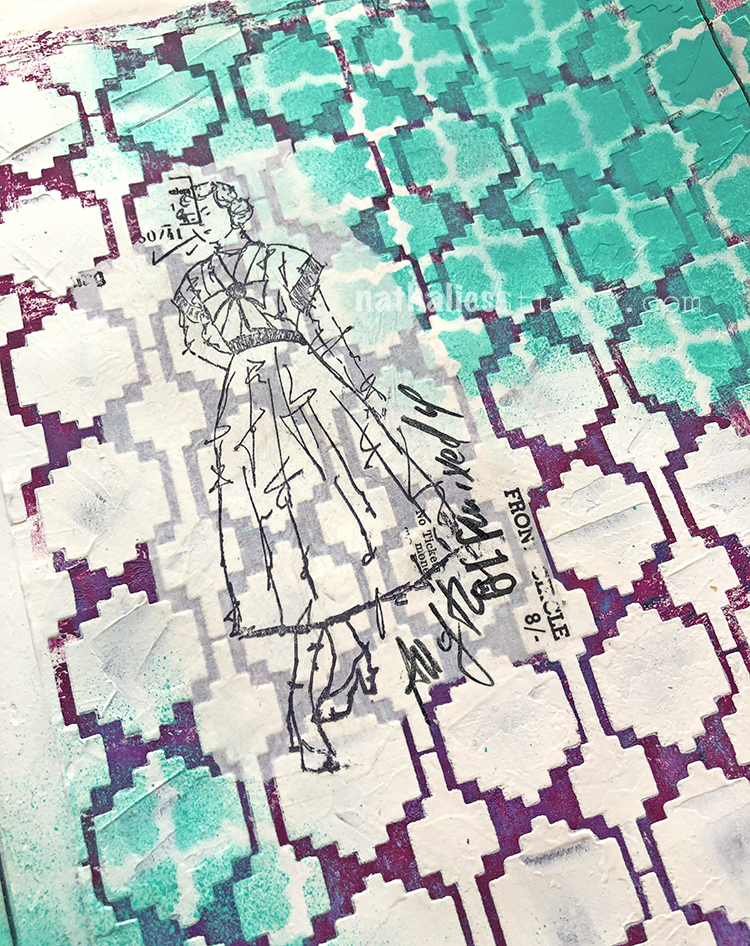
After the gesso dried I layered my Granada Stencil on top and used spray paint to create a second layer – i love how the two stencils work together. I used the Millie Stamp from the Actually I Can Stamp Set on a piece of tissue paper and then added it to the background with Fluid Medium. This way I could make sure to still see the background shining through but was also able to add the stamping regardless of the texture.
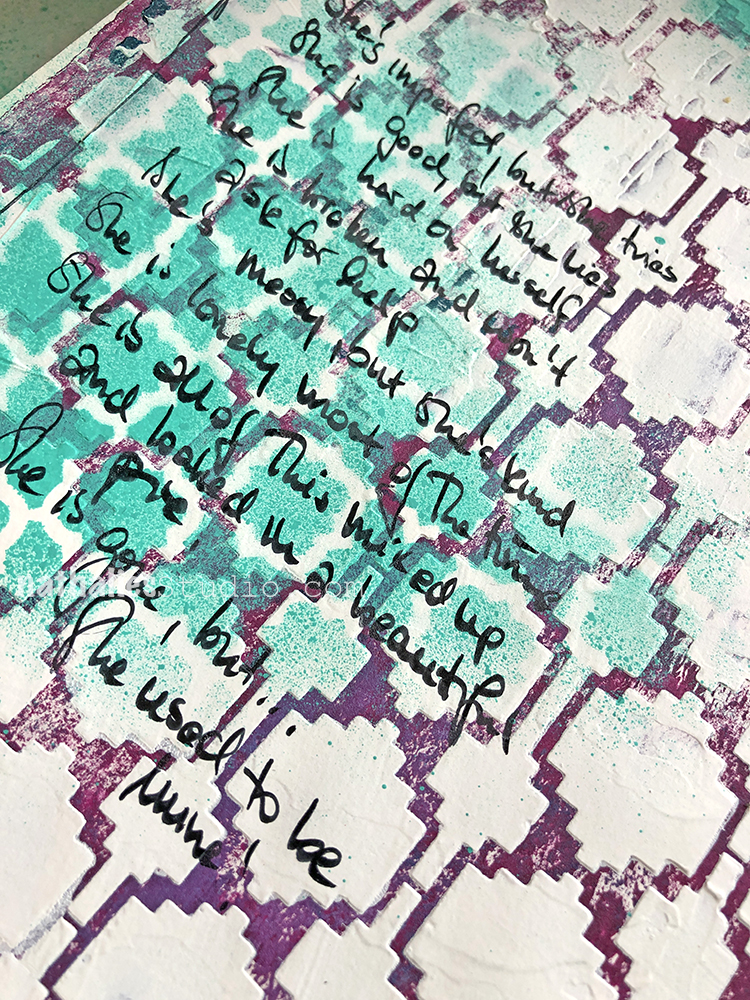
Added the journaling and there it is. Here are some of the supplies I used:

I love this project ! The background really inspires me to work in my art journal ! Thank you for the inspiration !
Reply