Blog: Acrylic paint

Oh Hello or … In My Art Journal Today

NatKalbach_OhHello01

Oh Hello! “If you are brave enough to say goodbye, life will reward you with a new hello!”

I liked this quote – I said goodbye to a couple things last month and apparently what I thought to be a terrible thing, opened new doors :) You never know, right. But I do believe that everything happens for a reason and that “everything will work out” in the end. Hey – if we hadn’t had that optimism what else would be left sometimes ;)

NatKalbach_OhHello02

For this page I collaged some book paper onto the surface, painted it, then covered some areas with masking tape and wax, painted over again, heated the wax, removed it, removed the masking tape and painted some areas again. Love the peeled paint effect. Makes me really happy! You can see a whole list of supplies on the bottom of this post.

……

Don’t forget to sign up for Creative JumpStart with a total discount of 20 Percent if you sign up with a coupon code:

CJS2016web1

You get 25 videos for just $45 (USD) for a limited time if you sign up before December 31, 2015 at 11:59 pm (EST)! After December 31st, 2015 it will be 50 USD.

But wait – it gets better: as my valued reader, you’ll get $5 extra off today. Just use this coupon code during checkout:

cjs2016

*This is a limited offer valid from 10:00 am Dec 4, 2015 to 11:59 pm EST on Dec 11, 2015.


—–

nSupplies


Have a wonderful day!

Comments (2)

  • Joi@RR

    |

    What fun – the tape and wax – really made this creation unique Nat and of course – LOVE the orangish colors!!! I bet you are missing having Julie close by and I truly do hope saying goodbye brings some new hello’s for you – for sure! j.

    Reply

  • Jenny Petricek

    |

    Great page! Love the vivid colors and the subject matter! :-)

    Reply

Leave a comment

Used to be ….or In My Art Journal Today

Usedtobe_natKalbach01

“I have already lost touch with a couple of people, I used to be” – so true ;)

Usedtobe_natKalbach02

For this spread I painted the background with Liquitex Brilliant Yellow Green, Yellow Light Hansa and Brilliant Blue – mixing the colors with a brayer. I then used my Lilly Wallpaper and Batik Stencil with some of the colors in the Background and used the Mish Mesh Stamp with some Titanium White. The image is painted with Liquitex Markers as well as the Journaling. An easy but fun spread – the right amount of work to get the morning creativity flowing.

nSupplies


I wish you a wonderful day!

Comments (1)

  • Gunvor

    |

    Love this AJ spread! Thanks for sharing!

    Reply

Leave a comment

I am in Love … or In My Art Journal Today

NatKalbach_InLove01

I’m in Love with cities I’ve never been to and people I’ve never met.

It is true. I love to travel and I love to meet new people …but I also love to go back to places and to see people I know again.

NatKalbach_InLove02

I love the texture of this spread. I had painted the background with red and yellow acrylic paint and stenciled with my Ornament Wallpaper Stencil and some Spray Paint. The spray paint left a nice dimension on the background. So I lightly covered the whole spread with Liquitex Titanium Spray Paint – leaving the painted area peak through a bit but also create a nice textured area of the stencil. It gave it a bit of a grungy shabby chic look….if I want to label this look – LOL . Then I took some Liquitex Acrylic Inks and started painting the city skyline as well as the water- choosing contrasting colors to make it more pop. I mixed the Yellow Azo and Naphthol Crimson for a nice orange right on the spread, as the spray painted area was less absorbent than paper and left me longer time to work on it. I added some green and purple accents in the houses with Soft Body Paints. For the Windows and marks in the houses I used my Filbert brush and Fan Brush in different ways- it was fun to limit myself to the brush as a tool in creating those elements.

NatKalbach_InLove03

I used a Fine Line Applicator filled with Black Acrylic Ink and Black Soft Body Paint and added the scribbly lines around the houses. The quote was written with a black marker and then overwritten with a white Signo pen.

Do you like to travel?

Here is a list of all supplies I used:

nSupplies


Have a wonderful day

Comments (7)

  • Joi@RR

    |

    I only like to travel – WITH YOU!!! I seldom leave the ranch but I soooo love your posts when you travel Nat. Oh well heck – I love all your posts but I do enjoy seeing all your photos of the sights and the things that you do. AND… you know – I always love your skyline projects. This one is no exception. LOVE LOVE the bright colors and the wonderful backgrounds. Great way to start my week – seeing your SUPER FINE post. Hugs. j.

    Reply

    • nathalie-kalbach

      |

      Joi – I see- I want to see pictures of a real ranch in the States- share some pictures with me :) Have a gorgeous day and hugs to you too, Nat!

      Reply

  • cat2468

    |

    Hey Nat!!
    I am a country girl who grew up on a farm. So it never ceases to amaze me how drawn I am to cityscapes……especially yours!! And the large piece you did before you moved here (sorry, my memory sucks these days!!) it was a waterfront/city painting for a contest?) despite my embarrassment I shall forge on to tell you how much that piece blew me away!! Maybe that’s where my memory went!!! Love your work and teaching style!! Hope to catch more on-line classes!l. Having trouble getting this comment to post!!! I’ll try later!!!
    Cat

    Reply

    • nathalie-kalbach

      |

      hi Cat, thank you so much for your wonderful words. I did a couple paintings before I moved to the States- maybe you find the particular one here in the gallery: http://nathaliesstudio.com/ngallery/ I hope I see you in class :) Have a wonderful day!!!

      Reply

  • cat2468

    |

    Hey Nat!!
    I am a country girl who grew up on a farm. So it never ceases to amaze me how drawn I am to cityscapes……especially yours!! And the large piece you did before you moved here (sorry, my memory sucks these days!!) it was a waterfront/city painting for a contest?) despite my embarrassment I shall forge on to tell you how much that piece blew me away!! Maybe that’s where my memory went!!! Love your work and teaching style!! Hope to catch more on-line classes!
    Cat

    Reply

  • Sue Clarke

    |

    I love to travel and wish that I could do more of it.
    It’s so fun to meet new folks and see that we are really after the same things in life.
    Plus the different designs and colors in different areas are inspiring.
    Nice colors in this art journal page Nat.

    Reply

    • nathalie-kalbach

      |

      Thank you Sue! I love that we can find so many things in common with many other people we have yet to meet :)

      Reply

Leave a comment

Art Tapas – Bite Sized Tips for the Mixed Media Artist – Tip #2 Labeling

Art Tapas are short videos (1- 3 mins) that will give some practical tips or advice about anything that is related to tools, art supplies or processes and any Mixed Media or Hobby Artist might appreciate. Lots of times these reflect some mistakes that I made along my journey, so to speak, things that I learned the hard way and sometimes they are just some things that I would have loved to have known when I actually started in Mixed Media.

Labeling of Acrylic paints

Art Tapas – Bite Sized Tips for the Mixed Media Artist – #2 Labeling from Nathalie Kalbach on Vimeo.

I hope you enjoyed this Art Tapa –  and if you have questions that you would love to have answered in some of the Art Tapas videos- let me know and I might just cook one up for you to nibble on :)

Happy Creating !


Comments (5)

  • Gunvor

    |

    Great tip Nathalie! Thanks!

    Reply

  • Kathy P

    |

    Great labeling tip, Nat! And I’m so happy to read that I am not the only messy painter!

    Reply

  • Linda on the Prairie

    |

    What an excellent idea! And my mess just goes on up my arms when I’m painting. Still trying to figure out how I got paint on the back of my knees last week!

    Reply

    • nathalie-kalbach

      |

      LOL- I hear you on the mess ;) I have probably not one single piece of clothing that does not have a spot of paint on it ..the paint on the back of the knees though, I still have to accomplish ;)

      Reply

Leave a comment

Must-Have Mixed Media Supplies – Acrylic Paint

AcrylicPaint

Hands Down – my absolute favorite and ultimate must-have mixed media supply is: Acrylic Paint! For many years Acrylic Paint is a companion of mine and I feel as if there is never a moment where I feel that this buddy and I might part. If I wasn’t too scared of needles, I might actually get an acrylic paint tube tattoo …maybe ;)

AP_NatKalbach

What I love about Acrylic Paints is:

  • well – they look beautiful
  • they are fast drying
  • if stored and used right they last long
  • they stick to almost anything (yes…that includes your clothes, if you are not careful) – giving lot’s of wonderful possibilities of substrates you can use acrylic paints on
  • they have a plastic like surface (due to the acrylic polymer emulsion)
  • they can be thinned with medium and that can make them almost look like water-color in some cases
  • they can be thickened with medium and that leads to a lot of texture
  • they are permanent once dried
  • they are water-soluble while wet.
  • they cover surfaces if opaque
  • you can use other paint media on top of acrylic paints
  • you can use some fun media with them for amazing backgrounds and textures
  • you can create amazing backgrounds and texture with solely acrylic paints and different techniques and tools
  • they are easy to clean up and off


Here are some examples using Acrylic Paint:

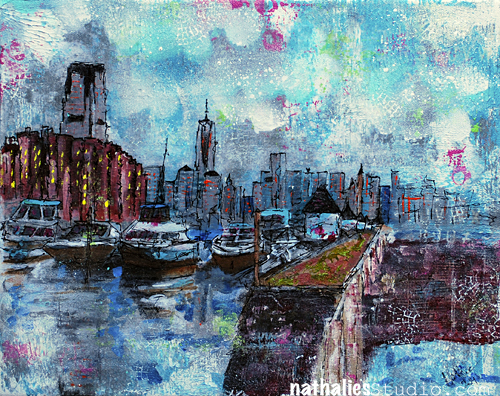
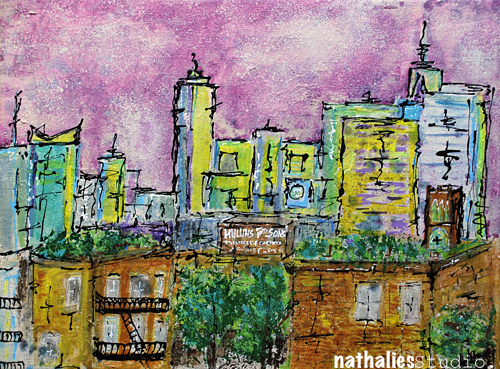
Acrylic Paint on Canvas – painted, brayered, stamped, stenciled, scraped

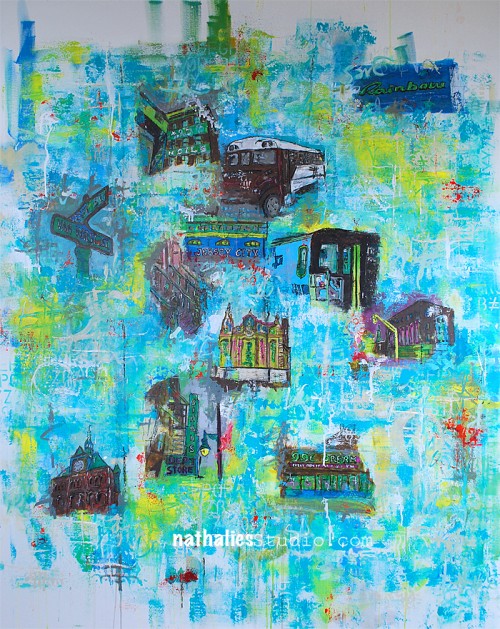
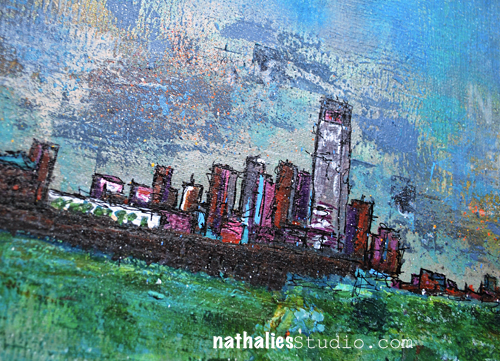
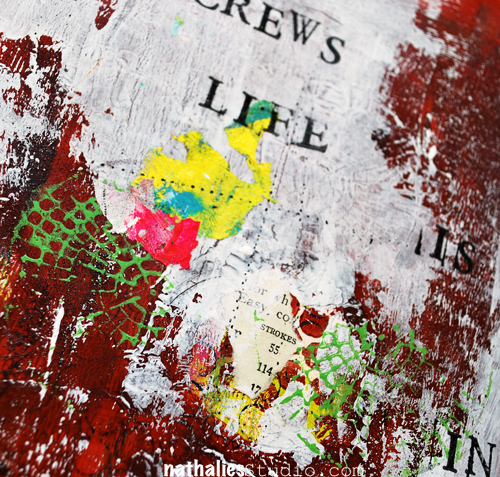
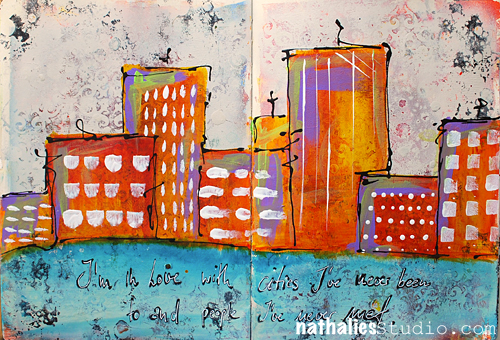
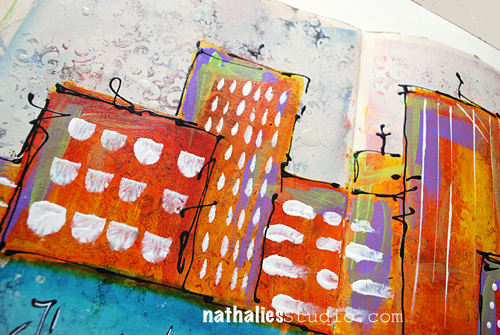
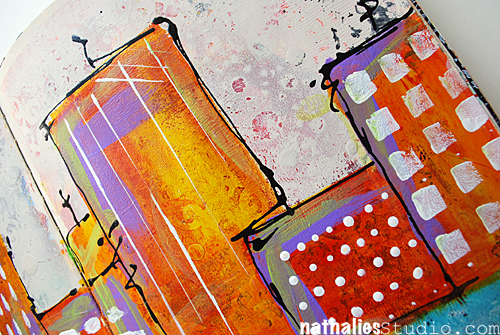
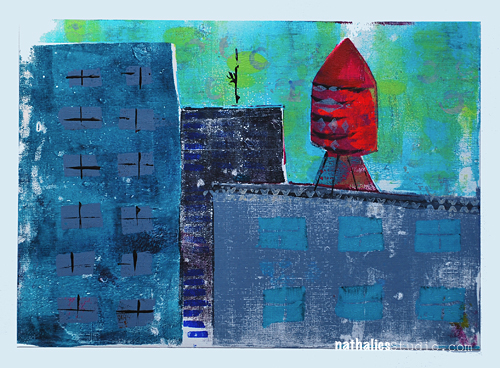
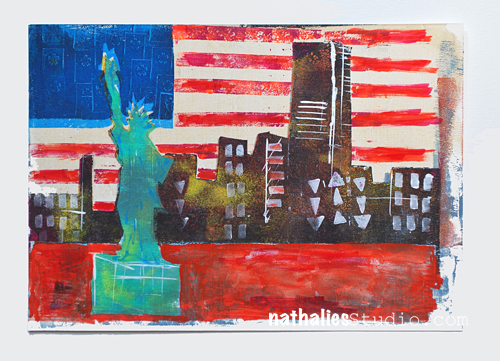
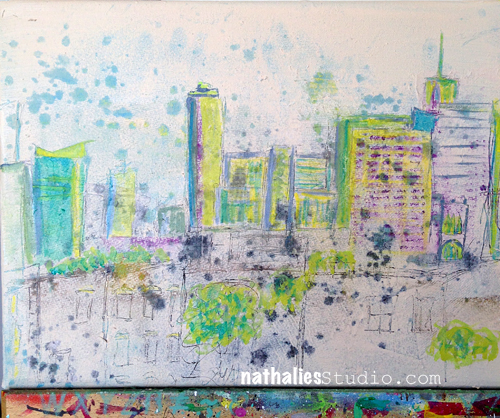
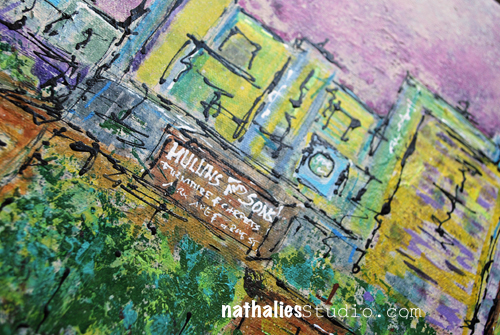
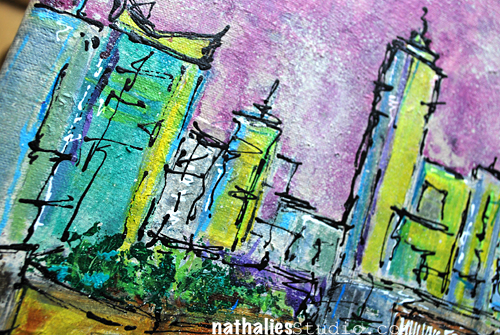
Acrylic Paint on Canvas – abstract background, collage elements and urban elements

NatKalbach_99CentDream

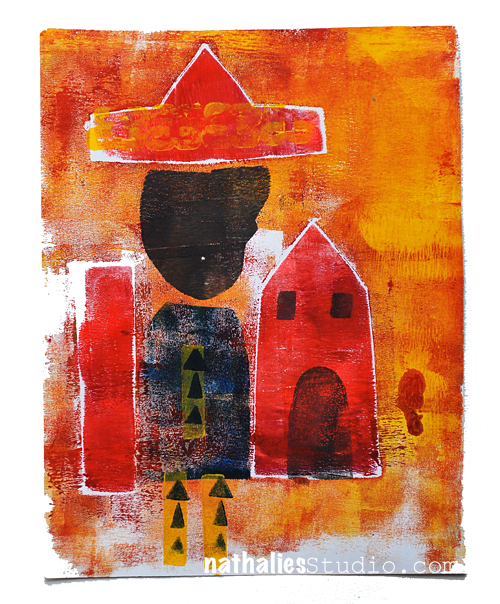
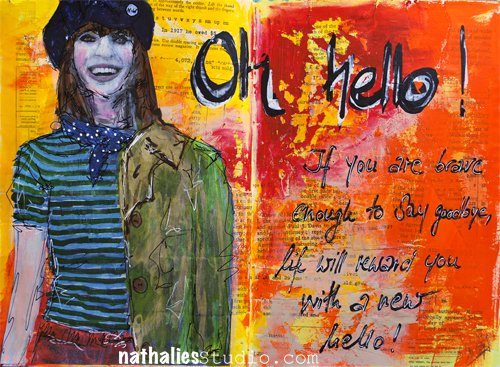
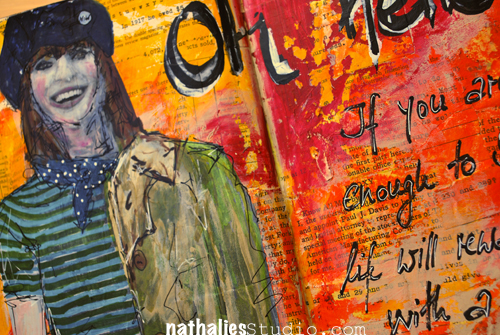
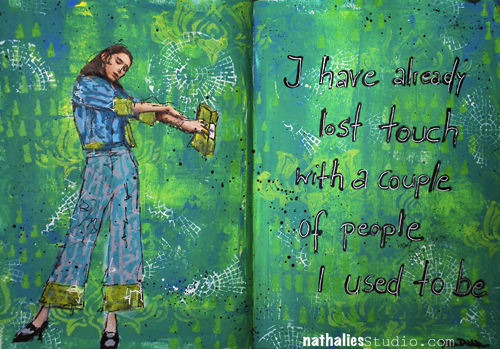
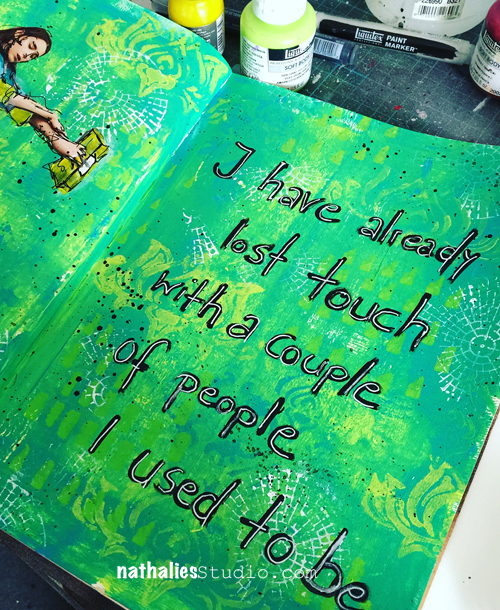
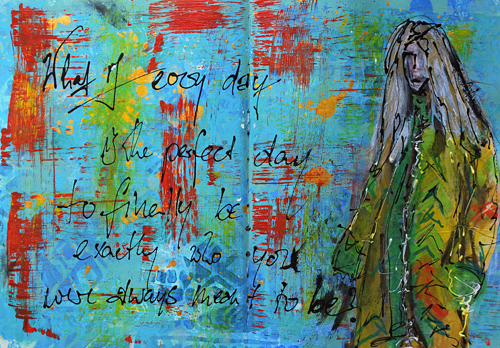
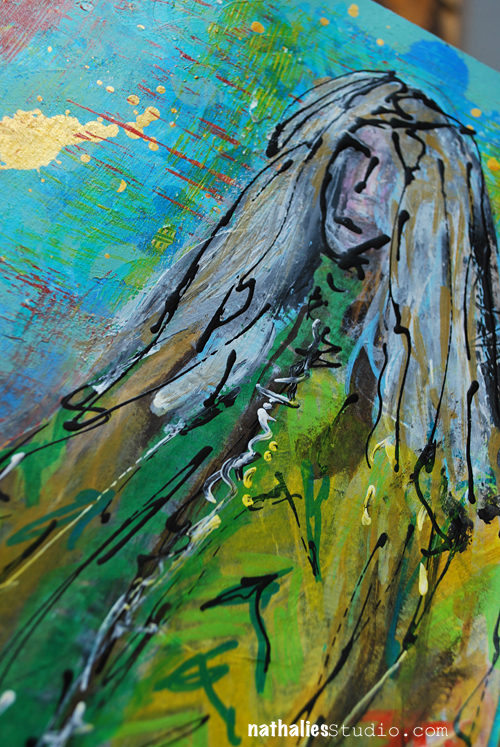
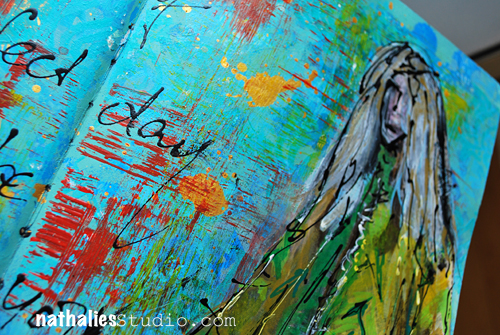
Acrylic Paint in an Art Journal Spread – brushed on, mixed with other acrylic media and stamped

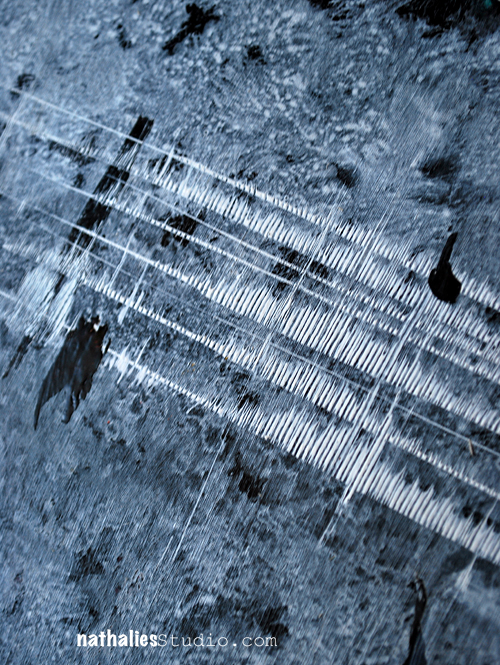
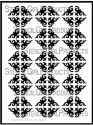
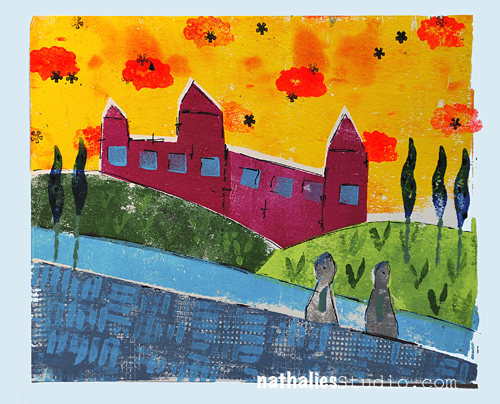
Acrylic Paint used for mono prints

Acrylic Paint used in different viscosities to create texture and dimension

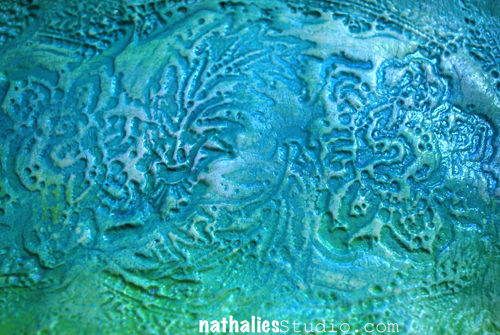
Acrylic Paint on clay revealing stamped texture

Acrylic Paint on canvas used in different viscosities, with different acrylic media

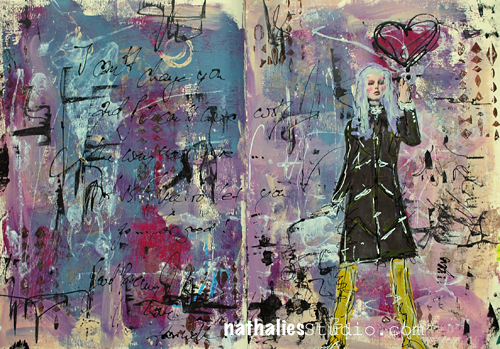
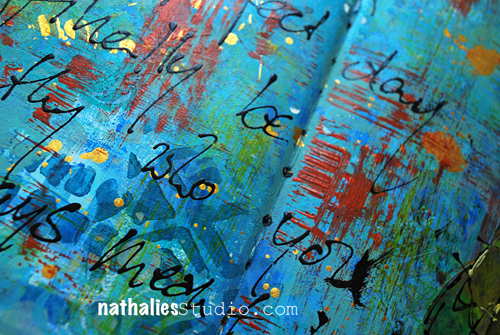
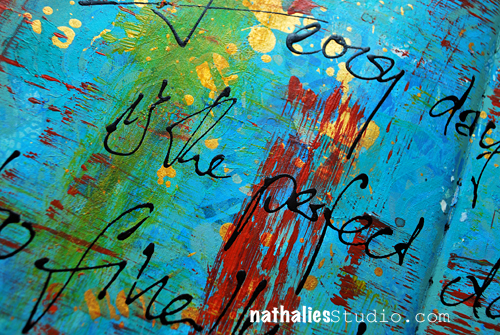
Acrylic Paint used in mark making on art journal spread

Acrylic Paint Skins used in art journal spread – stamping with acrylic paint

Pretty amazing the different things and looks you can achieve with acrylic paints, don’t you think? And there is way more because I only showed examples on how I personally like to use acrylic paint!!! So yes – just because of it’s versatility it knocks me off my socks and is my all time favorite must-have supply.

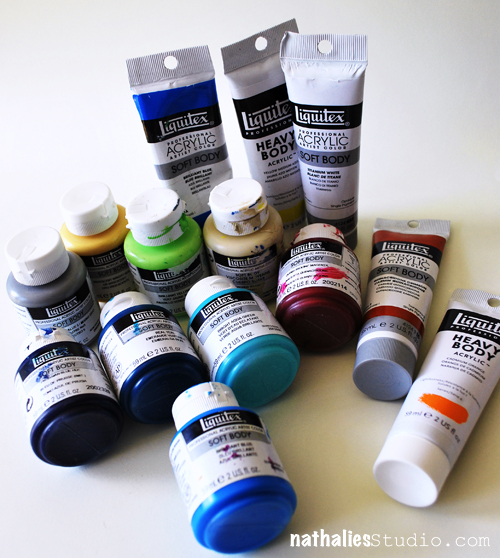
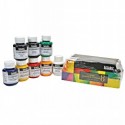
Which acrylic paints I use:

First off – Disclaimer: I am a Brand Ambassador for Liquitex so naturally I tend to recommend Liquitex products. But my love for Liquitex Brand paints began long before I began working with the company and it is a genuine love for their products. In fact I was playing with their paints back then in Germany and I was just having the best of times and I shared this with the world. And that is how the relationship with Liquitex many years ago began :)

I used a lot of acrylic paints in my artist endeavors. And over the last couple years I learned what I like and what I do not like. What I like, doesn’t have to be necessary what you like.  So just take it as my thoughts and my preferences, ok?

  • So first of all let’s state that I like good quality artist paints. Because I learned over the years that especially when working in an art journal for example that they aren’t as tacky as a lot of the cheaper non artist ones. I also learned the hard way that good quality paints give your paintings a longer vibrantly colored life. Nothing worse than a wonderful canvas you created where the colors fade significantly after a year or so.
  • I also love good quality artist paints because the color shift between wet and dry is not that high. I love to see how my work might look like when it is dry while I’m still working with my paints. I had many disappointments in the past where I was thinking a nice bright red was rocking my socks and then it was dry and a dark bloody mess as the paint shifted a lot when it dried.
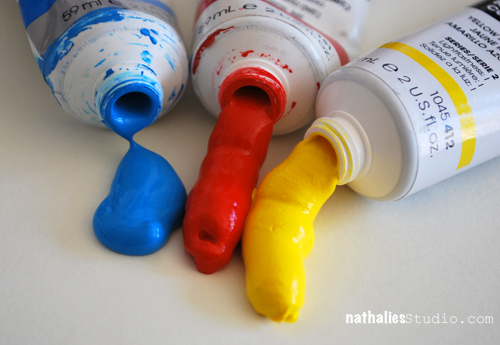
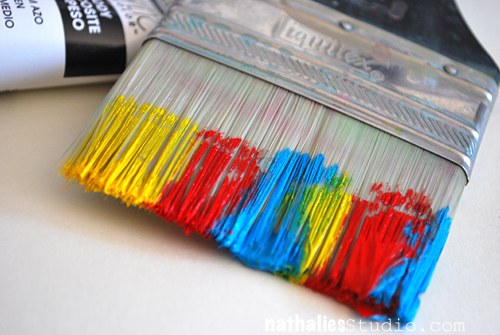
  • Highly pigmented colors go a longer way and they are usually also more beautiful and intense.
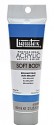
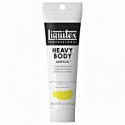
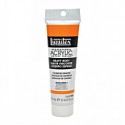
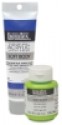
  • I love texture and I love to create texture with paints – so especially when painting on a canvas I prefer thicker paints like Liquitex Heavy Body Paints – more about this below
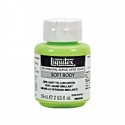
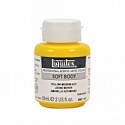
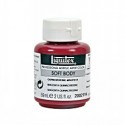
  • I do love thinner paints in my art journals and use Liquitex Soft Body mostly when working in a book – also more below about viscosity

I would start slow with just a couple colors and add up as you go. You can always start with some Liquitex Basics if you want to first play around a bit in your art journals and start stocking up Professional Quality paints as you paint more and more.

APB_NatKalbach

Viscosity:

Acrylic Paints come in different viscosities which means the state of being thick, sticky, and semifluid in consistency. Different Brands sometimes use different ways to label the thickness or thin-ness of their paints. Here are the ones that I use most often:

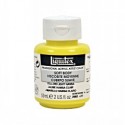
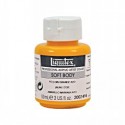
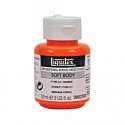
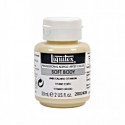
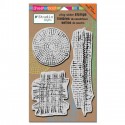
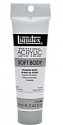
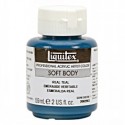
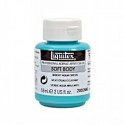
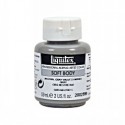
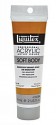
Soft Body Paints by Liquitex usually have a medium viscosity which means they are creamy and smooth. They cover evenly and they level out so that brushstrokes are rarely visible. I use them in my art journals and most often for the first layers of a painting on a canvas as well as detail work. I use them also whenever I paint on a project where I want an even smooth coating. I use Soft Body Paints when I need a glaze or when I want to stain fabric. I usually use Soft Body Paints instead of Heavy Body Paints for Mono Printing and they are the only paints that I use when I stamp with rubber stamps.

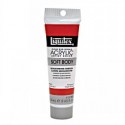
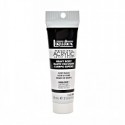
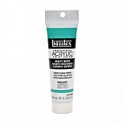
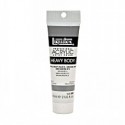
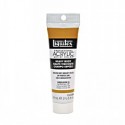
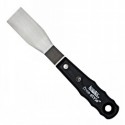
Heavy Body Paints by Liquitex have a thick consistency for traditional art techniques using brushes or knives, as well as for experimental, mixed media, collage and printmaking applications. Impasto applications retain crisp brush stroke and knife marks.  I love to use my brayer with Heavy Body Paints and another favorite of mine is to use Sgraffito-Techniques with Heavy Body Paints (check out the video below). I also love to use Heavy Body to build up texture and dimension on my urban paintings.


Here is a video where I use different Heavy Body Paints and the sgraffito technique I mentioned above

I will list the supplies that are still available and everything I mention in this post below in case you want to check it out.

APC_NatKalbach

My personal favorite colors:

Often times I get asked which are my absolute favorite acrylic paint colors  -that is a hard one – because it is like asking me which of my children I like the most. But of course there are a couple colors that I tend to grab all the time –


Art Tapas – Bite Size Tips for the Mixed Media Artist

Here are some bite sized tips and tricks around Acrylic Paint for the Mixed Media and Hobby Artist. They are part of a video series that I am putting together and I will update this post as I go along and there may be more tips relating to Acrylic Paints.

How to Store Acrylic Paint

Art Tapas – Bite Sized Tips for the Mixed Media Artist – #1 Storage from Nathalie Kalbach on Vimeo.

How I label my paint and why

Art Tapas – Bite Sized Tips for the Mixed Media Artist – #2 Labeling from Nathalie Kalbach on Vimeo.

You want to learn some fun things using Acrylic Paints?

Sign up for an In- Person Workshop with me or join me for a fun Online Workshop. I love talking about the Why and How I use my art supplies and my workshops. Most of my workshops are not so much about a specific project than more about enabling you to know your supplies, techniques and craft in order to dive full in into your own style to create your own amazing art! Not convinced yet? Read some testimonials from other students that have taken my classes and come and join me :)

Here are the supplies that I have mentioned throughout this Must-Have Mixed Media Supplies – Acrylic Paints post 

nSupplies


I hope you enjoyed the first installation of my Must-Have Mixed Media Supplies. See you next month for the second part!
Happy Creating

Comments (16)

  • Bea savellano

    |

    helpful. Thank u..B

    Reply

  • Rebecca Buchanan

    |

    Thank you Natalie! Add my voice to all those above. Learned something great from each of your videos. Also glad someone asked about the music and that you shared the source–I liked that too. Thank you for having this great series of tips and techniques!!!

    Reply

    • nathalie-kalbach

      |

      Thank you Rebecca, so glad you liked it and it was helpful!

      Reply

  • Leadonna Fritts

    |

    Nat, I could watch you create all day! You make it all look so easy and so doable! Thanks for the great tips. I’m going to paint the tops of my bottles and add my little squares as you have suggested. Thank you for the continued inspiration and I hope to someday take a workshop of yours!

    Reply

    • nathalie-kalbach

      |

      Awe- thank you Leadonna, so glad you enjoyed this post. Hope I will see you soon again – either in a workshop or else ! Have a wonderful day!

      Reply

  • Barb

    |

    Nathalie,
    I forgot to ask you a question. In the first video, do you happen to remember who sings the song and the name of the song. It really is enjoyable to listen to with the artistic work you were painting.
    Thanks

    Reply

    • nathalie-kalbach

      |

      Barb the artist is Jose Gonzalez – The album is called “In Our Nature” and the song is called Cycling Trivialities. I love the whole album – it is very relaxing :)

      Reply

  • Barb

    |

    I have been following you for a long time now. I found your work while you were living in Germany.
    Your work goes way beyond art journaling. When you moved here, your artistic talent just exploded.
    The buildings you paint are just amazing. I enjoyed the video and your use of paint. Thanks so much for sharing.

    Reply

    • nathalie-kalbach

      |

      Hi Barb, thank you so much for your wonderful words! that makes me happy!

      Reply

  • Joi@RR

    |

    SUPER FINE videos Nat. Loved the sgraffito one – of course because I love watching you create. Great way to start me day! Thanks bunches. j.

    Reply

    • nathalie-kalbach

      |

      Hi Joi, thank you – so glad you liked them :) Thank you so much for your support!

      Reply

  • Maggie M

    |

    Great tips, Nat. Following last year’s Creative Jumpstart, I purchased a large set of the Liquitex soft body acrylic paints and their acrylic ink and I love them. I don’t think I’d use any other brand now. I also love their mediums, ie. gels etc. They are a real quality product. I’ll be looking forward to your acrylic paint workshop:) Hugs, Maggie

    Reply

    • nathalie-kalbach

      |

      Thank you Maggie! So glad you enjoyed the post and yeah for liking the your new products! So cool you were part of Creative Jumpstart! huge hugs, Nat

      Reply

  • Kathy P

    |

    Wonderful tips, Nat! And love those videos! Going to re-organize my paint storage for sure!

    Reply

    • nathalie-kalbach

      |

      So glad you liked it Kathy and awesome that you are re-organizing your paint storage. Let me know how it went!

      Reply

Leave a comment

Art Tapas – Bite Sized Tips for the Mixed Media Artist – Tip #1 Storage

I am starting a new Web-Video-Series called – Art Tapas – Bite Sized Tips for the Mixed Media Artist.

Art Tapas are short videos (1- 3 mins) that will give some practical tips or advice about anything that is related to tools, art supplies or processes and any Mixed Media or Hobby Artist might appreciate. Lots of times these reflect some mistakes that I made along my journey, so to speak, things that I learned the hard way and sometimes they are just some things that I would have loved to have known when I actually started in Mixed Media.

But without further ado – here is your first Art Tapas

How do you store your acrylic paints? For some this might be obvious but, let’s talk about it, shall we? :)

Art Tapas – Bite Sized Tips for the Mixed Media Artist – #1 Storage from Nathalie Kalbach on Vimeo.

I hope you enjoyed this Art Tapa –  and if you have questions that you would love to have answered in some of the Art Tapas videos- let me know and I might just cook one up for you to nibble on :)

Happy Creating !

Comments (10)

  • Lisa Flaherty

    |

    Love this concept of “Art Tapas”, Nat! Great tip! As artists we can appreciate form over function, but if our supplies cannot function we cannot create the form! ;)

    Reply

    • nathalie-kalbach

      |

      Thank you Lisa – yes – agreed – no form without function – great thinking!

      Reply

  • Joi@RR

    |

    Hehehehh – you left me laughing Nat with your clean and simple ending – you are such a delight. This was so interesting. I had no idea sunlight would dry up paints. Mine are fine but hubby has his setting right in front of a huge window… dear me. Wait until I show him your video!!!! Thanks bunches. j.

    Reply

    • nathalie-kalbach

      |

      LOL- Joi – hope this is not causing a mayor uproar at home ;) Have a gorgeous weekend!Nat

      Reply

  • Gunvor

    |

    Love the formate! And a great first tip. I don’t have a craft room or craft space so I store everything – including the acrylic paints – in my walk in craft storage. Never had a problem with paints drying up before they’re used up.

    Reply

    • nathalie-kalbach

      |

      Perfect storage Gunvor! A walk in craft storage …that sounds like a dream :)

      Reply

  • Caroline Leplat

    |

    Hi Nat,
    This is a great concept! Love it. It’s a great first tip.

    Reply

  • Kathy P

    |

    Clean and simple for sure, Nat! And a great tip. I also found this out the hard way, and since storing my paints in an opaque plastic storage tub kept INSIDE my closet, no more dried up paints! Can’t wait to see what other tips you will have for us—-thank you for taking the time to share with us!!!

    Reply

    • nathalie-kalbach

      |

      Thank you Kathy! That is a great idea too to store them in plastic tubs in a closet- that way you can get the whole thing out when painting. Have a wonderful day!

      Reply

Leave a comment

Inspired by H.N. Werkman … or Creative Play

NatKalbach_WerkmanInspired06

Remember the blogpost of my museum visit to the H.N. Werkman Exhibition in Groningen in The Netherlands? When Birgit and I came back from that trip, we were so inspired by Werkman’s artwork, that we went right into her studio and played. Instead of using a printing press we used a mono printing plate. I later continued playing and refining some of the Werkman inspired printing techniques in my own style at home.

This is the first print I made inspired by Werkman.

I call this “Man with hat between houses” :) LOL- titles are also inspired by Werkman- I loved that he just described what you see in his titles and it was kinda funny.

NatKalbach_WerkmanInspired05

The Werkman exhibition inspired me, because his prints talked to me. I love how simple shapes combined tell a story.

As you can tell- the following one was inspired also by The Netherlands trip :)

“Windmill with 5 sheep”

NatKalbach_WerkmanInspired02

Werkman worked with Stamps, Stencils, Paints and texture Tools – I loved the combination of these tools and media as that is what I use all the time too.

“Blue Skyline with watertower”

NatKalbach_WerkmanInspired01

I loved his color choices – He was very bold in his colors which as you know speaks to me too.

This print is inspired by my visit to Toledo, Spain.  “Passing on the Toledo Bridge”

NatKalbach_WerkmanInspired03

Most of all, Werkman was inspiring to me because he dared to try new things. He was a printer by trade…who wanted to be an artist, and he combined his knowledge of printing with experimenting with new and revolutionary techniques for prints. Amazing!

This last print I did was a bit tricky with all the different elements and I am not super happy with the colors- but still fun! “Lady Liberty on 4th July”. I learned a lot from experimenting with this.

NatKalbach_WerkmanInspired04

It is wonderful how a visit to a museum can expose you to artists you might not have known before and then give you a huge push to try something new and fun.

What did you see lately in a museum that inspired you?

Comments (10)

  • Joi@RR

    |

    Oh wow – I missed this post. How in the world did I miss it. These are wonderful Nat. YEAH – I just knew you would get lots of use out of all those incredible pictures and memories from your trip. My favorite it the first one – Man Between Houses – rather describes our lives – always between something!! I just like the colors and the layout and symbolism of this one. But they are all FABULOUS. Even Lady Liberty is GREAT. Keep this up… these are just so inspiring, creative, color intriguing and delightful. LOVE them all. And I just have to say… blessed today to see you creating!!! Hugs j.

    Reply

    • nathalie-kalbach

      |

      Hi Joi, always love reading your comments and thoughts! you are such a motivation for me! Have a gorgeous week! hugs, nat

      Reply

  • Ami Pilon

    |

    I really like these. It looks like your view is spectacular.

    Reply

    • nathalie-kalbach

      |

      Thank you Ami! my view from the studio is pretty nice – I love seeing Lady Liberty, even it is more the side-back view of her ;)

      Reply

  • cheiron

    |

    Wow Nat these prints are AWESOME!!! I would love to see a class on this type of technique (hint, hint).

    Reply

    • nathalie-kalbach

      |

      Thank you Cheiron :) Yep – class is coming ;) hint hint- LOL

      Reply

  • Cheryl Zacher

    |

    Very nice. I love the color pop, and the common sights we all see everyday. Also, the judicious use of white space. Looks like you nailed it!
    Joy Joy

    Reply

  • Deborah A. Pierro

    |

    Hi Nat. I really liked all of these prints. I think they turned out really well, especially since they are monoprints and you have to paint pretty fast. I really missed your regular blog posts, like this one!

    Reply

    • nathalie-kalbach

      |

      Thank you Deborah! I will try to do more of blog posts like this one -it is just sometimes life gets in the way and we can’t do it all- but i love doing these kind of things and I am keeping your comment to heart and try more again :) Have a wonderful weekend!, Nat

      Reply

Leave a comment

Finally Be You or … In My Art Journal Today

NatKalbach_FinallyBeYou01

What if every day is the perfect day to finally be exactly who you were always meant to be?

NatKalbach_FinallyBeYou02

I love playing in my art journal before starting to paint on a canvas- it loosens me up and get’s me in the groove.

NatKalbach_FinallyBeYou03

Played with Soft Body Paints and Inks as well as my Batik Stencil and the orange marks are actually from a baster :) I love using weird tools for mark making.

NatKalbach_FinallyBeYou04

For the journaling and sketching marks I mixed soft Liquitex Soft Body Paint and some Acrylic Ink into a Fine Line Bottle.

NatKalbach_FinallyBeYou05

that was fun :)

Before I get to the supplies – please check also out my guest blog post on the Cloth Paper Scissors blog showing a sneak peak tutorial for my upcoming Art Journaling Live Workshop together with Dina Wakley , Julie Fei-Fan Balzer and Mary Beth Shaw. :)

Screen Shot 2015-05-19 at 5.16.39 PM

Thank you for stopping by and have a wonderful day!

nSupplies


Comments (1)

  • Joi@RR

    |

    So love seeing you in the magazine Nat – that makes me feel so proud and happy for you! YEAH!

    I think this journal page is fabulous. LOVE the colors and totally laughed about your orange baster marks!! Love the outfit your gal is wearing. SUPER FINE creation!

    In answer to your question…. yes! I would like a day to be who I was truly meant to be but… I couldn’t tell you what that is!!!! Not there yet – that’s for sure!!! j.

    Reply

Leave a comment

The Chunky Monkey Painting or … City Spring

NatKalbach_CitySpring01

I started a new urban painting and wanted to change things up in how I start my paintings . So instead of the normal procedure I forced myself to do it a bit differently.

I was inspired by some sgraffito in paintings by Paul Klee and Jean Dubuffets – which I have just shown in my Post here. Here is how my painting looked for a couple days when I was undecided if I should leave it like this or not. I actually really liked it.

NatKalbach_CitySpring04

I love taking photos of my work in progress to see in hindsight what I did and sometimes also …where I should have not taken the next step. As in this. Now that I look back …I almost ;) wish I would have just stopped. But I didn’t …a weird “this cannot be it” – feeling kicked in …and so I continued. And I went a bit overboard with it … kind of like when you hand me a jar of Ben and Jerry’s “Chunky Monkey” Ice Cream …nothings gonna stop me there either ;) although I know pretty much after two scoops that should be it.

NatKalbach_CitySpring02

Pretty soon I realized that it is not going into the right direction, but then I just wanted to see how far I could push it and I painted a lot with palette knifes -which I usually only use for texture. That was cool.  And then I also got totally addicted to sketching with a mixture of Soft Body Paint and Ink (Titanium White and Carbon Black) filled into a Fineline bottle. I know now exactly the consistency of the mixture of those two paint media I need to make it work. I just loved the way the lines came out and the erased dimensional look.

NatKalbach_CitySpring03

Do I regret going further although I am not loving the outcome? Nope …absolutely not. I learned a lot by doing this and I found some new things I definitely want to incorporate more into new paintings. I also learned that less is sometimes more and not boring …although overall more is more for me… I might just sulk and eat some Chunky Monkey now  ;)

I think it is important to do things in our creative process that we are not loving in order to stretch ourselves and learn . I really enjoyed the process and keeping track of this, so the time was not wasted.  And you know what …I can always make a new painting … maybe I even just gesso over this one …the texture underneath will probably already define the city skyline …what do you think? Now that makes me excited about this again … LOL – maybe it will be the continuing City Spring Canvas Saga.

Are you a less is more or more is more person? 


Comments (10)

  • Cheryl

    |

    I really like it, for it looks quite professional. I loved all the colors you used, and it looks and feels like an inner city. I hope you will keep it, frame it, a d. E pleased with the results of pushing yourself. I would hang it in my home!

    Reply

  • JanJ

    |

    Wow! I like both. In the original the colors are soft and light. I struggle trying to keep in pastel colors. To me, your completed one is more dynamic and powerful. I just can’t choose. Thumbs Up!

    Reply

    • nathalie-kalbach

      |

      yeah- the pastel was my problem too – it is just not me – mmmh mhhh – LOL

      Reply

  • Joi@RR

    |

    Good morning Nat. I like the first one – the more pastel one BUT… here’s the thing… if I went in a gallery looking for your paintings – I would never have picked the first one as YOURS. Sooooooooo…. my fav is the second one. PLEASE don’t gesso over it!!! It’s really Wonderful. Totally love the brown building especially the staircase and the sign on top. To me… it just is so you and also – to me – it’s a work of art. The first one is lovely – and it could be a new side of you – but the second one is FABULOUS… I love it. j.

    Reply

    • nathalie-kalbach

      |

      Thank you for your feedback Joi! I agree- the first one was just not feeling me – but I liked it :)

      Reply

  • Deborah A. Pierro

    |

    Nat, I like the soft look of your new urban painting. I also like your previous urban paintings.

    Reply

  • Bea

    |

    sorry, i like it…b

    Reply

Leave a comment