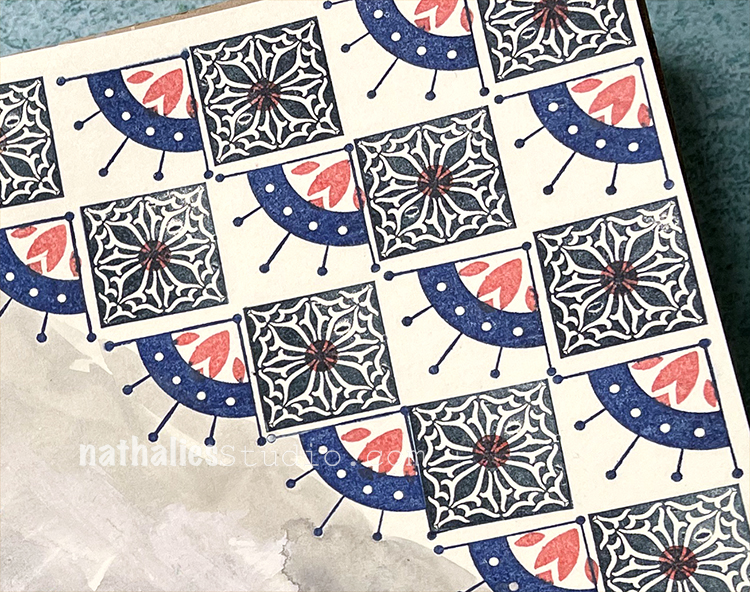
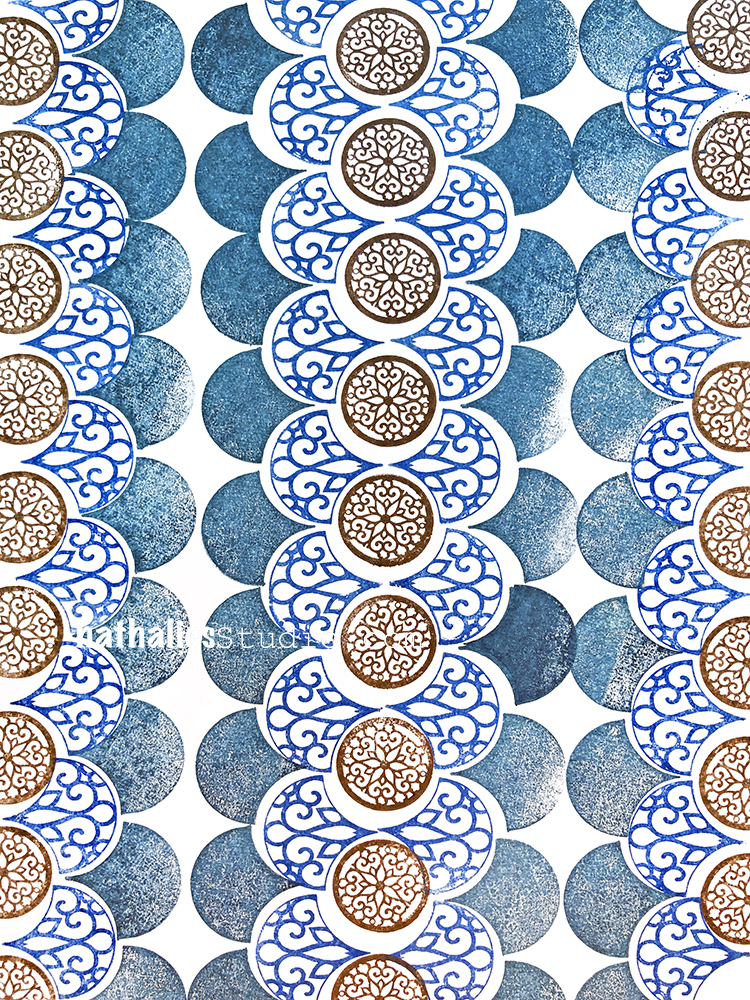
Happy Monday everyone – time for another pattern in my big vintage ledger! For this one I used my Floral Tile Large, Fan-Tastic Large, and Fan-fare rubber stamps. I like the way this turned out – it always surprises me what you can do with a few stamps and 2 colors. Check it out in the following video:
Here is a look at the finished pattern and the stamps I used:
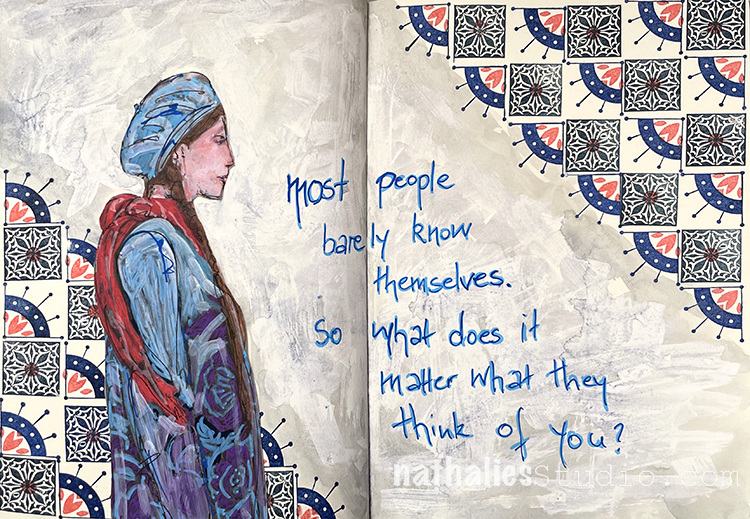
“Most people barely know themselves. So what does it matter what they think of you?”
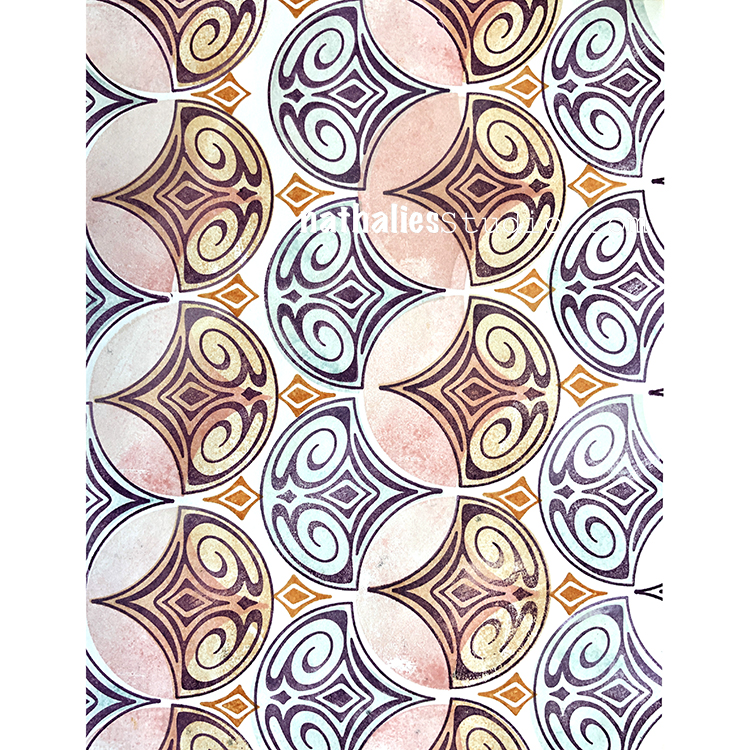
I took this pattern from Pattern Monday 3 using my Floral Tile Small, Mini Motifs, and Fan-Fare rubber stamps – unfortunately I laid my hand into the still pretty wet ink and ruined the white space in the middle. I tried to fix it with some white paint and water color but – mmhhhhh not sure if that actually made it better but oh well… moving on …
I overpainted a catalog image with acrylic markers and then used posca markers for the journaling.
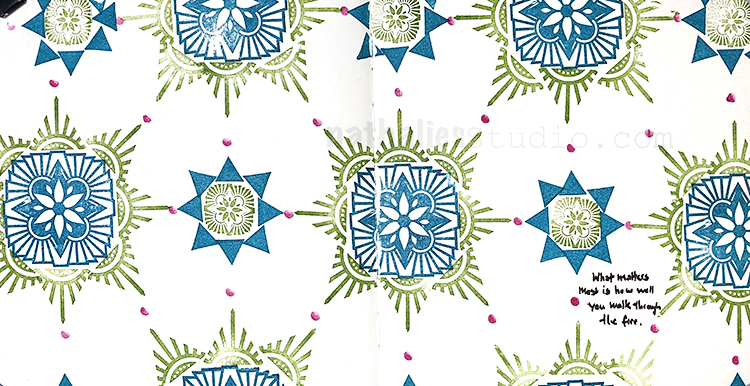
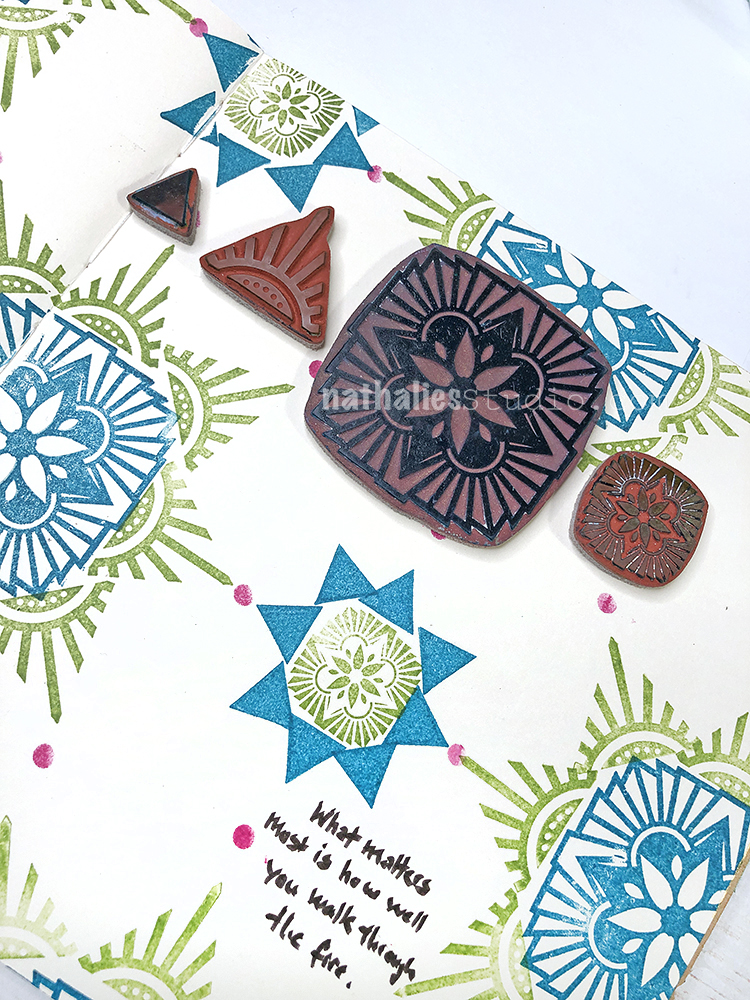
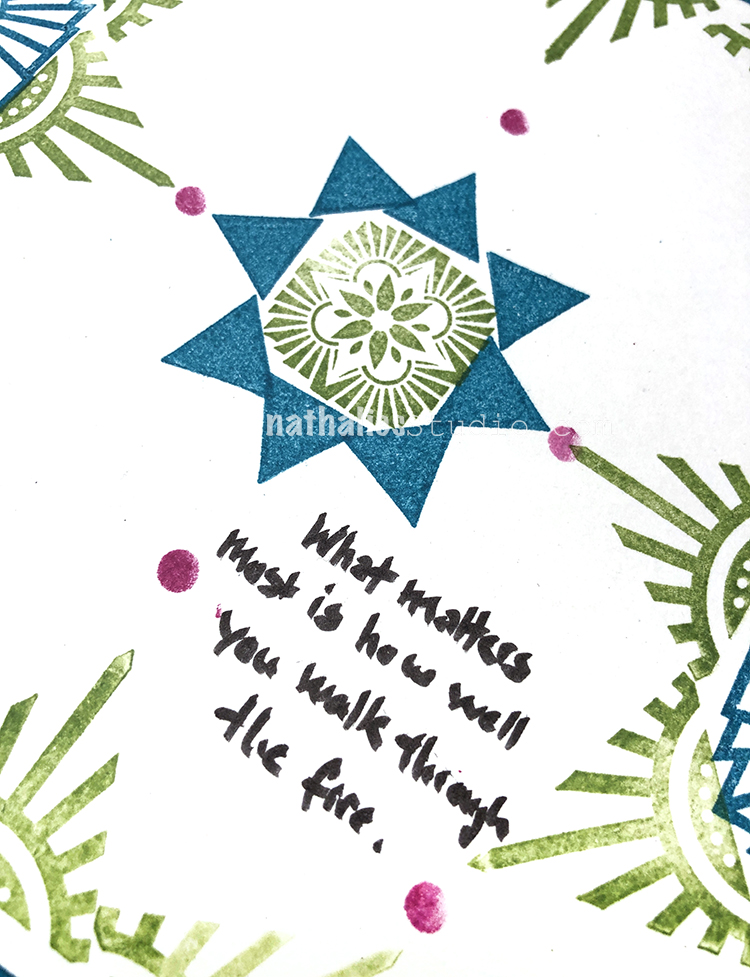
“What matters most is how well you walk through the fire.” Hoping to see everyone on the other side when all this has passed.
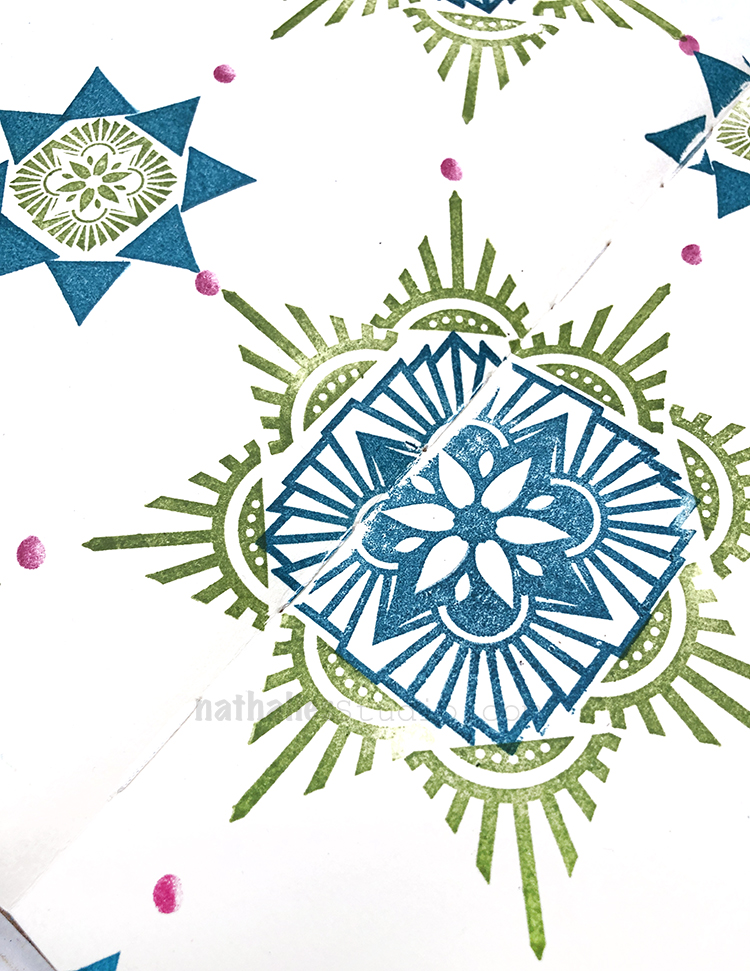
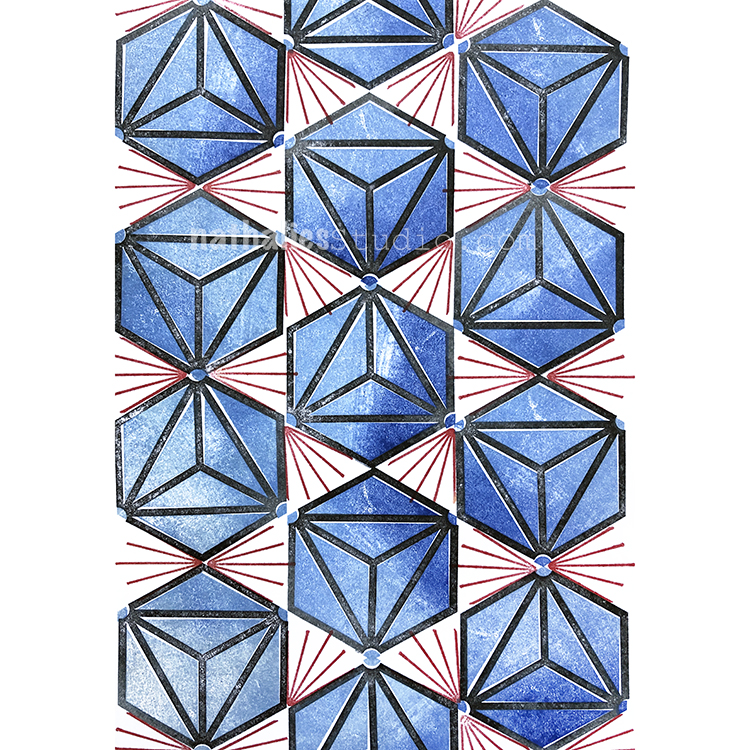
I created some star shaped patterns using my new Triangle Love rubber stamp set, along with my Floral Tile Large and Small sets. I love finding new ways that all of these stamps work together. Pattern building is definitely a good zen activity.
I also used a pencil eraser for the pink dots here and there – the little details tie everything together.
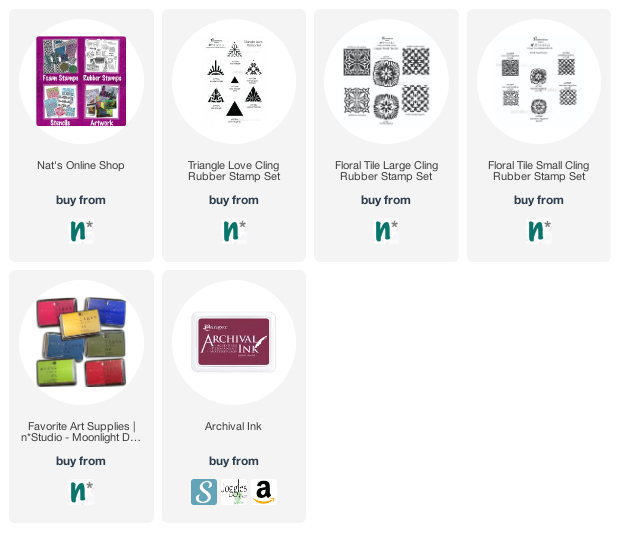
Here are some of the supplies I used:
Also some workshop news: The year long course Wanderlust is back on sale again and my lesson is coming up on May 1st. You can still sign up for the class HERE – it has 27 teachers and 50 lessons to get you going on your artistic journey.
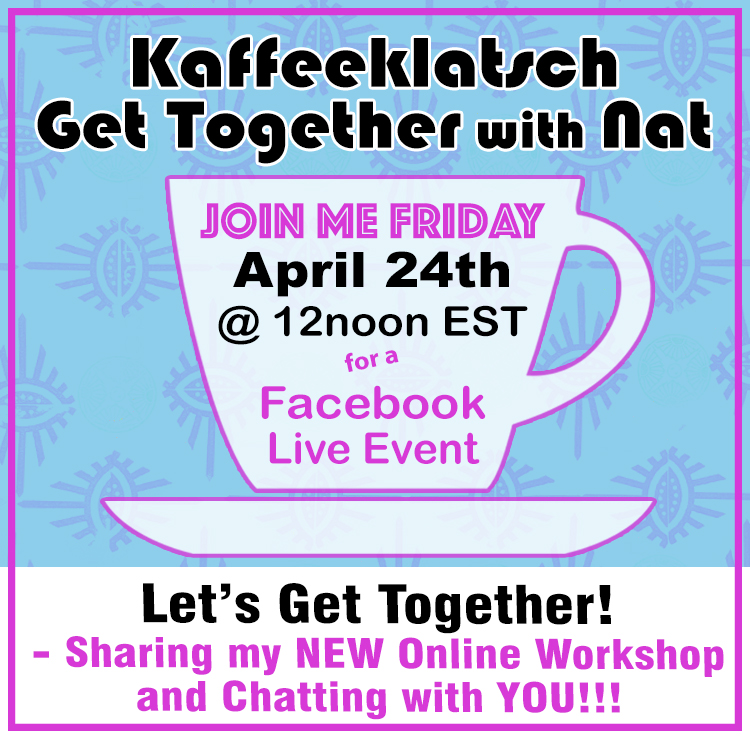
And join me tomorrow, Friday April 24th at 12noon EST for a Kaffeeklatsch chat on Facebook Live – I’ll be telling you about my newest online workshop and also hearing from you – what are you up to these days at home? Drop in and say hello!
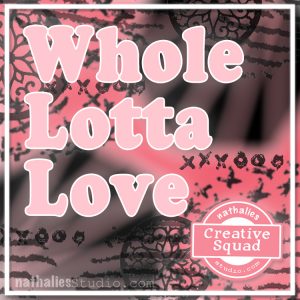
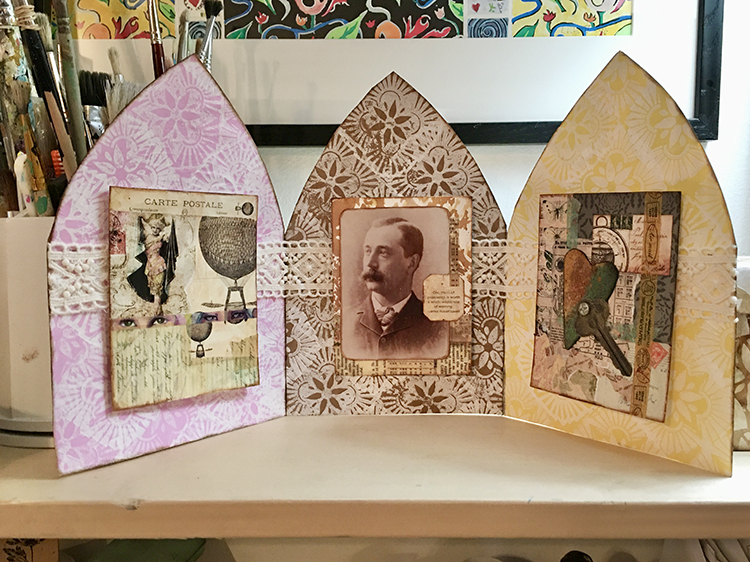
Hello from my Creative Squad! Today we have a unique project from Linda Edkins Wyatt – a triptych that holds 3 cards on display. Check out the video below to watch it come together. Linda uses my Floral Tile Large rubber stamps and this month’s theme: Whole Lotta Love – Who or what sets your heart aflutter this time of year? Let’s pay tribute this month to those warm fuzzy feelings of love and create something that celebrates that universal emotion.
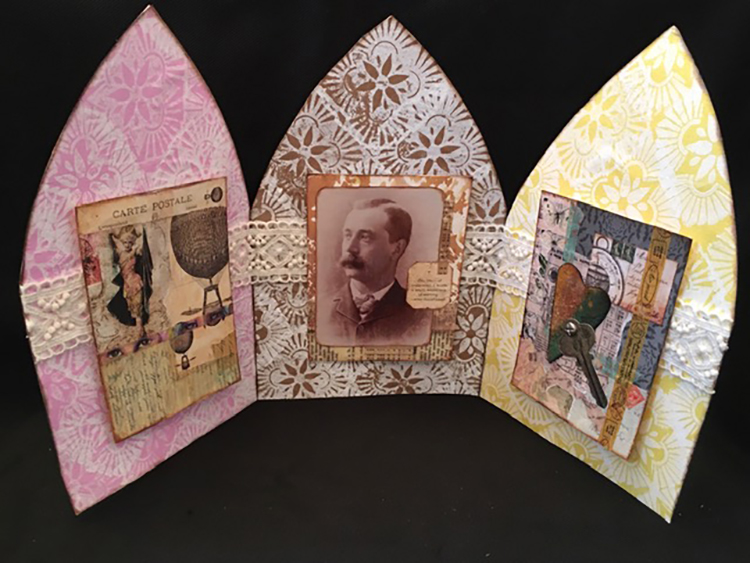
In November 2019, I participated in Nat’s “Deck of Cards” challenge. By the end of the month, I had 30 pretty cool pieces of artwork that were just the right size for greeting cards. I felt a little too attached to some of them to actually use as cards and send off in the mail to friends and family, so I bundled them up and propped them up on my display shelf. Here’s a few of them:
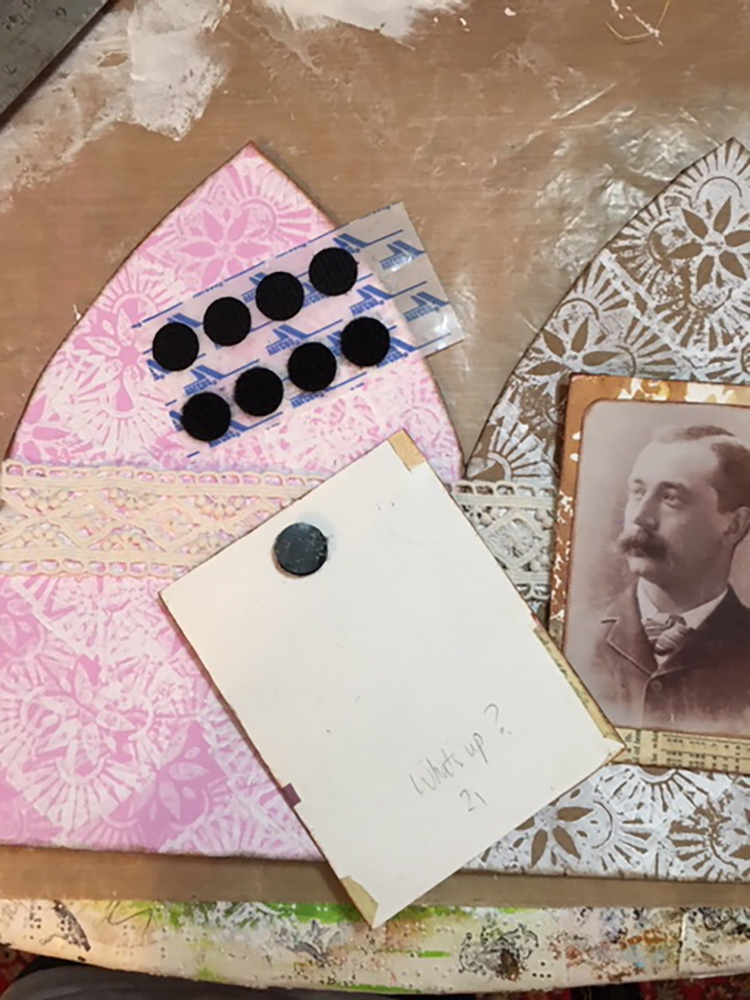
But…I wanted a prettier way to display the cards, so I hit on the idea of creating a free-standing triptych to showcase them. I had too many to display all at once, so I decided to attach little pieces of Velcro to my favorites so the display could easily be changed.
Here’s my video of the process:
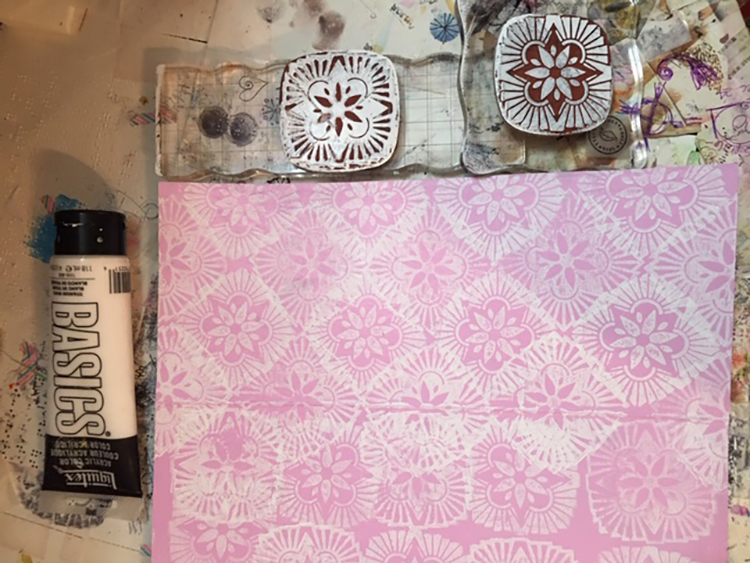
I started by mixing up my favorite shades of pink and yellow and painting some 140 lb. watercolor paper. In addition to the painted paper, I also used a piece of recycled brown paper bag. Next, I spread white acrylic onto my geli plate and picked up paint with Nat’s positive/negative Hamilton rubber stamps, then stamped all over the three surfaces. (Once the geli plate was full of marks, I also pulled prints off it with deli paper.)
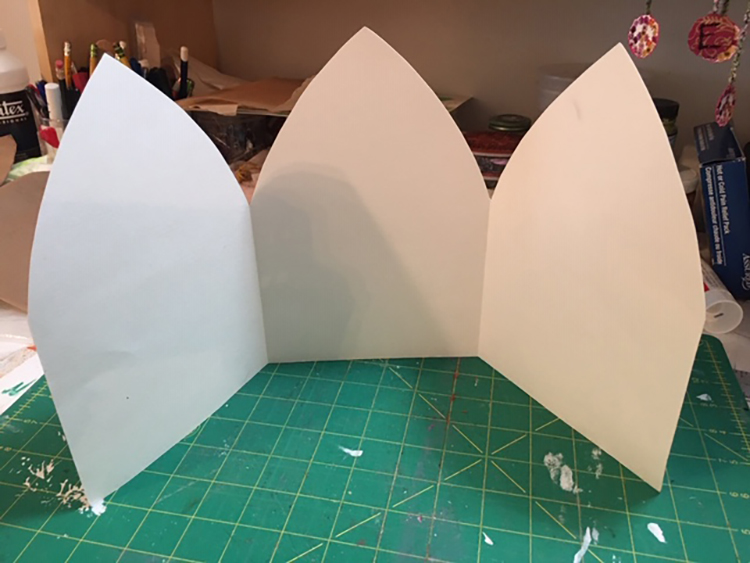
Once I had plenty of printed paper, I auditioned different cards and lace to see what would work best for my triptych. I folded and cut a fresh piece of watercolor paper to the triptych shape.
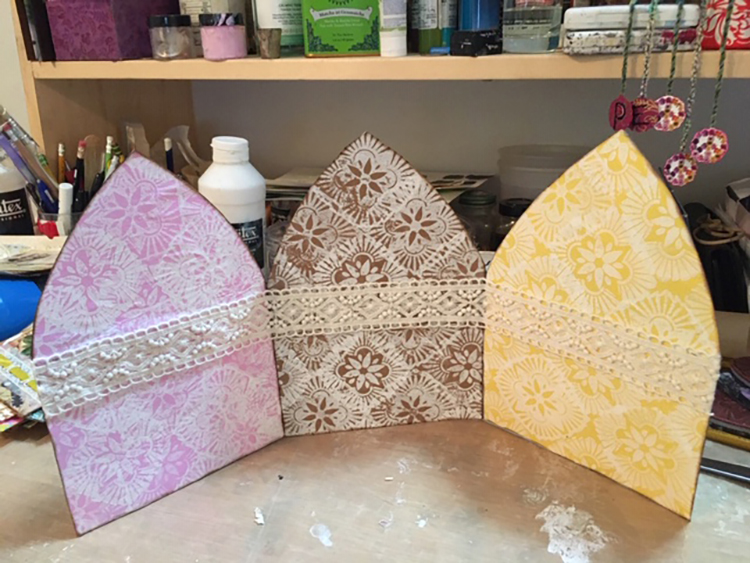
Next, I glued the printed papers on and cut them to size. With a glue stick, I added some gorgeous thick lace.
The final step was attaching the Velcro dots to both the triptych and the cards.
The hardest part was finding a space in my small apartment to display my new creation!
Thank you Linda! This is such a cool way to display any number of small works on paper! Great idea :)
Want to give Linda’s project a try? You can find all my Rubber Stamps in my Online Shop and in addition to her cards and a brown paper bag, here are some of the other supplies Linda used:
Feel inspired? Working on something yourself that you’d like to share? I love to see how you interpret our monthly themes. Email me how you used my stencils and stamps with the theme and email me an image – I would love to share your projects in my next “n*Spiration From Around the Globe“.
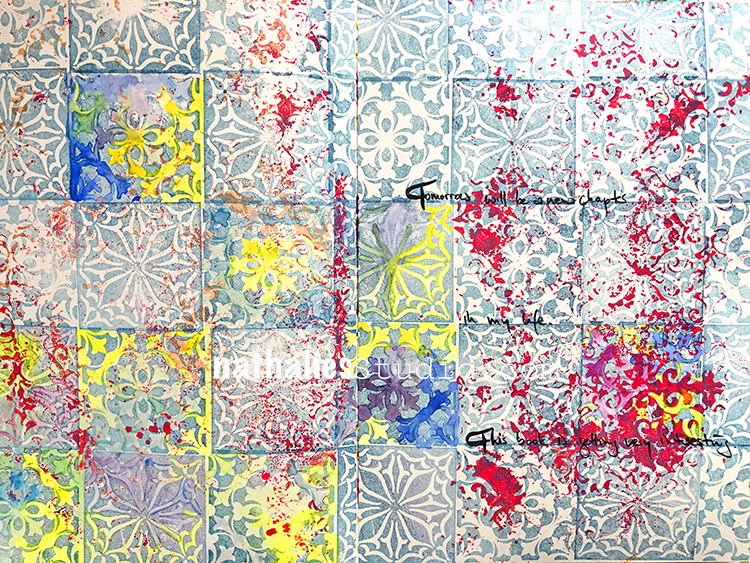
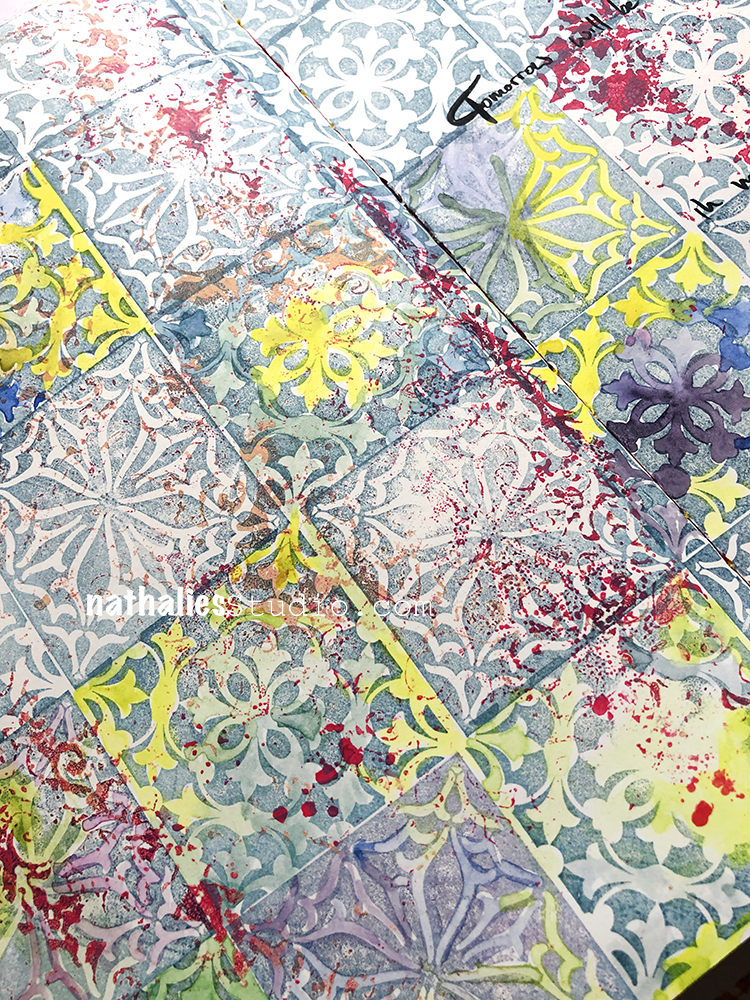
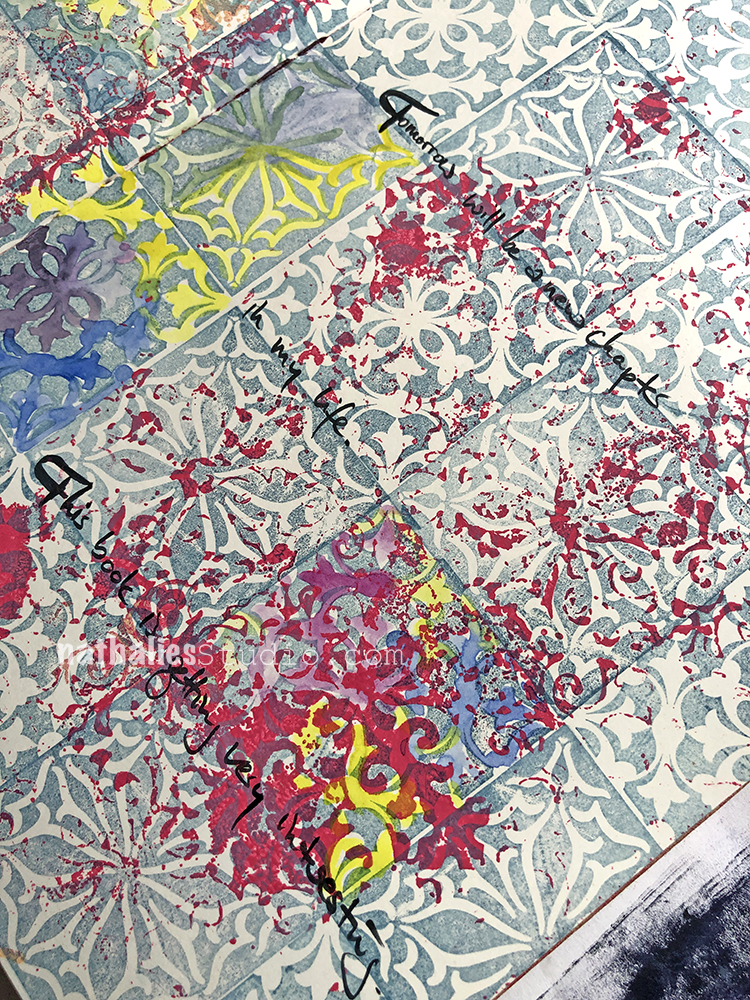
“Tomorrow will be a new chapter in my life. This book is getting very interesting.”
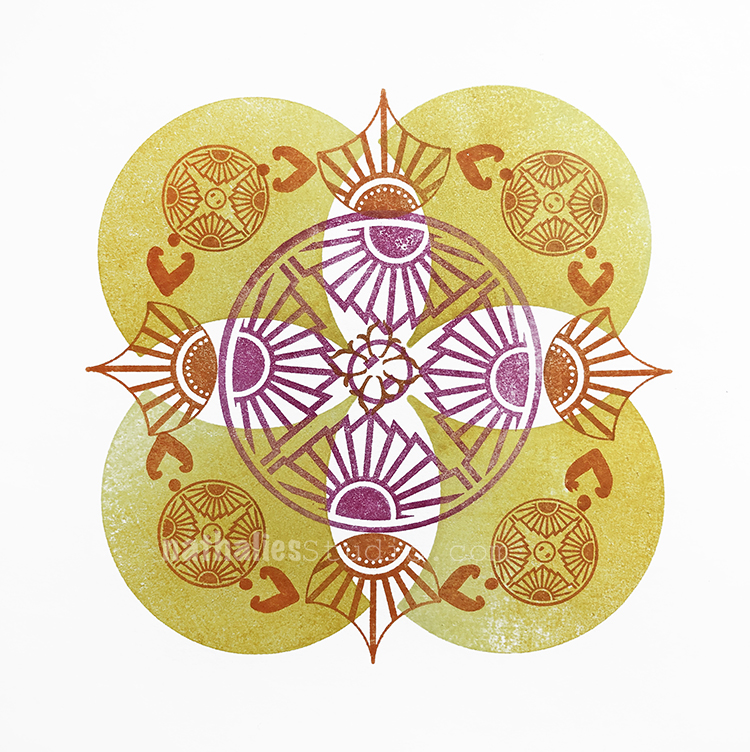
For the background I used the Van Vorst and Versailles rubber stamps from my Floral Tile Large set. Then I went back in with water color to bring out certain areas of the pattern.
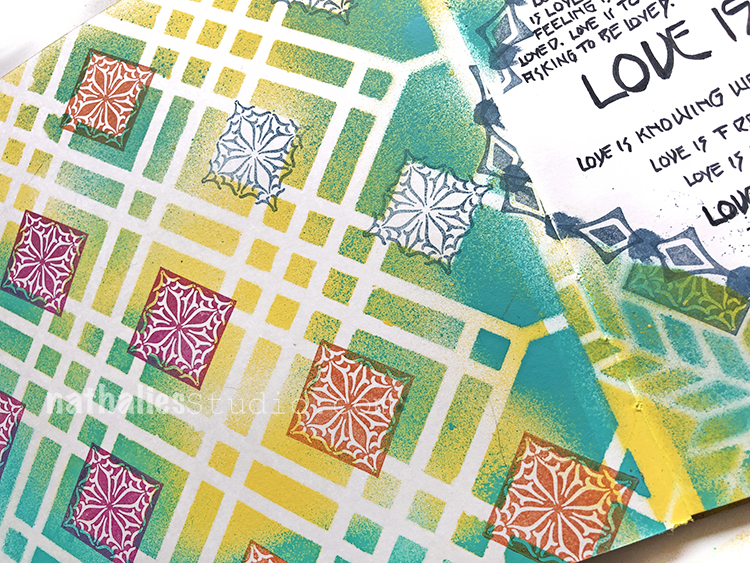
The red was spray paint that I had on a stencil and cleaned off on the page before getting started. I loved the little snippets of the paint as random marks.
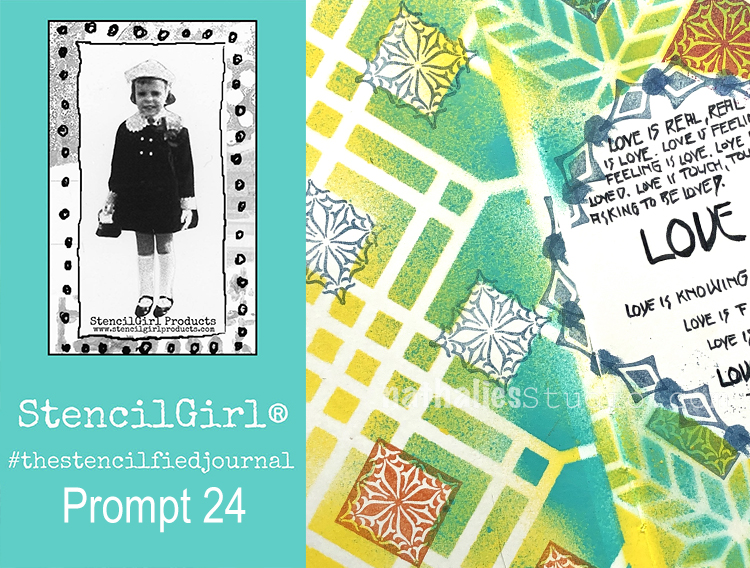
This is the final Stencilfied Journal post. My wonderful friend Tina Walker invited several people to join these prompts. The prompts were all music related and each week she posted a song. We drew inspiration from the lyrics, the video, the album cover or anything related to the song- the only restriction was to use StencilGirl Product Stencils. Here is my take on Prompt 24
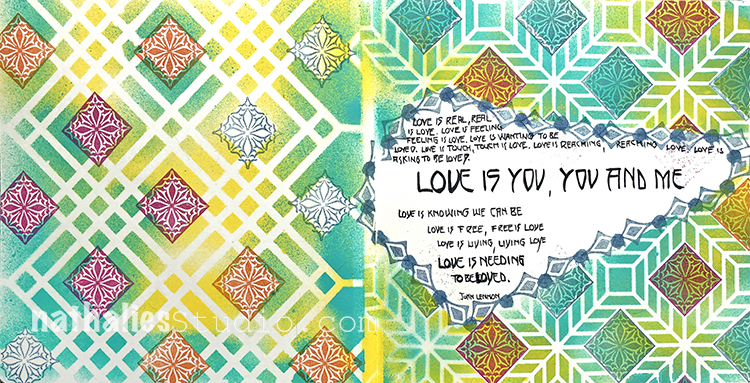
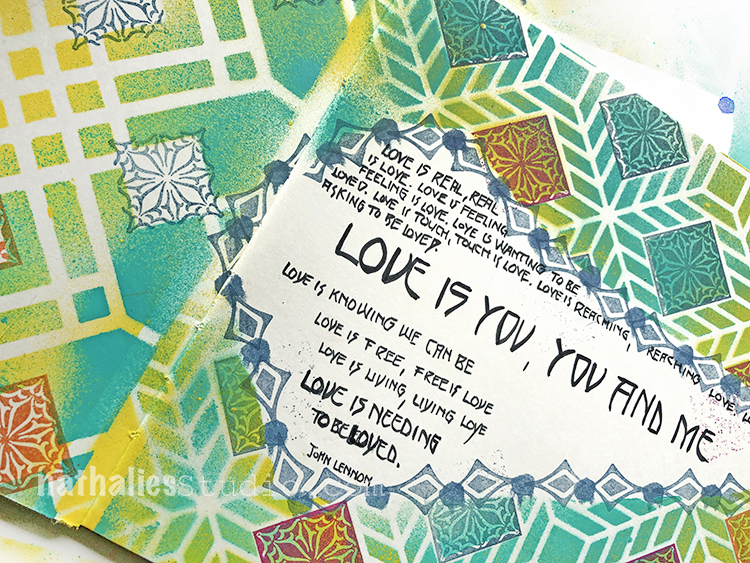
This final prompt was a free song – your favorite song – tough one as I have a huge variety of songs I like and a bit of a grungy alternative rock taste- but one song I always loved and once in a while listen to is Love by John Lennon and Yoko Ono.
I covered up the area for the journaling – and then layered my Santiago and Chicago stencils on top and sprayed and stamped.
I love how my Small Floral Tile rubber stamps fit nicely into the squares of the stencil.
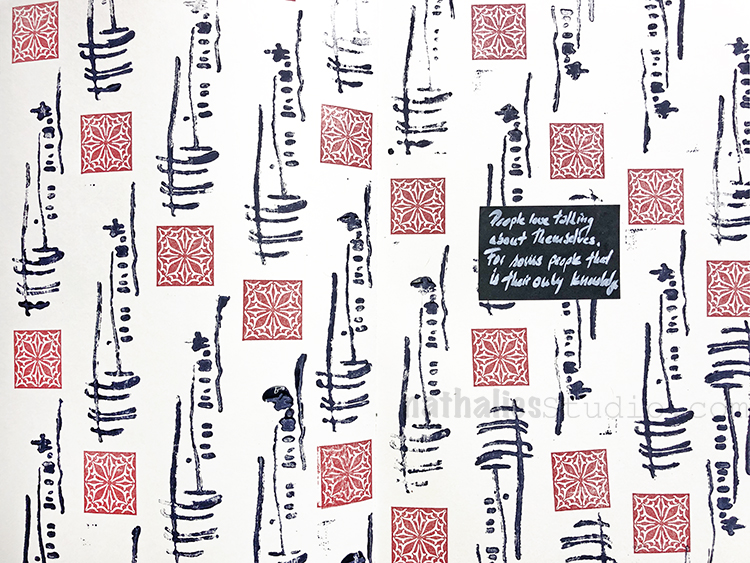
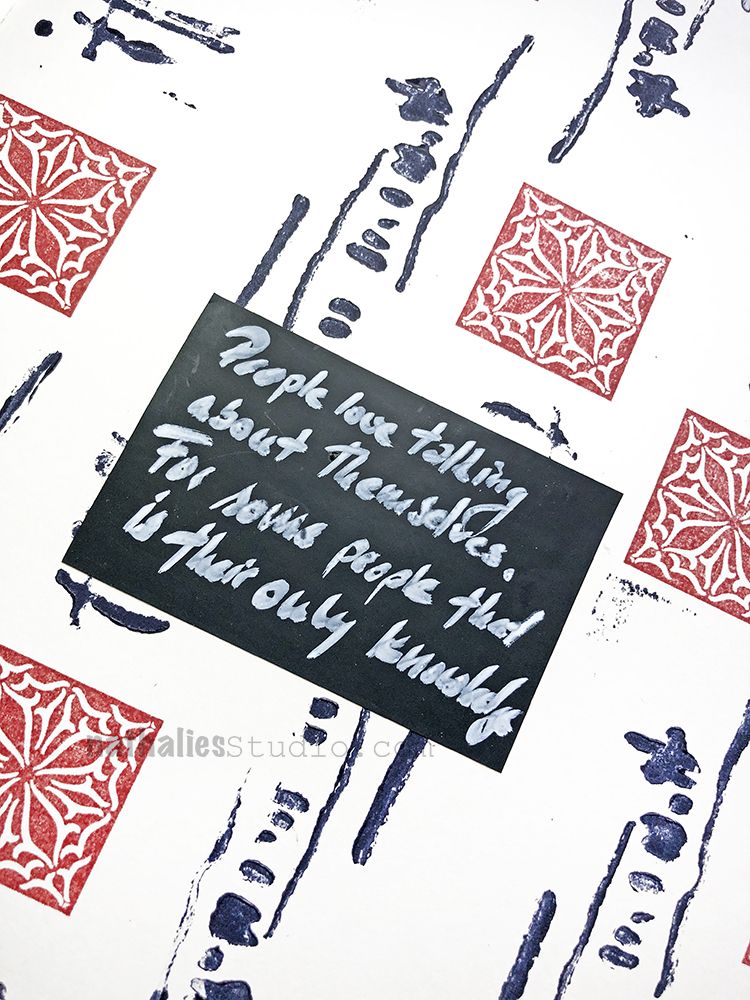
“People love talking about themselves. For some people that is their only knowledge.” From my shall remain anonymous assistant :)
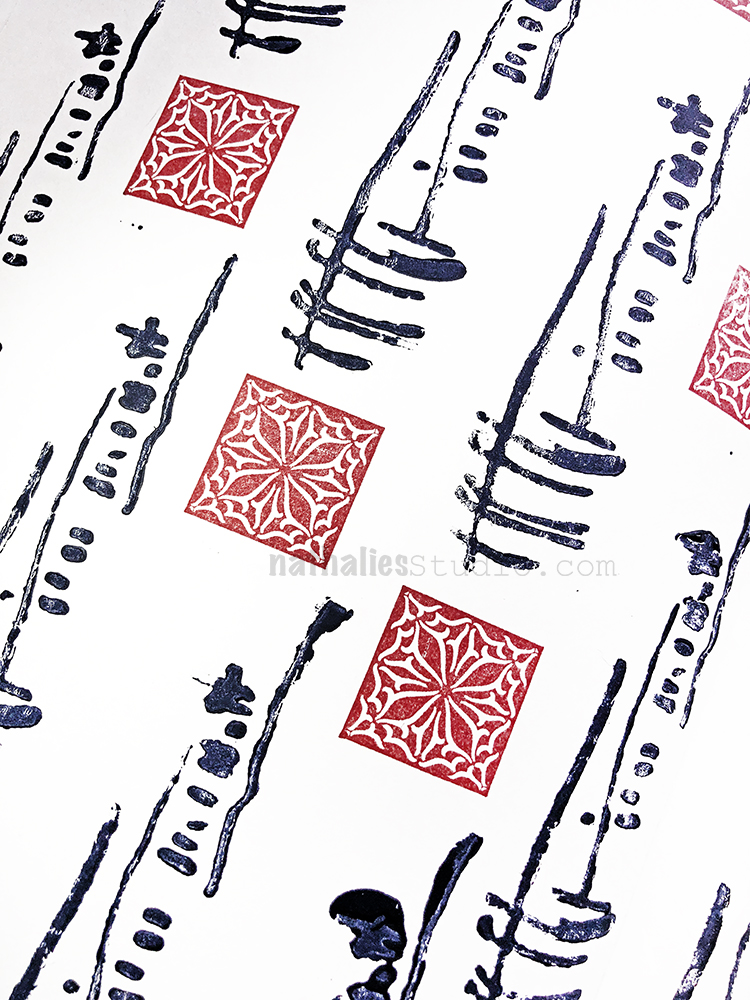
I made the background pattern with my Gnarly foam stamp and acrylic paint and the Van Vorst stamp in my Floral Tile Small rubber stamp set with red archival ink. The color scheme and the simplicity of it reminds me of Japanese calligraphy.
I put some chalkboard tape down for the quote and wrote in a white calligraphy pen.
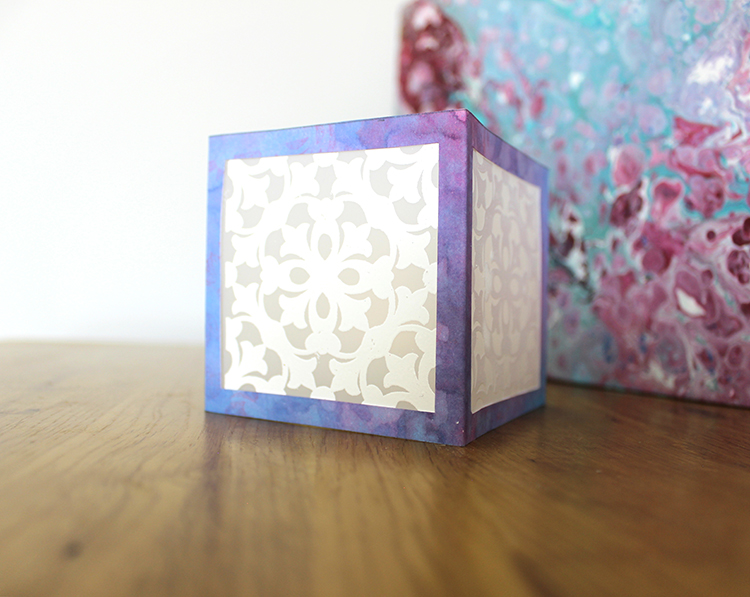
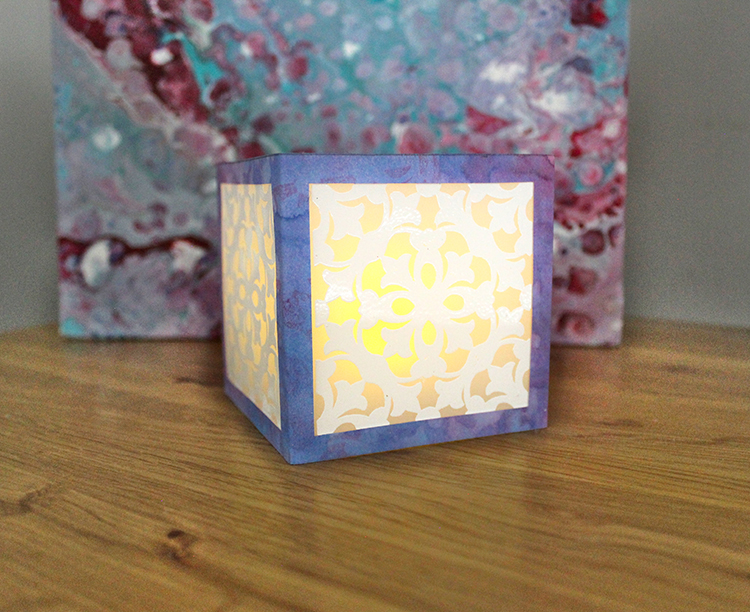
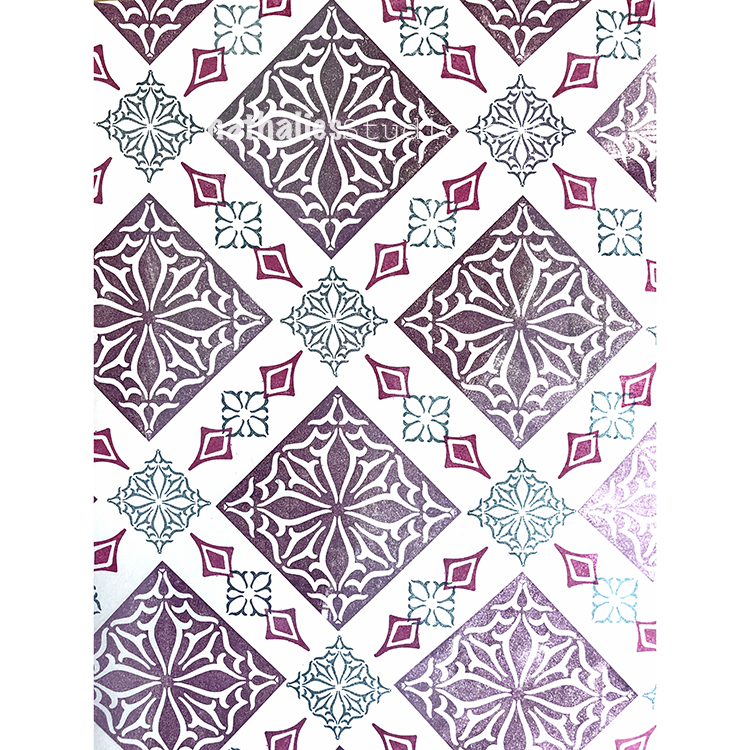
Hello from my Creative Squad! Today we have a beautiful paper lantern from Tania Ahmed that is sure to set the mood. She used my Versailles stamp from the Floral Tile Large rubber stamp set and this month’s theme: Pastel Dreams – This month we are focusing on the softer, gentler side of things and going pastel with our color palettes. These dreamy pale colors are undeniably appealing and just as powerful as their bolder cousins on the color wheel.
We love subtle mood lighting around the house and I love making little pieces like this paper lantern to use around the house as purposeful décor! I love the ornate filigree style pattern of the Versailles stamp so I knew that it would make a striking pattern for my paper lantern.
Steps:
1 Stamp and heat emboss 4 times on Duralar with Versailles Positive
2 Spray a 3” x 12.25” piece of sturdy cardstock with Distress Oxides Sprays. Mist liberally with water and lift ink with kitchen towel. Dry thoroughly
3 Stamp Versailles Negative with water to get ink to react. Lift with kitchen towel.
4 Stamp Versailles Negative with Distress Oxide in Picked Raspberry. Dry thoroughly.
5 Score cardstock panel at 3” intervals. You will be left with a ¼” flap. Cut out 2.5” square from centre of each panel with craft knife.
6 Cute out heat embossed Duralar and attach to square panel aperture. Fold and securely glue flap to assemble lantern.
7 Add battery operated tea light and enjoy!
Thank you Tania! You can find all of my rubber stamps in my online shop. Here are some of the other supplies Tania used:
Feel inspired? Working on something yourself that you’d like to share? I love to see how you interpret our monthly themes. Email me how you used my stencils and stamps with the theme and email me an image – I would love to share your projects in my next “n*Spiration From Around the Globe“.
I wanted to share a little Flip Through video of my newly finished Pattern Sample Book. I started Nat’s April Patterns back at the start of April with my new rubber stamps and decided to bind them together in one book. It was relaxing and super fun to create the patterns and now I have an awesome resource for inspiration. Enjoy the flip through!
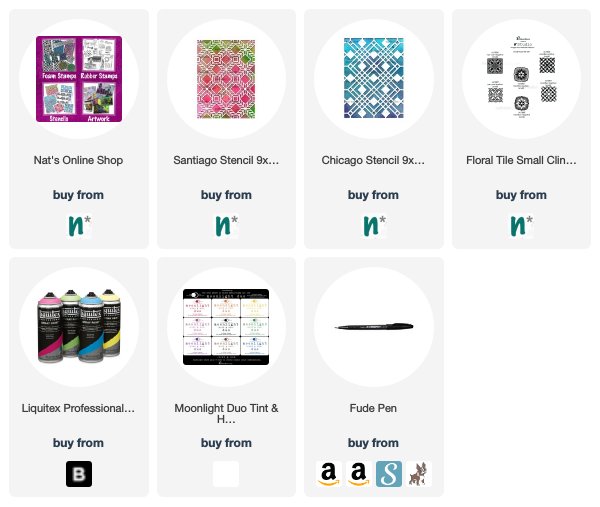
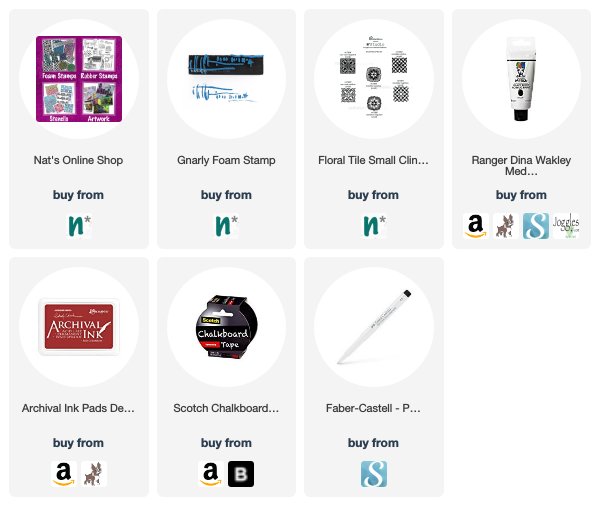
I hope you enjoyed this and are inspired to try some patterns of your own. All my new Rubber Stamps can be found in my Online Shop. Here are the supplies I used for these patterns:


What a fantastic quote!!!?
Reply