Nat

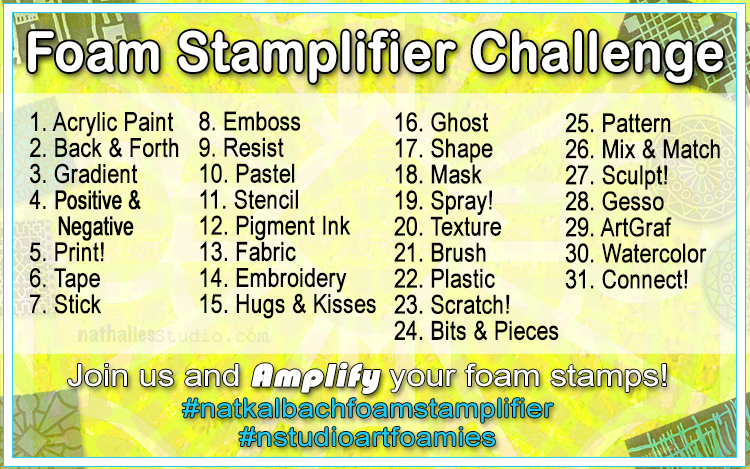
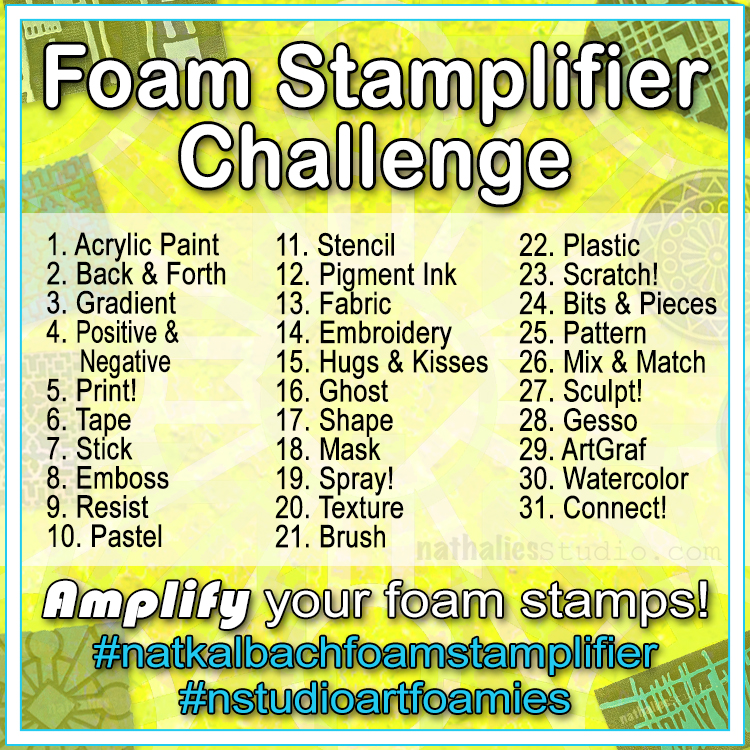
This month my Creative Squad is playing along with my new Foam Stamplifier Challenge: All month long you can follow my daily prompts on Instagram and on the blog to amplify your foam stamps!!! Today Tania Ahmed is following the prompt Print! She’s using my new Foam Stamps along with her gelli plate for monoprinting and then she shows a great next step for that monoprint :)
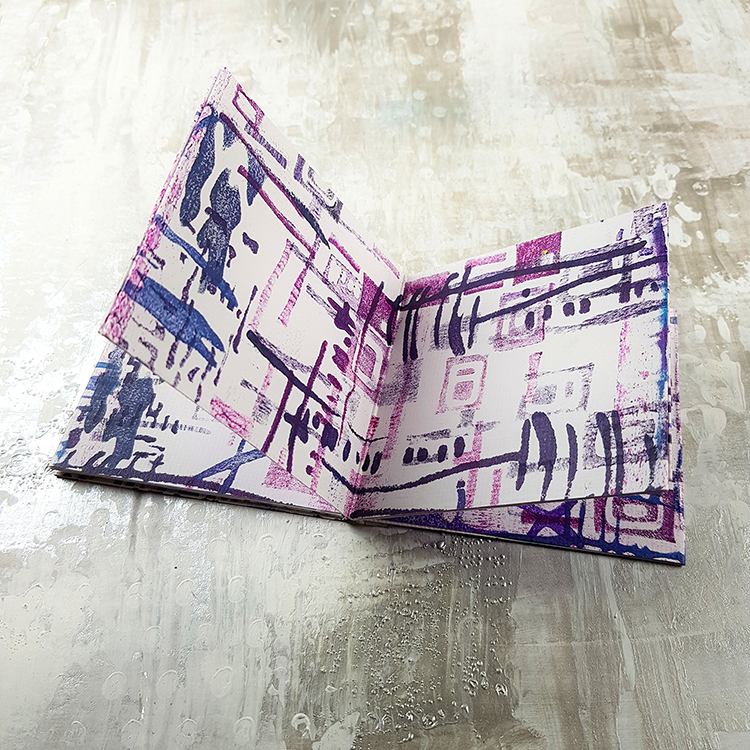
This month the Creative Squad was asked to play along with Nat’s Foam Stamplifier Challenge and my prompt was Print!
I love printmaking and I love Art Foamies stamps, so it was almost as if this prompt was made with me in mind, haha!
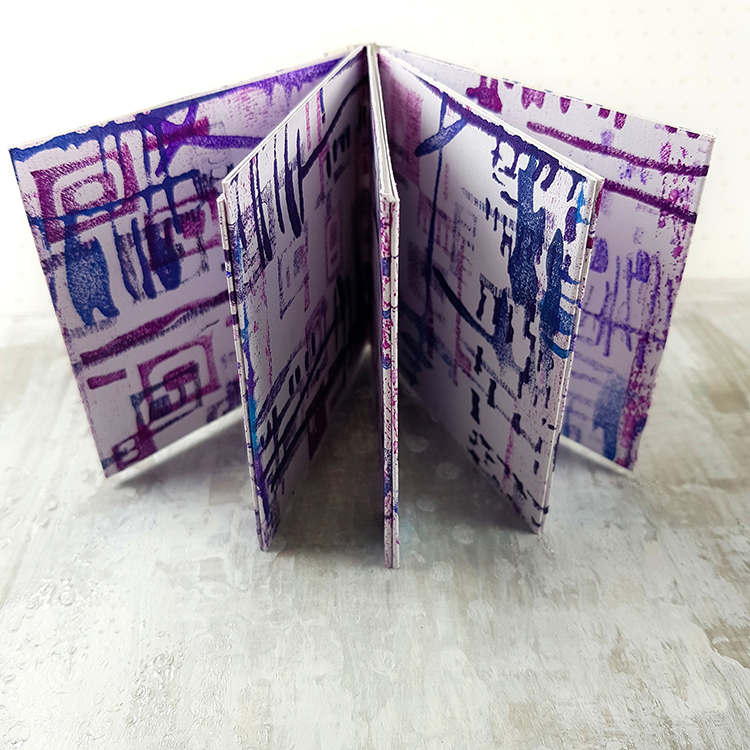
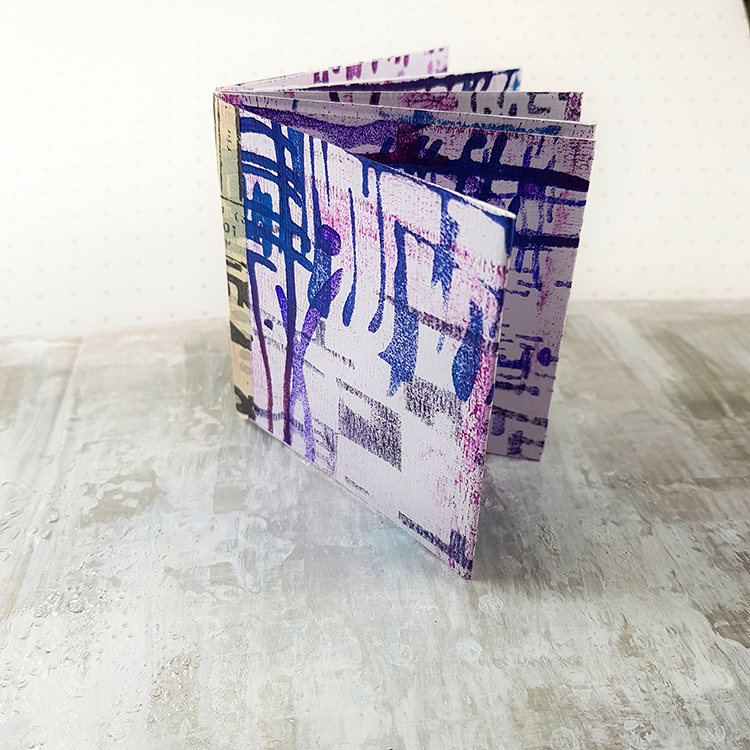
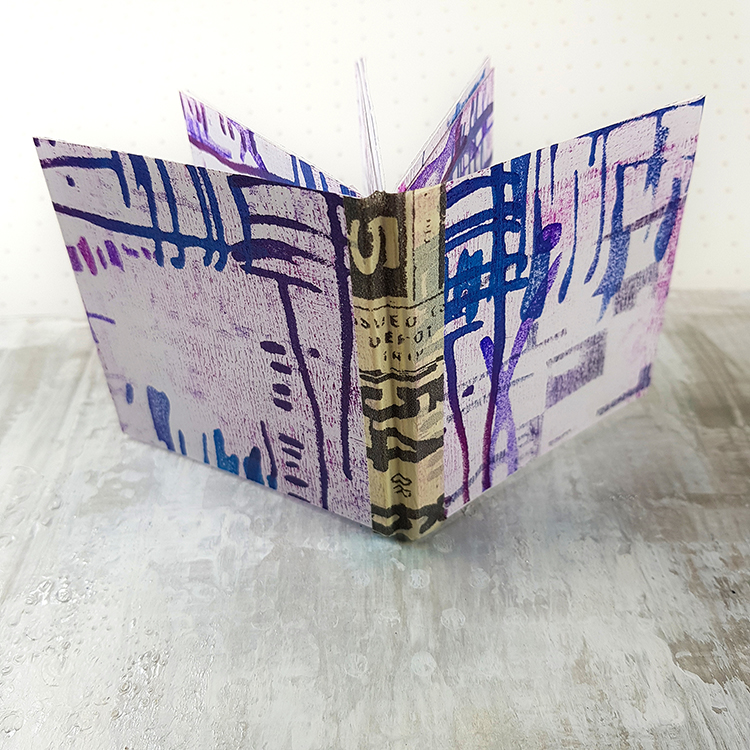
I made a video to show how I put together a little mini album made using 12×12 cardstock that stamped on using Nat’s newest Art Foamies release and a 5×7 Gelli Arts® plate.
Here’s how I put the mini album together:
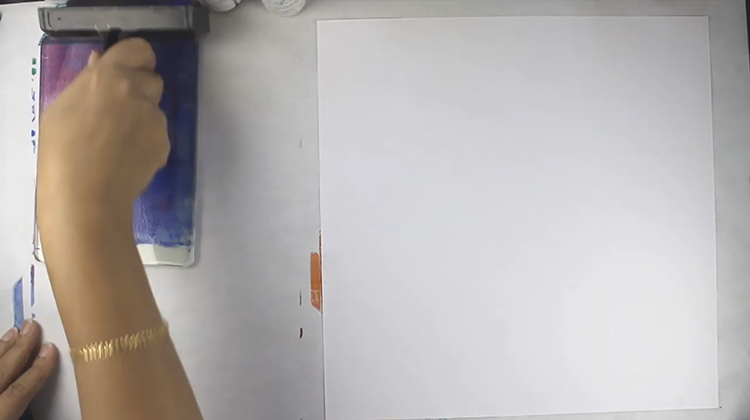
1 Apply a thin layer of acrylic paint to Gelli Arts® plate.
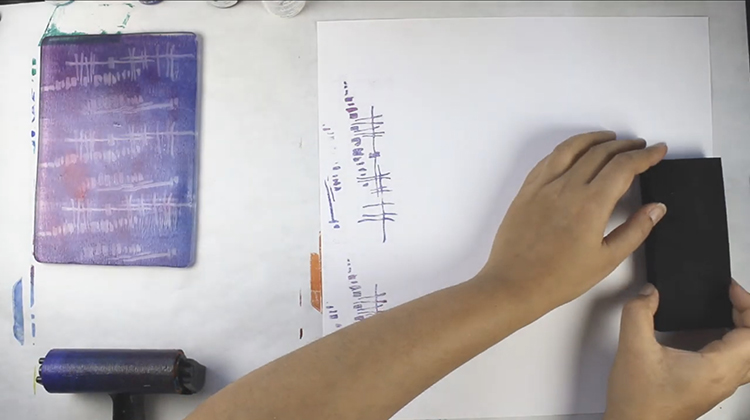
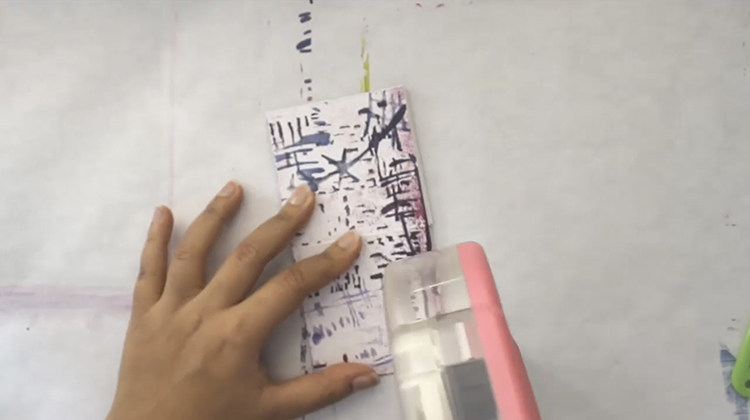
2 Use the Gelli Plate to ink the Art Foamies and then stamp on to cardstock and repeat until the paint just begins to dry on the plate.
3 Pull a print with the remainder of the paint that is left on the plate.
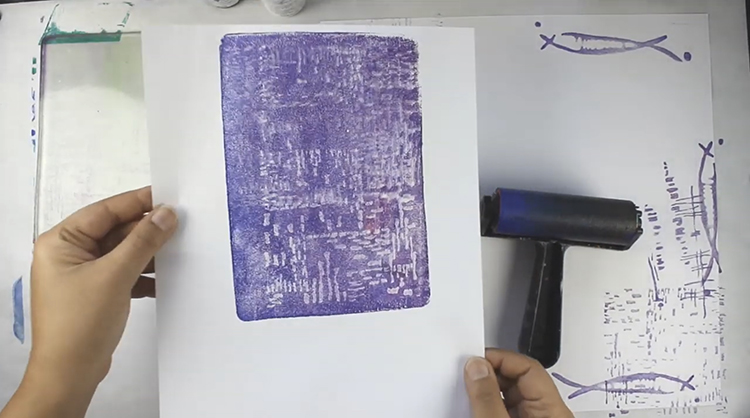
4 You can use this clean off paper for collages.
5 Apply more paint to plate and repeat steps until you are happy with your print.
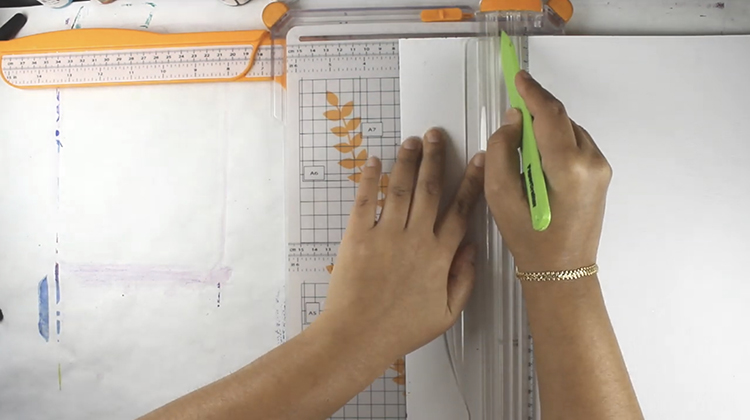
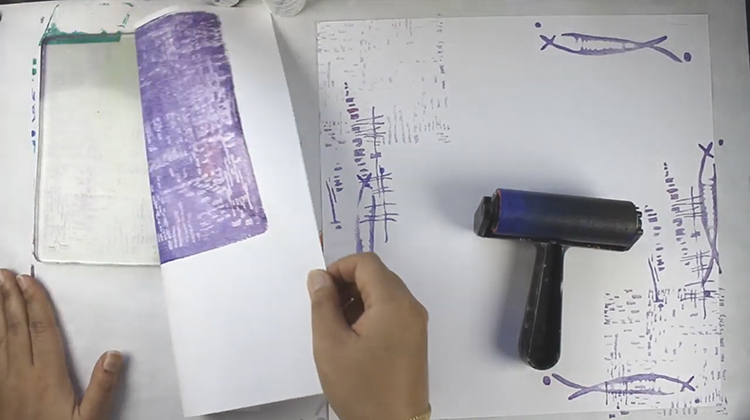
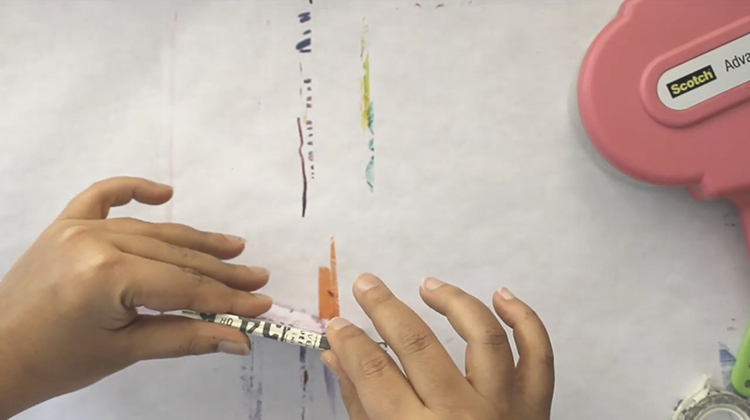
6 Score your cardstock at 3”, 6” and 9”.
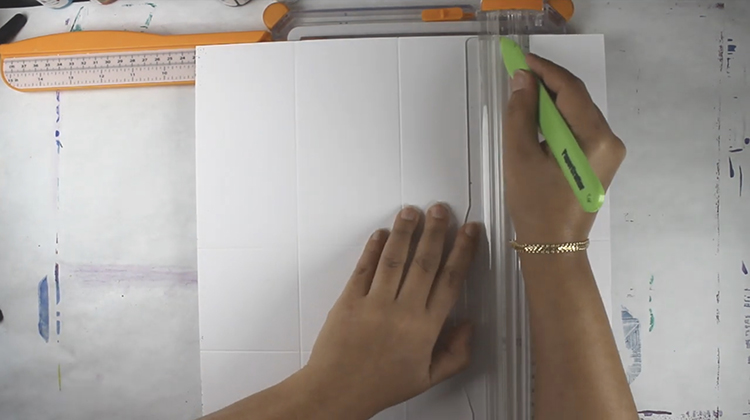
7 Rotate paper 90 degrees and score again at 3”, 6” and 9”.
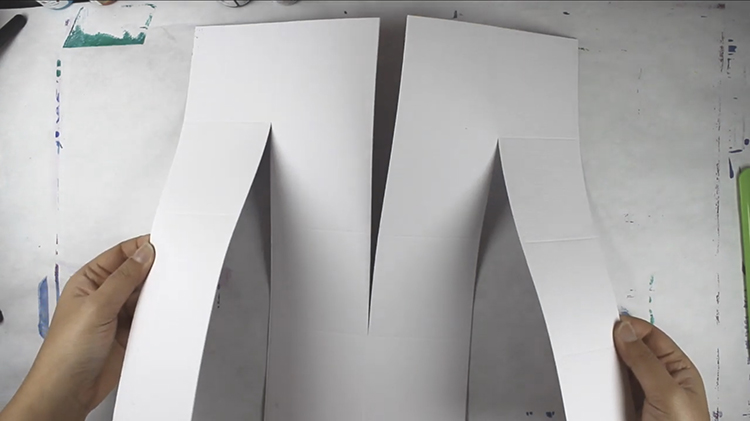
8 Cut up to the score lines as shown above.
9 Accordion fold the paper which will form a little 3” x 3” journal/album.
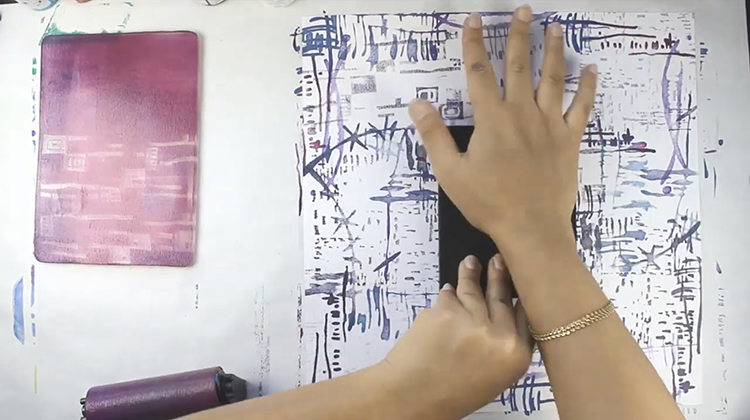
10 Tape or glue the backs of the pages together to make it a little more sturdy. You get leave some sides free to use as pockets.
11 To finish off the book spine, add washi tape for decoration!
Thank you Tania! What an cool little book and a great way to use a monoprint! You can find my Foam Stamps in my Online Shop. Here are some of the supplies that Tania used:

Feel inspired? I hope you join us for the Foam Stamplifier Challenge this month. As you play along, don’t forget to tag me when you share your creations – I would love to share your projects in my next “n*Spiration From Around the Globe“.
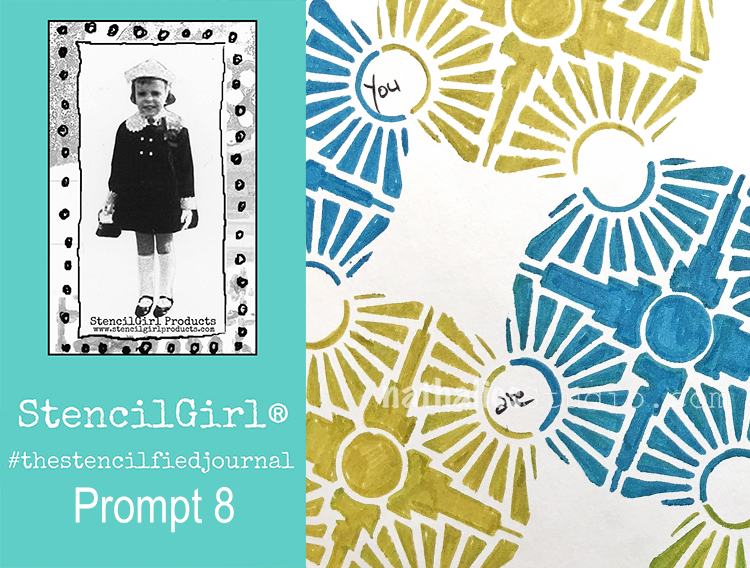
My wonderful friend Tina Walker is at it again – she invited several people to join her Stencilfied Prompts. The prompts are music related and each week she is posting a song. You can be inspired by the lyrics, the video, the album cover or anything related and the only restriction is that you have to use StencilGirl Product Stencils. Here is my take on Prompt 8:
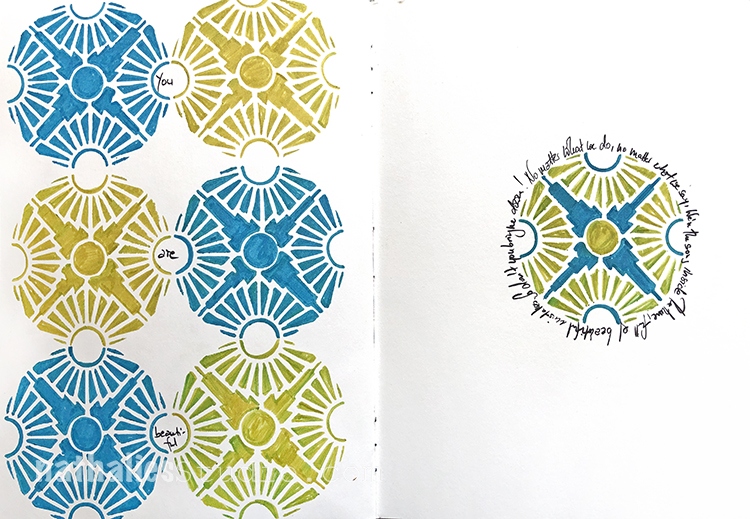
This week’s prompt was Beautiful – Christina Aguilera . The lyrics are awesome- as to the music…well by now you might have guessed I am a total grunge-rock-alternative kinda girl. LOL …but hey …I am in here ;)
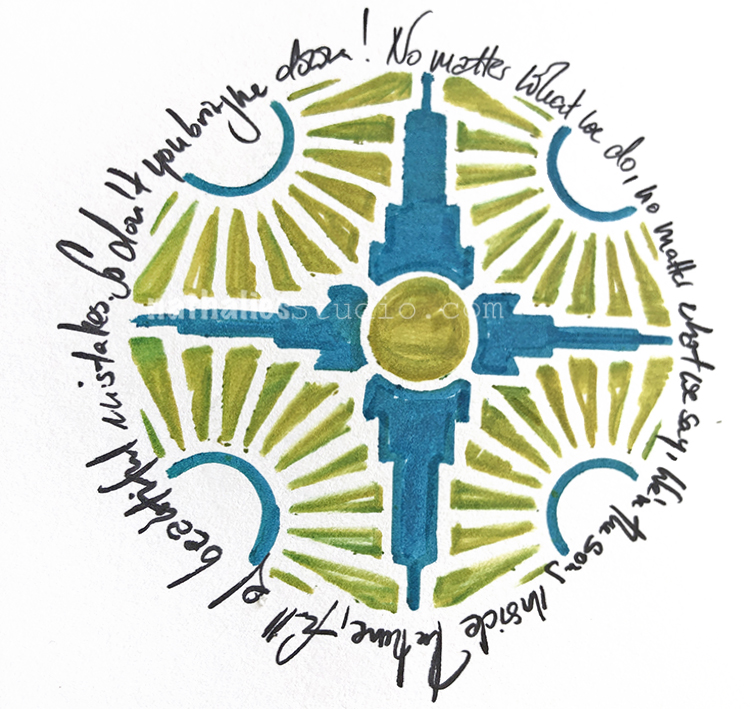
I used my Broadway Stencil with some ink pens – I was in our new house waiting for a contractor and this was what I stuffed in my bag and thought “make the most of this, a journal, a 4×4 stencil and three pens” and there you go:
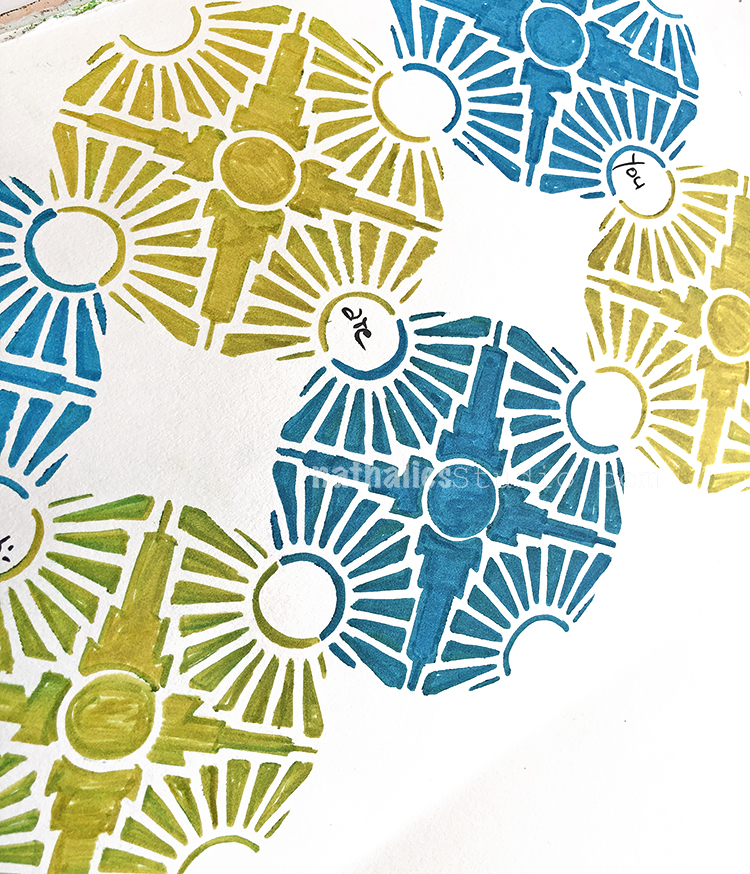
I actually plan on doing this more often – just pack a really limited amount of stuff and see what happens. It was really fun to do – easy but occupying and as you can tell since it was finished – the contractor was late. All in all better than a coloring book ;)
Here are the supplies I used for this one:
Are you in with me for the Foam-Stampflier Challenge to make the most of your Foam Stamps? Here are the first two days:
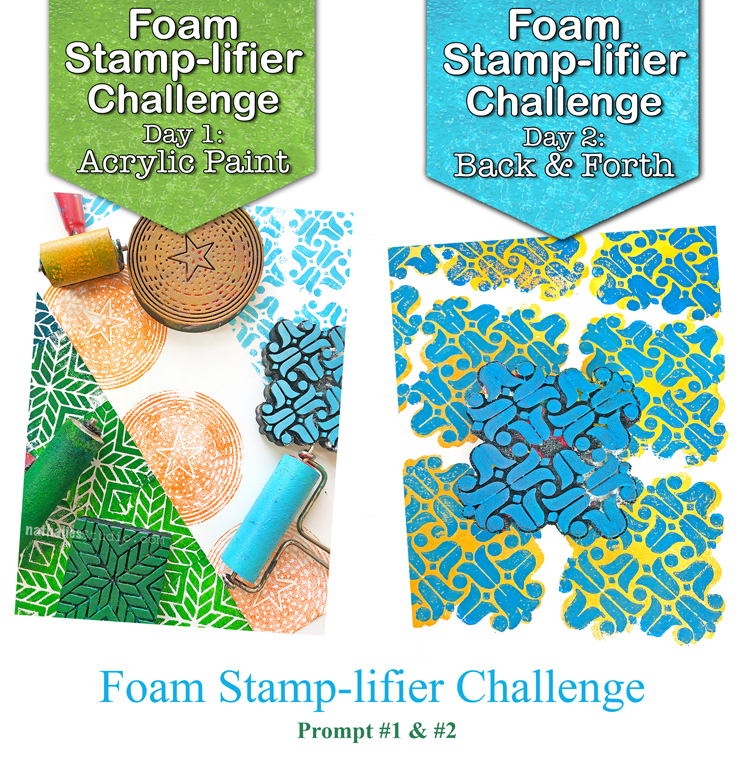
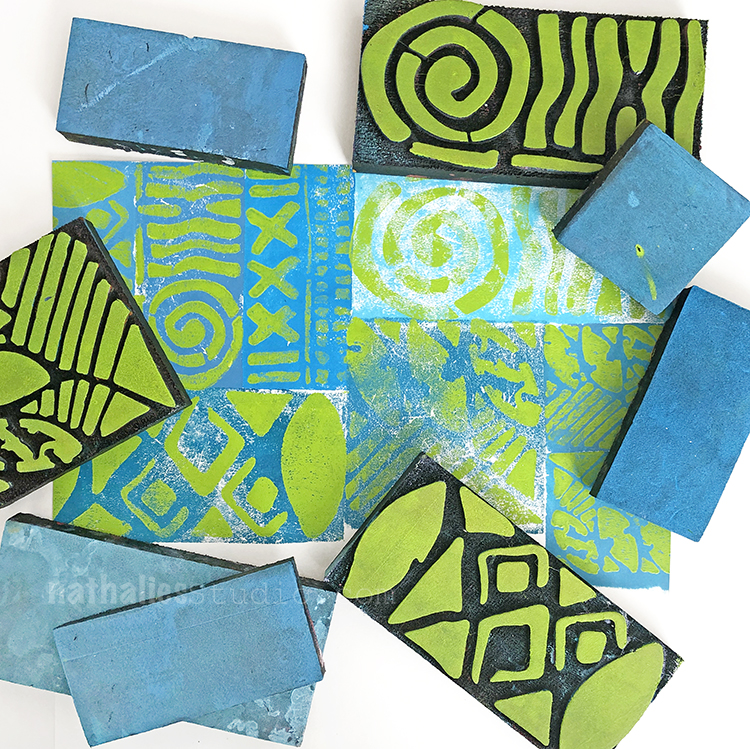
Day 1 – Acrylic Paint
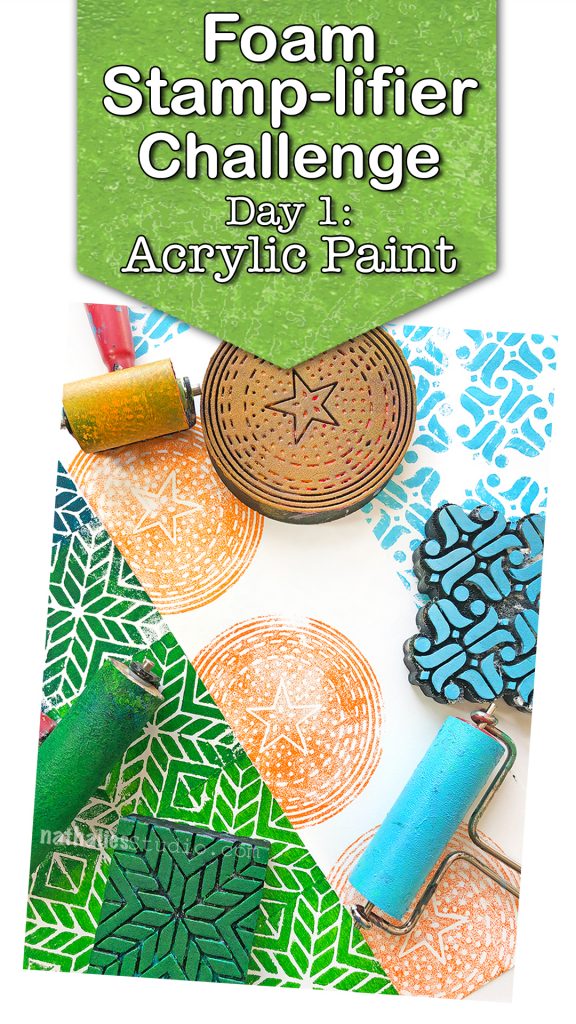
Yeahhh easy one- but hey- the reason why I am so in Love with foam stamps. I do love acrylic paint and I do love stamps. I usually just roll out some acrylic paint on a palette with a rubber brayer.
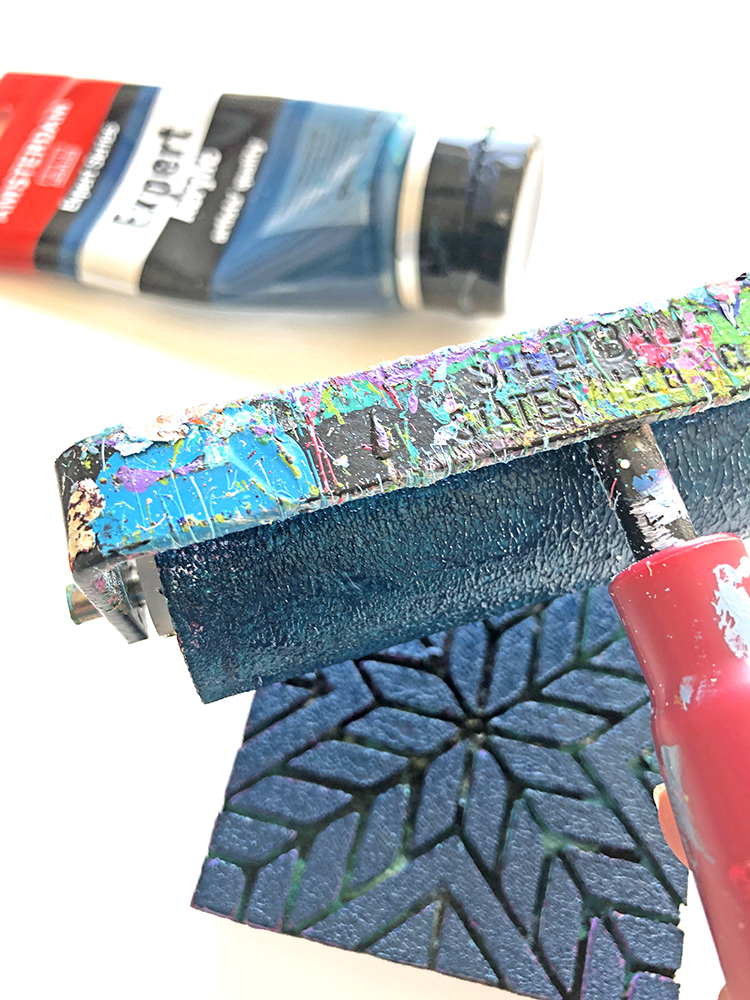
Making sure I cover the whole role of the brayer with my paint. I then transfer the paint on my brayer onto my foam stamp making sure that I cover the whole design evenly.

And then I start stamping.
I love the texture that the foam stamps due to their softness create with the paint and that not every single image is the exact same.
Now do I clean my foam stamps? Nope …I gave up. But do I recommend for you to clean them? Yep :)Here is a little video where I talk about it. But in short: Just rinse them under some water – in between steps “park them on a piece of wet cloth a or a moist baby wipe and if you want to a be a bit more thorough, use a super soft veggie brush. Why? you ask! Fair question, well you know they are foam stamps and they can be amplified in so many ways do to their softness and structure but if you just keep adding acrylic paint on top over and over again and gunk them up with basicially sheets of plastic, the get harder and harder and loose they properties of a foam stamp. It also gets harder to stamp good images as they “smoosh” easier over the paper if they are covered with acrylic paint. But …hey up to you – you are the Boss Applesauce!
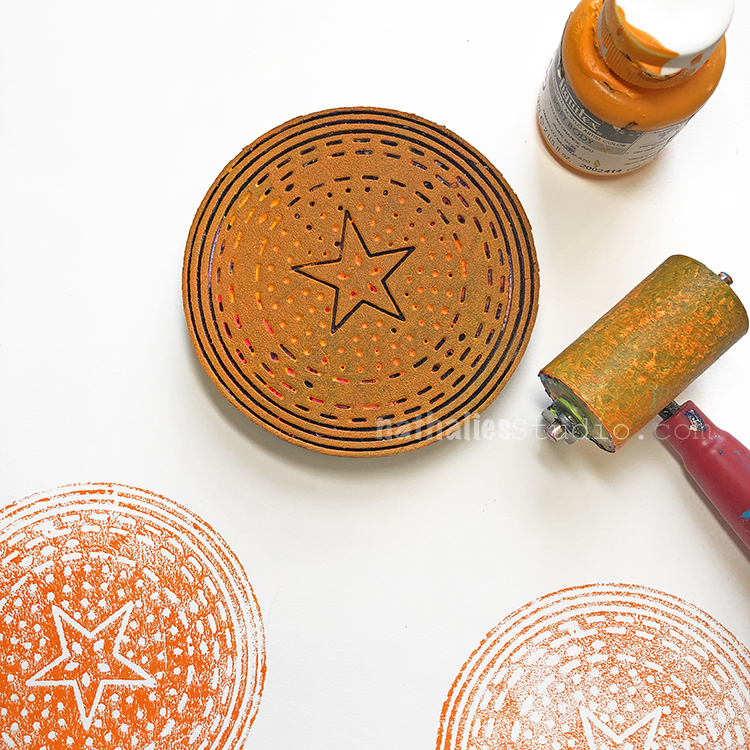
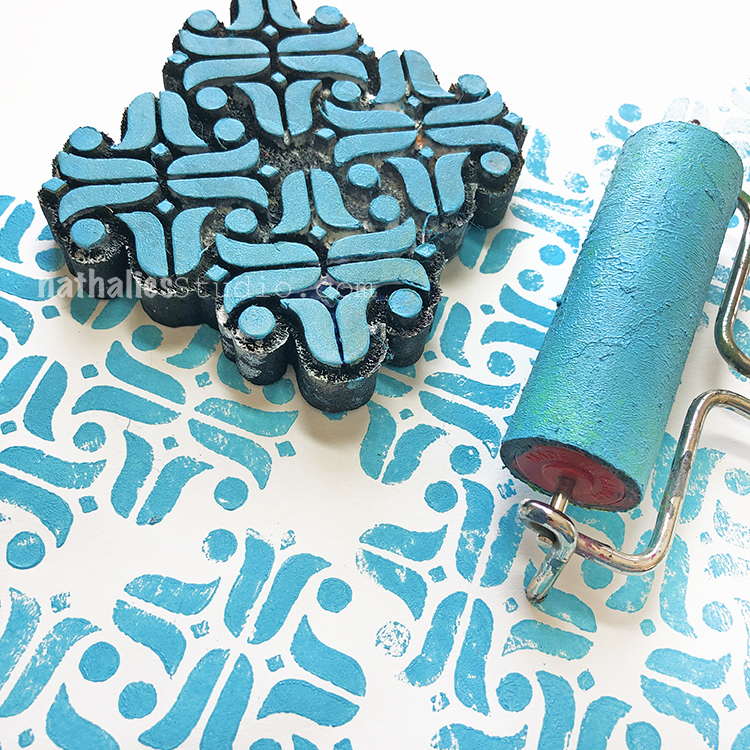
Day 2 – Back & Forth
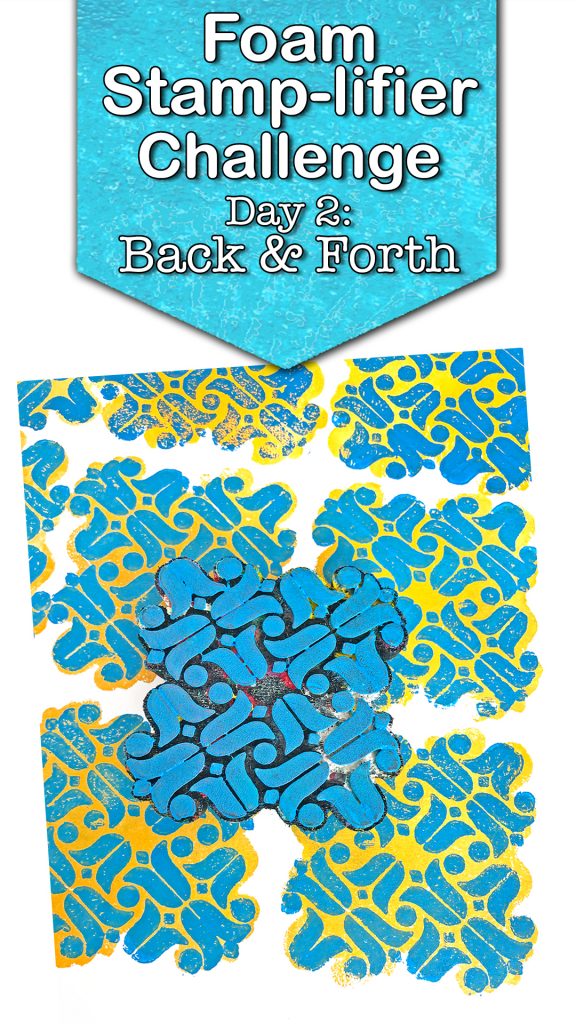
I love to amplify my Foam Stamps by also using the backs of the stamps.
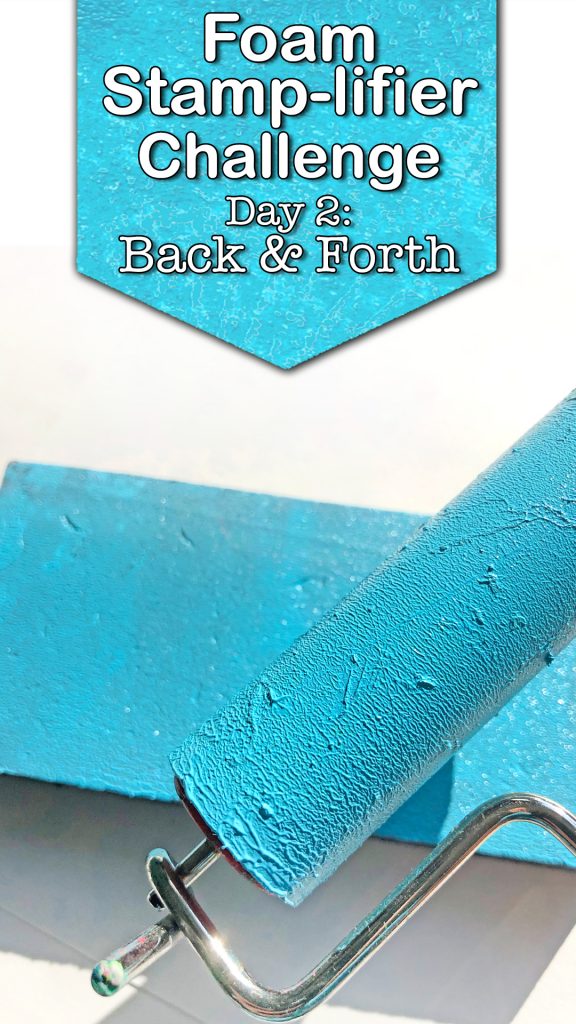
I apply the acrylic paint to the solid back side of the stamp – often choosing a nice corresponding color –
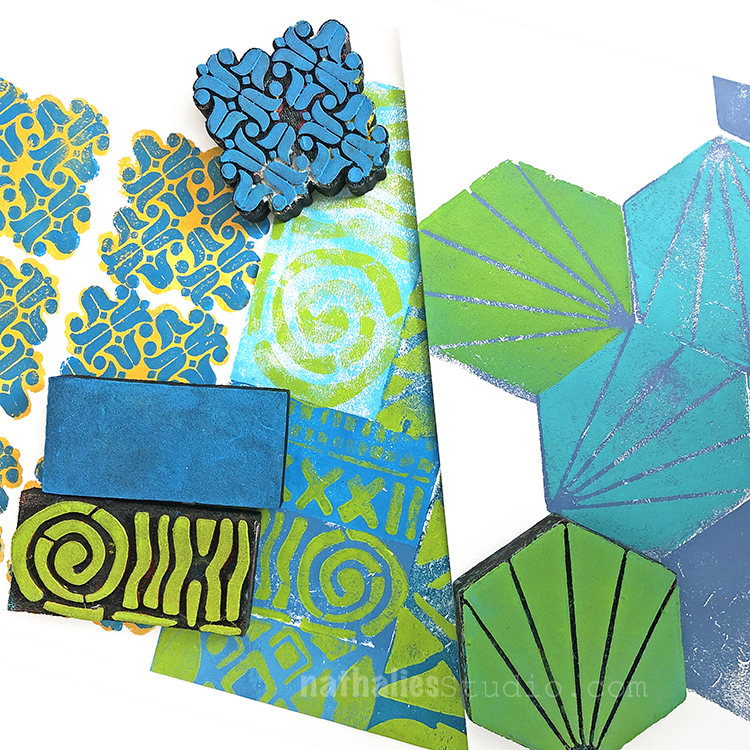
stamp and then flip the stamp to the pattern side, apply the paint there and stamp over the previously solid stamped shape.
This works with all the rectangles, squares,
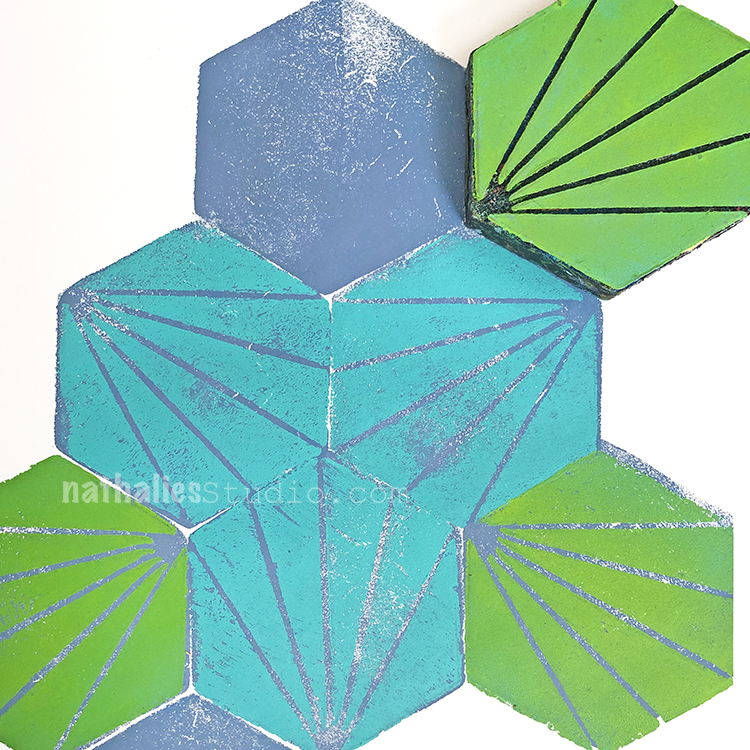
hexagons but even with other shapes like the oddly shaped Amsterdam Stamp as long as the shape is symmetric.
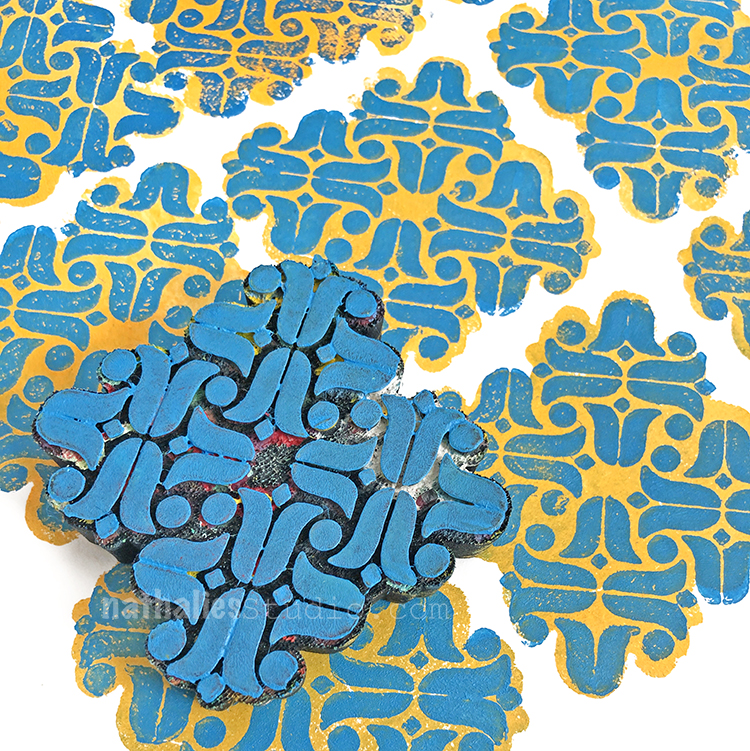
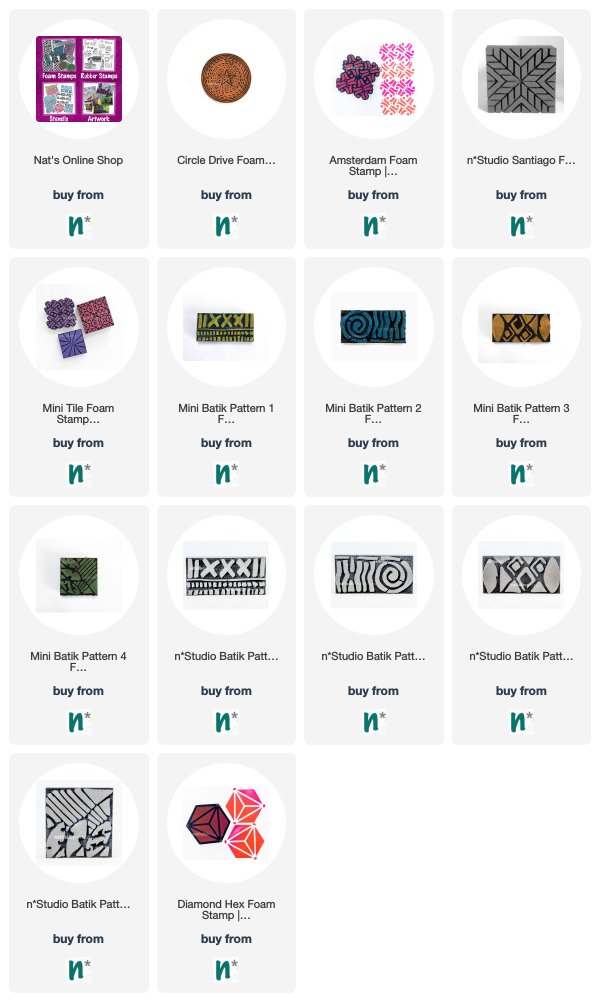
Here are the Foam Stamps that I used in the prompts:
Have you missed the prompt sheet? Here you go – I hope you will play along:

Hi Rowan, it is called “Wild Dog” – nat
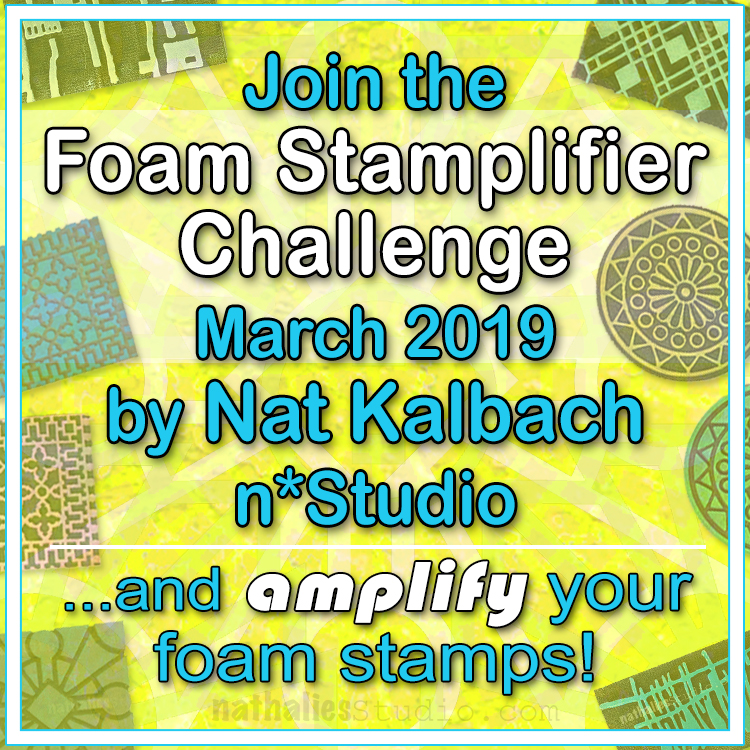
Come and join me in the Foam Stamplifier Challenge throughout the Month of March to amplify your foam stamps and make the most of them.
I love the versatility of foam stamps – one of the reasons why having my own line of foam stamps was always a big dream of mine and I am so stoked that for several years this dream became reality with ArtFoamies. In 2012 I offered an Online Class called “Foam Stamplifier” and I thought I should pick up the theme and name of my workshop and push it even further in this Challenge.
I hope you will play along! I will show each day on my instagram account (and every couple days on this blog) how you can amplify your foam stamps prompted by the key words in the prompt sheet. You can either try the same things or just try and do your own approaches following along with the prompts. I so hope you will share what you do and if you post on instagram, I hope you will use the hashtags #natkalbachfoamstamplifier and/or #nstudioartfoamies .
I hope you are in with me in March to amplify your Foam Stamps!
Wow – I cannot believe that February is almost over and it was a pretty long awaited month for me. There weren’t a ton of strolls through the hood as it was such a busy and cold month- but I have a couple photos. Strolls through my hood get me out of my studio, they help me unstuck and often I get inspired by what I see and to get new ideas to create something. It is part of my philosophy about Artful Adventures in Mixed Media – which is the subject of my book. Here are some photos that I gathered in the last couple weeks.
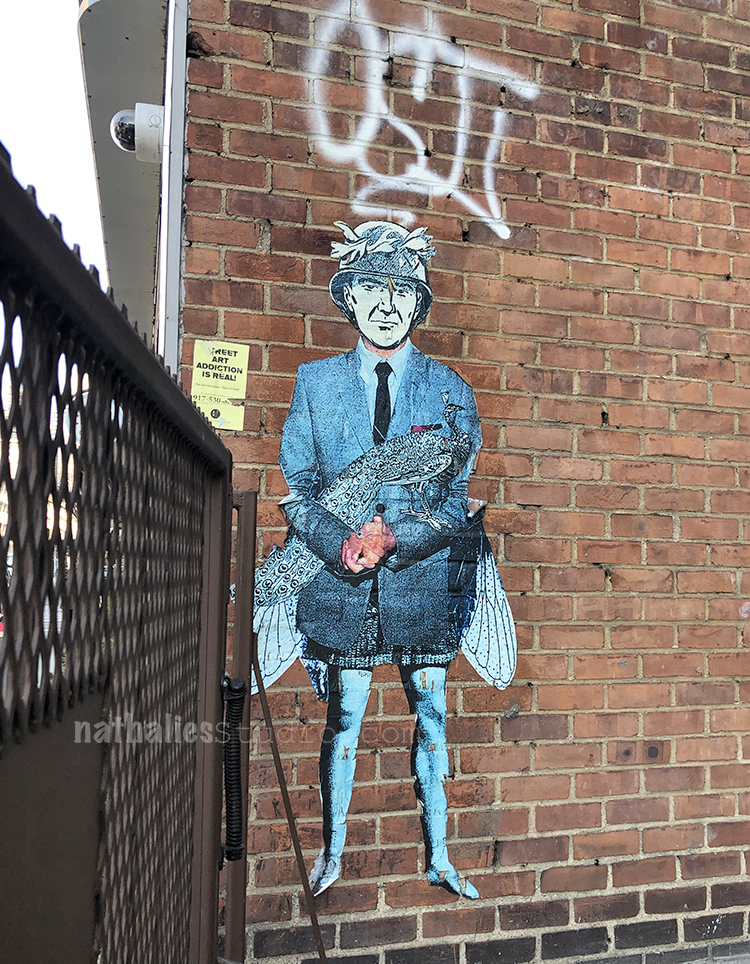
The photo above is actually taken in NYC – where we had a ton of stuff to do during the last couple weekends. Such a fun Collage paste up. I also love the sign next to it that says “Street Art Addiction is real”
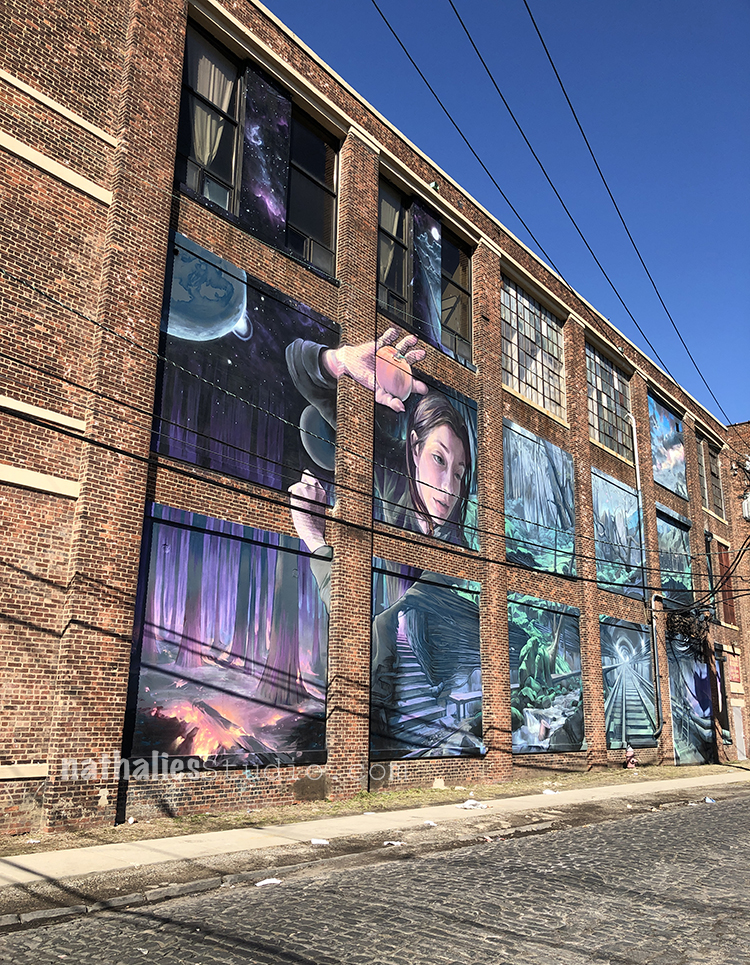
speaking of Street Art- this one always get’s me because of the sheer size of it – this is in the Bergen-Lafayette neighborhood in Jersey City by Distort but even bigger is this one
by Distort right at the Holland Tunnel- which I will never be able to get the whole image of – it is ginormous but so detailed.
check out this video to get a feel for how huge and magnificent it is.
Distort’s Mecca Project (GVM037) from Green Villain on Vimeo.
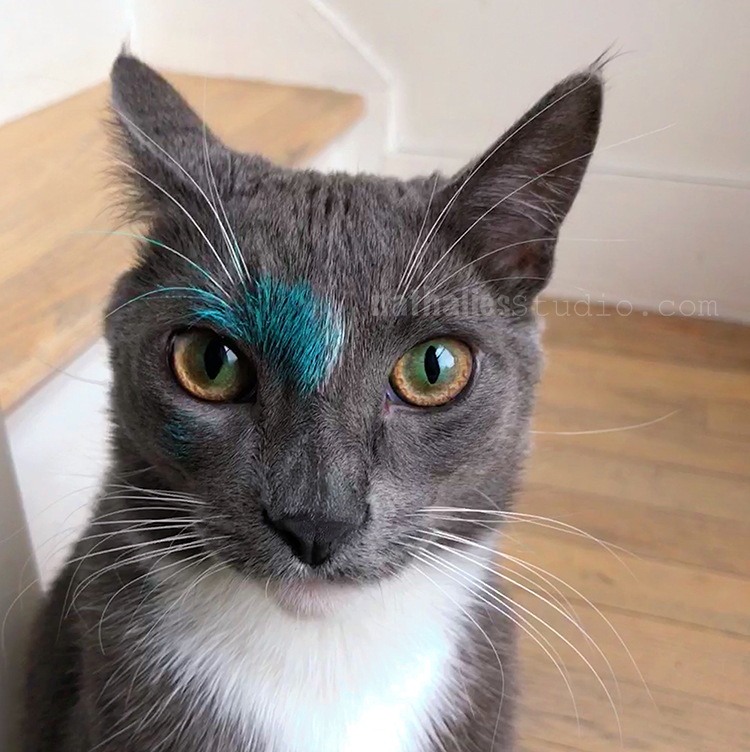
Bobby Pretzel definitely approves – as you can see he is now in his teenage fur dying phase …I have no clue how the paint on my palette ended up on his face- but “knock yourself out Pretzel” – LOL
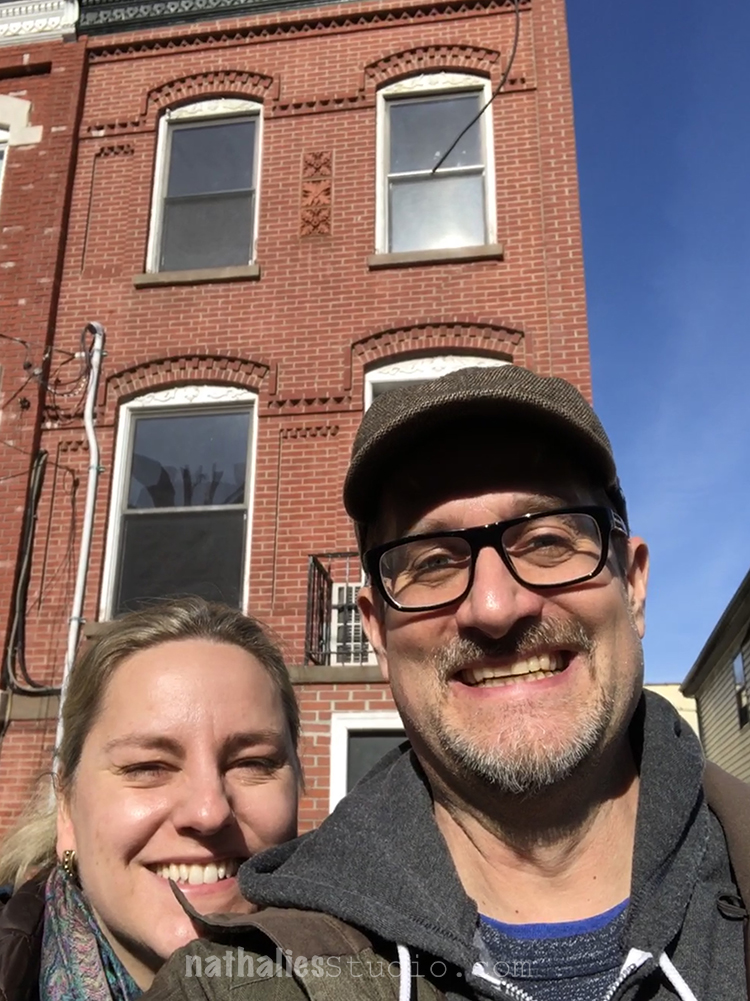
In other exciting news …We closed on a house. We are now the owners of a beautiful 1884 brick town house here in Jersey City. There is some major renovation to do in the second floor but the ground and top floor are pretty much done and I will have a nice big studio space on the ground floor. I cannot wait- but it will take at least half a year before it is done. (Impatient Nat)
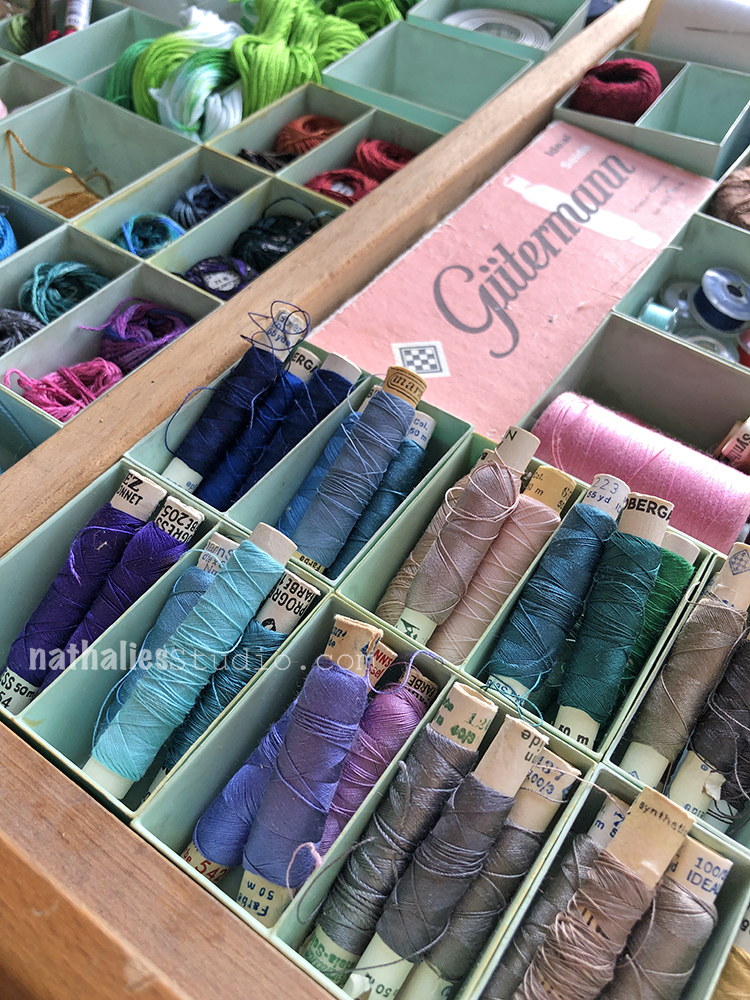
That gives a lot of time to sort the studio meanwhile and also declutter all kinds of areas in our apartment before the move. I just reorganized my sewing stuff into one of my letterpress folders and I kind of geeked out at all the colors- LOL. What a softie I am ;)
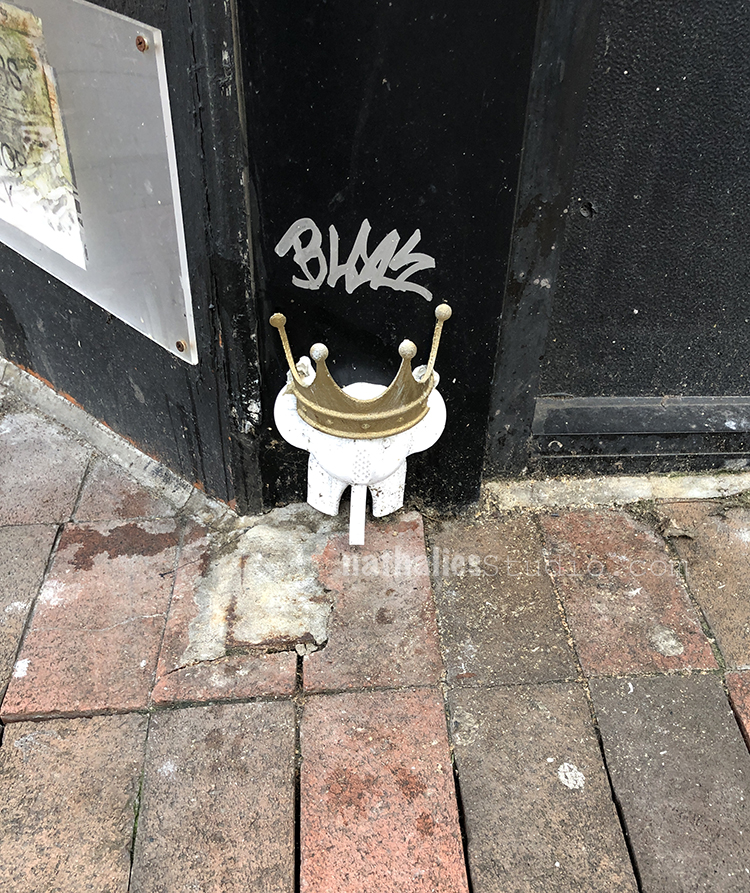
Love spying this little -sculpture piece on the corner of a Bar – fun!
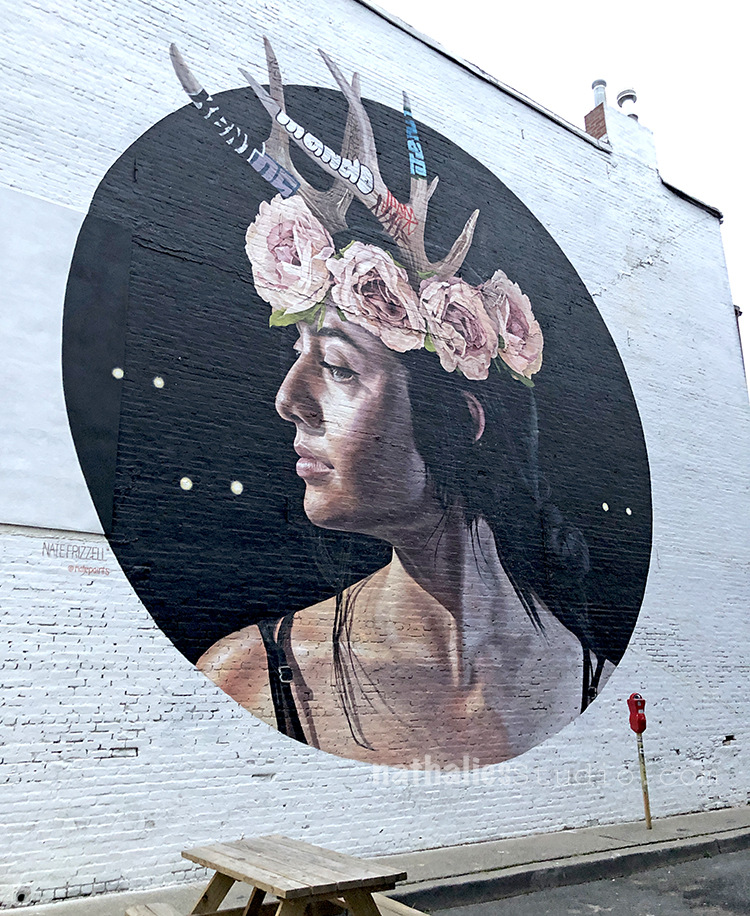
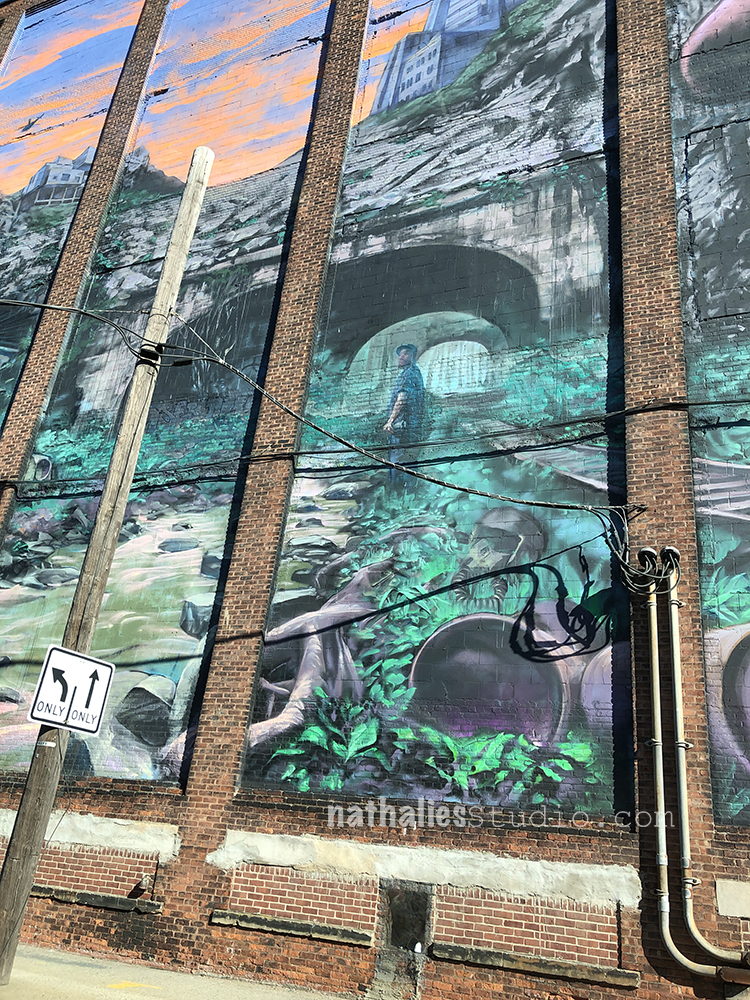
And I think I never showed this Mural downtown finished -pretty cool and a constant spot for people to take photos in front of. Yes..I guess I am addicted to street art :)
I am so ready for spring and more strolls through the hood- especially through the new hood where our house is located. It is in a neighborhood with some amazing Victorian Houses and it is interesting and a bit less “polished” than Downtown. I know, hahahah- some of you might not see my downtown pictures as polished- but trust me …it is ;) Hope you will join me soon for another stroll and wish you a wonderful day.
Congrats on your new home Nat!
Sounds like plenty of room for a studio and a place to hold classes (?).
Bobby Pretzel is so darn cute, might he inspire an art foamie or stamp one of these days?
Thanks for the tour of your hood. I always enjoy them.
Thank you so much Sue! Yes- I do hope that I can hold small classes in my studio :) Bobby Pretzel as a stamp …ohhhh -! Thank you for strolling through the hood with me !
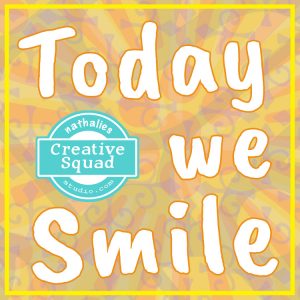
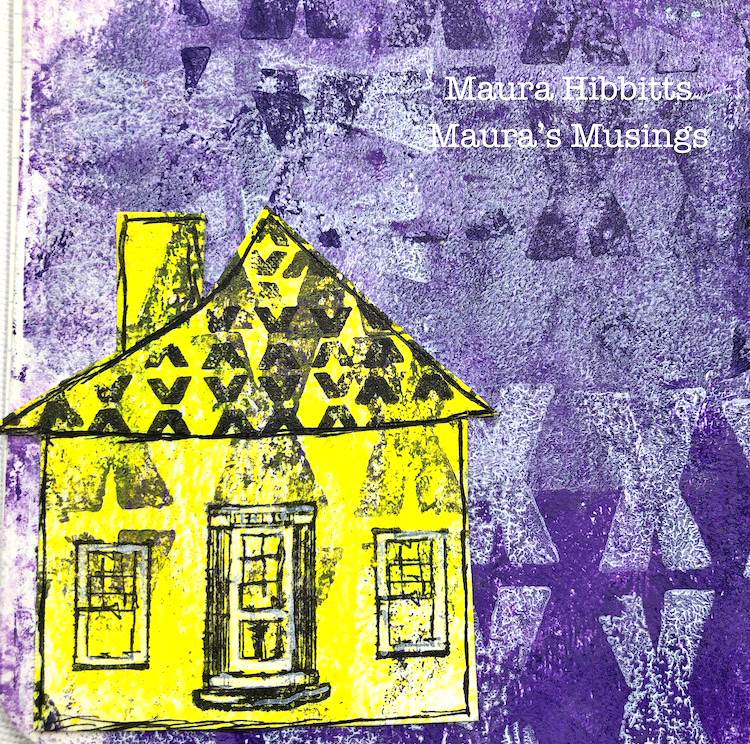
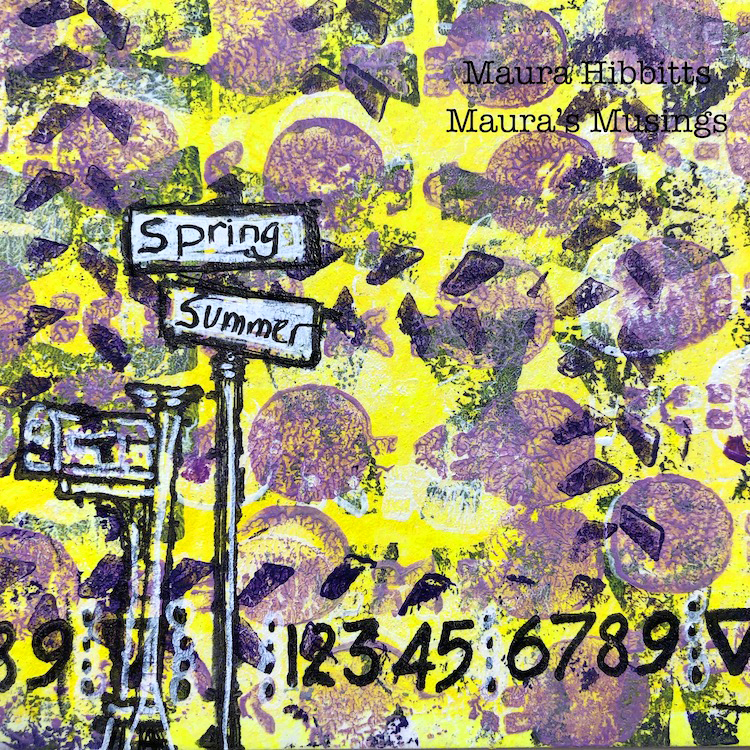
Hello from my Creative Squad! Today we have some cute little notebooks from Maura Hibbitts that will definitely inspire you! Maura is using my Marks stamp set, along with my Street Sign, Snail Mail, Numerals, and my Windows and Door stamp set and this month’s theme: Today We Smile – They say smiling can lift our mood and maybe improve our overall health. Let’s try it! Think about what makes you smile and share it with all of us. After all, smiles are also known to be contagious :)
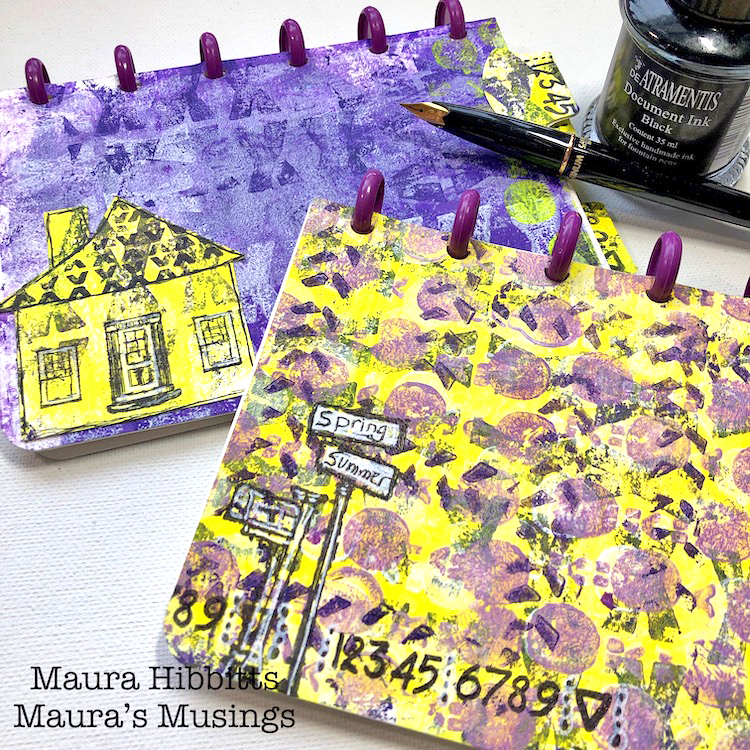
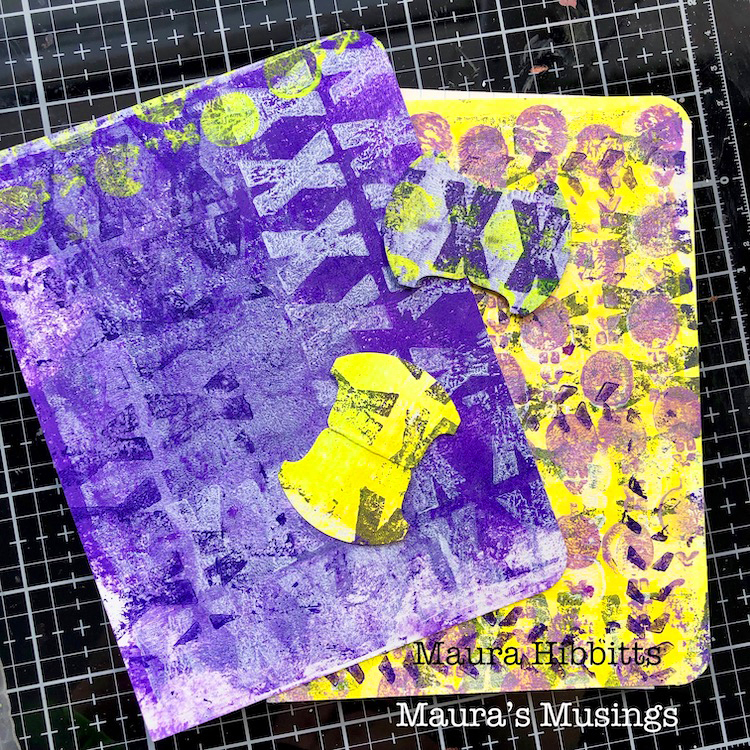
I’ve been inspired by all the wonderfully creative projects on Creative Jumpstart 2019, and I think that is why I’ve tucked in some home elements on my little notebooks. I immediately thought of working with bright yellow when I saw this month’s theme, perhaps due to our dark winter this year. I chose purple as my complementary color (the color opposite on the color wheel). Somehow, along the way, the cards I was going to make, morphed into these little notebooks.
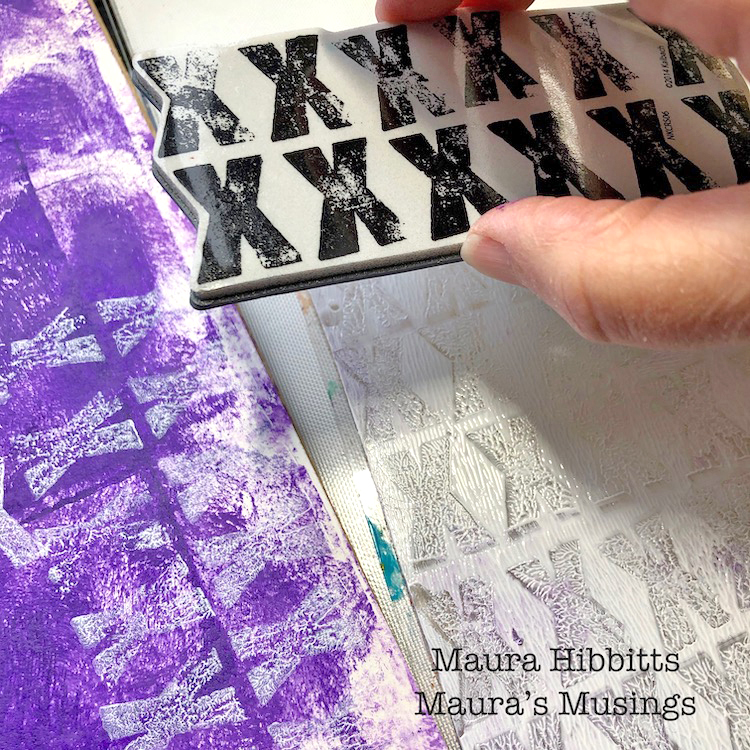
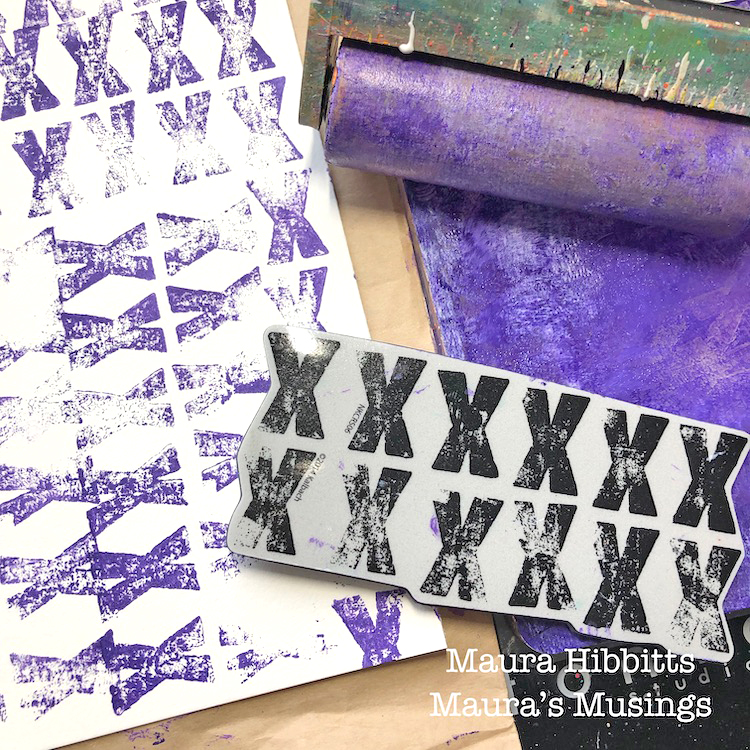
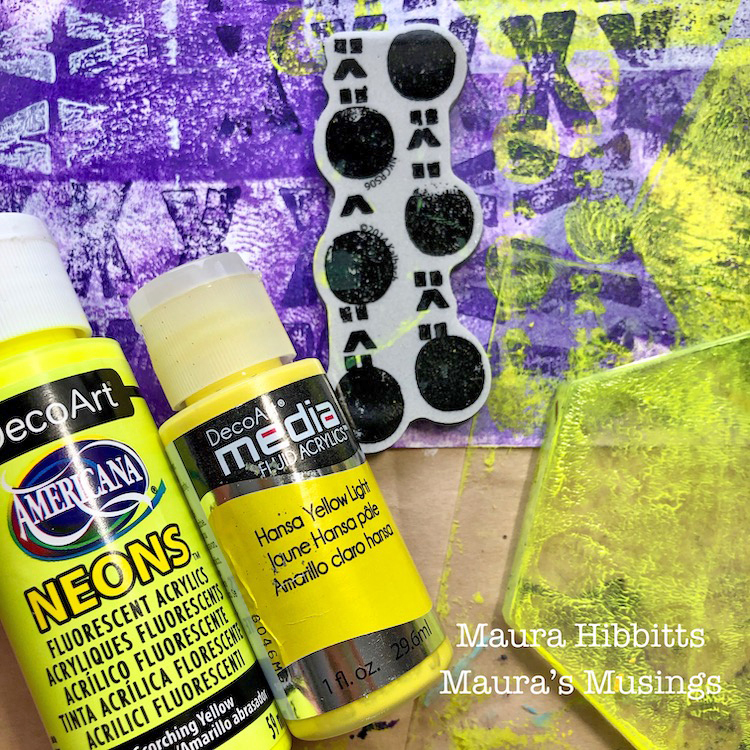
I pulled out my small gelli plate (6×6) and added Dioxazine Purple, then used the brayer to get a thin layer of paint. I randomly pressed one sheet of paper onto the plate to create a dark purple background. On my other watercolor sheet, I stamped X’s from Nat’s Marks stamp set with the dark purple. I went back in on my dark background with Translucent White and the X marks, and also layered in a bit of Lavender.
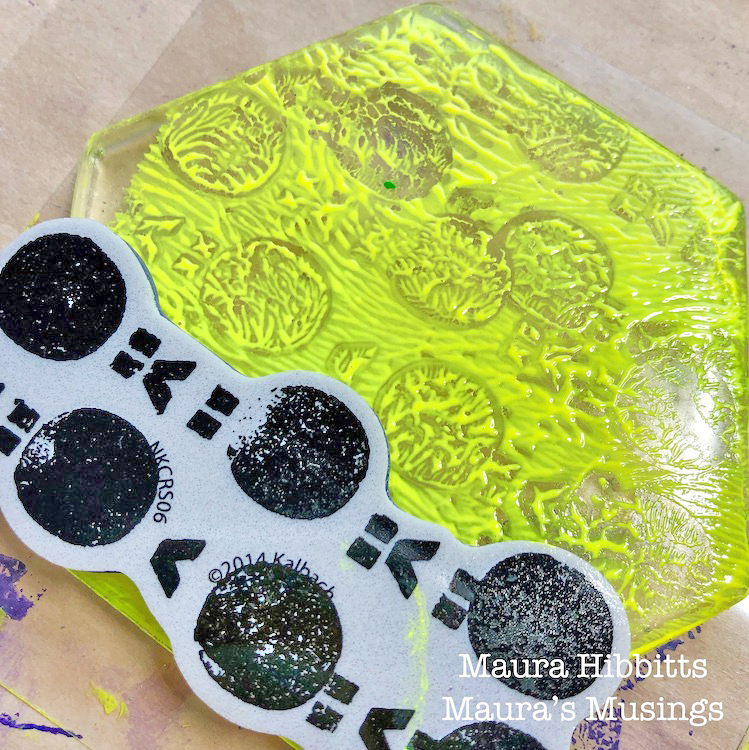
To create my yellow background, I mixed Neon and Light Yellow on the gel plate. Then, I stamped the hexagon gel plate into this and transferred it repeatedly onto my X paper. I also used the circle mark stamp from the Marks stamp set on the hexagon and stamped this on my paper. I stamped yellow circles onto my dark purple paper also.
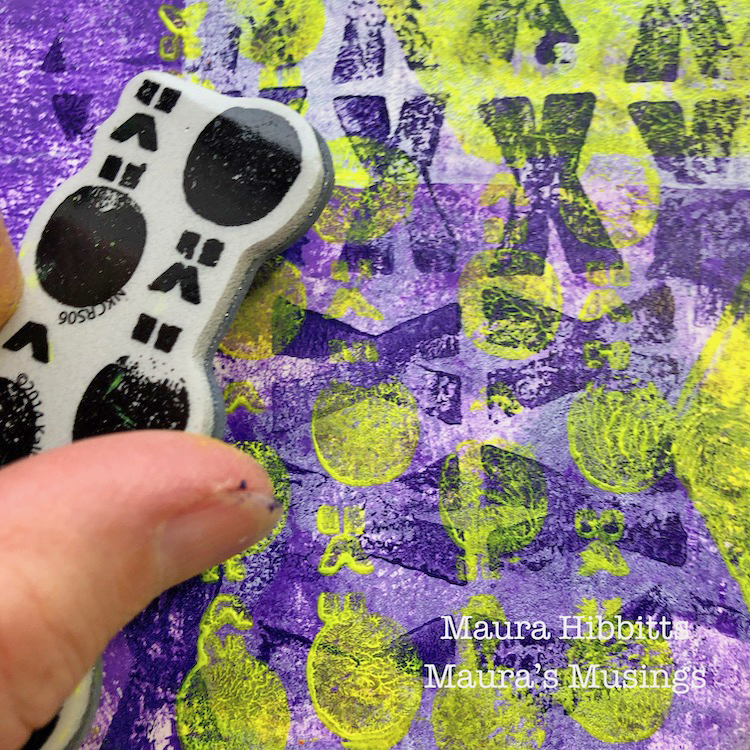
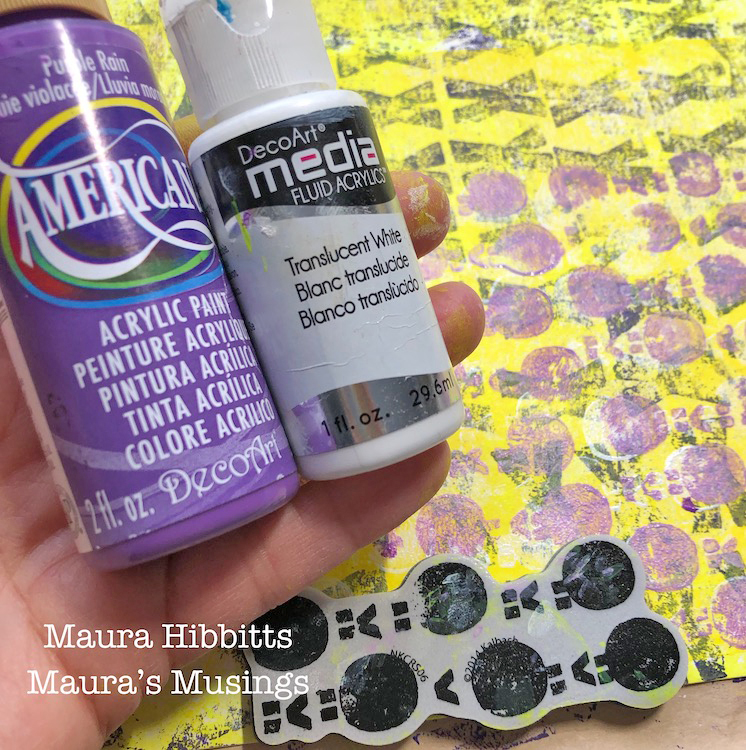
I decided to add a bit more purple to my Yellow paper, but wanted it lighter, so I mixed Translucent White with Purple Rain. Once again, the gel plate works as a great paint surface to stamp into, and I used the circle marks again. I then decided to add a bit more dark purple with the tread like mark and stamped in a random fashion.
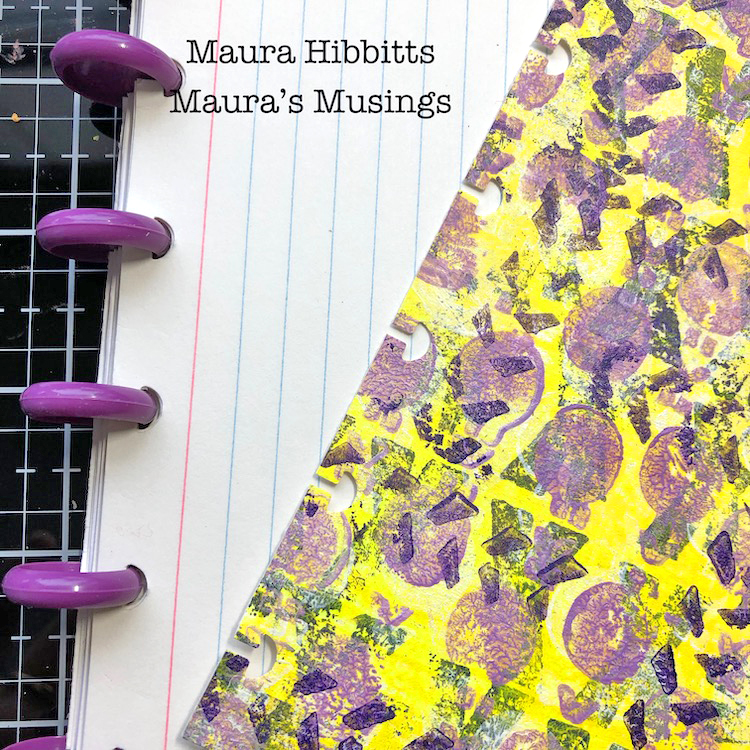
Now that my papers are made, I cut out four pieces 4 !/2 x 6” and rounded the corners of the bottom with a 1/2” corner rounder. I also used a tab punch to punch several tabs.
Time for the Rollabind machine. Can you believe, I almost got rid of this? I hadn’t used it in forever, and then I started to notice a lot of planners that use this system. Now, I am really glad I still have it! I used 4×6 index cards and A2 envelopes. Trim off the envelope flap before using the Rollabind in order to make this into a pocket. I adhered tabs to my pockets.
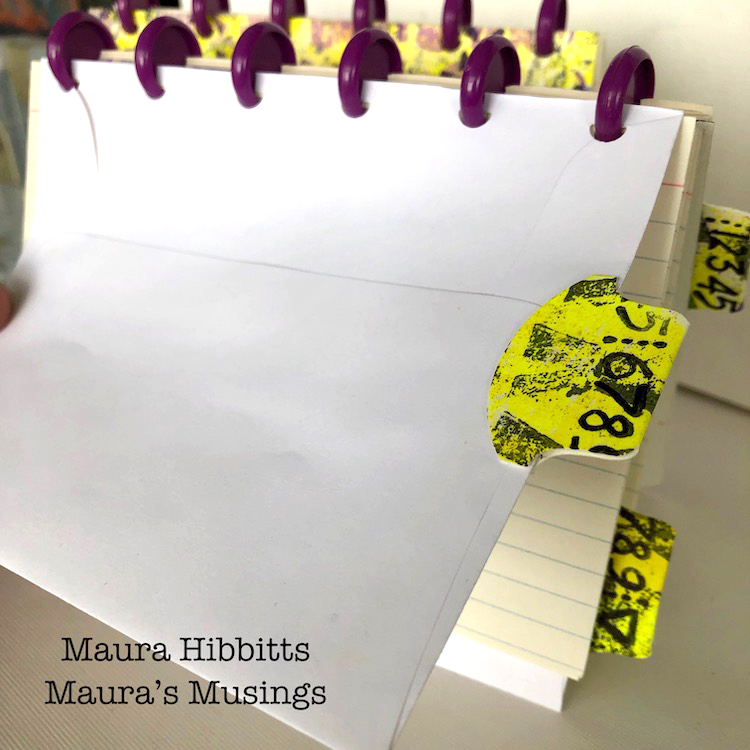
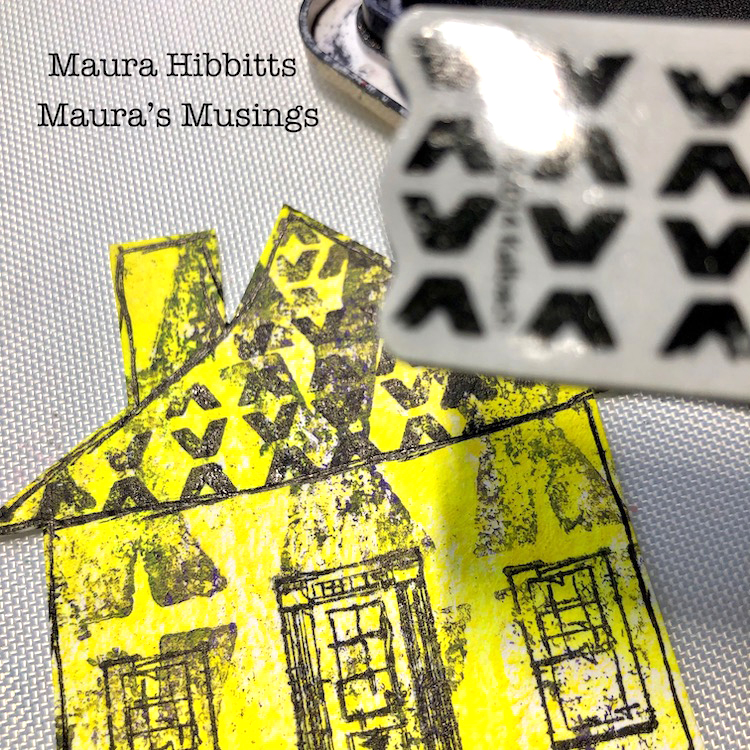
I stamped the Door and Window onto my purple notebook, but it really didn’t show up well. Then I decided to stamp again on the yellow, and hand cut a wonky little house. I didn’t sketch, I just went in with the scissors. I added some detail with black and white pens, and decided the roof needed more detail. I masked off the chimney, and stamped with the V marks and black ink. Then I adhered this to the front of the notebook, along with a tab. I also stamped images on my yellow notebook and added in some white details. Then, thinking of our Smile theme, I wrote in Spring and Summer on the road signs, because that would make me smile!
Here are some of the details of the covers. I thought it was pretty serendipitous to find the purple disks to use, as I had no idea what I had.

I enjoyed layering with stamps on this project. Stamping in different directions adds another element of fun. I’m smiling because I have two cute little notebooks I’ve made for gifts, and I think they will smile when they receive them. It’s a smiling kind of day! Maura
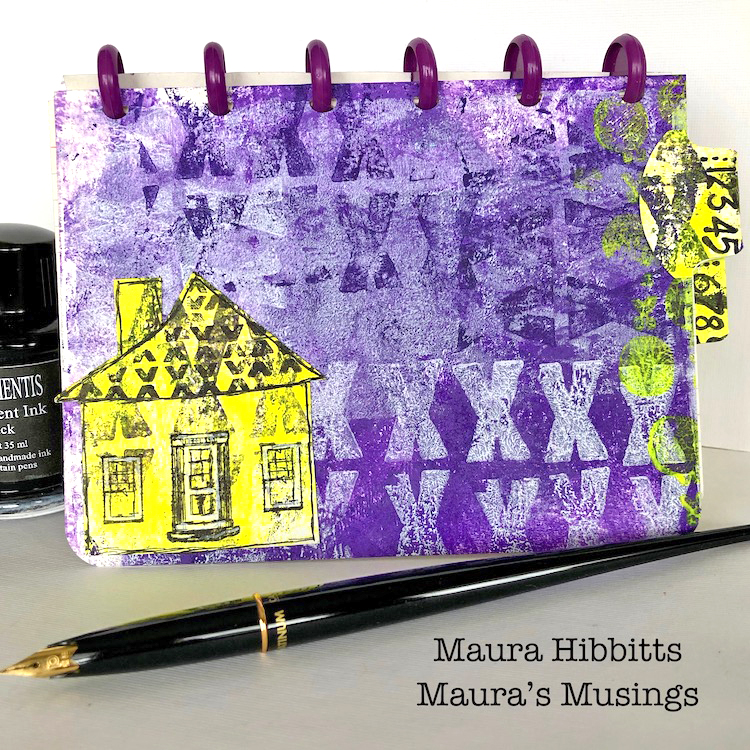

Thank you Maura! I love that charming little house :) You can find my Rubber Stamps in my Online Shop . In addition to a tab punch and rollabind system and disks, here are some of the other supplies that Maura used:
Feel inspired? Working on something yourself that you’d like to share? I love to see how you interpret our monthly themes. Email me how you used my stencils and stamps with the theme and email me an image – I would love to share your projects in my next “n*Spiration From Around the Globe“.

My wonderful friend Tina Walker is at it again – she invited several people to join her Stencilfied Prompts. The prompts are music related and each week she is posting a song. You can be inspired by the lyrics, the video, the album cover or anything related and the only restriction is that you have to use StencilGirl Product Stencils. Here is my take on Prompt 7:
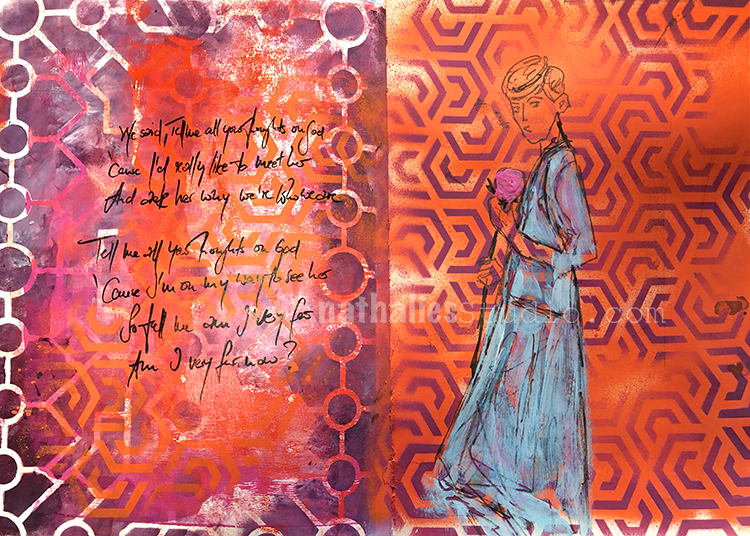
This week’s prompt was Counting Blue Cars – Dishwalla

A song I never heard before but I found the lyrics interesting yet again. I was in a very bold color mood and used my Exchange Place Stencil on the left with Acrylic paint and the Flower Maze Stencil on the right page with acrylic spray paint.
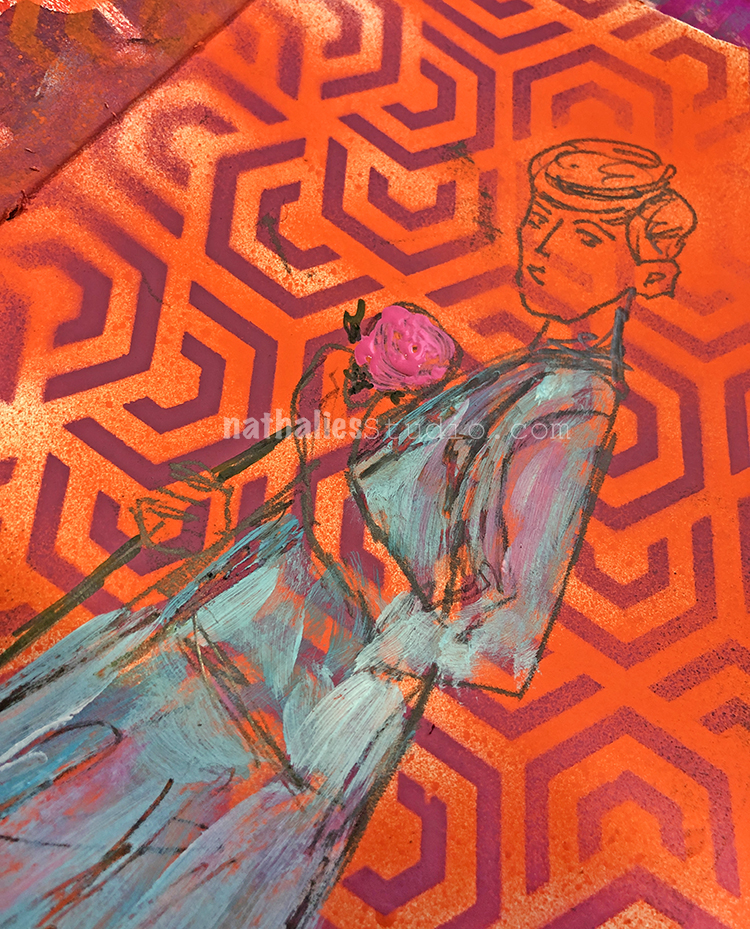
A little sketch and very limited painting on top – I actually like this- I want to explore this a bit more.
Here are the stencils I used:
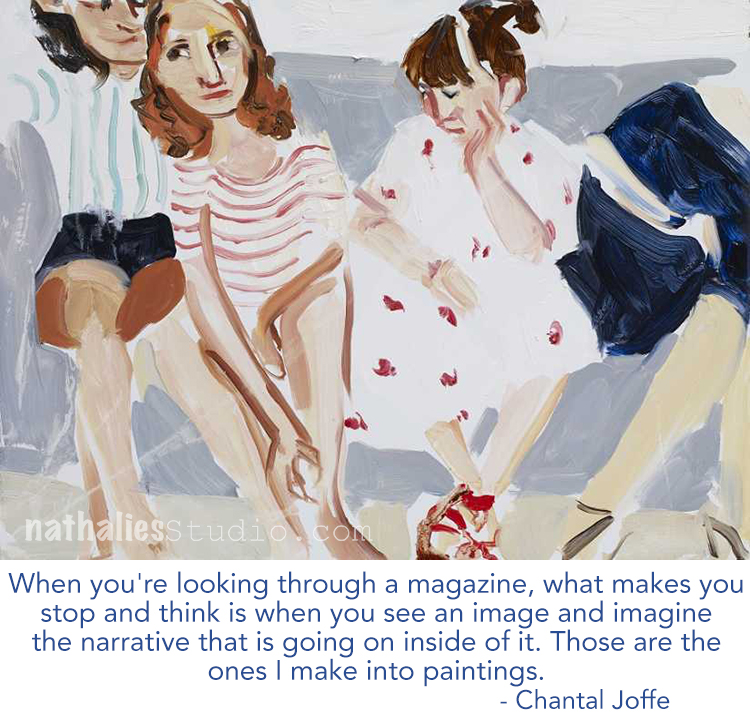
Hi, do you know the name of this painting?
Reply