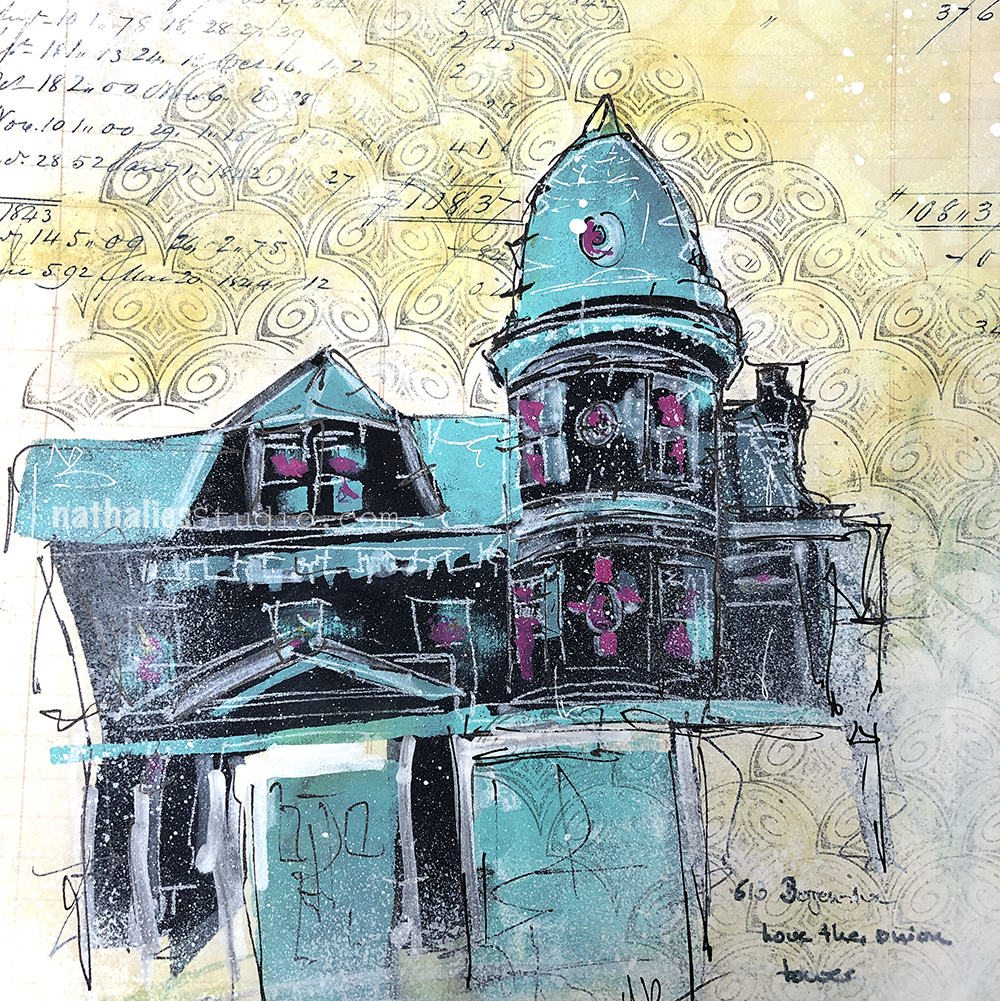
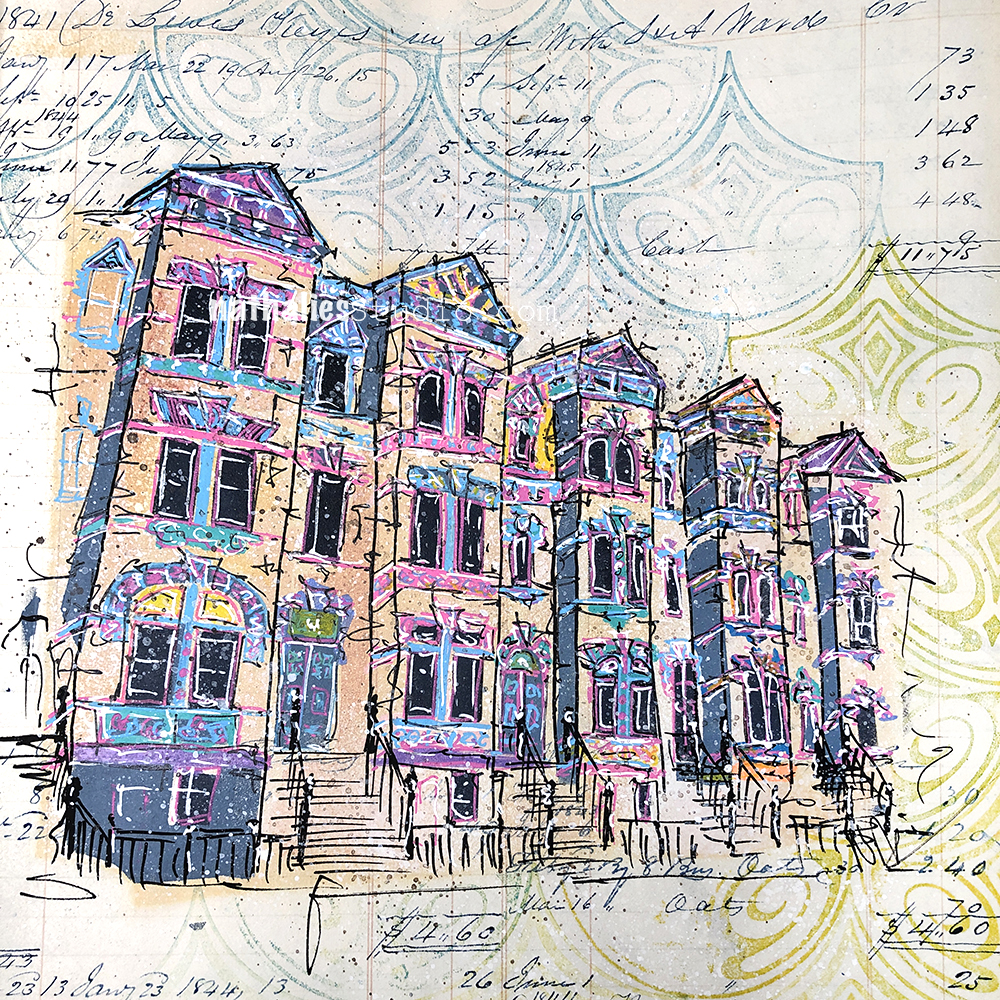
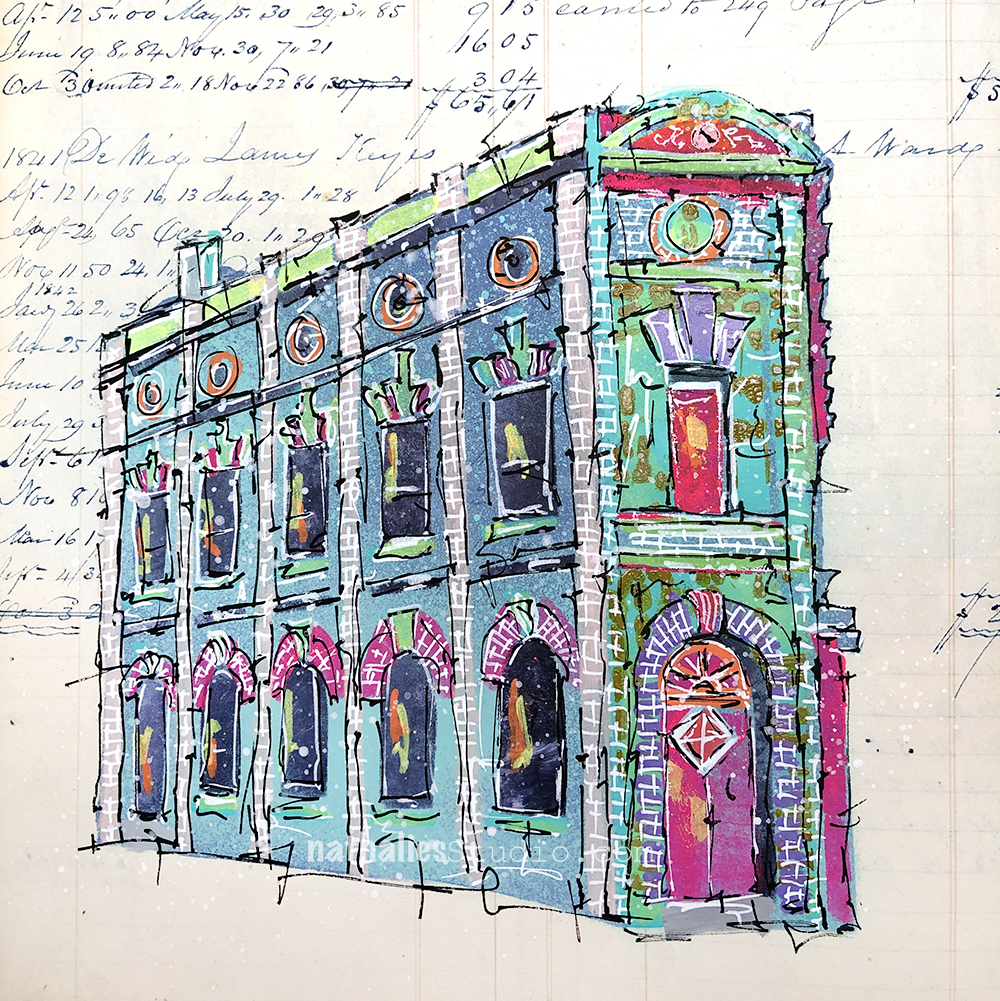
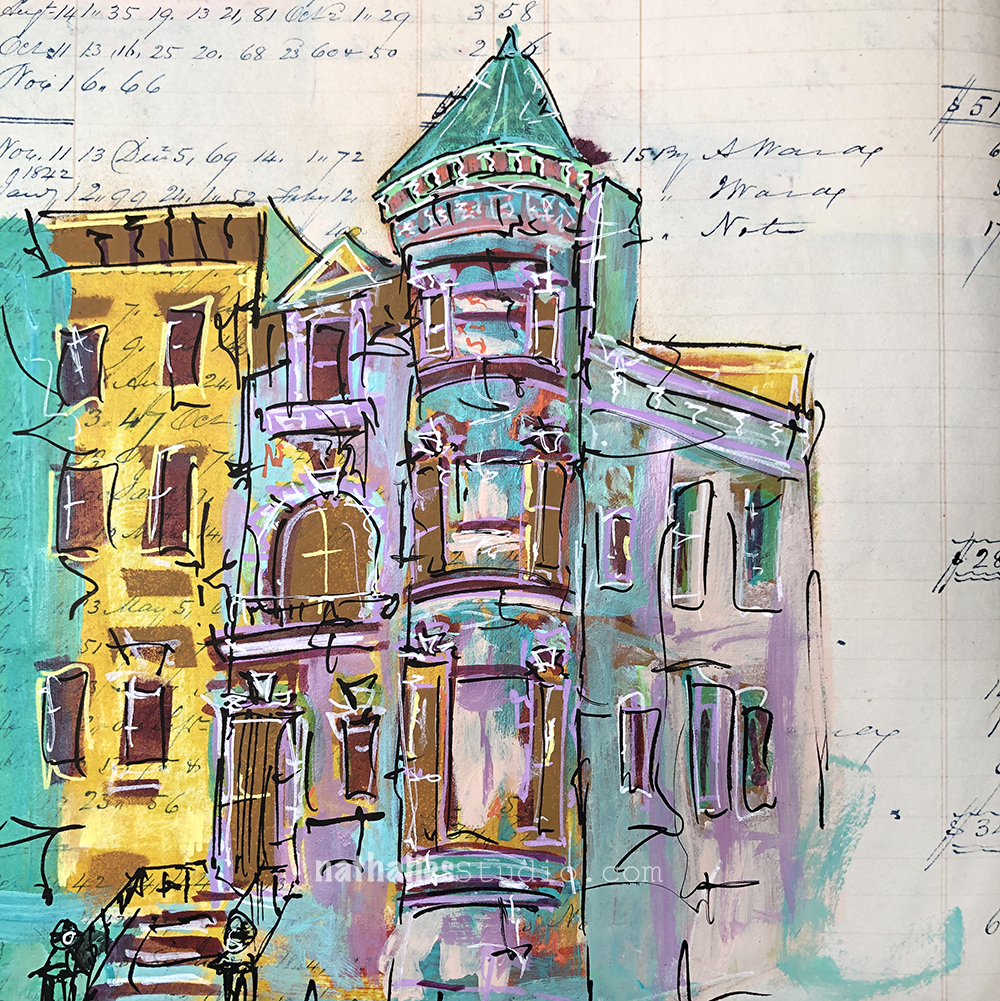
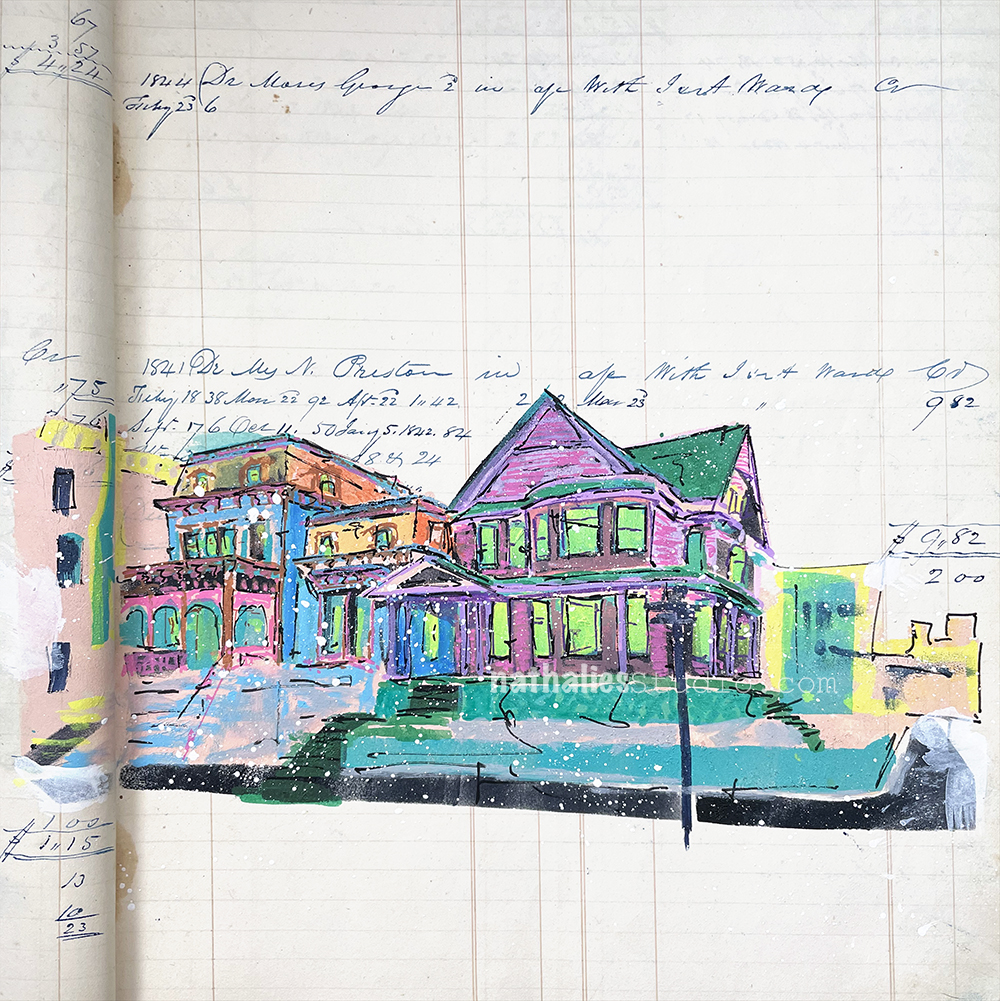
For over a year now I have been painting my Stroll Through the Hood buildings not only on canvas but also into an old ledger from 1840. It looks like the giant ledger book was used for tax collections of a ward and given that my paintings are about changes and gentrification – it makes sense to me. If I will ever be able to fill the book? I don*t know but here are some of the little paintings in the ledger so far which some of you might have seen already on instagram.
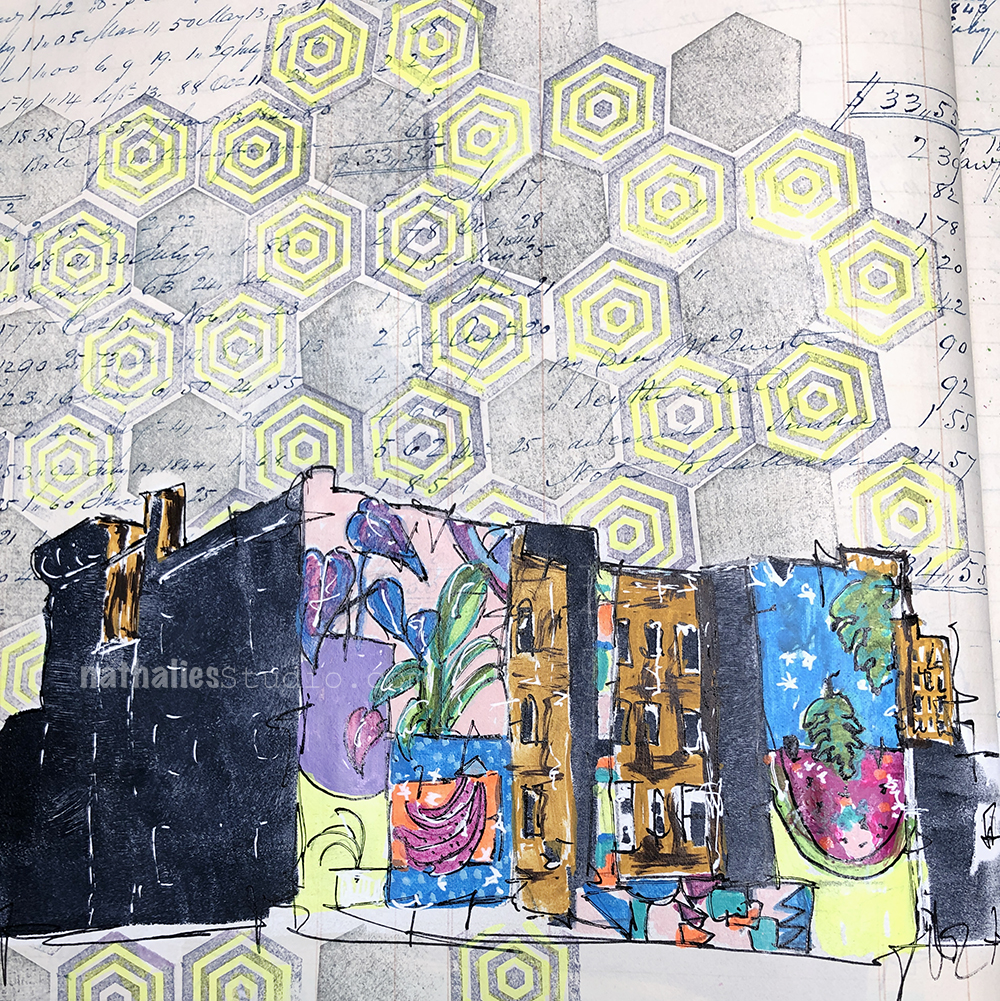
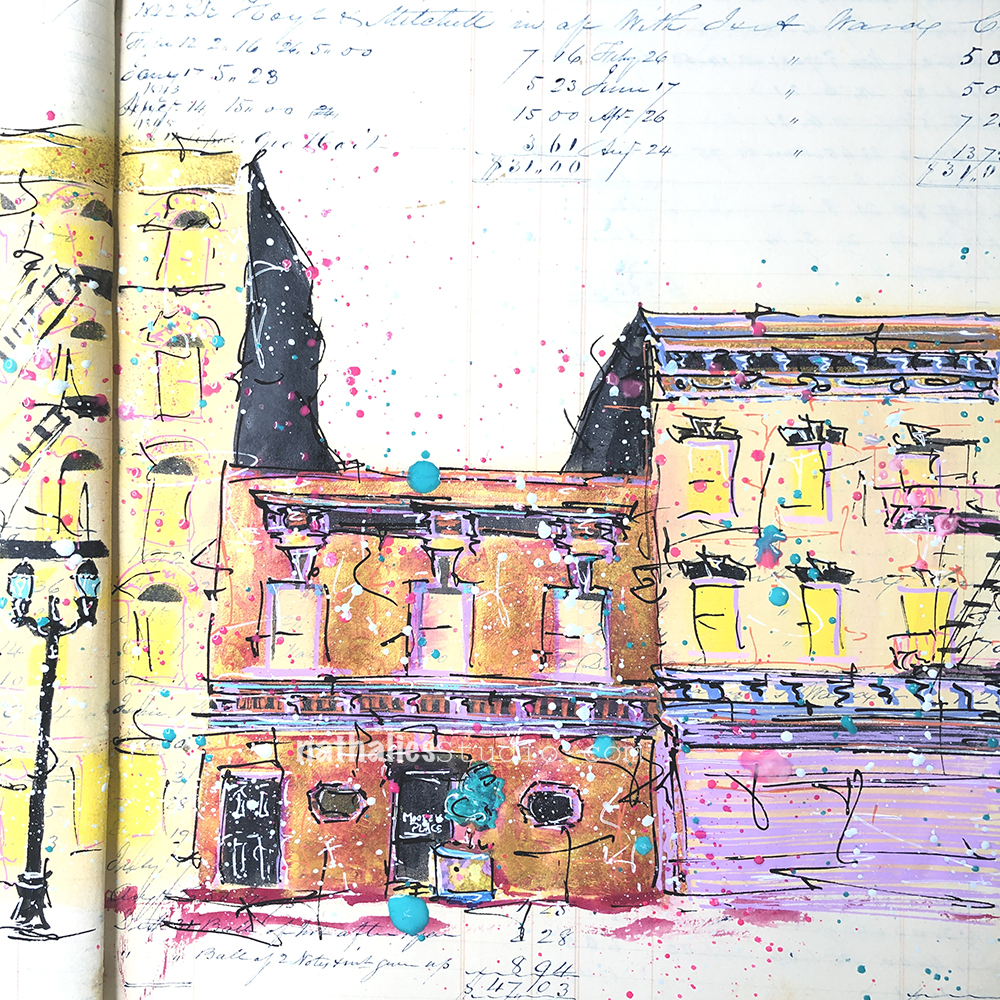
In the beginning I would add a lot of background patterns to the pages.
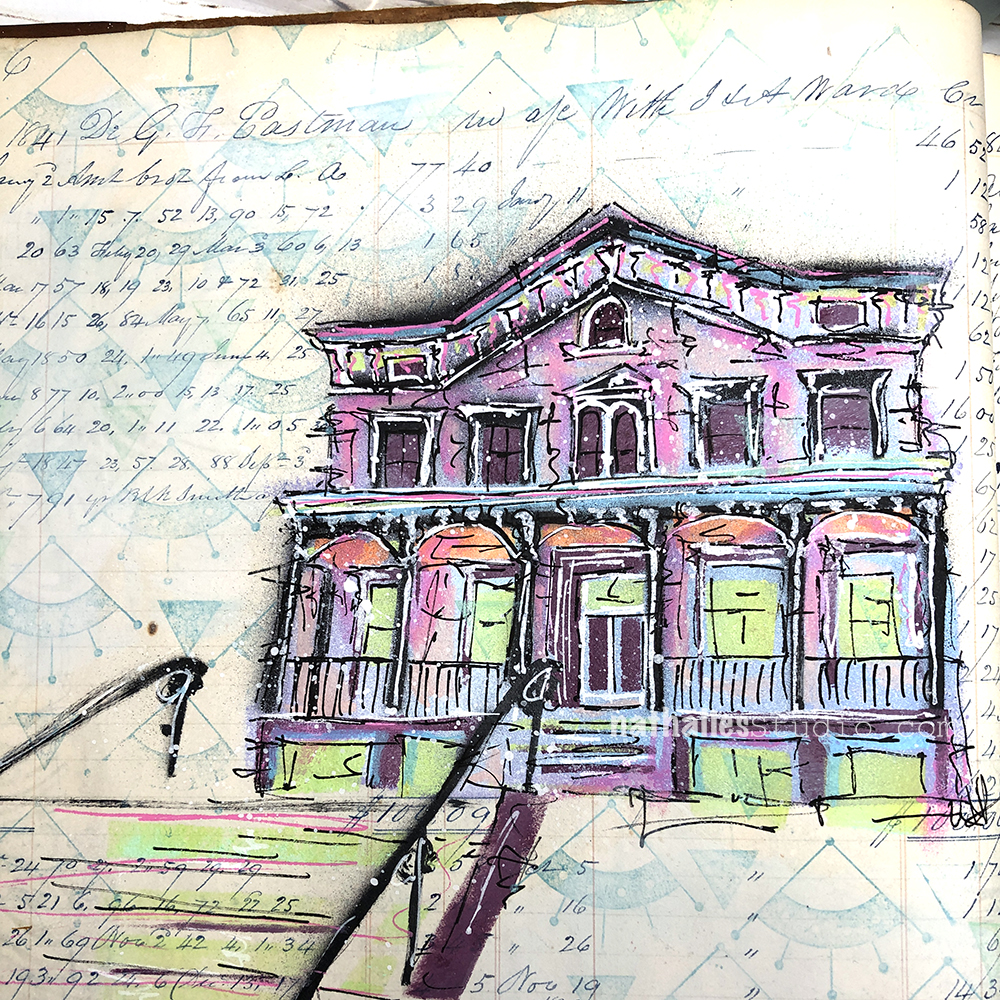
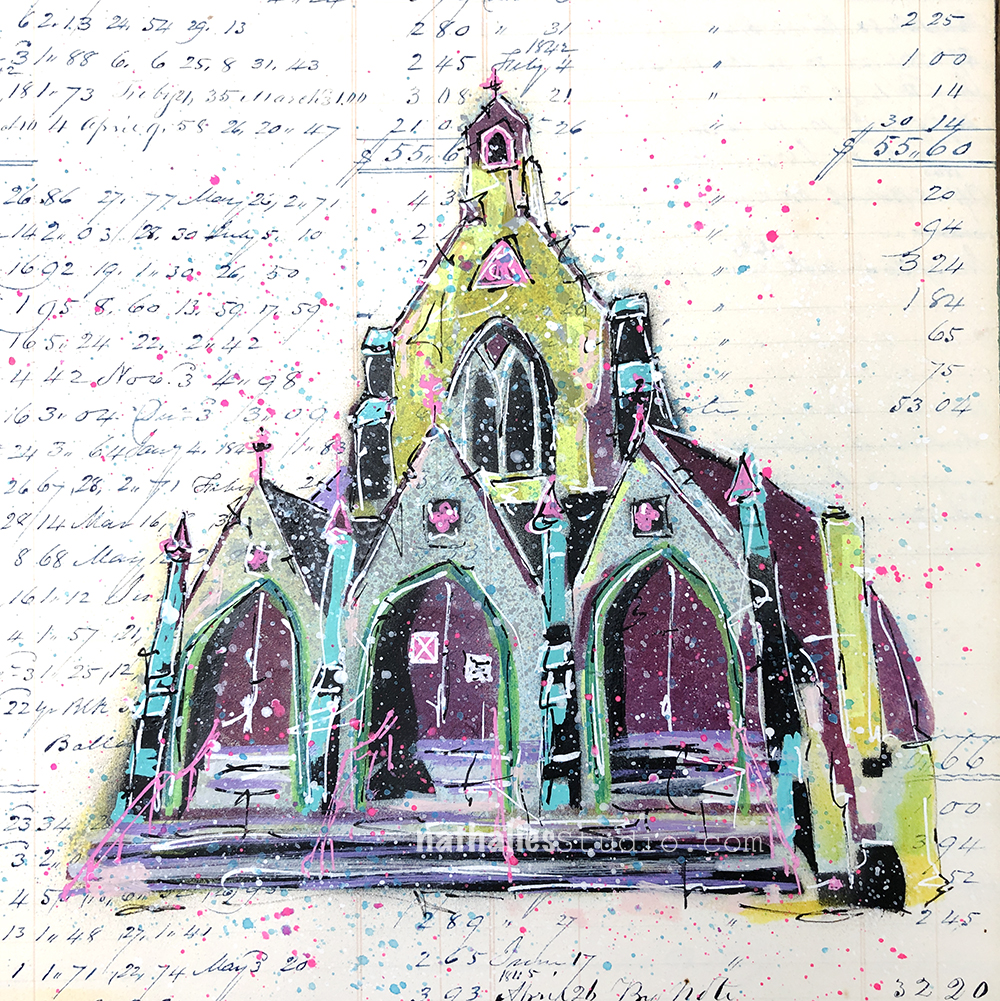
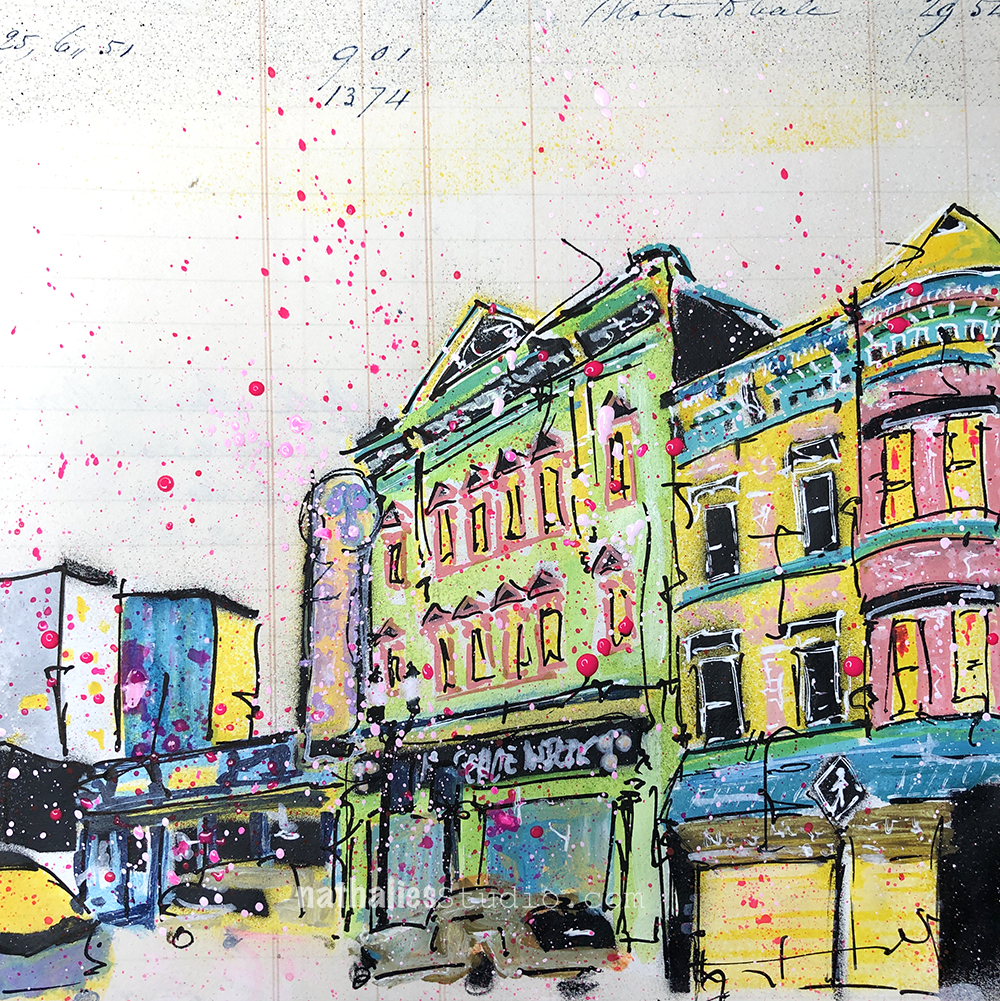
But then this became less and less until I wanted to have the ledger just show and speak for itself.
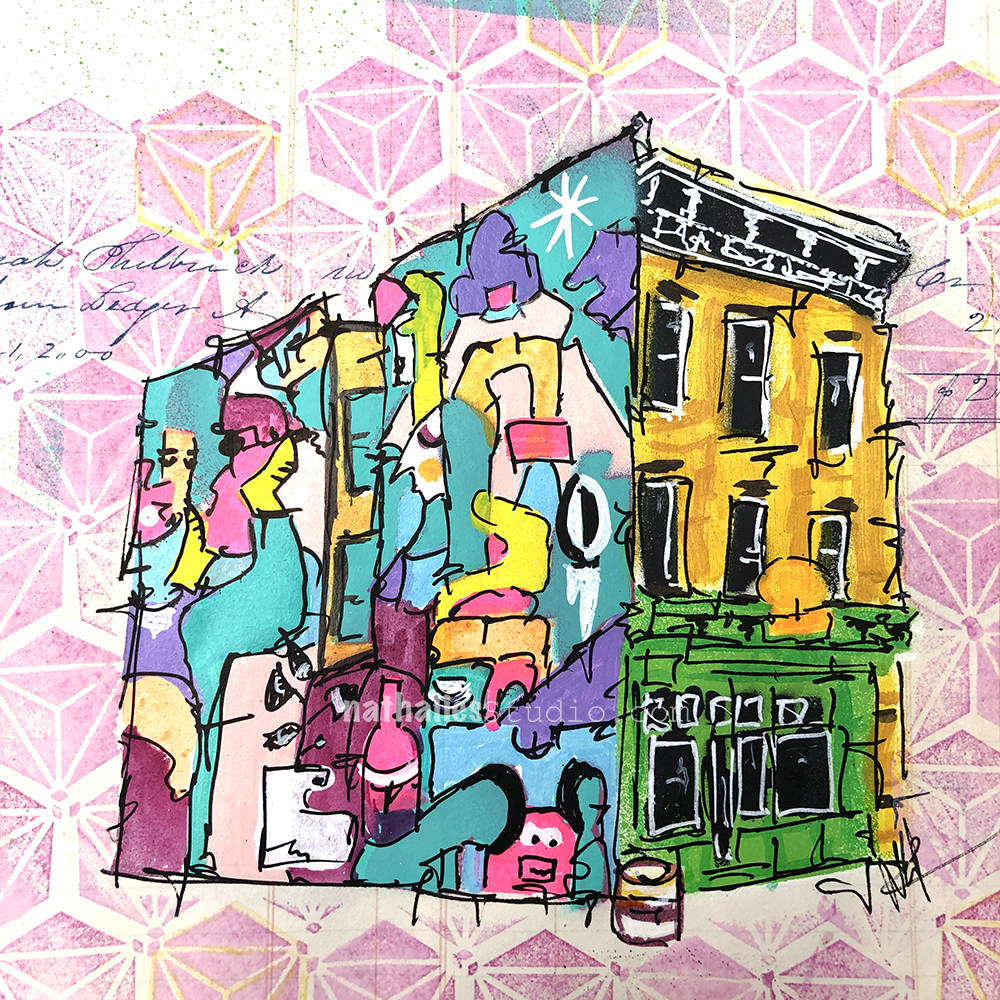
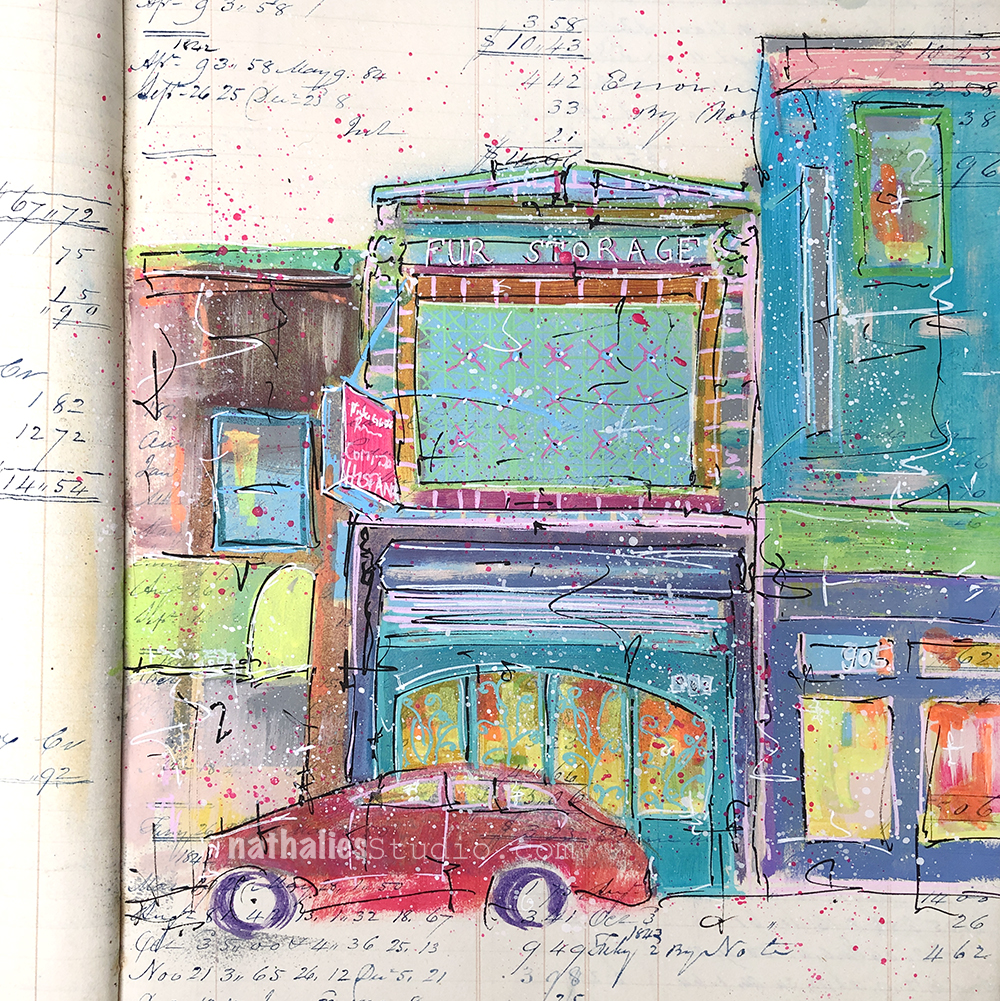
Almost all of the paintings on canvas I did with those buildings are sold and I love that I have a little record of the paintings in my Stroll Through the Hood Ledger.
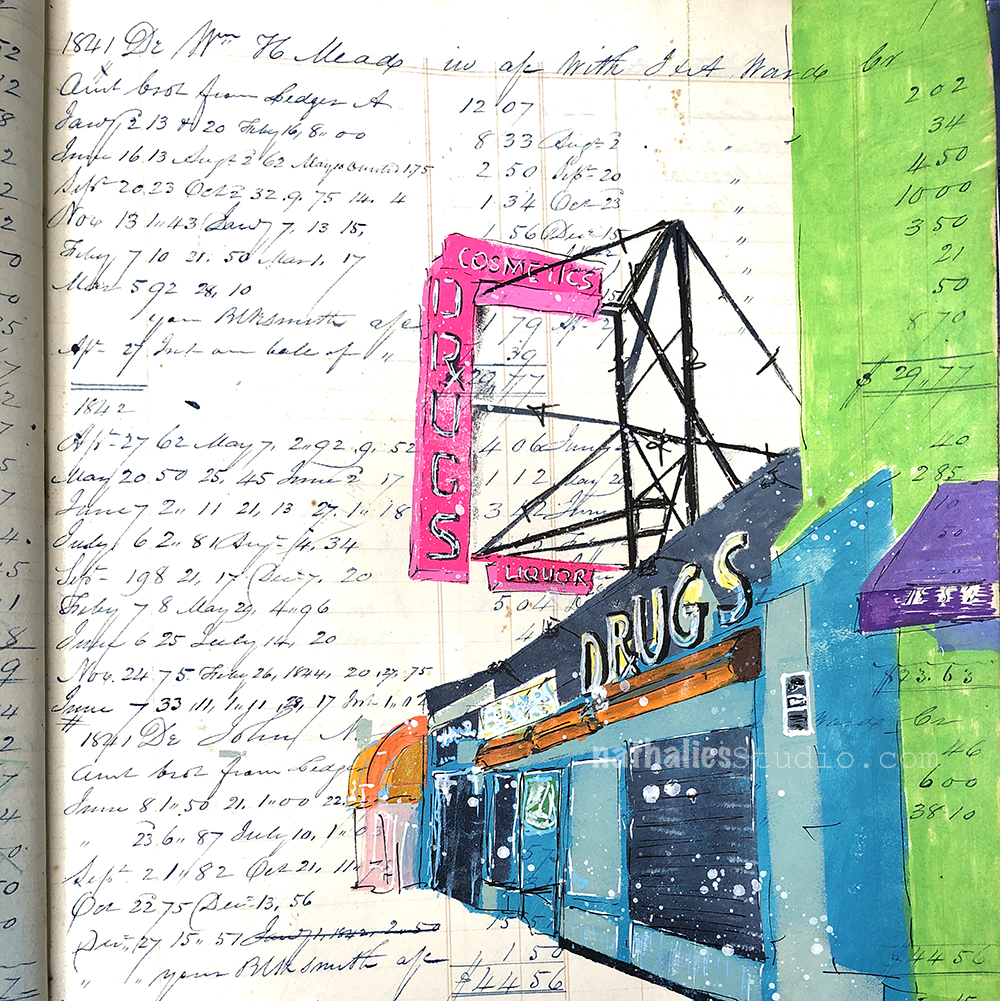
They are also part of a story of what happened in the world – pandemic, social injustice, my thoughts- each building has it’s story in the past and the now but also the story of my story with them. Going through those paintings tell the story of lots of emotions in the past year.
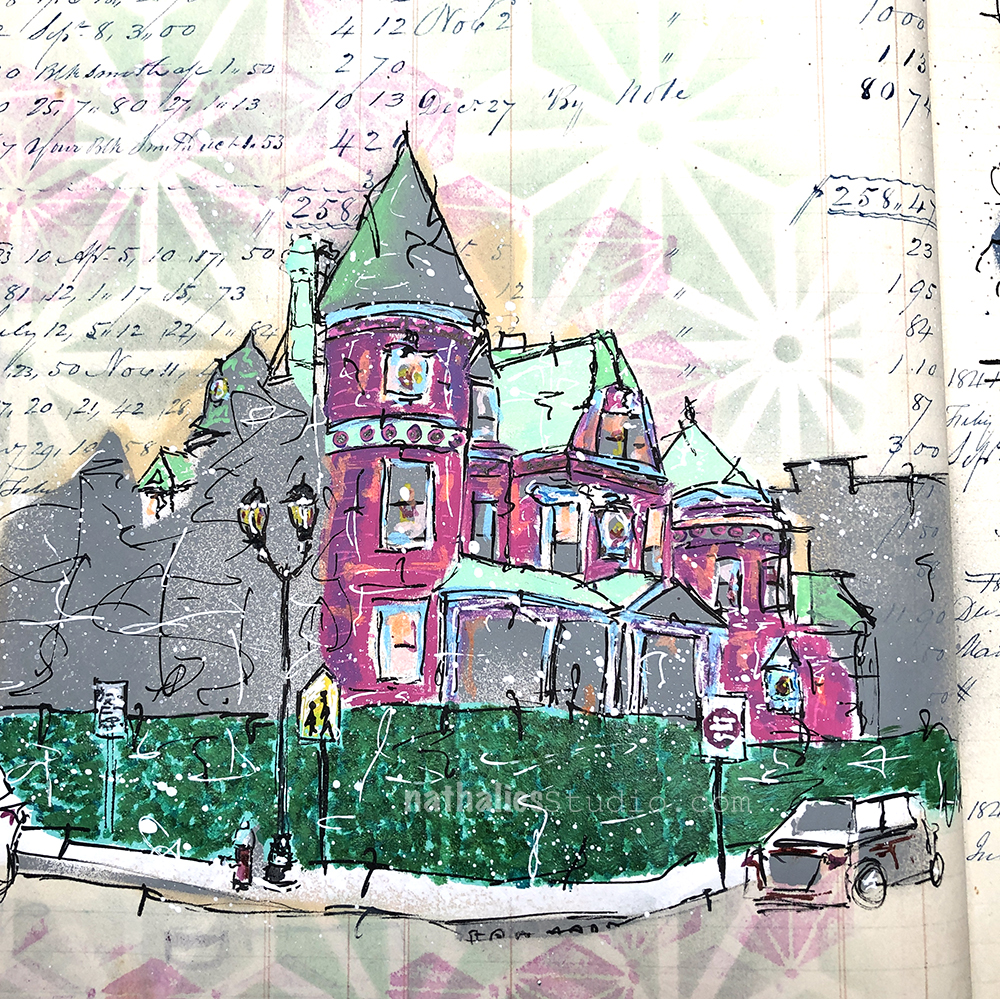
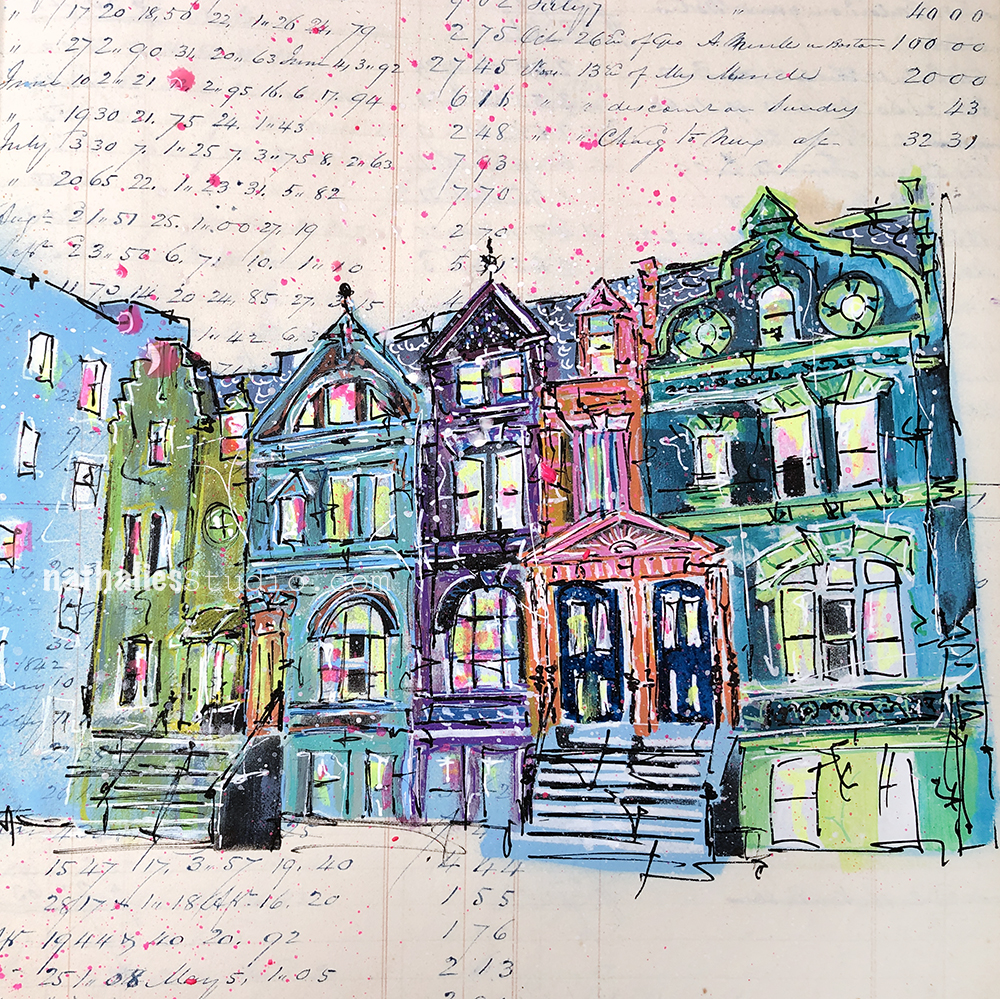
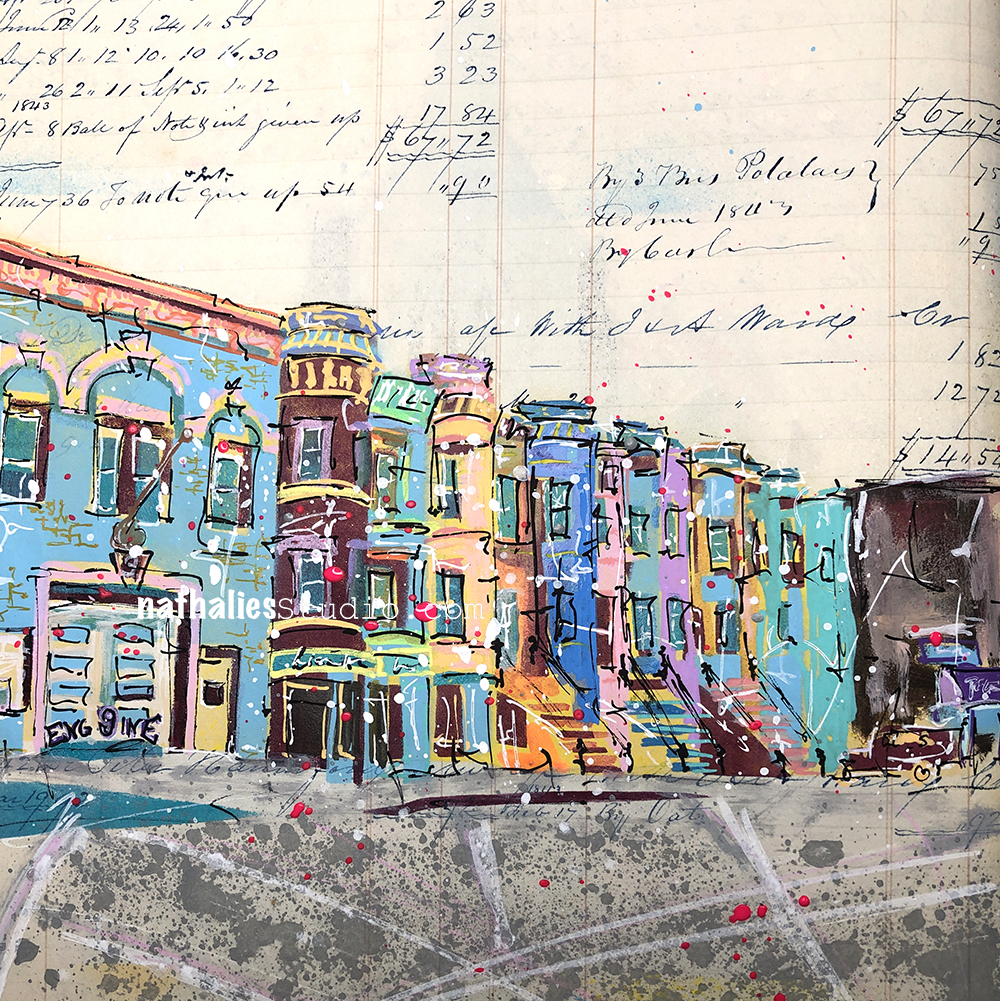
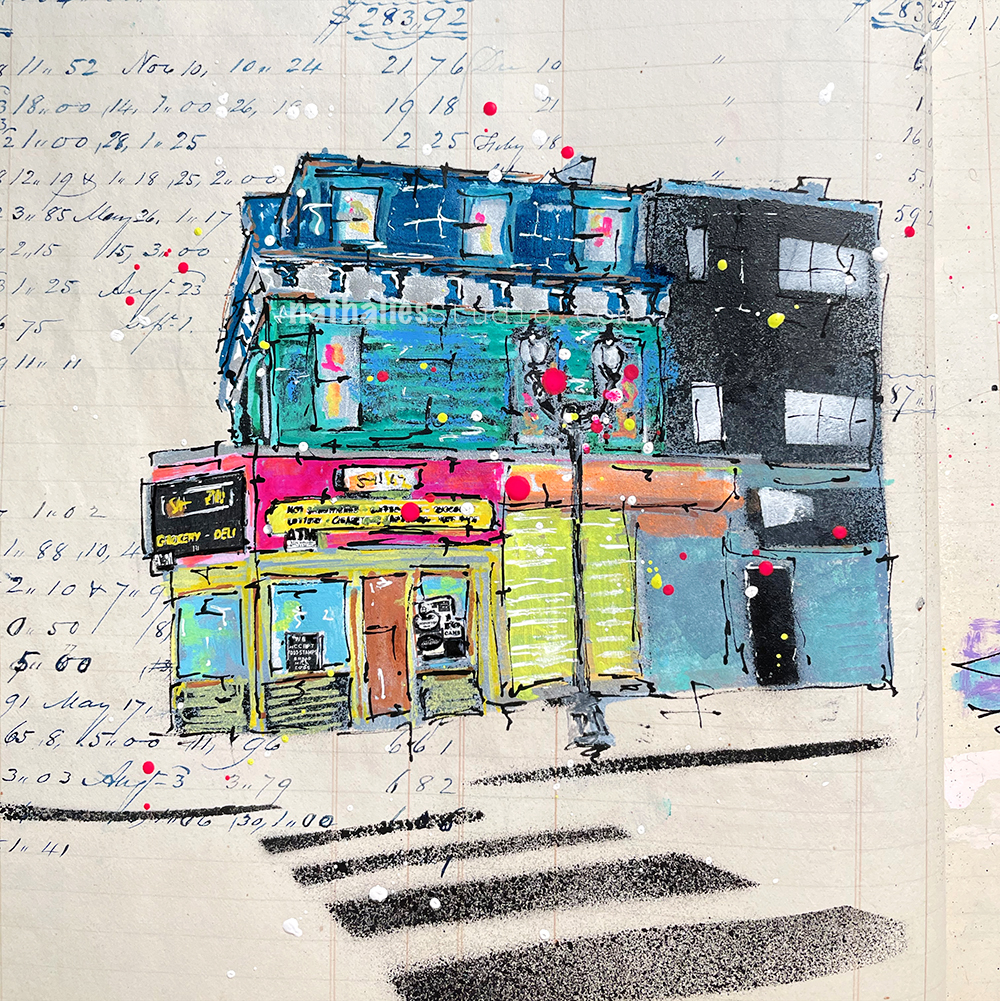
What happens with this ledger if I ever fill it up? It is not even filled up all the way in regards to the initial collection record – will I make it to the blank pages? I don*t know …it is not important …I really just enjoy my time in this magnificent book.
And maybe in another 180 years someone else will find this book and use it for another purpose and story …that would be cool …there is comfort in the thought …it would mean this planet made it …and that’s the story of “Another one in the Ledger” …there you have it :)
This is such a fantastic blog. I loved reading about your ongoing journey with this ledger. It’s so cool you gave it another life and perhaps another will do the same. The paintings are so lovely too! Yay! ❤️
I wonder how the paper will hold up for another 180 years?
Such a wonderful collection in one book!
And I love the idea of someone coming across it in the future and they will be thrilled and wonder about the story of a ledger that is so well painted and created.
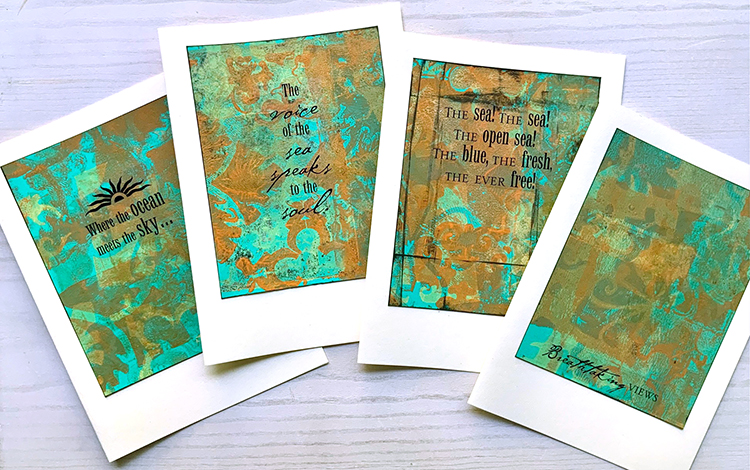
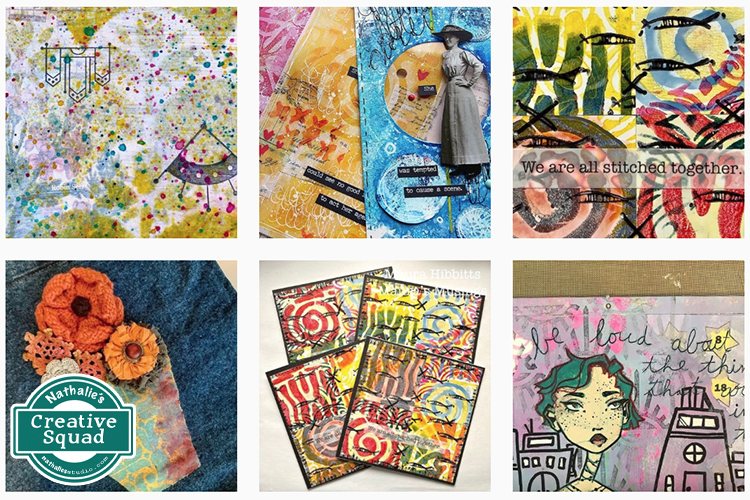
Today we have a series of cards from Creative Squad member Judi Kauffman. Is anyone else out there dreaming of the sea???
Judi is mixing up a lovely palette of colors and using a gelli plate along with my new StencilClub mash-up stencils for these cards and I’m really digging the subtle layers of pattern and color that she’s created. The stencils are exclusive for StencilClub members, and you can learn more about that here and get the new 3 stencil set.
In the meantime, let’s look at some of these cards:
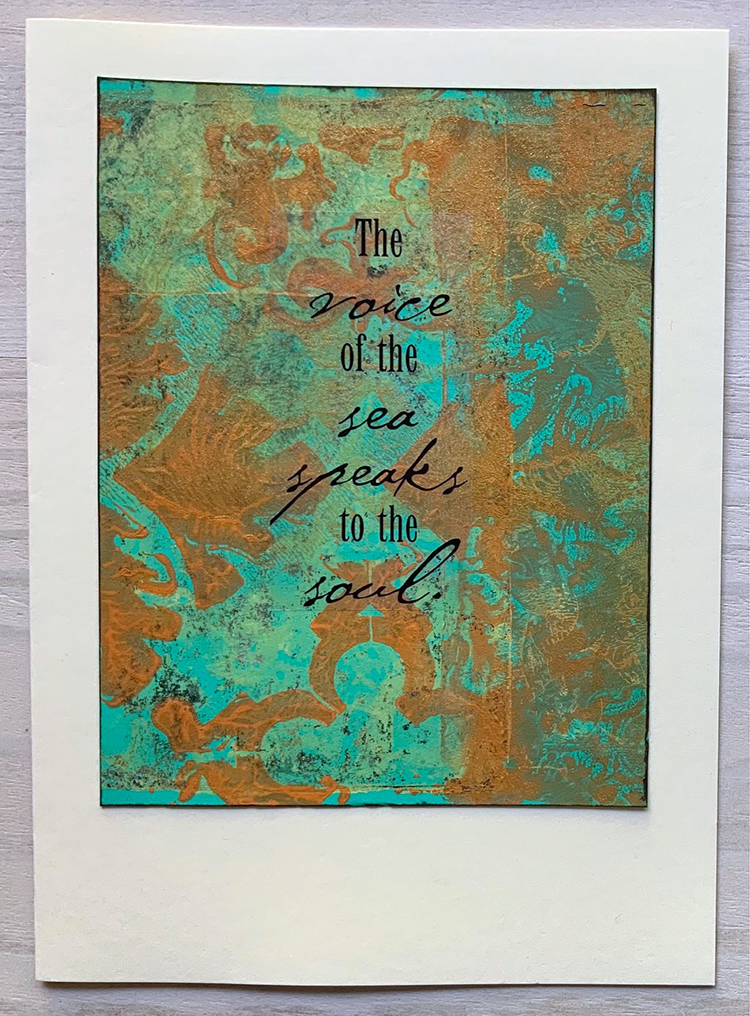
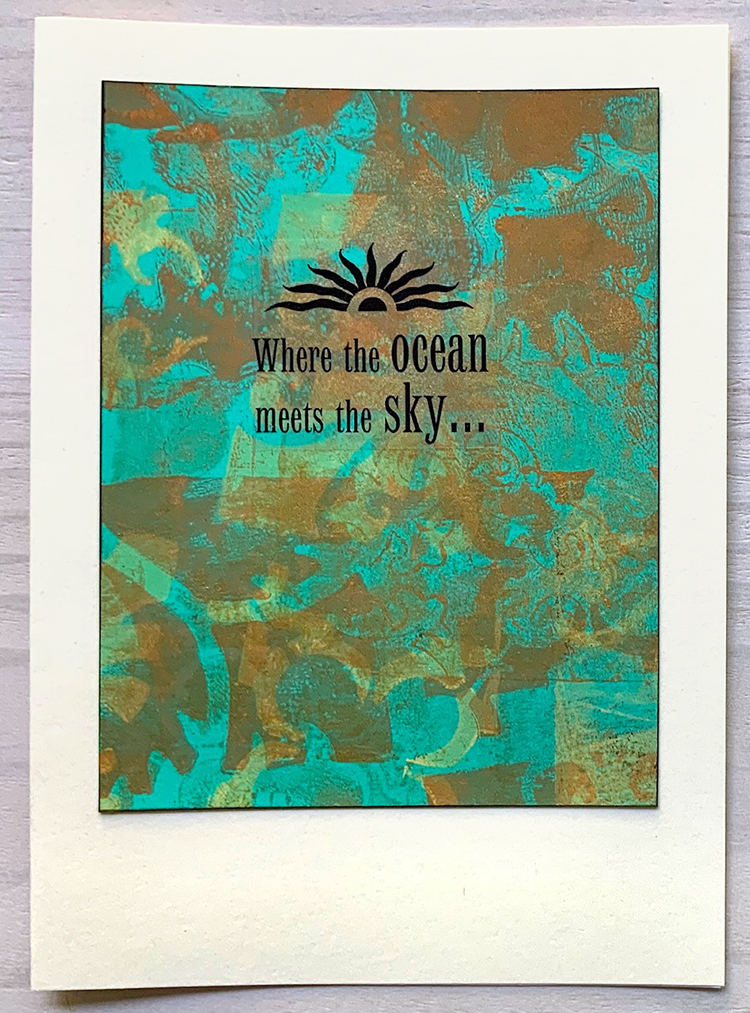
Judi used clear stickers for the words and phrases and it creates a seamless unity between the card’s sentiment and background.
She did her gelli prints on navy blue cardstock – giving them a nice depth of color.
Hello from my Creative Squad! Today we have a post and video from Riikka Kovasin who is sharing her mail art project and guess what??? You have a chance to receive one of these lovely envelopes from Riikka herself – read on to find out how :) They are a fantastic bunch, using my Grove Street foam stamp set and our theme this month: Dear Mother Earth – Our planet Earth is an amazing and beautiful gift to all of us. Let’s write her a letter, telling her just how we feel. This could be an actual letter/mail art, an art journal page, or some other mixed media project.
Bee Nice to Mother Earth
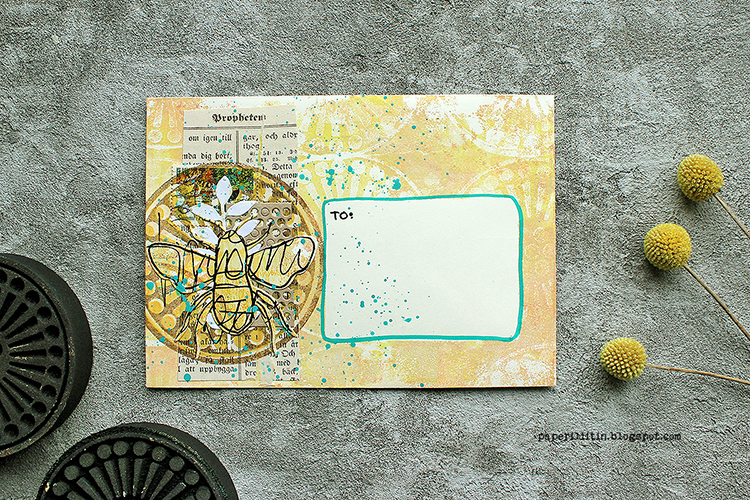
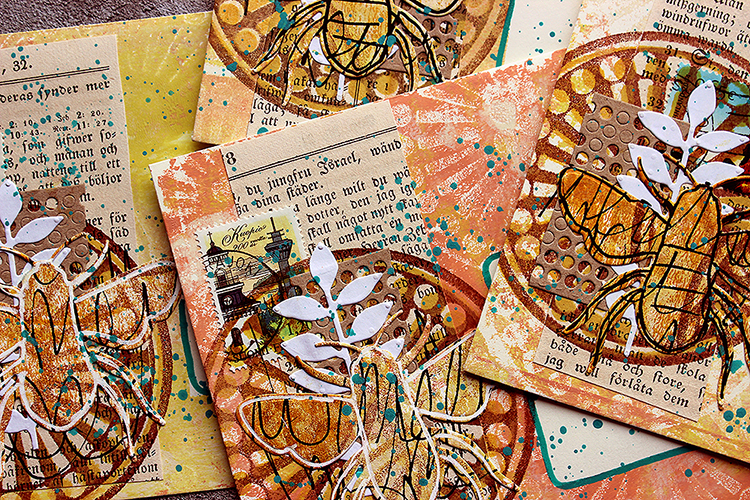
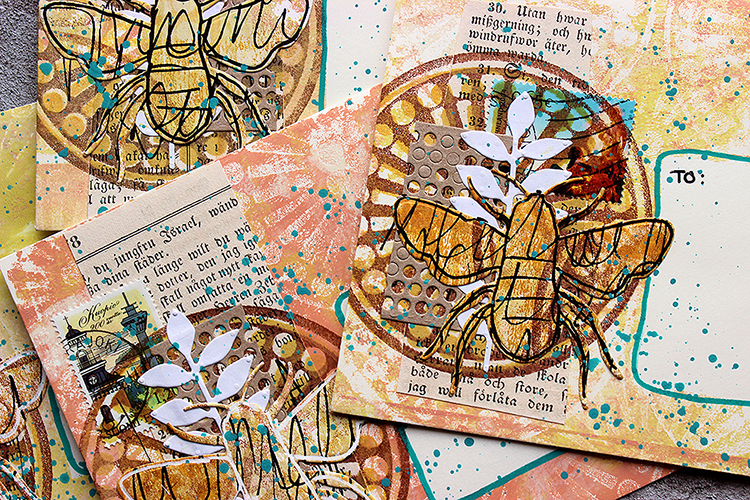
Heippa! It’s Riikka here with my project for this month’s theme of “Dear Mother Earth”. The theme mentions mail art so I jumped to this idea and decided to do a set of decorated envelopes to be sent out.
Mail art is an art movement with the idea of sending small works of art through postal services. The movement started in the 1950s and 60s. Mail art can take various forms such as postcards, envelopes or parcels. Some artists concentrate more on the envelope than the piece inside. Artists also can create their own postal stamps, called artistamps.
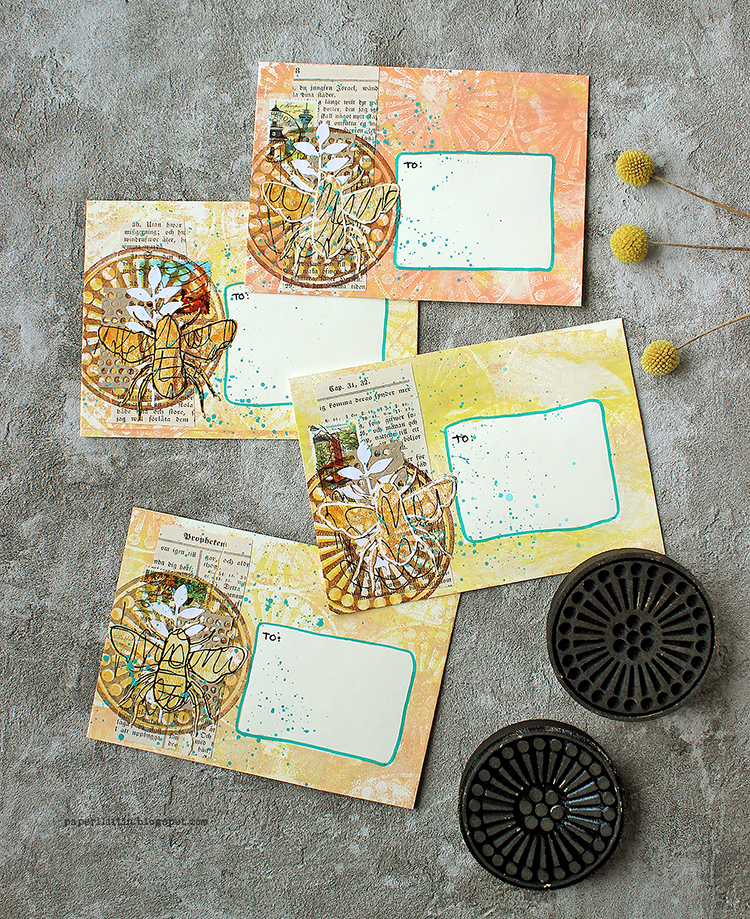
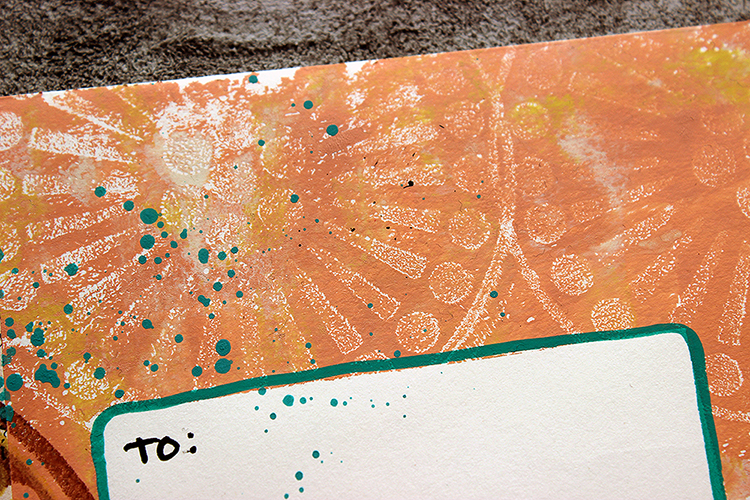
As I plan to send the envelopes out, I needed to create flat layers. I’m usually drawn to dimensional pieces and assemblages, but that kind of work wouldn’t hold through the mailing process without the protection of a parcel. According to some, mail art becomes mail art only after it is dispatched. Even though I actually am looking forward to seeing how the envelopes change in the mailing process, what kind of wear and tear they get, totally losing the added elements isn’t the thing. So, I made small, flat collages on the envelopes with the help of last month’s goodie – Grafix Double Tack Mounting Film.
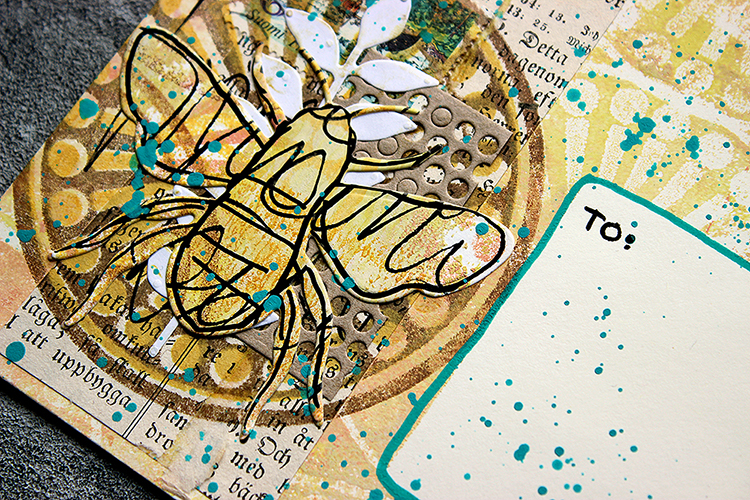
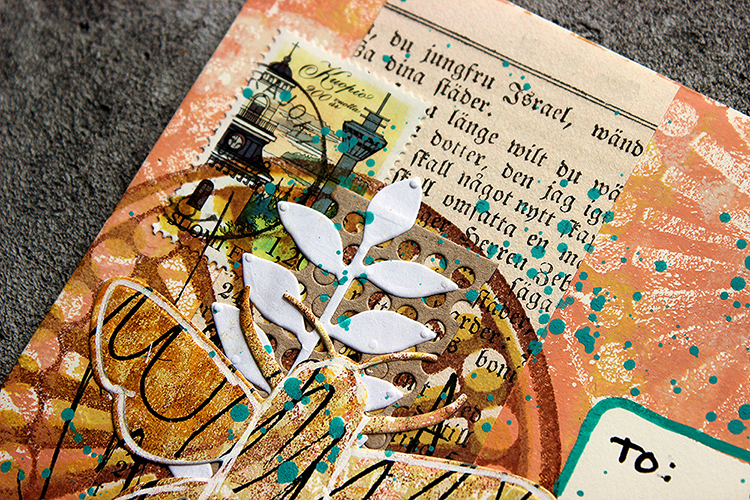
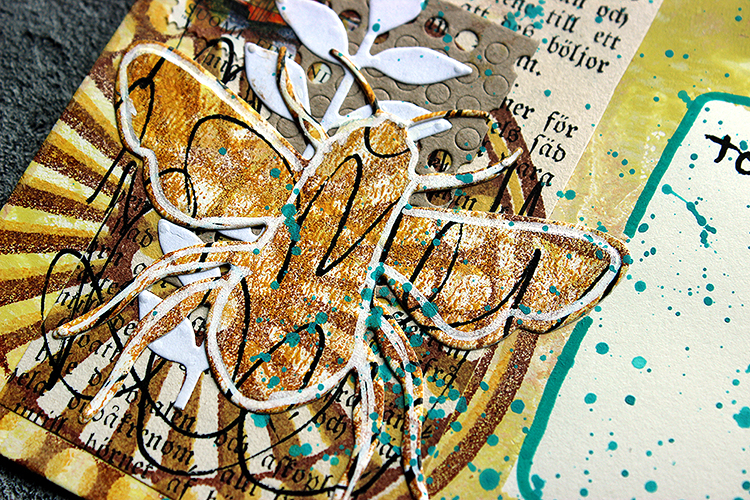
I first added a paint layer to the envelopes, masking off the placement of the address. I also made a separate collage sheet which I die cut to bees. I also die cut some leafy stems and a piece looking like dry wall tape. I collaged a piece of book paper underneath the die cut elements and added some stamping in there, too. If you wish to see how the envelopes came into being, please see the video underneath.
When thinking about the theme of Mother Earth, I had no option but to choose the “Grove Street” stamp set. I really like the pattern, but more important, the stamp was round and thus reminded me of Earth. As there’s been a lot of talk about the declining numbers of bees and insects, I felt that a honey bee would be a nice focal point in the layering. It somehow resonated with the nurturing Mother Earth theme, maybe partly because of the importance to the ecosystem as pollinators, but also through the Finnish national epic, Kalevala. There a honey bee flies to the heavens to bring a drop of golden honey to mother of Lemminkäinen so she can heal her son. I recently made an assemblage piece with that theme, you can see it here if you like.
And now comes the fun part! I’m sending these envelopes out and you could receive one. It’s first come, first served styled thing so if you wish to receive an envelope from me, please send me your mail address in an email. My email is rkovasin (a) gmail (dot) com. There’s a catch though – you need to send me a photo of the envelope when it has reached you as I want to see how it traveled! To make it worthwhile, I’ll pop something inside the envelope, too – a little note from me on a postcard picturing Finnish nature.
Thank you for stopping by today! Have a beautiful July! Xoxo Riikka
Thank you Riikka – these are such lovely little artworks and I love that you will send them out into the world!
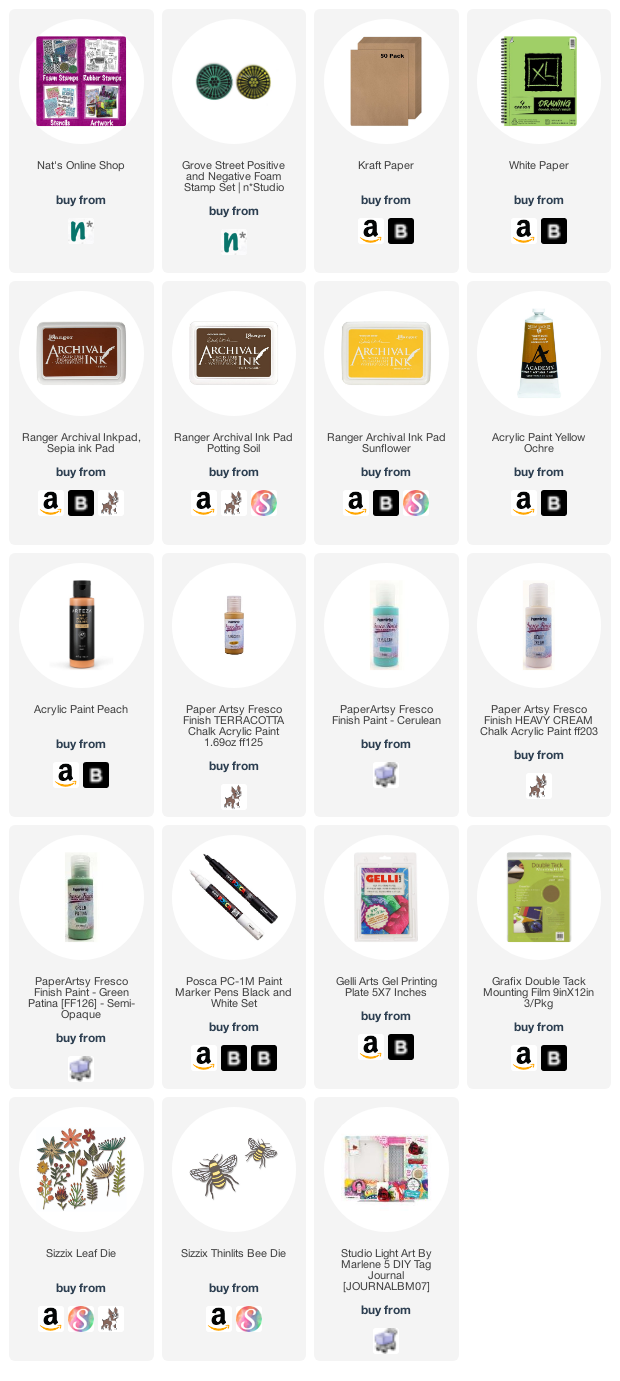
Give it a try: you can find all my Foam Stamps in my Online Shop and in addition to vintage book paper and postage stamps, here are some of the supplies Riikka used:
Follow Nat’s Creative Squad on Instagram too: Each week we post projects, ideas, and inspiration for mixed media art.
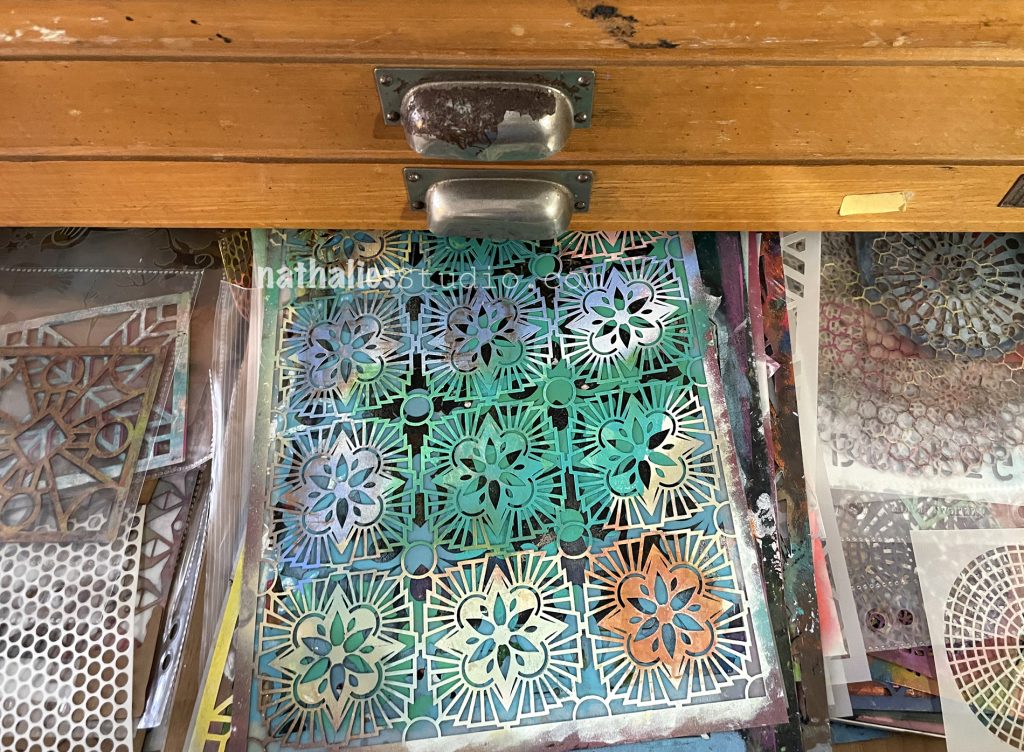
Happy Monday everyone – time for another pattern in my big vintage ledger! For this one I used my Floral Tile Large, Fan-Tastic Large, and Fan-fare rubber stamps. I like the way this turned out – it always surprises me what you can do with a few stamps and 2 colors. Check it out in the following video:
Here is a look at the finished pattern and the stamps I used:
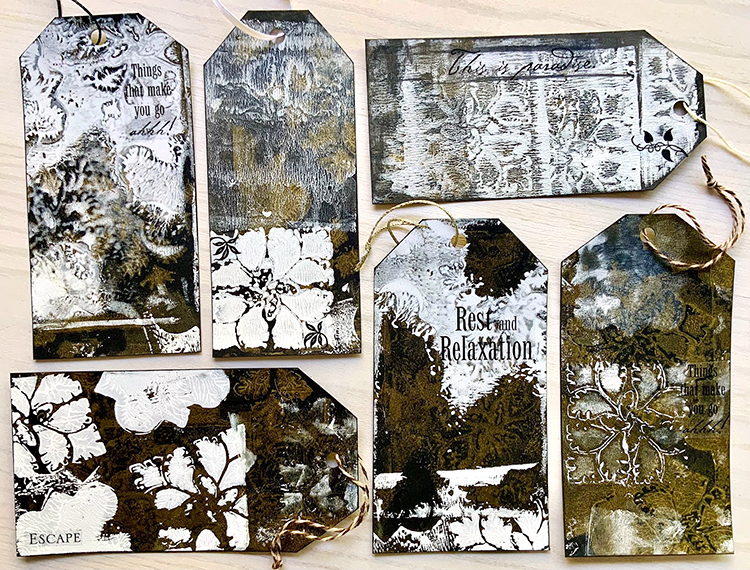
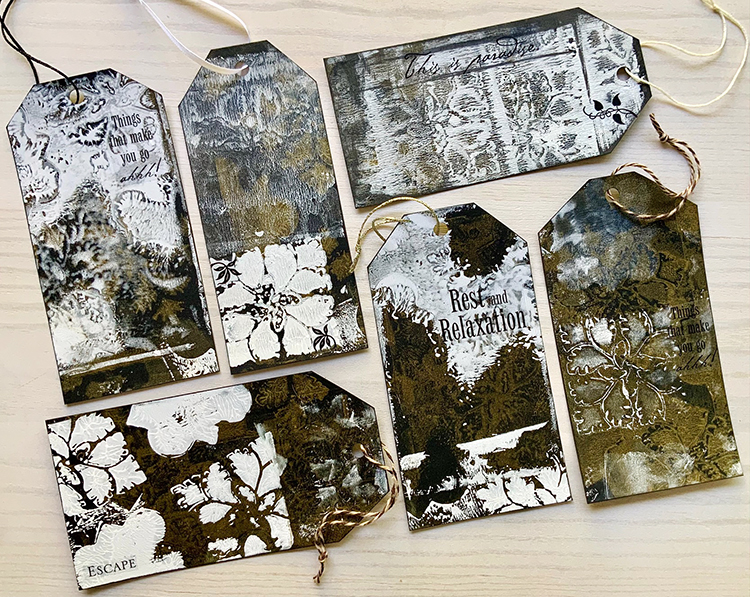
I’m sharing a suite of tags made by Creative Squad member Judi Kauffman today. With some stencils and just a few other supplies, Judi mixes big juicy texture, delicate layering, and bold pattern in these beauties.
She is using my StencilClub mash-up stencils that I designed with Mary Beth Shaw at StencilGirl Products. The 3 piece mash-up set is available exclusively to StencilClub members through this link.
Here are some of Judi’s tags using acrylic paint, a gelli plate, the stencils, and some word and phrase stickers:
I love how the patterns and colors blend and wash over each other. Here’s a closeup:
Judi is using black, vanilla, and bronze metallic paint.
Thank you Judi for sharing this grouping and for showing us how just a few stencils and colors of paint can yield so many lovely results.
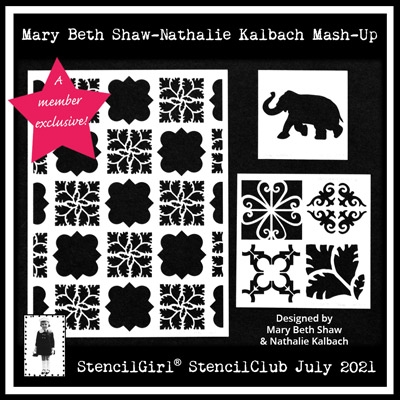
This month I am doing a stencil mash-up with StencilGirl’s very own Mary Beth Shaw for their StencilClub! This is an exclusive 3 stencil set for July 2021 if you are part of their StencilClub (Info here). It’s a mash-up so it includes design motifs from each of us, combined in a new way and new scale. Here is a little video introduction to the stencils with Mary Beth and myself:
I love how our patterns work together in this set and oh my, that little elephant is pretty cute! We had fun testing these out and I wanted to share a little sneak peak with you:
Here are the details: You get all three exclusive member stencils when you join StencilClub.
The large 9×12 inch stencil is easy to use to create repeating patterns. It evolved from Mary Beth’s Leaf Diamond and my Hamilton stencils.
The small 6×6 inch pulls in elements perfect for layering to create stunning patterns.
A baby elephant completes the set as a mini 4×4 inch stencil, open, so you can paint one color and then slide another stencil underneath and paint with a contrasting color.
You also get a Project video and PDF that Mary Beth and I made especially for you that you can download and keep.
The set ships out to members on July 15th. Can’t wait to see them in action!
Every couple of years, I tend to reorganize my studio – mostly the flow of my studio – by rearranging the furniture. It usually happens alongside a shift in priorities with my art. As you probably know, my work and income streams are diverse. From teaching workshops on and offline to consulting, painting, and licensing my creative designs, there’s a wide range of ways my studio must function for me.
When we moved to our new house 1 ½ years ago, my plan was to hold large workshops at home. I made room for workshop tables and chairs in the middle of my studio, but of course, with the pandemic, in-person classes came to a screeching halt for us teachers!
And like many, I had to pivot to make sure that I could still make a living with my art. Suddenly my work came to consist of more computer work, more filming, and more painting, so the flow of my studio wasn’t working with my workflow anymore!
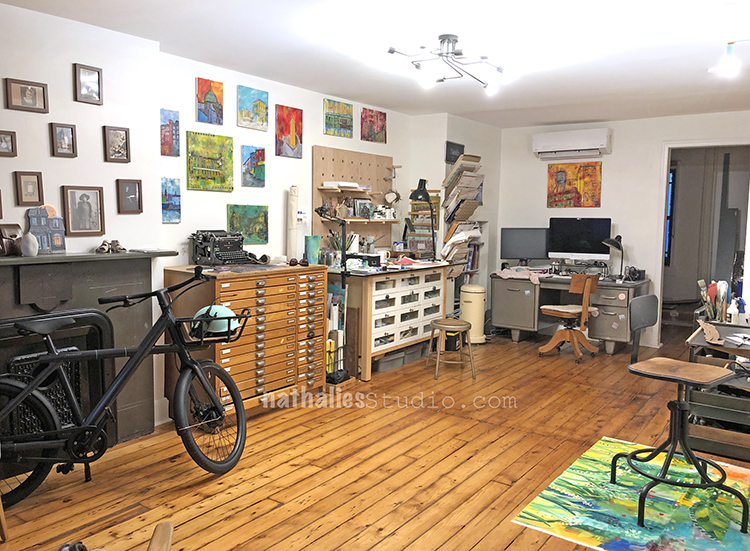
Studio Set Up After Move
My desk was facing the wall and the only window in the room was to my back. Spending more time at the computer made me realize how much I disliked this setup. For filming, I discovered that I needed permanent space for a camera on my workbench if I didn’t want to painstakingly take the equipment up and down all the time. And yet somehow, I still left my studio in pre-pandemic mode for a long time.
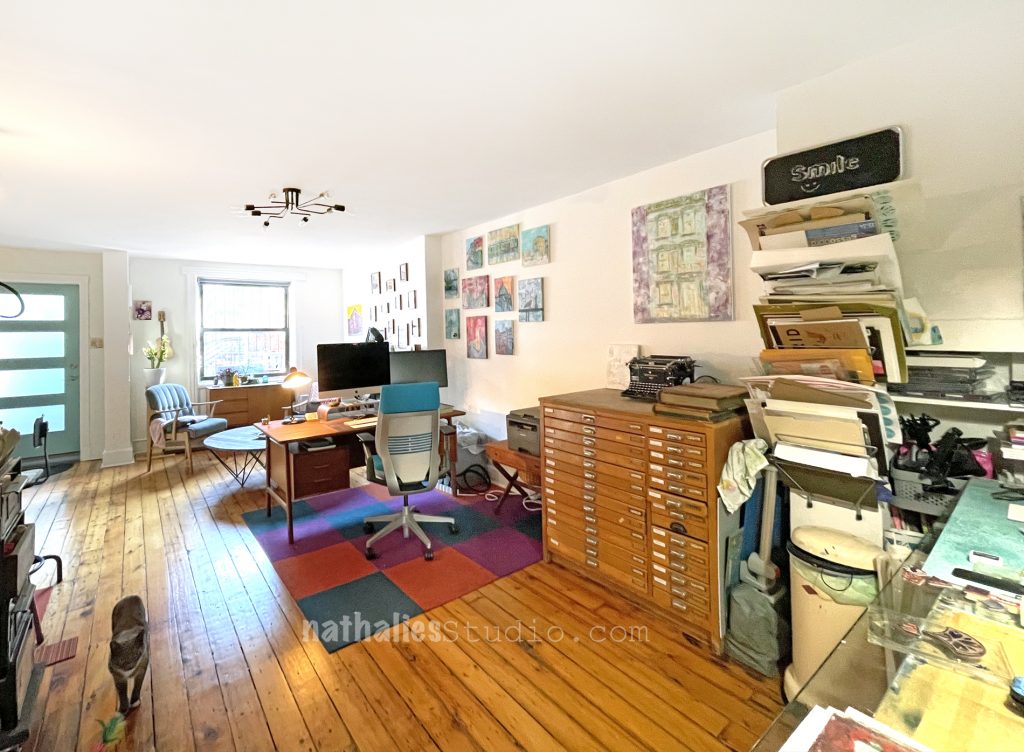
First, the pandemic itself was a reason not to change it. Then I dreaded the thought of going through all of my stuff and creating a new setup. *Then* there were so many other things to do that I thought would be more important. But I finally found a desk which I absolutely love and thought it would be great to put it in the middle of the studio – facing the window this time – and use it as a divider between the seating and entrance area from the painting and filming area.
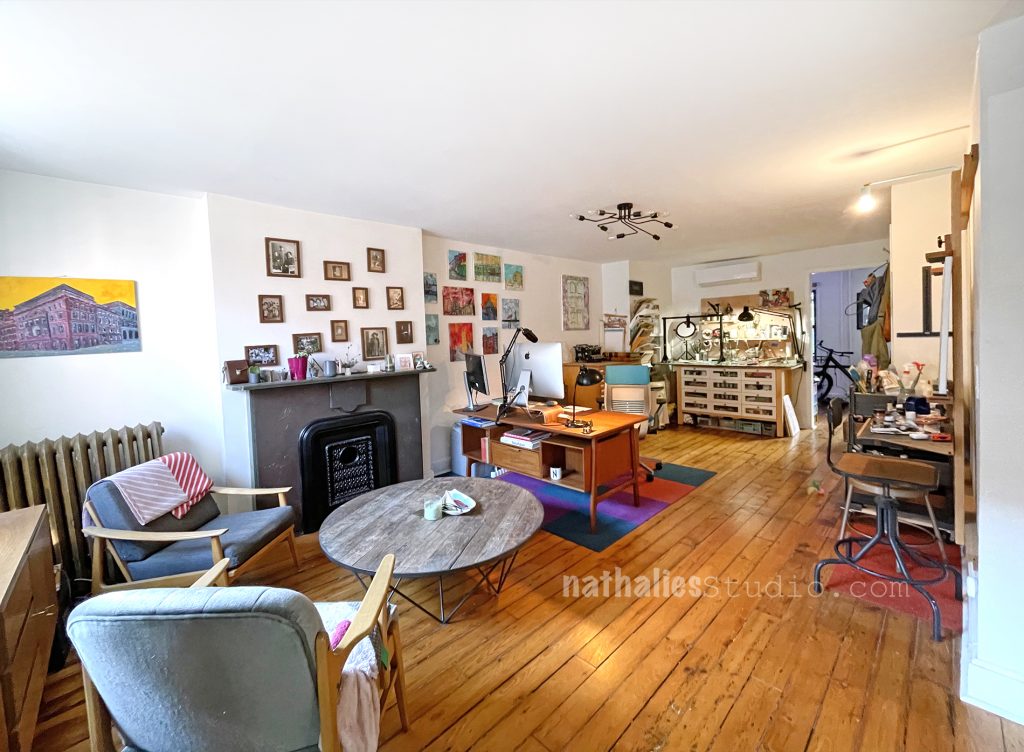
New Studio Set Up
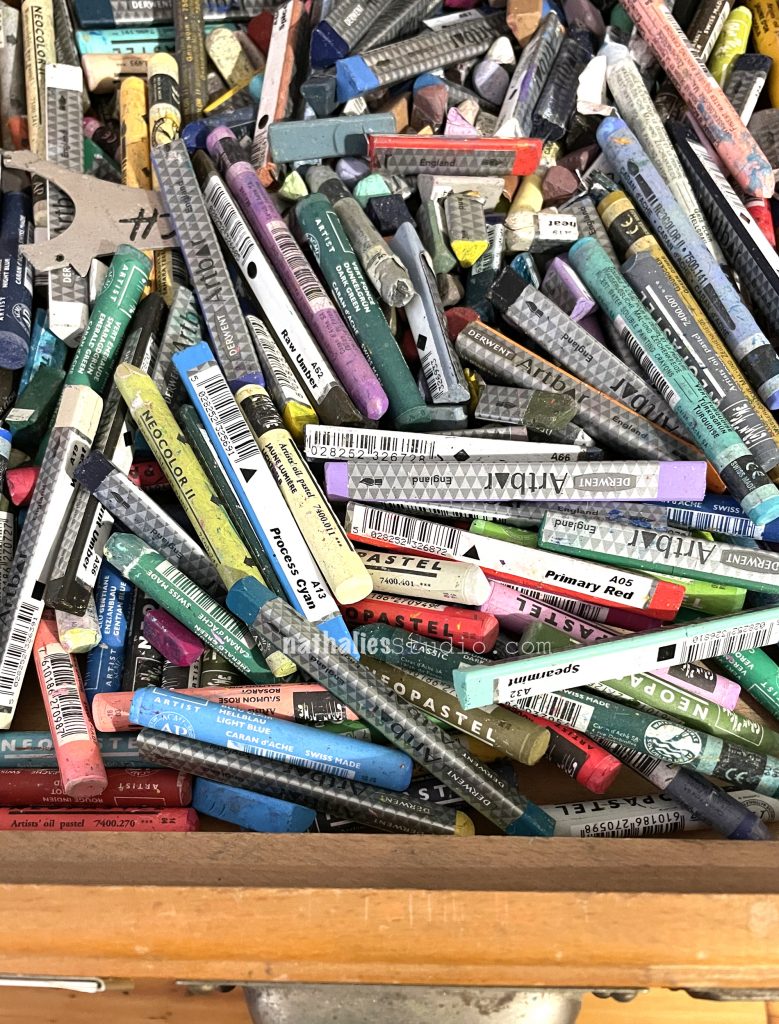
Once I had a plan on how to rearrange the furniture, I started going through my supplies and surprise, I had a total blast doing it! I reevaluated which of my art supply organization worked and what needed to be adjusted or could use a new solution. I sorted all of my collage paper and made a commitment to use it. What I didn’t commit to, I threw away. I donated a ton of books I hadn’t looked at since before we moved to an art student. I gave art supplies away that I hadn’t used since the move so that someone else could enjoy them before they become useless.
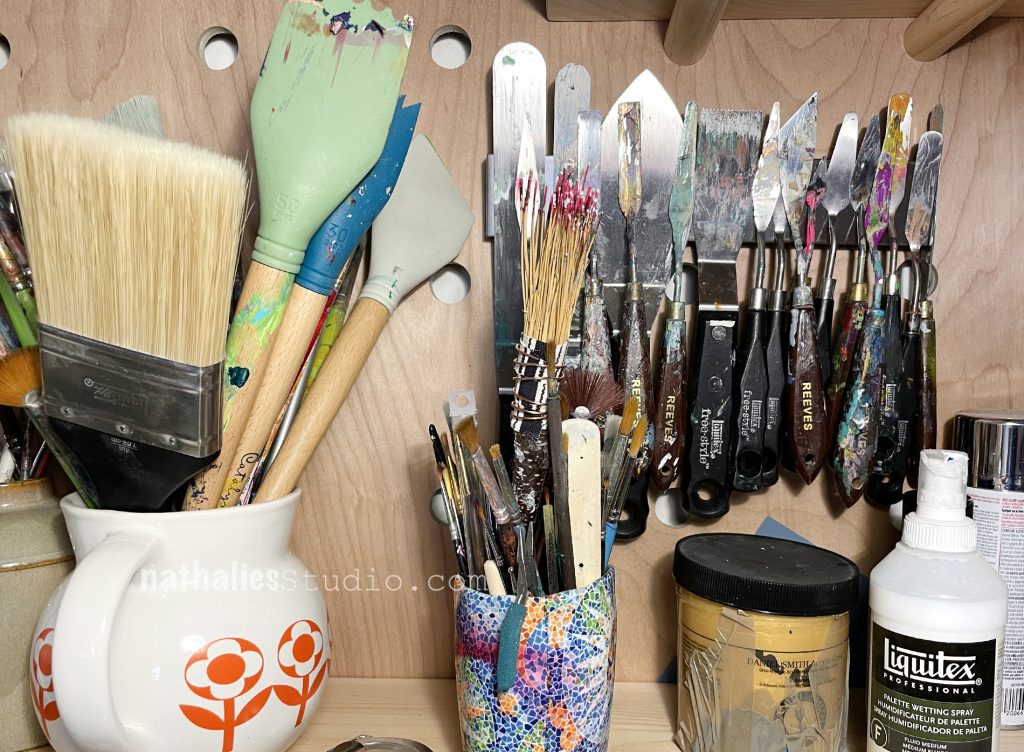
Pegboard over Workbench
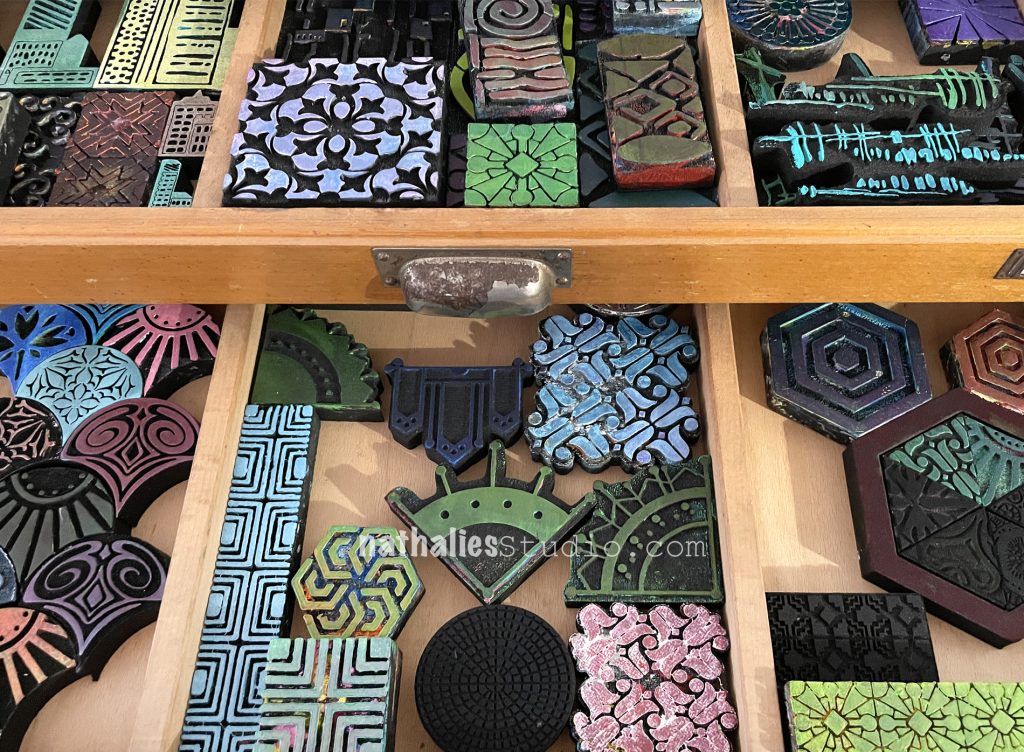
I found so much fun in adding some new things too, like a little old sewing table that hosts my printer on top and cables in its yarn drawer or the little magnet on my pegboard that displays my palette knives for easy access. My letterpress cabinet stayed pretty much the same, but now it’s right next to my workbench. Some drawers host my stamps and stencils, some host wax bars and other fun stuff.
Letterpress Cabinet with long flat drawers – here hosting my foam stampsso much for organizing stencils ;) the narrower drawers on the right side of my letterpress mostly host paint media like waxbars, watercolor, markers, pencils etc.
Wow, and I cannot even begin to tell you how much I love the changes! Not only did going through all my art supplies during the shifting and reorganization spark a lot of inspiration, but it gave me a renewed spark going into my work. Tackling this task reminded me how being stagnant can be a hindrance for a creative outlet.
View from the other side towards the window
Now, will these be the last changes I make to my studio? Probably not! Times change, work changes, needs will change and so will my studio, but for now it is my sacred happy place and it works well for me.
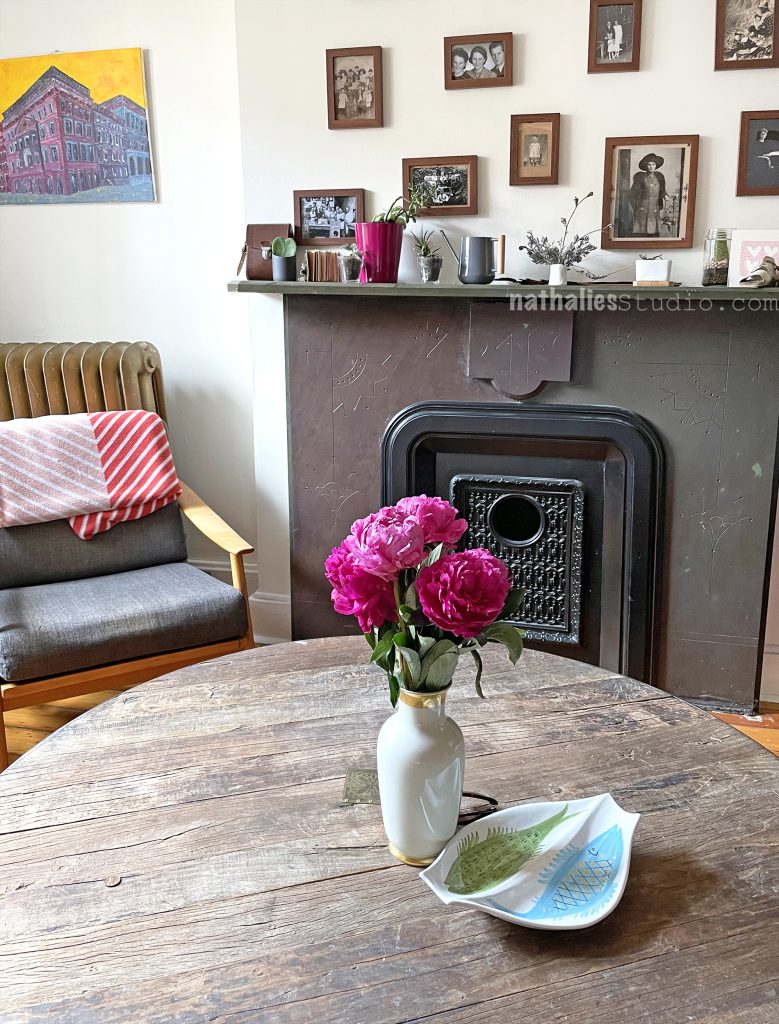
Sitting Area where I read, journal and make notes of ideas
Did you join us for the latest episode of Spill your heART? If not, you can enjoy the recording below. In Episode 5 we discussed the topic: Studio Organization with my panel of artists: Rachel Juanita Bellamy, Rae Missigman, and Tania Ahmed. In the episode we share photos and stories from our own working studios, we discuss the challenges we still struggle with, and we share solutions that we use to keep our spaces as organized and functional as possible so that we can easily create when it’s time. Check it out:
Here’s an overview:
In this 5th episode I am speaking with panelists Rachel Juanita Bellamy, Rae Missigman, and Tania Ahmed for our topic: Studio Organization. As working artists our studios need to wear a lot of hats and studio organization and functionality are important to how we work, film, and create products. Some of us have spaces that are in our homes and are shared with other family members while others have dedicated spaces where supplies can spread out and stay out for days. Regardless of their location or size, our studios are set up to make working and playing easy, inspired, and a joy in our lives. In this episode we share our tips for organizing papers and other supplies, we talk about cleaning, we explain if and when we purge supplies, we bond over stories of family members “borrowing” our tools, and we reveal the realities of how our studios actually look. Although we are professionals, we all have our weaknesses and struggles when it comes to Studio Organization but through the years we have found ways to use our spaces to our advantage, and we share that experience with you.
Join us for the next one on July 30th:
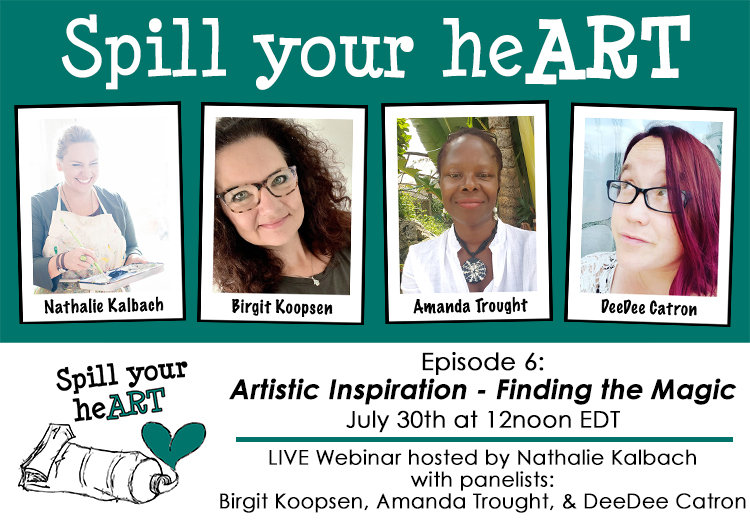
Episode 6: Artistic Inspiration – Finding the Magic
Join me along with panelists Birgit Koopsen, Amanda Trought, and DeeDee Catron as we discuss that all important but sometimes elusive ingredient to creativity: Inspiration. As professional artists we will share practical tips for finding and energizing your artistic mojo. We’ll also discuss how to encourage it when it gets sluggish, takes a temporary hiatus or when it goes completely missing. Whether you are looking to cultivate inspiration naturally or to take more deliberate actions to get back into the groove, this webinar will focus on tips and tricks for locating, encouraging, and maybe even fabricating artistic inspiration so that you can get on with things and make the magic happen.
A Look Back – This time I’m looking at Starting with Yellow – or specifically, yellow backgrounds in my art journal. I think yellow can mean a lot of things and evoke a lot of different emotions and the following art journal spreads all have predominantly yellow backgrounds and range from happy to hopeful to brave. Read on and enjoy!
A Look Back is a blog series to show you some projects and posts that you may have missed – sometimes going WAY back in the archive. I think it will be fun to revisit a few ideas that we haven’t seen for a while. I’m excited to see how a little look back might inspire something new in the future :)
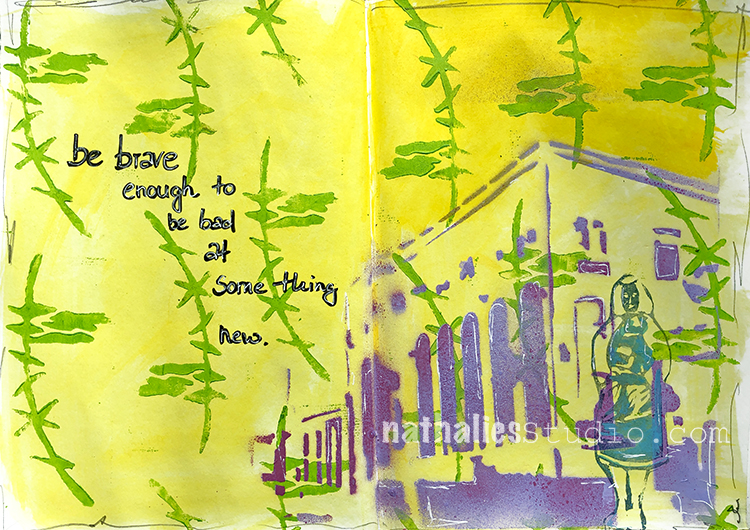
In this first spread I started with that yellow background and then kept the color palette pretty simple. Check out the full post here to read how I created my image and added my Groovy foam stamp.
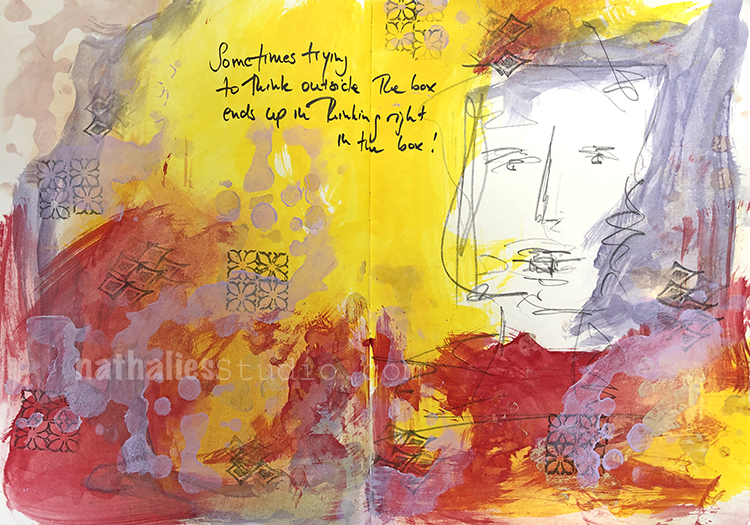
I brought a few other colors together with yellow in this art journal spread as a base for a quick pencil sketch and some of my Fan-Fare stamps. With the boldness of this background, the rest of the spread came together with ease.
Yellow was the base of this all over pattern here in my art journal. I added my Kyoto stencil and some eraser dots here and there too.
In this art journal page, I anchor my building in a field of yellow. My background is definitely yellow, but given interest with areas of blank page here and there and some of my Wabi Sabi stamps too.
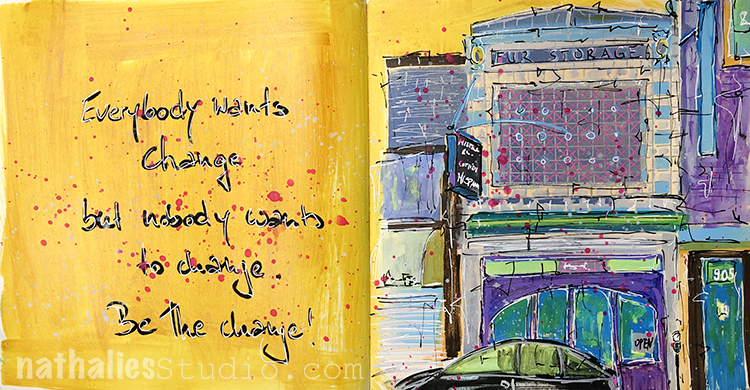
The boldness of this art journal page emphasizes the call to action, “Be the change!” Yellow feels like the right hue for that energy and hope.
I hope you enjoyed this look back on some projects that started with yellow. Here are some of the supplies I used:


Comments (2)
Robin
| #
This is such a fantastic blog. I loved reading about your ongoing journey with this ledger. It’s so cool you gave it another life and perhaps another will do the same. The paintings are so lovely too! Yay! ❤️
Reply
Sue Clarke
| #
I wonder how the paper will hold up for another 180 years?
Such a wonderful collection in one book!
And I love the idea of someone coming across it in the future and they will be thrilled and wonder about the story of a ledger that is so well painted and created.
Reply