Blog: Stamping

Lucky Stars – Cards

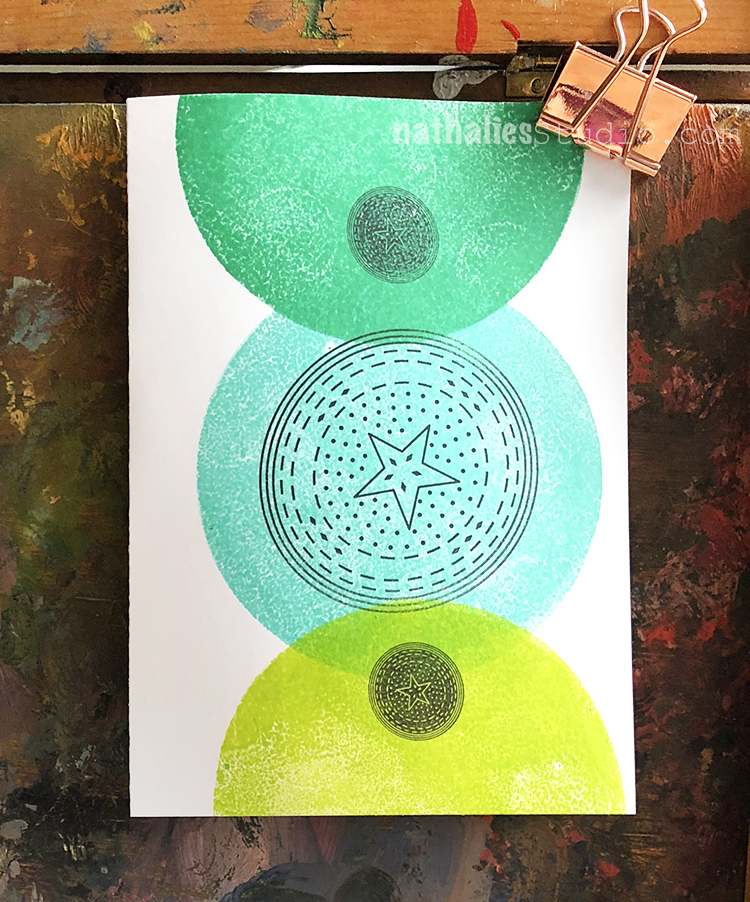
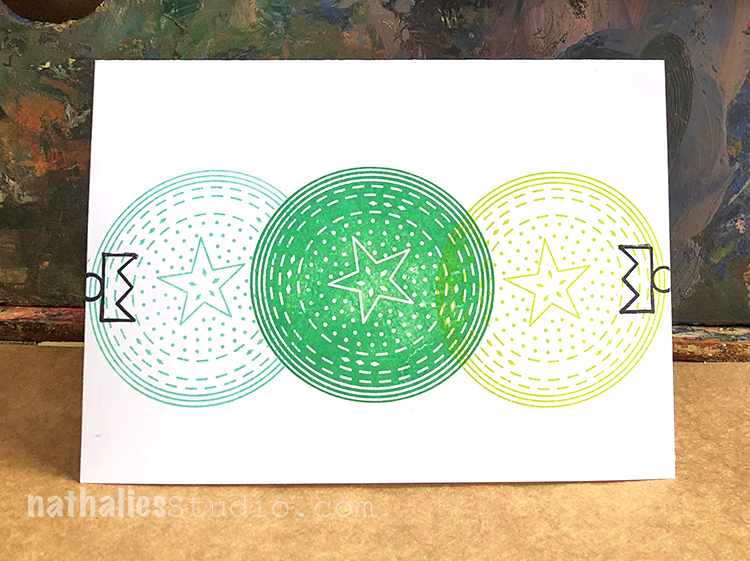
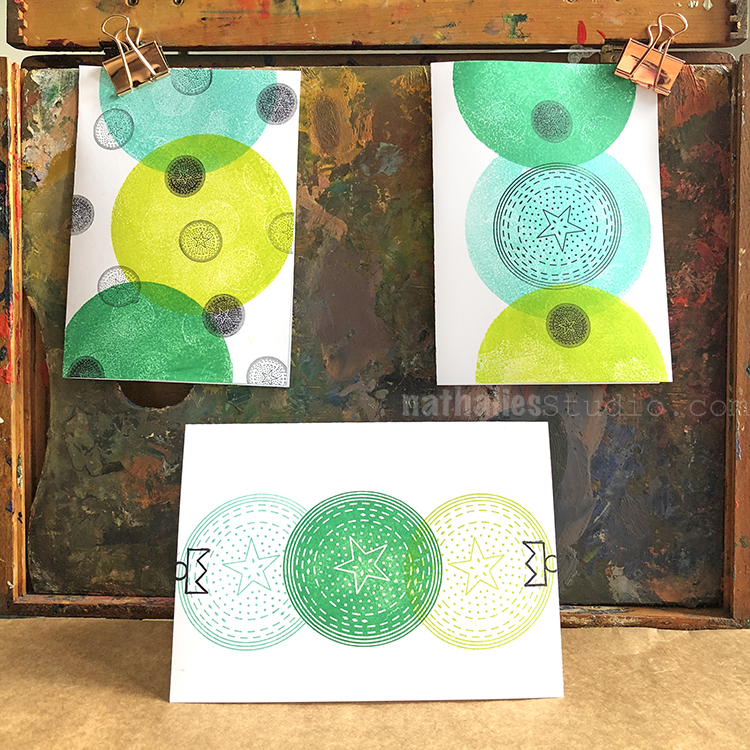
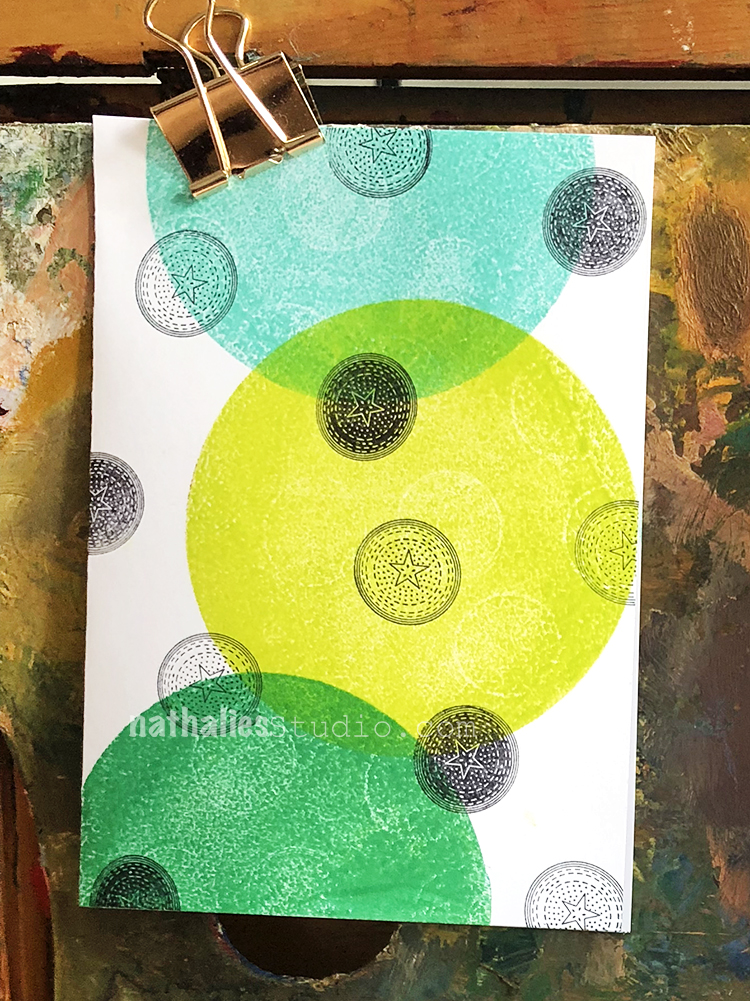
So much fun to make some cards with my new Circle Jumble Sets. I used the Circle Drive Positive and Negative Stamps of both Sets (small and large) and just played around.

For this card I used some dye based inks on a small round gel plate and then stamped with the plate to create some overlapping circles in different colors. Then I used the small positive and negative Circle drive and stamped on top.

For this card I repeated the stamping with the inked up round gel plate and then used the Large Positive Circle Drive stamp in the center and the Small Central Drive on the sides.

And here I just stamped the Large Positive and Negative Circle Drive overlapping each other and used the Topper stamp from the set on the side. It was fun to do a coordinating set of cards- and I stacked them away to use for a variety of occasions.

Here are the supplies I used for the cards


Leave a comment

Home is Where you Launch – Art Journal

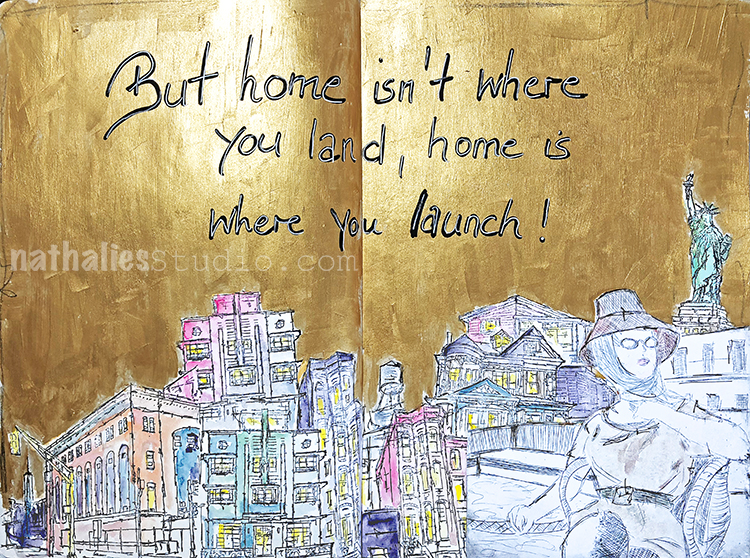
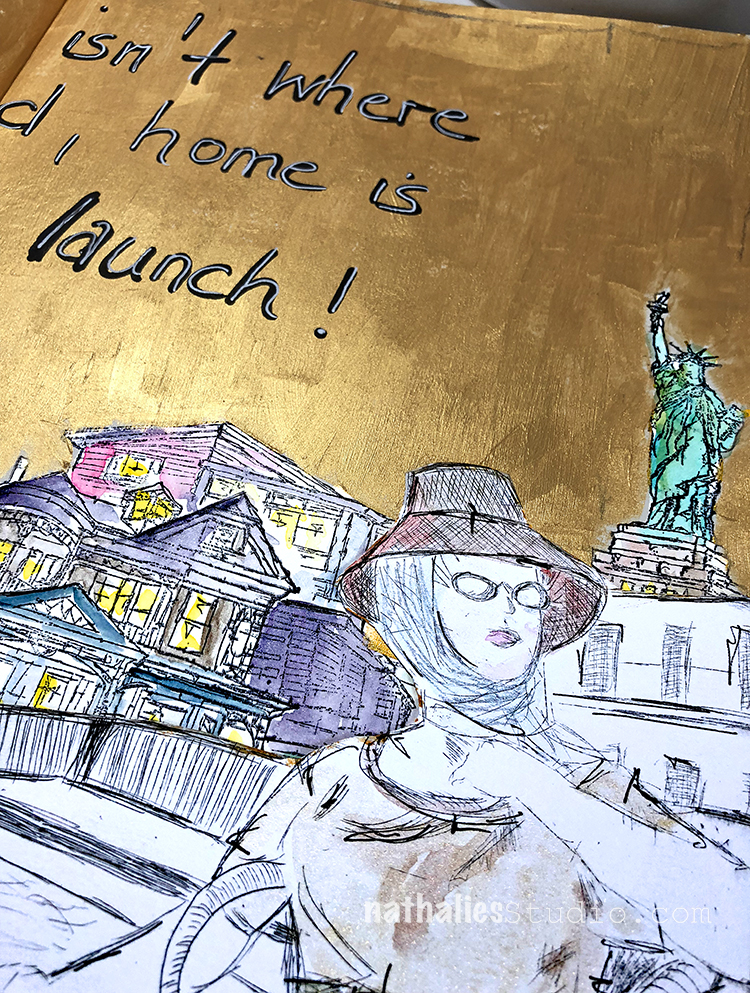
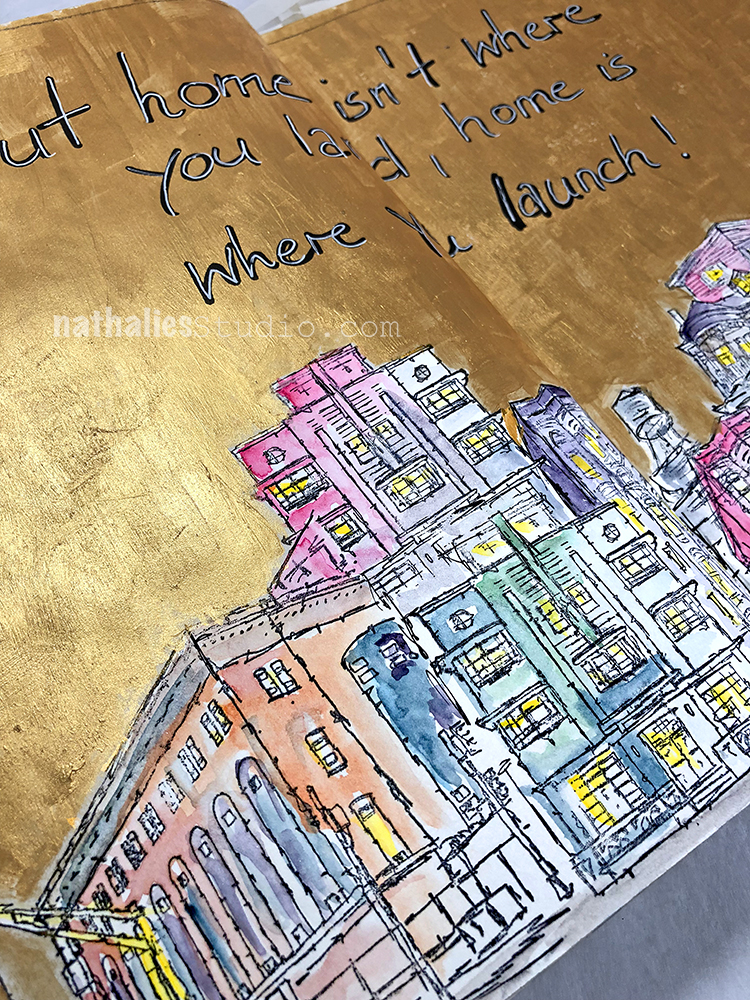
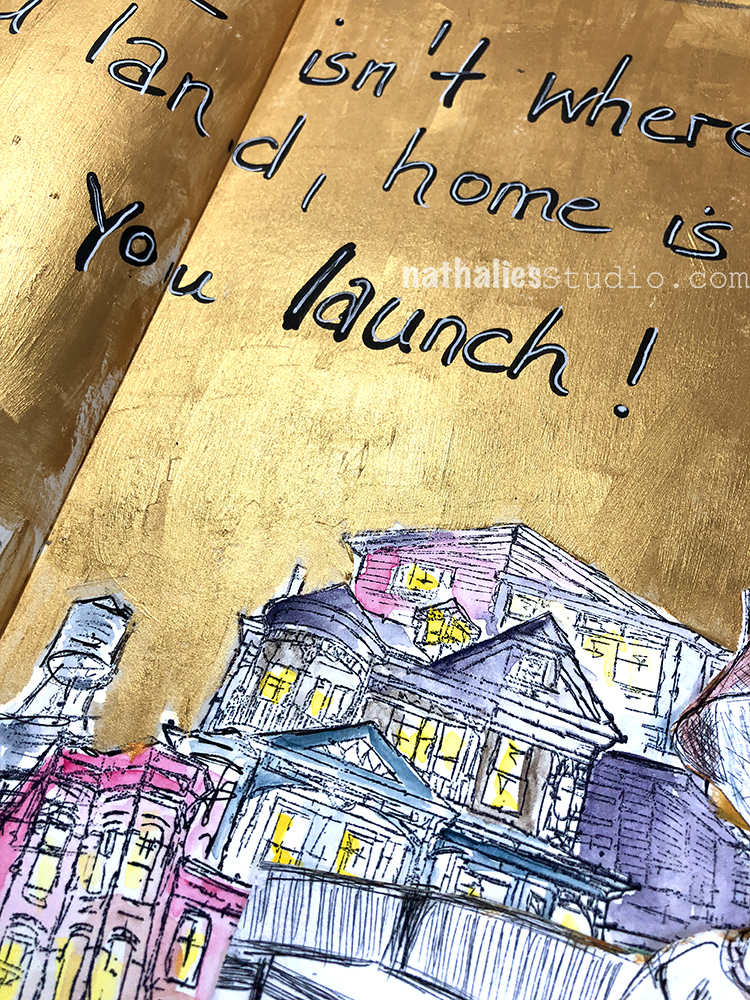
“But home isn’t where you land, home is where you launch!” (from An American Marriage by Tayari Jones) Even though I love living in the States and call it my home and I do not see myself going back to Germany and even though I do feel more like a European than being German…I guess home is still a city in Germany called Hamburg :) I think this is a feeling I share with a lot of immigrants and when I read this quote it really resonated with me and I knew I had to use it for an art journal spread.

I used one of my drypoint prints with the lady as a collage element – you can read more about the drypoint etching class I took here.

I stamped and layered my Stroll Through the Hood and Stroll Around the Block stamps and then colored them in with watercolor.

I painted the top of the background with golden gesso – and I really love how the gold and the watercolor play together.

Here are some of the supplies I used for the spread:


Comments (4)

  • Janene

    |

    I understand what you’re saying. I grew up in Southern California and still consider it my “home” even though I haven’t lived there in over 40 years (and I’ve lived in a couple of other places in between then and where I live now). When I visit California, I’m flooded with good memories of my early life there. But my new home is fantastic in an entirely different way. Kinda like the difference between chocolate and vanilla – both are delicious, but I’d never mistake one flavor for the other!

    Reply

    • nathalie-kalbach

      |

      I love your comparison with the flavors – that is beautifully put! thank you for sharing Janene!

      Reply

    • Donna B.

      |

      I feel the same way. I’d never thought about it before, but I also have strong feelings about the place where I grew up. In my case, I don’t even know anyone who lives back in my old home town or the surrounding area anymore, but if I were to go back there, I suspect it would still feel like my home.

      Reply

      • nathalie-kalbach

        |

        Thank you for sharing Donna- I totally understand what you mean about that it would be different but still feel like home.

        Reply

Leave a comment

Thoughts on Paper – Art Journal

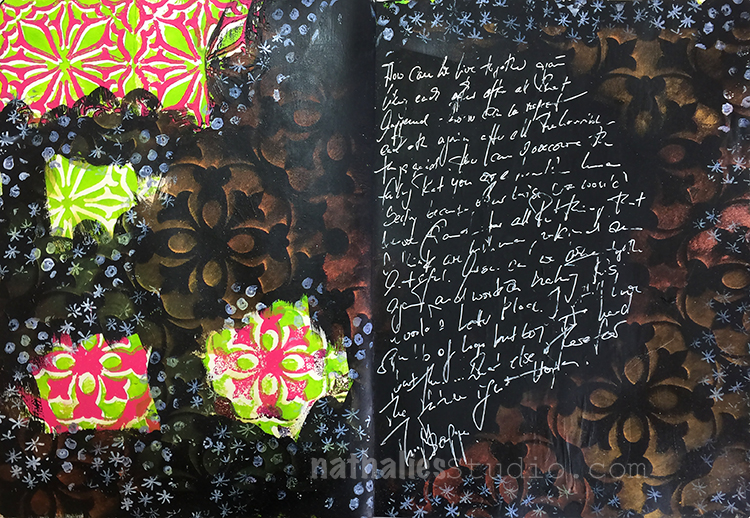
After watching Tina Walker’s Creative JumpStart Video I was inspired to pull out my PanPastels. Her video wasn’t about using PanPastels but she had used them in a little part of her video and that made me pay extra attention. I used to use them all the time and also teach with them and then somehow I really neglected those little pans full of pigment joy! So it was time to dust the pans off and get them out.

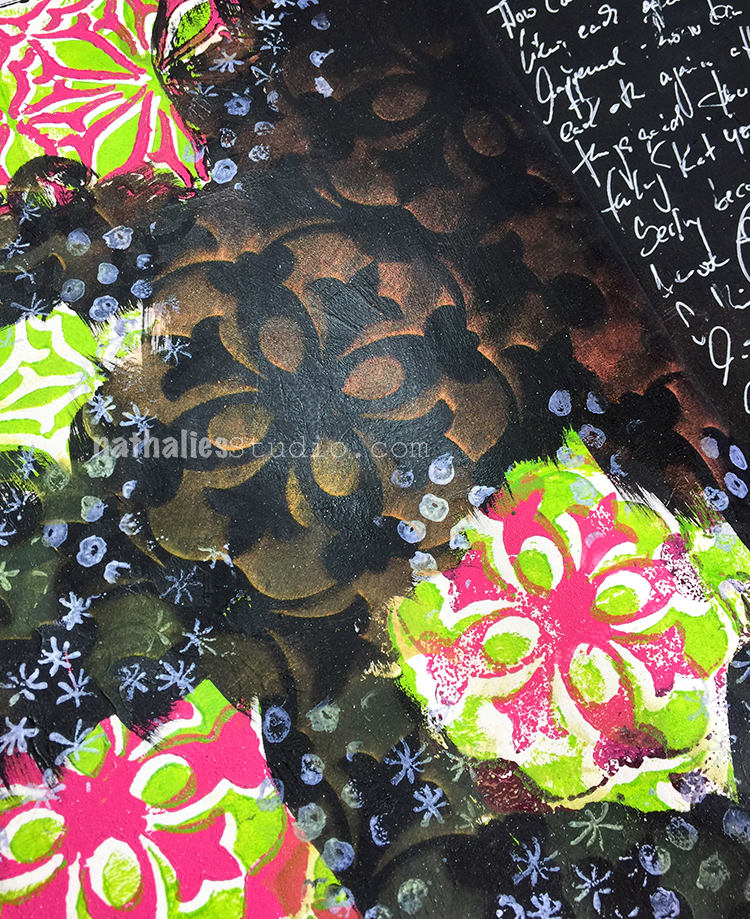
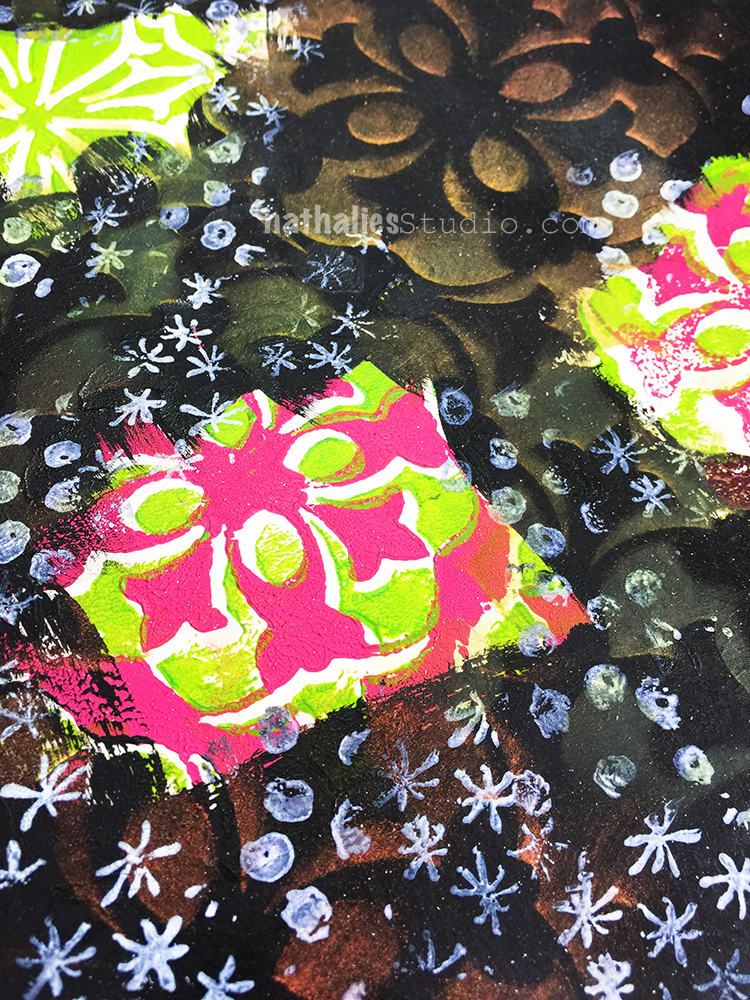
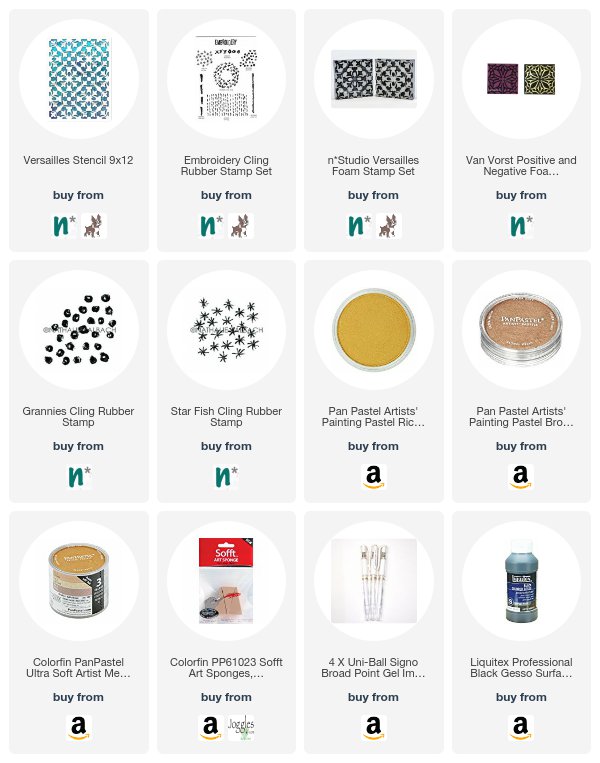
I had covered up some of the background with black gesso which I had stamped with my Versailles Positive & Negative Foam Stamp Set and my Van Vorst Positive and Negative Foam Stamp Set.

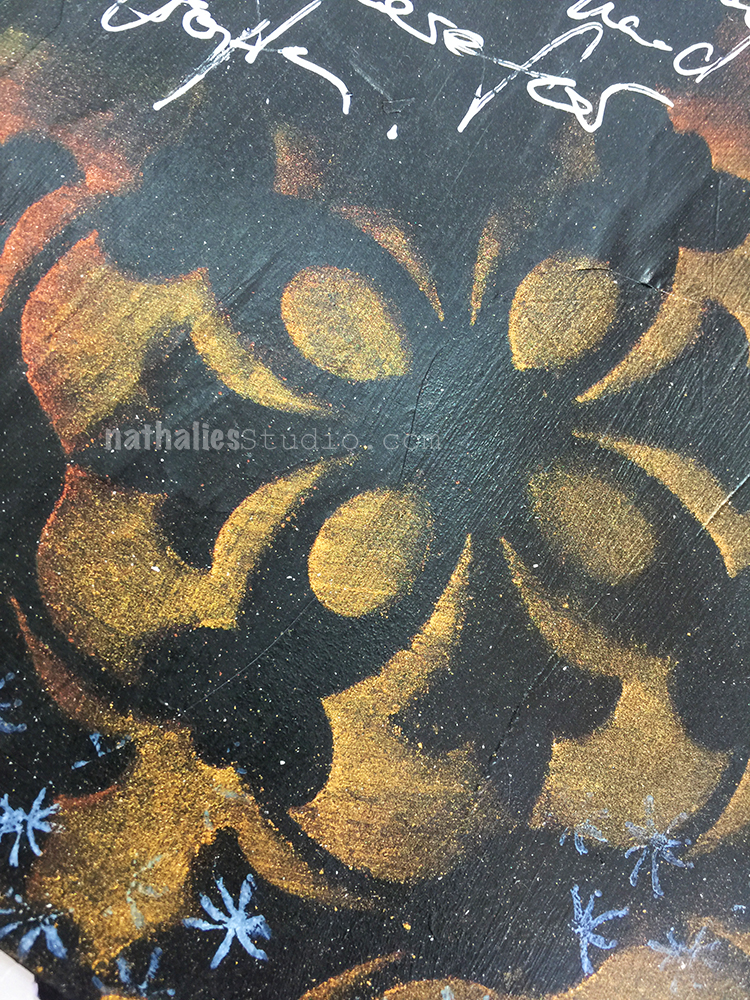
I used gold and bronze PanPastel over black gesso using my Versailles Stencil. I always love how black gesso makes the pastels really pop.

I also stamped with the white side of RubberMoon’s new awesome Moonlight Duo Ink Pads. Each ink pad has a white pad next to the initial color for creating tints and I just love the white by itself. It dries permanent – yeahhhh!!! I used my Embroidery Stamp Rubber Stamp set. This page was really more a bit of a play but I had fun and I put some thoughts down as well – and it served a couple of really good purposes:

  • I pulled out my PanPastels again and I realized I need to use them more again!
  • I tried the white ink pad side of my RubberMoon ink pads and know this will be a staple in my mixed media art
  • I actually did something creative on a day which was filled with computer work and non creative to-do’s and that prevented grumpiness
  • I once more realized that I do not like the look of light green and metallic color next to each other – yeah – sometimes even that is a thing to discover- LOL

I hope you are part of Creative JumpStart as well – it is such a great and supporting community and looking at everyone’s project based on the daily videos is another wonderful source of inspiration. If you haven’t joined yet- you can still do it – sign up for Creative JumpStart 2018 !

Here are some of the supplies I used for this spread:


Comments (7)

  • florenceturnour

    |

    Lol hairspray. Does it smell perfumed? I guess workable fixative doesn’t smell all that nice. I love that you are writing white on black. I’m going to have to give that a try too!

    Reply

    • nathalie-kalbach

      |

      LOL- all I head. Fixative is actually smelling worse and most you have to apply. That wasn’t an option with the cold here anyway- LOL

      Reply

  • cathsheard

    |

    Oooh, those metallic PanPastels – wow! They look fab….

    Reply

  • Catherine

    |

    Nathalie, I really like these journal pages! I love using Pan Pastels, but never quite know how to affix them to the page! Did you use anything so they won’t rub off? Thanks!

    Reply

    • nathalie-kalbach

      |

      thank you Catherine. yes they def. need to be fixative either with a fixative or in this case just with hairspray.. hairspray might change the color but i can live with this in my art journal

      Reply

      • Catherine

        |

        Thanks, Nathalie! I think that would be the easiest! Will try it!

        Reply

Leave a comment

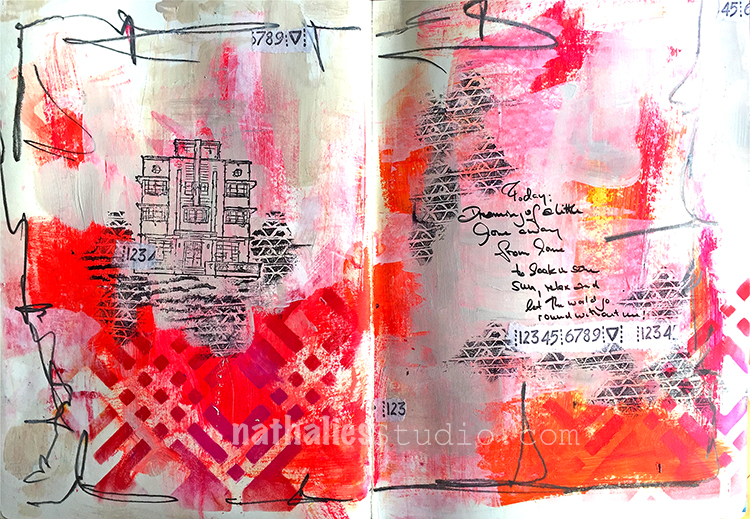
Home Away from Home

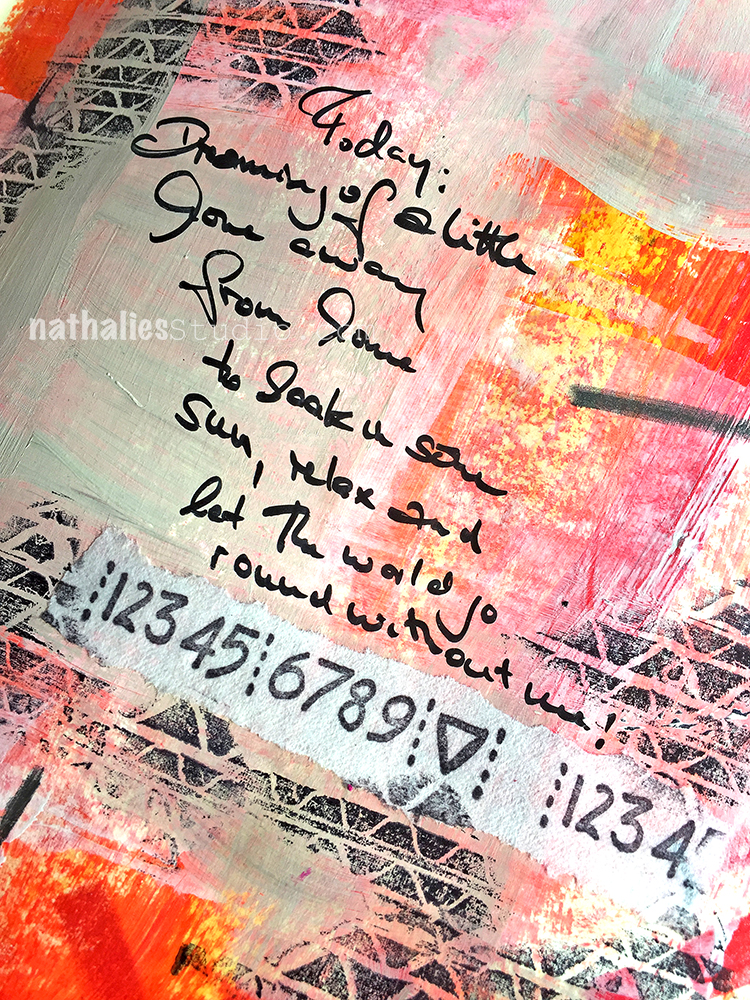
Today: Dreaming of a little home away from home to soak in some sun, relax and let the world go round without me!

Don’t we all have days like that :) ?

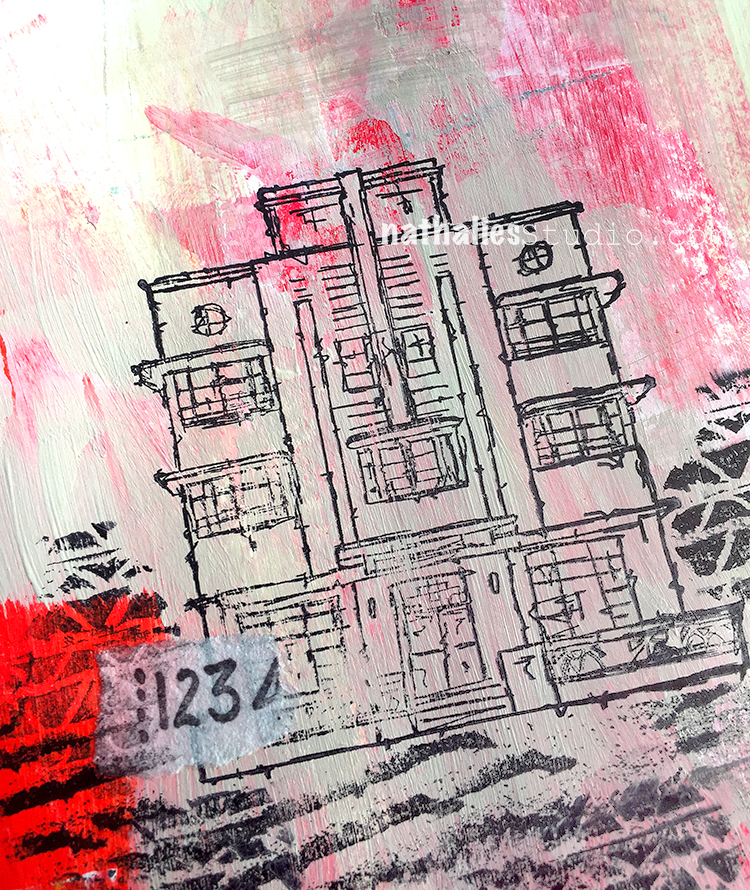
I used the numerals stamp from my Home is my Castle stamp set and stamped it on tape – love the look. I also stamped my art deco stamp from the Stroll Around the Block stamp set and then added some of the Cardboard stamps around it

Some stenciling with the Chicago Stencil and some marks with a soft pencil. I love when the cardboard kind of looks as it comes out through a torn layer of paper, which can be easily achieved with those stamps by only partly inking and stamping them.

Here are some of the supplies I used


Wishing you a wonderful Monday!

Leave a comment

Which Direction?

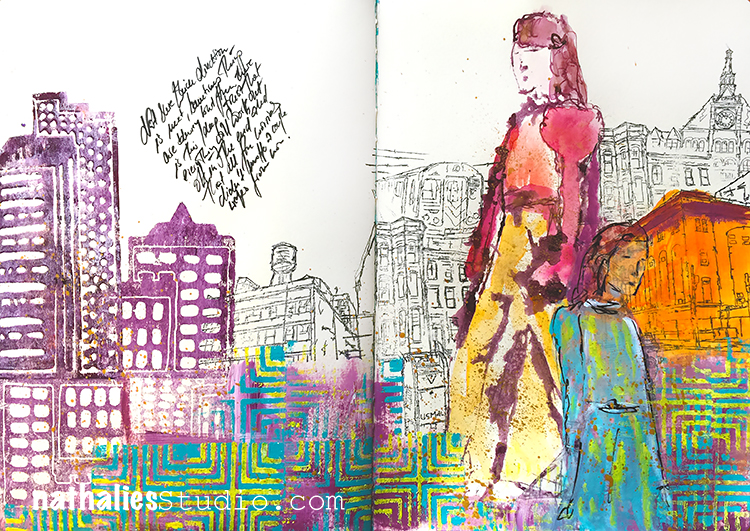
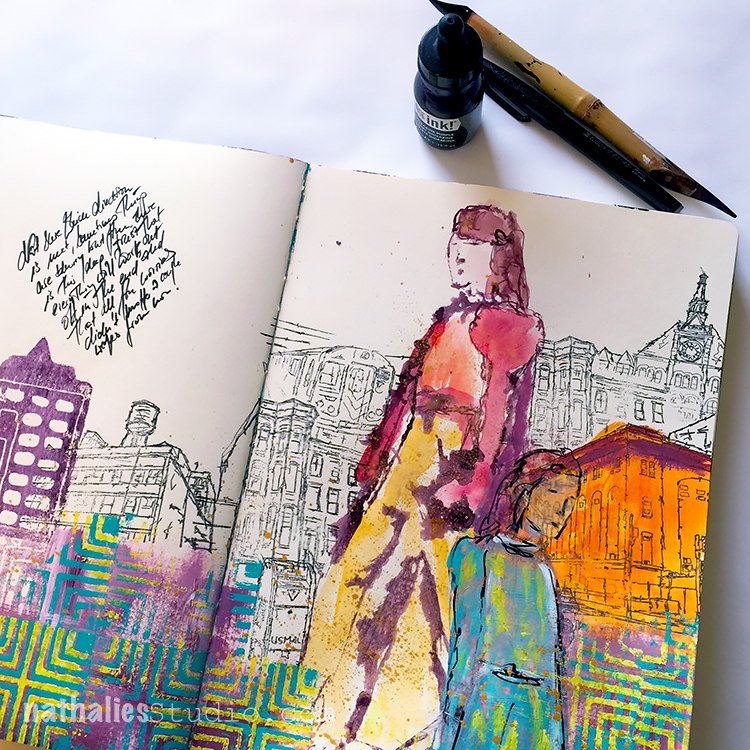
I was thinking about how so many times in our lives we have to rethink the direction we want to head – always so tough , so many questions, so many uncertainties.

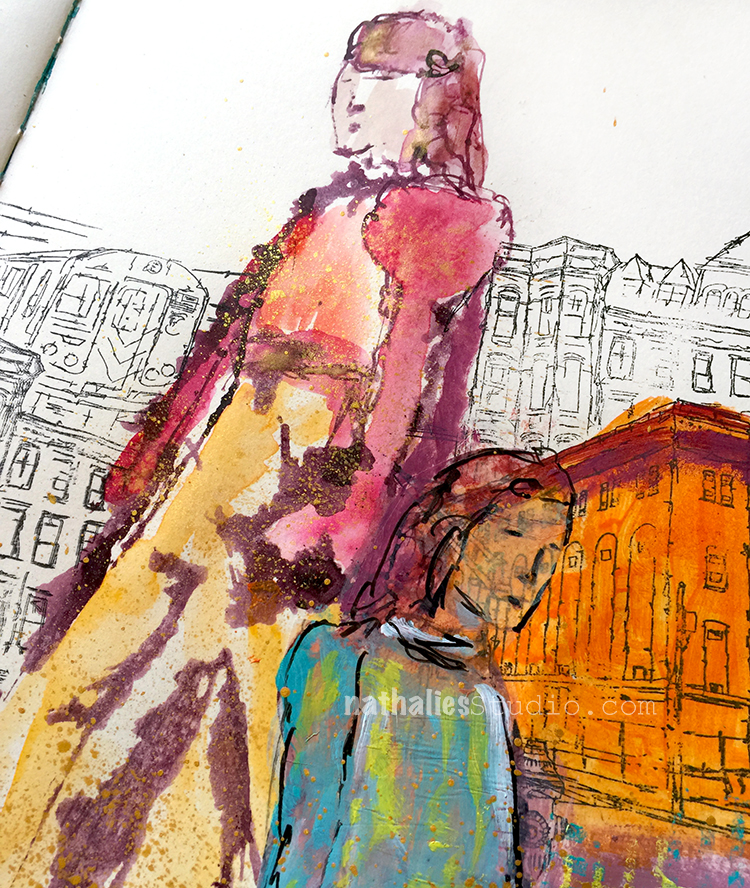
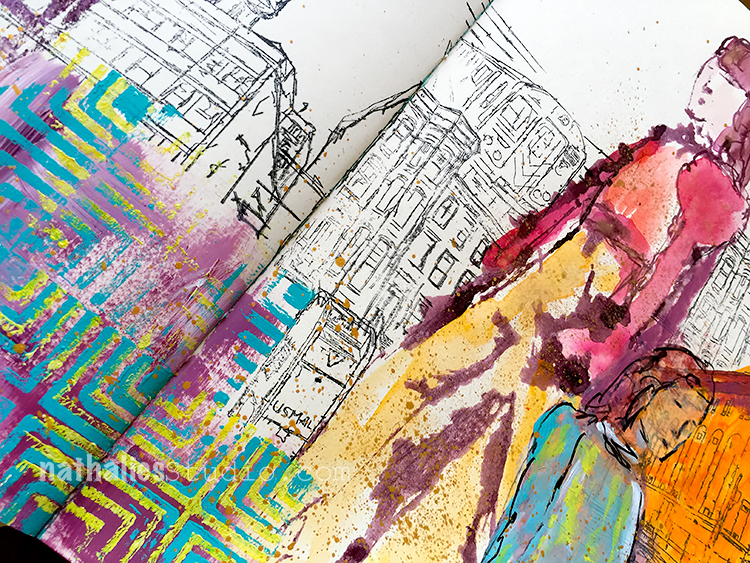
For this art journal spread I sketched the lady on the left with acrylic ink and a bamboo sketching pen, and colored her in with watercolor. The right lady is on a piece of painted deli paper which lets the background show through.

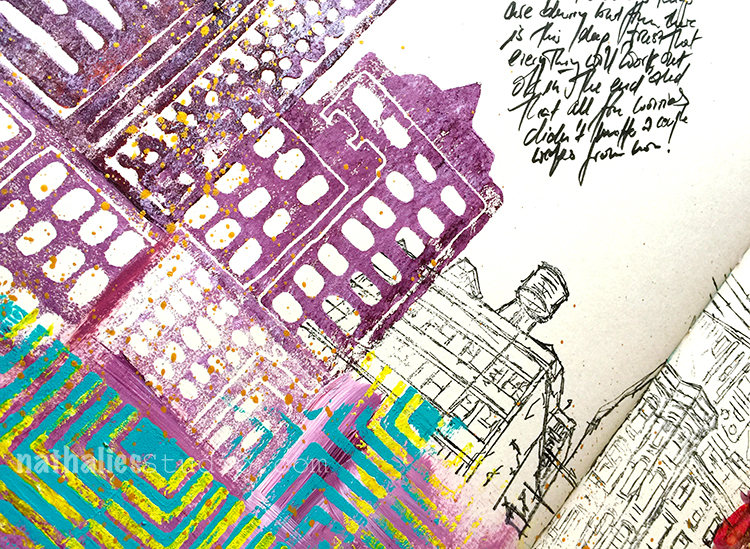
I added some stamping with my Stroll Through the Hood RubberMooon Stamps and stamped with acrylic paint and the MidTown ArtFoamies Stamp Set as well as the Mini Manhattan Positive and Negative Stamp set.

I sprinkled some golden ink over the spread and added the journaling. I do love how this turned out.

Different from my usually super filled pages- but still funky :)

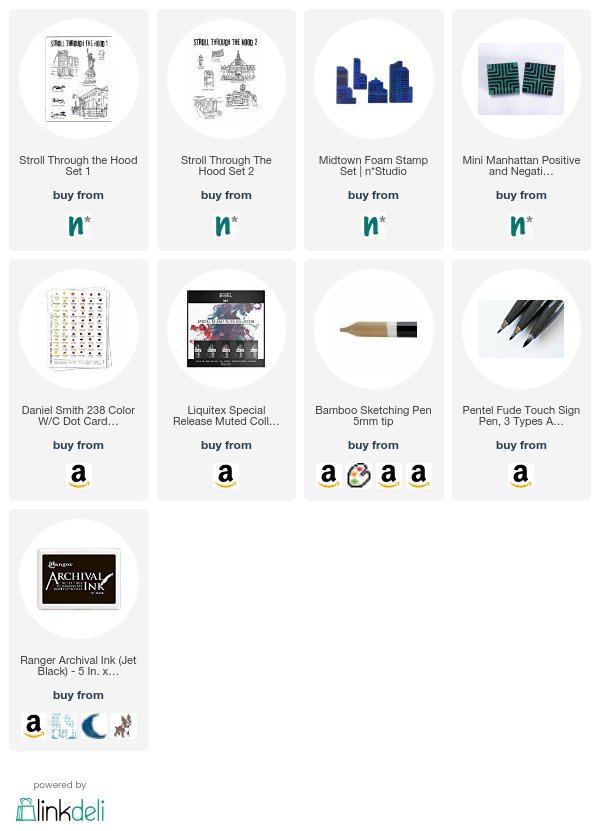
Here are some of the supplies I used for this spread


Comments (2)

  • Joi@RR

    |

    Love this one Nat. Your gals are so abstractly done – in a great way and then the buildings are more “solid” – stabilizing. Love that some are black/white too. And the Mini Manhattan stamp is perfect symbolism for the “which way” – and perfect in the varying colors to show different choices. This is one that would be great on a huge canvas – so symbolic and the type of art that speaks! You always inspire me. Have a blessed holiday season. Xj.

    Reply

    • nathalie-kalbach

      |

      Thank you so much Joi! Wishing you a wonderful holiday season as well!!!<3

      Reply

Leave a comment

DIY: Flower Pot Madness

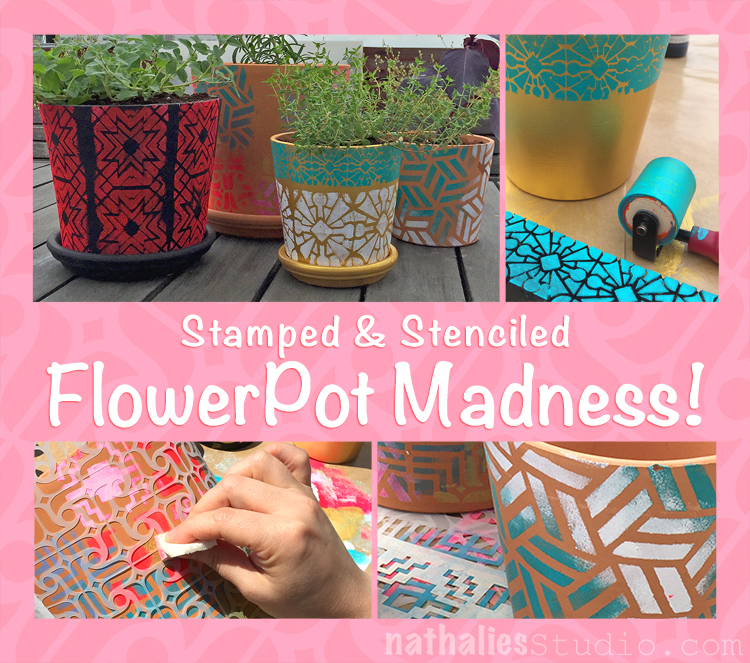
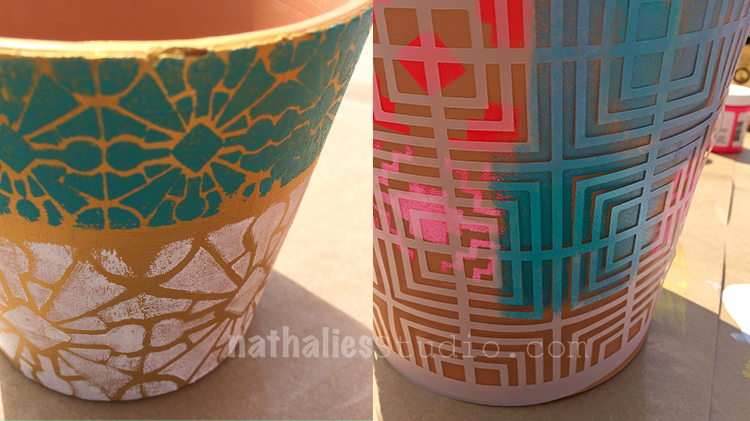
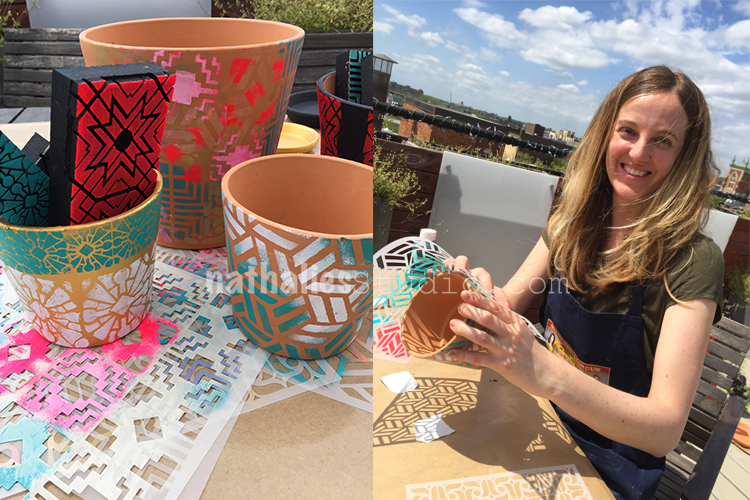
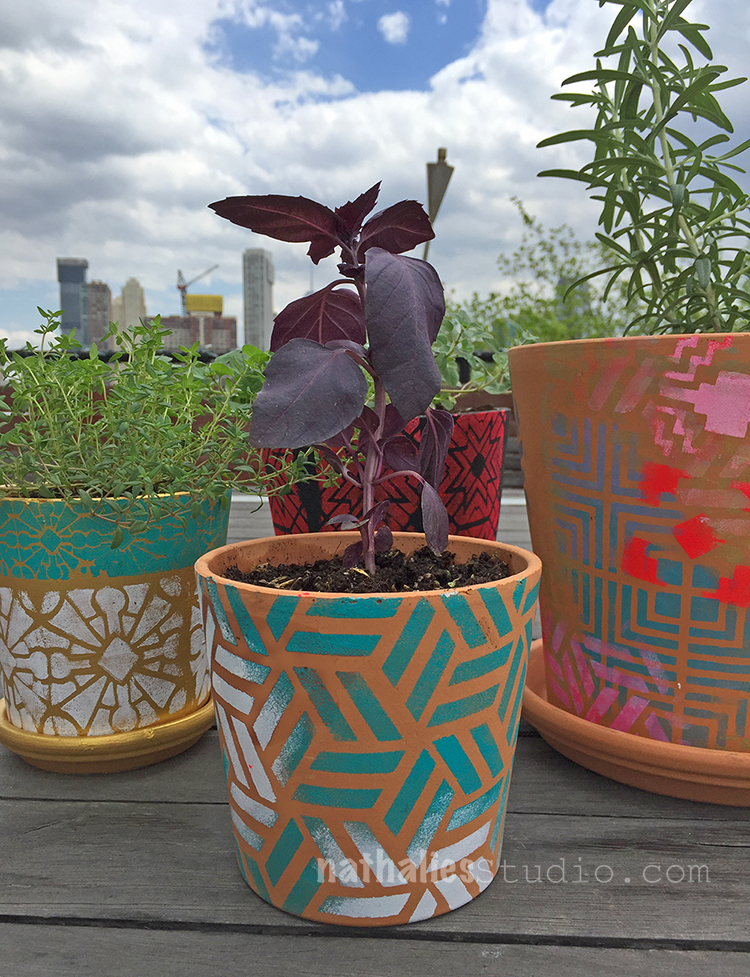
My friend Kim and I decided a while ago that we would stamp and stencil some flower pots and even create some as an upcoming Mother’s Day gift. I also think that Kim can’t bare seeing my really badly neglected plants on the terrace ;) (I do have a brown thumb for sure!)

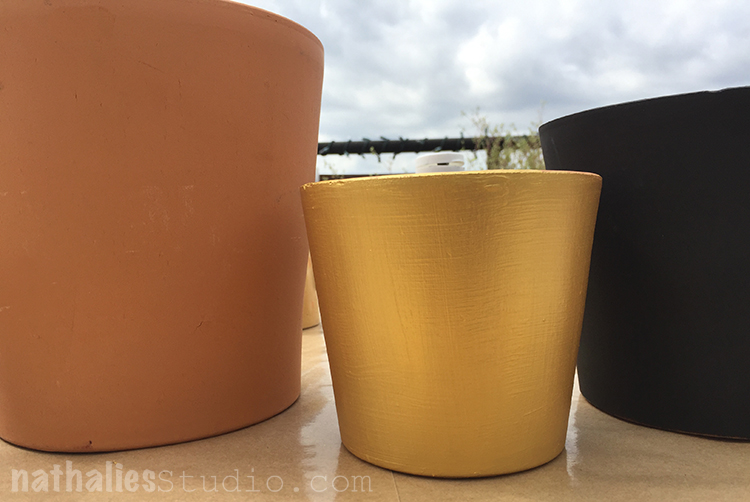
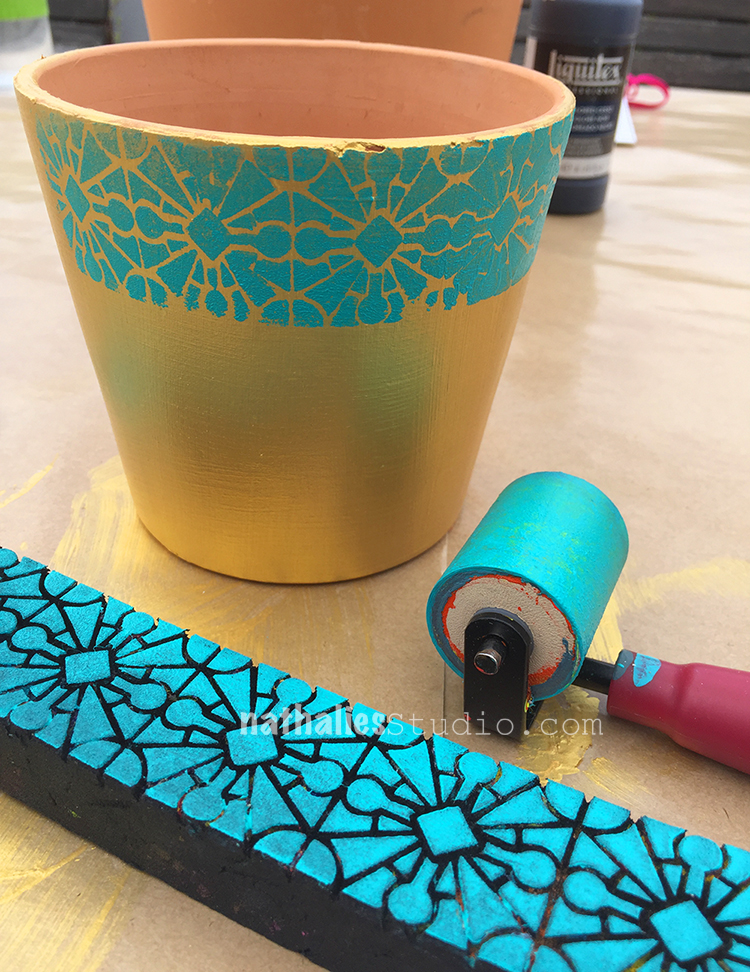
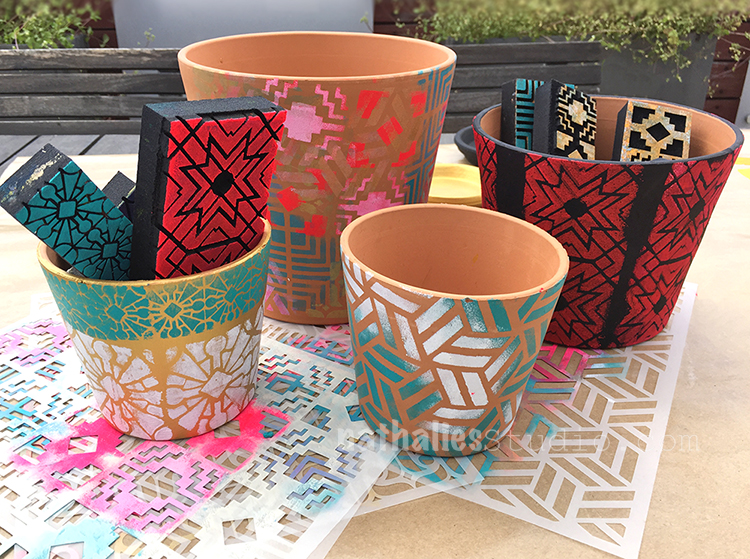
We left some pots in their natural color and painted others with golden gesso and black gesso.

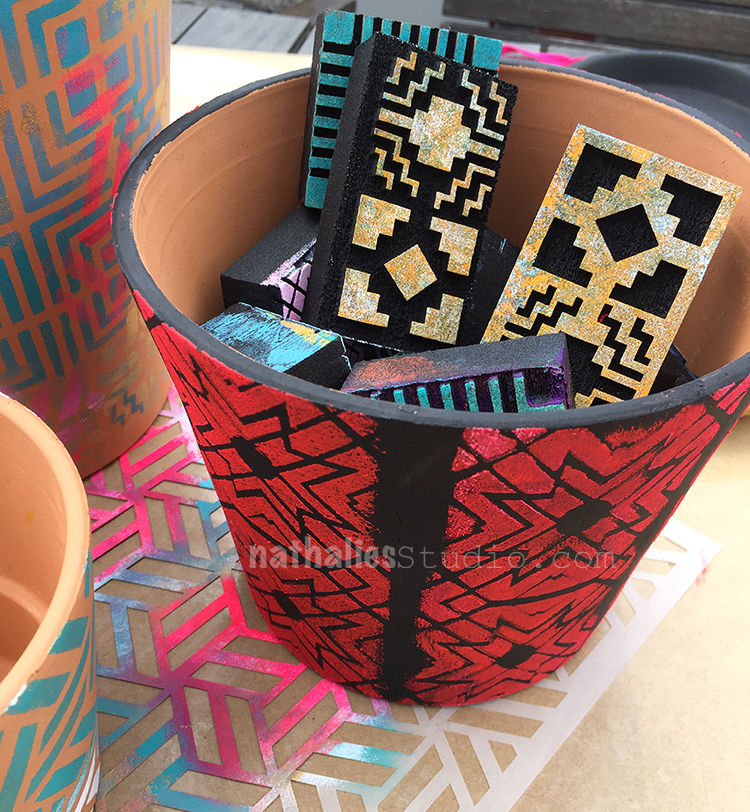
On some pots we used my ArtFoamies Foam stamps. We used a brayer to apply acrylic paint to the foam stamps and then used them on the pots. Especially the border stamps worked well since they can easily and carefully wrapped around the pots.

We both really loved how the colors popped off the black and golden gesso-ed pots.

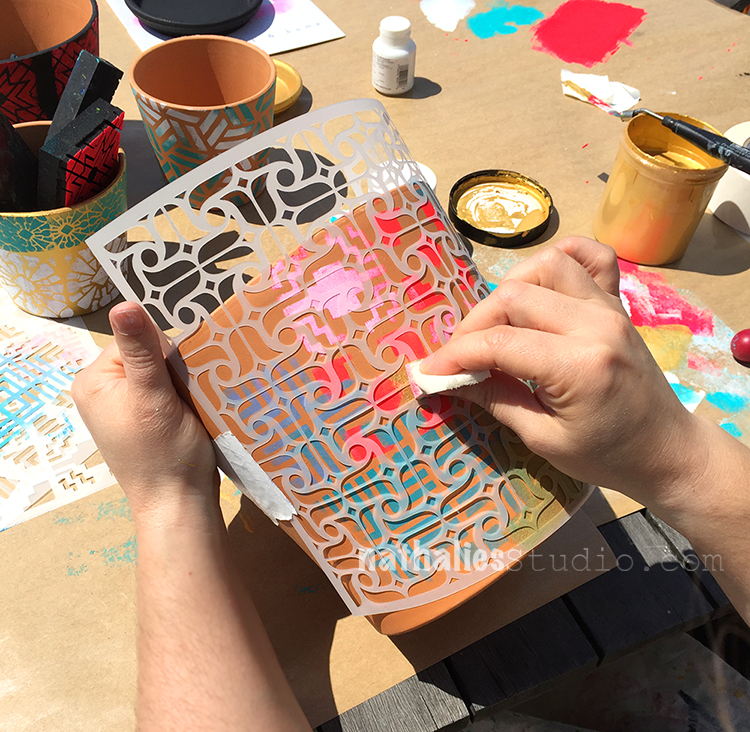
For some pots we used Stencils – we secured the stencils with masking tape and it was so fun and quick.

On one pot I got a bit wild and layered all kinds of stencil designs.

While Kim took a more “less is more” approach and used one stencil with variations of color – I like that very much :)

We loved being outside and it was such an easy and colorful project – I could do this all day long- no kidding.

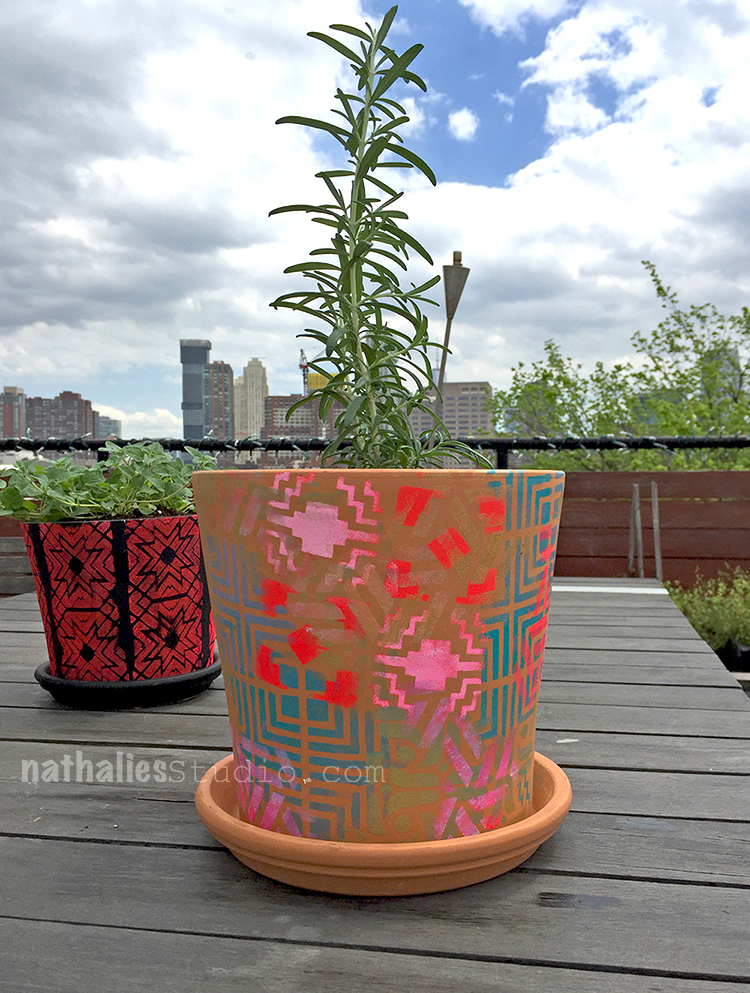
And then we added some herbs and dirt and voila

Don’t you think this rosemary should be happy in this new home? Well…I promised to also water it ;)

Mother’s Day can come now and …summer – Cannot wait to sit outside and enjoy my new funky colorful pots on the terrace!

Here are some of the supplies we used – some links are affiliate links:


Hope you have a wonderful day and enjoyed this little project!!!

Comments (4)

  • Sherri Scott

    |

    Nat, they’re beautiful! I might try to brighten my flower pots

    Reply

    • nathalie-kalbach

      |

      Sherri, so glad you like them and yeahhhh – brighten yours too :)

      Reply

  • Sue Clarke

    |

    Looks like you and Kim had fun and what a nice collection of pots you ended up with as well.
    Will you put any kind of protection over the paint to help the design last longer Nat?

    Reply

    • nathalie-kalbach

      |

      thank you Sue :) You can seal those with Matt Medium of course.

      Reply

Leave a comment

DIY – Stamped Easter Eggs

For the upcoming Easter Holiday I decided to dye some eggs. I bought some wooden eggs, blew out some brown eggs and cooked some white eggs to have a variety to play with.
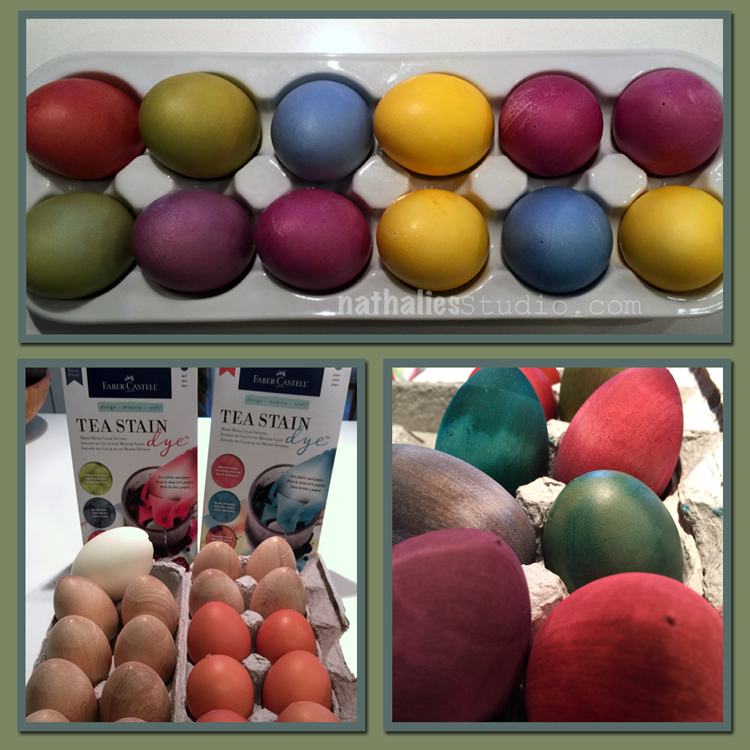
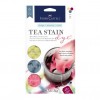
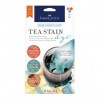
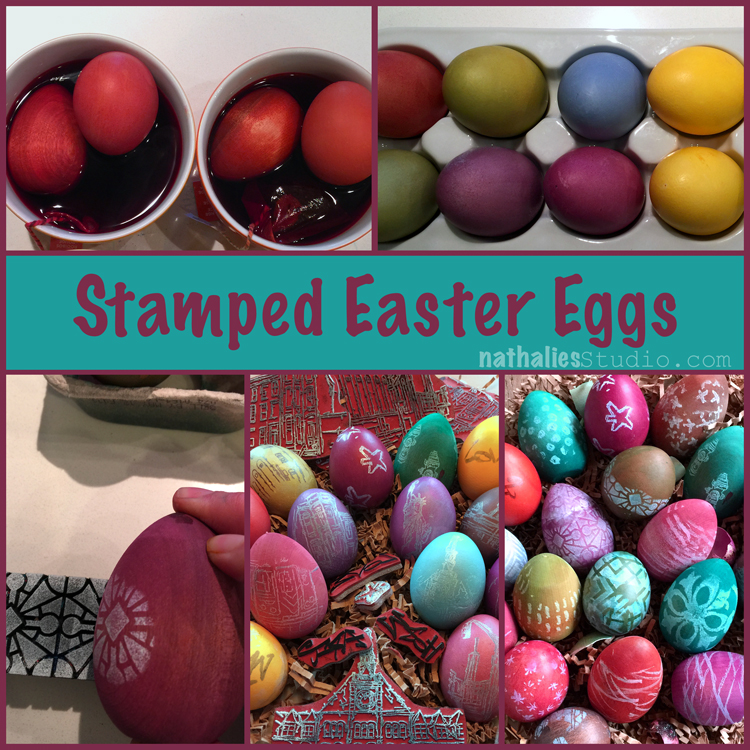
I dyed the cooked white eggs with some natural dyes (Yellow/Orange (Annatto extract), Purple (Radish), Blue (Cabbage) – see picture on top of the collage. For the blown out brown eggs and the wooden eggs I wanted to try the new Tea Stain Dyes by Faber Castell, which are not suitable for food. They are meant to dye fabric and paper but I thought it should work with wood and egg shells too. I loved how the colors came out with these dyes, especially on the wooden eggs, the brown eggs were a bit tricky with the light green, but it was all good. Both dyes resulted in colors that I was super happy with.
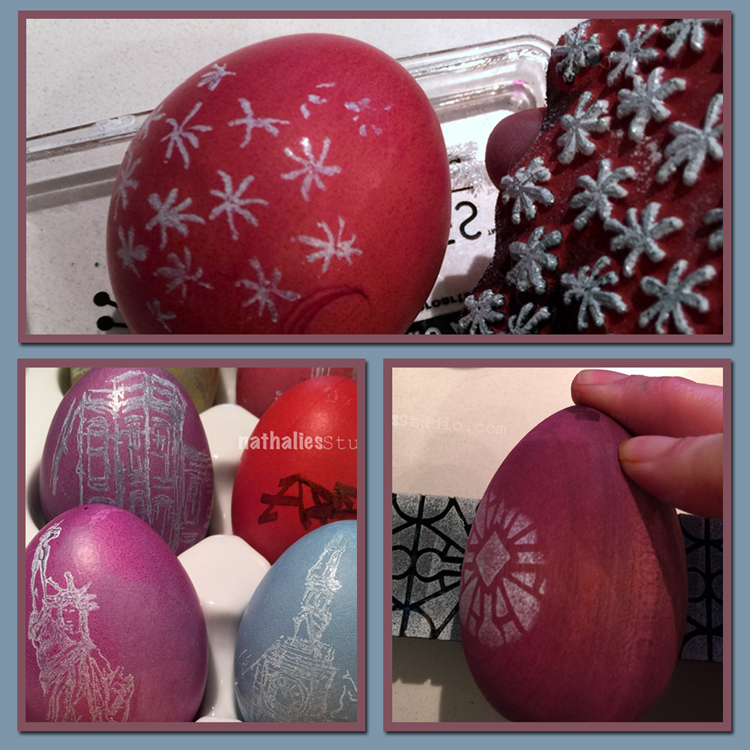
I stamped the eggs with a white pigment dye stamp pad – using my inked cling rubber stamps by wrapping those carefully around the egg, and using some of my foam stamps by rolling the egg over the inked stamp.
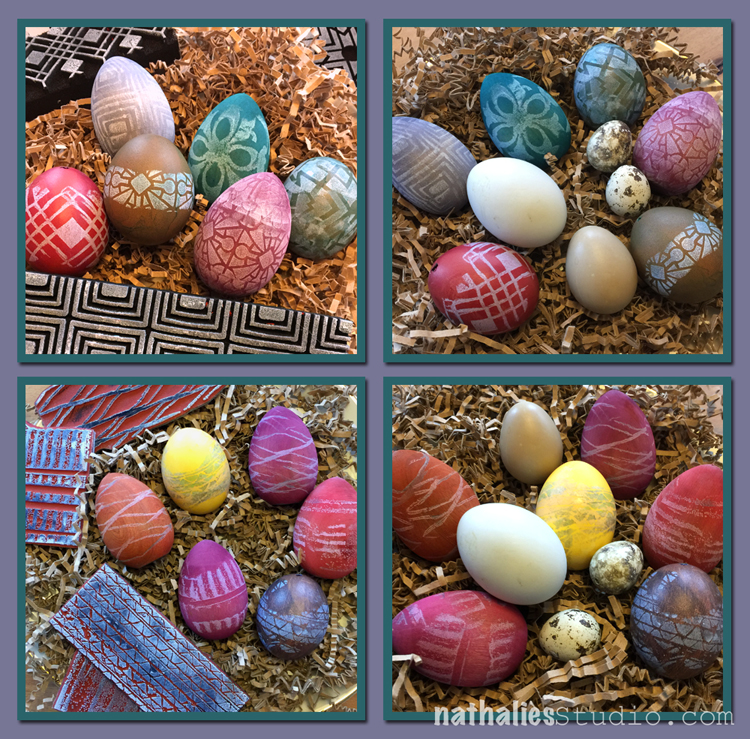
On the top row you see the eggs stamped with my ArtFoamies foam stamps – I love how they turned out- the impression is bold.

On the bottom I used my Cardboard Cling Rubber Stamp Set. I loved especially how the Tread stamp gave a look of rubber bands but I do love ever single one. The yellow of course was a bit tough with white ink …so I used an archival ink on top which made it a bit smudge. Oh well.
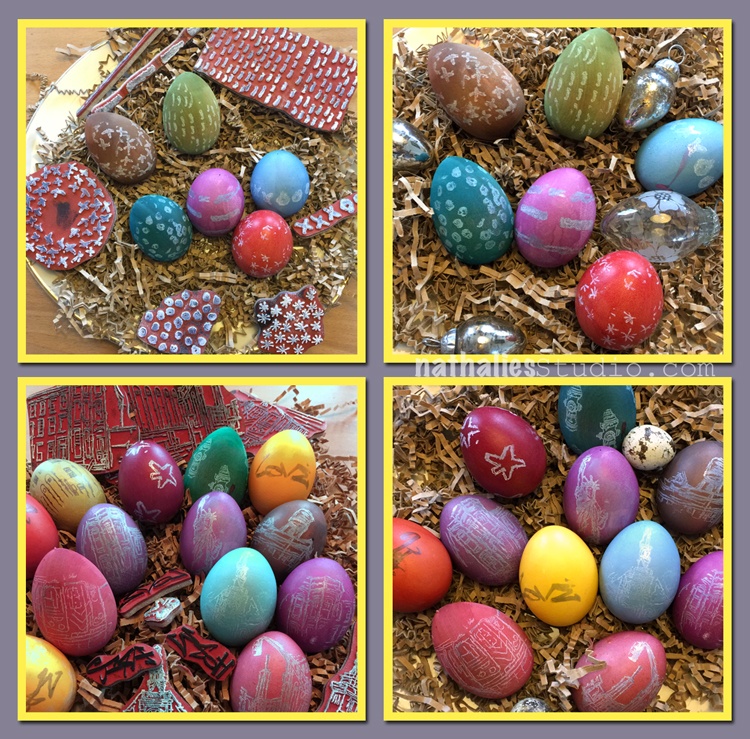
Next I tried my Embroidery Cling Stamp Set – ohhhhh- i so loved the look of this. The different stitches came out really well on the eggs.

On the bottom you see eggs used with the Stroll through the Hood Cling Stamp Sets -see the Hydrant pattern – I was geeking out- LOL- I know it is random but I love it.
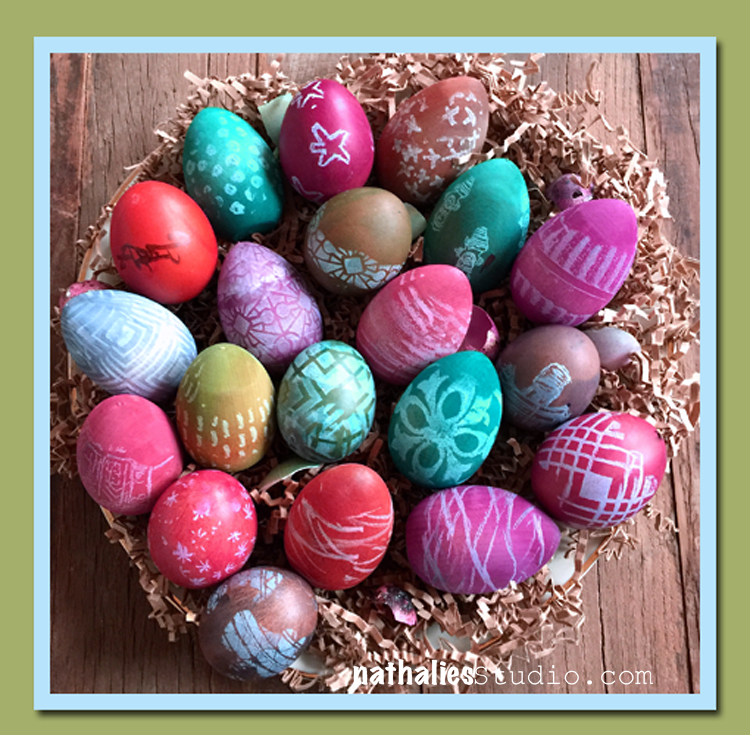
Here you have a couple of the eggs as decoration on my table. The cooked eggs are in the fridge waiting to be consumed in the next couple days ;) That was super fun to make, so easy ! I hope you like them and give these a try :) Here is the supply list of what I used besides some brown and white organic eggs:

Comments (4)

  • stephanie

    |

    great eggs!

    Reply

  • Joi@RR

    |

    Heheheh – love your EASTER PARADE of EGGS Nat! They are GORGEOUS. Your stamps are perfect on them. Xj.

    Reply

    • nathalie-kalbach

      |

      thank you Joi, I am so glad you like them :) Have a wonderful start into the week! <3

      Reply

Leave a comment