Creative Squad

Creative Squad: Good Morning Good Evening – Riikka Kovasin

Hello from my Creative Squad! Today we have a post and video from Riikka Kovasin who is sharing an art journal page using my Row Houses foam stamp and Art Deco Empire stencil in response to our theme: Good Morning Good Evening – Are you a Morning Person or a Night Owl? Or maybe neither? Create a project inspired by your preferred time of day – when you are in good spirits, doing what you love, and enjoying life.


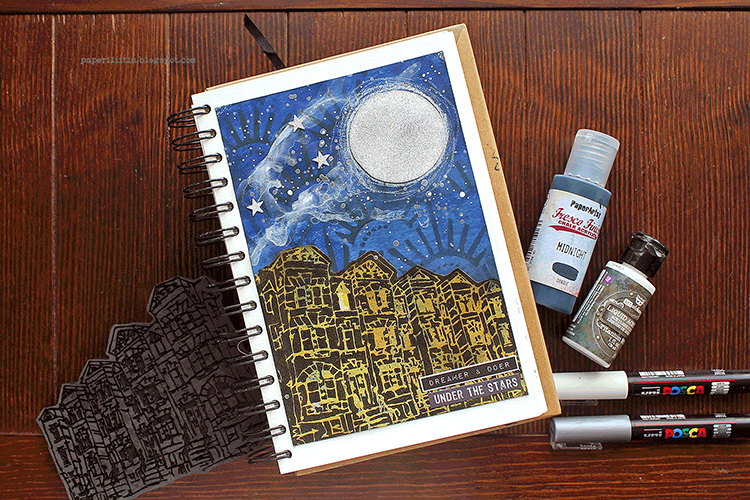
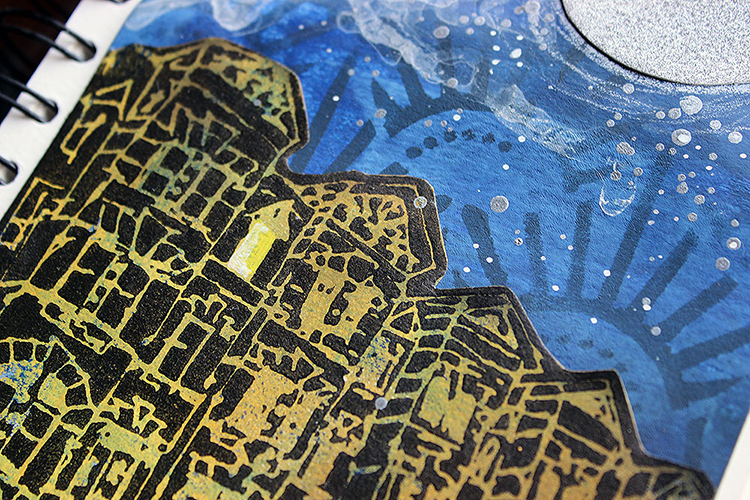
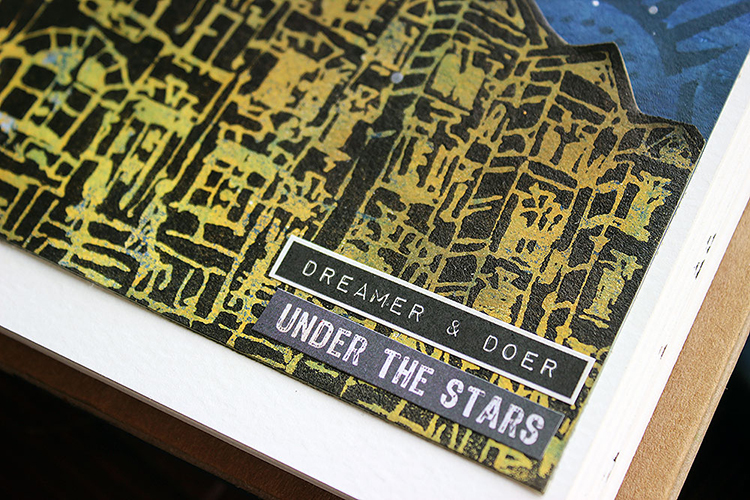
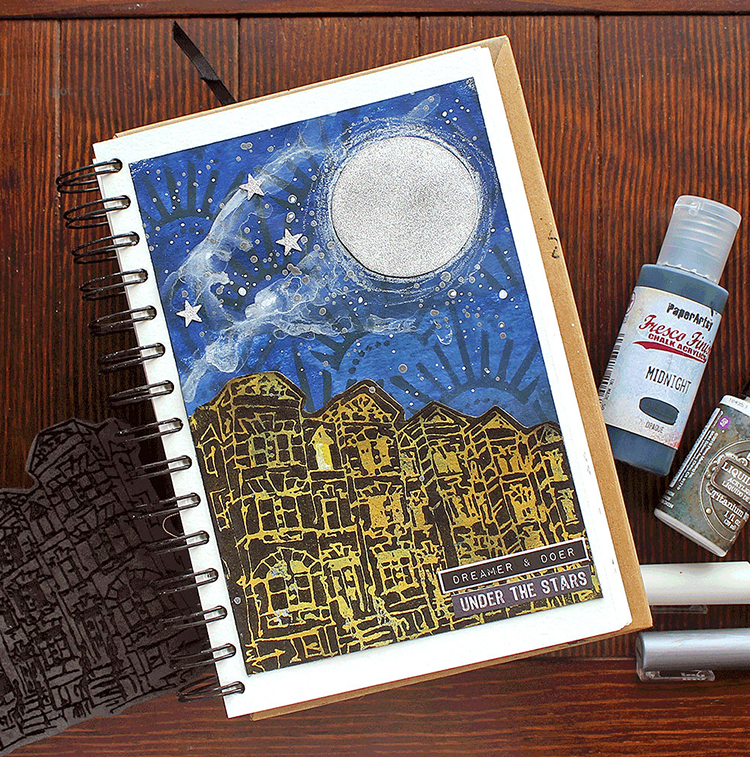
Dreamer and Doer Under the Stars 

Hi there! It’s Riikka here today with my take on the theme “Good Morning, Good Evening”. I did an art journal page and as always, recorded a little video while making it. 

I’m a would-be night owl. When I was younger and could get away with less sleep, I used to draw, sketch and get my best ideas during the nocturnal hours. But as I’m growing older, I need my eight hours and during work weeks can’t really be up too late. When I’m on vacation, though, and can self decide my daily rhythm, I tend to craft until morning hours and then sleep in. But unfortunately, in everyday life that rhythm doesn’t work. Thus the “would-be”. 

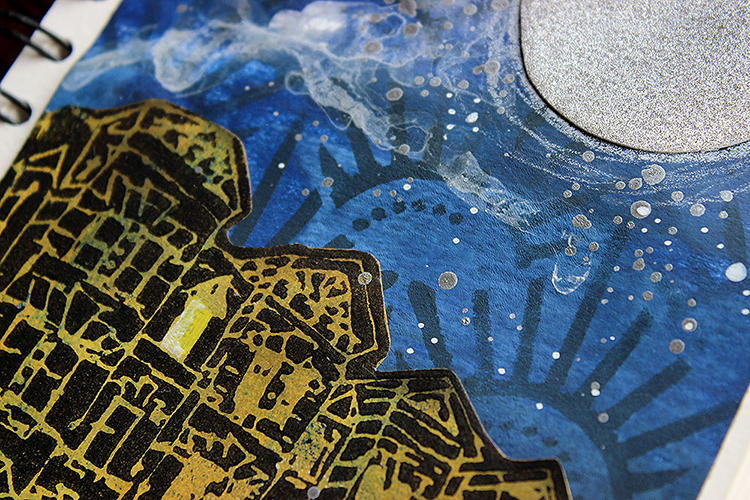
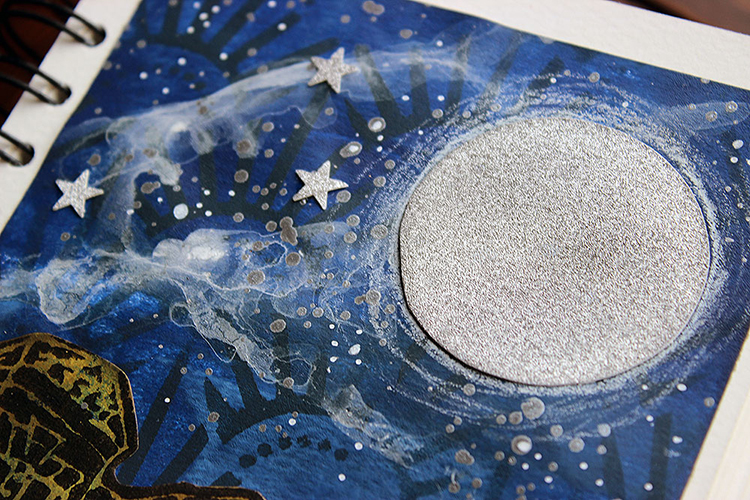
I knew immediately that I wanted to depict night, but the question was how and with what. The answer came when Nat’s great new stamps arrived. I stamped each of the motifs to a cardstock to try them out (and made a Reels out of it) and then used that cardstock to create two projects. The other of those was an art journal page. I really loved how that turned out and thought to re-create it with some alterations – most of all the color scheme. The other inspiration for the page was a stunning evening scenery through our living room window one night. An inky blue sky with white smoke-like clouds and stars just emerging and underneath it the black and golden apartment buildings with some lights on. I used that image to compose my color palette and even added that airy cloud to the sky. What the scenery was missing, was the big silver moon I added to the page.

I used gel printing plate to create the colored pieces. A gradient blue for the background and a mix of two yellows for the building. As I mimicked the golden tones I saw during the evening, I needed a yellow background for my black building silhouette. That created the effect of a lit building. I colored one of the windows of the “Row Houses” with yellow to show that someone is awake. I kind of thought that would be me, crafting, when the city is otherwise asleep. The “Row Houses” was an obvious choice for the scenery as we live in an apartment building and all the other buildings around are also with several stories.

I was looking for “a night owl” text sticker to finish the page, but fortunately couldn’t find one. That forced me to think other versions, and I combined two texts to compose a story. It sounds a bit poetic – dreamer and doer under the stars. Dreamer I thought in this case to mean both actual dreaming, sleeping, but also hopes and dreams. Doer on the other hand is the crafting part. Are you also a “under the stars” style crafter or rather the opposite?

Thank you for stopping by today! Have a great week!


Thank you Riikka – I love that window and thinking about who may be in there, working away under the moonlight!

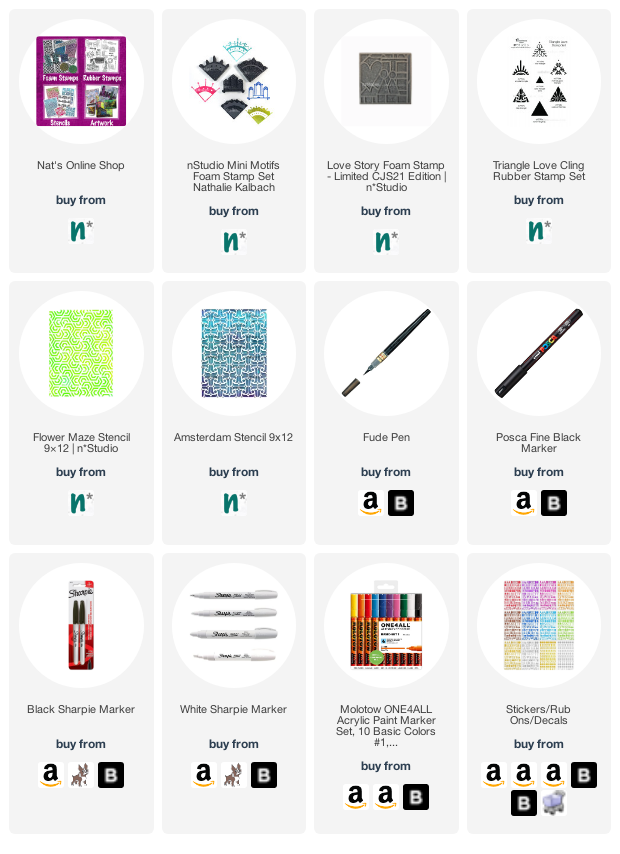
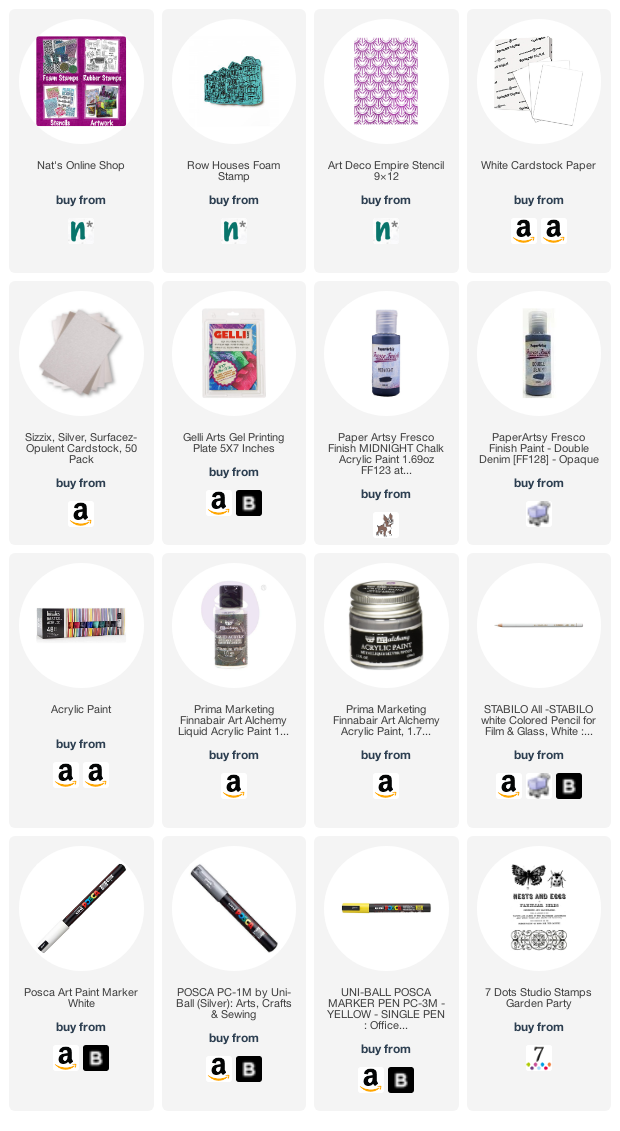
Give it a try: you can find all my Foam Stamps and Stencils in my Online Shop and here are some of the supplies Riikka used:

Like what you see? Follow the Creative Squad on Instagram for weekly posts, artwork, and inspiration.

Comments (1)

  • Sue Clarke

    |

    Riikka, this is stunning. I love the golden colors around the buildings and the moon dust!

    Reply

Leave a comment

Pattern Monday 14 – Video from my Ledger

Happy Monday and welcome to another pattern in my big vintage ledger! This time I’m using stamps from my Small Circle Jumble, Triangle Love, and Mini Motifs rubber stamp sets. I love the complexity that this pattern gets just from the complexity of the stamps. Have a look:

Here is the finished page and what went into it:

Now it’s your turn. Here are the supplies I used:

Comments (2)

  • Sue Clarke

    |

    Love the patterns and the bright colors!

    Reply

Leave a comment

Hydrant Card from my Creative Squad

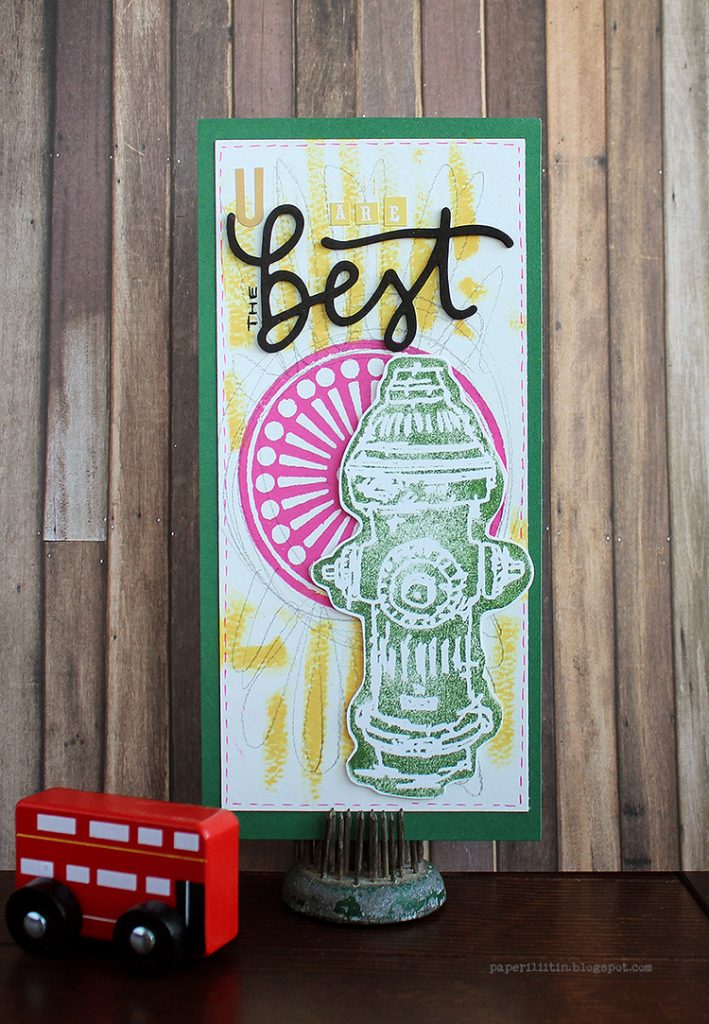
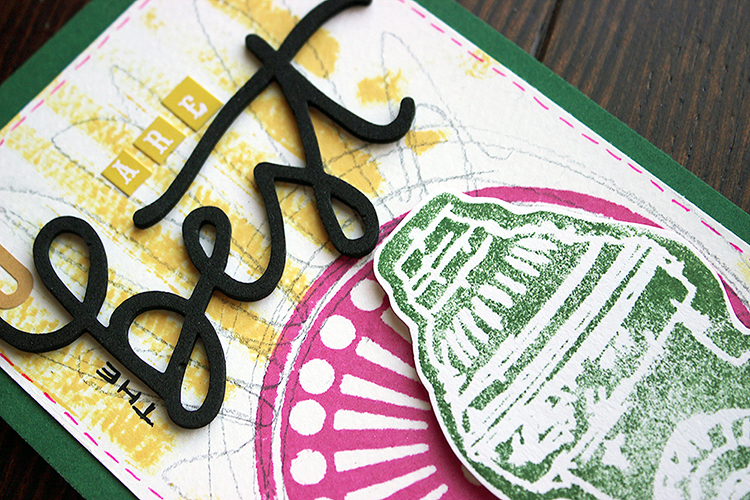
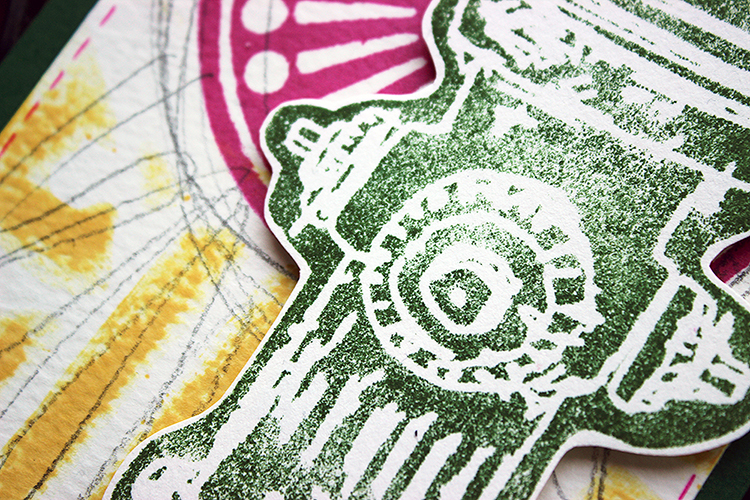
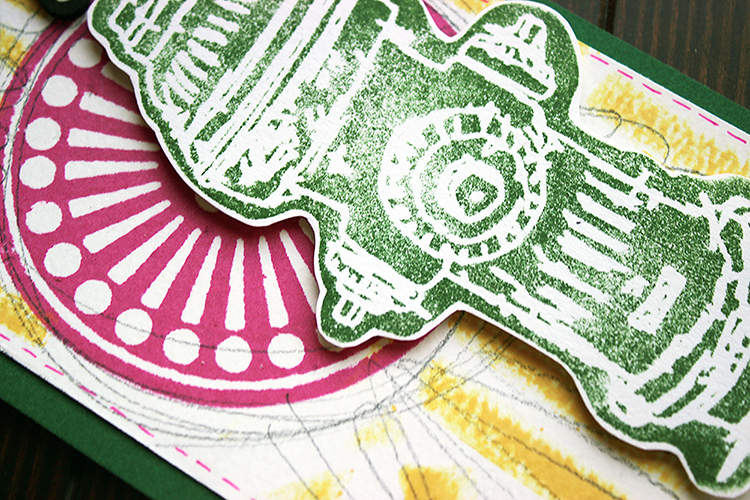
A bonus project from Riikka Kovasin from my Creative Squad for you today :) I think this card is super cute with the Hydrant foam stamp as the focal point on top of Grove St (for some extra oomph) and the message “You are the best”!

Here is from Riikka:

“I’m not totally sure how a person could be the best hydrant, but I still thought that the Hydrant would make a great focal point in a card! The shape is really captivating, don’t you think? Maybe it’s more like the hydrant looks like number one? Or that it doesn’t have anything to do with the sentence! “

“Where the art journal page was layered with different mediums, this card is more straight forward. There’s only different inks used in this card. Oh, and some pencil scribbles. The background is done using Archival Inks. First I stamped the circle (another ArtFoamies, Grove Street) and then added some yellow patterns around using a stencil. The focal point, the “Hydrant”, is stamped using Distress Ink and it’s actually from a try out sheet I did after getting the stamps. You might have seen that on my Instagram Reels.”

Thank you Riikka – I think anyone would be honored to be called the best hydrant LOL

Give it a try: you can find all my Foam Stamps in my Online Shop and here are some of the supplies Riikka used:

Leave a comment

Stroll Through the Hood – August 2021

Strolls through my hood get me out of my studio, they help me get unstuck and often I get inspired by what I see and get new ideas to create something. It is part of my philosophy about Artful Adventures in Mixed Media – which is the subject of my book. Here are some photos that I gathered in the last couple weeks.

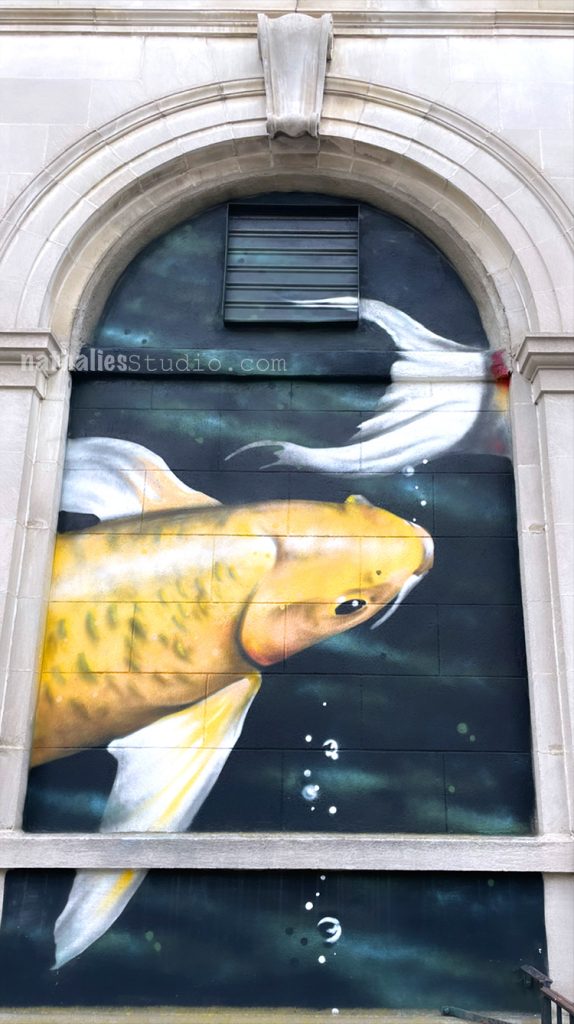
A window that was closed at a police station – the little aquarium make this act look much better!

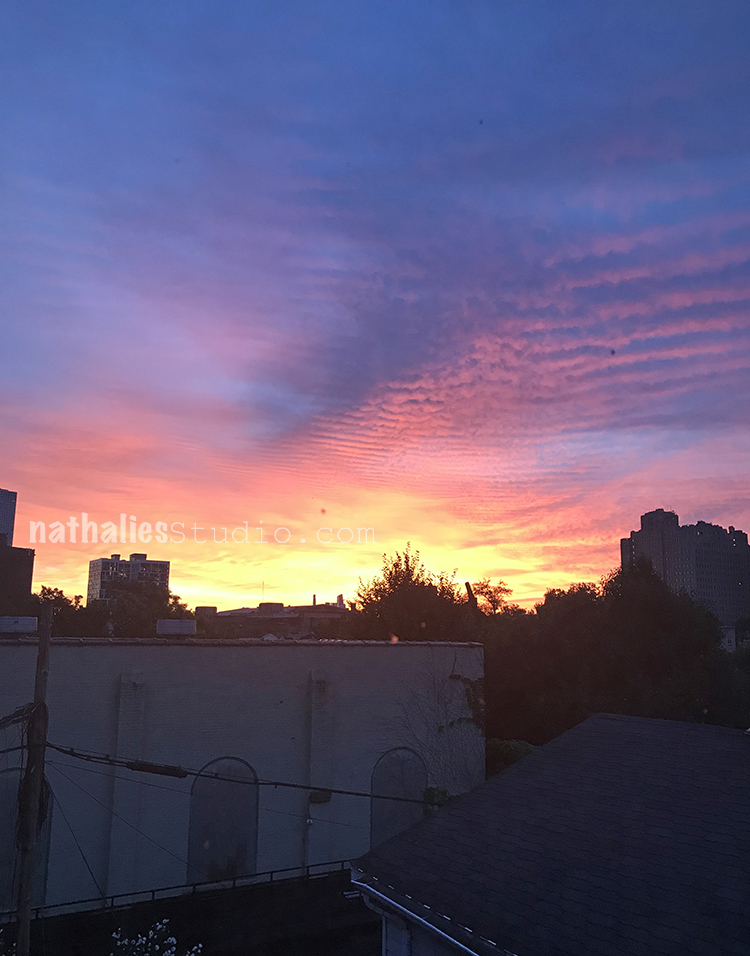
The early bird sees the sunrise – never ceases to amaze me.

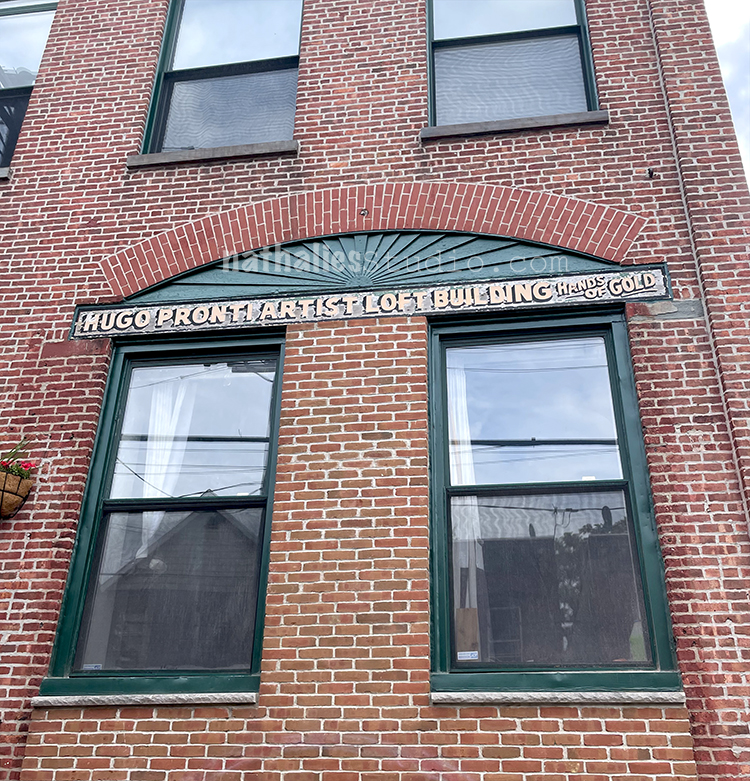
I love the sign above the window – Hands of Gold ! Apparently this building used to be a suitcase factory- why it is was named into Hugo Pronti Artist Loft Building? No idea because those lofts in there are not any “normal” artist could afford- but maybe I find out some day :)

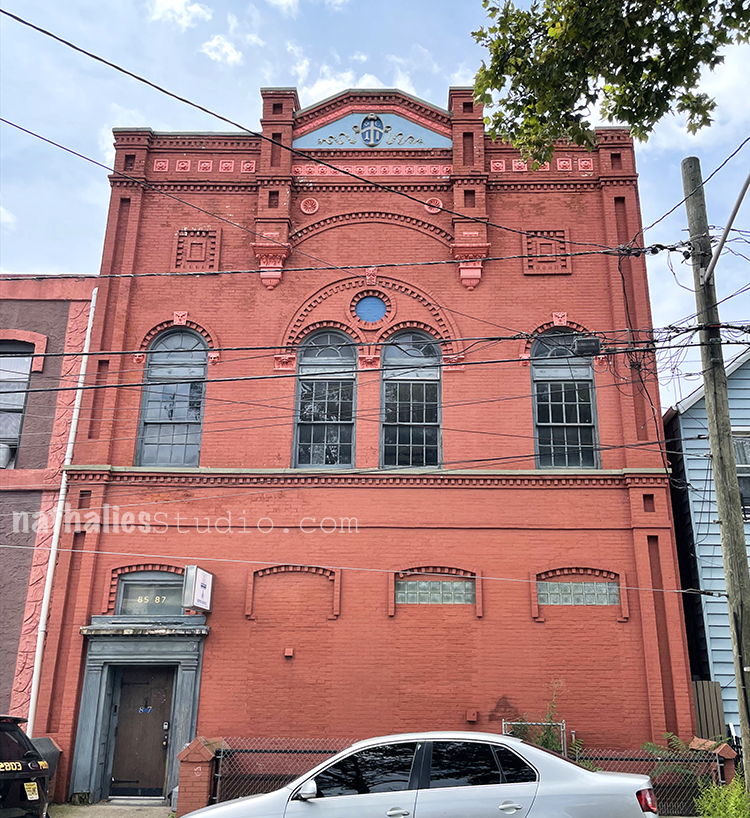
Another gorgeous brick building- the windows here are also bricked up – I wonder how this looks inside – it looked as if Elk Lodge was using it, but if it is still in use, I couldn’t say.

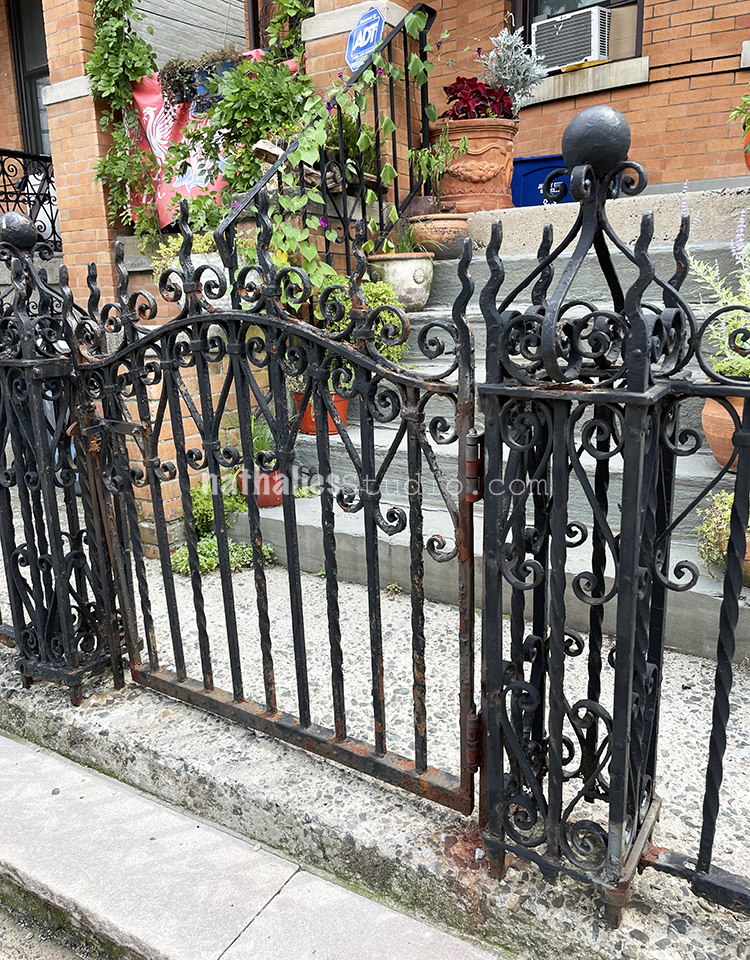
what a beautiful old gate.

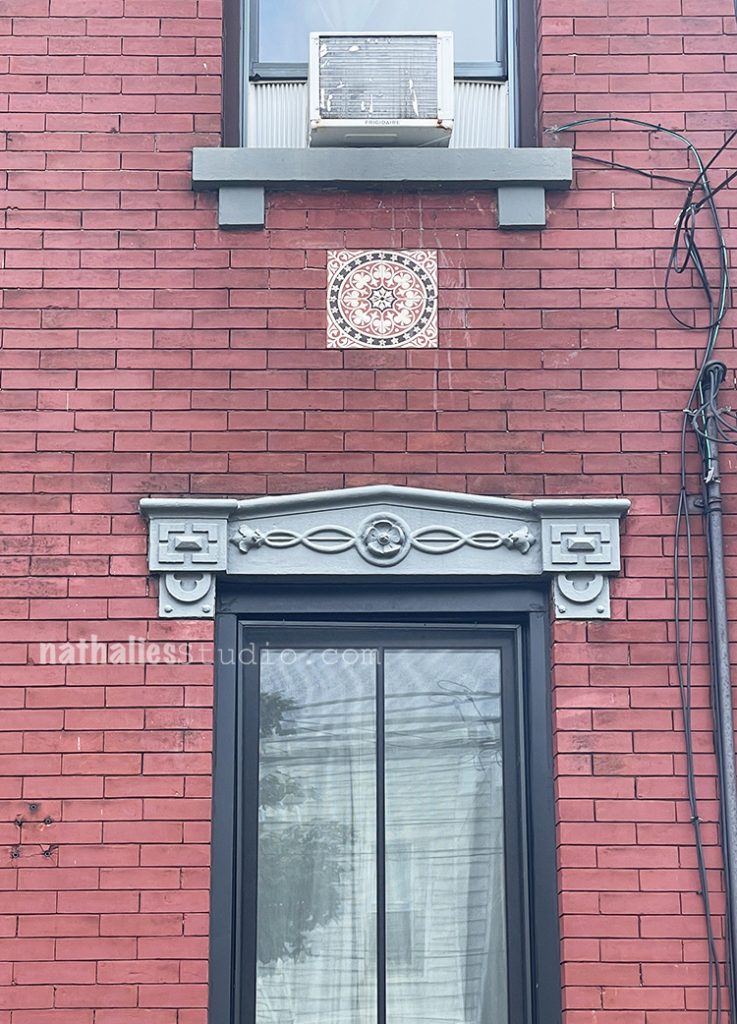
This brick house in a row of many had this super beautiful tile in the brick.

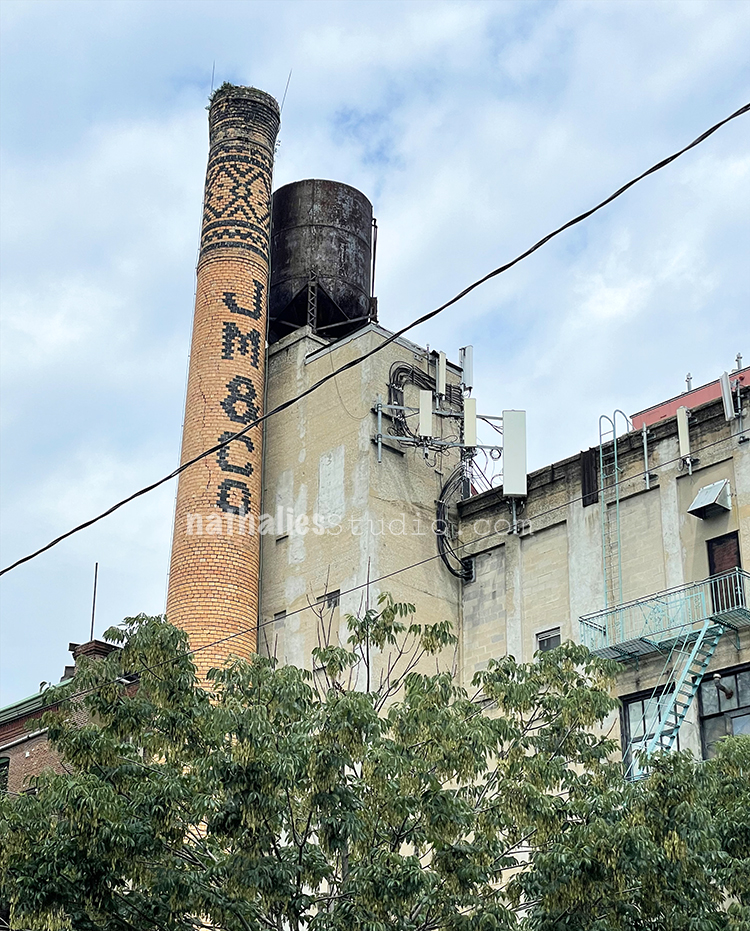
Guess we have a little brick theme this time – love this chimney!!!

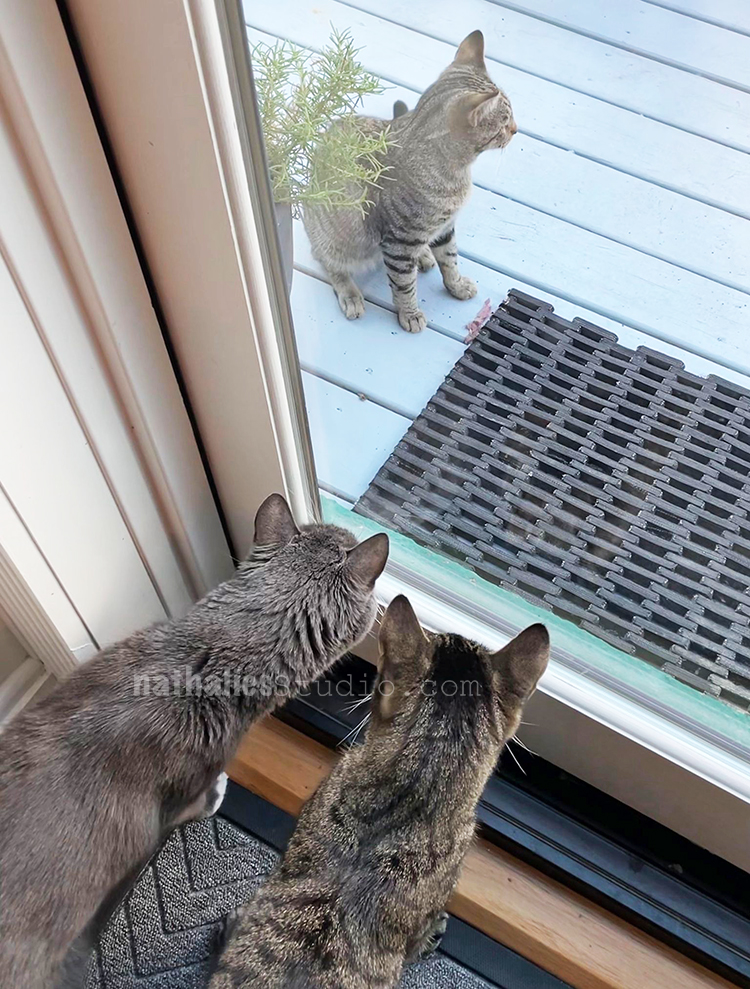
Bobby Pretzel and Mingus are checking out the visitor on the deck…the guy outside was pretty unimpressed LOL

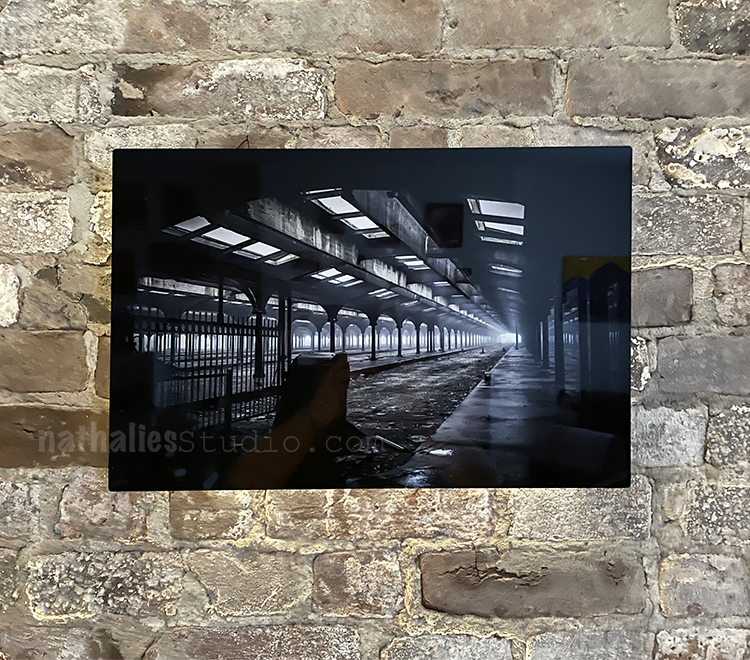
Love this new photograph printed on metal that my husband purchased from Chris Woodward, an awesome photographer from Jersey City. Check out his photos here on instagram.

That was it this month – see you next month again with some photos from my Strolls Through the Hood.

Comments (2)

  • Vee

    |

    THANK YOU again for a great inspirational tour through your hood.
    Those old buildings have so many interesting small elements.
    The gate is really beautuful!
    Thanks again for sharing.

    Reply

Leave a comment

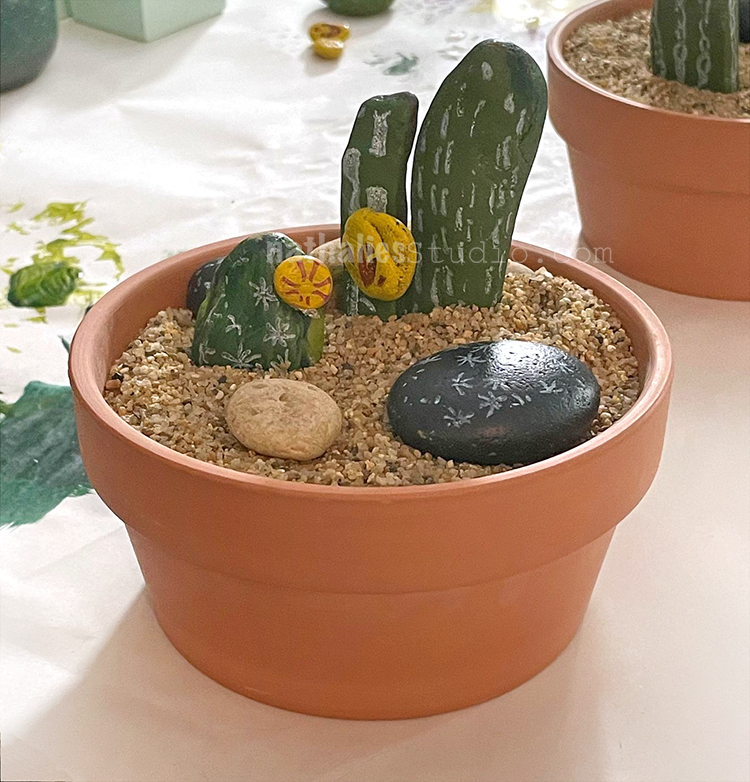
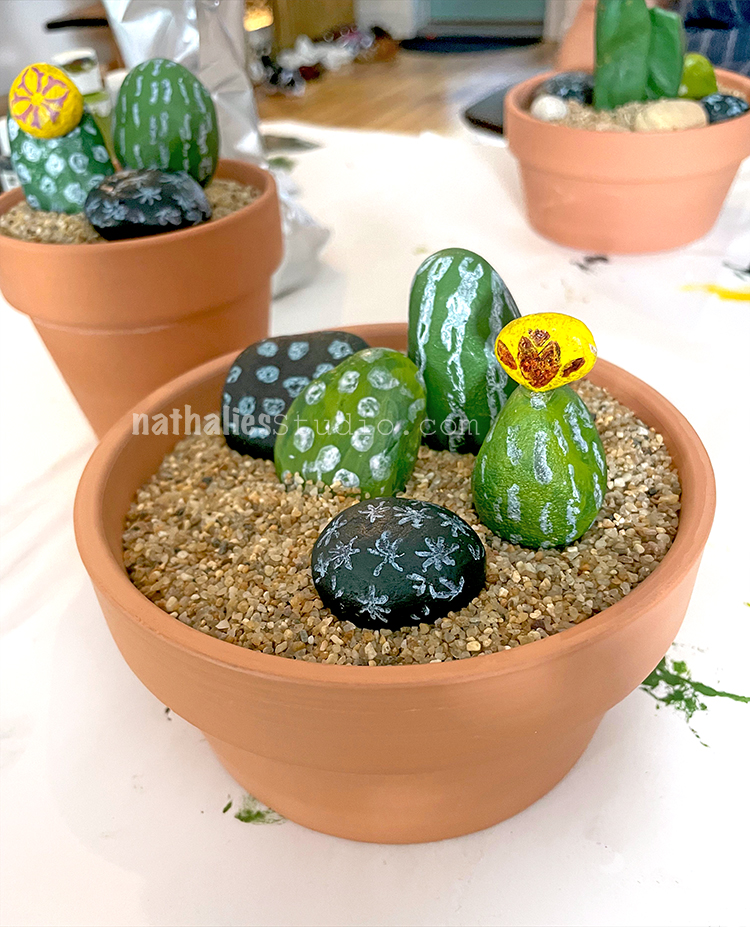
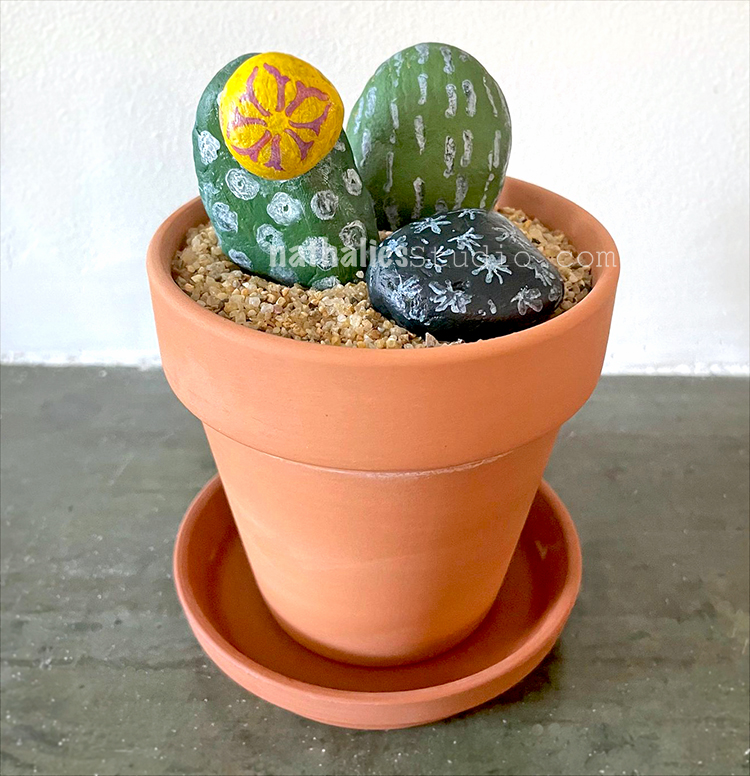
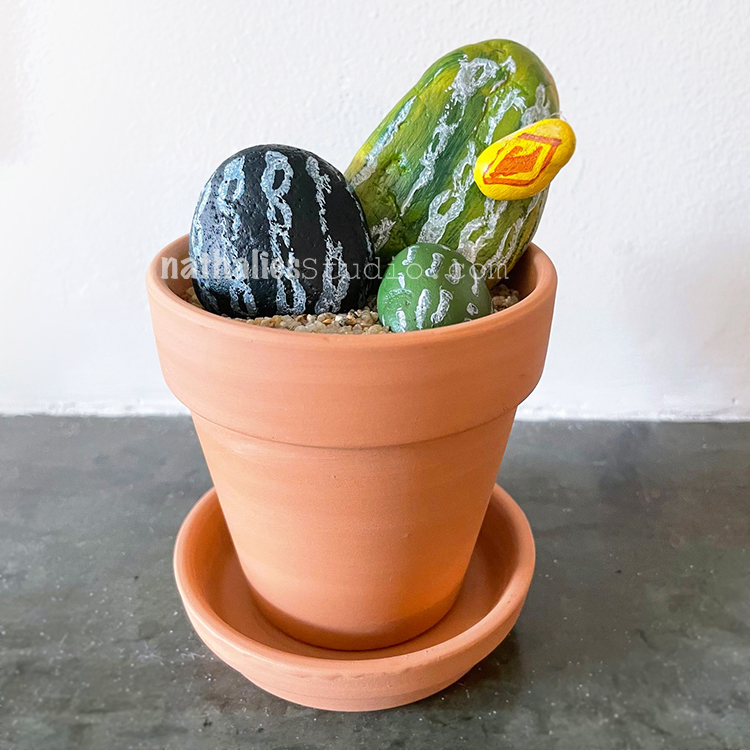
Faux Cactus Rock Garden – DIY Play Date

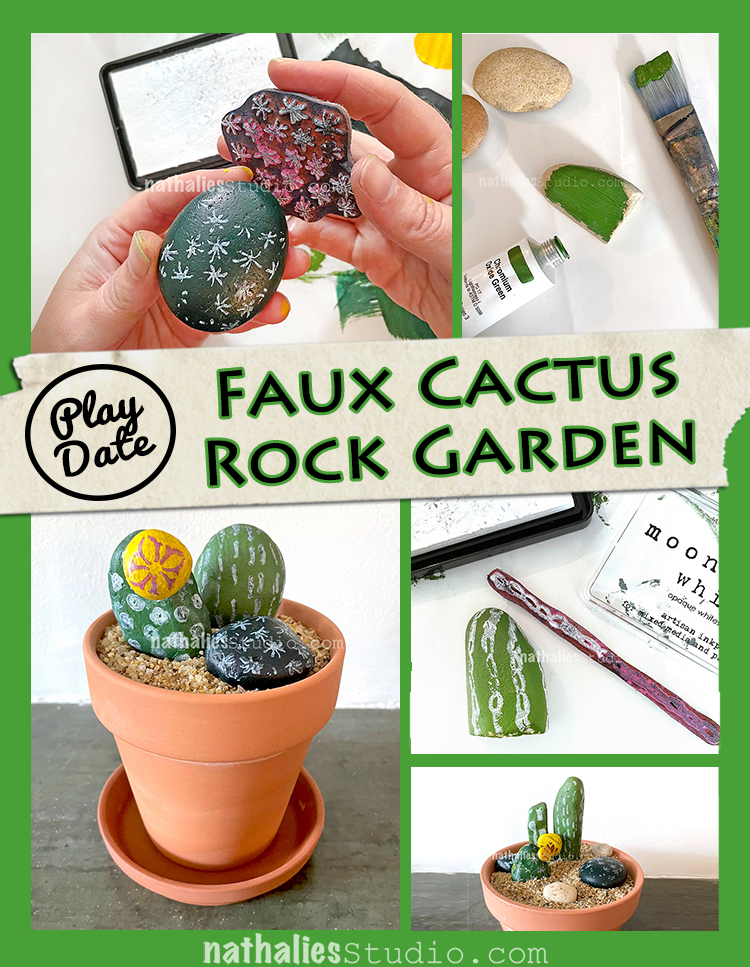
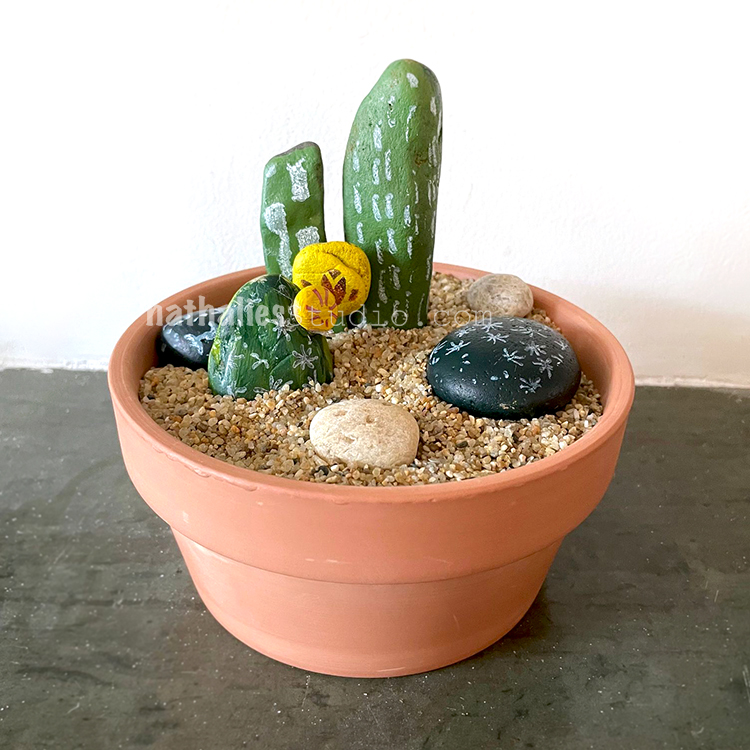
Last week Kim and I had another Play Date together to create a few Faux Cactus Rock Gardens! This was an easy project and I think the results are pretty darn cute.

I love succulents and cacti – they are plants that almost anyone can keep alive and they have such interesting, sculptural shapes. But let’s say that you really do not have a green thumb… well I’ve also been seeing a lot of faux versions too using materials that are usually hanging around and easy to get… like rocks! Yes this is a good old painted rock project – suitable for all ages and skill levels :)

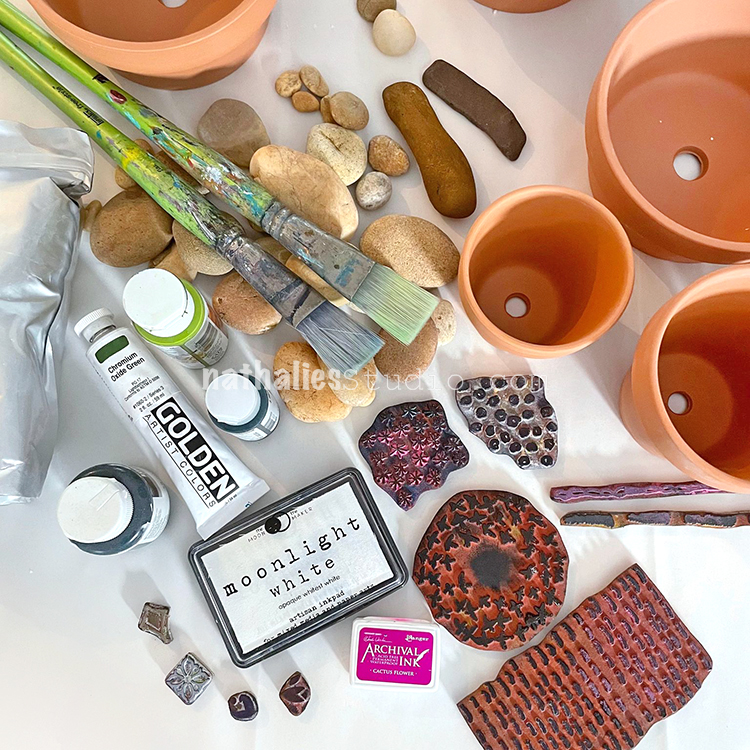
Our materials were: rocks (variety of shapes), 3 colors of green acrylic paint, paintbrushes, Moonlight white opaque ink pad, my Embroidery and Fan-fare rubber stamp sets, a pink archival ink pad (Cactus Flower is a great color), gravel, and a few small terra cotta pots. We also wound up using yellow paint, old newspaper and a glue gun.

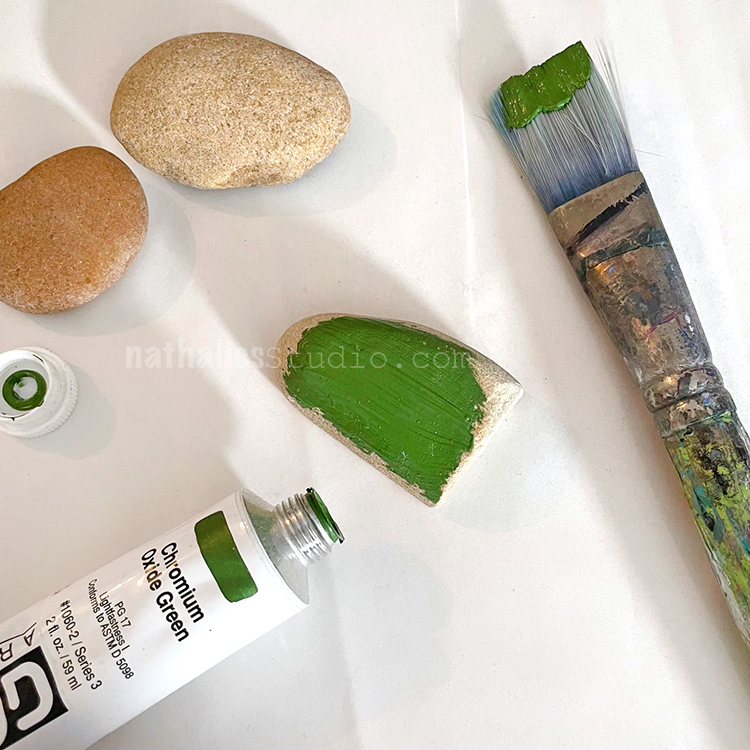
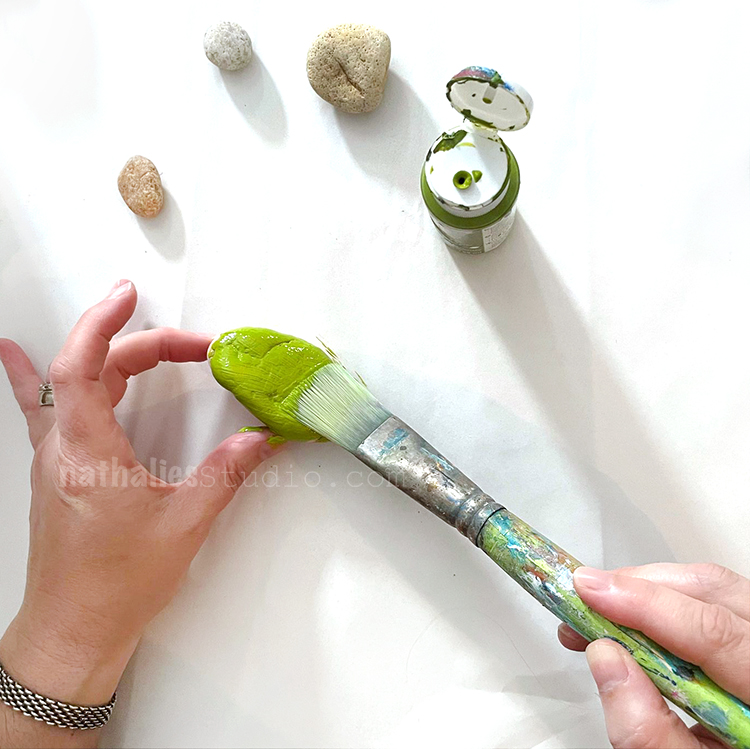
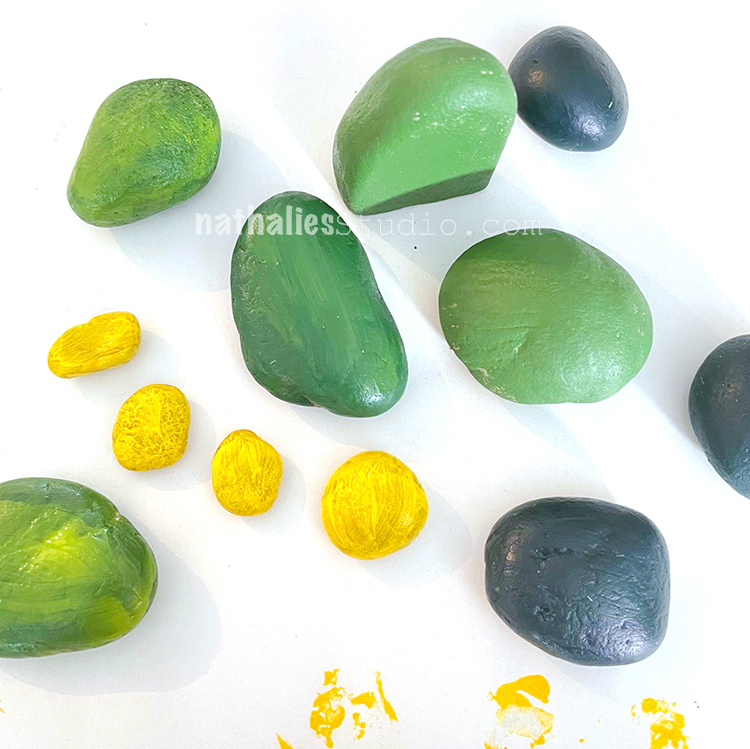
The process is pretty easy – just paint your rocks different colors of green using acrylic paint. We found that higher quality paints like Golden and Liquitex covered better and were more vibrant. Those rocks suck up the paint like a sponge.

And no matter what, you will have a green thumb when you are finished this LOL. Keep some wipes handy or wear gloves even to avoid painty fingers.

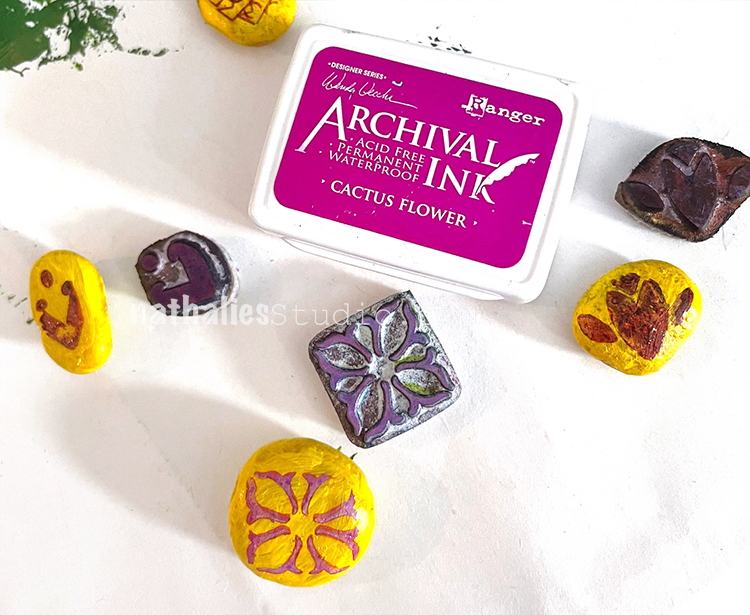
We painted a bunch of rocks, and we also made some small ones yellow for a few cactus flowers.

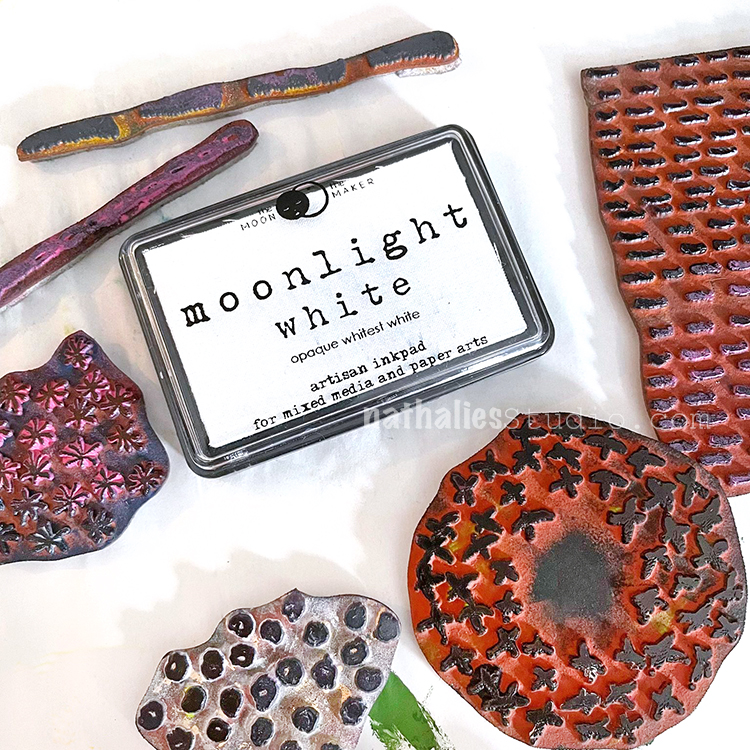
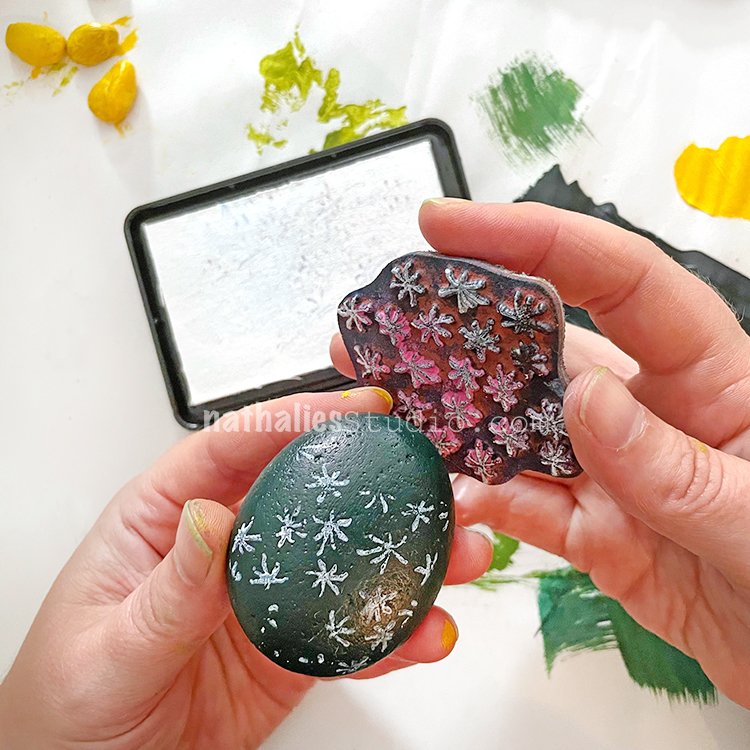
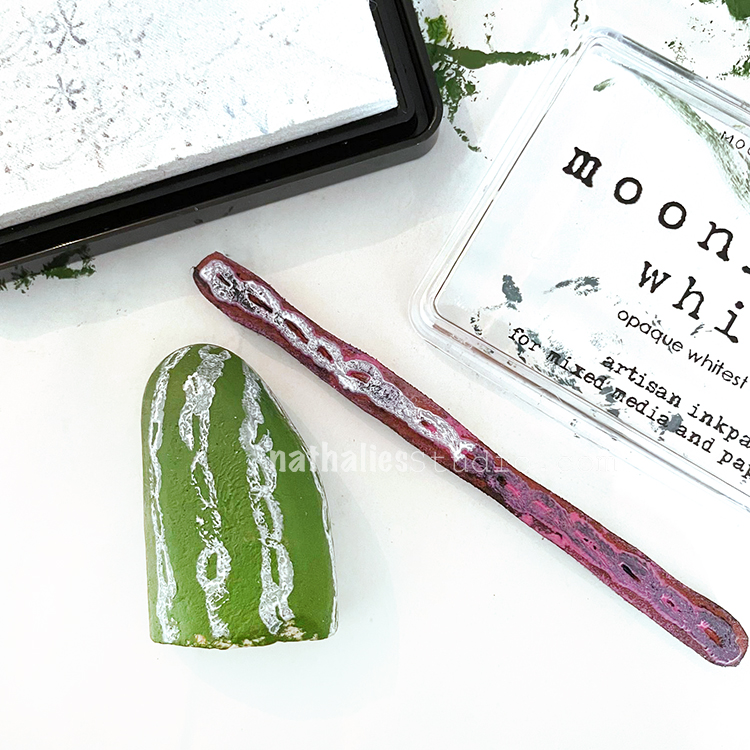
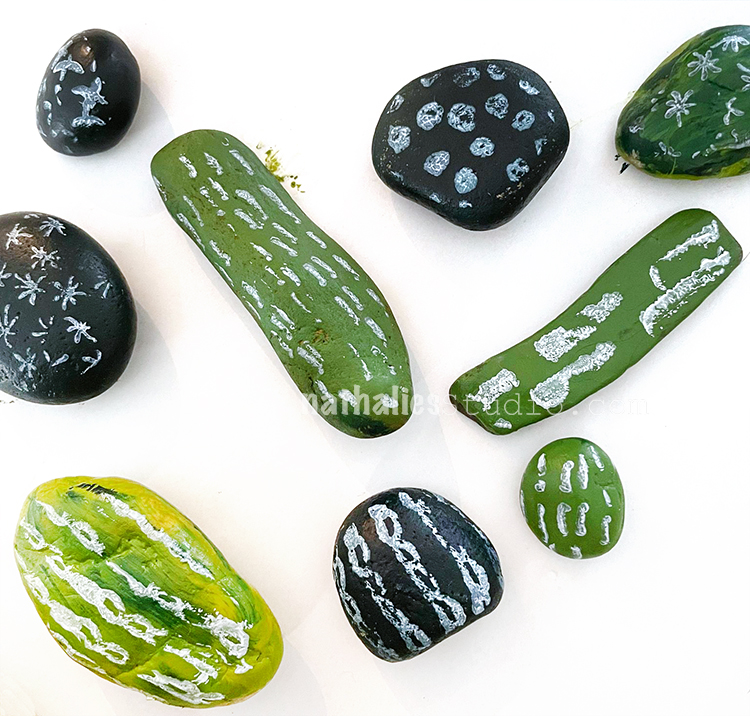
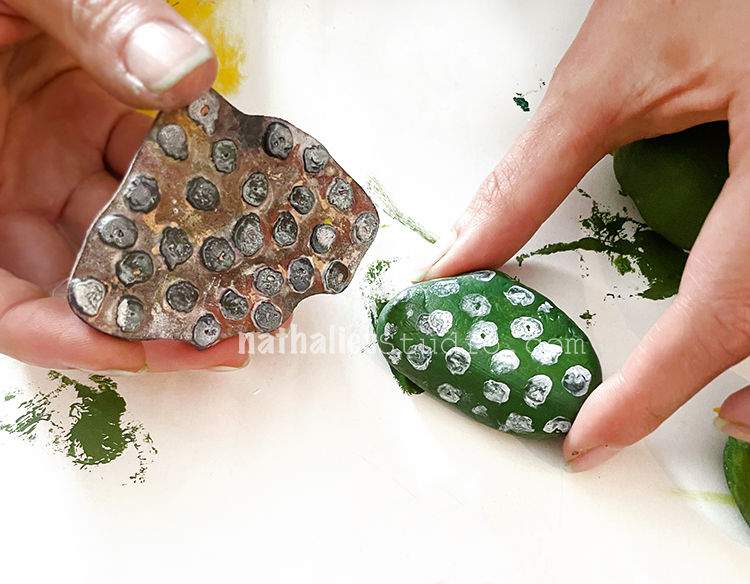
For the cactus spines we used Moonlight White – an opaque white ink pad – and rubber stamps from my Embroidery stamp set. The stamps that worked super well were Running, Grannies, Star Fish, and Chain Link – they really made our faux cacti look distinctive.

Here is Star Fish in action, putting on some faux cactus spines.

And my Chain Link stamp is nice for the long rocks… er cacti ;)

And here we have Grannies. Unmounted or cling rubber stamps will help you stamp on the uneven rock surface. And if you miss a spot, just go back in with more.

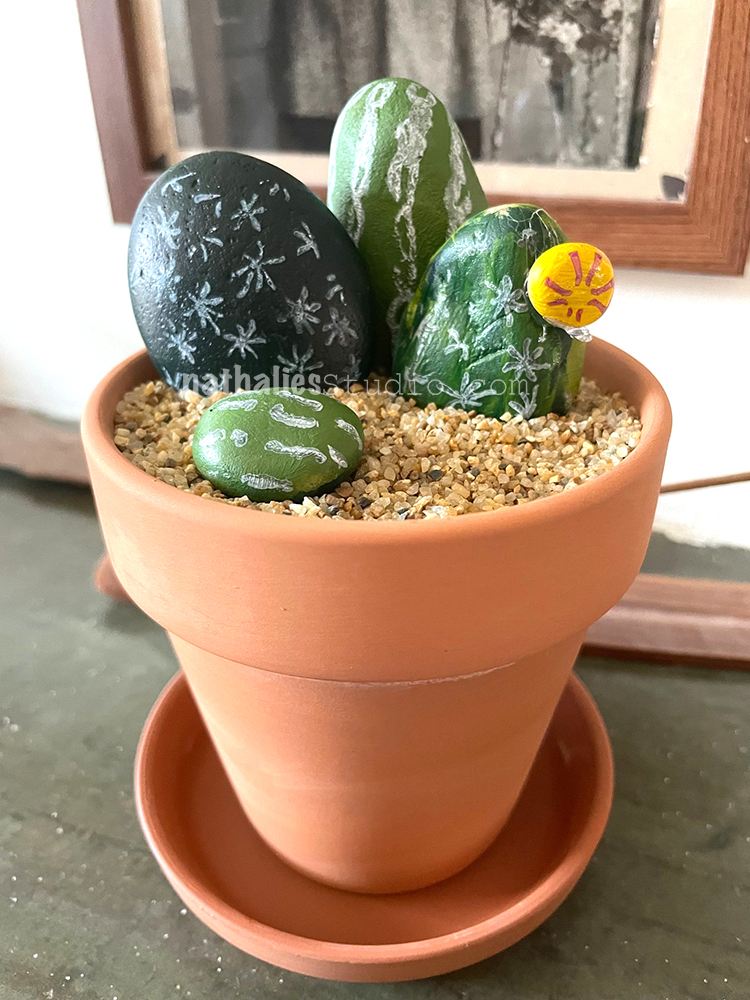
Here are our finished cacti! A big variety of shapes, colors, and spine styles.

For the cactus flowers we used my Fan-Fare stamp set and a pink ink pad – Archival Ink Cactus Flower is just perfect!

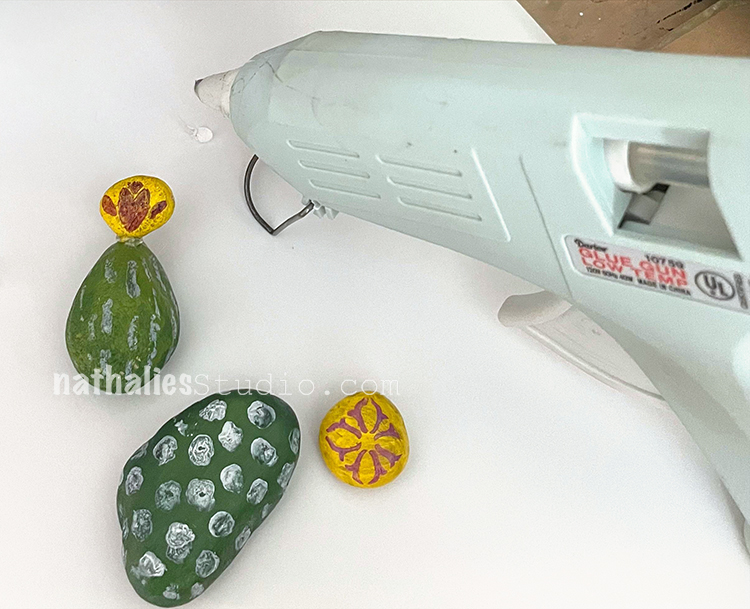
We glued the cactus flowers onto some of the cacti using hot glue.

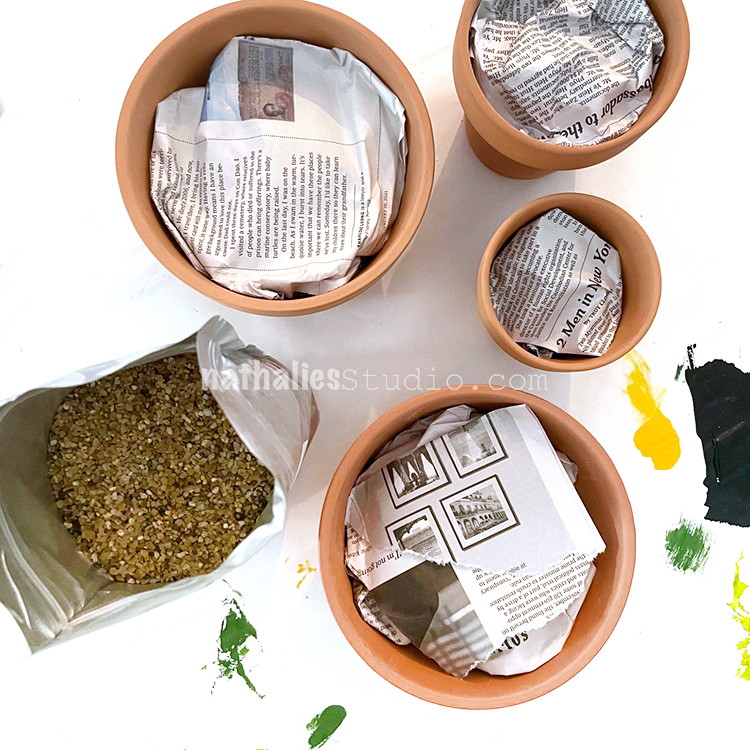
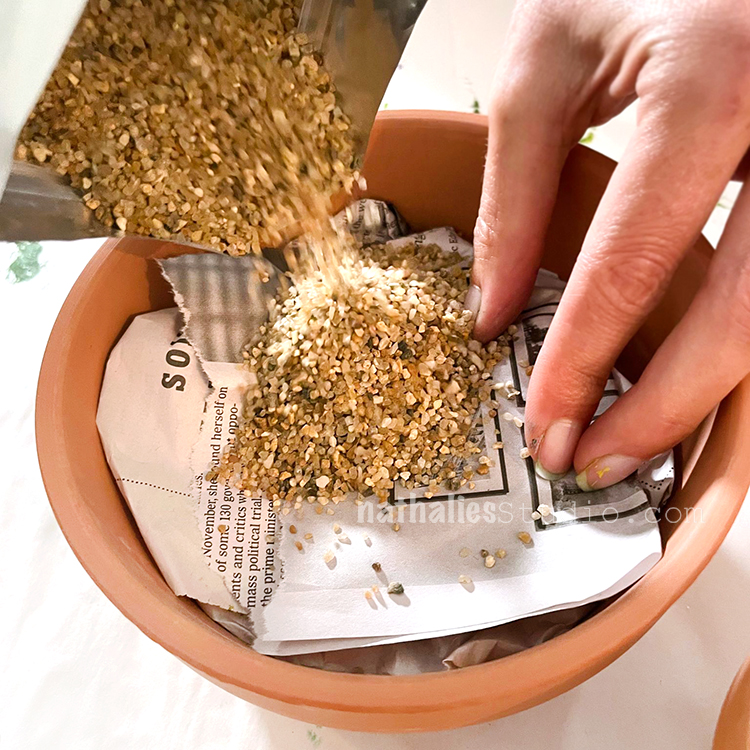
To prepare the pots for the gravel, we filled them most of the way up with old newspaper. Our gravel bag was pretty small and this was an easy way to fill them up and still have enough gravel for the top.

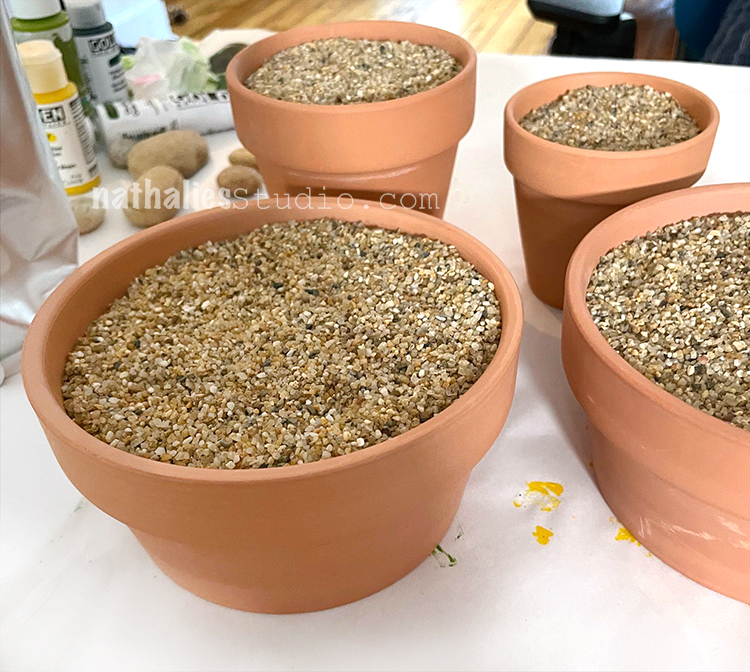
Time to top it off with our cactus gravel.

We used both short, wide pots and regular small terra cotta pots. You could use any small pots or containers you have on hand. We found about .5 – 1″ of gravel was needed to support the rocks.

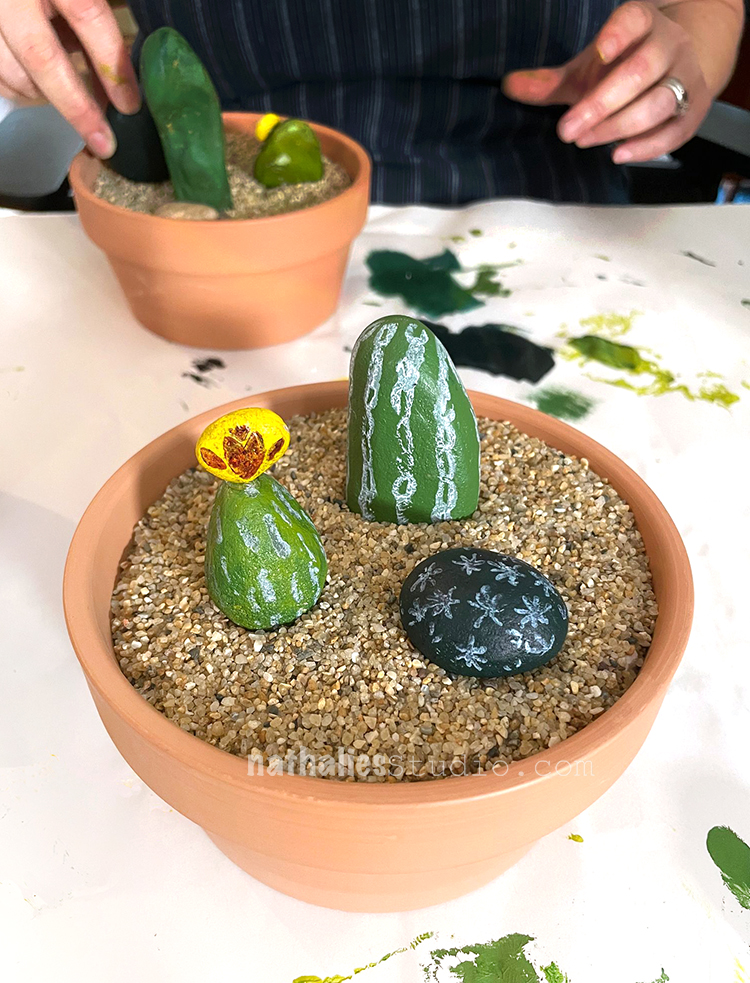
Now the fun part – arranging our little Faux Cactus Rock Gardens! You can spread things out…

…or go naturalistic with some unpainted rocks too!

Choose a variety of shapes, colors, and one with a flower to set the mini desert scene. You get the picture. Have fun with it! Get the kids involved – this is one everyone can do.

Give it a try! In addition to some old newspaper and rocks, here are the supplies we used:
Comments (2)

  • Sue Clarke

    |

    SUPER cute and I have killed cactus before.

    Reply

Leave a comment

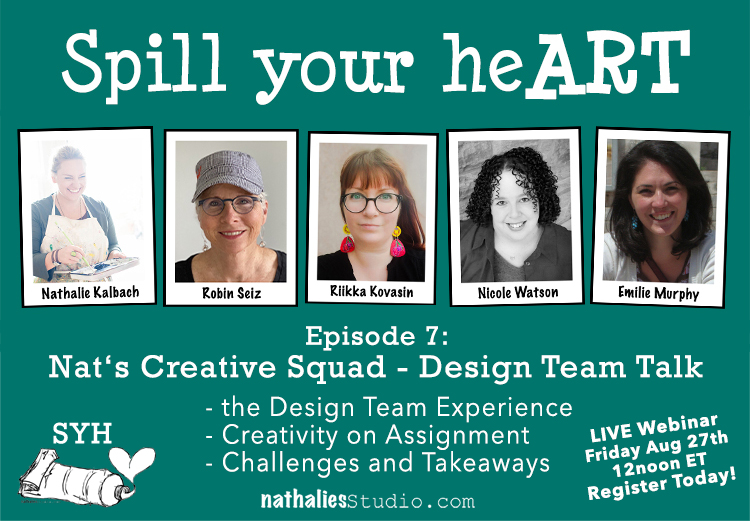
Design Team Talk – SYH Webinar Tomorrow Aug 27th!

Get ready for my Creative Squad on tomorrow’s Spill your heART!!!

I’ve got 4 of my Creative Squad members – past and present – ready to talk about Design Teams! Have you ever wondered what it’s like to be on a Design Team? We’ll hear from 4 veterans on what it takes to join one, how to flourish, what it’s like to create “on assignment”, and what they’ve taken from the experience.

Register to Attend the LIVE Webinar on Friday, Aug 27th at 12noon ET (NYC time).

My panelists will be Robin Seiz, Riikka Kovasin, Nicole Watson, and Emilie Murphy, sharing their Design Team experiences. Also our audience will have a chance to participate in the discussion in the live chat and may ask the panelists questions live in the Q&A.

Join us! Register HERE.

Leave a comment

Creative Squad: Good Morning Good Evening – Judi Kauffman

Hello from my Creative Squad! Today we have a post from Judi Kauffman that made me smile and chuckle using my Lady Liberty and Hydrant foam stamps and our theme: Good Morning Good Evening – Are you a Morning Person or a Night Owl? Or maybe neither? Create a project inspired by your preferred time of day – when you are in good spirits, doing what you love, and enjoying life.


Stamping, Day & Night! 

Imagine my delight when Nathalie’s ArtFoamies arrived for this month’s project – Lady Liberty and Hydrant! Both spoke to this city girl’s heart. The theme fit both stamps very well, I thought. And they’re big enough to fill a card front with little else.

Day person, night person? I am a bit of both. My best energy is in the morning but sometimes my best ideas take shape at night How about you?

Project 1 – Statue of Liberty cards: 

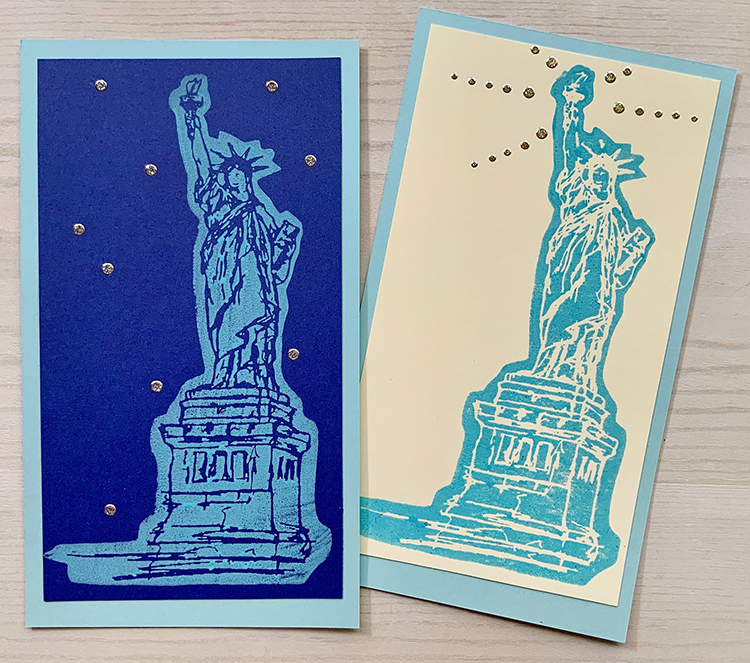
Our godson and his family live in an apartment in Brooklyn that looks out at Lady Liberty so I get to say good morning and good night to her when I visit. Each time I see the statue I thank this country for welcoming my grandparents to this country of immigrants. 

I made a pair of very simple cards that allow the beautiful image to take a starring role. Tiny glitter dot stickers create the stars in a night sky and the rays of a noonday sun.

Project 2 – The Hydrant:

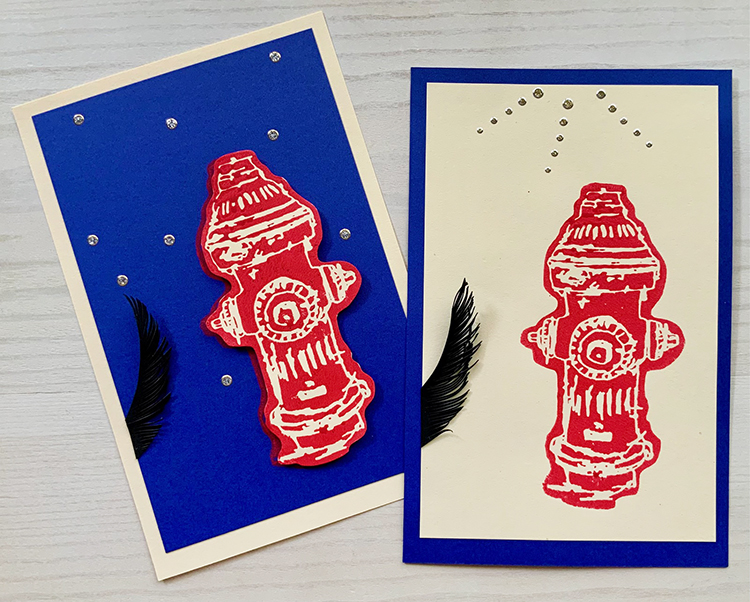
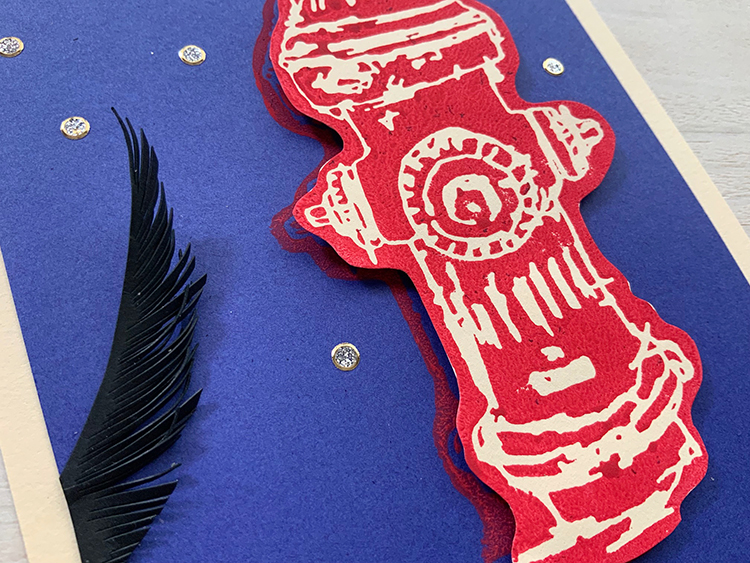
Every day and each night (and many times in between…) dogs out on walks with their owners get to check their email by sniffing the fire hydrant across the street from my house. I hand-cut a wagging tail for each card. The tail becomes shorthand for a dog, just enough to create the scene! The night version of the card has a fussy-cut hydrant, offset on foam squares so the one stamped on the background stays visible and becomes a shadow. 

Bonus – Other takes on a fire hydrant:

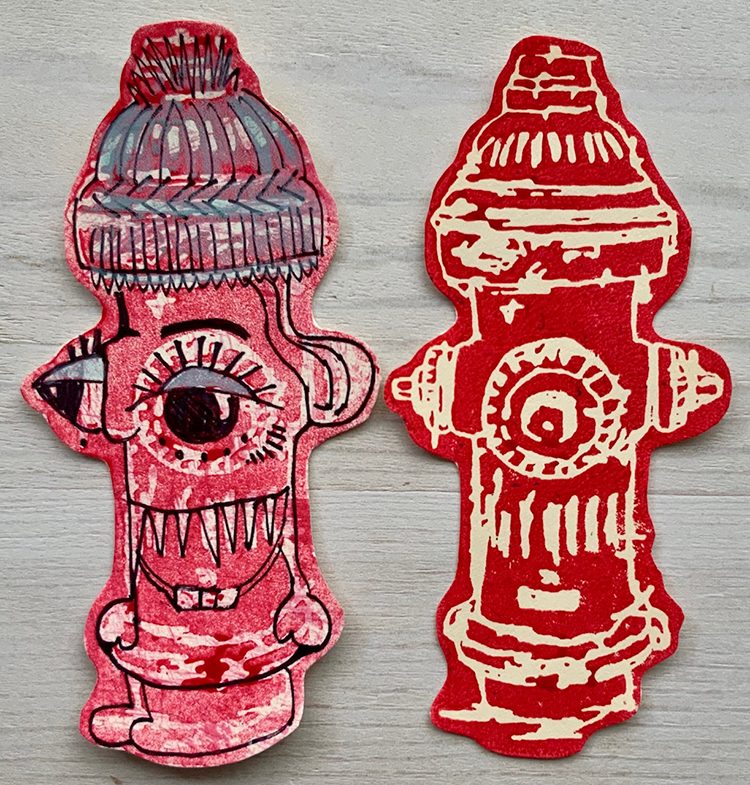
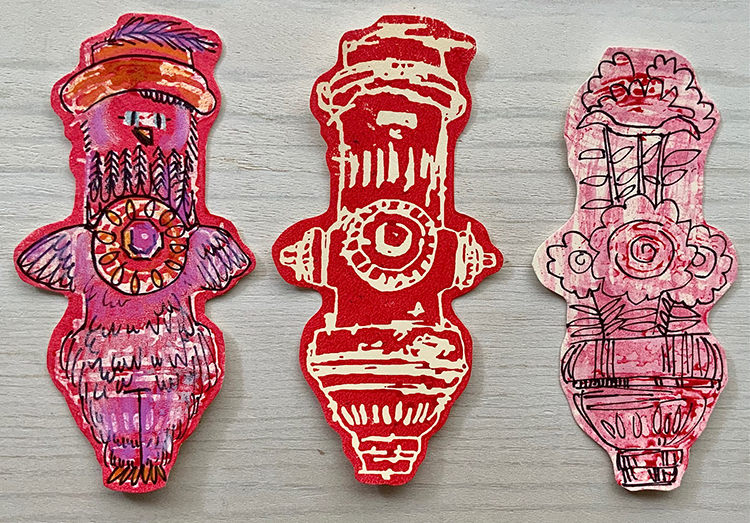
While I was at it, I stamped extra fire hydrants to fussy-cut for more cards. Some of the extras were quite pale because I was using up paint before cleaning the stamp to put away. One thing led to another and some of those extras got turned into a bird, a vase filled with flowers, and a strange big-eyed creature wearing a knit hat. 

Have fun turning fire hydrants into something else! And be sure to share what you come up with…


Thank you Judi for this creative group of projects and unique ways to look at the stamps!

Give it a try: you can find all my Foam Stamps in my Online Shop and here are some of the supplies Judi used:
Like what you see? Follow the Creative Squad on Instagram for weekly posts, artwork, and inspiration.

Comments (3)

  • Sue Clarke

    |

    Oh my…the tail to the hydrant! Funny story about our dog park. We don’t have hydrants in my area (we have many small ponds to draw water from via our fire trucks), and someone made some “fake” fire hydrants for the dog park and painted them red. The dogs from my area didn’t know what to do with them. The dogs who come up from MA “showed” the NH dogs how to pee on the hydrant. I’m not sure if that comes across as funny, but it made me laugh and your hydrants made me think of it!

    Reply

    • nathalie-kalbach

      |

      LOL- that is funny ! Don’t judge a dog by the fire hydrant LOL

      Reply

  • jean marmo

    |

    Such wonderful cards. Love the simplicity of Lady Liberty. So clever to add the tail to the hydrant. I love how you turned them into other things!

    Reply

Leave a comment

Pattern Monday 13 – Video from my Ledger

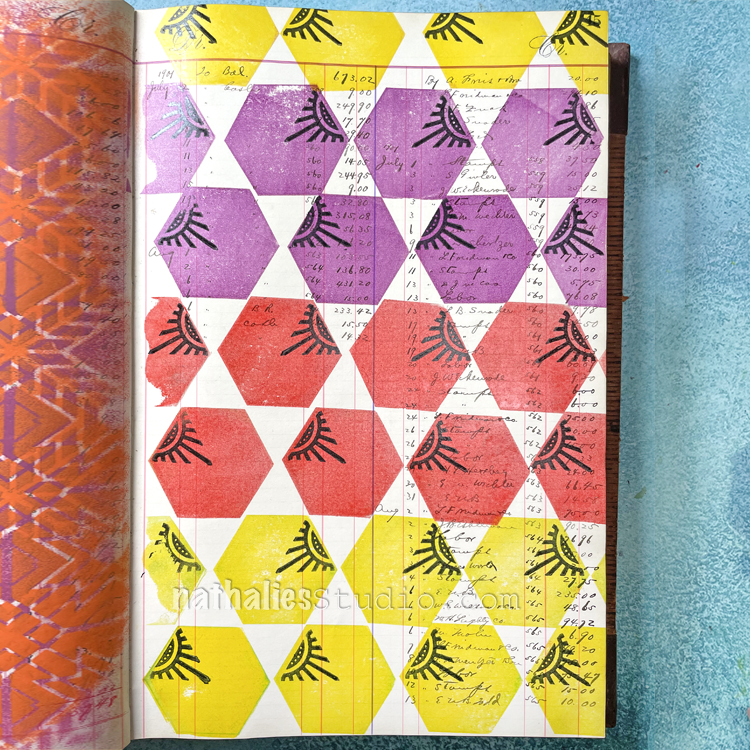
Happy Monday and welcome to another pattern in my big vintage ledger! Today I’m using my Solid Hex Large rubber stamp and a stamp from my Triangle Love stamp set. I think the simplicity of this pattern works well and when I put the video together, the music made me laugh LOL. Enjoy:

Here is another look at the result and my supplies:

Give it a try! Here are the supplies I used:
Comments (2)

  • Robin

    |

    So creative. I love this pattern!

    Reply

Leave a comment

Art Journal Flip Through – August 2021

Here’s an Art Journal Flip Through of a journal that I kept pretty much for at least 4-5 years. It had some pages that were published and therefore it stayed at the publisher for a while and then I eventually got it back. I used it a lot to try out new products- like stamps and stencils.

Although I do not like every page in it, some I love a lot and it is interesting to see all the different styles and even some things from several years ago that I had totally forgotten about.

Have a look:
https://vimeo.com/manage/videos/578639959

Comments (4)

Leave a comment