The Small Things in Life – Art Journal

I created this Art Journal spread on a snowy day last week – as you can probably guess :)

The lady is drawn on deli paper, stamped and pasted into the journal. I stamped with different of my ArtFoamies Designs and then painted with grey and white. I like how it came out.

For the journaling I used a bamboo sketching pen and ink – I love using a bamboo sketching pen – have you ever seen my video I once made of the match made in heaven? It is a bit older but you might still find it interesting to see how I use those pens with the ink

Liquitex Ink and Bamboo Sketching Pen from Nathalie Kalbach on Vimeo.

Here are some of the supplies I used with the art journal spread


Leave a comment

June 22-24, 2018 3 Day Workshop in Coventry, UK

Birgit Koopsen and I are so excited that we are coming back to teach another 3-Day Workshop in Coventry in the U.K for Art Workshops.

Take a Stroll Around the Block with Birgit and Nat and discover that inspiration is all around you!
In this 3 day workshop, we’ll embark upon a creative scavenger hunt to seek out inspiring clues in our environment. You’ll learn how to turn these inspiring clues into artwork by using inspiration maps, some of Birgit and Nat’s favorite techniques and tools, and your own personal style.

Based on what you have seen on your stroll and how you apply these tips and tricks, you’ll come away with very unique and personal art journal pages that work. In the end, you’ll have learned about pattern design, composition, and other Elements and Principles of art and a new technique for gathering inspiration for your art-making.

After these three days you’ll know how to find and look for inspiration in architecture, street art, nature and museums and how to translate all this into meaningful and creative artwork.

I hope you will join us, we had such an awesome class last year in Coventry- you can see some pictures of the 3Day Workshop back then here.

Here is a little video where Birgit and I are talking a bit more about the workshop and what we will do:

Birgit and Nat talk about the Stroll Around Block Workshop from Nathalie Kalbach on Vimeo.

Information for sign up and pricing can be found at Art Workshops.

SaveSave

Comments (2)

  • Karen Bearse

    |

    Dream team this look awesome! How much fun that would be.

    Reply

Leave a comment

My Home is My Castle – Maura Hibbitts


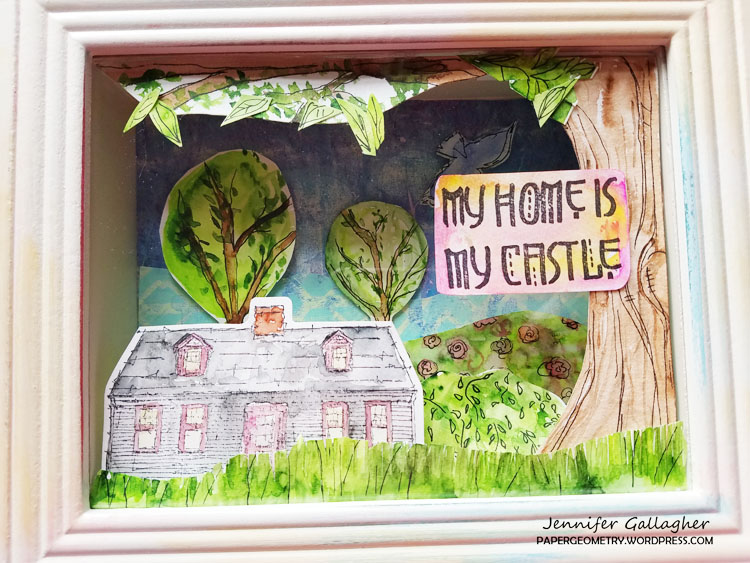
Hello from the Creative Squad! Today we are super happy to introduce to you our newest member: Maura Hibbitts! Maura is a master of colorful layers and we are so happy she will be with us to share some of her projects. Today she brings us an art journal spread with tons of yummy texture. Maura uses my Stroll Around the Block stamp set, the My Home Is My Castle cling stamp, my Santa Fe foam stamps, and my Toledo stencil. She is also working from this month’s theme: My Home is My Castle – Home means many different things depending on who you ask and where you are in the world. This month we’re thankful to have a place to call home, a place where we can rule and be King – or Queen :) – of the castle!


I am honored and excited to join you this month on the Creative Squad!

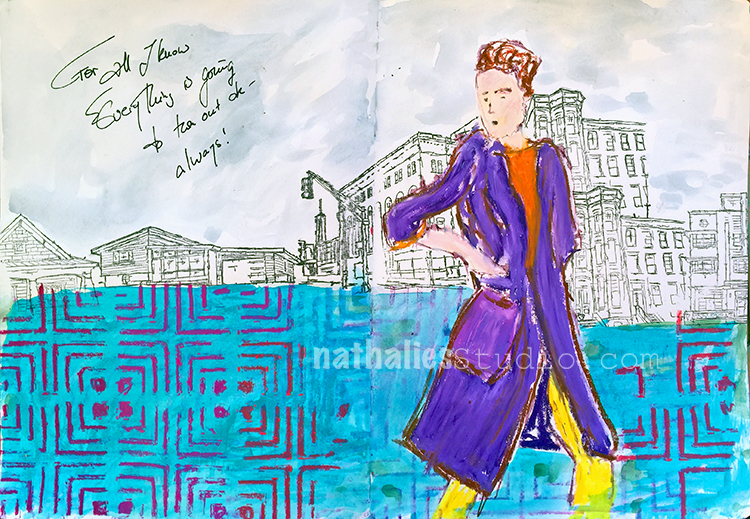
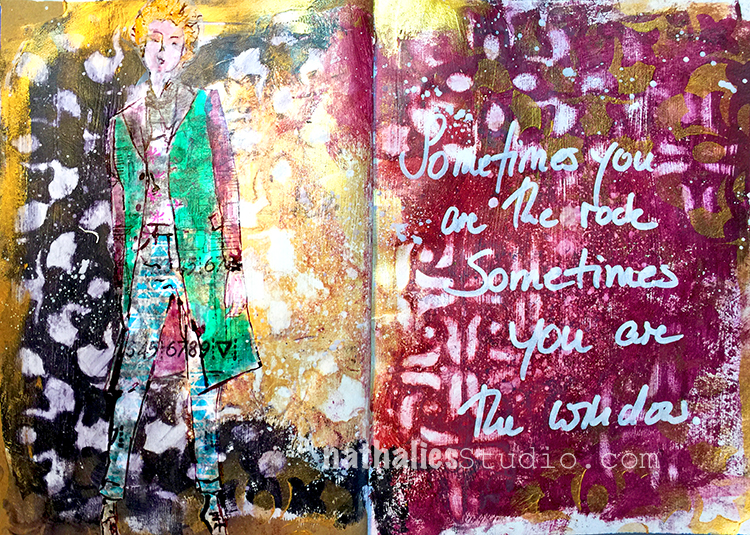
When I started thinking about this month’s theme, “My Home is my Castle”, I started to imagine a castle behind my own little house. There are so many sayings that relate to this idea, like Queen of the castle (me, I guess), or a man’s home is his castle (hubby), that I knew where I wanted to head with this. In real life, I am glad I don’t live in a huge, drafty castle that I would have to clean, as housework is a much lower priority than creative work.

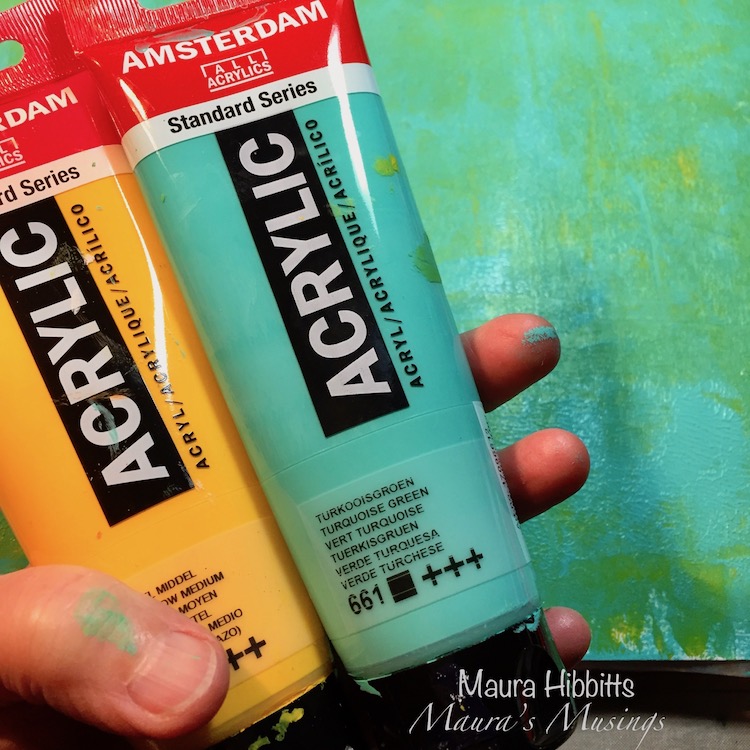
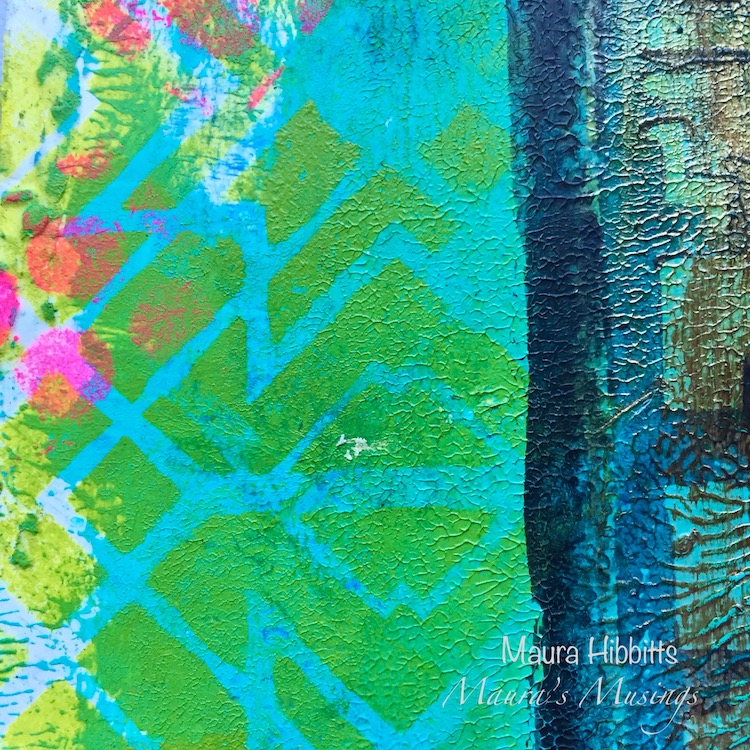
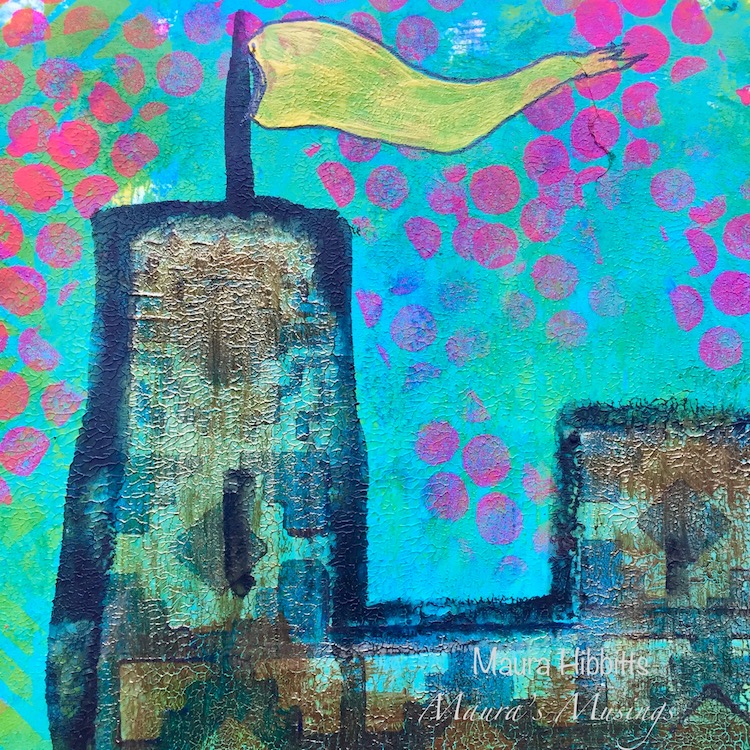
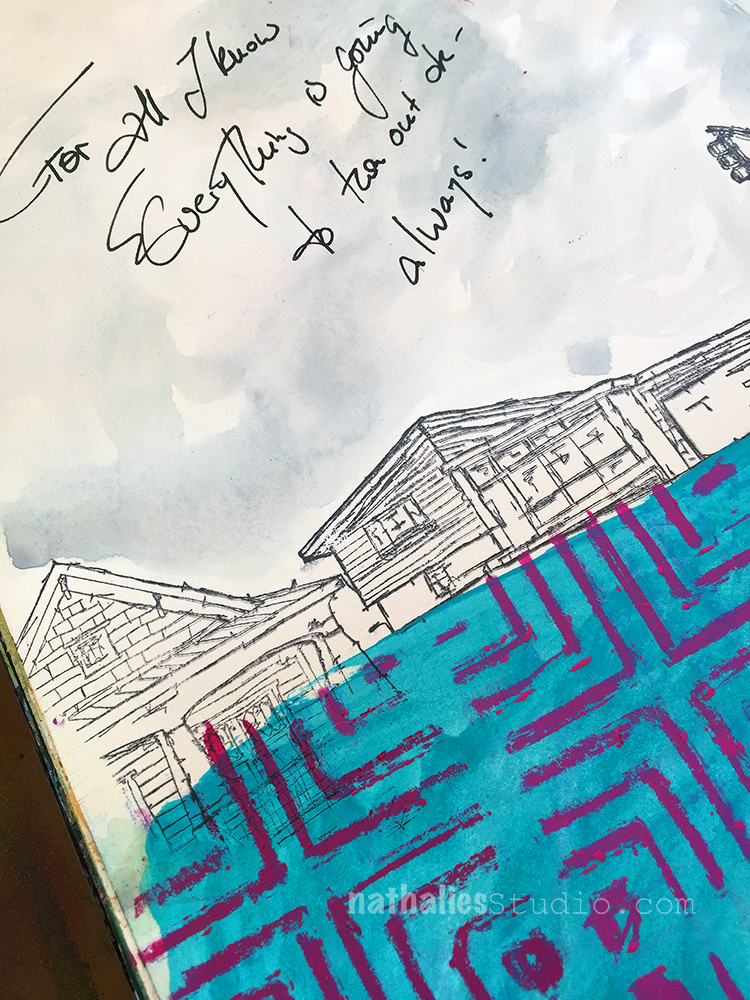
I headed to my big Dylusions art journal, and squirted on some yellow and turquoise paint and blended it together with a brush. While the paint was still wet, I closed the book and pressed the pages together. Open them up immediately and let dry to create a nice texture.

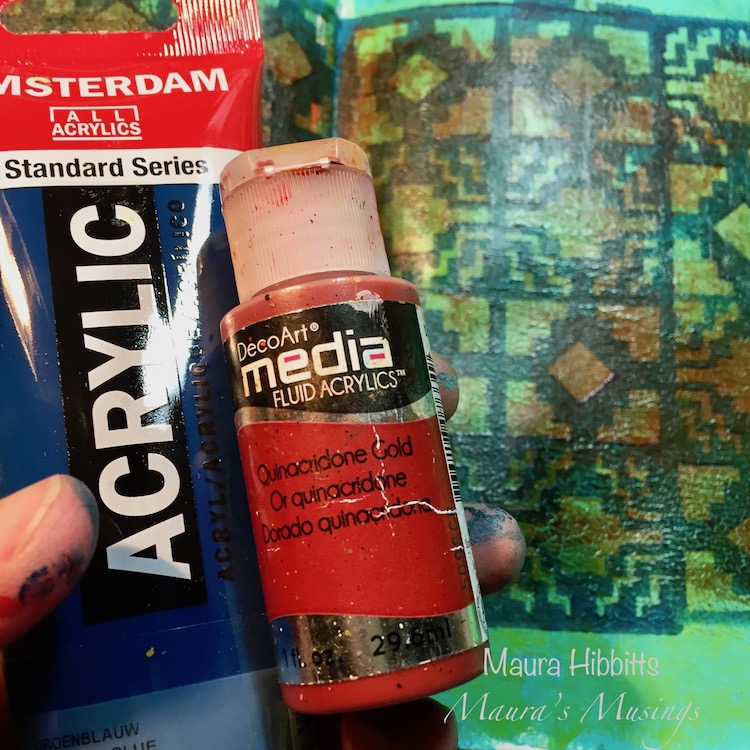
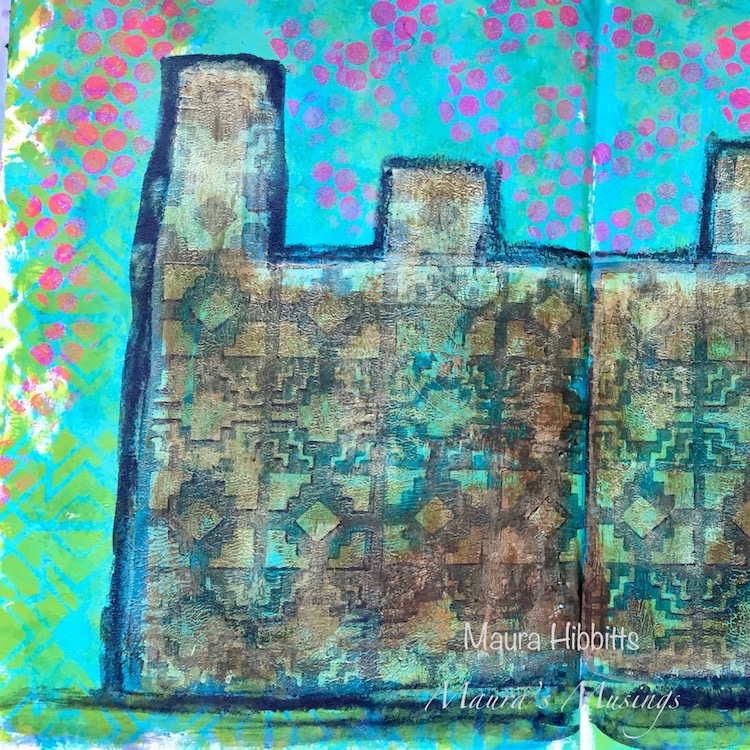
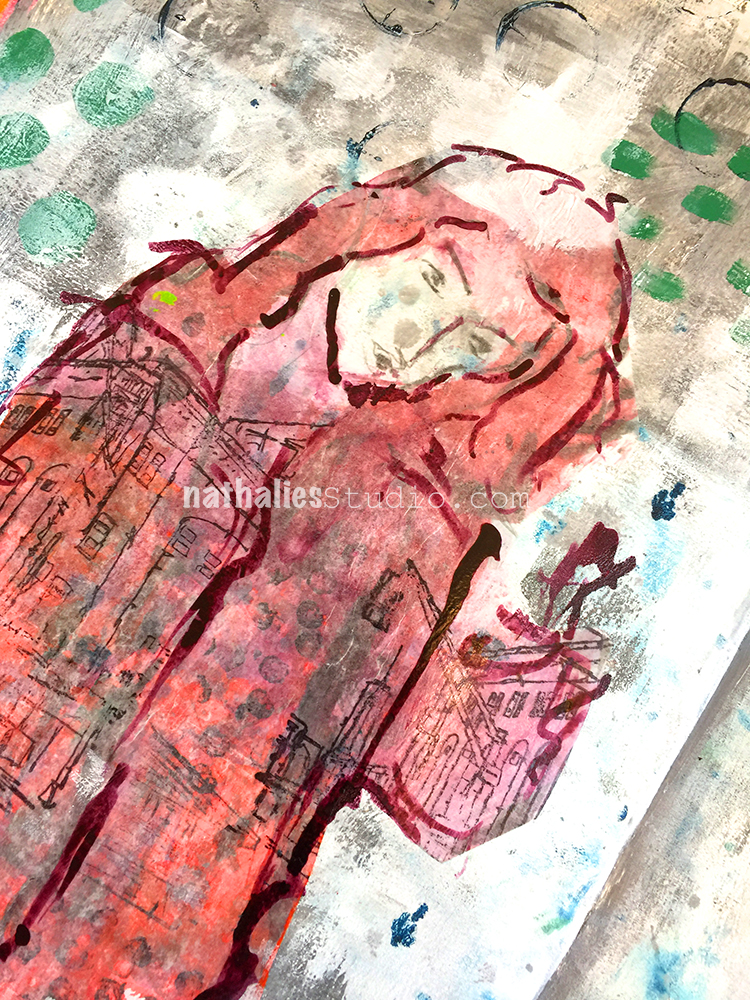
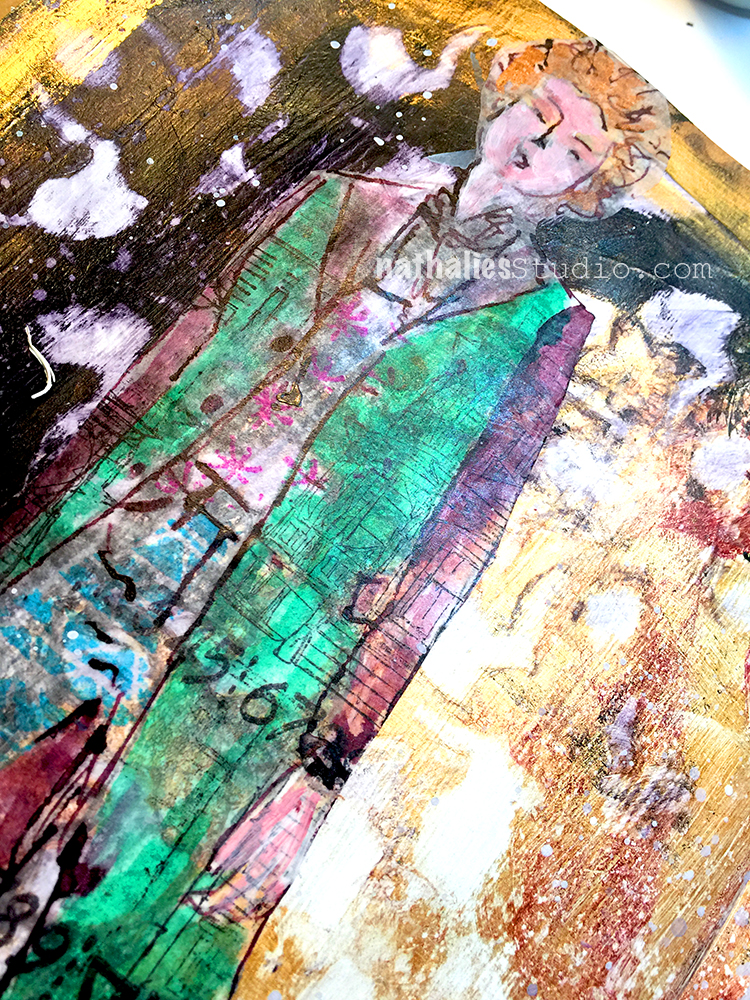
Next, I used dark blue paint with a brayer on the Art Foamies large Santa Fe stamp and stamped a repeating pattern across the pages to create the main part of the castle. Then, I used the small Santa Fe stamp to make the upper part of the castle. Once that dried, I went over the castle with Quinacridone Gold.

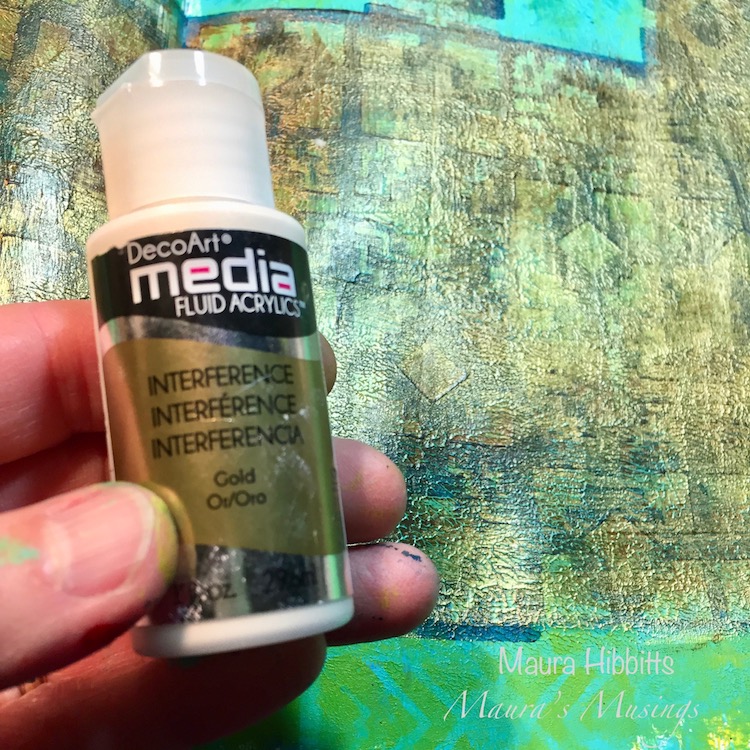
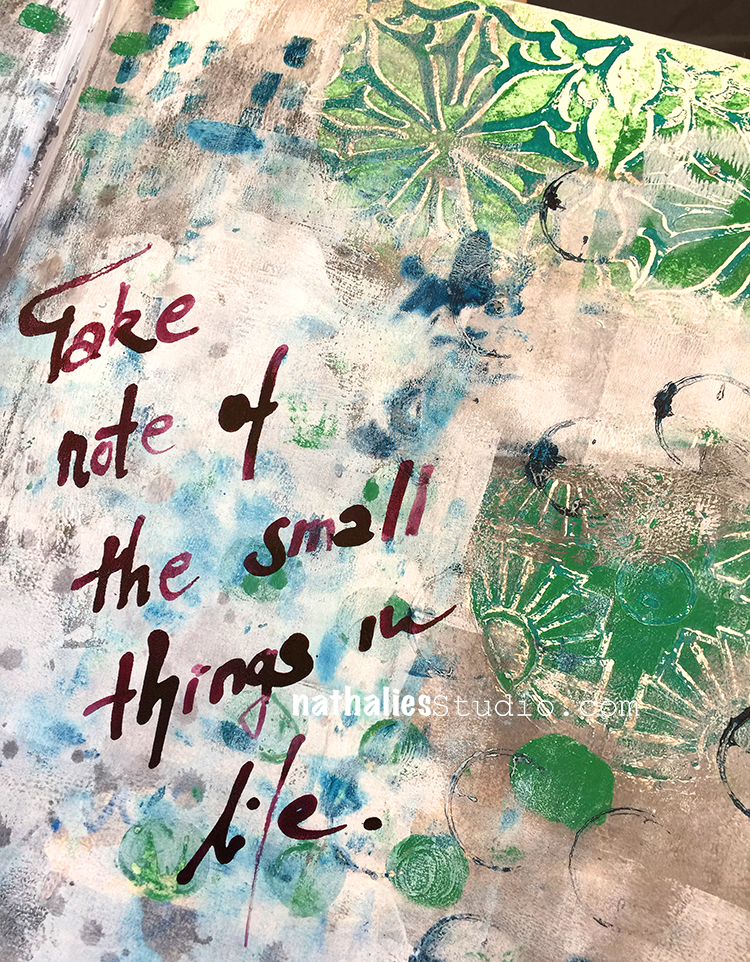
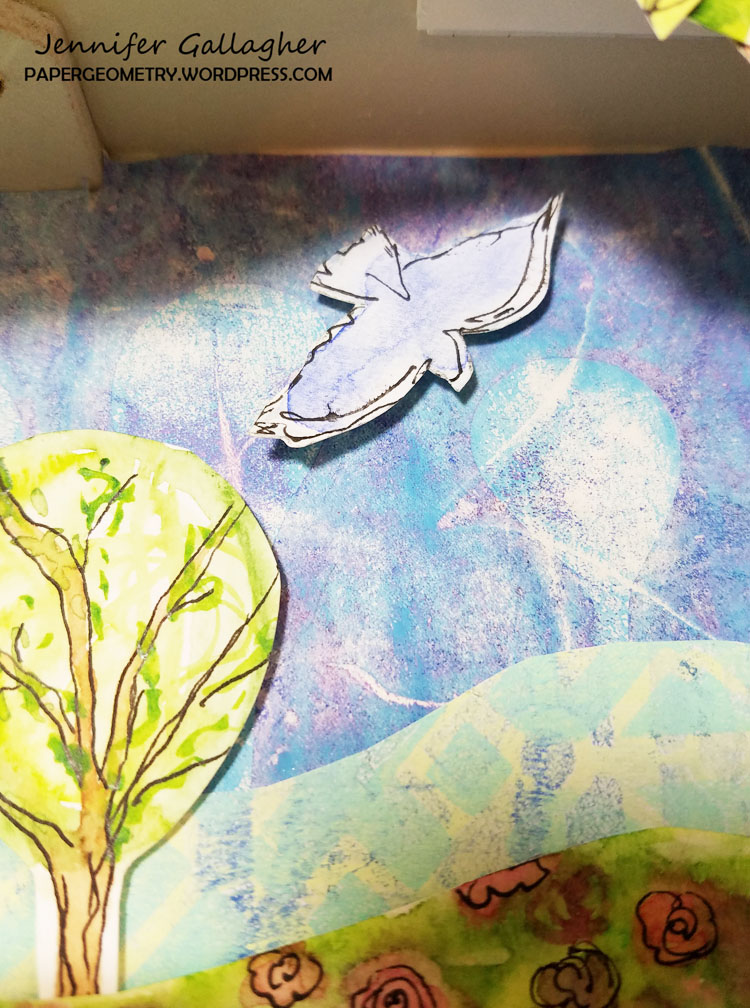
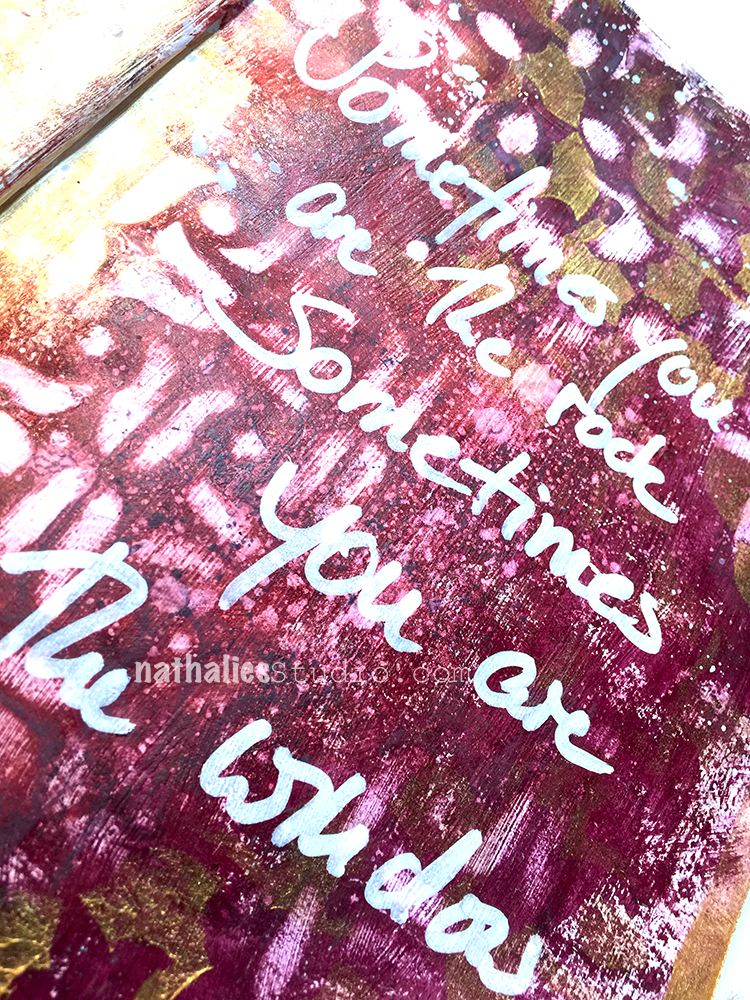
I wanted to add a bit of a dreamy quality to my castle, so added a layer of Interference Gold. I like how this brought out more of my paint texture too. I also added bright green with the Toledo stencil around the edges of my pages.

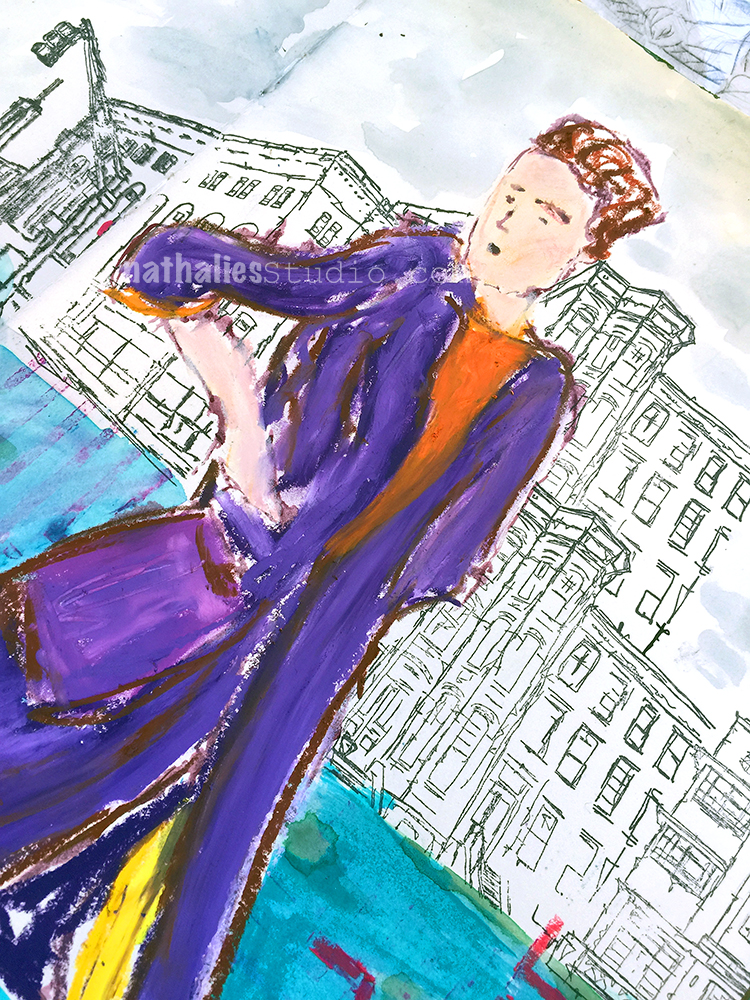
I outlined the castle with a graphite pencil and went over it with a water brush, and added in some window slits and an entrance. Using bright pink paint with the Wired stamp, I added pops of color for contrast, and also stamped some color pops onto a sheet of green card stock for later use.

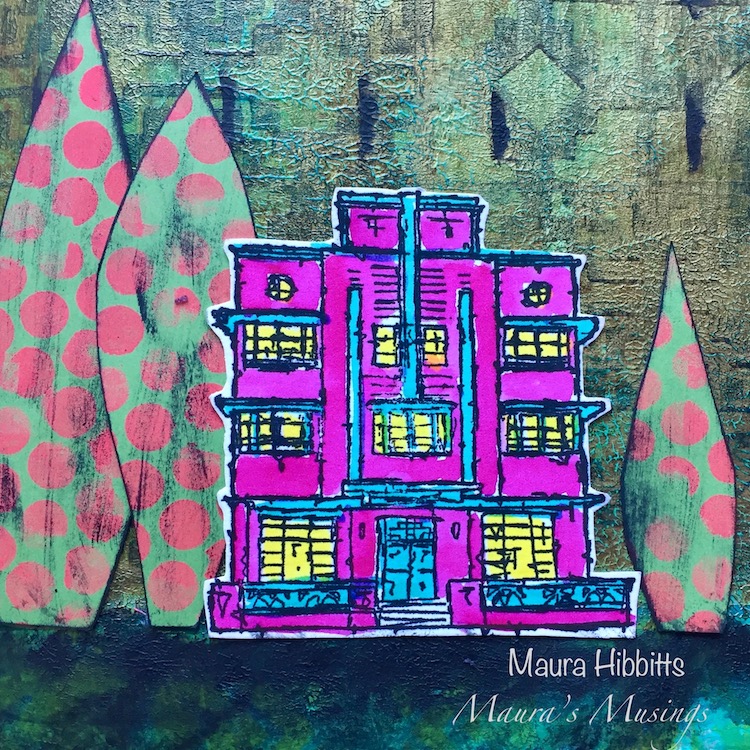
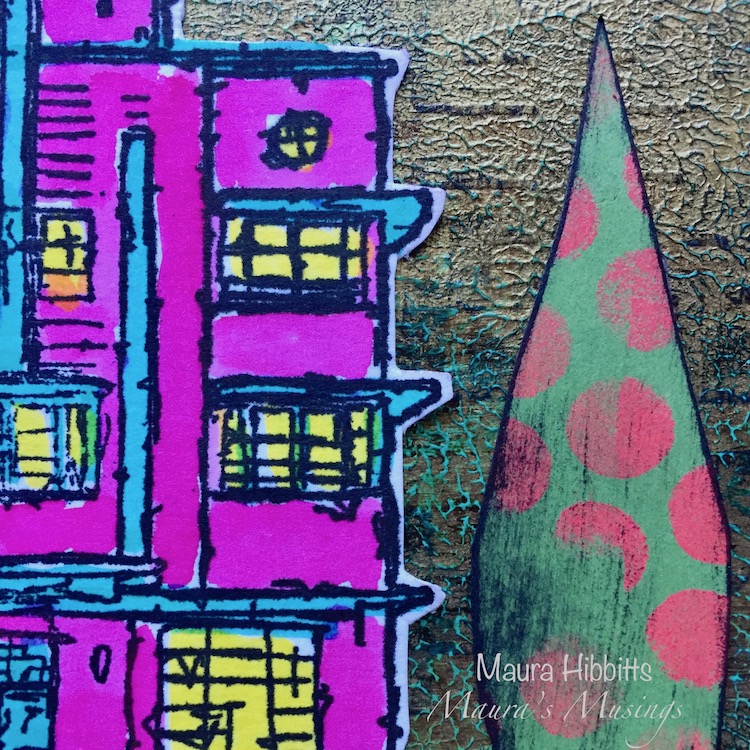
Here’s a closeup of the colors and textures on the page.

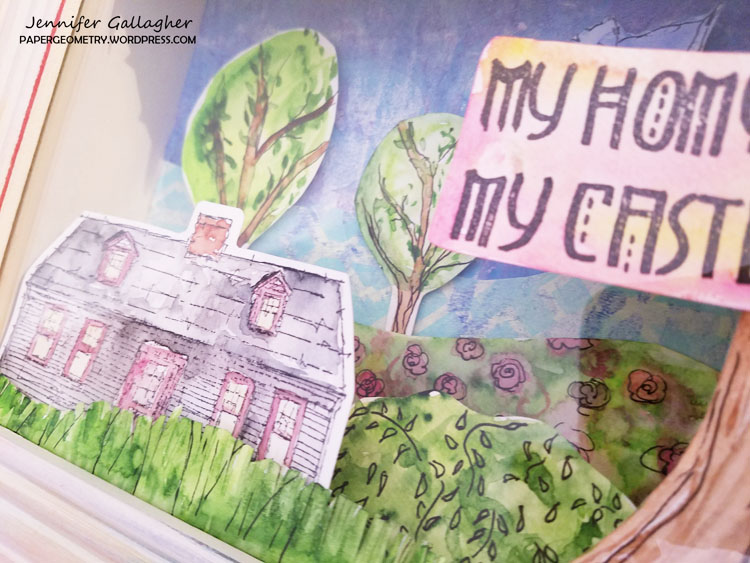
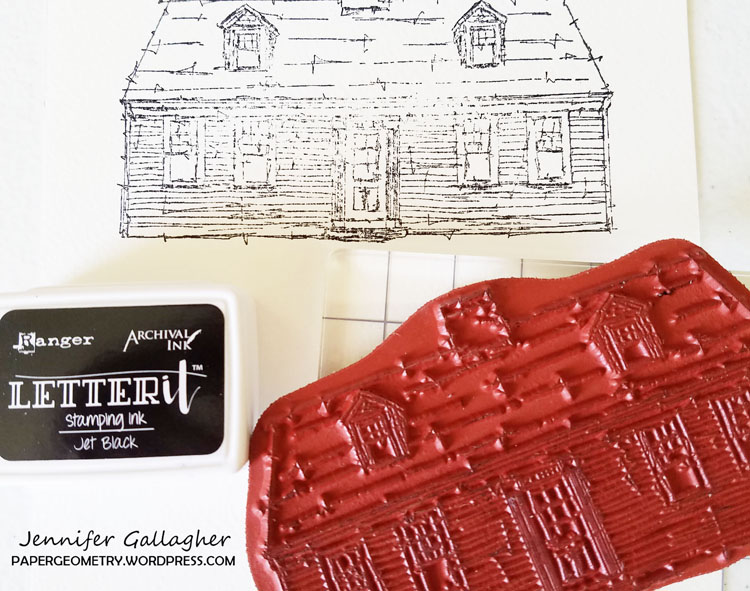
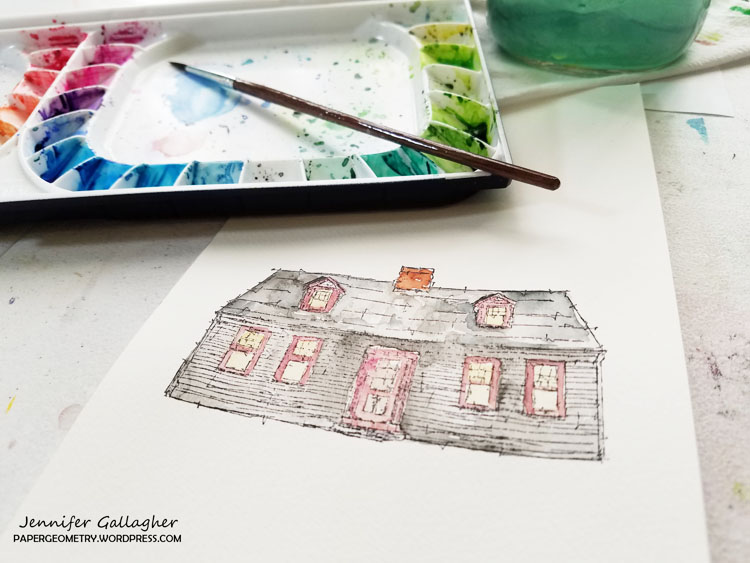
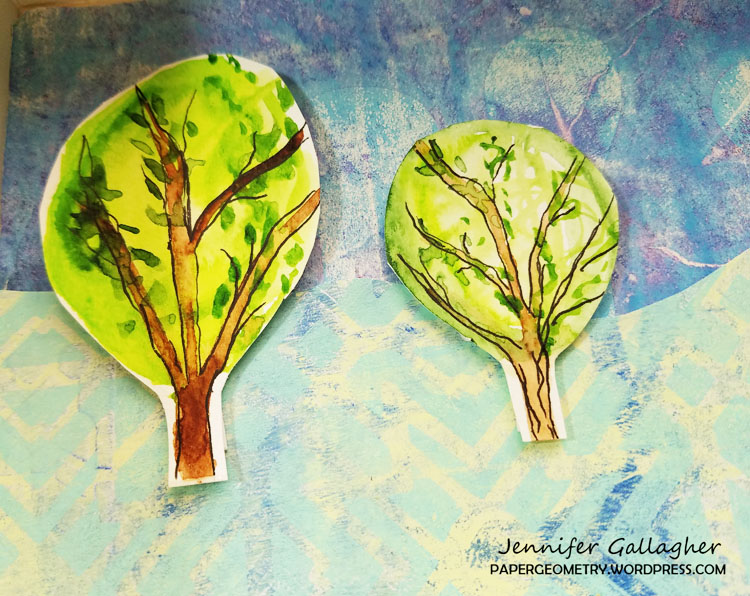
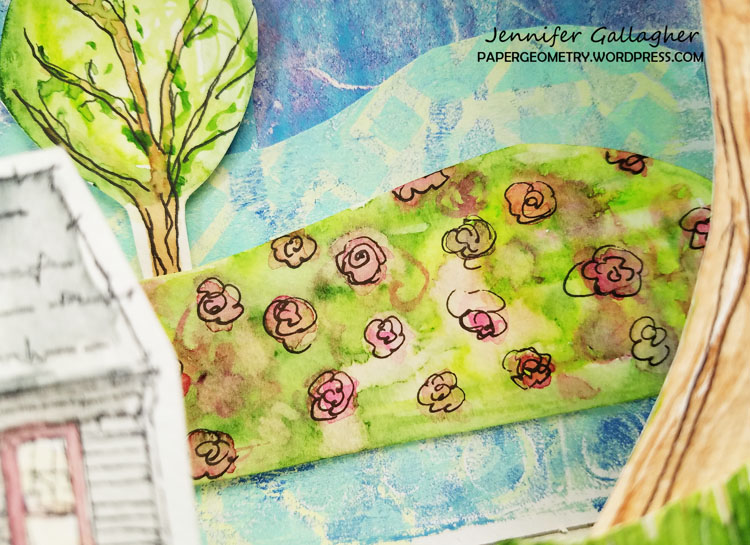
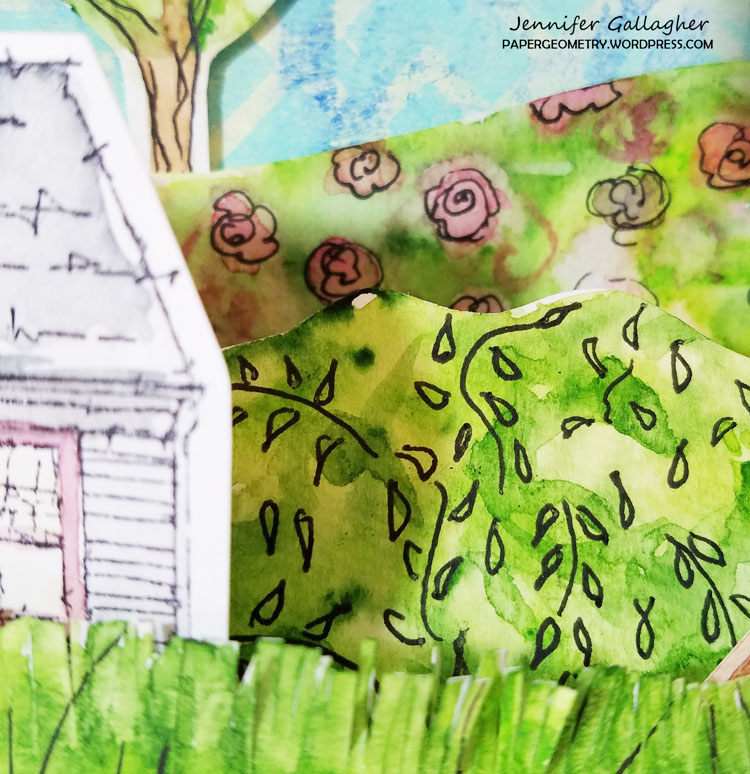
I chose Nathalie’s Art Deco home stamp for my pages, so I could use bright colors on it. I was thinking of those wonderful turquoise and pink homes in Florida (maybe because it is so darn cold here). I stamped it onto watercolor paper, added color with watercolors and markers, then fussy cut it out. I cut out a few funky trees with the paper I’d previously stenciled, and distressed them a bit with black ink.

Of course, I had to add a flag flying from one of the turrets of the castle. I painted it in yellow and went around it with a black pen.

Behind each of our homes, whether an apartment or house, is the castle of our imagination. I hope you’ve been inspired by my art journal pages to create your own awesome project!


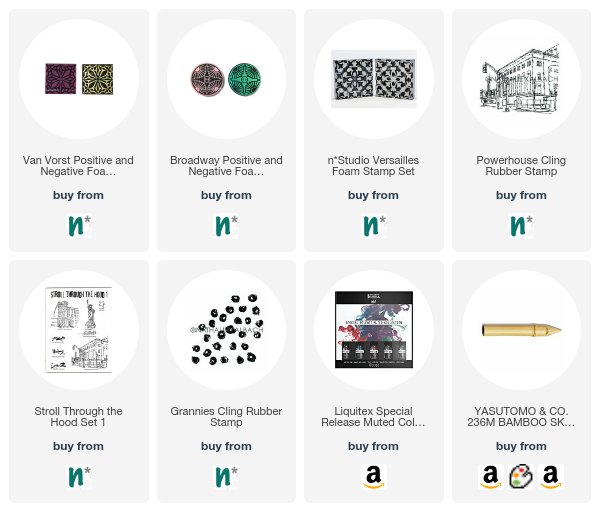
Thank you Maura! I love that cute little pink Art Deco house in front of the giant castle :) Here are the supplies that Maura used:


Play along with us too: I love to see how you interpret our monthly themes. Email me how you used my stencils and stamps with the theme and email me an image – I would love to share your projects in my next  “n*Spiration From Around the Globe“.


SaveSave

SaveSave

Comments (1)

  • Joi@RR

    |

    CONGRATULATIONS Maura. What a great addition Nat!!! Loved your creativity – your home/castle are WONDERFUL. Super textures too!! Xj.

    Reply

Leave a comment

Too Many Thoughts – Art Journal

“I am too little butter on too much bread. I am too many thoughts in too little head”  – Tyler Knott Gregson

This started actually out as many different approaches to a background and thinks just didn’t work out the way I wanted and once I just started covering it up with the gold I fell in love with the antique- streak look and left it. There -problem solved ;)

The girl is mainly on deli paper with I stamped and painted and layered Neopastels on top. Her eyes are a bit off but I can live with that …Moving on is the motto ;)

Love how the foam stamped pattern shows is slightly visible through the gold layer.

Here are some of the supplies I used for this spread:


Leave a comment

For All I Know – Art Journal

I have been working on a big assignment and some personal tasks lately which have me stressed out a bit …so a little art journaling mantra is keeping me sane ;)

some stamping with my RubberMoon stamp sets and I used Neopastels to paint inside the ink transferred figure. I also traced with a pink Neopastel inside the opening of my Manhattan stencil and while I like the outcome, there was a lot of the Neopastel sticking to the stencil which wasn’t easily to get off or transfer to a different spot – so this was probably a one time adventure LOL.

Here are the supplies I used for this spread.


Comments (4)

  • Lois Moore

    |

    I read somewhere that a soak in water with dishwasher “liquid” soap would remove dried on paint from stencils. Maybe it will work with your neopastels too.

    Reply

    • nathalie-kalbach

      |

      I will try that Lois. My best experience so far is with Murphy’s Oil- but I usually do not remove paint as long as it is acrylic paint. I will give it a try :)Thank you

      Reply

  • Sue Clarke

    |

    Do you put something over the neopastels so that they don’t smudge on the opposite page when the journal is closed?

    Reply

    • nathalie-kalbach

      |

      Sue, if the layer of neopastels is not too thick it is not a problem, but in this case where it is very thick I put half a sheet of delipaper in between the pages to keep it from transferring to the other side.

      Reply

Leave a comment

Artist Quote of the Week – Max Ernst

Comments (4)

  • joanja

    |

    ha ha quite a quote with the present theme of jumpstart 2018!

    Reply

  • stephanie

    |

    Made me giggle!

    Reply

Leave a comment

My Home is My Castle – Jennifer Gallagher


Hello from the Creative Squad! Today we have a super charming little project from Jennifer Gallagher that will definitely inspire you and warm your heart :) She is using my Stroll Around the Block and My Home is My Castle stamp sets and this month’s theme: My Home is My Castle – Home means many different things depending on who you ask and where you are in the world. This month we’re thankful to have a place to call home, a place where we can rule and be King – or Queen :) – of the castle!


With the beginning of each new year, it is normal to think back over the past and assess where you are and what is important to you. What is most important to me is family. My husband and I often talk about how much we love it at home. Not necessarily the structure itself, but the time spent with each other and the memories we have made here. This month the creative squad will be sharing inspiring projects that reflect on just that. Using Nat’s new Rubbermoon stamp collections, Stroll Around the Block Sets 1 & 2, we hope to inspire you and share with you what home means to each of us.

Back in the Summer, I acquired several of these shadow boxes at a yard sale. I wasn’t sure exactly what I was going to do with them but I knew they would come in handy. You can purchase shadow boxes at your local hobby and craft store or create your own with recycled materials. I started by removing the frame and glass from the front and emptying the box of all the decorations. I sanded down the frame to give it a distressed feel. Then with a baby wipe, I smeared some Tim Holtz distress stains on the frame and let it dry.


I knew that I wanted to create a little scene in the shadow box to represent my home. I decided to keep with the artistic and sketch-like feel of Nat’s stamps and I felt watercolors would compliment that. I chose the Cape Cod stamp because it most resembles my ranch style home. I stamped the image onto watercolor paper with archival blank ink and then used my watercolors to match the colors of my house.

I decided on where I wanted the house to sit in the box and then designed the other pieces around it. I decided to add a large tree, a flower garden, bushes, a bird, smaller trees in the background and grass. This is where your creativity can really shine. Is this an exact replica of my home? No. But it does relay the feeling I have about home to my audience. Keep that in mind when designing your piece.

I started by choosing a blue and green gelli print from my stash. The blue to represent sky and the green as grass in my background. I used double sided tape to fix those to the shadow box. I then started painting my trees. I used my gelly roll pen to add sketchy lines to each element.

Starting on the background, I fixed each element with scor-tape. The bird and background trees were added with mounting tape to give it a little lift off the background. As I moved closer to the foreground, I fixed the elements with paper tabs like you would in a pop-up book. Mix up the levels throughout the box, giving your piece lots of dimension and interest.

The finishing touch was to stamp the sentiment, My Home is My Castle, onto watercolor paper with archival ink and add a pop of color to it. Once added, I was able to put the glass and frame back on my shadow box.

To me, this piece expresses how I feel about my home. It’s a happy and peaceful place. It is truly my favorite place on Earth. I hope that this piece inspires you to step out of the box this year in your artful adventures. I am wishing you all a wonderful year filled with art, happiness, and creativity.


Thank you Jennifer for this awesome way to use a shadow box! In addition to gelli printed papers, Jennifer used the following supplies:


Play along with us too: I love to see how you interpret our monthly themes. Email me how you used my stencils and stamps with the theme and email me an image – I would love to share your projects in my next  “n*Spiration From Around the Globe“.

Leave a comment

Sometimes you are the window…sometimes you are the rock

Loved Michelle Ward’s video at Creative JumpStart 2018 and used her technique with my Amsterdam and Versailles Stencil creating a grungy background.

Just love the outcome – Michelle does the technique a bit different when I usually do- so it was fun to do it with a different approach. What Technique you ask ? WElllllll…LOL- yes- I am doing this to you right now…you gotta sign up to and see yourself- it is so much fun and the videos are so awesome. You still have time to join us for Creative JumpStart and play along!

Loved creating the girl with some ink sketching and stamping- ….I kinda want her coat- LOL.

Here are some of the supplies I used for this spread:


Comments (1)

  • Dee Spillane

    |

    Love this so much!

    Reply

Leave a comment