Blog: ArtFoamies

New Art Foamies Stamp June 2018 Release!

I am so excited about my new ArtFoamies Foam Stamps. They can be used with acrylic paint, ink and other paint media on paper, canvas, wood and other surfaces. Are you ready for some samples?

Let’s start with my new Hexagon shapes.

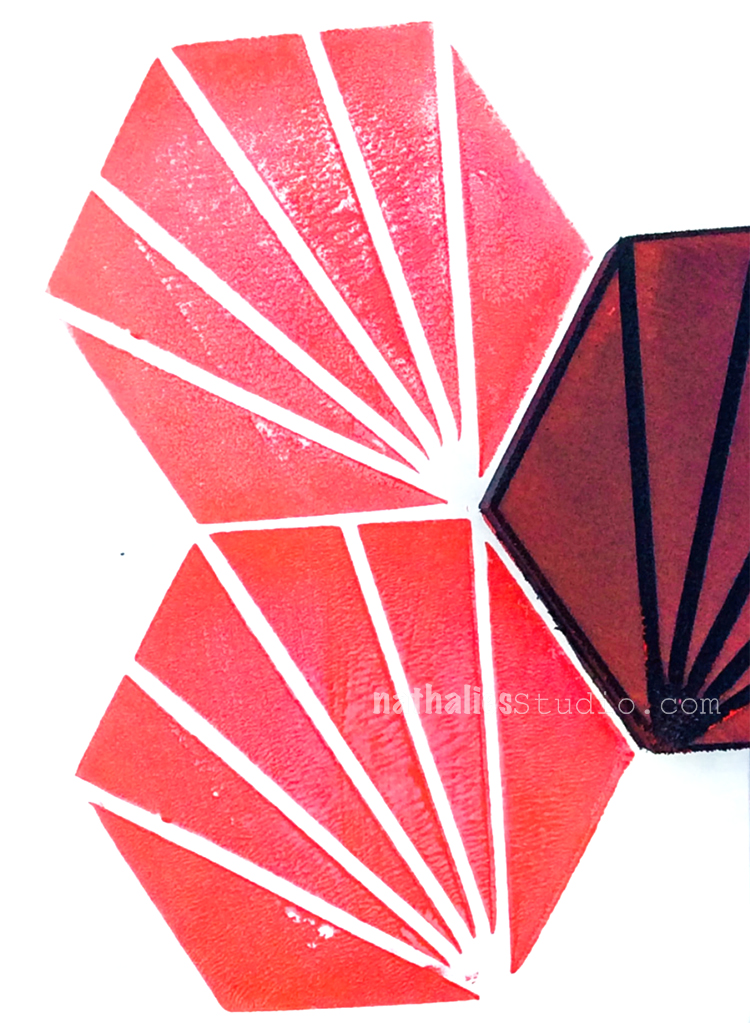
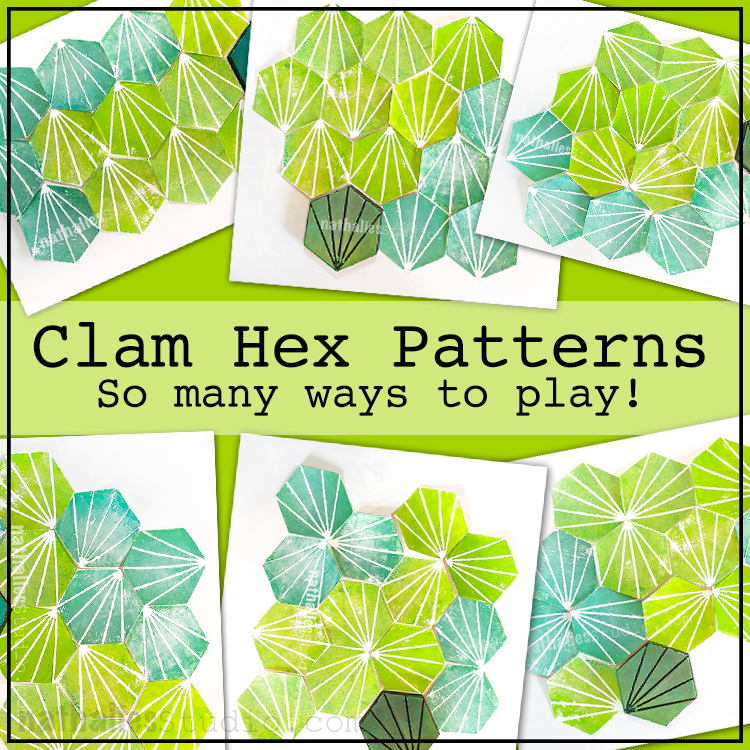
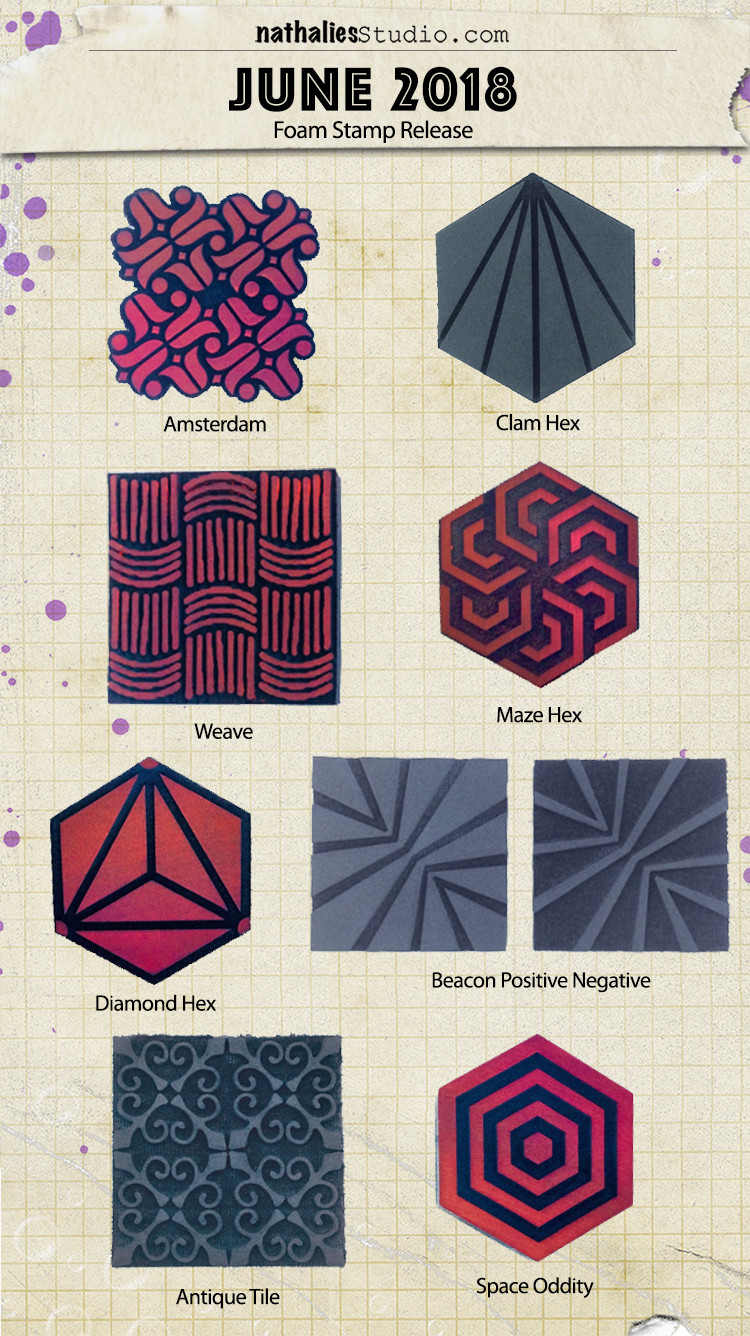
Clam Hex – This stamp is inspired by the simple beauty of a clam shell. With the versatile hex shape you can tile it up in a bunch of different ways, depending on how you orient the markings, and create different fields of pattern. Backgrounds, layers, focal points and more are possible.

Here is an art journal page using the Clam Hex alternating the direction of the stamp up and down.
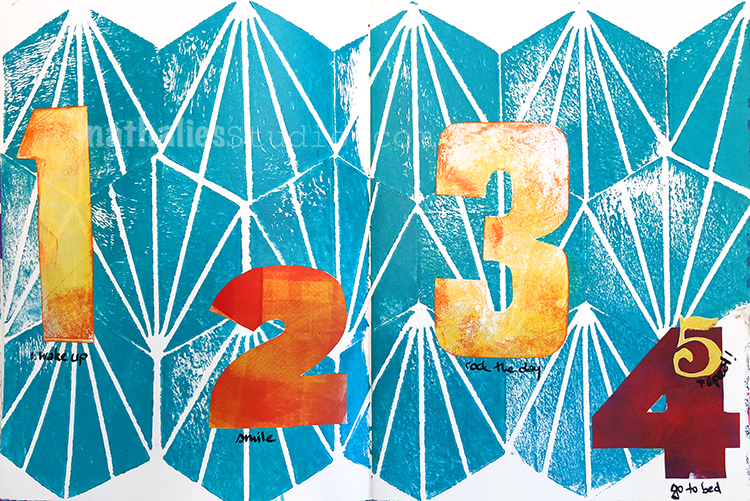
The many possibilities of this stamp actually makes my head spin- I will go into details about those in the next couple weeks for sure :)
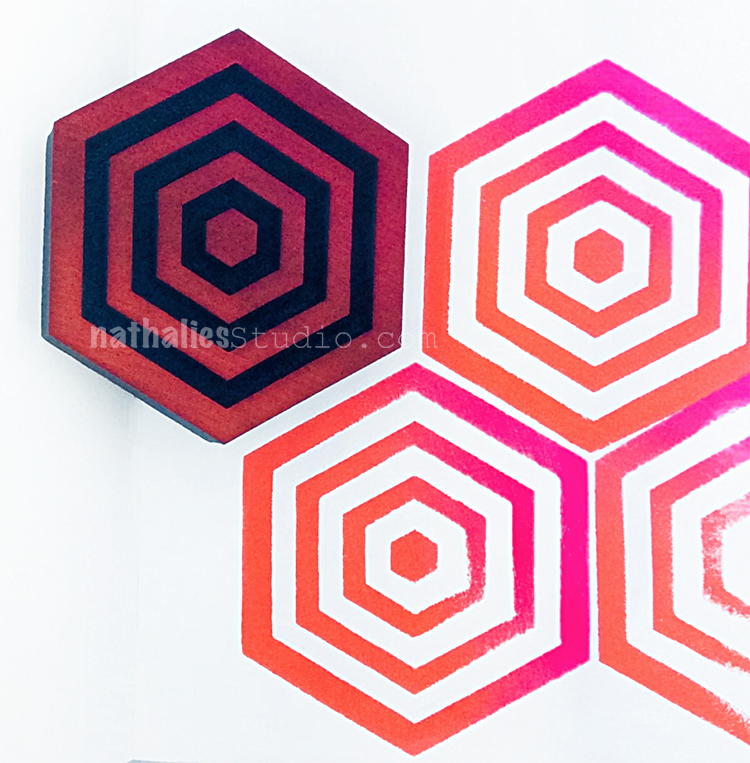
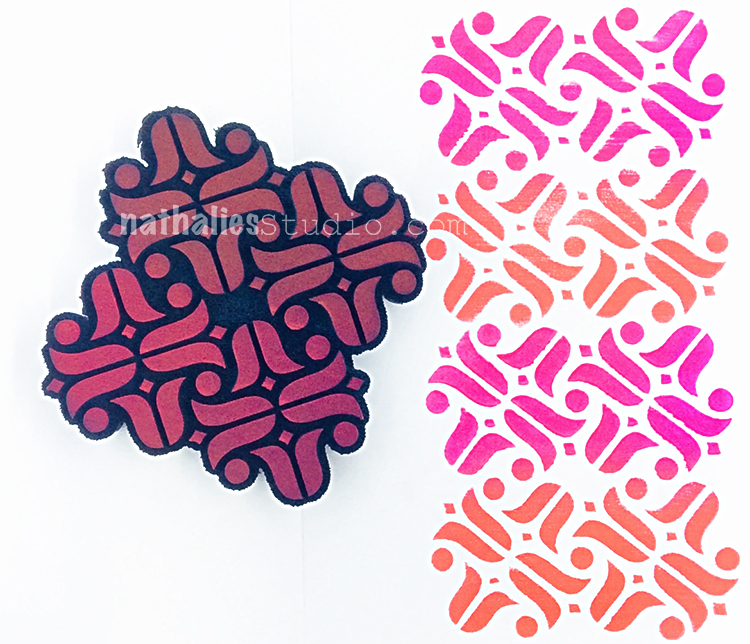
Space Oddity is inspired by none other than the amazingly talented David Bowie and the utterly unique and otherworldly places he transported us to through his music, style, and many personae. Look deep into this hex shaped design and begin your own creative journey. Designed with radial symmetry, you can tile this baby up and create an entire field of op art hex shapes. Backgrounds, layers, focal points and more are your destiny.

Here is an art journal spread with this puppy :)
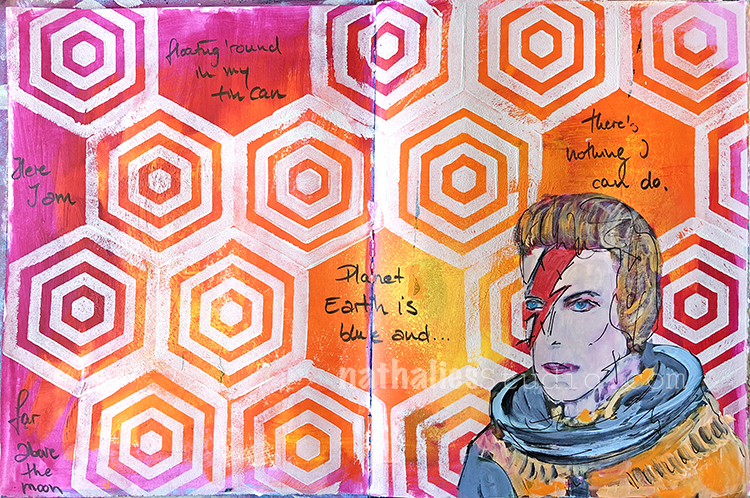
This stamp makes me so happy :)

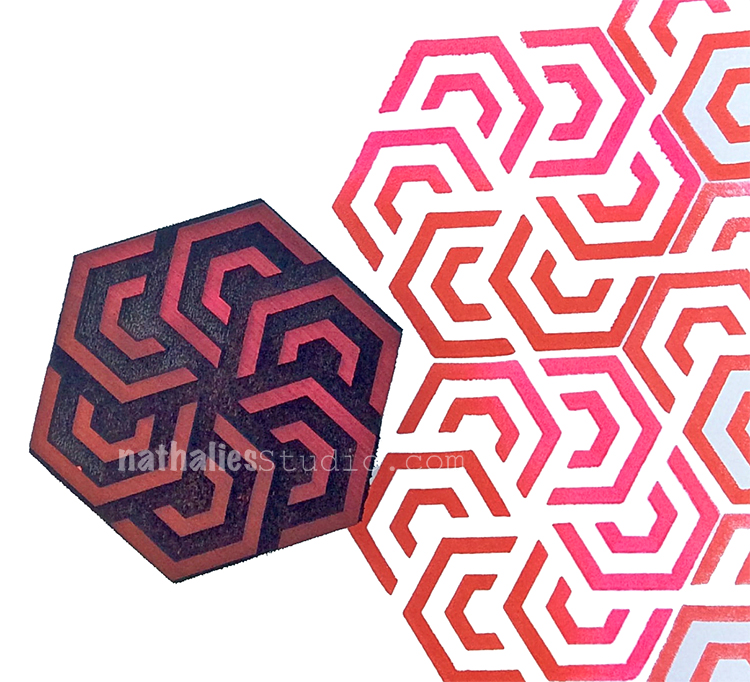
Maze Hex – This hex style foam stamp has a radial design that can be interpreted in so many ways.

Maybe you see a flower in its design? Maybe the winding pathways of a maze? How about the motion of a spinning piece of machinery?
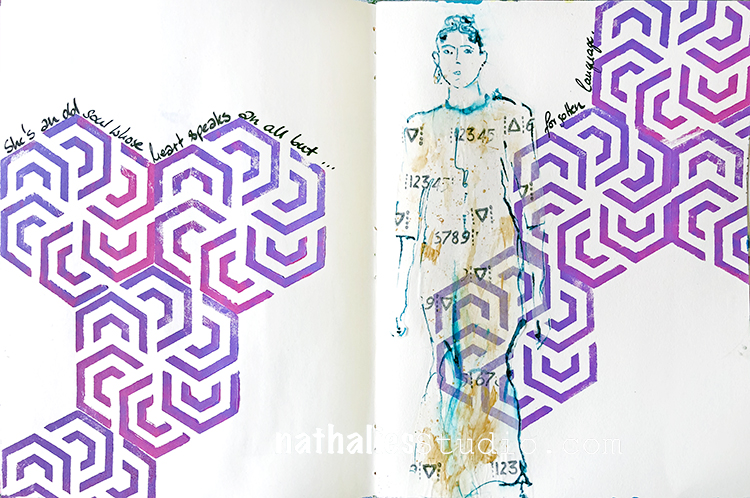
Your choice ;) Use the Maze Hex on its own as a hypnotic focal point or tile it up to create a field of flowers background.

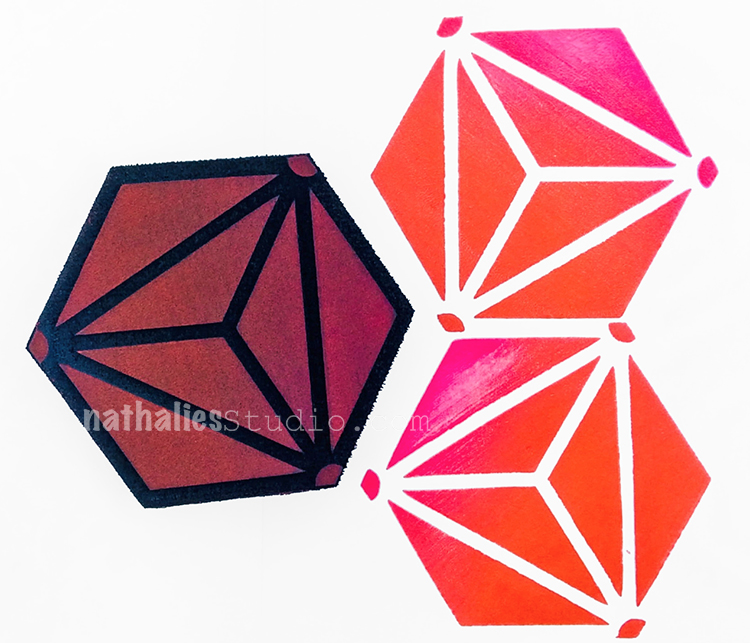
Diamond Hex– This stamp is inspired by the geometry of a faceted stone.

You can create fields of interesting patterns by repeating this pared down and modern interpretation.
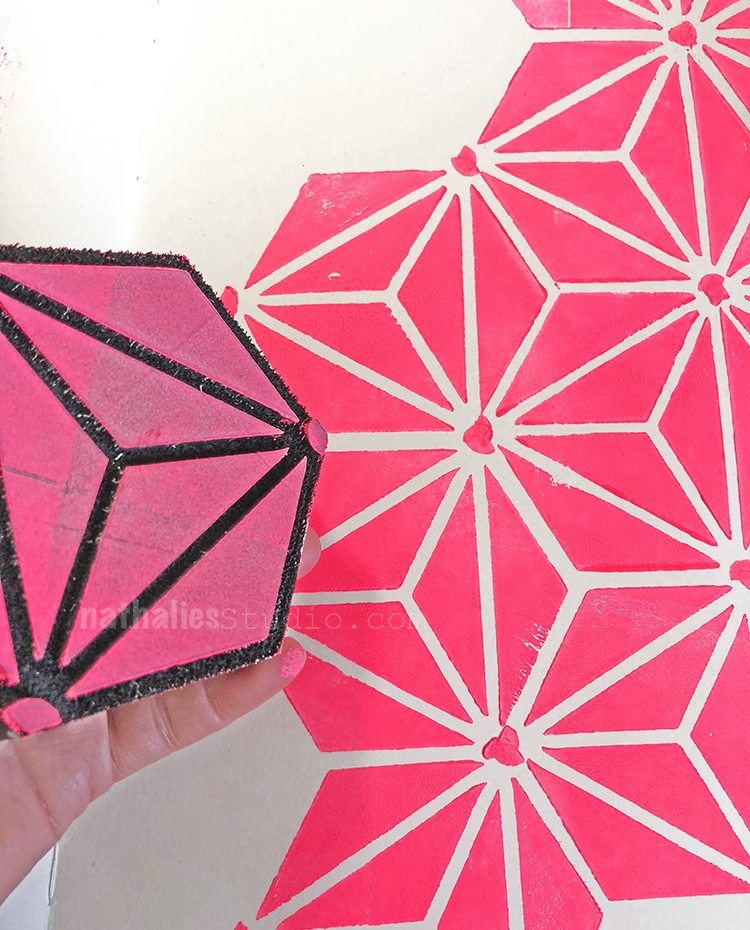
Rotating the design as you go will give you additional variations to the field. Backgrounds, layers, focal points – yes, yes, and yes! Remember: “Diamonds are a girl’s best friend” LOL
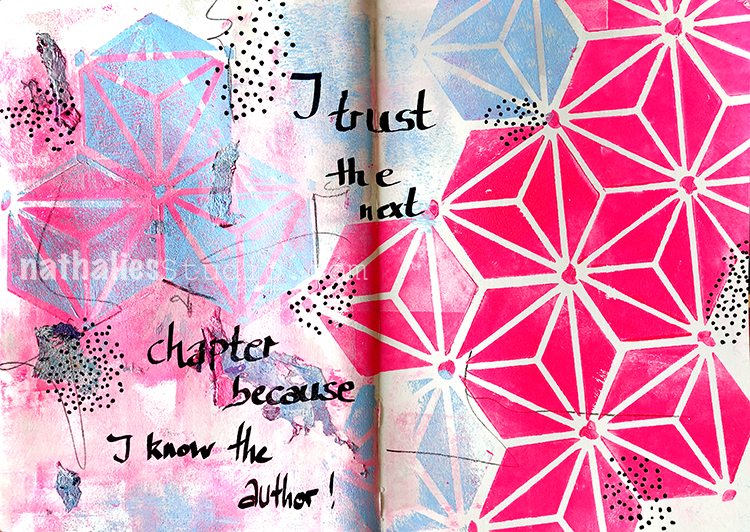
did I get you hooked on those hexagon stamps yet?

But wait there is more ;)

Beacon Positive and Negative – set with two stamps, inspired by the gorgeous Art Deco era buildings known as The Beacon in Jersey City.  These towers sit on a hilltop not far from where I live, and can be seen from miles around in the night sky.

Just as a beacon guides travelers on their way and provides safe passage to ships in the night, these stamps offers a radial, starburst style design to call attention to your art, mixed media projects, and art journal pages.
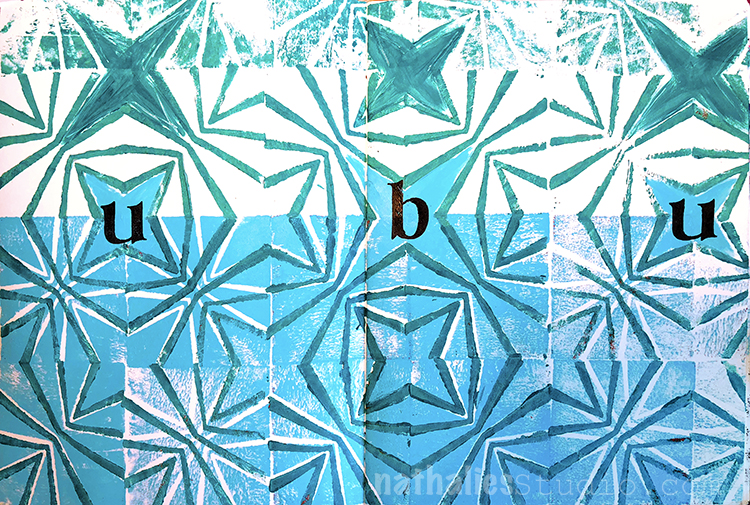
Use the positive and negative stamps as single designs or together for a unique layering effect.

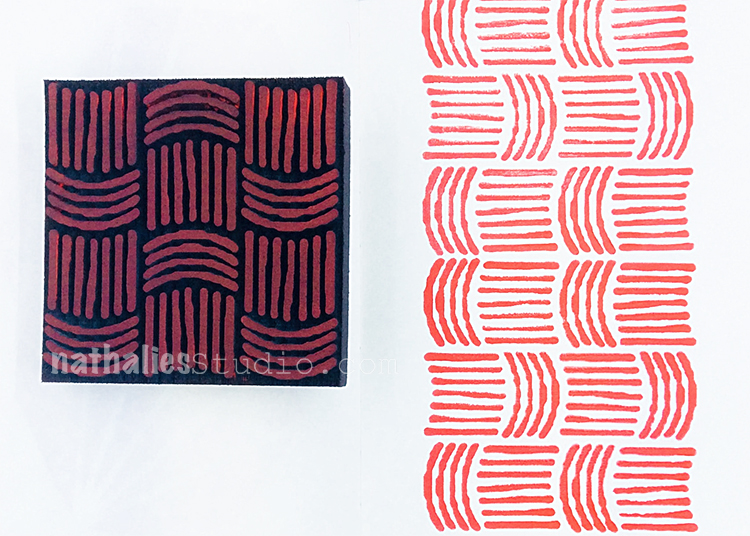
Weave – was inspired by the simple, visual rhythm of woven fabric.

The repeating design is great for stamping multiple times to create continuous patterned backgrounds. Where? In your artwork, mixed media projects, block printing, art journal, fabric and textile projects, on your gelli plate, and wherever you CREATE!
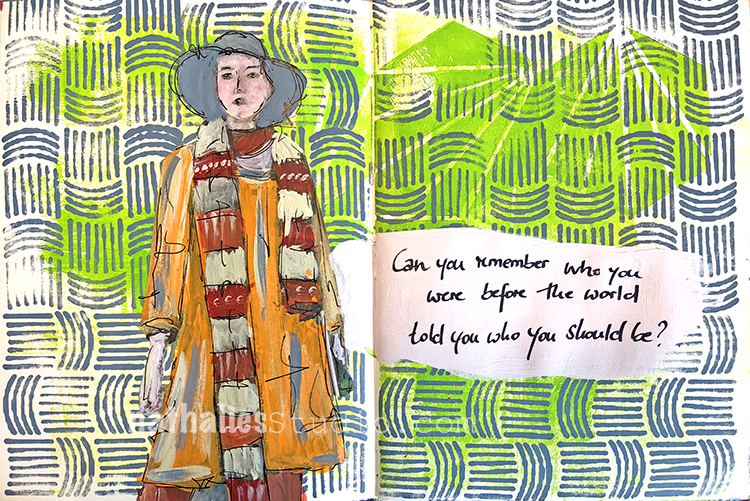
I love it, simple yet pretty cool.

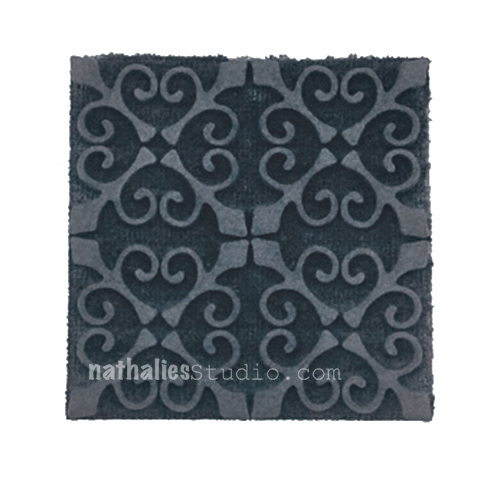
Antique Tile – was inspired by the beautiful wrought iron balconies, gates, and fences known as “Iron Lace” in and around the city of New Orleans.

Add a bit of Antique Victorian style, old world Spanish tradition, or French Creole flair with this pattern.
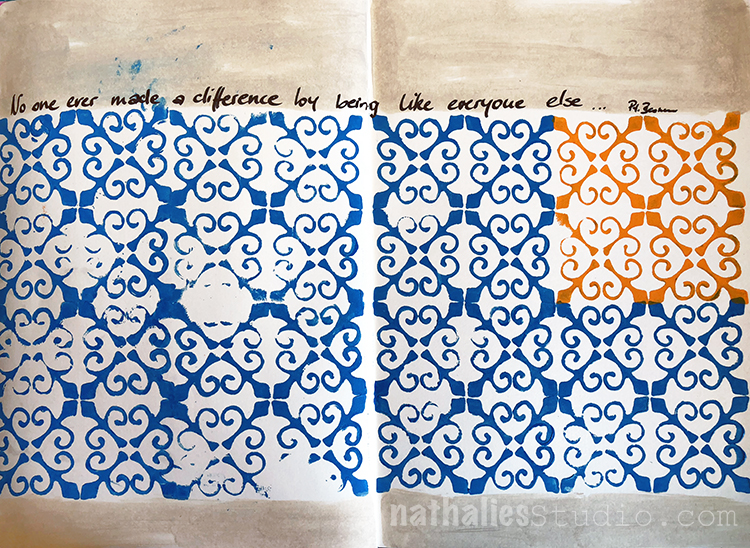
The ornate design of this one is perfect for layering or creating intricate backgrounds in your artwork, mixed media projects, block printing, in your art journal, etc.

And last but not least…

Amsterdam – was inspired by the beautiful and progressive city of Amsterdam.

Traveling to Amsterdam I always enjoy the lush markets overflowing with bundles of tulips and flowers, and the old and new architectural styles living side-by-side.
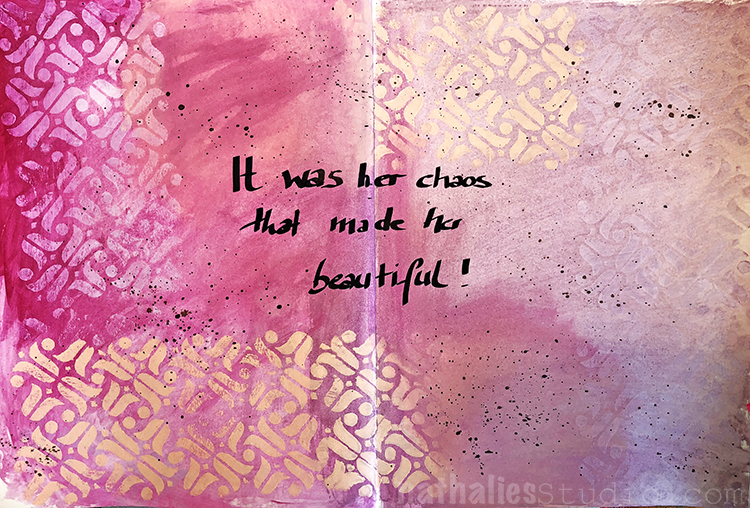
and that is it for now :) All of the designs are in the store now and ready to be shipped out :)


But… WAIT …..WAIT…..

Do you want to win the new stamps? I am giving away to one lucky winner a nice package of ALL the new stamps!

UPDATE: This contest is closed. Congratulations to our winner Nancy Faulls!!!

Here is how you can win:

  1. Comment on this blog post which of the new stamps is your favorite.  You can can actually get another entry if you
  2. join me at my Facebook Live event today starting at 4pm EST here and share the recorded video afterwards with your Facebook Followers.
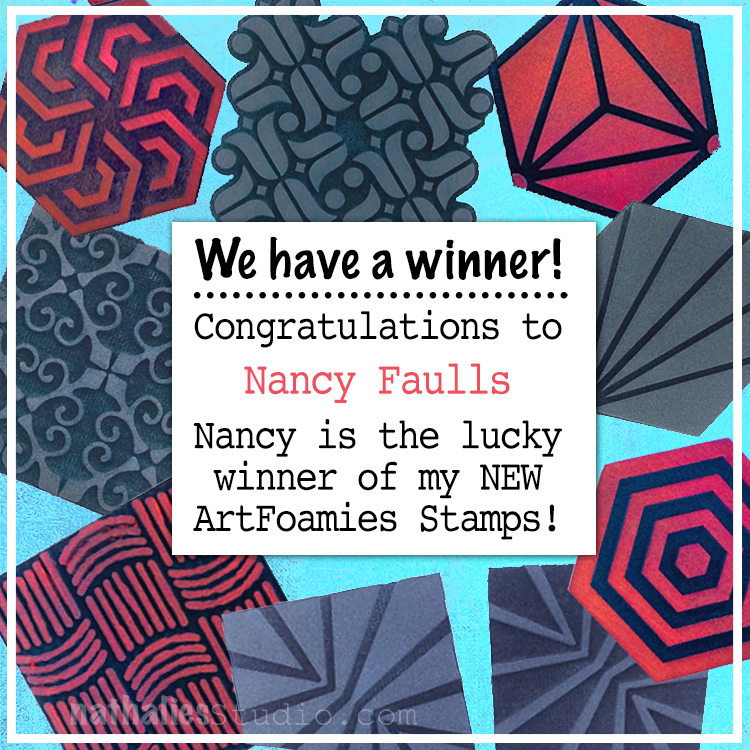
I am very happy to announce that the winner of my new foam stamps is Nancy Faulls! She will receive the full set of my 8 new designs to use in her creative projects. We’d also like to say a BIG thank you to EVERYONE who tuned into the Facebook Live event yesterday to join the fun Kaffeeklatsch we had and all those who shared that video. We also send a BIG thank you to everyone who read the blog post announcing the new stamps and who made such nice comments on there. Half of the fun of these new product reveals is getting to share my excitement for the new designs with you and hopefully inspiring you to try your own style of using them in your artmaking. You guys rock!

 

SaveSave

Comments (21)

  • goofmeister1949

    |

    Oh my gosh, all of the designs are wonderful but my absolute favorites are Antique Tile and the Weave. Cutting the weave up is so intriguing. Thanks for all you do

    Reply

  • pam hansen

    |

    Oh how can I choose just one. They are all so fabulous. I really like Space Oddity and Weave, but I’m pretty sure they all have a place just waiting for them in my studio!

    Reply

  • Martha Christopher

    |

    How can I choose, but if I do then it would be clam hex… I wasn’t really drawn to it when I saw the foamie stamp but when I saw it stamped I fell in love!

    Reply

  • Marelle Jackman

    |

    OH wowwwwwwww yes please would love to use these in Australia!

    Reply

  • Liz Thayne

    |

    Love all these new foamies, but my favourite is the diamond hex as it looks so versatile.

    Reply

  • Anita Rodway

    |

    LOVE THEM ALL!!!! But my fave has got to be the Diamond Hex. They look fantastic Nat <3

    Reply

  • Nancy Faulls

    |

    Nat:
    As always, I love them all. My favorite is Maze Hex.
    Nancy

    Reply

  • Jennifer Henrichs

    |

    I love them all but I think my fav is the diamond hex ?- Jenn Henrichs

    Reply

  • AnnetteD

    |

    Clam Hex without a doubt!

    Reply

  • Marit Warnitz

    |

    I love them all. Hard to choose just one of them. I love Amsterdam obviously, because I live in the Netherlands. And Clam Hex because it reminds me of a sea shell. <3

    Love, Marit

    Reply

  • Eeva Hall

    |

    oooh I love yhe clam hex, and amsterdam the most <3 <3 <3.

    Reply

  • Sue Clarke

    |

    Weave is my most favorite but the others are just as much fun (I just happen to have a crush on baskets/weaves).
    The David Bowie page is AWESOME!
    Thanks for the chance to win Nat.

    Reply

  • julie b

    |

    So, are you asking me to pick a favorite child? Fabulous release of stamps! Amsterdam is one of my favorite stencils of yours so it would make sense that this stamp would be a fave but clam hex makes for a beautiful collection of umbrellas (think card idea like you showed) and then there are the hex designs for gorgeous backgrounds and ah, there is the weave stamp for the upcoming fall/winter months. On the other hand tile patterns have my heart; does this stamp have the positive/negative too? Thank you for all your inspiration!

    Reply

  • Marcia

    |

    Thanks for the new stamps Natalie and the examples! I love them all but I think diamond hex is my favorite.

    Reply

  • Yvonne B.

    |

    I am loving the Diamond Hex. They are all so cool and I really like the examples you have for each. Makes me want to try them all out even more!

    Reply

  • Jean Goza

    |

    Congrats on your new foamies line. They are all wonderful and I love the art samples you shared for each of them. My favorite is Weave. I’m sure it is influenced by the fact I have been working with fabric lately. ;-)

    Reply

  • Bea

    |

    I like them all but Amsterdam is my favorite…

    Reply

  • Tania

    |

    Congratulations on the fabulous release Lovely! ?

    Reply

  • Delores Azary

    |

    They are all great, but Maze Hex is a favorite!
    How exciting! Congratulations on your new stamps!

    Reply

  • Lynda

    |

    It’s difficult to pick a favorite as they’re all wonderful. Swayed by your examples, I’d have to choose clam hex, followed closely by Beacon positive negative. Your Artfoamies make playing so much fun!

    Reply

  • Brenda

    |

    They’re all wonderful! Especially after seeing all of your samples! My favorite at the moment is the Amsterdam.

    Reply

Leave a comment

All Shapes and Sizes – Jennifer Gallagher


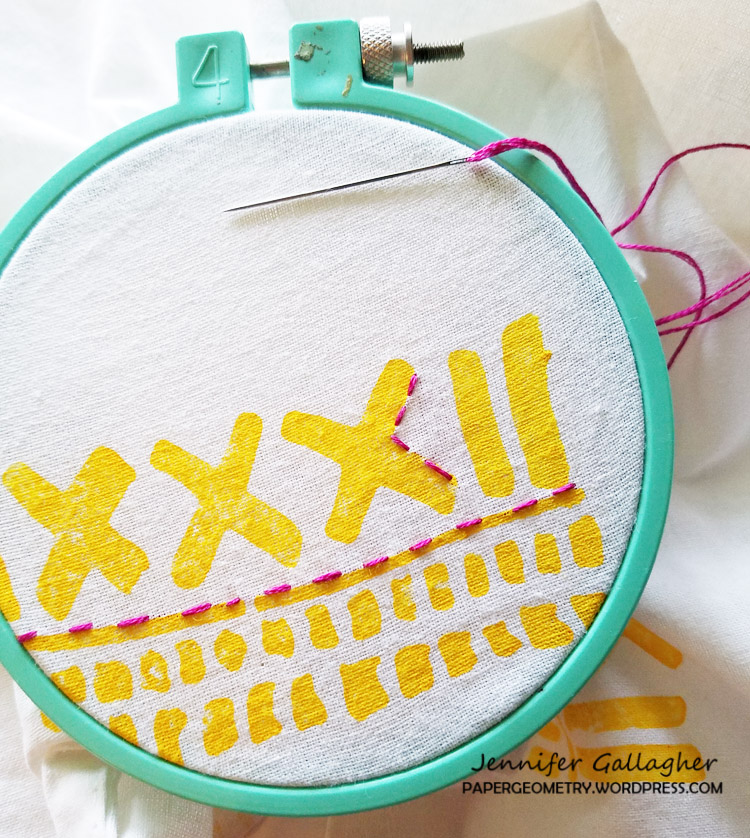
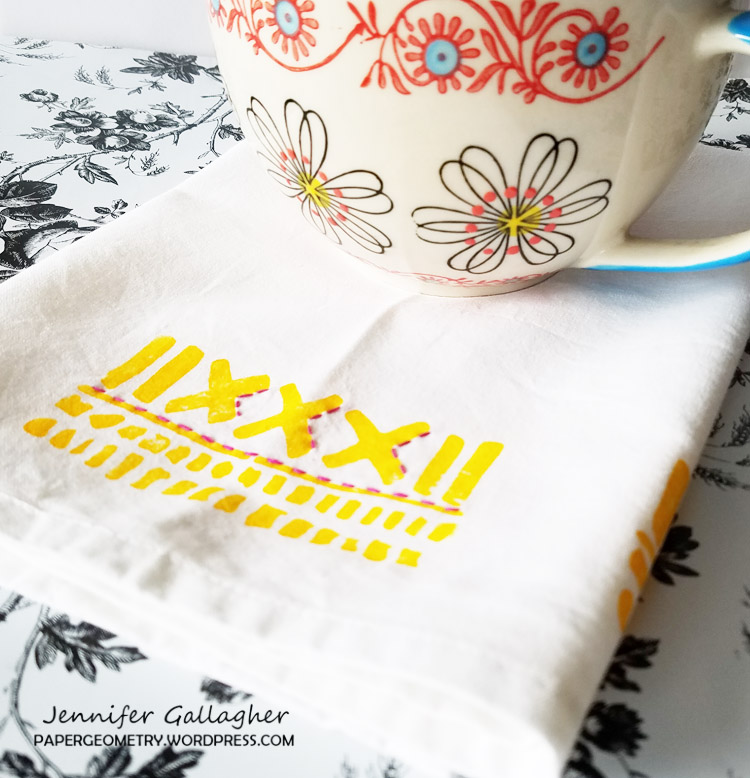
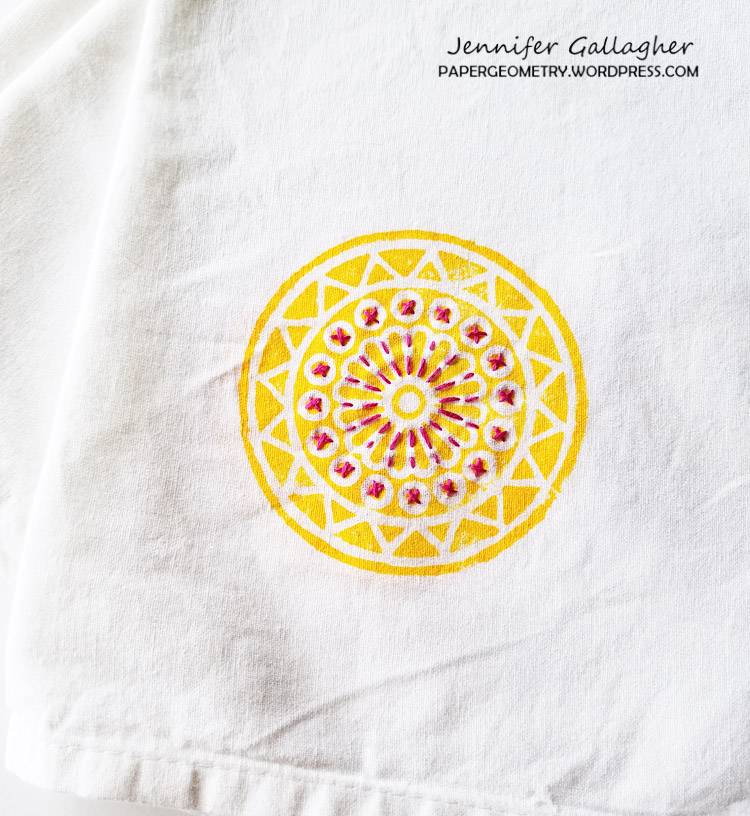
Happy Tuesday from the Creative Squad! Today we have a post from Jennifer Gallagher that will definitely inspire you to up your summer entertaining game! Jennifer brings us some awesome stamped and embroidered napkins using my Valley Road and Mini Batik Pattern 1 foam stamps, and inspired by this month’s theme: All Shapes and Sizes – Circles and squares, big and small, let’s mix it up and play with different shapes and sizes this month. Just because things are different doesn’t mean they can’t look great together!


This month we are celebrating all shapes and sizes. I am a firm believer that mixing shapes and patterns leads us to the most interesting design. With that in mind, I am making a fun set of stamped and embroidered napkins that mix some of my favorite n*Studio ArtFoamies. Although I am using different shapes and designs, you will find they compliment each other quite well.

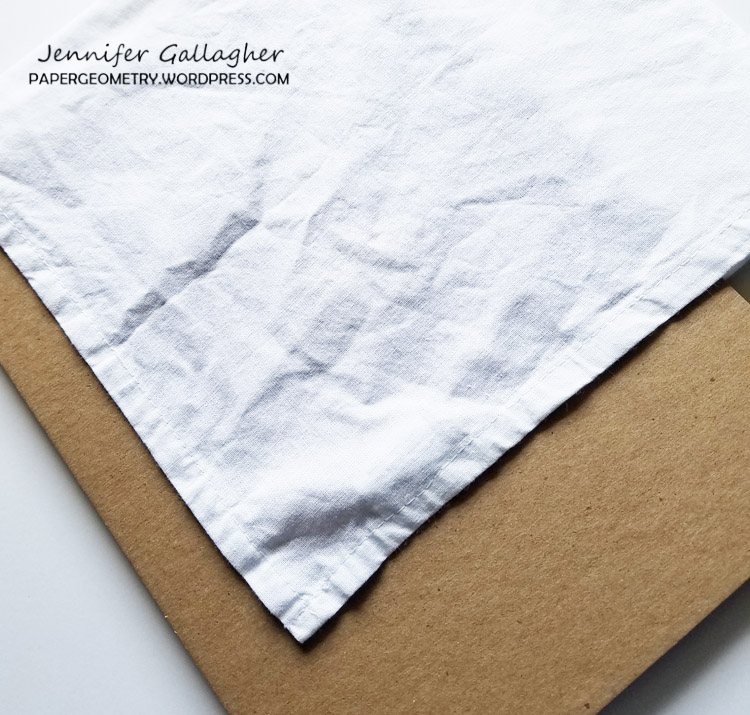
I started with a package of four white 100% cotton dinner napkins designed for embroidery. Make sure to prewash these types of items to remove the sizing. After washing and drying them, I gave them a quick steam to knock out the majority of the wrinkles. I then laid a large piece of cardboard under the area I would be stamping to prevent the paint from soaking through to the layers underneath.

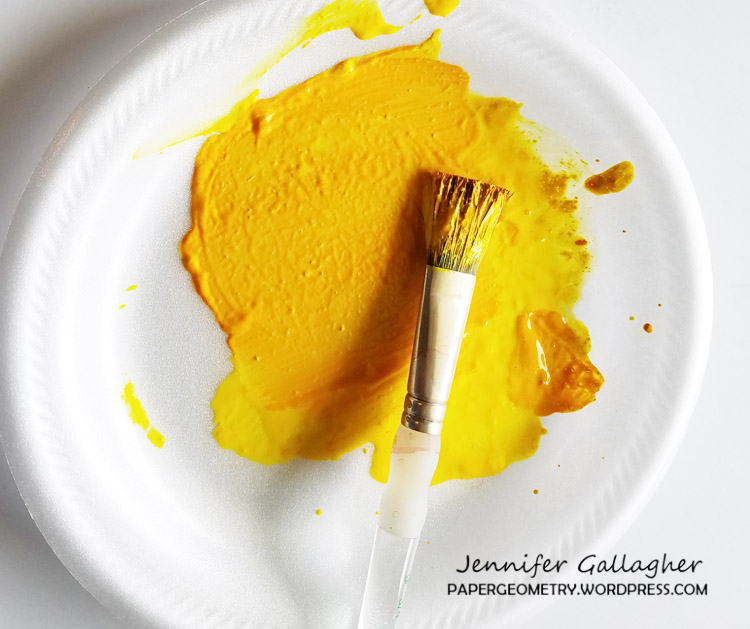
I didn’t have any textile paint on hand, but I did have some textile medium. I mixed up my paint with the medium according to the directions. This product turns your regular acrylic paint into fabric paint. I settled on a bright and cheerful yellow.

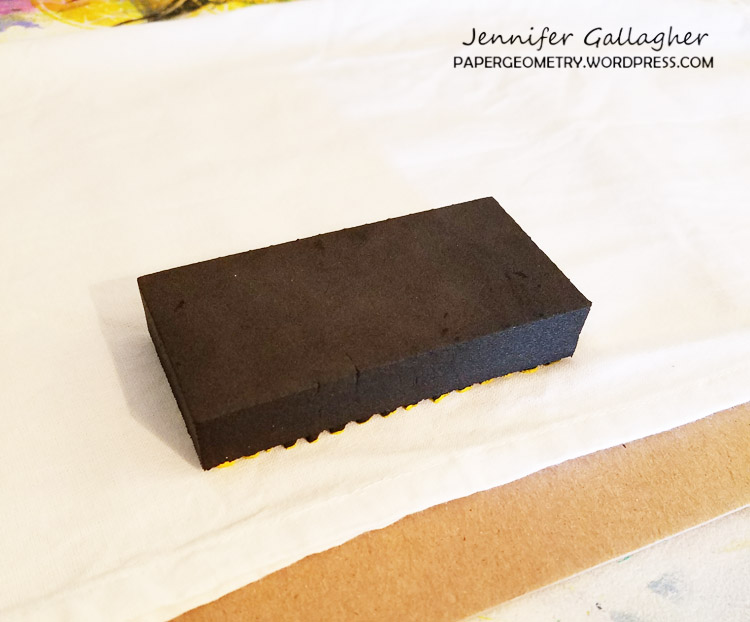
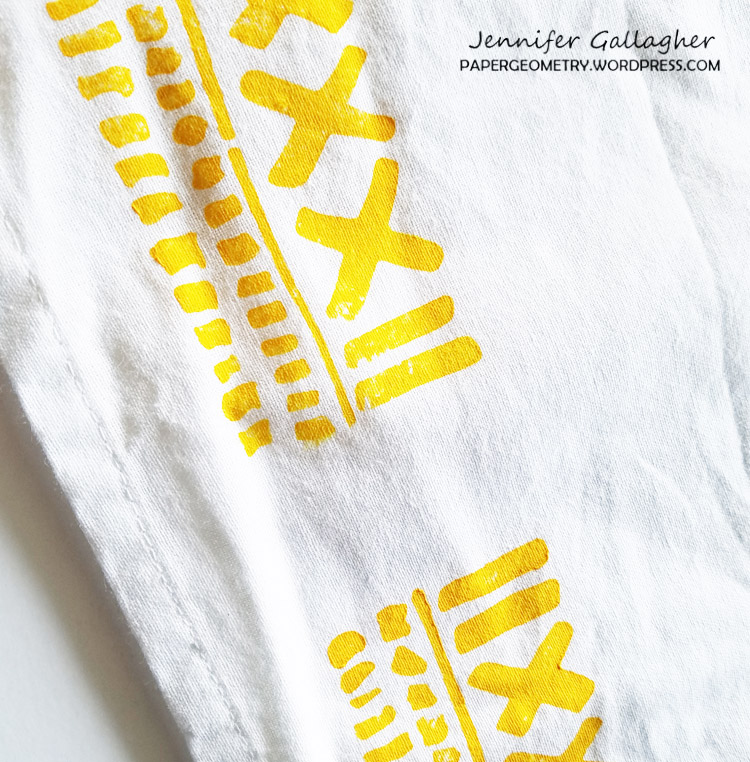
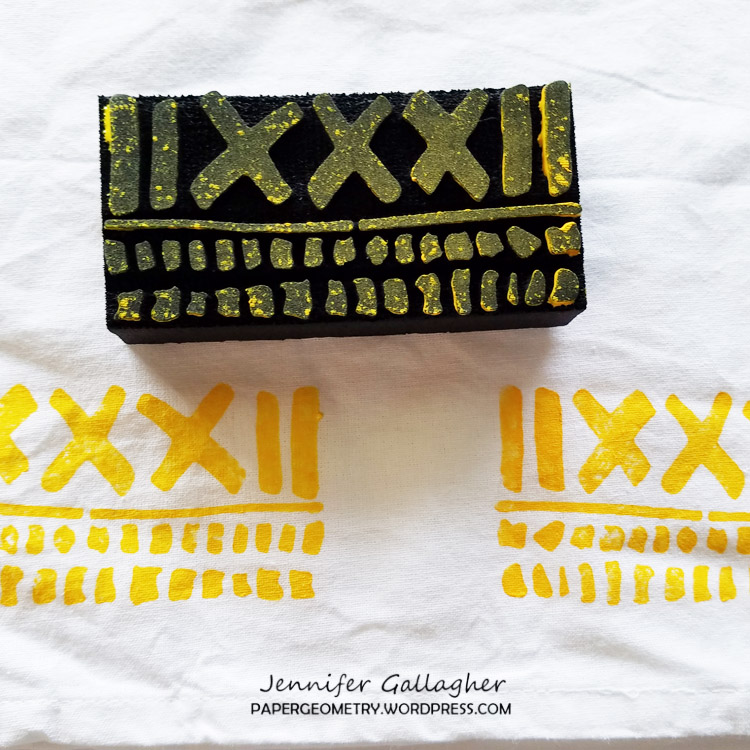
Next, I dipped my ArtFoamie onto the paint. It is important not to overload your stamp with too much paint. ArtFoamies are very high quality stamps and will hold the paint and leave a wonderful impression. There is no need to load too much paint as it will seep into the negative spaces of your stamp and leak out once pressed down. I am stamping with Nat’s Mini Batik Pattern 1 stamp and the Valley Road stamps.

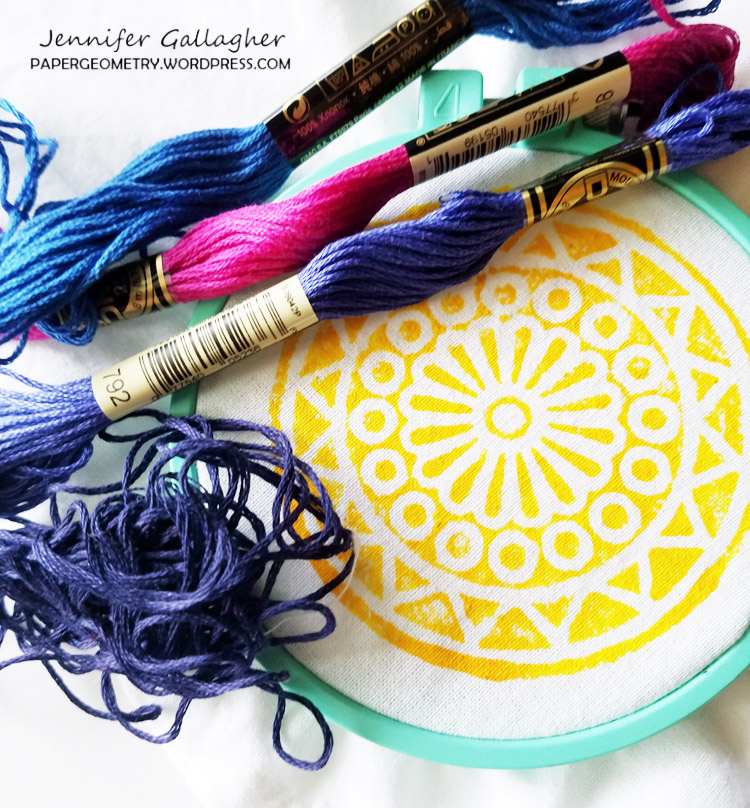
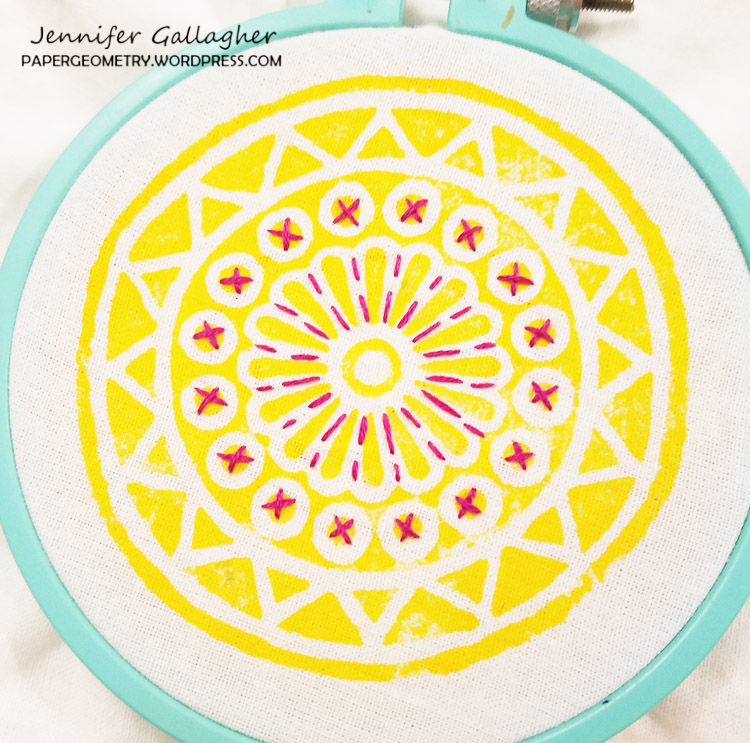
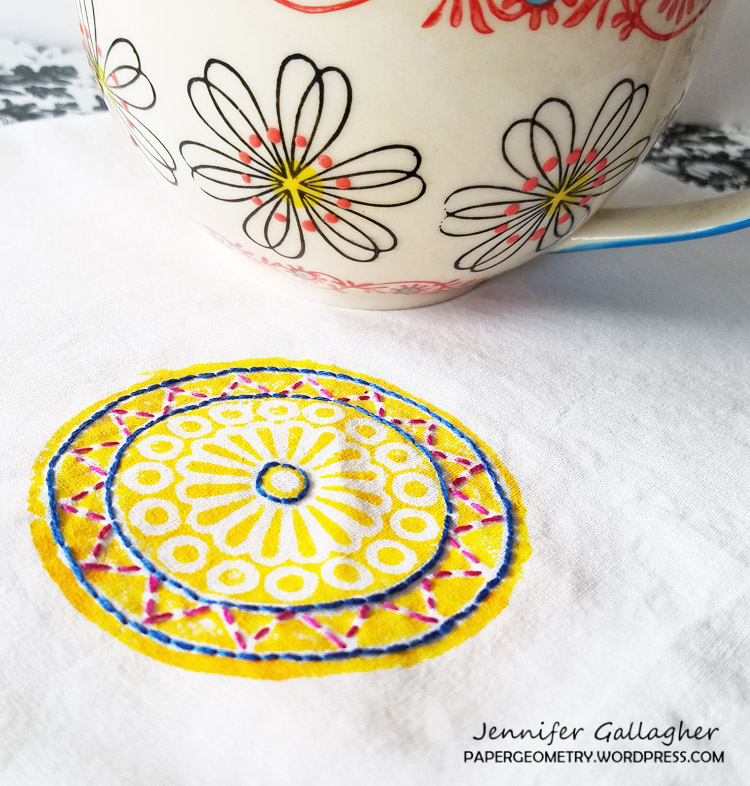
Once the paint dried, I placed my napkin into a four inch embroidery hoop. After choosing a handful of colors to embroider with, I began some basic stitching. You don’t need to be an embroidery whiz to add some basic stitches to your napkins. There is a wealth of free information online about embroidery. If you have never tried it before just do a quick google search.

Each napkin has a variety of stitches and colors used. You can customize your own set by varying the n*studio artfoamies you use and the colors you coordinate.

These fun napkins are perfect for a summer picnic. I hope I have inspired you to stamp and embroider your own items. Be sure to share with us what you create! Enjoy.


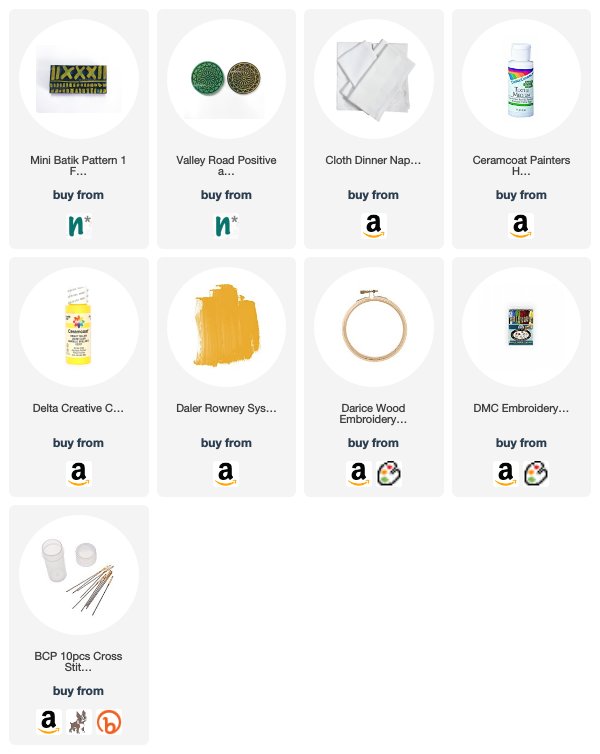
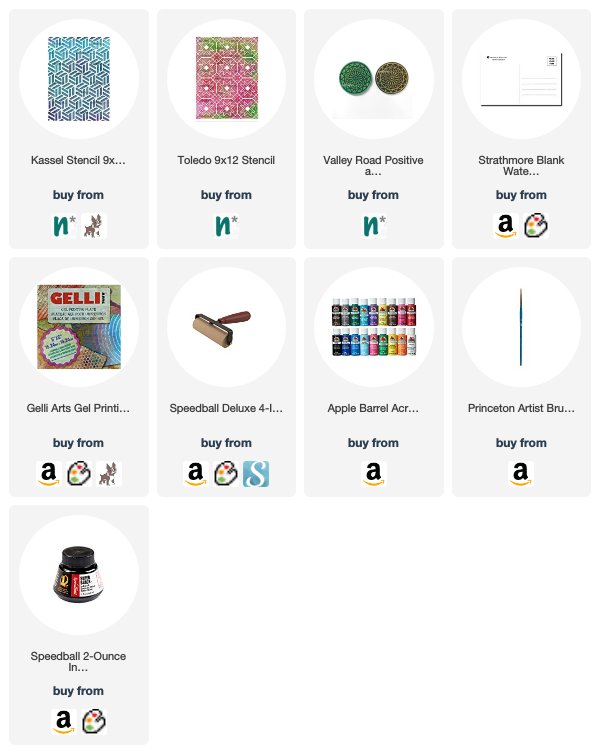
Thank you Jennifer – these napkins made me so happy. What a cheery and fun project! Here are some of the supplies that Jennifer used:


And if you feel inspired to share some of your own projects with my stamps and stencils, please send them my way. I post projects almost every month in my Inspiration From Around the Globe posts!

Leave a comment

All Shapes and Sizes – Josefine Fouarge


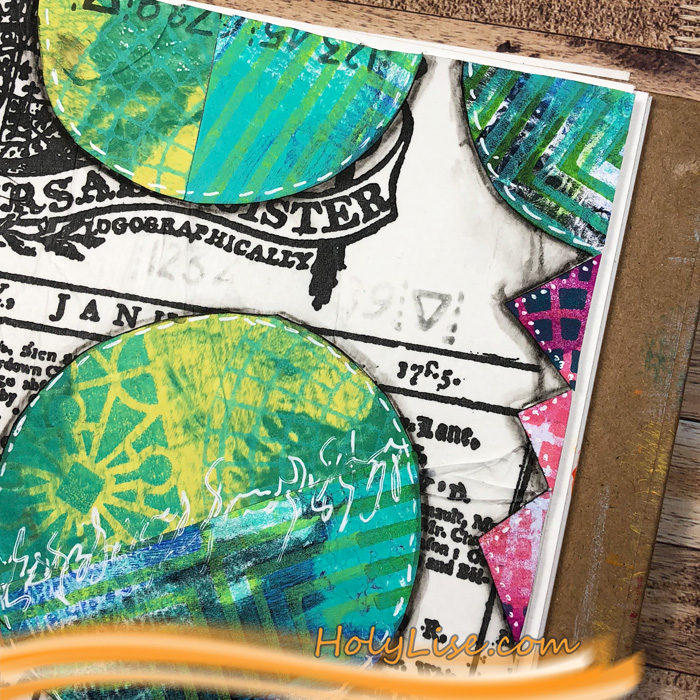
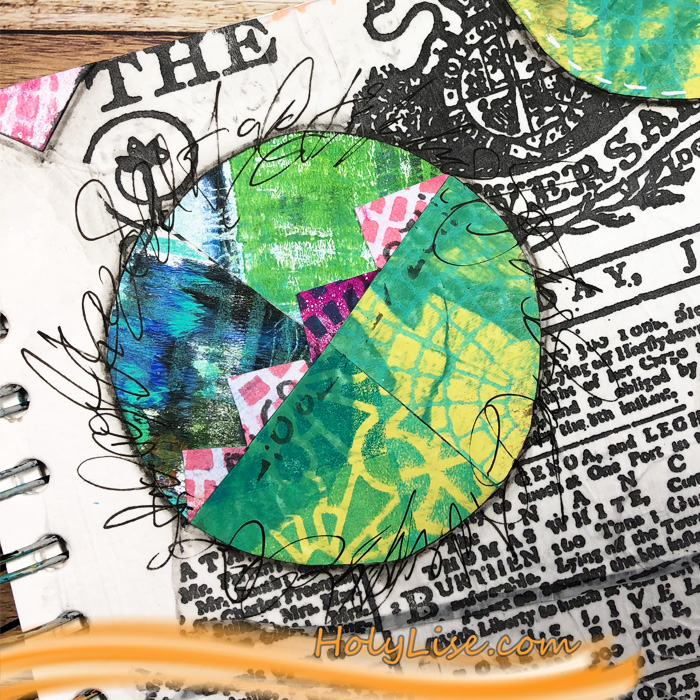
Today we bring you a post from the Creative Squad! The lovely Josefine Fouarge is with us today to share a fun art journal page that celebrates one of her favorite shapes and one of mine too – the circle! Josefine uses my Mini Manhattan, Buenos Aires Border, and Central Avenue ArtFoamies stamps as well as my Numerals rubber stamp for her page. She was inspired by our theme this month: All Shapes and Sizes – Circles and squares, big and small, let’s mix it up and play with different shapes and sizes this month. Just because things are different doesn’t mean they can’t look great together!


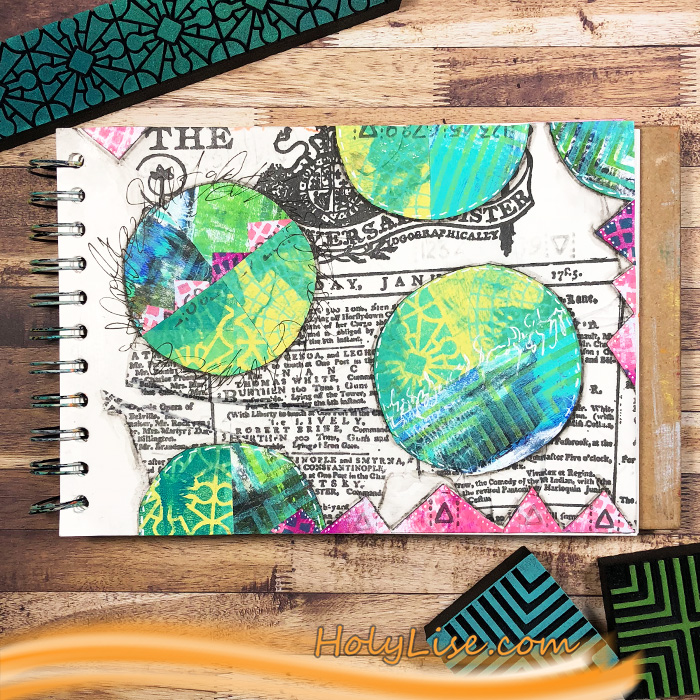
I’m super excited about this month’s theme. I love shapes and it’s so much fun to incorporate them in my art journal. If I would have to pick a favorite shape, it’s definitely circles. I constantly draw circles and add bubbles to my projects.

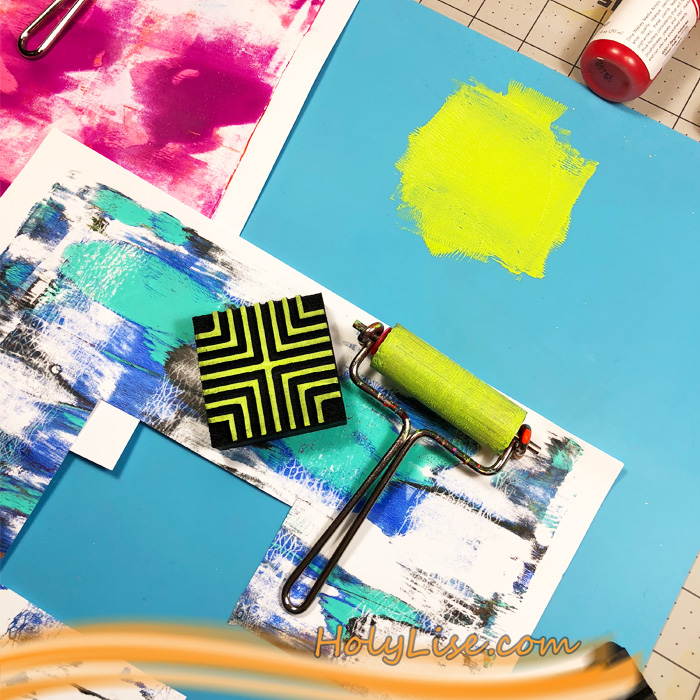
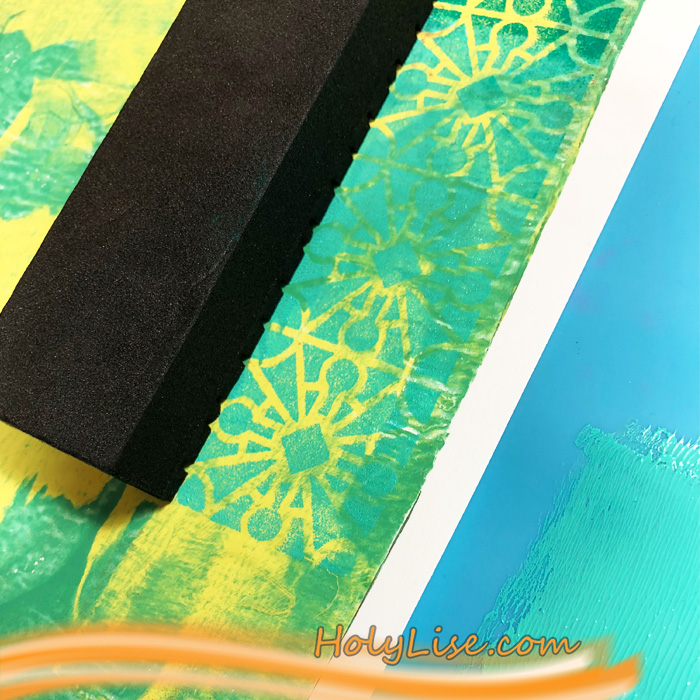
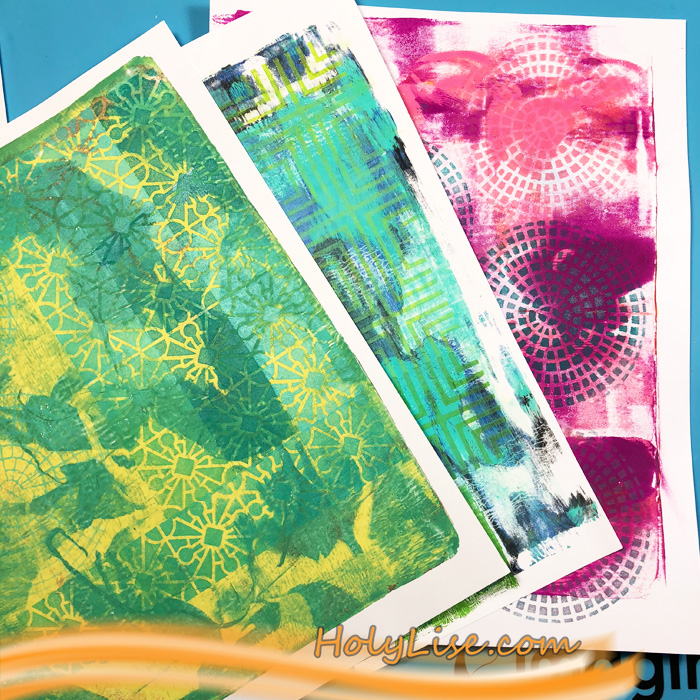
That’s why I decided to emphasize them even more for this theme. I started by picking some random mono prints. I have a huge stack of them and thought that they are perfect for adding random marks and then cutting them into shapes. In addition, I selected a few ArtFoamies foam stamps and Dina Wakley paints. I made sure that the paints fit to the mono print background, so I didn’t end up with harsh contrasts or muddy colors.

On the first page, I stamped using the positive and negative Mini Manhattan foam stamp.

Next up, I used the Buenos Aires Border foam stamp and stamped one pattern next to another. Here, I didn’t add one color to the entire stamp, but tried to create an ombre effect with a lighter and a darker blue. I stamped the pattern several times lined up next to each other.

For the third page, I picked a contrasting color and I decided to change the shape of stamp as well. Here I used the Central Avenue stamp. I liked it so much that I added a few more circles, stamped with the Central Avenue stamp, to the first and second page as well.

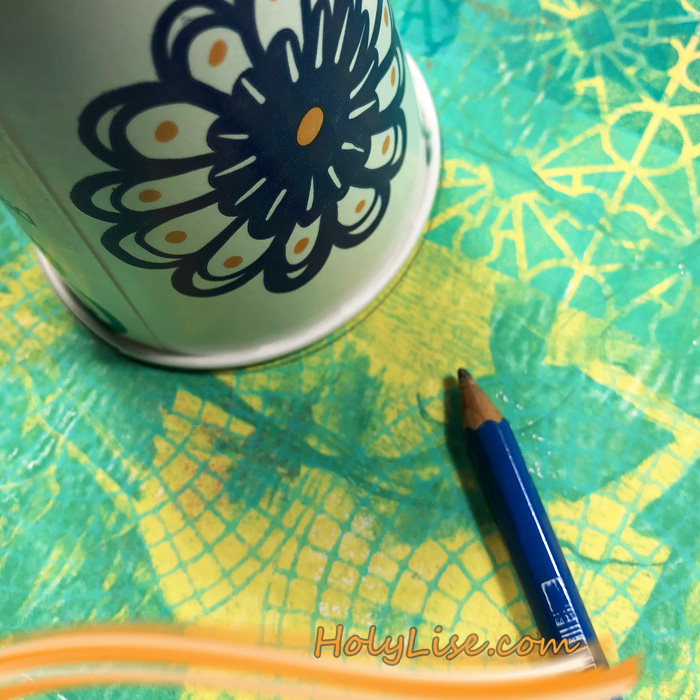
Now I had to cut out some shapes. Even though I love circles I’m not good in free hand drawing them, so I used a little help, a paper cup, and randomly drew a couple of them onto the first two pages.

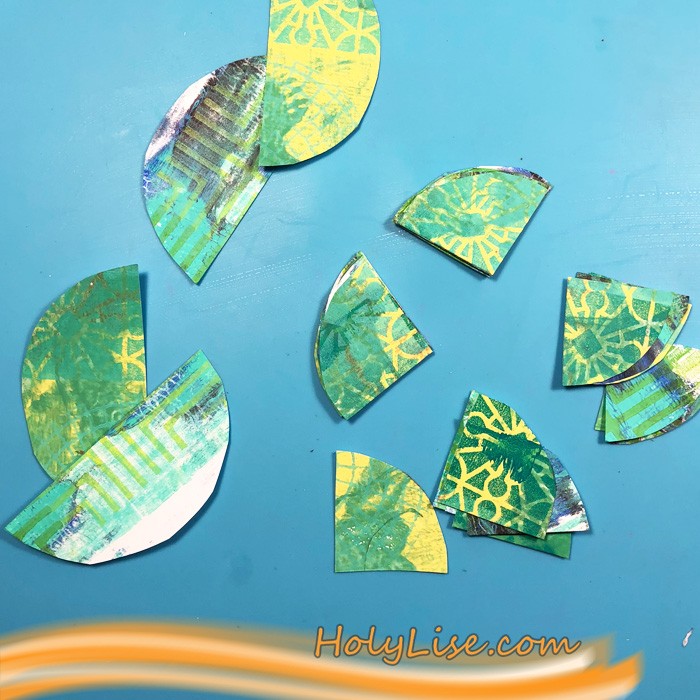
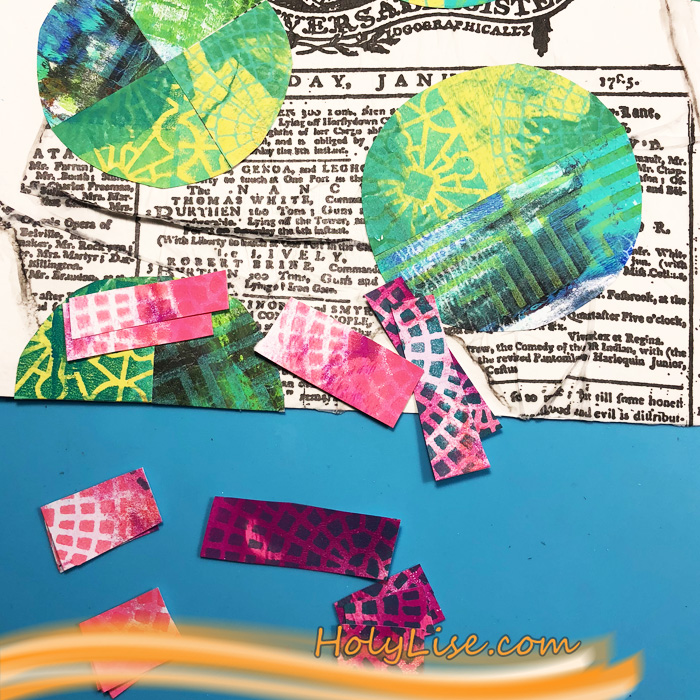
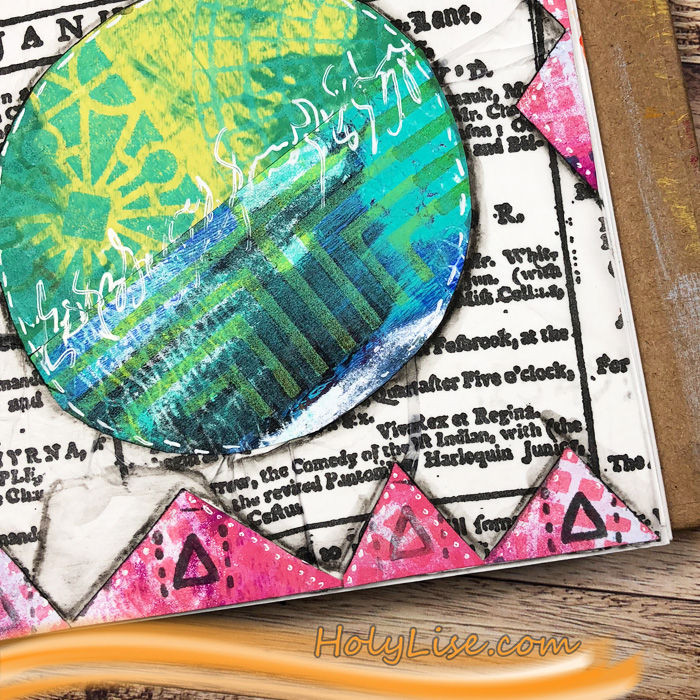
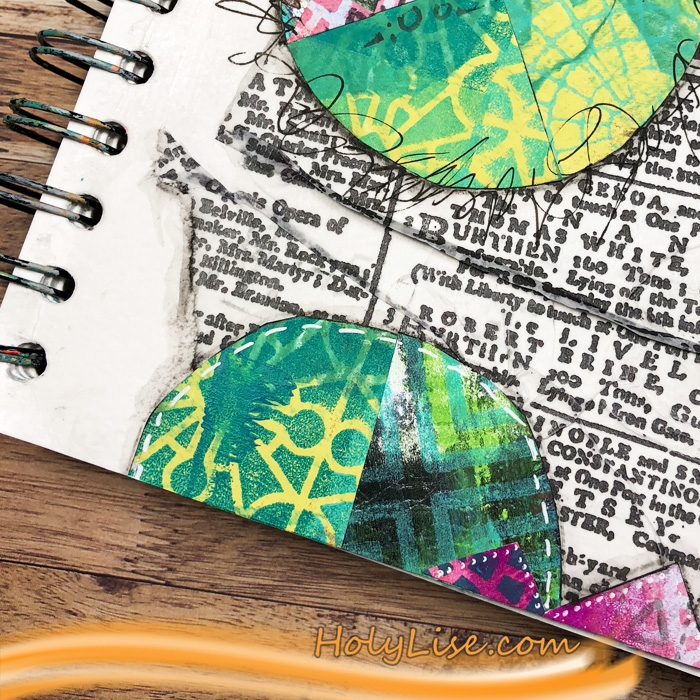
I wanted to mix and match parts of the circles, so I cut some of them in halves and the rest in quarters. Before doing anything with the circle pieces, I prepared the background of my art journal page. It was as simple as using some tissue paper with a magazine print on it (it’s actually French fries paper from a restaurant) and adhering it with gel medium onto the page. I made sure that it looks really messy, with wrinkles and torn edges. I then “puzzled” individual, non-matching circle pieces back together and adhered them onto my art journal page.

Next, I cut out a few squares from the contrasting mono print piece and made those pieces even smaller by changing the shape into triangles later on. I randomly adhered these triangles around the border of my art journal page.

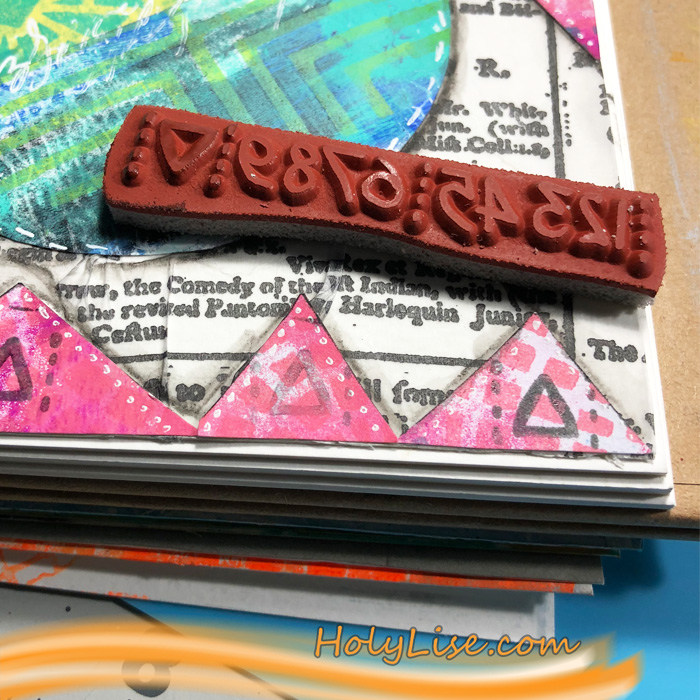
To add a few finishing touches, I outlined all the circles and triangles with my water color pencil and blended it out with a water brush. It still felt like something was missing, so I picked the Numerals stamp from Nat’s My Home is My Castle stamp set and stamped it all over the page with grey ink – in some areas just parts of it and in some areas the entire row.

At the very end, I added some scribbly journaling to it.

I hope you enjoyed this theme as much as I did. Thanks so much for stopping by! Don’t forget to come back every Tuesday for more inspiration from the Creative Squad.


Thank you Josefine! I love that you collaged together some really cool elements like papers from your mono print stash and even paper from some french fries! The layers are so interesting to look at. If you’d like to try something similar, here are some of the supplies that Josefine used:


And if we inspired you today and you’ve made some artwork, send me a pic and you might just see yourself in our next Inspiration From Around the Globe!

SaveSave

SaveSave

Leave a comment

All Shapes and Sizes – Tania Ahmed


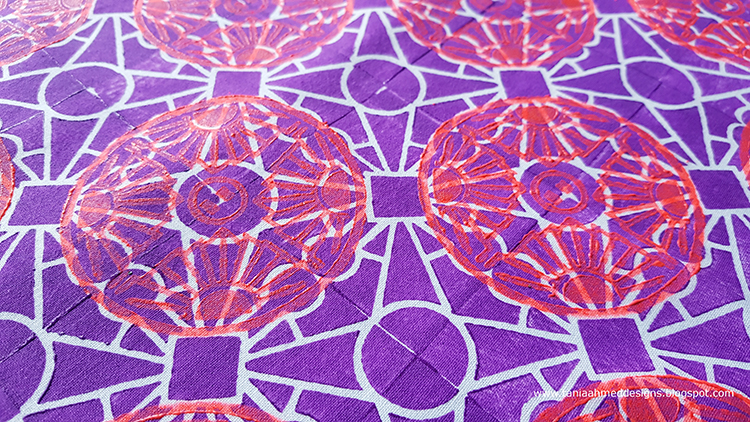
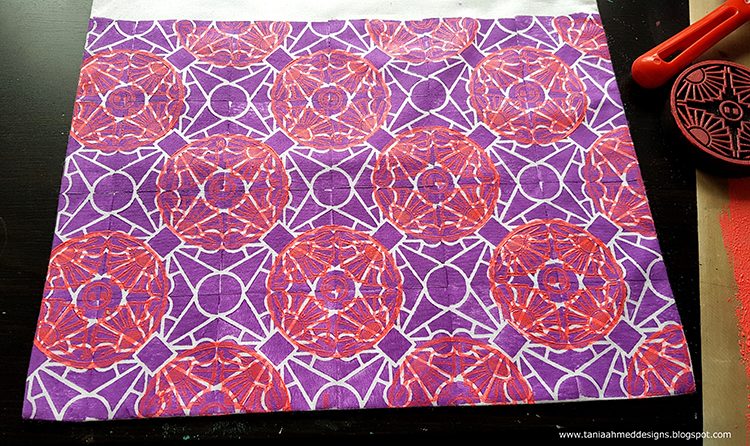
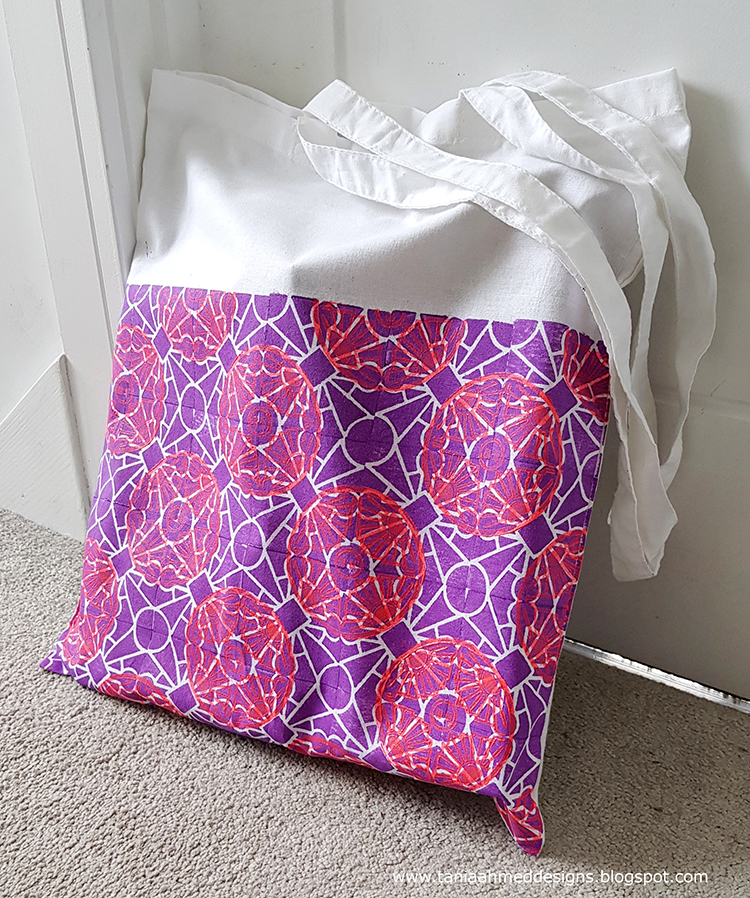
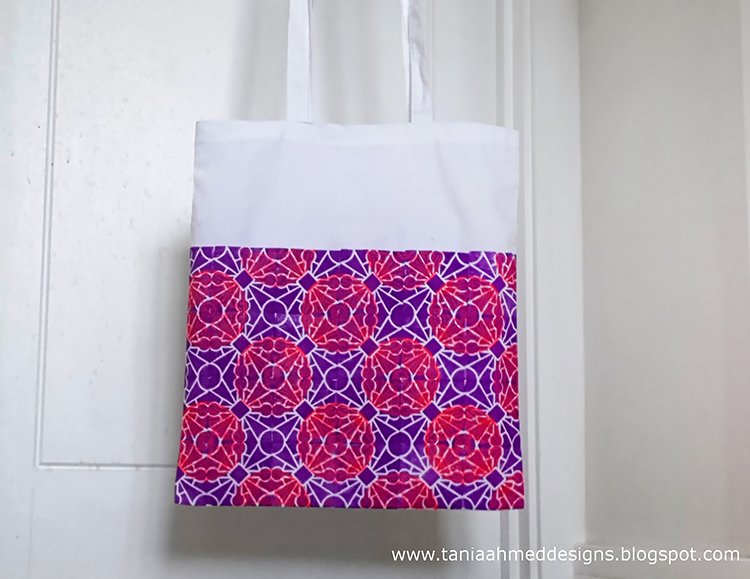
Welcome to a post from my wonderful Creative Squad! This week we have Tania Ahmed and her super cool tote bag project using my Buenos Aires and Broadway ArtFoamies stamps. I love using these foam stamps on fabric and Tania shares a video with us that shows just how easy it can be to get a great looking result. Tania was inspired by the new theme this month: All Shapes and Sizes – Circles and squares, big and small, let’s mix it up and play with different shapes and sizes this month. Just because things are different doesn’t mean they can’t look great together!


I have had a love for block prints all my life and have grown up wearing colourful prints with handmade patterns. Nat’s Art Foamies are perfect for creating backgrounds and patterns and are so very easy to line up.

The challenge this month was “All Shapes and Sizes” and I was inspired to create a repeating pattern on a canvas bag that I had been saving for a while.

I made my own fabric paints using some fabric medium that creates paint that is the perfect texture for stamping on to cloth. Plus it makes it more durable.

Watch the video below to see how I decorated the canvas bag:


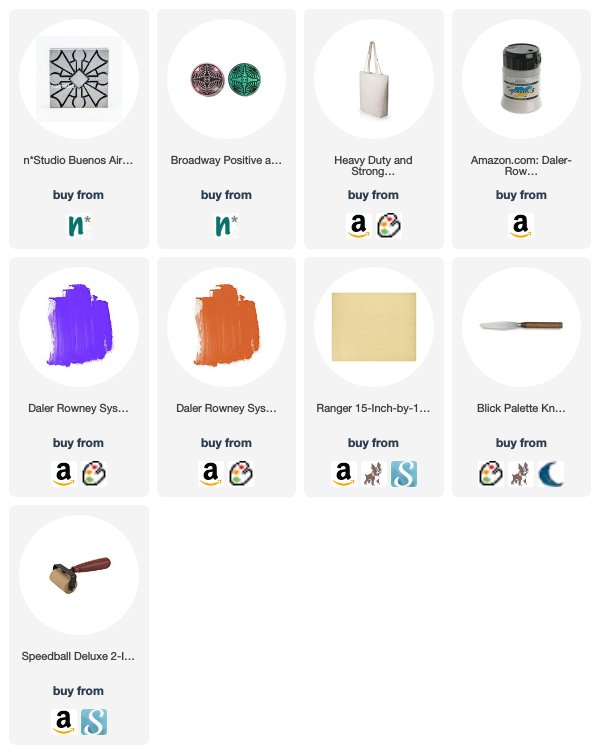
Thank you Tania! There are so many ideas for this one – spiffing up those shopping totes, maybe a new summer beach bag, or even a tote for summer library books. Here are some of the supplies that Tania used:


Feel inspired? Working on something yourself that you’d like to share?  I love to see how you interpret our monthly themes. Email me how you used my stencils and stamps with the theme and email me an image – I would love to share your projects in my next  “n*Spiration From Around the Globe“.

Comments (2)

  • Tracy Evans

    |

    Fantastic project , colours and step by step video. Thank you. Tracy x

    Reply

  • maura

    |

    Awesome bag, Tania! Love the colors you used, and how you left part of the bag natural. Maura

    Reply

Leave a comment

Forget the rest – Art Journal

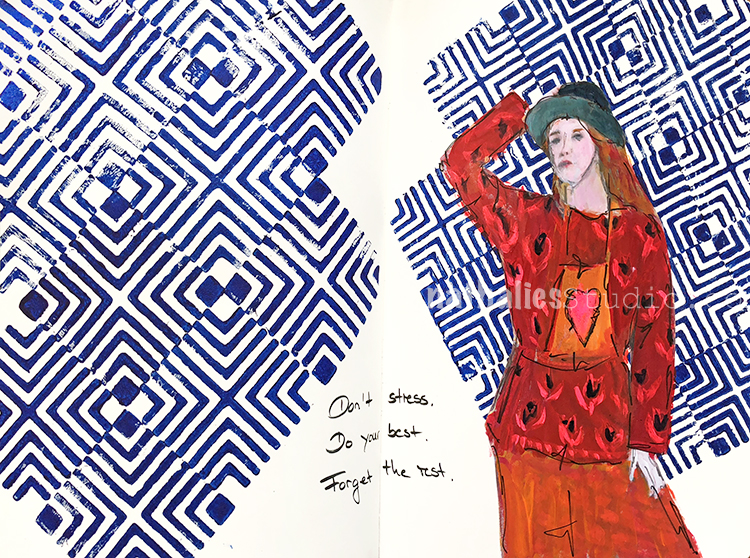
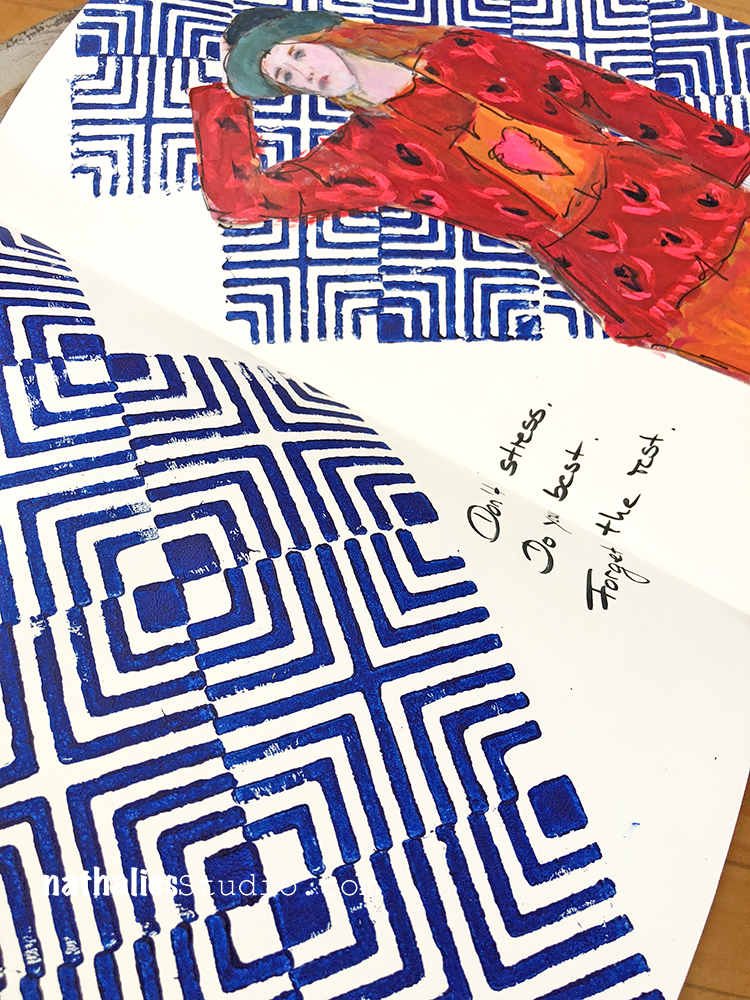
“Don’t stress. Do your best. Forget the rest.” A good mantra …I will do my best but not stress to remember- LOL

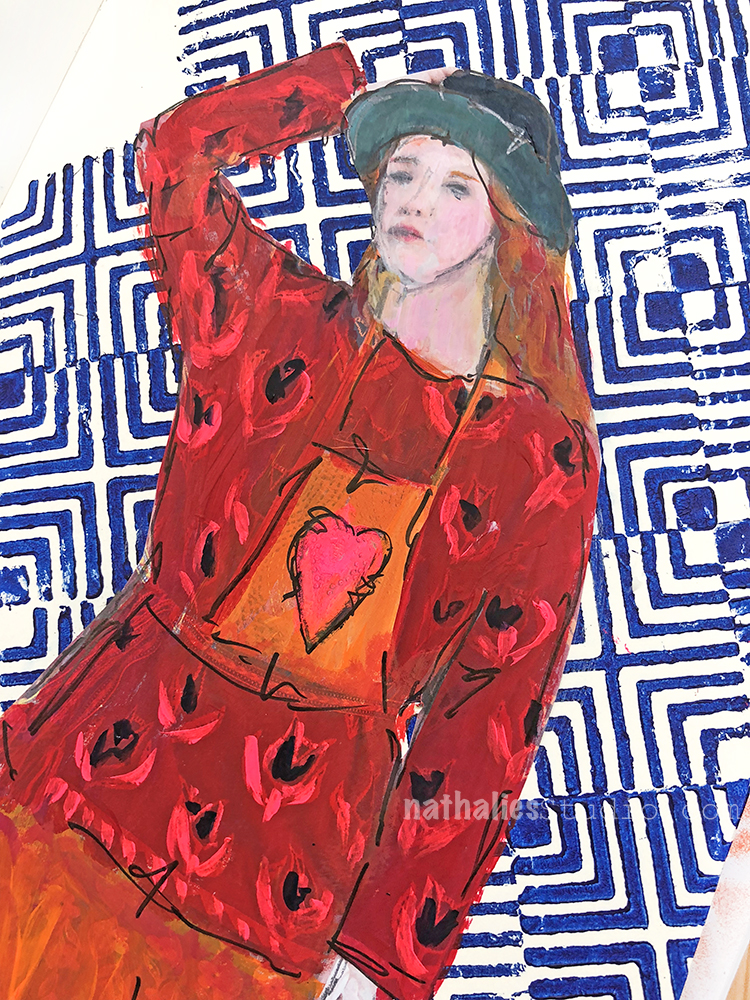
I kept the background simple by stamping alternating the positive and negative Manhattan Foam Stamp on the left- and then doing the same on the right with the Mini Manhattan version. It is fun to not only use the two stamps in the sets on top of each other or each on their own, but to also create fun pattern by using them alternating and in different directions.


I painted over a lady from a catalogue with acrylic paint in red and orange for some pop and added the journaling with a Fude Pen – quick and easy yet fun to create. I am in this weird mode of trying more ways to do less with more breathing space in my art journals – maybe a part of my reorganizing, purging urge right now.

Here is what I used for this spread:


Leave a comment

Trapped – Art Journal Spread

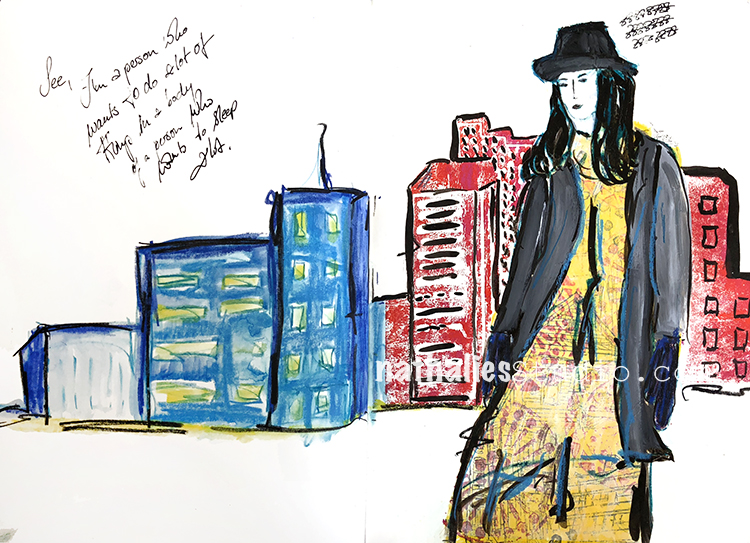
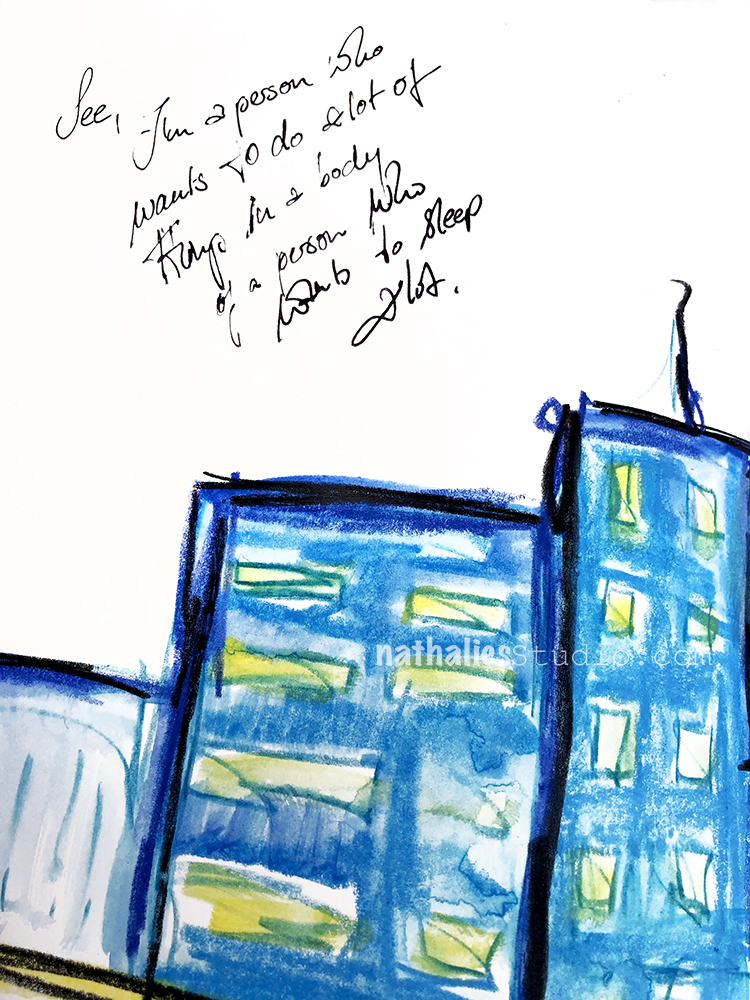
“See, I’m a person who wants to do a lot in a body of a person who wants to sleep a lot.”

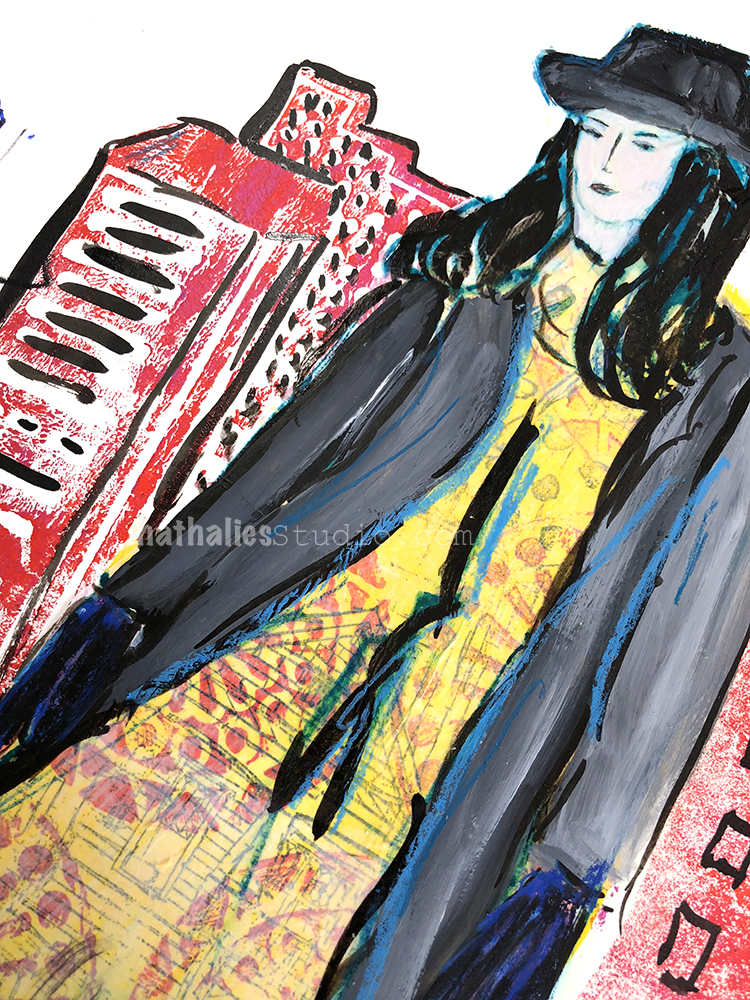
LOL- so true! This was the beginning of a demo at a workshop and then I finished up the page -it is a bit weird- but I kind of like it. Noticed her mittens …that is what happens when you screw up the hands…you just add mittens ;)

Played with Stabilo Woodies, Ink and stamps

Here are some of the supplies I used for this spread


Leave a comment

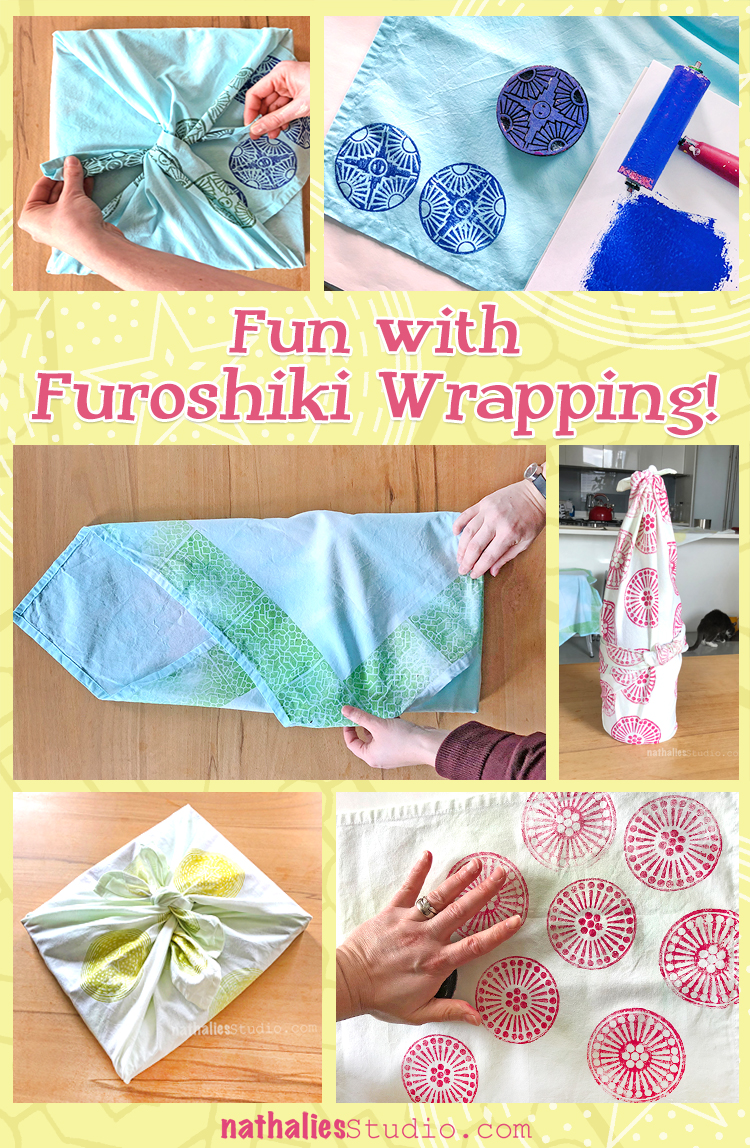
Fun with Furoshiki Wrapping

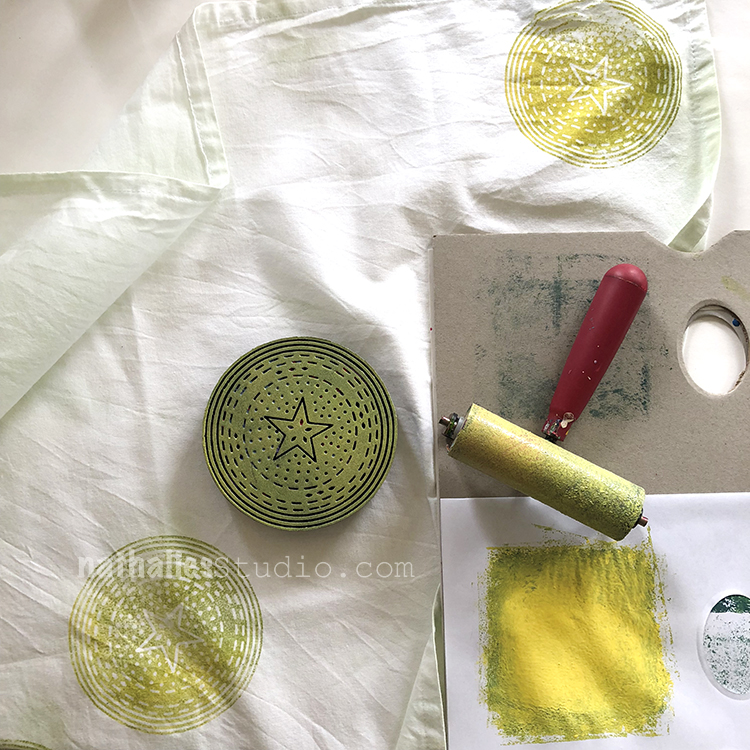
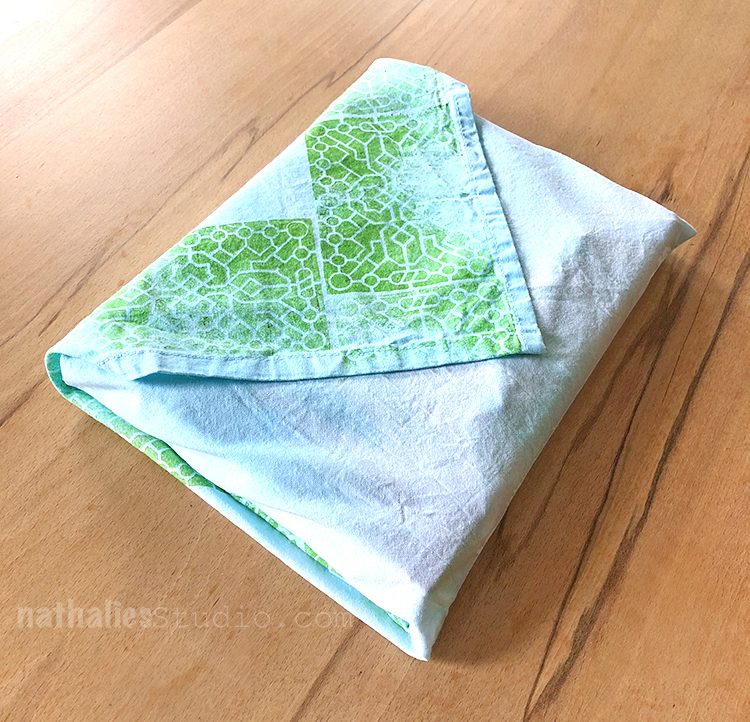
Furoshiki is the wonderful art and tradition of wrapping things in a nicely printed square cloth. When I was in Japan I saw specialized Furoshiki stores everywhere, selling not only the beautiful cloth but also showing how to wrap different gifts, books, and make bags etc. I totally fell in love with this and so Kim and I decided to have a little playdate to make our own wrapping cloth.

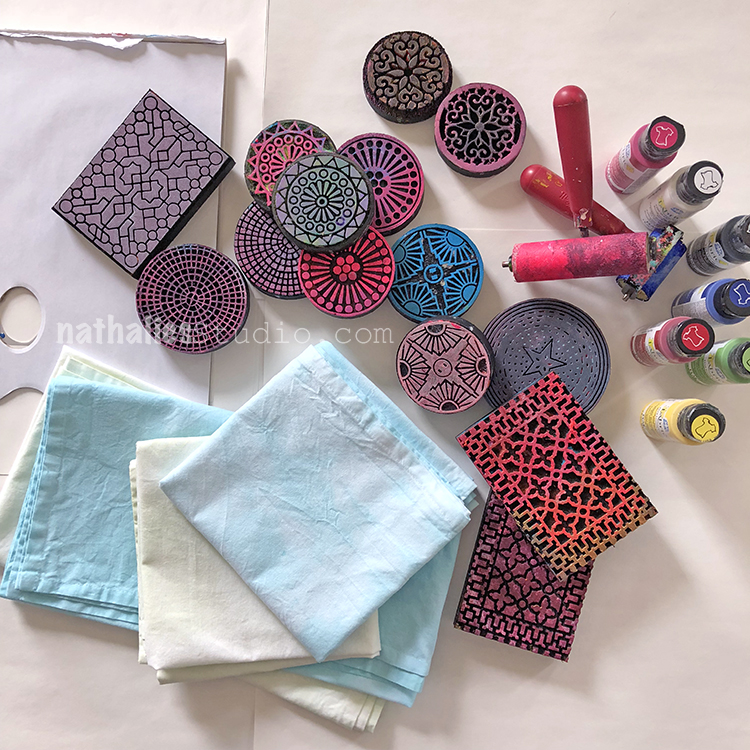
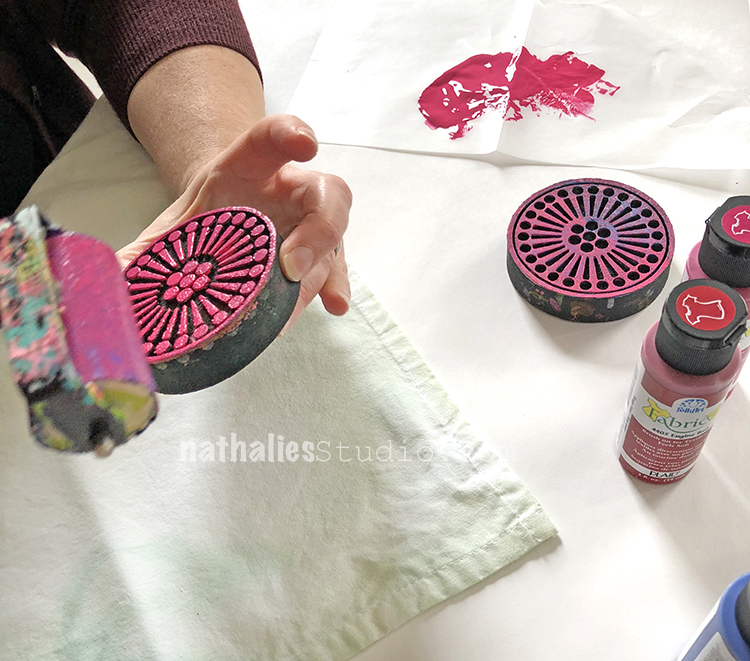
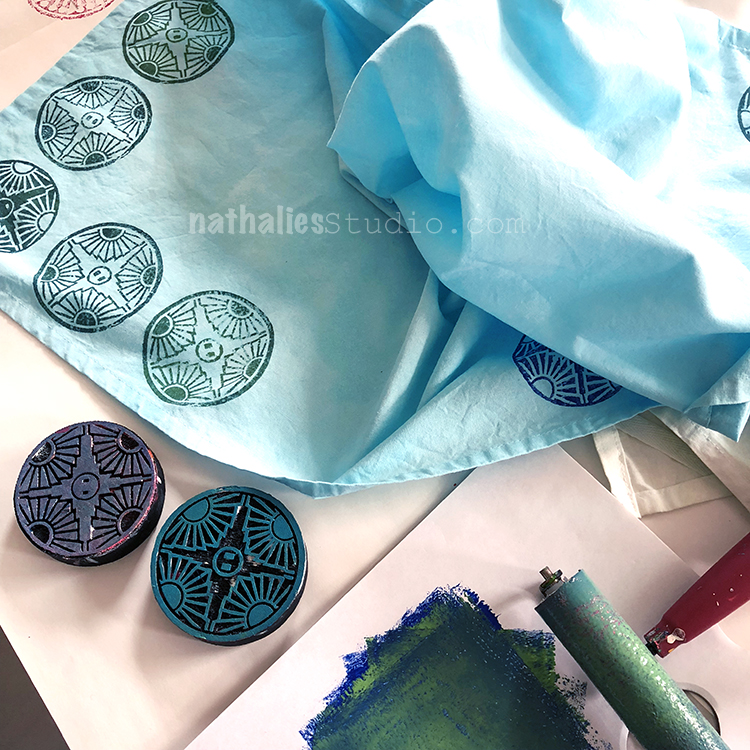
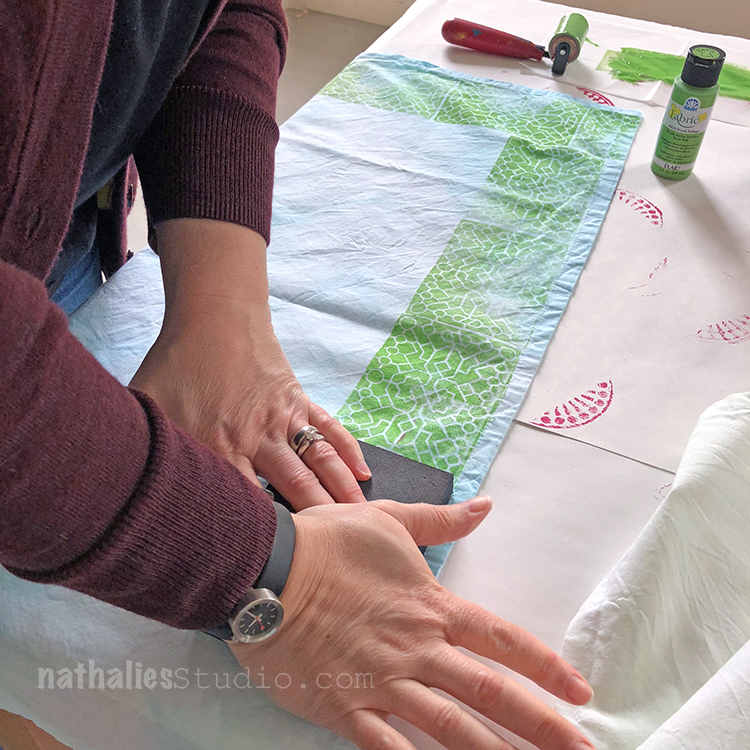
I dyed some white cloth beforehand so we would not just work with plain white and then gathered fabric paint, some foam stamps and brayers.

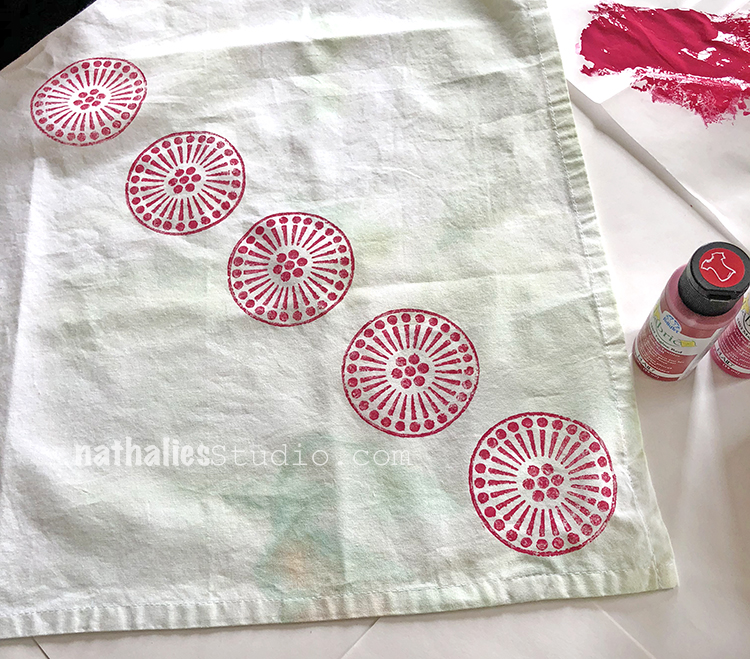
For one of of the pieces i used my Grove Foam Stamp Set and created a pattern leaving some white space as this seems to work the best for this purpose.

Kim created a pattern using the Broadway Foam Stamp Set.

And create a border using my Exchange Place Foam Stamp.

And Kim used for her second piece the Circle Drive Foam Stamp.

Then the wrapping part started. Our cloth was a tiny bit too stiff …it worked but when we do this again a thinner fabric would work even better.

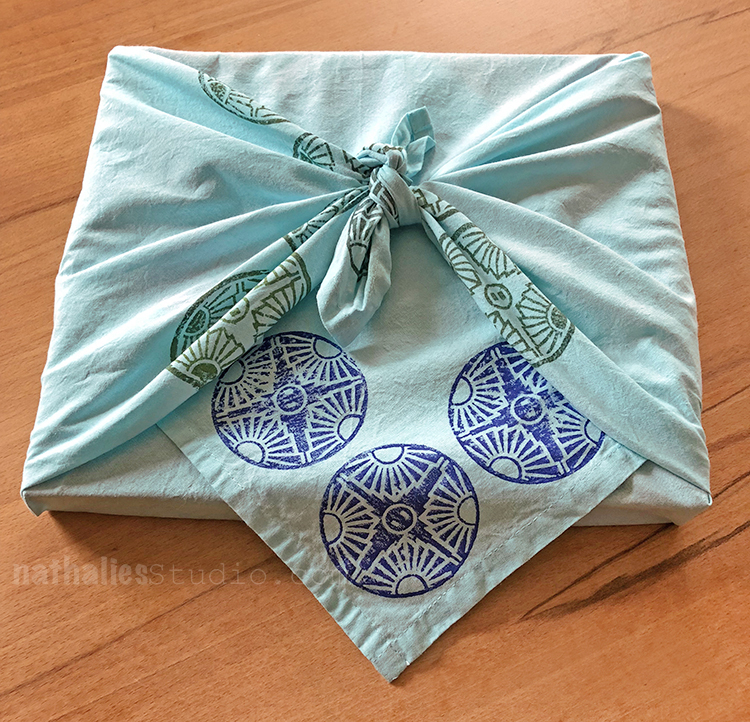
Here is the close up

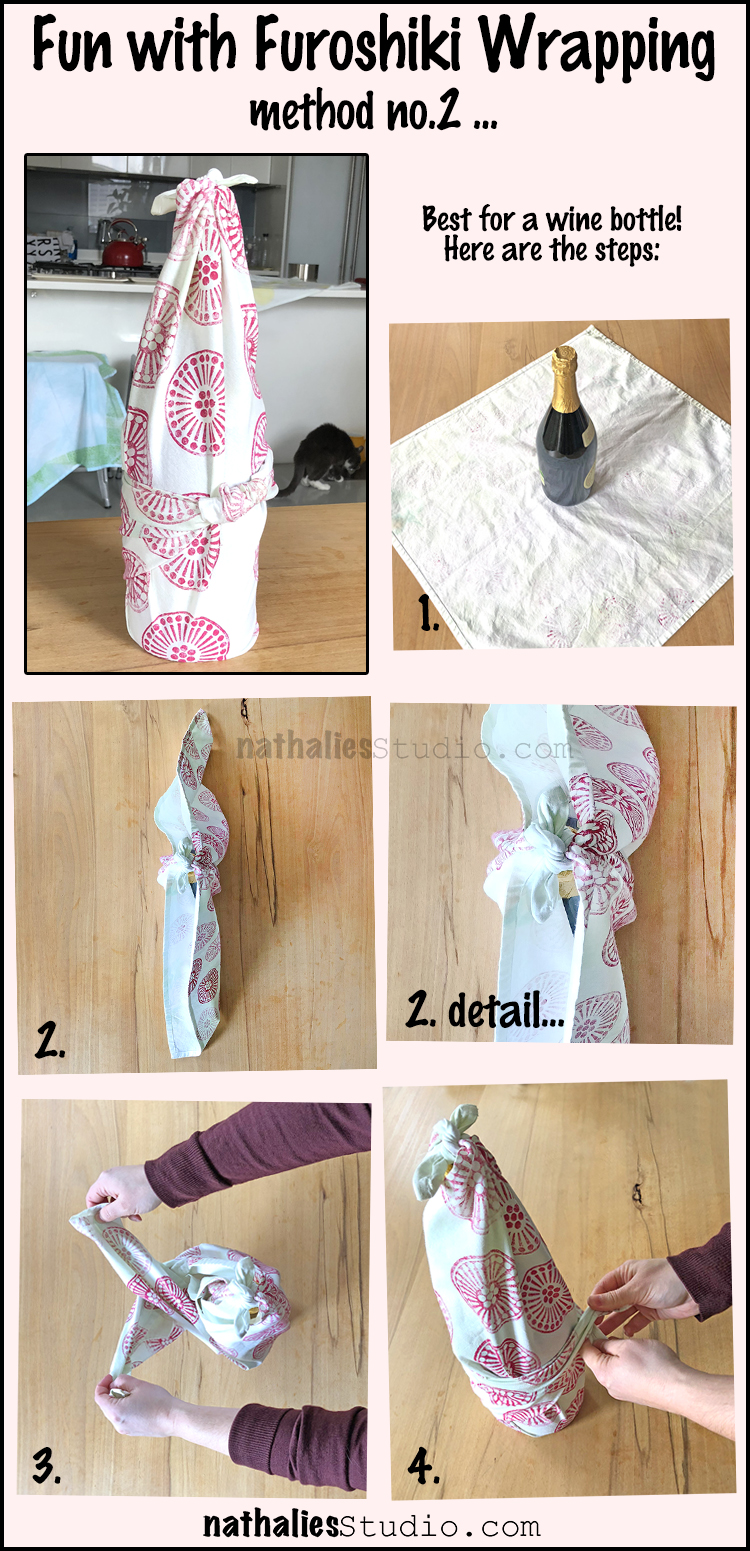
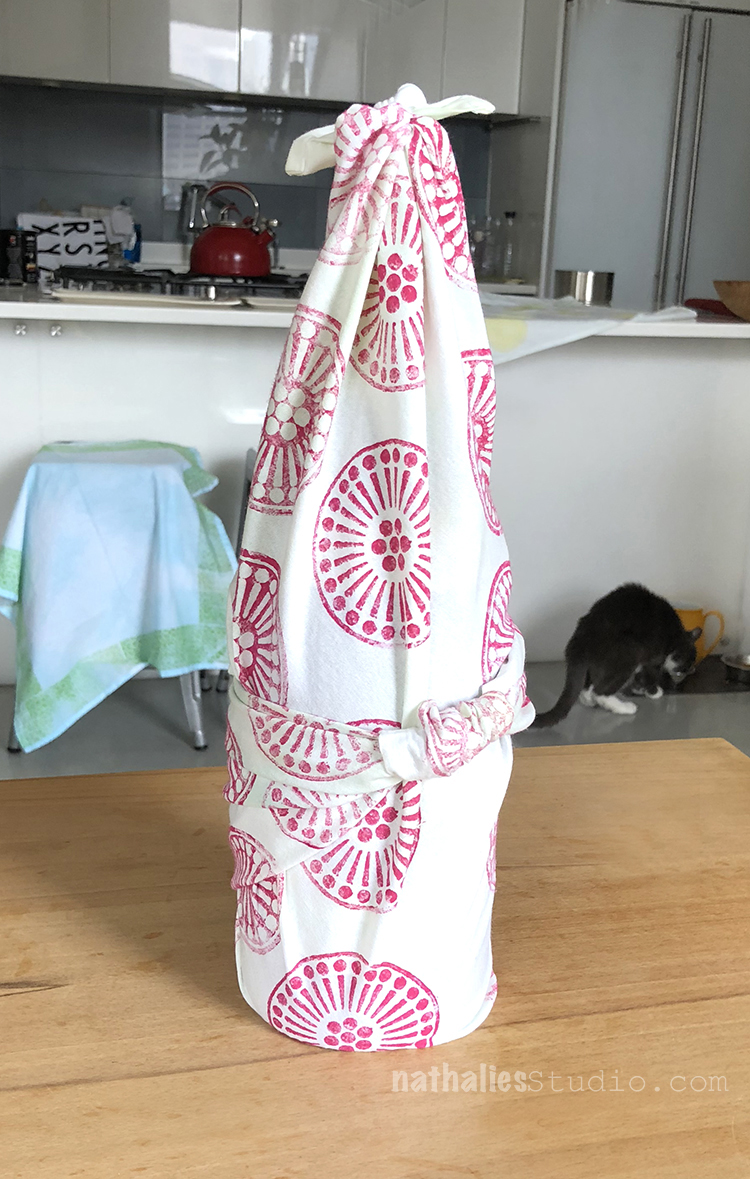
and wrapping a bottle

you can tell …the cat sneaked into the picture …but there you go- LOL ;)

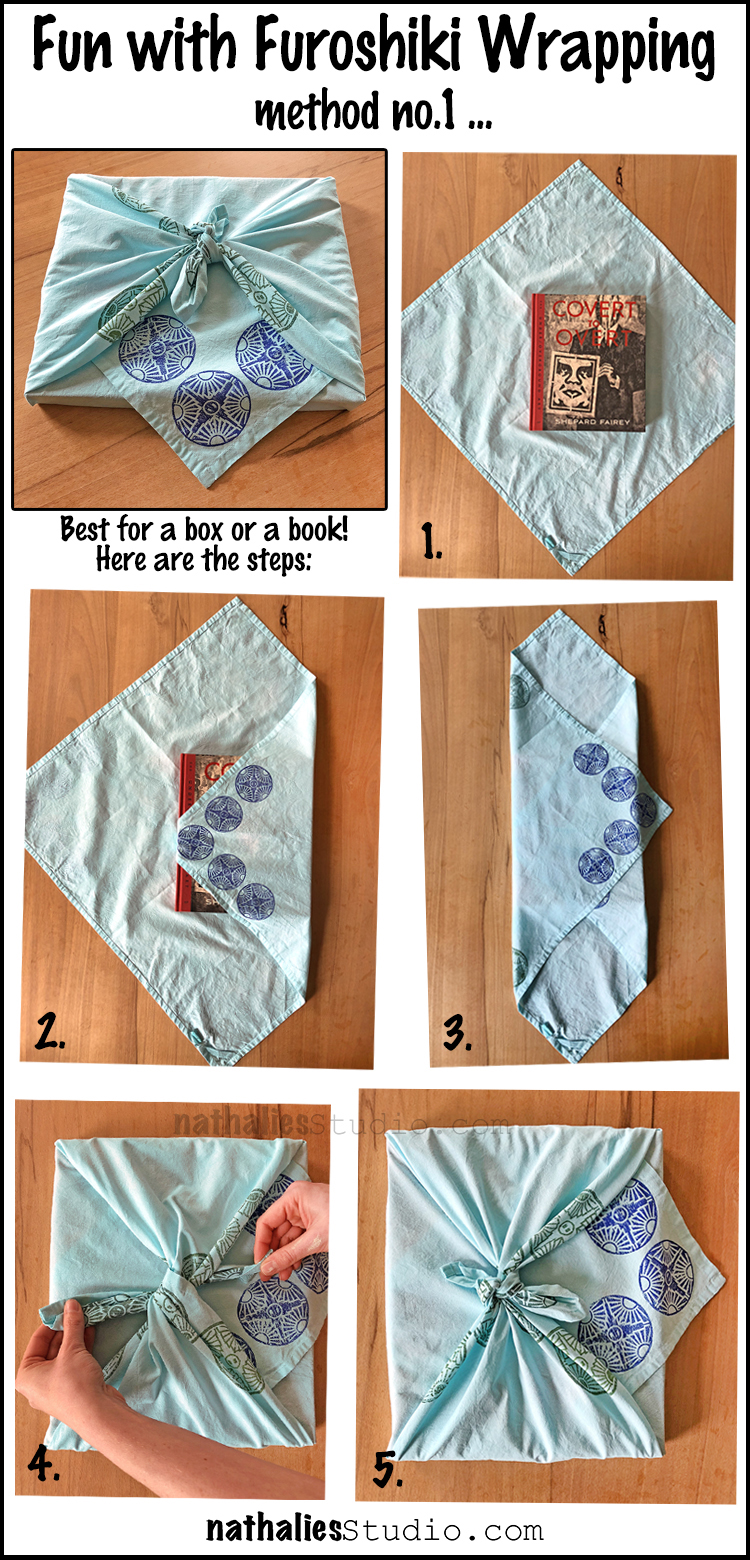
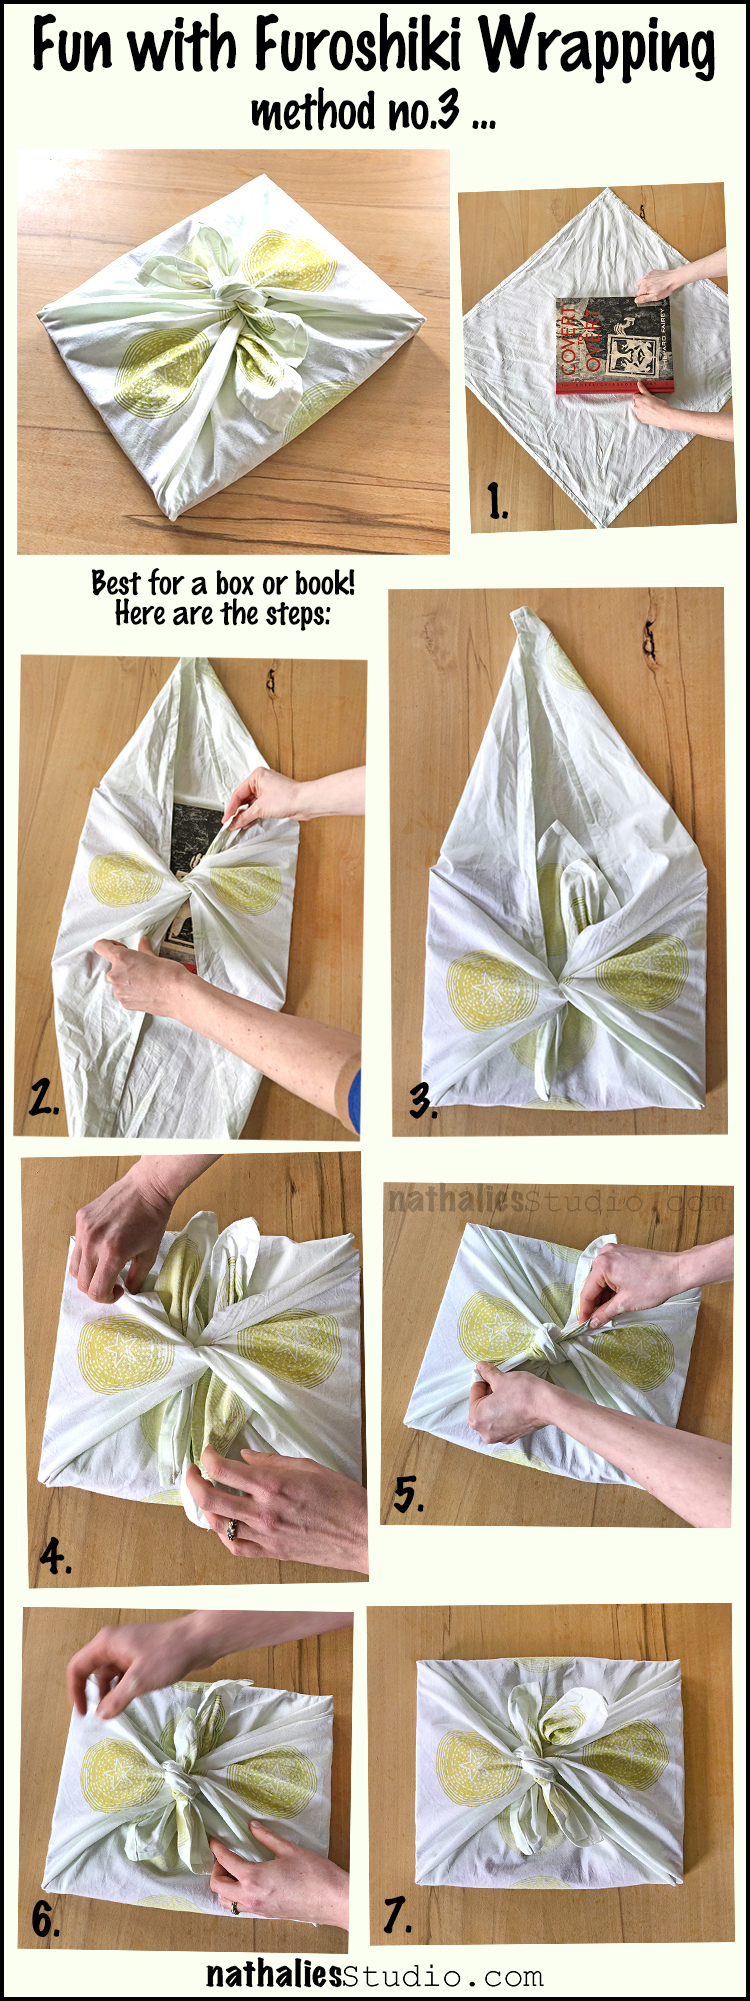
Another method for boxes or books

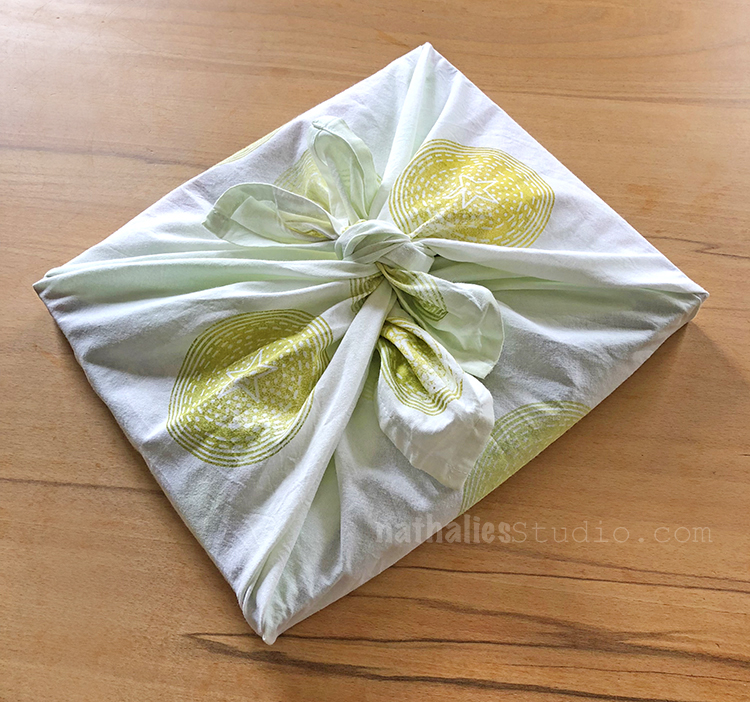
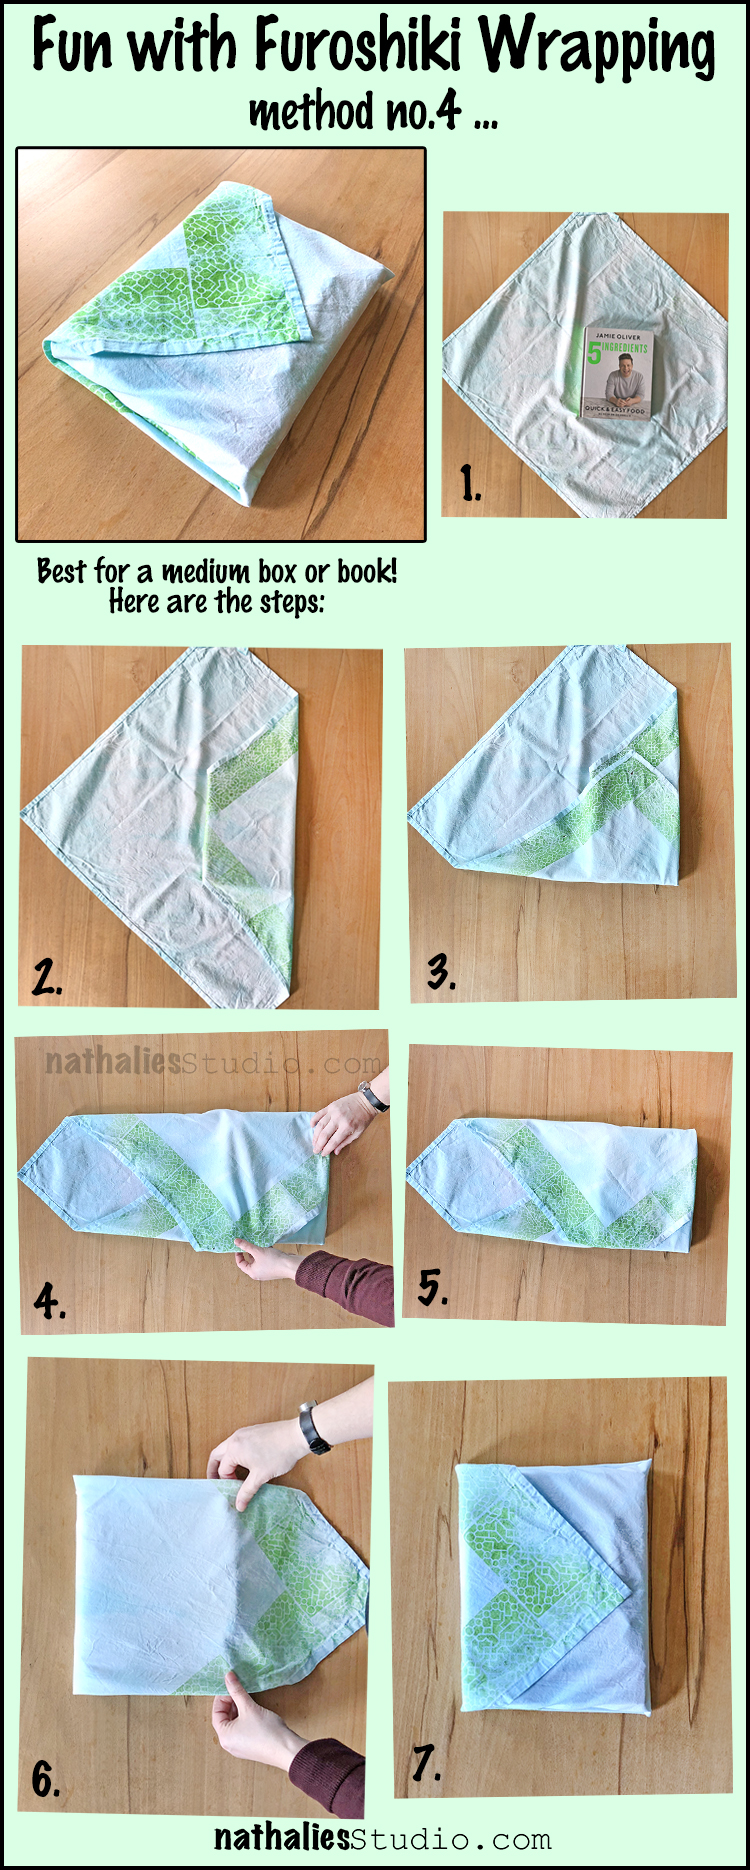
And a simple but fun one

I love that these cloth can be used in so many ways by the recipients. Either reused for gifts yet again or as kitchen towels, or depending on the fabric as shawls etc. So many options and a great way to give a beautifully wrapped gift. I hope you liked our playdate and give Furoshiki a try.

Here are some of the supplies Kim and I used for this Furoshiki play date:


Comments (2)

  • Janene

    |

    Very beautiful! I would love to receive a gift (or even my lunch) wrapped in something so lovely. I don’t have any fabric paint (yet), but I’m seeing a trip to the store this weekend so that I can give this a try. Thanks for sharing!

    Reply

Leave a comment

Vacation Mode – Maura Hibbitts


Happy Tuesday from the Creative Squad! Today we are excited to share with you a wonderful little upcycled travel bag from Maura Hibbitts. She is using my Versailles foam stamp set and my Urban Scribble stamp set (no longer available but if you’re looking for building stamps here is a good place to start) along with this month’s theme: Vacation Mode – Here in the Northern Hemisphere, we are slogging through winter with only one thing on our minds – vacation! Whether it’s Spring Break, a weekend getaway, or an hour with a good book, everyone needs an escape to Vacation Mode now and again.


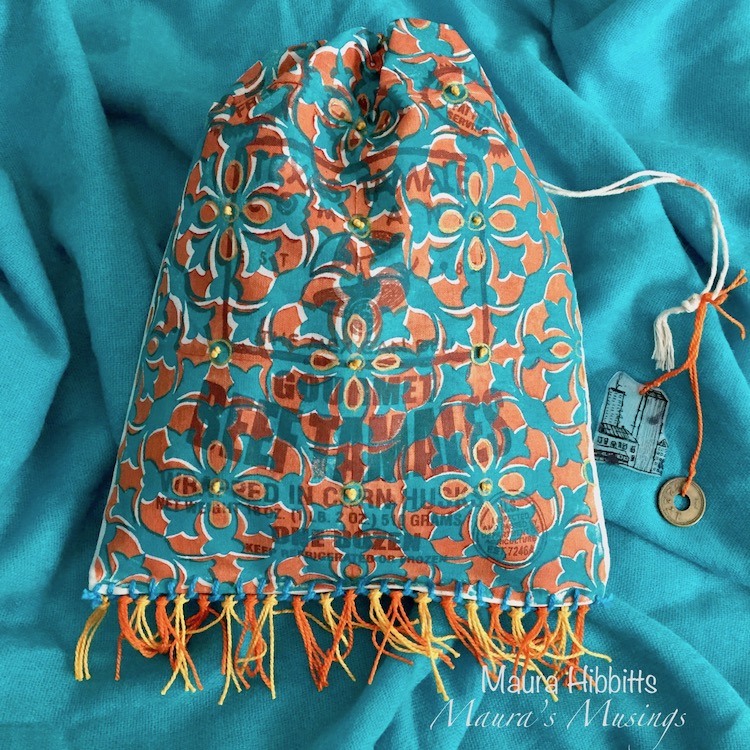
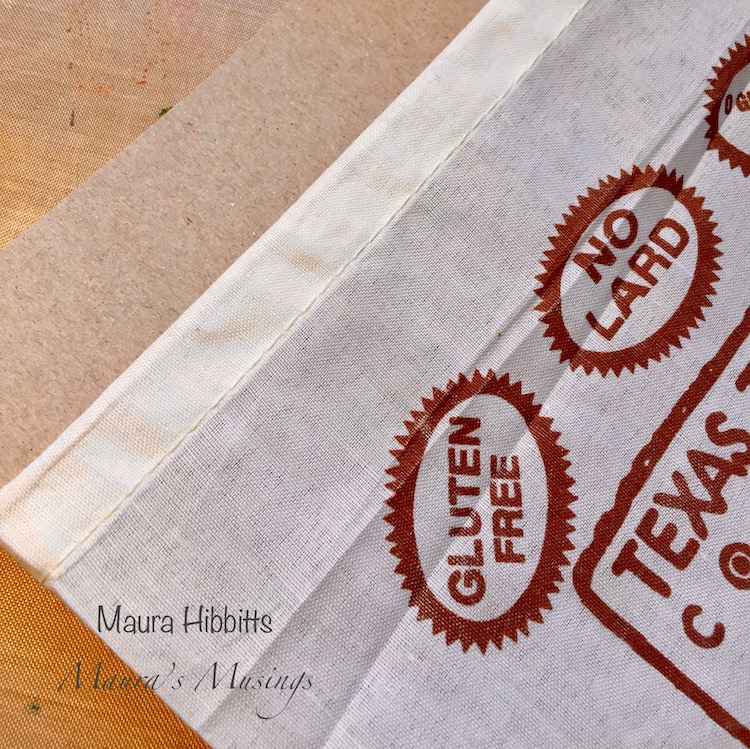
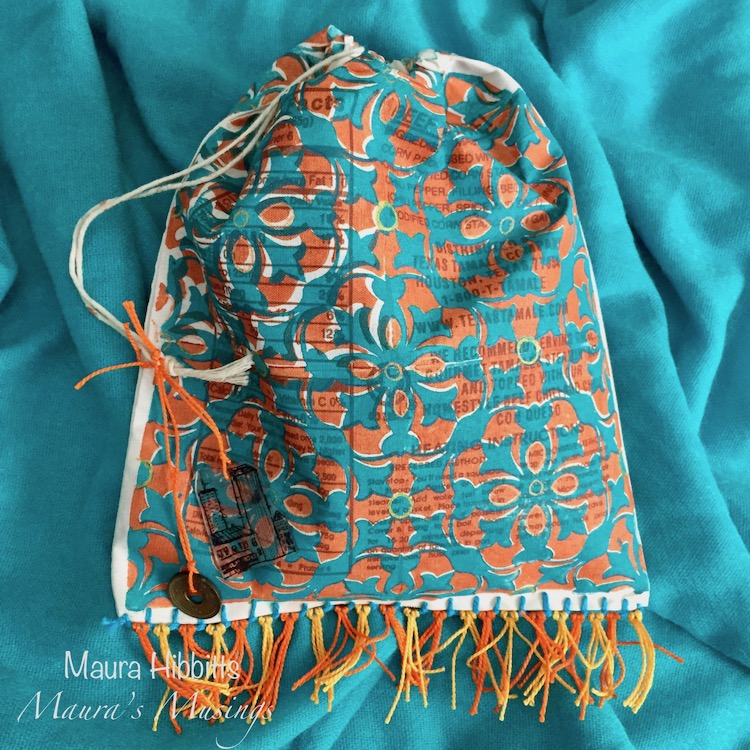
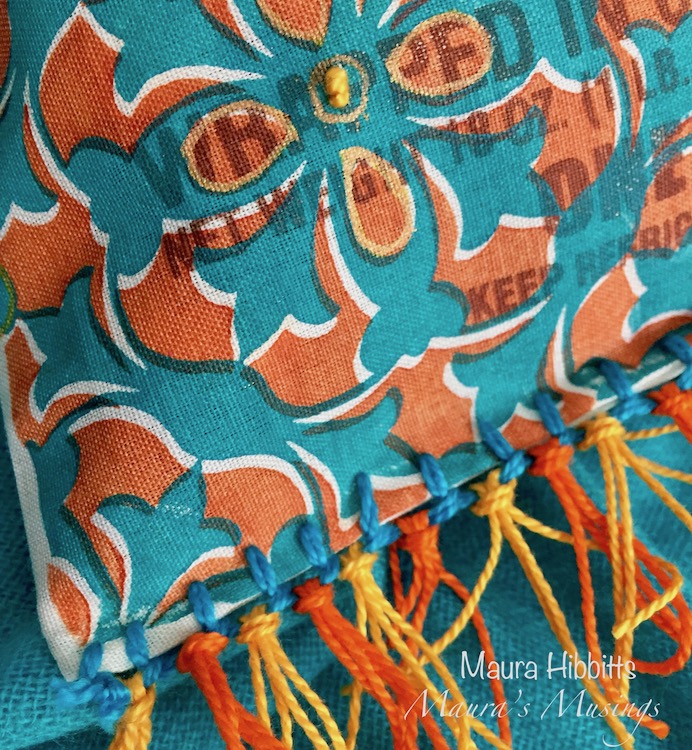
When I go on vacation, I like to take along an art project or travel journal to capture my experiences. I up cycled a small canvas bag that came filled with some yummy tamales for my project. You could use a purchased canvas bag, or sew one yourself if desired. (Mine is about 8 x 10 inches/20.5 x 25.5 cm) I like how the printing peeks through my stamped design. Now I have a fun bag I can fill with art supplies, or use to fill with found treasures on my vacation.

Start by inserting a piece of cardboard into the canvas bag. This will keep the paint from leaching through the other side.

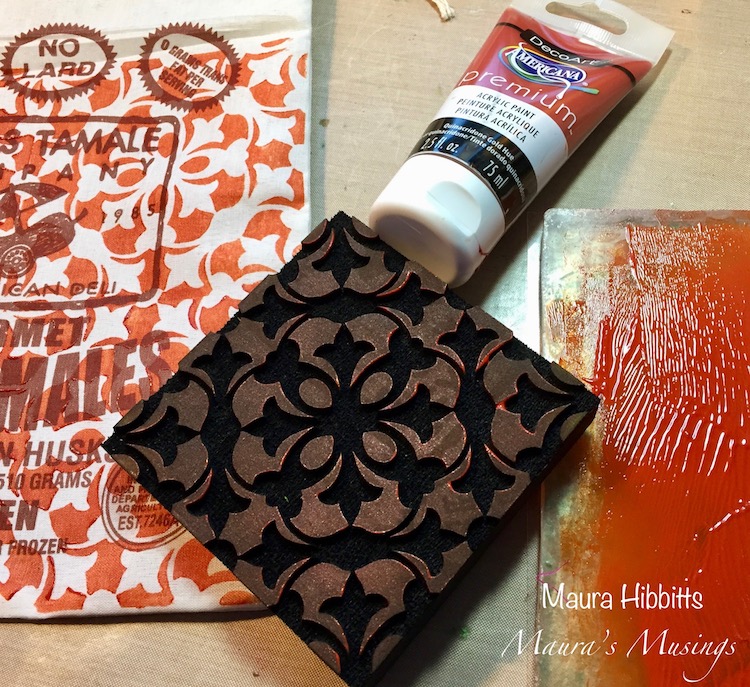
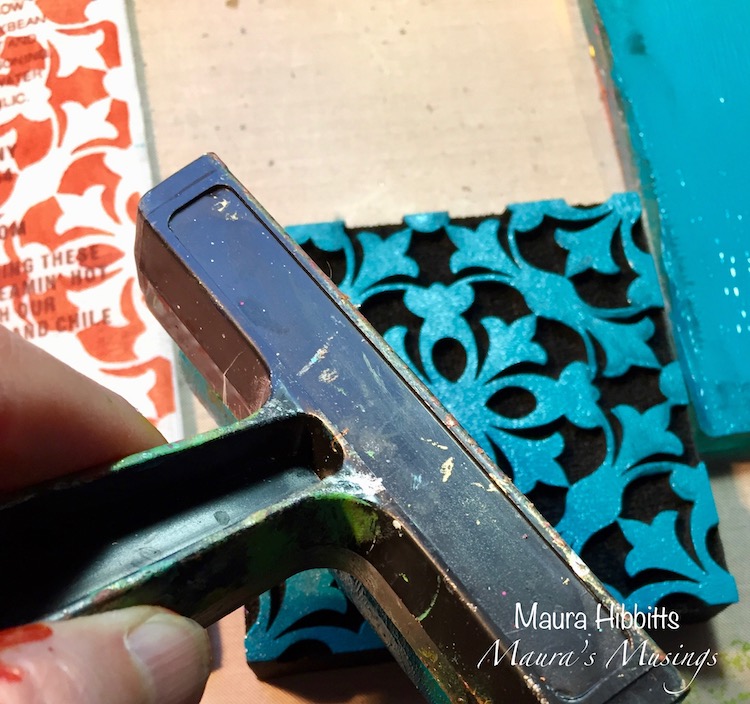
I found the best way for me to get good paint coverage on the Versailles ArtFoamies stamps was to use my gel plate and a brayer to adhere the Quinacridone Gold paint onto the foam. You could also use a palette instead of the gel plate. Do both sides of the bag, and be sure this paint layer is completely dry.

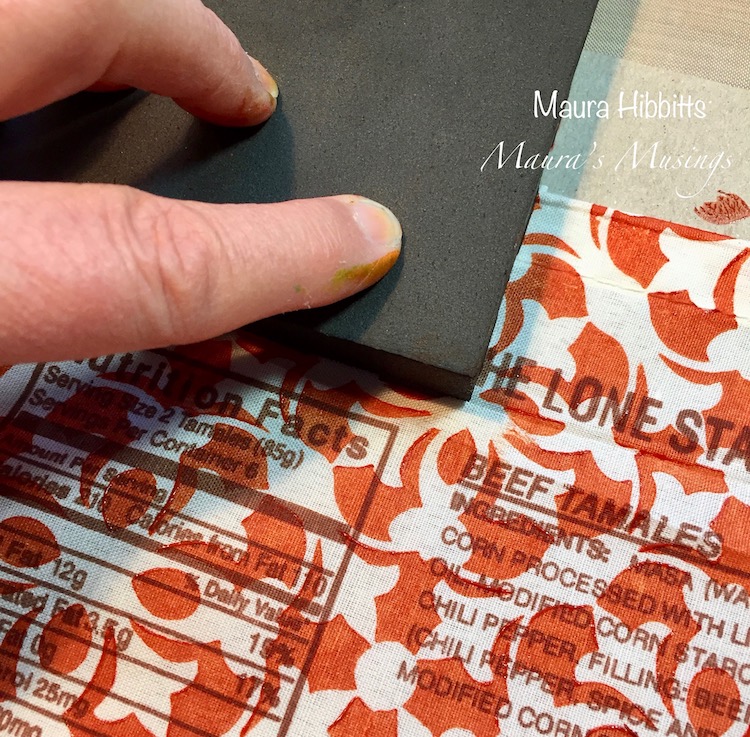
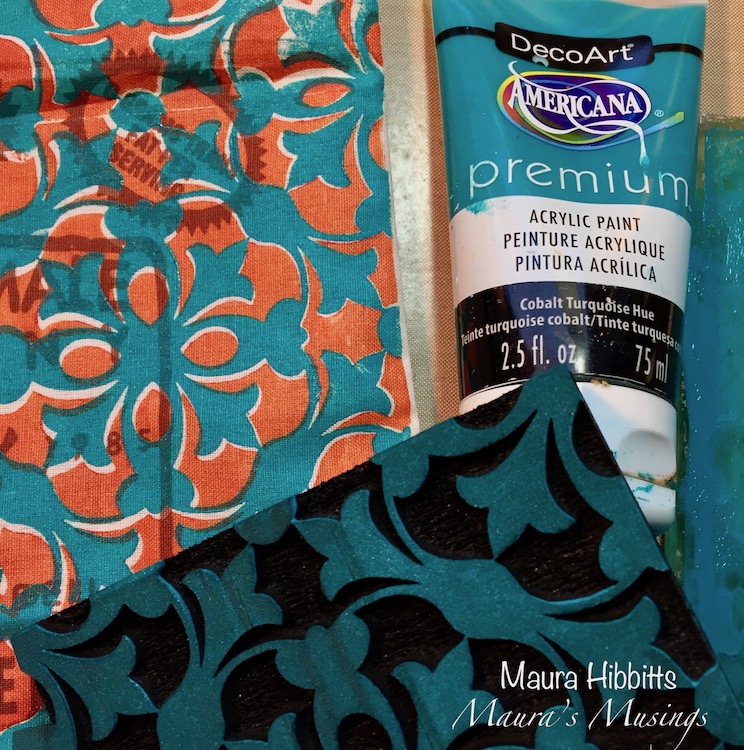
Through trial and error, I discovered I was able to match the stamped images up better if I started with the negative impression, and then stamped the positive with the Cobalt Turquoise Hue acrylic paint. Let dry. As you can see, there are a lot of imperfections in matching the images, but I’m ok with that.

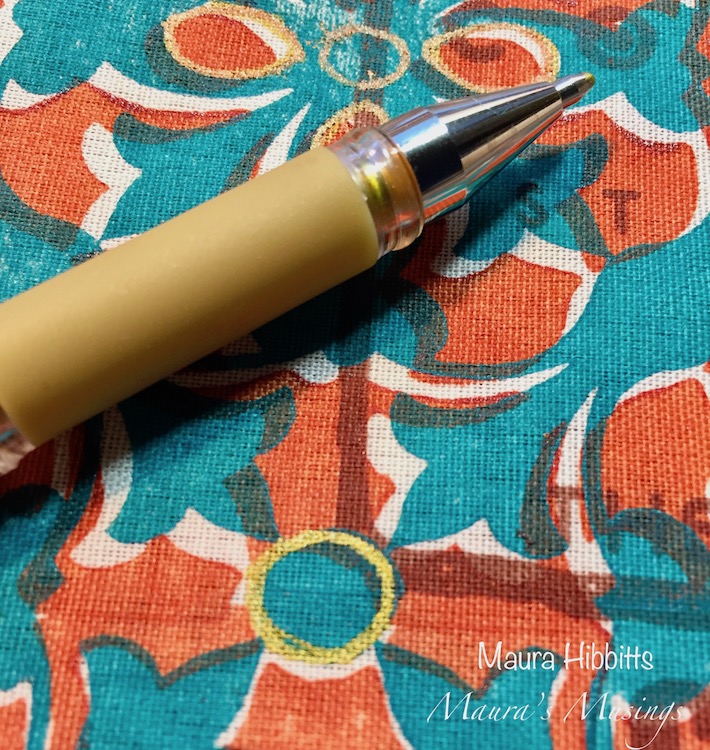
I used a gold pen, and a Posca metallic orange pen to add some doodles to the bag on both sides. I don’t plan to wash this bag, so did not worry about using washable pens, but take that into consideration if you plan to wash your bag.

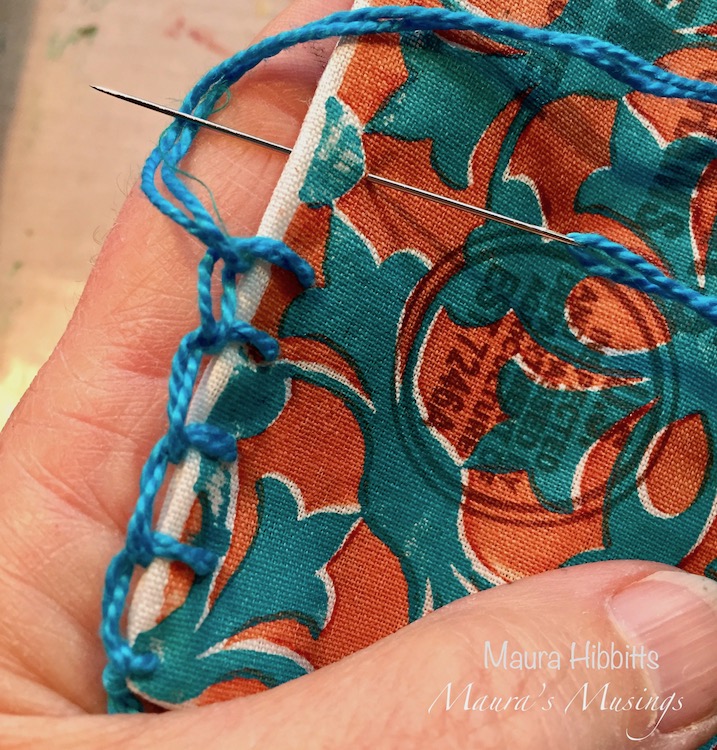
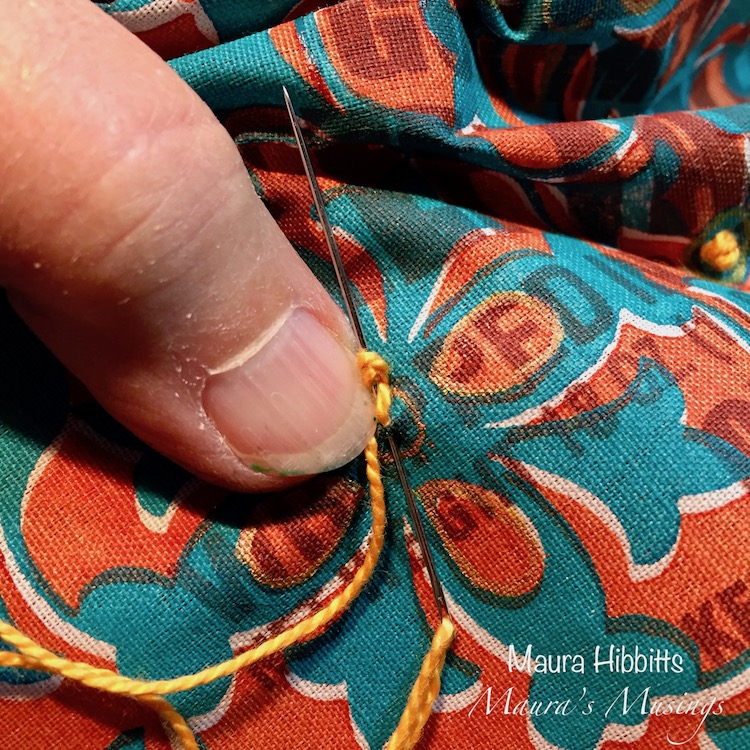
Now, it’s time to add some embroidery. I used turquoise thread and stitched the bottom of the bag with a Blanket Stitch. Next, on the front panel, I added French Knots inside the circles I’d drawn with the pens, using a yellow orange thread.

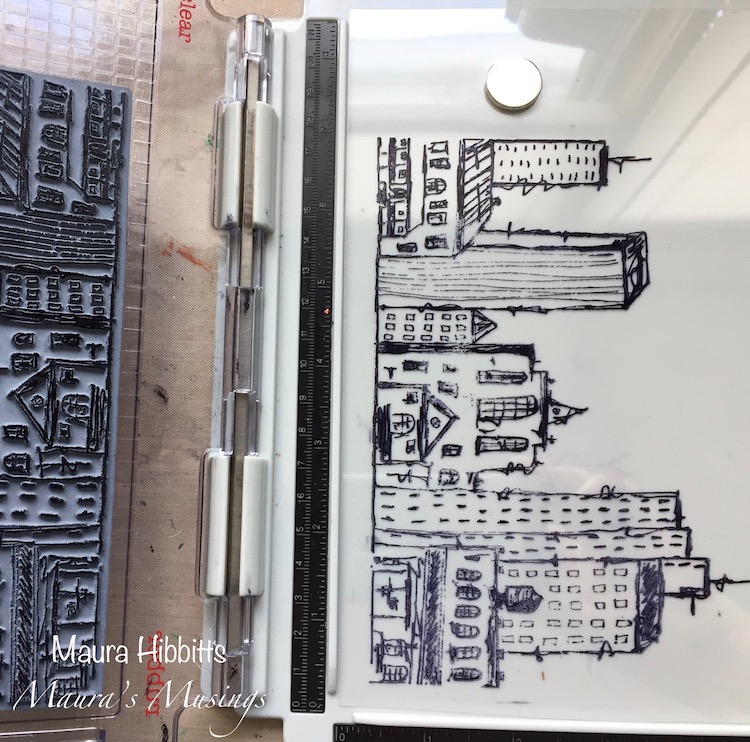
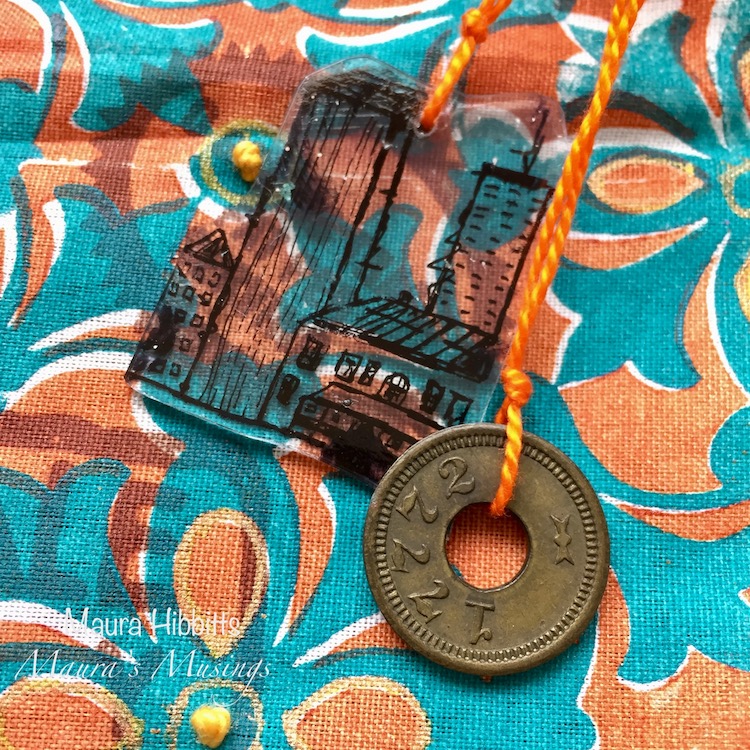
I wanted to make a charm to add to the bag, so I stamped the Urban Scribble image onto Shrink Plastic with archival black ink, and cut a section of it to use. Punch a hole into the plastic, then heat it and shrink it with your heat gun.

My final touches on the bag were to add the shrink and metal charms with embroidery thread, and tie loops of bright orange and yellow orange threads to each section of my blanket stitch at the bottom. Once I’d tied the loops on, I trimmed them to the same length. Now I just have to plan my next trip and decide what to fill my artsy travel bag with!


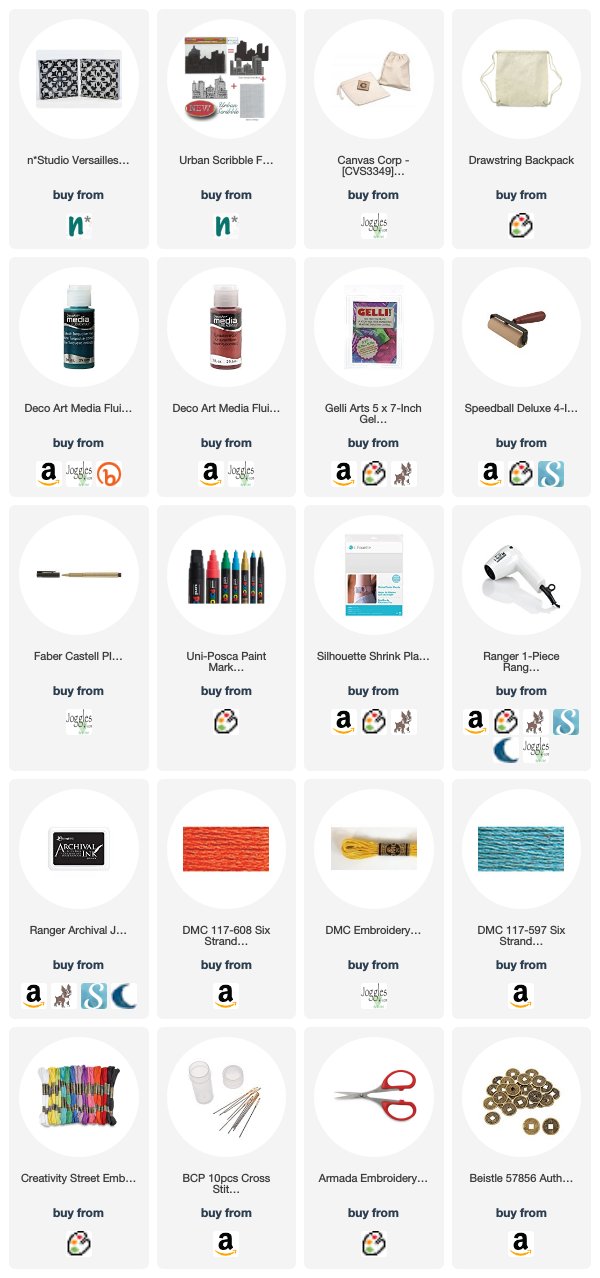
Thank you Maura! I could see using this bag for a fun evening out too! I just love the bold colors and the embroidered details – so cool!! In addition to an upcycled canvas bag (there are some possible choices in the list below) and some cardboard, Maura used the following supplies for her project :


Feel inspired? Working on something yourself that you’d like to share?  I love to see how you interpret our monthly themes. Email me how you used my stencils and stamps with the theme and email me an image – I would love to share your projects in my next  “n*Spiration From Around the Globe“.

SaveSave

Comments (1)

  • Sue Clarke

    |

    I absolutely love this Maura! The color and the tag you made are awesome.

    Reply

Leave a comment

Vacation Mode – Jennifer Gallagher


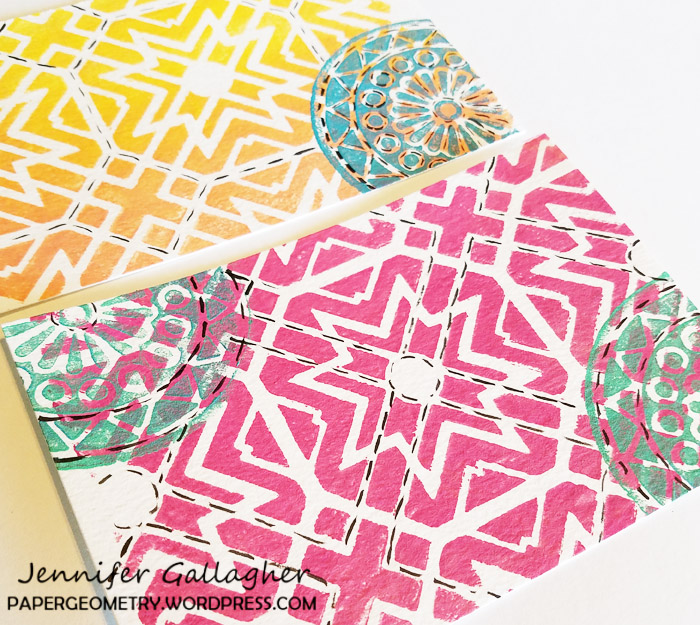
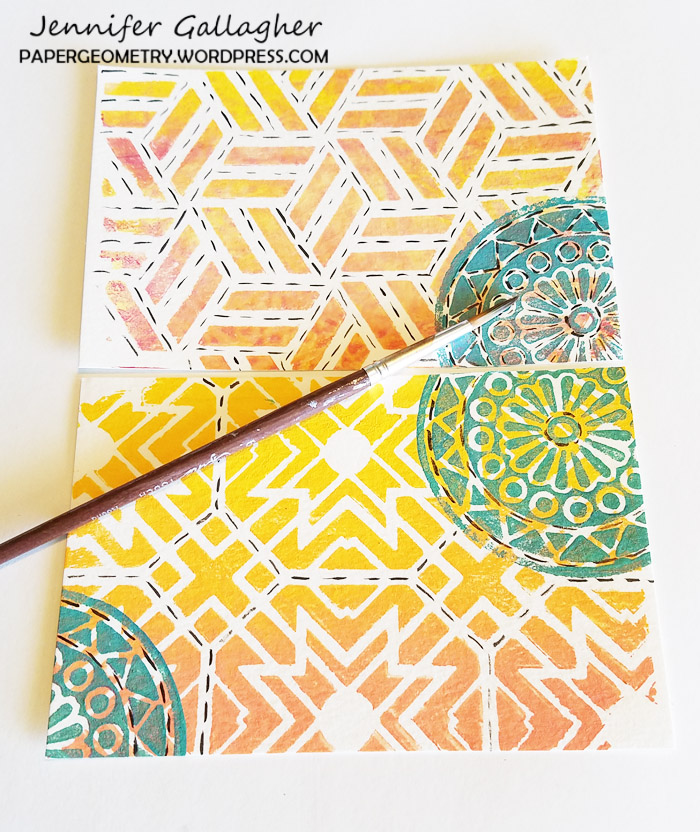
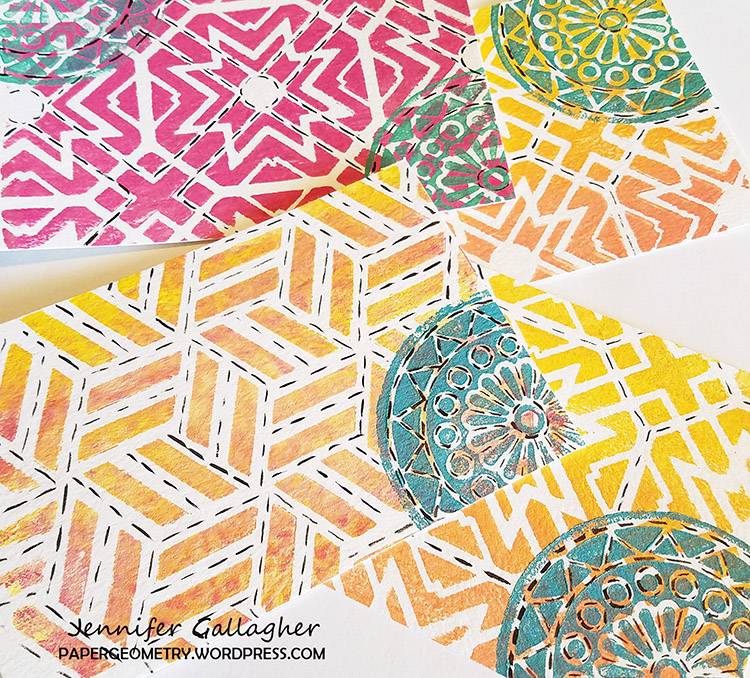
Hello from the Creative Squad! Today we have Jennifer Gallagher and her set of absolutely lovely postcards to send from your vacation destination. She is using my Toledo and Kassel stencils and my Valley Road foam stamp, along with our theme: Vacation Mode – Here in the Northern Hemisphere, we are slogging through winter with only one thing on our minds – vacation! Whether it’s Spring Break, a weekend getaway, or an hour with a good book, everyone needs an escape to Vacation Mode now and again.


This month we are in Vacation Mode here at the Nstudio Creative Squad. What better time to beat my current winter blues than looking ahead to Summer and family vacations. I love the warm Summer sun, sand between my toes, and the salty ocean breeze. So, today I will walk you through making some adorable beach-inspired postcards to send to family and friends from any destination.

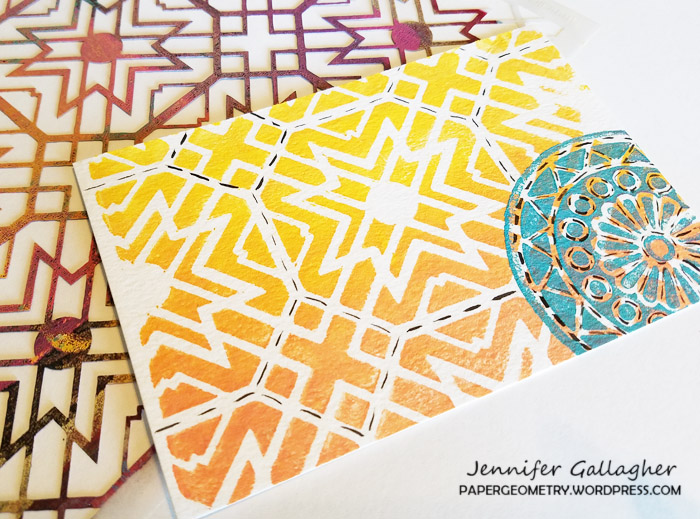
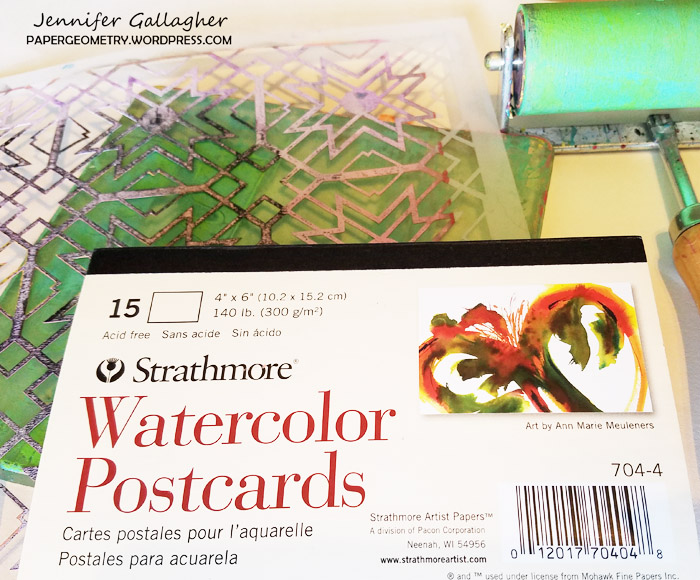
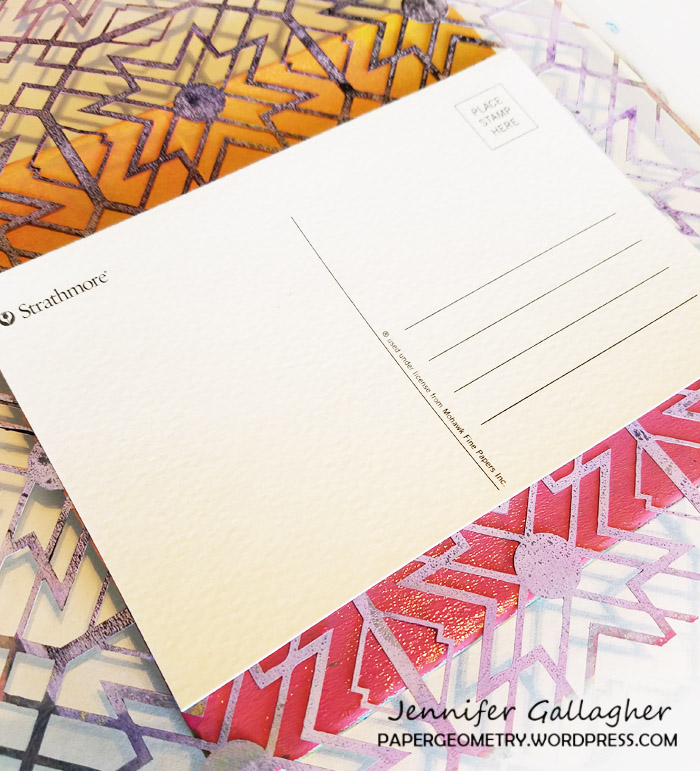
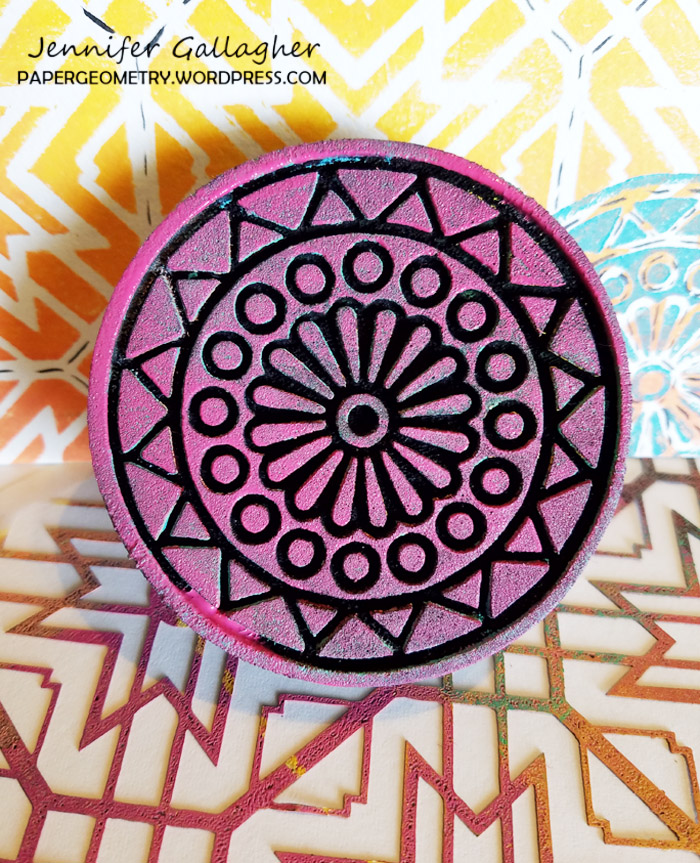
These fun postcards are quick and easy to make and you can use your favorite Nstudio stencils, stamps, and artfoamies to make them uniquely you. I used my six by six inch gelli plate, brayer, watercolor postcards, and inexpensive acrylic craft paints. To make some really standout postcards I used Nat’s Toledo stencil, Kassel stencil, and Valley Road Artfoamies.

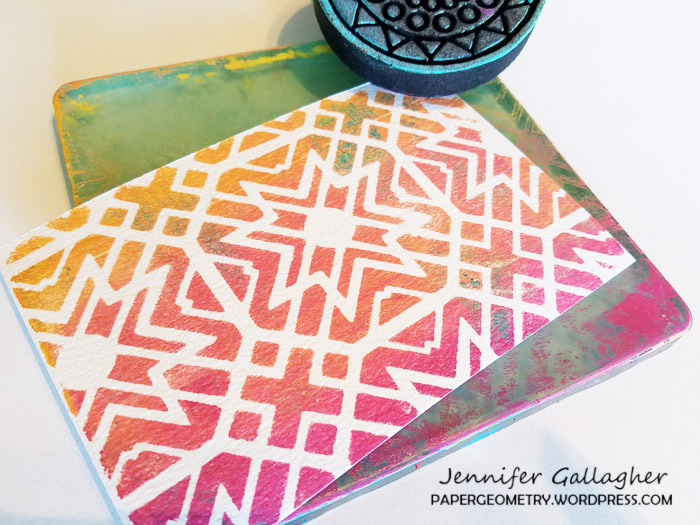
I layered my paint onto my gelli plate from light to dark in coordinating colors with my brayer. I put down my stencil and pressed my watercolor postcard down. Press firmly!

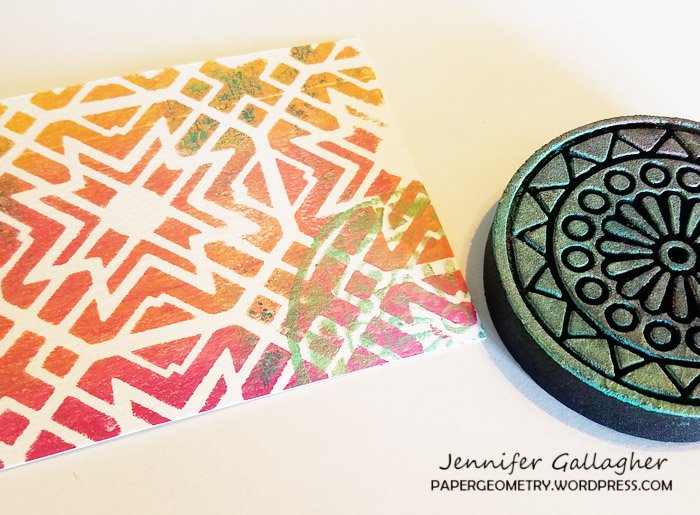
I chose complimentary colors, in this case turquoise and teal, and applied the paint to my artfoamies. I applied the design in interesting places on my postcards.

After the paint dried, I decided to add some interest with black India ink. Following the spaces between the stencil gives an interesting line for the eye to follow.

Now all that is left is to send them out. Thanks for stopping by and be sure to visit every Tuesday for the latest Creative Squad post. Enjoy!


Thank you Jennifer! Those colors are sure to brighten any gloomy winter day :)  Here are some of the supplies that Jennifer used:


Feel inspired? Working on something yourself that you’d like to share?  I love to see how you interpret our monthly themes. Email me how you used my stencils and stamps with the theme and email me an image – I would love to share your projects in my next  “n*Spiration From Around the Globe“.


Join us on Thursday March 22nd at 4pm EST for my latest Kaffeeklatsch on Facebook! I’ll be chatting about all the latest and greatest here at Nathalie’s Studio. Special this time is a GIVEAWAY you will not want to miss, tales from my trip to Japan, and lots of news about exciting upcoming in-person workshops! Join us and say hi!
SaveSave

SaveSaveSaveSave

Comments (1)

  • maura

    |

    Love how you made your own postcards with the stencils and stamps, Jennifer! Cool idea and colors! Maura

    Reply

Leave a comment