Blog: DIY

A Look Back – Spring DIY Ideas – Cool Stuff You May Have Missed 25

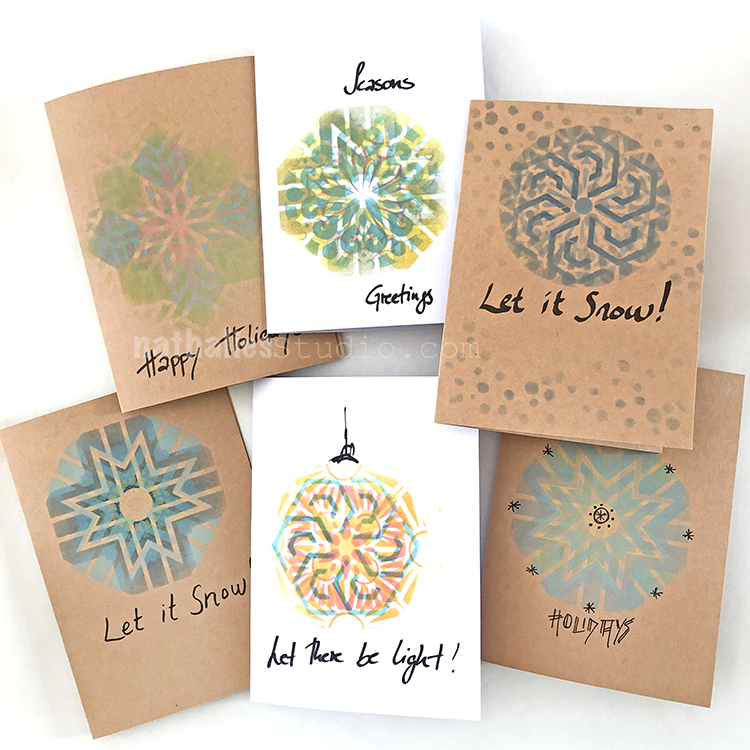
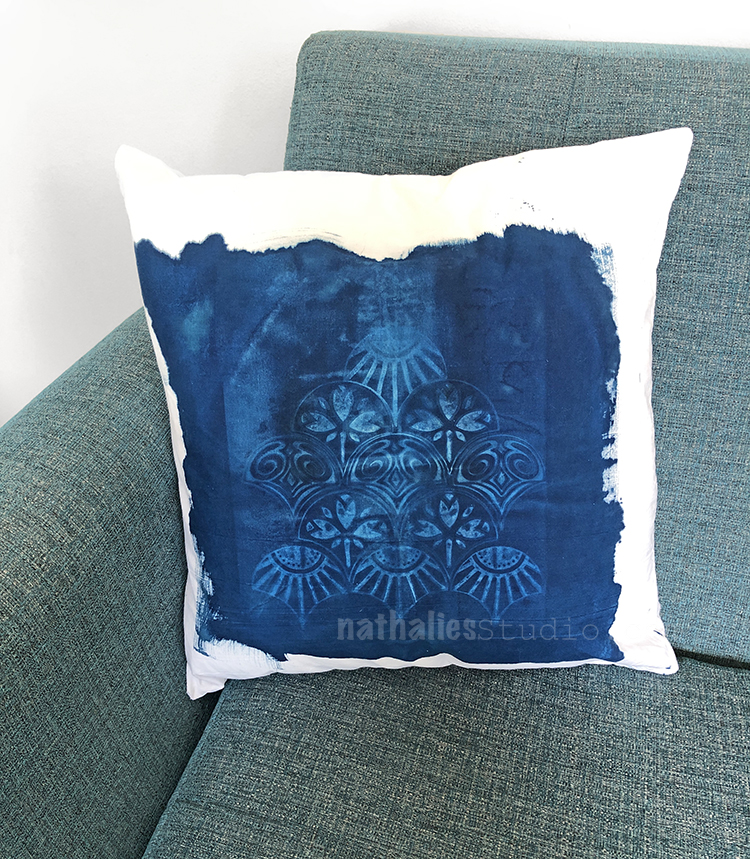
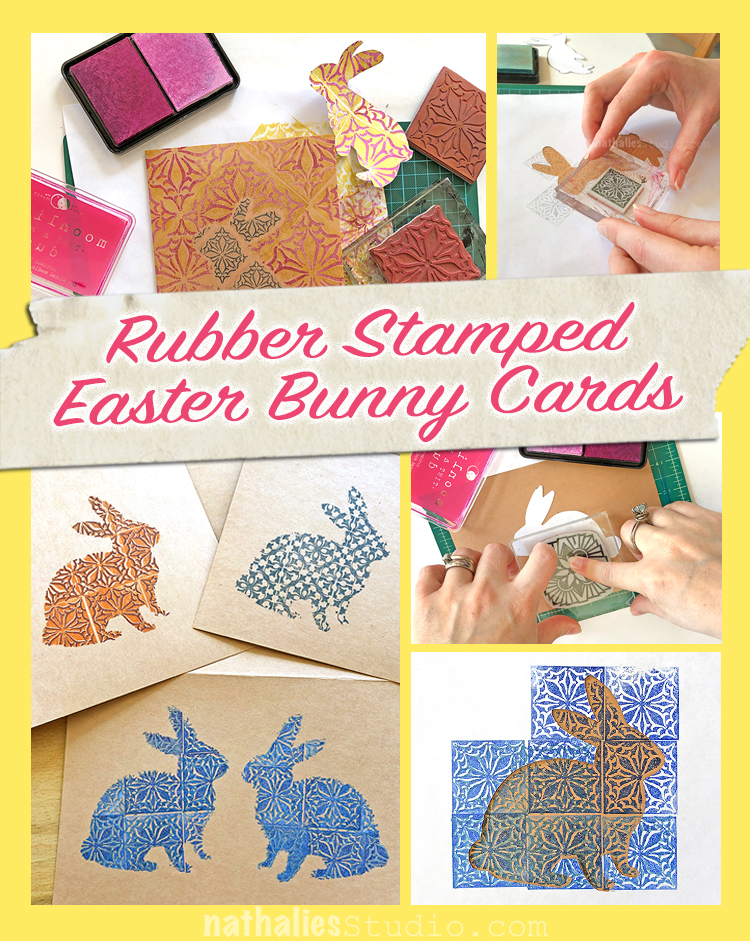
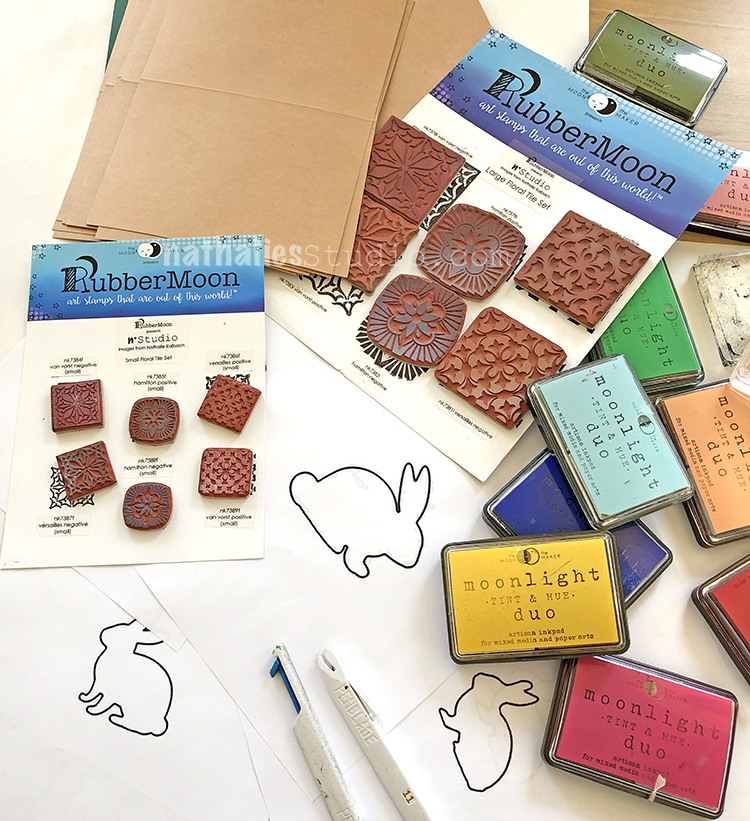
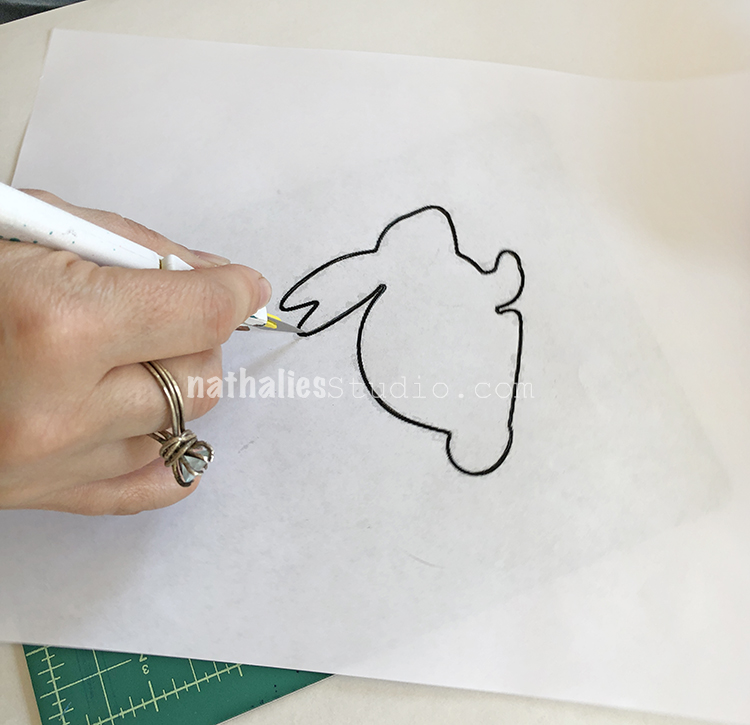
A Look Back – This time I’m looking at some Spring DIY Ideas that are great ways to get creative and make a few lovely things for this time of year. A stenciled umbrella to help you chase away those springtime showers in style? Yes. A vertical garden using your favorite rubber stamps? You betcha. A paper wreath project that the whole family can make? Read on and enjoy!

A Look Back is a blog series to show you some projects and posts that you may have missed – sometimes going WAY back in the archive. I think it will be fun to revisit a few ideas that we haven’t seen for a while. I’m excited to see how a little look back might inspire something new in the future :)


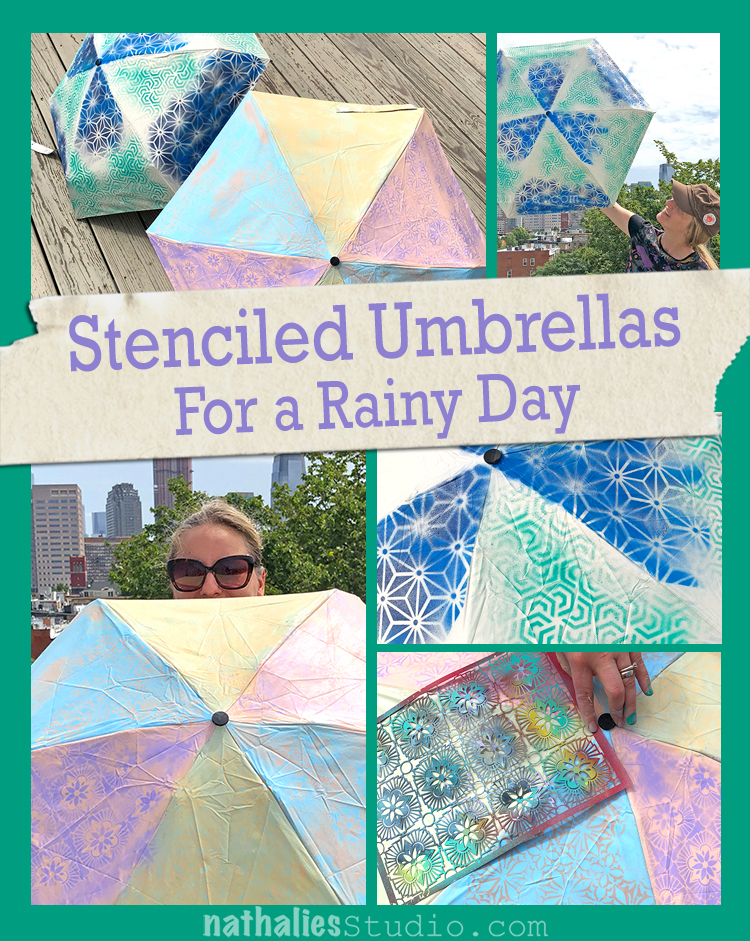
Spring showers got you down? No problem – grab a boring old umbrella and give it a little style with stencils and spray paint. I loved decorating a simple white umbrella in colors and patterns that made me happy no matter what the weather. And bonus – this little compact white umbrella was great in the summer to keep the sun off on particularly hot days in the city. Check out the full tutorial here.


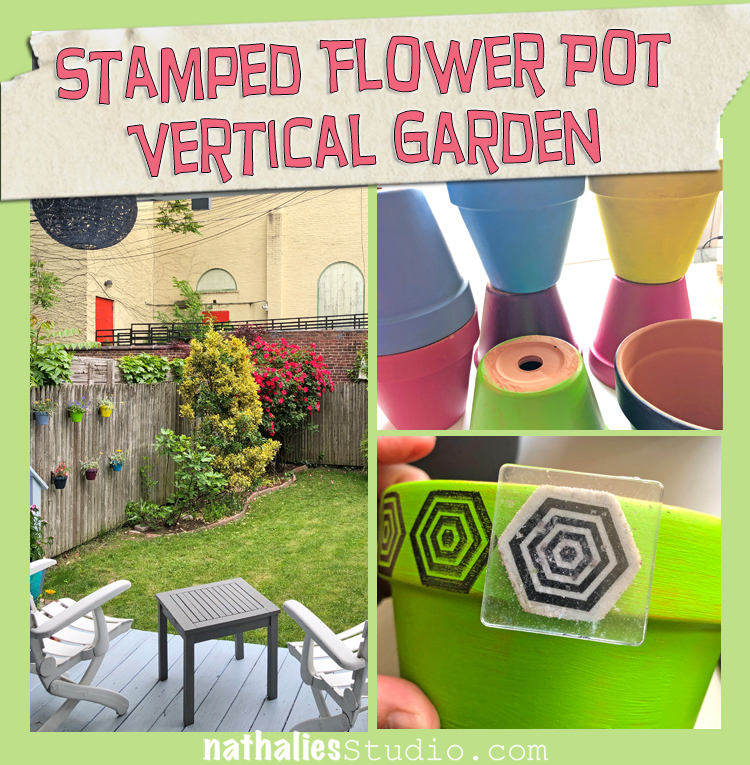
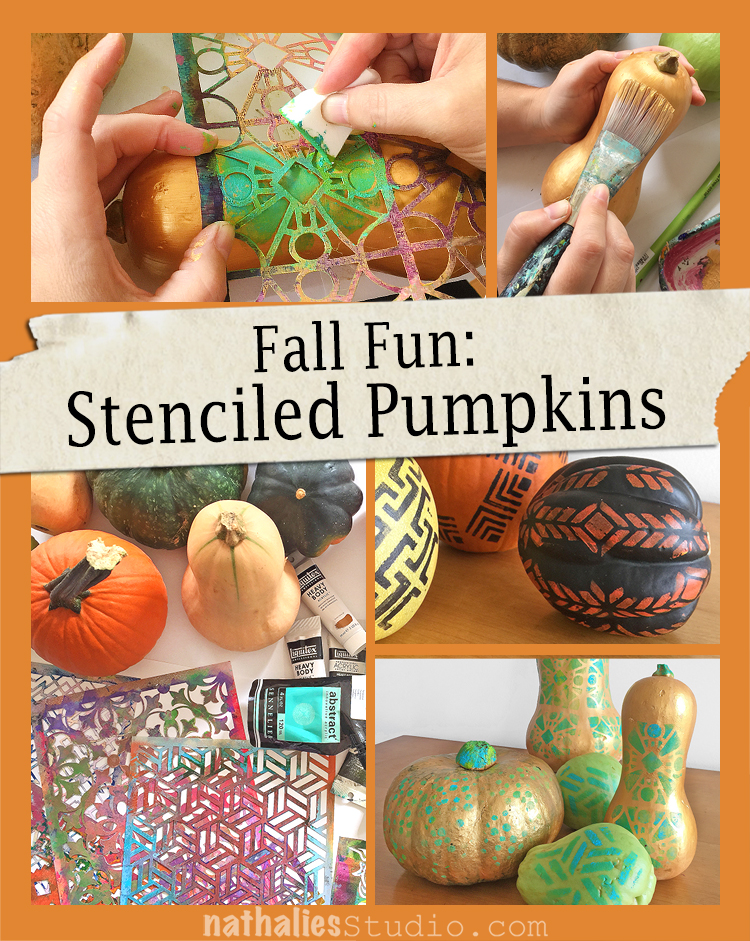
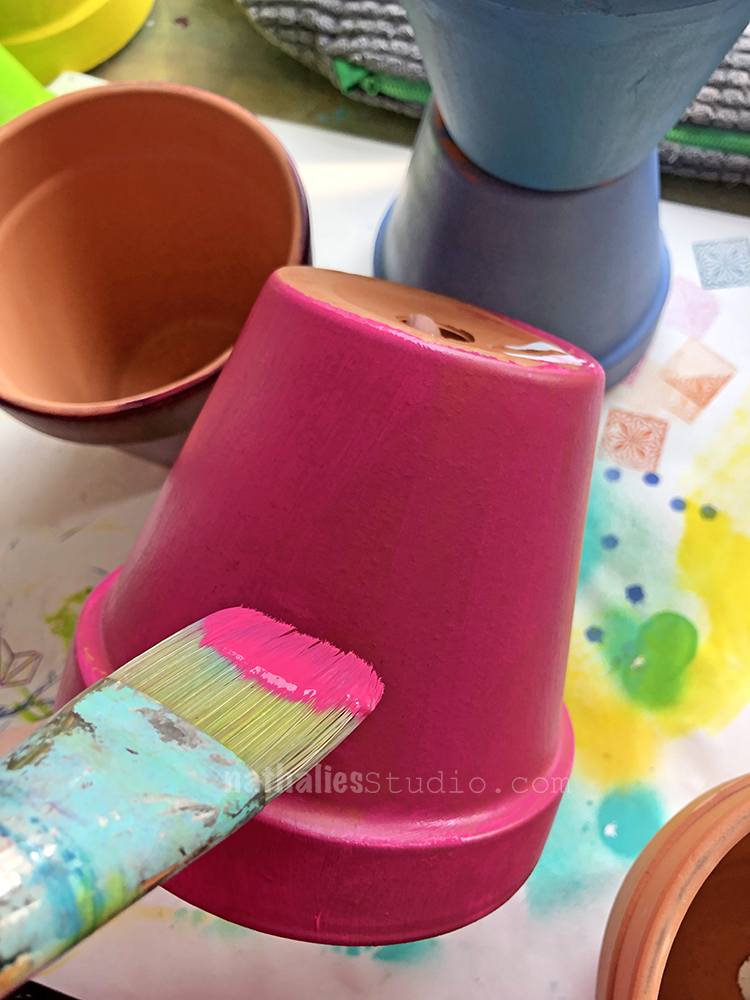
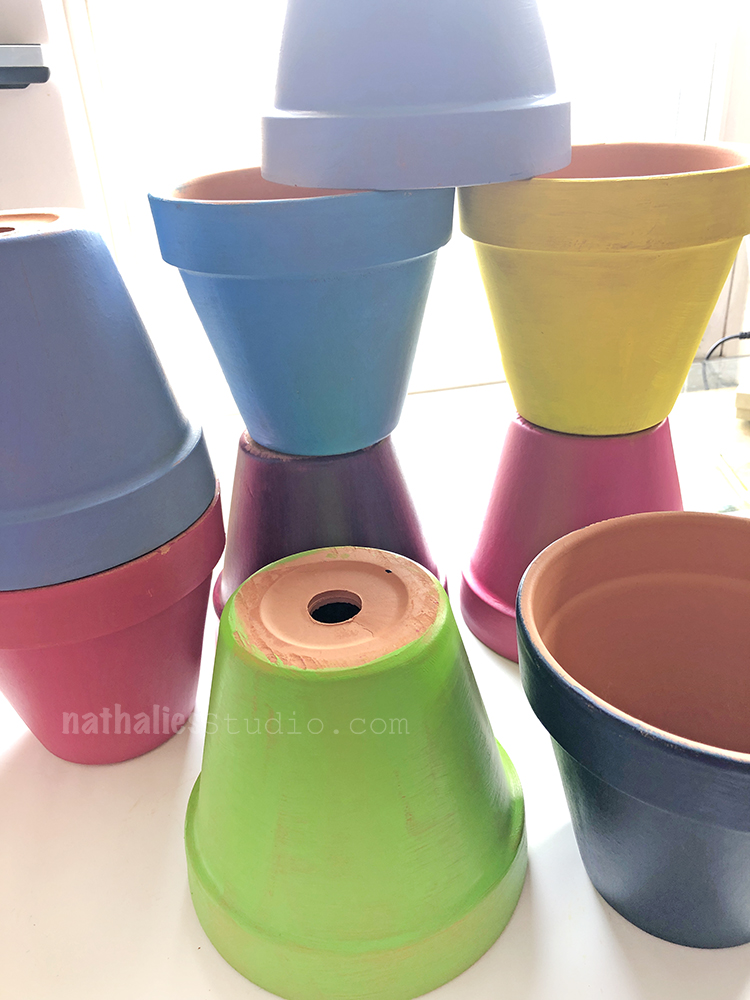
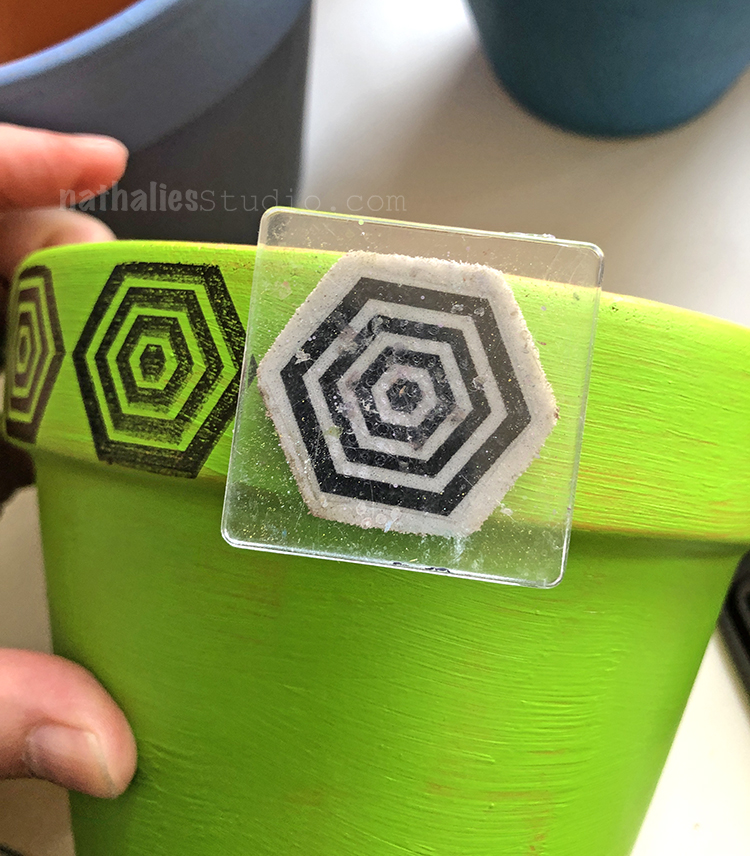
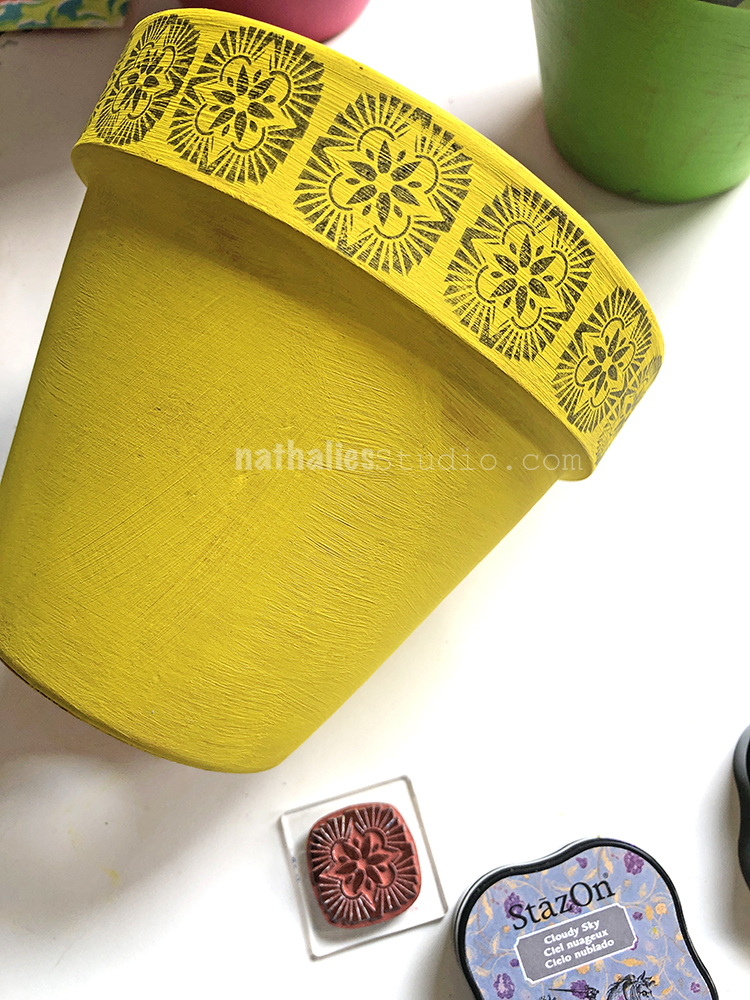
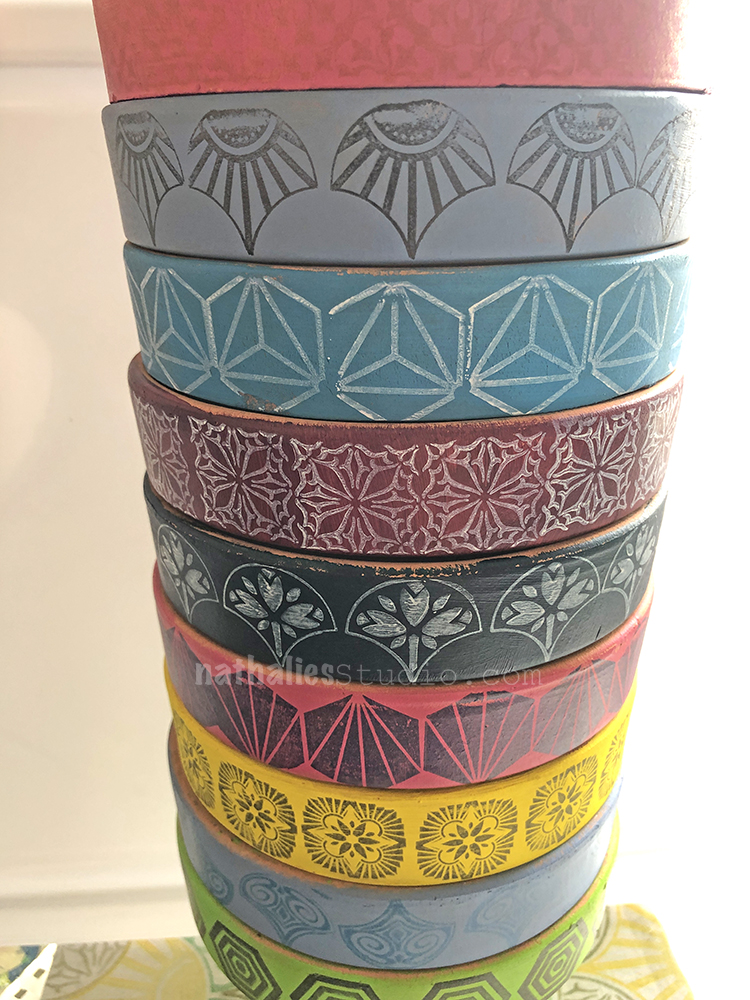
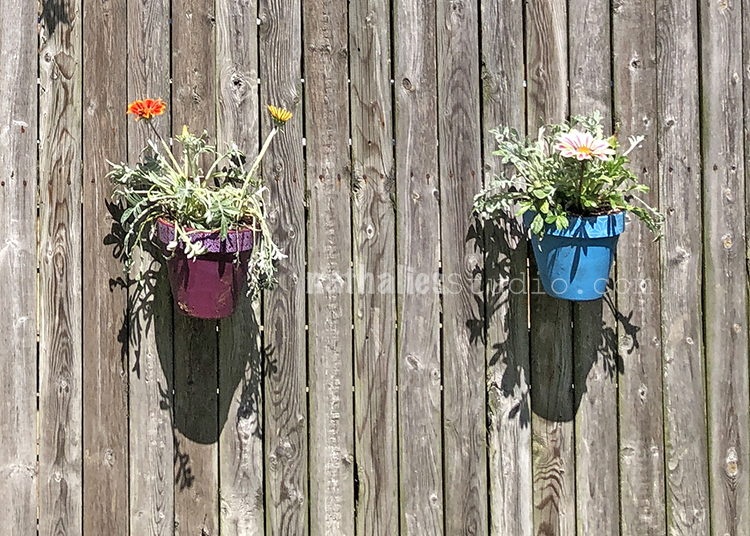
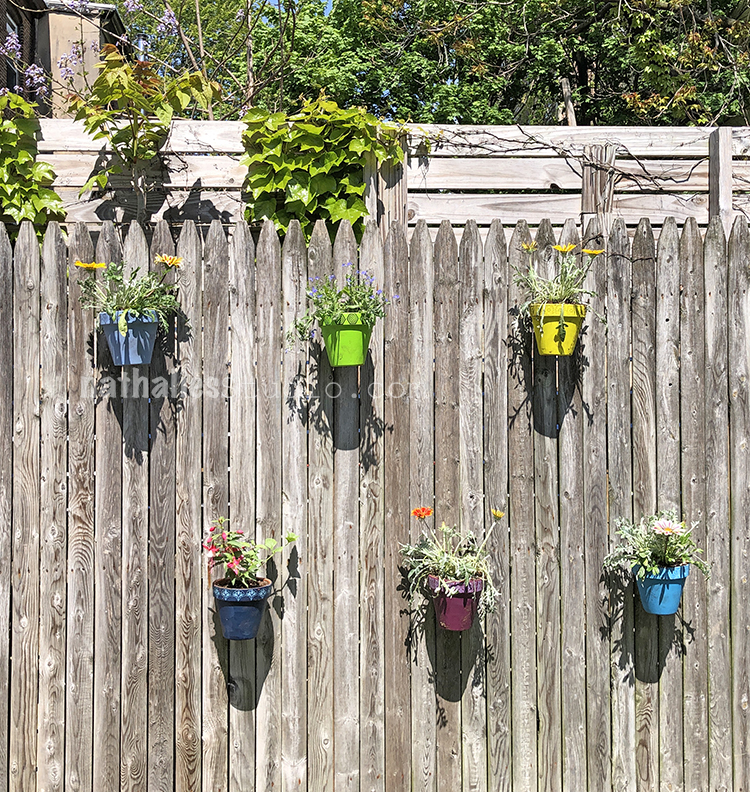
Every year the weather warms up and I long to be outside and to see flowers! And while those little plants are growing bigger, I love to have colorful pots adding pops here and there in the garden. I painted and used rubber stamps to make some simple terra cotta pots a lot more fun. Read the DIY steps here.


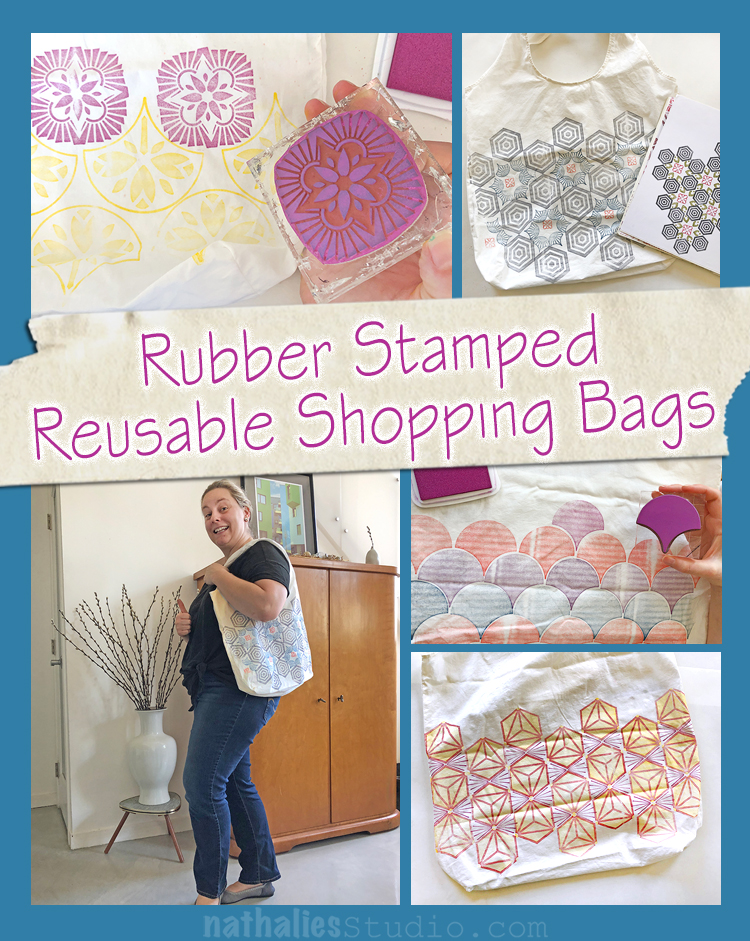
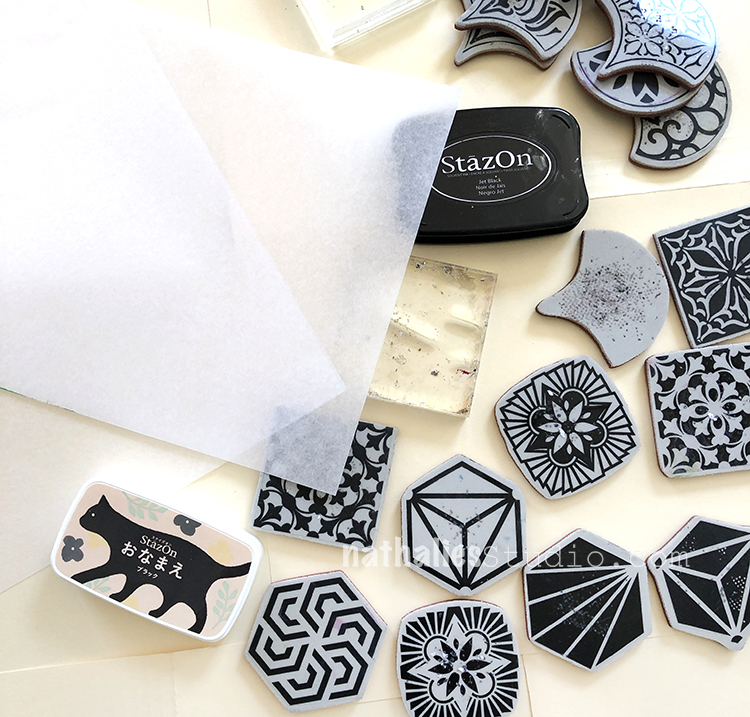
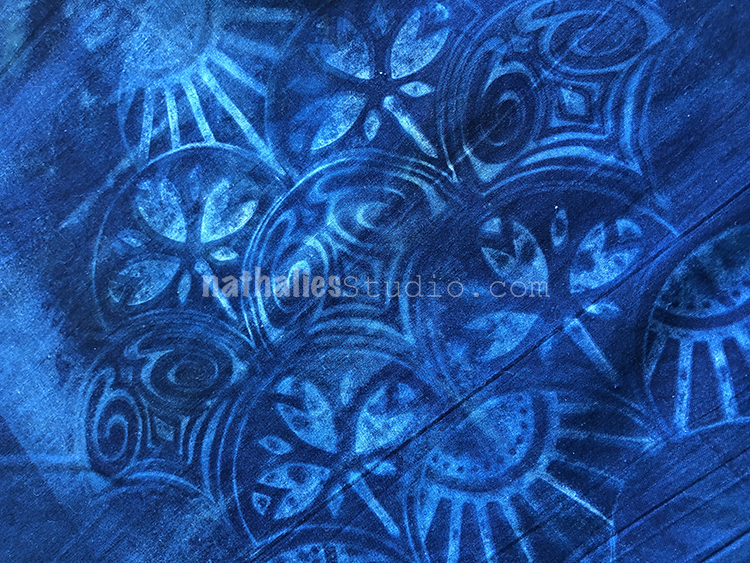
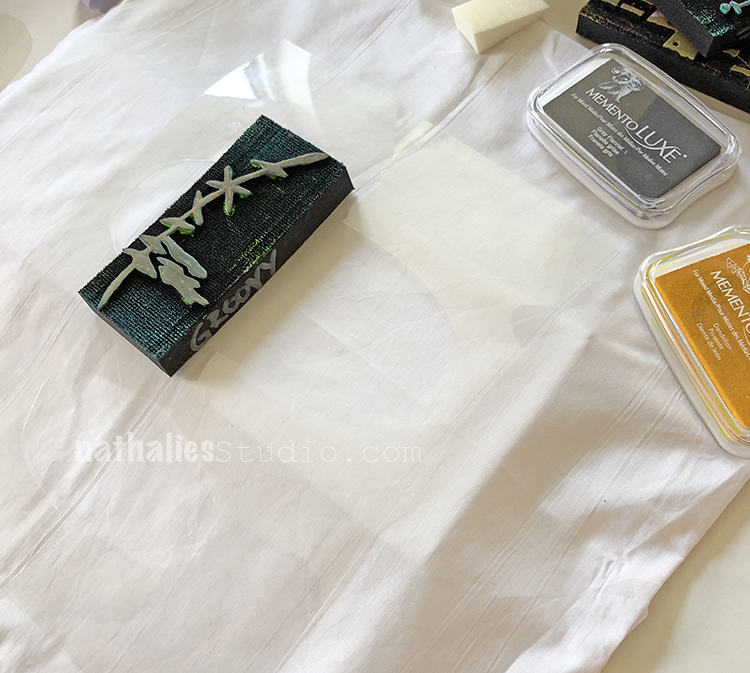
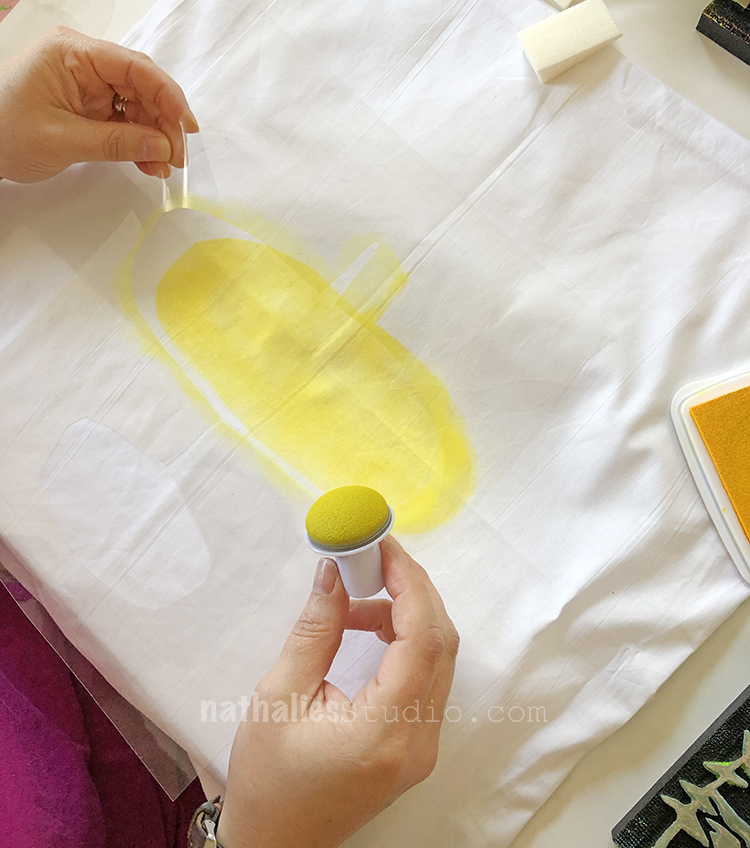
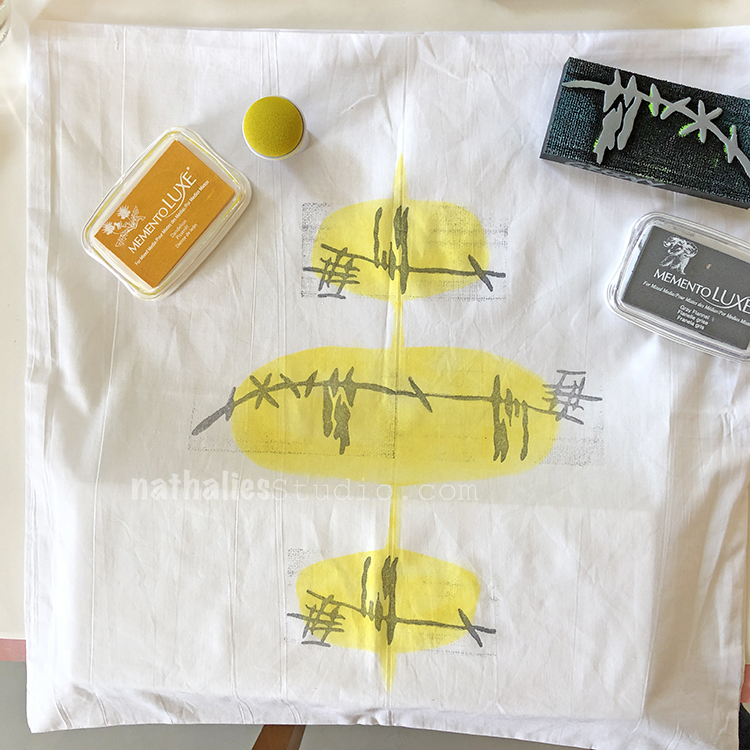
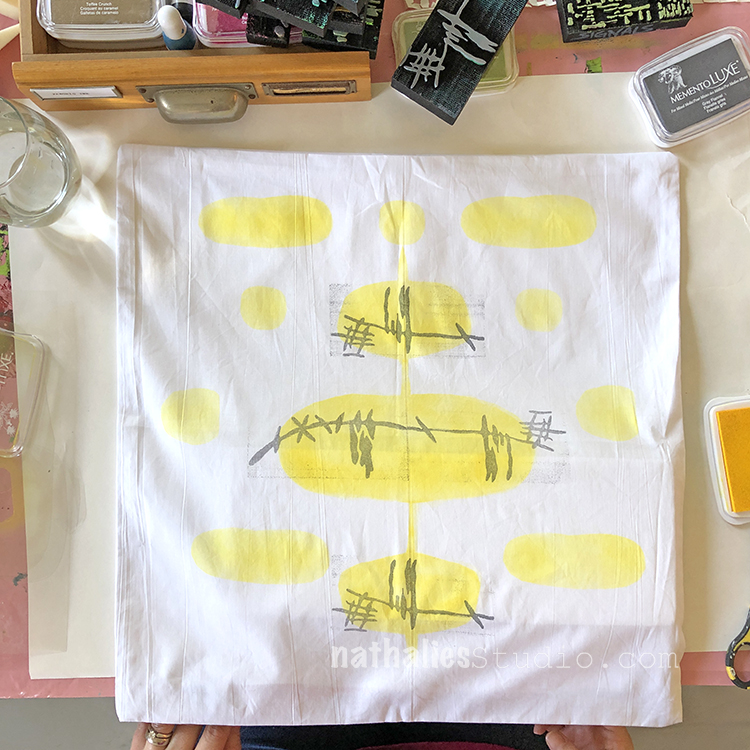
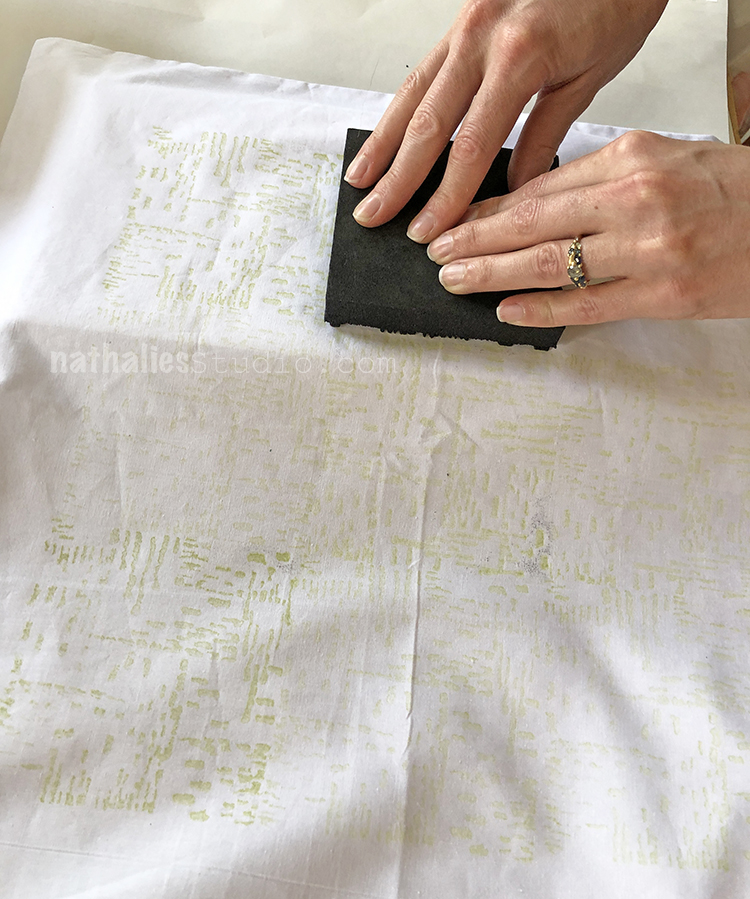
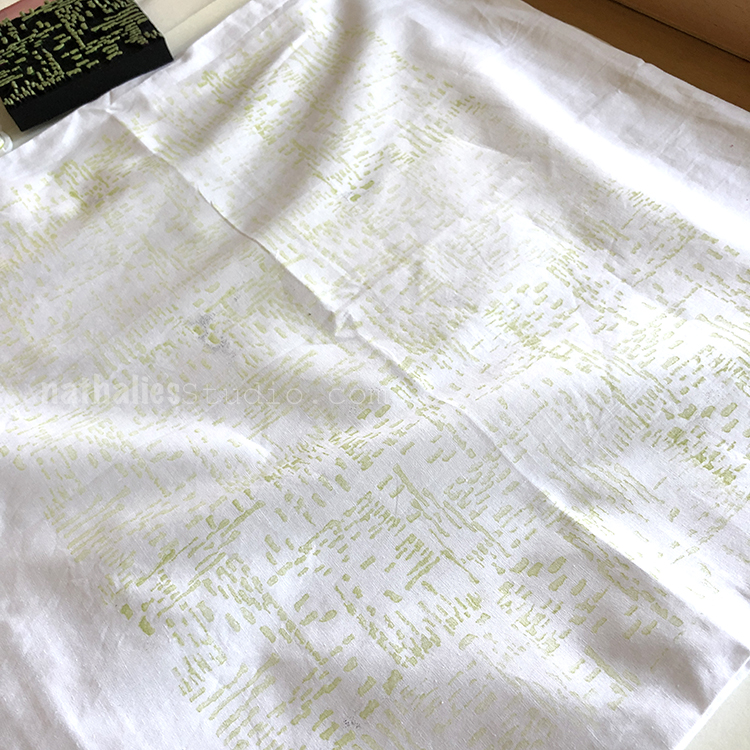
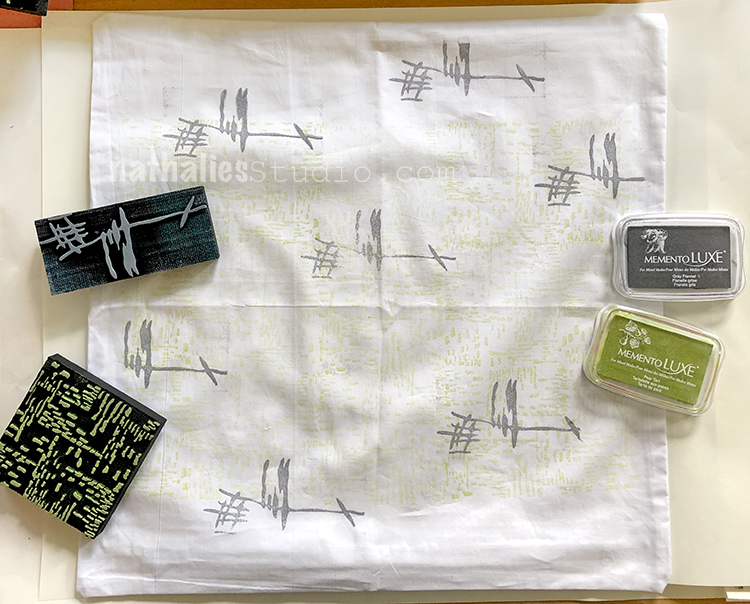
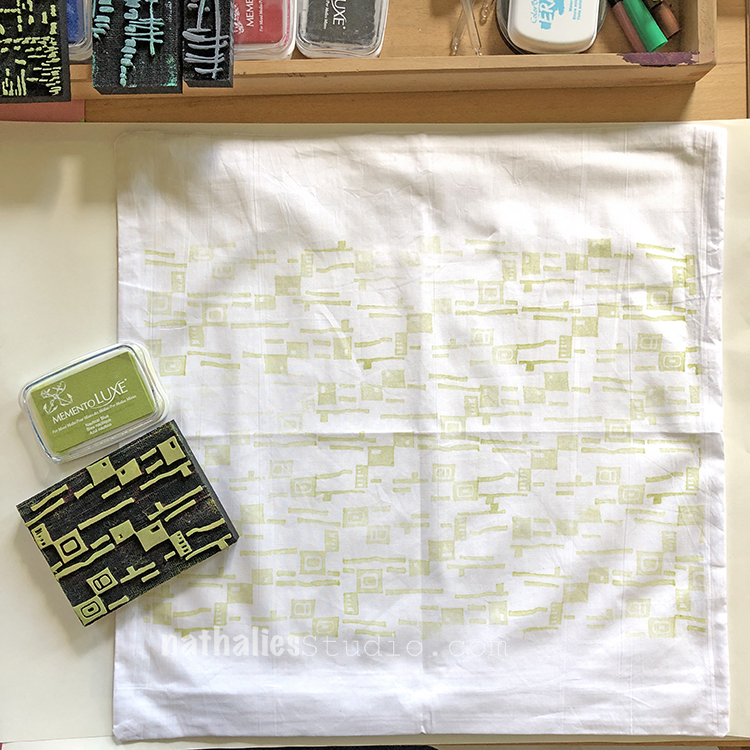
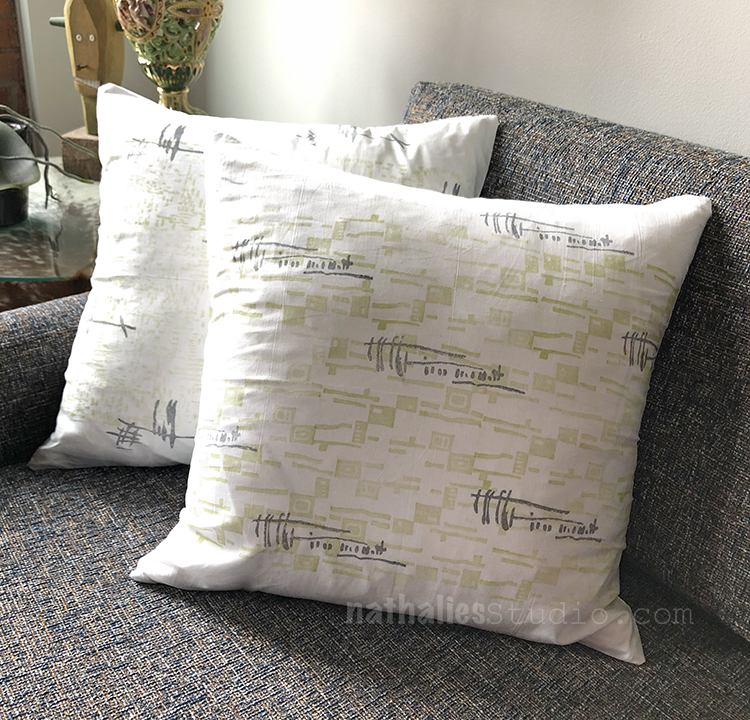
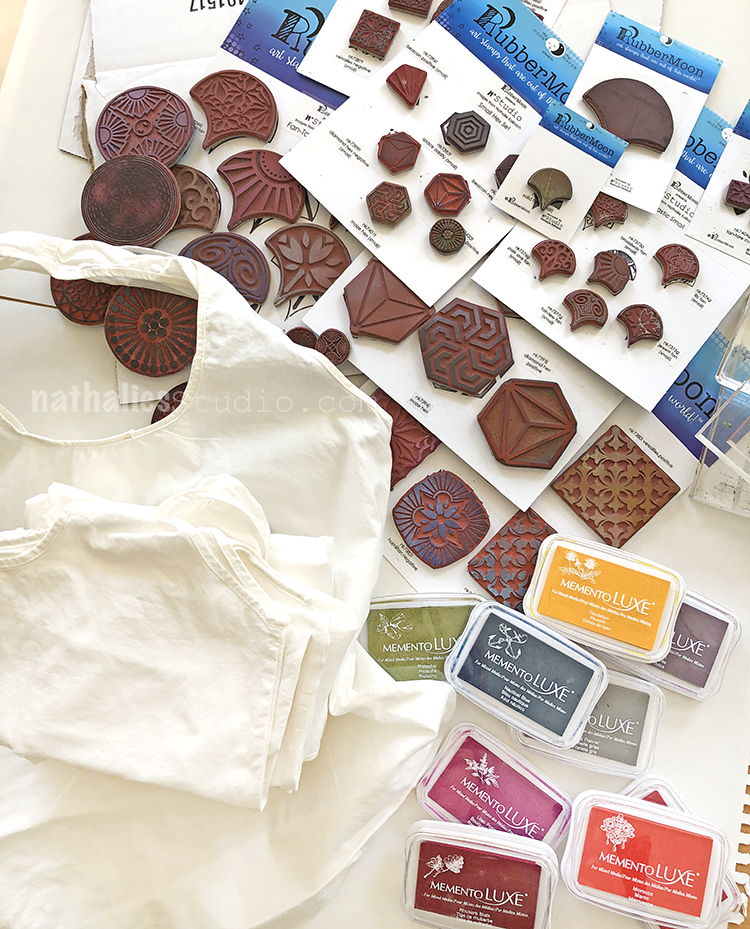
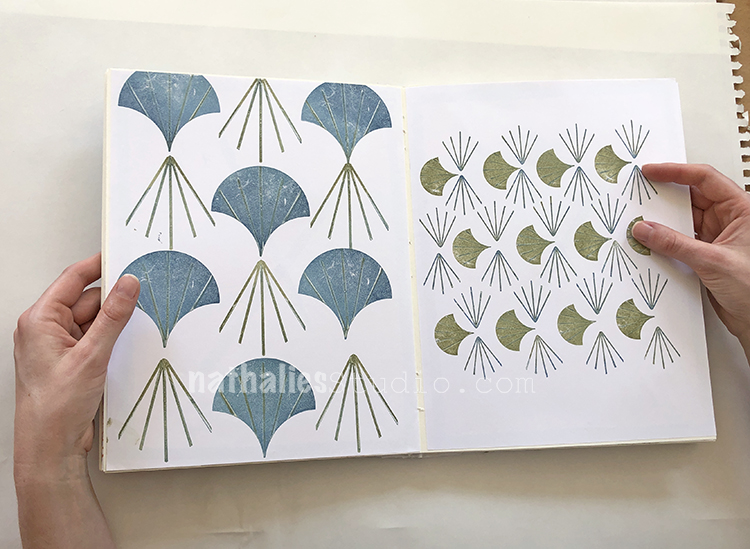
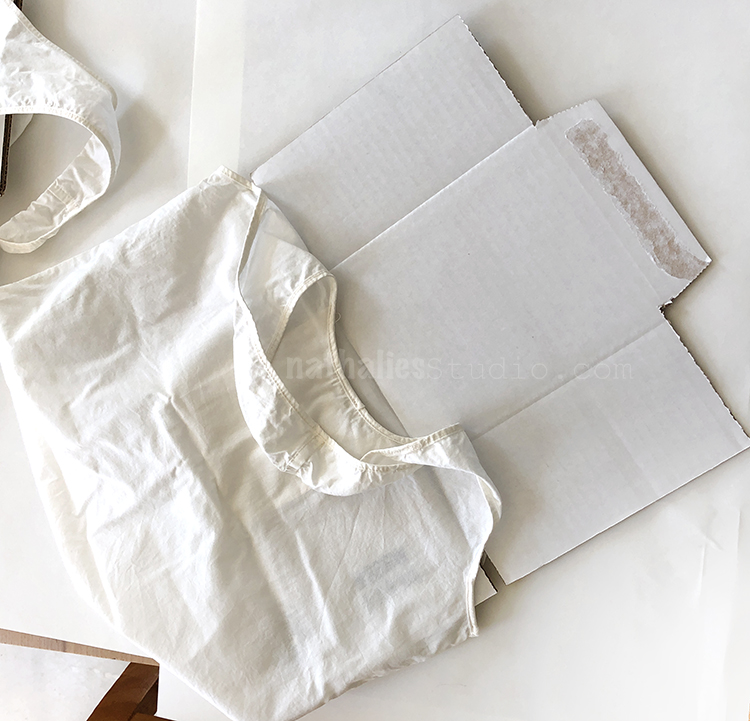
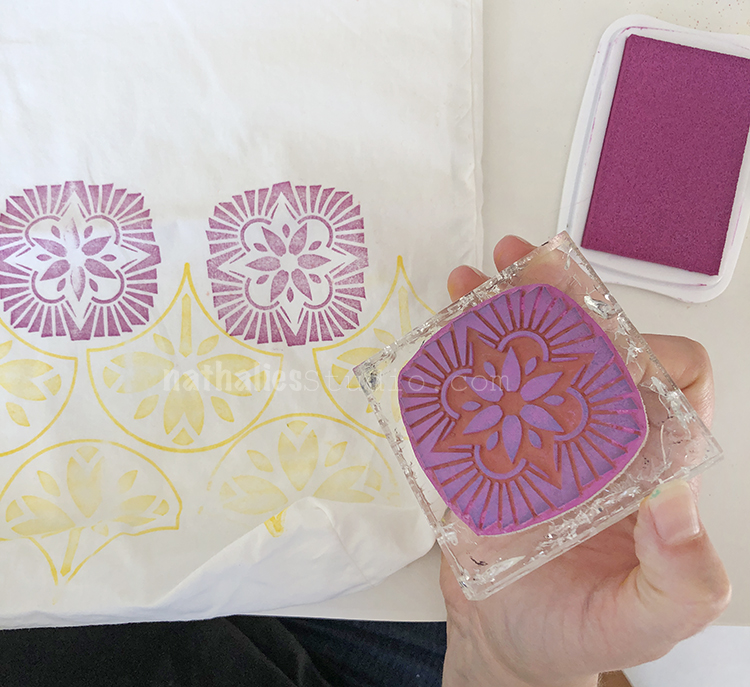
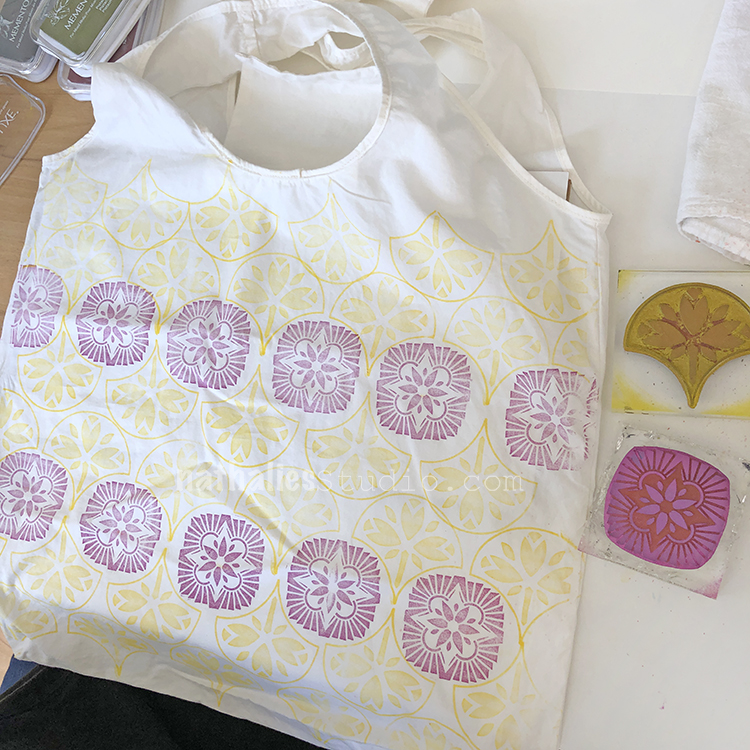
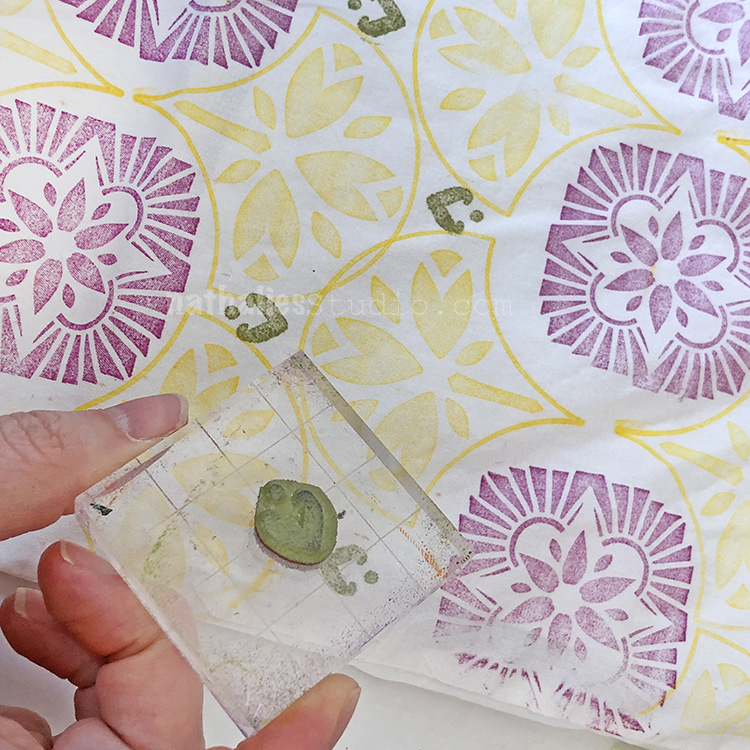
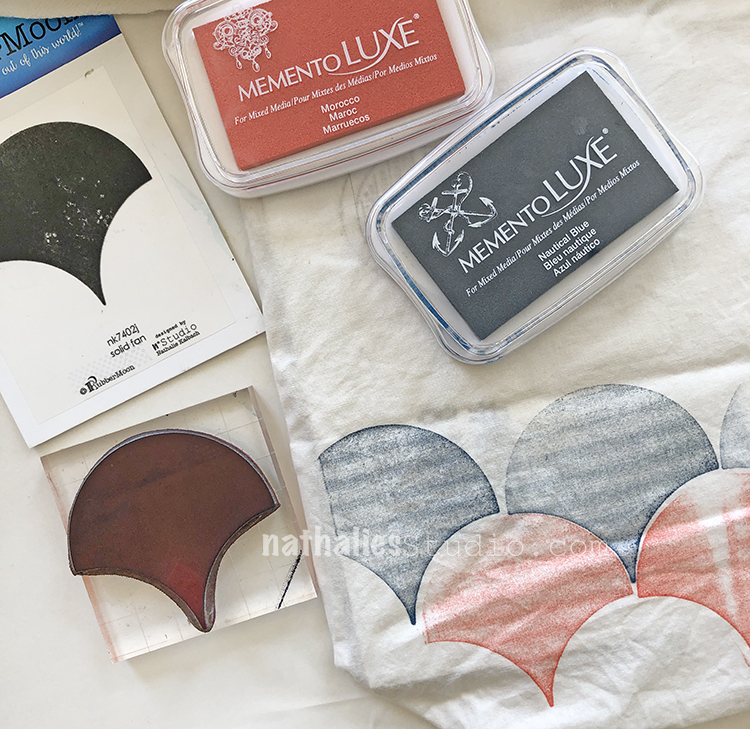
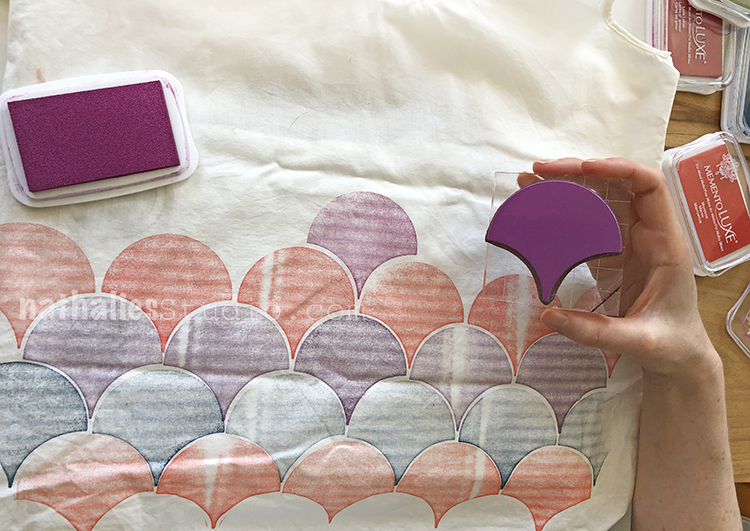
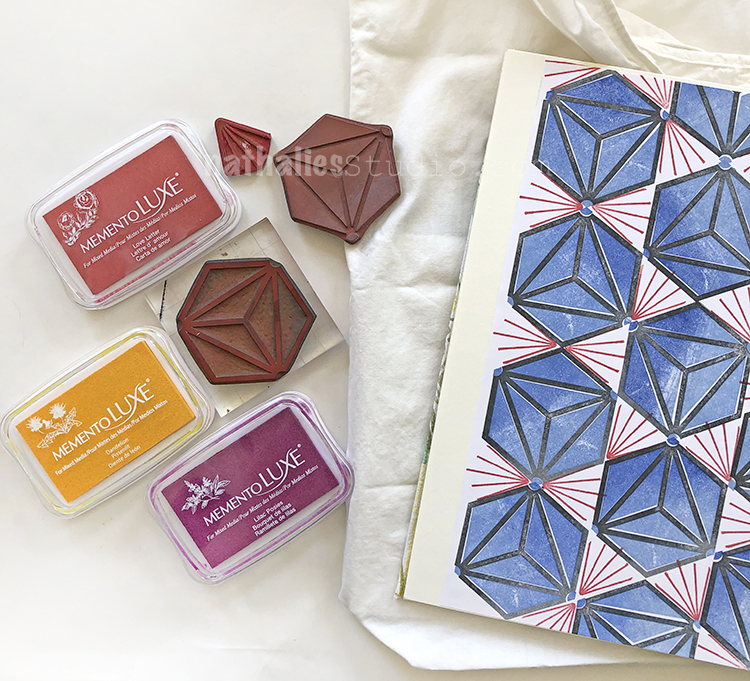
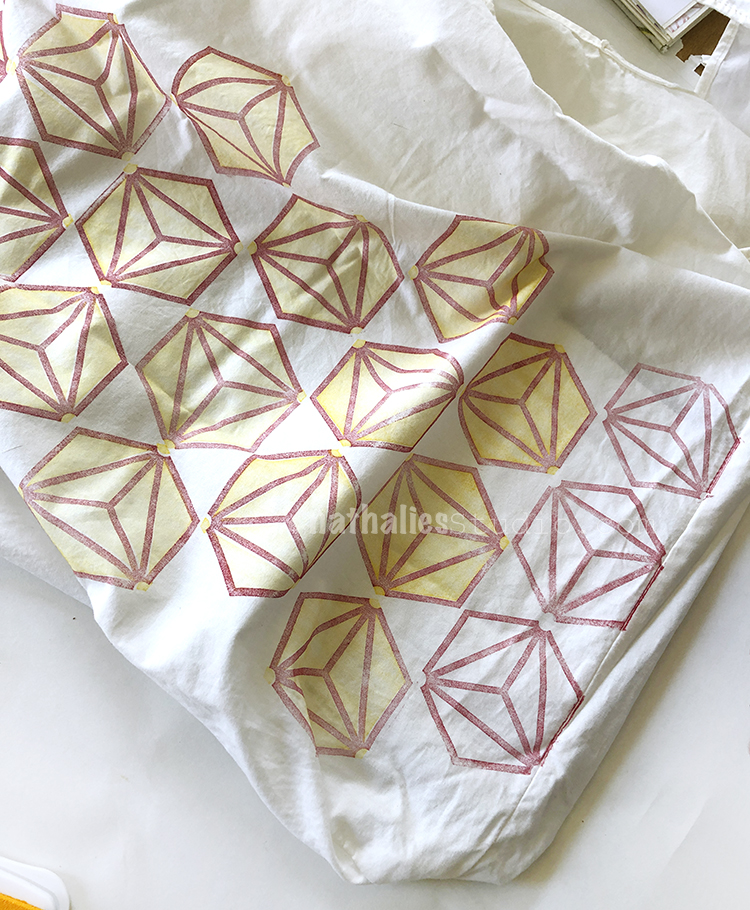
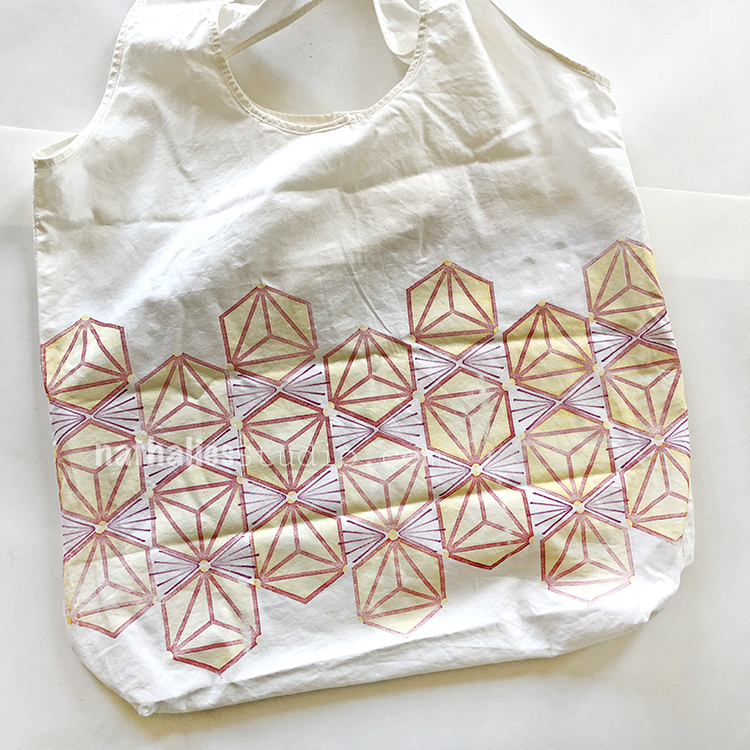
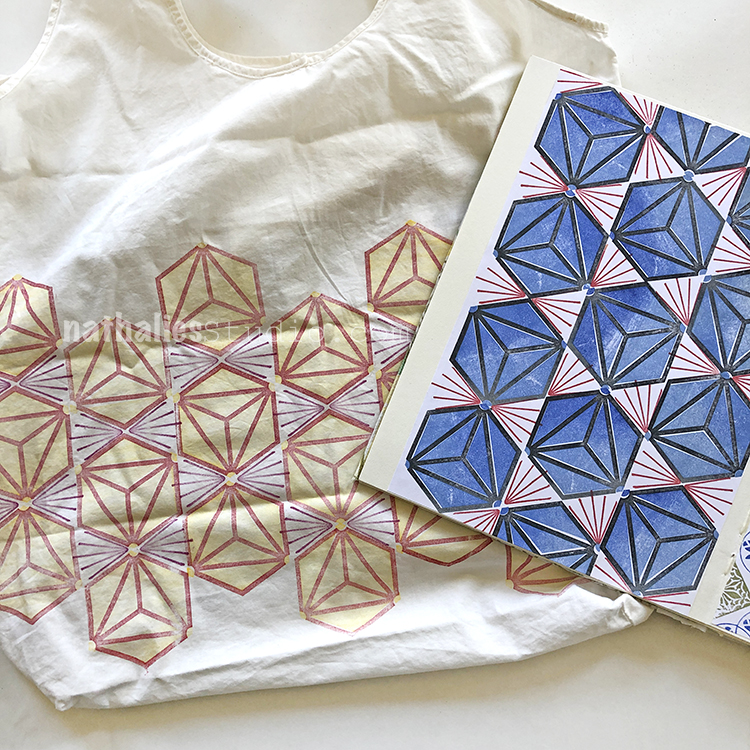
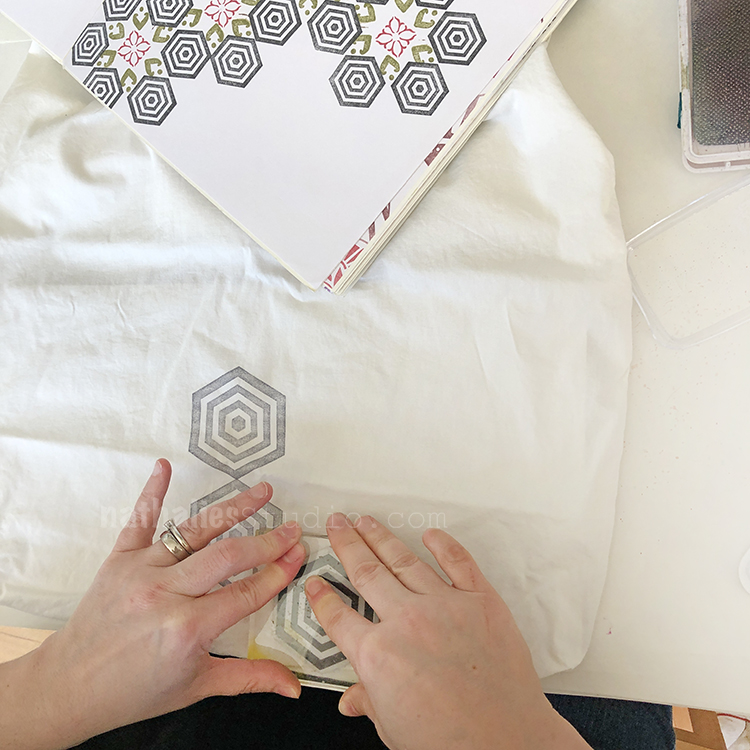
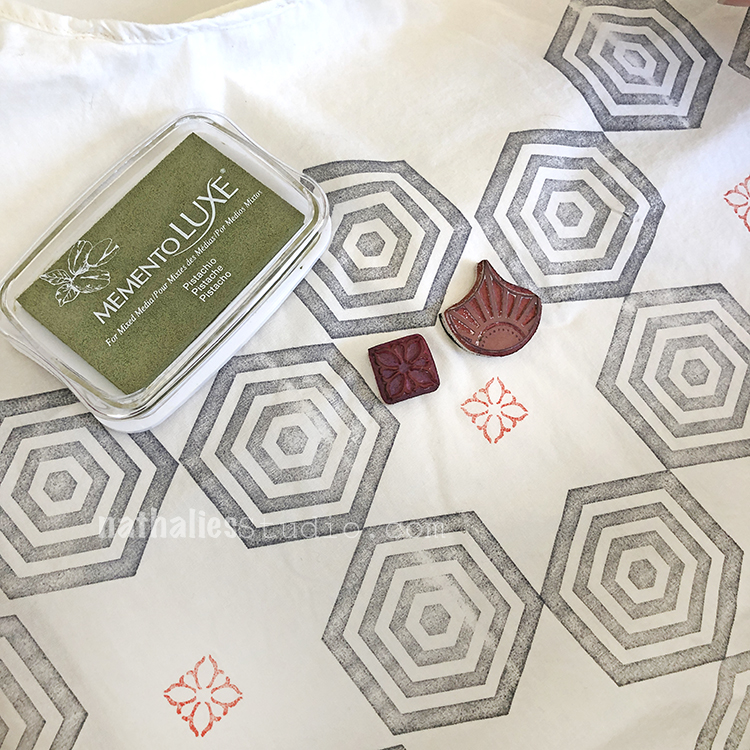
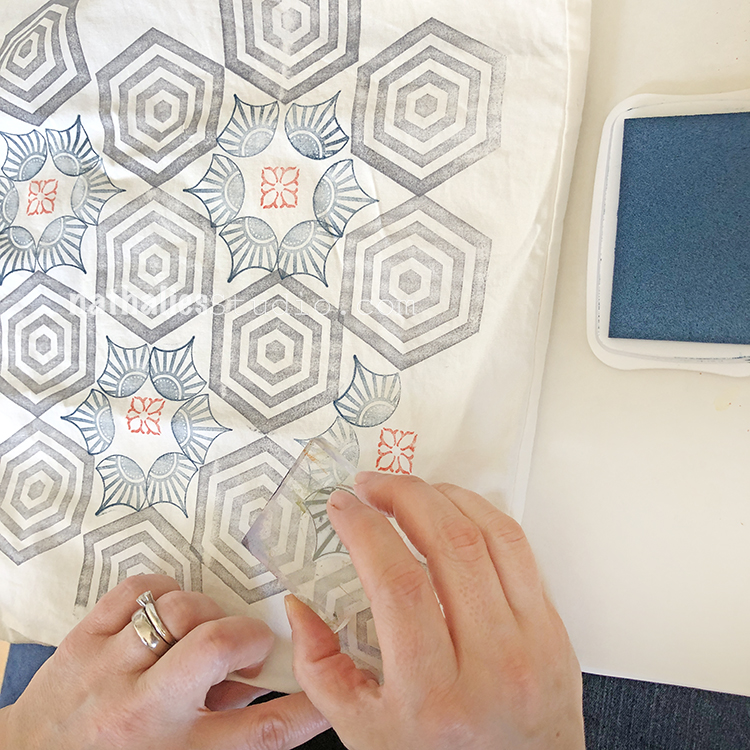
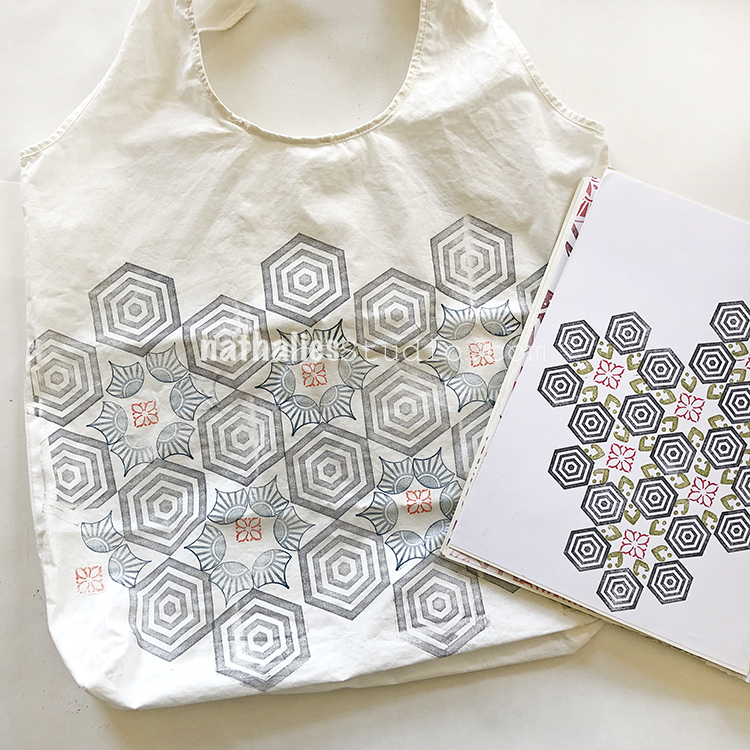
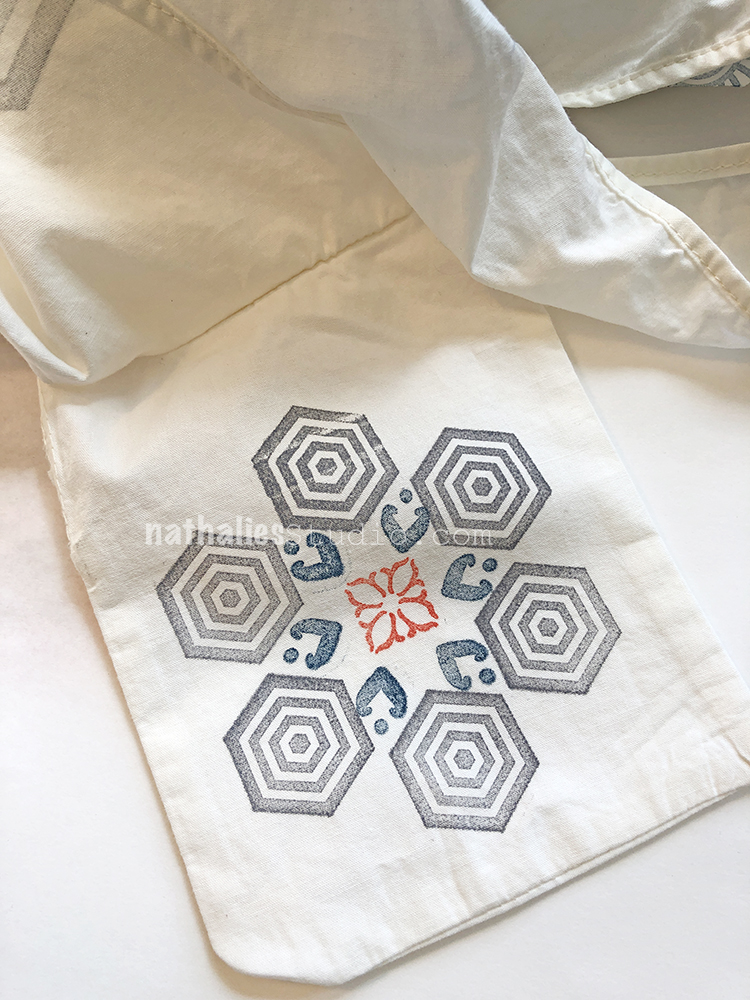
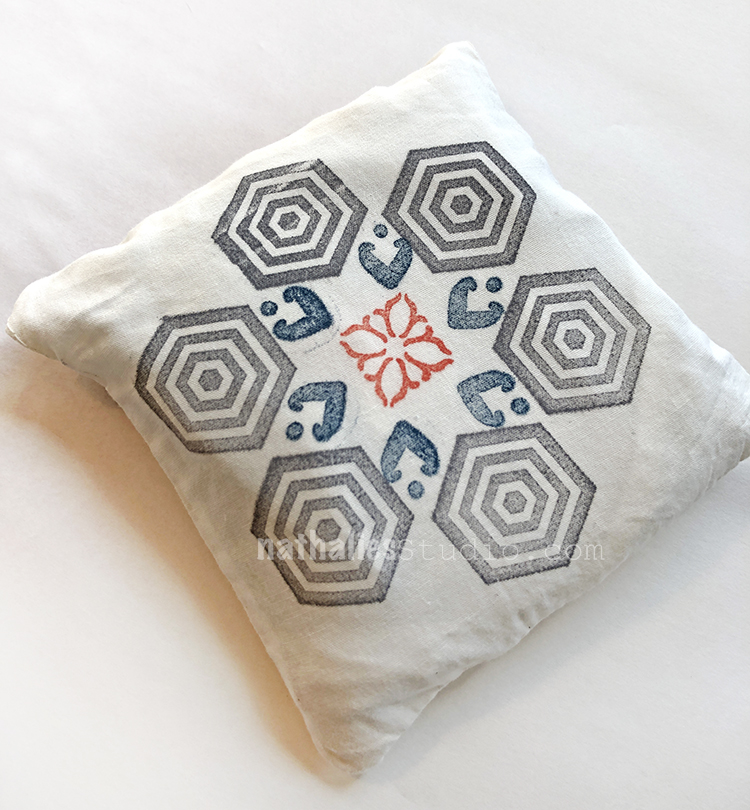
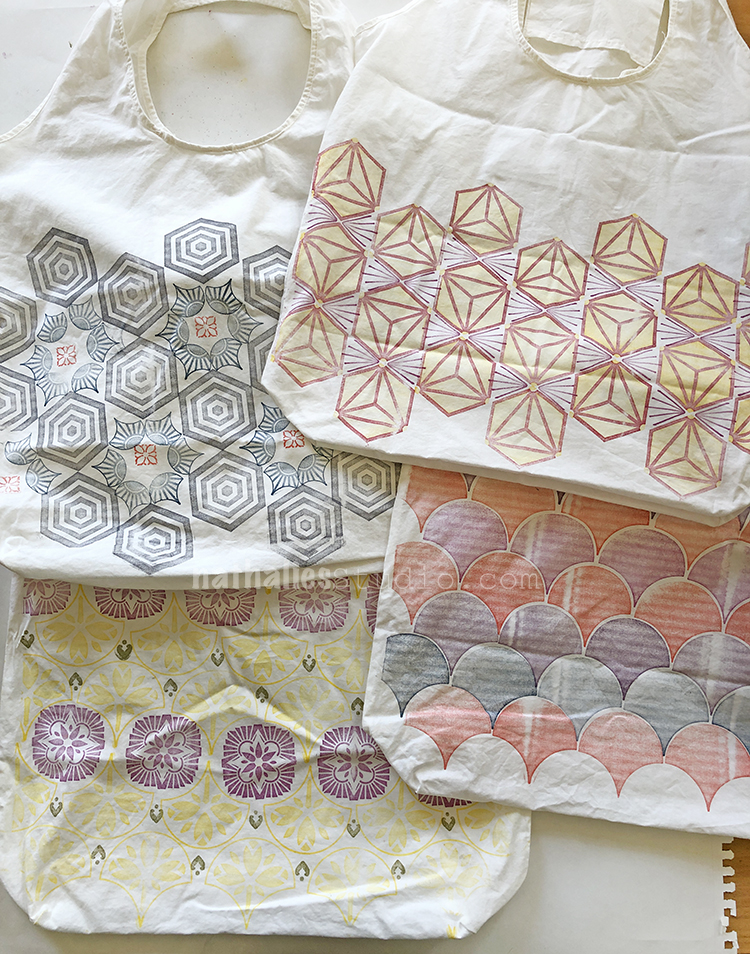
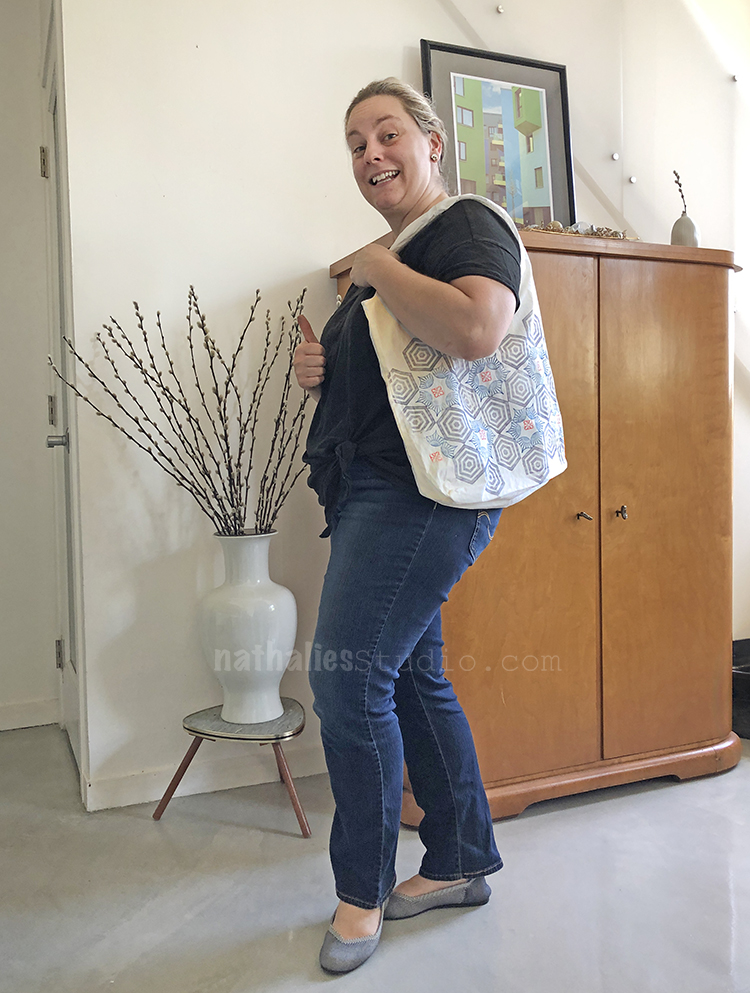
I’m a pattern junky as you know, so this DIY was a no-brainer. Tote bags get a ton of use so why shouldn’t they be just as cool as the rest of your stuff? I used rubber stamps and fabric ink to stamp my shopping bags with bold patterns. See my inspiration and step-by-step instructions here. And then take your lovely new bags and go support a small business in your hood!


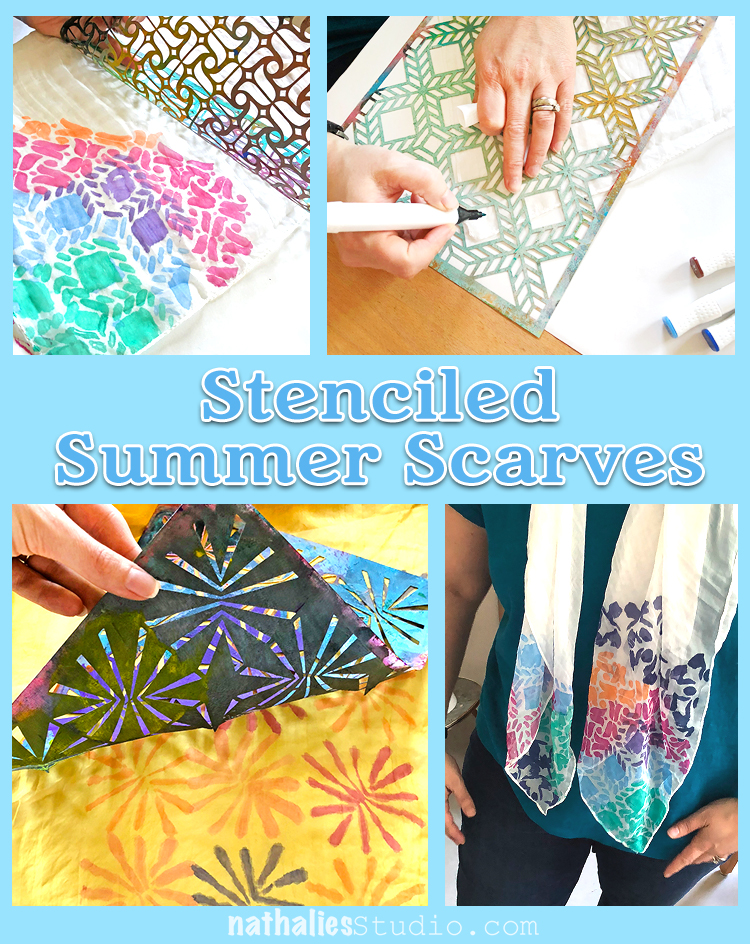
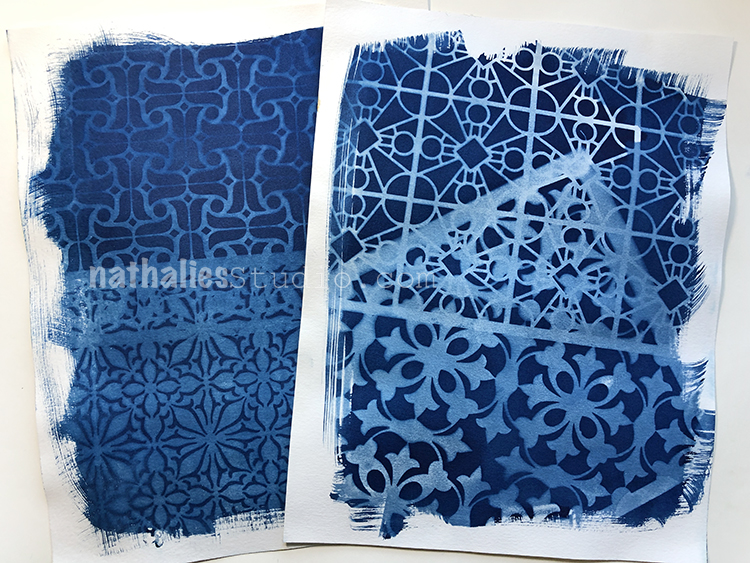
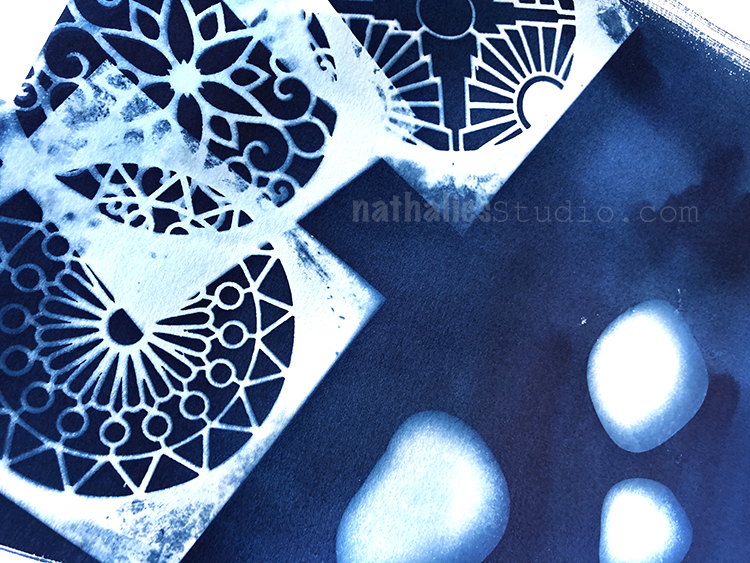
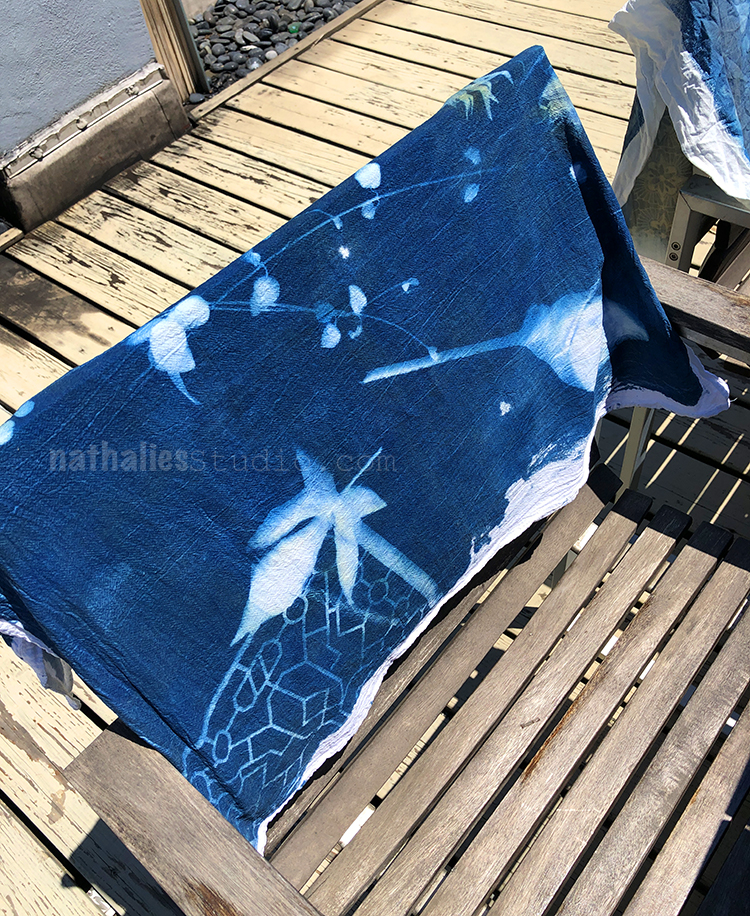
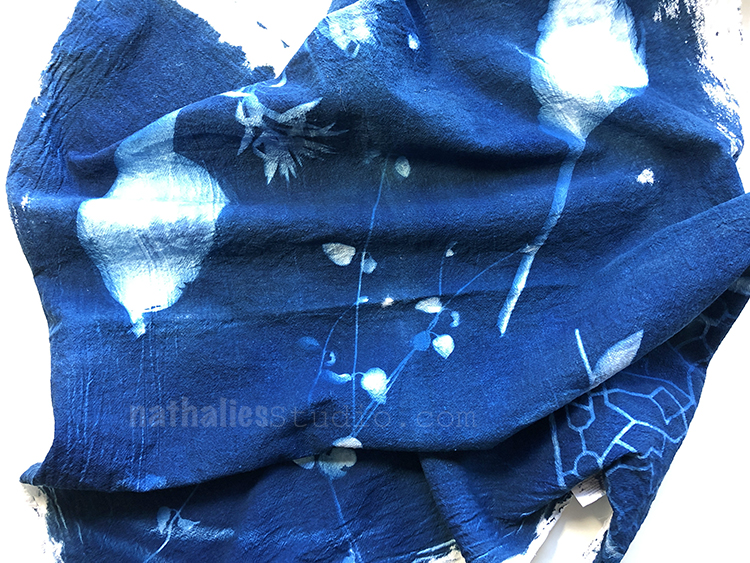
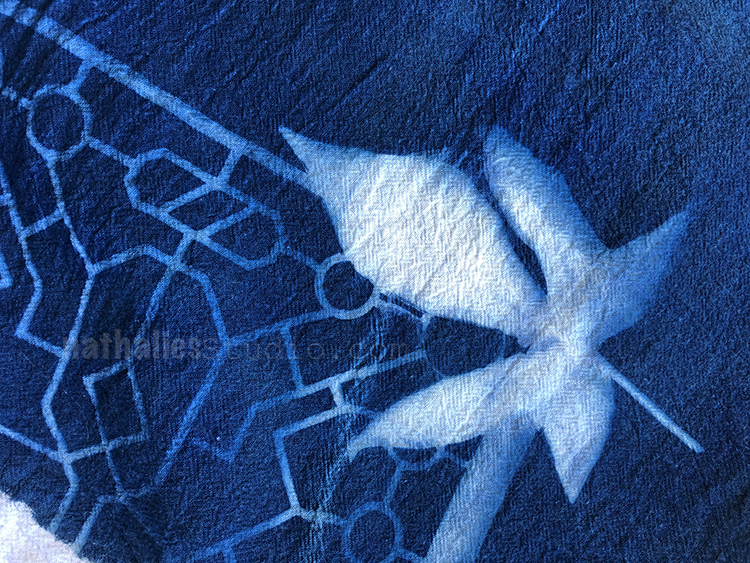
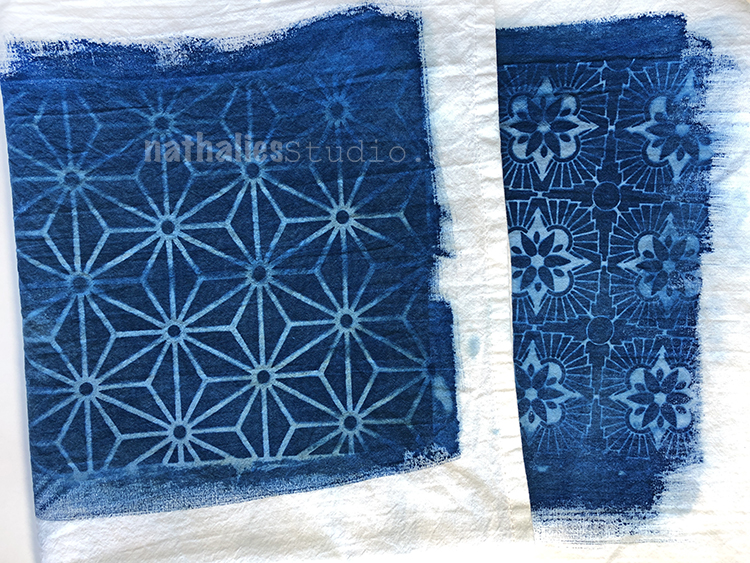
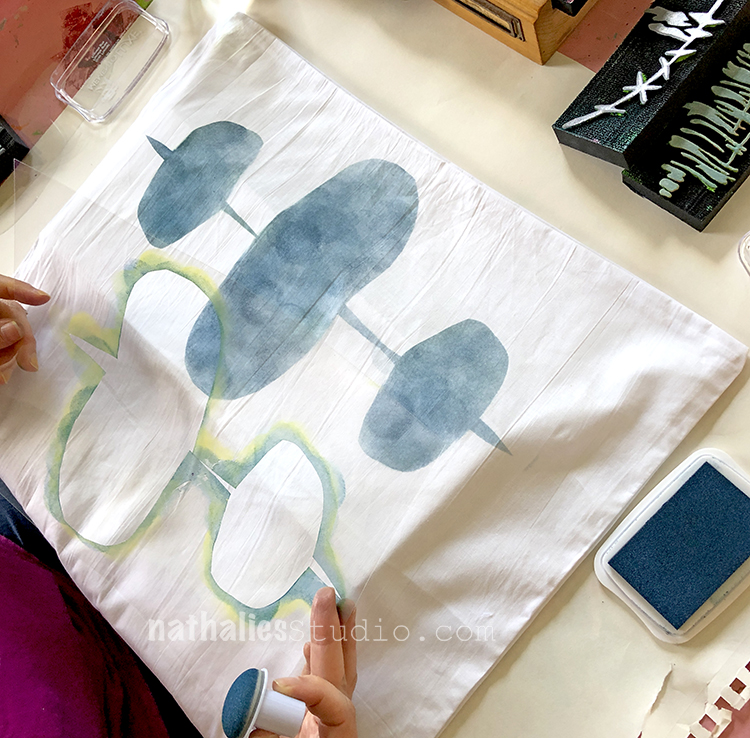
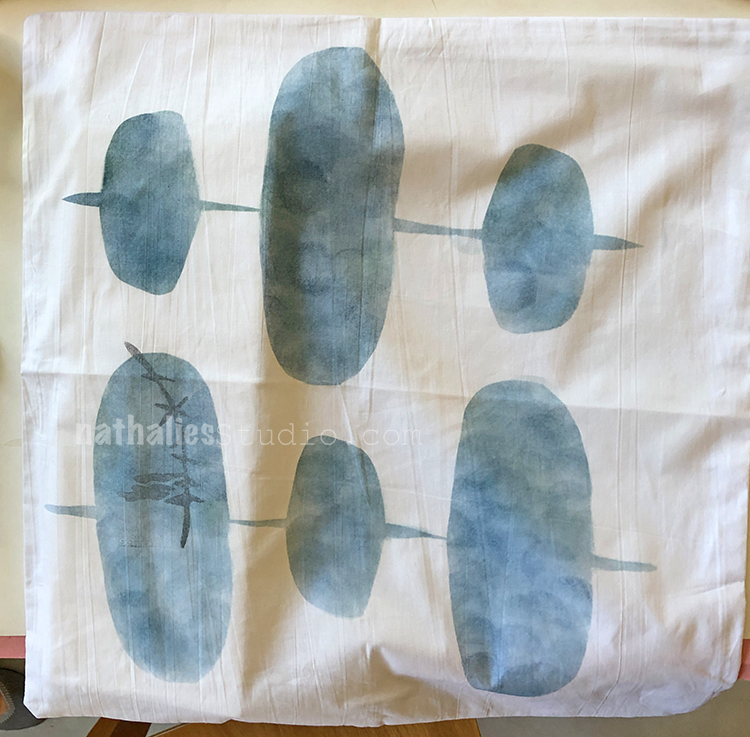
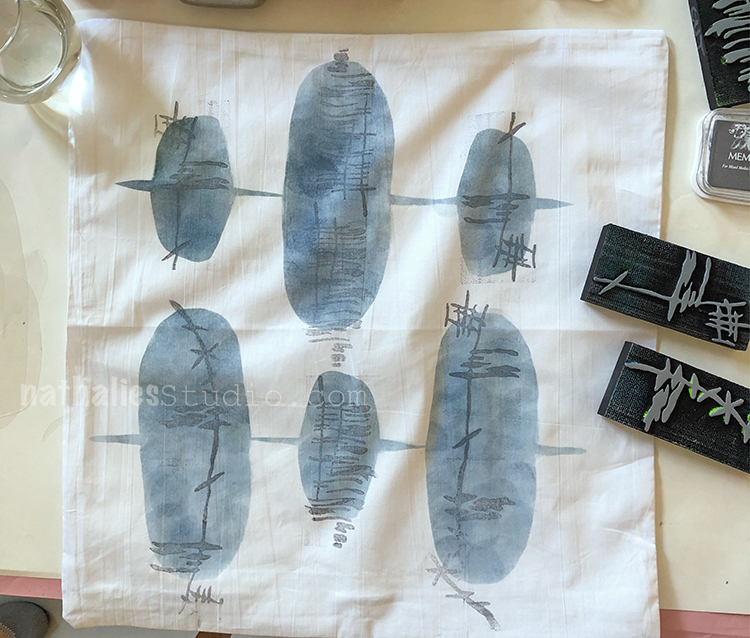
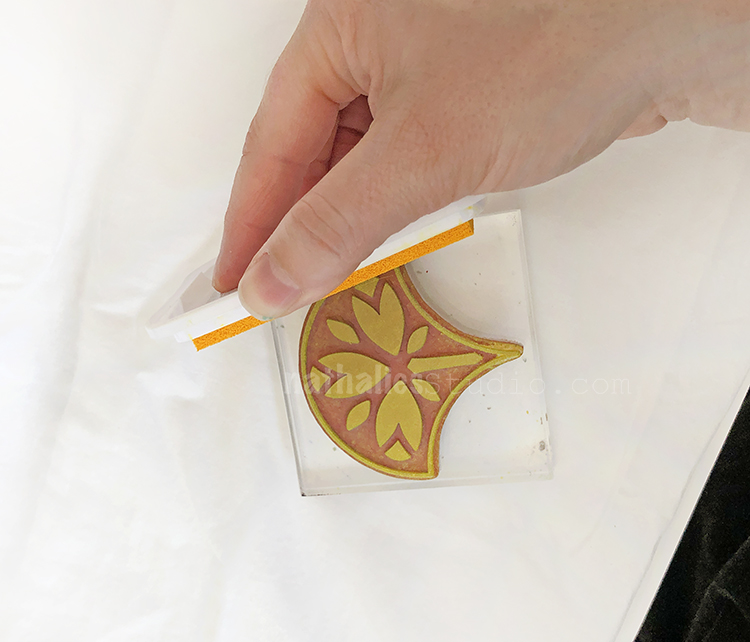
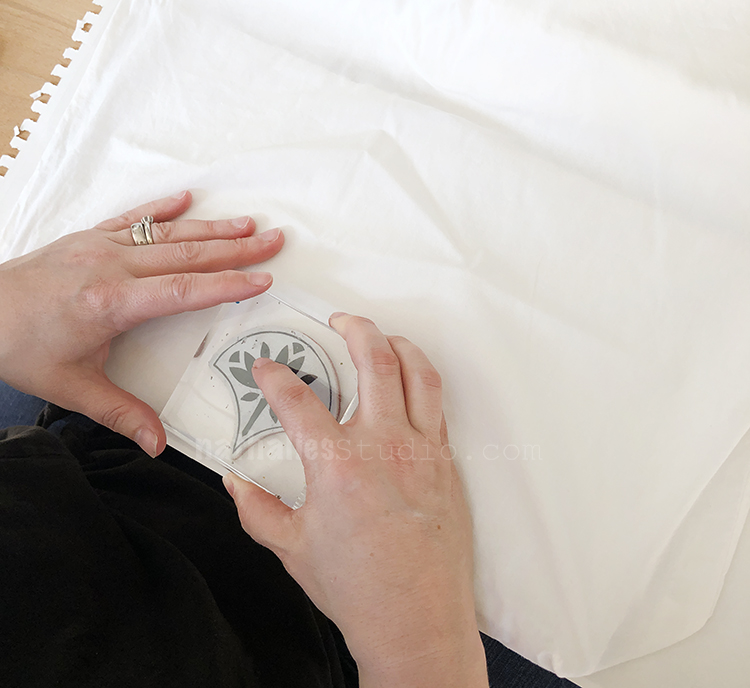
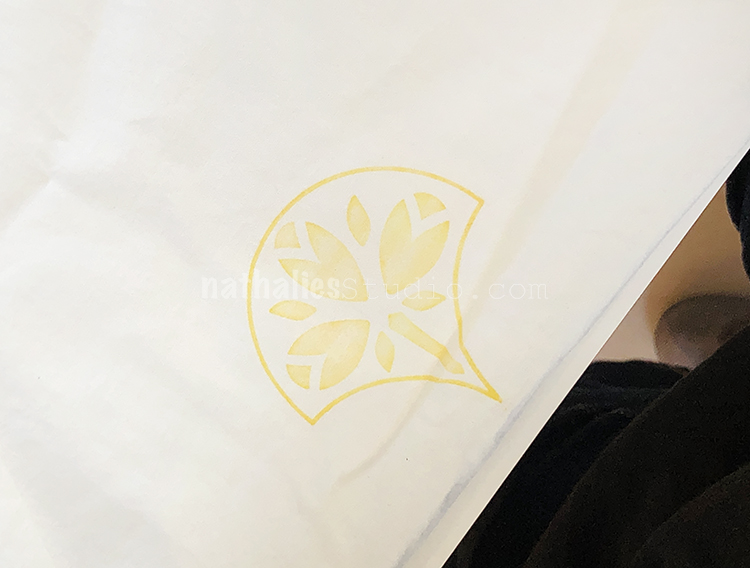
What do you get when you combine plain fabric scarves with stencils and fabric markers? Beautiful watercolor-like patterns and a one-of-a-kind wardrobe staple. This is an easy project with just a few supplies. See the instructions here.


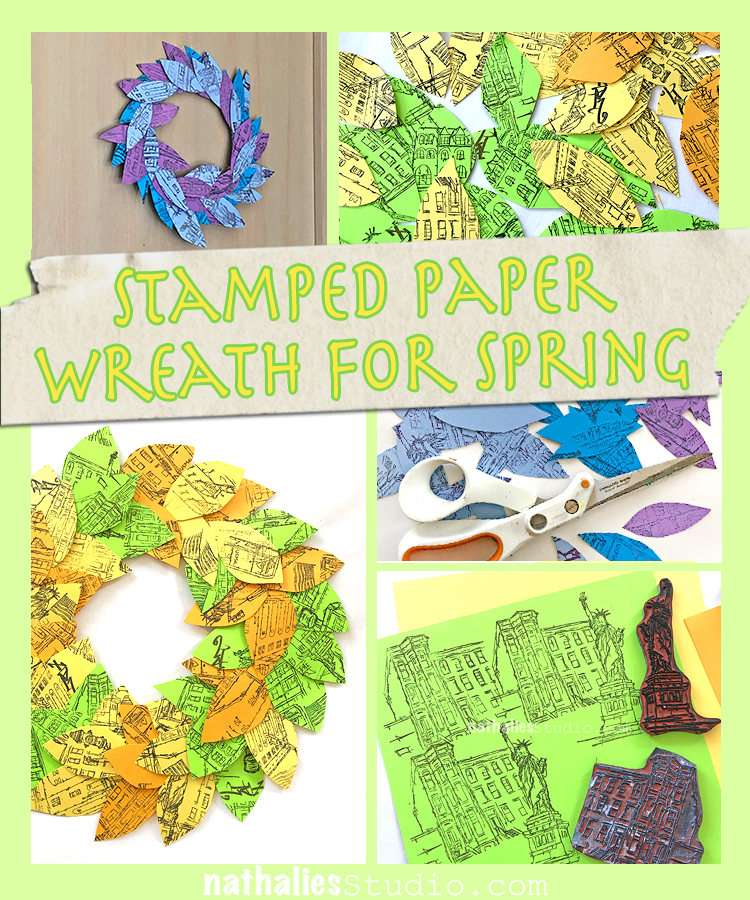
Here is a spring project that the whole family can do together. I used colorful paper and rubber stamps to make the “leaves” and then glued them to a cardboard ring that I cut from an old box. Read all about it here.

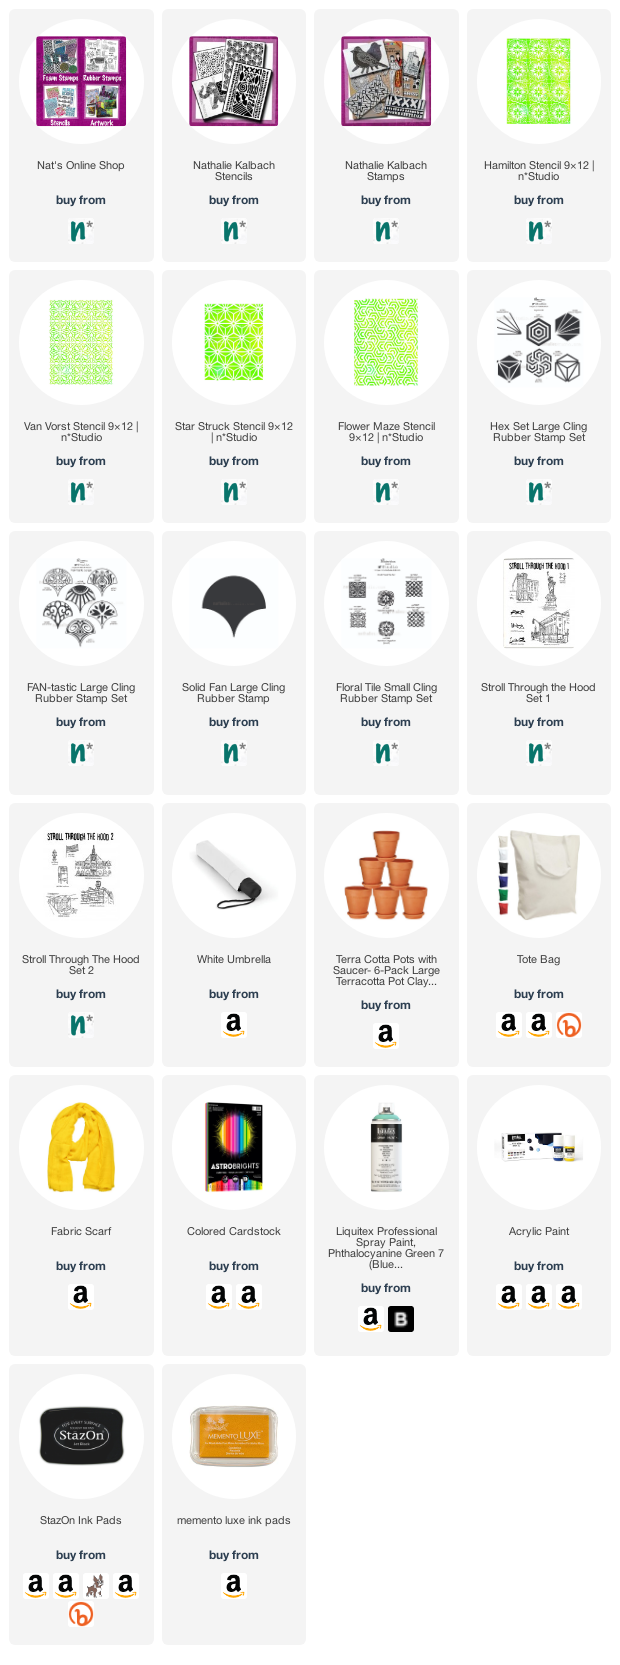
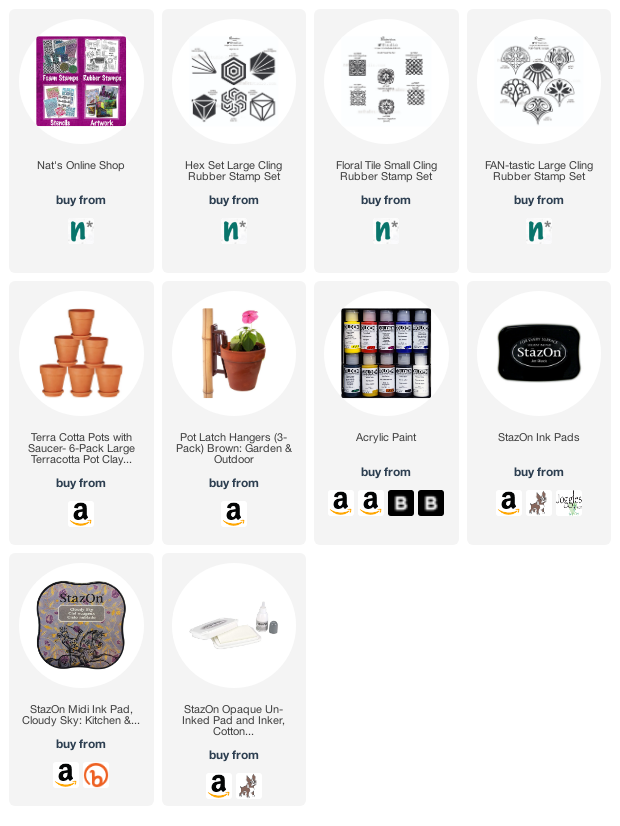
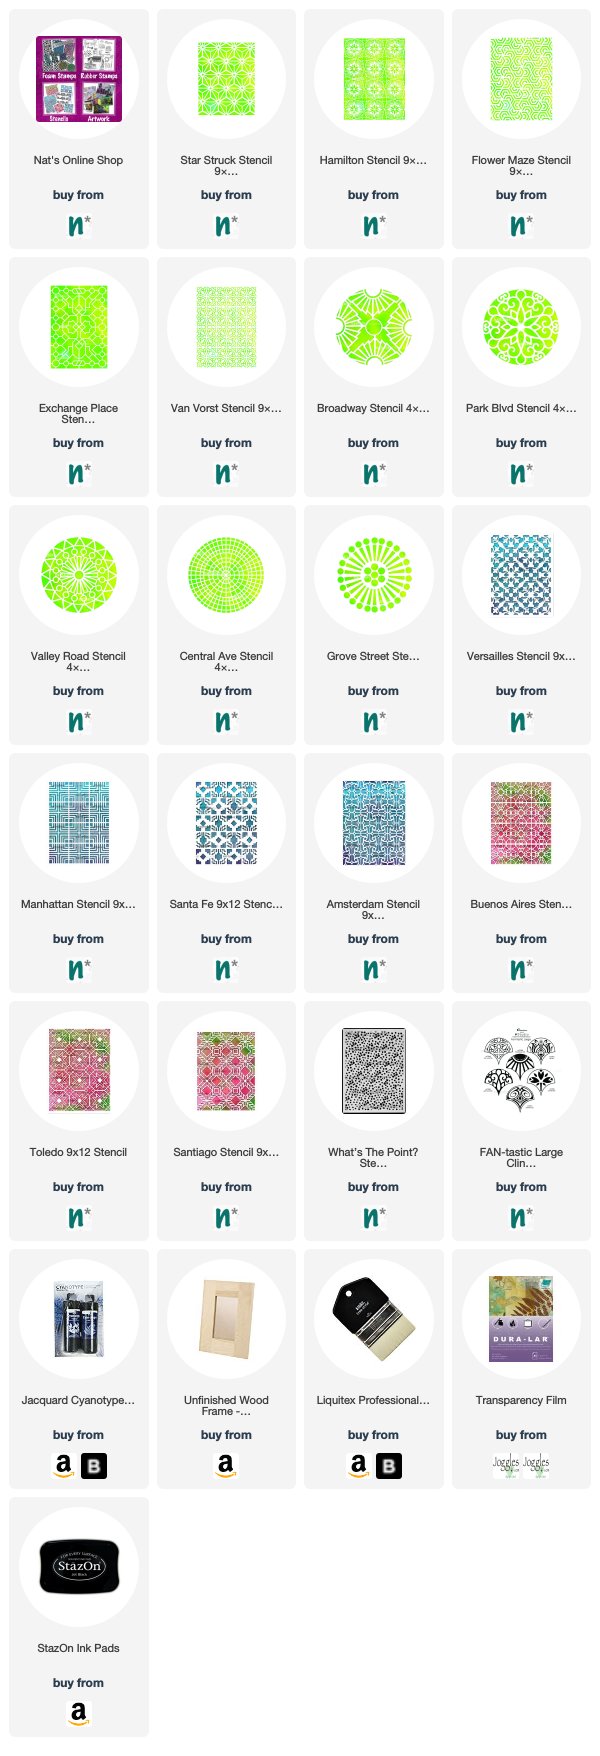
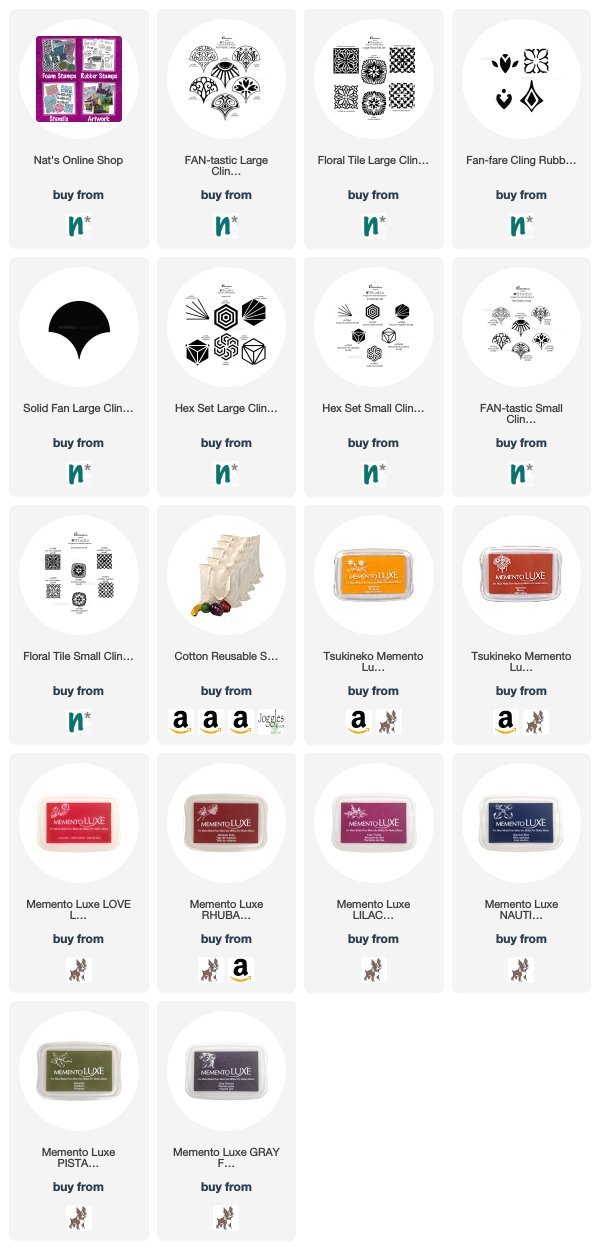
I hope this list of Spring DIY Ideas inspires you to try some new things and get creative. Here are some of the supplies I used:

Leave a comment

A Look Back – Cool Stuff You May Have Missed 21 – Fall Play Dates

A Look Back – This time I’m looking at some fun fall play dates that Kim and I had back when we could get together in person and play with my stamps and stencils. Some of these are very seasonal (pumpkins) and others are just nice ideas for when you need an indoor activity to do. Read on and I hope you try some of these project ideas too!

A Look Back is a blog series to show you some projects and posts that you may have missed – sometimes going WAY back in the archive. I think it will be fun to revisit a few ideas that we haven’t seen for a while. I’m excited to see how a little look back might inspire something new in the future :)


This project was a great way to decorate pumpkins without getting out the carving knife and spreading gourd guts all over your kitchen LOL. We used my stencils and acrylic paint and came away with some very cool decor. Check it out here.


Here is a project that you can pull together with all those collage papers and deli papers you have in your stash. We gussied some of ours up with my foam stamps and acrylic paint and then cut out simple leaf shapes for a wall hanging. This is an easy fall project for all ages and abilities. Check it out here.


Has colder weather and shorter days got you thinking about indoor activities, curled up in front of a fireplace? Embroidery is an ideal activity if you just want to relax and chill. We used my Stroll Around the Block and Stroll Through the Hood 1 and 2 rubber stamps as a guide for our colorful stitched projects seen here in this post.


Thinking about sprucing up your decor while spending more time at home? We used my foam stamps and fabric ink to create modern pillow covers for our living rooms here in this play date post.


Your Thanksgiving table may be a little smaller this year but it doesn’t have to be any less Instagram worthy – check out these napkin rings we created using my stencils and pan pastels for a one-of-a-kind holiday tablescape.


I hope you enjoyed this look back and are inspired to try a few of these craft ideas.

Here are some of the supplies we used:

Leave a comment

DIY Vertical Garden – Stamped Flower Pots

This project has been a long time in the making – I began during the renovation of my house last year and then put it all on hold until this spring. Anyway, I’m happy to share with you my DIY vertical garden that I made with simple terra cotta flower pots, some acrylic paint, my rubber stamps, and stazon inks.

Here’s how I did it:

I painted a bunch of pots on the outside with a colorful array of acrylic paint. I know these may not last forever, but I am happy to enjoy them for definitely a few seasons :)

Can you tell I like happy colors lol

Then I went for rubber stamps that would work well around the rim. Here is one from my Hex Set Large set – and that set has 6 stamps that would work perfectly for this. I used Stazon inks.

Here is one of the stamps from my Floral Tile Small set in action – another great stamp set option for making a group of pots with an array of designs.

I created quite a few in a variety of colors and patterns.

I installed the pots on the fence in our back garden. The fence is old and a bit shabby and a new one is not in the budget right now, but until it is – here is a nice pop of color. I used some nifty brackets to hang the pots – see the link in the supplies below.

I got a variety of different flowers in a mix of colors to fill them.

Like these! I got a flat from a local plant shop that created a mobile plant store in a truck that they drove all over the city, selling plants, while we were being careful during the lockdown. Pretty cool way to support a local small business!

Ta-da! My colorful vertical garden :)

And a view of our happy oasis. I love spending time back here with hubby at the end of each day. 

Are you planting anything this year?

Here are some of the supplies I used for this fun project:

Comments (2)

  • Sue Clarke

    |

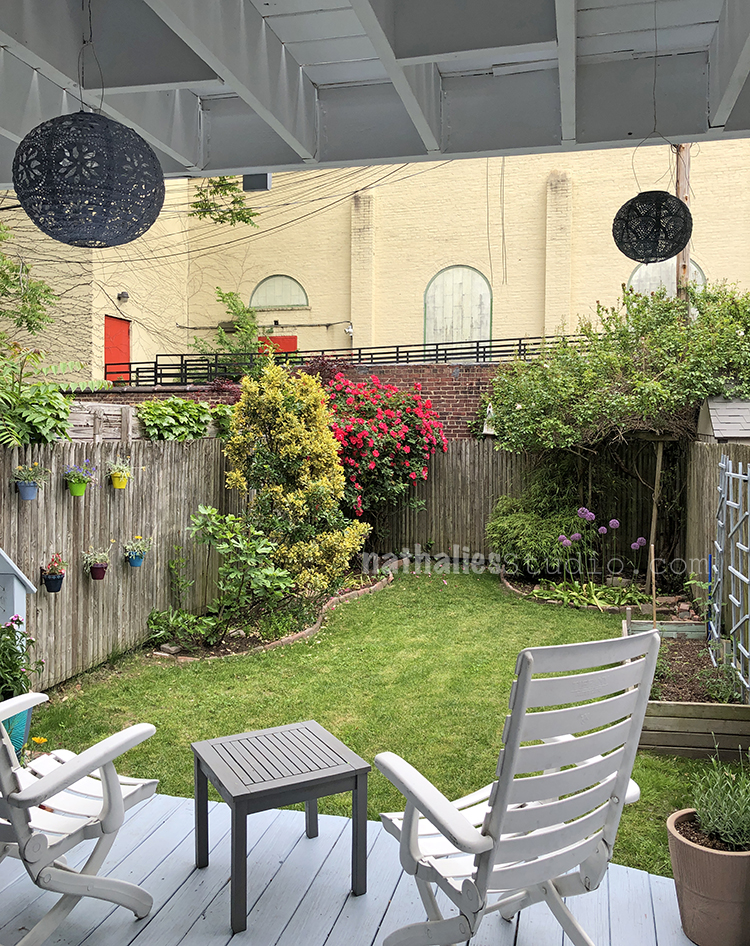
    So bright and cheery Nat. That’s a nice oasis you have there!

    Reply

Leave a comment

Layered Stencil Holiday Cards – DIY Play Date

Last week Kim and I got together to make some holiday cards based on this snowflake card I made for my Deck of Cards Challenge – Kim was really excited about playing with the process. It is so simple and easy and wow does it make some gorgeous cards. We made a stack of layered stencil cards – snowflake inspired designs, patterns that reminded us of stars, and just festive layers of color and shape that would bring joy to the season.

All you need is: blank cards, stencils with a radial pattern, Distress Inks, ink blending tools, masking tape, and some pens or markers to finish them off.

We began applying the Distress ink through a stencil, held in place with masking tape, onto the front of a blank card. Here is my Valley Road stencil.

This one we blended out the color – the inks work really well for blending – and kept the design a single layer. I would later add a top to the design as if it were a tree ornament.

But the real magic happens when you start building up layers of color and pattern. Here is my Toledo stencil as a first layer in blue.

Then we rotated the stencil and added another layer in green. Be sure to have several different ink blending pads for different colors – so you do not contaminate the colors.

The resulting layers of color and pattern have a softness that is quite lovely. Here I added in some extra sparkle and lettering with a fine point pen.

In this way, layering up different stencils with different colors, we created some beautiful holiday cards.

Sometimes we used larger stencils like my Manhattan stencil here, and only stenciled a small part of them.

Here we taped off a part of my Star Struck stencil.

We found that about 3 layers of pattern and color gave us the most successful designs. We also played with the color wheel – the above cards use all warm colors, just perfect for a star.

The above card was made by layering up my Valley Road, Flower Maze, and Grove Street stencils. To really push the snow element, we added my What’s the Point stencil for the dots.

We hope you give this technique a try – get some stencils and ink and try layering up some designs. You will love the results!

Here are some of the supplies we used for these cards:


Have you stopped by my shop yet for my Five Day Frenzy Sale? You can save 25% off ALL physical products – my biggest sale of the year! It’s a great way to take part in Small Business Saturday – we appreciate your support :) Just use the coupon code FRENZYFIVE at checkout to save. Enjoy!

Leave a comment

Grungy Cards – DIY

I thought I would make a few cards using a monoprinting technique with my new Mixed Media Chips.

On a gelli plate I rolled out some acrylic paint with the Midtown 1 and Midtown 2 chips.

Then I printed directly onto blank cards. To attach the chip, I used Coccoina glue stick. I always loved this glue stick- smells a bit like almonds and I am so happy that I found it now also available in the states. It is great for paper and thin paper embellishments.

In addition to my nice and grungy monoprint I also stamped part of the My Home rubber stamp on this one.

This one I snuck in my Love Knots stamp for the xxxooo.

And this one got really yummy grungy and then I also added my Love Tag stamp. I’m really happy with how they turned out, especially with the addition of the painted Mixed Media Chips.

Here are some of the supplies I used:


Leave a comment

Cyanotype & Stencils – Play Date

This was such an interesting and exciting play date with Kim – so excited to share it with you today! I have wanted to try cyanotype (aka Sun Printing) for a long time and we finally did. Now this did require some prep ahead of time, and it definitely is an active process, but the results are very cool.

I purchased a cyanotype kit on amazon (link below) that was a 2 part mixture. You can find the chemicals a lot of places, just be sure to follow the directions on the packaging. My kit required some prep 24 hours before we did the actual “printing”. As for supplies, we used the cyanotype kit, large paddle brushes, gunked up stencils (YES – this is one argument for not cleaning them lol), and a surface to print on. We chose wood frames, some fabric, and watercolor paper. Following the directions of our kit, we painted the surface with the mixture in a dimly lit room and let them dry. Ours worked best when we allowed them to fully dry.

Then it is time to head outside on a nice sunny day. We first did the frames. Here you can see 2 frames covered with an array of stencils. If it is windy you will need to weigh the stencils down.

Here is my Santiago stencil on the frame, catching the sunlight. Our mixture was a greenish yellow when it went on and slowly turned to a bronze color when it had been exposed to enough light.

And here is my Toledo stencil on a frame.

When they have exposed enough, you race them inside and rinse them until the water turns clear. The covered areas will wash away to reveal the wood color and the areas exposed to sunlight will begin to turn a beautiful blue.

Over the next few hours they will cure to full color and look just gorgeous!

Stencils with thicker lines worked a bit better and we learned that it is safer to weigh the stencil down in case wind picks up.

I just love the variety you can get and it all just works together because of that wonderful blue.

We also tried fabric with stencils (Hamilton and Star Struck here) and leaves. Weigh everything down and try to find flat leaves so you get defined edges. The fabric and paper exposure was really quick – so have a plan and all your stencils and objects ready to immediately put down on the fabric when you bring it outside.

Here is some paper with leaves and grass – all of these blew in the wind very easily so we did not get a good print here. I would put rocks on them next time. The top paper had some stencils and rocks. Setting up multiple papers at once was a bit hectic as they started changing very fast. Make a plan, have plenty of extra material (stencils, leaves, rocks, etc) and expect to just roll with it.

The paper process was the same – rinse immediately after bringing inside. Here you see a print I made with my Buenos Aires and Versailles stencils getting a rinse.

We let them dry in the sun and you can see some interesting results.

Definitely something to play around with here.

After a bit, the blue really came out.

My Valley Road, Park Blvd, and Broadway stencils came out very crisp.

We rinsed and dried the fabric as well. Here you see some leaves, vines, and a peek of my Exchange Place stencil in the corner.

These were pretty unplanned compositions. It is worth getting familiar with the process and just playing at first. Kim and I are planning a second play date now that we know how it works and then we can better prepare for what we make in the end.

Regardless, it was really awesome to see the potential and beauty of cyanotype printing.

We are imagining all sorts of fabric and clothing projects :)

Another variation we did: stamping with my new rubber stamp sets and black stazon ink onto transparency film.

I stamped the film with my Fantastic Large stamps and then put it on top of a treated pillowcase… It blew off several times in the breeze hence the “double vision” look to the print.

But still a really cool idea for future cyano projects!

So as you can see there is so much potential to using this medium with your stamps and stencils. We are just getting started and will definitely share future adventures with you as well. Don’t be intimidated by the process – it isn’t that hard and the results can be sooooooo nice and surprising some times. I hope you give it a try!

Here are some of the supplies that we used:

Comments (3)

  • loopdlu

    |

    Love these! One tip is to place picture frame glass on top of the leaves/stencils/transparency/etc to hold everything down and in place.

    Reply

  • Rae Lynn

    |

    These turned out so cool! I love the blue!

    Reply

Leave a comment

Foam Stamped Pillow Play Date

A couple weeks ago Kim and I got together for a little home decor play date – stamped pillows. We used my newest foam stamps, some fabric ink pads, and white cotton pillow cases (we already had inserts). This was a pretty quick and easy way to refresh the living room.

Take the time to iron your pillow cases first. The stamping will look better if you’re working on a smooth fabric.

Slip something sturdy and smooth into the case before you stamp to prevent the ink from bleeding through to the other side. We used some styrofoam pieces I had laying around.

I made my own stencil out of transparency sheets for a sponged background. It’s hard to see in this photo, but it is a shape that is sort of classic mid century.

I filled in the shape with yellow ink, slowly building up the density of the color on the pillow case.

Then I went back in with gray ink and my Jazzed foam stamp. If you don’t want the edges of the foam stamp to print, press more lightly on the stamp. I like the added visual texture here and the authentic block print look.

I also stamped with my Groovy foam stamp – it connects really well with the Jazzed one to make a longer, continuous design.

I filled in some of the other areas with additional yellow shapes.

Kim stamped a subtle background pattern using a pale green ink and my Signals foam stamp.

Here’s the complete background.

Then she came back and stamped my Jazzed stamp over it using gray ink.

I began a second case using blue ink and the same hand made stencil.

I sponged in the abstract shapes.

And then I added the Far Out, Jazzed and Groovy stamps over the shapes.

Kim’s second case began with a background using my Mid Century Squared stamp.

She finished her second pillow with my Gnarly stamp again in gray. After the cases dry, follow your ink manufacturer’s instructions for setting the ink, end enjoy your new home decor!

Stamped pillow cases are a very quick way to spruce up your sofa.

My cases look great on our teal sofa.

I love how the yellow one compliments some of the books in the background.

And the blue one is definitely my favorite – I might make a second one in this color.

I planned it so they also work with some of my existing pillows.

I hope you try this project – just another way to use foam stamps and fabric inks. Here are the supplies we used:

Comments (2)

  • Sue Clarke

    |

    Love these! Nice way to add a new look for sure with just a fine new pillow with a groovy pattern.

    Reply

  • susan

    |

    oh, Nat, these are adorable! (i have used your elephant stamps to do pillows for a friend.) i love the block print look you got from the foam stamp mounts. now i know my next project!

    Reply

Leave a comment

Rubber Stamped Reusable Shopping Bags – DIY Play Date

After getting into making patterns with my rubber stamp sets, I knew I wanted to take that idea and use it on a couple fabric projects. Kim and I got together to put some of those lovely patterns to use on reusable shopping bags. Our neighborhood is getting rid of plastic bags in June so we wanted to be ready to shop with a unique tote or two.

The supplies couldn’t be simpler: white (pre-washed and pre-ironed) cotton tote bags, a selection of my rubber stamps, and ink pads that are for stamping on fabric. We used Tsukineko Momento Luxe inks – you can find the links for those below.

We both took a minute to page through the pattern book I made with all those Nat’s April Patterns. It has become a great source to go to for inspiration.

Before you begin stamping, put some cardboard or a magazine in between the layers of your bag so it doesn’t bleed through. Be careful of any creases or gaps or textures in this – it can show up in your stamping. It is best to find something smooth for in there.

I started with the Jewett stamp from my Fan-tastic Large set and inked it up in yellow. The fabric ink is kind of sticky and you have to be a bit fast and also thorough with the inking.

It is easiest to start your pattern in the center of the bag and then work your way out. That way it will be even left to right and you can decide how close to the edges you want to go.

The ink colors can be light in some cases and bolder in others.

After two layers of the Fan-tastic Jewett Fan, I switched to the Hamilton design from the Floral Tile Large set and started stamping in a magenta color.

Looks great already but needs something more…

I finished off the pattern with a stamp from the Fanfare set.

Kim jumped in with my Solid Fan in the large size to do a simple but cool scallop pattern.

She chose a lot of different fun colors – don’t forget to clean your stamps in between colors. Also, you can see that with the solid stamp, the texture of the cardboard insert shows a bit – not a bad effect but something to consider when choosing a liner.

Kim found another pattern in my book that she really liked. She chose three ink colors. And the pattern needed one stamp from the Small Hex set and the two Diamond Hex stamps from the Large Hex set.

She started with the red ink and then filled in with yellow.

Looks awesome! And shows you don’t have to cover the entire bag.

Kim’s bag and the pattern inspiration.

For my second bag I chose a pattern and decided to make it bigger. Tip: You will get a lot more done if you go with a larger stamp ;)

I began with the Space Oddity stamp from the Large Hex set, added a red Fan-fare stamp in the middle, and then I took a minute to choose my next stamp. More Fan-fare or the Broadway Fan from the Fan-tastic Small set?

I went with Broadway Fan :)

And here is the finished bag next to the inspiration.

Our bags included a little pocket pouch to fold the bag into for storage. We decided to stamp that too. Here I used the Fan-fare stamps and the Small Hex set.

Then you can store them like this.

They look pretty awesome! Remember to follow your ink instructions for setting the ink. Every fabric ink is different. These will need to be ironed to heat set the ink.

I’m ready for a plastic bag free Jersey City :)

Here are some of the supplies that we used:


Comments (2)

  • Gillian Callaghan

    |

    Thank you for sharing these ideas.

    Reply

  • Mary Cheng

    |

    This is fabulous!
    I sew Boomerang bags http://www.boomerangbags.org for our local community to make people aware of plastic bag issues in our environment.
    I think printing with your foamies will add an artistic touch to our bags! I will give it a go with the inks you mentioned. I do have some of you foamies and hope there is more at a local craft fair next week!
    Thank you Nathalie

    Reply

Leave a comment

Rubber Stamped Easter Bunny Cards – DIY Play Date

Hippity Hoppity :) Kim and I got together for a Play Date with some of my new Rubber Stamps for the upcoming Easter holiday. We had a nice morning stamping some Easter Bunny Cards for friends and family.

For supplies we had my new Floral Tile Large and Floral Tile Small stamp sets, blank cards, colorful ink pads, some bunny images we printed off the internet, a craft knife, and repositionable tape.

First we carefully cut out some rabbit shapes, leaving both the outside and inside intact. These became our stencils and masks.

We used Scrapbook Adhesives E-Z Dots to temporarily stick our stencil to the front of the card. I love this tape – it’s easy to apply, sticks well, and comes off easily too!

We stamped into our bunny “stencil” with stamps from my Floral Tile Small set – the scale is just perfect for tiling into small areas. Here I am using one of the Hamilton designs.

Kim began with one of the Van Vorst designs from the Floral Tile Small set.

I used both the Positive and Negative Hamilton stamps from the small set and filled in the entire bunny.

And here is the big bunny reveal! Now to fill in the rest…

Put a bit of repositionable tape onto the bunny mask and place on top of your stamped image.

Begin filling the area around the bunny. Here I decided to use the Hamilton stamps from the Floral Tile Large set.

It becomes quick work with the large size stamps.

Kim worked with the Van Vorst stamps from the Floral Tile Large set to fill in the area surrounding her masked off bunny.

Looks pretty awesome when it is all done!

I experimented with outlining the bunny too – there are a lot of ways you can take these cards to another level.

Another card beginning with the outside, using the Versailles Positive and Negative stamps from the Floral Tile Large set.

And another using the Versailles Positive and Negative stamps from the Floral Tile Small set.

A very sweet bunny in blue using the Van Vorst Positive and Negative stamps from the small set. This dense pattern worked really well to define the bunny shape.

Kim getting into it – so fun with a lot of different stamp pad colors to choose from!

In the end we made quite a few cards – some that are really wonderful!

I just love this one I made with 2 bunnies!

Kim made a sweet orange one…

So fun to play with different iterations!

And then I realized that the stamped bunny masks should not go to waste – they looked great on the cards too!

Last one :)

We hope you try some of these techniques with my new stamps. Try mixing up different colors, playing with the positive and negative designs, and work with both sizes. We had a blast and can’t wait to spread a little Easter cheer with our cards.

You can find my rubber stamps in my online shop. Here are some of the supplies that we used in this play date:


Don’t forget! Now is a great time to shop in my Online Store and use the coupon code SWEEPSALE to get 20%off all physical products. Hurry! The sale ends April 15th at 11:59pm EST.

Leave a comment