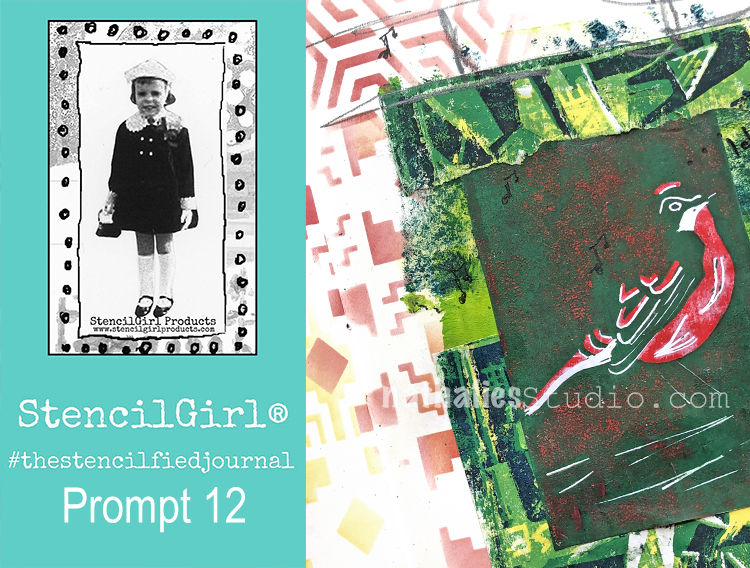
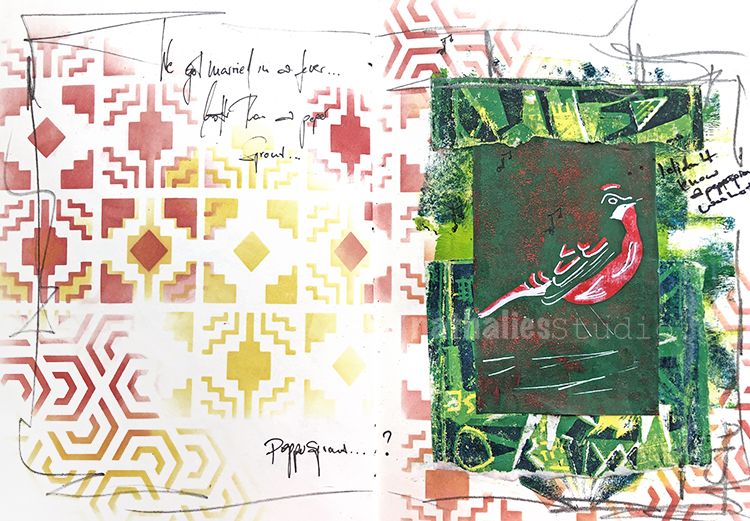
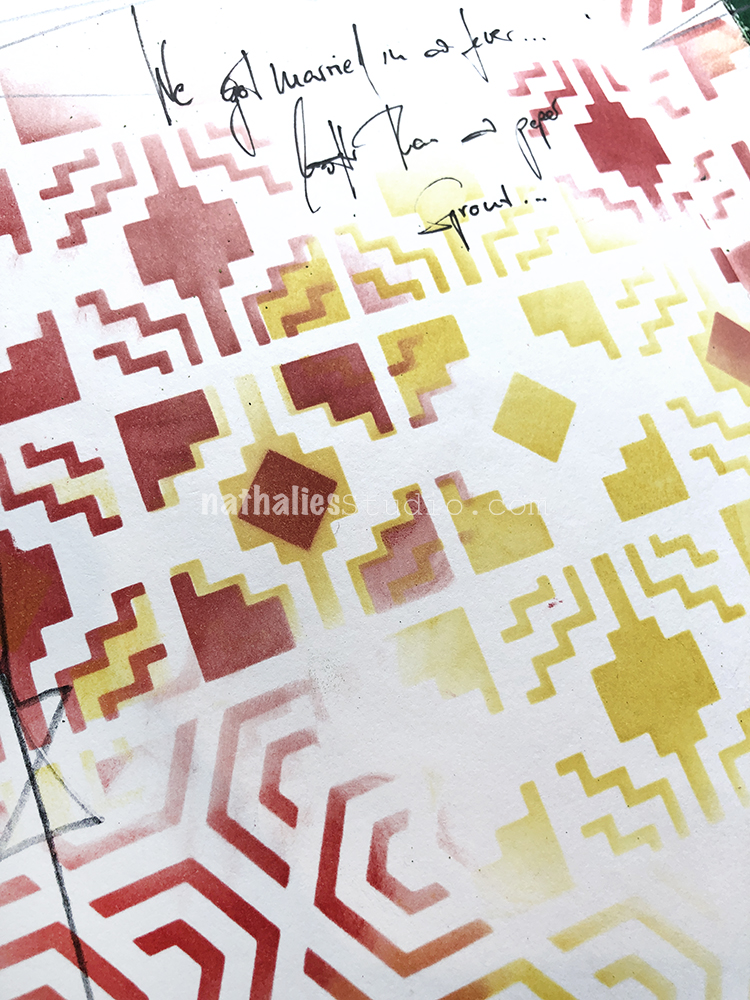
My wonderful friend Tina Walker is at it again – she invited several people to join her Stencilfied Prompts. The prompts are music related and each week she is posting a song. You can be inspired by the lyrics, the video, the album cover or anything related and the only restriction is that you have to use StencilGirl Product Stencils. Here is my take on Prompt 12
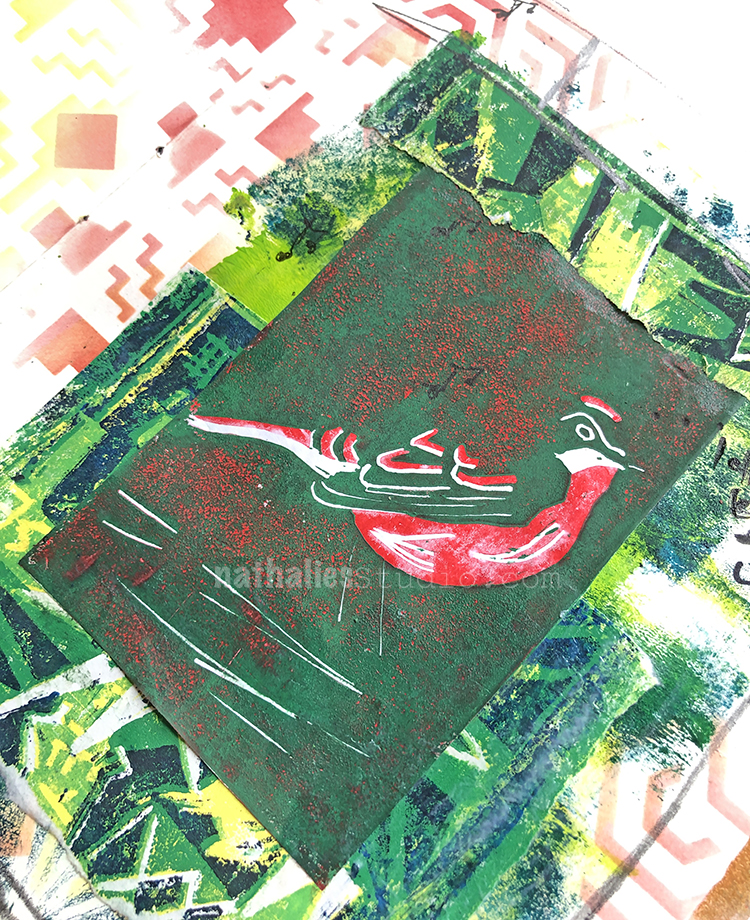
I used also some older prints of mine …because hey …do birds know that pepper sprouts are hot? LOL – Questions over questions …told you I am a weirdo ;)
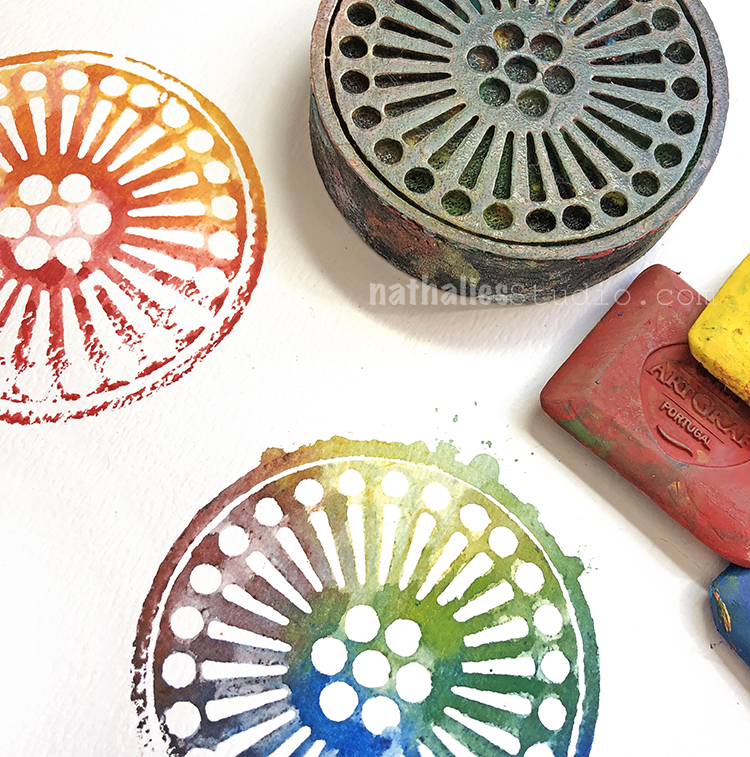
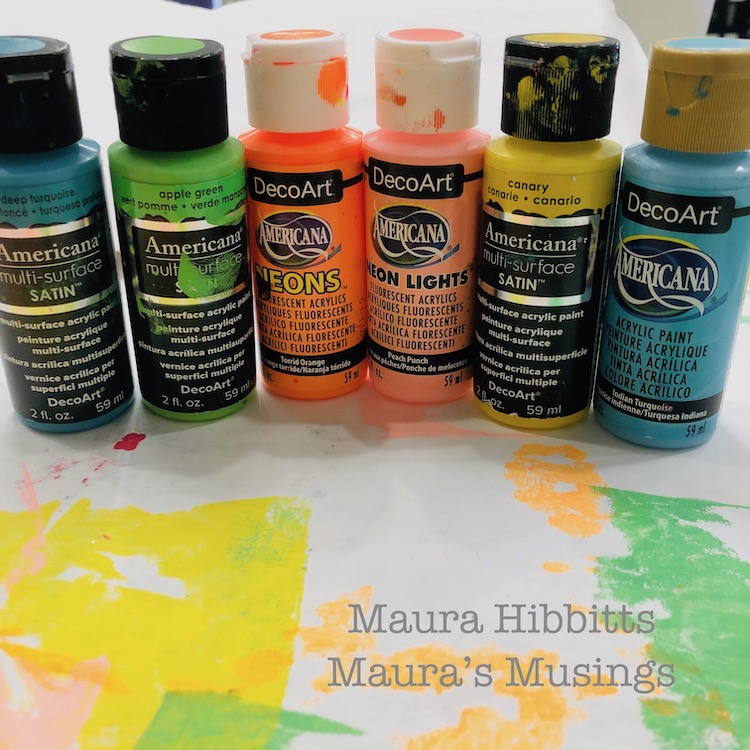
If you have taken a class with me in the past couple years, I have surely “forced” you to try ArtGrafs ;) No, seriously those little watercolor graphites are one of my favorite things to use with foam stamps.
Simply wet the foam stamp a little bit, rub the water-soluble graphite on top and stamp. You can use different colors and blend them as well. Take note that this doesn’t work with any graphite- it needs to be like this one water-soluble.
The ArtGrafs are so crazily pigmented that you can stamp several times, simply spritz some water in between on the foam stamp and check if you cannot get yet another wonderful image stamped off.
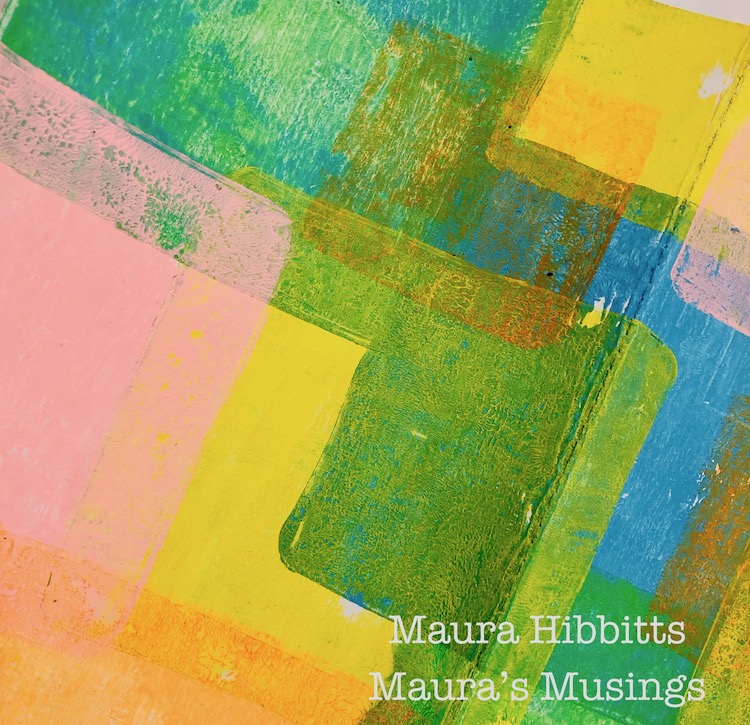
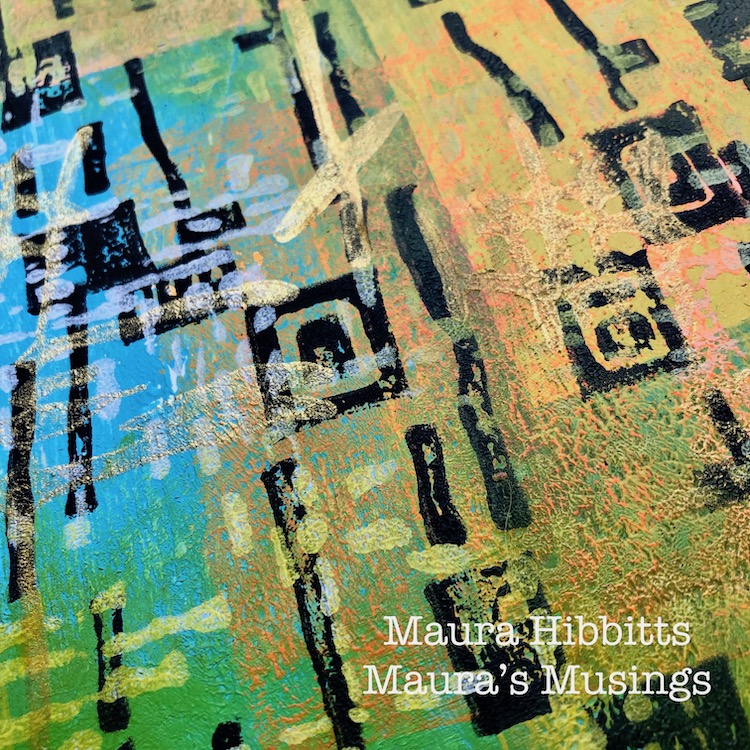
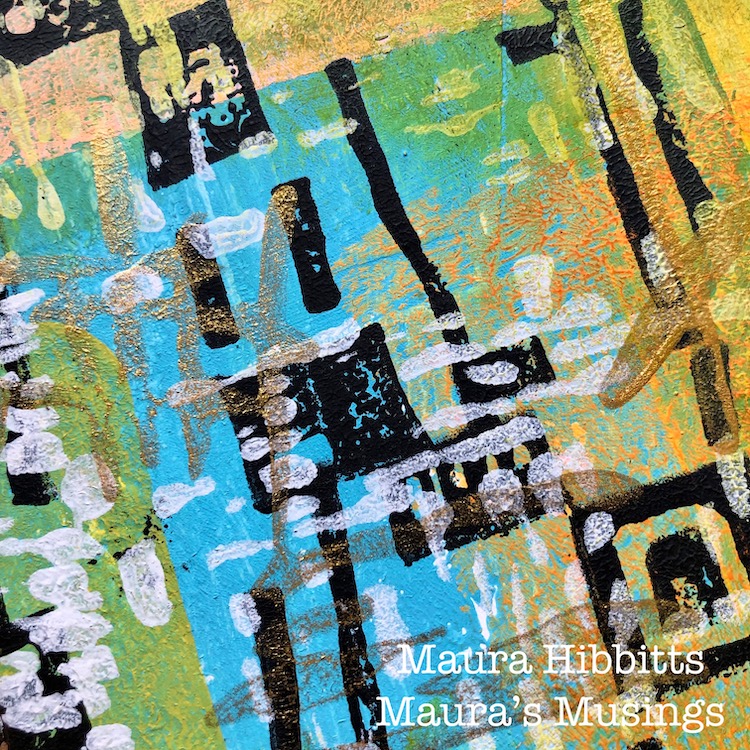
Day 30 – Watercolor
Oh Yes! You heard right – use your foam stamps with watercolor! For this I use a little trick:
I add my watercolor out of the tube on top of a gel plate and then add water and thin it down then press my stamp into the paint and stamp on paper.
The plate acts as a palette and inkpad and helps that the watercolor doesn’t dry too quick. For dry watercolor in pans, simply load your wet brush and watercolor and try to apply directly to your stamp. If that doesn’t work, try to add the paint first to the plate and then stamp into it. Trust me it is fun to try
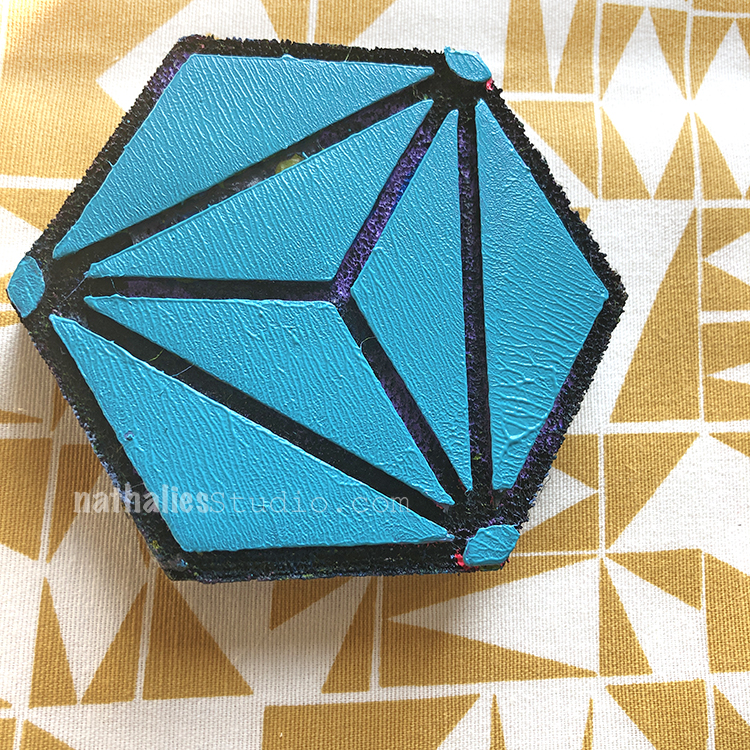
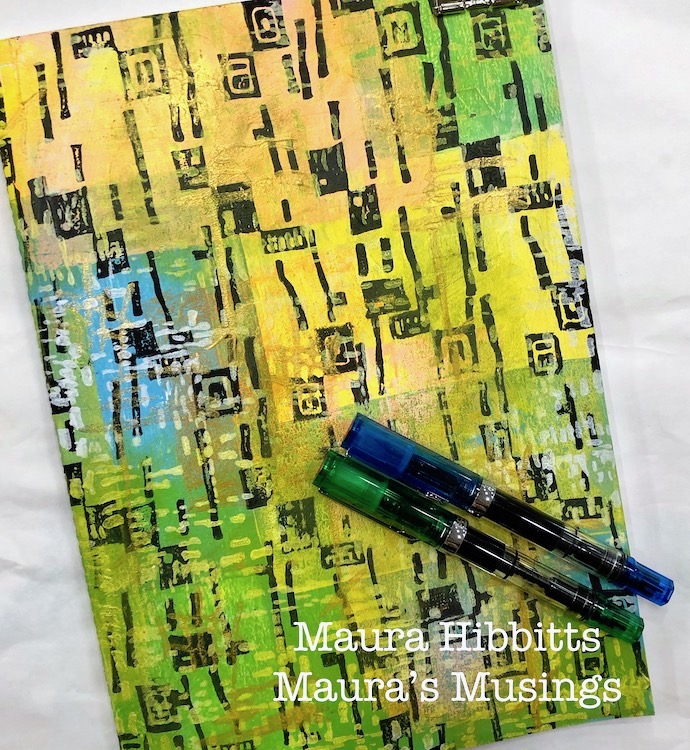
Day 31- Connect
There are many ways you can “connect” the prompts of the last days- either use several different techniques on one art journal spread, create layers, or like I did create an Art Journal. I bound my own art journal –based on my online workshop BYOAJ – Bind Your Own Art Journal.
For the cover I printed on some fabric and then I chose my favorite Foam Stamplifier pages and made them into signatures for my book. They will provide great starting prompts when I want to art journal and remind me of the different techniques.
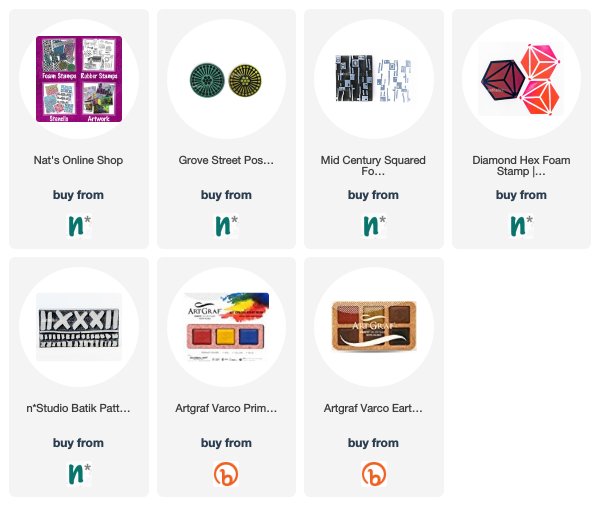
Here are the foam stamps I used for those prompts:
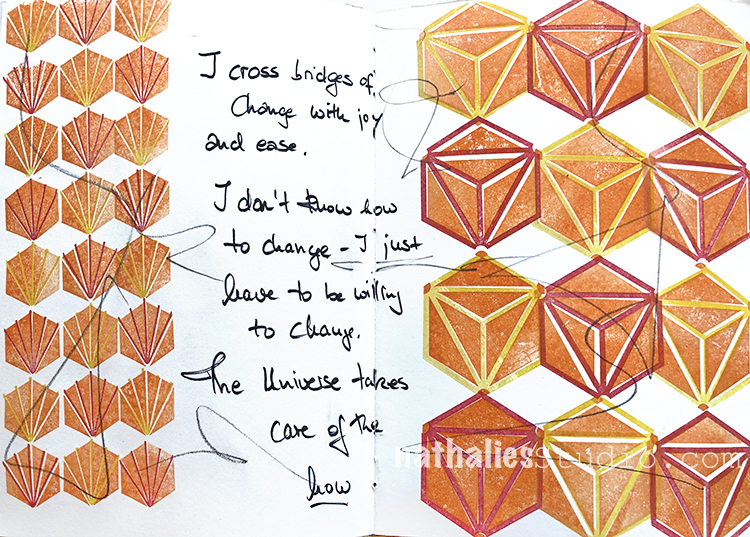
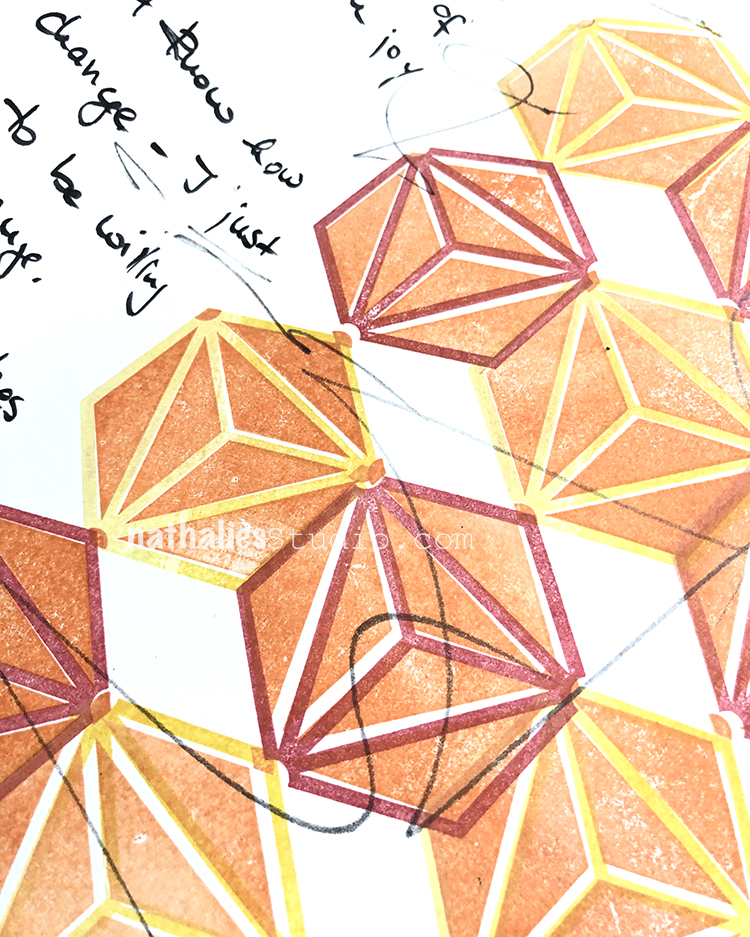
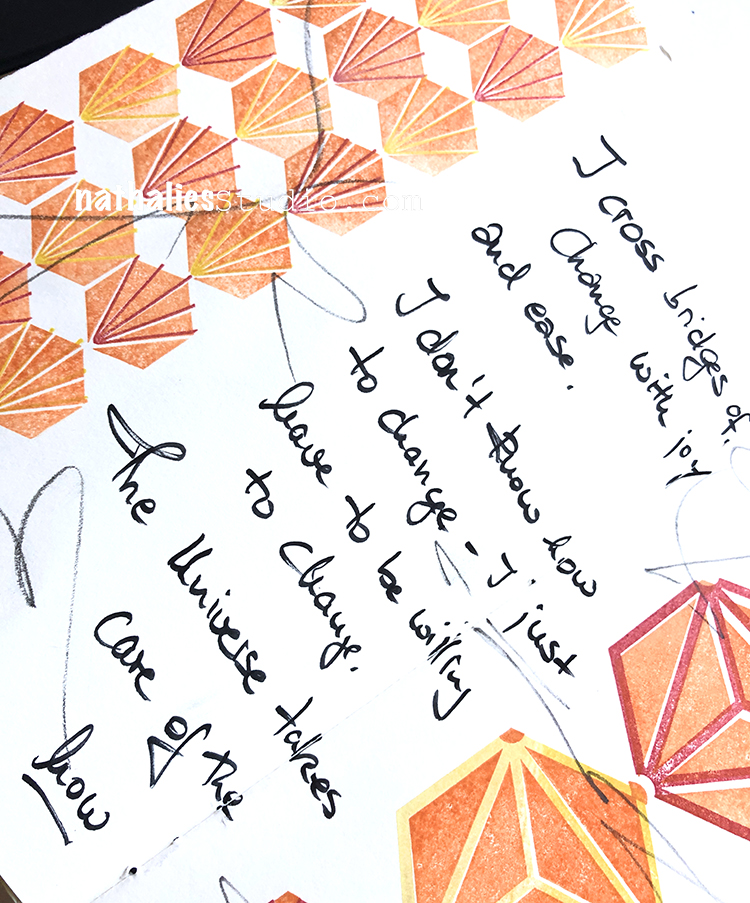
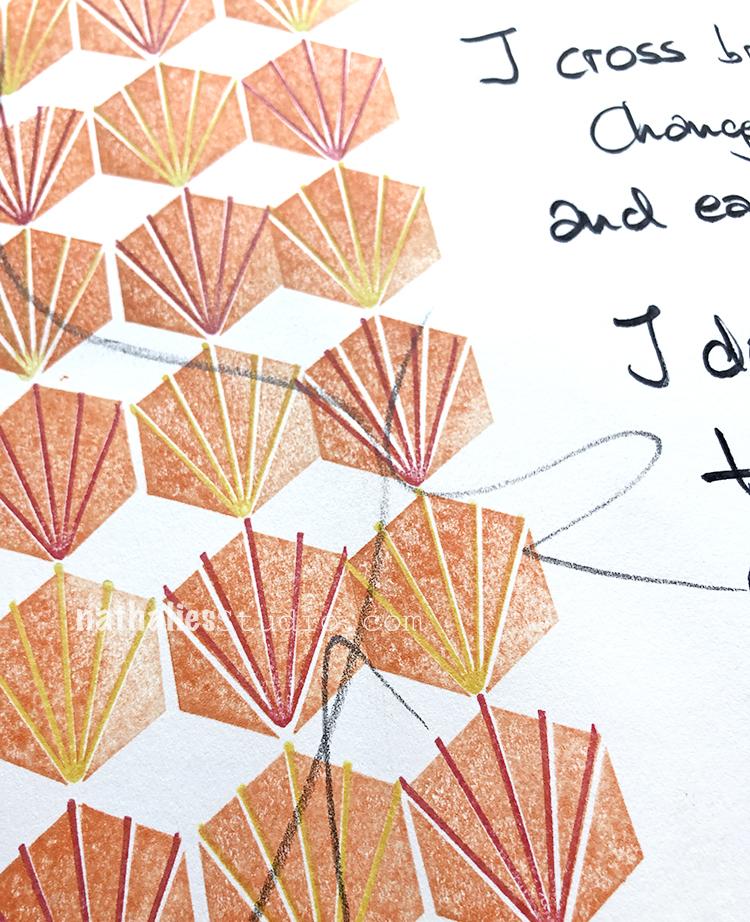
I saw this quote on instagram and I really liked it . “I cross bridges of change with joy and ease. I don’t know how to change – I just have to be willing to change. The Universe takes care of the how.”
Of course it is not always THAT easy- but I think I do like change and I have an instilled confidence in me that things will work out.
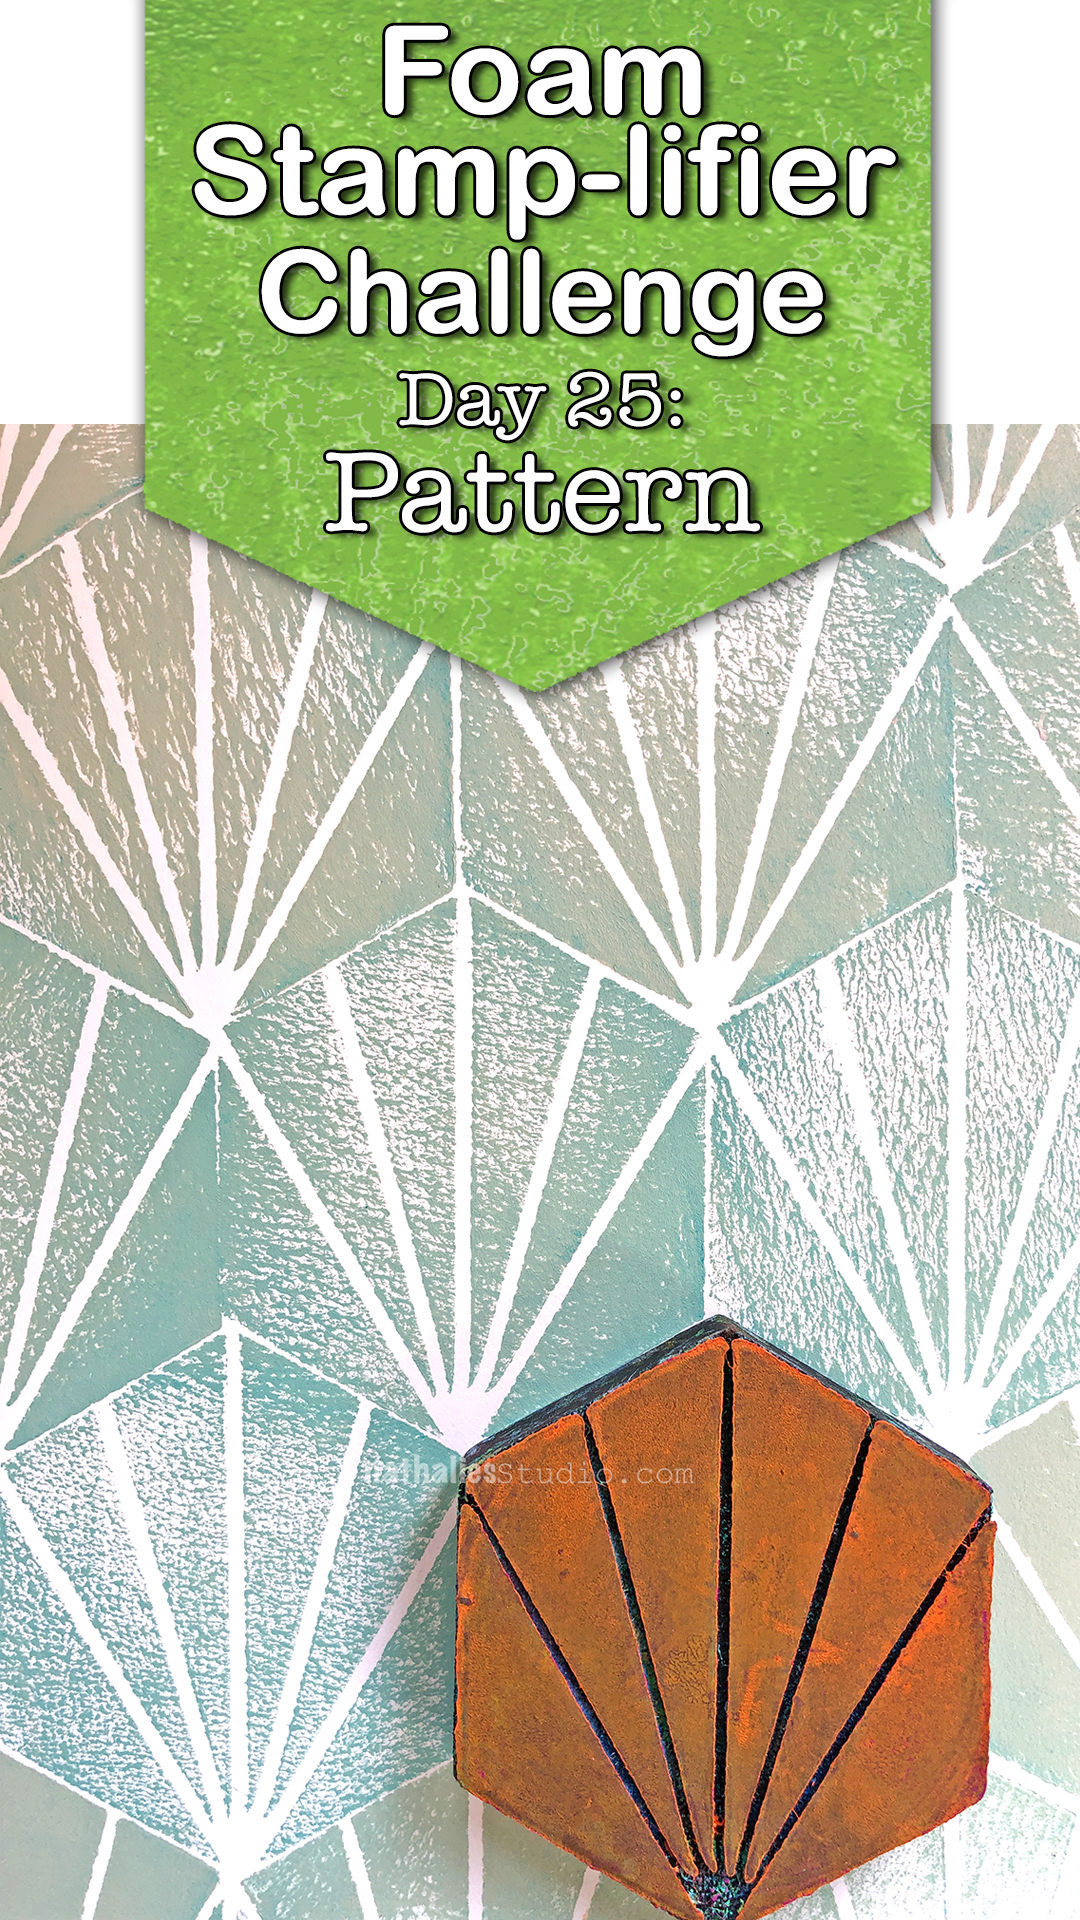
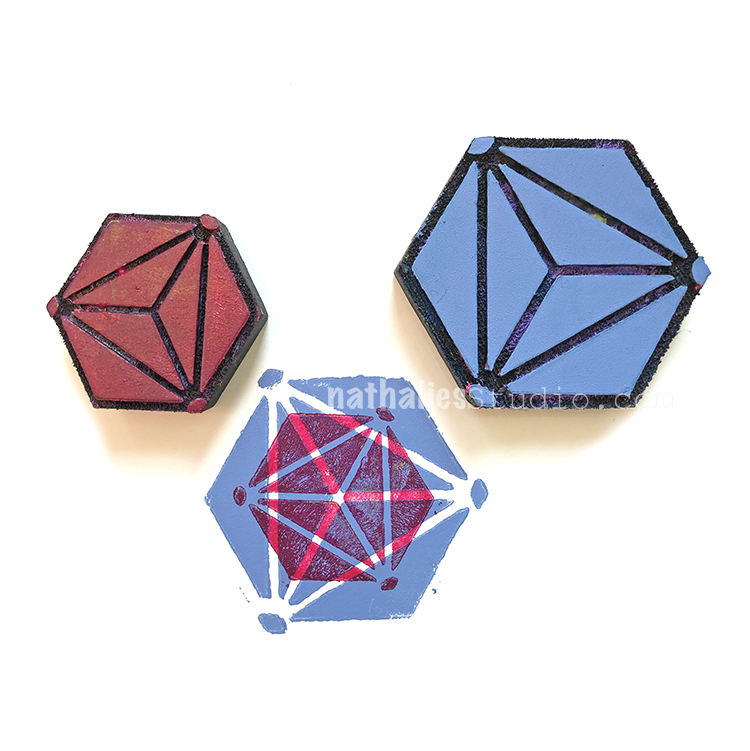
It is so much fun to create pattern with Foam Stamps- there are so many ways to use them to do that. Sometimes lining up the same stamp next to each other in different directions creates different patterns. Sometimes combining different foam stamps create a nice pattern cohesive pattern like my new mid century patterned foam stamps.
I also love creating tile patterns with my stamps and just thinking of the ways I can amplify one foam stamp and create different outcomes makes me all giddy.
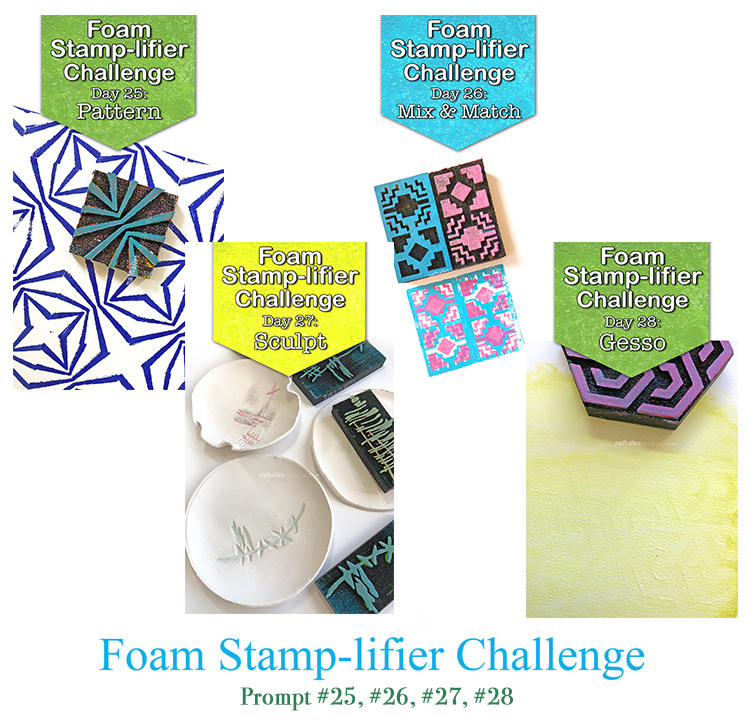
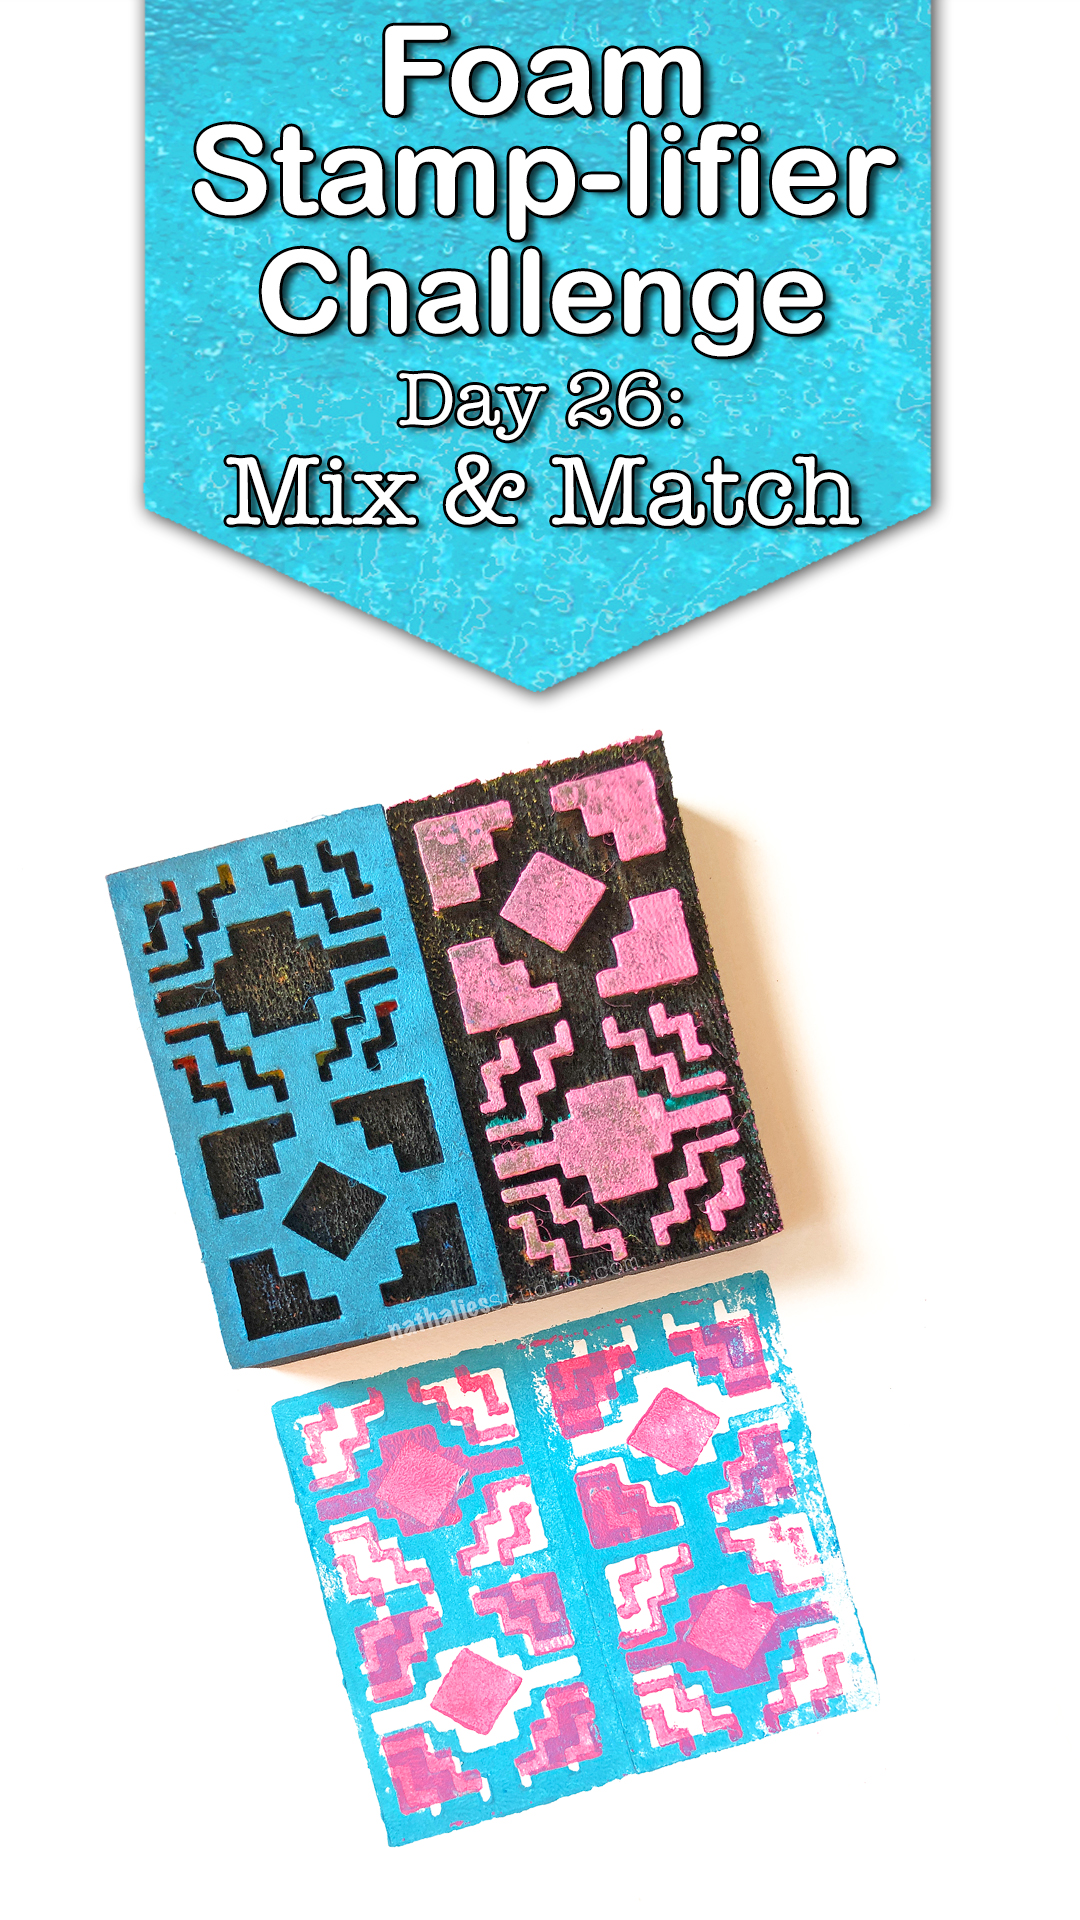
Day 26 – Mix & Match
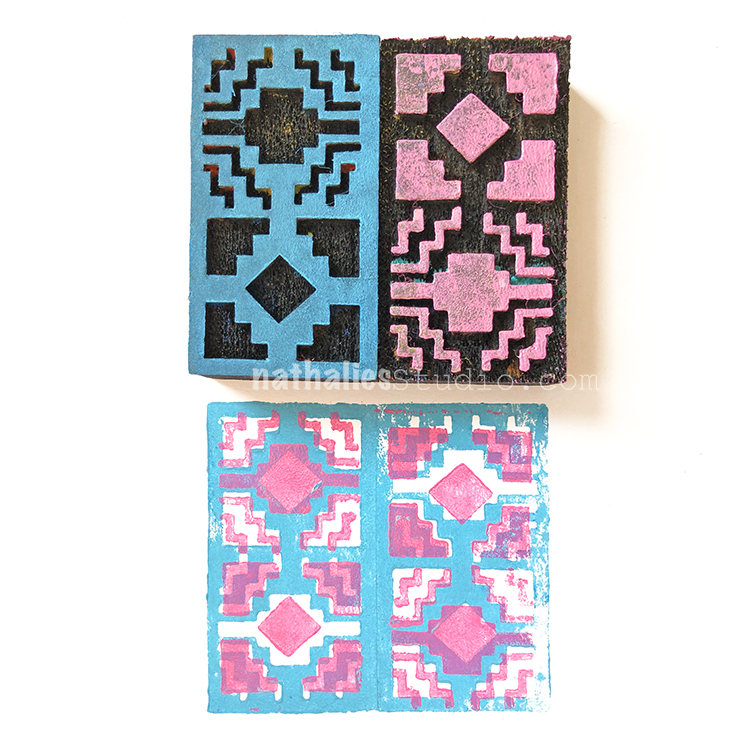
Another way to use the foam stamp is to layer different foam stamp patterns on top of each other.
I love to use the same pattern as a big and small pattern to layer on top of each other.
Or as you can see my Creative Squad member Tania created a really cool layered Holiday card by printing the Clam Hex Stamp next to each other and then layering the Circle Drive stamp in the middle – I just love what she did there.
Or sometimes just stamping the positive and negative stamps- like the Santa Fe stamp on top of each other by layering them in opposite directions will create a fun new layered design. Just play with it.
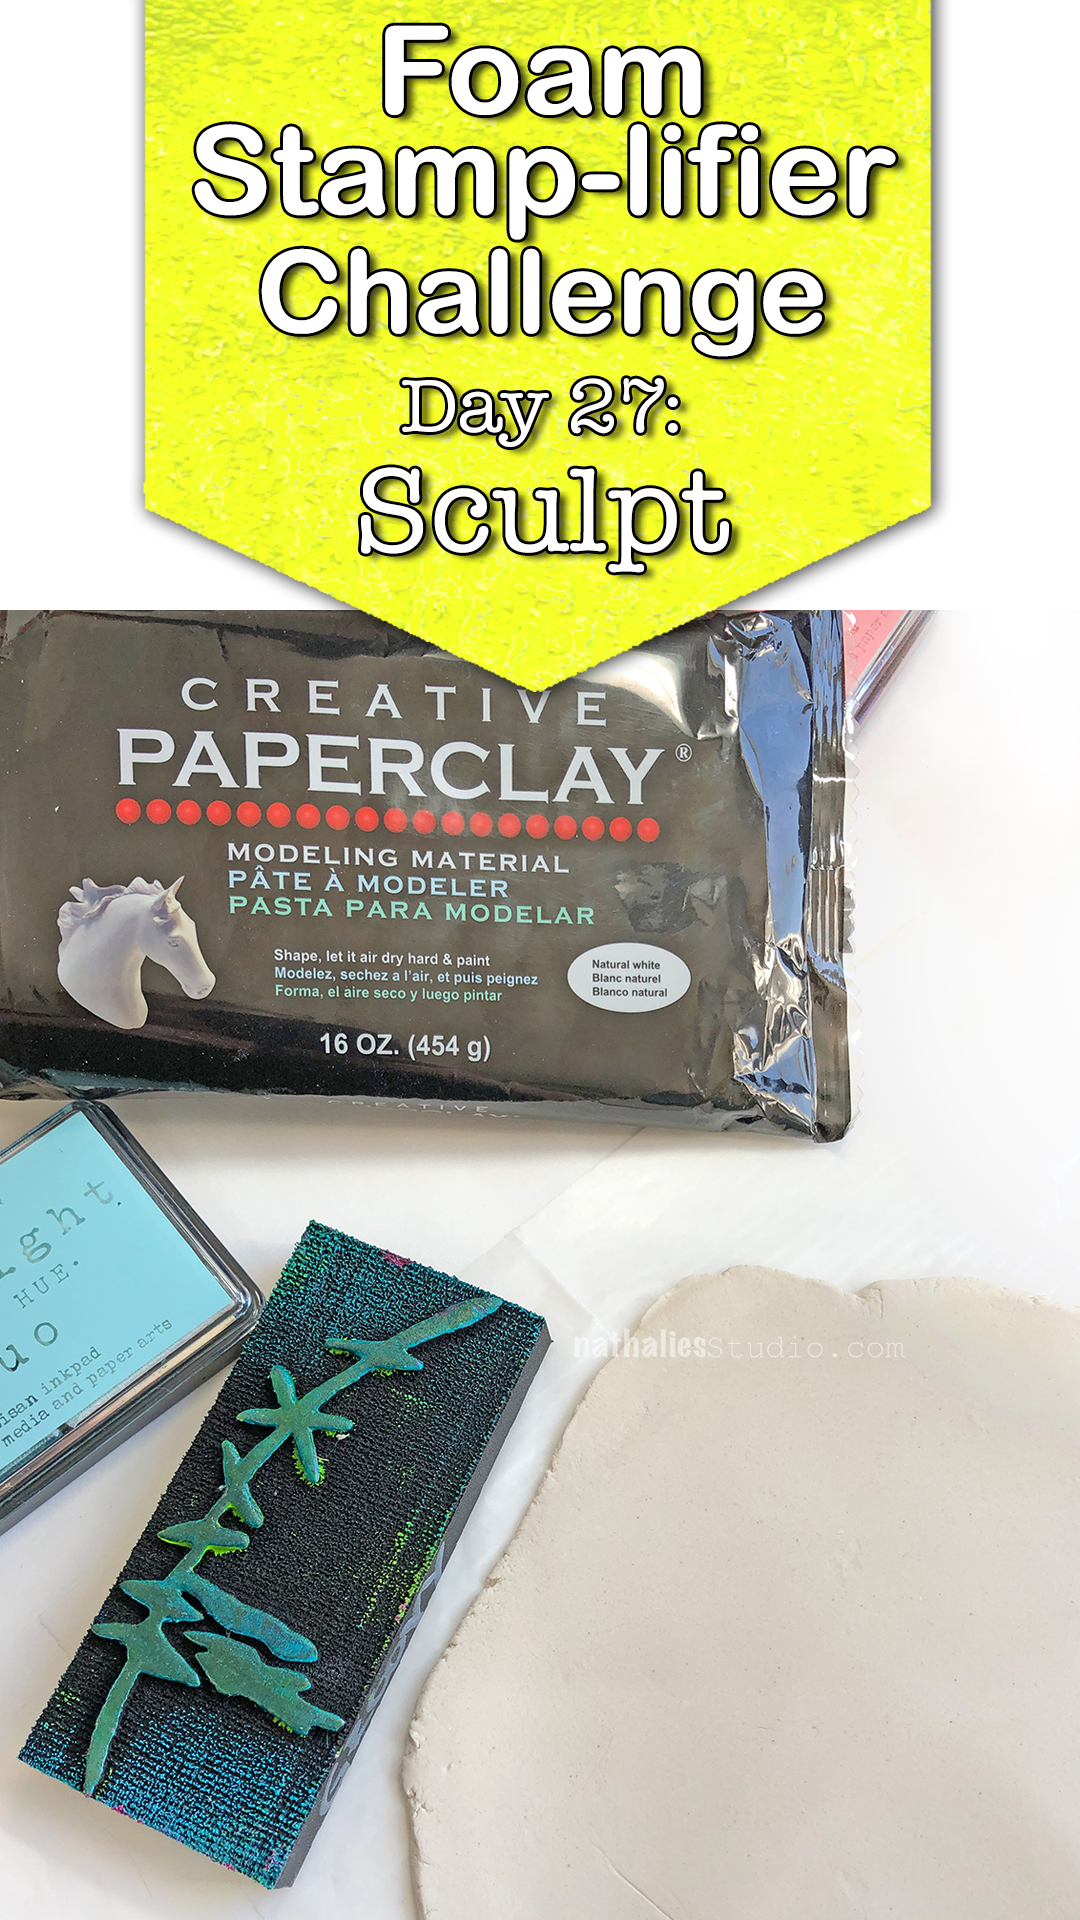
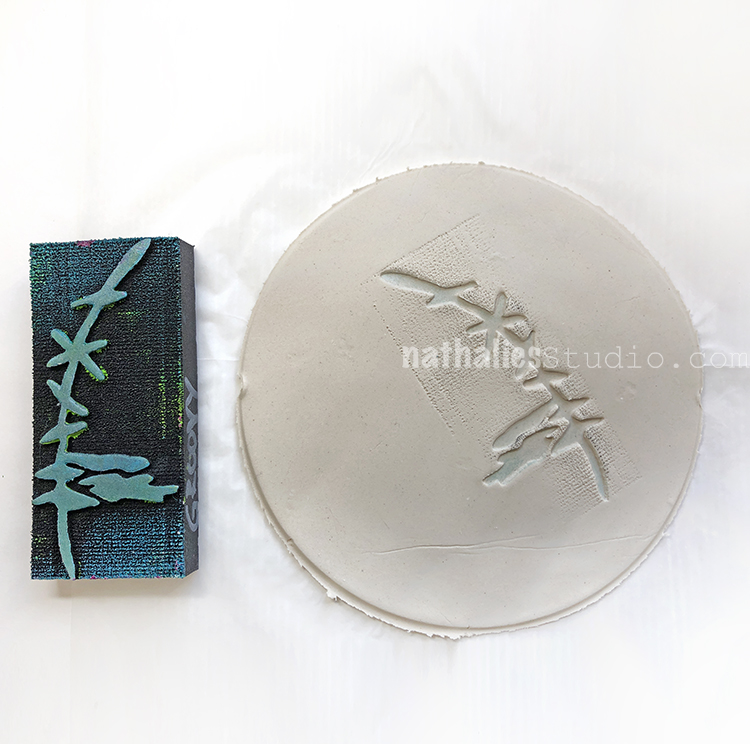
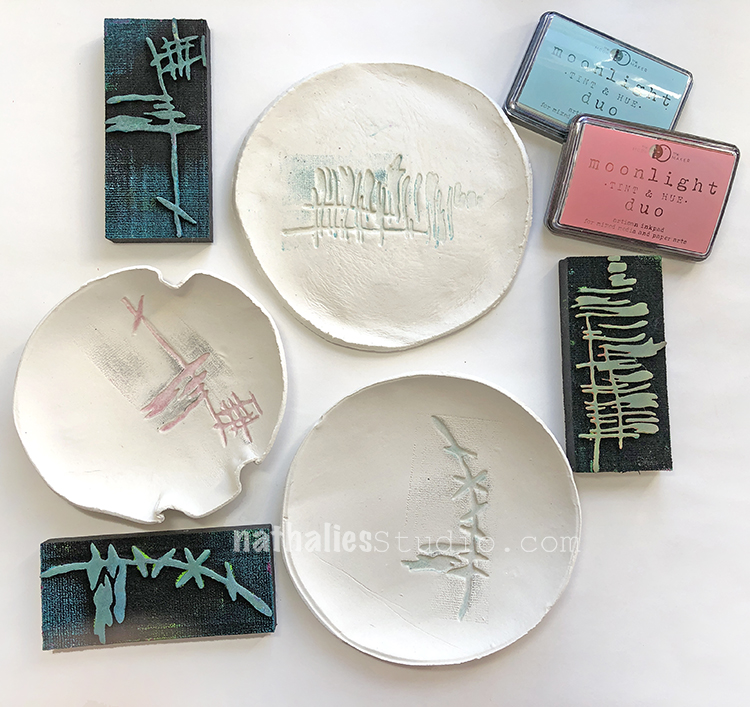
Day 27 – Sculpt
I love using my foam stamps when sculpting little plates or bowls with air-drying paper clay. I rolled out my paper clay as you would roll out dough, put a plate or bowl of my desired size on top and then cut the clay around the edges.
I then pressed my inked up foam stamps into the clay to create texture and pattern with a faint of color. For the bowl shapes, I put the clay disk into the bowl, shaped it to my liking and then let it dry overnight. I love these little pieces; they make great gifts and can be used to hold jewelry or other little tidbits.
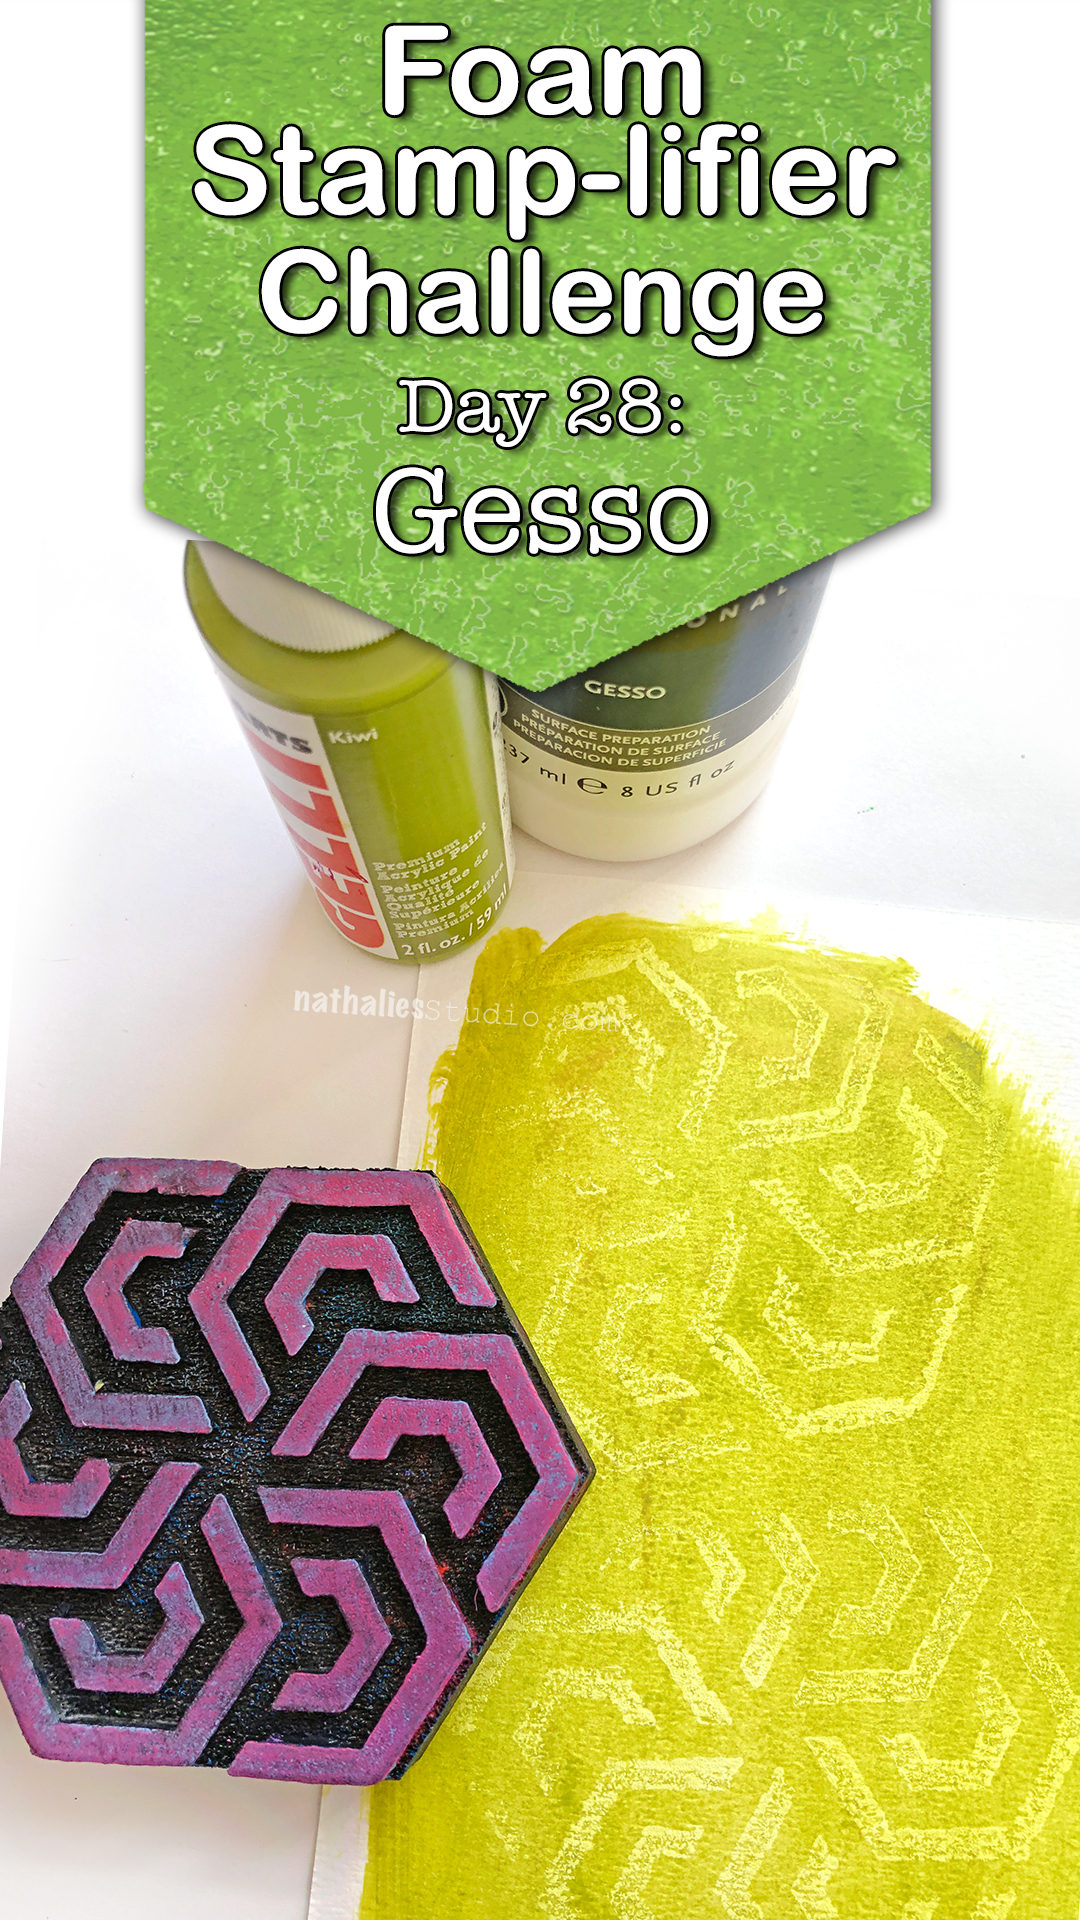
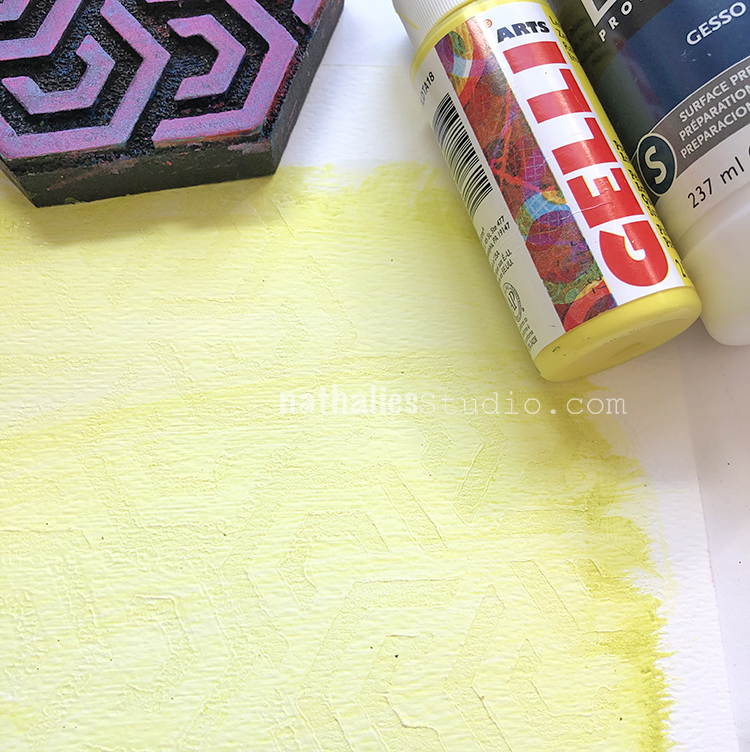
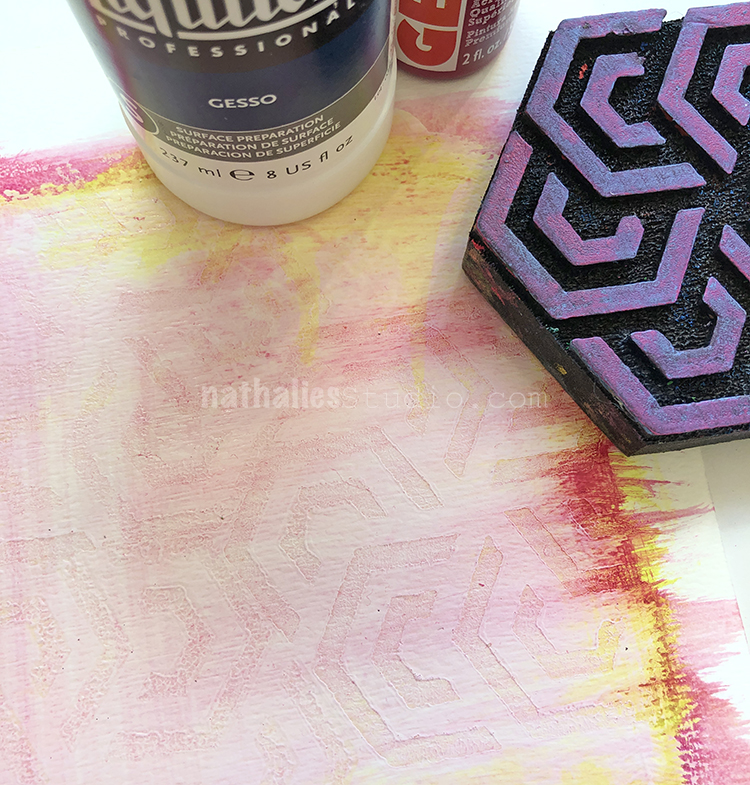
Day 28 – Gesso
Gesso is such an awesome medium. One of my favorite techniques with Gesso and foam stamps is to paint a layer with gesso, and then press the stamp into the gesso while the gesso is still wet.
Remove the gesso from the foam stamp after each print. Then let the imprinted surface dry. The magic starts when you add a thin layer of acrylic paint on top of the surface.
The paint gets more resisted on the raised gesso areas and accumulates in the grooves revealing the pattern and texture in a really beautiful way. Sometimes I let the paint dry and even add another different color – again needs to be fairly thinned down! – on top.
Here are the different foam stamps I used for these prompts
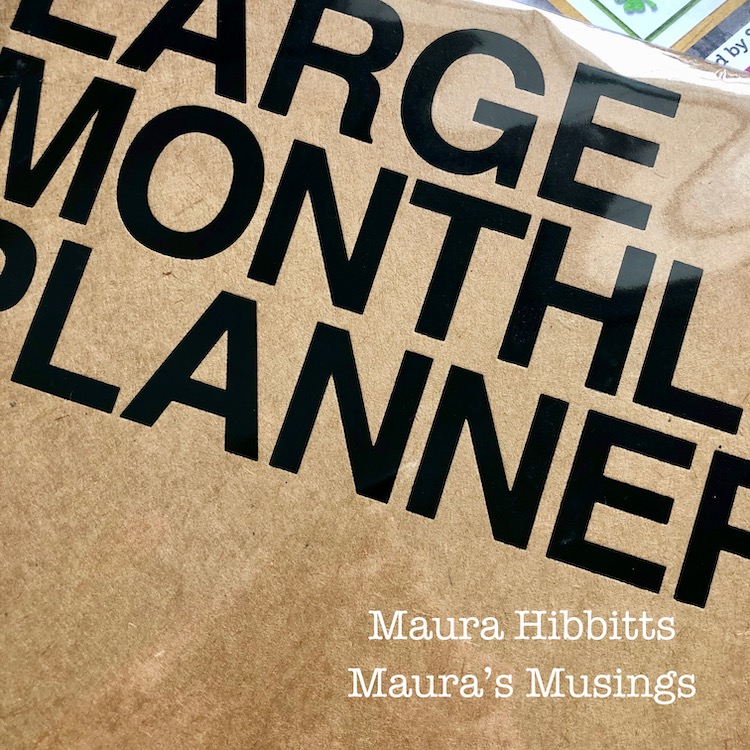
How fun is it to mix and match several Art Foamies into a project? For me, it’s a blast! I love to create layers with colors and designs, and I am mixing and matching to my heart’s content as I transform a calendar. I use a large calendar to keep track of all my art deadlines, and I’m going to need a new one soon, so time to get started!
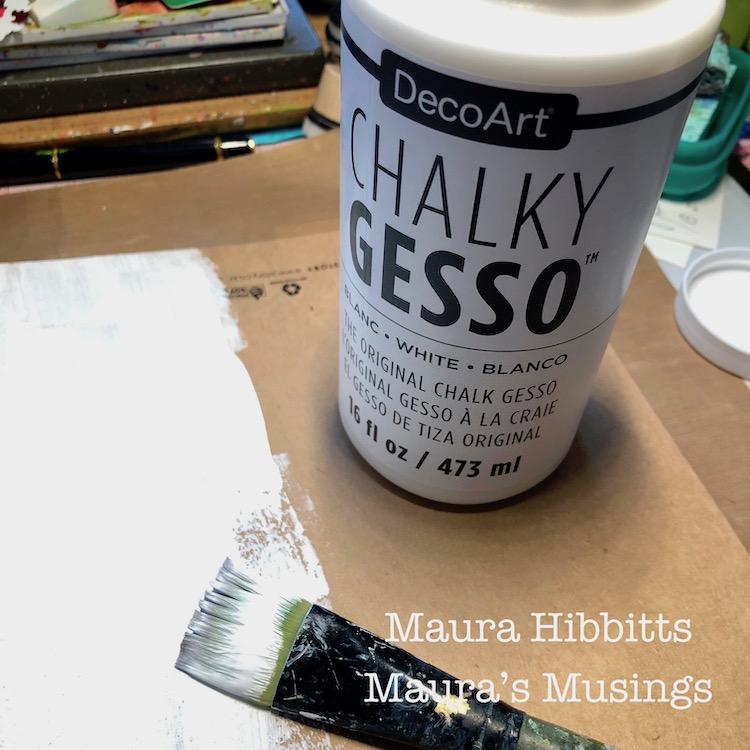
First step is to apply a layer of gesso to the kraft calendar and let it dry completely.
I wanted a colorful background to build my layers onto, and came up with this idea. I took my 6×6 gel plate, and added a layer of paint with the brayer, then “stamped”my plate onto the calendar. I repeated this several times with one color, then added new colors. I also overlapped my blocks of color to make it more interesting.
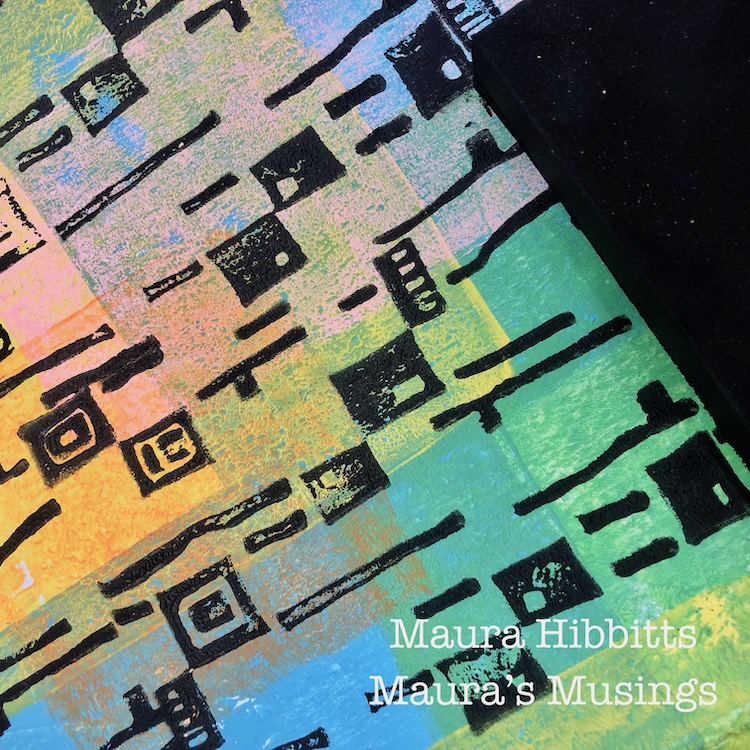
Now, it’s time to stamp a repeating pattern onto my calendar with the Mid Century Squared ArtFoamie (love this pattern!) and black acrylic. I brayer the paint onto the gel plate, press my stamp into it to get a good solid layer of paint on it, and then line it up and stamp the bold pattern. My gel plate acts like a giant stamp pad, only with paint. Use the heat tool if necessary to speed up the drying time of the layer.
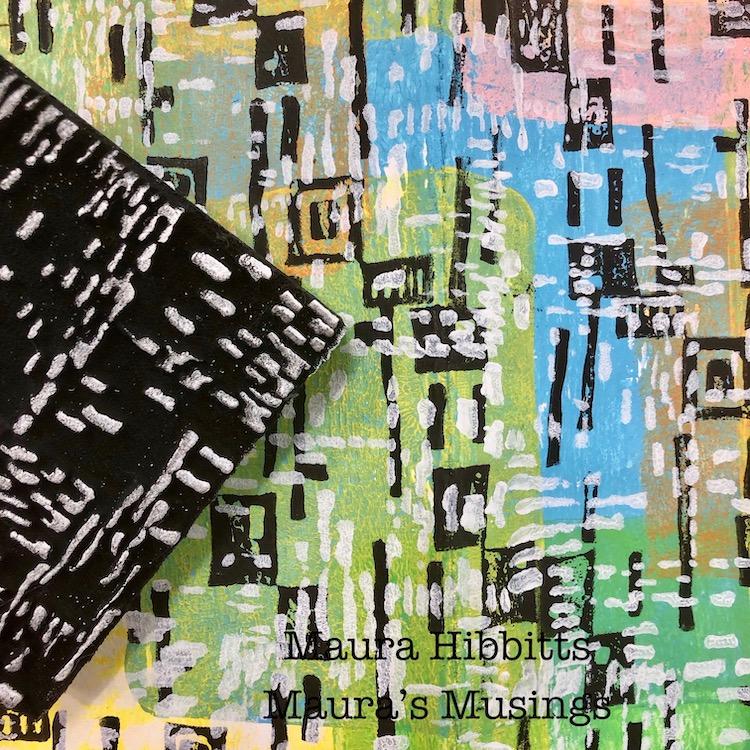
Next layer is white acrylic with the Signals ArtFoamie. I repeat the previous step in order to get another overall pattern that I am mixing and matching with the black.
Every calendar needs a bit of glitz and glamour, right? The Jazzed Art Foamie is perfect with a shimmer of gold. I randomly stamped this image onto the calendar, again using my gel plate like a giant stamp pad with the paint.
I mixed and matched three different patterns onto a very colorful background, and at this point it was looking a bit wild. I decided to tone it down and pull it together by rubbing on some transparent fluid acrylics with my fingers, and using a baby wipe to remove it a bit if I got too heavy fingered. Once my cover was dry, I stamped the months on the pages and started writing in the dates.
Check out the details to see how easy it is to mix and match ArtFoamies to create delicious layers! Each design remains visible, but is linked to the others.
I toyed around with the idea of adding a focal piece to my calendar, but decided I like it just how it is. I now have my own personalized, colorful calendar which will be fun to pull out and use for planning.
Thank you Maura! I just love these colors and how my Mid Century Squared stamp pops when done in black. Awesome! You can find my Foam Stamps in my Online Shop. In addition to white Chalky Gesso, here are some of the supplies that Maura used:
Feel inspired? I hope you join us for the Foam Stamplifier Challenge this month. As you play along, don’t forget to tag me when you share your creations – I would love to share your projects in my next “n*Spiration From Around the Globe“.
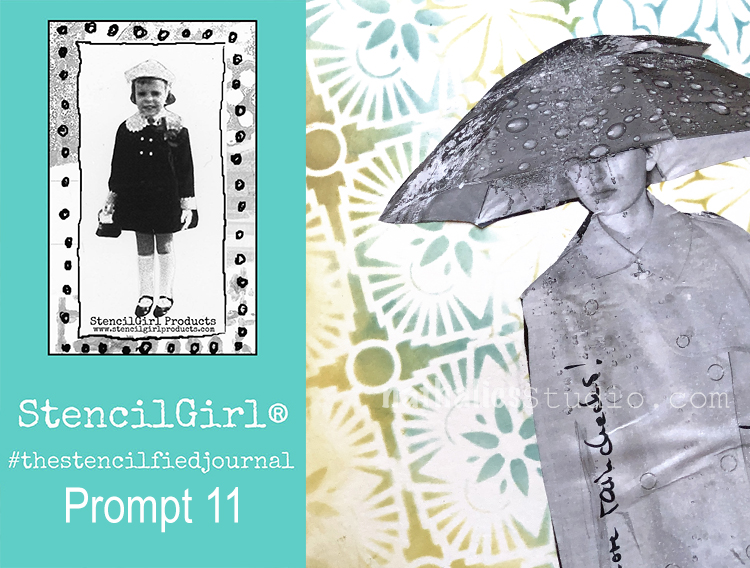
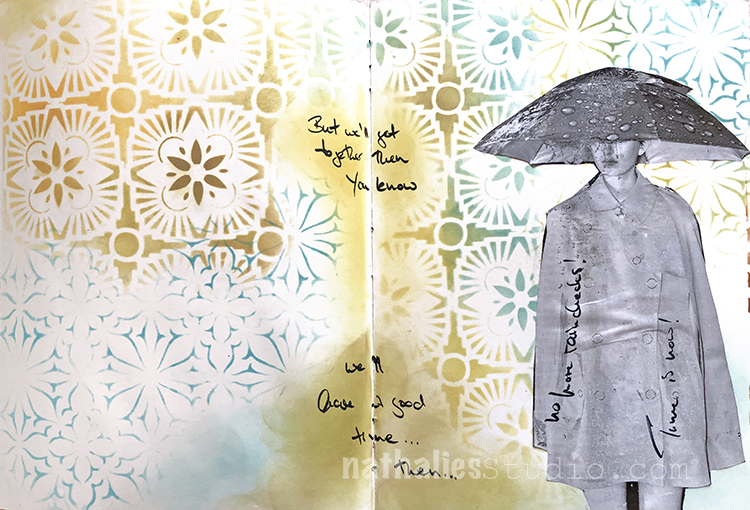
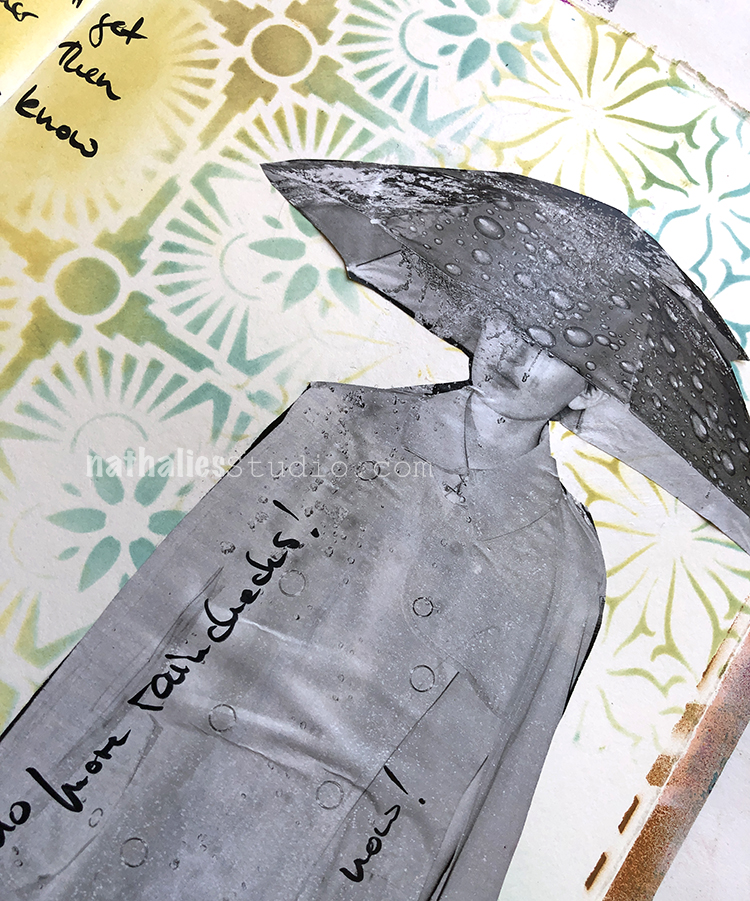
My wonderful friend Tina Walker is at it again – she invited several people to join her Stencilfied Prompts. The prompts are music related and each week she is posting a song. You can be inspired by the lyrics, the video, the album cover or anything related and the only restriction is that you have to use StencilGirl Product Stencils. Here is my take on Prompt 11:
This week’s prompt is “Cat’s in the Cradle” by Harry Chapin. A good reminder to live in the now and to not use too many rainchecks ;)
I used my Van Vorst Stencil as well as my Hamilton Stencil and created the background by using Distress Oxide Inks with the stencils.
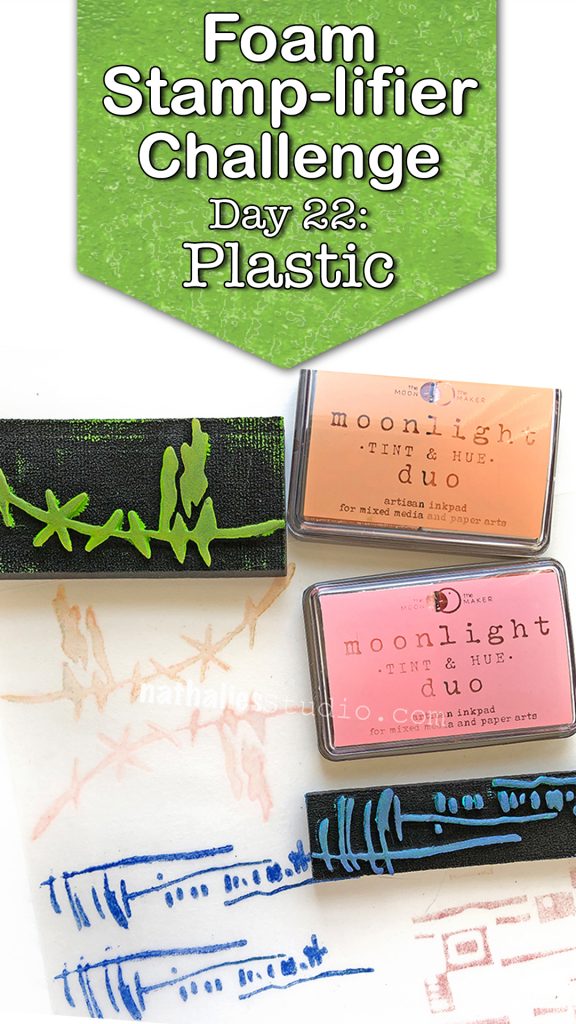
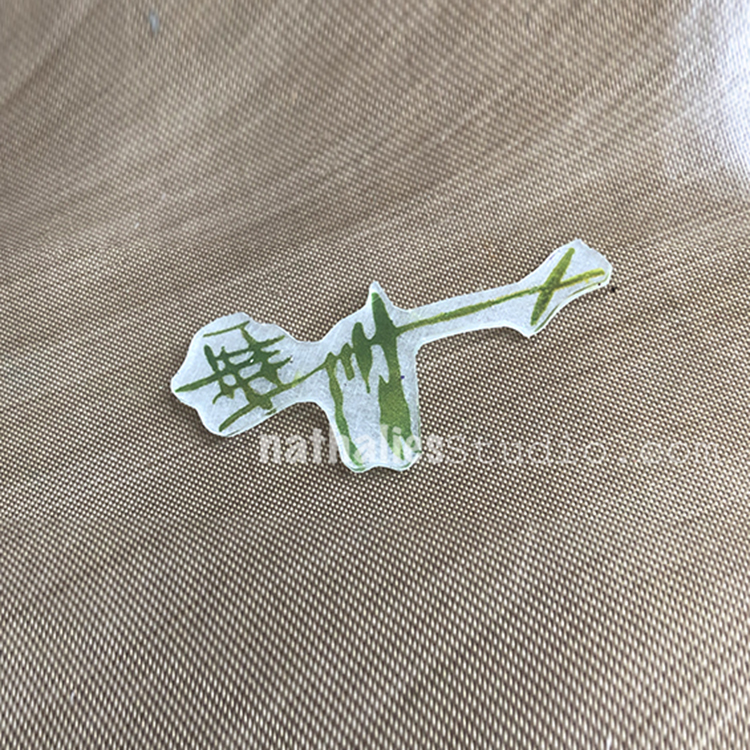
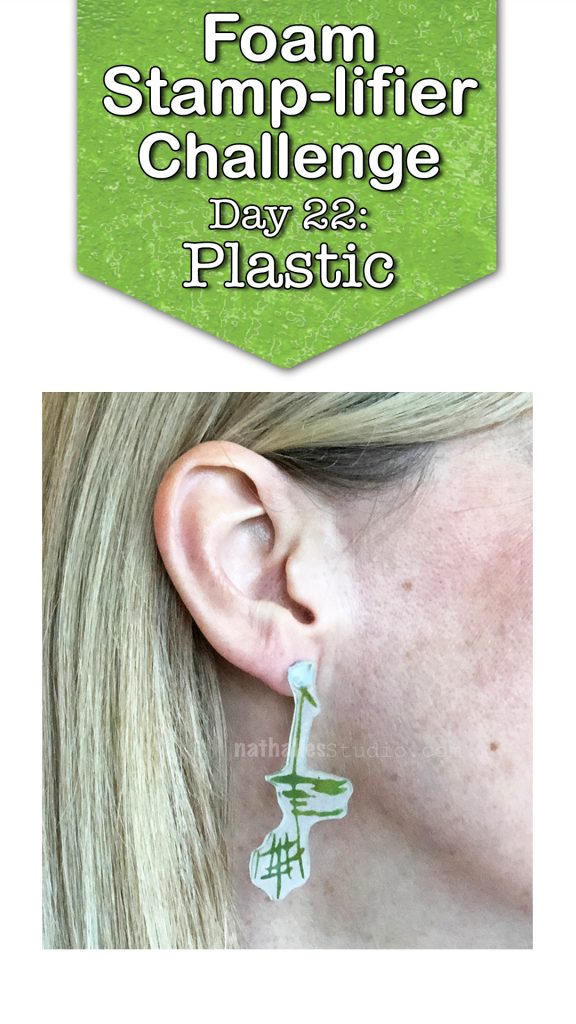
Printing on top of plastic sheets or overhead foils is a fun way to create transparent elements for your work or nice dividers for your art journal but my favorite of all must be using Shrink Plastic. From wine charms, to embellishments to earrings. Using the foam stamps with inkpads of your choice, stamp your desired images.
Then heat the shrink film up as the manufacturer recommends and you will get a tiny version of your stamped image. Too cute! Here is a sample where I used the shrink film to create myself some new fancy earrings.
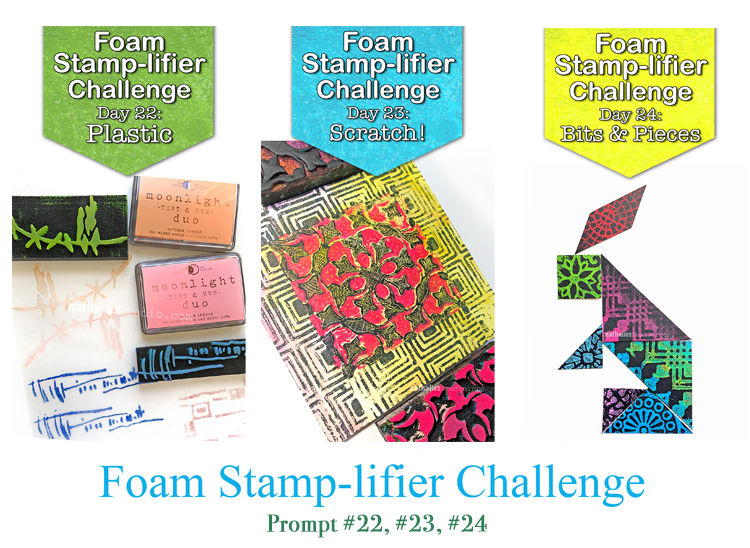
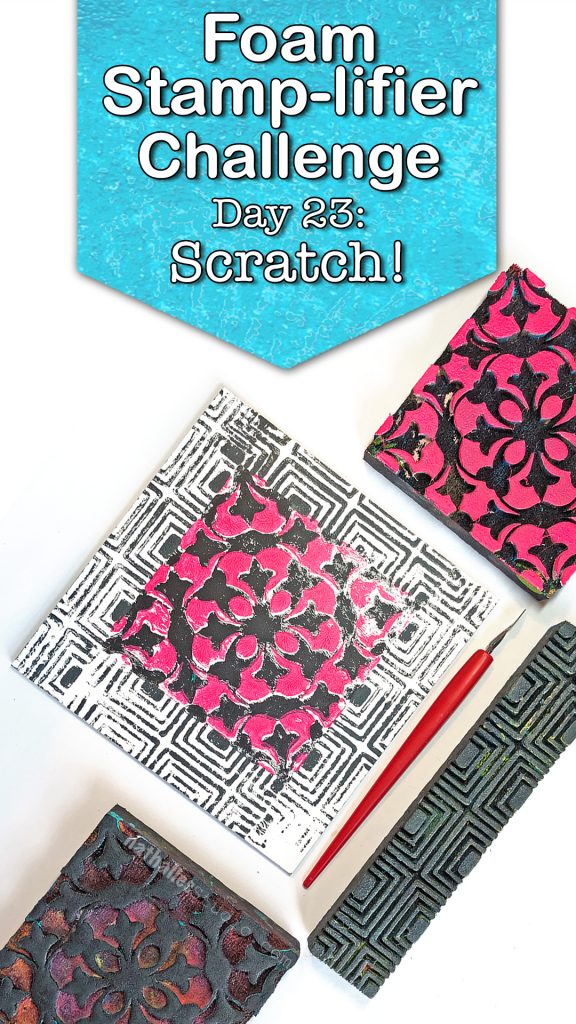
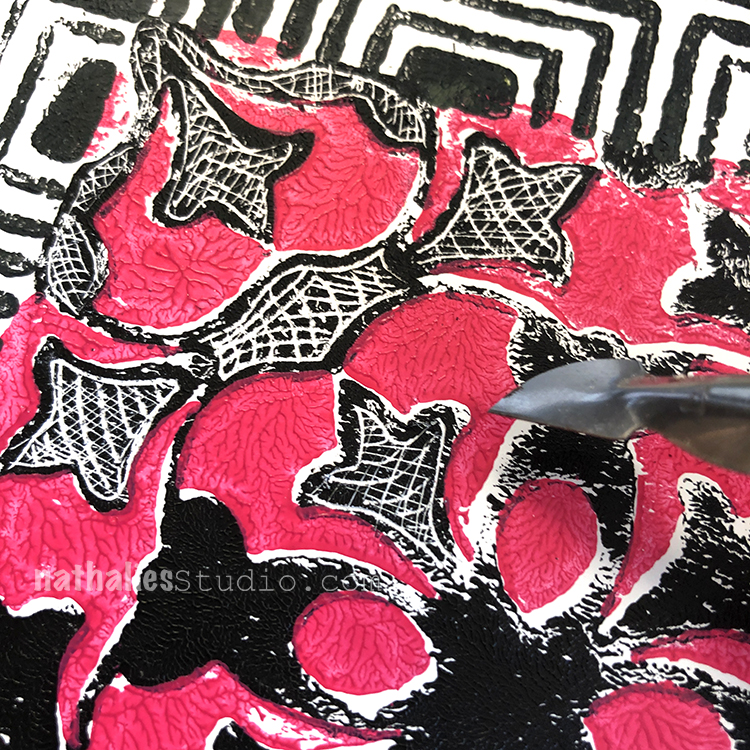
Day 23 – Scratch!
Another fun way to use Foam Stamps is to stamp onto some Ampersand Clayboard to create some great textured designs.
Stamp on top of the clay board with acrylic paint or spray ink or inks and then start scratching into the design. It is like doodling by scratching- better then coloring books- trust me!
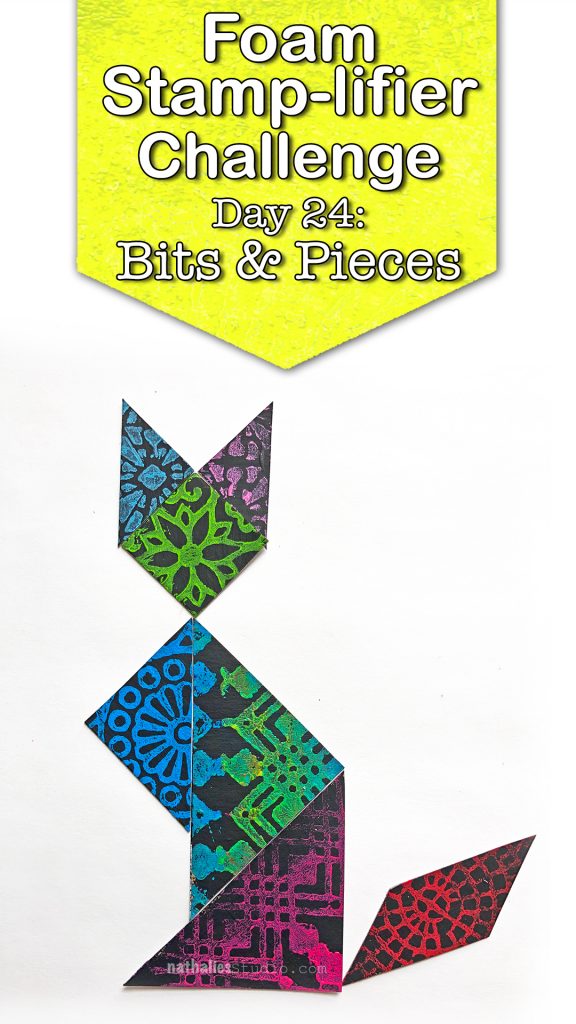
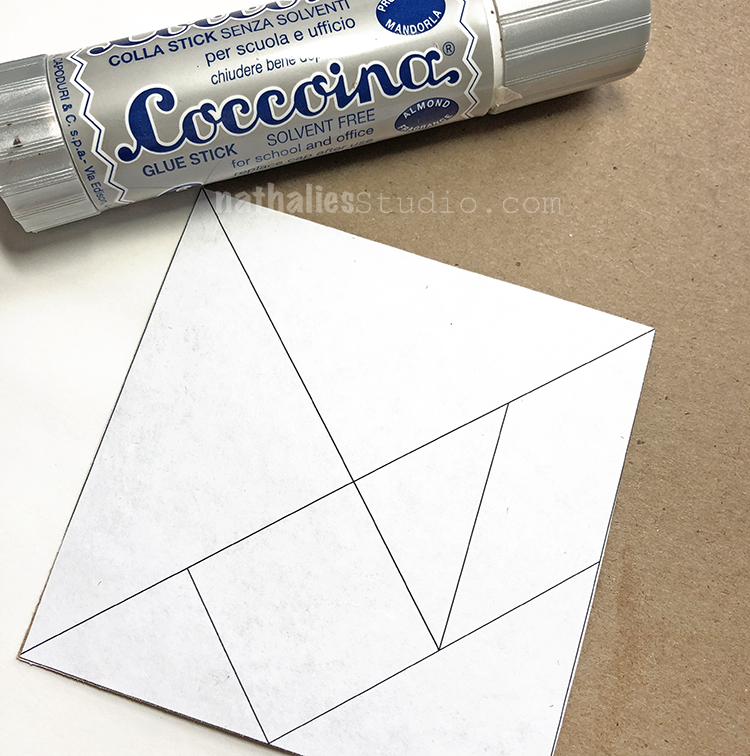
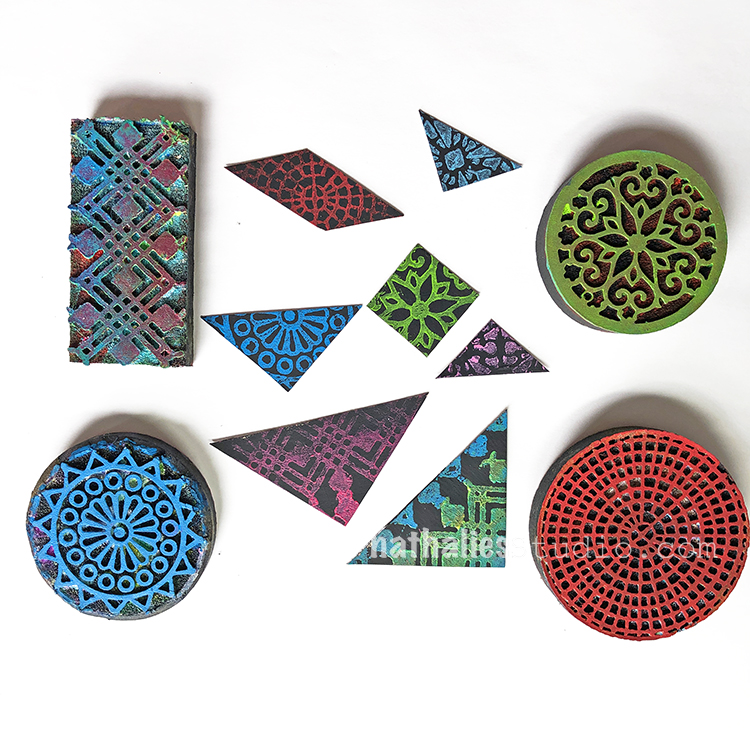
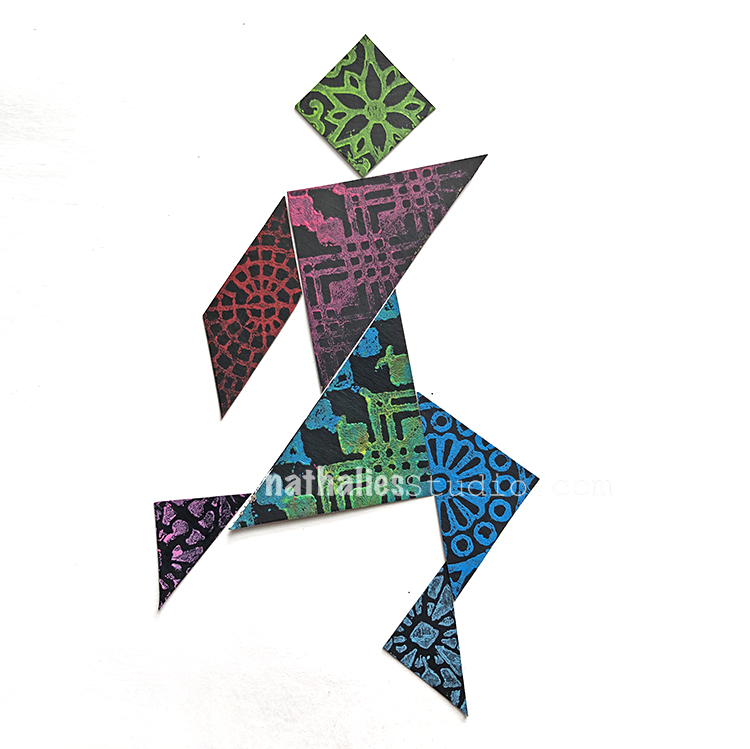
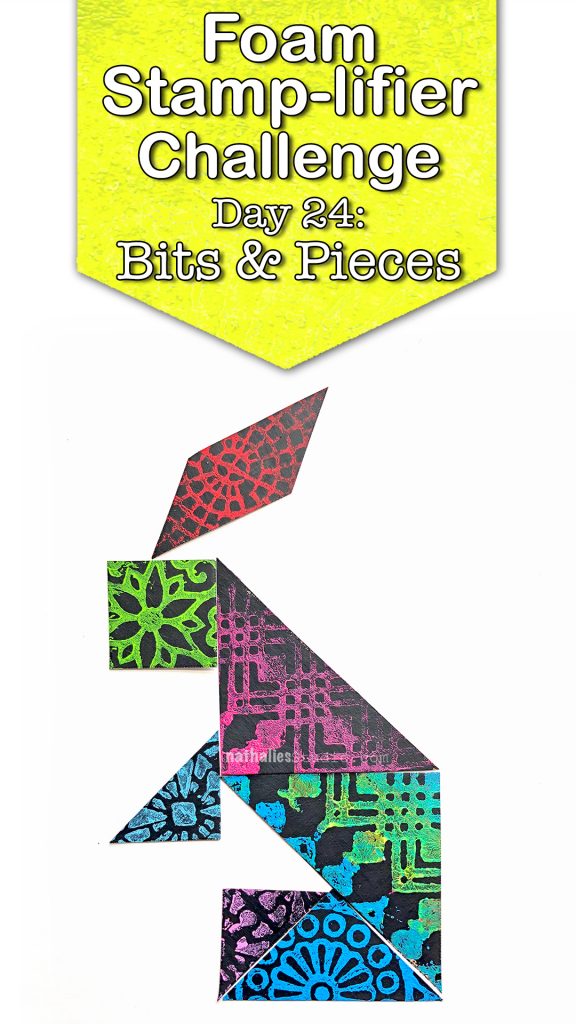
Day 24 – Bits & Pieces
How about using bits and pieces of foam stamped paper to create something new?
You could create a tangram which is a puzzle which consists of 7 flat geographic shapes which put together can create a new shape.
Simply google tangram, print out the template, glue it on some white or black paper, start stamping with your foam stamps and cut it.
And then go and play …
Here are the different foam stamps I used for these prompts
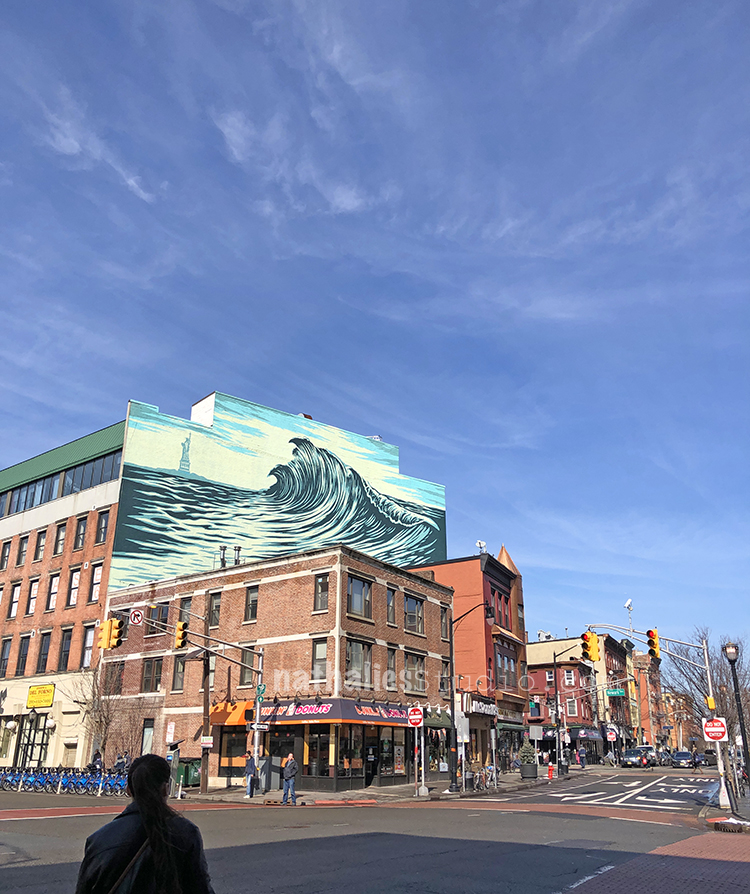
March!!! woot woot- finally things are getting warmer- LOL. I cannot wait to get the bike out again. Strolls through my hood get me out of my studio, they help me unstuck and often I get inspired by what I see and to get new ideas to create something. It is part of my philosophy about Artful Adventures in Mixed Media – which is the subject of my book. Here are some photos that I gathered in the last couple weeks.
Indoor light inspiration at a concert of The Chills – it was a fun evening out with a couple of our friends and bonus – just around the corner from us.
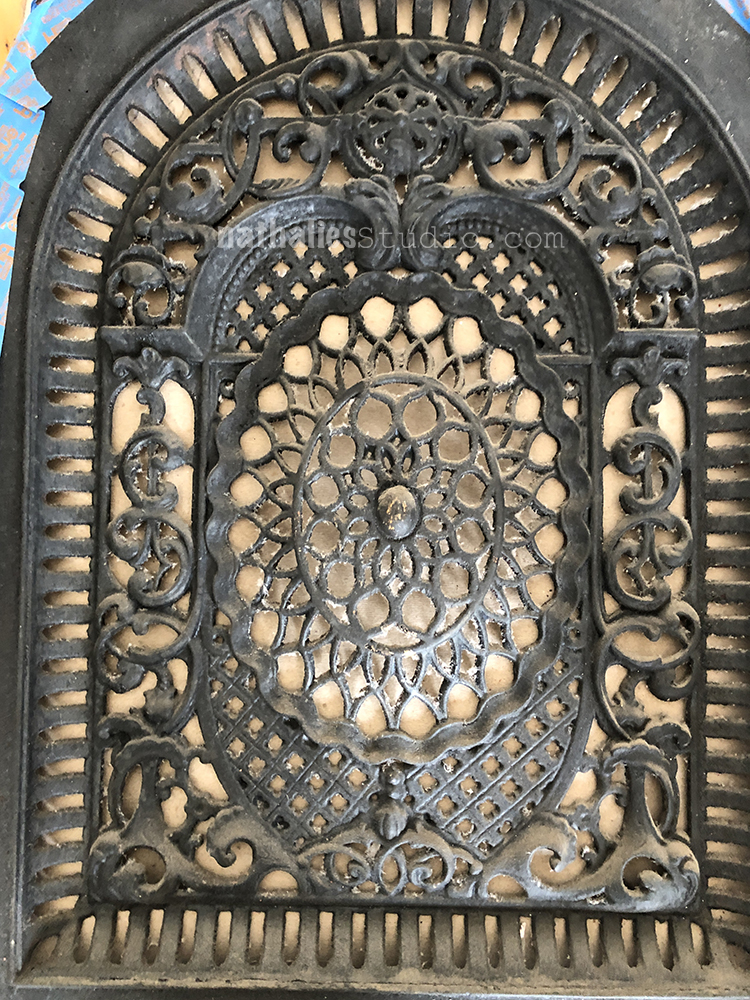
One of our fire place grates – needs some cleaning- how freaking awesome is this? I cannot believe how lucky we are to have it :)
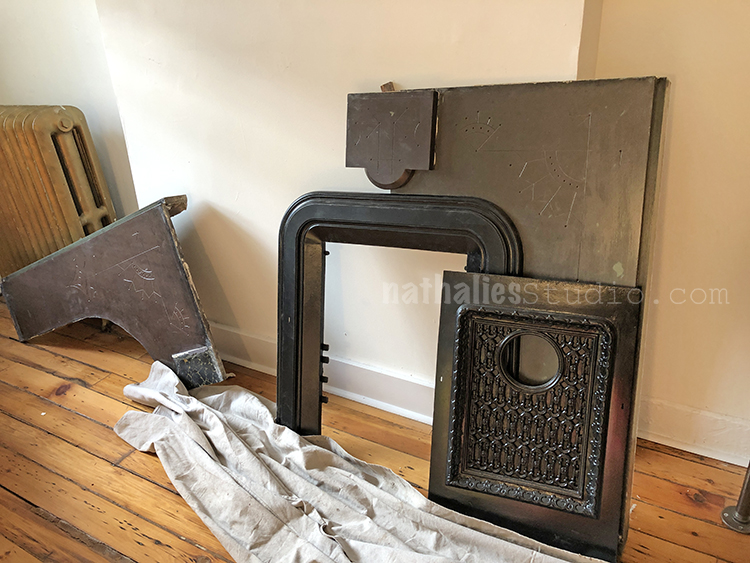
We have four fireplaces – one is working again after we rebuild and relined the chimney and built a new fire box. One was at a bad spot so we moved it to my studio and – woohoo it didn’t crack! Score
This is how a dismantled mantel looks like. The mason created an inside brick wall for the mantel and I painted the wall black- I share some pix later once we have everything fixed up on the wall as well.
We also got some old vintage tiles at an architectural salvage place – they are for a border in our kitchen backsplash and mimic the design of our banister and some of the door frame designs. I know I am a nut but when I spied those tiles I was instantly like “we have to have those”. That was before we even had the house and ever since I was worried they would sell the tiles before we go them…so ….last week I made it at 8am to the place to get them …yes….it is THAT bad ;)
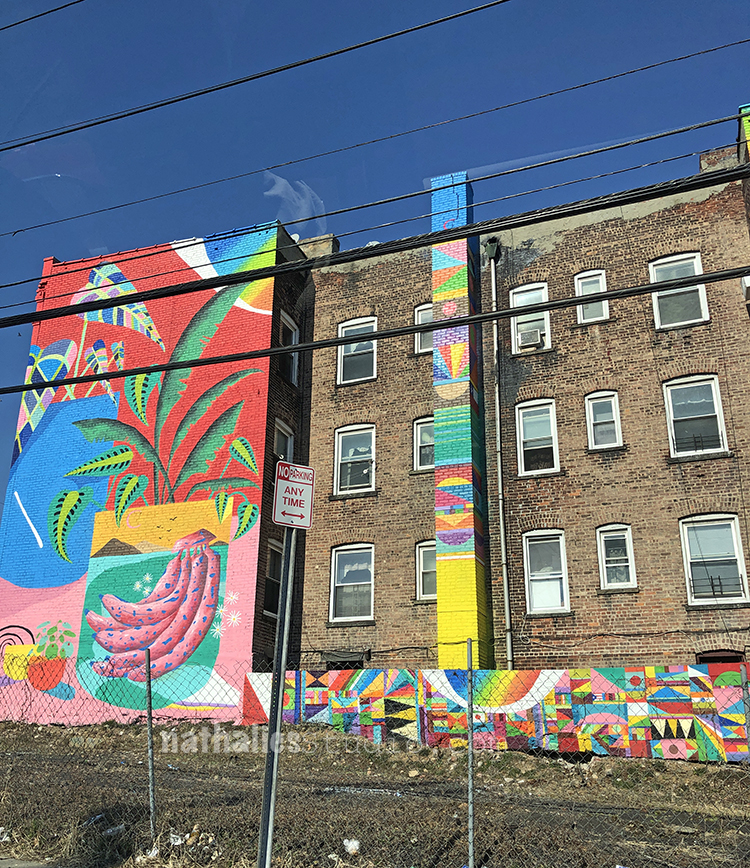
Fun colorful mural in my soon to be hood.
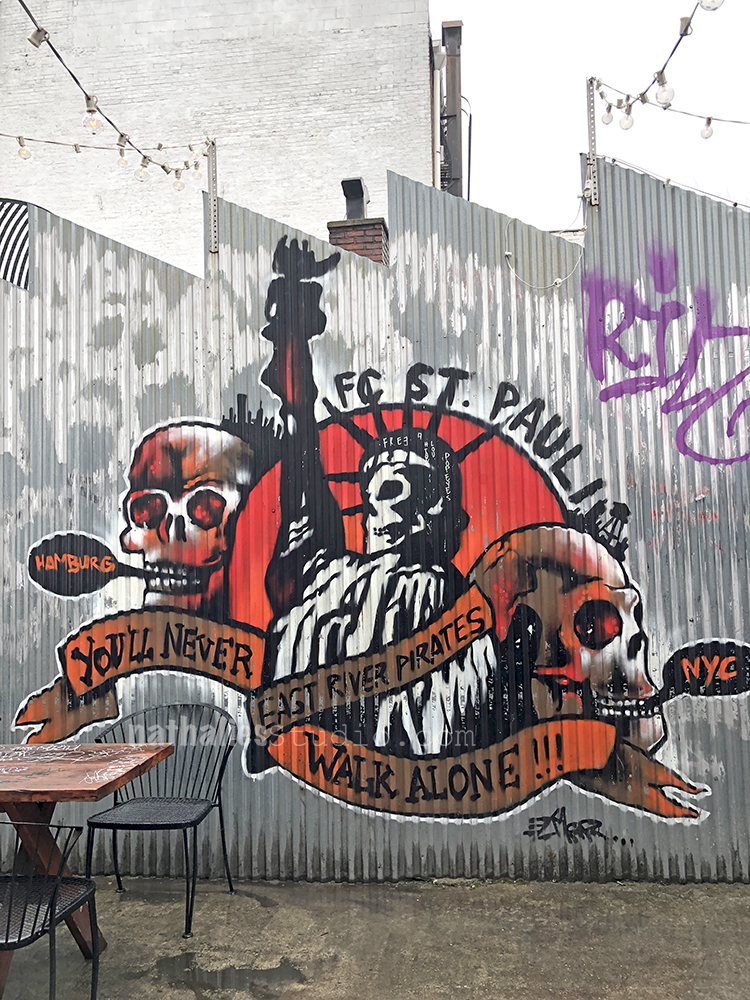
And …the St. Pauli NYC sign – YESSSS -my home soccer team from Germany has a fan club in Brooklyn and we finally made it there. Loving it! Made me feel like being in Hamburg for a couple hours.
Hope you all have a great month and are up for some stroll through your hood! Cannot wait to show more pix from my new one and I will also put some house pix in once in a while.
I love your neighborhood! So many interesting things to see, and if you ever get bored (not possible!!!), you can always cross the river and find more great stuff to see.
Those vintage green tiles are FABULOUS! I understand why you practically camped out in front of the store to keep from missing out on them. Can’t wait to see more of your home renovation adventure.


thanks so much for sharing your hood pics. we live in rural va and are surrounded by natural beauty, but not much wo-man created art!
Reply