Hi there! It’s Riikka here with my third and final guest project! I hope you have enjoyed them so far. They are all quite different, but that’s just to show that Nathalie’s stamps go so well to different projects and styles!
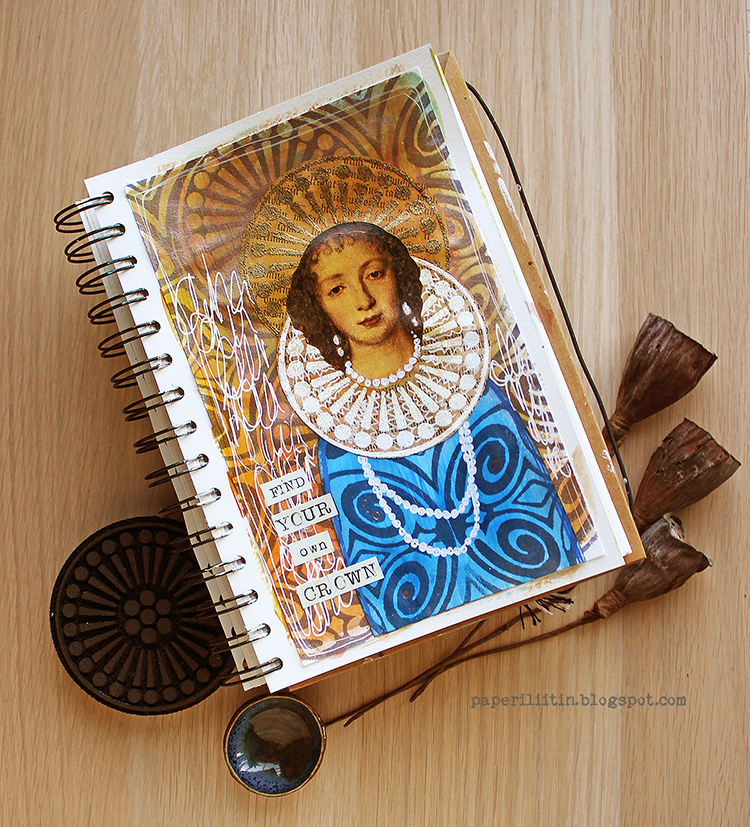
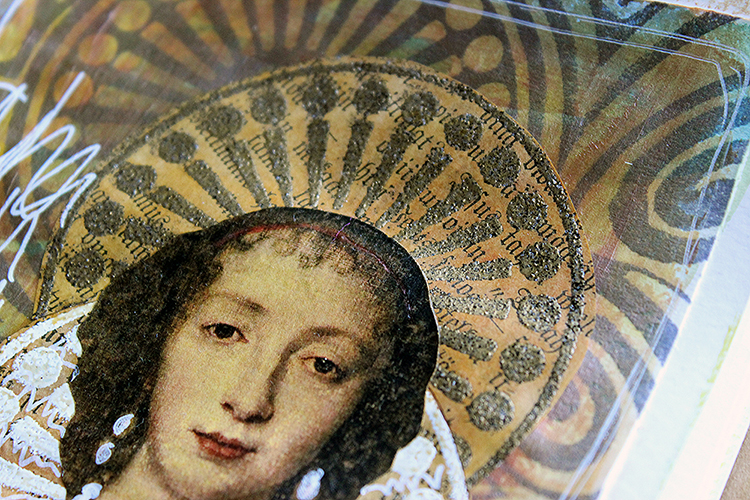
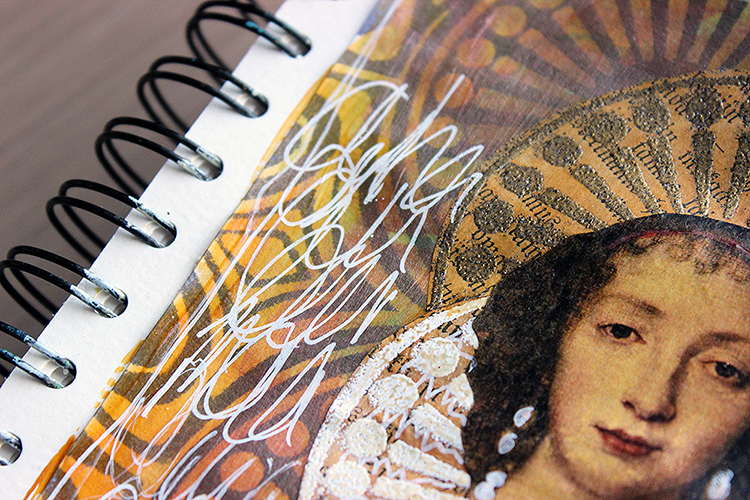
As my final piece I made an art journal page. I really love how versatile the “Grove Street” stamps are. In the card they reminded me of a sun with the rays of light, in the earrings they made me think about Nordic patterns and Marimekko and here I turned them into a crown and neck ruffle! All with the same stamp set!
I started the page by making some patterned paper of my own. The stamps make it easy as you can combine them in various ways. I created one bigger pattern and another smaller one. The bigger one then became the background for the page whereas the smaller one ended up being a piece for the dress. I used the Grove Street foam stamps and the Fairview Fan foam stamps.
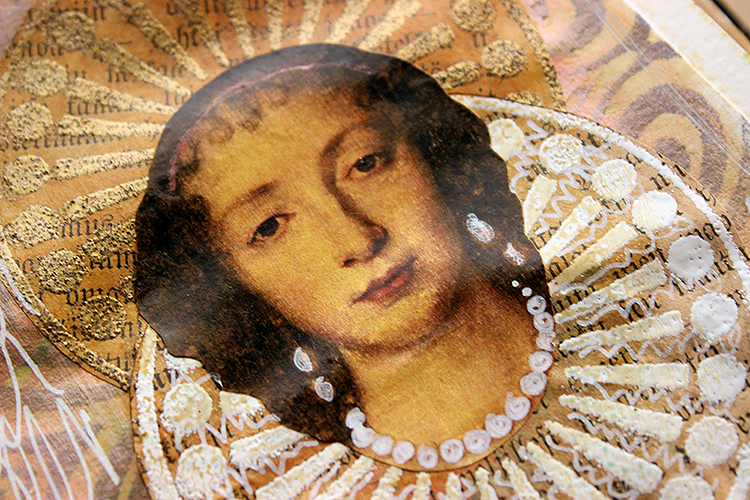
The character I made for the journal has a head from an actual painting. The painting is by Anthony van Dyck and it’s of Queen Henrietta Maria, done in the 17thcentury, 1638. I printed the head a couple of times as I wasn’t sure about the size but went with the middle size one.
The part that’s not visible in the video is the collaging or adhering. After I have the background painted and the elements embossed and printed, I collaged them all together using an acrylic gel or a glaze of sorts called Izink ICE. This way I could make the background older looking by using a tea-colored glaze there and make the blue dress even more vibrant using blue gel. I’ve added a link to a series I made as a Seth Apter Creative Team member about ICE to the description box of the video, so you can see more, if you wish.
Thank you for this chance, Nathalie! I hope you have enjoyed these projects and thank you for stopping by today!
All the best, Xoxo Riikka
Thank you Riikka -absolutely love how you used the foam stamps for that collar and dress! Henrietta has some serious style :)
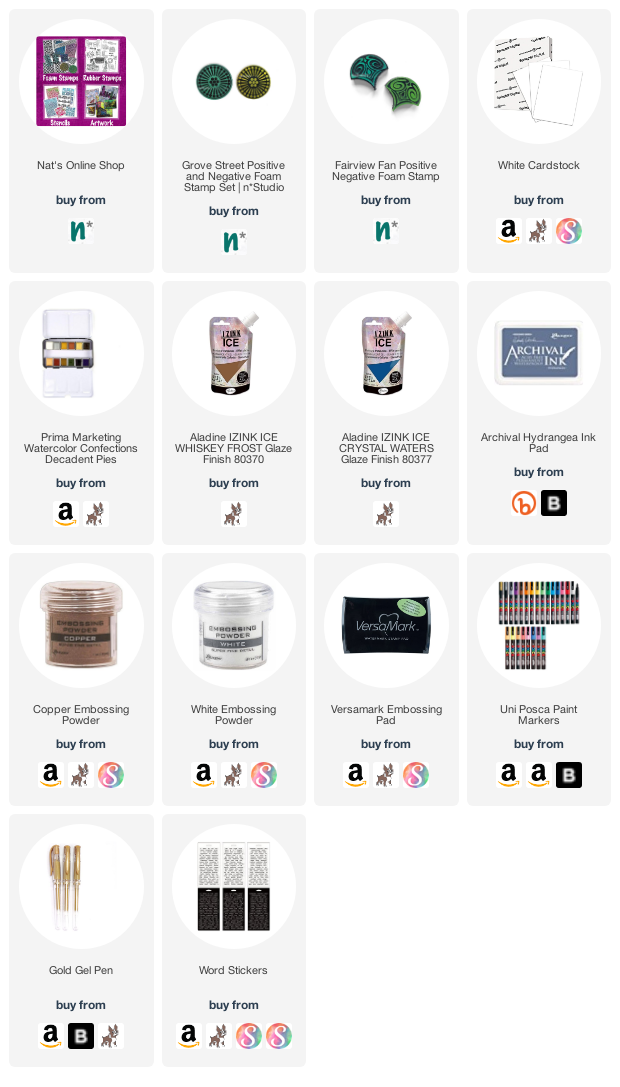
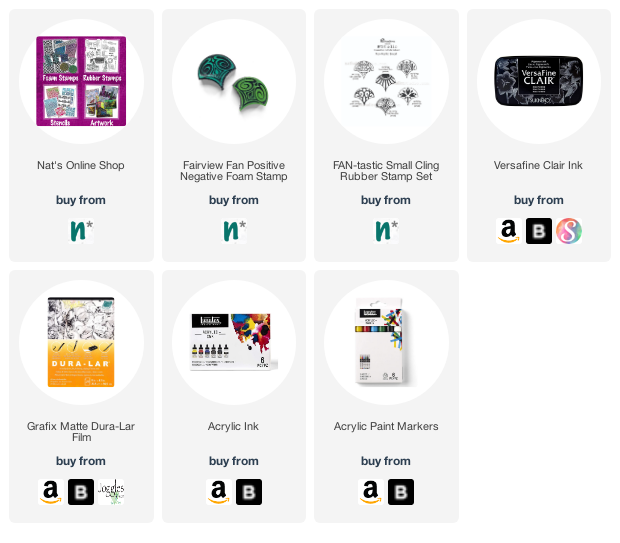
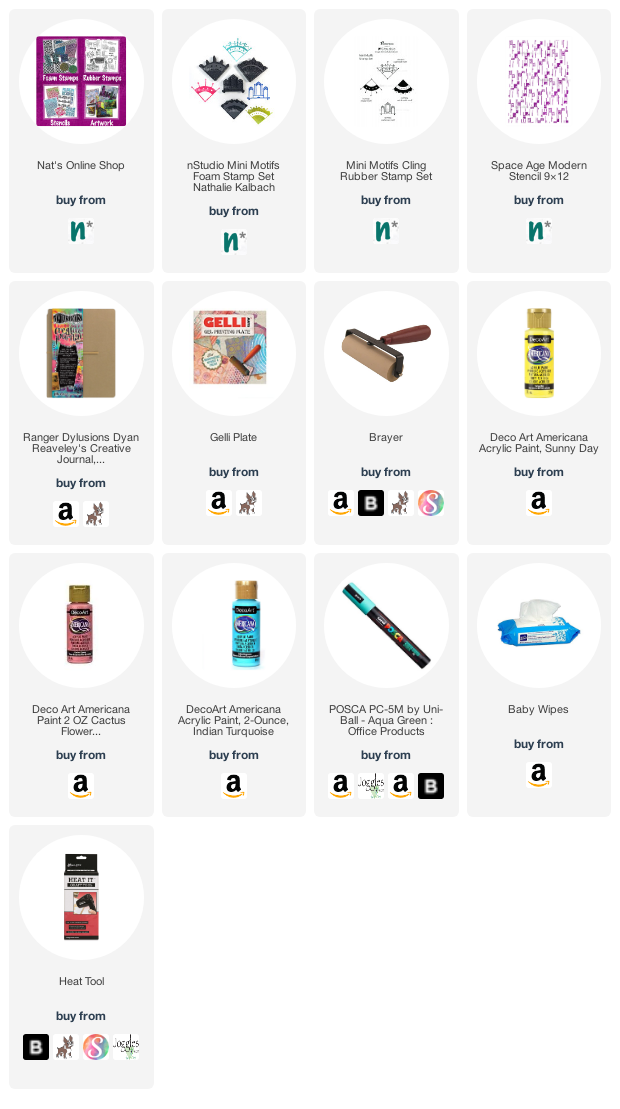
Want to give it a try? You can find all my Foam Stamps in my Online Shop and here are some of the other supplies Riikka used:
Beautiful! Love the rich palette and how much the white really pops. Nathalie’s stamps work so well, especially for the ruff! Just gorgeous. Thx for doing this guest tutorial.
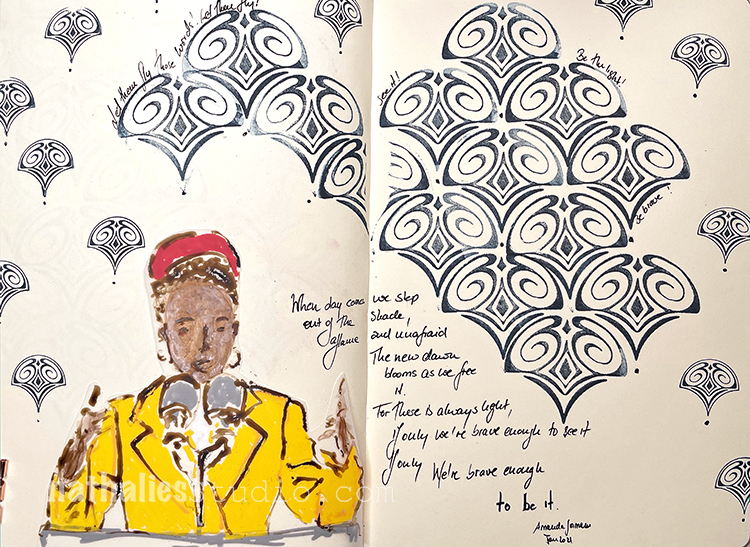
When day comes we step out of the shade, aflame and unafraid The new dawn blooms as we free it For there is always light, if only we’re brave enough to see it If only we’re brave enough to be it
-Amanda Gorman
I was so inspired by Amanda Gorman’s poem from the presidential inauguration, and particularly the final lines.
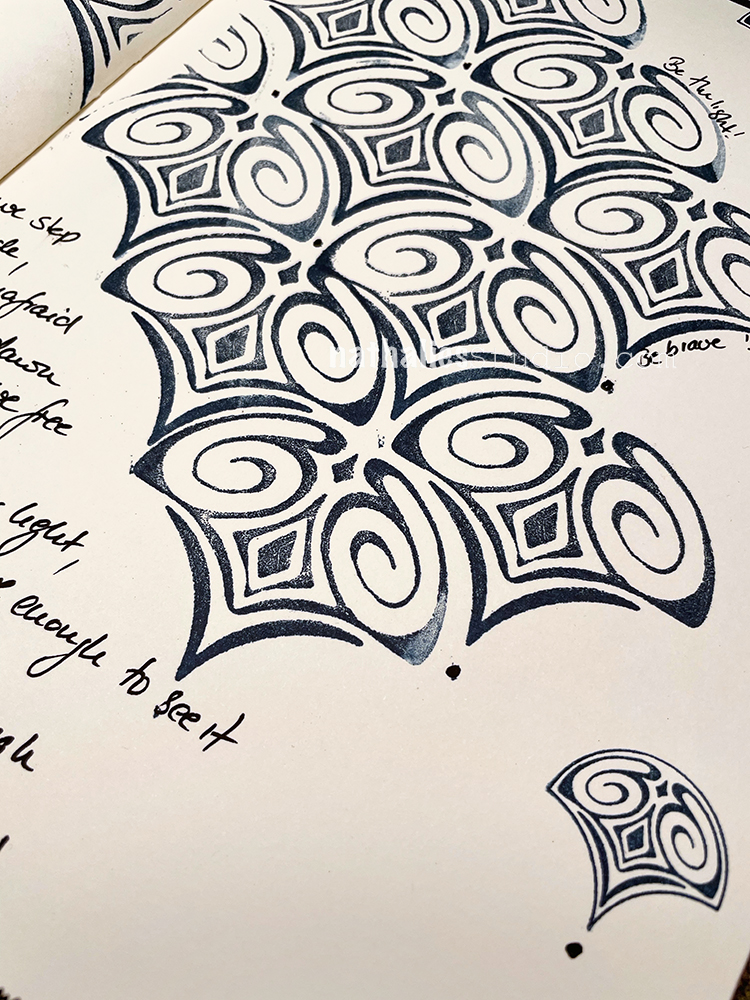
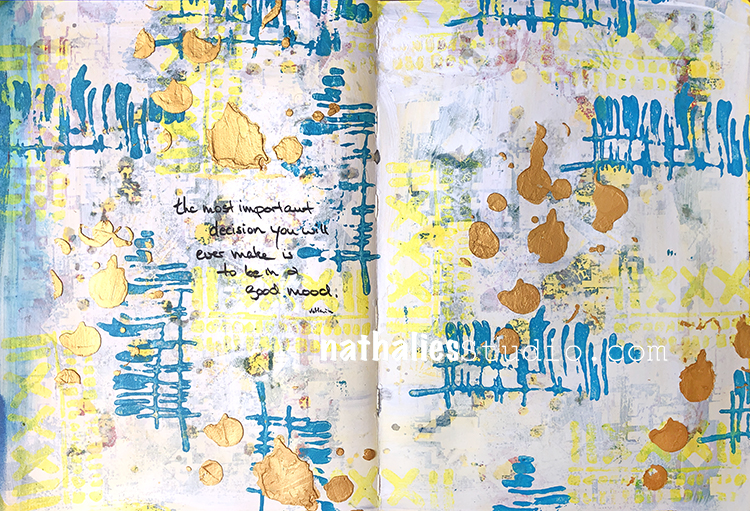
For my background I used my Fairview Fan foam stamp and also the Fairview rubber stamp from my Fan-tastic Small set. I added little dots under some stamps to make them look like exclamation marks – words fly…
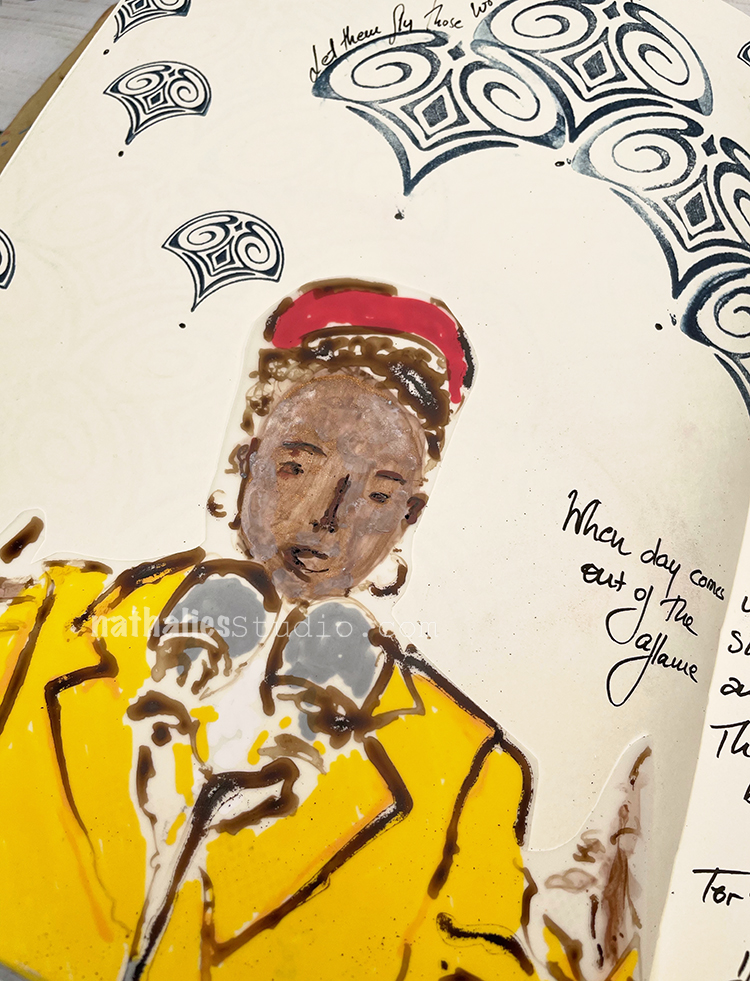
I sketched Amanda on Dur-a-lar matte with acrylic ink and paint markers.
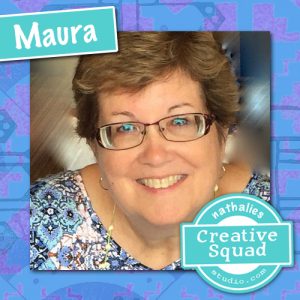
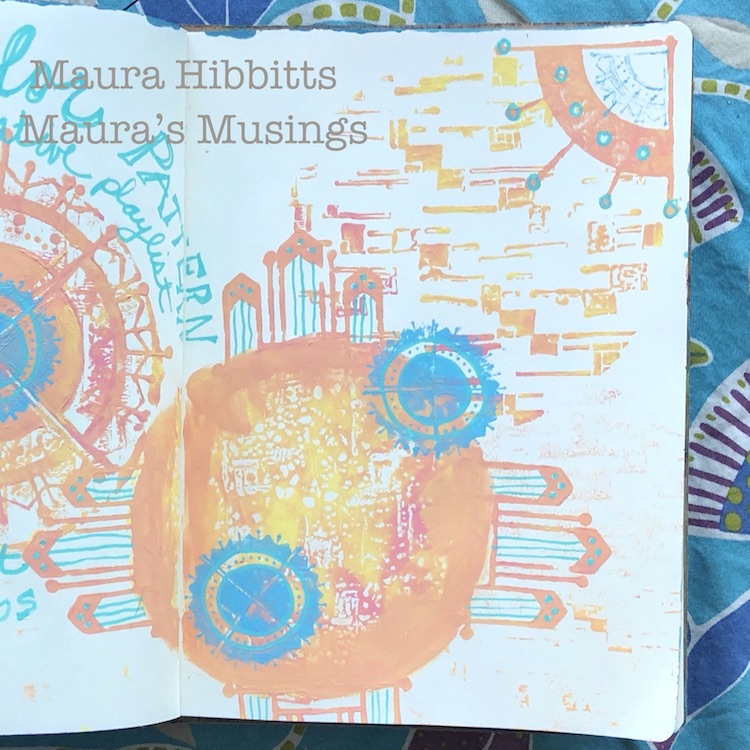
Hello from my Creative Squad! Today we have Maura Hibbitts sharing an art journal page with us that shows off some of her favorite art making tools – both supplies and ideas that get her creativity flowing. She is using my Mini Motifs foam stamps, Mini Motifs rubber stamps, Space Age Modern stencil, and our new monthly theme: My Creative Playlist – Your favorite mixed media supplies are like your favorite songs: they lift you up, inspire you and just feel good to groove to. What are your favorite supplies? Use them in a project – YOUR Creative Playlist that always gets you going.
We are creating a list this month of our favorite creative supplies, and I realized that not all of mine are physical items. Some of the things that really super charge my creativity are color and pattern, as well as nature, books, and my ever present imagination. In all honesty, there are a LOT of supplies that I love to work with, but some of my favorites are paint, ink, stamps and stencils…anything that I can layer up and get messy with. Oh yes, I am a messy artist!
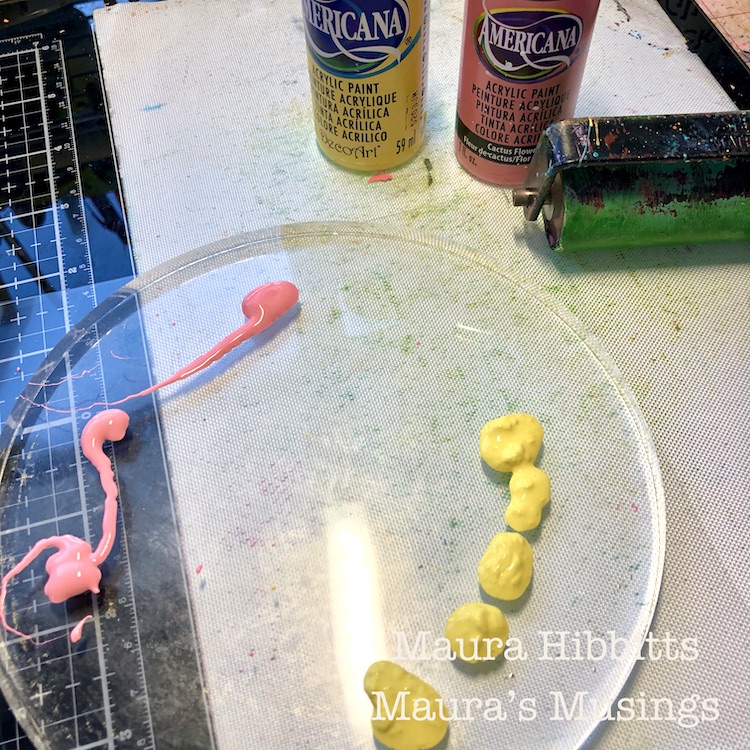
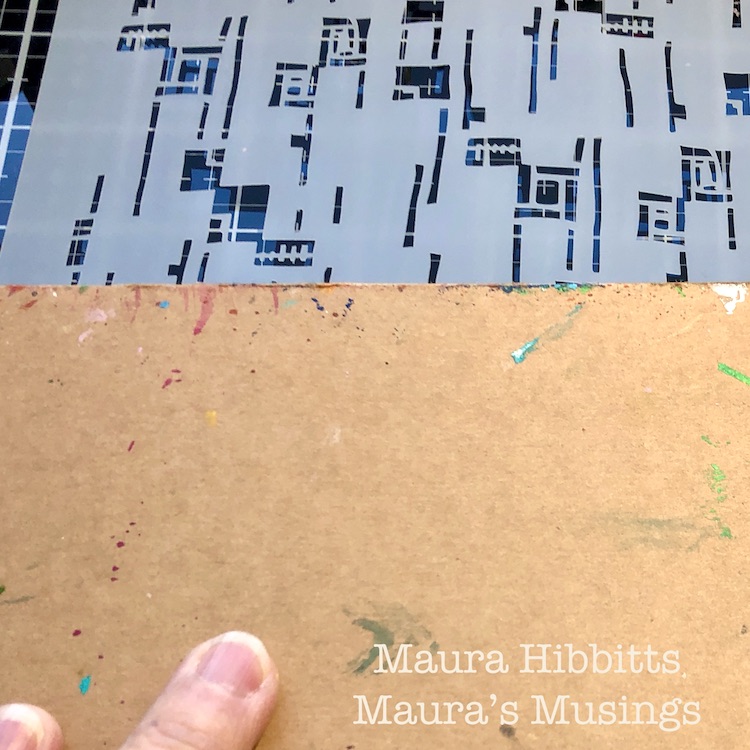
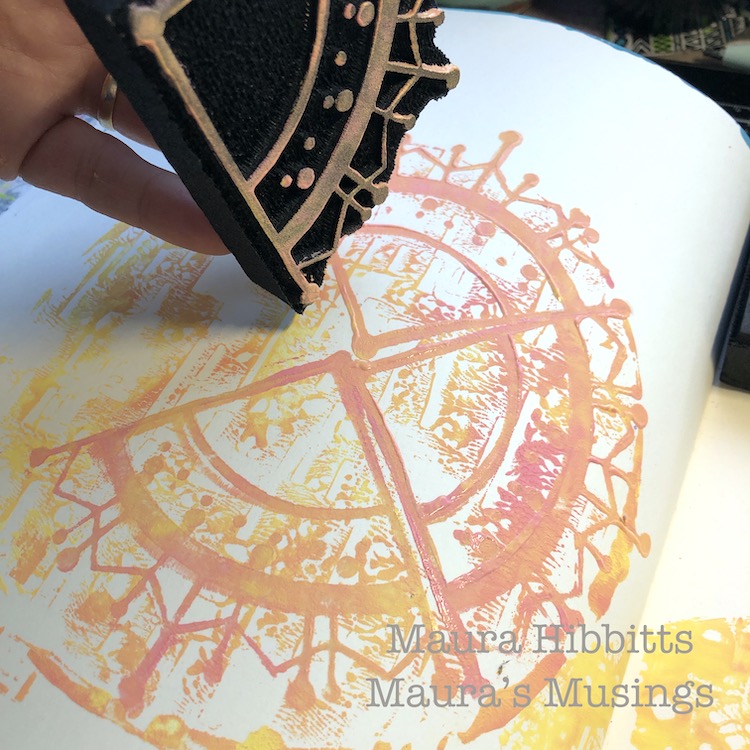
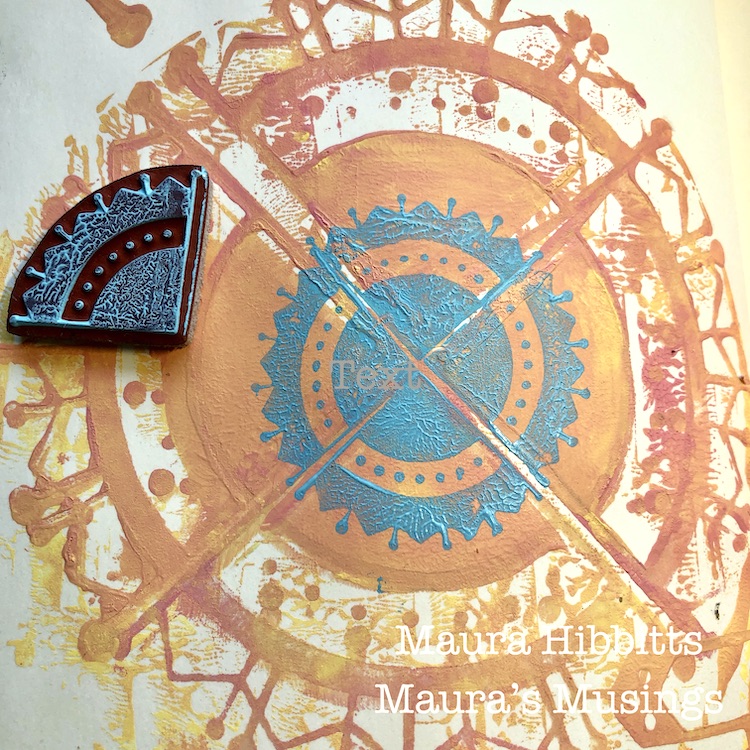
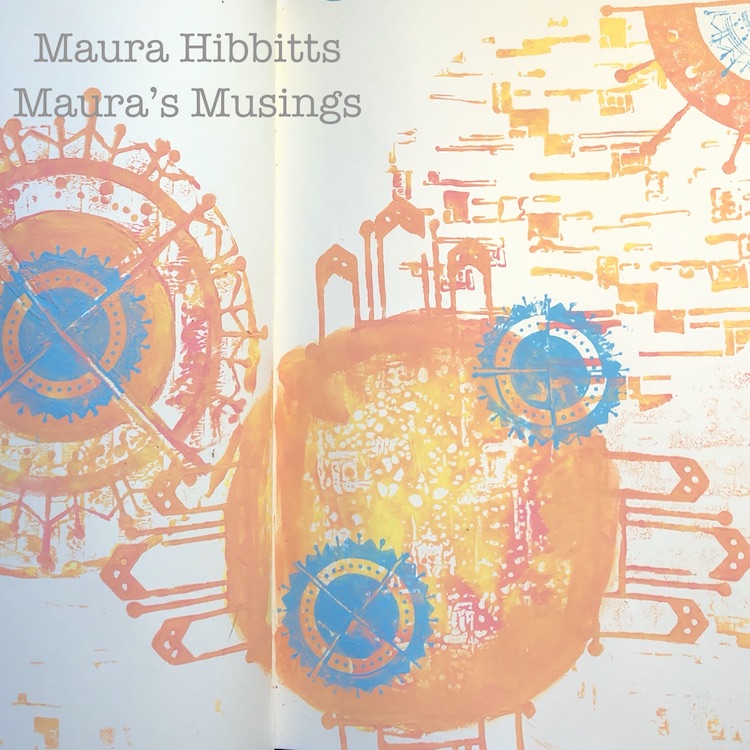
I headed to one of my large journals to start working on my creative playlist. I started with a round gel plate and yellow and pink paint. (Not my usual colors, but I have to play with other colors nicely too.) I blended them a bit on the gel plate with the brayer, then laid the Space Age Modern stencil onto the plate. I pressed the journal directly onto the plate to get my first impression.
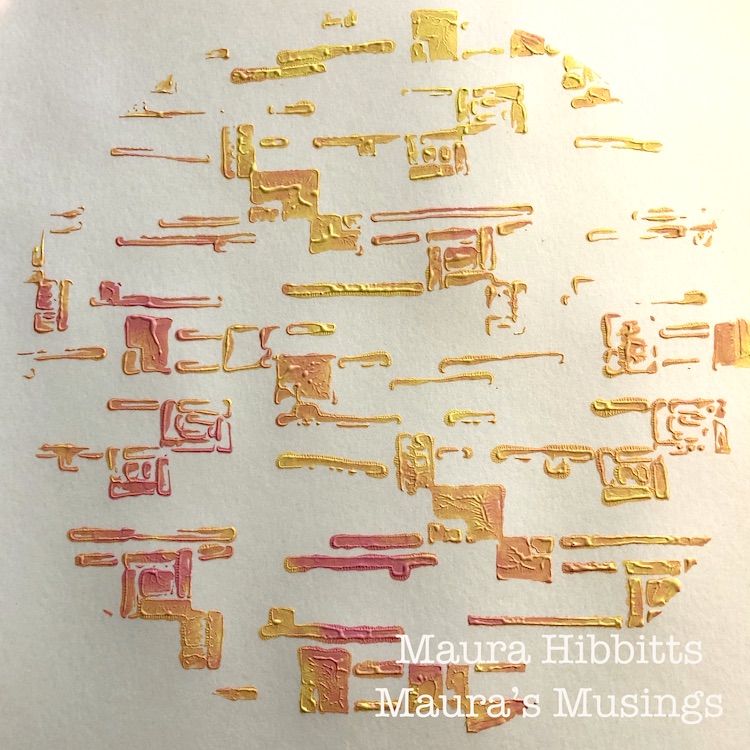
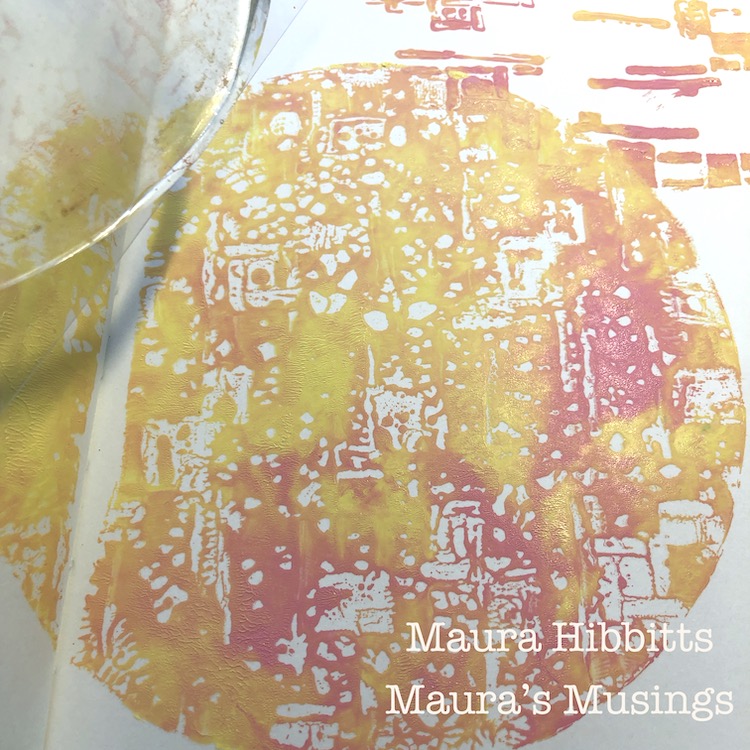
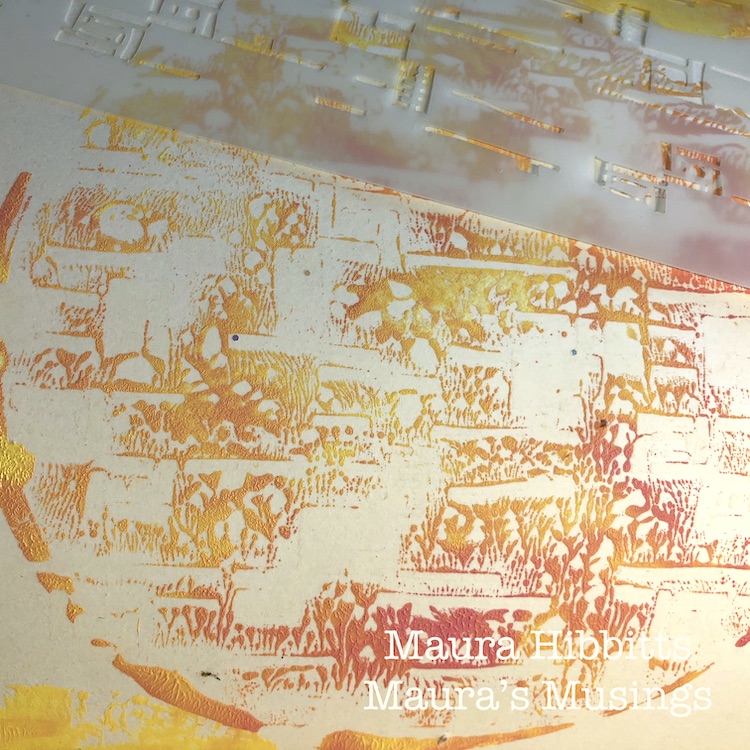
To get the second impression from the gel plate, I took the plate with the stenciled image on it and pressed it onto the book. For the third impression, I pressed the stencil with the paint on it, into the journal. Now I have three unique impressions from one use of the the gel plate.
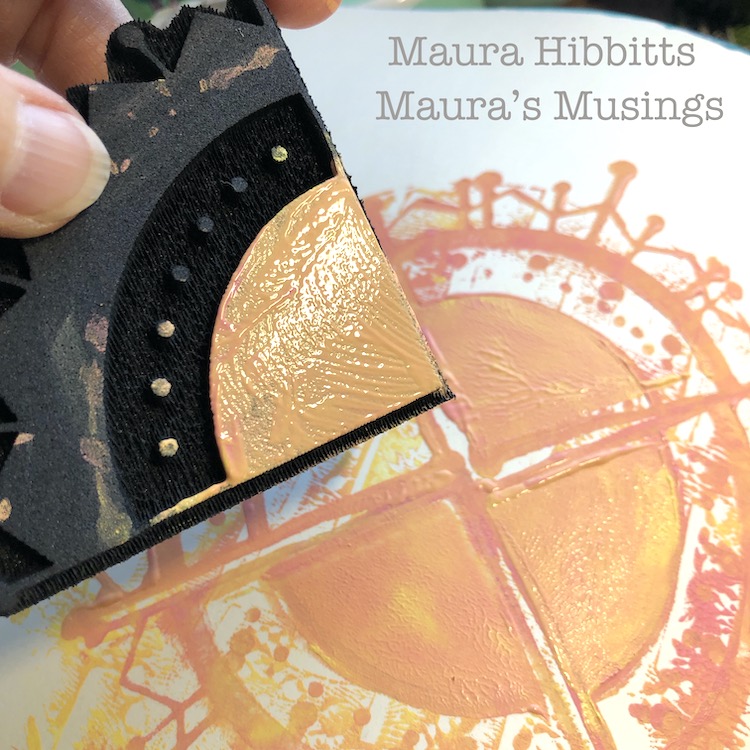
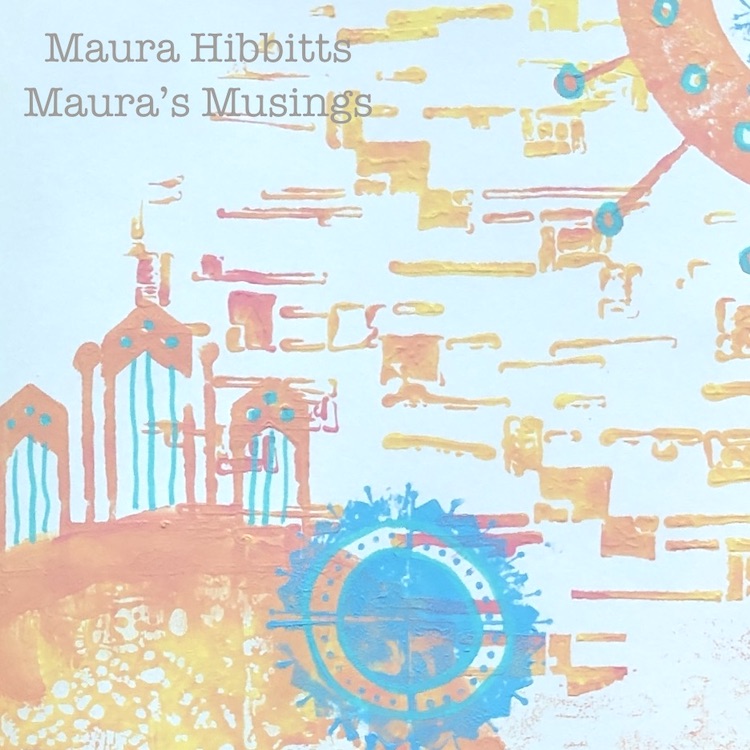
Once again, I blended some pink and yellow paint, and pressed the Mini Motif ArtFoamie into it, then began stamping the image in the center of one circle. I took a second stamp and applied paint to only a portion of it with the brayer, and stamped that over the first images.
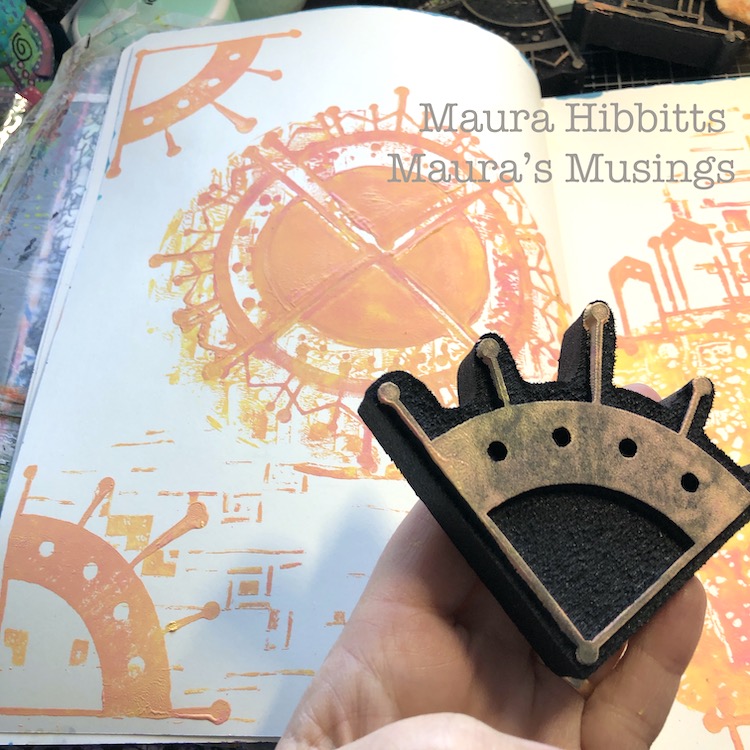
Use the previous method with the Craftsman Mini Motif stamp and apply to the four sides of another circle.
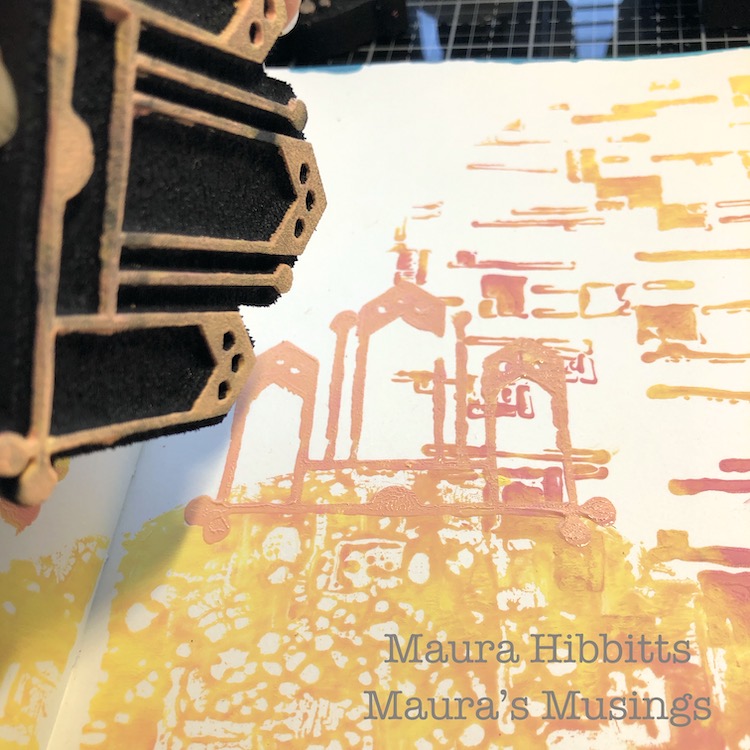
Next stamp the Mission Motif into three corners of the pages with the paint blend.
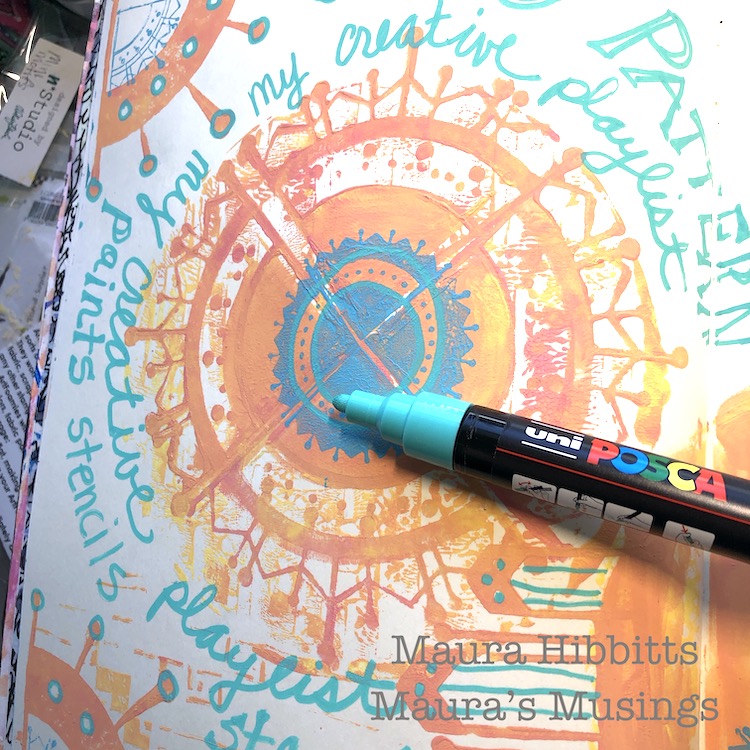
Apply turquoise paint for contrast, to the gel plate and brayer. Take the rubber Arts and Crafts Motif stamp, apply the paint, and stamp four times to create a circular pattern. Repeat two more times across the pages.
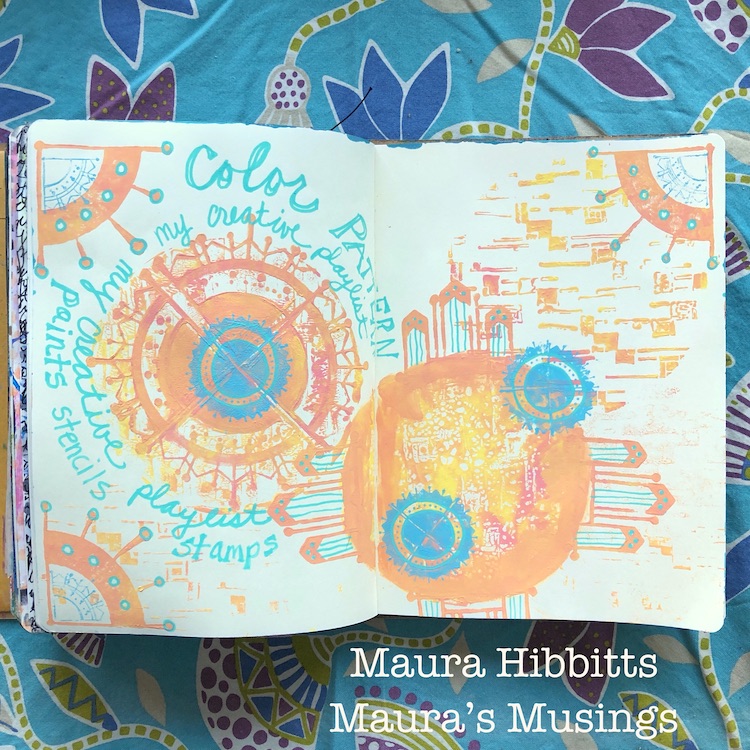
Hand letter your words around one circle with the turquoise paint pen, and also use it to embellish the stamped designs.
My creative playlist is filled with color, pattern, paint, stamps and stencils.
I need to be creative and express myself through color and design, it brings me joy and fulfillment. Our art is an expression of who we are, our thoughts, and our emotions. I think these pages are full of light and a sense of coming together. What do you see?
Be well and have a lovely February, Maura
Thank you Maura – we definitely see light and optimism in this beautiful page!
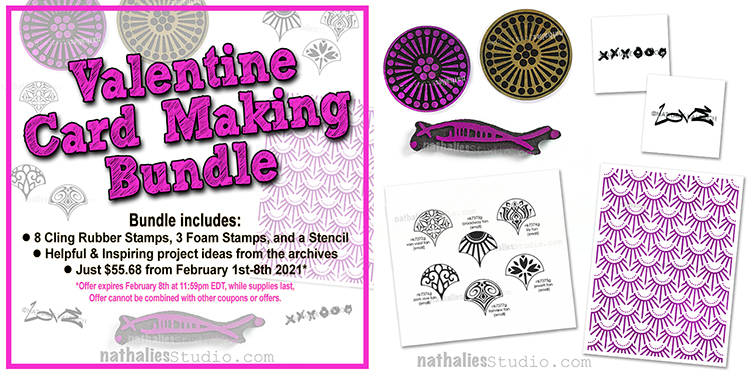
Are you ready for Valentine’s Day? I’ve put together this special product bundle to help you create tons of unique Valentine’s Day cards for all your sweethearts this year.
My Valentine Card Making Bundle includes a selection of foam stamps, rubber stamps, and a stencil, as well as some inspiring card making ideas from our archives to help you on your way.
The bundle is just $55.68, a big savings off the $69.60 regular price, and supplies are limited so hurry in to get your bundle before they run out for good. This offer expires February 8th at 11:59pm EDT, and cannot be combined with other coupons or offers.
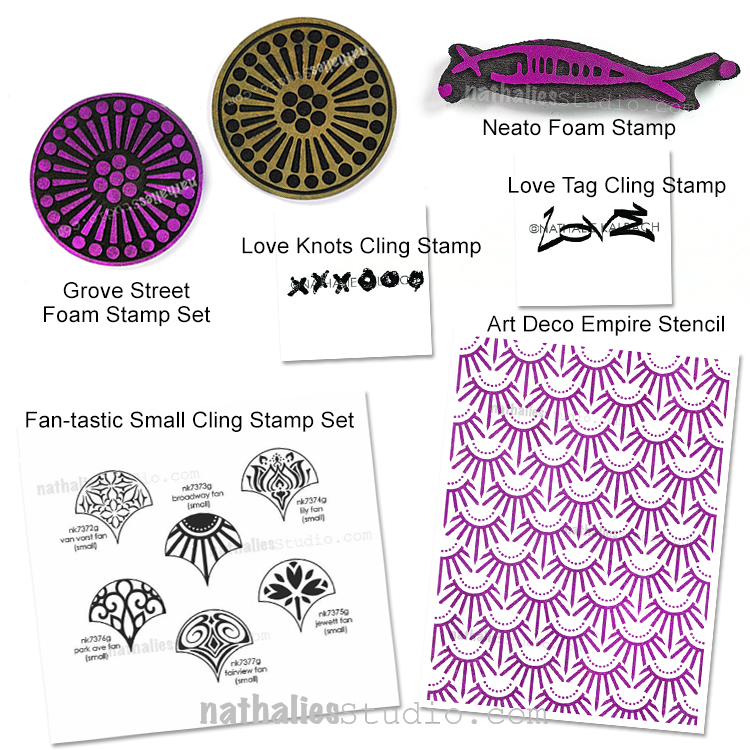
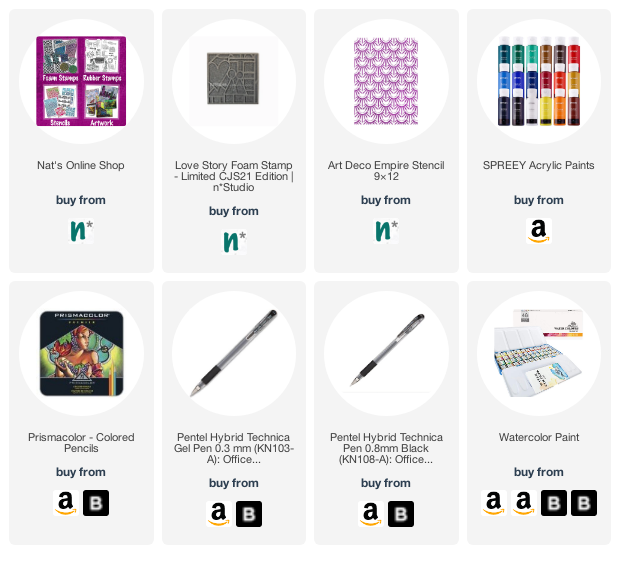
Here are the stamps and stencils that are included in the set*:
Grove Street Positive Negative Foam Stamp Set
Neato Foam Stamp Set
Fan-tastic Cling Rubber Stamp Set
Love Tag Cling Rubber Stamp
Love Knots Cling Rubber Stamp
Art Deco Empire 9×12 Stencil
In total you will receive 3 foam stamps, 8 cling rubber stamps, and a 9×12 stencil. *No product substitutions are permitted.
Once you purchase, you will receive an email with links to project ideas from the archives to get you started on your Valentine card making.
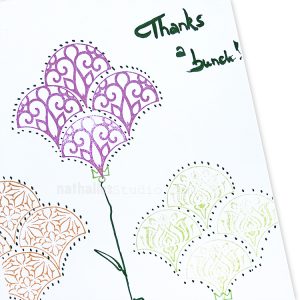
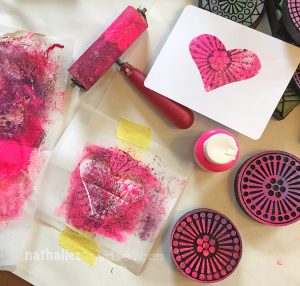
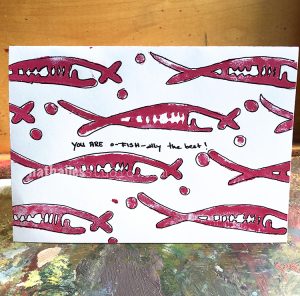
Here are some examples:
This bundle offer is only available through February 8th at 11:50pm EDT, while supplies last, no product substitutions are available.
We are so excited to share some projects with you from Riikka. Enjoy!
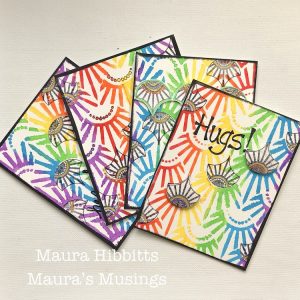
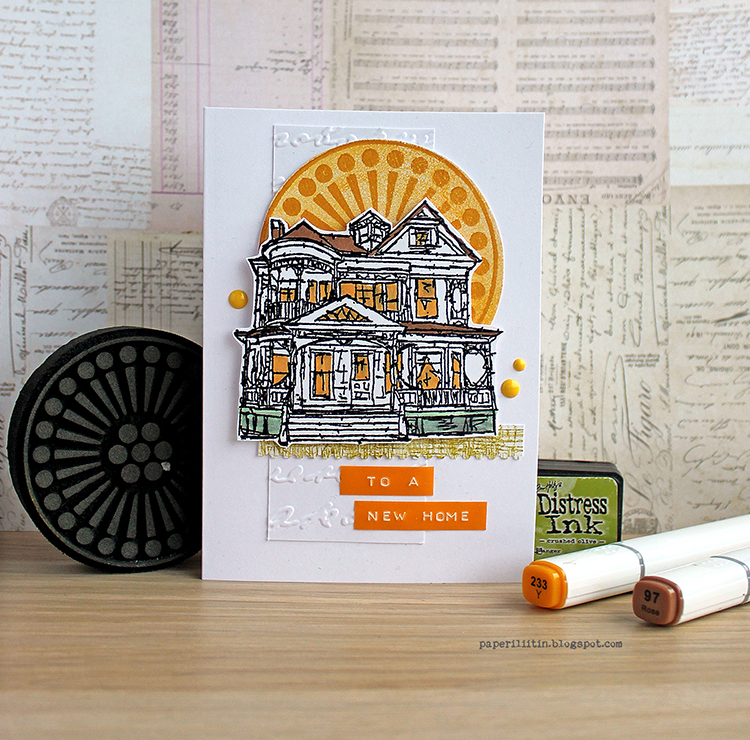
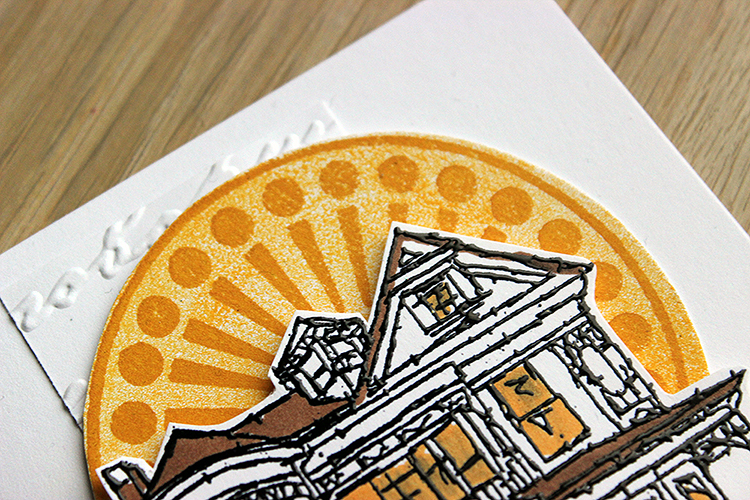
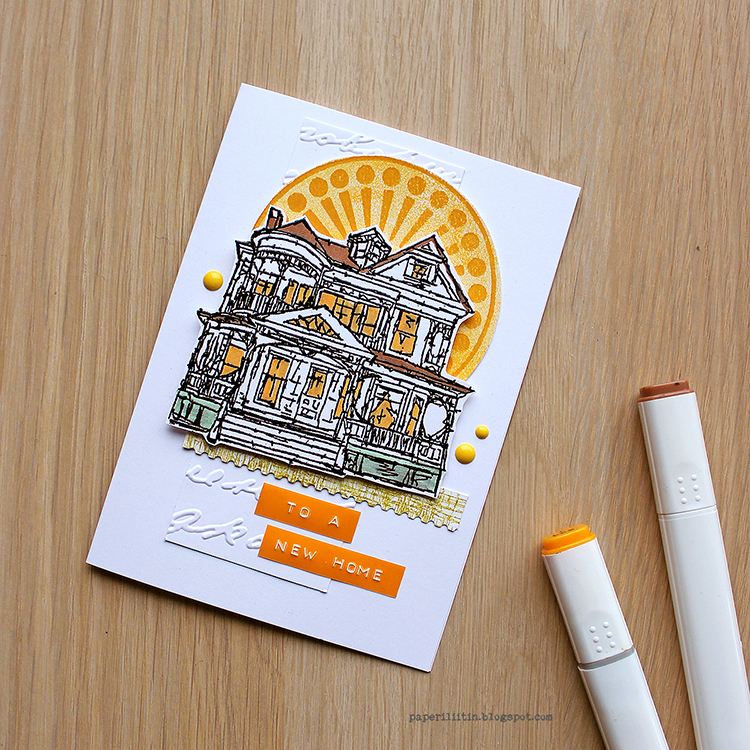
Hi there again! It’s Riikka here with another project! This time I made a card. The rays in the “Grove Street” stamp made me think about a sun, so I combined that with one of the beautiful, detailed house stamps Nathalie has. This one is “Queen Anne”.
When I started, I was thinking of going with yellow tones and instead of black embossed the stamped house first with pale yellow. When I then started adding colors to it, I realized that it won’t work. The pale yellow looked odd with the stronger colors coming on top. So, I ended up using black anyway.
I recorded a little video while working with the card so you can even see my two takes with the outline color:
After getting the elements done the card was easy to put together.
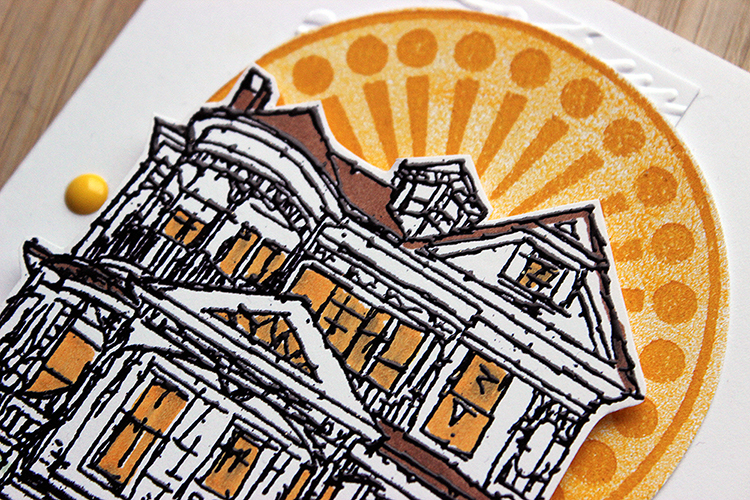
I used white on white in the background where I added a strip of embossed white cardstock as kind of an anchor. On top I then added the warm sun and then the house.
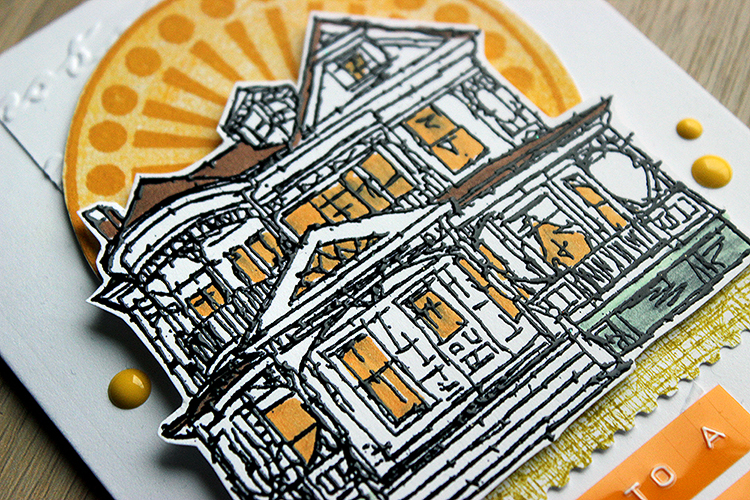
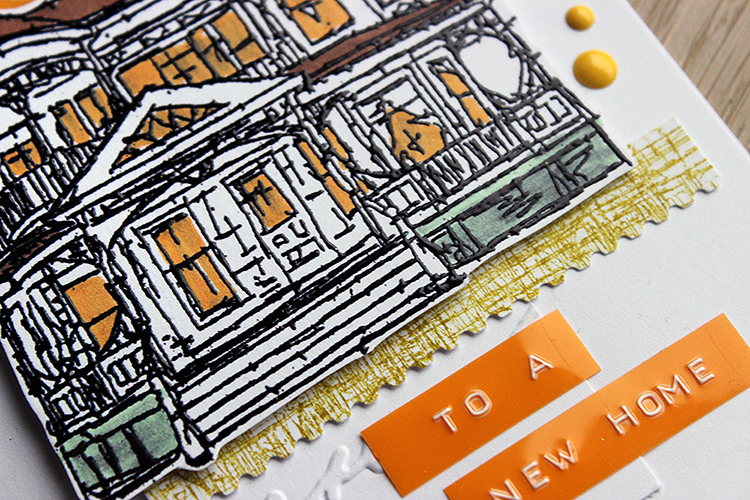
Like I write in the video, the house just couldn’t float on the card front, so I stamped some grass, too. For that I used the “Queen Anne”, too, stamping the lines multiple times on top of a strip of white cardstock. The intersecting mishmash creates an illusion of a texture stamp!
Thank you for stopping by today! Wishing you a sunny day!
Xoxo Riikka
Thank you Riikka – love watching you work in the video to figure out the best solution!
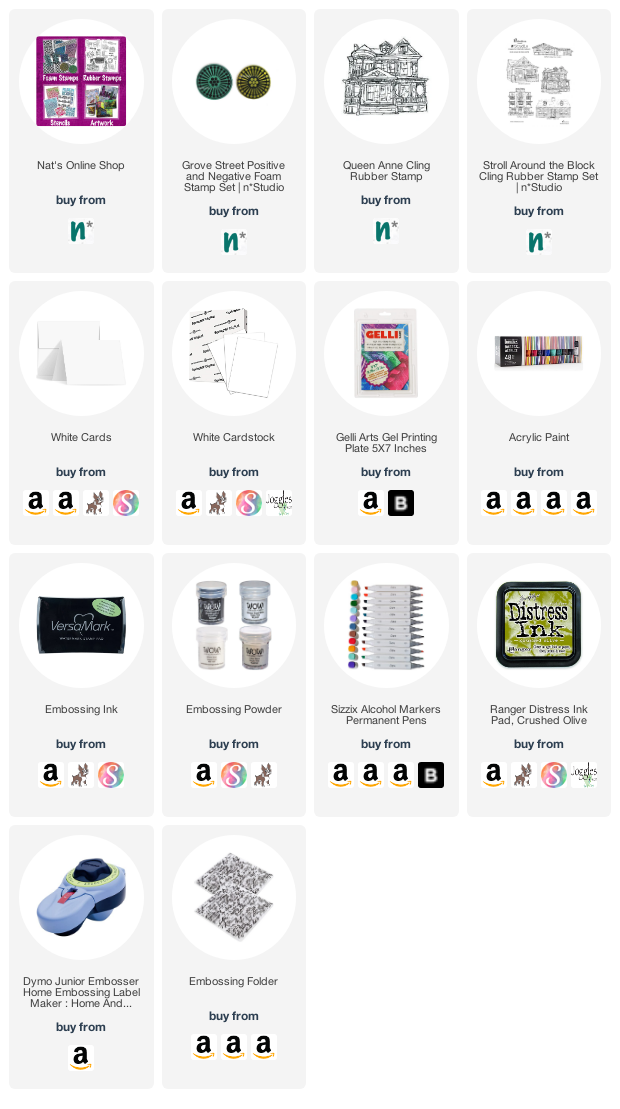
Want to give it a try? You can find all my Foam Stamps and Rubber Stamps here in my Online Shop and here are some of the other supplies Riikka used:
Today we have a very special Guest Post from one of our Creative JumpStart 2021 teachers: Riikka Kovasin! She is bringing us 3 different shrink film earring ideas using my Grove Street and Fairview Fan foam stamp sets. Before we get into it though, let’s hear a bit about Riikka:
“Heippa! My name is Riikka Kovasin and I am a mixed media crafter from Finland. I live in Helsinki with my darling husband and our two sweet daughters. Creating is my passion and a way of self-care. Besides family and crafts, my weeks are filled with a full-time job.
I have been doing all sorts of crafts my whole life. I really got into papercrafts after I found scrapbooking when my older daughter was about 6 months old – that’s over 10 years ago. Since then my style has evolved to more and more mixed media direction and nowadays, I tend to go dimensional and do more altered and mixed media pieces than regular layouts.
I absolutely adore getting my hands into paints and mediums! To me the process of creating is equally as important as the finished project.”
We are so excited to share some projects with you from Riikka, and this is the first of a few that will be coming in the next few weeks so check back for more :)
Hi there! It’s Riikka Kovasin here today to share a guest project with you. I actually made a couple projects, so you’ll be seeing me a few times in the course of next weeks.
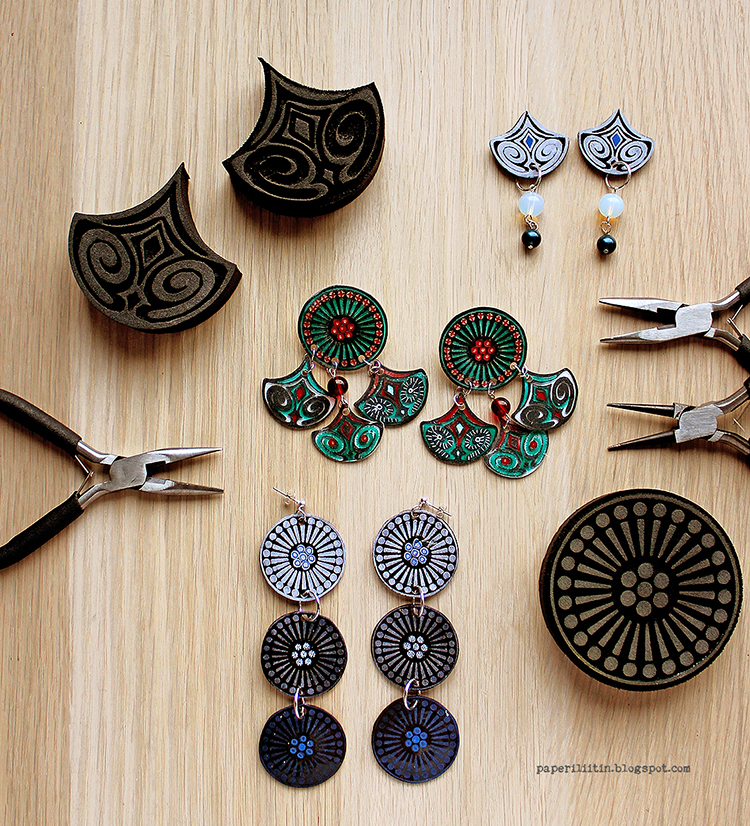
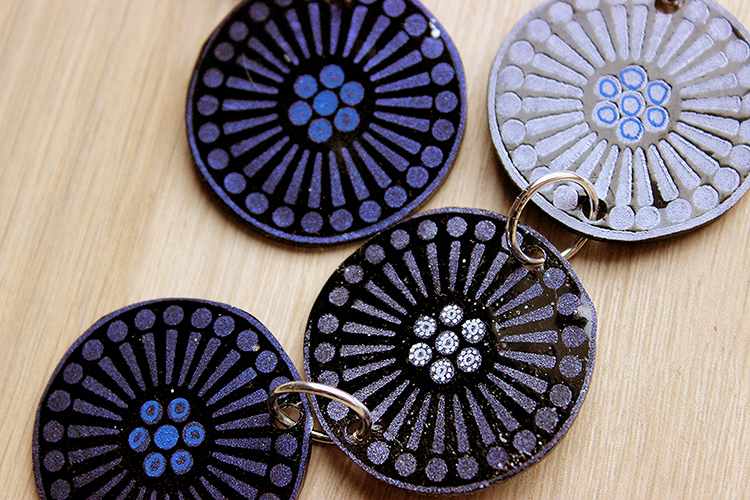
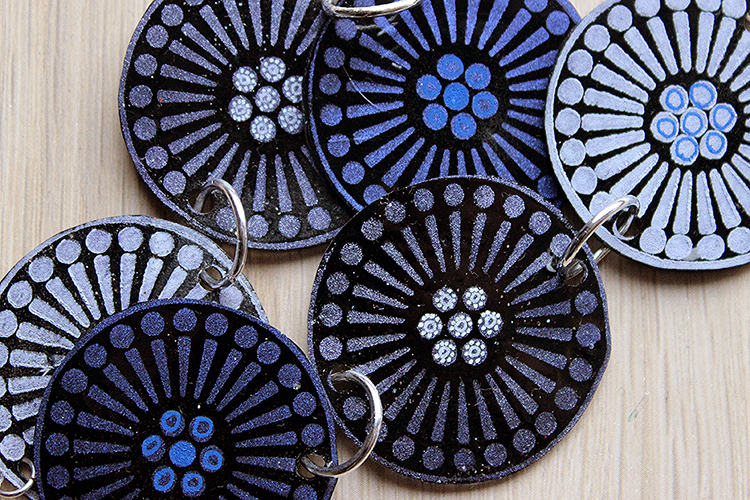
As my first go I made some jewelry pieces. I really love the patterns of the foam stamps and love how satisfying it is to stamp with them, but on their own they are maybe a touch too big to be used as jewelry. As a pendant, maybe, but as I’m more into earrings the images seemed a bit too big. But no worries, I can always use shrink plastic! That way I’m getting the pattern and the feel of the foam stamp, but the finished piece is half the size! So satisfying!
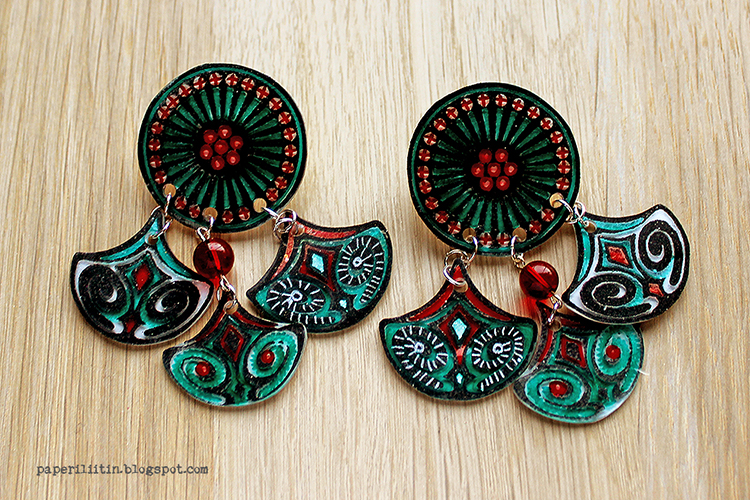
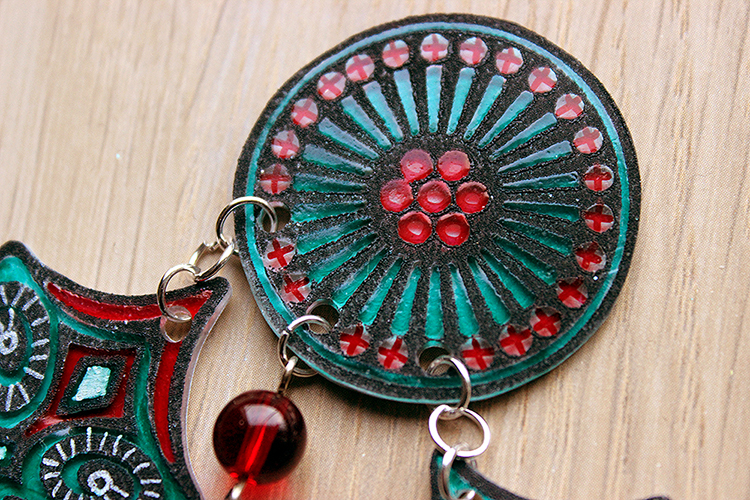
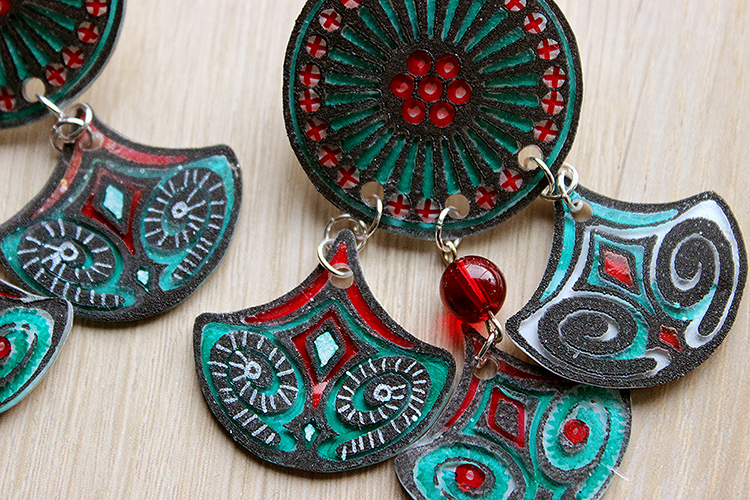
For these three pairs of earrings, I used both white and black shrink plastic. I used acrylic paint to stamp the images and then colored them using alcohol and paint markers. The first pair is made using both the Grove Street and Fairview Fan foam stamp set. The circular piece has an earring stud at the back.
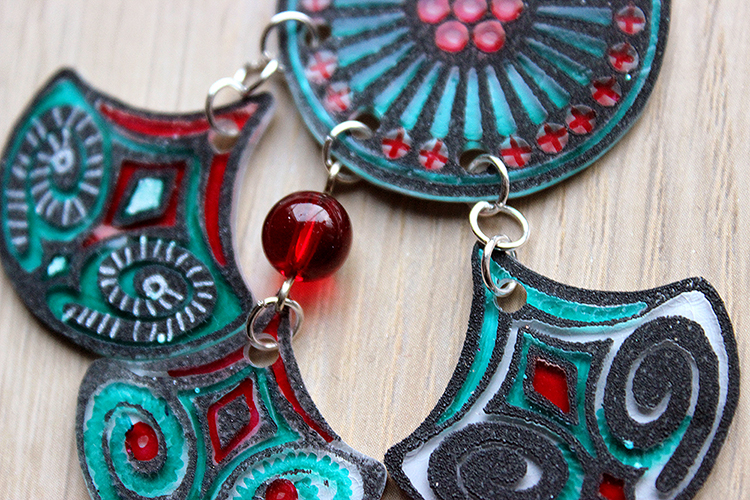
The dangly parts are made using both positive and negative version of the fan stamp set. To make the center fan a little bit longer than the other two I added a red glass bead between the circle and the fan.
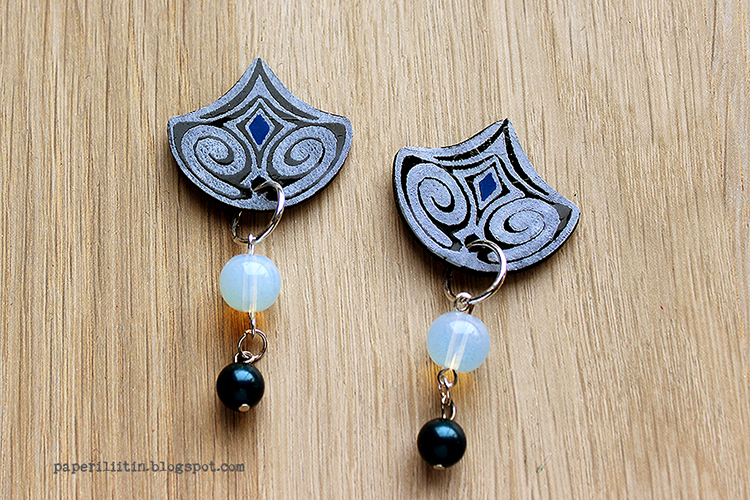
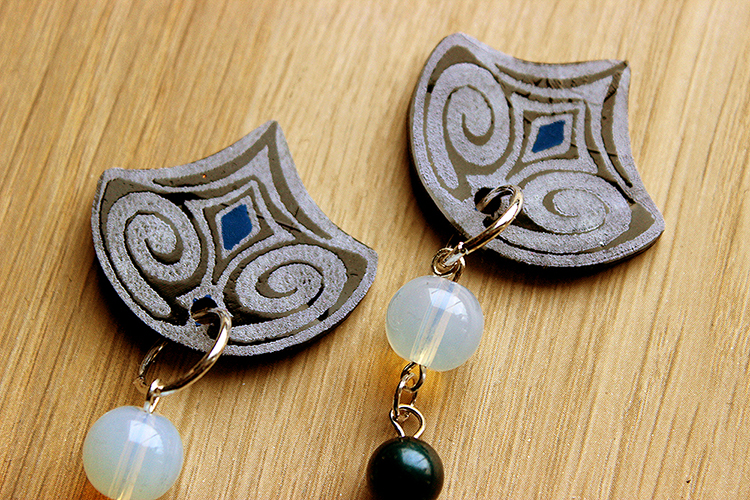
The second pair has even more glass beads as there’s just the fans that are stamped. Again, there’s a stud piece at the back.
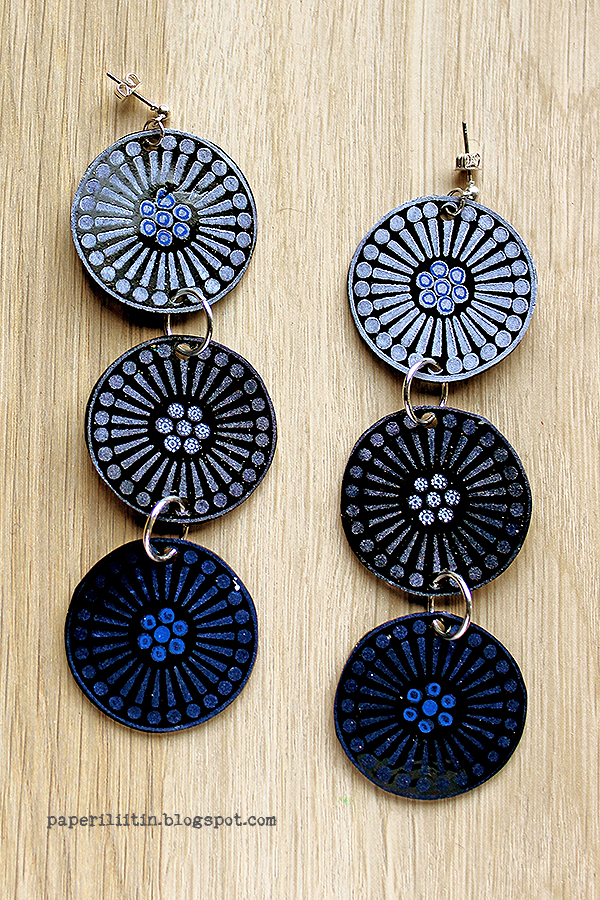
The last, but not least, is maybe my favorite. I made that using the Grove Street stamp, just alternated the color I was using on top of black shrink plastic. The first one is done with inky blue metallic acrylic paint, the second one pale blue metallic acrylic and the one nearest to the ear is then white acrylic paint.
These dangle all the way as I added a stud earring with a little ring on top.
I’m not a jewelry maker but these were so easy to do even I managed them! Now the only trouble is to decide which pair to use!
Stay safe everyone! Xoxo Riikka
Thank you Riikka! Wow who is excited to try foam stamps with shrink film now? I love all three of these possibilities and I love how they could work for a variety of different fashion styles.
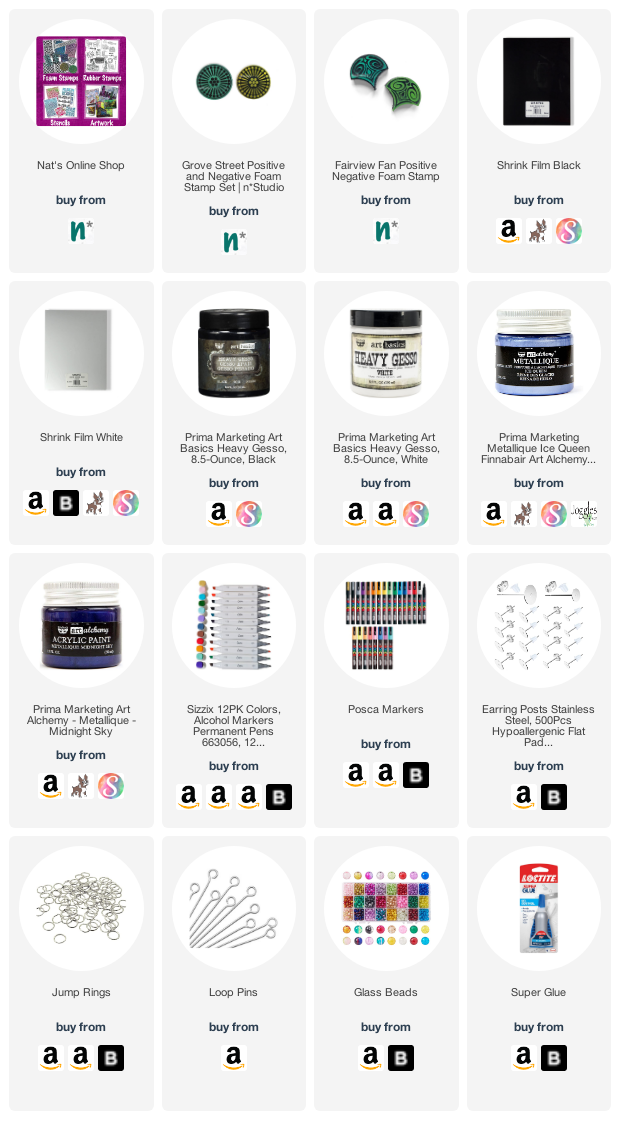
Want to give it a try? You can find all my Foam Stamps here in my Online Shop and here are some of the other supplies Riikka used:
Great lesson. Thanks so much… Who even knew there was black shrink plastic?!!!! I really love the effect you get with that! I’m going to add it to the very long list of things I must try.
Thank you Robin! In my craft store they had this selection of four different kinds of shrink plastic sheets in a pack – black, white, glossy transparent and mat transparent :) That was perfect as I didn’t have to choose which color to pick :D
Awesome post. You read mind. I’ve been wanting to make earrings with shrink plastic for the past few weeks but was struggling with drawing a decent image and coloring so that it wasn’t smudged or looked good. Your stamps and the type of paint solved my roadblocks! Beautiful, beautiful earrings that I think I can actually make. One question, did you sand the plastic first?
Hi Kath! I didn’t sand the plastic first so the earrings are bound to get some wear and tear. Sanding helps the paint to grab the surface better. Or then just add more paint when it seems to wear off :D
Thanks for that input. I just seem to smudge the colors. However, I noticed when I sanded, you could see the marks, which I do not like. I can’t remember what people use to glaze the plastics.
I’ll have to check it out. I just love how the paint you used worked with the stamp and it didn’t look like it smudged at all.
The stamps you used are sold out. I’m gonna wait for restock. That’s how much I liked your earrings!
I’m so happy to hear that you liked these so much Kath!.
As you are stamping on top of a sleek surface with a slippery paint, it may slip and smudge. If you look closely to the other of the white stamped circles (with gesso), it’s a bit thicker than the other. A slight slip or turn caused that.
My tips would be to use a heavy body style paint, more gel-like, use just a little of it, and to use light pressure when you lay down the stamp. Another way is to actually put the stamp to the table, pattern side up with the paint added and carefully place the shrink plastic on top.
Hopefully this helps when the stamps have been restocked and you get to make your jewelry pieces!
Love this idea! Rikka…you are always so clever and original, combined with a dose of practical. Thank you both for this “bonus”! It was a nice surprise.
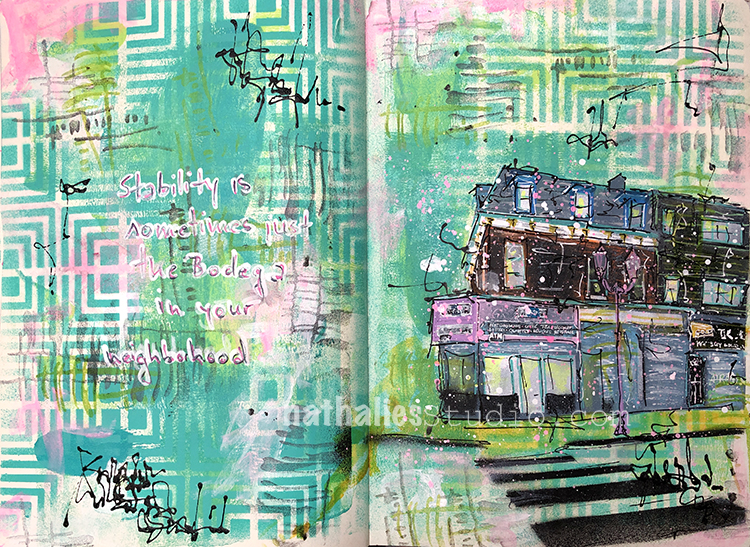
Hello from my Creative Squad! Today we are jumping with Jordan Hill, who is using my Love Story foam stamp and Art Deco Empire stencil to tell a story in her art journal. This month’s theme is: Storyteller – This month we’re playing along with Creative JumpStart 2021 and the theme Storyteller. We’re using our artwork, our color and material choices, and our personal style to tell a Love Story.
Hello everyone, I’m super excited to be back with my project for this month’s theme of storyteller!
For this particular prompt, I did quite a lot of reflection before I actually got to work. The word ‘storyteller’ is so incredibly complex and can mean so many different things, I wanted to make sure I was accurately portraying what it means to me. When I think of the word ‘storyteller’, the main theme that comes to mind is the idea of a journey.
My work is a collection of a variety of things that are important and have meaning to me, many of which I have collected over my own journey as a creative person. This collection of ideas is a representation of my story as an artist, and that’s what I wanted to try to express in this month’s project. Let’s get into it!
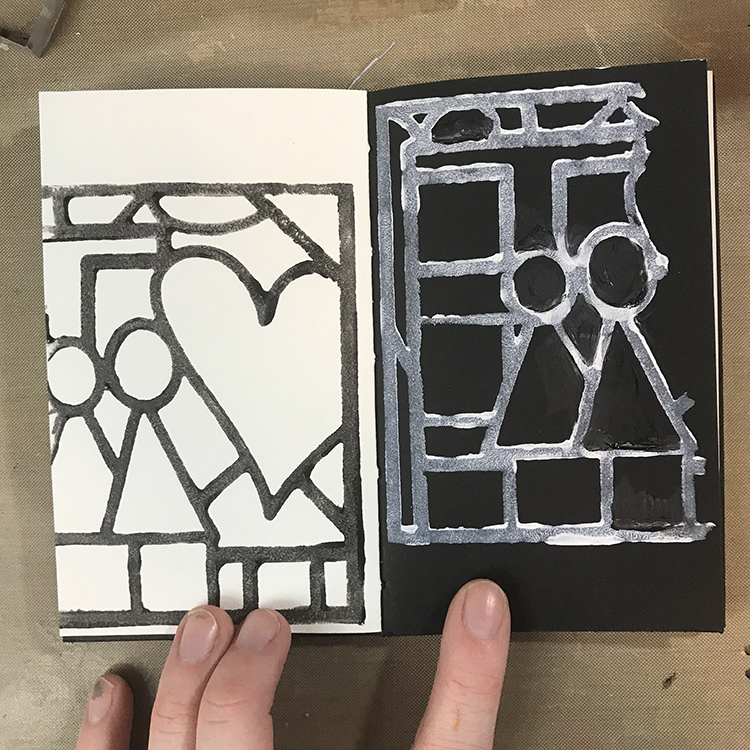
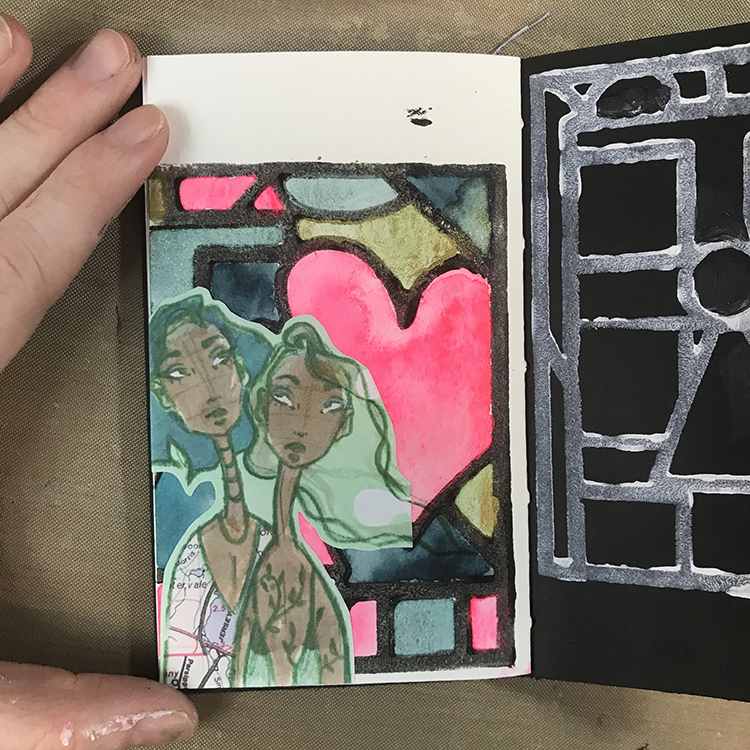
The first thing I did in order to get this page started was pick out a fresh spread in one of my art journals (I chose the journal I created for last month’s project – one of the many parts of my creative journey). Then, using Nathalie’s “Love Story” Foam Stamp, I stamped the design twice, once on each page. On the white page, I used black acrylic paint, and on the black page I used white. This gave me a fun starting point!
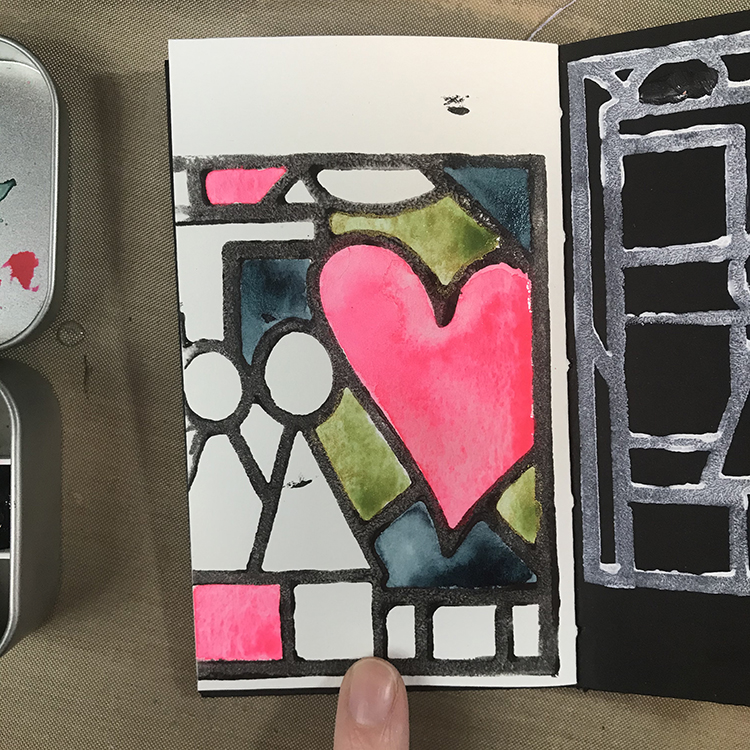
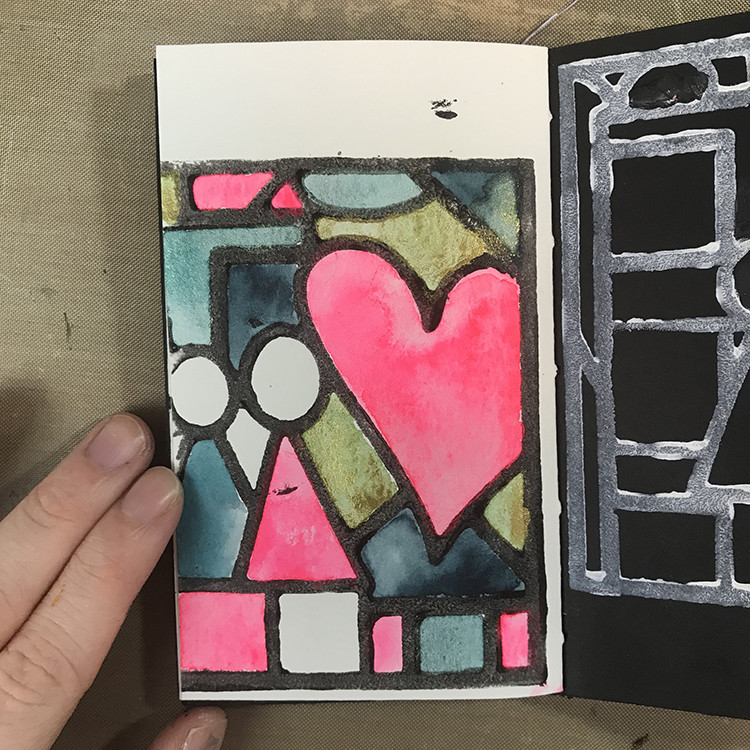
Next up, I knew that I wanted to fill in some of the different spaces with watercolor. The colors I used for this spread were primarily handmade watercolors that I made myself, which is another step in my story that I wanted to document.
I didn’t fill in all of the sections, since I knew I was going to add a piece of collage on top. As I was filling in the spaces, I tried to incorporate the same colors in several different areas in order to keep everything cohesive and lead your eye around the page.
After the watercolor was completely dry, I glued down a piece of collage that was yet another part of my story. This particular image was a previous mixed media piece that I scanned in and printed out to reuse in future work.
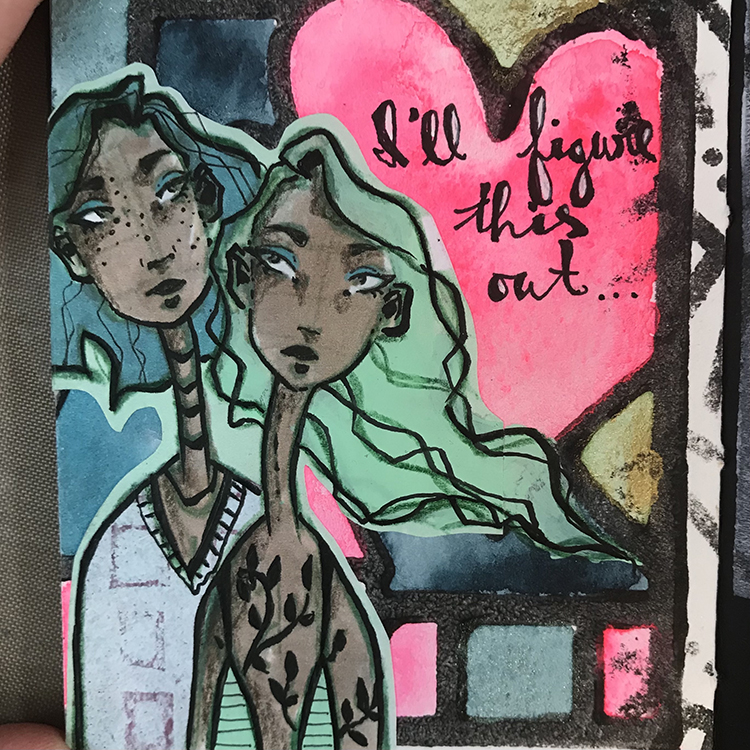
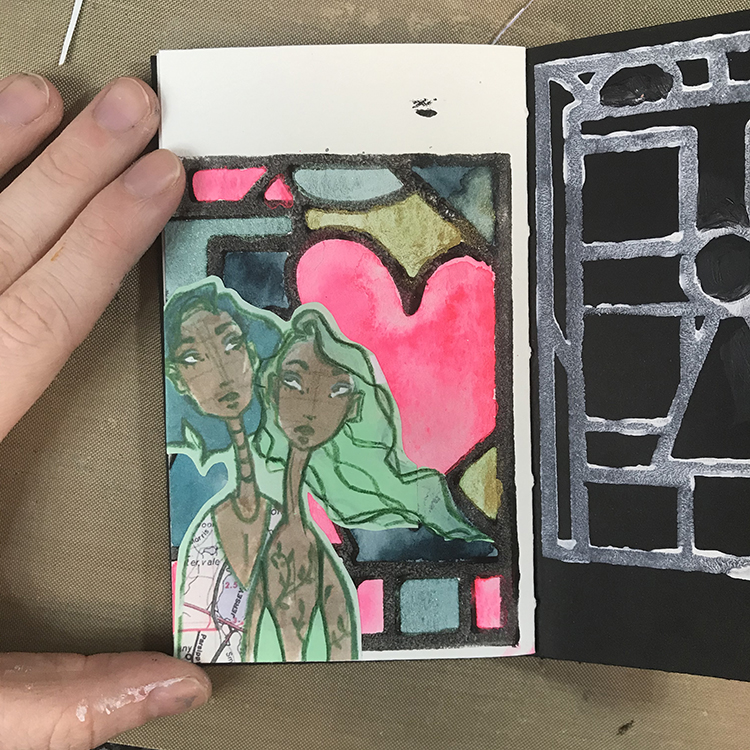
Once the collage piece was glued down, I wanted to incorporate it a bit better into the page. The first thing I did in order to achieve this was extend the shape of the hair. When I was cutting out my image, the figure on the right had hair that ended in a straight line. Using the same color of acrylic paint, I extended the lines of the girl’s hair. I also added some of the same acrylic paint to that girl’s shirt. I then used a colored pencil to redefine some of the lines that I had lost through adding paint.
Once I was happy with the hair, I then got to work on the details. First, I used Nathalie’s “Art Deco Empire” stencil to add some additional interest to the areas of the background (primarily the top and side) that hadn’t received a lot of love yet. I really like the way this stencil ended up looking like an extension of the original stamped image.
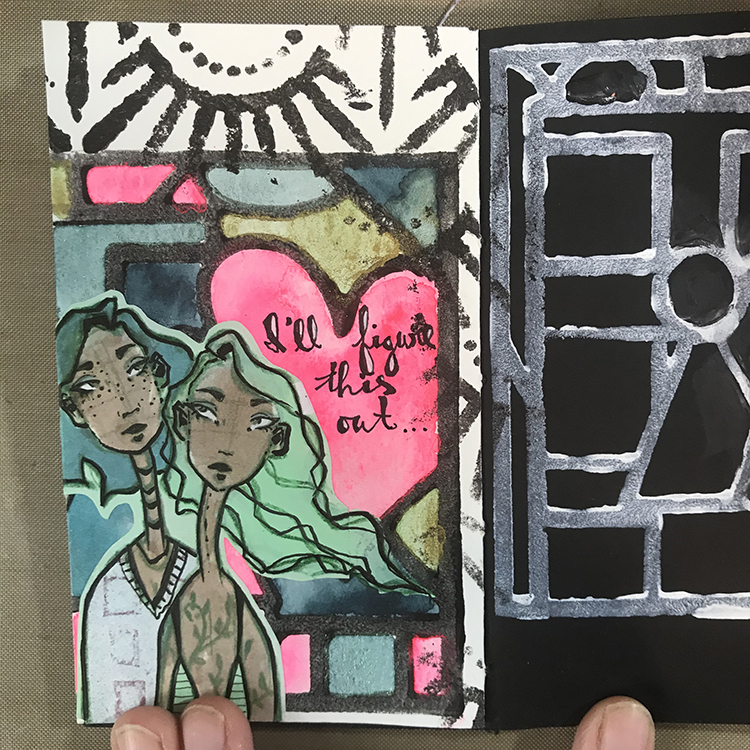
Next, I cut a piece of gelli printed paper to use for the shirt for the girl on the left. The map piece I had used for the original illustration wasn’t working for me anymore and I felt this choice was a lot more neutral. Then, using an ink pen, I started adding details. I traced over almost all of the original line work I had done in pencil and added some stripes and a collar to the shirts. I also gave the girl on the left freckles where she didn’t have them before.
This is also the stage where I added words; these ones are words I pulled from a journal where I simply dump my thoughts. As I wanted to continue the idea of the “storyteller” theme, I scanned through and latched onto this particular group of words. It just felt fitting.
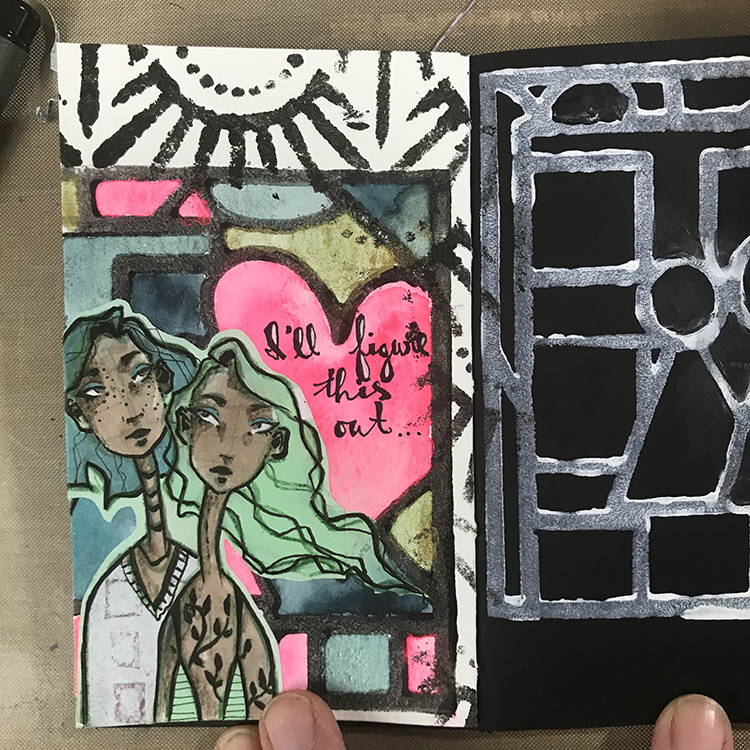
For the final details, I added some colored pencil to the shadowed areas of the faces and traced over the (originally green) vine tattoos of the figure on the right with an ink pen. This gave the figures the final amount of depth I felt they needed in order to call them done!
In the end, I think that the combination of the stamped image and the watercolors as a background is very interesting and it reminds me of stained glass, which I like. I hope you enjoyed my project for this month and consider giving it a try yourself!
Thank you Jordan – love the combination of the bold stamped background with your detailed collage element figures!
Give it a try: you can find all my Foam Stamps and Stencils in my Online Shop and in addition to her collage element, here are some of the supplies Jordan used:
Don’t forget to check out Nat’s Creative Squad on Instagram too: Each week we post projects, ideas, and inspiration for mixed media art.
Jordon, thanks for sharing your post and your story. I love how you used the collage element with Nat’s stamp. The figures have so much personality with the detail you added!
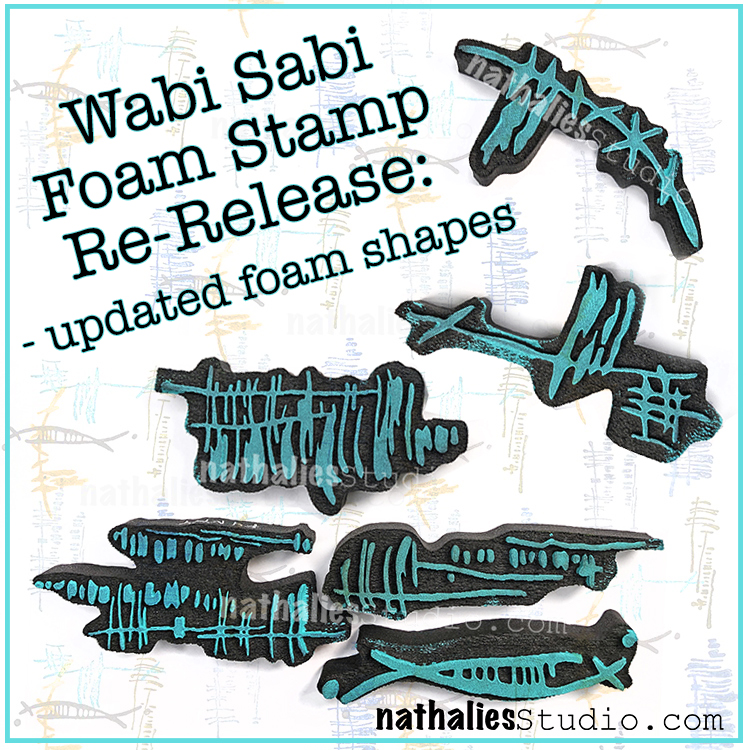
We’ve updated our Wabi Sabi foam stamps and wanted to share the news with you :) You may recall that before the foam surround was just rectangular – well now it’s cut to mirror the design. I find them easier to identify when I’m going through my stamp stash and also – the backsides are now funky abstract shapes that are worthy of stamping too!
Here are some of the stamps in action:
I love to use them for mark making and to add some random line elements to give a background extra interest.
They look great as bold marks too if that is your style…
…or as something more subtle. However you roll today!
Check out all my foam stamps in my online shop – lots have been restocked.
Hello from my Creative Squad! Today we have Robin Seiz sharing a mini book project with us that tells her Love Story about gardening. Robin is using my Love Story foam stamp as well as my Signals, Downtown, and Manhattan stencils and my Running rubber stamp. Our theme is: Storyteller – This month we’re playing along with Creative JumpStart 2021 and the theme Storyteller. We’re using our artwork, our color and material choices, and our personal style to tell a Love Story.
Happy New Year Friends!
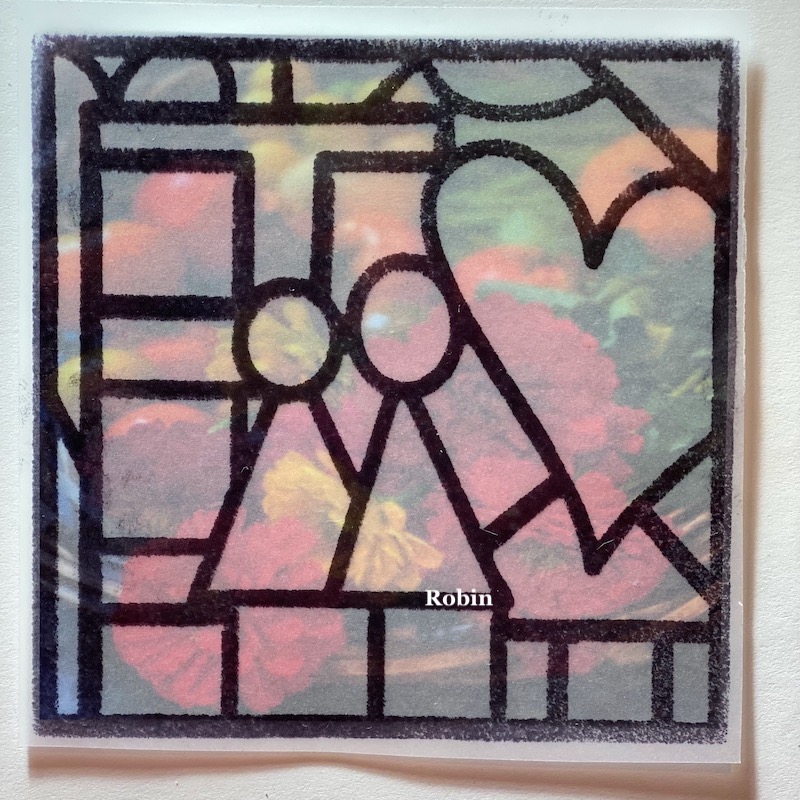
I hope you are having as much fun as I am playing along with Creative Jump Start 2021. I must admit, I often come into my studio without a purpose. I choose materials that move me in the moment and I create. I have to be honest that I don’t often think about the story that I am telling. It’s something that I have struggled with through the years and wanted to learn how to do. This themed project — Tell Your Love Story — gave me the breakthrough that I was looking for and a way to tell a story through my art. I thought for weeks about what story I wanted to tell and as I looked at the beautiful Love Story artfoamie that Nathalie created, I saw two women looking out a window and I immediately knew the Love Story I wanted to tell. It’s about my love for gardening and how it came to be.
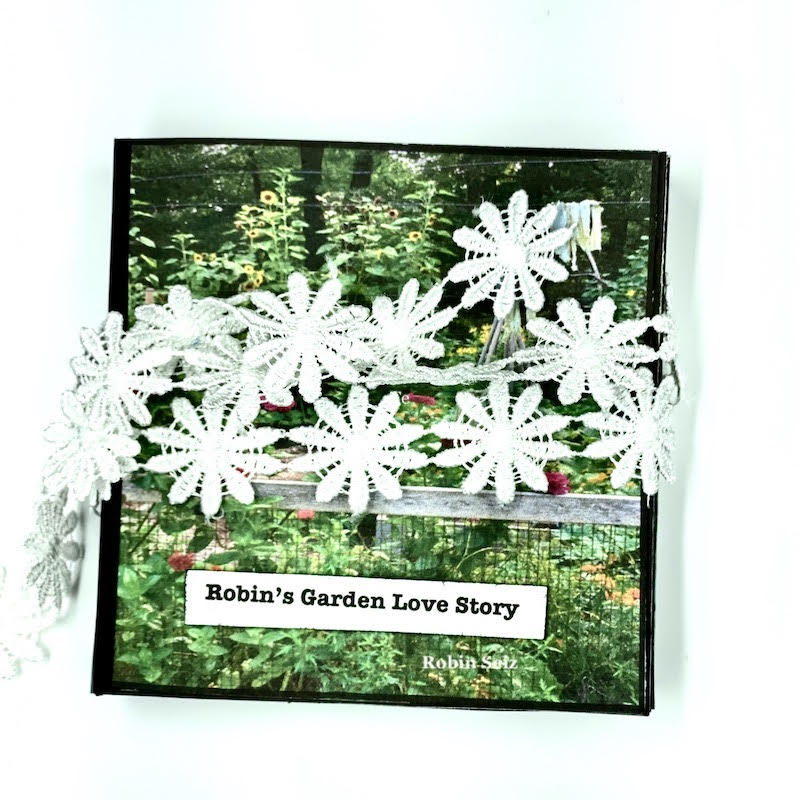
I have created this video which tells my story and includes a flip through of my final mini-book project.
Below, I’ll take you through the tutorial so you can create your own mini-book.
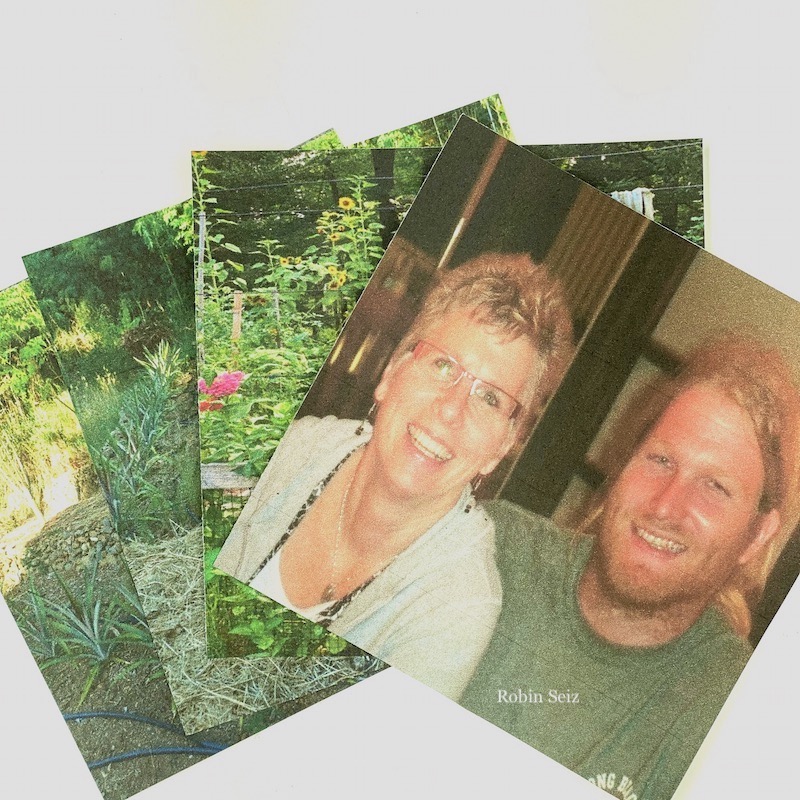
I began with scouring my pictures for just the right ones. I printed them on regular copy paper and cut them to 4” x 4”; the size of Nat’s Love Story foam stamp.
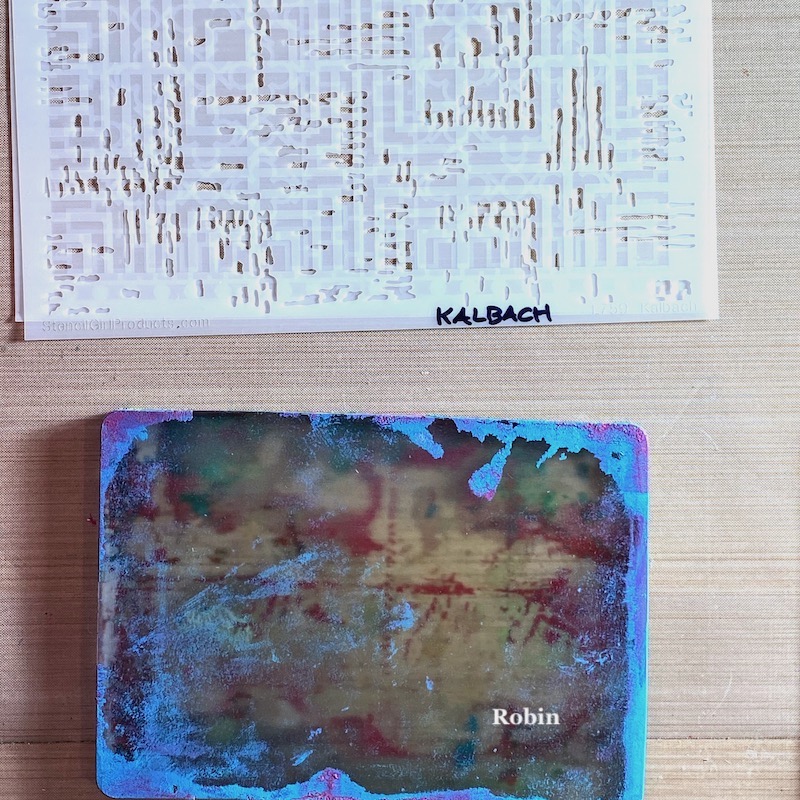
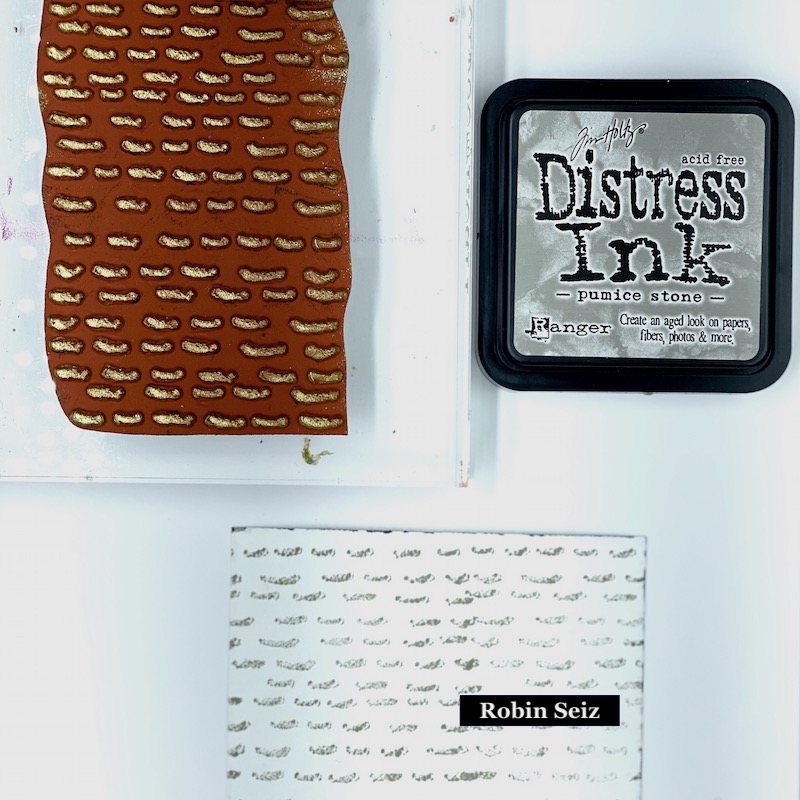
My Gelli plate is by far the tool I love the most in my studio. Whenever I can, I include it as part of my work. I printed a bunch of papers using a bold base layer and then a contrasting layer using 3 of Nathalie’s stencils, (Signals, Downtown, and Manhattan) which all looked to me like the layout of a garden with rows.
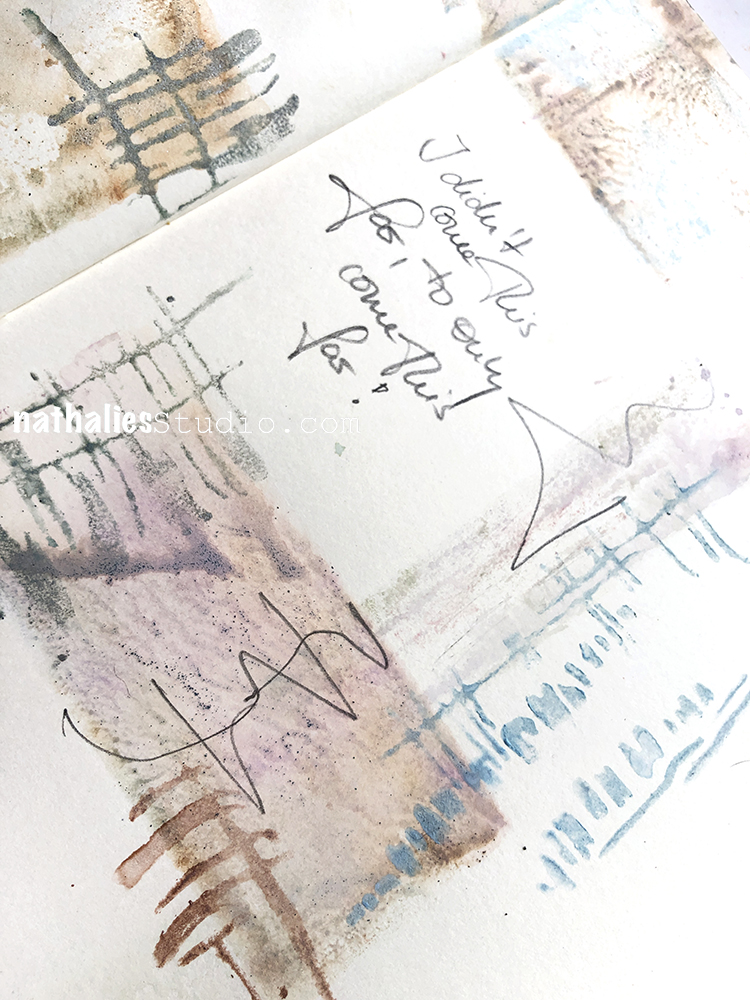
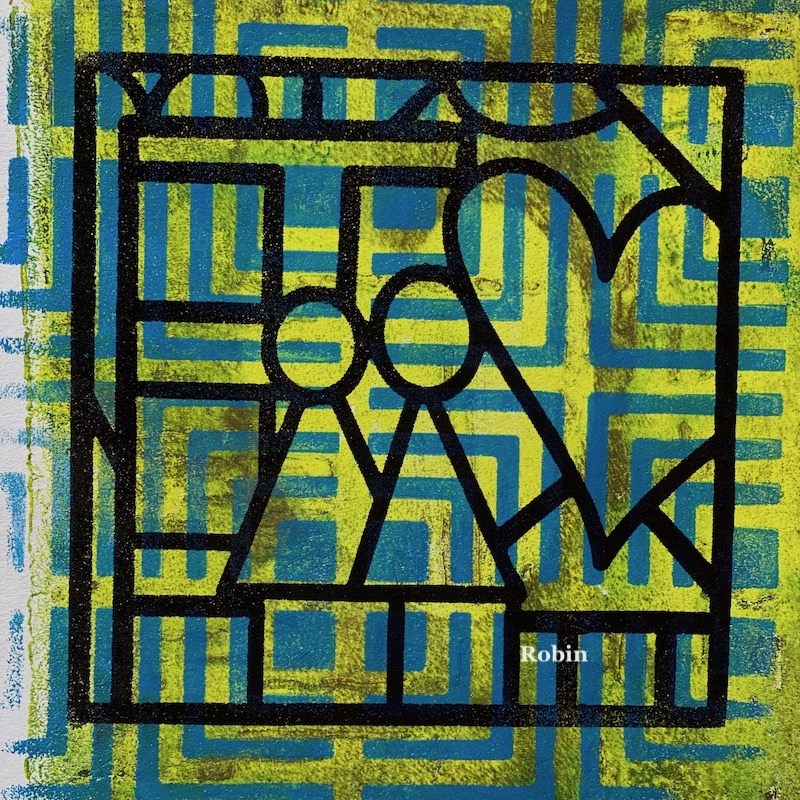
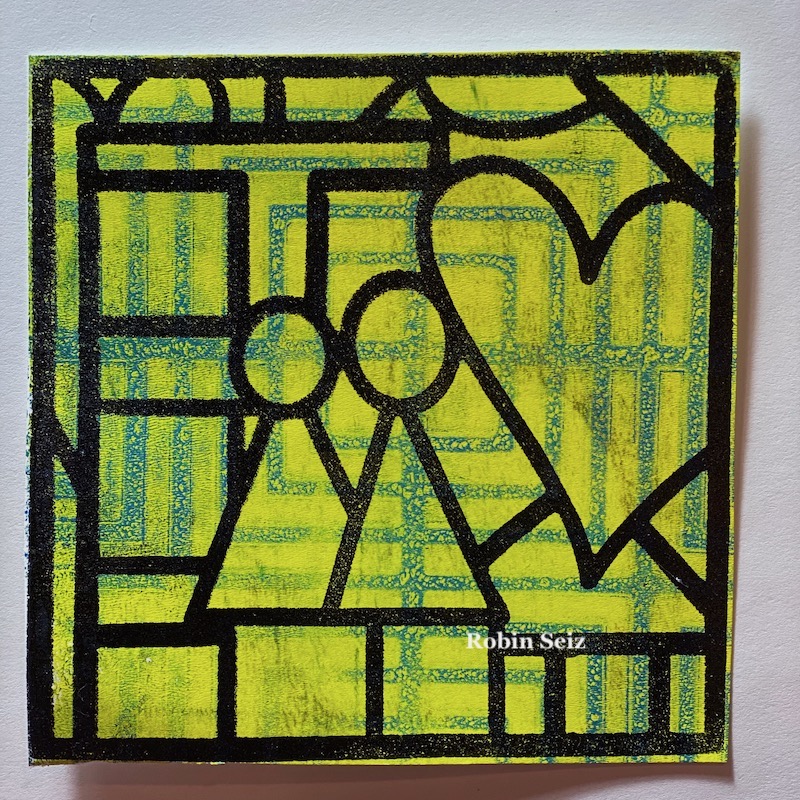
I stamped the Love Story artfoamie on each Gelli print with a black permanent ink.
I trimmed the paper to the same 4”4” size of the artfoamie.
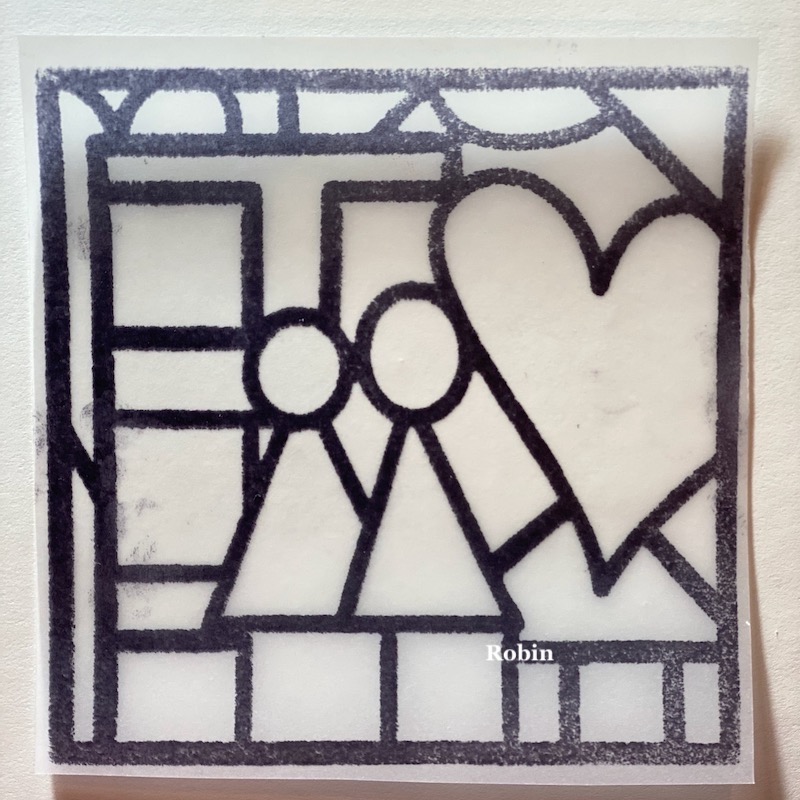
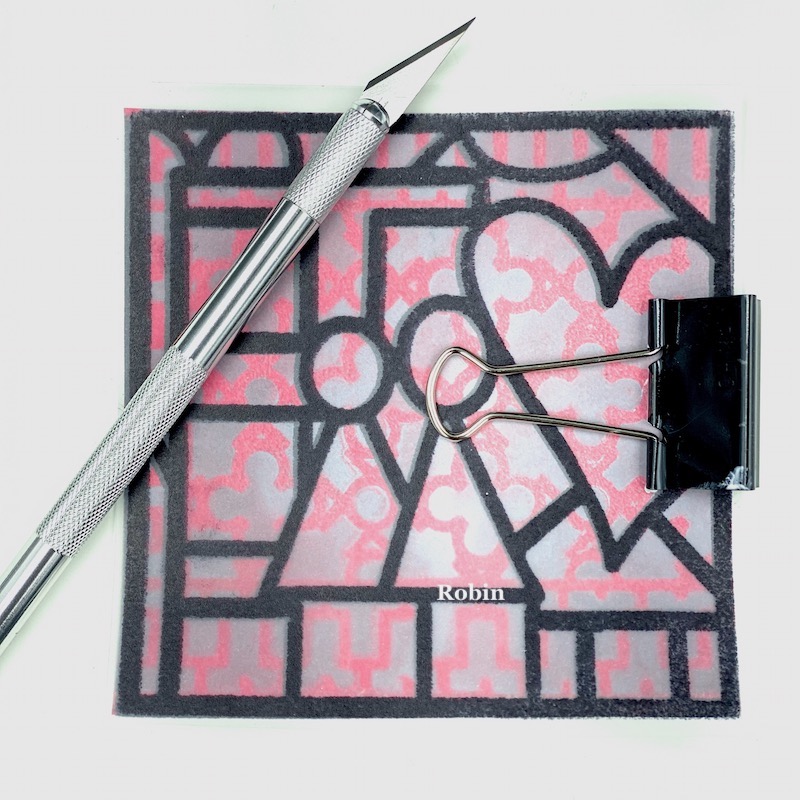
Since I wanted you to be able to peek inside my garden, I had to plan what I wanted you to see. In order to do that, I stamped the Love Story artfoamie onto a piece of tracing paper and cut it to 4”x4”.
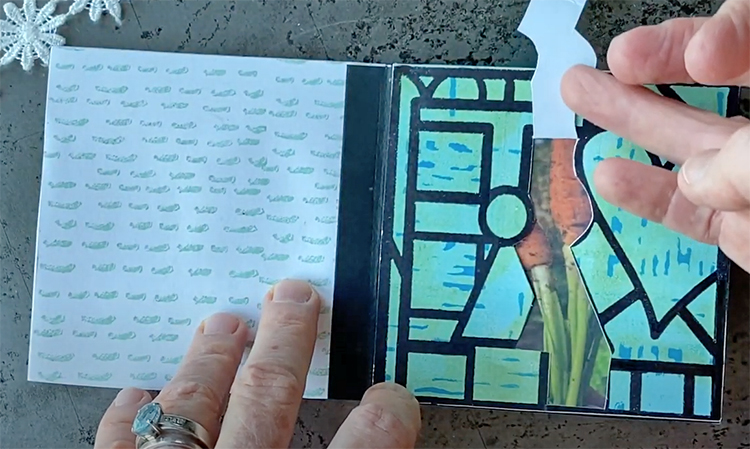
I lined up the tracing paper over each picture and planned what area should be cut out, remembering this would be a like looking through a window.
Next I used an Exacto knife to make the cuts through the Gelli prints. Let me just say, the Exacto Knife is a bit intimidating to me, so I went slowly making sure my fingers were out of the way and I was moving the paper around the curves as much as I could. I used a cutting mat for this step. This step was the most time consuming; or at least it felt that way. In the picture below, I have the tracing paper lined up over the gelli print with the picture underneath, but I had to remove both the tracing paper and the picture and ONLY cut on the Gelli print. If truth be told, I did forget this once or twice and had to reprint a few pictures. :o)
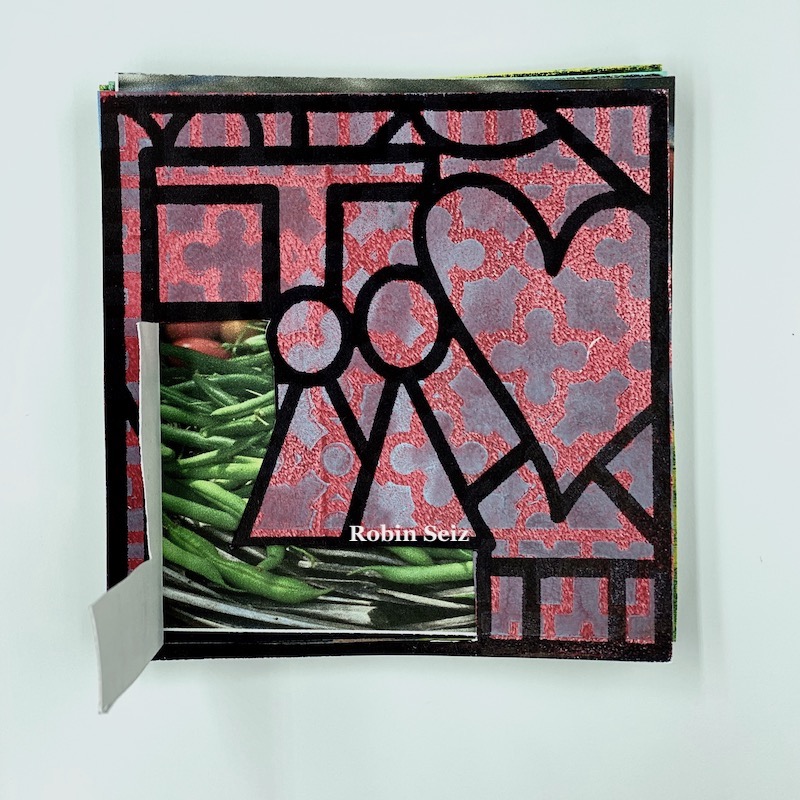
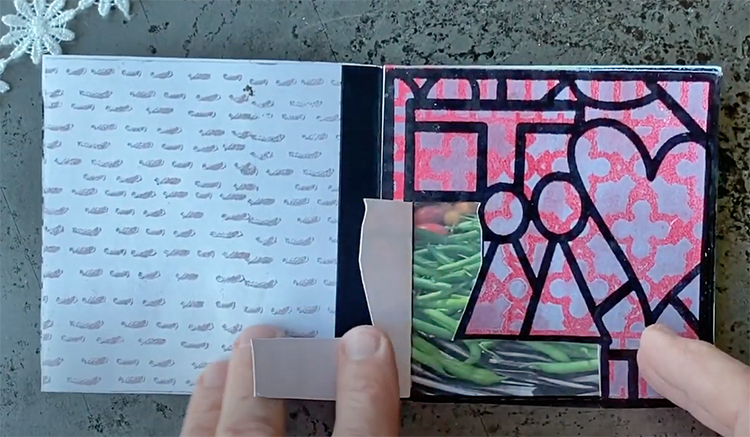
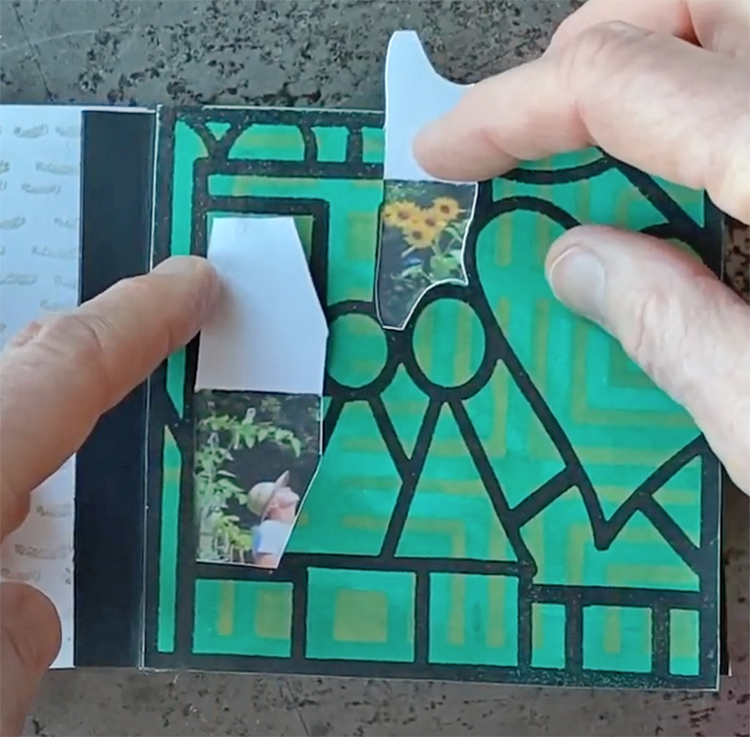
This left me with exactly what I was hoping for — a peek into the garden through the window.
Next I glued the cut Gelli Print to the corresponding picture so the window would come to life.
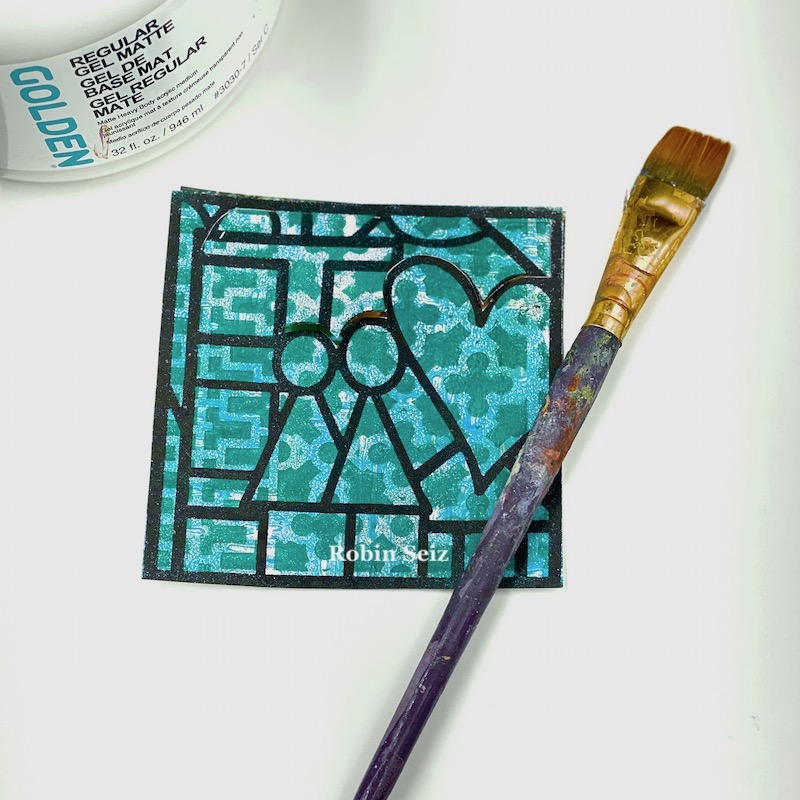
Once all the pages were complete, I wanted the backsides to have some kind of interesting design, but nothing that would compete with the Gelli prints. I used the Running stamp from Nathalie’s Embroidery set. This stamp reminded me of rows in a garden.
Now it was time to put it all together. Bindings can be a challenge and this mini-book wasn’t created on sturdy paper. I wanted a simple way to put it together that wasn’t going to be too bulky. I cut 4”x1” strips from black construction paper and folded them in half. They were glued to each page to make a signature. These signatures where then glued together. To keep all the signatures together, keep it strong, and finish it off, I cut a piece of black duct tape and adhered it to the front, around the signatures and to the back of the book. To finish it off, I tied some pretty ribbon around the outside to keep it closed and bring the garden to life.
I hope you enjoy this project as much as I enjoyed doing it. I loved telling you my Love Story.
Thank you Robin – what a beautiful way to represent one of your passions and I love the element of discovery that the book has with those interactive windows.


Comments (6)
gbp2019
| #
Riikka lovely video and gorgeous results
Reply
Riikka Kovasin
| #
Thank you!
Reply
rarebird
| #
Beautiful! Love the rich palette and how much the white really pops. Nathalie’s stamps work so well, especially for the ruff! Just gorgeous. Thx for doing this guest tutorial.
Reply
Riikka Kovasin
| #
Thank you so much Wendy!
Reply
Sue Clarke
| #
Love it! The words are an especially nice message.
Reply
Riikka Kovasin
| #
Thank you so much Sue!
Reply